820
South East
Posts: 793
|
|
Dec 17, 2018 13:39:36 GMT
|
A little bit of progress on the exhaust system. Welding bench is done, though in these pictures I was still waiting for the steel sheet to go on top. Straight through centre section now has V Band flanges welded to both ends 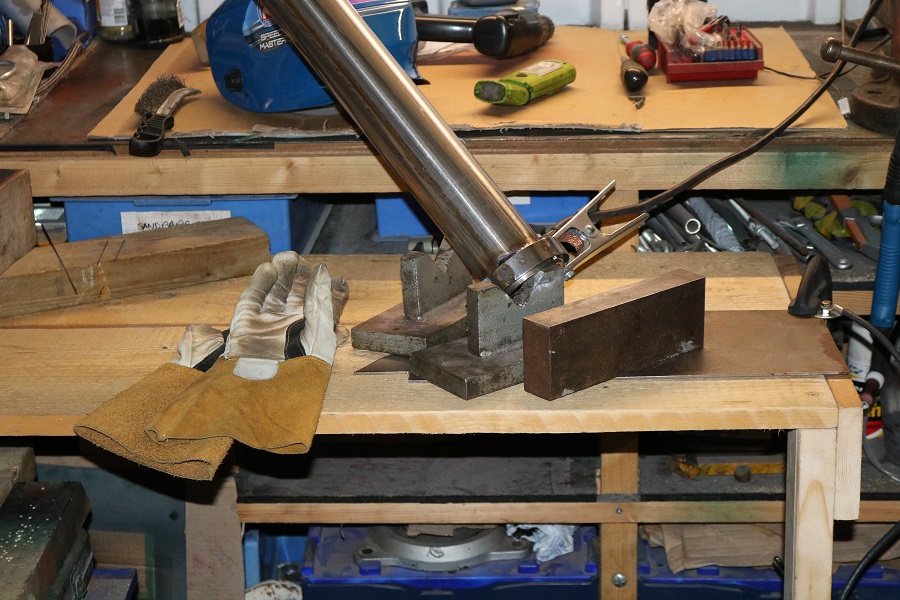 Sitting more comfortably at a suitable height bench I was able to use the pedal properly and felt I made a step forward in my TIG welding ability, still very inconsistent but a bit neater and no warpage 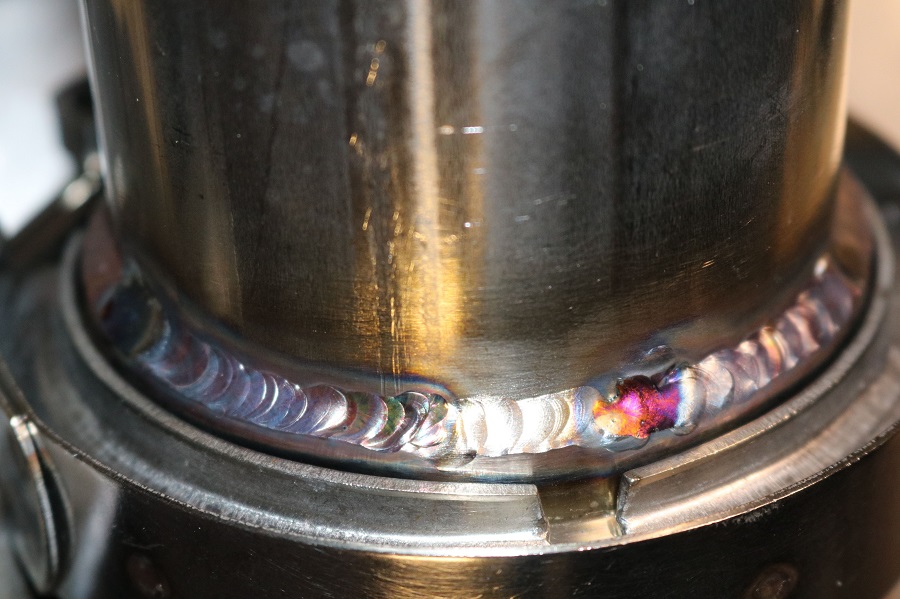 Now the turbo is lower in the engine bay the intake pipework will not twist enough take up the angle between turbo and air filter. I built the air box in 2007 to avoid hot air from the engine bay, the sides are shaped to fit close to the bonnet when closed but there was a small gap so when stationary still drew some hot air. When moving cool air passes over and round the headlamp there is also air directed from the fog light blank to underneath the filter Plan now is to re position the air filter at a different angle in the same location and build another similar air box but with a lid this time. The lid idea is inspired by the Glacier Hepolite racing SD1 Vitesse at the Classic motor show, it has the same position air filter but in a lidded box also fed cold air from around the headlamp. 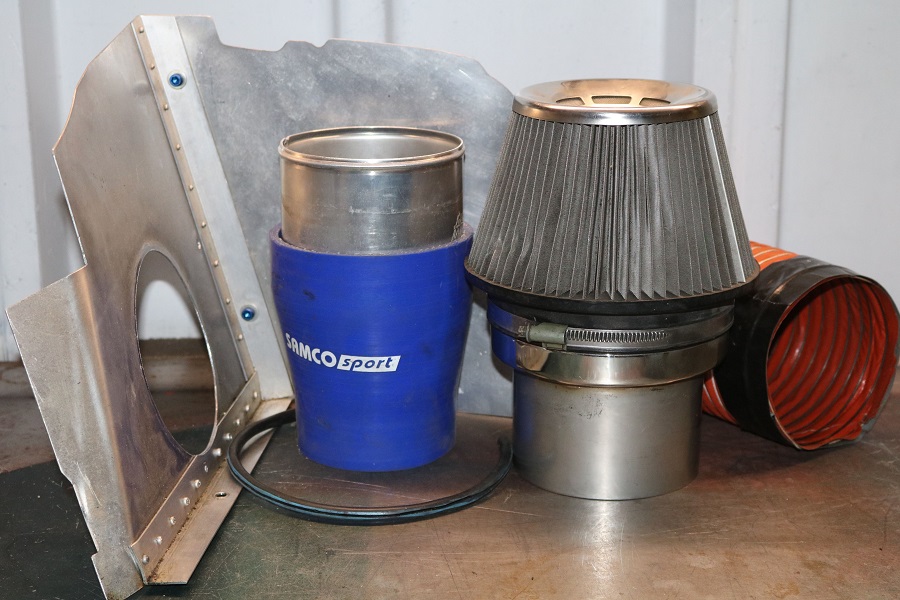 Plenty of space but quite a steep angle up to where the filter sits 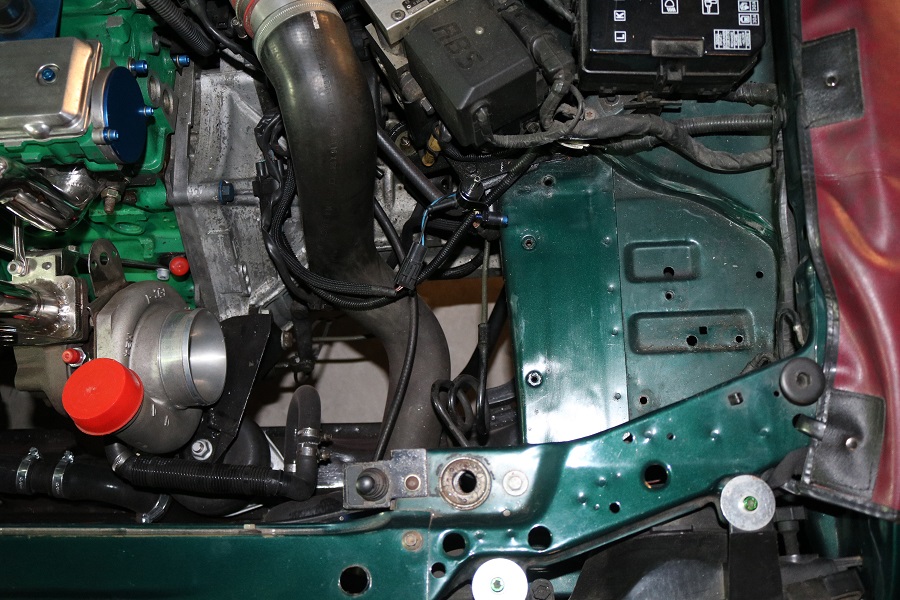 Another heat shield is needed for the bonnet above the exhaust manifold so fitted 4 rivnuts the the bonnet frame and a pair of aluminium braces to fix it to 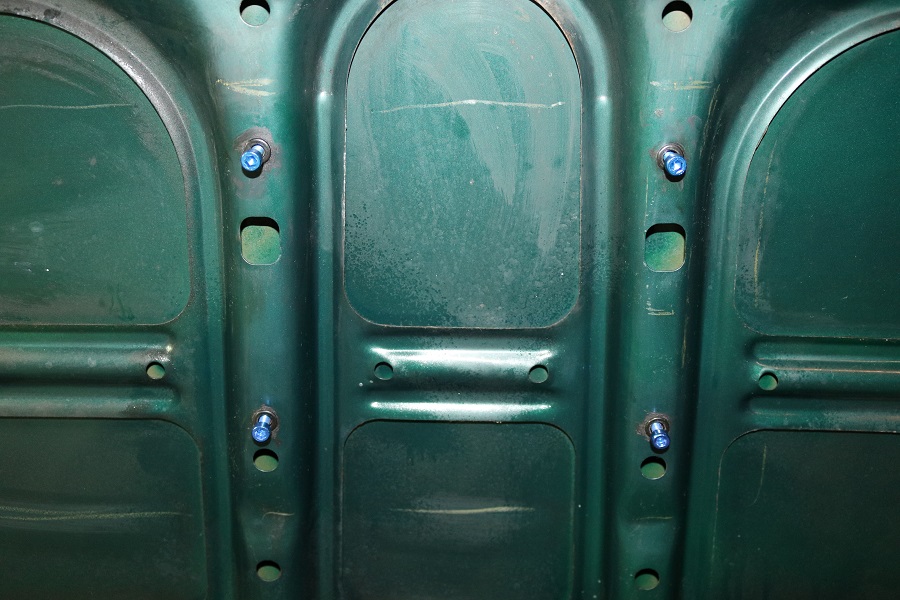 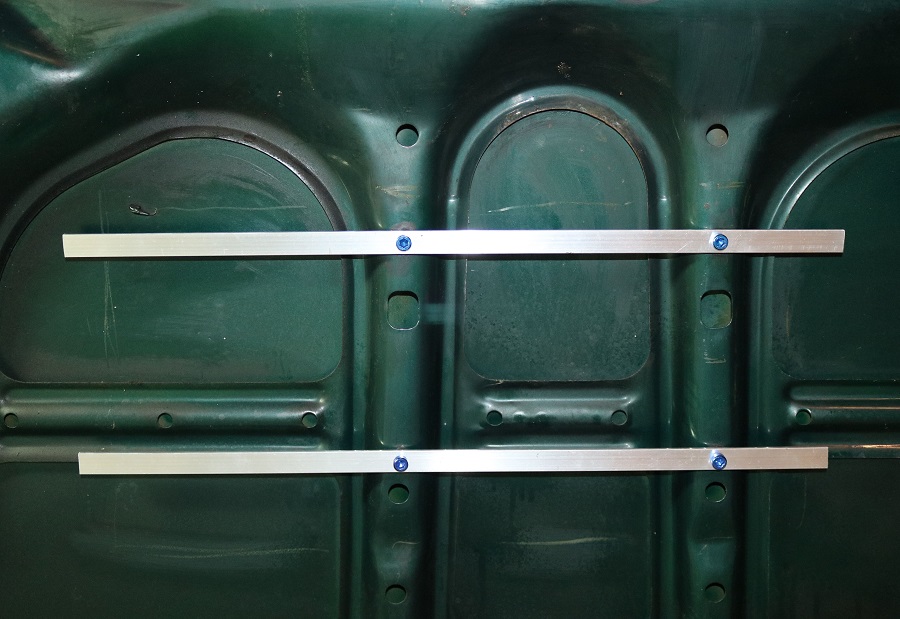 Next update probably not till next year so have a Happy Christmas and new year Jim |
| |
Last Edit: Sept 10, 2021 19:41:13 GMT by 820
|
|
|
|
|
|
|
Dec 17, 2018 18:35:26 GMT
|
have a good christmas  p.s you could get some P seal along the top edge to take up the gap between the air box and bonnet ? |
| |
|
|
|
|
|
Dec 17, 2018 21:56:07 GMT
|
|
That TIG welding looks very nice as does the rest of your work. I sometimes follow the Skid factory on you tube. They also do quality work on swapping engines and adding turbos
Keep up the good work
Peter
|
| |
|
|
820
South East
Posts: 793
|
|
Dec 18, 2018 14:15:59 GMT
|
have a good christmas  p.s you could get some P seal along the top edge to take up the gap between the air box and bonnet ? Thanks Darren, I did consider something like that but the edge shape was a bit complicated. I have a vision in my head how the new box should look sloping up behind the headlight it should be more effective, I hope to use as many of the old parts as possible. That TIG welding looks very nice as does the rest of your work. I sometimes follow the Skid factory on you tube. They also do quality work on swapping engines and adding turbos Keep up the good work Peter Thanks Peter, that means a lot coming from you. I took a quick look at skid factory, looks good, so it is bookmarked for later. The old metal box to go behind my seat is finished, not a lot of care went into the painting unfortunately but the box is pretty battered and will never look perfect, pictures below from start to finish. Now to find something to secure it inside the car. 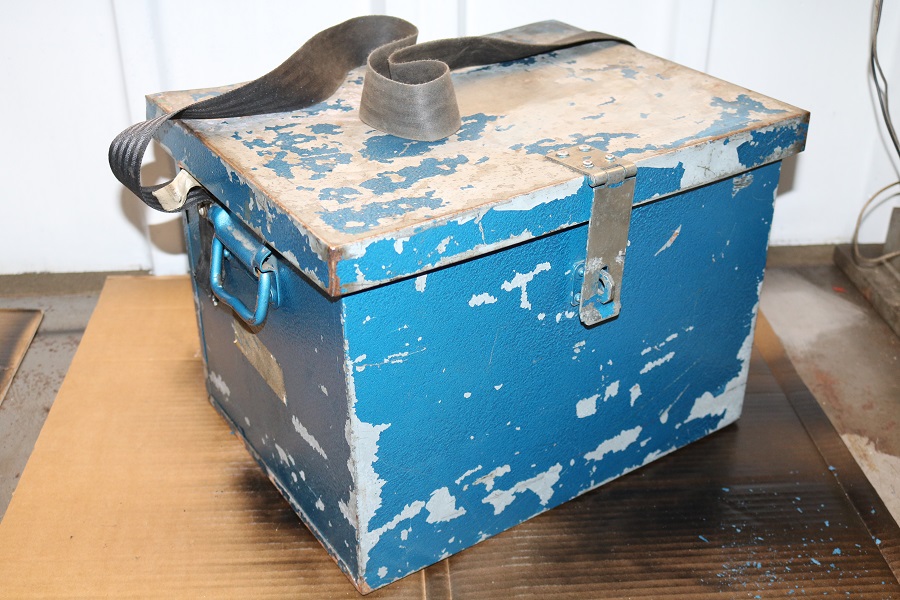 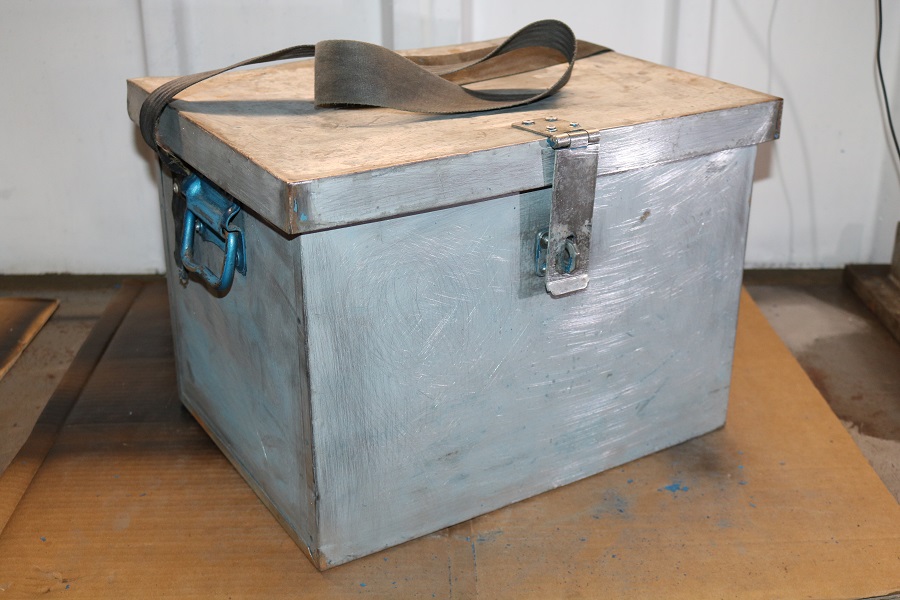 The lid was crooked when closed so had to build a contraption to pull one hinge straight 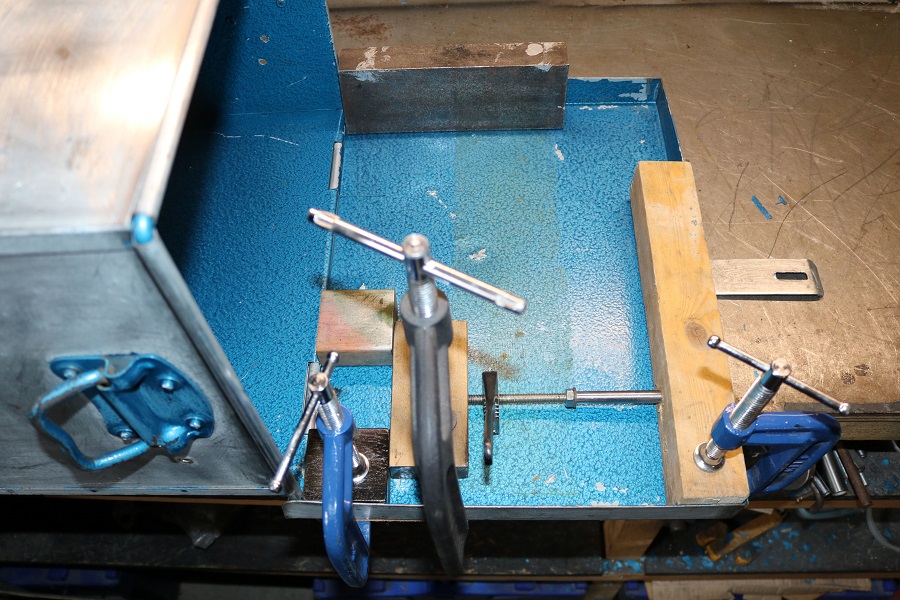 Now the Vitesse has a matching British racing green designer metal box 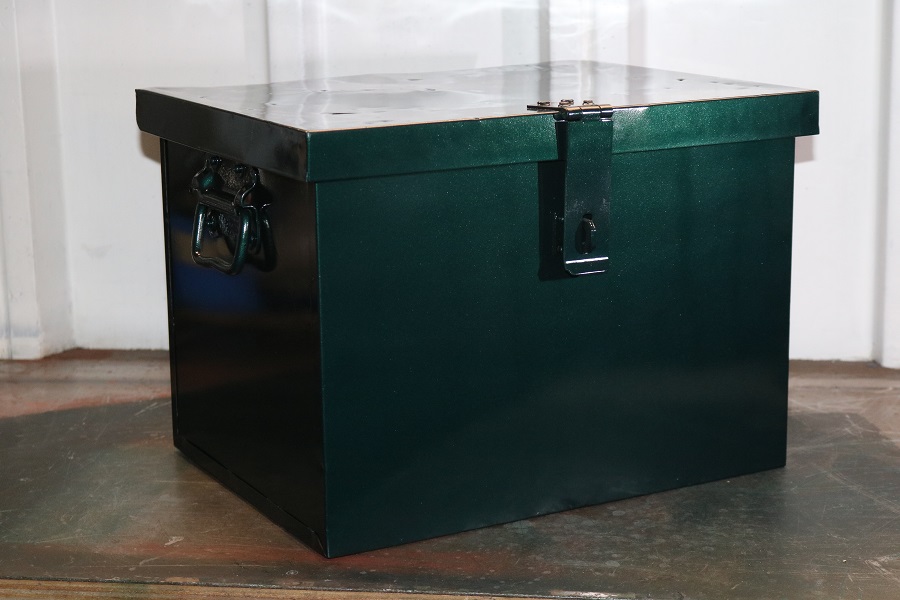 |
| |
Last Edit: Sept 10, 2021 19:42:13 GMT by 820
|
|
|
|
|
Dec 18, 2018 15:18:49 GMT
|
|
Very nice. Your TIG welding looks perfect by the way.
|
| |
|
|
820
South East
Posts: 793
|
|
Dec 23, 2018 19:55:24 GMT
|
Thanks Jim, its ok here and there. I did manage to get some more time on the car before the Christmas distractions start. Next section of exhaust I cheated, I am under no illusions my TIG welding is pretty rough so had a competent TIG welder join the 2 bends to the short straight, I then welded the V-Band flanges to each end which is a bit easier. 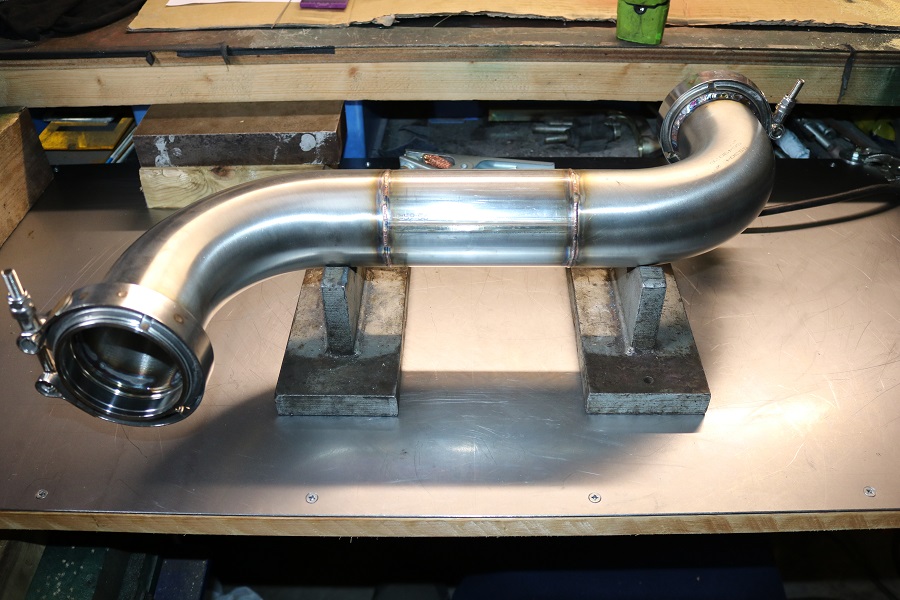 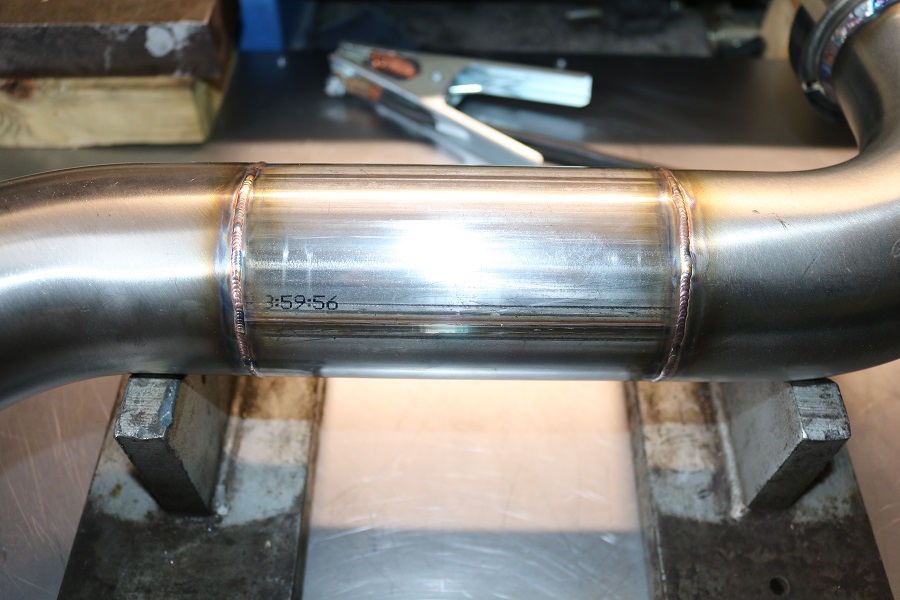 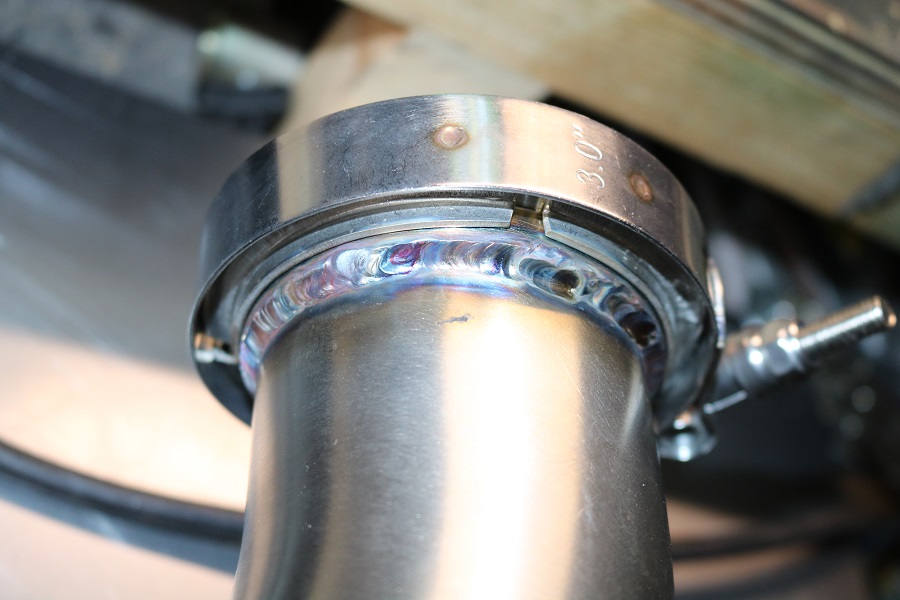 Bonnet heat shield is fitted, no nonsense big rectangle of aluminium 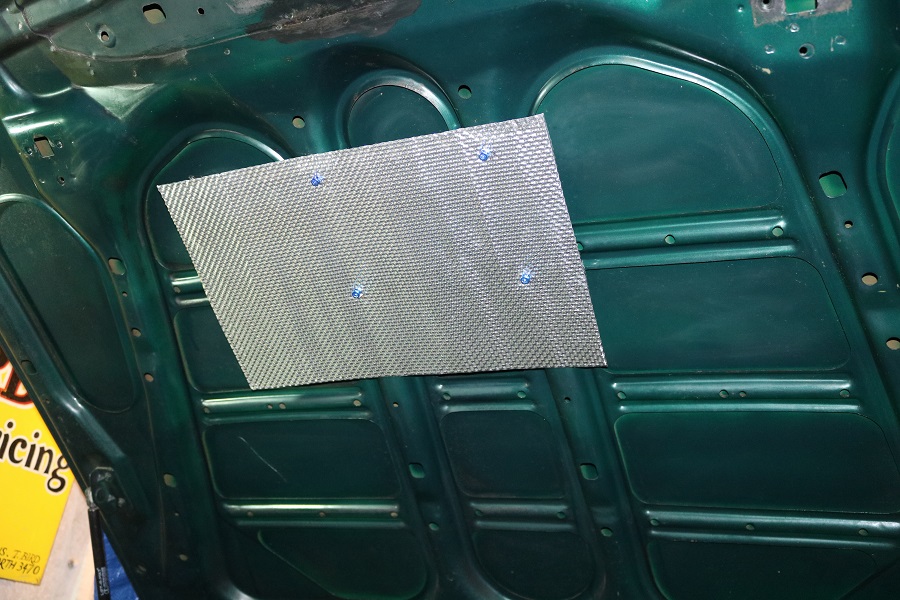 The last section of the N/S strut brace mount I also had welded professionally because it is visible, my welds on the back and underside are rough but out of sight I couldnt risk ruining the thing and having to start again. Still a couple of corners to tidy but will leave that till last when the other side is done. 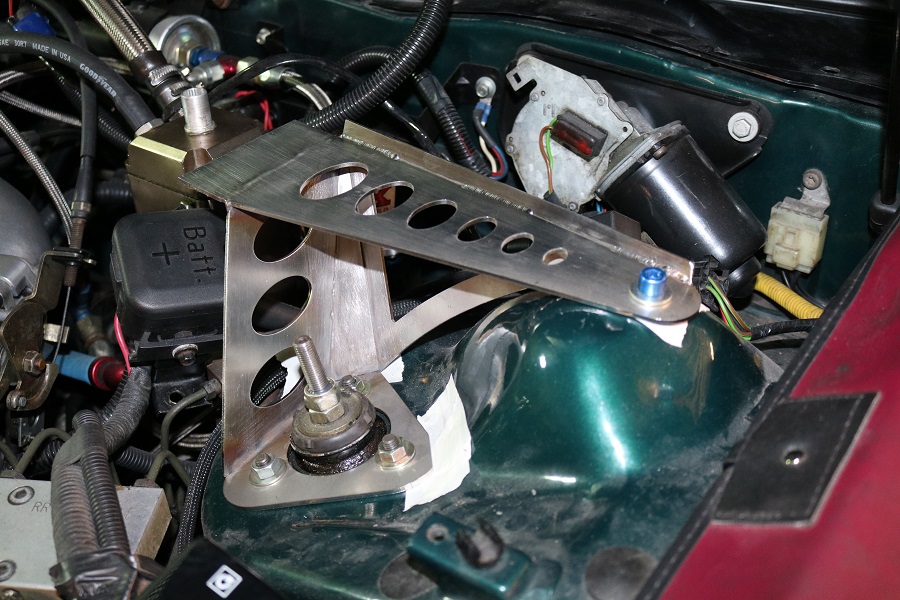 thats all for now, have a great Christmas and new year all |
| |
Last Edit: Sept 10, 2021 19:42:59 GMT by 820
|
|
820
South East
Posts: 793
|
|
Jan 21, 2019 21:09:03 GMT
|
New year update. To fit the strut brace I need to lower the oil catch tank, it has two breather inlets, an oil return to the sump and filtered outlet on top. It gets a bit oily around the outlet filter and surrounding parts after the engine has been working hard, so while it is out I want to reduce the oily vapour. 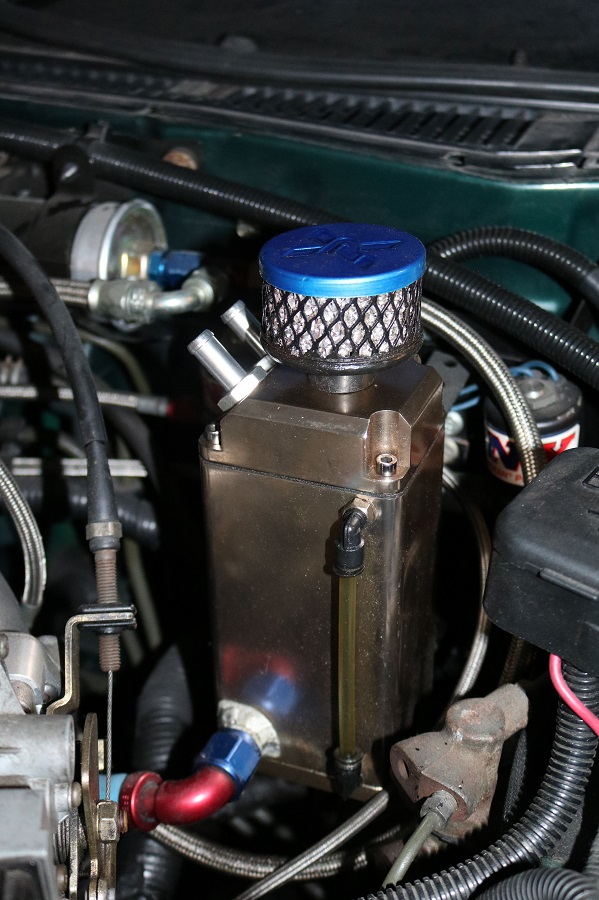 Inside, the breather inlets are close to the filtered outlet allowing some oil to be blown straight out the filter. 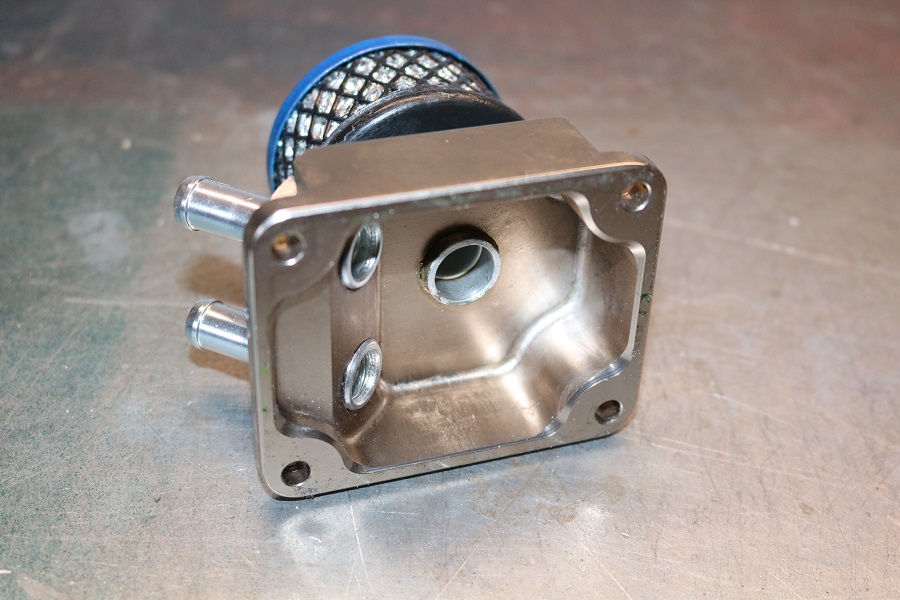 I added a baffle hoping any oil drops blown out the pipes will condense on it, run to the bottom of the tank then return to the sump rather than out the filter with the fumes 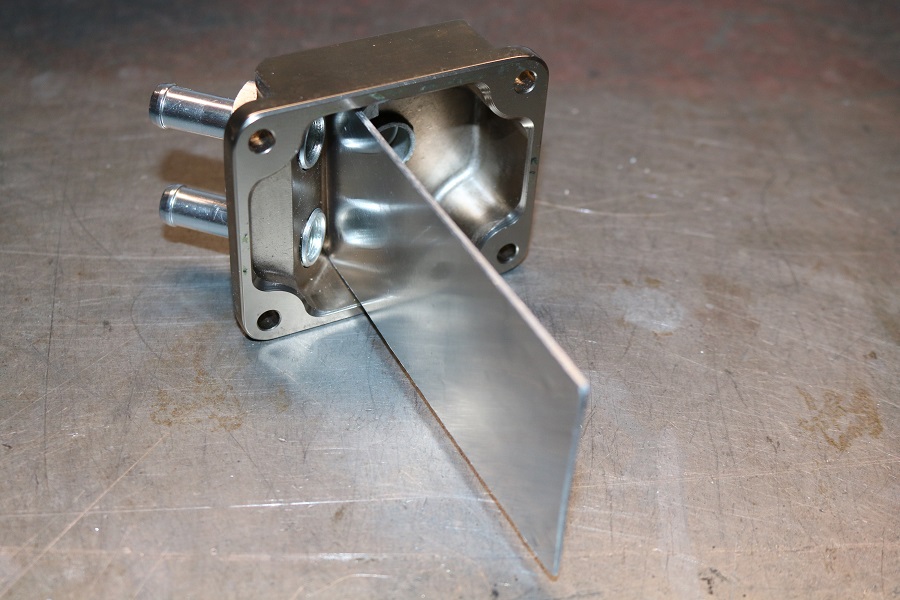 This mod to the gear linkage (see earlier post) made almost no difference to the movement in the rear mount. 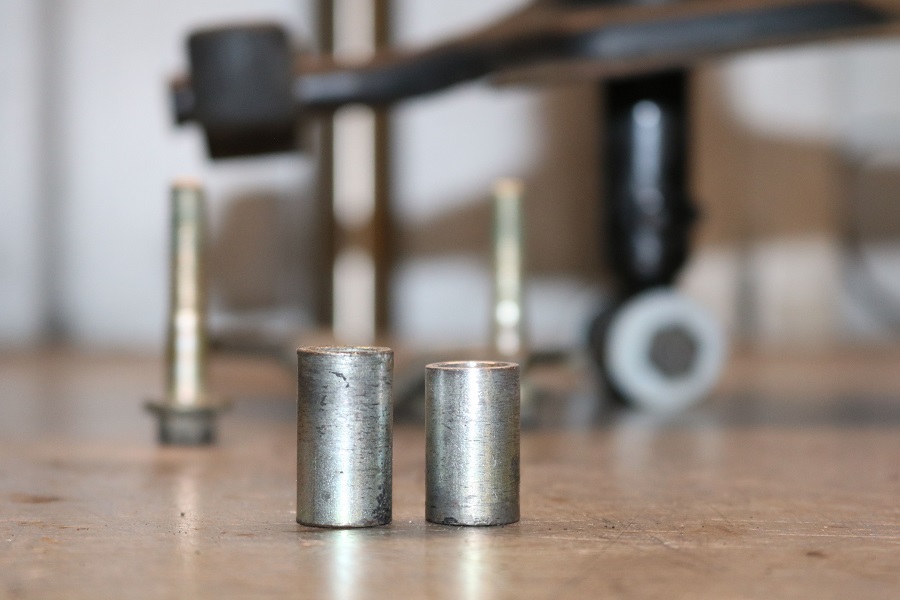 Both were shortened 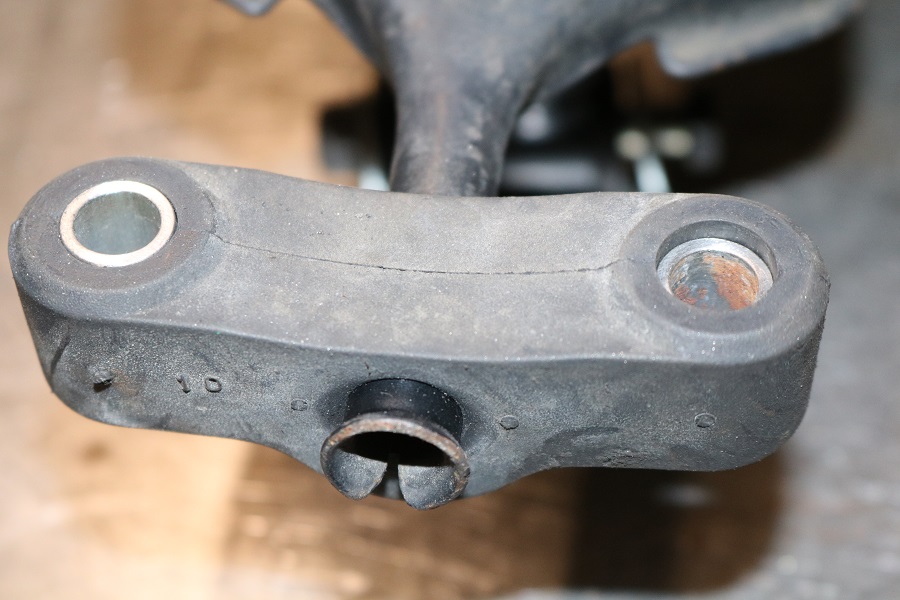 so plan B was add a 6mm aluminium spacer under the mount bush to further compress the rubber, this has worked much better if a little crude. View is from under the car looking back up at the tunnel 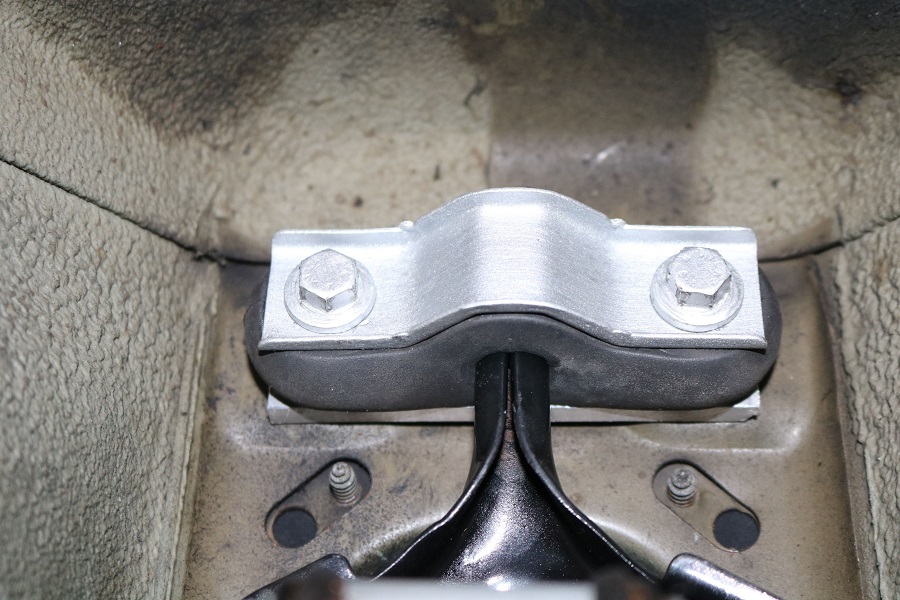 The exhaust system is almost done, I need to fully fit the manifold and downpipe before I can finish the rear mounts and tailpipe, so last chance to get the shiny parts together for a picture. I also added a mount for the downpipe to bolt to the block reducing loads on the manifold, especially if it bottoms out. It all depends on a final look inside the manifold with an inspection camera to make sure there is no swarf or weld debris likely to fall off and damage the turbo. That is this weekend then if all okay I can start to finally reassemble the engine, pipework, cooling system, finish the air filter and get it started. “Rover Vitesse Turbo exhaust kit” 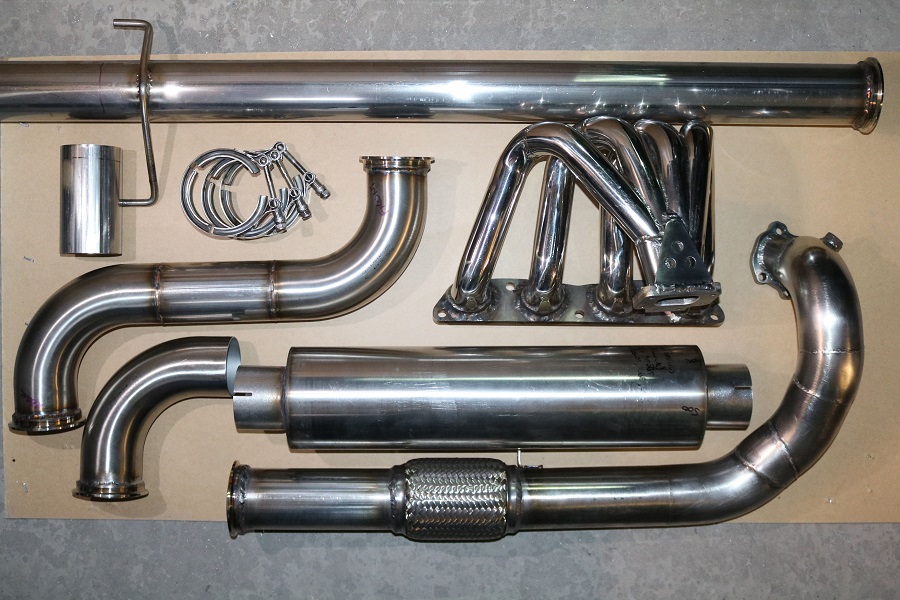 |
| |
Last Edit: Sept 10, 2021 19:43:56 GMT by 820
|
|
|
|
|
|
|
|
Nice attention to detail with the breather setup and the exhaust kit looks very nice!
|
| |
|
|
820
South East
Posts: 793
|
|
Jan 23, 2019 20:07:34 GMT
|
|
Thanks Peter, the cam belt is almost 6 years old and due for replacement so took the cover off for a look, it looks like I fitted it yesterday, no visible wear, clean with all writing and Gates logo like it just came out the box. I looked up the MOT history, the car has done just over 600 miles on that cam belt, just over 2000 miles since 2007. It will still be changed but I will get it running first, an oil and filter change and some new spark plugs then the belt.
|
| |
|
|
|
|
|
|
|
|
Beautiful craftsmanship. Love the ensemble photograph. Mike from midland performance centre gave me the rolling shell of a rover 218is bubble and I’m going to fit my spare t16 into it! When the project gets under way I’ll start a thread for it.
|
| |
|
|
|
|
79cord
Posted a lot
  
Posts: 2,617
|
|
|
|
|
Beautiful work.
Rear shift linkage bush looks exactly like Civics '81-'01 with more rigid aftermarket items available if needed or useful.
Hope squashing it in still allows the longitudinal movement it is designed for.
|
| |
|
|
820
South East
Posts: 793
|
|
Jan 24, 2019 14:11:28 GMT
|
Beautiful craftsmanship. Love the ensemble photograph. Mike from midland performance centre gave me the rolling shell of a rover 218is bubble and I’m going to fit my spare t16 into it! When the project gets under way I’ll start a thread for it. Thanks Jim, new parts only ever look like that once so its nice to have a reminder. Look forward to the new project. I think the 1.8's had the PG1 gearbox which is the same as the T16 and makes the swap a bit easier. I had a 25 Vi a few years back, looked like any other run of the mill 25 but had the VVC engine, a GTi with a different name to keep insurance down, probably about 200kgs lighter than an 800 so it will fly, only thing that lets the T16 down is its weight. Beautiful work. Rear shift linkage bush looks exactly like Civics '81-'01 with more rigid aftermarket items available if needed or useful. Hope squashing it in still allows the longitudinal movement it is designed for. Thanks 79cord, I wasnt going to post about the bush, not very interesting update but glad I did now, I did not consider the longitudinal movement, never crossed my mind. The movement should be minimal but to reduce the stresses on the rubber bush being pulled about I will add some copperslip to allow longitudinal movement through the bush. I looked had a quick search for the Honda parts too, all looks very similar and given me more ideas, thank you |
| |
|
|
820
South East
Posts: 793
|
|
Jan 27, 2019 14:16:34 GMT
|
|
I looked inside the exhaust manifold with a camera at the areas mirrors and light cannot reach, it is not good. I know this should be done before starting the conversion then might not have used this manifold.
Some of the welds have come right through to the inside, (not my welds) not good for flow, poor picture but you can just make it out. There is nothing I can do about these.
Also some nasty little bits sticking up from the same joints pictured above but the opposite side of the tubing. I tried some flexible plumbing tools but could not touch them, these worry me that they could come off and enter the turbo.
I have ordered a roll of coarse emery cloth to try, these little tags are on the inside curve so hoping I can drag the emery cloth right through the manifold back and forth over them to break them off or rub them down
Also closed the outlet end, filled it with hot water to check for leaks, found 3 or 4 pin holes and welded over those.
|
| |
Last Edit: Sept 10, 2021 19:45:15 GMT by 820
|
|
|
|
|
Jan 28, 2019 19:14:35 GMT
|
|
I stumbled across your thread by sheer accident and have thoroughly enjoyed reading it from start to finish.
With regards to the difficulty in finding suitable bushes, etc... and I don't know whether I am talking total rubbish, there is a material referred to as 'NYLON 6' which is readily available, and which can also be machined.
There is also an active contributor on Retro Rides who goes by the name of Johnny Bravo. This person is a seriously competent engineer who also does a lot of machining for some very big projects. I seem to have it in the back of my mind that he has machined specialist bushes for some of his paid work.
Perhaps a message to him may give some ideas, etc...?
Keep up the good work with your project.
|
| |
|
|
|
|
|
Jan 28, 2019 21:26:41 GMT
|
|
could you reach them with a carbide burr on a die grinder (or even carbide burr on a flexible drill extension) ?
cant quite picture which bit you are looking inside of.
|
| |
|
|
820
South East
Posts: 793
|
|
Jan 29, 2019 16:37:53 GMT
|
I stumbled across your thread by sheer accident and have thoroughly enjoyed reading it from start to finish. With regards to the difficulty in finding suitable bushes, etc... and I don't know whether I am talking total rubbish, there is a material referred to as 'NYLON 6' which is readily available, and which can also be machined. There is also an active contributor on Retro Rides who goes by the name of Johnny Bravo. This person is a seriously competent engineer who also does a lot of machining for some very big projects. I seem to have it in the back of my mind that he has machined specialist bushes for some of his paid work. Perhaps a message to him may give some ideas, etc...? Keep up the good work with your project. Thanks norfolkshire, glad you enjoyed the read, I will look into the nylon 6 material, sounds useful also noted johnny bravo for fabrication, cheers for the tips |
| |
|
|
820
South East
Posts: 793
|
|
Jan 29, 2019 16:44:46 GMT
|
could you reach them with a carbide burr on a die grinder (or even carbide burr on a flexible drill extension) ? cant quite picture which bit you are looking inside of. It is the welds arrowed, they are not visible inside from either end of the manifold and no way of getting any rotating tools that far in and round the bends. I have already decided this manifold is temporary, I count all the time and £'s put into it as welding and fabrication experience. 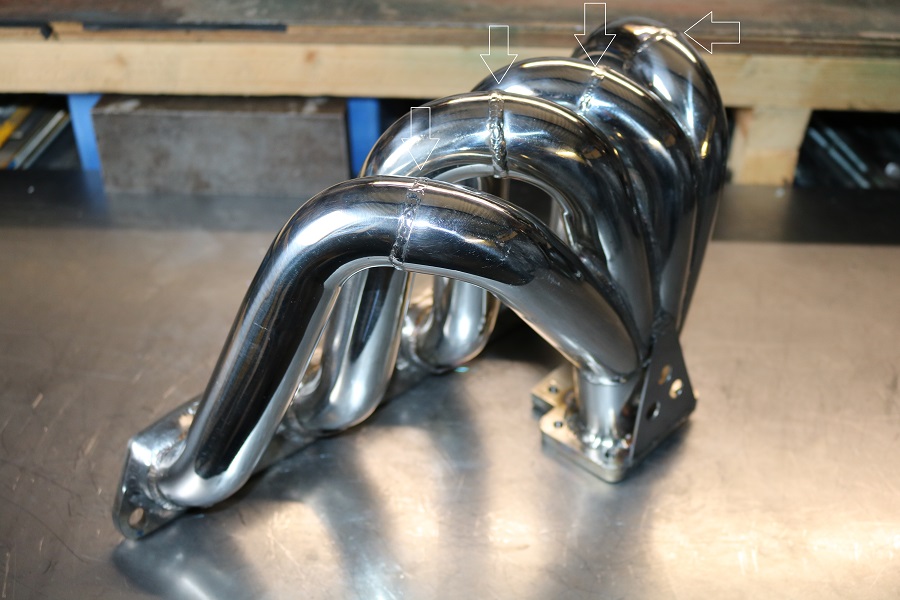 and a small update, I couldnt find any stainless steel wire mesh to fit inside the catch tank so went for the next best thing, stainless steel washing up scourer the idea is to help separate the oil from the gases. Also removed the level sight tube thing from the side as it serves no purpose. 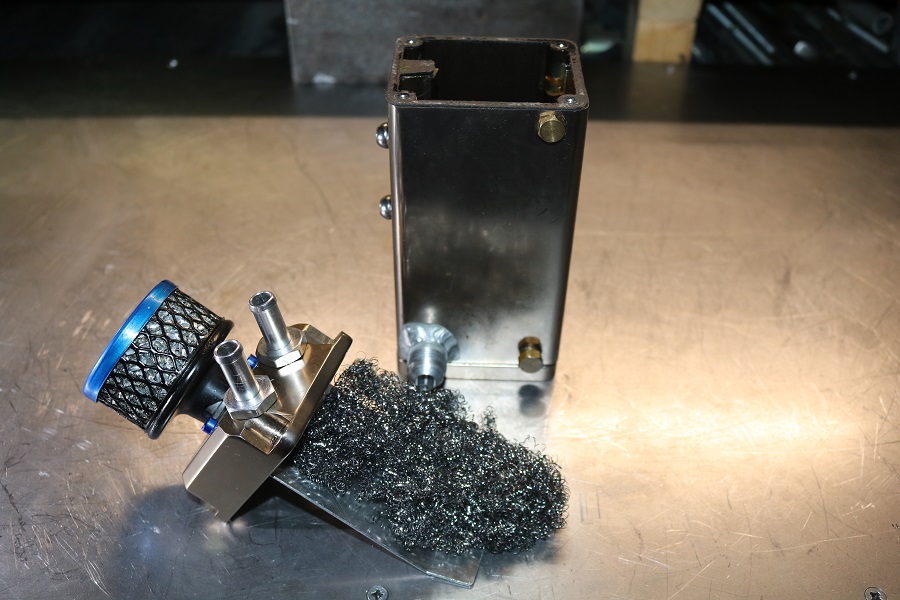 |
| |
Last Edit: Sept 10, 2021 19:45:42 GMT by 820
|
|
|
|
|
Jan 29, 2019 21:08:15 GMT
|
curse word  it may have an undetectable effect if the primaries are relatively generous in size compared to the cast version ? i have heard of using steps to kind of deter "reversion" (graham bell 4stroke performance tuning) admittedly it wasn't a bulbous intruding weld but the manifold flange being larger than the exhaust ports. |
| |
Last Edit: Jan 29, 2019 21:10:31 GMT by darrenh
|
|
820
South East
Posts: 793
|
|
Jan 30, 2019 14:08:38 GMT
|
It does have a bit of that in a more effective position at the entry to the manifold, the lower edge has a small lip, how effective that is on a turbo engine though is doubtful with the back pressure caused by a turbine wheel blocking the way out. 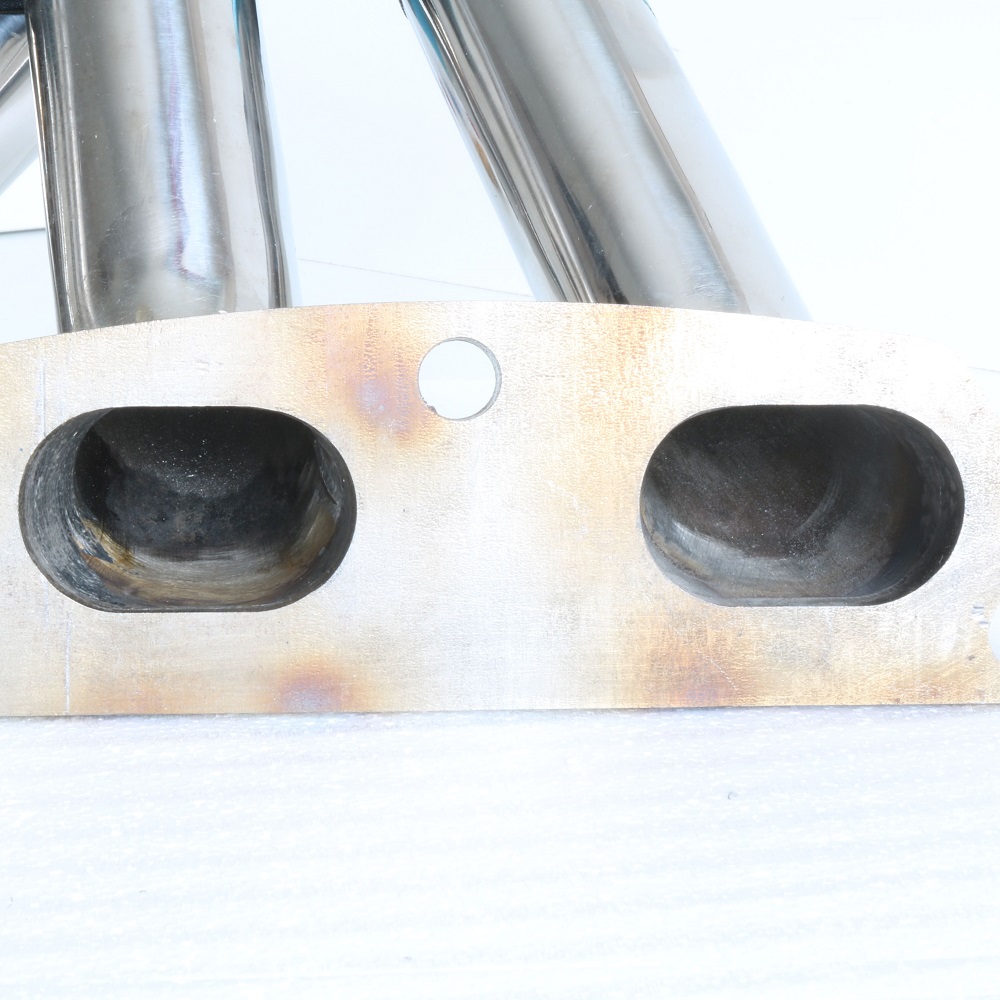 Those welds inside the primaries, the little tags along with the materials it is built from and the high probability it will crack, means it will not be as efficient as it could be and bound need repairs. I could never trust it to reliably complete a track day. If I can get the car up and running with this fitted it will give me chance to finish a few other jobs and get some prices for a proper manifold built to engine specification. I think I knew early on it was not up the job but kept at it as you do just in case it comes together in the end, but there you go all good experience |
| |
Last Edit: Sept 10, 2021 19:46:02 GMT by 820
|
|
820
South East
Posts: 793
|
|
|
|
|
The emery cloth worked, 2m strips dragging it backwards and forwards through the manifold removed the little tags and the manifold is now fitted for testing.
|
| |
|
|
|
|


