ChrisT
Club Retro Rides Member
Posts: 1,638
Club RR Member Number: 225
|
|
|
|
Thanks, does go a bit quick, might go quicker with a bit of carb tuning - the engine was missing at high revs, but I think 30 is more than enough for now....... Love it! Minor point - try and film in landscape as you'd get a lot more in the frame. Yeah, new technology to me - using a mates phone and not knowing that turning it sideways wouldn't upset it.... |
| |
|
|
|
|
ChrisT
Club Retro Rides Member
Posts: 1,638
Club RR Member Number: 225
|
|
|
|
I plan on running this engine for a couple of months whilst collecting the parts to do the inevitable change to a XE engine. You know it makes sense - off the top of my head all you need, as you've got the 1.8 base, is an exhaust manifold and better clutch |
| |
|
|
ChrisT
Club Retro Rides Member
Posts: 1,638
Club RR Member Number: 225
|
|
Jul 27, 2013 15:49:00 GMT
|
|
Seconded on the Serck idea - I used them to re-core my 16v manta rad and haven't had a problem with it yet.....
|
| |
|
|
ChrisT
Club Retro Rides Member
Posts: 1,638
Club RR Member Number: 225
|
|
Jul 25, 2013 21:18:55 GMT
|
Finished off the diff housing cover..... 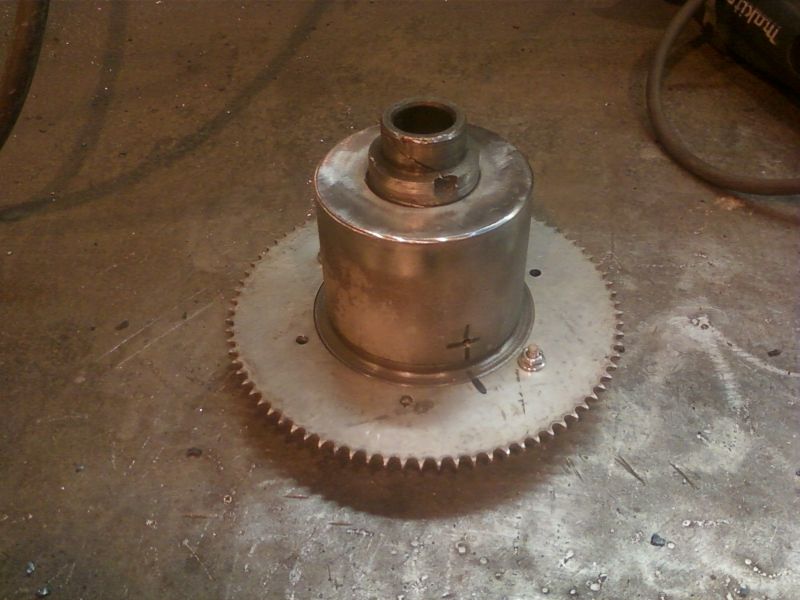 Bought a 'cycle computer' to use as a speedo, with handy max speed recall function....   |
| |
|
|
ChrisT
Club Retro Rides Member
Posts: 1,638
Club RR Member Number: 225
|
|
Jul 23, 2013 20:20:36 GMT
|
1wd is fun but I can't help thinking it might be better with 2wd, should be able to skid in both directions, so been messing around with the old manta diff to make it fit. Removed the ring gear..... 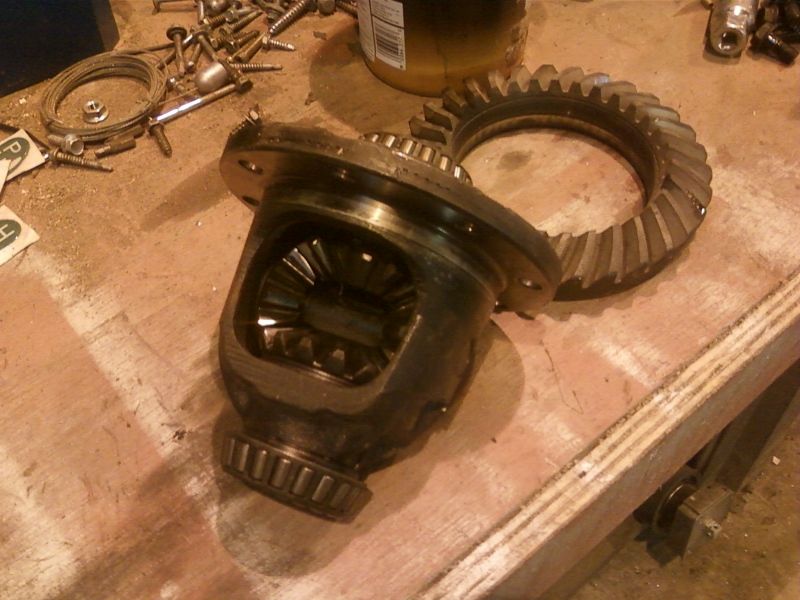 Cut off the bearings, turned down the spider gear housing and the ring gear flange in the lathe... 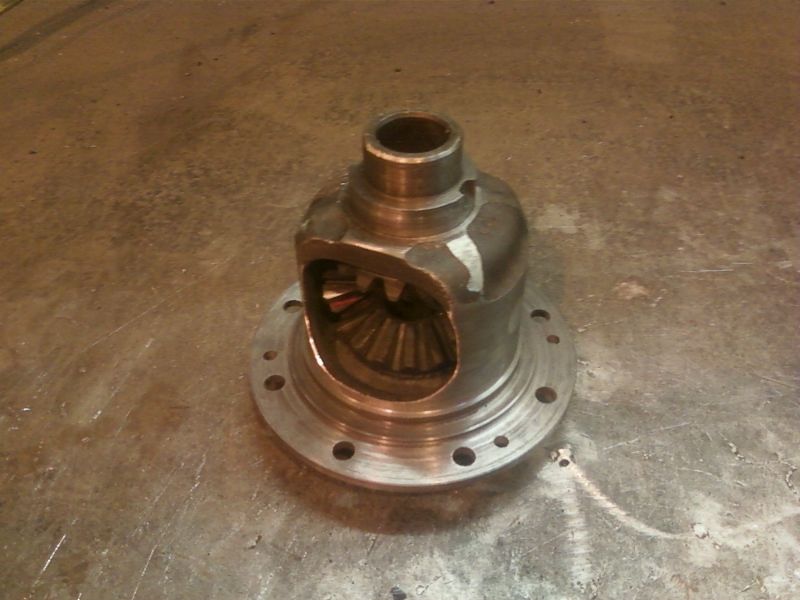 so that I could mount the axle sprocket.... 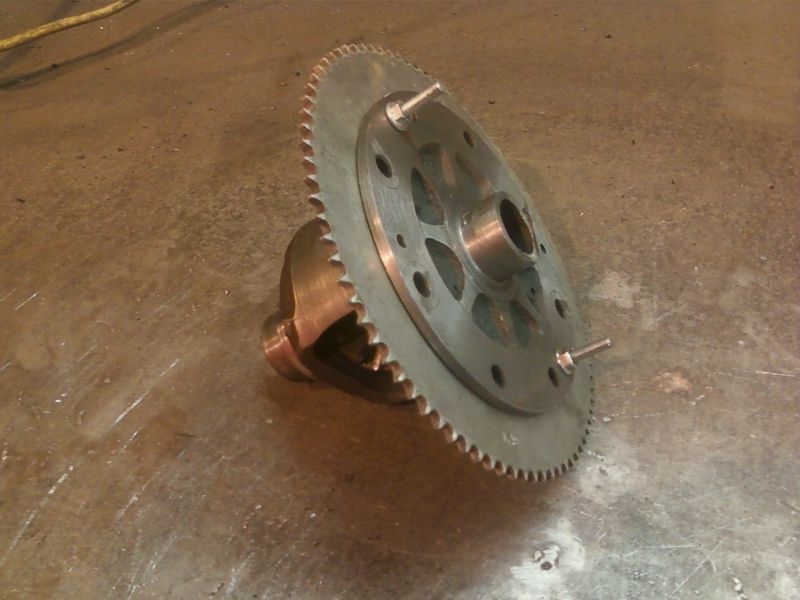 and put a section of 4" tube over to keep the grease in - will be welding a cover over the end.... 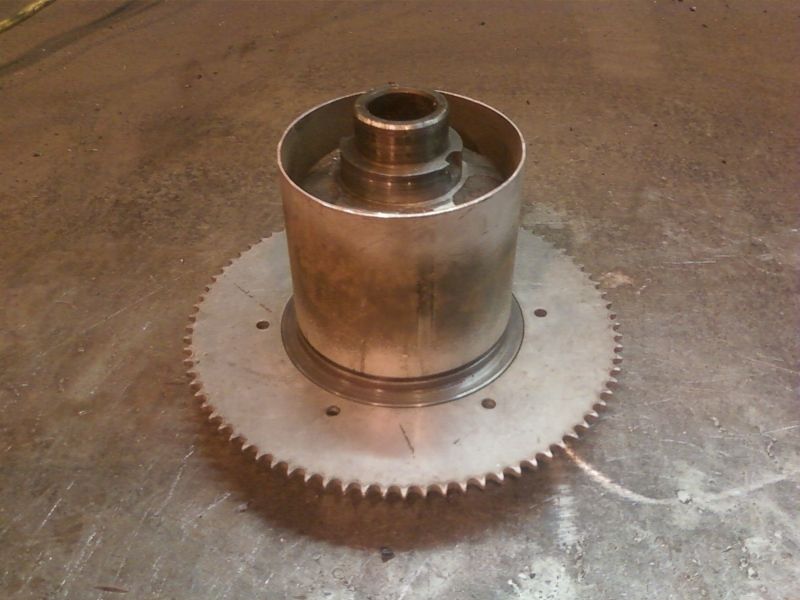 Just need to figure out how to make the splines on the axle shafts to locate in the side gears...... |
| |
|
|
ChrisT
Club Retro Rides Member
Posts: 1,638
Club RR Member Number: 225
|
Pointless FWD kart deviceChrisT
@christ
Club Retro Rides Member 225
|
Jul 19, 2013 19:55:09 GMT
|
|
Interesting project - liking the idea for the differential......
|
| |
|
|
ChrisT
Club Retro Rides Member
Posts: 1,638
Club RR Member Number: 225
|
|
Jul 19, 2013 17:49:58 GMT
|
Video of a mate having a quick blast on it.......  Seen 25mph on the satnav but I was having to hold it in one hand, with the other on the throttle - no spare one for the brake lever so wasn't going as quick as I probably could. Should really check it over before using, especially after abusing it the day before....... 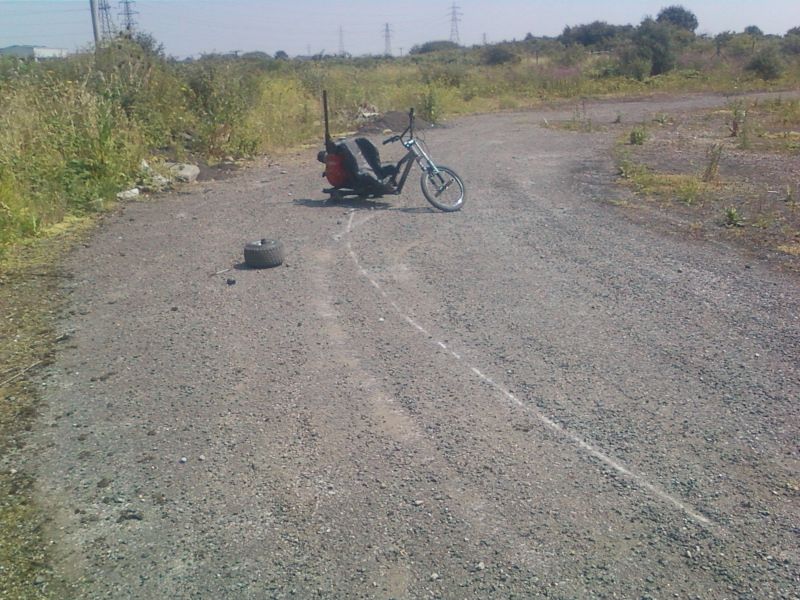 Just the hub nut on the free wheel coming loose, no damage, replaced with two nuts and a spring washer...... |
| |
Last Edit: Jul 19, 2013 17:50:57 GMT by ChrisT
|
|
ChrisT
Club Retro Rides Member
Posts: 1,638
Club RR Member Number: 225
|
|
|
|
|
Some sort of bracket from the engine to the manifold or downpipe so it can't move so much?
|
| |
|
|
ChrisT
Club Retro Rides Member
Posts: 1,638
Club RR Member Number: 225
|
|
|
|
|
|
| |
Last Edit: Jul 4, 2013 17:16:38 GMT by ChrisT
|
|
ChrisT
Club Retro Rides Member
Posts: 1,638
Club RR Member Number: 225
|
|
|
|
^^^^I did put that at the bottom of my last post  But they are longer so along with a bit of extra weight they are extending the wheelbase, which I thought might move the weight forward so the front end is less likely to lift as it had a tendency to do. |
| |
|
|
|
|
ChrisT
Club Retro Rides Member
Posts: 1,638
Club RR Member Number: 225
|
|
|
|
well, it sort of moves under it's own power  Could you fit a larger sprocket to the axle, lower the gearing a bit, put less stress on the clutch?? |
| |
|
|
ChrisT
Club Retro Rides Member
Posts: 1,638
Club RR Member Number: 225
|
|
Jun 29, 2013 11:17:58 GMT
|
looks stunning, absolutely love it  |
| |
|
|
ChrisT
Club Retro Rides Member
Posts: 1,638
Club RR Member Number: 225
|
|
|
|
Close up of the handlebar clamps.... 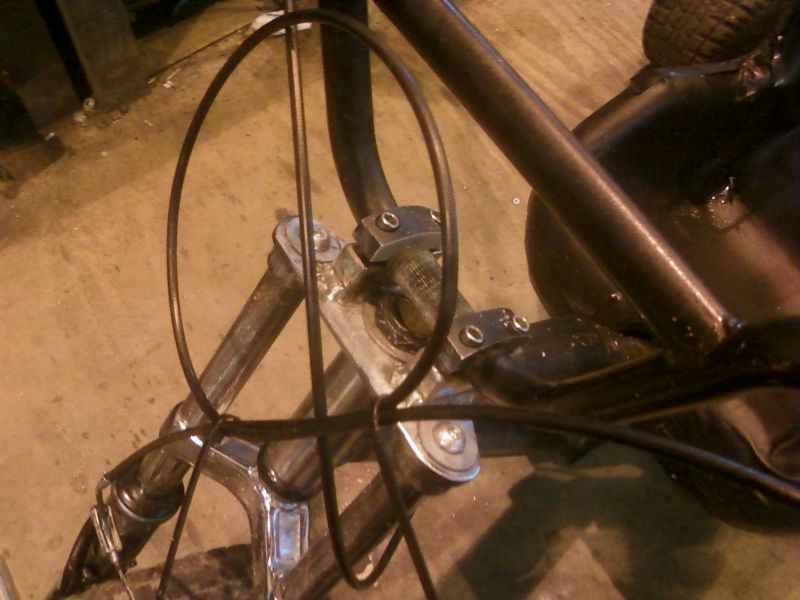 Planning on fitting a front disc brake in the future so I've temporarily refitted the v-brakes by attaching the mounting posts to the forks with jubilee clamps, space is a little tight but I've got them working...... 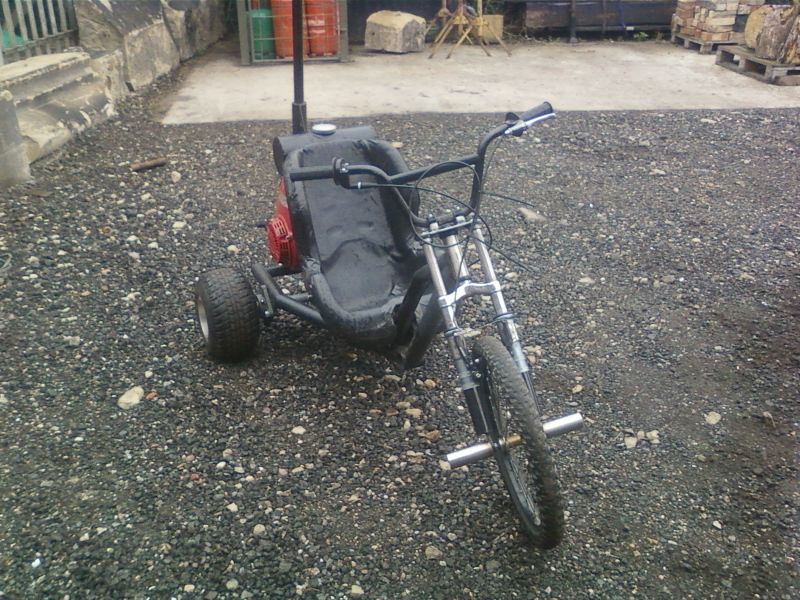 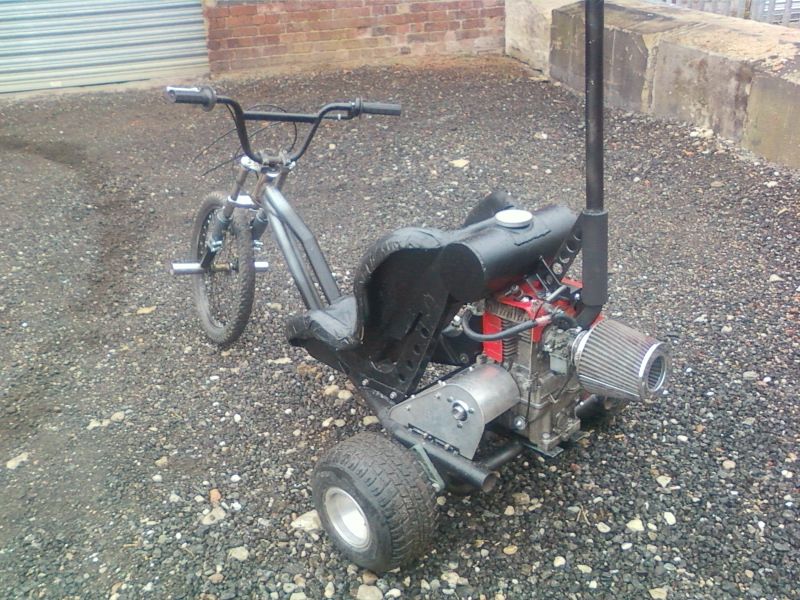 Took it out for a run and I'm not sure the suspension has made any difference at all but at least it looks better  Time to try and sort out a diff and some rear brakes....... |
| |
|
|
ChrisT
Club Retro Rides Member
Posts: 1,638
Club RR Member Number: 225
|
|
|
|
|
....
|
| |
Last Edit: Jun 29, 2013 7:57:02 GMT by ChrisT: double post
|
|
ChrisT
Club Retro Rides Member
Posts: 1,638
Club RR Member Number: 225
|
|
Jun 27, 2013 21:35:17 GMT
|
Clamps made and handlebars back on..... 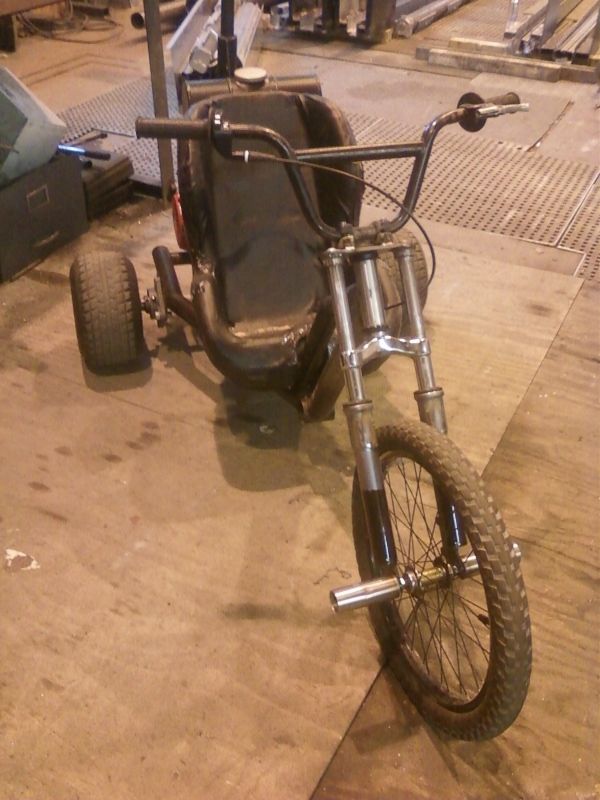 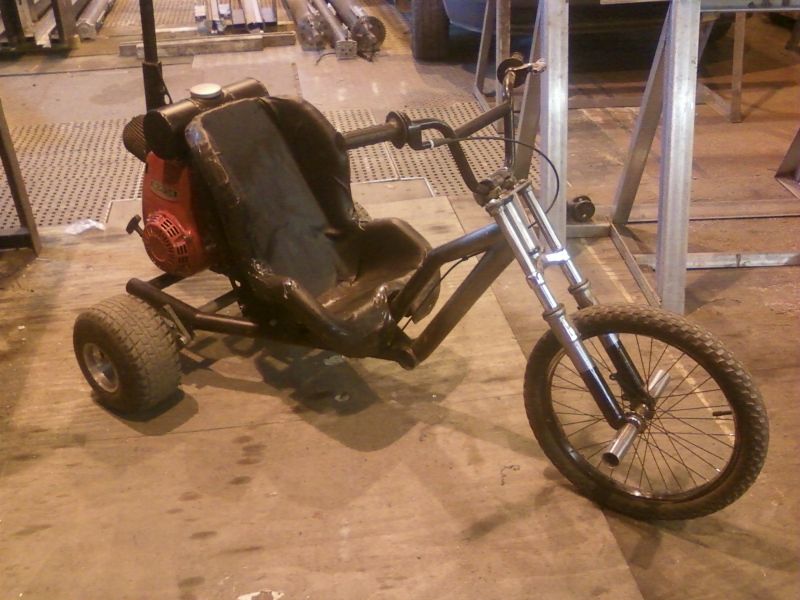 |
| |
|
|
ChrisT
Club Retro Rides Member
Posts: 1,638
Club RR Member Number: 225
|
|
Jun 25, 2013 20:35:28 GMT
|
That's what I was thinking of using, there's hopefully just enough room to fit something between/under the starter and the frame. Found some mechanical calipers but rather than using a brake lever on the handlebar I think some kind of handbrake next to the seat would be good. I've got hold of some mountain bike suspension forks which I thought I could quick swap over but it's turned into a slightly longer job...... They didn't fit in the front tube so found some tube the right size, cut out the old one and welded that in place....  Didn't look right to me so did a bit of fabrication... 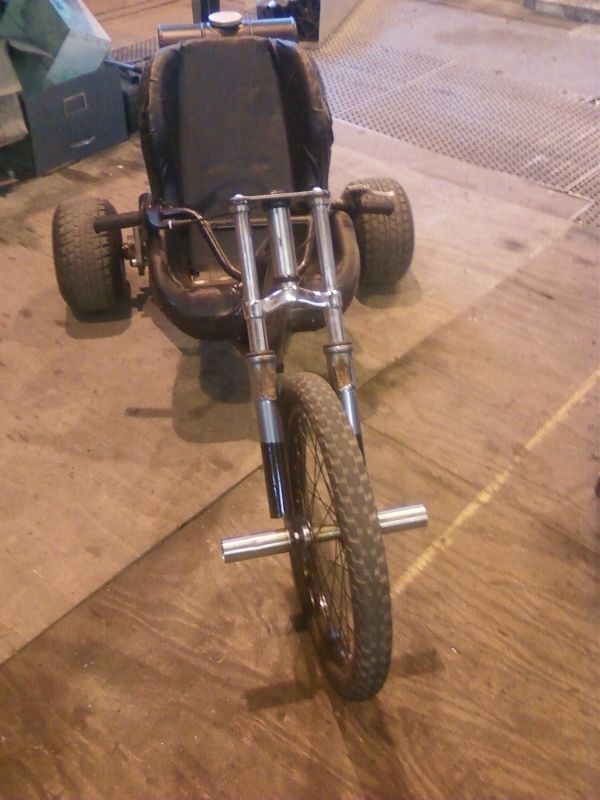 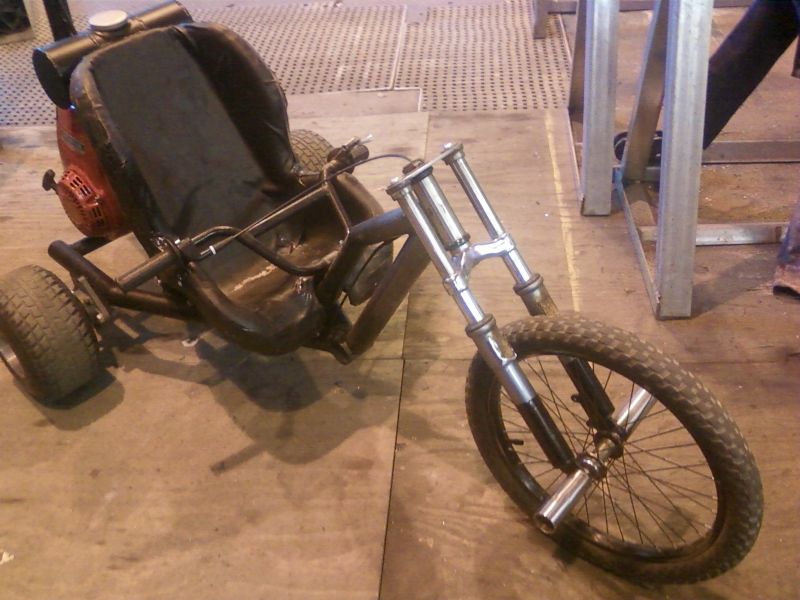  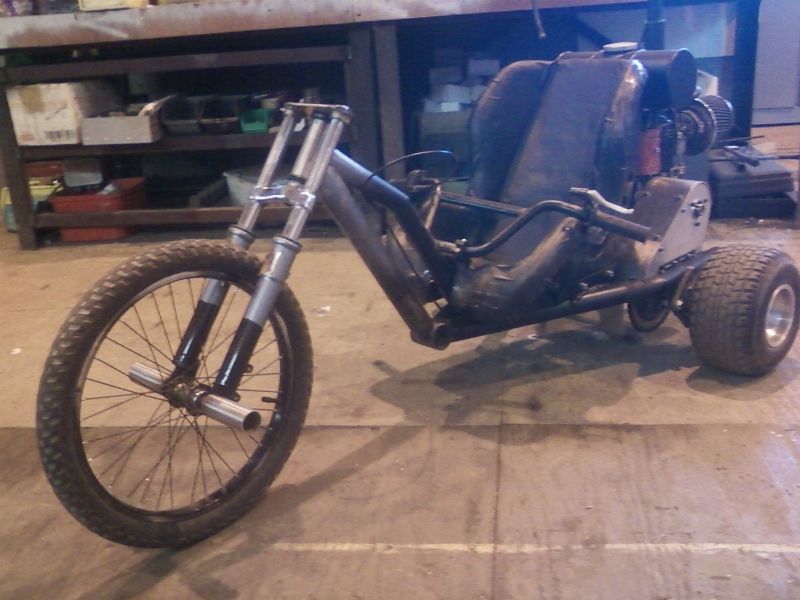 Just need to finish off the handlebar clamps..... |
| |
Last Edit: Jun 25, 2013 20:36:22 GMT by ChrisT
|
|
ChrisT
Club Retro Rides Member
Posts: 1,638
Club RR Member Number: 225
|
|
|
|
|
Sounds cool and yeah this really needs rear brakes as I get the same problem of the front locking and just being pushed along as there's not much weight over the front.
|
| |
|
|
ChrisT
Club Retro Rides Member
Posts: 1,638
Club RR Member Number: 225
|
|
|
|
Suppose I could do but that would be too easy While the tank's empty I thought I'd best clean it up and paint it, also added a 19mm bearing to the chain guard to support the end of the output shaft, and replaced a few bolts with stainless capheads..... 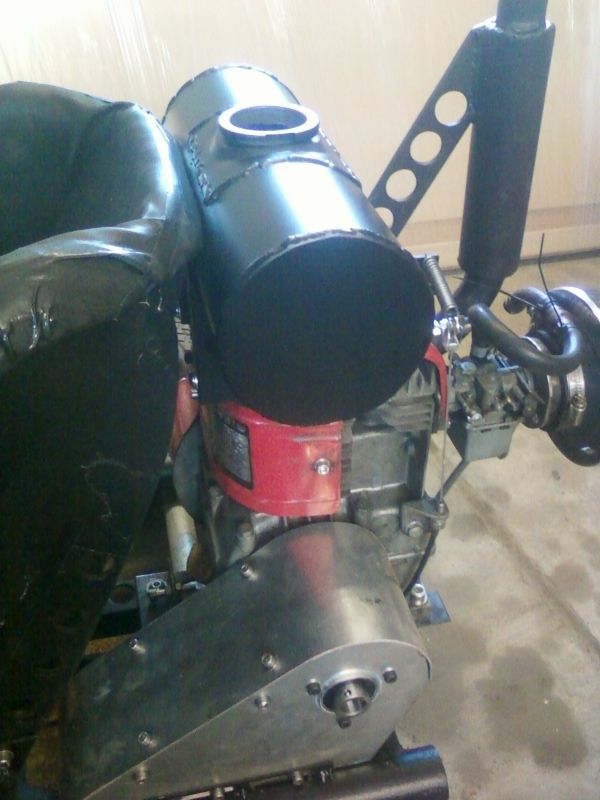 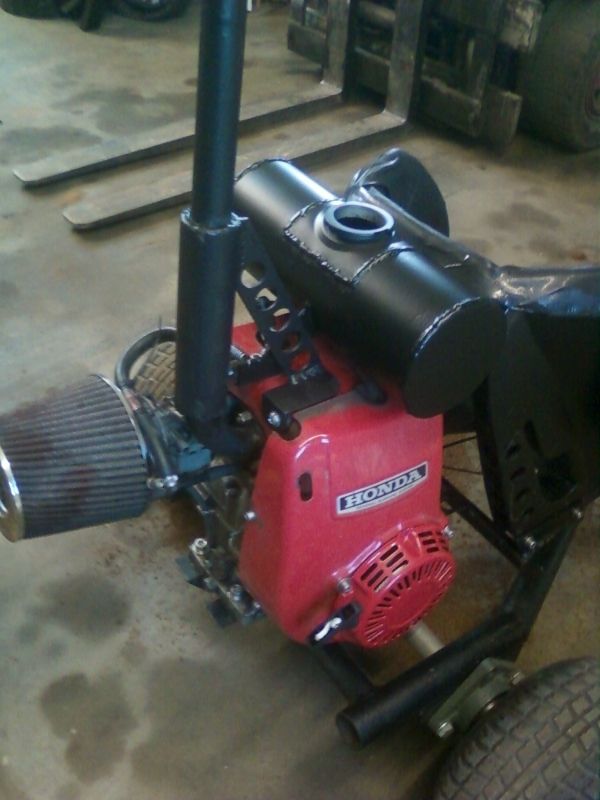 |
| |
|
|
ChrisT
Club Retro Rides Member
Posts: 1,638
Club RR Member Number: 225
|
|
|
|
Thanks Small update, I've somehow spent the last two evenings fitting a pull start - the motor came without one but I figured wrapping a bit of cord round the starter cup each time wouldn't be too much of an inconvenience - turns out it is - and the current starting method of using a socket on a drill isn't really practical anywhere beyond the workshop. Couldn't find one for my engine so bought one for the later series, sounded about the right size. First problem - the starter cup was a lot smaller than the original one and had fixing holes in a different pattern so I couldn't bolt it straight to the flywheel. Second problem - I mis-measured the depth it needed to sit at. Third problem - after getting it fitted I managed to bend the 'ratchet starters' (the lugs which are thrown out to engage the pull cord/starter cup), guessing the motor's a bit more heavy duty than the pull start was designed for. Straightened them and welded on some bracing. Original starter cup cut down and plate welded in along with new cup...... 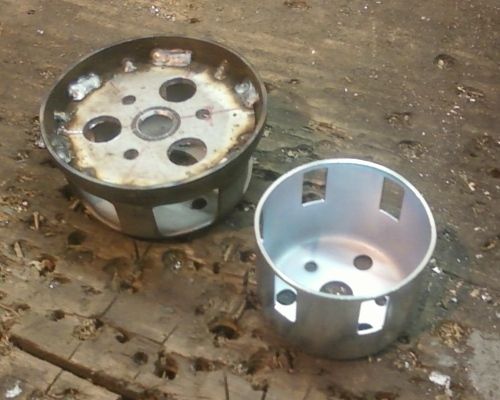 Which will sit like this on the engine...... 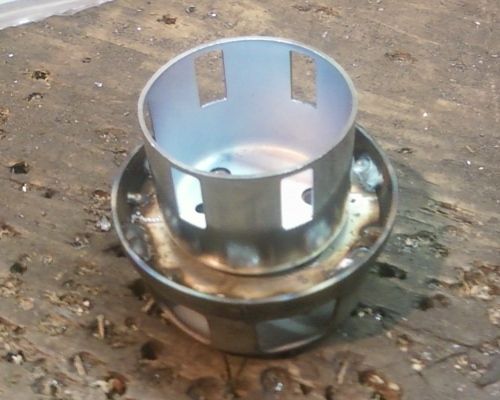 Only it stuck out too far so new cup's been cut down and welded rather than bolted to the old one... 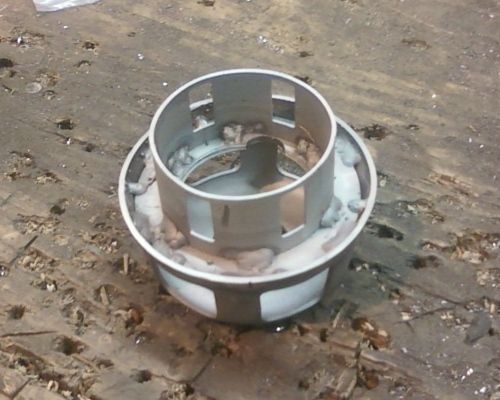 This needed further trimming down/welding back together of the old cup before I could finally bolt on the pull start, which didn't align with the bolt holes in the engine cover so had to slot the ones on the starter and use large washers..... 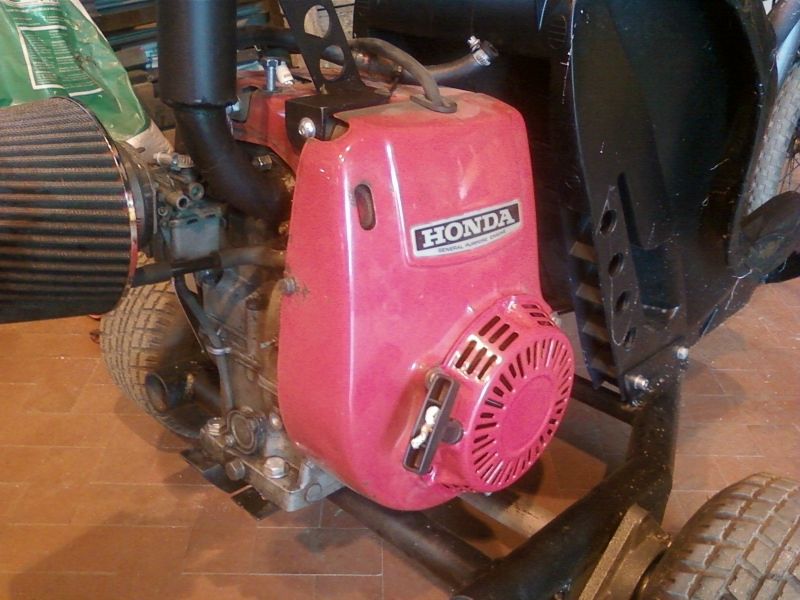 Got back to the workshop this afternoon to be greeted by a strong smell of petrol - the rubber seal in the bottom of the tap had given up during the day and emptied the contents of the tank all over the floor :roll: Bought some Viton sheet, a petrol resistant rubber, so I can make a new seal along with one for in the tap and the tank cap. Messing about with the carb the other day I found it picked up better, no bogging down like normal, with the choke half on - meaning it's not getting enough fuel so I've ordered a set of micro drills (0.3-1.6mm in mostly .05mm increments) so I can drill the main jet out a little..... |
| |
|
|
ChrisT
Club Retro Rides Member
Posts: 1,638
Club RR Member Number: 225
|
|
Jun 17, 2013 20:07:42 GMT
|
|
Certainly an interesting project, I shall be watching progress.
Can't help thinking that motor is going to struggle to get those diameter wheels rolling but I hope you prove me wrong.......
|
| |
|
|
|
|


 Love it!