|
|
|
|
|
That's good to know! I thought the reproduction was a bit - mmh - cost oriented, so to say. But if that's the original spec, that's fine  And the way they are fastened they don't need much substance, that's right. I will attach them with black edge protection strip, though. To keep them in line with the (original) mat black bumpers. Today I ordered some paint - I've come to the conclusion that I'm biting the bullet and repaint the white door. It's much easyer than repairing the original door. I'm not going to find a better door anyway, and it fits pretty good. Actually, it's nigh on perfect. No dents, no rust - no nothing. It's full of wax and had been stored in a dry workshop for many, many, many years before I bought it. My plan was always to try and repair the original door, whilst keeping the original stripe, since it's alwys been there. But... Adding a new one is just another part of this cars history. Some stuff needs replacing after 34 years. So I made up my mind and I'm replacing the door. It's been on there for 6 years anyway. 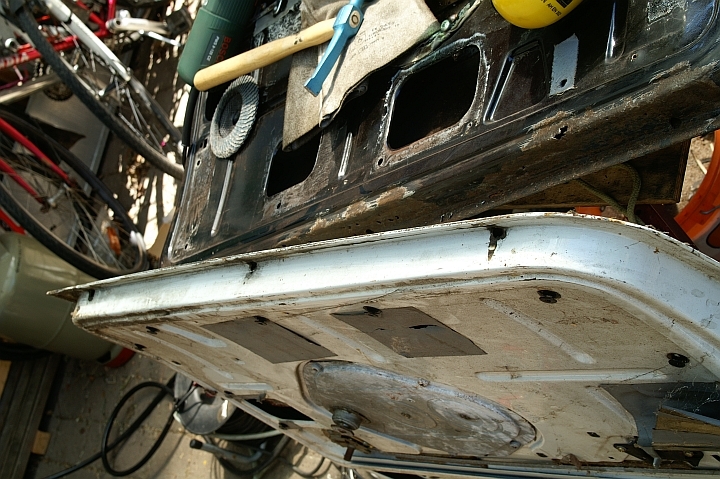 Cheers, Jan |
| |
|
|
|
|
|
|
|
|
|
Sooo - half the day today was spent looking for a set of flywheel housing bolts... I just could not find any. But whilst giong through all the stuff, I found a little eletric AISIN fan that was once cable tied to a japanese 911. Scrap bin rescue. Hooked to a battery - it's working! And a perfect size to fit a Mini!   So that's going on, together with the rubber shroud used on rover coopers. Nice! Eventually I found all the bolts I had been missing so far, all together in a card board box. Ha! So onto setting the idler gear clearance. It's very important to torque these bolts carefully to the right spec, 25nm. You need repeatable measurements, the clamping force of the bolts squishes the gasket which in turn influences the idler clearance! I measured 0.13mm difference between hand tight and torqued bolts! First try with the old gasket - I had re-used it many times (3 times I think). 0.05mm clearance. That's too tight.  Factory spec is between 0.1 to 0.17mm clearance, I try to get somewhere in the middle. So, next try with another gasket, the thickest I could find (I have stash of those)...  Erm - nope. 0.3mm, way too much. So lets try a thinner, softer gasket...  Getting closer, but still no cigar. Let's try the gasket I used before, but in new:  Spot on, 0.15mm clearance. I confirmed each measurement with a feeler gauge, double checking never hurts. So - you don't always need expensive thrust washers, you can also try to play around with different types/manufactureres of gaskets. And it should also tell you to never replace this gasket without checking the idler gear clearance!! It can be done with the gearbox bolted to the engine - plastigage could be used, p.e. The factory manual even recommends this. I install the gasket with a veeery thin smear of sealant, so far THIS gasket never leaked on my engines. And speaking of which; I forgot to put the cap on my tube of sealant yesterday.  So no marrying gearbox & engine today. Booo!  And this is all for today. Cheers, Jan |
| |
|
|
|
|
|
|
|
I have a literal box full of speedo gears - all perfectly well and unharmed. Just not the right ones  Anyway, I'm now £31 poorer, replacement should be on it's way soon. Mr. GuessWorks remanufactured them, very nice! Brake booster installed for good, with reinforcement & service access panel.   I'll try to get black screws, so they don't show as much. And whilst bolting it all on, I discovered a split CV gaiter... I had already replaced it once. Sigh. And I noticed that the brake hoses are twisted (wasn't me, I only ever gave it into someone elses hands once to replace the calipers, since I had no time). Yet another thing to replace. They'r 12 years old and getting a bit stiff, doesn't hurt to throw them out. And - I tried on some australian wheel arches.  I like the look of them a lot! They'r a bit flimsy though... |
| |
|
|
|
|
|
|
|
Another not-so-thrilling update... The most part of today I spent looking through my magnifying glas.  I opted against using an air die grinder and cumstain targlide burr. One slip, and you've done more damage than good. So the diamond files it was. They can remove the hardened steel, but it's more like adding scratch after scratch. Very tedious work... I discovered yet another chipped tooth, so I had to do 3. After working them smooth, I polished the teeth with steel wool and some "sharp" cutting compound.  After I had reassembled the gearbox, I noticd a tight spot when turning the gears. Out with the dial indicator, as there was nothing obvious. But it only started to bind after I had installed the speedo drive housing. Main shaft has 0.005mm or runout, the speedo worm gear had a spot with over 0.025mm. Hmmmm... No idea.  Upon pulling the speedo gears, I noticed that the pinion had cracked all the way through:  Unfortunately it's the very rare green 16 teeth gear that's not longer available new. Bügger! Cheers, Jan |
| |
|
|
|
|
|
|
|
Everything helps! Maybe I should try to make the whole front end out of aloonimum, how hard could it be? Back on track - today, not much happened. The grey vinyl insulation tape I ordered arrived. After I rubbed my greasy fingers on it, it looks almost like it was always there.  Then I painted all the bits I made...  ...and pulled the laygear. Couldn't find my grinding bits, so that's how I left it for today. Cleaned all the surfaces, made new gaskets for the oil pick-up.  Cheers, Jan |
| |
|
|
|
|
|
|
|
No thanks, I'd like to keep my dignity |
| |
|
|
|
|
|
|
|
Travel is the same... Pedal to the metal carpet is full throttle. I just replaced the fixed end with a movable end with a bit of rubber bolted to the floor. The articulation/length of the pedal is still the same. So, another day full of work. And again stuff I wanted to fix for a long time... First of; the brake lines. Note; I did not flare them, this was someone elses work. It did function and didn't leak, but it's not pretty.   Also the routing of the brake lines was a bit messy. I never liked it, and they had never been fixed to the bulk head. As it used to be:  Time to make some new ones...  Before I bent the new brake lines, I made the bracket for the booster a bit nicer...  ...and turned a random bit of aloominimum into a brace for the inner wing:   Then I shepd the new brake lines. Still not perfect, but much better. To hold them to the bulk head, I raided the mercedes parts bin. I could have also done the clutch line, but... Meh.   If you look close, you may be able to spot that I once hacked the inner wing apart. I did this to gain access to the brake line union, which was pretty seized. No chance with the clutch cover above it. This left everything sort of exposed to the wheel splash. I always wanted to make a removable "service cover". I found a bit of aluniminum sheet, which I quickly made into a cover. Bolted in place, so it's removable should I need access. Not very pretty, but once painted and covered in grease and dirt... Zero fcuks to give.  Should do what I intended it to do. It also stiffened the inner wing a bit. That's all for today. Cheers, Jan |
| |
|
|
|
|
|
|
|
After parting off, I drilled a hole into my turned chicken dildo. And filed it flat on both sides, using the hole as a guide to get it about square.  Chamfered the edges, reworked the contours a bit with my newly aquired diamond files. Nice bit of kit! And ended up with something that looks a bit a like a connecting rod:  Next, I attacked a spare throttle pedal with a hack saw and decapitated it...  ...stuck it into a furnace and hit it with a hammer:  ^picture taken after refining it with an assortment of files & sanding paper, of course. After I had rendered the old pedal pretty much useless, I headed back to the lathe. And made another little round thingy.  After I finished the steel thingy, I made some tiny, thin washers out of POM. Didn't think I would be able to part them off, but it went OK and without distortion.  The next step was to drill a hole into my hammered pedal. And weld in the little thingy I had just made. Almost melted into a glob of molten metal. I guess 60 amps was plenty.  Then I cut a thread onto the stud I had just welded on. And all parts assembled, it looks like this:  Which goes like that:  The little conrod is the attachment for the pedal, which has a hole in the back. It's a push fit.  I guess now we should try it, eh? So far I had taken no measurements, I just held the Inno & stock pedal next to each other and went by a wild guess... I kid you not! Anyway - let's try it on...   That'll do! Minimal actuation through it's travel - perfect! No tight spots, no binding. Smooth all the way. The top end of the pedal is about where the stock pedal sits, so there's no big difference, except one has it's rubber bolted to the floor...  I didn't do the hard part though; drilling holes into the floor... Yikes. That's all for today. Thanks for watching Cheers, Jan |
| |
|
|
|
|
|
|
|
|
|
Yeah, I thought it would be catastrophic - but - I'm going to enjoy it. A lot. And I'm thinking about going back to part-time work. Less money, but more freedom. Anyway, I did a wee little bit more... Some free-hand form turning on the lathe. Or whatever you call that...  Cheers, Jan |
| |
|
|
|
|
|
|
|
|
|
Sooo - since I was granted a sabbath month off work (I may also have run a red light and lost my license, but I'd never admit that publicly), I finally have some time to get my hands dirty on the severly neglected little british car One part of it's history is that it never had a screen washer installed. For the last 15 years or so. It was never a problem with TÜV, I always had a washer bottle & pump in the boot, this always seemed good enough for Mr. TÜV But nowadays, it's a fail. So - I had to do something about it. In my vast pile of rubbish I found all the ingredients... A bottle of a MkIII Mini (I think) and a washer pump out of a Porsche 911 (don't ask, we broke one for spares).  And a bracket out of an Innocenti 1001 front cut I once bought. It's been on my shelf for at least 14 years now.  I bent the bracket flat and bolted the washer pump on. Just like that, the holes aligned absolutely perfect! Then I raided the W124 spare parts department and found two rubber mounts of different lenght. Which just happened to be the perfect difference in height to mount the bracket to the firewall. Using one hole that was already in the firewall from factory.  The stock Mini connector fits the 911 pump, as if it was meant to be. Put everything back together with a bit of W123 washer hose. And it even just about clears the bonnet hinge!  Absolutely perfect - and didn't cost me one cent Though I paid money for what I'm going to install next; a very rare floor mounted Innocenti throttle pedal.  Also been on the shelf for at least 10 years, I just never got round fitting it. Now I'm going to! That's all for today, it's still a bit frosty in my workshop. And it's a holy holiday, something about a bunny which lays eggs and Jesus, I don't really get it... Cheers, Jan |
| |
|
|
|
|
|
Mar 29, 2018 19:43:45 GMT
|
It's turning into quite a mission to fix that old barstuart of engine hoist...  Plot twist; it wasn't the hoist that leaked. It was the blöödy bottle of oil I stored on it's base. The bottle to with old oil I used to fill it up. I noticed that my work bench had started leaking oil when I accidentally left the bottle on it for a couple of weeks. Duuuuuuuh.  Just so you know! And I bought more hammers. High quality, made in germany - never used. 30€. Awesome! 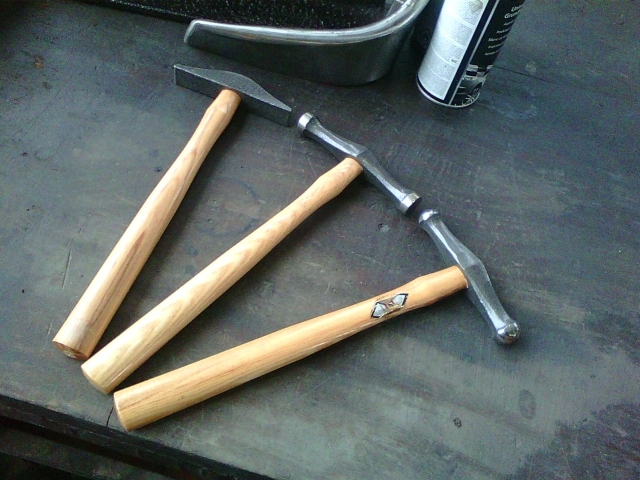 |
| |
|
|
|
|
|
Mar 18, 2018 12:41:08 GMT
|
Mercedes did some weird sh!t in the 80's... I can't remember right now, but as said - I'll investigate. I'm going to replace that housing anyway. Almost forgot to mention; the belt tensioner needed replacing. Again. I think this ist the 4th time now... This time I went for an pre-assembled kit, tired of replacing the bearing. This is another "weird" bit; using a ball bearing for an oscillating belt tensioner. In the 90's they switched to a bronze bushing. But of course not without re-designing the whole front cover & tensioner geometry. And I replaced the rear sway bar links - and whilst doing so I discovered a stuck brake piston. New calipers on order - don't have the time rebuild the old ones. Cheers, Jan |
| |
|
|
|
|
|
Mar 17, 2018 20:45:13 GMT
|
I've been told that that's actually a mild case of cavitation on Mercedes engines... The thermostate is on the suction side of the pump. Maybe that's a bit of a long-term problem? Anything else seems to flow well. Radiator is new-ish. But you are right, it might be clever to look for blockages and not do it away as mileage related I don't know how old the pump & housing are... Anything between 500-800.000km seems plausible. Cheers, Jan |
| |
|
|
|
|
|
Mar 16, 2018 21:50:16 GMT
|
Hey! Still alive... Just very busy with work & life. Taxi is still doing fine. 1.032.000km currently. The aux heater is missbehaving, not had time to look into it yet. I suspect a bad glow plug, since ignition is troublesome. Once it runs, it runs fine. Today, after work, I replaced the water pump. Since the car was runing hotter than usual, even with the low temperatures we currently have. So - time to make it ready for the warm season in time. All went well. But... I've never seen this bad cavitation damage in an automotive water pump. I guess it's done a couple of revolutions...   Didn't change much, though. Maybe the gap between impeller & pump housing is just too large for good efficiency. Due to the cavitation - and what appears to be mechanical damage (maybe impeller failure in the past? Debris that went through the pump?). So I'm replacing the housing. Should have a good one somewhere... And that's all for now. But there's a lot to come soon, you'll see. I just thought this was worth showing since you don't see it every day. One of the things with ultra-high mileage cars. Cheers, Jan |
| |
|
|
|
|
|
Feb 15, 2018 20:34:24 GMT
|
|
Some dort of drop gearbox?
|
| |
|
|
|
|
|
Feb 12, 2018 19:57:40 GMT
|
Your doing this just to confuse us mere mortals |
| |
|
|
|
|
|
|
|
Jan 30, 2018 19:46:14 GMT
|
Wee little Mini update... After talking to some people, I'm convinced that I can move on. I'll grind & polish the damaged areas and run the gear. All in. So I left the 998 power unit untouched, plugged it up and stored it away.  Next I removed the brake booster. I never liked the way I had routed the brake lines. Initially I wanted to just re-shape them, but when I looked at the flares - I was a bit shocked. They are really bad. I didn't to them, this was done by some garage many, many years ago. Obviously they never leaked, but I don't like them one bit. So I'll re-do them.  And I'm in two minds whether I replace the booster bracket. It's not pretty - but it's the very first custom car-part I ever made I'm probably going to just re-shape it into a bit of nicer form. And reinforce the inner wing a bit, since it's a bit floppy. And I'm going to fabricate a "inspection hatch", as I once cut a big hole in it to access the clutch slave & brake unions. Also made a start at tidying up the wiring loom. Make it all a bit nicer to look at. Back then it was my daily and I was always in a hurry to get modifications done. So - a lot to do, many plans - little time... As always. Though if it gets warmer, I might be more willing to do work after work. That's all. Cheers, Jan |
| |
|
|
|
|
|
Jan 29, 2018 18:18:17 GMT
|
Maybe you should do an Ape based RX-2  Or an RX-2 powered Ape. Or an Ape powered RX-2. I don't mind... But I sure will follow along with delight |
| |
|
|


 And the way they are fastened they don't need much substance, that's right. I will attach them with black edge protection strip, though. To keep them in line with the (original) mat black bumpers.

 So no marrying gearbox & engine today. Booo!


 Or an RX-2 powered Ape. Or an Ape powered RX-2. I don't mind... But I sure will follow along with delight