|
|
|
Dec 18, 2010 22:39:14 GMT
|
I'm either brave or stupid ive not worked it out yet but I'm deffo keeping at it as its got such charicter already and i want it done now lol. Given that it looks as though you may need to do some major chassis rail reconstruction, I have some pics of what the rails should look like inside (there's a LOT of reinforcement etc in there), so if they are of any use let me know and I'll dig them out  Paul, if you could do that it would be great.i do think ill need to do some chassis reconstruction at the front, however from the pictures the underneath in the middle maybe solid. |
| |
|
|
|
|
|
|
|
Dec 19, 2010 16:38:09 GMT
|
I'm away from home at the moment, but if I haven't posted them up by say New Year, please drop me a reminder by PM |
| |
|
|
|
|
|
Dec 21, 2010 22:50:09 GMT
|
A right hand front chassis rail is shown (this is an NOS Volvo panel):   Captive nuts for bumper irons & ARB mounts    Mounts for steering box (or idler if the other side or lhd)  Similar internal reinforcement at the back of the rail (above the rear mount for the crossmember)  Rear mountings for crossmember  Front mountings for crossmember  In situ with inner wing Hope these pics help! |
| |
|
|
|
|
|
Dec 21, 2010 23:09:14 GMT
|
|
Really like these old buses!
Don't be put of by the rot, it can all be repaired, one section at a time :-) Go for it!
|
| |
|
|
speedy88
Club Retro Rides Member
"Nice Cortina mate"
Posts: 2,281
Club RR Member Number: 118
|
|
|
|
|
I never noticed before how pretty amazon saloons are from the back! Nice car
|
| |
|
|
|
|
|
Dec 22, 2010 12:01:30 GMT
|
Thanks Paul thats a great help. Doesnt seem like it will be that difficult to fix up. Not touched it since its got cold and snowy outside as i need to strip the underseal and my gas burner wont work  |
| |
|
|
Em
Part of things
 Fuel Injected? Carb Infested!
Posts: 601 
|
|
Dec 22, 2010 12:31:13 GMT
|
|
Looks like a fair bit if rust in the front there! What's the rest of it like?
Never owned one of these but always had a soft spot for them, very cool looking old wagons!
Best of luck with the resto mate!
|
| |
|
|
|
|
|
Dec 22, 2010 13:00:31 GMT
|
|
Ive only started on the front really as there isnt enough room in the garage to look at the rest (There is under a inch between the front bumper (when fitted) and the garage door so I'm starting at the front and will work back.
I know it needs the doors looking at, drivers side looks like surface rust but passenger side looks a bit worse. The rear arches are a bit crusty too as well as the boot floor corners and the spare wheel well. At the moment I'm not worried about the welding involved. As strange as it sounds it seems alot simpler than my Mini Estate to repair.
|
| |
|
|
|
|
|
|
|
Right, not done loads of work over the holiday period but o well, weathers improving now so back to work. Worked out why the passenger door doesn't open  The handle is missing the button to press the latch so i need to find a new handle or button. Dragged the car out of the garage so here are some more pics. 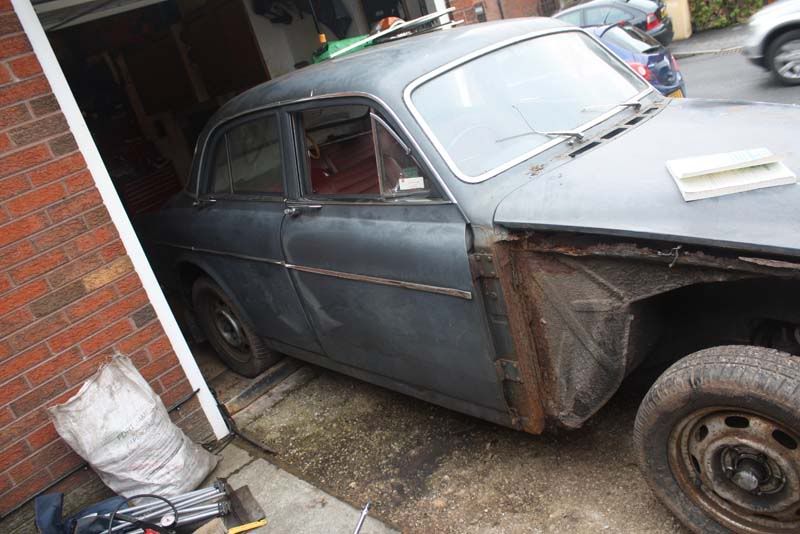 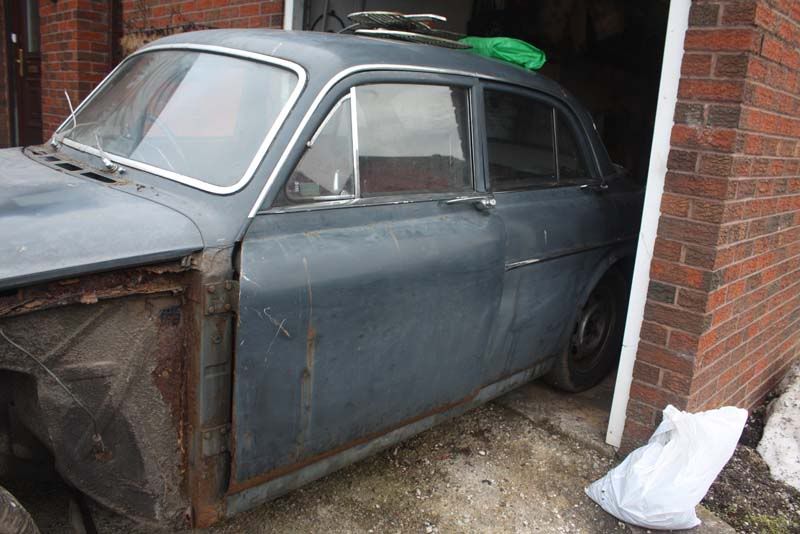 Dash, in quite good condition but needs top re-covering.  Boot, surface rust in places plus covered with a horrible fiber type stuff. 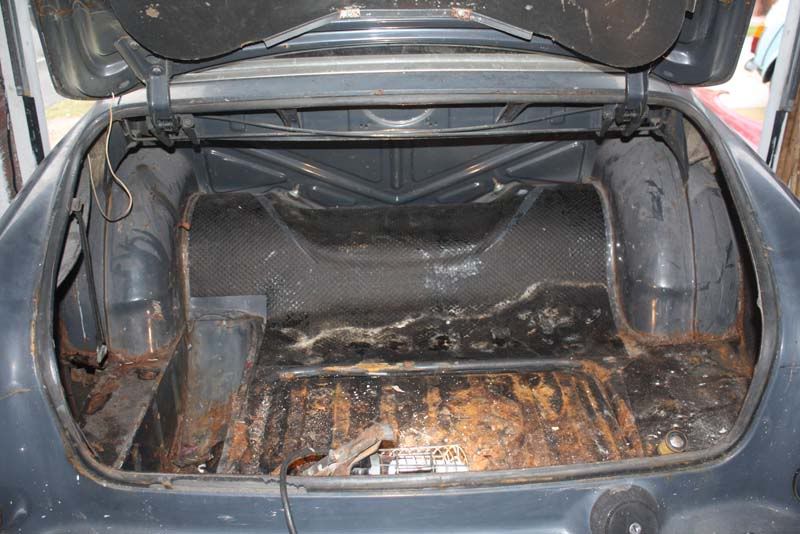 Bit rusty and few holes 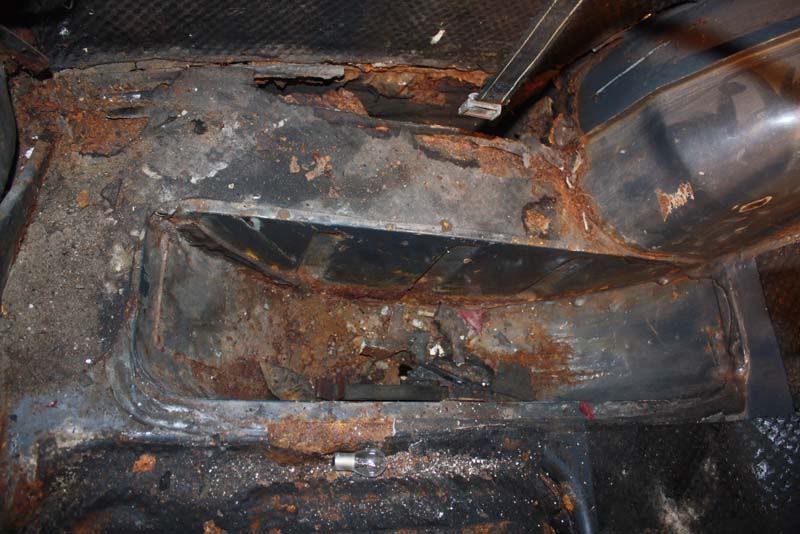 No idea what that white stuff is. 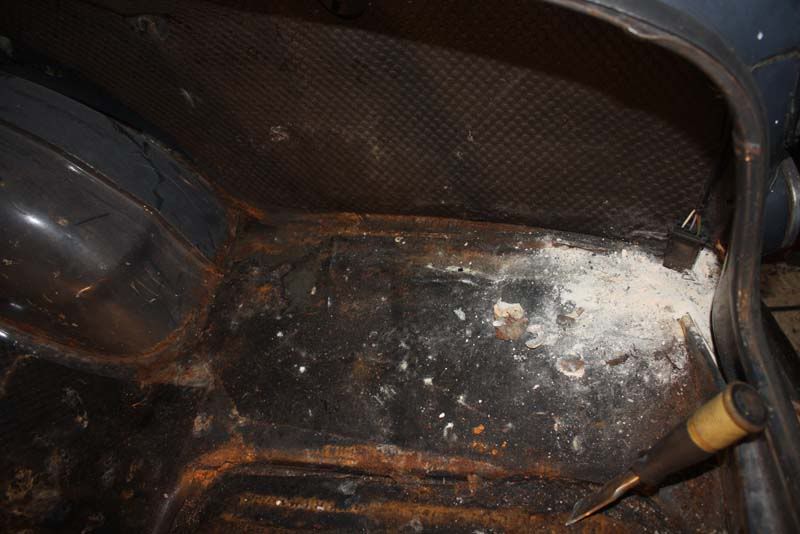 Found a new hole at the bottom of that door 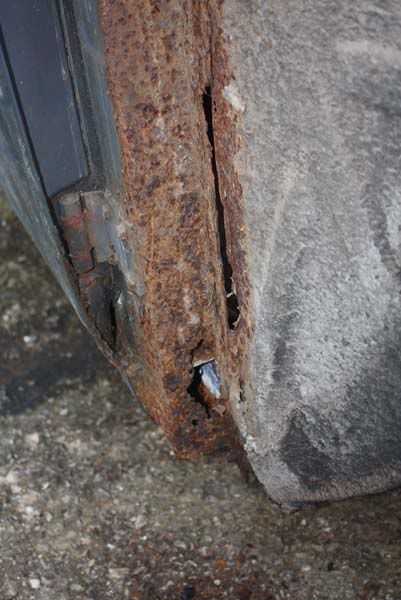 Interior bodywork, floor is solid and that colour doesn't seem to be rust but the fiber thing again which has turned that colour, under that is original paint. 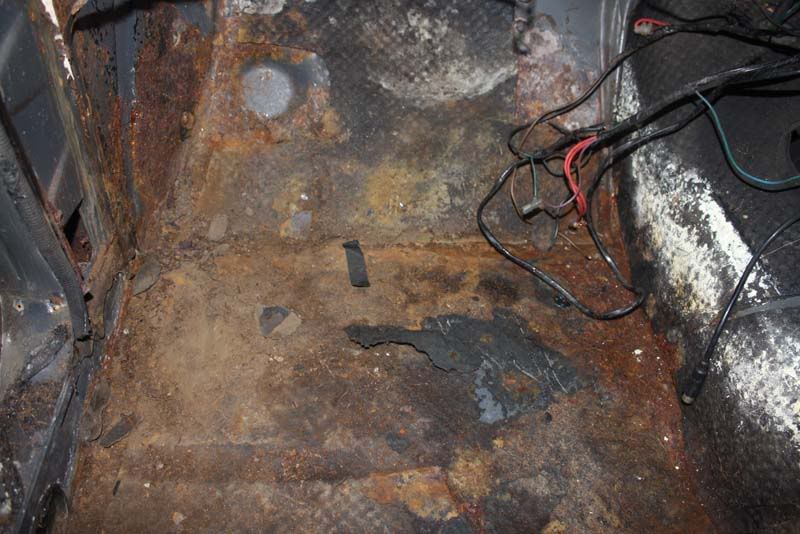 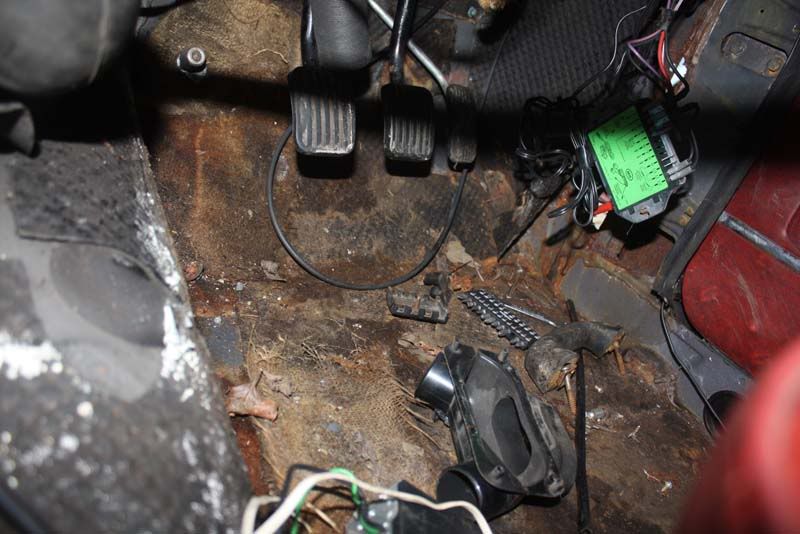 Few shots of the underneath, at least 5mm of underseal in places so its going to be fun to remove it all. 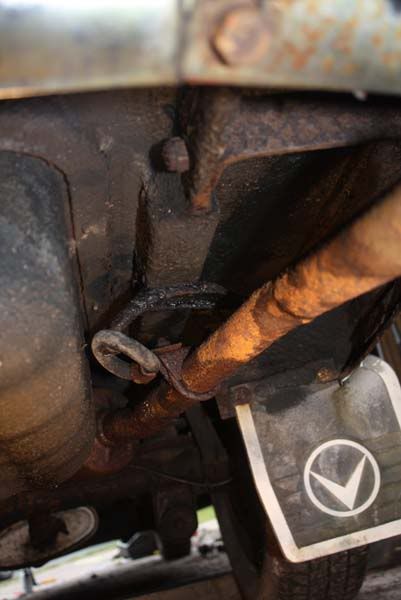 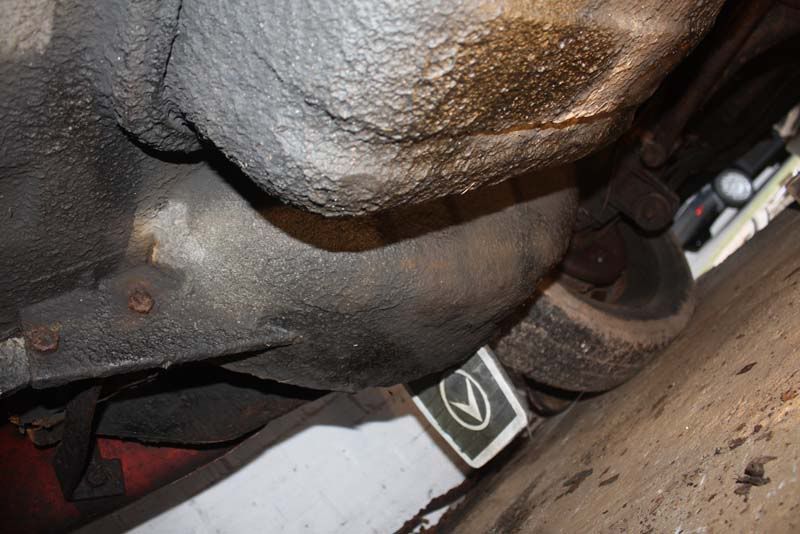 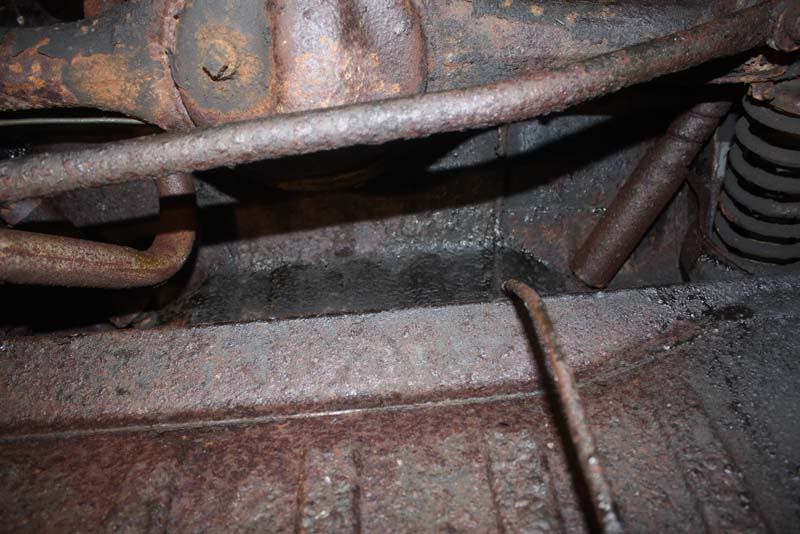 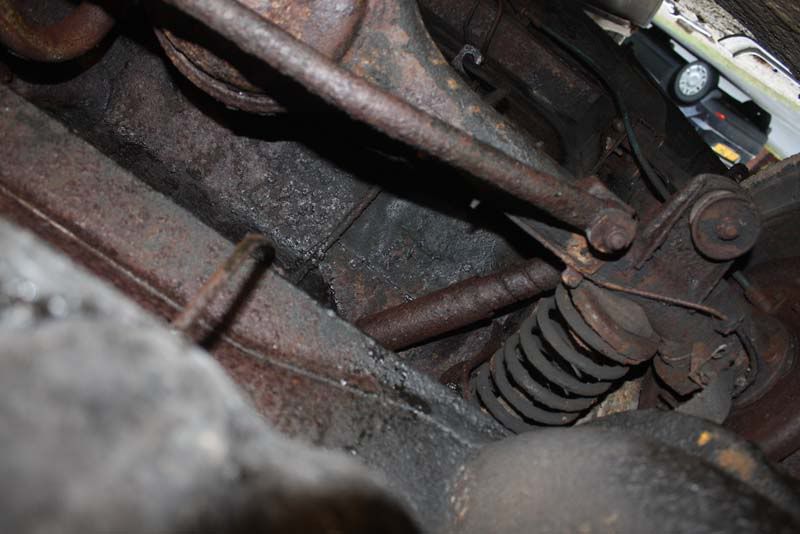 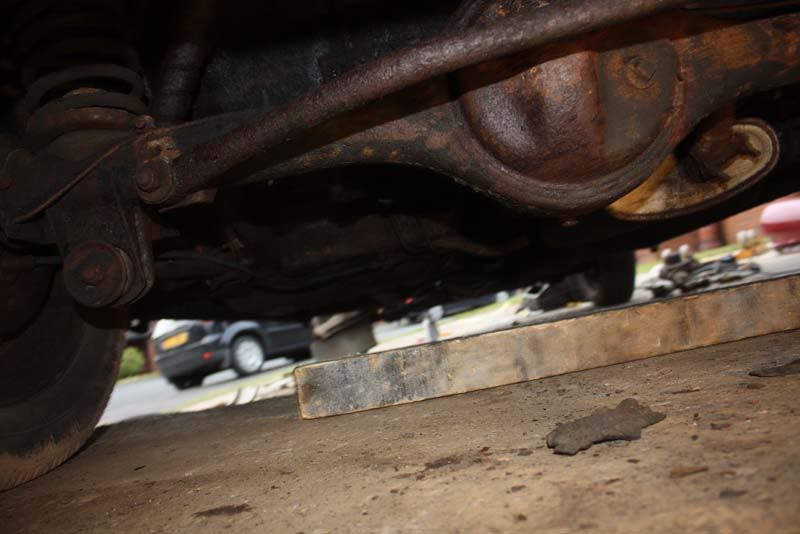 Will get better pictures when its up in the air. Started the removal of the underseal from the front wings today, removed the passenger side underseal and it looks quite solid apart from the rust areas i had already found... However when i jacked it up putting it on the axle stand to remove the wheel started to go straight through the crossmember.... on moving it further back it was ok but to my horror it was repaired by 1mm steel (if that) tacked into place. Now having a re-think of what I'm going to progress with and my plans for the restoration. Also does anyone have a exploded diagram of the panel names? Being new to the car I'm not sure what i need to ask for when i order things. |
| |
|
|
|
|
|
|
|
For referencing parts I find the catalogue you can get from VP autoparts here quite good, 8mb, lots of nice big diagrams. Click 'Catalogues/price-list' at the left. www.vp-autoparts.com/If that's not to your taste I can try and find where some of the others are hosted. I think the brown fur is the carpet underlay that's been slowly absorbed by the sound-deadening. It's primary purpose is to hold moisture next the panels.Chiselling with a fairly sharp chisel works quite well to get the sound-deadening off. Especially in the cold, whole sheets just ping off. Though I don't know if I'd want to point a chisel at your car Good luck. |
| |
Last Edit: Jan 4, 2011 15:51:30 GMT by elcappo
|
|
|
|
|
|
|
|
|
|
Thanks for that link got a few others from the VoC too.
Ive already used a chisel on the floor underlay and it chipped off in a few areas, touch wood the floor seems good.
|
| |
|
|
|
|
|
|
|
This weekend has been productive ive removed all of the interior and took the sound proofing type stuff off the floors.... the results have been suprising. Front passenger, hole over the chassis rail which is also above the bodged area. 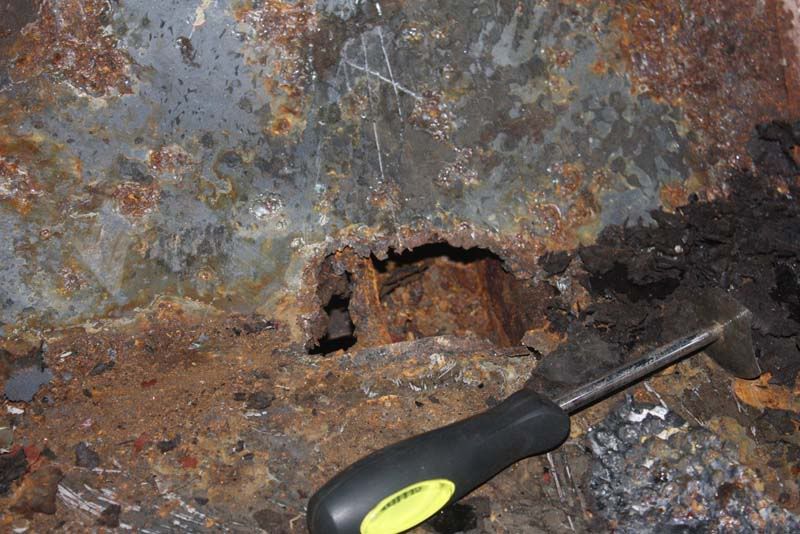 Small hole in the corner 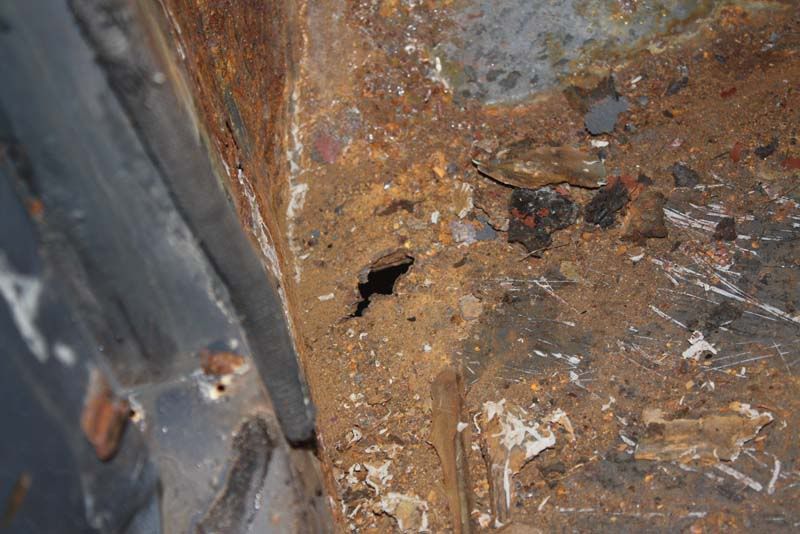 Rear drain hole has gotten a bit larger 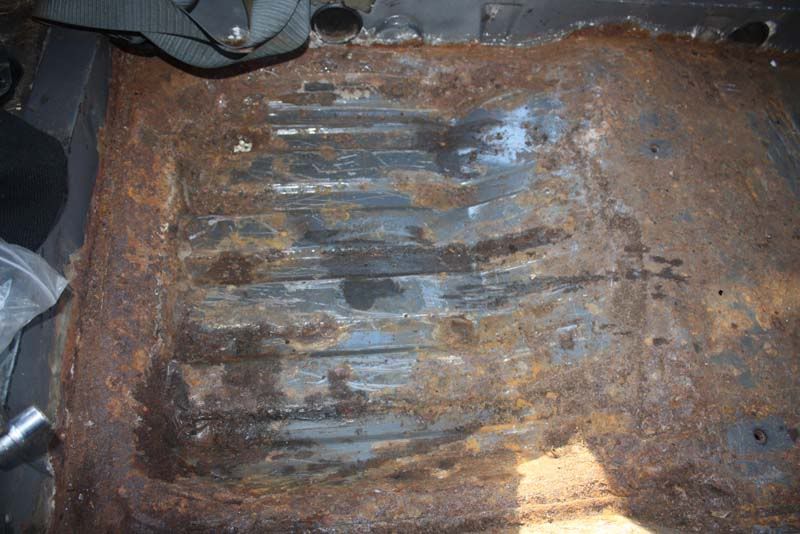 Mainly surface by the feel of it. 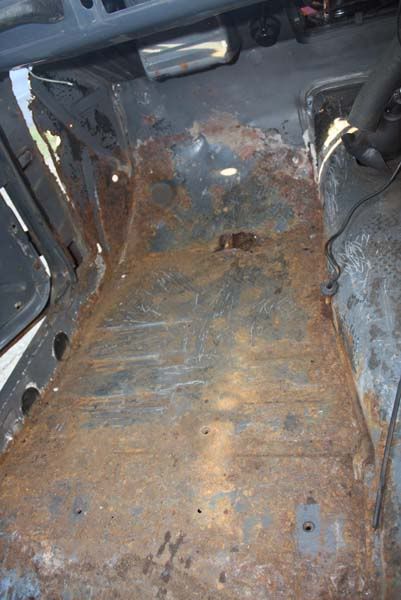 Looks alot worse than it is.  Drivers rear, the holes have been circled. Its not too bad. 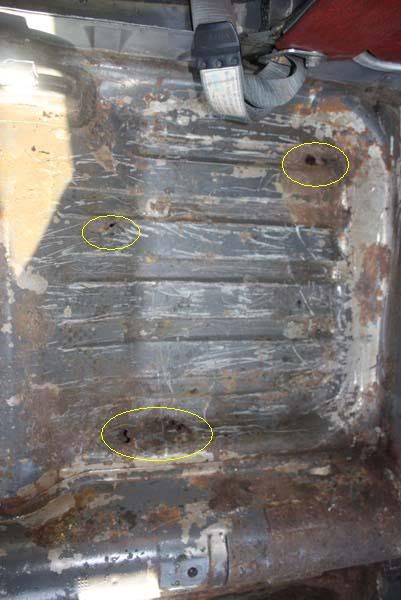 Drivers front is solid. 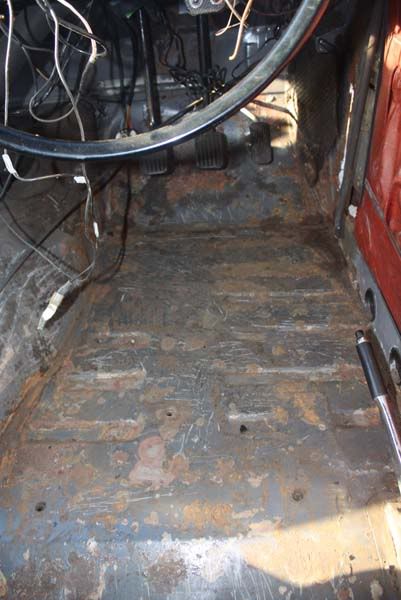 Passenger rear door... lovley rust. 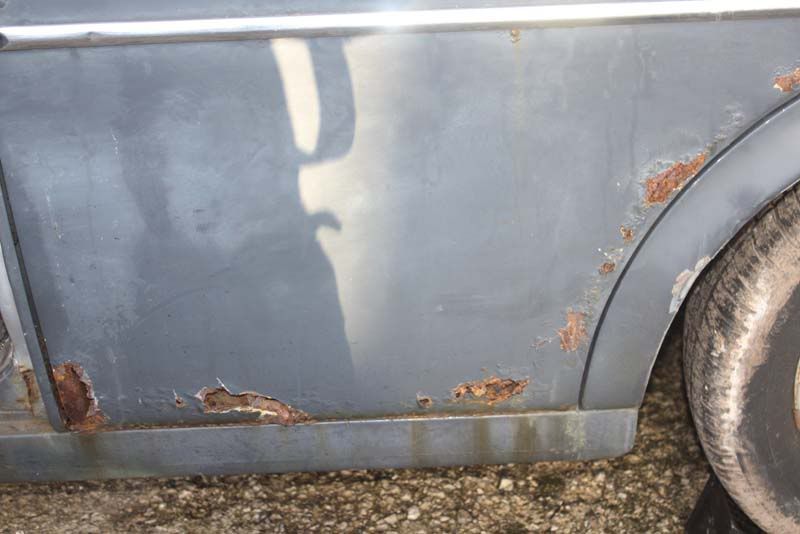 Rear valance... needs replacing 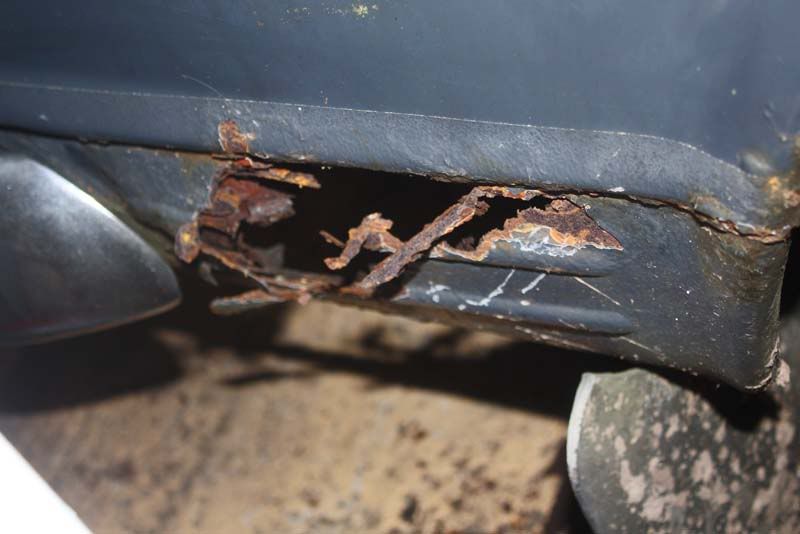 At least the interior is good 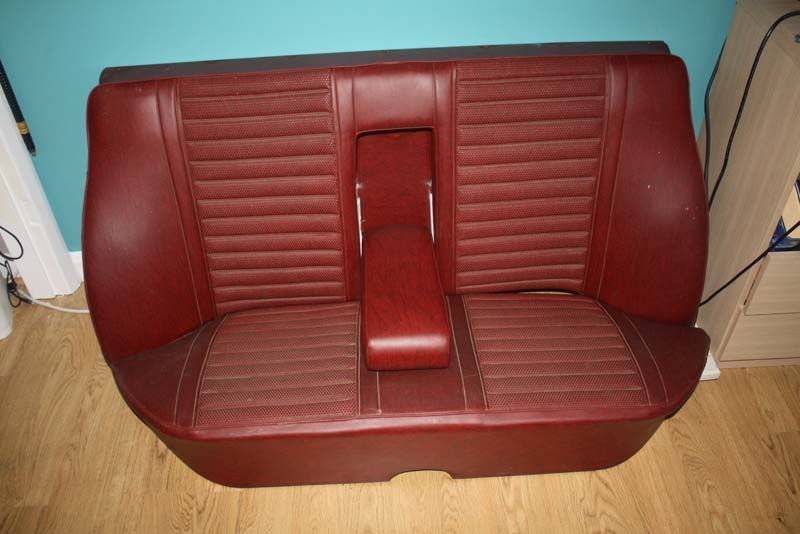 Next job, clean the floor up and get rid of the surface rust. |
| |
|
|
|
|
|
Jan 10, 2011 14:43:11 GMT
|
Well the result of the wire wheel in the grinder is... Rear passenger side. Front of the rear nearest the prop tunnel 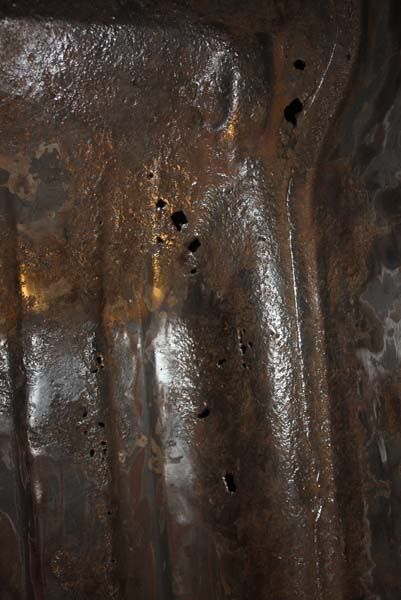 Rear 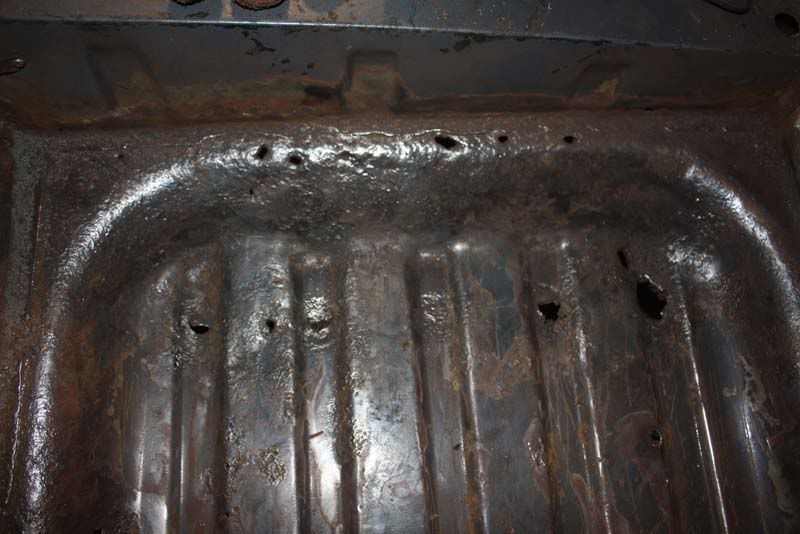 Nearest the door 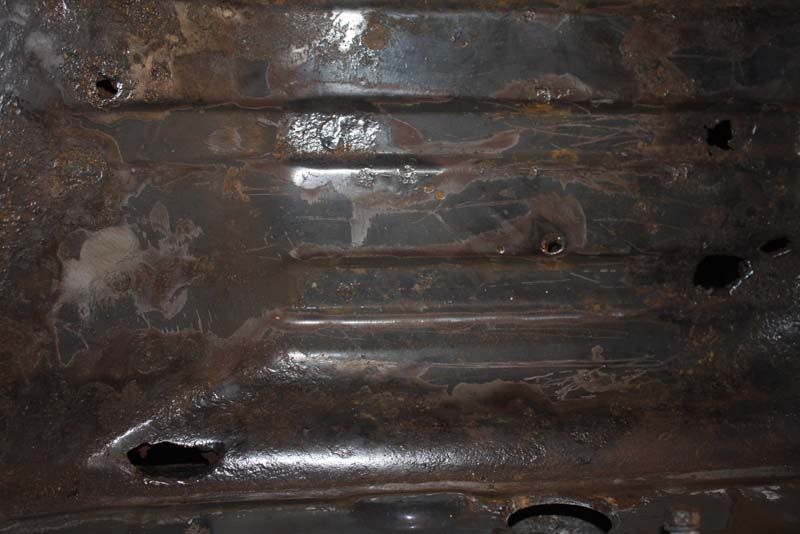 Under the front seat area 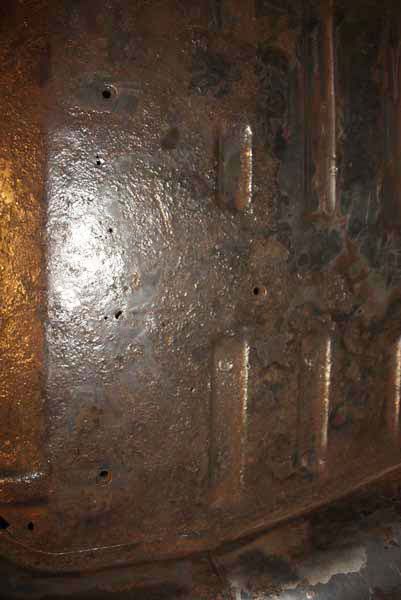 Front corner (You can just see a a hole a bit higher near where the light switch would have been on a LHD, also a small hole above that)  Prop Tunnel and passenger floor 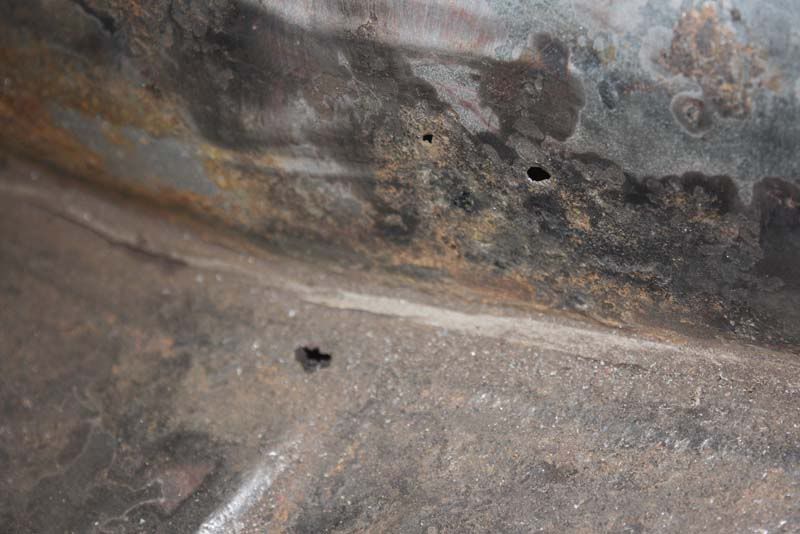 Hole above the chassis rail 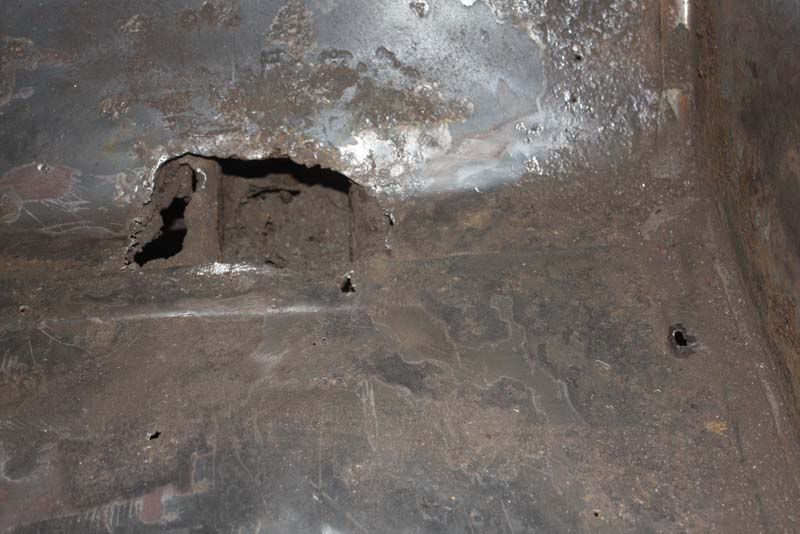 Drivers rear floor. 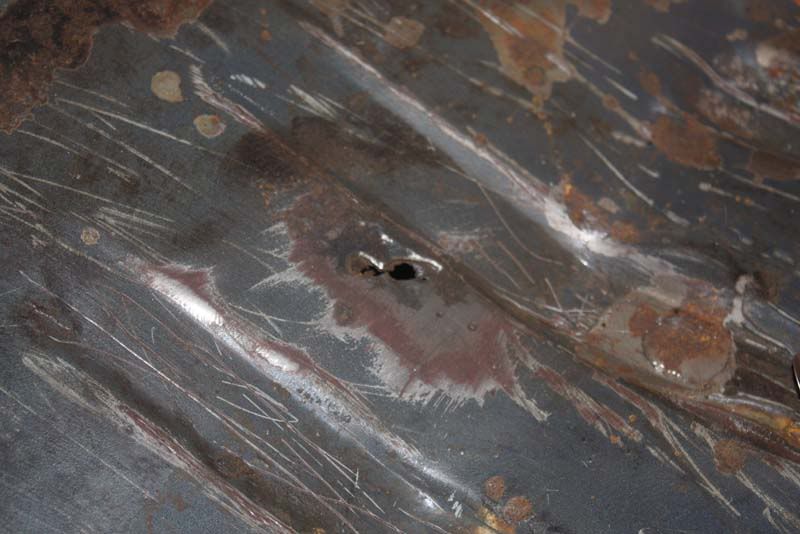 Rear corner  Rear near the prop 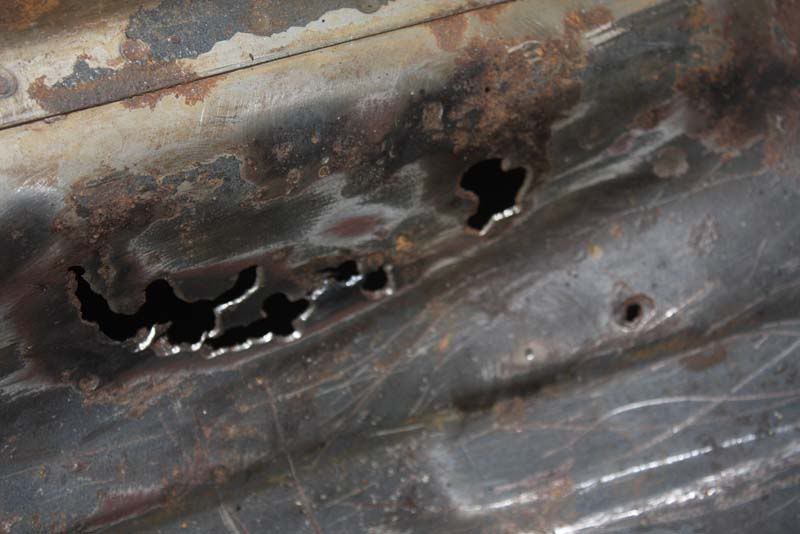 The front of the drivers side has two tiny holes which i cant get to show on my camera they disappear when i use the flash. It doesn't seem too bad.... however the passenger floor pinholes seem to follow the lines of the chassis so that will need a bit of looking at to see if i do small patcher or to cut out the steel around the chassis, clean the inside up clearing any rust and then paint the inside before i replace the floor. Would have done more but Ive lost the guard for my grinder so will have to wait till i get a replacement. |
| |
|
|
|
|
|
Jan 12, 2011 15:11:54 GMT
|
Another update... thought to myself on tuesday... why am i looking for my grinder shield when i can fix the compressor and fire up the plasma cutter so got the compressor up and running yesterday so today this happened. Setting up the cutter just to cut through the top steel and not the underneath took awhile to get just right but these are the results. Its rusty underneath but i knew that before i started on the floor but going away from that it seems to stay like new. 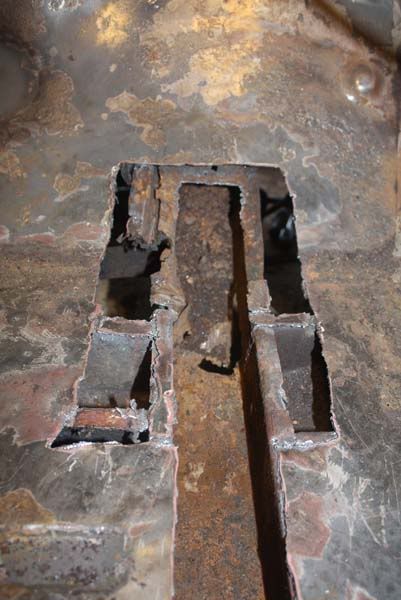 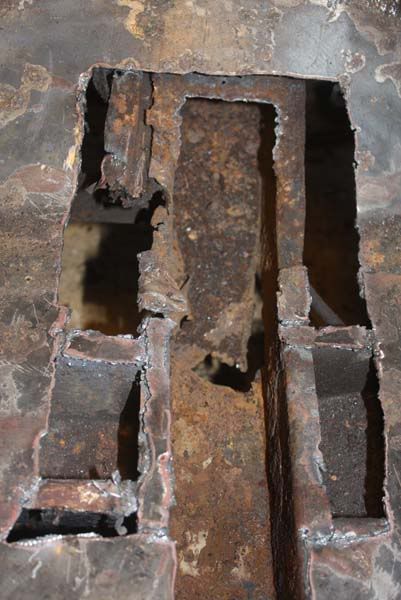 After a few inspection holes i decided that i needed to take all the steel above the rails off as there was alot of rust laying in there. 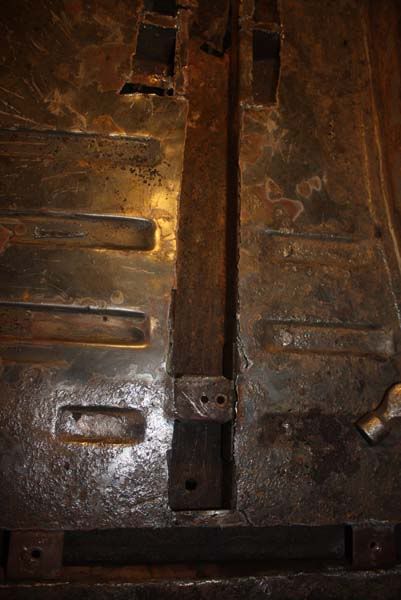  Luckily the rails are nice and strong just need cleaning up and painting before recovering. Next job is removing some more metal either side of the rails to allow me to plate it better as well as clean up the rails. |
| |
|
|
|
|
|
Jan 13, 2011 17:13:28 GMT
|
Good news everyone I kinda got a bit trigger happy with the plasma cutter and this happened to appear. 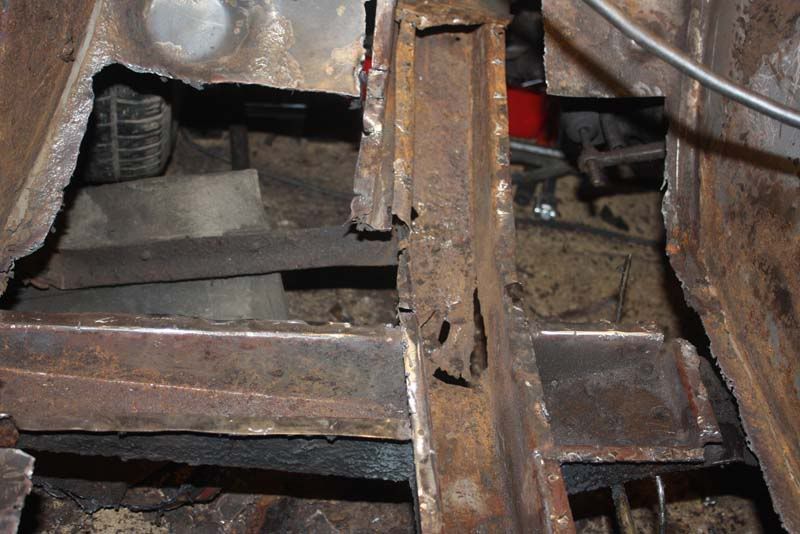  This is the worst of the chassis rail, its very thin but only at the bottom at the top lip 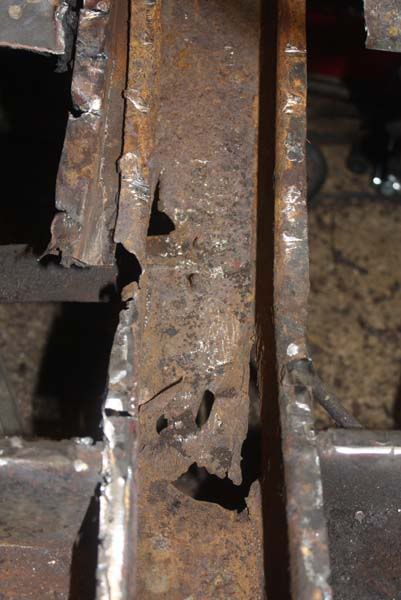 I had to cut quite high on this panel as the top plate for the rail was paper thin all the way up so that will get replaced. 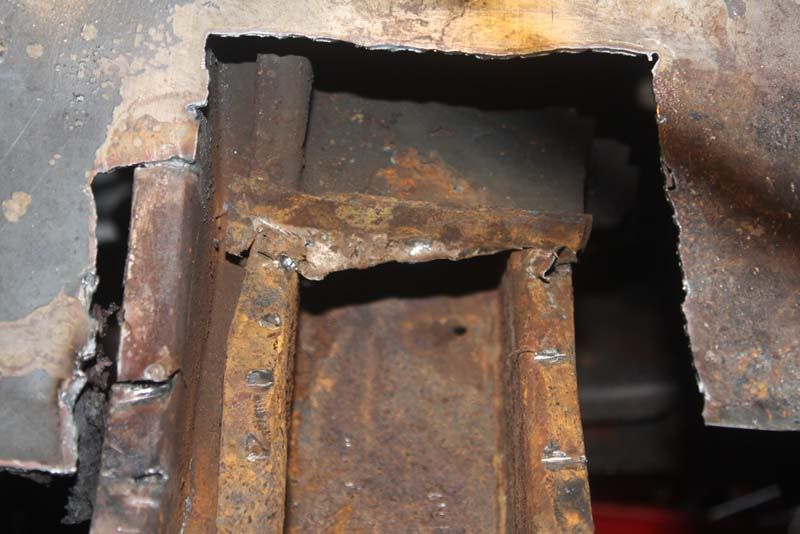 Only other bad bit was to the outrigger to the left which has lost a inch of the lip so that will get repaired too. 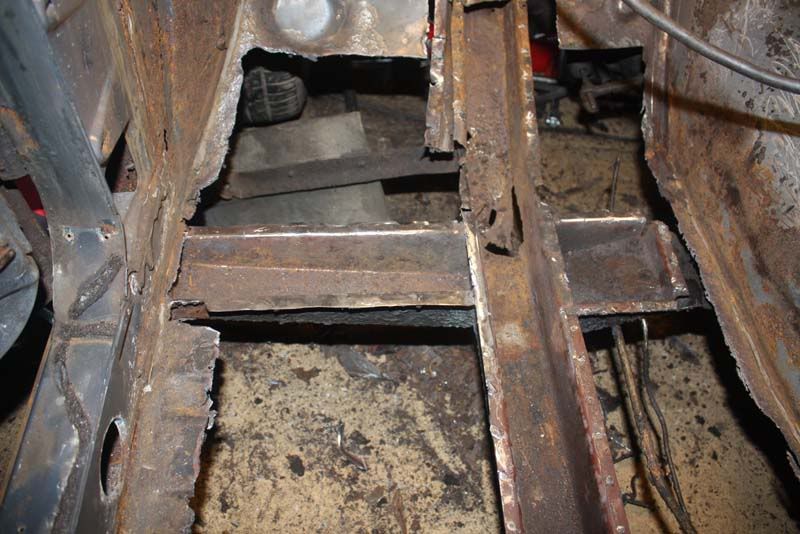 Order the panels tomorrow |
| |
|
|
|
|
|
Jan 18, 2011 16:29:50 GMT
|
Well there has been progress since last time but not much to show as ive been trying to get the underseal off. What a horrible job that is, can only do too much before the thiners get to me and have to call it a day. Wish there was an easier less smelly way of cleaning it back to metal. On a similar note there is very little corrosion under the underseal :thumbs_up: Well today has been a good day, still clearing the floor but i got a birthday present 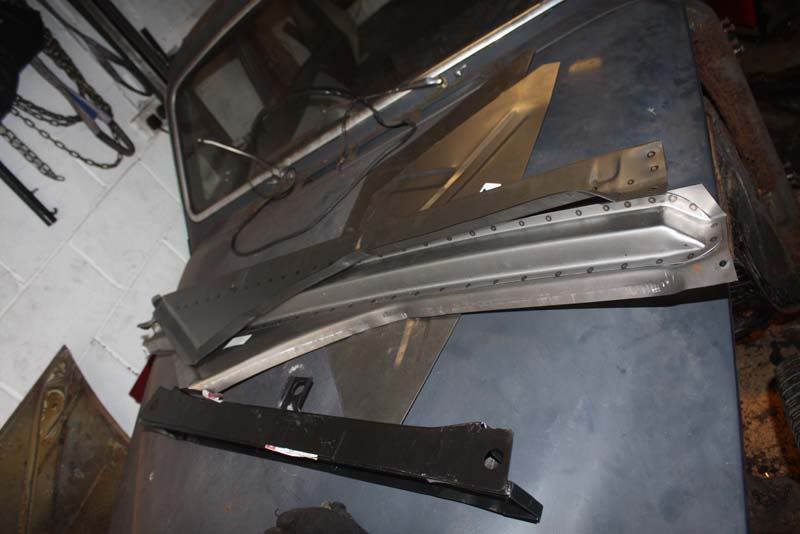 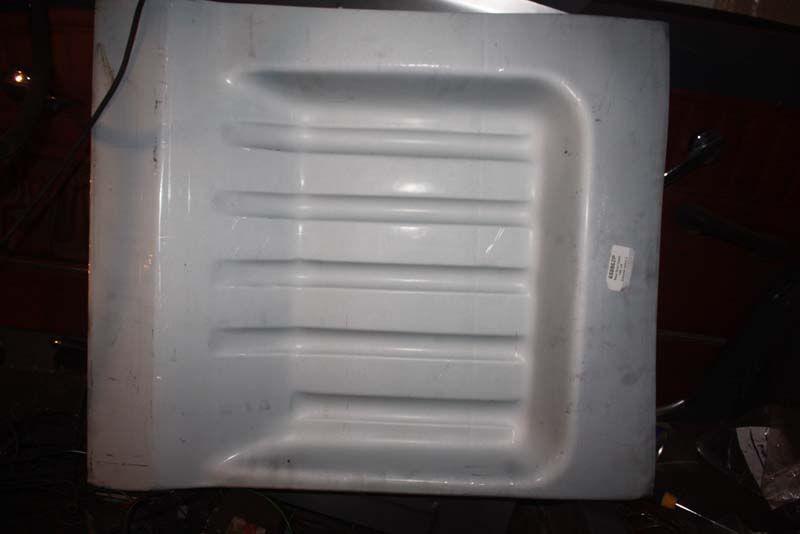 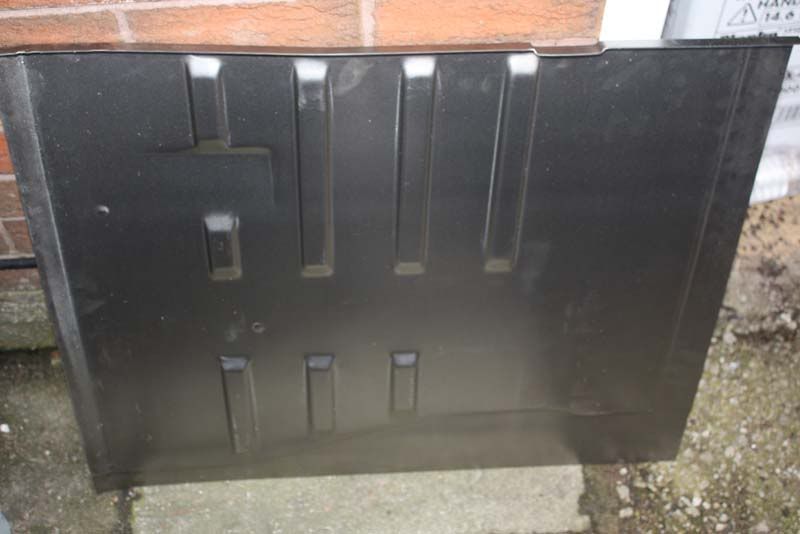 Panels! Time to kick this project into overdrive. Also currently researching a engine change, will involve 5 cylinders  |
| |
|
|
|
|
|
Jan 18, 2011 16:45:57 GMT
|
Interesting to see what the floor pans look like in their raw form - I never saw the rear ones before they were fitted to my car. Really looking forward to seeing your progress with this project! |
| |
|
|
|
|
|
Jan 18, 2011 17:01:54 GMT
|
|
OMG you will be the best welder known to man by the end of this restoration lol
must admit I'm loving the car though, theres a grey one the same colour about 10 mins from me which has been parked up for at least 10 years, always calling me as i drive past lol
|
| |
|
|
|
|
|
Jan 18, 2011 17:03:27 GMT
|
|
Brave resto, but will be so worth it! I get so mad when I uncover bodges by so-called "restorers". Still, it's getting done properly now. Really nice cars, these.
|
| |
|
|
|
|
|
Jan 28, 2011 18:35:53 GMT
|
Thanks for the comments, its good to know people are intrested ;D Well its time for an update. Ive been slowly cleaning the rust from inside the chassis rails so not updated with that boring update My steel arrived on monday so I made a attempt at fixing the chassis. Welded my first repair area in and made a start on the worse bit near the front. Cut our a area and made a patch following the original contour. Making the side repair pieces. 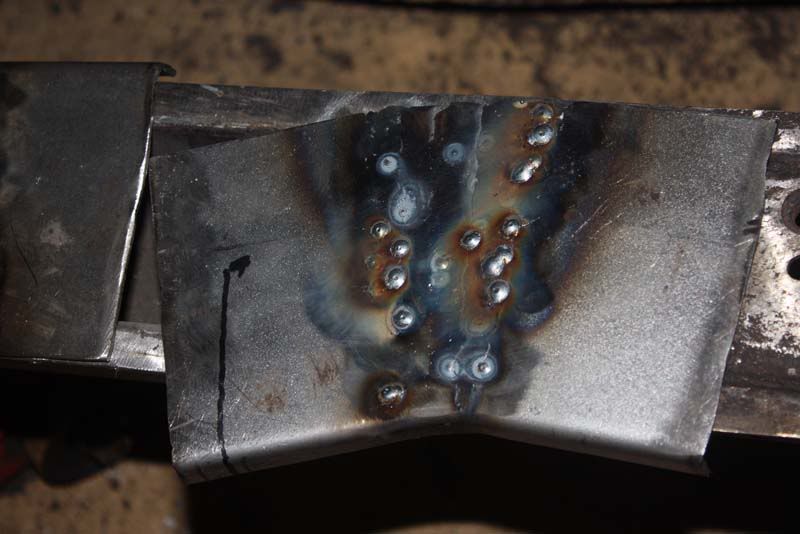 All cut out (Was supported) 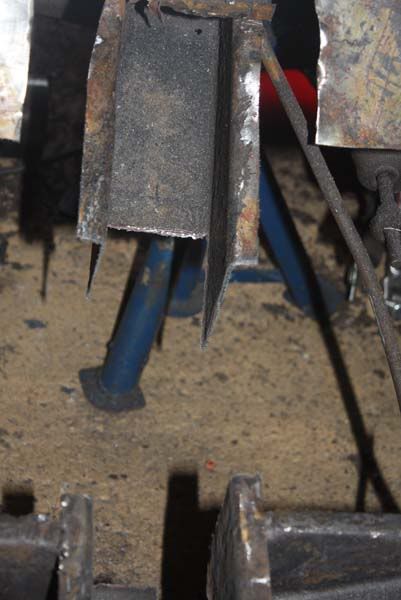 Tacked into place once ajusted to fit correctly, keen eyes will notice the line and two dots. The line was used to find the location of the holes required for the mudflaps. 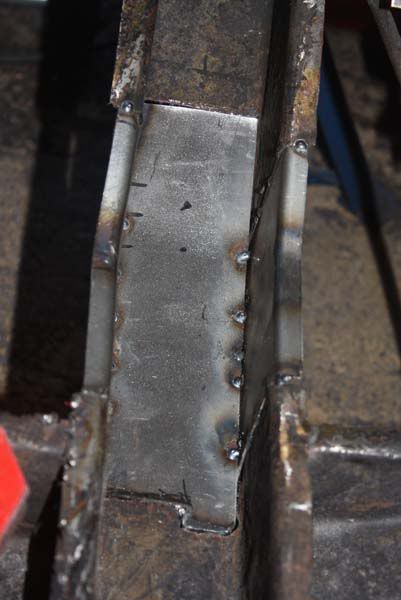 Welded in fully 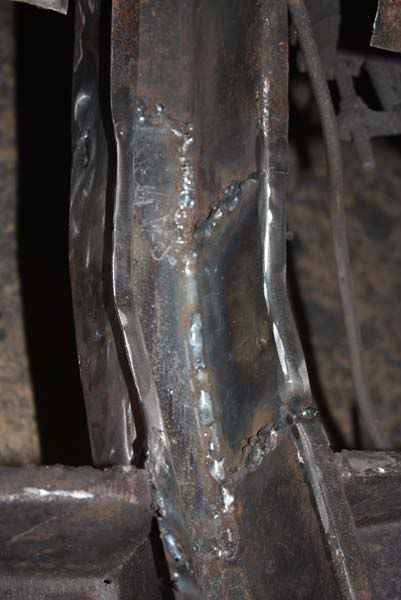 Wont be able to tell once painted and sealed. 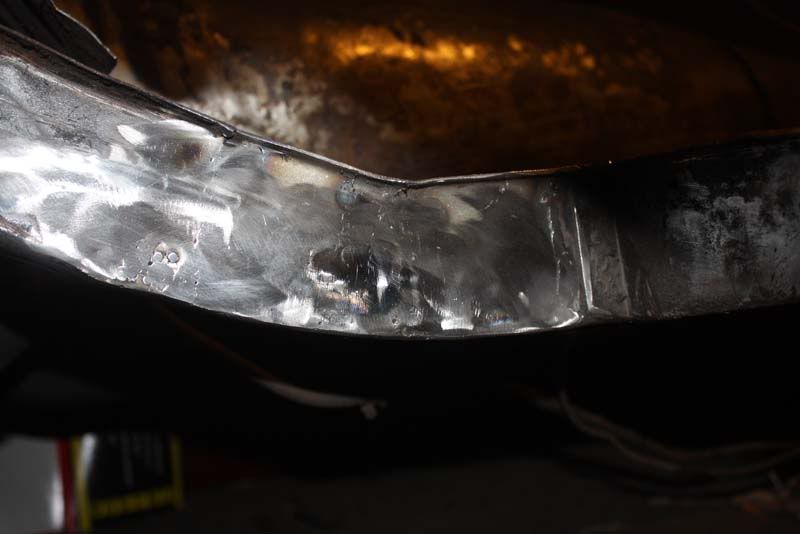 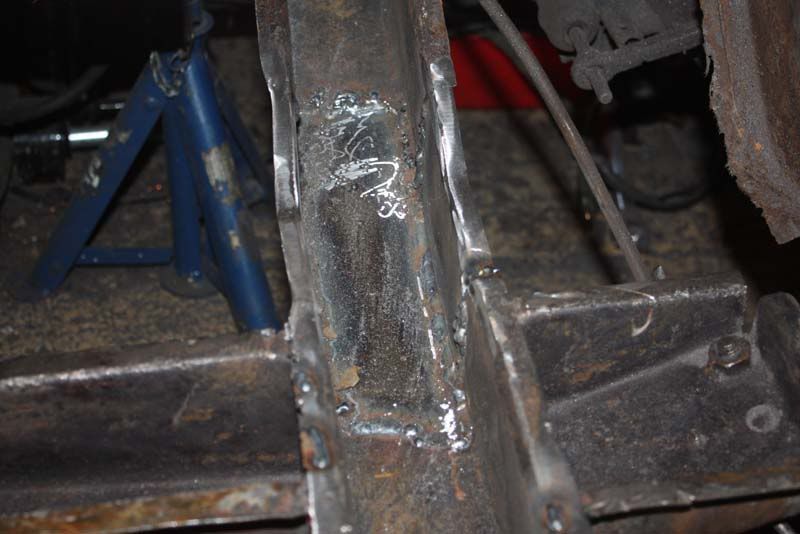 Started on the rear repair but managed to overheat my swan neck after the wire misfed. Get one of those tomorrow and carry on. 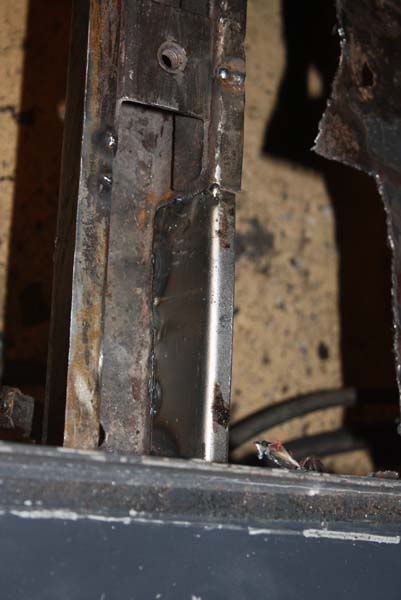 |
| |
Last Edit: Jan 28, 2011 19:15:30 GMT by Jackman
|
|
|
|


 Given that it looks as though you may need to do some major chassis rail reconstruction, I have some pics of what the rails should look like inside (there's a LOT of reinforcement etc in there), so if they are of any use let me know and I'll dig them out


 The handle is missing the button to press the latch so i need to find a new handle or button.