|
|
|
Jul 14, 2016 12:49:11 GMT
|
I actually arrived on this forum having stumbled across ollymk1escort's thread on his Megane Maxi. I registered just to comment and ended up posting a couple of pictures. Olly asked me to put up a thread for my cars and I've been meaning to for a while. We'll start with this one. Rather than typing everything out from scratch, I've lifted much of the thread from another forum, so please excuse me if it doesn't make perfect sense throughout. Progress with the car has been slower than I would like, as I have way too many cars. The current stable is this Escort, an Escort F2 Kit Car, a MK5 Escort Equipe, a Clio 172 Cup and my daily Golf R. I'll get there though. Would like to start testing this car over the autumn/winter, ready to get out and about next year and do some events. Anyway, on with the show: Most people might not be interested, but some of you might. I've come from a Ford background and actually own two Escort RS2000 rally cars. One of them is an ex-works F2 Kit Car which was bought with the shell on one pallet and the rest of the bits on another, so that is going to take some rebuilding. This one is a much more low-rent affair, but its purpose is just to have some fun, do a few events and not spend huge sums of money. You'll have to stick with me a bit here, as there is plenty to get through, so it might run over a few posts... The car belonged to a friend of mine, so I was aware of it. I was looking to build a car from scratch and he mentioned the idea of selling it, but decided not to. I didn't really think much of it until, a couple of months later, I got a phone call from him saying that he had been offered a Lancia Delta HF 4WD that he had known of for years. He absolutely HAD to have the Delta, but he needed to sell the Escort to help fund it. Anyway, a deal was struck and I got the Escort in December 2012. The idea was to make a couple of small changes and then get it out on the stages and have some fun. Didn't quite work like that... The car is based on a 1991/92 RS2000 2WD, though it's actual age is unknown. It was registered on a Q plate in around 2000, presumably because it was stolen/recovered or has some kind of dodginess in it's past. It was converted into a stage rally car around this time, with some very basic modifications, very similar to that of the cars used in the RS2000 Rallye Sport Series in the early 1990s. This is the only picture I have of it from back in the day, when it was owned by a Shelly Taunt, who still rallies now: 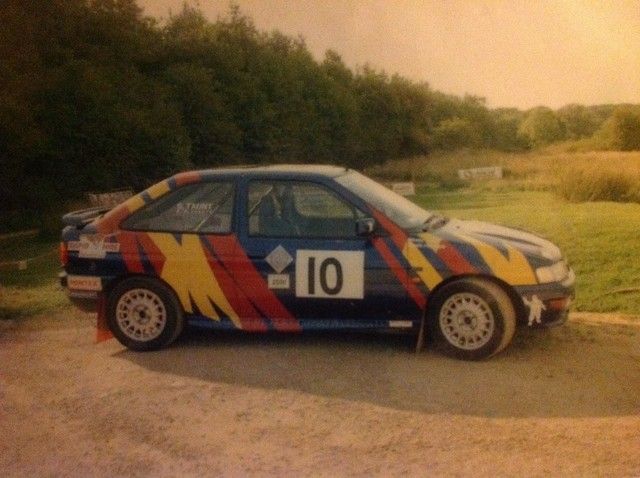 I think it looks ace in that picture. I would love to get some more pictures, but have been unable to track any more down so far. Anyway, the car had a couple of different owners and the spec changed a bit, mainly to the body work. This included some blinkin' awful wide arches, which were actually based around some trailer mudguards. These had been cut in half and tacked to the standard wings (which were butchered). To widen the track, the rear hubs had been spaced, and the front arms and shafts were custom. So, when my friend Mike got the car, it looked more like this (couple of old event pictures also included): 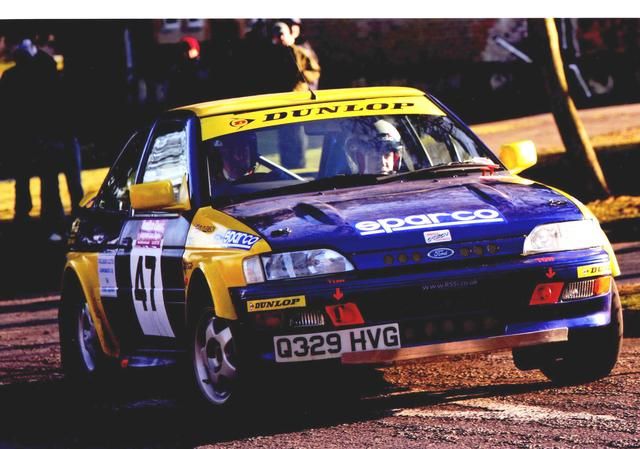  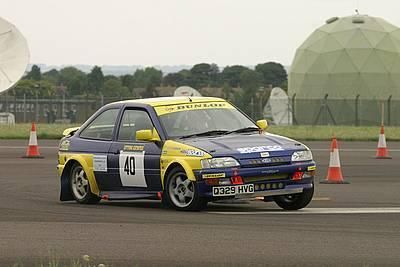  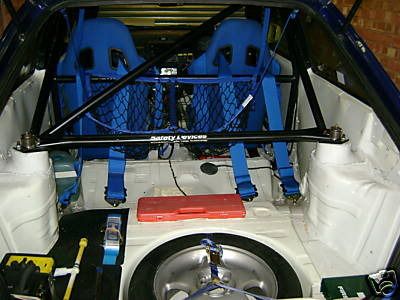 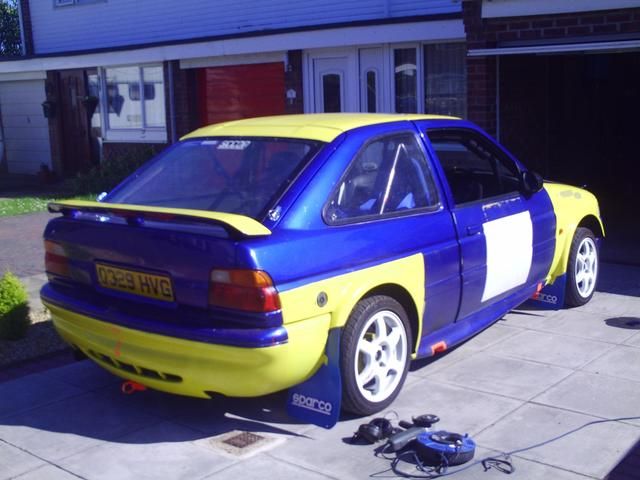 To be continued momentarily... |
| |
|
|
|
|
|
|
|
Jul 14, 2016 12:55:36 GMT
|
Mike set about making his own mark on the car before he started using it (he'd had a 15 year break from rallying so this was his ticket back into it). Like me, he had a bit of a "thing" for the F2 Escorts of the 1990s, so wanted to get a bit of that look into this car. He did actually consider re-shelling it into an old Ford Motorsport press car, but decided to take a slightly lower budget approach, face-lifting the car to MK6 style, and adding a couple of F2 bits too. So, at the front, the later bonnet/bumper/grill were fitted, along with the Group A type headlamps:  At the rear, a lightweight Ford Motorsport tailgate was fitted, along with the MK6 rear light panels and a replica of the F2 Kit Car rear wing (this is a bit of a marmite thing for obvious reasons!): 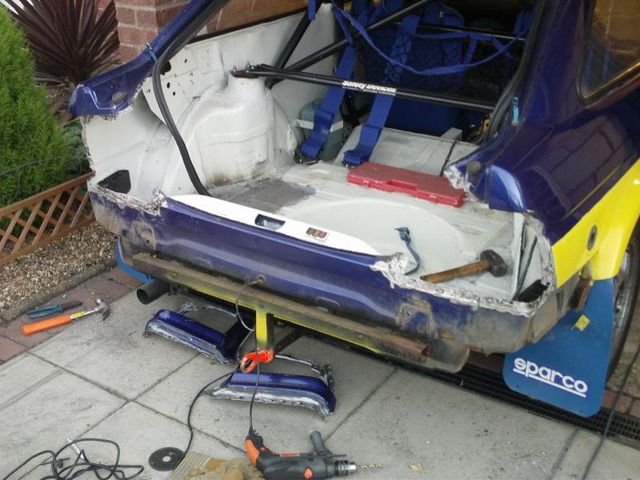 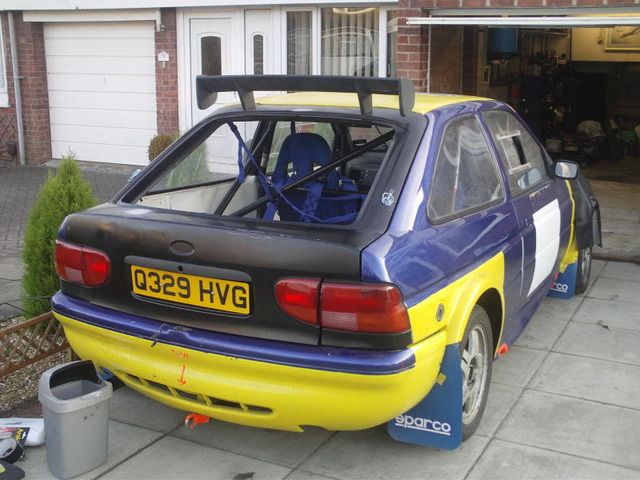 The car was then shipped off to a body shop and given a quick blow over in Ford Diamond White to give it a different look:   And back together: 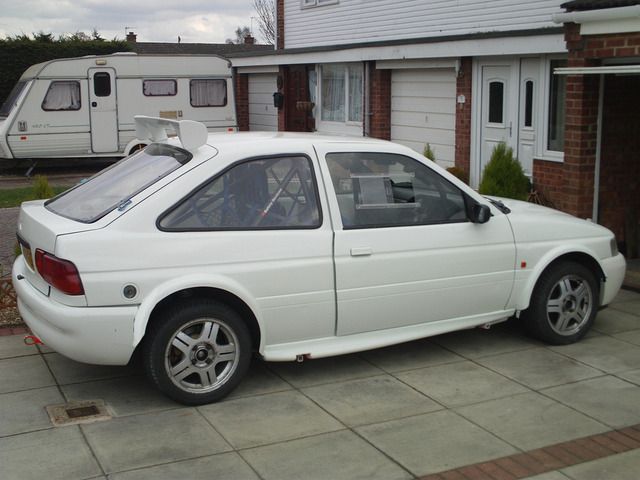 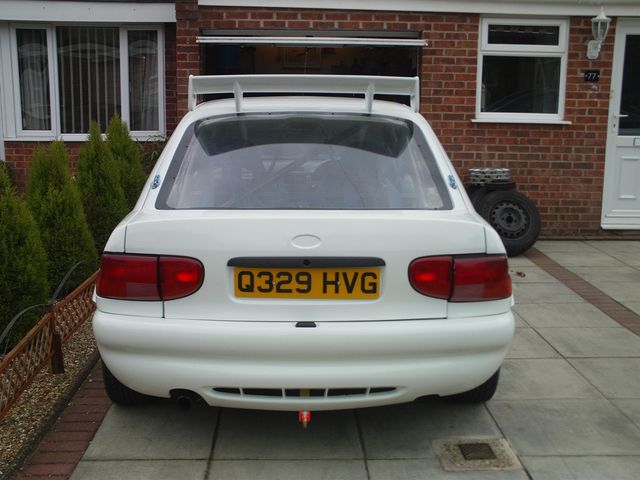  Mike then used the car for a few single venue tarmac rallies in the east of England. With a standard engine and only 150bhp it was never going to win any pots, but it proved pretty reliable, retiring once due to a driveshaft retaining clip failing. Few event pictures: 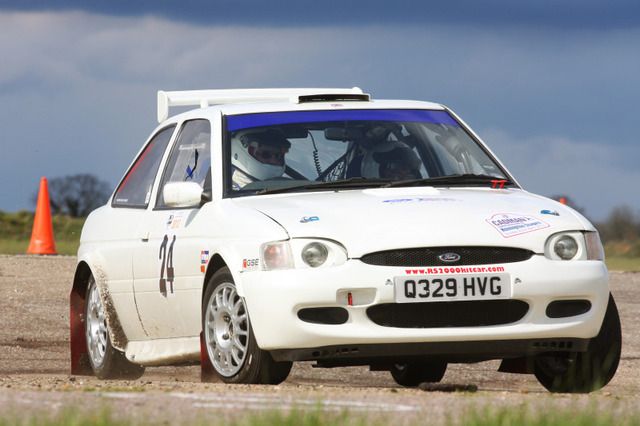  There was one minor blip at a very slippery Snetterton stages, where he put the car into a wall and I had to help gaffer tape it back together. Still finished though! 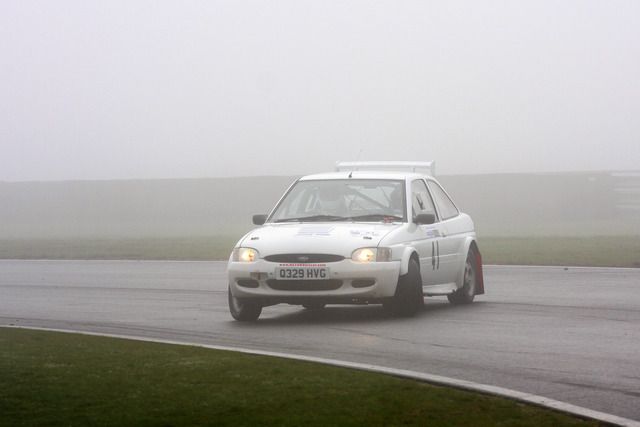 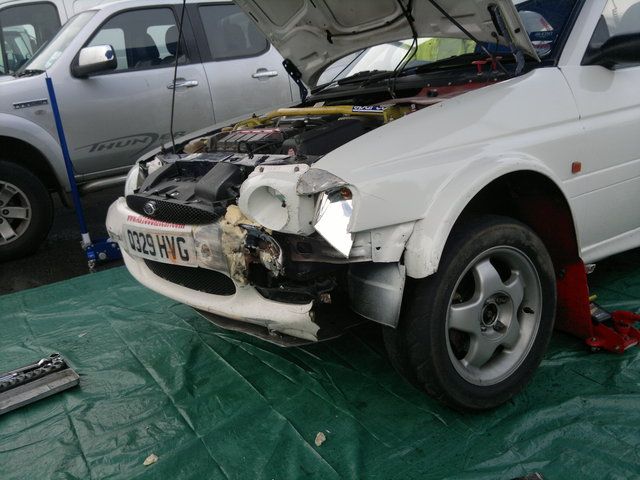  So this takes us up to the point where I got the car... |
| |
|
|
|
|
|
Jul 14, 2016 12:58:04 GMT
|
So, I took delivery of the car, and here it is! With the Kit Car spoiler removed... 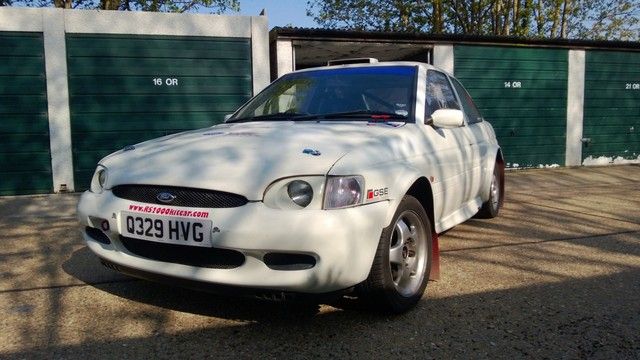 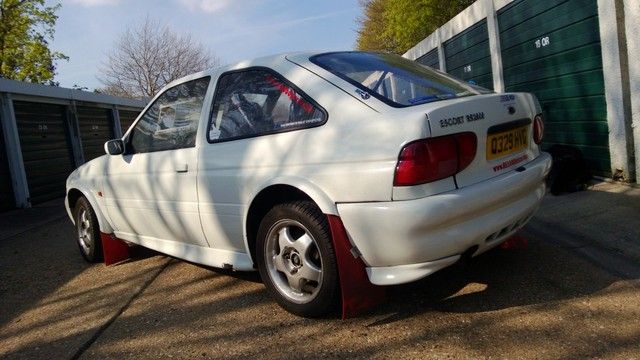 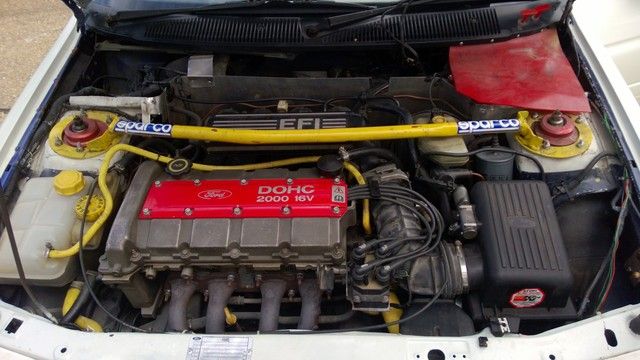  Ok, so the spec of the car when I got it was as follows: Body1991/2 Escort RS2000 3dr body shell Partial seam welding, modified/strengthened front and rear suspension turrets Safety Devices Bolt-in roll cage Sunroof filled curse word wide arches MK6 front/rear panels Lightweight Ford Motorsport tailgate Group A headlamps Replica Kit Car rear wing Replica Kit Car Bonnet Vent Group A style roof vent Respray in Diamond White Regulation big ass mudflaps traveller jacking points and rear tow eye Engine/GearboxStandard RS2000 2.0 16v Superchip Air Pulse System removed from exhaust manifold De-cat Ashley Group N exhaust system Five speed MTX75 gearbox Quaife ATB diff Dav Mac driveshafts (+45mm each side) BrakesStandard front rear disks/calipers Hydraulic handbrake Brake bias valve Internally routed brake lines SuspensionBilstein Group N height adjustable dampers Modified front suspension arms with spherical bearings Group A top mounts front and rear Rear hub spacers Poly ARB bushes Custom drop links Plus all the usual safety-related gubbins, so seats, harnesses, extinguishers etc etc |
| |
|
|
|
|
|
Jul 14, 2016 13:05:57 GMT
|
Ok, so with the car in my possession, I had intended to just give it a few teaks and then get on with driving it. One thing I wanted to address was the standard brakes, which are a bit pap. I considered going up to 17" wheels to facilitate this, so I tried a couple on the car: 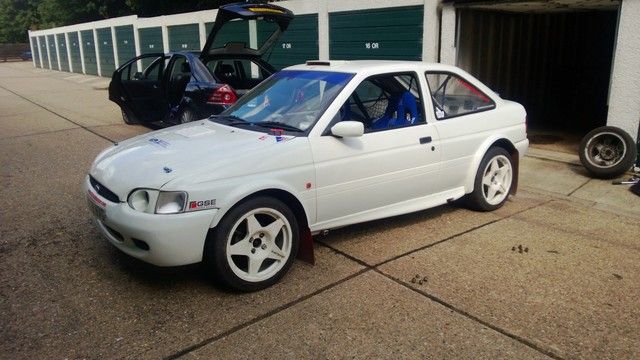  Certainly emphasised the camber on the front! 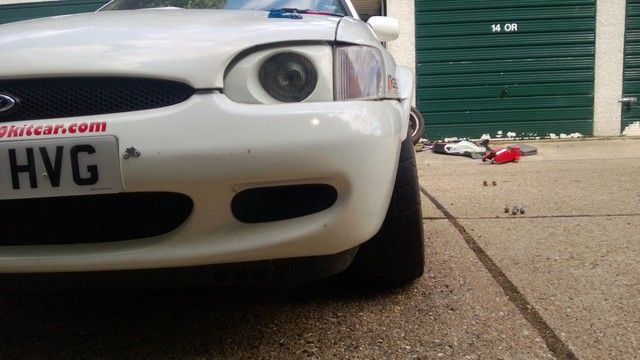 But it did highlight a problem. The wide arches had been fitted such that they weren't at all central in relation to the axle lines, as you can see here: 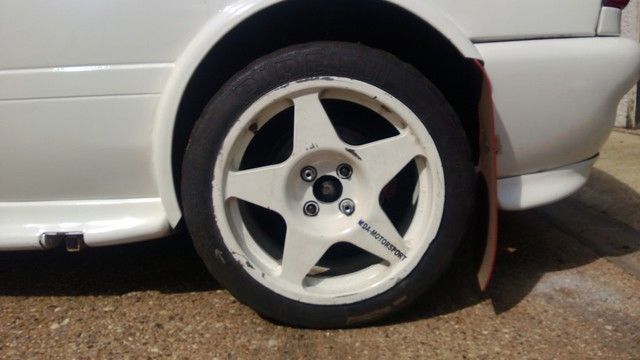  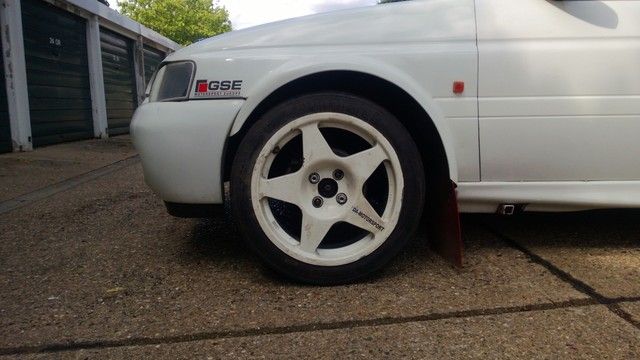  I had never liked the arches, but I had intended to just put up with them to avoid the hassle of changing them, but this was going to be more of a problem, so I decided that I would need to look at changing them. I have since decided to stick with 15" wheels. It looked pretty naughty on 17s, but tyres can be expensive for these, and it is extra weight and doesn't exactly help with the already poor standard gearing. This is where things very quickly spiraled sadly. The car was "ok", but I started to poke around and found a few wiring issues that I wasn't happy with. Nothing to do with the guy I bought the car from, but a result of numerous people adding and removing bits over the years and just not doing a great job of it. I just couldn't use the car like this, as I am fussy, so decided that, as the interior was looking a bit tired, I would strip it down and give it a lick of paint, as well as addressing the wiring issues. I'm glad I did really, as this uncovered some corrosion issues that would need to be dealt with. The car, given its age and use, was actually pretty solid generally (impressive for a MK5 Escort) but there were a couple of problem rust areas. The most concerning of these was where the left-hand front roll cage mounting was. When the cage mount had been welded into the car, the fitted hadn't then sealed the floor/sill, meaning water had got in and caused a lot of rot. The floor and sill had actually separated, so the roll cage foot was the only thing holding them together. God knows what would have happened if the car had taken an impact on that side - doesn't bare thinking about. Anyway, this was a pretty awful job but, with the help of a good friend, it was dealt with. No pictures of this, as we just kind of got on with it, but it's done and dusted now. The other area of rust was on the front bulkhead, and this required quite a lot of rebuilding. So, a picture below of the rust cut out (you can see that the heater blower motor hole has also been filled in):  And then it was repaired: 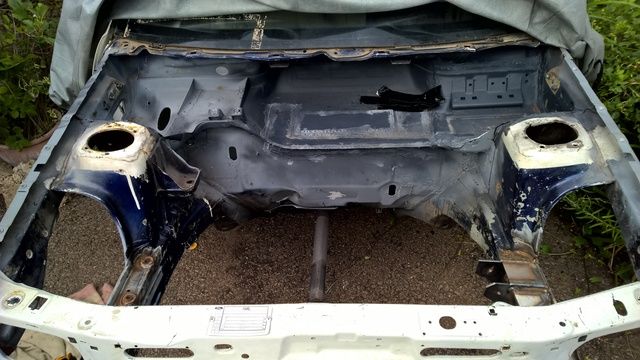 You can also see to the left of that area, some additional brackets to support the Group A bias pedal box, which has replaced the standard item. This also meant the servo etc could be binned, saving a little bit of weight. Early dummy fit of the pedal box:  Whilst this work was being carried out, the seam welding was extended to the bulkhead and front suspension turrets/chassis rails, as this hadn't been done previously. As well as that, the jacking points were also a bit suspect. At the rear, there was a rather awful towing eye arrangement that comprised of some box section that was welded across the rear panel and to the spare wheel well. The jacking points on the sills had some box section that poked out under the skirts (you can probably see this in some of the earlier pictures. I hated all of this. Some of the modifications that have been carried out to the car were clearly done without much thought and just using whatever materials were laying around, so these were all removed. I decided to take a little inspiration from the F2 cars here. At the front, some box section was welded to the front crossmember. These allow some separate attachments to slot into place, meaning the whole front of the car can be jacked up in one movement. They'll need to be trimmed down once the bumper is on, but here they are: 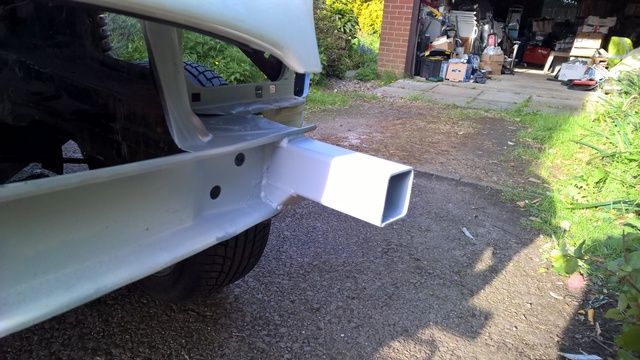 Next, some proper sill stand points were added. Again, these will need to be trimmed down to suit the sideskirts: 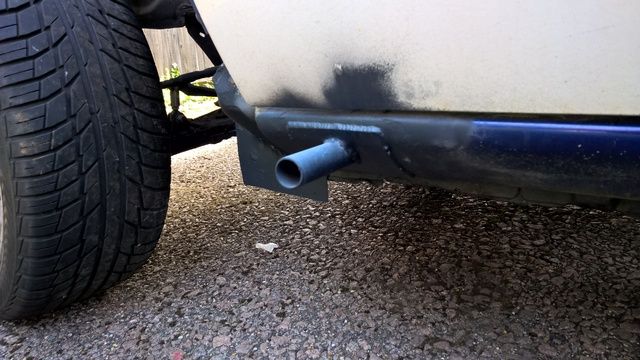 And a picture of an ex-works car to show how the whole deal works: 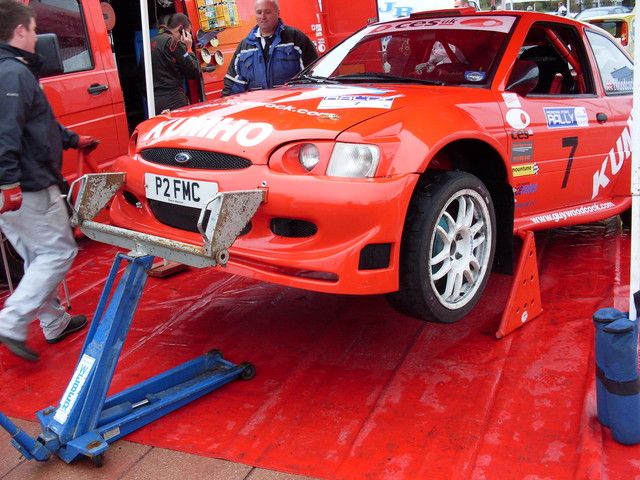 For the rear, the inspiration from an ex-works car continued, with drop brackets installed that act as towing eyes and a means of jacking the rear of the car: 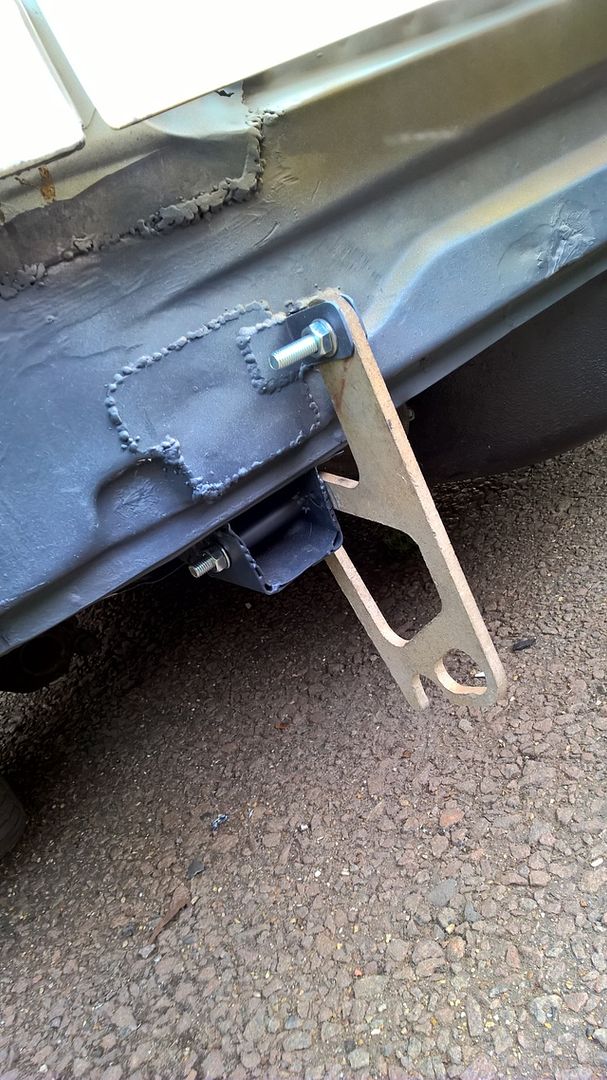 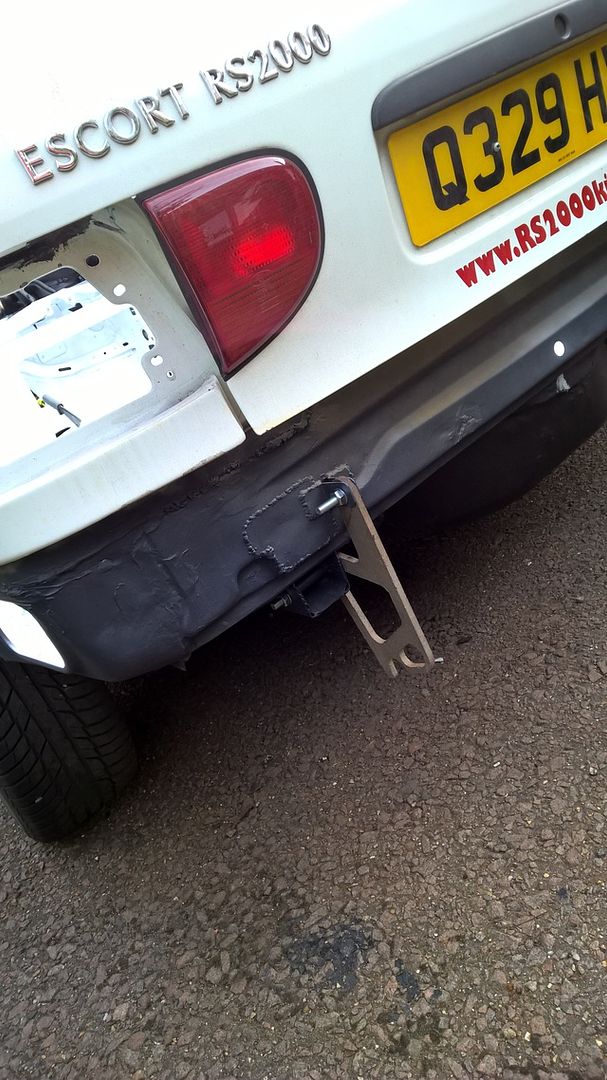 And that ex-works again: 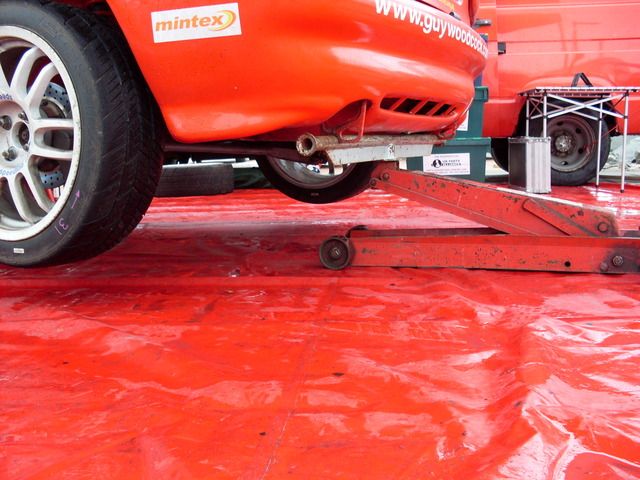 To be continued some more... |
| |
|
|
|
|
|
Jul 14, 2016 13:09:52 GMT
|
One of the other major fabrication jobs was the engine and gearbox. The standard engine/box mounts in the RS2000 are, frankly, rubbish. The engine mount actually sits behind the engine which puts some quite strange loads on it, and means the brackets are all quite convoluted and heavy. Simple solution here really - fit a Group A engine mount. This meant turning up some threaded bushes that were welded into the chassis rail. Here they are:  The next job was the gearbox. Multiple things going on here. The big problem with rallying a road car is the gear ratios. Even on tarmac rallies, you don't really need to be able to do more than about 100-110mph, meaning that road car gearboxes are way too long. The RS2000 box is no different, but there aren't really many good off-the-shelf solutions. A sequential box was clearly not an option, and the gear sets available for the Escort don't appear to get great reviews either. The next issue is that the gear linkage gets loose with age, meaning the shift is pretty horrible. As already mentioned, the standard mounts are also weak. This was all leading to one solution - junking the standard gearbox. The replacement is actually similar, it's still an MTX75, but this time from a MK1 Ford Focus. This has several advantages over the Escort unit. Firstly, it is strong as an ox. Secondly, it bolts to the Escort engine. It uses a hydraulic clutch so it will work with my bias pedal box, but it also opens up more aftermarket parts opportunities. The Focus is quite popular in the US, so there are a couple of gear/final drive options available for a good price. The box is also cable operated, meaning I can position the gear lever wherever I like, and the shift is much nicer than the Escort mechanism. All of this sounds great, but it did present problems. I had been told that the box wasn't a straight fit. Apparently the bell-housing is bigger thanks to the hydraulic clutch, so the box would foul the chassis rail. I wasn't convinced by this, so decided to just bolt a gearbox up to the engine and try it. The result? It fitted perfectly. Not even close to the chassis rail, so it was just good ol' internet hearsay. With the engine/box dummy fitted, I just had to make some new mounts to suit the Focus gearbox. A clevis was fabricated on the chassis rail, and a new bracket for the gearbox. I still need to make the lower torque mount, but that can be done any time really. With the gearbox mount done, and some other engine bay tidying done, it was time to get the spray gun out. As you can see in the older pictures, the engine bay was still the Pacifica Blue of the original car, so it was nice to get everything into shiny Ford Frozen White: 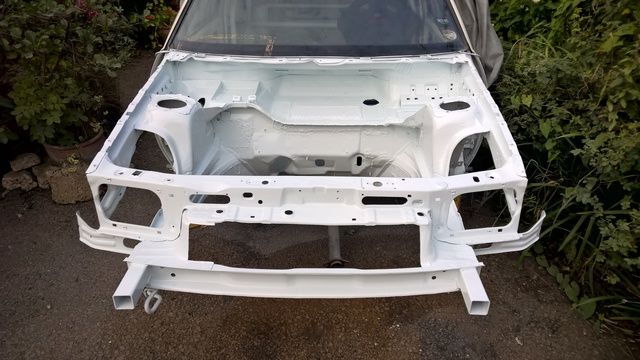  That gearbox clevis I mentioned:  Then the front subframe and steering rack could go back in, along with the freshly painted strut brace and top mounts:  The front dampers were tested on a dyno and found to be in good shape, so they were cleaned up and refitted, along with reconditioned uprights, hub and lower arms. The engine is being left alone for the moment, so was given a lick of paint and fitted, along with a bog standard Focus gearbox for now. This will be removed and have some new gears an the Quaife diff fitted in due course. You can see the new upper gearbox mount arrangement here too: 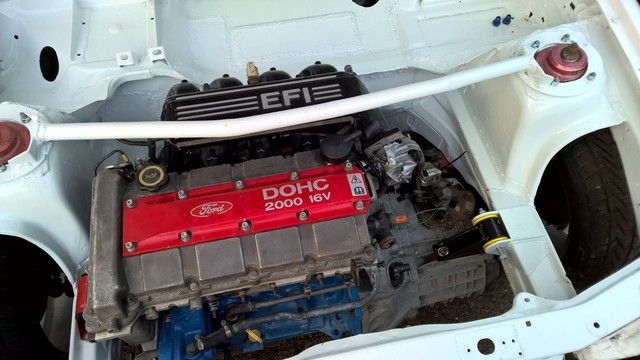 The Group A engine mount: 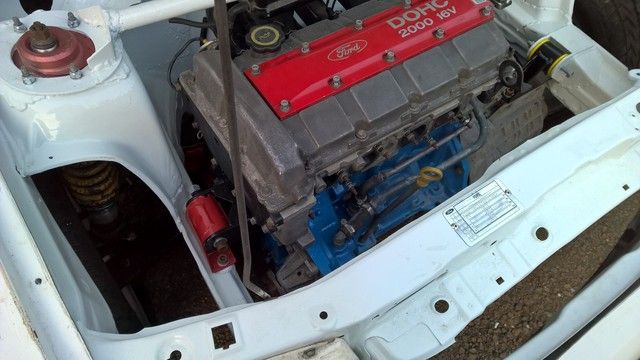 Obviously most of the bits are missing here, but things will be looking a lot cleaner in here. The heater stuff is all gone, along with the brake servo. It should save a few kilograms, as well as making things a bit easier to work on. Hope you're staying awake, because it's on to the body work next! |
| |
|
|
|
|
|
Jul 14, 2016 13:15:18 GMT
|
Remember (all those many posts ago) the talk about hating the wide arches? Well, that needed to be addressed in a big way. The front wasn't so difficult. I ordered a set of Escort Cosworth GRP front wings, then drilled out the spot welds and removed the standard steel wings and binned them. An early test fit of the GRP wings, apologies for rubbish pictures taken in the dark: 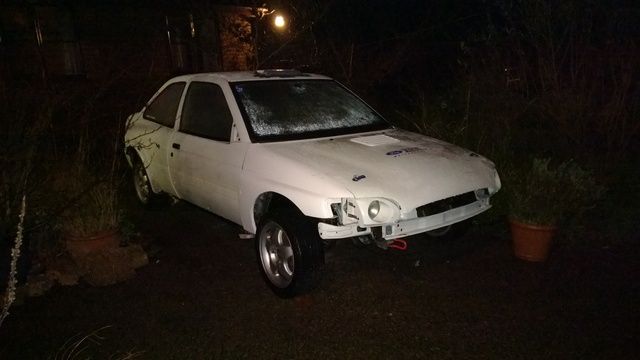   The rear was a bit tougher. The MSA stipulate that you should keep steel rear quarter panels. I initially thought about fitting some rear arch repair panels to put the rear end back to standard, so I bought a set and started playing. It quickly became apparent that, thanks to the unique (i.e. curse word) way that the extensions had been fitted, that fitting the repair panels was just going to be a total nightmare. The quarter panels had been trimmed back and the extensions just pushed in between the inner and outer arch skins, it was shocking, and really not very strong at all. With all this in mind, I decided to just fit some Cosworth style rear wheel arches. I cut the original arch extensions off and rebuilt the inner arch so that it was actually strong, but didn't worry about making it too pretty. I then bought some GRP Cosworth style rear arches and set about fitting them. They haven't been done to an impeccably high standard, as the car is bound to get damaged at some point, but they will do the job. They are held in place with countersunk rivets and also bonded in place, just to make sure. Anyway, a few pictures of the fitting process on one side: 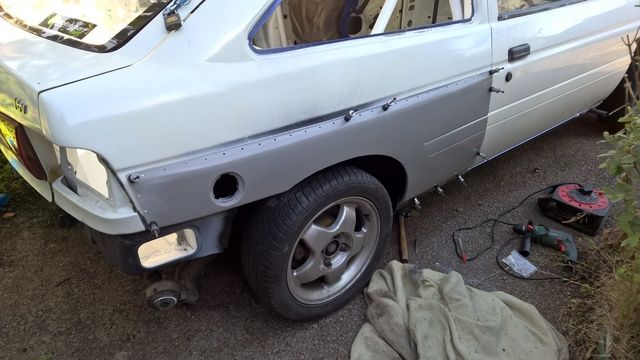 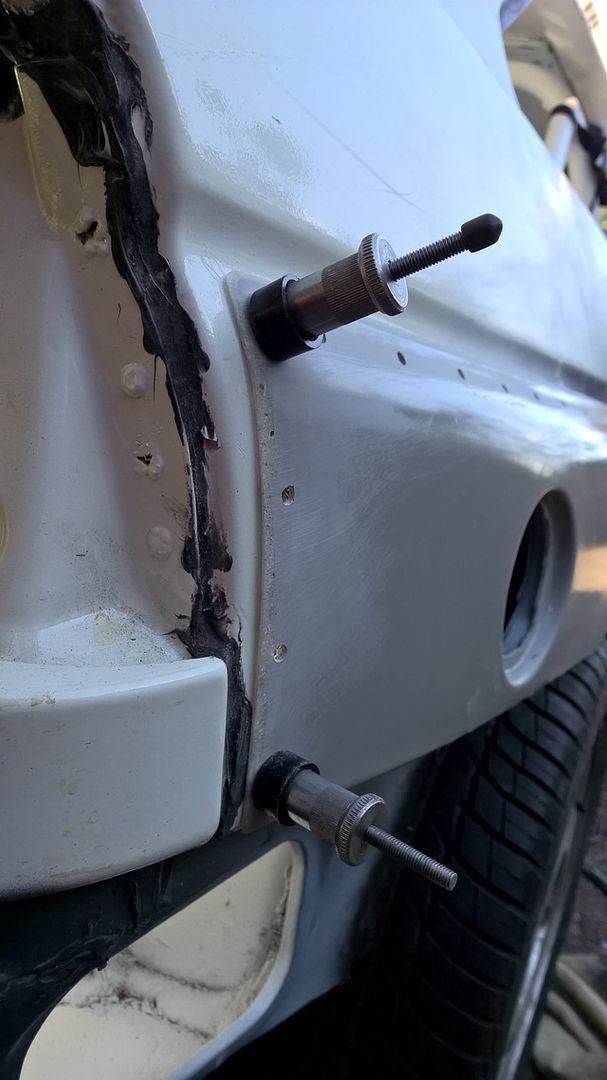 Once they were fitted in place, I sanded the edges back to get them to match as closely as possible, and then used the bare minimum of filler to make it look a bit prettier: 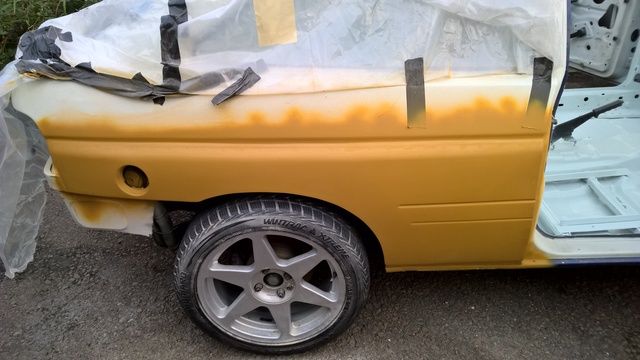  The rest of the body work was actually in reasonable condition, so just required a bit of sanding to get it to "good enough", so I was ready to think about paint. Now, sending the car off for a beautiful paint job would have been quite expensive and, given that the car is going to be abused and get scuffed, scratched and dented, paying for an expensive paint job was just pointless. The solution was to get the spray gun out again and to give the car a fresh look, I decided to move away from the white and apply a nice coat of Ford Signal Yellow, as available on the MK2 RS2000. The finish is far from perfect, but it's good enough for what the car will be used for: 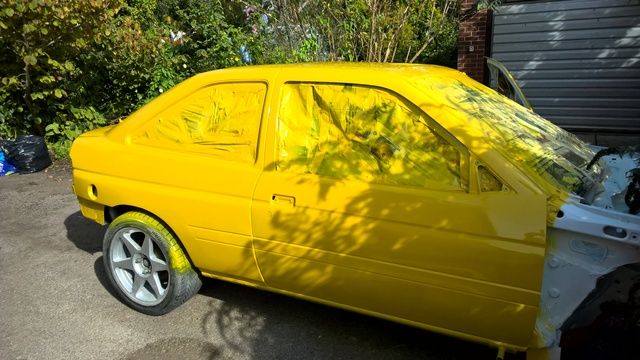  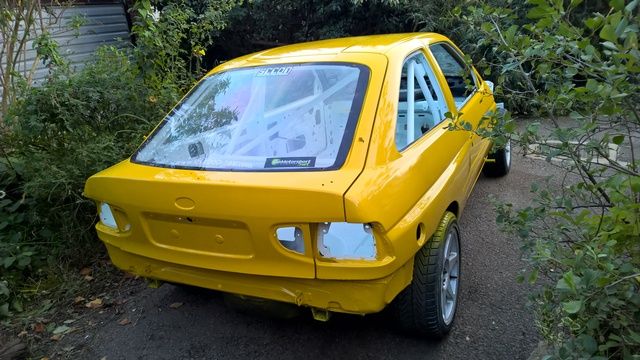 Mad to think that this whole thing started with the idea of giving the interior a freshen up isn't it? But, finally, the interior also saw some paint. Frozen white to match the engine bay, but with the front part of the cage in satin black. In this picture, the heavily trimmed and flocked dash has been fitted, along with the front of the cage: 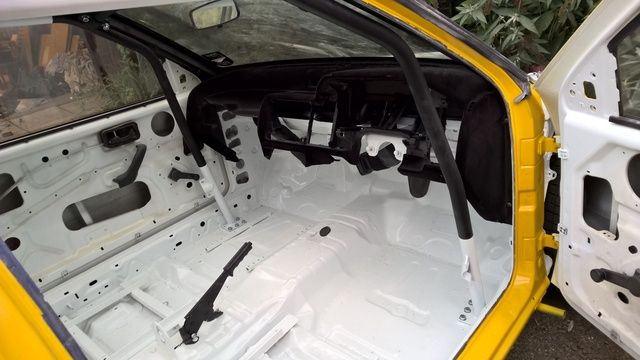 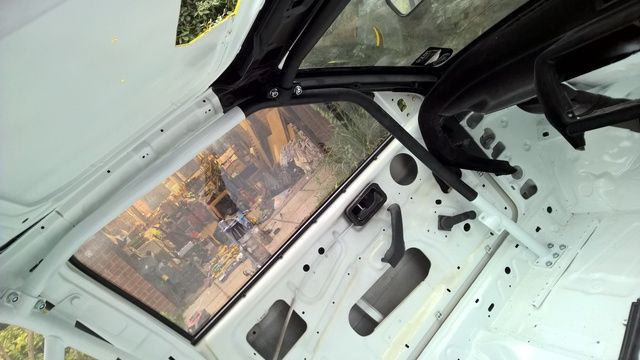 With the outside painted, a few bits could be bolted back on, and the windows refitted:  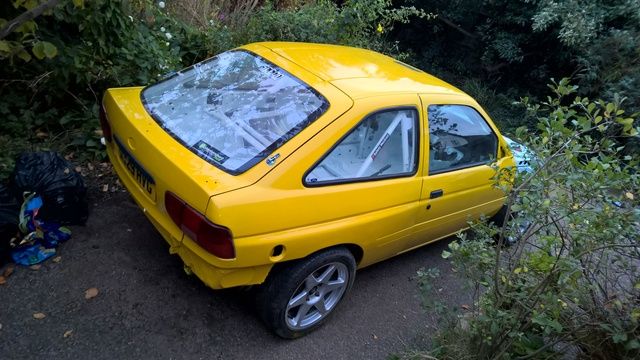  We're getting there... |
| |
|
|
|
|
|
Jul 14, 2016 13:19:31 GMT
|
A few modifications have been carried out as well as the wheel arches. I've decided not to refit the Kit Car spoiler as it just adds drag, so I've drilled the holes for a standard Escort spoiler which I need to paint at some point. I also fitted new doors. The originals had had the lock barrels removed which just annoys me, and I also wanted to fit wind-up front windows. Whilst the glass does add some weight, I really don't get on with sliders, so it was a sacrifice I was willing to make. I've retained the plastic rear side and rear screen. Moving to the interior, I started fitting a few bits in, just to work out where things need to go, where to route fuel/brake lines etc etc. The seat is an ex-works Ford Motordrive from a car driven by Daniel Alonso in Spain. It's Kevlar and super-light, but out of date so just an ornament. It's useful for fitting though, as I sold the Sparco seats that came with the car. I didn't find them very comfortable and, with steel frames, they were quite heavy: 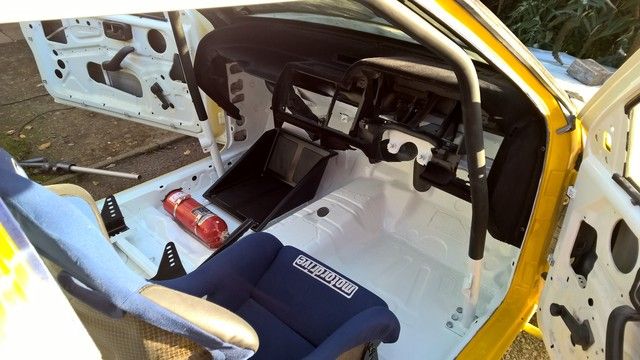 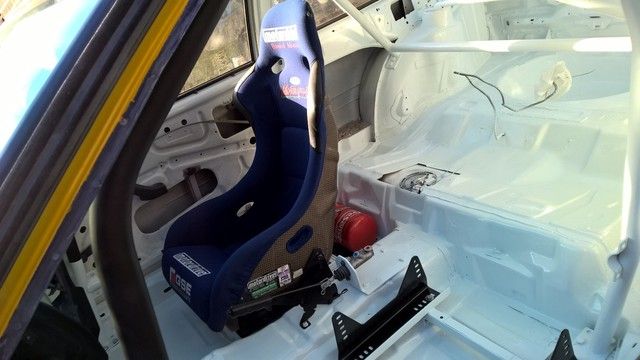 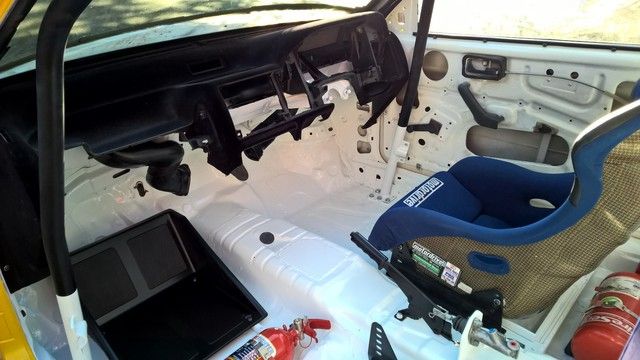 Looks a bit bare right now, but lots to think about in here. As noted in a previous post, the standard heater system has been removed. I bought a micro heater (one of the eBay ones), so this will be mounted on top of the exhaust tunnel. I've retained the ducts to the windscreen vents, so the heater will be solely for clearing the screen. The car does have a heated screen too, but it's good to have a back-up. When I bought the car, the footrests were aluminium chequer plate, so were binned as they were too heavy for my liking. The passenger one is now GRP and has brackets with multiple mounting holes so its position can be adjusted to suit navigators of varying size. For the driver's side, I will add a carbon panel to the floor as your feet would be a bit too lower otherwise. This will be fitted after the pedals have been fitted though. These still need some tweaking. The steering column has been lightened a bit, and will be fitted with revised mounts so that it's a bit lower. You can also see where the hole in the tunnel for the original gear lever has been welded over read for the Focus gear lever to be position. This will be done once the seat/steering wheel positions are finalised. The standard dials and dash panels have all been ditched to save a bit of weight. The dash will just consist of a carbon panel to fill in the big hole, and the dials etc will be mounted directly to this. So, back to the outside, although much of the car was painted, I didn't do the front end panels. I sourced a new bonnet as the original was damaged, so set about starting to get these parts fitted. The bumper is an old scrap item with holes loosely cut in it to suit the front jacking points. Once the front panel fit is finalised, I will measure and cut a proper bumper, but didn't want to waste one while I was fiddling: 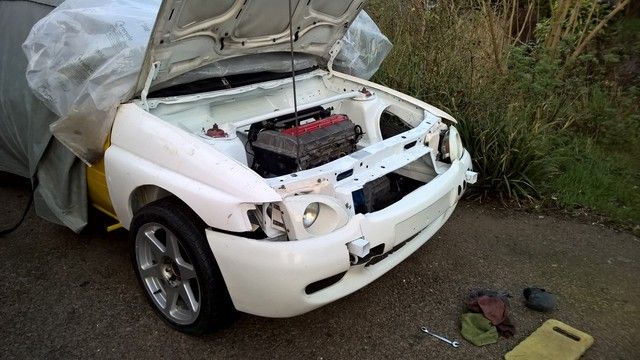  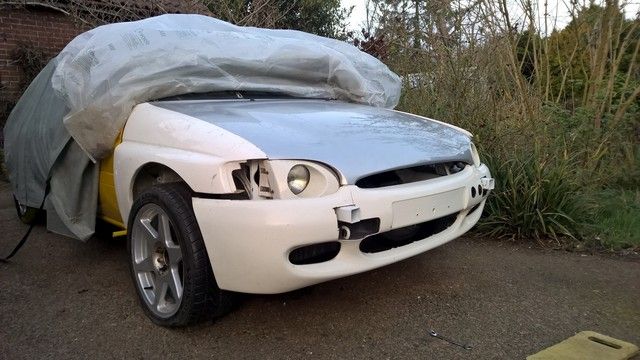 Thanks to the car having the odd knock in the past, it probably isn't the straightest in the world, and this is made worse by the GRP wings and headlights. Quite a bit fettling has been required on this so far, but the panel alignment is getting there slowly. Thanks to a couple of friends for their help with this so far. Bonnet pins refitted too: 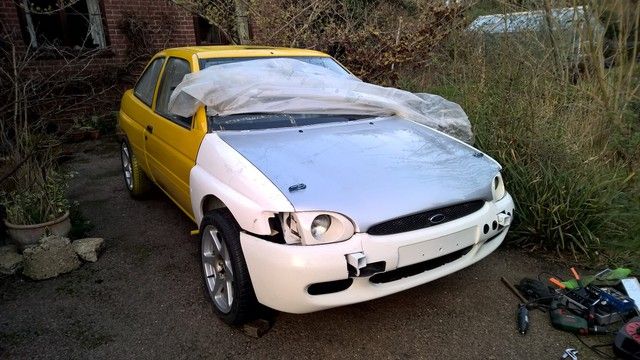 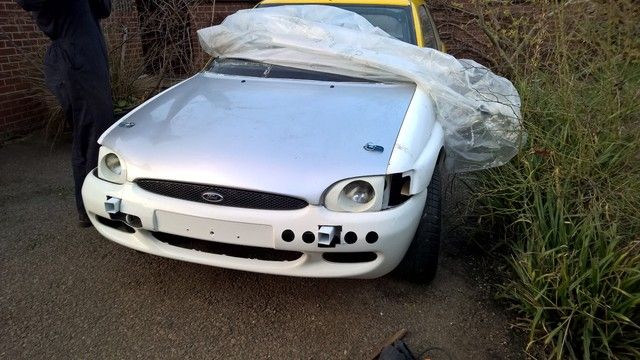 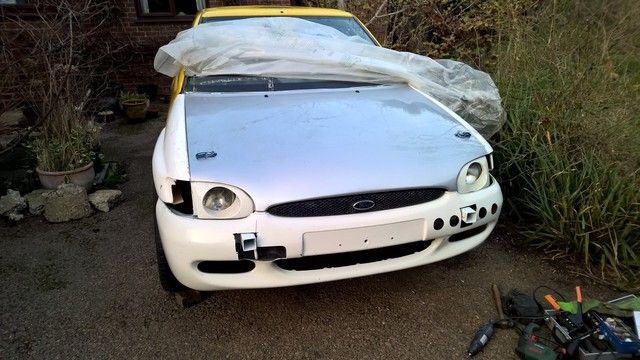 I'm currently working on the pedal box, as this requires a few custom brackets and thinks making up, so I'm waiting on some parts to arrive for that. Once that is fitted, I can start to plumb in the brake lines and work out where I'm going to fit the fluid reservoirs. That will also allow me to fit the wiper mechanism, scuttle panel etc etc. In more exciting news, I also picked up a set of Wilwood four post calipers and 280mm disks today. These will replace the standard and hopeless 260mm ones. I'm sure I've missed out plenty of stuff, and I appreciate that most of you won't care, but I hope you enjoyed reading. Or that it will at least help you sleep tonight. Still more coming... |
| |
|
|
|
|
|
Jul 14, 2016 13:23:38 GMT
|
Still working away on this... Got two weeks off over Easter and want to get the rest of the body work sorted out, so I've been trying to get on with some of the fiddly associated jobs. All of this stuff seems to take forever and requires endless little brackets making up, but that's life. First off I made some ally brackets to support the base of the wings to the sill and also the front behind the bumper. No pictures of that, but the wings are no longer floppy. Next up I fitted the proper front bumper. This had to have the front jacking point holes made in it and I had to make up some brackets to fix it to the wings. I also trimmed the ends down a bit so it matches the Cosworth arch profile a bit better. Thanks to the mismatch of MK5 and MK6, Cosworth and RS2000, not to mention the use of GRP parts, the panel gaps were never going to be perfect, so this has all been done just to keep it simple and fuss-free. The chances of damaging these parts are incredibly high, so I just don't see the sense in spending ages on getting perfect gaps. It just needs to be easy to remove and light. Function over form and all that. The only thing left to do here really is to remove the foam from the front bumper, tidy up some of the brackets and add some little tabs so the bumper just screws on above the jacking points. Anyway, it's made the front end look a bit more like a car:   Next on the body work hit list was the side skirts. These were fairly simple, just needed a hole putting in them for the sill stand tubes and a bit of trimming to suit the wide front wings. I have since trimmed the sill stand tubes down, as they are still very long in this picture! 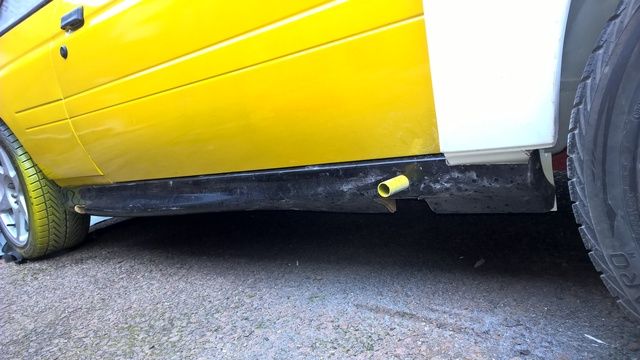 You can see at the front where I've been trimming to suit the wings. For some reason I don't have a picture of it finished. You can also see the difference in wheel arch profile from a Cosworth to a normal Escort, with the Cosworth having a longer wheelbase. I will be trimming the arch profile to match the side skirts. This will also gain me some wheel arch clearance which is no bad thing.  The final job was to fit the rear bumper, which took much longer than I thought it would! The rear jacking points mean that the standard bolt positions had to go anyway and I wanted to save some weight, so I spent what felt like an eternity removing foam to be left with this: 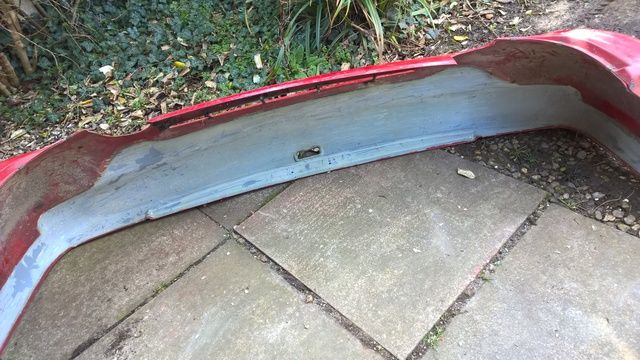 Half a bloody black sack full that was... Anyway, bumper on, secured on a bracket at the top, an M6 on each side and an extra little support bracket to the spare wheel well. It is amazingly flimsy so I suspect I will get through a few of these! Just needs a spot of trimming to match the rear arch profile. Oh, and painting of course... 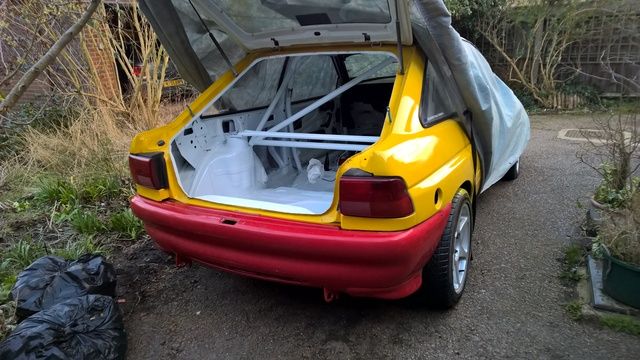 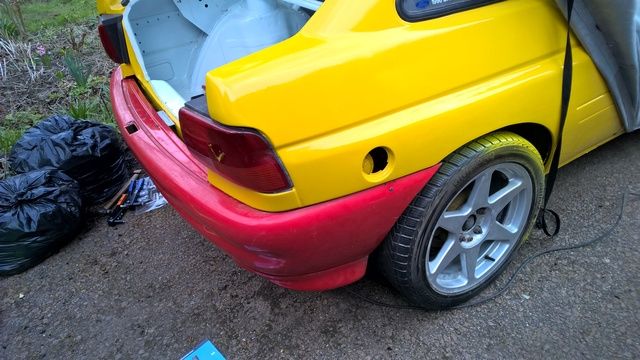 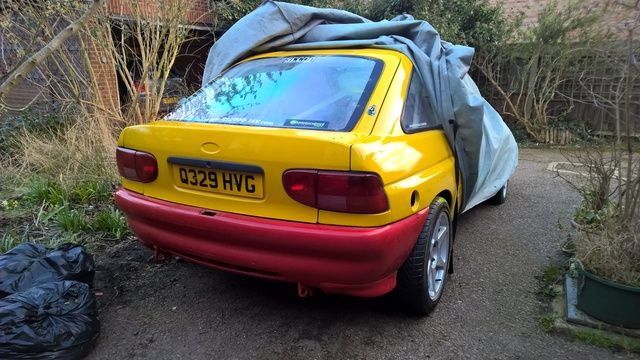 Rear jacking points/towing hooks are on and bumper required some trimming to accommodate: 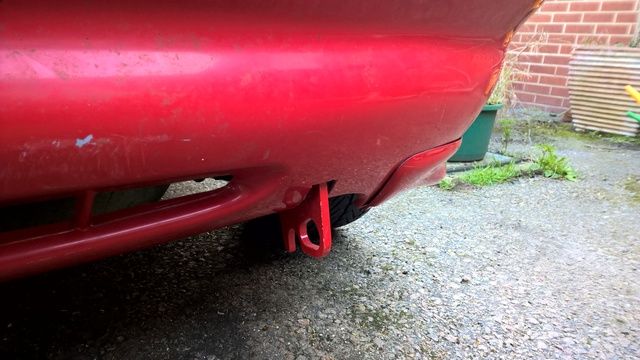 Going back a while, Mat Lewis at MDA Motorsport made me a replica Group A pedal box. Mat originally made it with a single return spring for each pedal. The works ones used two springs and, when I put the cylinders in, it did feel like one spring might not be enough, so I modified it to use two. It probably would have been fine to be honest, but I didn't want to have to take it out again, and I can't leave anything on this car alone lol. Anyway, assembled with rebuilt cylinders (again courtesy of MDA) and ready to fit: 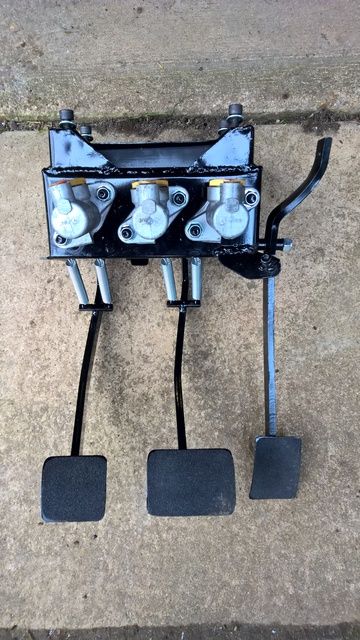 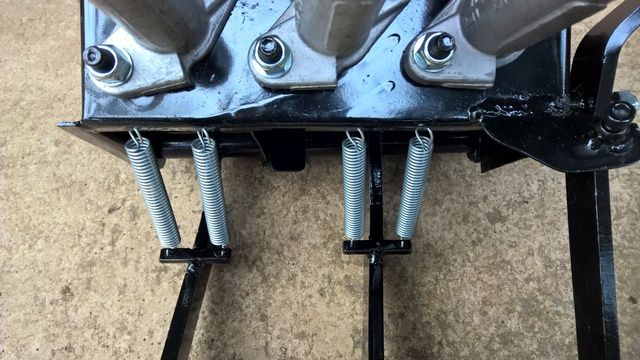 So, as of Friday I am off work for two weeks, so the wings will get some final fettling and then I need to get busy prepping and painting. It will never be a concourse car, it's all very rough and ready, but it's built for a purpose. There's lots of nice shiny examples out there, so I will leave that stuff to other people lol. Oh, one last thing, I fitted some retro rally stickers to my tool box lol. 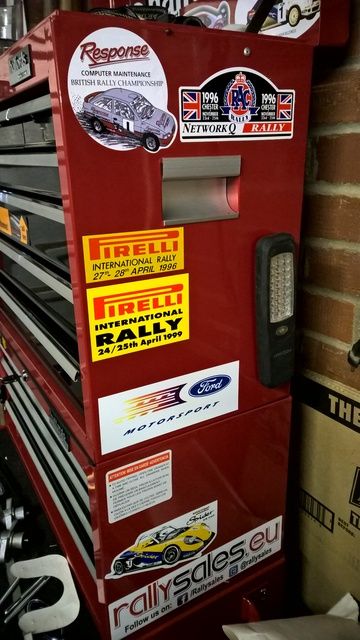 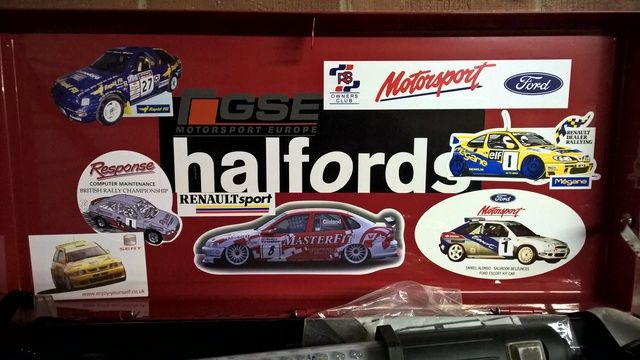 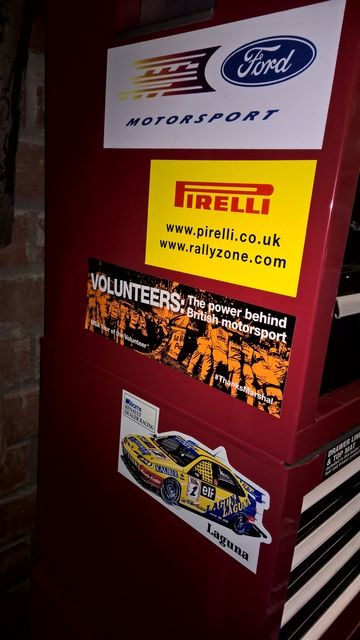 Nope, still not done yet... |
| |
|
|
|
|
|
Jul 14, 2016 13:24:07 GMT
|
|
Very nice work!
If this is your 'rough' rally car for thrashing, I can't wait to see the other one get built!
|
| |
|
|
|
|
|
Jul 14, 2016 13:26:54 GMT
|
It's update time again. I had two weeks off over Easter so I tried to spend as much time on the car as possible. The aim was to finish off the painting. The shell was actually painted last September but winter meant that I couldn't really finish things off and I had to do a lot of fettling to get everything to fit. Anyway, on with the show. As I say, the target was to finish off the painting. This entailed quite a lot of work to be honest; just menial, laborious stuff like sanding, so it was a bit dull. As with the rest of the paint work, this is very much being done for a purpose. The finish is far from perfect, but it's good enough for the job and, once there's a few stickers on it, you won't really notice the imperfections anyway. Started with some quite easy stuff, painting the rear spoiler and rear bumper. With these finished and fitted, the rear end was looking better already. Much better than the yellow/red "Noddy" look in pictures above anyway: 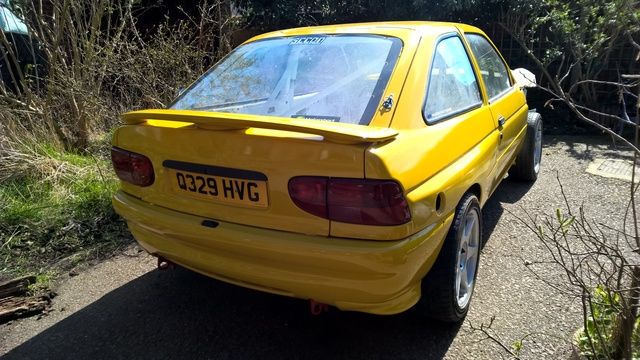 I stripped down the front end and spent a lot of time working on the front wings, firstly to get them to clear the doors when they opened, and also modifying the wheel arch profile to suit my car's odd wheel base length. Cutting the arches wasn't all that fun, but they came out ok. I also painted the bonnet. This hasn't come out all that well to be honest. There was a slight reaction in the paint, so it looks like it has little pin-pricks all over the place. Very odd but, again, with some stickers on it, who cares. Anyway, refitted with catches and washer jets back in: 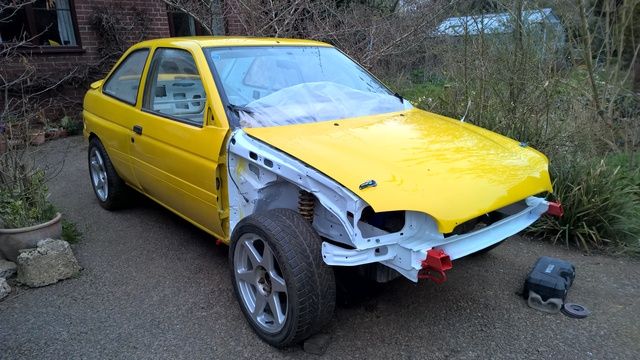 You can also see that I painted the jacking points red, just because really. The roof vent was also painted and fitted with the obligatory sticker. I don't really like the position of this to be honest, but I didn't want to mess about drilling new holes for it and filling the old ones. 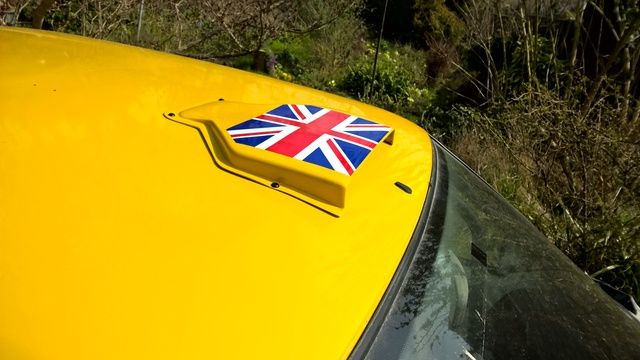 Then we'll just skip to the end shall we?! Wings were finally finished after making side repeater holes, reprofiling arches and doing various other things. Front bumper was painted (and then promptly fell off the stands so had to be painted again) and then the whole lot put on, along with the door mirrors. The panels aren't sitting quite right currently, I need to move the bonnet back a touch so it lines up with the bumper better and I'm waiting for the ally bolts for everything to turn up, but you get the idea. You can also see the vents in the back of the wings too:  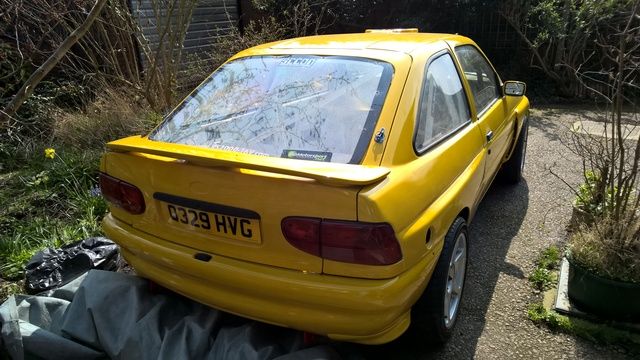  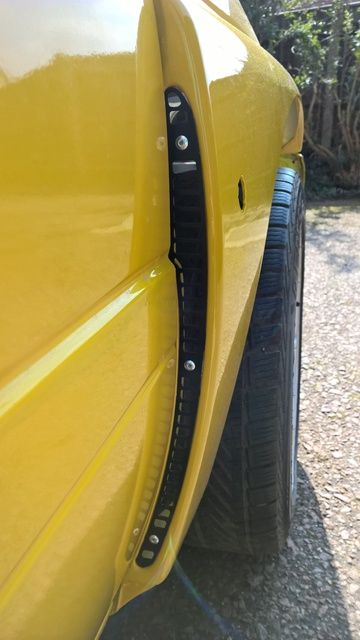 The side skirts have been painted but aren't refitted yet. That's a job for the weekend. The headlights are also still missing thanks to the drama with the front bumper. When it all fell over, one of the stands smacked into a headlight casing that was drying near it, promptly taking a couple of big chunks out of the gel coat - bummer. This is going to need a little filler to repair it and I ran out of time to do that. Oh, and I need to fit all the bits of trim to the front bumper too, as it's just the bare shell currently. Next on the list is to have the gearbox rebuilt with some new gears and my Quaife diff, then the exhaust and engine ancillaries can all go back on, which should help to bring the front end down a little bit. Quite a lot of weight has been lost from the front of the car, so some suspension adjustment will be essential, and I may end up changing the front springs, depending on how it all works out. We're up to Easter now, not long to go. |
| |
|
|
|
|
|
|
|
Jul 14, 2016 13:28:49 GMT
|
Another minor update. Didn't have a mad weekend on it this weekend but repaired the LH headlamp casing and painted that, then fitted the lights, bumper parts and sideskirts. Pictures below: 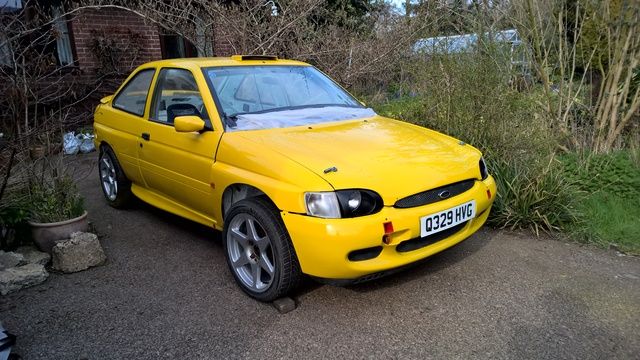 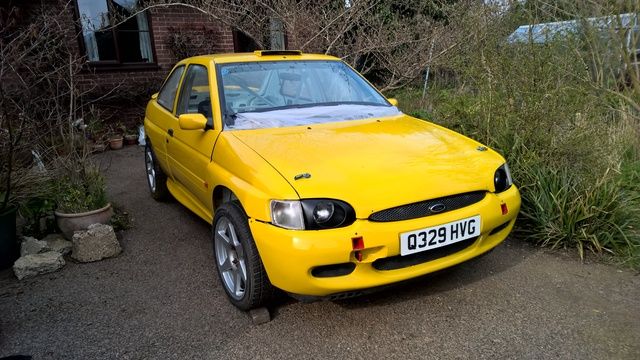 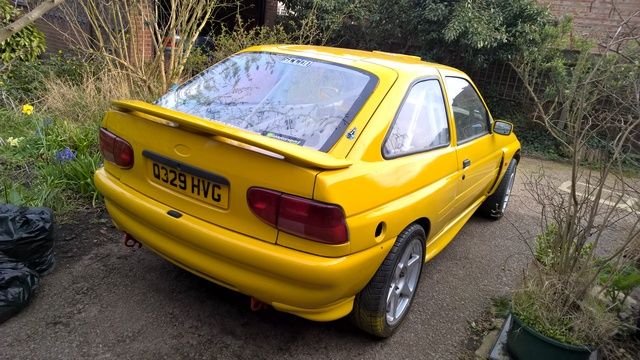 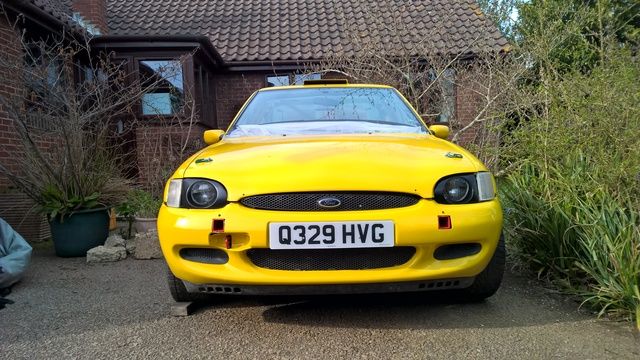 That's the bodywork pretty much finished now. I need to add a couple more rivets to the RH side skirt as my rivet gun gave up the ghost halfway through but that's about it until the vinyl goes on. Pretty pleased with the look. Glad I did the headlights in black as I think it breaks up the yellow a bit and adds a bit more aggression to the front end. I'm in the process of buying an MFactory gear kit so will be finishing off the gearbox mounts this weekend and then the box will come out to have the gear kit and Quaife diff fitted. Once that is done, all of the engine accessories can go back on and things should start to come together apace. I promise it will be over soon... |
| |
|
|
|
|
|
Jul 14, 2016 13:30:19 GMT
|
Just a small update: I've made up the lower gearbox mount but not taken any pictures. I've also dropped the gearbox off at a local place to have the diff and final drive from the old box fitted into it, along with these:  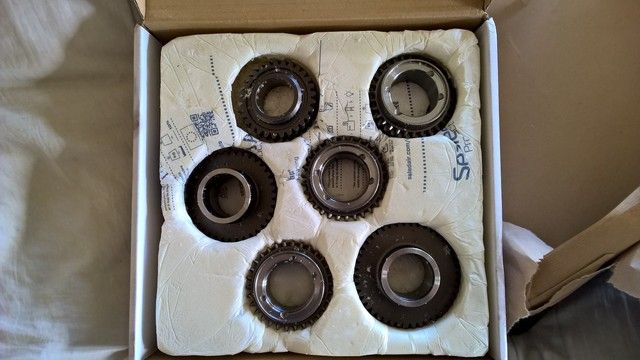 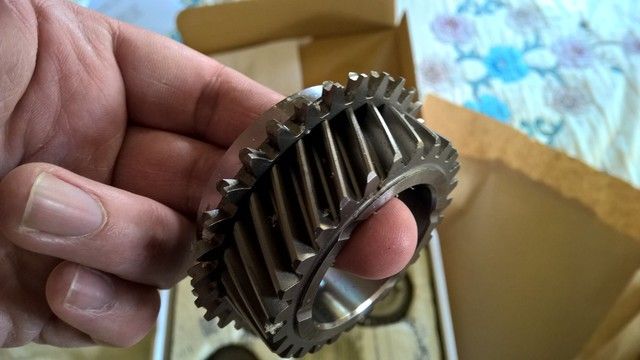 MFactory 3rd, 4th and 5th gear which should drop the top speed down to 110-115mph depending on the tyre size. Doesn't sound a lot but more than enough for most rallies and should help the car along a bit. Rarely used to get out of third or fourth so this should help make the post of the few ponies it's got. I've also bought the warning lights for the dash, some materials to make the interior rear quarter trim panels and dash board inserts and arranged to have a new loom made, so things are getting there. Once the gearbox is back, that will be fitted so then the shafts can go in, along with the alternator, exhaust rad etc etc. More to come soon. |
| |
|
|
|
|
|
Jul 14, 2016 13:32:05 GMT
|
Another small update. Picked the gearbox up having been rebuilt. Sadly they couldn't make the 3.8 RS final drive work but luckily they had a 3.56 out of another Focus box so only slightly longer. Means top speed will be around 118mph instead of 110 so still more than adequate for my needs. They even painted it silver. All of it. Even the selector mechanism and plugs for some reason. Very strange. Anyway, will be fitted once I buy and fit a new clutch release bearing so hopefully at the weekend. 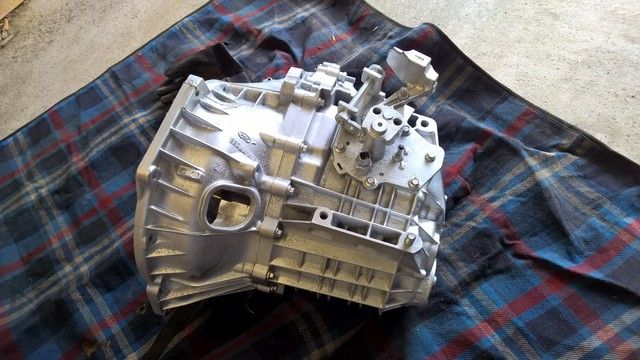  And no, you can't have the tartan blanket. Elsewhere, I didn't get much done as did some other stuff this weekend. I did fit the inner front arch guards though. These have been a total pain in the behind. Had previously been painted but every time I tried to repaint them, the primer reacted, so I had to sand them right back to the gel coat which was a bit of a t**t. Should have sanded them more so they were smooth, but a bit of a pointless exercise really. Anyway, they're black and fitted, so it's on to the next job. 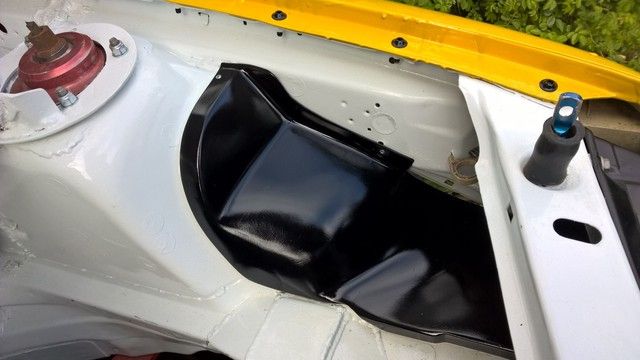 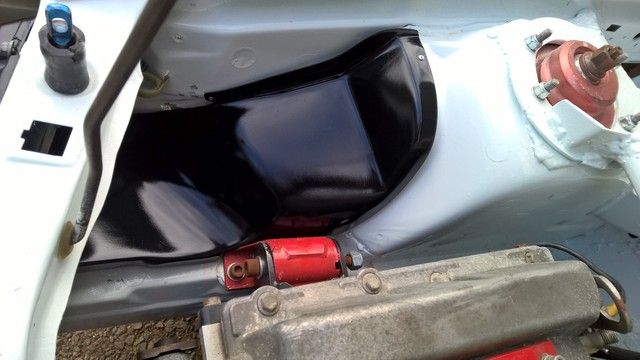 As I say, hopefully the box will go in at the weekend, then I can start messing around with drive shafts. Until next time. |
| |
|
|
|
|
|
Jul 14, 2016 13:33:22 GMT
|
More small updates. I had planned to fit the gearbox over the weekend but, after seeing @pauleds experience with his clutch, I've decided to replace it so the box should hopefully go in next weekend. Dropped the front hubs with my friend earlier to have new bearings fitted too, just because. Did a little work on the inside. Firstly, made an alloy bracket to hold the heater: 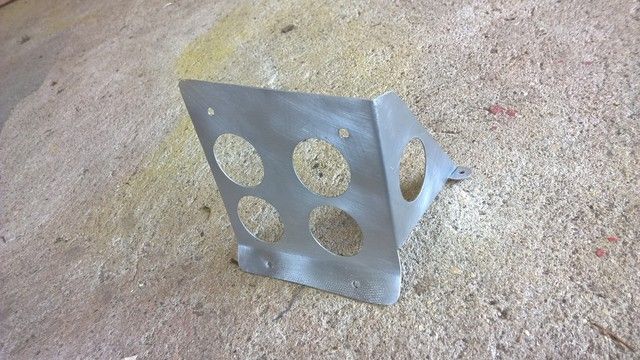  Also fitted the carbon centre console and cut-off switch bracket. Obviously this will be furnished with fuses and relays in due course: 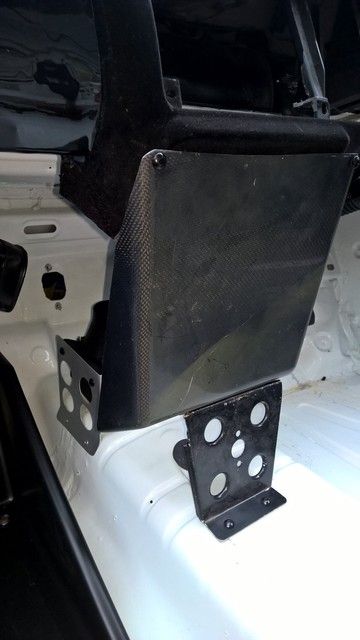 Dash is coming together a bit more. I ditched the LHS dash panel and replaced it with a loosely formed version made out of 1mm plastic sheet. Not the prettiest but an awful lot lighter than the standard piece. Also made a blank for the clock at the centre of the dash: 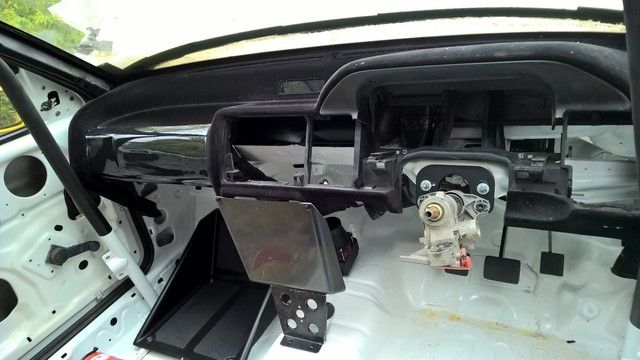 I've made a start on the main dash panel so will try and finish that off this week and also fit the gearbox/uprights/driveshafts hopefully. You can see the column lowering bracket in the picture too, though that column is just a placeholder as I have a lighter version to go in. Until next time. |
| |
|
|
|
|
|
Jul 14, 2016 13:34:58 GMT
|
Thanks to a couple of friends popping round yesterday, the gearbox is now fitted. This is probably the single biggest performance modification I've made, reducing the gearing significantly. Fitted a new Sachs clutch and slave cylinder while I was about it, as the old clutch was pretty worn. With the new mounts, the engine is pretty much solid, so that should make the thing vibrate a bit. Not sure how long the silver paint will last, but it was nice of the gearbox builder to put some effort in I suppose. 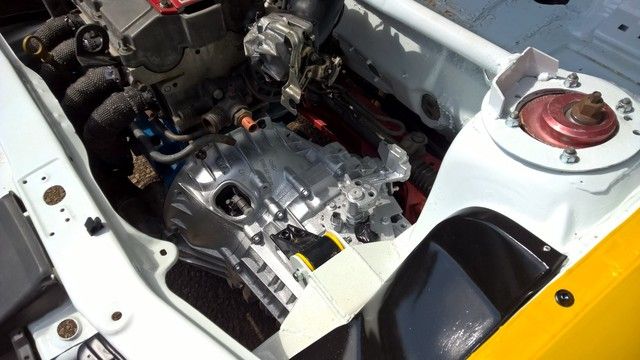 Heat-wrapped manifold fitted: 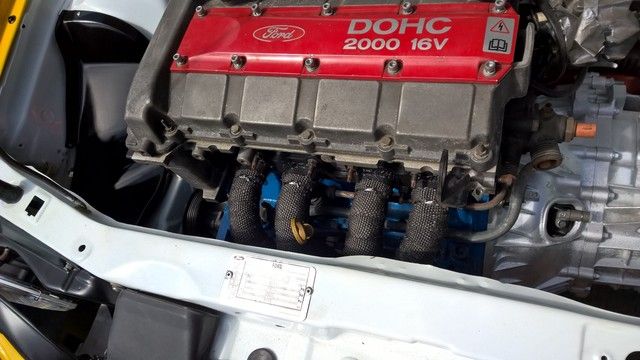 Also fitted the starter motor, alternator and PAS pump back on. Shame about the rusty engine mount bolts. Will probably just put some paint on them. Not taking it apart again.  Was going to put the new aux belt on but it didn't fit so I need to buy another one. I've got a spare cam cover to paint so will make a start on that. Waiting to get the front upright back with new bearings in them so, providing the drive shafts still fit, it should be rolling again by the weekend I hope. That brings things up to date from the other forum. I'm working on some updates at the moment but will probably post those all together once things are more certain. |
| |
|
|
|
|
|
Jul 14, 2016 13:37:55 GMT
|
Very nice work! If this is your 'rough' rally car for thrashing, I can't wait to see the other one get built! Haha thanks. I'd be lying if I said I hadn't gotten a bit carried away! |
| |
|
|
|
|
|
Jul 28, 2016 15:00:04 GMT
|
Been rather lazy and not updated this lately! Few bits been happening so let's get to it! Firstly, I've been trying to work out drive shafts. Thanks to the use of a Focus gearbox, the offside Escort shaft no longer fits. I've just bought a two piece shaft from a 2.0 Focus so I will give that a try and see how it works out length-wise. I will need to make a bracket for the intermediate bearing but that isn't too difficult. The length is the big issue (ooh err) so will have to see how that goes. One massive job, I fitted a MK2 Escort washer bottle in the boot: 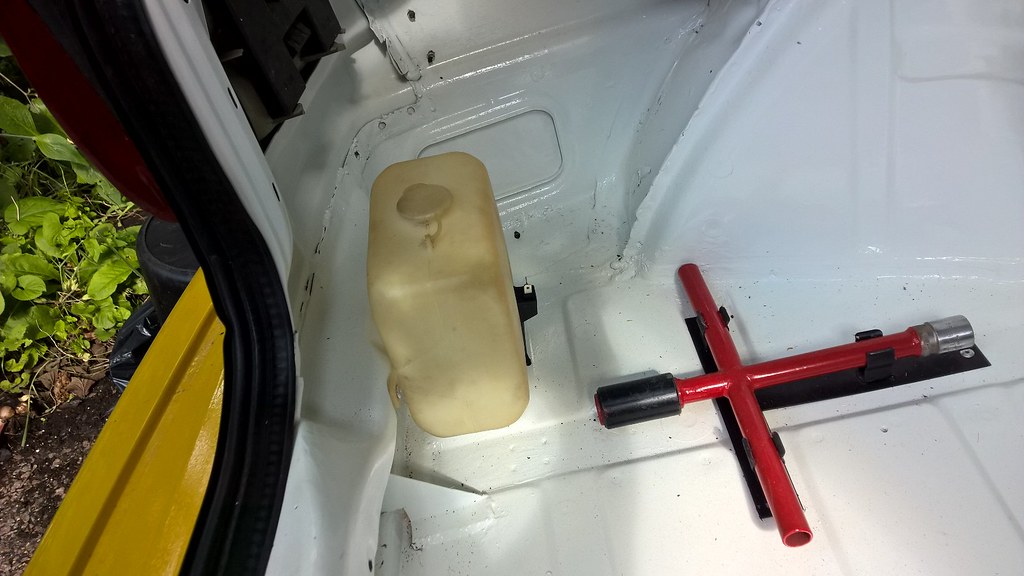 WP_20160626_16_11_46_Pro WP_20160626_16_11_46_Pro by Jon Scoltock, on Flickr Since taking that picture I've plumbed the pump into the washer jets, but no pictures of that. Inside the car, I've been making a cover for the fuel pump. I wanted to be able to remove the pump so wanted a bolt down cover, and wanted a bit of space for the fuel lines etc, so knocked this up using a spare piece of floor pan and some sheet steel:  WP_20160711_14_03_45_Pro__highres WP_20160711_14_03_45_Pro__highres by Jon Scoltock, on Flickr Painted and with fittings in: 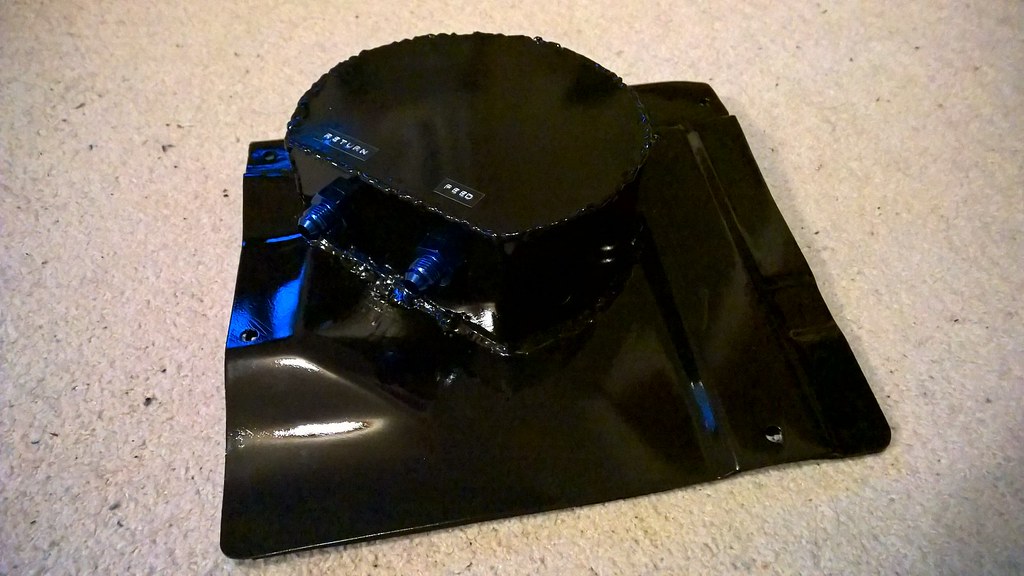 WP_20160723_21_12_02_Pro WP_20160723_21_12_02_Pro by Jon Scoltock, on Flickr Getting back to the engine bay, I fitted a black cam cover, just to tidy things up a bit. Also fitted another plug cover, but need to fit new stickers to it: 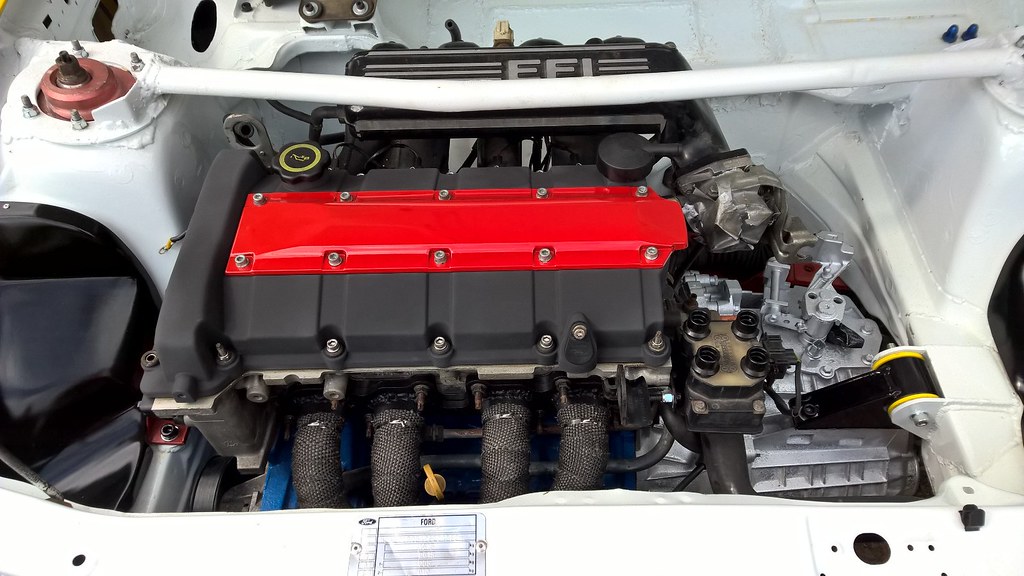 WP_20160626_15_55_11_Pro WP_20160626_15_55_11_Pro by Jon Scoltock, on Flickr Thanks to the Group A inner arch guards, the standard header/PAS tanks weren't really ideal. I had ordered a nice aftermarket one with AN fittings but it was going to take 3-4 months to turn up, so I picked up a Sierra PAS reservoir and mounted it on top of the bulkhead: 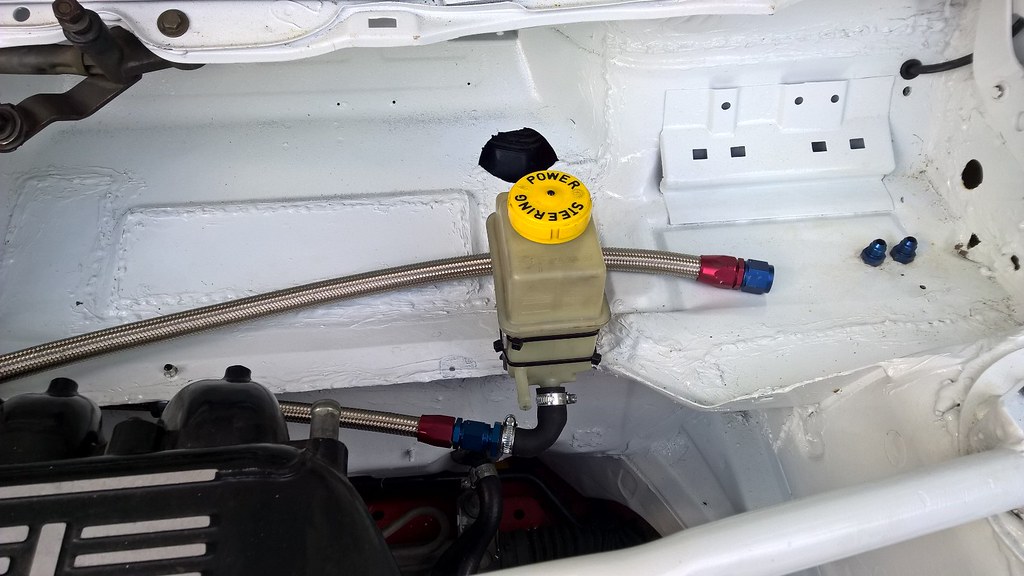 WP_20160702_17_18_08_Pro WP_20160702_17_18_08_Pro by Jon Scoltock, on Flickr I then bought an alloy header tank which was a sensible size but unfortunately it had the outlet on the bottom, which wasn't a lot of use: 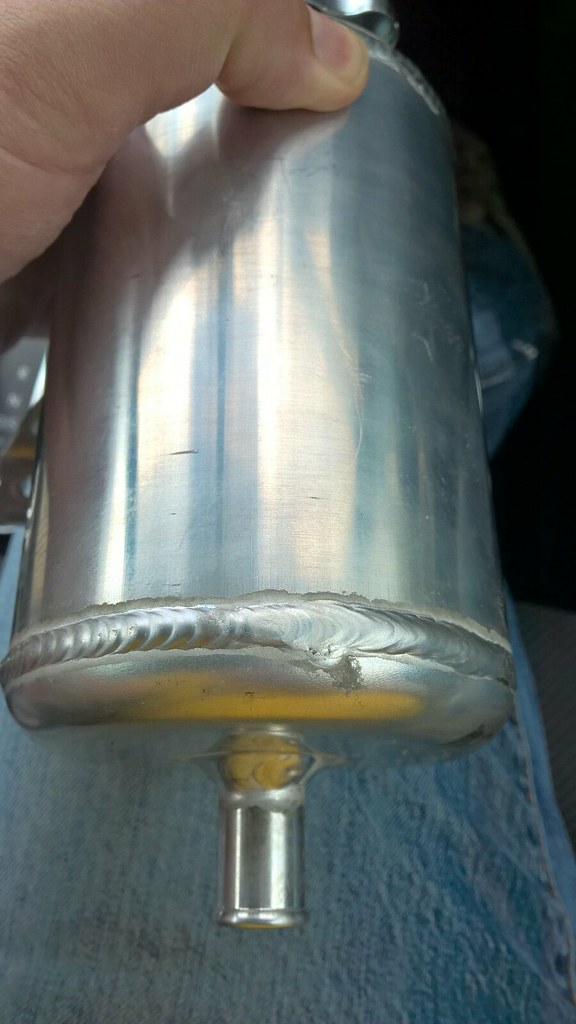 WP_20160708_13_49_40_Pro WP_20160708_13_49_40_Pro by Jon Scoltock, on Flickr So a friend of mine welded up the original outlet and welded in a new one on the side for me: 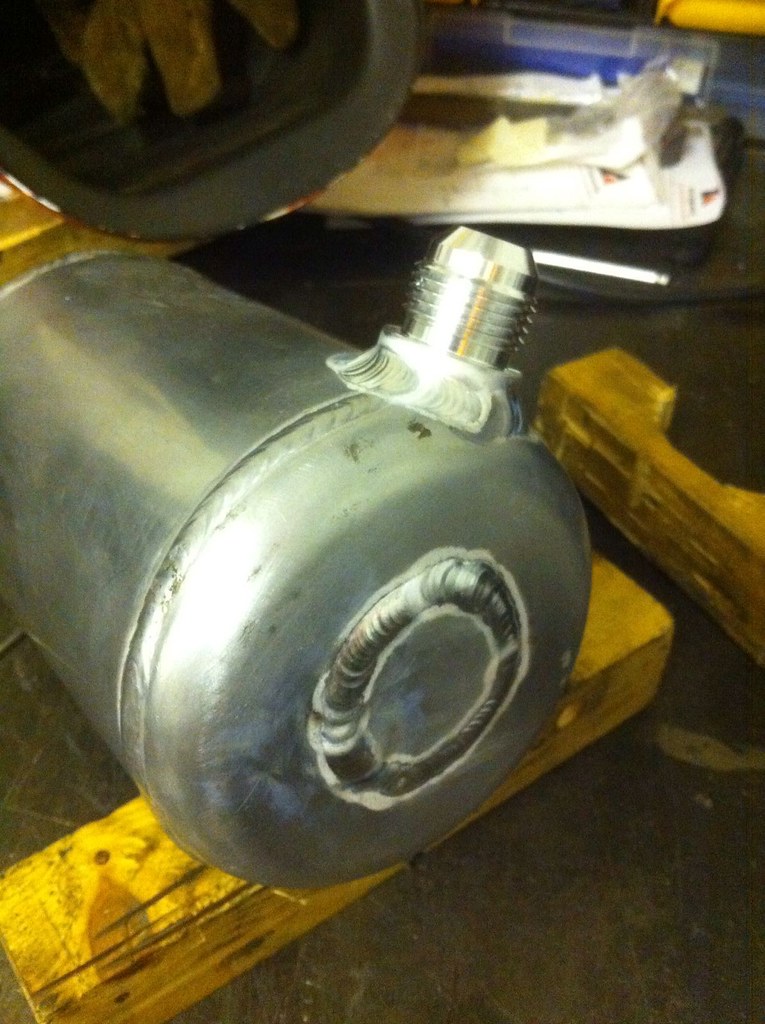 IMG-20160716-WA0004 IMG-20160716-WA0004 by Jon Scoltock, on Flickr The header tank could then be fitted in place:  WP_20160723_17_15_19_Pro WP_20160723_17_15_19_Pro by Jon Scoltock, on Flickr Coolant and PAS feeds running down to their respective pumps: 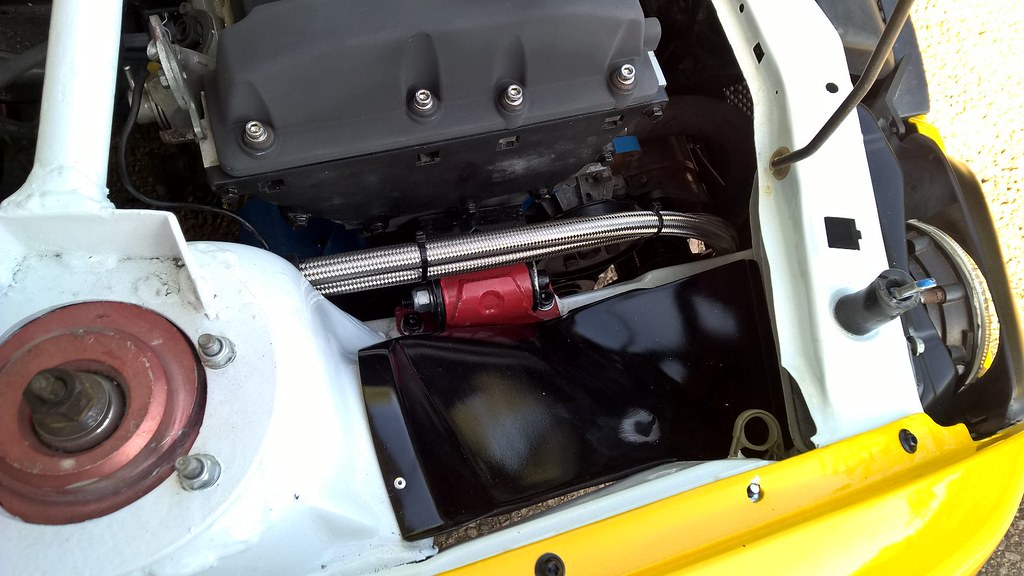 WP_20160723_17_15_35_Pro WP_20160723_17_15_35_Pro by Jon Scoltock, on Flickr Also fitted the brake/clutch reservoirs: 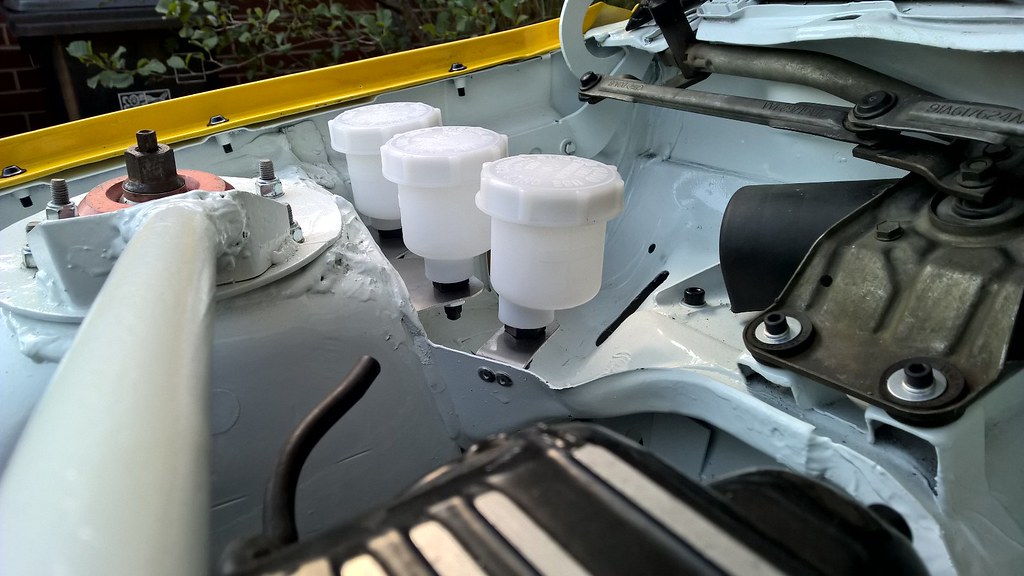 WP_20160723_17_15_54_Pro WP_20160723_17_15_54_Pro by Jon Scoltock, on Flickr To leave an engine bay that is looking a bit more complete: 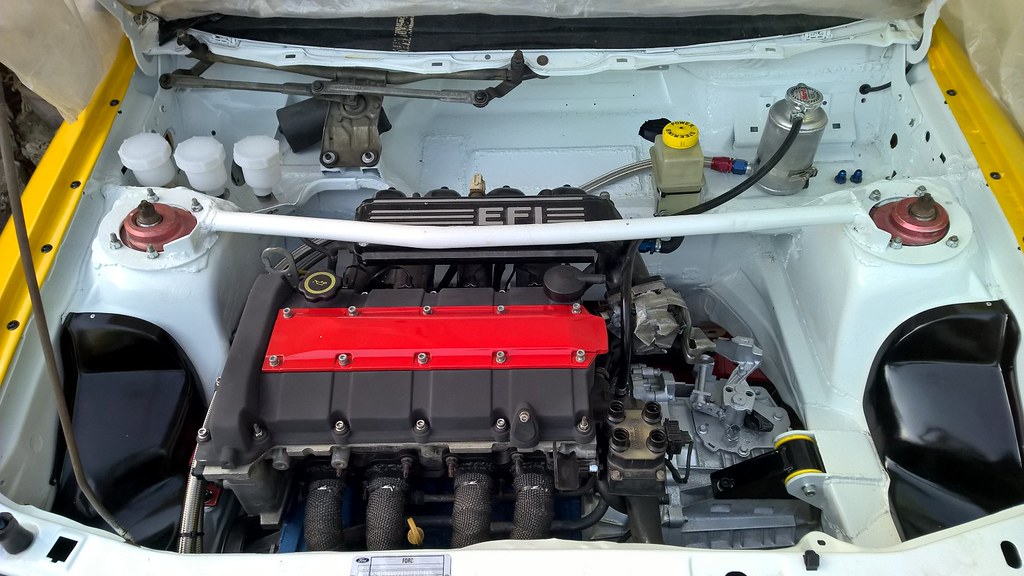 WP_20160723_17_15_27_Pro WP_20160723_17_15_27_Pro by Jon Scoltock, on Flickr The cooling system is now fully plumbed in, as well as the PAS system. The next job is to buy the bits to make up the brake lines, as I've been putting that off while I try and work out how best to route everything. Having the reservoirs in position helps with that a bit though, so I can start measuring up and then order the necessary bits to do the brakes. Once the drive shafts are finally sorted I will be able to move it around again which will be useful. Until next time. |
| |
|
|
adam73bgt
Club Retro Rides Member
Posts: 4,867
Club RR Member Number: 58
Member is Online
|
|
Jul 28, 2016 16:08:31 GMT
|
Just read through this from the start, what a transformation! Impressive amount of work going in  will almost be a shame to get it all muddy  |
| |
|
|
luckygti
Posted a lot
 I need to try harder!
Posts: 4,912
|
|
|
|
|
Just read it through too. I have a real thing for the Mk5 RS2000 and one is high on my wish list. Loving the way this is going though, I think it looks great.
|
| |
Last Edit: Aug 1, 2016 21:07:33 GMT by luckygti
|
|
|
|
|
|
|
|
Fantastic build looking forward to more
|
| |
1988 Ford Fiesta Popular Plus Daily
1978 Triumph Spitfire Project
2002 Nissan Almera Tino Budget Build!
|
|
|
|


 will almost be a shame to get it all muddy

