|
|
|
|
|
So, this thing has come to roost in my shop. It is an Australian built MGB that has seen a lot of the world during its years. Sadly, it came to this due to a young woman and a cell phone who did not see the little MG below her SUV. Insurance declared it a write-off, but what do they know eh? Going to break out the big buffer and see what I can do.   The good news is that nobody was permanently hurt and since the SUV bumpers are so high off the ground, the sheet metal damage is above the frame structure and mostly cosmetic. Of course the car did go off to the frame shop for a good pull to make sure all the bits critical bits below were where they are supposed to be. It then got pushed into my shop. Wasting no time getting the crumpled bits off. Note that the car is pretty much perfectly rust free Thank God!  They sure used a lot of lead to cover up the wing to scuttle interface; its a good 1/4" thick. Wont be getting lead unless I get curious about how to do that stuff.  One side off. Still a lot of clean-up on the flanges going to be required.  Trunk panel and other side next.... |
| |
|
|
|
|
vulgalour
Club Retro Rides Member
Posts: 7,083
Club RR Member Number: 146
|
|
|
|
|
That's practically brand new under the crumpled decorative panels. Watching with interest on this one.
|
| |
|
|
|
|
|
|
|
|
Normal equation these days; Young woman + phone + large car = CRUNCH (at some point). That looks in very good overall nick, mate.
|
| |
Rover Metro - The TARDIS - brake problems.....Stored
Rover 75 - Barge
MGZTT Cdti 160+ - Winter Hack and Audi botherer...
MGF - The Golden Shot...Stored
Project Minion........
Can you see the theme?
|
|
jpsmit
Posted a lot

Posts: 1,254
|
|
|
|
Looks like a really solid start. I am just going to put this here as another possibility for the shell rps-ltd.info/images.html |
| |
|
|
|
|
|
|
|
|
I had a very similar accident in my elan +2 a few years ago, young lad in a Toyota Landcruiser rear ended me when stationary, fortunately nothing in front though. Upper body from the doors back had to be replaced but chassis, boot floor etc undamaged, a bit daunting but actually turned out a pretty easy repair, new section bonded in along all the original joints except a short butt jount on the sills.
After the volvo/mx5 this should be pretty easy for you!
|
| |
|
|
|
|
|
|
|
Amazing how much time drilling spotwelds takes up. This thing is going to look a bit stubby before it looks better  There might be a silver lining to this project. This is the backside of the original quarter pane archl. I would guess that this was not too far from anouncing itself on the outside of the bodywork. Also, it would appear that someone has been here before me.  Previous dogleg repair:  Jumping ahead to what I want to see!  So far the only problems I forsee are the aftermarket panels that were supplied. In the past six MGBs that I have done, I have nothing good to say about aftermarket panels other than they are better than nothing. But never by much. If you are going to be working on an MGB, do yourself a huge favour and buy the heritage panels. If you are paying for the job, there will be negative savings with aftermarket panels. |
| |
|
|
glenanderson
Club Retro Rides Member
Posts: 4,107
Club RR Member Number: 64
|
|
Jul 11, 2016 18:50:50 GMT
|
|
Bookmarked.
It's no wonder they rust so badly in less temperate climates, there's barely any paint/protection on those hidden panels.
|
| |
My worst worry about dying is my wife selling my stuff for what I told her it cost...
|
|
vanpeebles
Part of things
I am eastbound in pursuit of a white Lamborghini, this is not a recording.
Posts: 978
|
|
Jul 11, 2016 20:12:59 GMT
|
Good luck with this one  People who drive while using mobiles should have their ears cut off, Reservoir Dogs style. |
| |
|
|
jpsmit
Posted a lot
Posts: 1,254
|
|
Jul 11, 2016 20:36:12 GMT
|
Looks like a really solid start. I am just going to put this here as another possibility for the shell rps-ltd.info/images.htmlSo, having written this as a kit car option, I looked again at this and the other thread - are you located in Ontario? If so, where? And have I asked this before? Amazing work! |
| |
|
|
|
|
|
Jul 11, 2016 21:23:47 GMT
|
Looks like a really solid start. I am just going to put this here as another possibility for the shell rps-ltd.info/images.htmlSo, having written this as a kit car option, I looked again at this and the other thread - are you located in Ontario? If so, where? And have I asked this before? Amazing work! London Ontario would be home base. Not my car just helping out a guy who likes it enough to want to fix it after this mishap. |
| |
Last Edit: Jul 11, 2016 21:25:11 GMT by bjornagn
|
|
|
|
|
|
|
Jul 18, 2016 15:35:17 GMT
|
Making decent progress on this car. The crumpled quarter on the RH side if completely removed along with all the fiddly no fun to get at spotwelds (actually not too bad for that). While I have done a bunch of MGB shell rehabs, this is not only the first full quarter replacement I have done, I was surprised to find no documentation on the process in my Google searches. Used to hang on the MG Experience and even on that forum I could find nobody that has done a full quarter replacement. So what I learned: The quarter comes off easy enough until you get to the B post. Then it stops making sense. A smart person REALLY does not want to remove that B post panel, because the car was put on the chassis rack and delivered with good gaps. I need to keep the reference points. After hours of head-scratching, I resigned myself to removing the B post panel. What all the thinking did was to convince me that I had to remove the B post without altering the door latch mechanism. That just makes the job funner. Using the spot weld marks, I am confident that I can get the B post panel back on where it came from and maintain the door position. Here it is back together. If you look at the red dots, you can see that the spotwleds are on different plains. Clever bit of engineering in that the two pieces snap together like a puzzle piece. Pain in the ass for the poor guy replacing a full quarter. A body shop would have cut and grafted the new quarter just behind the B post to save time.  Here is a new one on me. See the little plate welded on top of the sill? I have done about 6 of these sill restorations and I don't recall ever having seen that bit. Is it particular to the Aussie cars or is it just another sign of old age?  Another anomaly. This one will curse word off the Brit crew who seem to battle rust on an endless war: This is the original sill on the car. The car has had one dogleg repair in its past. What is strange is that the inner sill is still solid. Typically the inner bit pretty much mirrors the outer dogleg. ![]() ![]()  |
| |
Last Edit: Jul 18, 2016 15:36:10 GMT by bjornagn
|
|
|
|
|
Jul 19, 2016 11:38:28 GMT
|
|
Thanks for the views and "Thanks" on the post. It is good to know someone is actually interested in this obscure bodywork stuff.
|
| |
|
|
samta22
Club Retro Rides Member
Stuck in once more...
Posts: 1,274  Club RR Member Number: 32
|
|
Jul 19, 2016 12:39:41 GMT
|
Definitely interested - not to derail this thread so I'll try and get round to sorting one for it, but this is mine at present  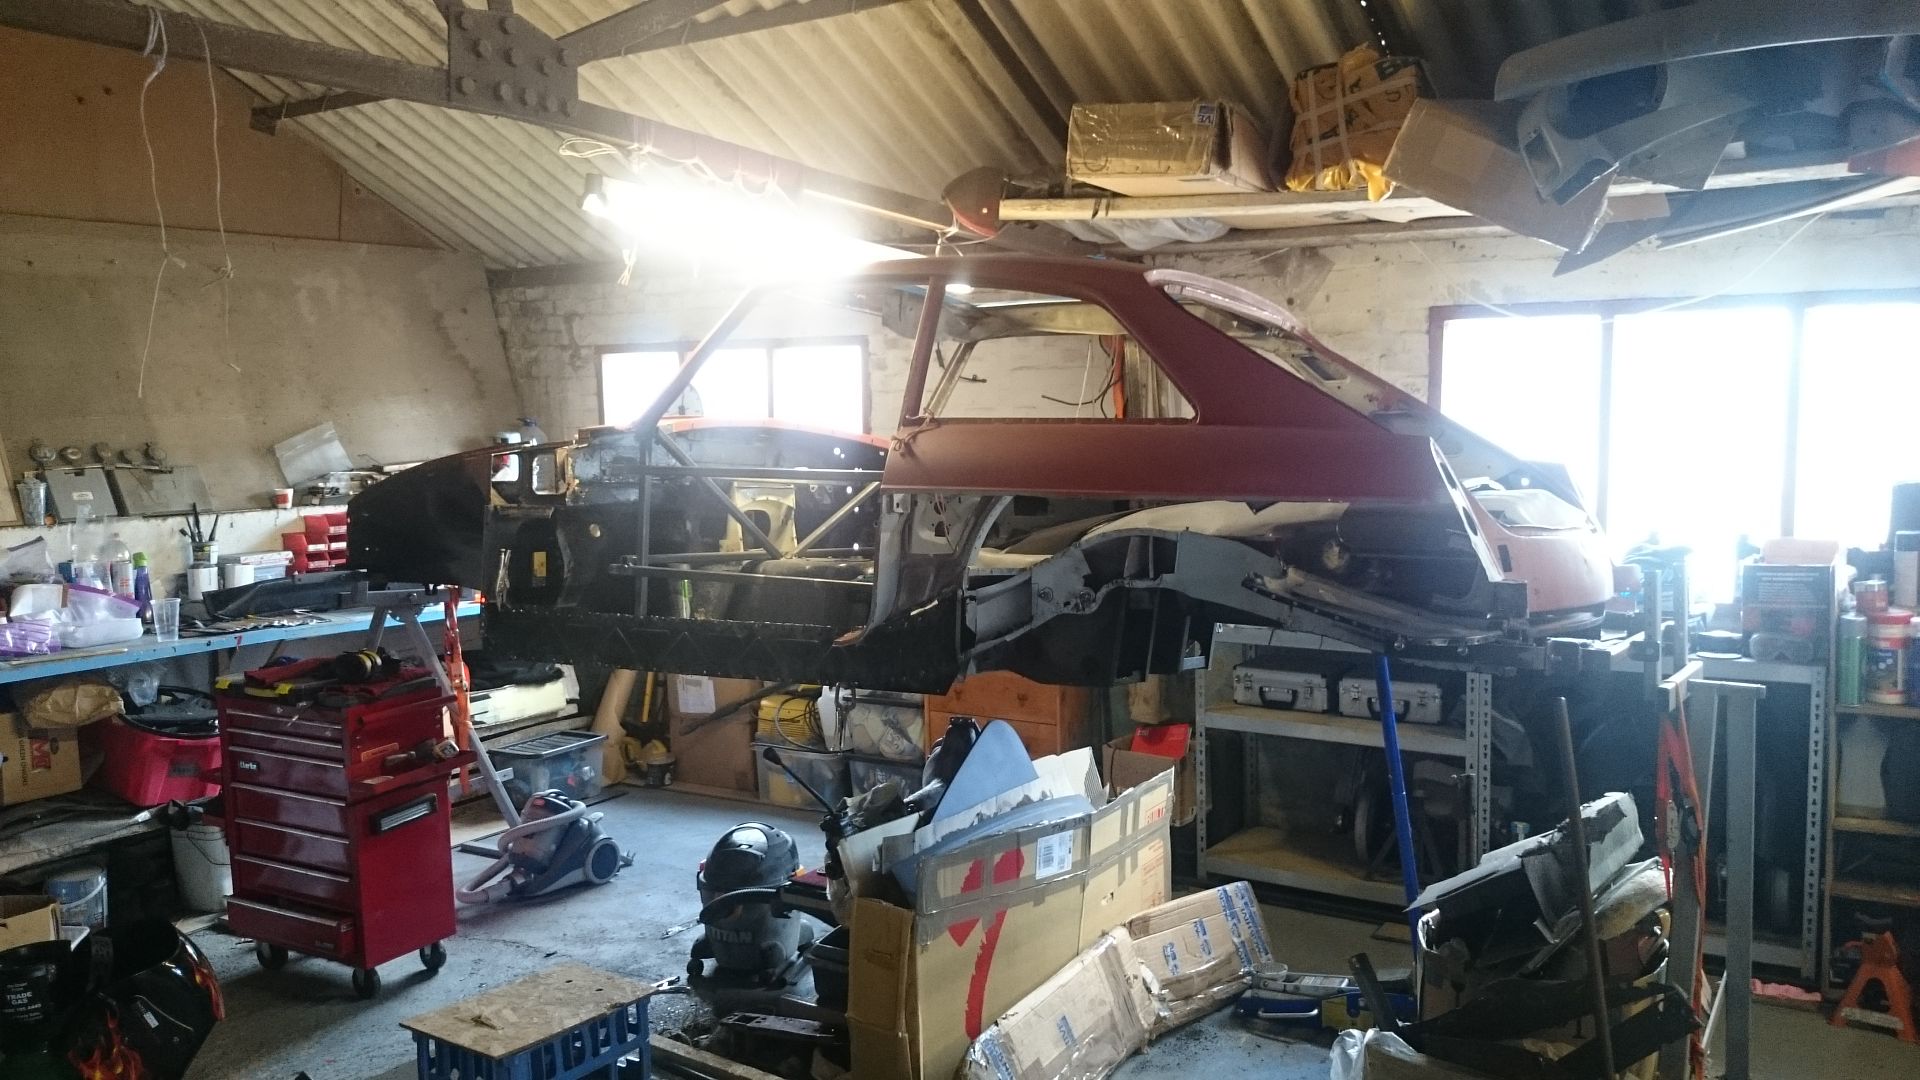 Some major reconstructive surgery happening after (many) previous bodges. |
| |
'37 Austin 7 '56 Austin A35 '58 Austin A35 '65 Triumph Herald 12/50 '69 MGB GT '74 MGB GT V8'73 TA22 Toyota Celica restoration'95 Mercedes SL320 '04 MGTF 135 'Cool Blue' (Mrs' Baby) '05 Land Rover Discovery 3 V8 '67 Abarth 595 (Mrs' runabout) '18 Disco V |
|
|
|
|
Jul 19, 2016 14:27:33 GMT
|
Samta: Good to see you are doing it right. We are very lucky to have quality panels from BMH. What I am doing here is a doodle compared to what you are doing, but the message to anyone looking and thinking we are bonkers is "Get stuck in and do it right". Here is a pic of my first MGB. The roof panel is the only panel in the picture that came from the factory. Curious why you did not opt for the full rear quarter panels that go up into the C pillar, since you are going as far as you are with your rebuild?  Just for perspective. I posted this pic above after cutting most of the old wing off. Looks close to done eh? This is seven hours later, after mucking about with the mating surfaces and B post.  Overall I am happy with the panel fit, but I am guessing another 7 hours of fettling before I strike an arc, and then only after I have got all around to the other side and the panels are temporarily held in place with sheet-metal screws. Note the trim line on the new panel is not lined up with the door. The door and rear wing were aligned when I started, so need to get back to that. |
| |
|
|
samta22
Club Retro Rides Member
Stuck in once more...
Posts: 1,274
Club RR Member Number: 32
|
|
Jul 19, 2016 16:35:54 GMT
|
Oh there was only one way to do this GT, properly or not at all - it was seriously bad underneath! Worryingly I did have it MOT'd and on the road for a short while but when investigating a cracked rear spring and deciding I may as well refurbish the whole axle, I spotted the rear subframe resembling swiss cheese and barely holding together and so things spiraled out of control. Car is a little more progressed that the last picture as I did get the full heritage panels in the end so chopped the rest out. Likewise with the complete side assembly which incorporates the footwell side, A post and outer sill sections underneath it, you can also spot the complete rear wheel arch assembly which is also now fitted. Here it is all pinned in place to check panel fit and alignment. 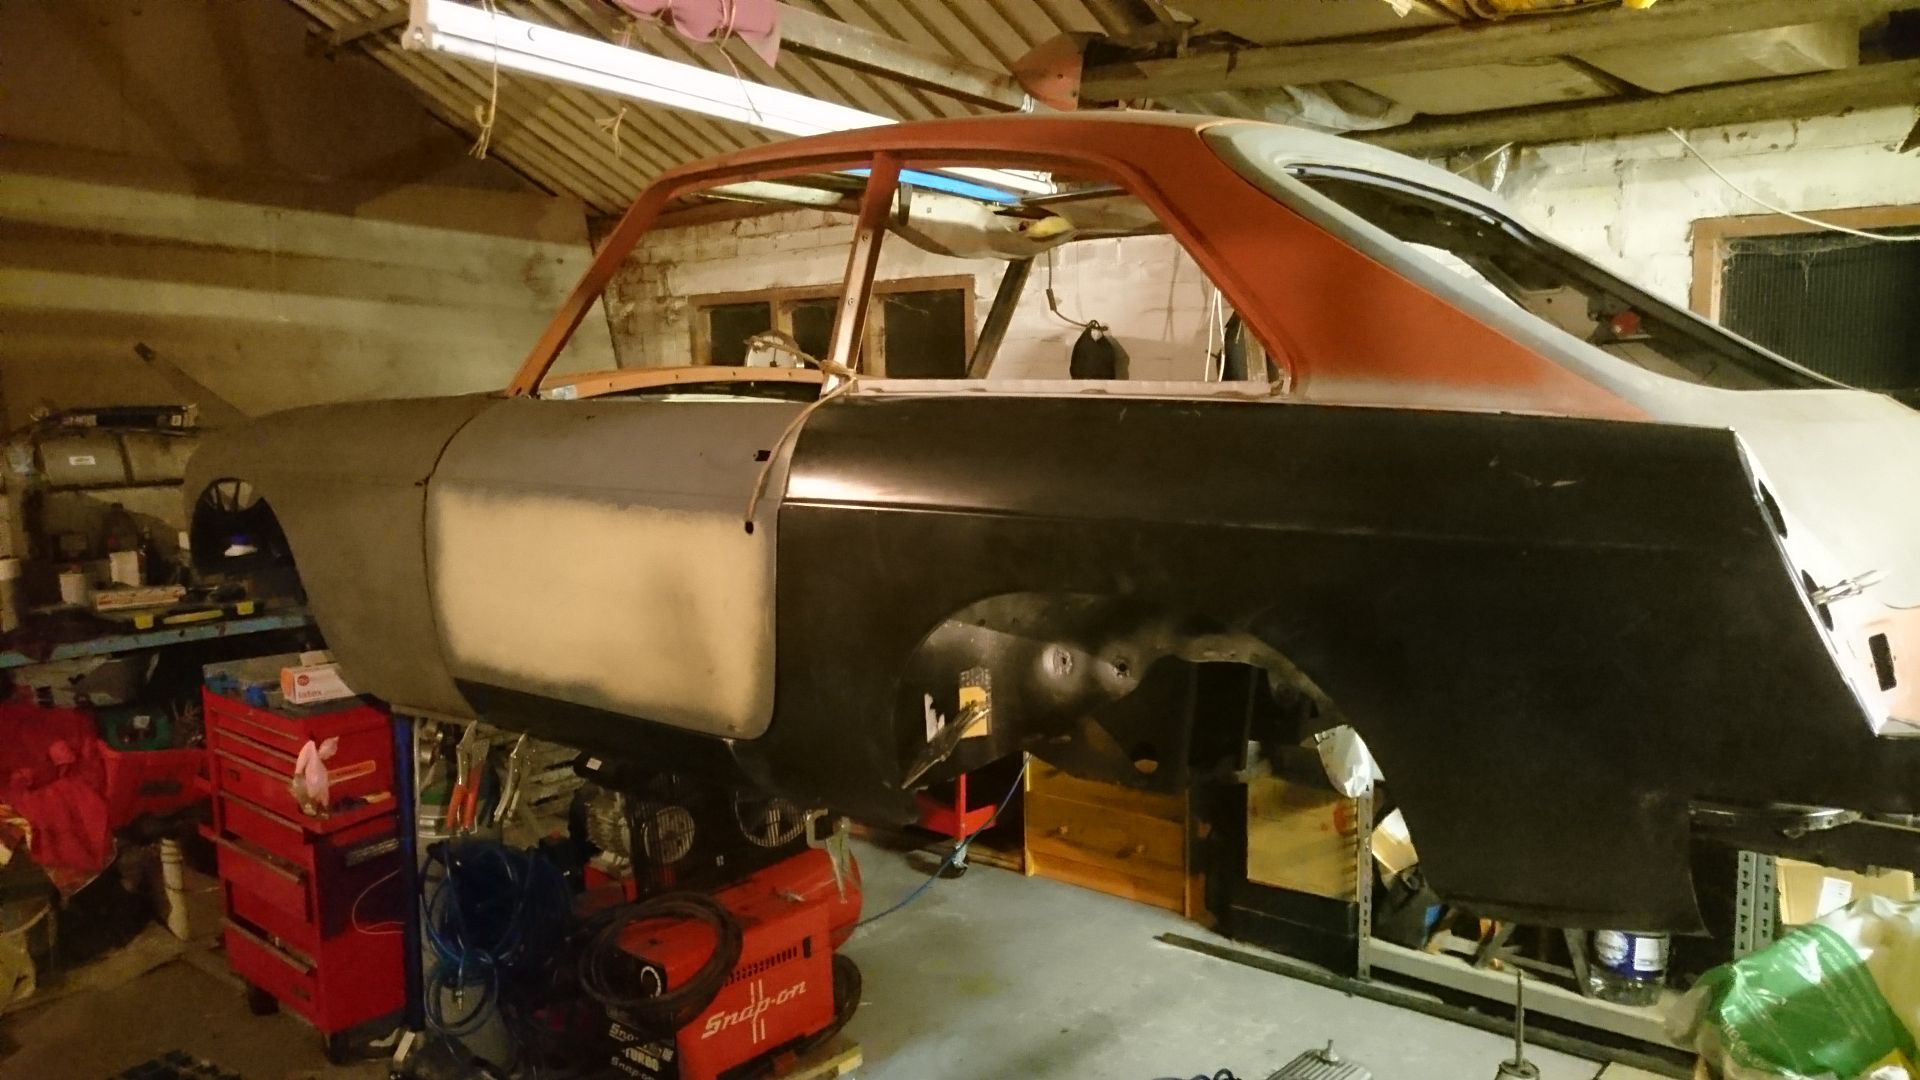 [/URL] and yes the front wing was slightly off but door gap to sill and rear wing were nice and even - bailer twine was to stop the door opening  . |
| |
'37 Austin 7 '56 Austin A35 '58 Austin A35 '65 Triumph Herald 12/50 '69 MGB GT '74 MGB GT V8'73 TA22 Toyota Celica restoration'95 Mercedes SL320 '04 MGTF 135 'Cool Blue' (Mrs' Baby) '05 Land Rover Discovery 3 V8 '67 Abarth 595 (Mrs' runabout) '18 Disco V |
|
|
|
|
Jul 19, 2016 22:08:19 GMT
|
Reading & enjoying |
| |
|
|
|
|
|
|
|
|
|
Bit more progress tonight. When I last left off, I had just got the rear quarter panel fit about where I wanted it to be. The rear panel, however, did not want to play nice with anything anywhere. So I called it a night. Tonight after about an hour or so of fettling, she popped right where she needs to be. So, I guess I can say I have "Turned the corner" on this job.  The real test will be when I fit the LH quarter panel and find out if everything wants to meet in the middle. |
| |
|
|
|
|
|
Jul 22, 2016 14:06:09 GMT
|
Sent the E36 M3ty trunk pan back to the supplier and sourced a proper BMH panel. So much better and even at $300 more, it probably saved the owner money over cutting up the Chinese part to make it fit. Not to mention it would look like curse word when all said and done.  Two more pieces (LH quarter and trunk lid) and we can see how much trouble I am going to be in getting all the gaps to work. To those following along at home, you are looking at about $3000 Canadian worth of tin to do the rear repairs. About the same for the front bits. |
| |
Last Edit: Jul 22, 2016 14:09:10 GMT by bjornagn
|
|
glenanderson
Club Retro Rides Member
Posts: 4,107
Club RR Member Number: 64
|
|
|
|
|
Nice. There's nothing worse than poor panels. You're better off starting from scratch than with some of the rubbish out there. MG owners are so lucky with the availability of BMH parts; I really wish other manufacturers offered quality "heritage" panels for their old models.
|
| |
My worst worry about dying is my wife selling my stuff for what I told her it cost...
|
|
|
|


 People who drive while using mobiles should have their ears cut off, Reservoir Dogs style.


 .
.