|
|
|
|
|
|
I was seriously tempted by that when it cropped up on Car & Classic... being ex-BR myself I nearly bought it but I had a wedding to shell out for and a stressed wife; which is a BAD combination when you mention "Look what I've seen dear...."
Still wouldn't mind a Maestro van to replicate a BR van with - I need a cr@p hauler/ parts chaser anyway (an Ital or Marina would be better though....)
|
| |
Rover Metro - The TARDIS - brake problems.....Stored
Rover 75 - Barge
MGZTT Cdti 160+ - Winter Hack and Audi botherer...
MGF - The Golden Shot...Stored
Project Minion........
Can you see the theme?
|
|
|
|
|
|
|
|
|
|
Back in the late 80s I killed two of these on separate occasions whilst thrashing the guts out them delivering parts for lexmead, never got the sack!! Such carefree days back then this thread has made me want one now !
|
| |
Fraud owners club member
1999 Jaguar s type
1993 ford escort
|
|
|
|
|
May 27, 2016 19:46:45 GMT
|
marinanut - I didn't know it was on C&C. Couldn't you have just told her you'd sorted out her wedding transportation! I'd love an Ital or Marina van, good luck finding one though! mercdan68 - I can imagine them being fairly fragile, mine definitely needs the valve clearances adjusting as it's a bit loud. I've heard gearboxes are weak spots? So time for an update on the Maestro van! When I bought him I was made aware that a problem had developed with the brakes. Basically the pedal went to the floor as though you were bleeding the system. At the very end of the pedal travel it would apply the brakes though. This was very strange considering none of the fluid was missing and it wasn't leaking out anywhere. So first job was to get him up on stands and give it a bleed. 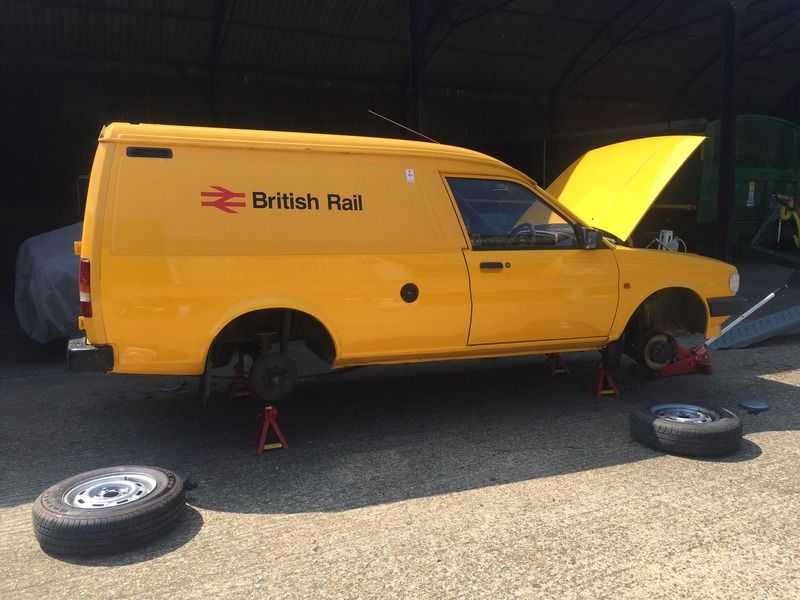 Turns out I'm only getting air out of one of the lines from the dual system from the 'Easy Bleed'. This lead me back to the master cylinder as the other circuit would bleed nicely. 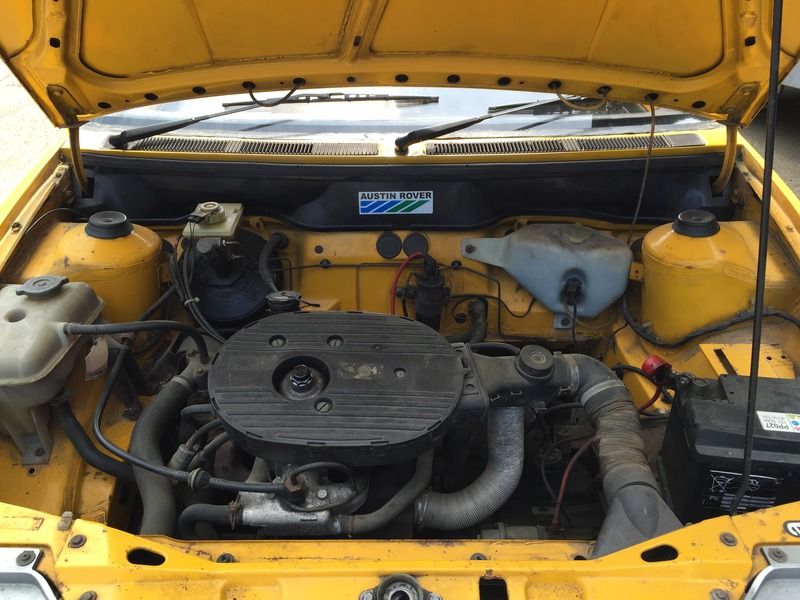 So I decided to strip down the master cylinder. 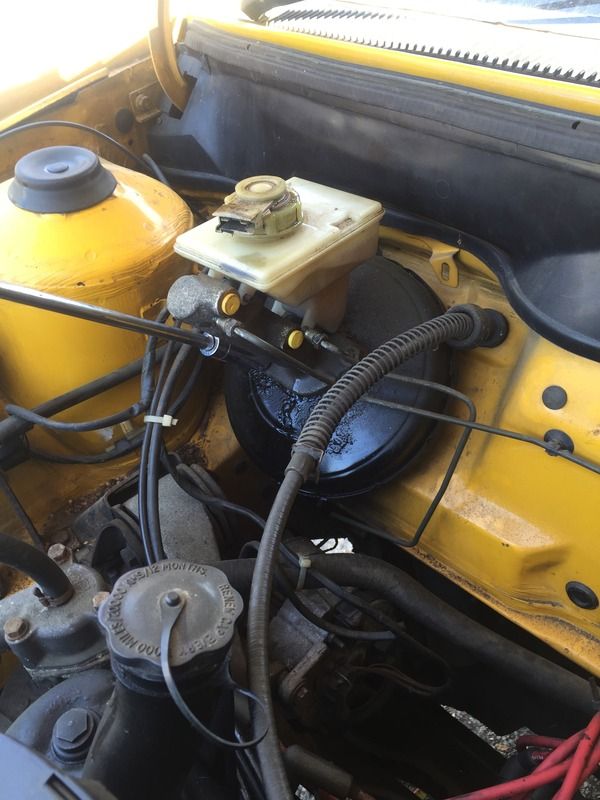 Once the cylinder was removed the servo was looking like this. This simply won't do and will need restoring. 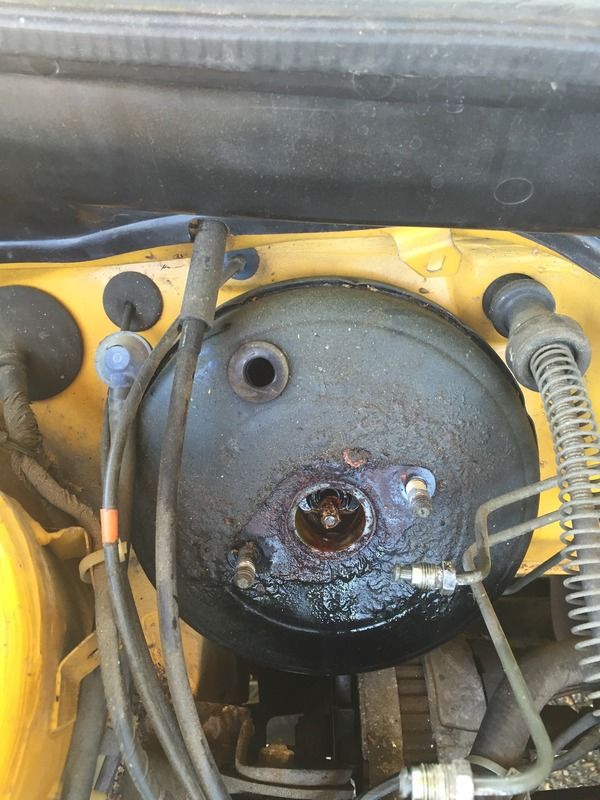 Unbolted the servo and removed the linkage from the brake pedal. 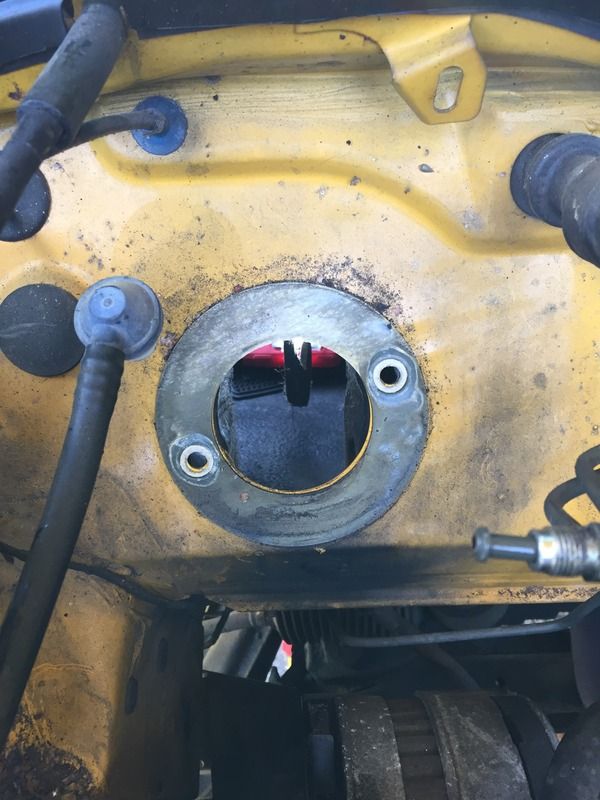 On inspection the fluid hasn't broken through to the inside of the servo so I'll rub this down fully and repaint it. It'll go again. 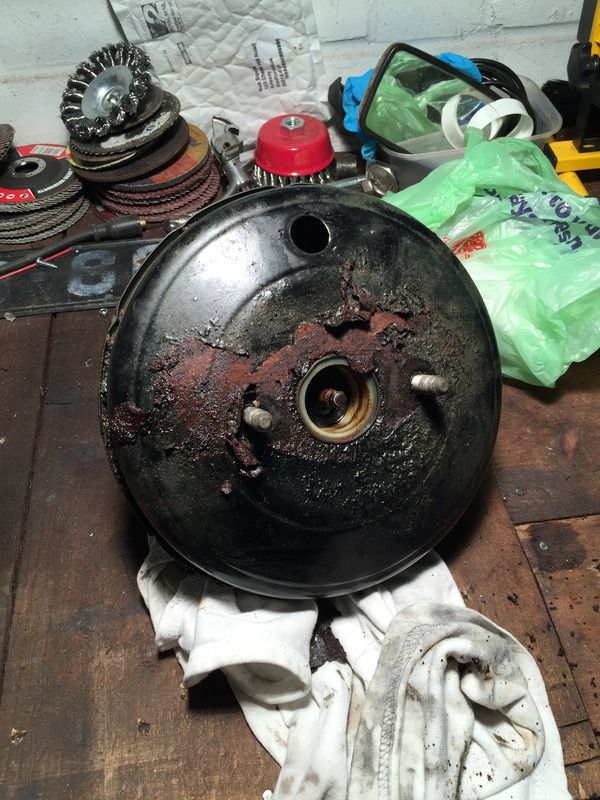 The master cylinder now got the strip down treatment. 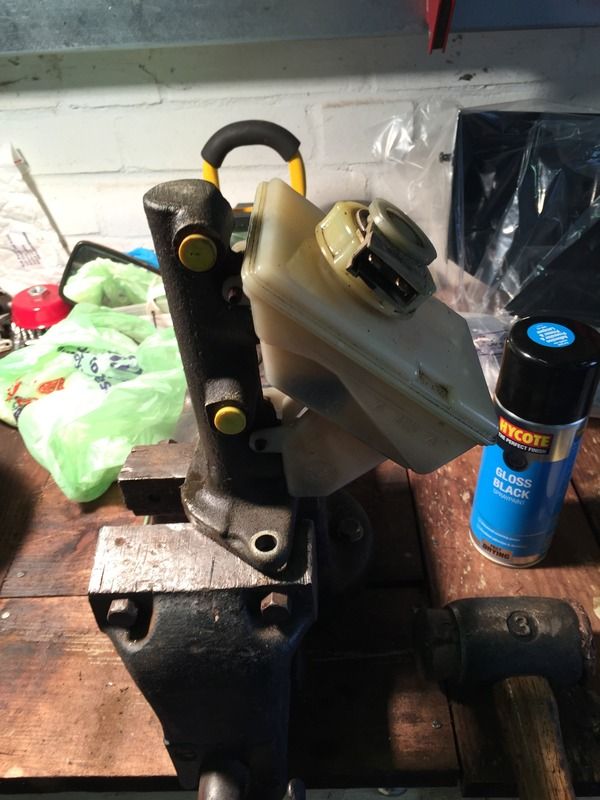 I stripped it down and found that the secondary piston was at fault, the seal wasn't holding so a new master cylinder has been ordered.  The new cylinder doesn't come with a new reservoir so I gave the old one a thorough clean and degrease ready for the new cylinder. 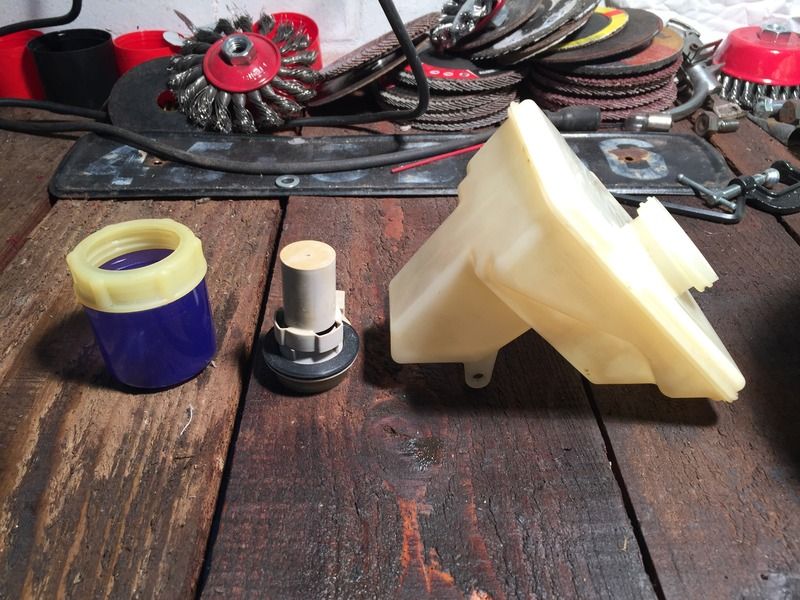 The new cylinder won't be here till next week so I had to leave it for now. Was quite pleased to find this under the bonnet. A nice little feature of the old fleet workshops I'm guessing? Gives me some help when it comes to servicing. Nice little touch. 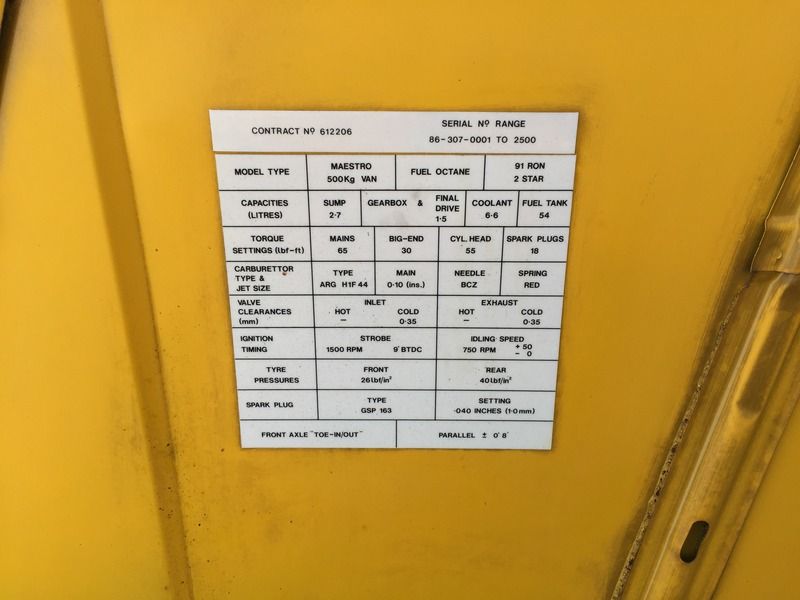 Thanks for looking and all comments welcomed. |
| |
Twitter @w0rd5w0rth
1957 Ford Prefect
1965 Austin 1100 4 door
1968 Fiat 500L
1969 Ford Escort Super
1971 Vauxhall Viscount
1974 MGB GT
1978 Vauxhall Cavalier GL
1981 Ford Capri GL
1982 Ford Cortina Crusader
1985 Vauxhall Cavalier L
1987 Austin Maestro City 500
1987 Ford Fiesta 1.1L
1988 Volvo 240GL
1989 Ford Sierra Cosworth
1991 Fiat 126 BIS
1993 BMW 740i
1997 BMW M3 Evo
1998 Ford Transit Beavertail
2002 MINI Cooper S
|
|
|
|
|
May 27, 2016 22:54:27 GMT
|
|
Well, if you ever get fed up with it you know where I am.......
|
| |
Rover Metro - The TARDIS - brake problems.....Stored
Rover 75 - Barge
MGZTT Cdti 160+ - Winter Hack and Audi botherer...
MGF - The Golden Shot...Stored
Project Minion........
Can you see the theme?
|
|
|
|
|
|
|
I'd love an Ital or Marina van, good luck finding one though! There is a driveway bound Ital van near me but it is just the slightest bit frilly...!!! Should I pop a note through the letterbox?! Your Maestro Van is looking superb and, yet again I am very envious of you!!! |
| |
***GARAGE CURRENTLY EMPTY***
|
|
|
|
|
May 28, 2016 17:28:41 GMT
|
marinanut - See the below update, you might change your mind! grifterkid - Thanks fella I know I can always count on you. Stick a note through the door and see what happens lol! Ok time for an update on the van now that I'm on a roll. Firstly I rubbed down the servo ready for painting. 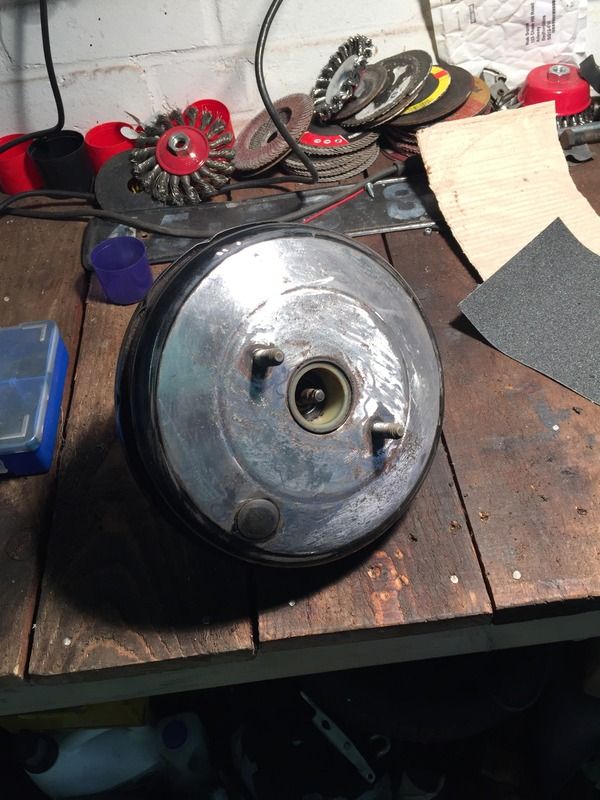 Then after a few coats of primer and a couple of coats of gloss black it was starting to look ready the new master cylinder. 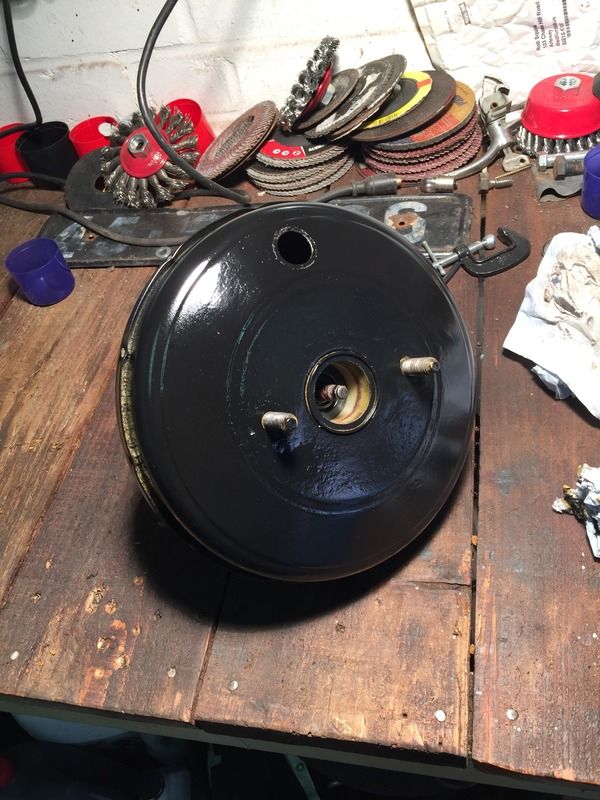 I feel better about fitting it back on the van now with a nice new master cylinder. When I was removing the servo originally I couldn't help but notice I was getting rather wet from the soggy floor! I decided to investigate this further, immediately regretting I had. First up I removed the plastics floor lining. This will clean up nicely.  The sound deadening was completely sodden. 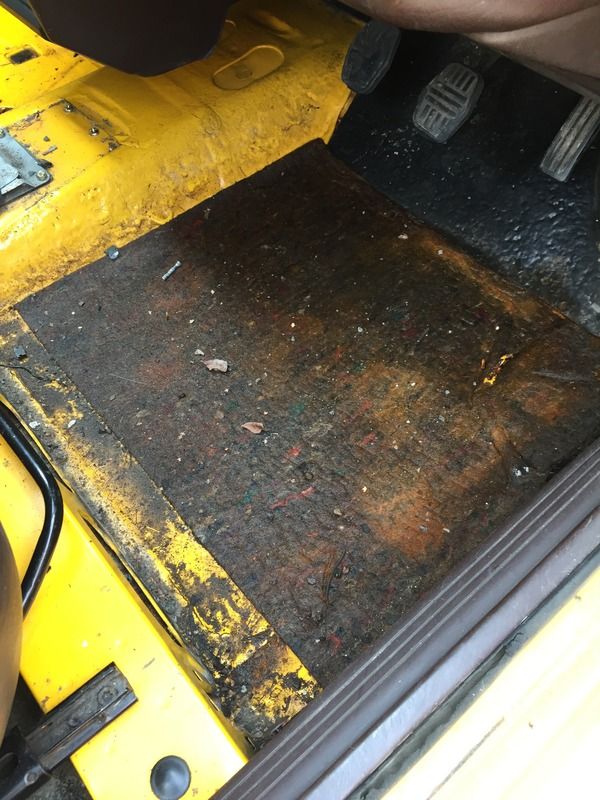 I binned the sound deadening as it stank! I'll replace it. Much sponging to be done from the pools of water on the floor. 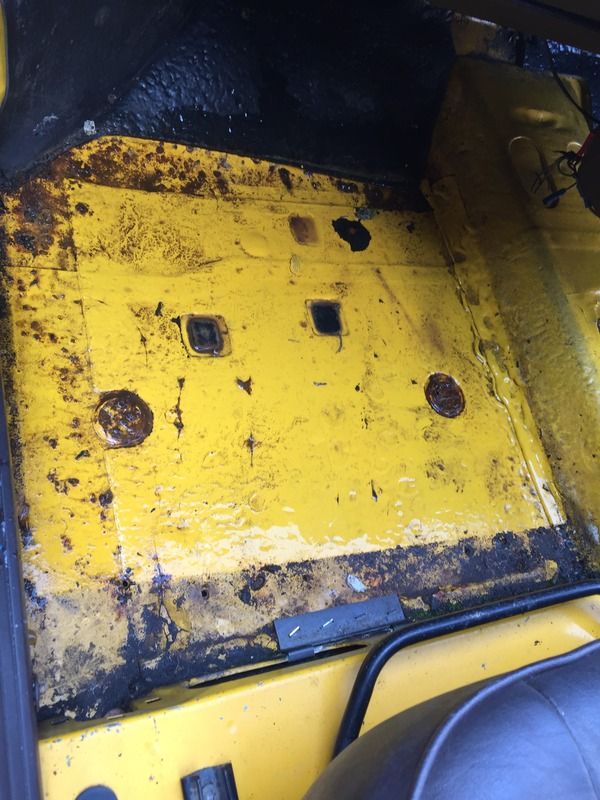 Then I found a lovely little modification to the driver footwell. I noticed a metal plate lying on the floor that I'd found under the soggy sound proof. When I picked it up I was amused to find that on the other side it had loads of butyl sealant squashed up against the floor covering the rotten great hole. 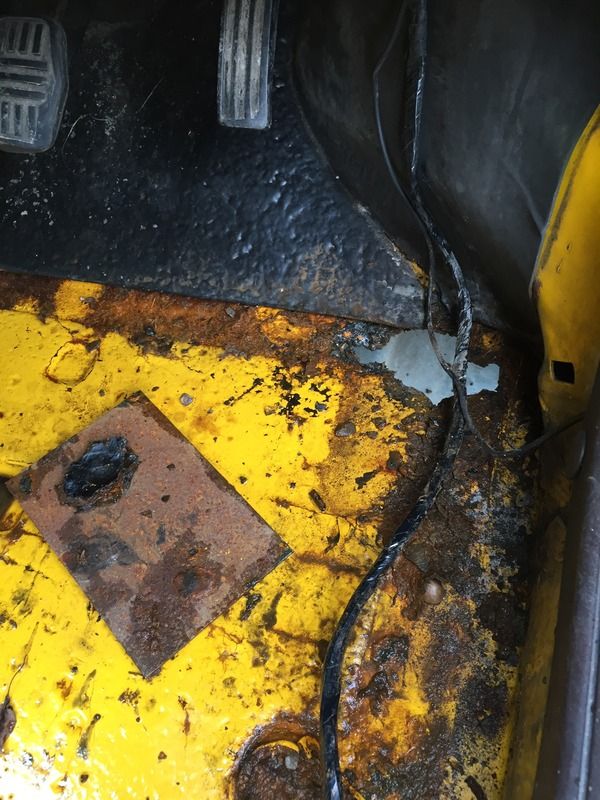 Dug around at the hole a bit more, not too bad and only gone due to the seem of the welds and I should imagine quite common. I'll get this repaired up. 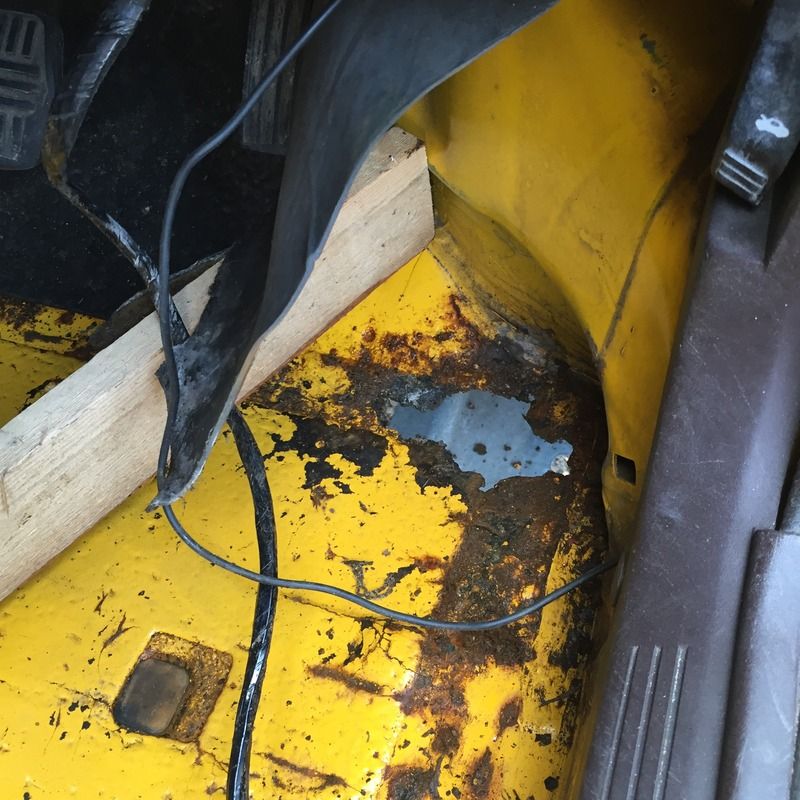 Thanks for looking and hopefully more updates to follow. |
| |
Twitter @w0rd5w0rth
1957 Ford Prefect
1965 Austin 1100 4 door
1968 Fiat 500L
1969 Ford Escort Super
1971 Vauxhall Viscount
1974 MGB GT
1978 Vauxhall Cavalier GL
1981 Ford Capri GL
1982 Ford Cortina Crusader
1985 Vauxhall Cavalier L
1987 Austin Maestro City 500
1987 Ford Fiesta 1.1L
1988 Volvo 240GL
1989 Ford Sierra Cosworth
1991 Fiat 126 BIS
1993 BMW 740i
1997 BMW M3 Evo
1998 Ford Transit Beavertail
2002 MINI Cooper S
|
|
|
|
|
May 28, 2016 22:31:06 GMT
|
|
'Tis but a scratch, Man! Extra ventilation... no problem.....
|
| |
Rover Metro - The TARDIS - brake problems.....Stored
Rover 75 - Barge
MGZTT Cdti 160+ - Winter Hack and Audi botherer...
MGF - The Golden Shot...Stored
Project Minion........
Can you see the theme?
|
|
|
|
|
|
|
Nice to see someone else giving a Maestro van some love, will be watching your thread  |
| |
|
|
|
|
|
|
|
i don't know maestro anatomy at all, but ive had huge amounts of water ingress problems on mk2 astras. one thing thats never happened is the footwell filling with water from a hole at the lowest point of the car... i guess what i'm saying is that once that hole is repaired youll probably find the problem gets worse  |
| |
Last Edit: May 29, 2016 9:19:16 GMT by darrenh
|
|
|
|
|
May 31, 2016 18:41:52 GMT
|
|
marinanut - That's one way of looking at it yes.
alexhatcher - Thanks pal, I've been watching yours. Love the direction you've taken yours. Really suits it. Am I right in thinking that the Maestro vans are unique in having 4 x 114.3 which is different to the car? I've taken inspiration from your thread about the VW golf Mk2 coilovers.
darrenh - I hear you loud and clear, I have my suspicions that the dodgy fitted windscreen is suspect.
|
| |
Twitter @w0rd5w0rth
1957 Ford Prefect
1965 Austin 1100 4 door
1968 Fiat 500L
1969 Ford Escort Super
1971 Vauxhall Viscount
1974 MGB GT
1978 Vauxhall Cavalier GL
1981 Ford Capri GL
1982 Ford Cortina Crusader
1985 Vauxhall Cavalier L
1987 Austin Maestro City 500
1987 Ford Fiesta 1.1L
1988 Volvo 240GL
1989 Ford Sierra Cosworth
1991 Fiat 126 BIS
1993 BMW 740i
1997 BMW M3 Evo
1998 Ford Transit Beavertail
2002 MINI Cooper S
|
|
|
|
|
|
|
May 31, 2016 18:47:25 GMT
|
|
|
| |
Rover Metro - The TARDIS - brake problems.....Stored
Rover 75 - Barge
MGZTT Cdti 160+ - Winter Hack and Audi botherer...
MGF - The Golden Shot...Stored
Project Minion........
Can you see the theme?
|
|
|
|
|
|
|
Yeah as above, the are 4x114.3 |
| |
|
|
|
|
|
Jun 11, 2016 18:26:05 GMT
|
marinanut - I did notice they are Japanese spec size. You've got some skills and love to restore that Ital estate. It looks great. alexhatcher - I love how the wheels look on yours mate, but you've beaten me to that look. I'll have to find my own  Time for an update on the Maestro, my new master cylinder had arrived so I fitted it up to the freshly restored servo and also my newly cleaned reservoir bottle. 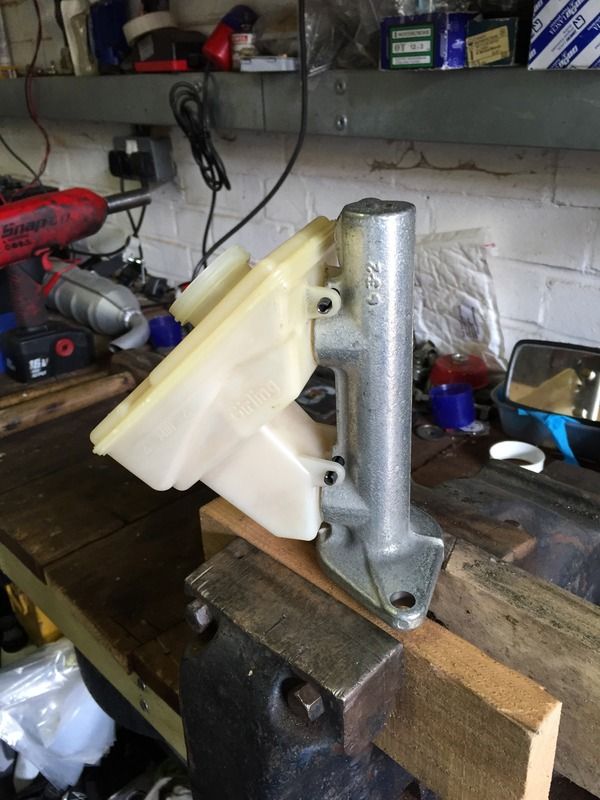 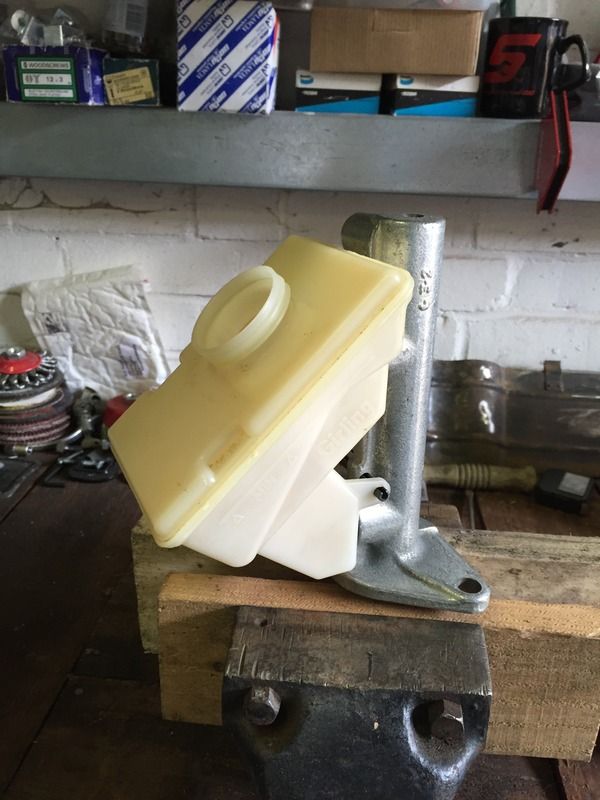 I mounted the assembly back in under the bonnet to the bulkhead. 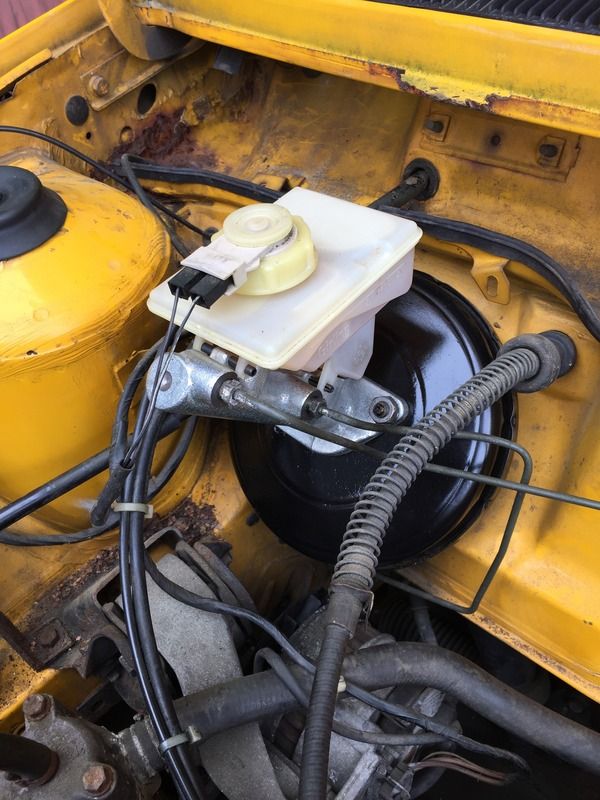 Bleeding was quite difficult when I expected it to be quite the opposite. I think there was a large build up of air in the load sensing valve. In the end I used a mixture of power bleeding and foot pumping which cleared the valve out and I got a great solid pedal again. I decided to strip down, clean and adjust the rear brakes. They're in great condition. 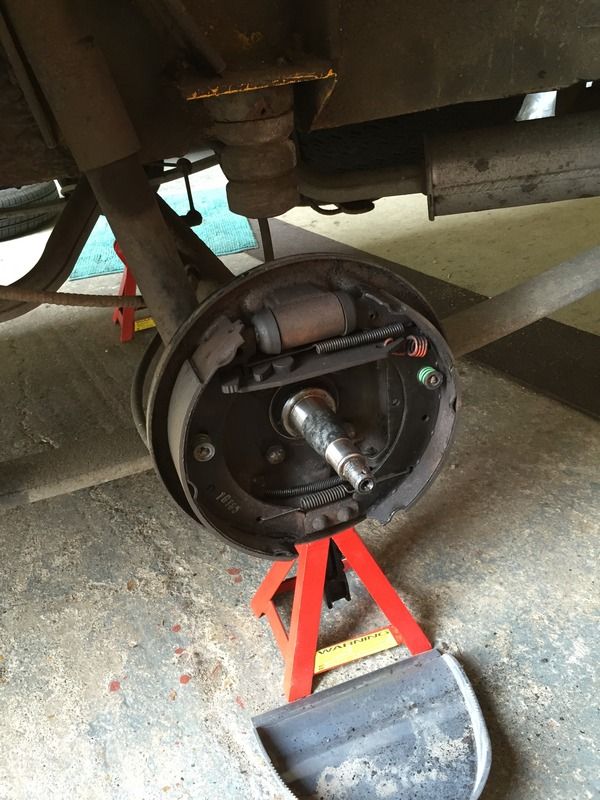 Next up was a general service job, I dropped the old oil out and removed the filter. (You can see it missing in the pic below) gave it some fresh 20w50 mineral oil (2.7L thanks to the BT service specs under the bonnet) I fitted a new distributor cap and rotor arm, the cap was really crusty so was worth replacing. I also removed the air filter housing in preparation for the next tasks to be carried out. 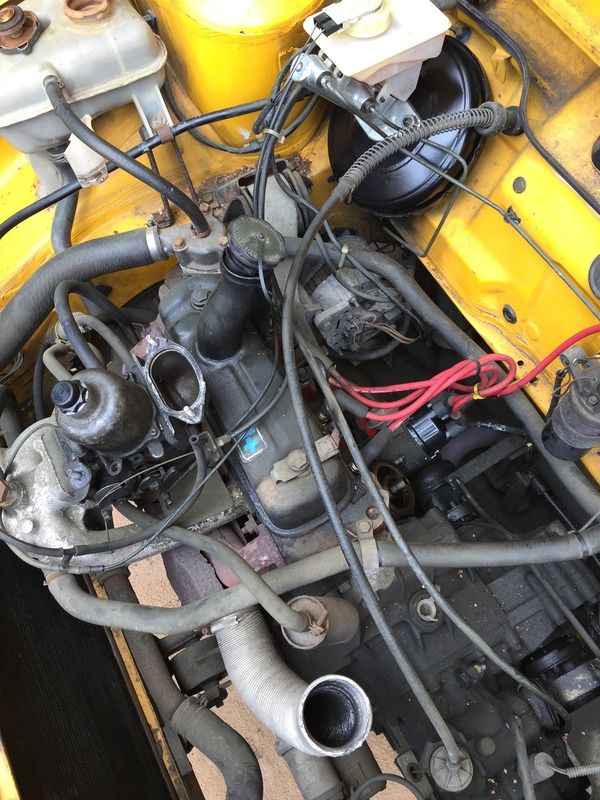 Hopefully some more updates to follow soon, thanks for looking. |
| |
Twitter @w0rd5w0rth
1957 Ford Prefect
1965 Austin 1100 4 door
1968 Fiat 500L
1969 Ford Escort Super
1971 Vauxhall Viscount
1974 MGB GT
1978 Vauxhall Cavalier GL
1981 Ford Capri GL
1982 Ford Cortina Crusader
1985 Vauxhall Cavalier L
1987 Austin Maestro City 500
1987 Ford Fiesta 1.1L
1988 Volvo 240GL
1989 Ford Sierra Cosworth
1991 Fiat 126 BIS
1993 BMW 740i
1997 BMW M3 Evo
1998 Ford Transit Beavertail
2002 MINI Cooper S
|
|
|
|
|
Jun 12, 2016 18:26:09 GMT
|
Ok another update again today on the Maestro. First job was to adjust the tappets. I quickly removed the rocker box cover and all appears well. 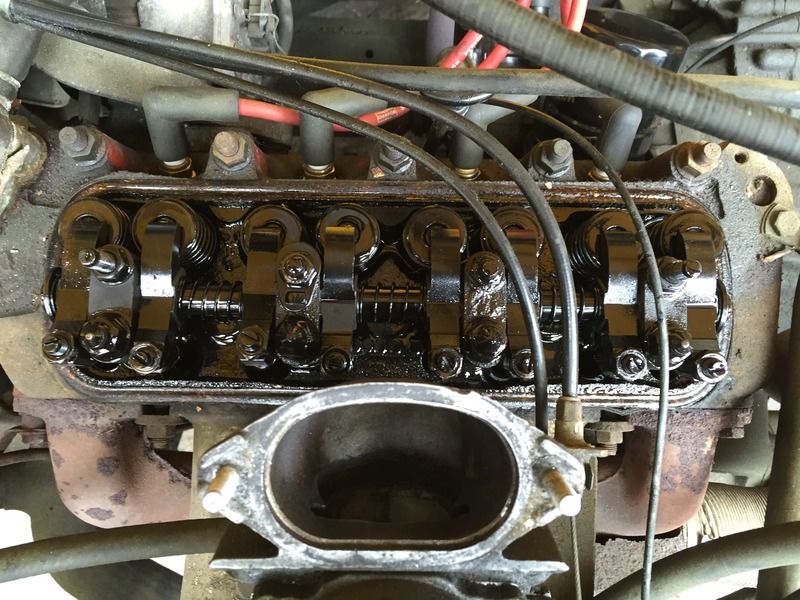 According to my technical data under the bonnet courtesy of British Telecom, the valve clearances should be 0.35mm cold. A couple were loose and two were actually over tightened. I also noticed that the rocker arms are quite well worn and recessed from the valve. 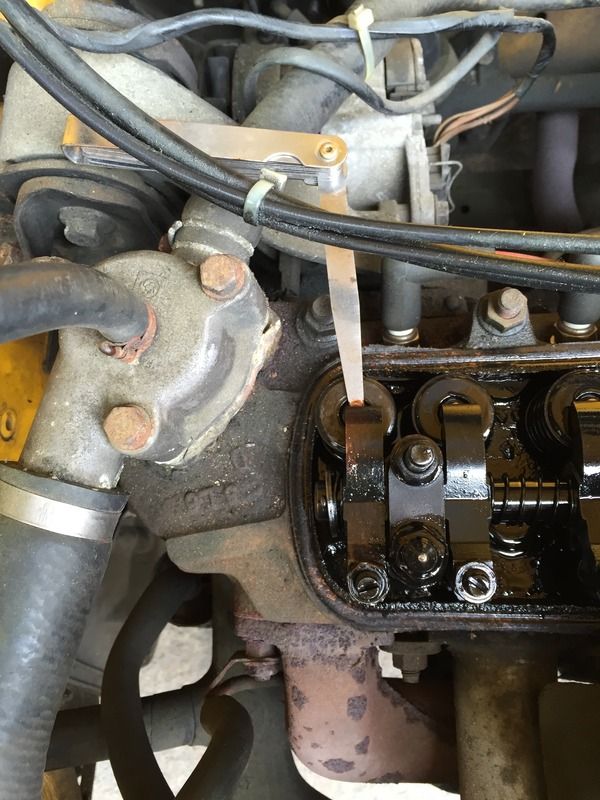 I gave the rocker box a good clean and polish and it came up quite nice and original again. 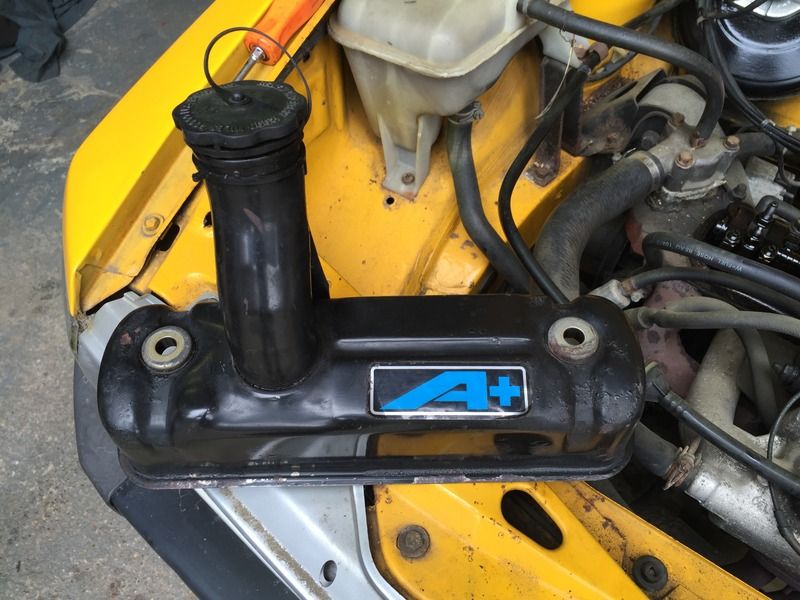 I refitted the rocker box cover and gave the engine a run. There was a noticeable difference, it ran much quieter so I was pleased. 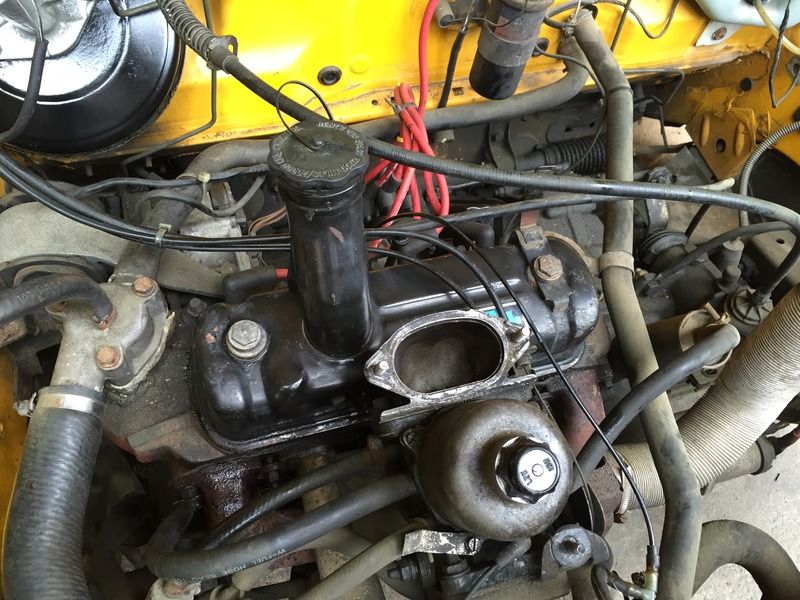 However I then heard another noise which sounded a lot like the exhaust manifold blowing, sure enough the exhaust manifold was blowing from number 1 end. I had a quick look at the job and decided that it wasn't too big of a job. I wanted to flush the coolant anyway so now seemed a good time. I started the strip down. 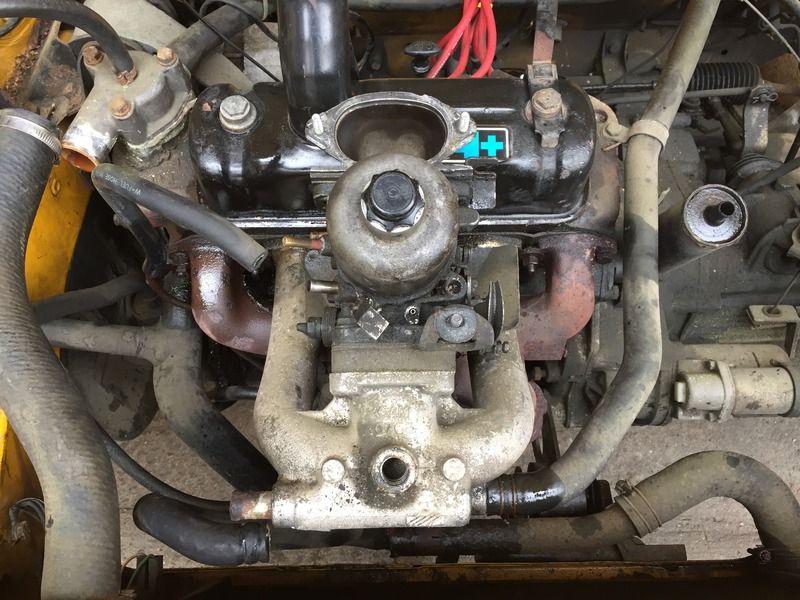 The inlet manifold and SU carb came off nicely. 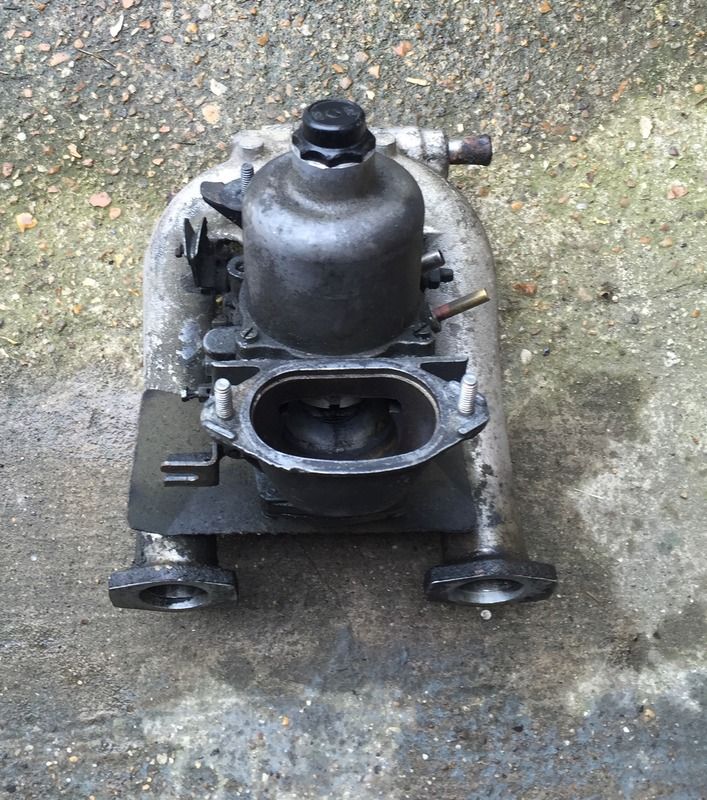 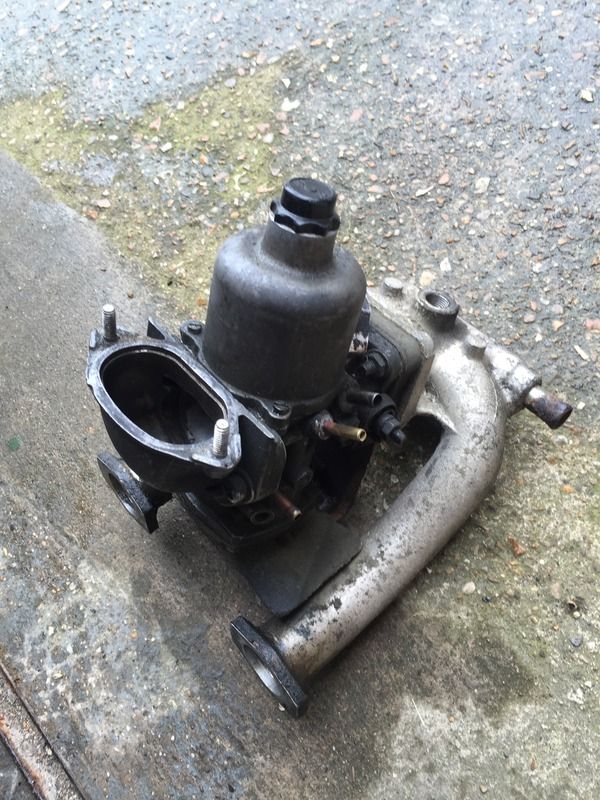 I removed the SU from the inlet as whilst it's off I may as well give it a clean and overhaul. 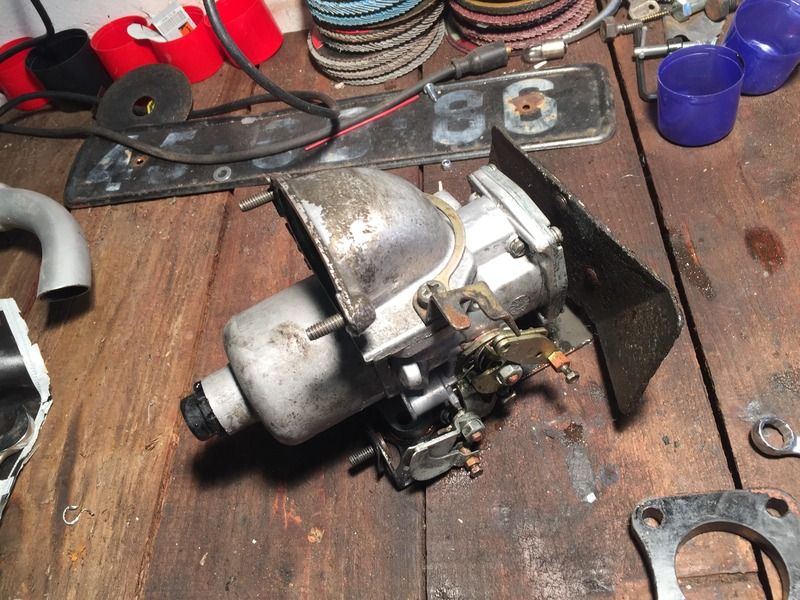 However I then found another problem, a bit like the cooling system on my Fiat 126 the waterways had corroded. 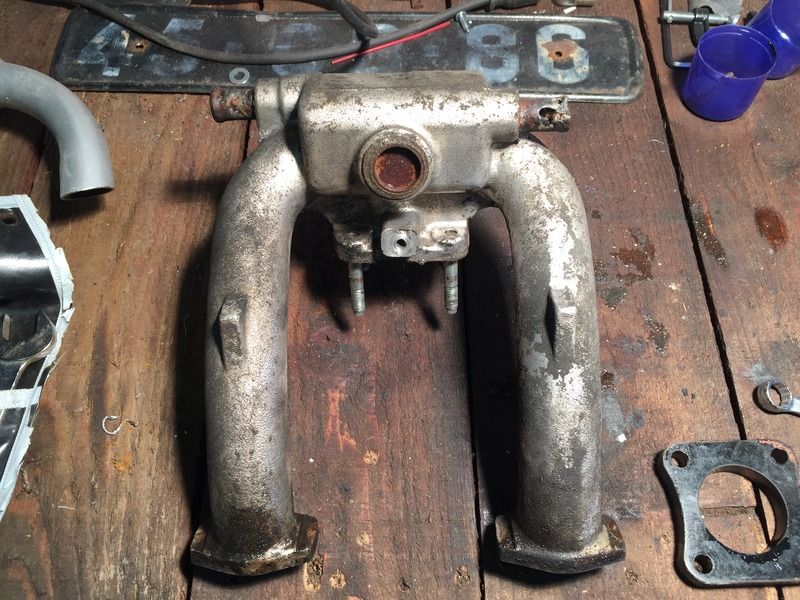 These will need repairing as well. 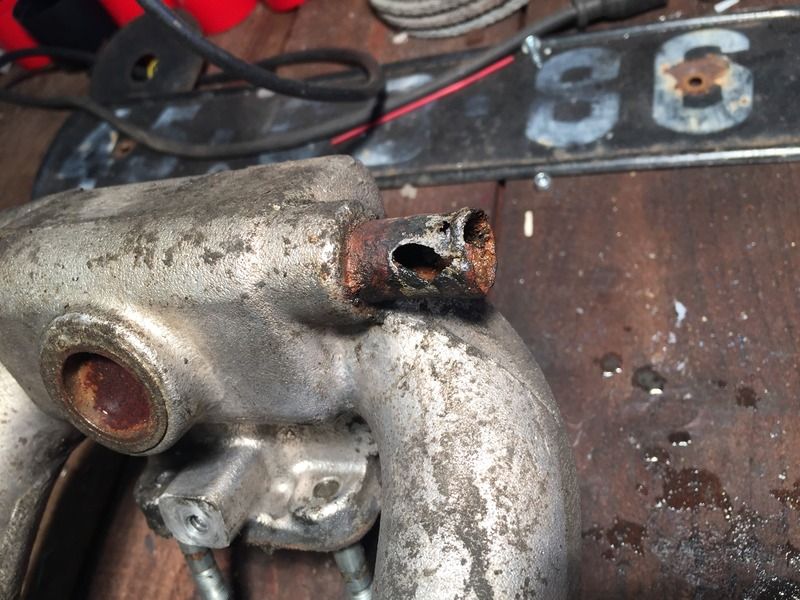 Back to the exhaust manifold, they all came undone nicely except for one. 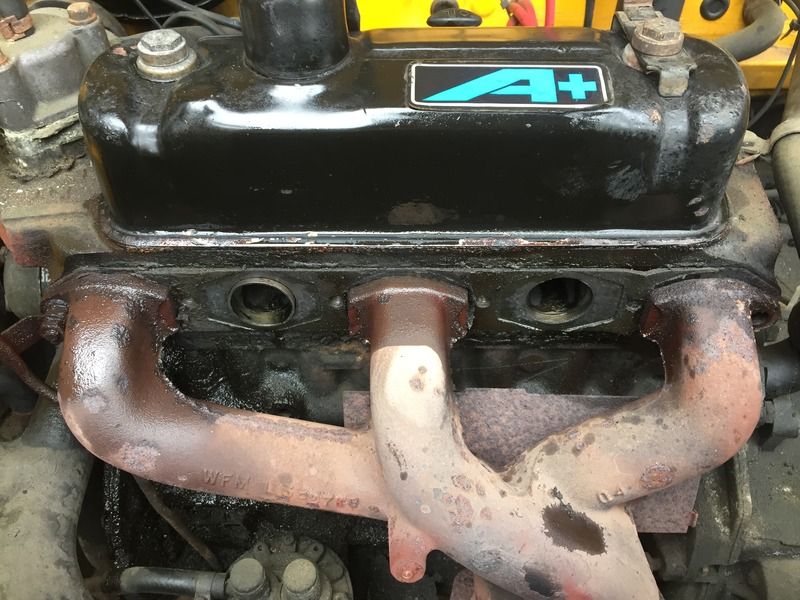 However, a nut snapped in the exhaust that houses a support bracket which joins the inlet to the exhaust manifold. 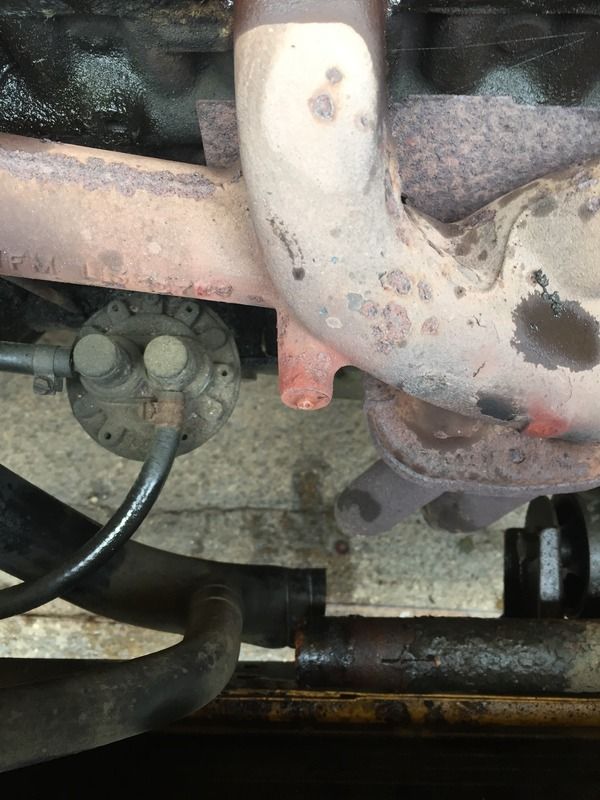 Yet another job that needs doing, since the manifold would not separate from the downpipe I needed to drill this bolt out in situ. There simply wasn't enough room between the exhaust manifold and radiator. Therefore I removed the front panel and radiator. 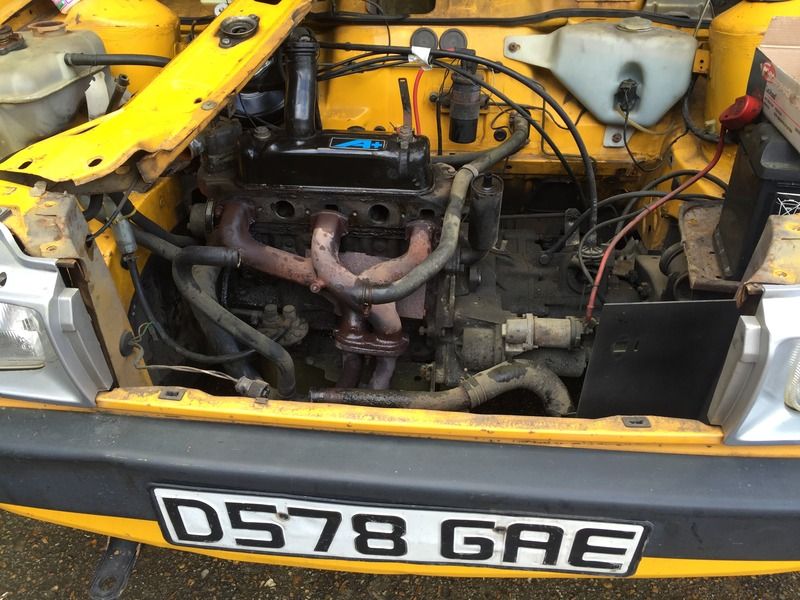 This now gave me clear access to the broken bolt. 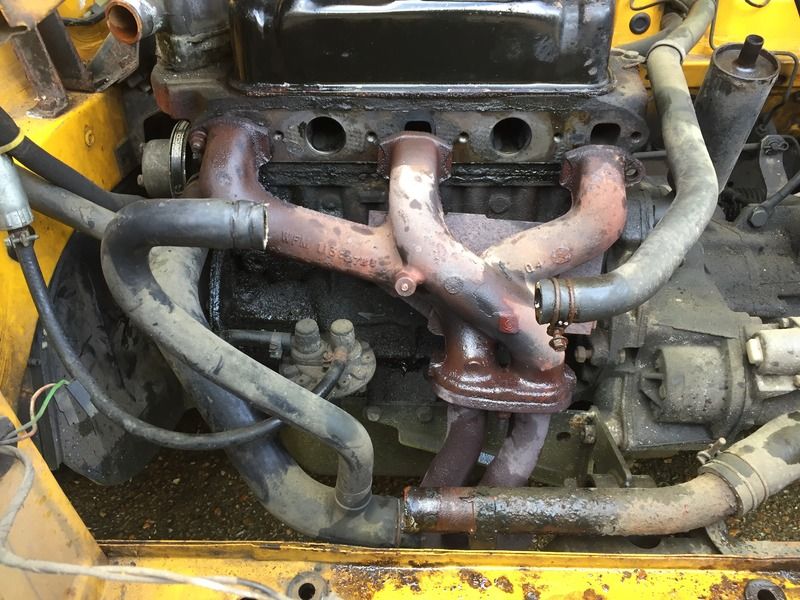 I drilled out the stud, but an extractor wouldn't shift it. Therefore I oversized the hole to 7mm with the intention of rethreading it to M8. 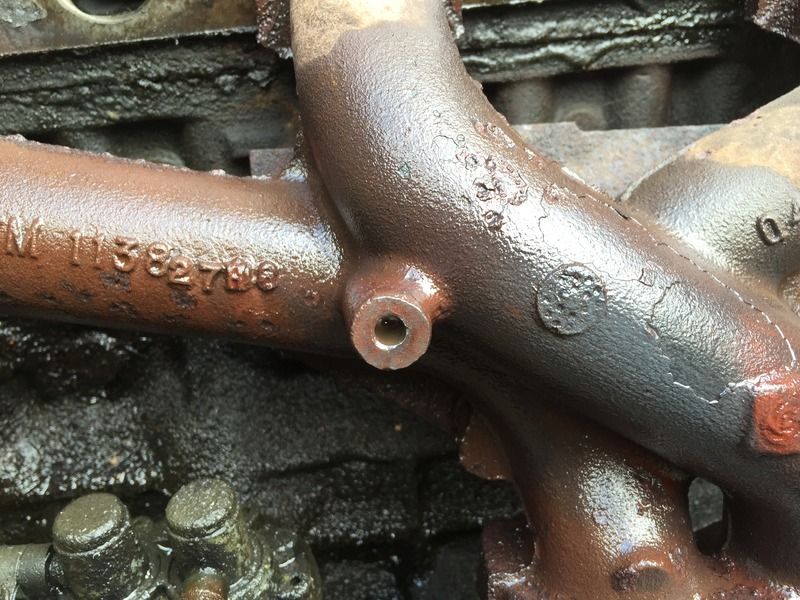 Finally worked the last exhaust manifold stud out of the head and removed the manifold forward out of the way. 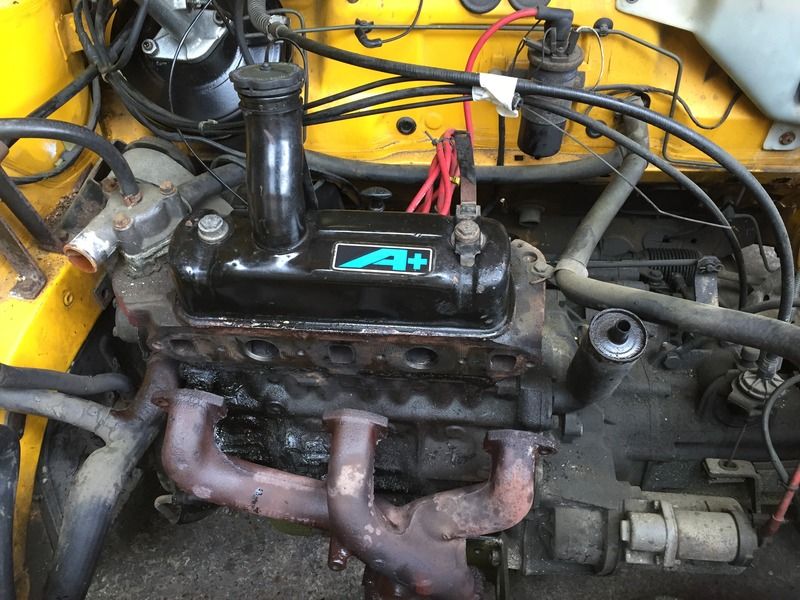 When I removed the old gasket it was clear as to where the blowing was coming from. 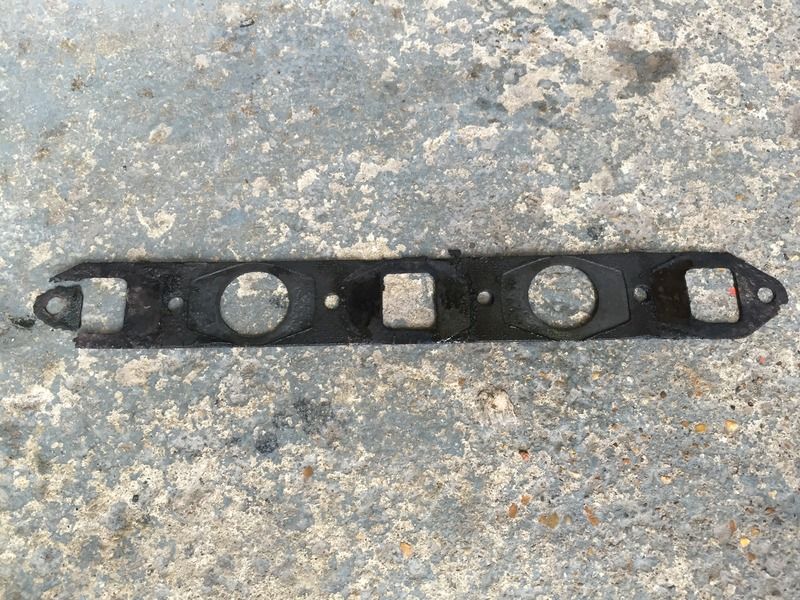 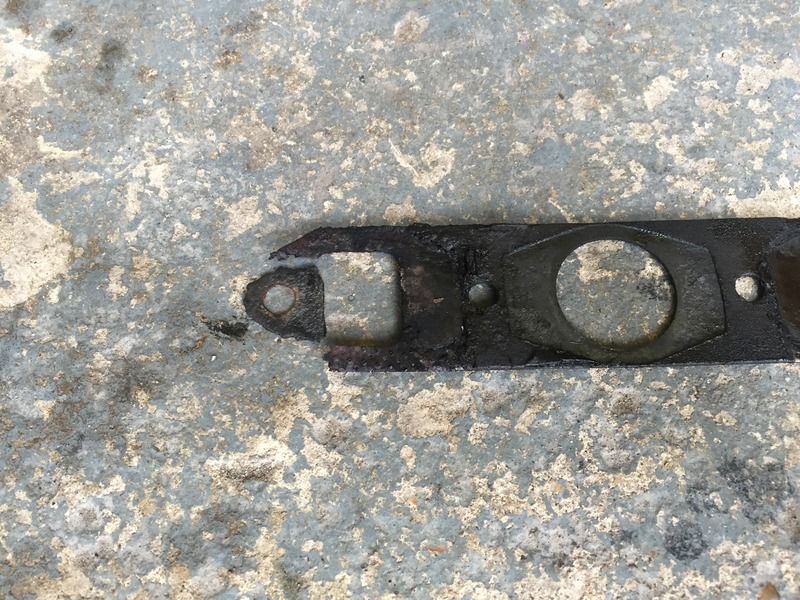 Whilst I was in that area my eye was drawn towards the mechanical fuel pump and all the crud and curse word around it. The gasket was blown and oil had been leaking out of it for a long time. I also noticed these fuel lines thankfully. 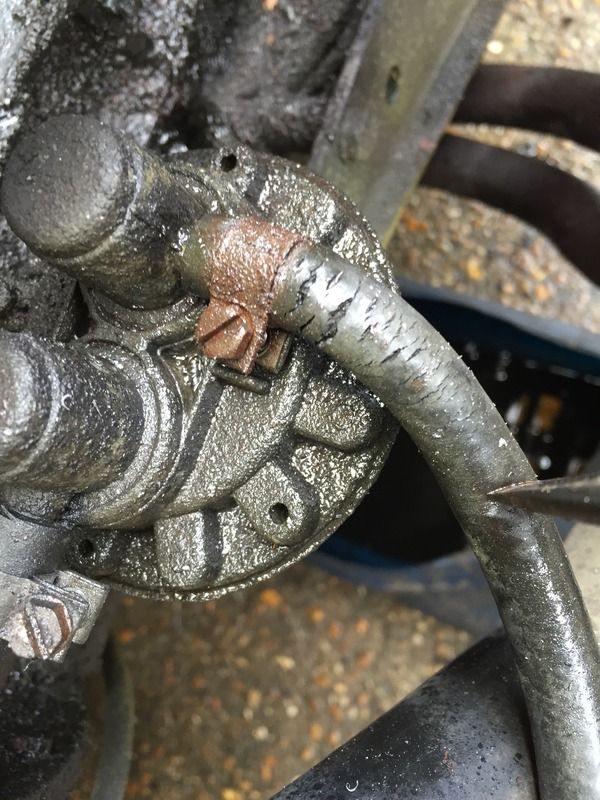 Fuel pump off and ready for a clean and replacement gaskets. 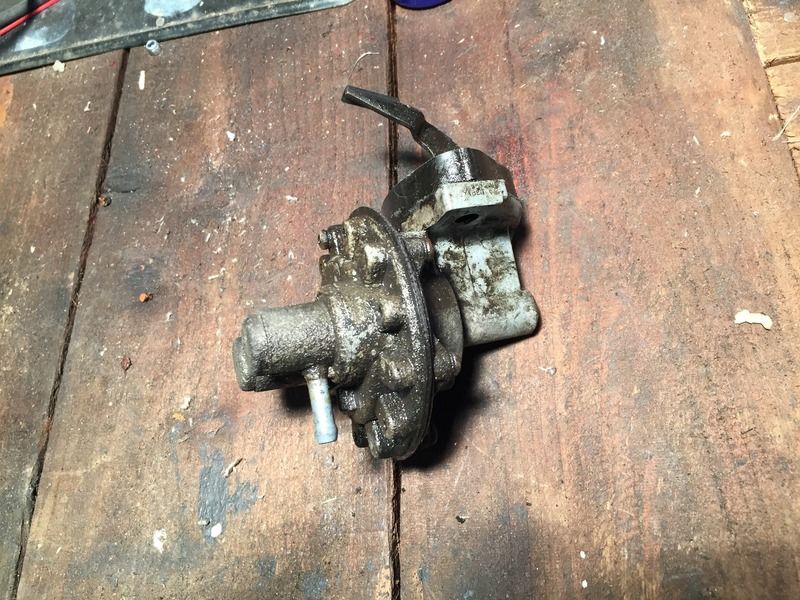 The area in question and you can see all the thick dirt and grease around the block itself.  That's all for now but for every job I do I seem to find another area that needs attention! As usual, thanks for looking and all comments welcomed. |
| |
Twitter @w0rd5w0rth
1957 Ford Prefect
1965 Austin 1100 4 door
1968 Fiat 500L
1969 Ford Escort Super
1971 Vauxhall Viscount
1974 MGB GT
1978 Vauxhall Cavalier GL
1981 Ford Capri GL
1982 Ford Cortina Crusader
1985 Vauxhall Cavalier L
1987 Austin Maestro City 500
1987 Ford Fiesta 1.1L
1988 Volvo 240GL
1989 Ford Sierra Cosworth
1991 Fiat 126 BIS
1993 BMW 740i
1997 BMW M3 Evo
1998 Ford Transit Beavertail
2002 MINI Cooper S
|
|
|
|
|
Jun 13, 2016 10:39:34 GMT
|
|
good stuff!
as i found with my landy, if you set warn tappets with a feeler gauge you end up with slightly too big a gap. gonna try with a dti
|
| |
|
|
|
|
|
Jun 13, 2016 11:21:24 GMT
|
|
|
| |
|
|
|
|
|
Aug 15, 2016 16:03:14 GMT
|
Time for an update, Bought some parts for the engine from Mini Spares. Got some new manifold studs and nuts, a new manifold gasket, new fuel pump gaskets and fuel pipe. Also I sorted out the inlet manifold water jacket by putting a new insert inside the rotten jacket. 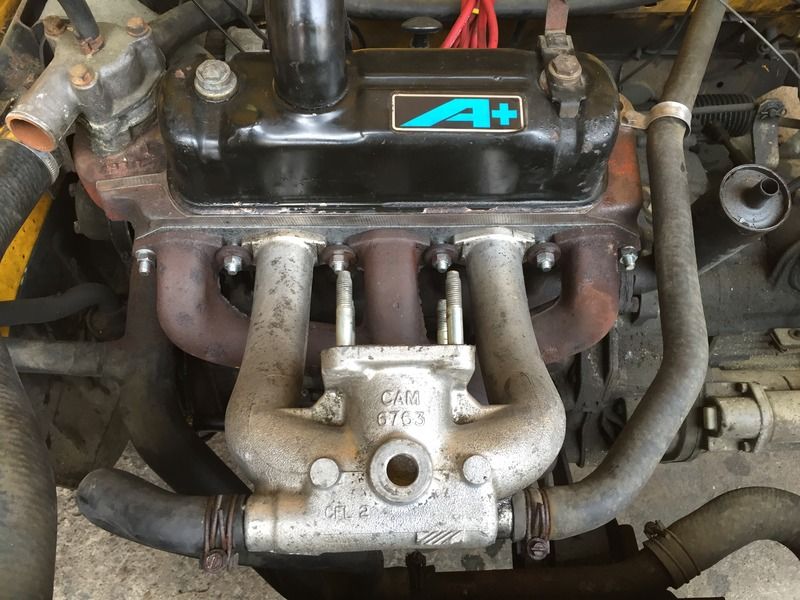 Then refitted the freshly serviced SU carb. 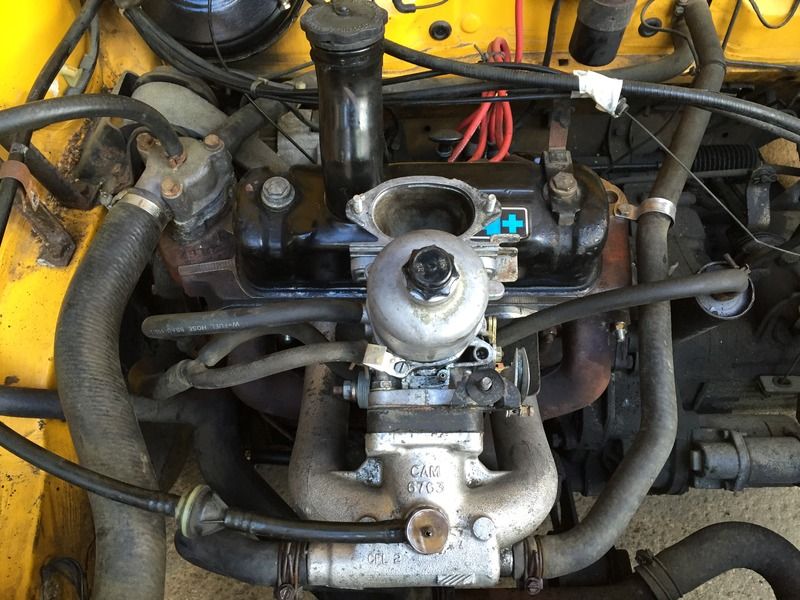 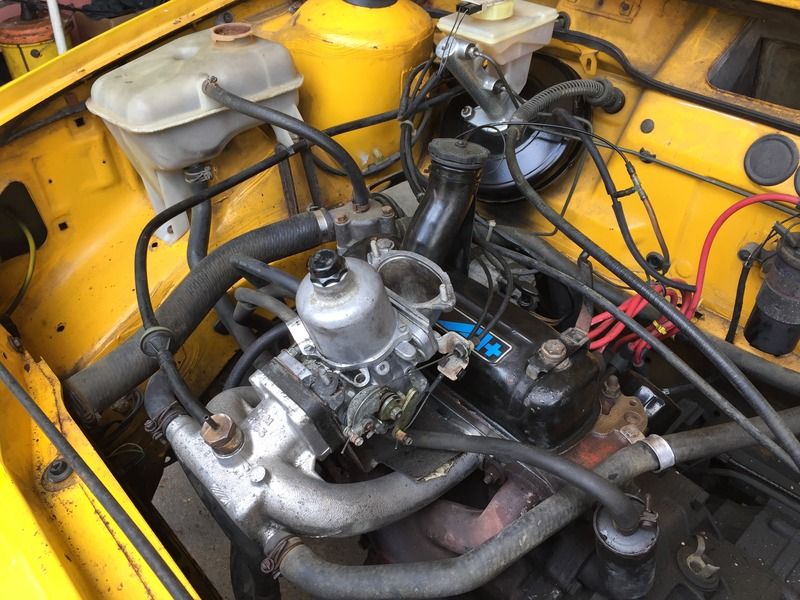 I tried to give the header tank a clean out as it was full of sediment and dirt. Got it clean inside but it didn't look too clean outside. 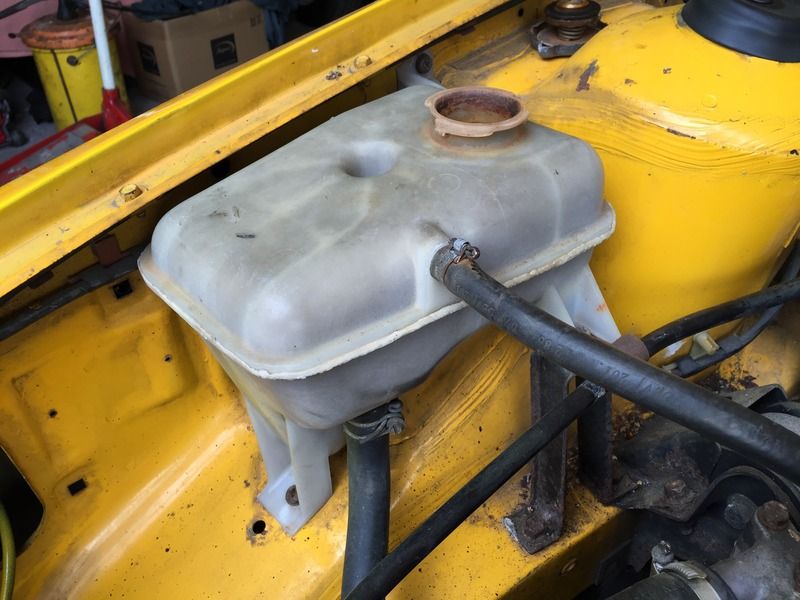 However I will be making this Unipart header tank cap sparkle again! 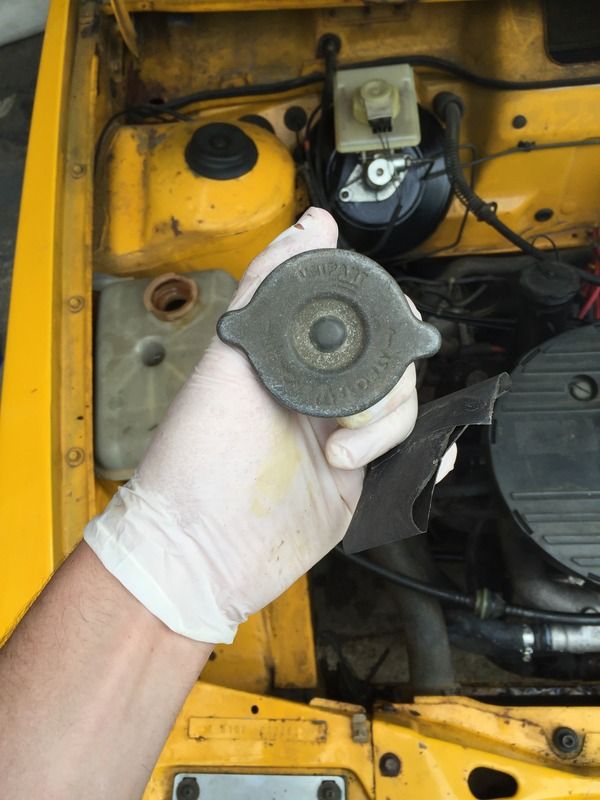 Once filled with coolant and fired up the engine sounded lovely. No exhaust blow anymore and it actually sounds much quieter. Next up it was time to have a look at that drivers floor. 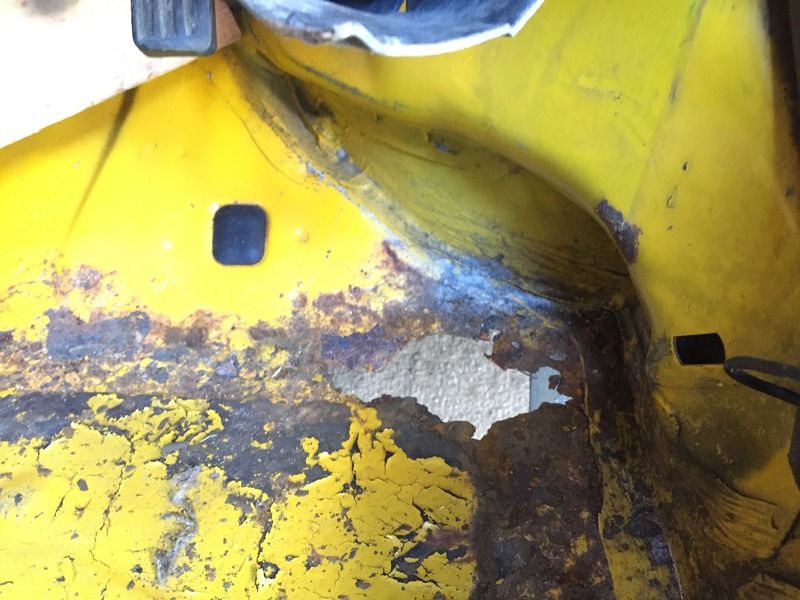 Once I started using the wire brush attachment on the angle grinder it soon became clear that the rott had spread much further. 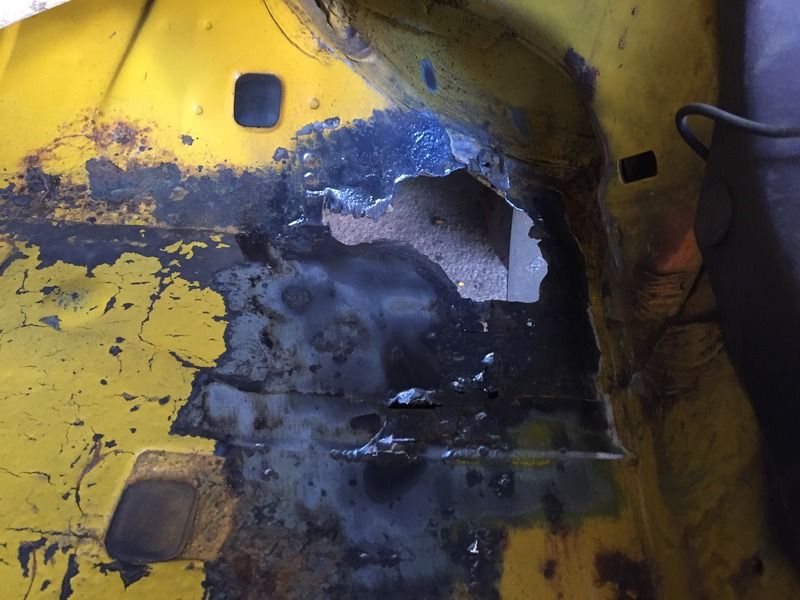 And then much further AGAIN! 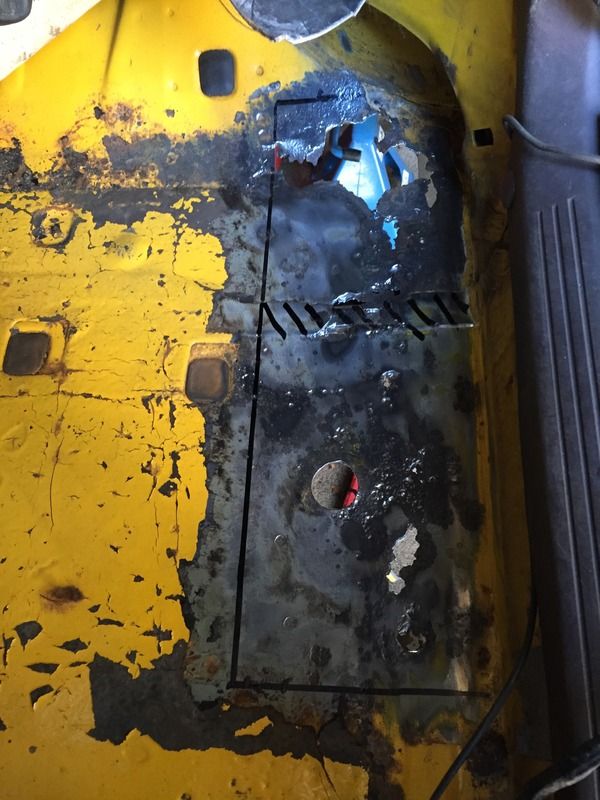 Having had a good look underneath I had to adjust my cut lines for the front chassis leg which runs diagonally. I also needed to be a bit careful around the outrigger/jacking point. 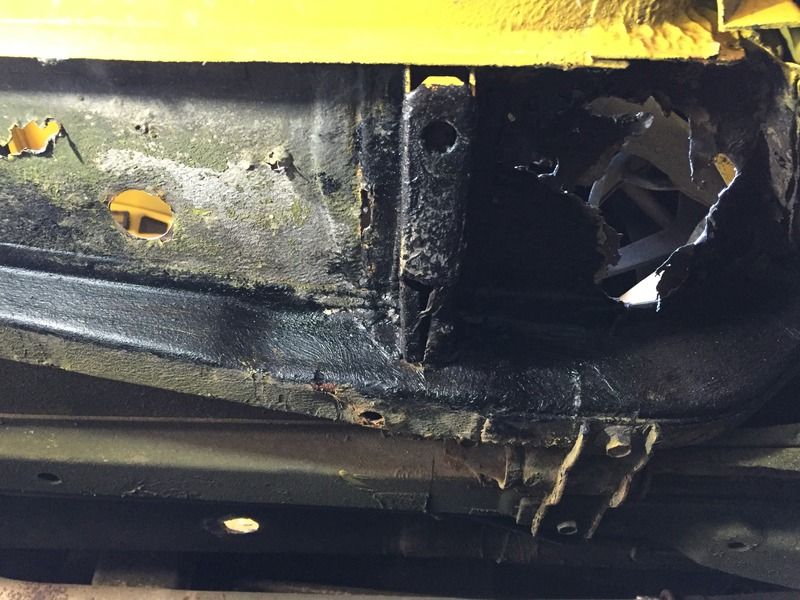 So I adjusted my cutting lines to miss the chassis leg and avoid the jacking point. 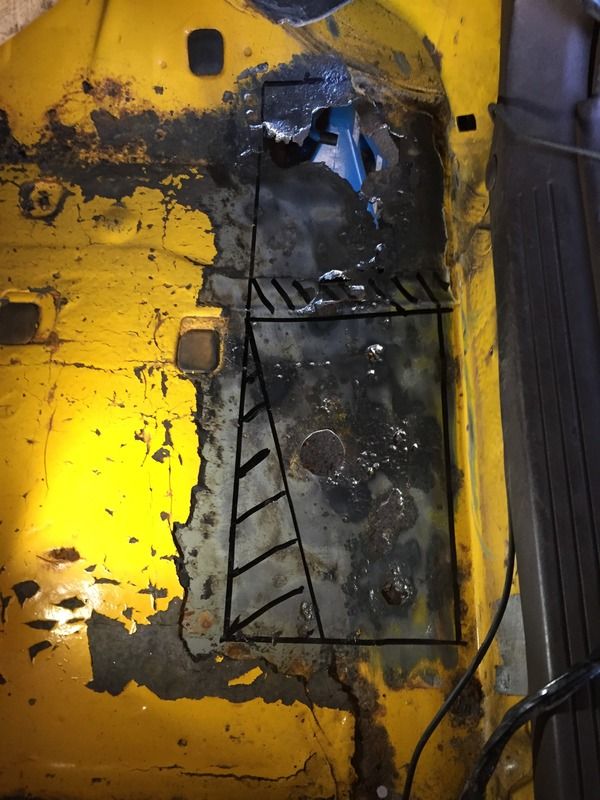 First panel cut out with the cutting disc. (The eagle eyes amongst you may notice a problem here that I have no idea why I didn't spot it but as you will see causes me issues later) 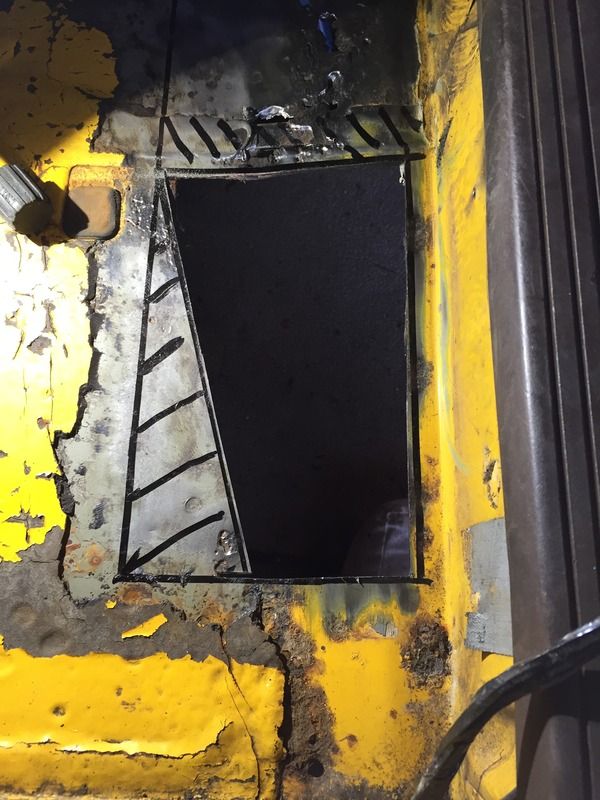 Second piece now cut out and also the spot welds removed from the outrigger keeping it in tact. 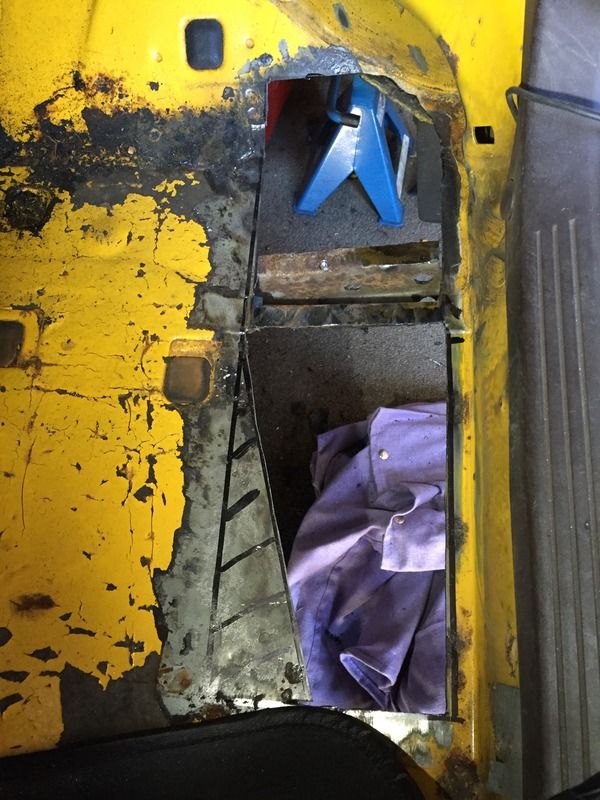 Gave the underside a good clean up so that I have a nice fresh clean surface on which to weld. Got caked in gunk doing this part. 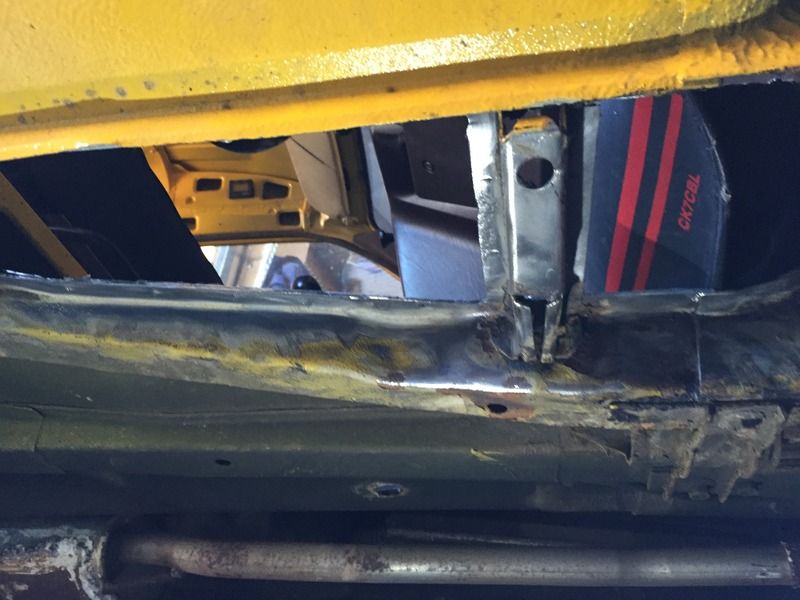 Here was my deliberate mistake earlier, when I cleaned up the underside with the wire wheel it broke through with more rust so I had to extend my cut further down another inch. 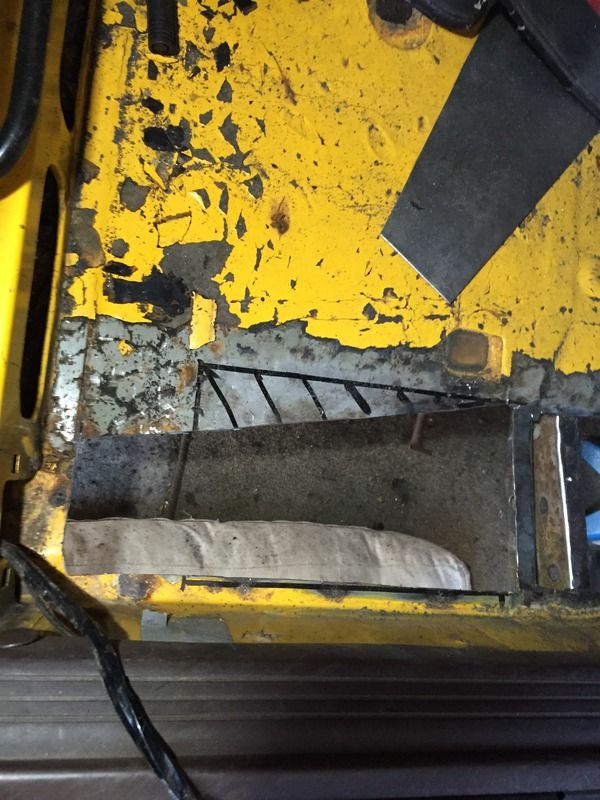 I ran out of time today so had to end it here. I need to make some plates and then weld them in next time. I'm by no means an expert to welding and panel repair, I'm still a real novice. So if anyone can see room for improvement or offer advice I would greatly appreciate it. |
| |
Twitter @w0rd5w0rth
1957 Ford Prefect
1965 Austin 1100 4 door
1968 Fiat 500L
1969 Ford Escort Super
1971 Vauxhall Viscount
1974 MGB GT
1978 Vauxhall Cavalier GL
1981 Ford Capri GL
1982 Ford Cortina Crusader
1985 Vauxhall Cavalier L
1987 Austin Maestro City 500
1987 Ford Fiesta 1.1L
1988 Volvo 240GL
1989 Ford Sierra Cosworth
1991 Fiat 126 BIS
1993 BMW 740i
1997 BMW M3 Evo
1998 Ford Transit Beavertail
2002 MINI Cooper S
|
|
|
|
|
Aug 15, 2016 18:38:56 GMT
|
|
Great stuff,really enjoy reading these updates!
In my experience of rust .... Always assume its spread further then you first thought.
And that ........................... Cardboard is cheaper and easier than steel in making the eventual plate the right shape and size!
|
| |
|
|
|
|
|
Aug 16, 2016 12:05:42 GMT
|
|
Really enjoying this build! Have you tried putting the header in the dishwasher? Works with washer bottles a treat
|
| |
96 E320 W210 Wafter - on 18" split Mono's - Sold :-(
10 Kia Ceed Sportwagon - Our new daily
03 Import Forester STi - Sold
98 W140 CL500 AMG - Brutal weekend bruiser! Sold :-(
99 E240 S210 Barge - Now sold
02 Accord 2.0SE - wife's old daily - gone in PX
88 P100 2.9efi Custom - Sold
|
|
|
|
|
Aug 19, 2016 21:10:01 GMT
|
Optimusprime - You're certainly right about rust spreading much further than you first thought. I used your tip about card templates in the below update. Cheers buddy. SmokeEm - Glad you're enjoying the thread buddy, I will try the header tank in the dish washer but I have to wait until the Mrs isn't looking! Time for another update on this. As you remember we left off last with a big hole in the floor. So first up I made a template out of cardboard and then out of 1.5mm steel sheet. 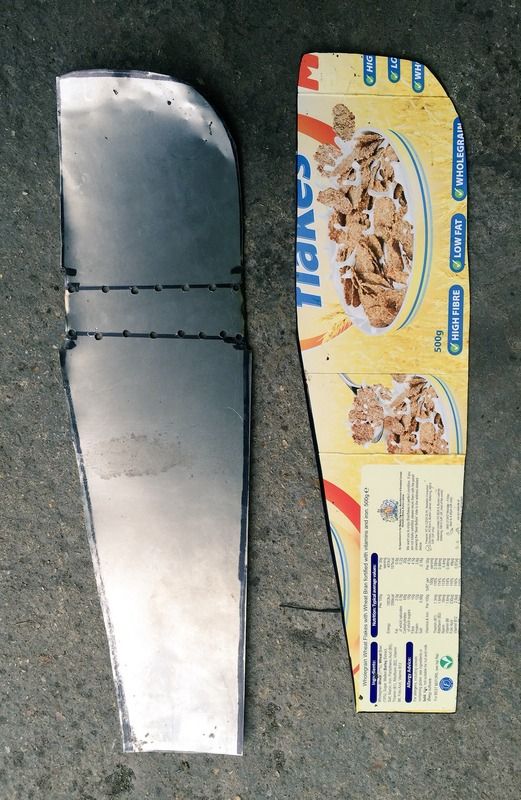 Once I'd got the shape, there was plenty of trimming of the plate until I was happy with the way it sat in the gap. 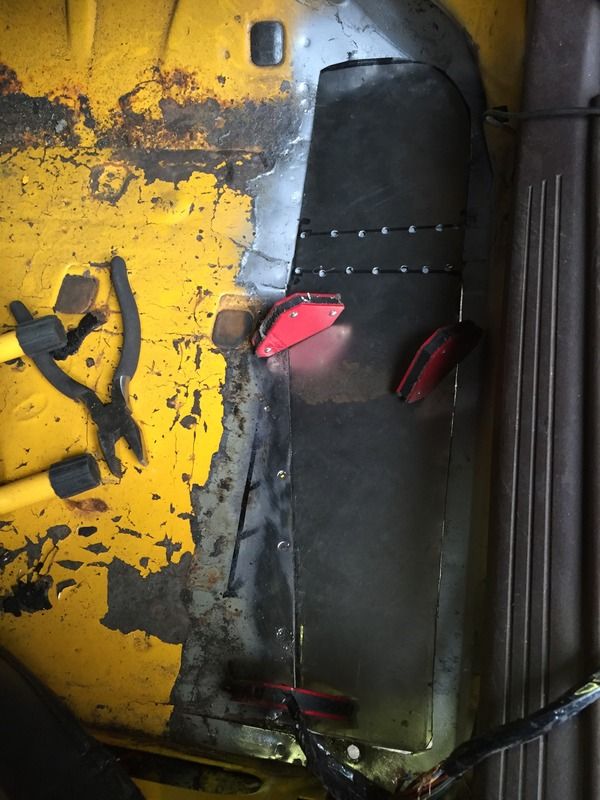 Now I really am a novice with welding but I have a good friend who is really good at it and I'm trying to learn from him and he's happy to share his knowledge. First up I put some tacs on, then used the panel beating hammer to close the gap, then another tac. 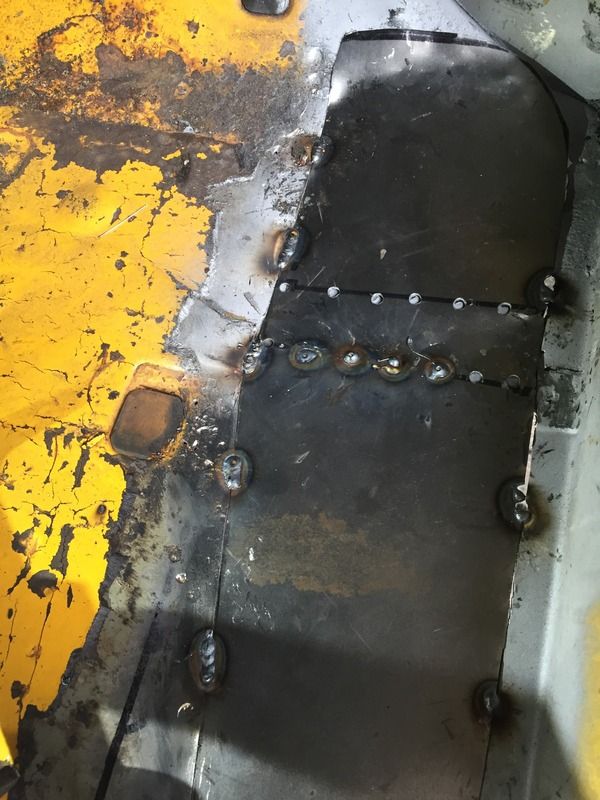 I then used a big fat black marker pen to highlight the welding line as I kept losing it whilst welding and looking through the mask. 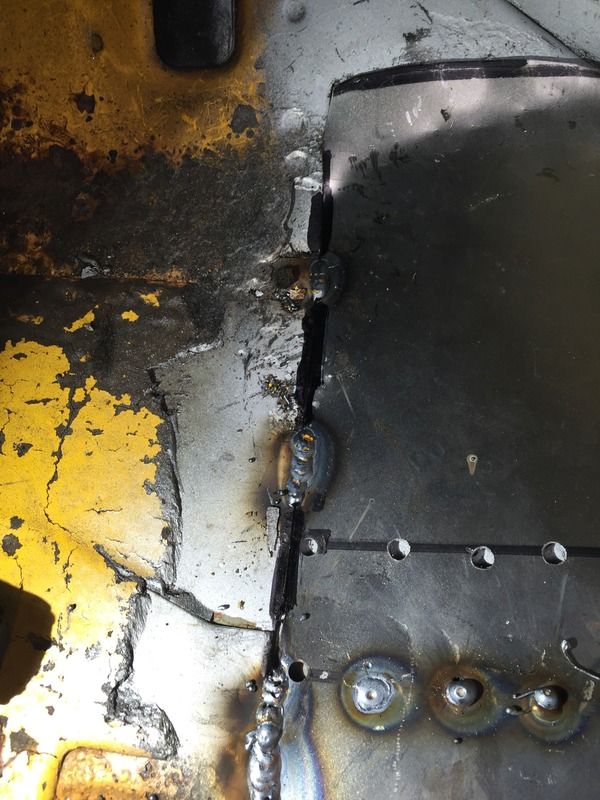 Next up I joined up all the tacs as I was happy with the plates positioning. 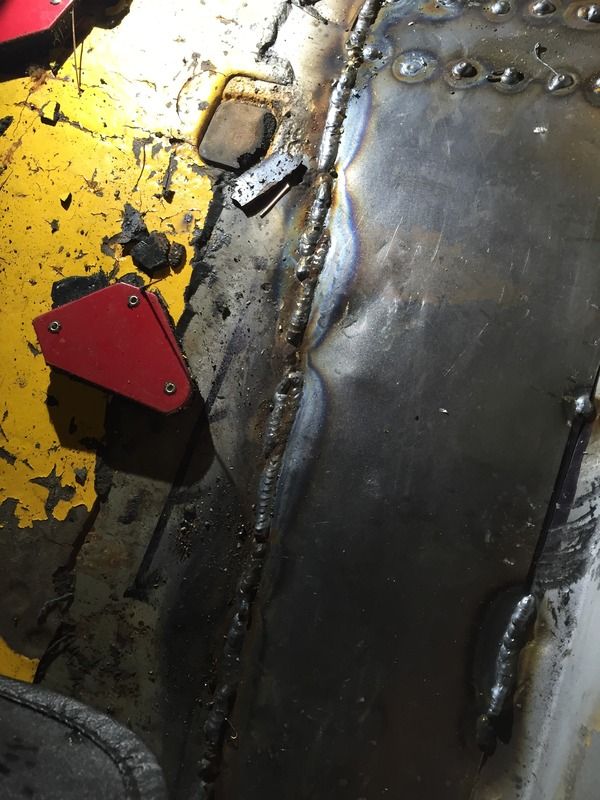 I also did some plug welds for where the plate goes over the jacking point outrigger. 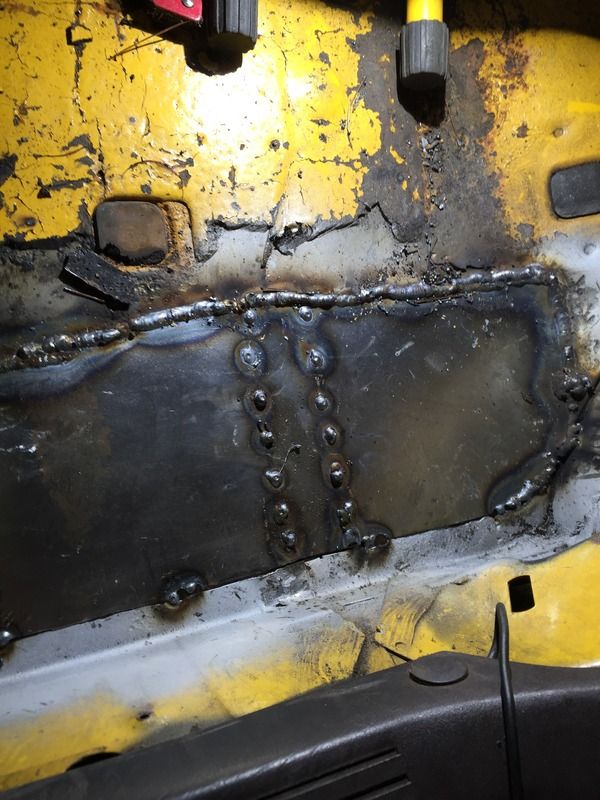 The rounded corner was really awkward to weld up, purely due to not being able to get the tip in to the space! 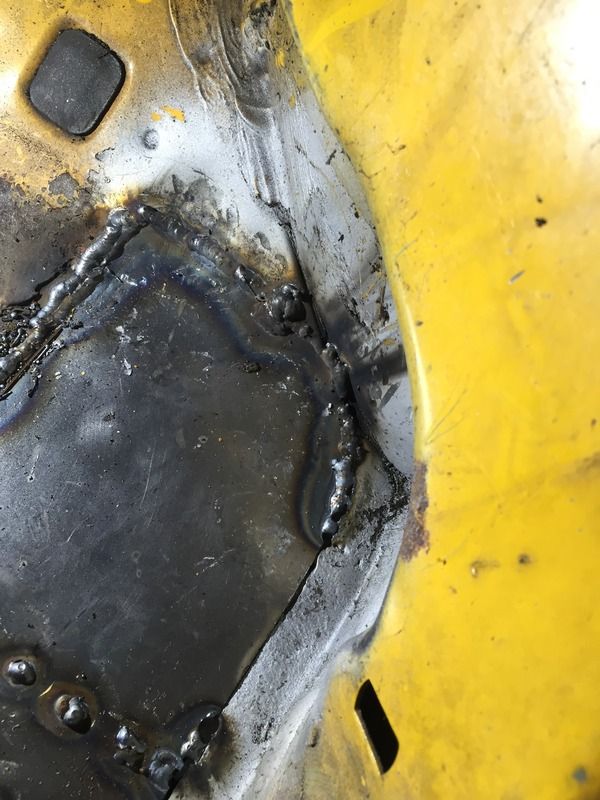 The final article all welded up and in position. It obviously needs cleaning up and the welds smoothing but I'm happy with it. 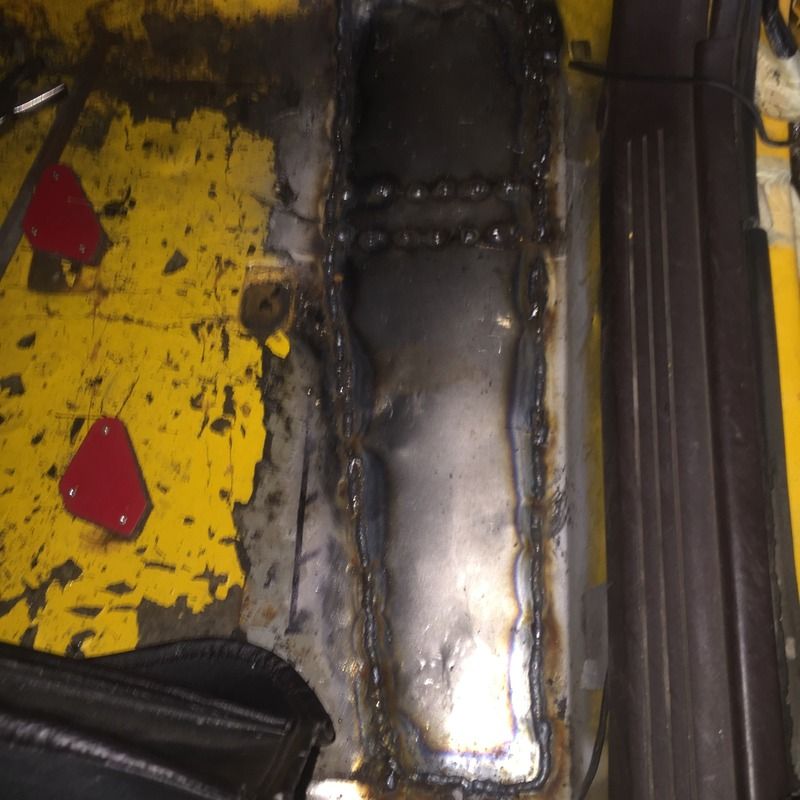 Underneath it will need seem sealing and a lot of undercoating for protection but that will be next on the list.   As usual, thanks for looking and all comments appreciated. |
| |
Twitter @w0rd5w0rth
1957 Ford Prefect
1965 Austin 1100 4 door
1968 Fiat 500L
1969 Ford Escort Super
1971 Vauxhall Viscount
1974 MGB GT
1978 Vauxhall Cavalier GL
1981 Ford Capri GL
1982 Ford Cortina Crusader
1985 Vauxhall Cavalier L
1987 Austin Maestro City 500
1987 Ford Fiesta 1.1L
1988 Volvo 240GL
1989 Ford Sierra Cosworth
1991 Fiat 126 BIS
1993 BMW 740i
1997 BMW M3 Evo
1998 Ford Transit Beavertail
2002 MINI Cooper S
|
|
|
|


