|
|
|
|
|
Ok, bear with me here. I have mentioned this car a couple of times on here and been told I should do a thread... So I am going to copy everything over from a different forum to bring this place up to date, and then update as I go on with the Resto. I bought the car back in June '13, with the idea to spend a couple of years doing the resto... well best part of two years later its still in the garage looking worse than when I got it, as you shall see :lol: Picked it up from a local dealer, lots of work to be done, but it runs, drives, and had a new APK (Dutch MOT)... Quick pick from taking it out first night, letting the o/h have a play in the sunshine...  Lots of work, plenty of rust to be attacked, and I dread to think what I am going to find under the vinyl roof... But first jobs will be fixing some of the small niggles like the lack of working fuel gauge and rev counter, and the rotten door window pillar seal before to much rain gets in... Its going to be something of a rolling resto, and no doubt I shall be asking a lot of questions on here in the coming months... plan is to have it solid by the end of the year, and then look at getting paint / interior sorted out over the winter ready for next year. But as it is too big to fit in my garage, this is all going to be a bit time / weather dependent. That and I have to keep it rolling as much as possible so as not to block the drive... Let the fun begin  |
| |
|
|
|
|
|
|
|
|
|
So I finally got some time on this... After driving it for a while I found that there was a few issues with the trans, namely when hot it was reluctant to shift up in to 3rd, and would shift out of first almost instantly. in the end it came out and was rebuilt, and so far drives rather well. So, with some good weather behind me I got cracking on the resto. First job was to get the fuel tank out. There seems to be a problem with the sender, mainly it doesn't, and well a fuel gauge might be useful. Plan was to drop the tank and deal with the trunk floor at the same time. Well, best laid plans and all that. The towbar that was fitted meant that I couldnt drop the tank as the filler neck would come out from between the tow bar and the boot floor. So, out with the towbar... easy you would think expect it was construced in such a way that one of the crossbars was actually constructed in place and wouldn't come out from between the chassis rails without being cut in half... so out came the angle grinder, off came the bumper, and in the end the tank dropped out... Enough waffle - picture time... Bumper and tow bar off  Floor doesn't look too bad  Worst of the rot is around the body mounts and the seal lip   Dropping the bumper off did reveal one thing though, large amounts of fiberglass and shiny paint :lol:   Lastly the offending tow bar, and you can see where I had to cut the rear bar to get it out, it was fitted with the ends of the bar inside the chassis rails and was obviously bolted together and then welded once on the car... Shall have to sleeve the cut section and get it welded back together as I actually wanted to keep it.  |
| |
Last Edit: Jan 15, 2018 11:38:25 GMT by SamJ
|
|
|
|
|
|
|
another couple of hours on it this evening... wire brush cup on the grinder and attack the trunk floor... Must say its not as bad as I feared, still got to investigate the seam under the light clusters, but so far there is nothing too worrying there, shouldnt take too long to get welded up and painted over the weekend.  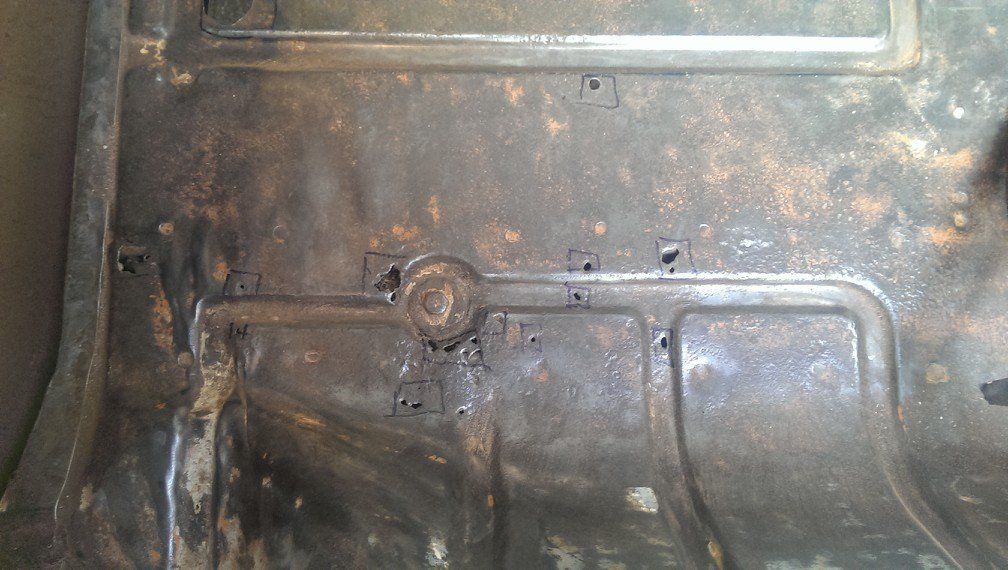 |
| |
|
|
|
|
|
|
|
Spent the weekend on it, got the trunk floor all welded up and painted inside and underneath. Got to grab some more fuel line tomorrow and then I can get the tank back in. Still got to get the tow bar welded back together again and then that and the bumper can go back on. 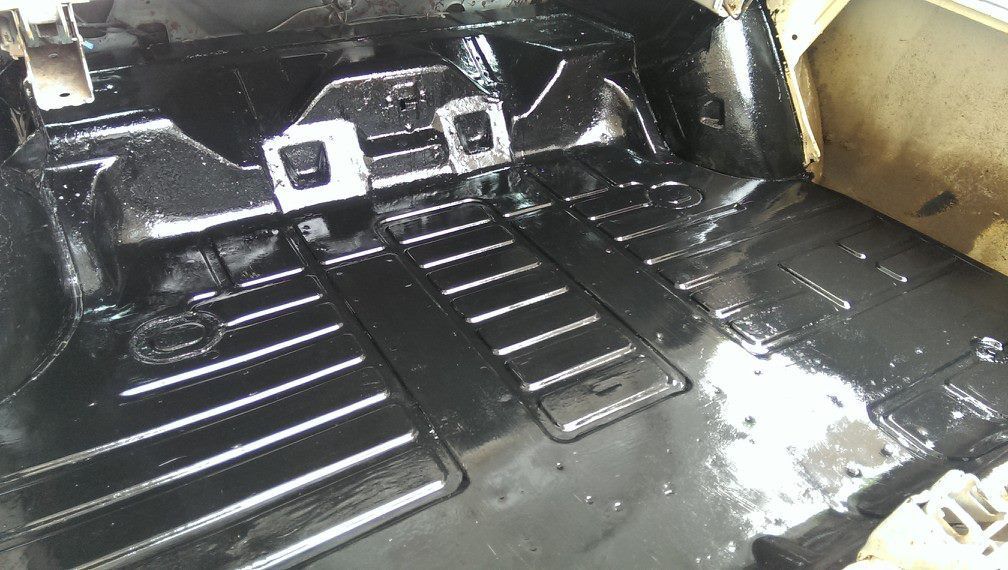 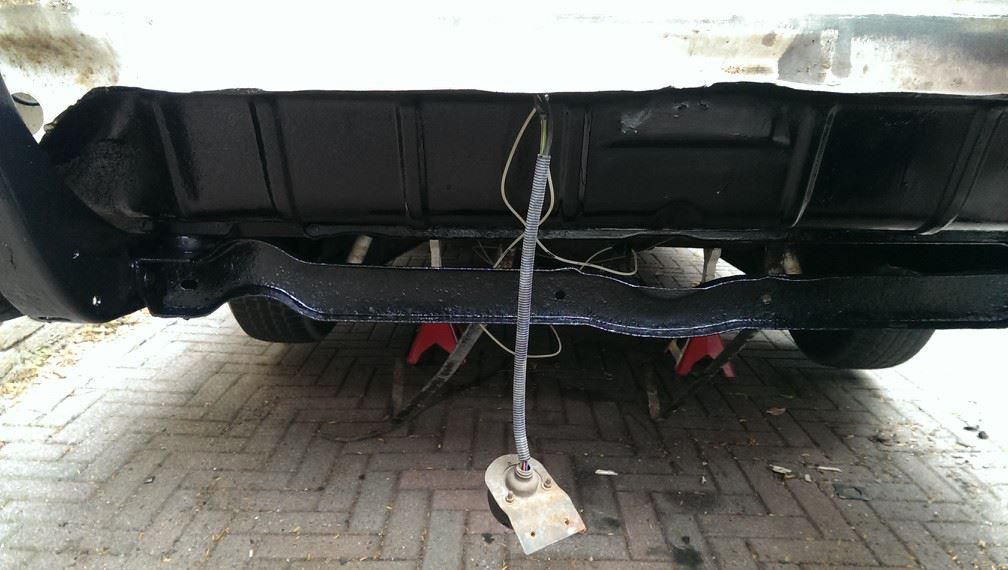 |
| |
|
|
|
|
|
|
|
Right, best get back on with this! So all that ^^^ work happened back in July now(!), at which point I got it back on the road and then life got in the way... summer, festivals, moving house, and then christmas... But, the reason for the house move meant I now have the Olds in a garage With a nice new welder purchased, I have made a start on it again... So this week saw the rear bumper and lights coming back off again, and the trunk lid seal removed... 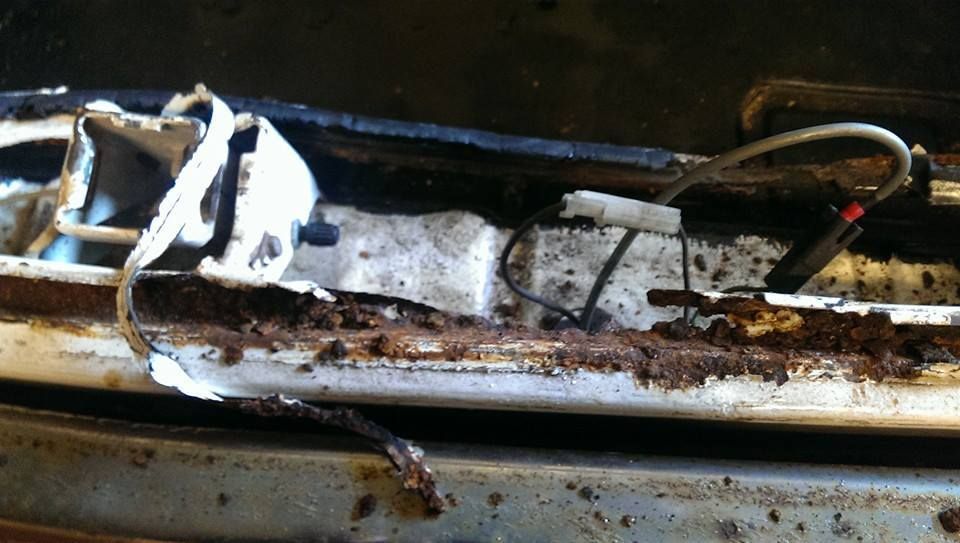 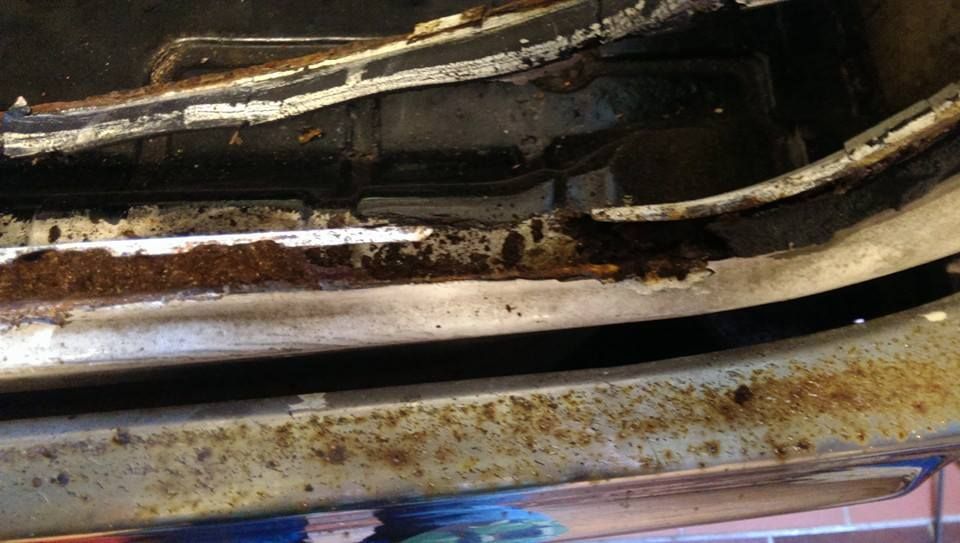 well thats all a bit crusty! got as far as cutting out the first section, and getting the repair piece ready to go in, but then couldn't find my weld-through primer, so that stopped play on monday... 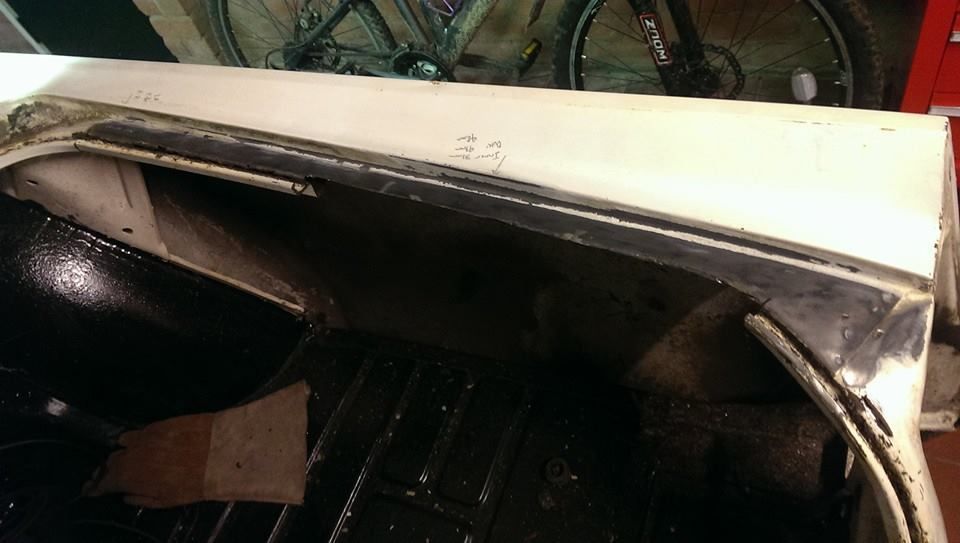 Managed to get all the rest of the edge repaired this week, and a good amount of brushable seam-sealer loaded into the bottom of it, once the rubber seal is glued in place it should be nice and tidy. So today I turned my eye to the trunk lid. When I got the car there was a piece of stainless glued along the lower edge of the trunk lid, with this and the trim removed I attacked it with a wire brush on the grinder and found rather a lot of filler, and not so much metal... 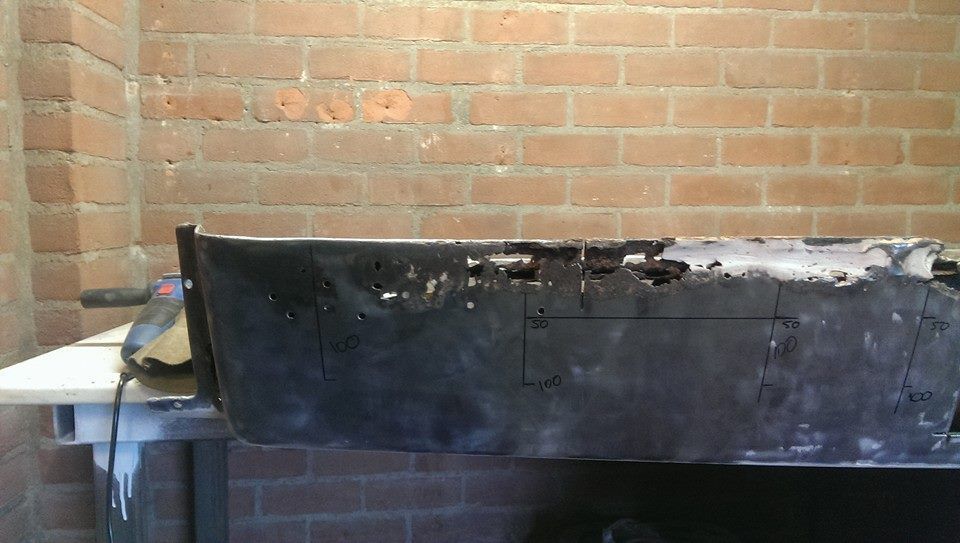  I got as far as cutting a section out, and making up a repair piece, but I just wasn't happy with it. I need a metal folder, trying to do everything with strips of metal and bits of angle iron just isn't working... I have a folder on order, but the shop supplying it has been closed all this week, so hopefully a call to them when they open again tomorrow will bring about something useful, otherwise any free time will be spent pulling out the interior and the rear window ready to deal with the rot around the bottom of the rear screen. |
| |
|
|
|
|
|
|
|
So, not a whole lot to report. I'm still waiting on my slip roller / box brake to be delivered, and until that happens I can't be getting on with the repair panels... So last night I took the opportunity to escape to the garage for a couple of hours. Got a few bits of trim removed, and the rear seats out. plus started to have a bit more of a dig around the rear screen... So, under the rear seat there is a nice crusty patch that will need tackling... 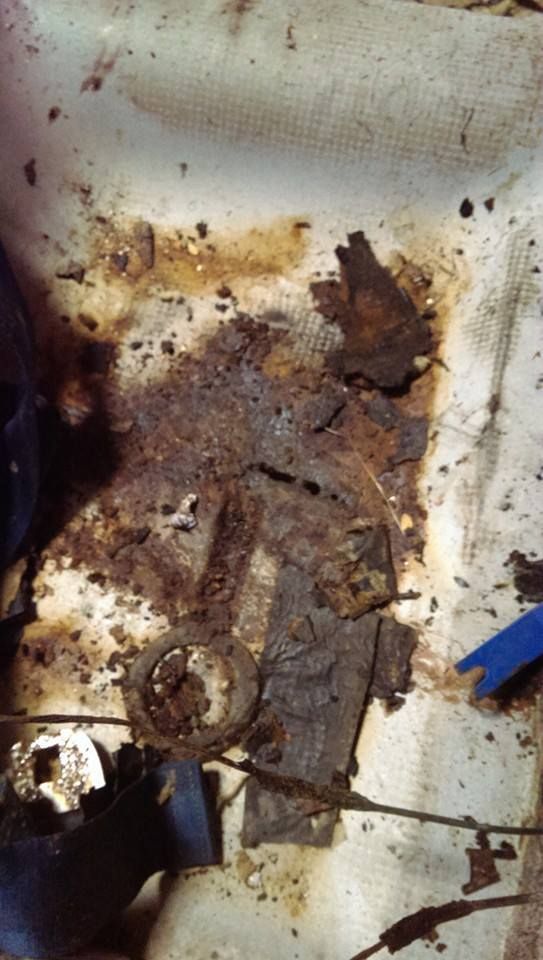 and the rear screen edge / lower c-pillars don't look so healthy... 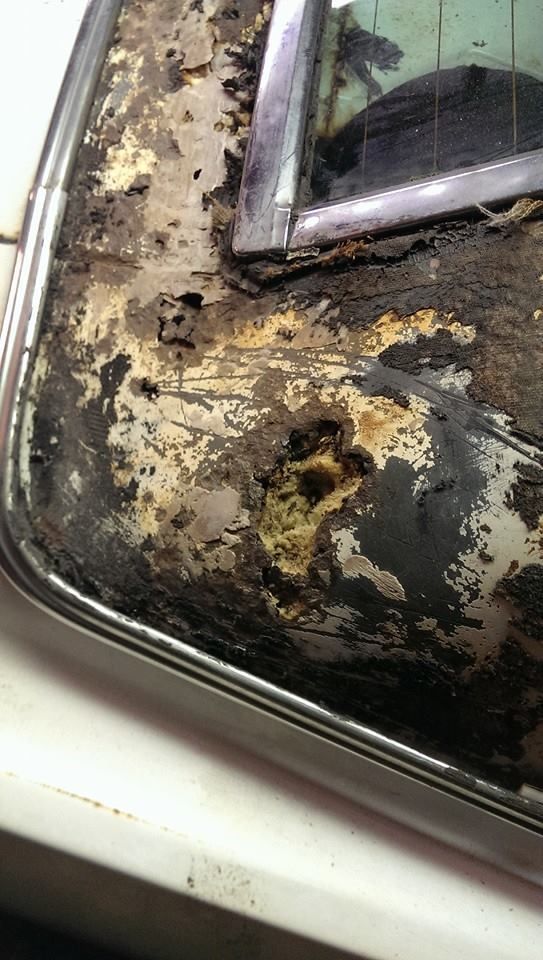 I knew that vinyl roof would be hiding something nasty... Hopefully I shall have an assistant tonight to help me get the rear screen out, and then I can pull the roof lining down and get on with cleaning up the outer roof skin ready for repairs. |
| |
|
|
|
|
|
|
|
Managed to get the rear screen out last night, and well... its not pretty... 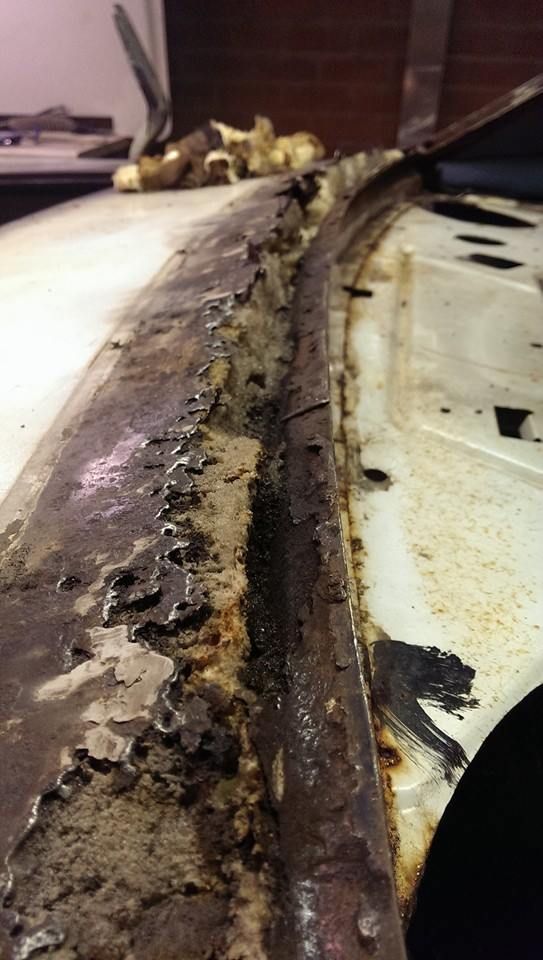 Large amounts of expanding foam, filler, and wet news paper. Unf there was also a lot of moisture trapped under the foam. So, after an hour off poking, prying and scraping I managed to get all the rubbish out. Luckily there is a lot of surface rust on the inner panels, but by the looks of it once it has dried out and been given a wire brush I should be able to get away with just treating the rust and giving it a good coat of zinc paint, meaning its just the outer skin to fabricate. 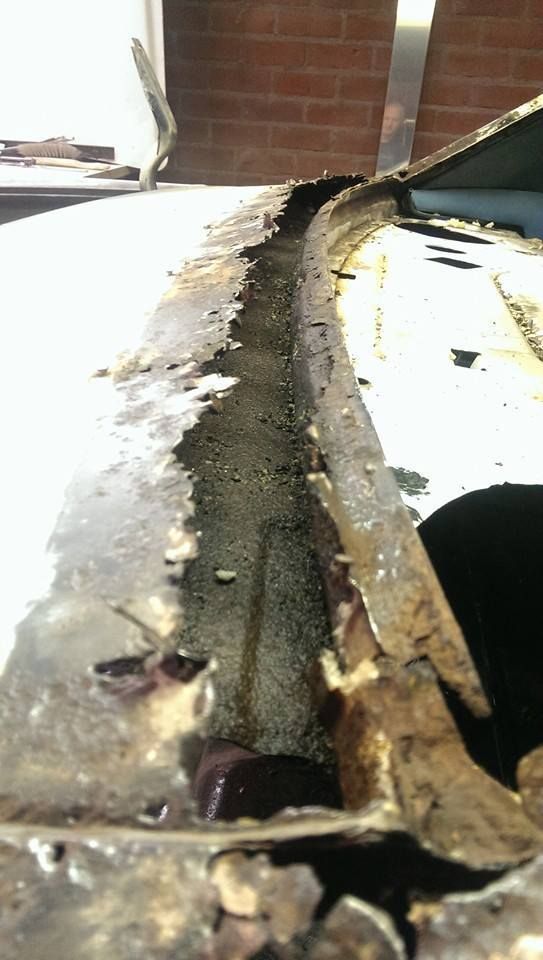 Also, after 2 weeks of waiting for the local tool shop just over the border in belgium to get something in stock I gave up and drove the 3 hour round trip to Gouda and picked up a roller / guillotine / box brake which will hopefully let me get back on with sorting out the trunk lid tomorrow. 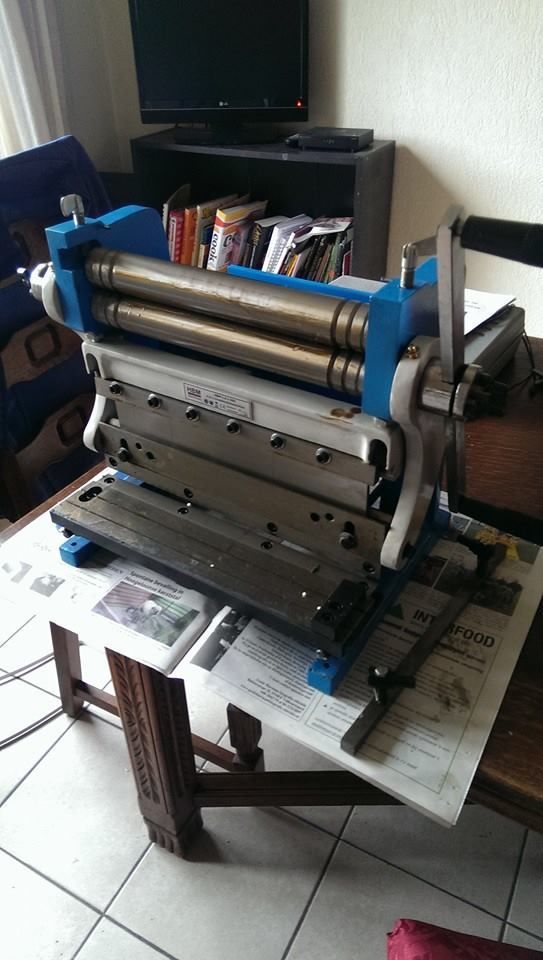 |
| |
|
|
|
|
|
|
|
Currently getting the air ride system plumbed in. Wanted to make sure I could get the ride height / turning circle / wheel fitment sorted before going to far on the bodywork in case some "adjustment" was needed. Hoping to have all the plumbing done this week, and then once I have the brackets back from Reneanglia who is welding them up for me should be able to get it all bolted in and bouncing Shall update with some pictures when I can get it out of the garage again, currently its sat on the bumpstops with only about 5cm of ground clearence and the step out of the garage is too much for it :lol: |
| |
|
|
|
|
|
|
|
Current state of the truck install... 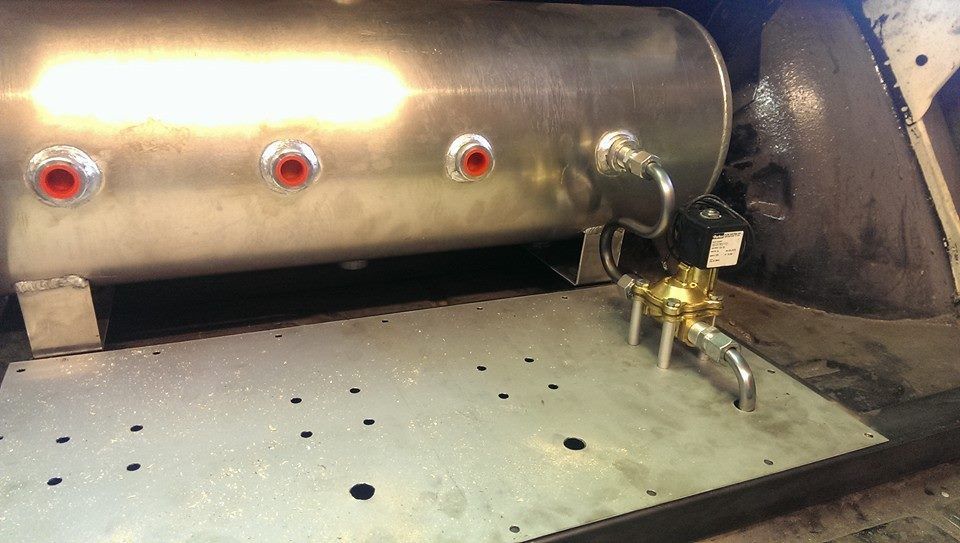 |
| |
|
|
|
|
|
|
|
trunk install just about finished. Will have to come apart again for paint / polishing, but not until somewhere in the far future... 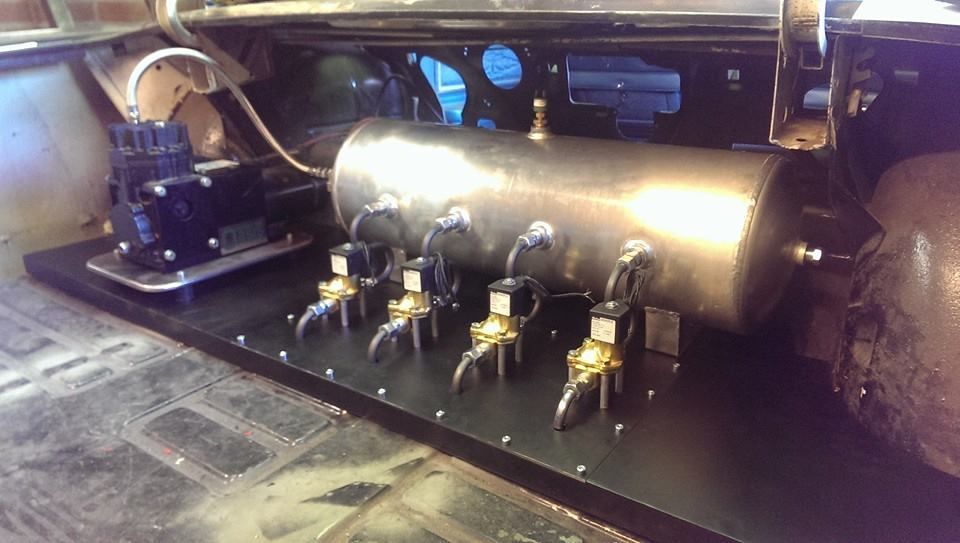 Now just to make brackets to mount the dump solenoids under the trunk floor, run all the flexible lines, do all the wiring, fit the bags... etc etc :lol: |
| |
|
|
|
|
|
|
|
|
|
Today has been a good day First a trip to Etten-Leur to collect a small box of parts 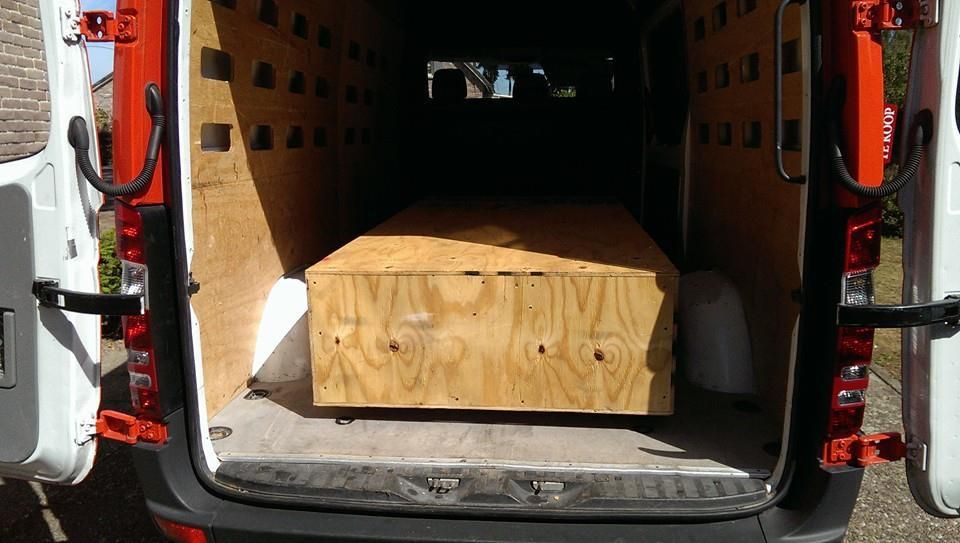 and then after getting a new deep cycle battery to power the compressor...  Click the picture, do it (hopefully the link works) |
| |
Last Edit: Feb 5, 2015 8:48:34 GMT by SamJ
|
|
|
|
|
|
|
Right, thought I would update this thread - not a lot to show but I have been posting it all over on the Classic Oldsmobile forum, thought I would get this thread to the same state.... Wow, it's been a long time since I got this updated! or rather, a long time since I did any significant work on the Olds... Unf life keeps getting in the way. I am a bit of a keen runner, and after an 8hour day at work and a 10 mile run in the evening, going out to the garage to weld up rusty cars soon loses its appeal :lol: So, back in the summer I had a nice big box of parts arrive from the US (above) Inside was a complete rear screen and surround cut from a donor car, plus front and rear bumpers and a few other body cuts. Unf though, when I got the donor screen section stripped and cleaned down it was in a pretty bad shape, and would make for just as much work as repairing my existing one. So, I set to with the welder, and slowly but surely turned the mess above into the solid mess below 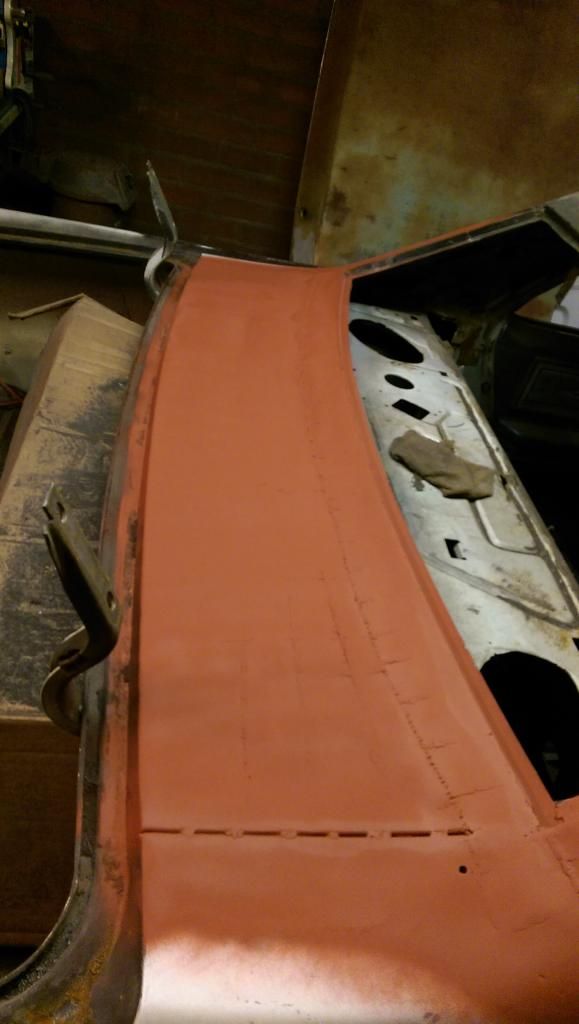 It's not pretty, but a bit of time with some body filler and it should be good enough. I hope to get a first skim of filler on it tonight, and then its on to stripping all the paint off the rear quarters and repairing the mess that some previous owner has made down in the corner of the wheel arches... |
| |
Last Edit: Feb 5, 2015 8:51:06 GMT by SamJ
|
|
|
|
|
|
|
So, time to turn to the right rear fender. I knew there was a mess of a repair in the corner of the wheel arch...  Looks like someone has just plated over the rot without cutting it out first. 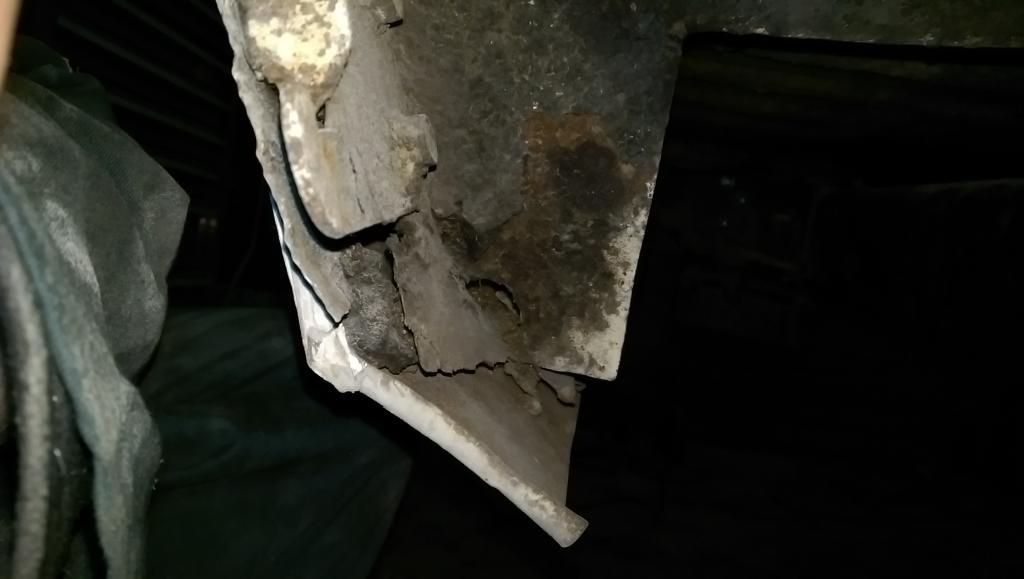 I've got a section cut from another car, needs a bit of work, but better than nothing 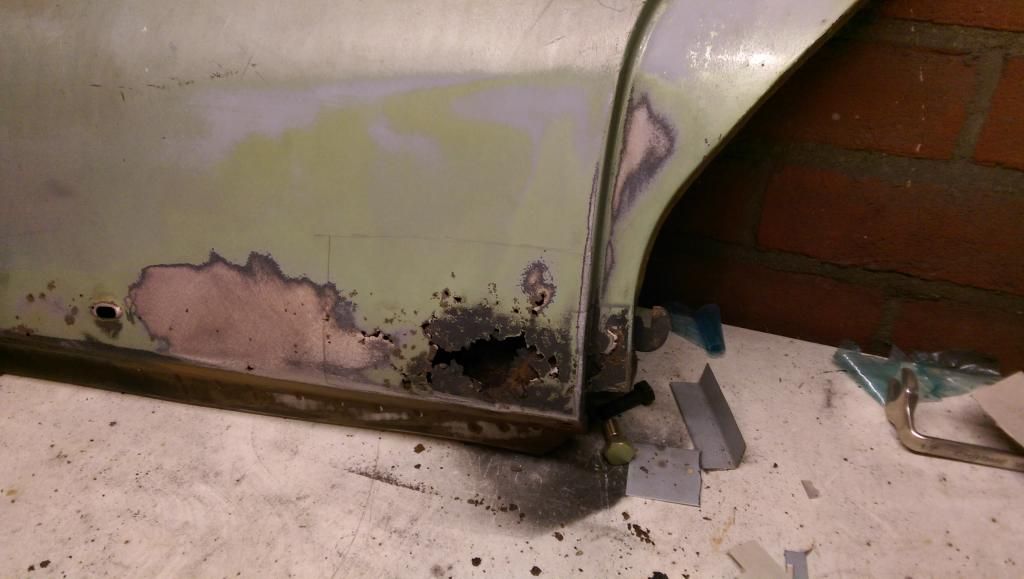 starting poking around the rest of the panel and found 3/8" of filler above the wheel arch... 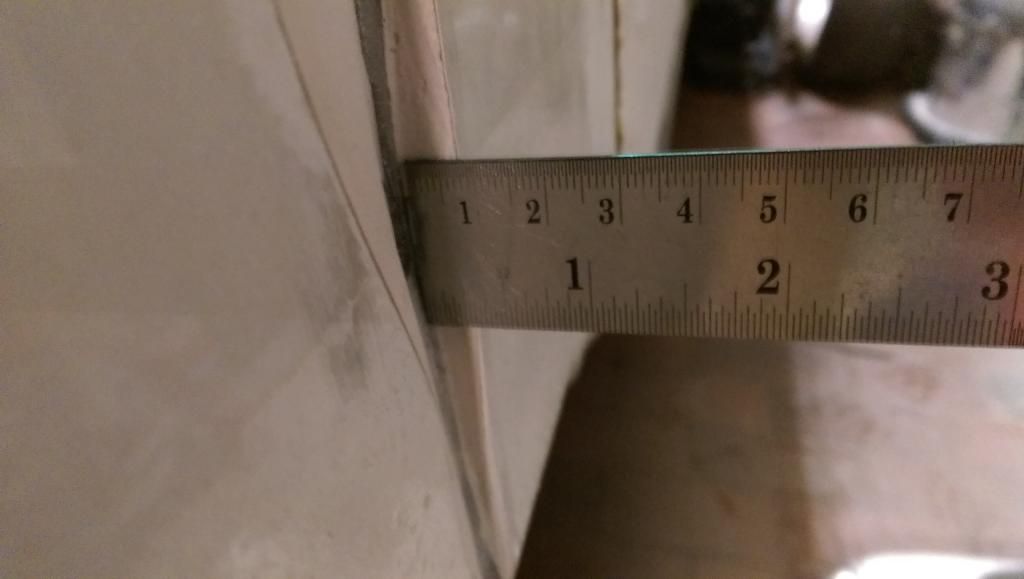 |
| |
Last Edit: Feb 5, 2015 8:50:36 GMT by SamJ
|
|
|
|
|
|
|
There is something weird about the rear arches though. On the right side there is a lip along the top that the skirt closes against 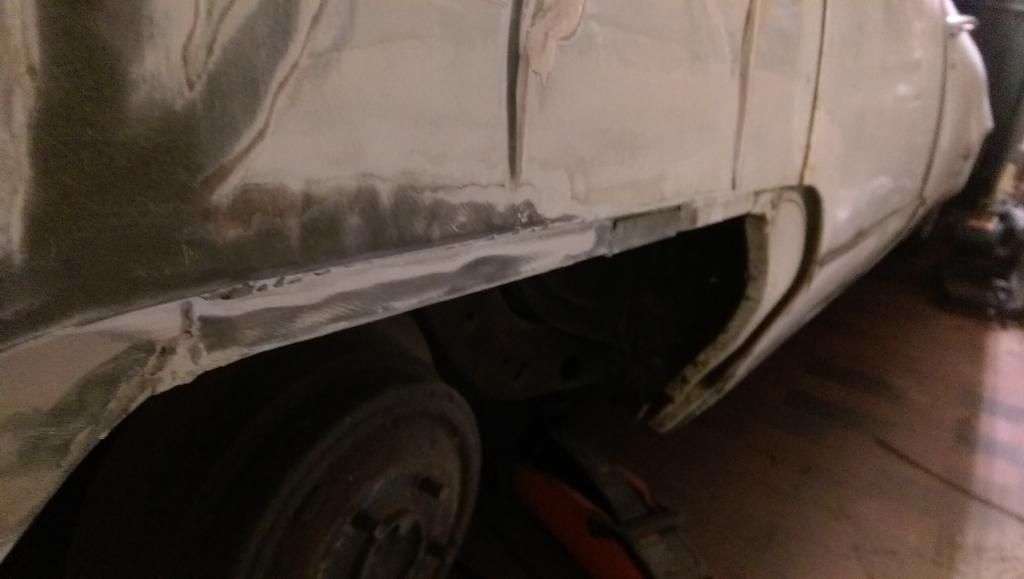 but it's not there on the left side... 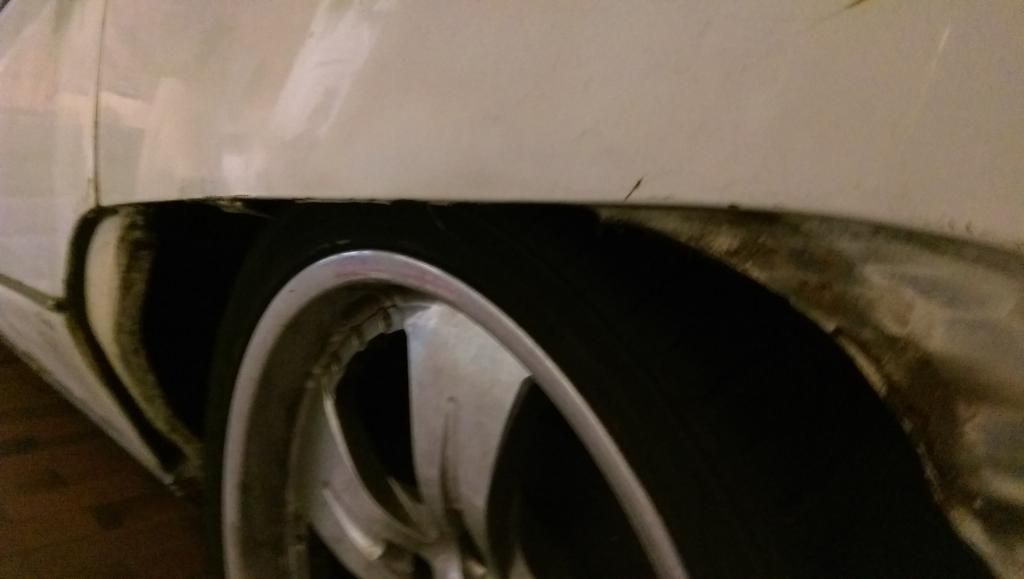 I think the right side is correct but bodged, the left side has been cut and the inner and outer panels arent connected along the whole top of the arch :lol: |
| |
|
|
|
|
|
|
|
So I started clearing up the body cut that I had been sent last summer. I knew it would need a bit of work... Decided to drill out all the spot welds and split the panels to make sorting it all easier. Inside of the outer panel: 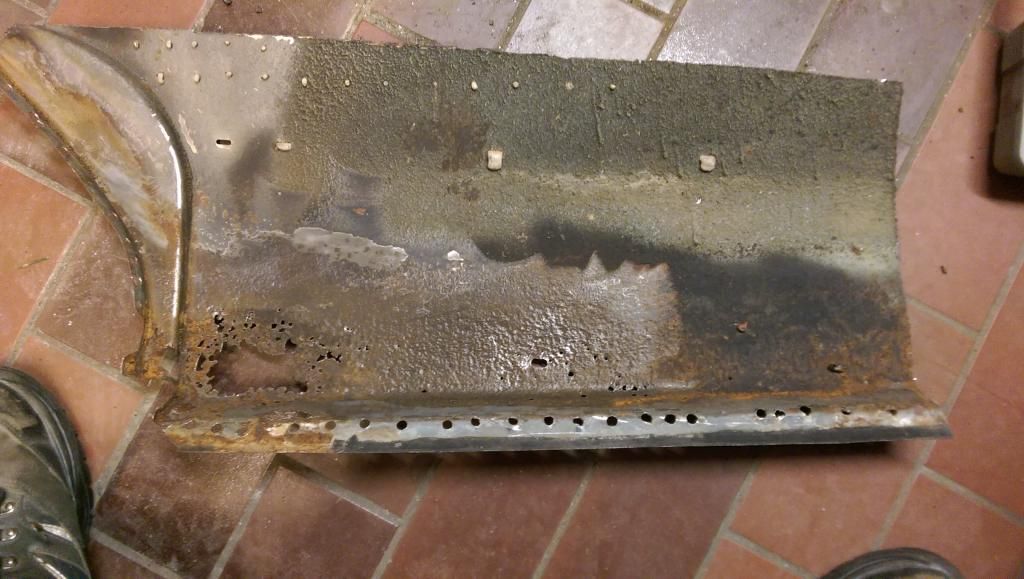 Worst of the Inner panel: 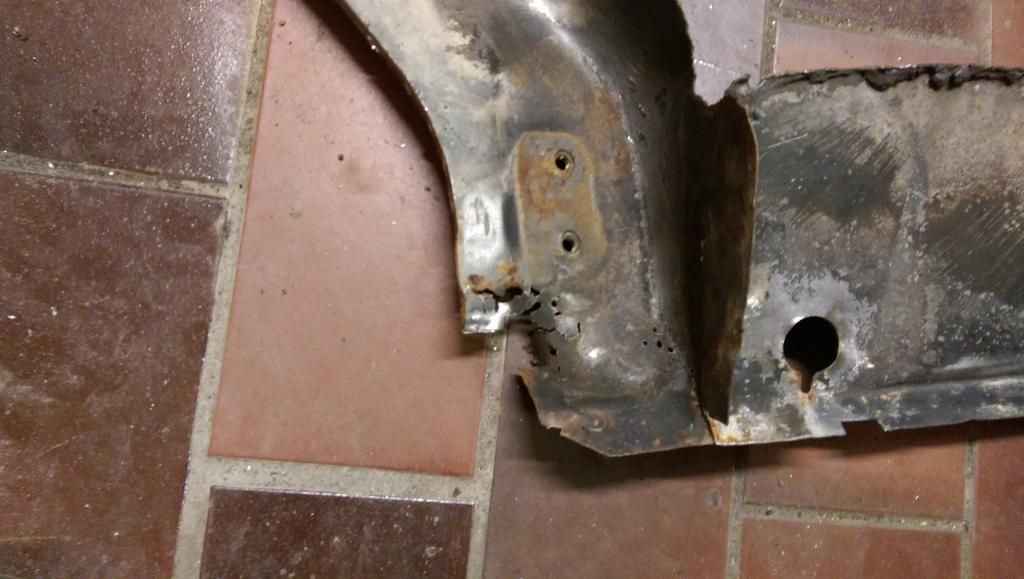 Just the odd hole to fix: 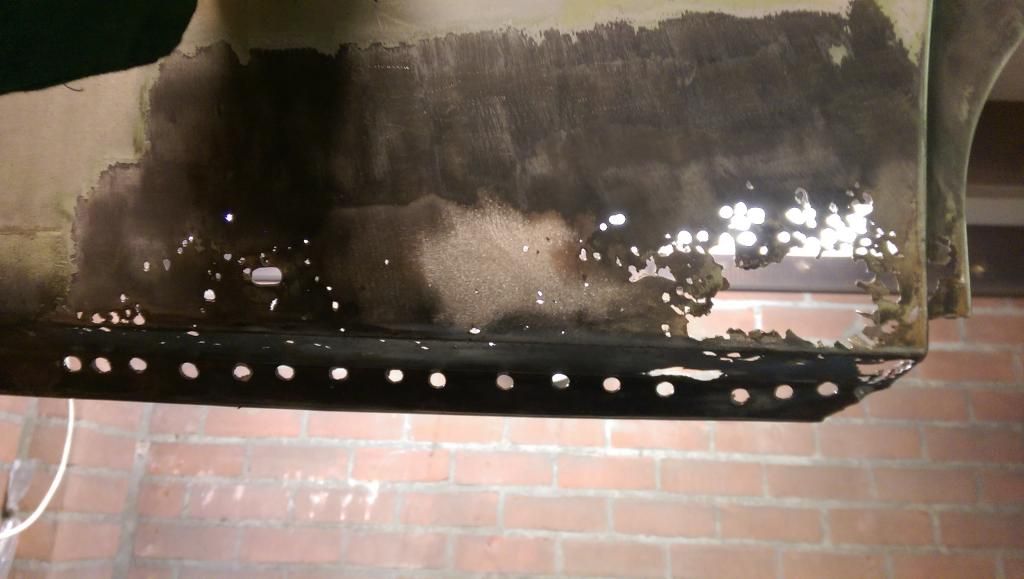 Thing is, this is better than either of the rear quarters on my car, and the best of the two body cuts I was sent :lol: Ah well, shall be an interesting prospect. Plan is to repair the inner panel, then use it to clamp the outer panel to whilst I repair that. Then its cut out the rotten inner and outer sections of the car, and weld the new repaired sections in... Sounds easy when you write it like that Not going to get much progress until next week now, work and holidays getting in the way. |
| |
|
|
|
|
|
|
|
Some how I missed out getting new wheels for this back in the summer... Out with the 15s, in with the 20s 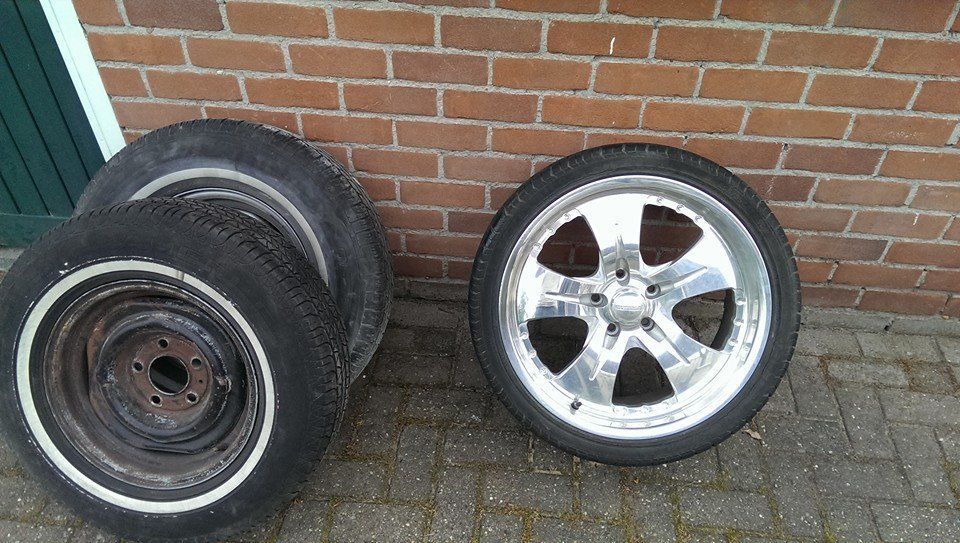 Got them from a guy local, and they looked huge when I went to look at them in his yard, wasn't sure they would work but once bolted up I am happy with them. 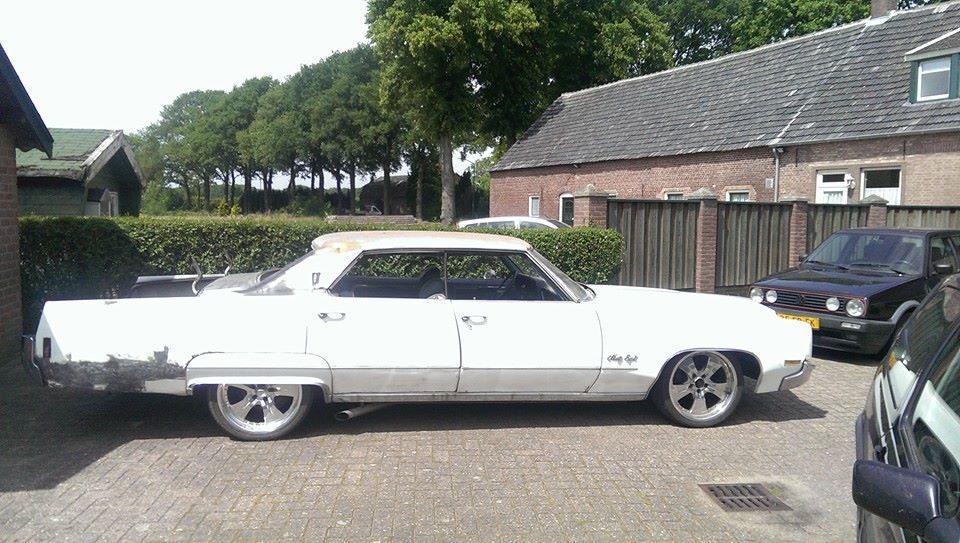 |
| |
|
|
|
|
|
|
|
|
And there we are... thats where the car stands at the moment... still a lot of work to go, and the chances of it being back on the road in June before the APK (MOT) runs out is slim, but ah well... It will be done when it is done...
|
| |
|
|
|
|
|
|
|
|
Well, you'r not afraid of a bit of work hey....
|
| |
|
|
|
|
|
|
|
There are moments when I think... "curse word I wish I had never started this..." but you reach a point where its either keep going or scrap it, and I've got too much time / money / energy into it now to scrap it. Plus I know that once it is done it will be worth it. This is up for sale local(ish) to me for €12,500. They are good looking cars when done up well.  |
| |
|
|
Speedle
Posted a lot
 Need a Country Rock band in the Hampshire Area? https://www.facebook.com/DirtRoadDiaryUK
Posts: 2,221
|
|
|
|
What a beast! Look like it's finally in safe hands now and getting the treatment it deserves. The new wheels are just right too! Excellent stuff chap, keep us updated  |
| |
|
|
|
|