Fungus
Part of things

Posts: 960
|
|
Jan 12, 2015 21:04:42 GMT
|
I thought it was about time i posted on here about something other than my bike. I've had my '90 Polo for just over a year now and i'm finally giving it all the work it needs. I ran it as a daily up until last year with a fairly tuned 1400cc and a short-ratio 5 speed, but it was never as nice as a knew it could be. I'm at uni now, so all of my time back at home is spent on the Polo! I sold the engine and gearbox to a mate of mine the day before i left for uni, as I've got another one to build up. Most of the pics are from my phone so they're not great. So anyway, i got home on the 19th of December and set to work (almost) straight away. The front panel was a mess from my mate trying to top the car when the alternator died, as the towing eye ripped out and ruined the panel (it was rusty anyway so there were no hard feelings). I got a front panel for christmas (VW Heritage and one left), so i got the old one off fairly quickly; 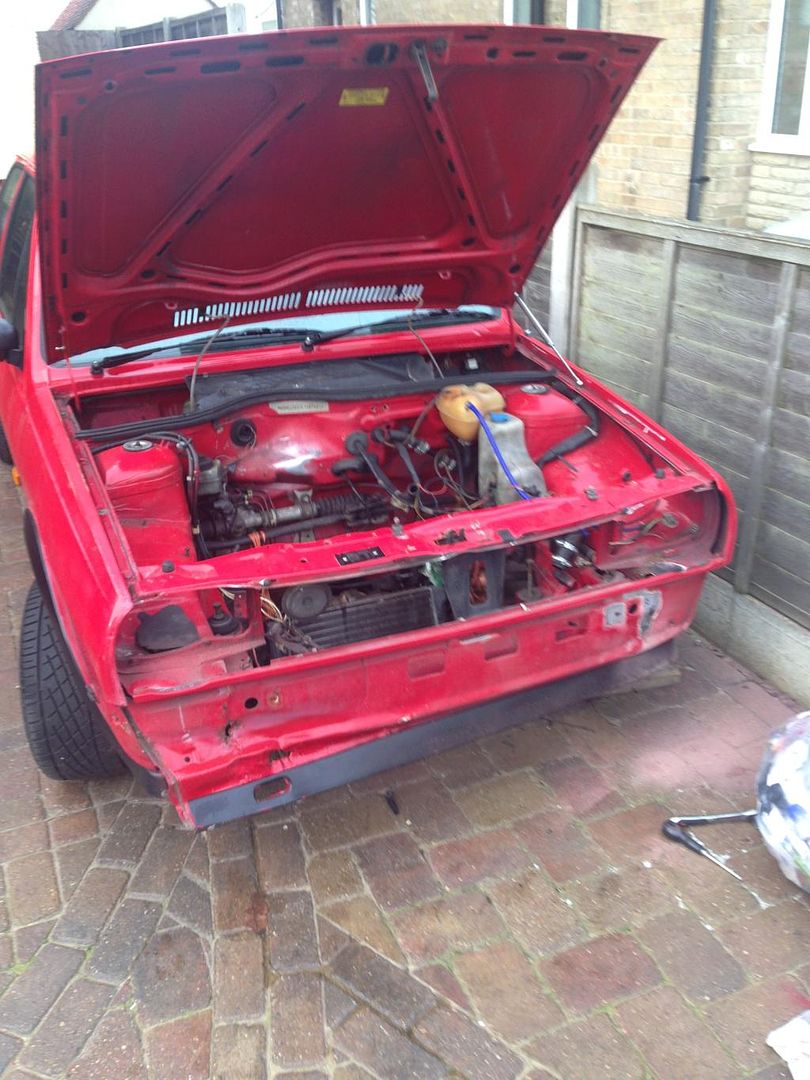 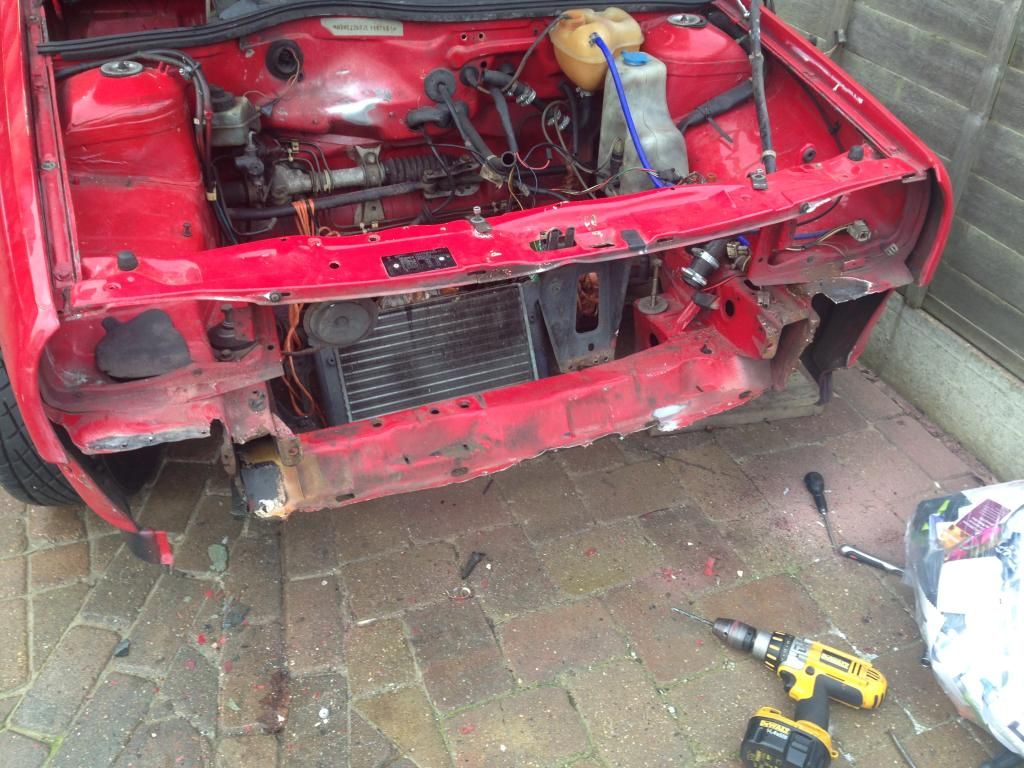 The new panel was offered up and it actually fit really well 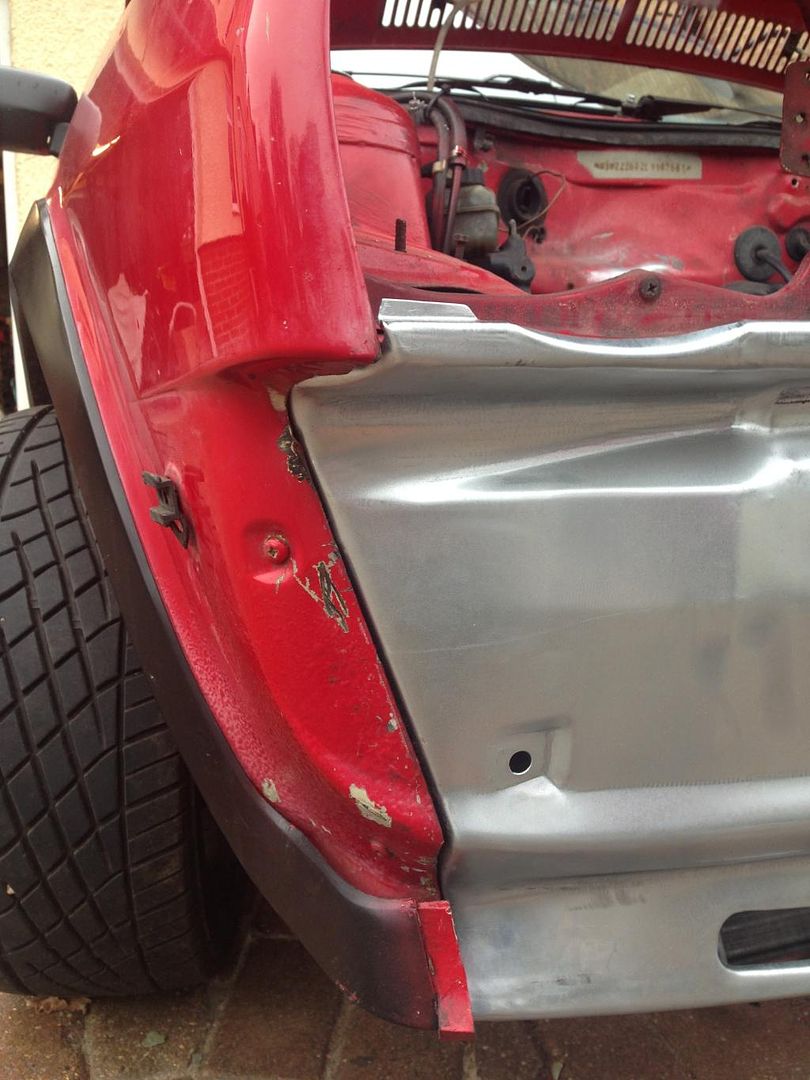 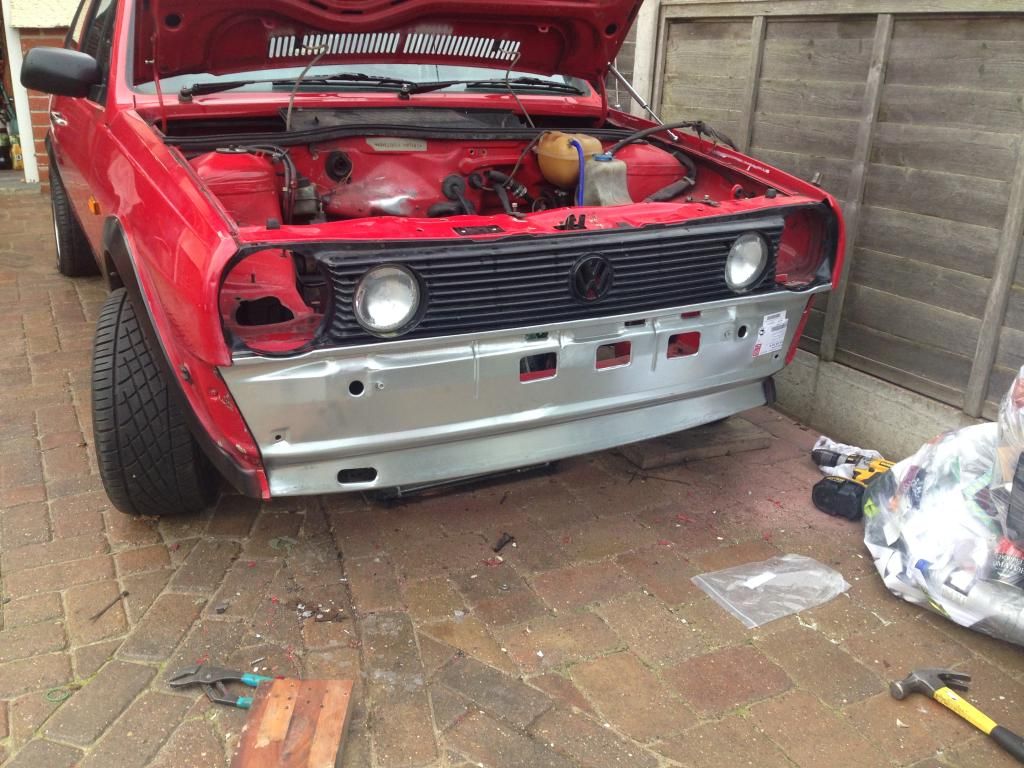 No pics of the welding yet but i was really pleased with how it came out. |
| |
Last Edit: Jul 7, 2015 1:39:54 GMT by Fungus
|
|
|
|
Fungus
Part of things
Posts: 960
|
|
Jan 12, 2015 21:09:03 GMT
|
The next week was spent clearing out an old unit on my friends farm, which is where the car now lives. It actually made for a pretty nice workshop, although it was a tad cold! Once the car was in the 'workshop', i began stripping the suspension; 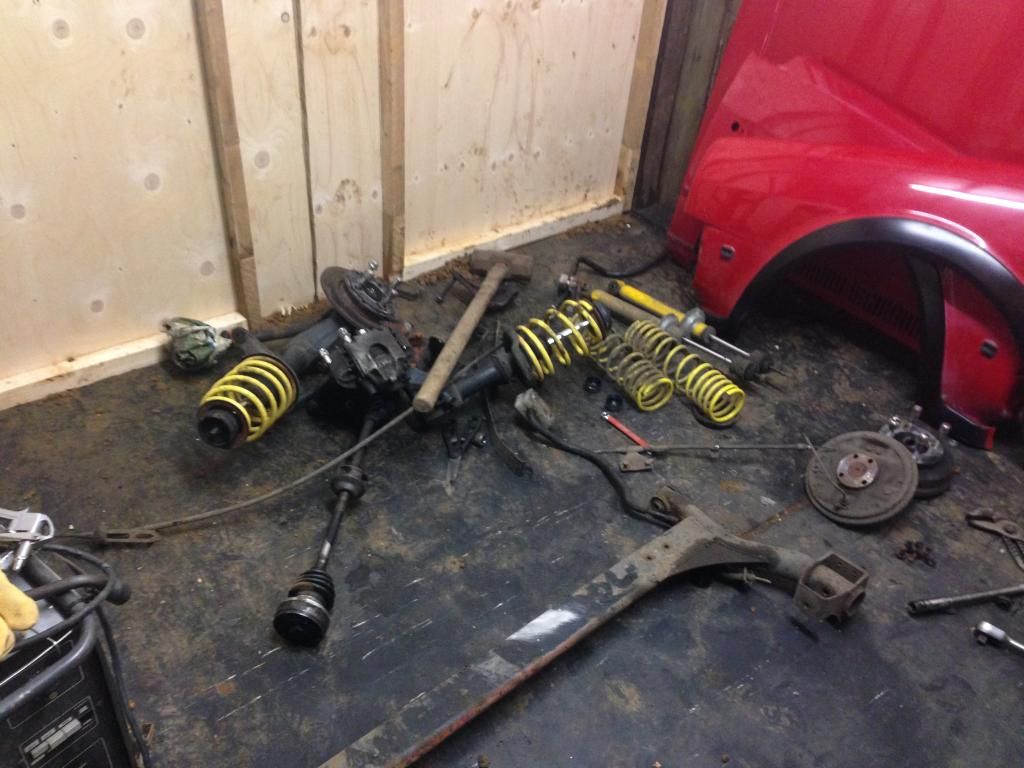 As well as getting the inner arches stripped 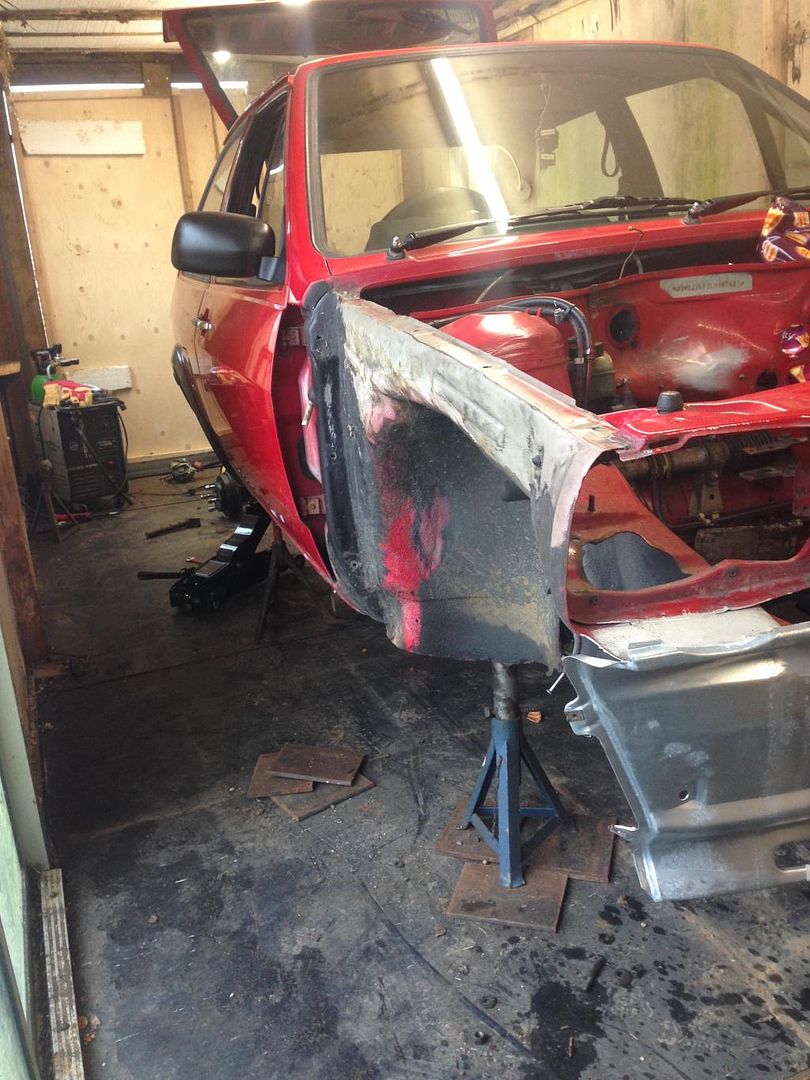 Meanwhile, a mate of mine took care of the only rust on the car, which was at the end of the passenger sill/inner wheelarch 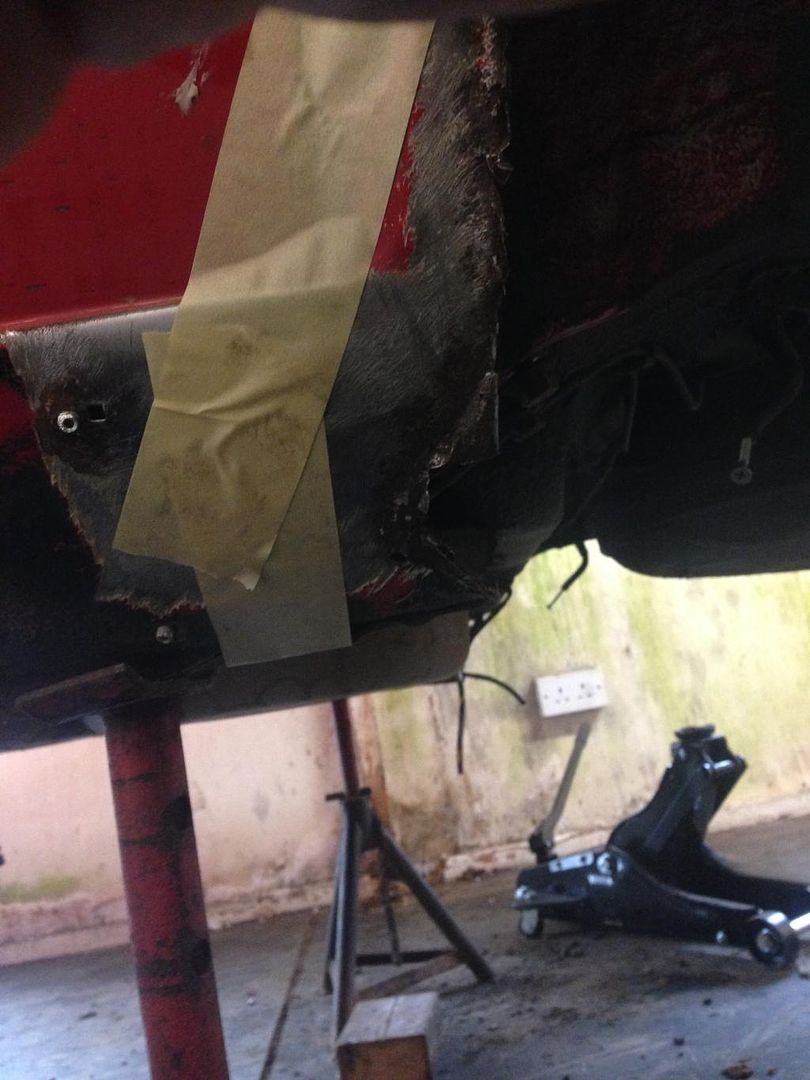 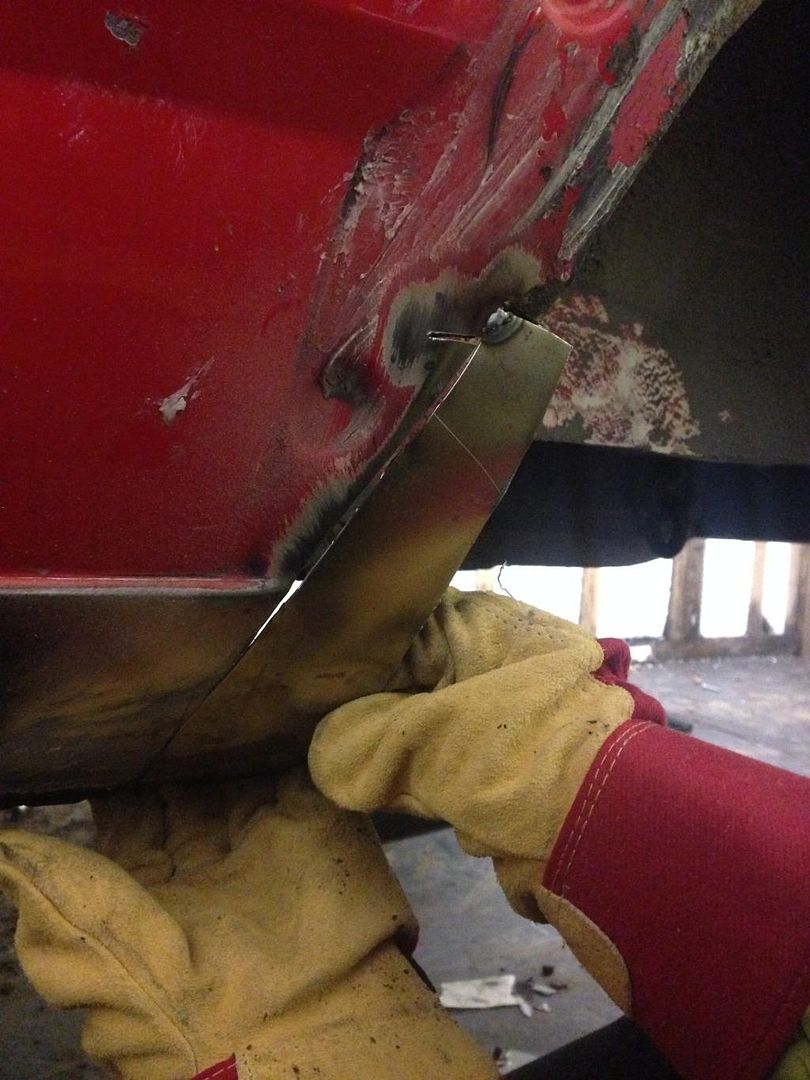 We decided to leave a lip sticking out to roll over with a hammer, to match the rest of the arch panel. 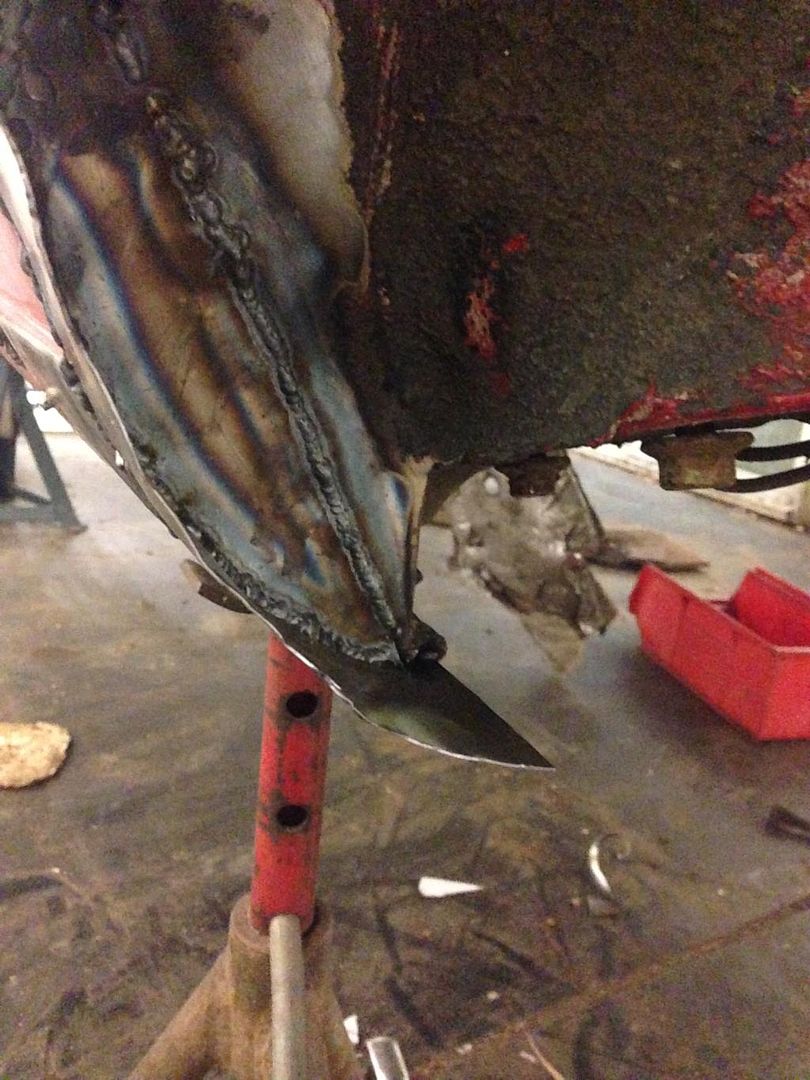 After the edge was rolled, i gave it a few coats of epoxy 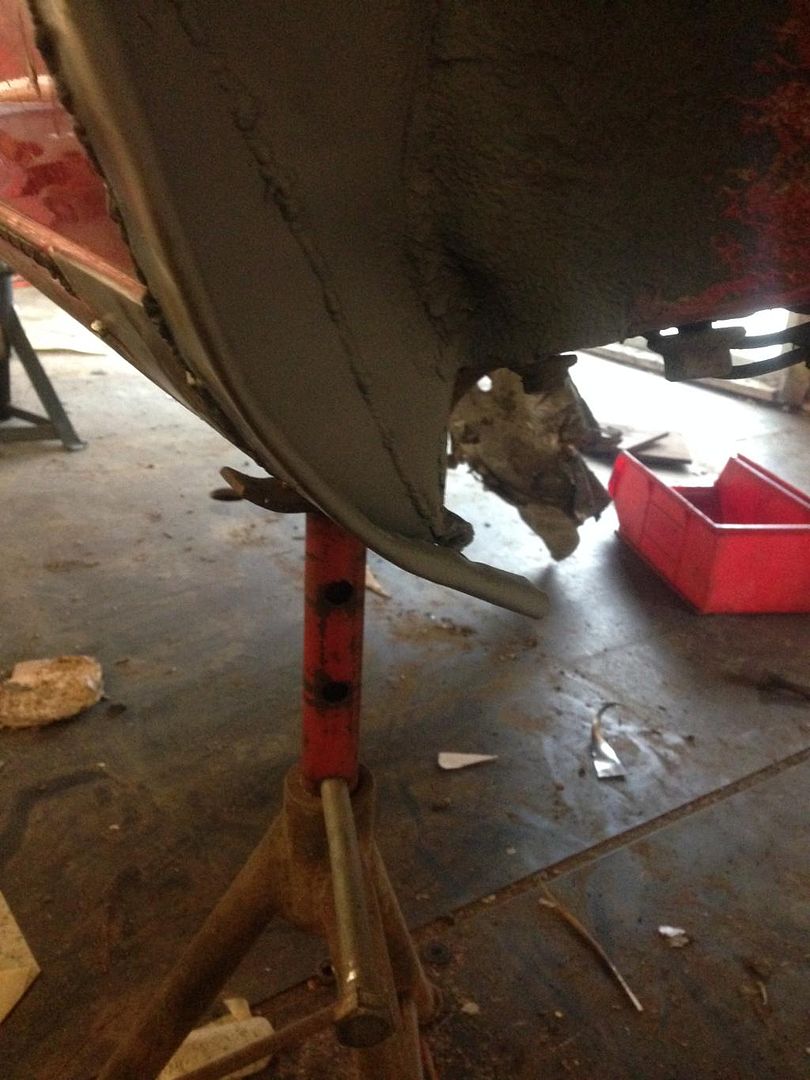 |
| |
Last Edit: Jan 12, 2015 21:09:59 GMT by Fungus
|
|
ad6r
Part of things
'82 Polo GL -' 88 Polo C - '91 Polo CL -' 09 Scirocco GT
Posts: 24
|
|
Jan 12, 2015 21:09:30 GMT
|
|
Looking good mate, look forward to seeing the progress on this build
|
| |
|
|
Fungus
Part of things
Posts: 960
|
|
Jan 12, 2015 21:14:59 GMT
|
All 4 arches were eventually stripped and prepped, and then sprayed with 2 coats of UPOL Gravitex (Excellent stuff) 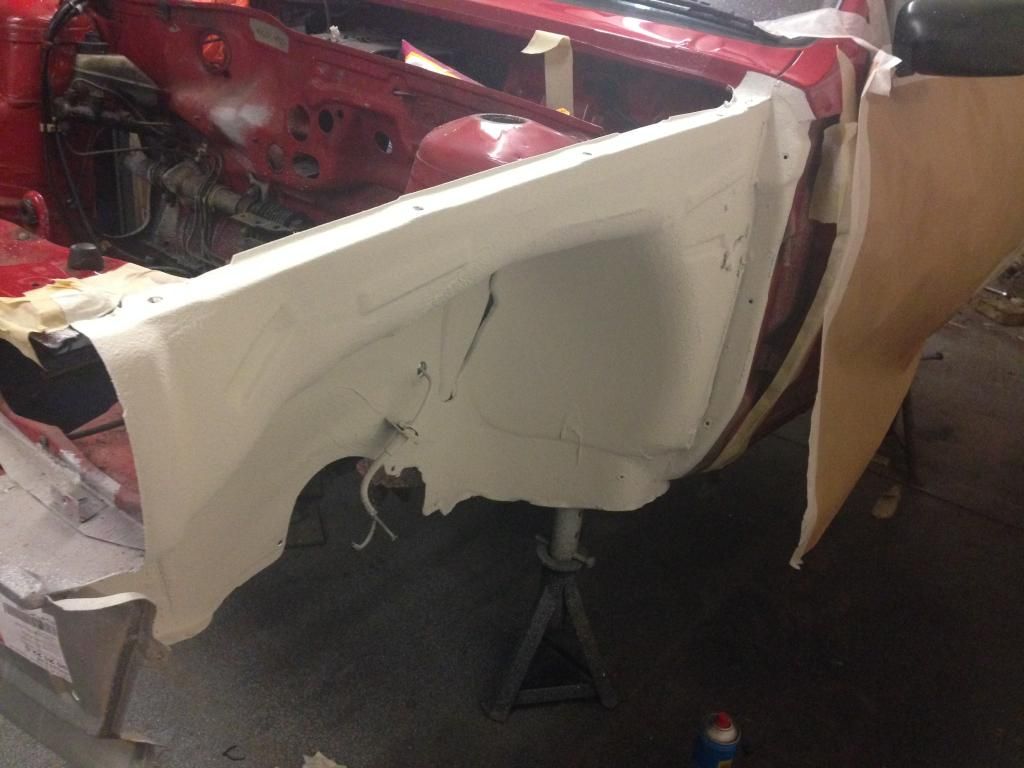 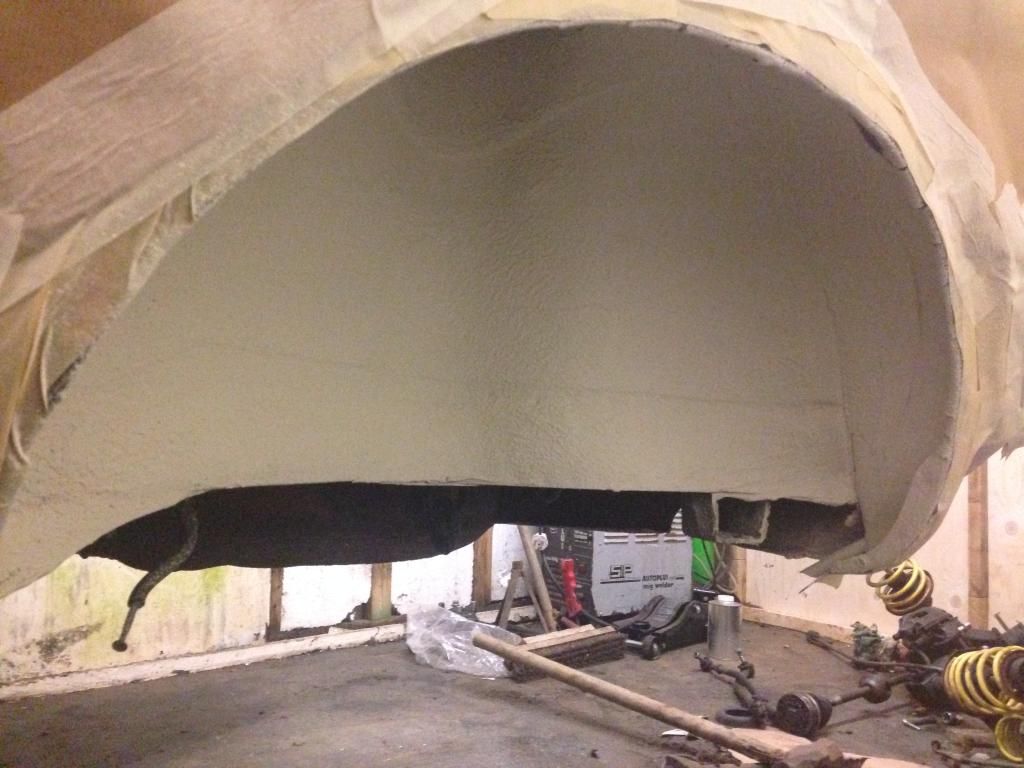 I also did the boot floor later on (after realising i had just enough time) but i don't have any pictures of that. When the Gravitex was cured, i put on 3 coats of Tornado Red (ignore the rattle can in the photo, would've taken an eternity to do it with those things) 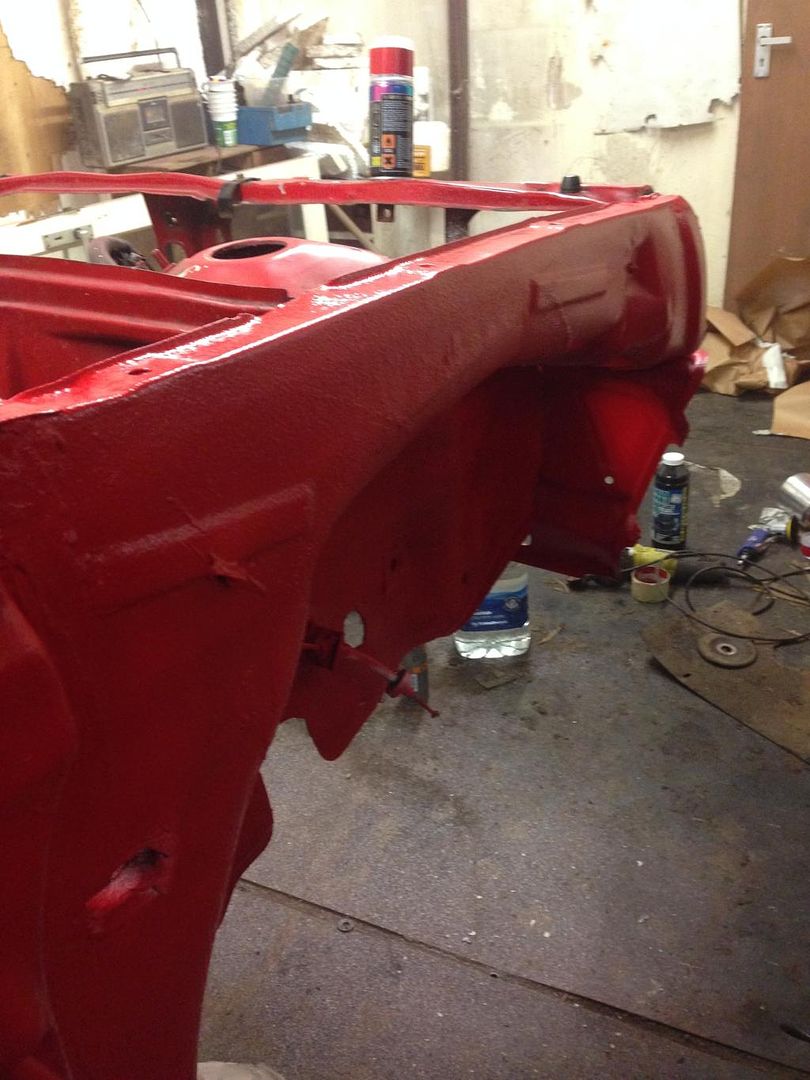 I love the finish left by the Gravitex 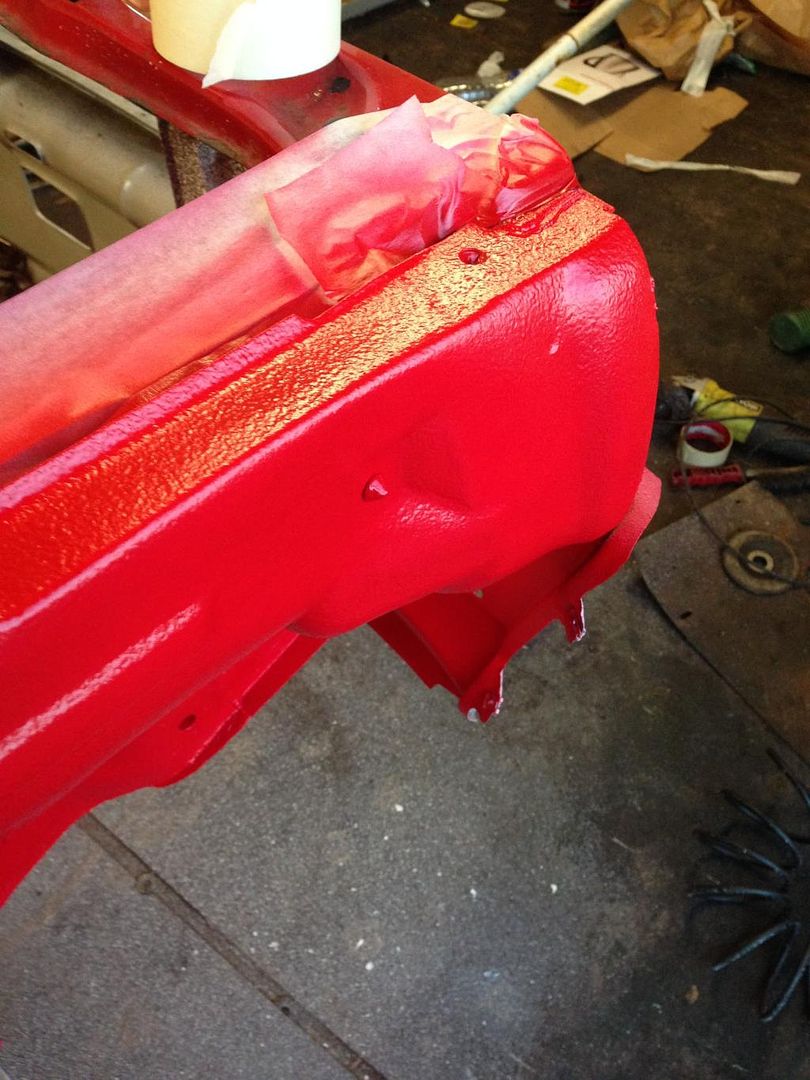 I had also been prepping all the suspension parts, which were dropped off at a local bodyshop for Etch primer and Gloss Black 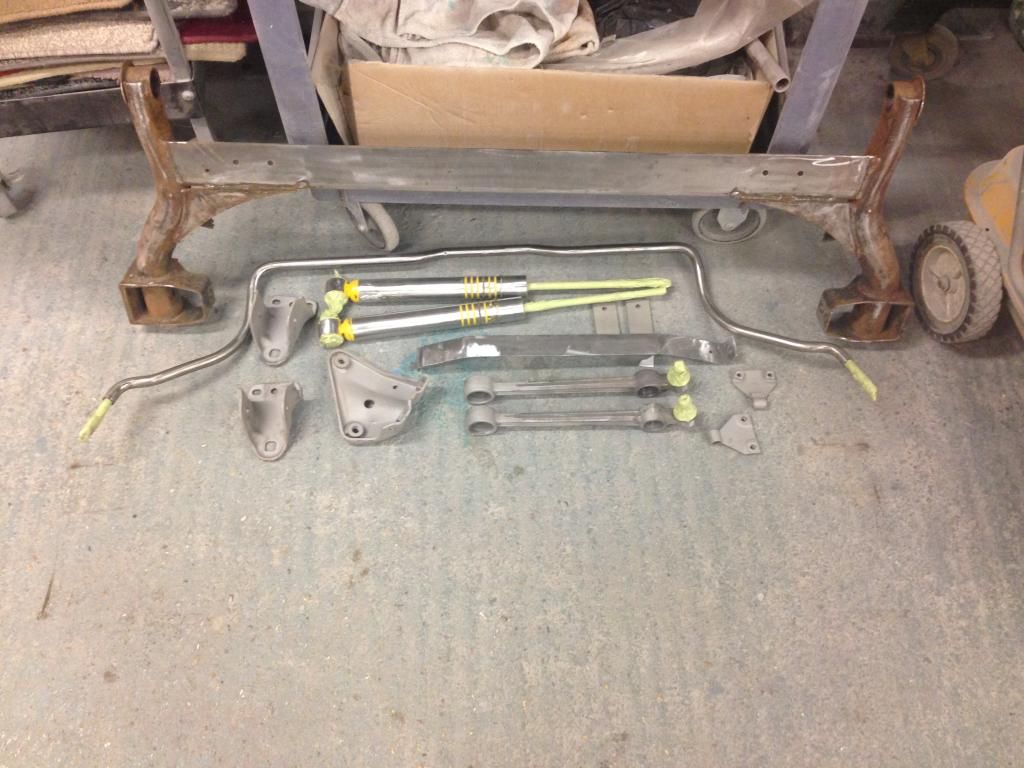 |
| |
|
|
Fungus
Part of things
Posts: 960
|
|
Jan 12, 2015 21:18:06 GMT
|
The parts came out absolutely great, and were swiftly assembled, bushed and installed; 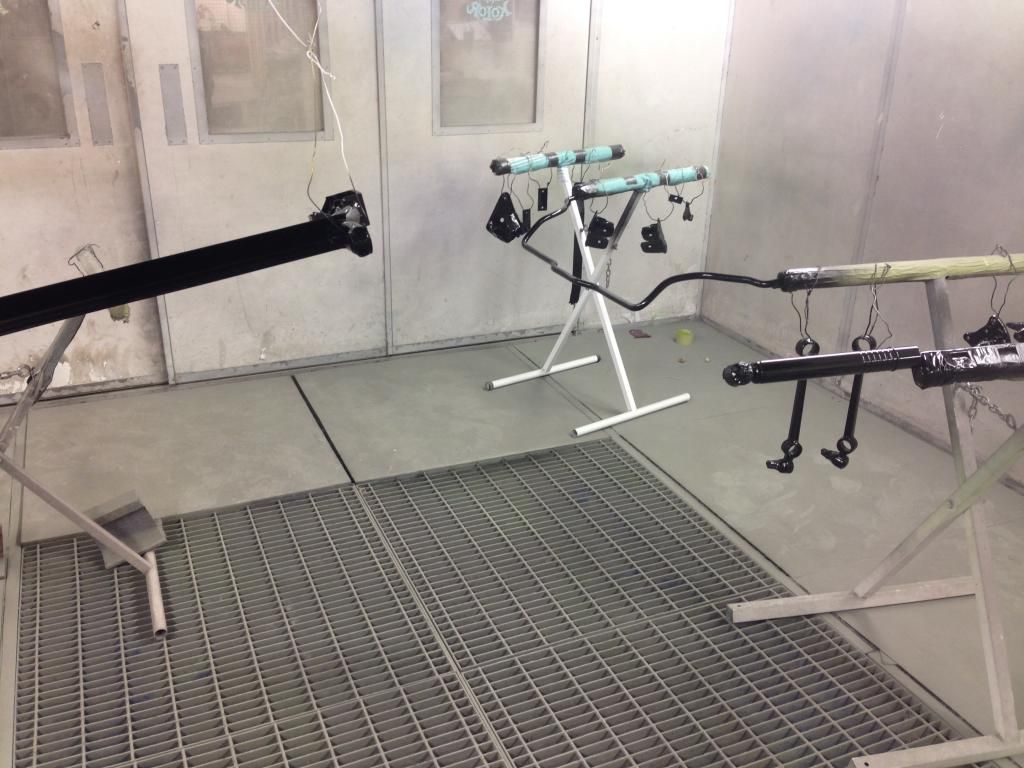 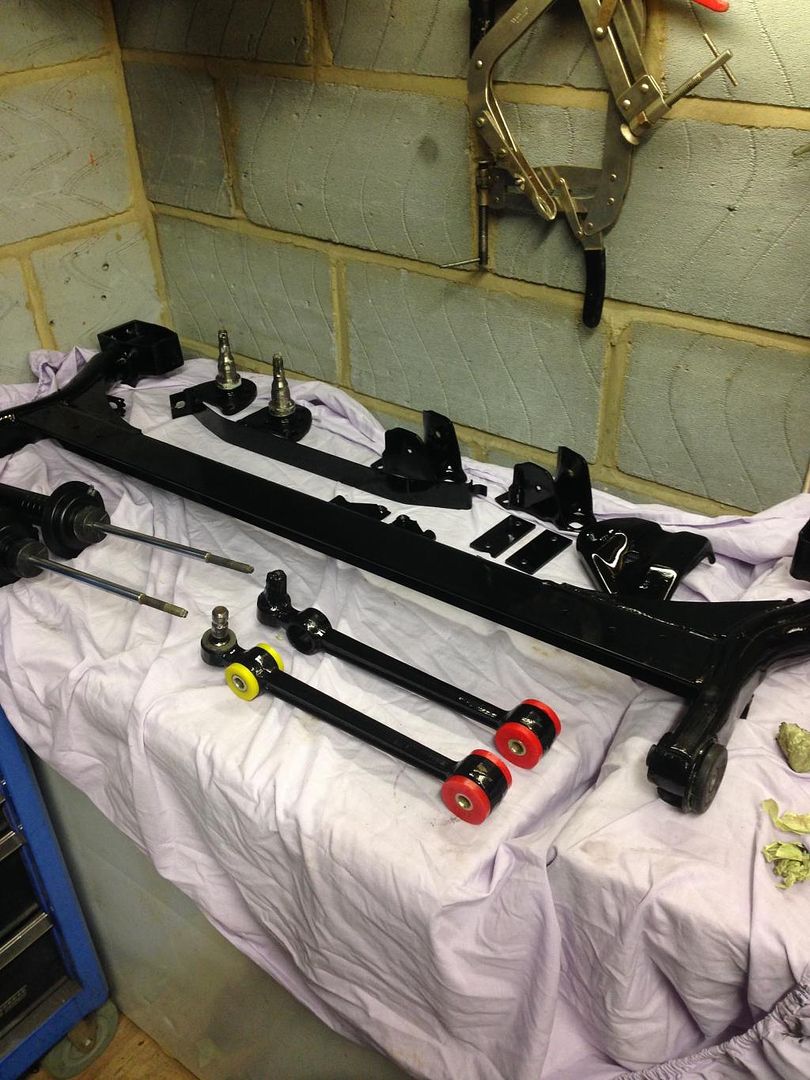 The rear beam was built up with Mk2 Golf GTI stub axles, discs and wheel bearings ready for the calipers when i can afford them 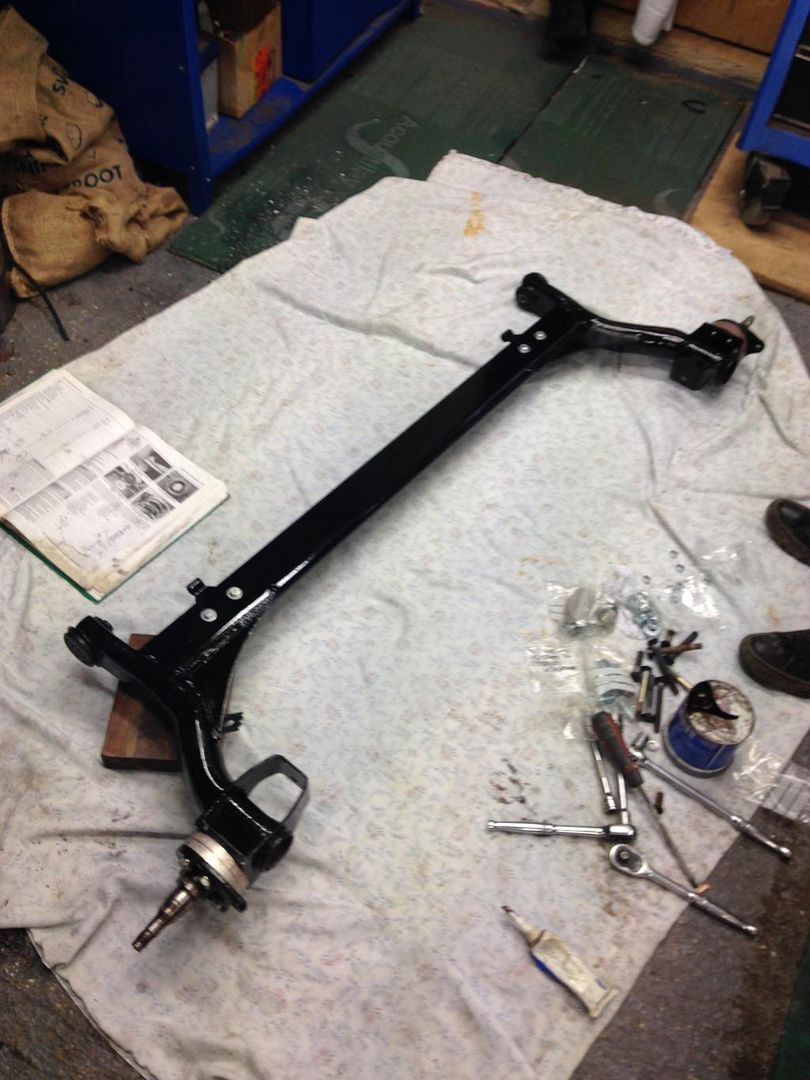 TCA's came out especially nice;  |
| |
|
|
Fungus
Part of things
Posts: 960
|
|
Jan 12, 2015 21:23:30 GMT
|
My new (to me) VW2 calipers were rebuilt and painted, ready to go on the front along with vented discs and HEL braided lines; 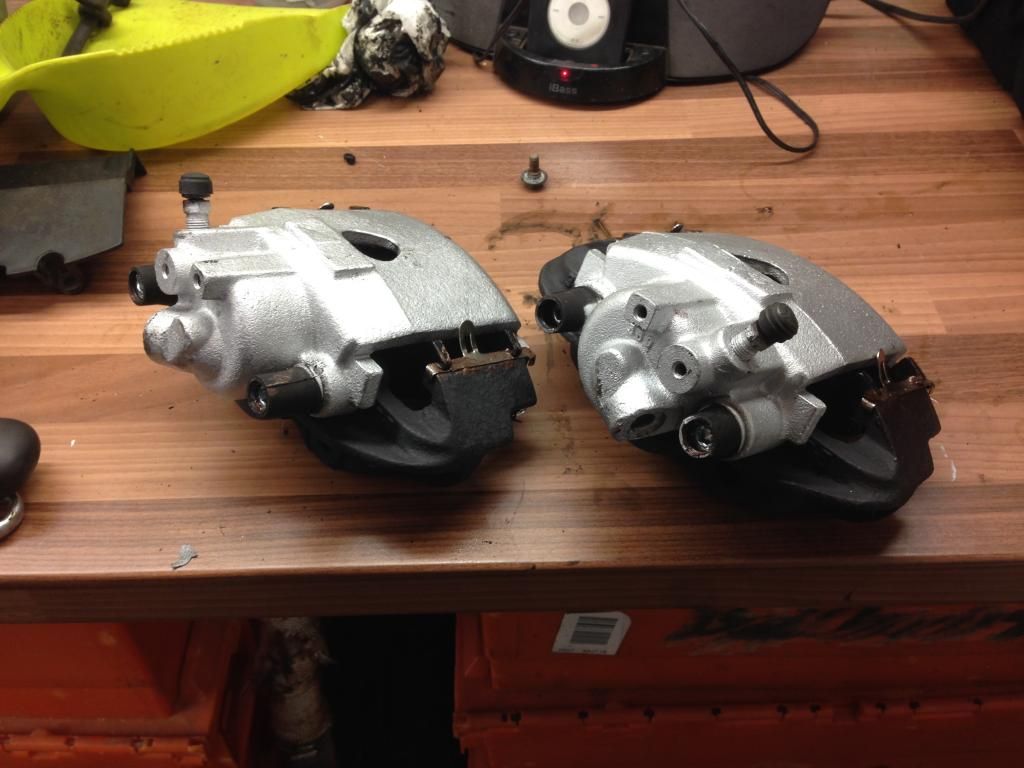 And finally here's a picture of everything bolted up! 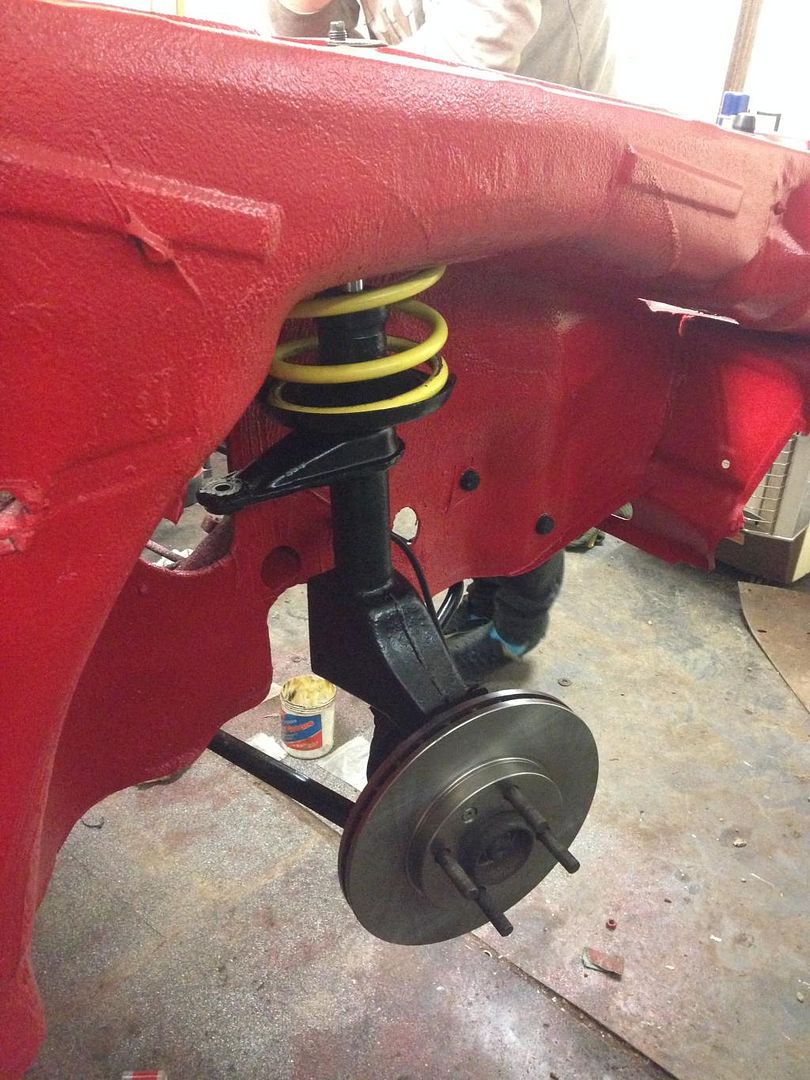 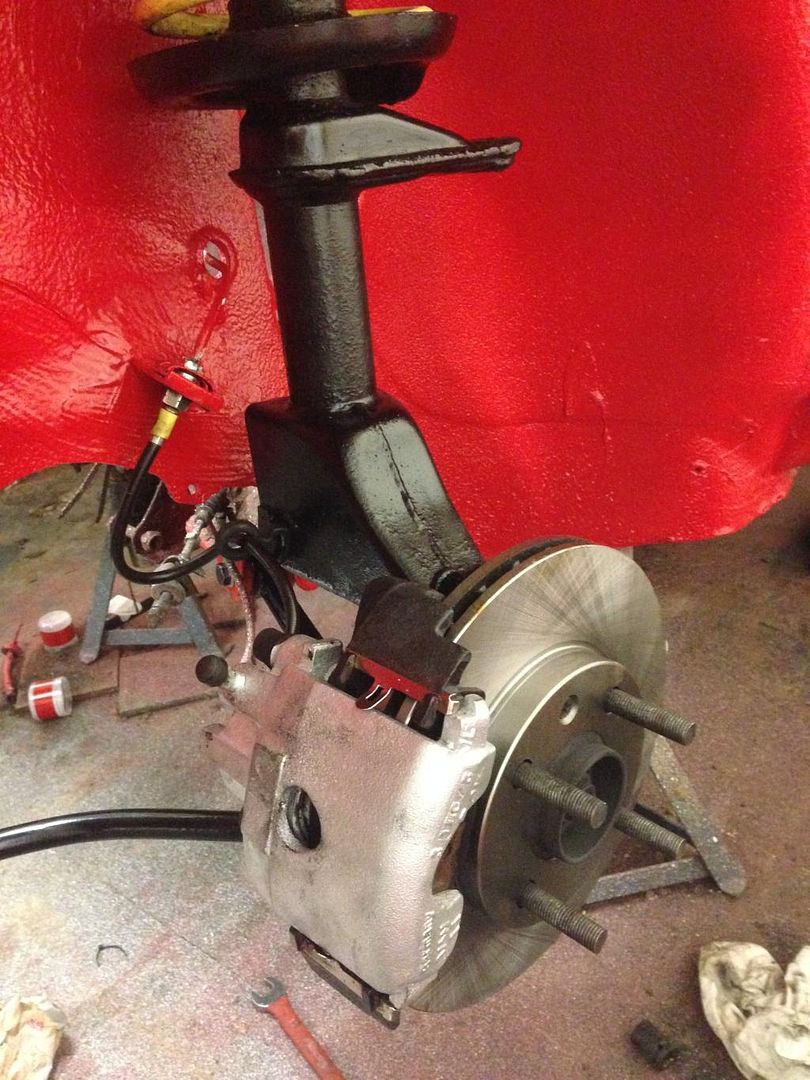 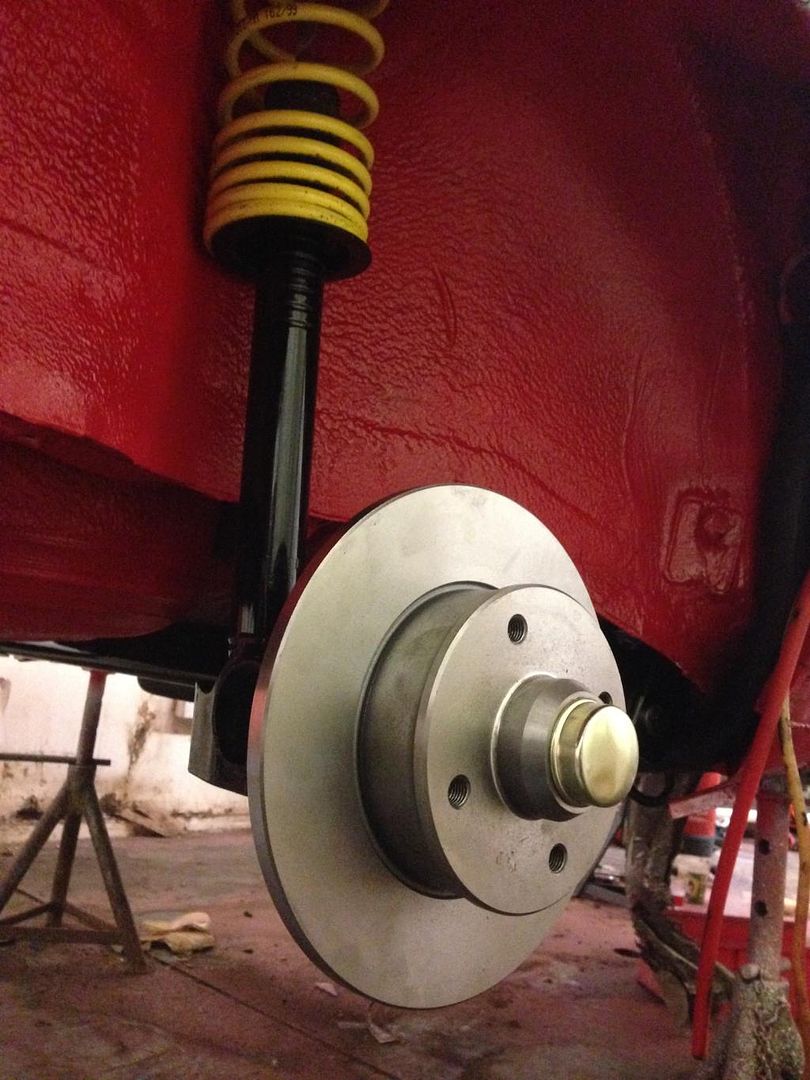 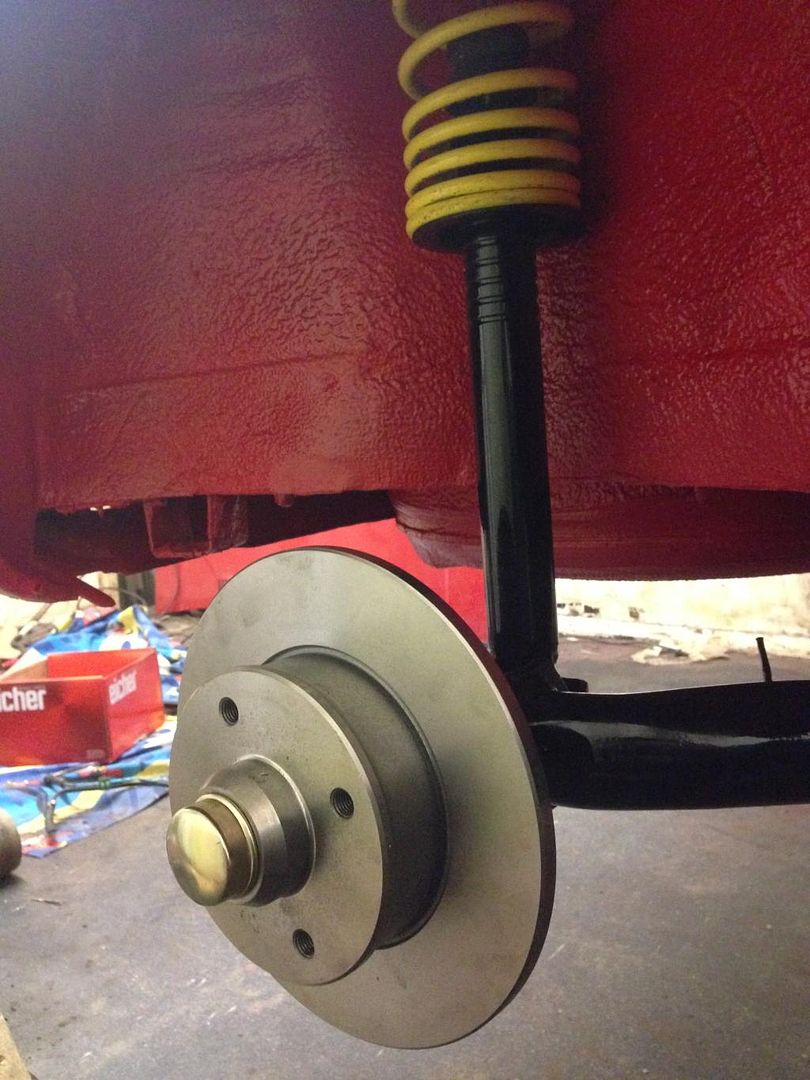 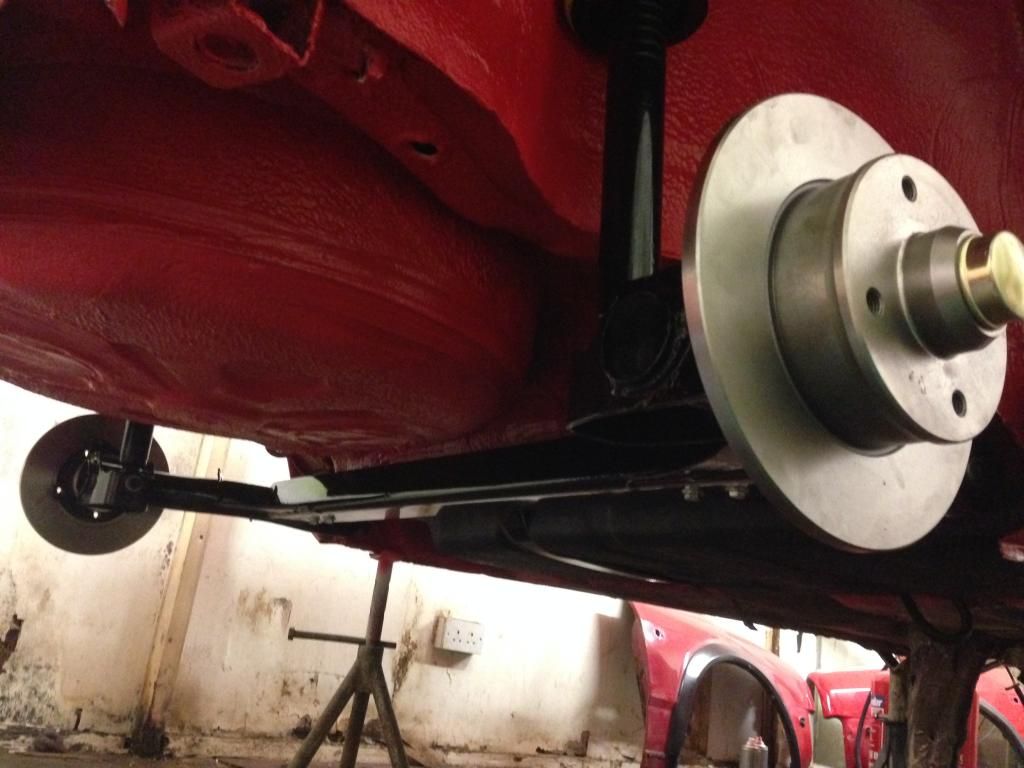 That's it for now! I'm back at uni now so progress will halt for a little while. Sorry again for the quality and quantity of photos; by the time the workshop was ready for the car, i had 6 days to do all the work! All 6 days at the workshop were about 16 hours long. All i can say is thank god for good mates a local specialists. Hope you enjoyed the read. |
| |
|
|
Fungus
Part of things
Posts: 960
|
|
Jan 12, 2015 23:45:07 GMT
|
Looking good mate, look forward to seeing the progress on this build Thanks, i'm hoping to get the engine built next time i'm home  |
| |
|
|
|
|
|
|
|
|
looks good
what tuned 1400did you have ive got a abd lined up for mine so instrested what spec
|
| |
91 golf g60, 89 golf 16v , 88 polo breadvan
|
|
Fungus
Part of things
Posts: 960
|
|
Jan 13, 2015 12:37:03 GMT
|
|
It was an ABD with some head work, a GT cam, GK inlet and a 32/34DMTL
|
| |
|
|
|
|
|
Jan 13, 2015 19:24:08 GMT
|
|
The underbody looks absolutely superb on that.
I've heard good things before about Gravitex, did you have to bare metal everything before applying? Is that a special type of paint you have used on the colour coats?
I'd love to do mine like that, very nice work mate.
|
| |
|
|
|
|
Fungus
Part of things
Posts: 960
|
|
Jan 13, 2015 23:08:47 GMT
|
The underbody looks absolutely superb on that. I've heard good things before about Gravitex, did you have to bare metal everything before applying? Is that a special type of paint you have used on the colour coats? I'd love to do mine like that, very nice work mate. Thanks, it's a really solid car. I didn't bare metal the entire thing, just quite a lot. Everything was thoroughly prepped with 240-grit and degreased, and then epoxy primer was applied. The Gravitex went over the Epoxy primer. Once the Gravitex has cured, it can be overpainted with anything really. I gave it a day to cure and i didn't have any problems. |
| |
|
|
Fungus
Part of things
Posts: 960
|
|
Feb 26, 2015 23:00:40 GMT
|
Little update! So the car is in Essex and I'm in Plymouth until June. Still though, i can do a few bits and bobs, right? I've got the Cylinder head for the new engine down here to play with. I've just got it back from having a 1.5mm skim and recut valve seats, so i started prepping it up for paint; 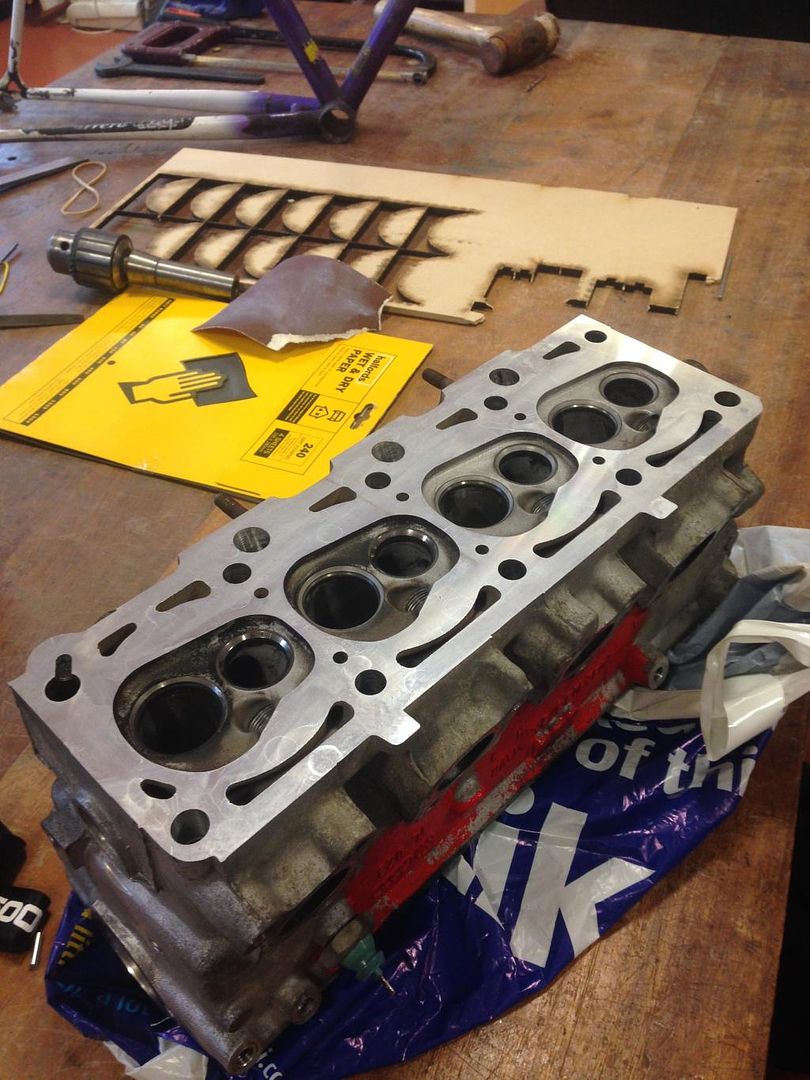 Someone had painted it red (very badly, but i bet the power gains were phenomenal) but it was pretty well stuck on there and i didn't want to blast the head or do anything too messy (i don't want loads of old paint/aluminium/sand inside the head). So, the whole lot was thoroughly flatted with p240 and masked up; 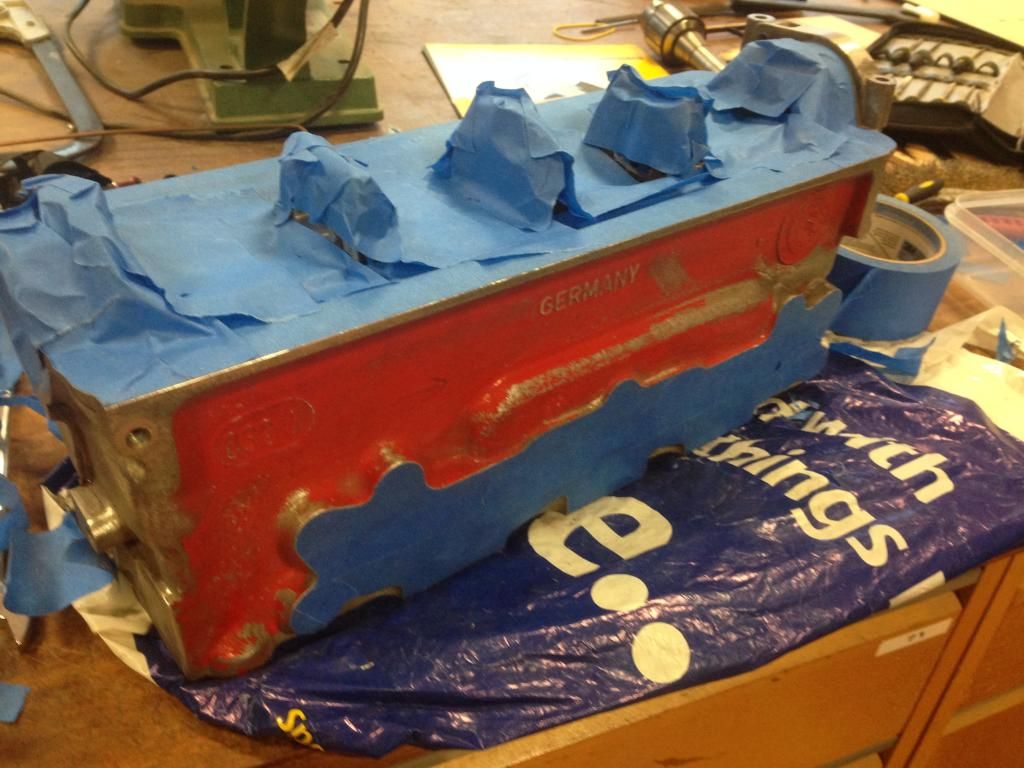 This also got smoothed off; 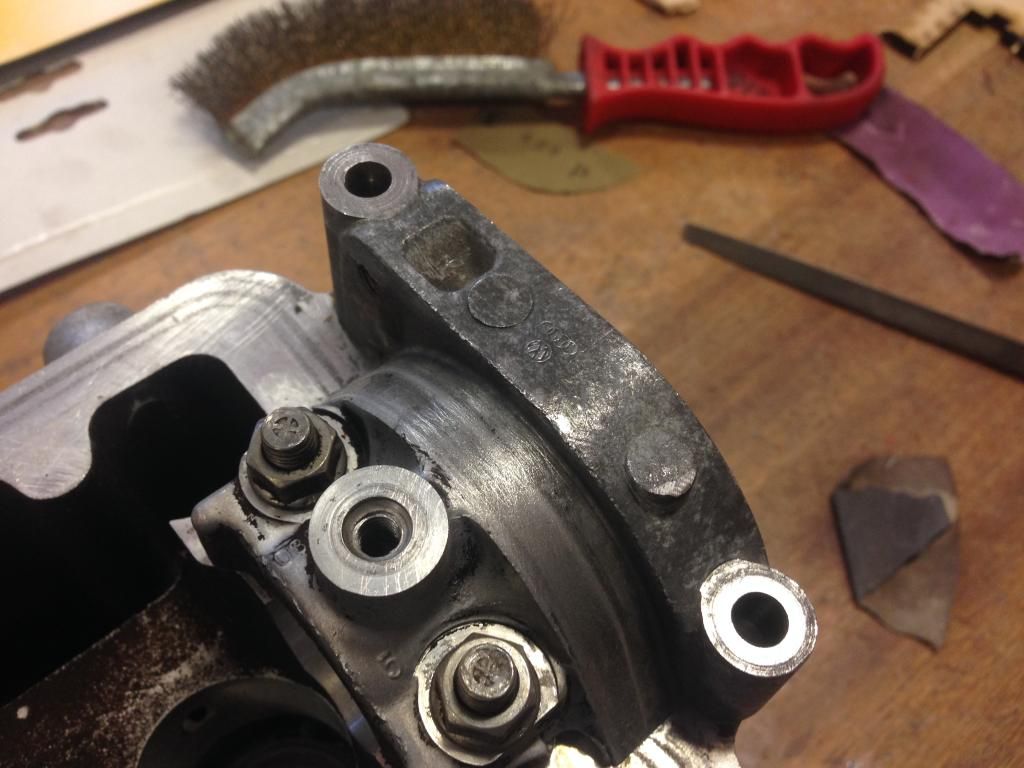 And then it was time for Etch-primer in the booth; 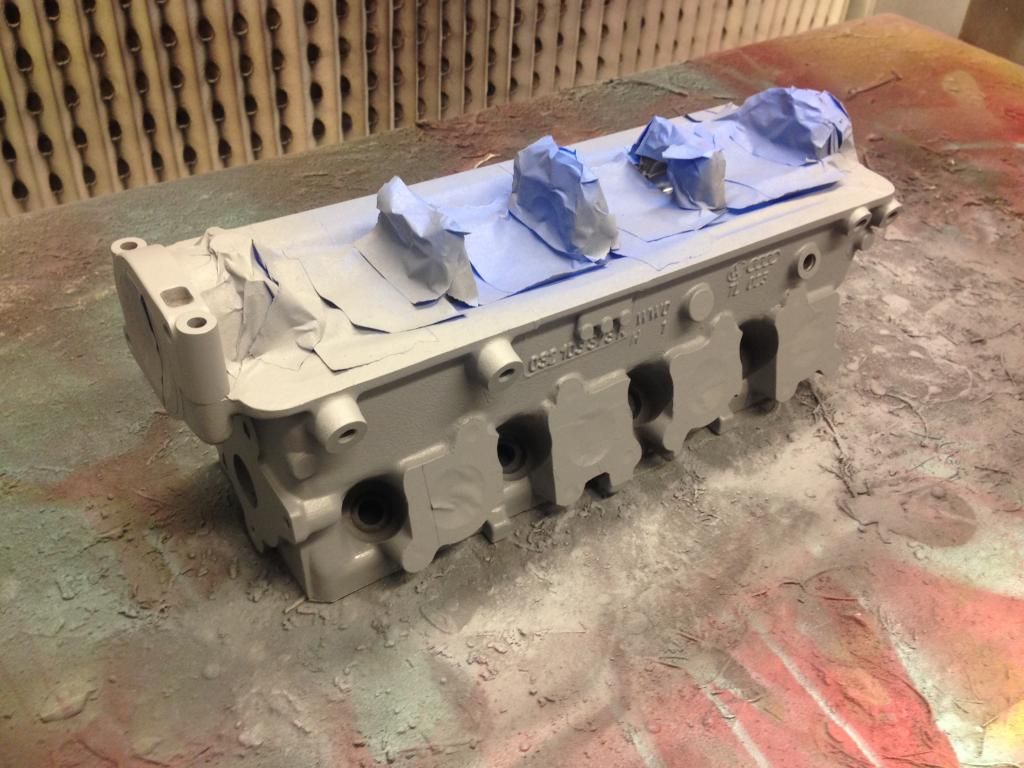 And then in the oven to bake on for an hour. It's safe to say the primer has adhered well after this! looks pretty decent too. 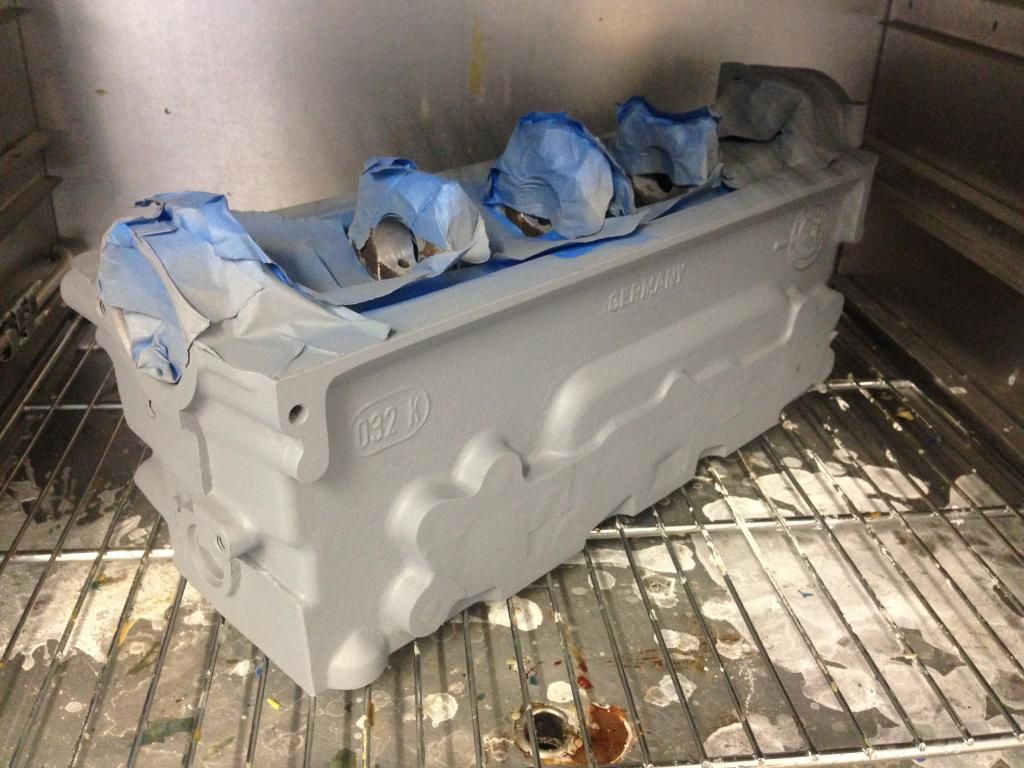 Here's the Distributor flange/cam bearing after smoothing 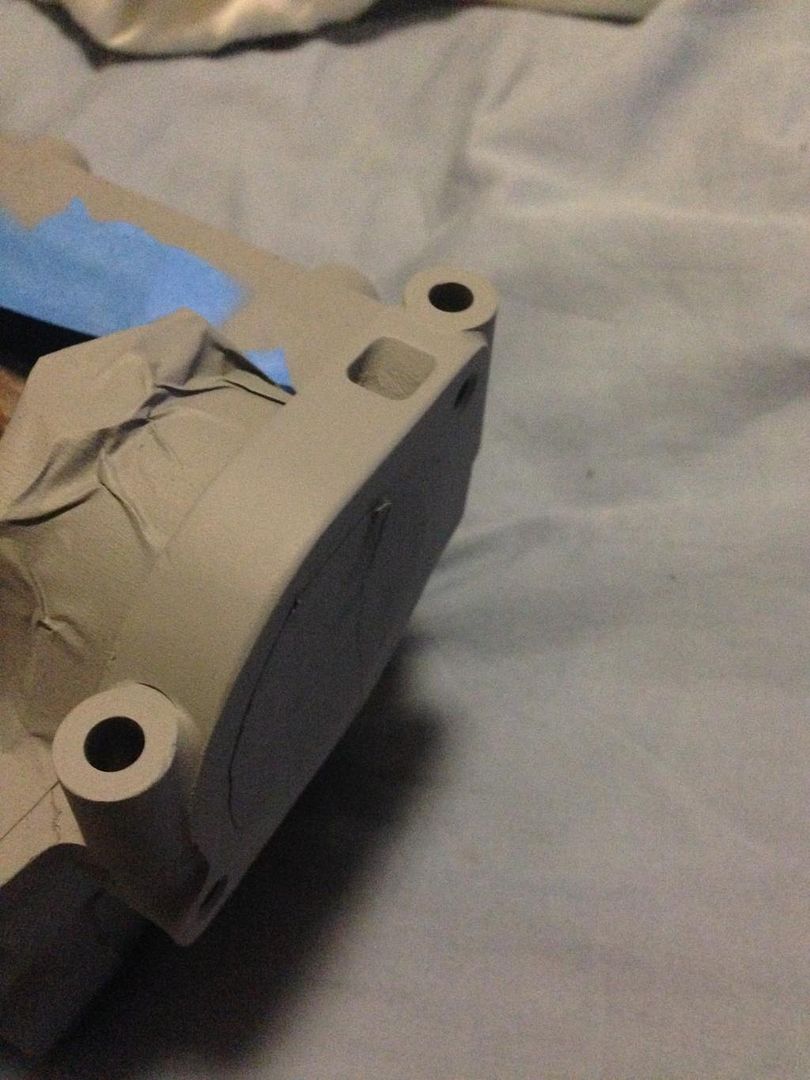 So that's it for now as i'm waiting for my Scotchbrite pads and VHT paint to arrive. The engine and box (and most of the things under the bonnet) are going dark grey to match the centres of my wheels, should look cool in a red bay. Oh, and i started cleaning up the valves rear for a quick lap-in when the head is done. 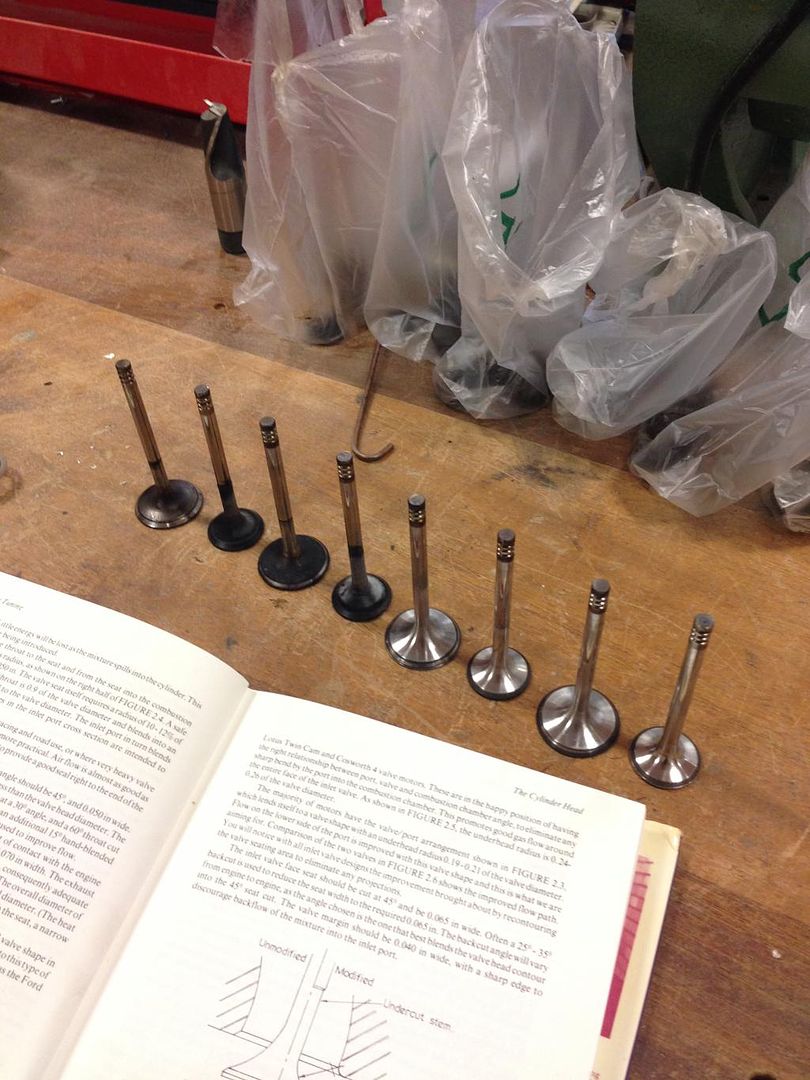 That's it for now. Hopefully the supplies will arrive early next week and i can get the head built. I know it's boring stuff but it's all i can get away with at Uni! Stripping down the cylinder head in my flat was interesting... |
| |
|
|
qwerty
Club Retro Rides Member
Posts: 2,410
Club RR Member Number: 52
|
1990 Volkswagen Polo Coupe qwerty
@qwerty
Club Retro Rides Member 52
|
Feb 26, 2015 23:19:03 GMT
|
|
Fantastic work. When I passed my test I had a tornado red Coupe S. One day i'll have another to build how I wished I could have got that first one.
|
| |
|
|
Fungus
Part of things
Posts: 960
|
|
Feb 26, 2015 23:25:35 GMT
|
Thanks This was my first car, bought it just before it was 17 (just over a couple of years ago). At the time i just built a 1.4 for it and was behind the wheel every possible second. I cae really cose to selling it but i'm glad i didn't, it's getting some proper attention now |
| |
|
|
qwerty
Club Retro Rides Member
Posts: 2,410
Club RR Member Number: 52
|
1990 Volkswagen Polo Coupe qwerty
@qwerty
Club Retro Rides Member 52
|
|
|
Thanks This was my first car, bought it just before it was 17 (just over a couple of years ago). At the time i just built a 1.4 for it and was behind the wheel every possible second. I cae really cose to selling it but i'm glad i didn't, it's getting some proper attention now Mine was standard engine wise but had Koni's, golf gti 14" steels and GT interior. I love this age Polo. I've had 5 or 6 mk2 or mk2f's. |
| |
|
|
|
|
|
|
|
Great work...this is what student loans should be spent on!  |
| |
|
|
polo6n1600i
Part of things
All I need is WD40 & Duck tape!
Posts: 405
|
|
|
|
|
One of my favourite shapes of Polo - had 17-18 mk2's & mk2F's. loving the attention to detail with the engine rebuild - keep it up! My first car was a MK2 square back with 14" Audi 80 wheels (the early 1970's / early 80's square ones still had 4x100 stud pattern)ranger interior, straight through exhaust made out of a scaffold pole!
|
| |
2002 Vw Polo 1.9 TDI sport - Daily Diesel
2006 Vw Passat 3.2 v6 estate - family wagon
1990 Rover Montego 1.6 LX - Project 41
|
|
Fungus
Part of things
Posts: 960
|
|
|
|
|
Thanks for the praise guys, good to see some Polo-love on here!
They're such a great first car. I got mine because a local guy was selling it cheap in need of a load of work, I'm so glad I bought it. Its so easy to work on and the Mk2's really seem to be appreciating in value.
|
| |
|
|
Fungus
Part of things
Posts: 960
|
|
|
|
Time for an update! Still nothing too exciting as i don't get too much time with the car itself. So, after the head was primer'd (which turned out awesome, stuck really well and cured nicely) i had a change of plans. At first i was just going to lap the valves in and be done with it, but the seats turned out to be pretty bad and didn't seal properly. So, the head was sent back to the engineers where the seats were re-cut (3-angle) and the valves re-ground and lapped in. This all looked very pretty indeed; 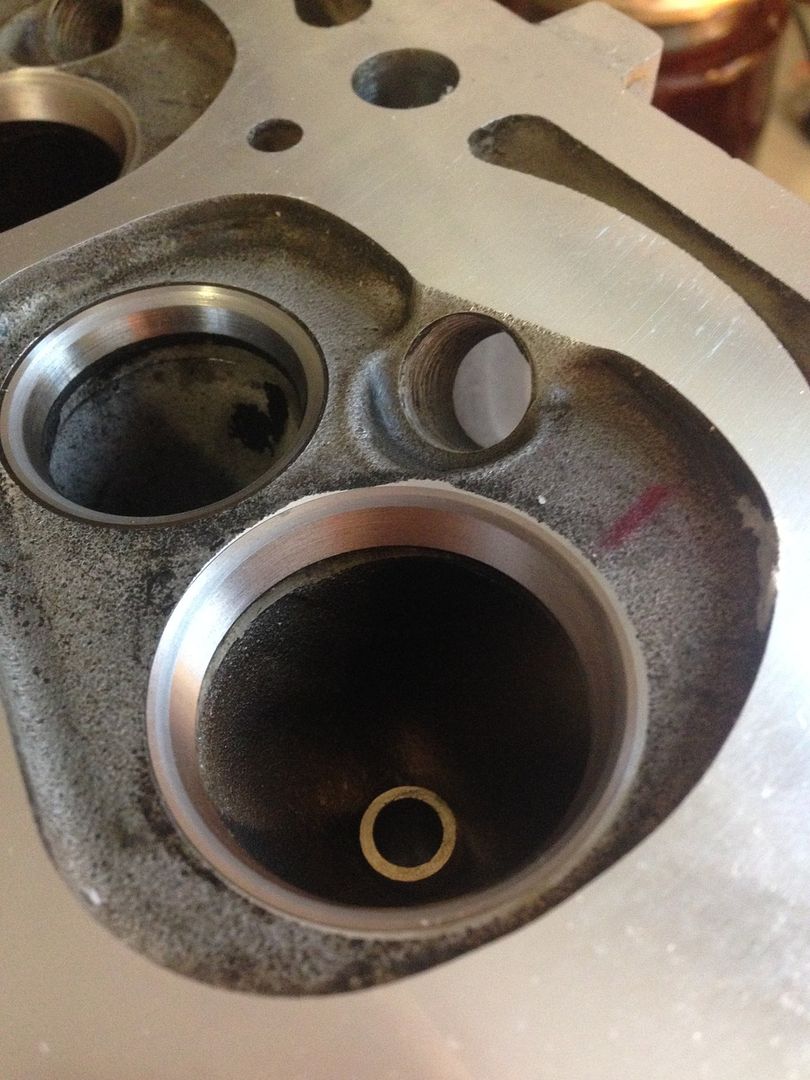 I decided I would build the head before painting it, to avoid and damage to fresh paint. 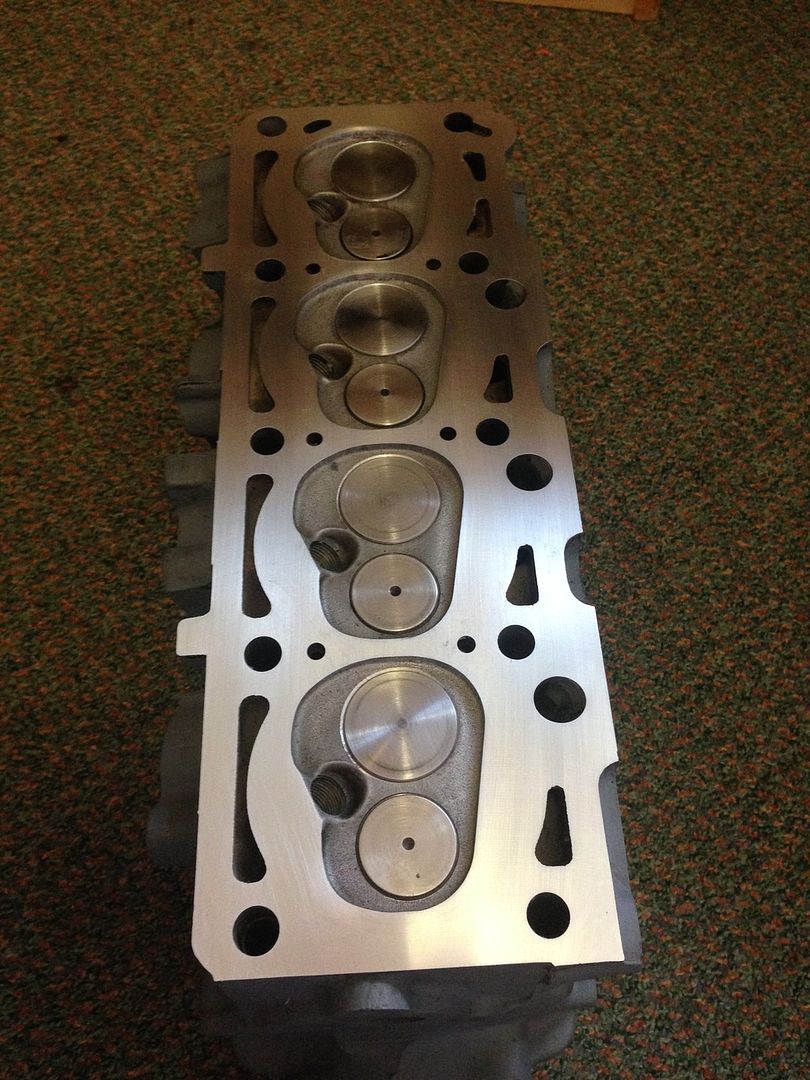 It went together really easily, thanks to my new spring compressors. The head was then masked and the primer keyed with scotchbrite 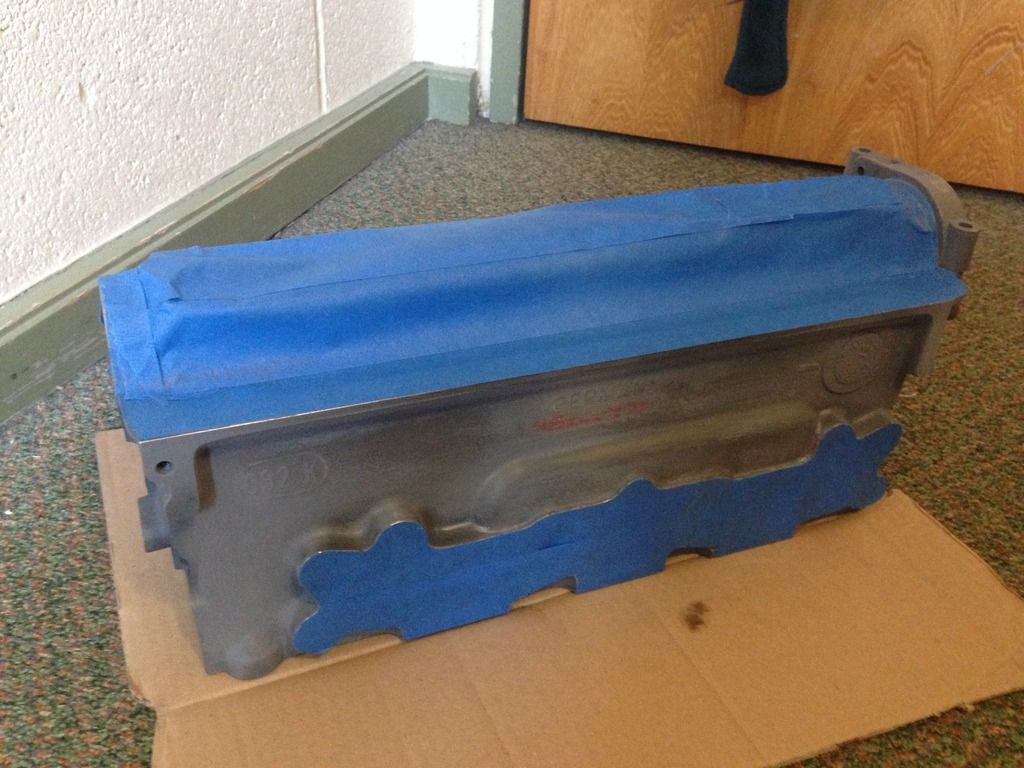 The paint I have chosen for basically all the engine parts, and a load of other stuff in the bay, is this stuff; 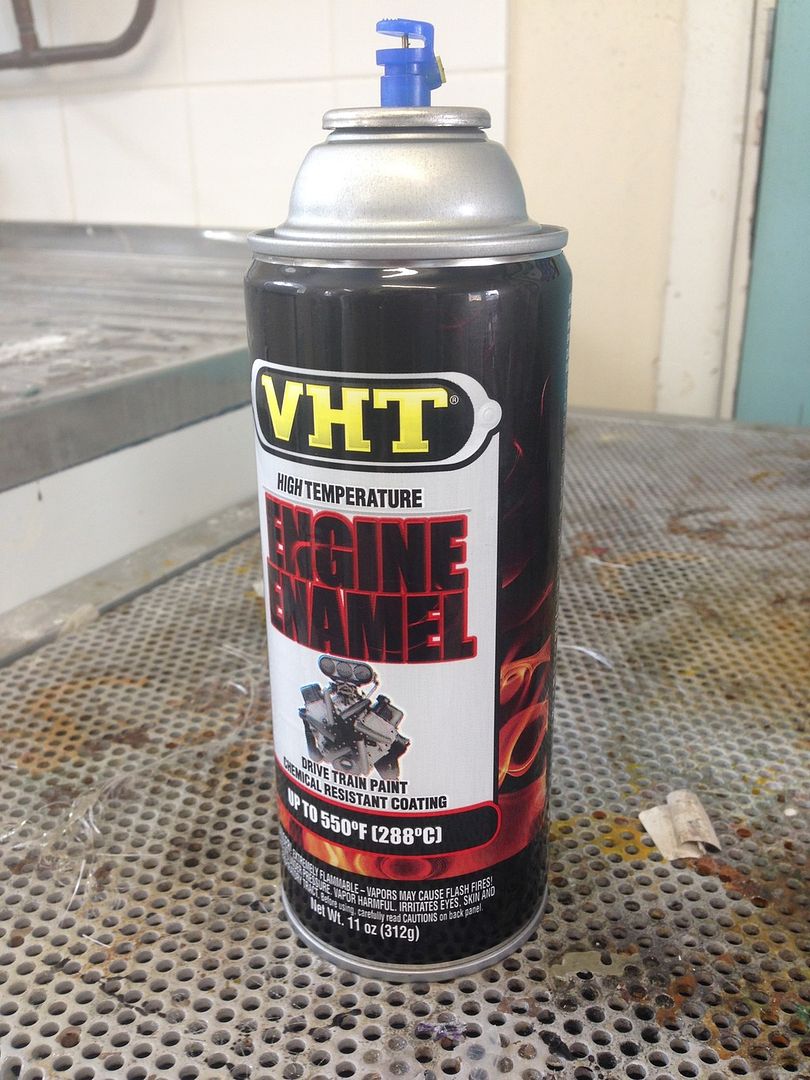 It's not cheap (for a rattle can) at about £16, but there's a good reason i chose it- I love the combination of dark grey and red on this car, hence the colour of the Revolutions (see the fist few pics). The wheels were painted very recently, so I wanted some VHT paint to match. I probably could've used regular aerosol but i didn't want to take the chance given the amount of prep-work gone into the head. So anyway, the paint went on really nicely thanks to a small oven in the Uni's paint workshop, which the head fits in. So before painting it, it sat for 45 minutes on low-temp to thouroughly warm it through. I've always found this makes a huge difference when painting. 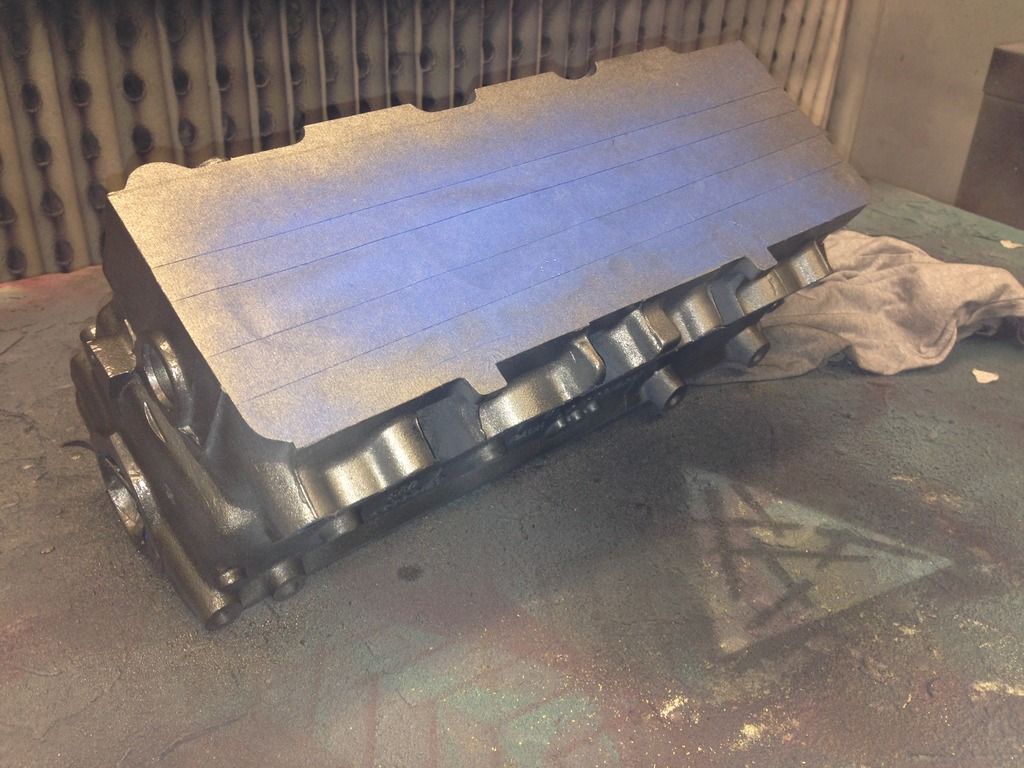 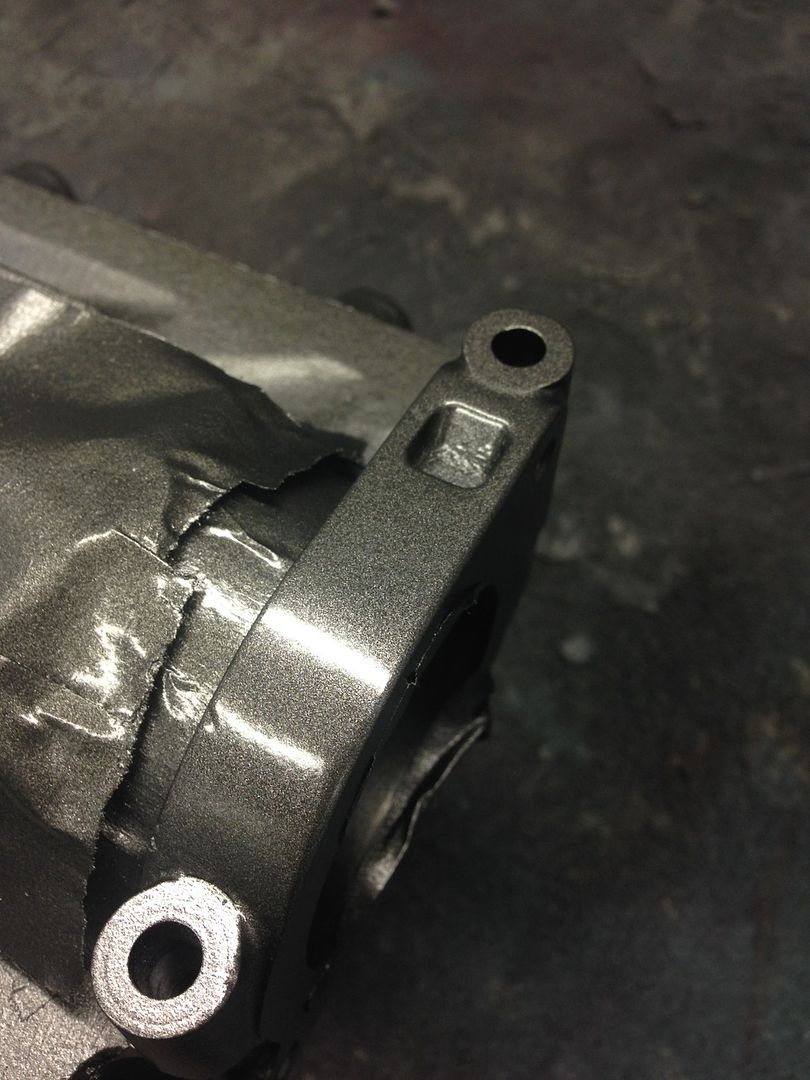 The head was then put back in the oven to cure for an hour at 100 degrees, as per the instructions on the paint can. 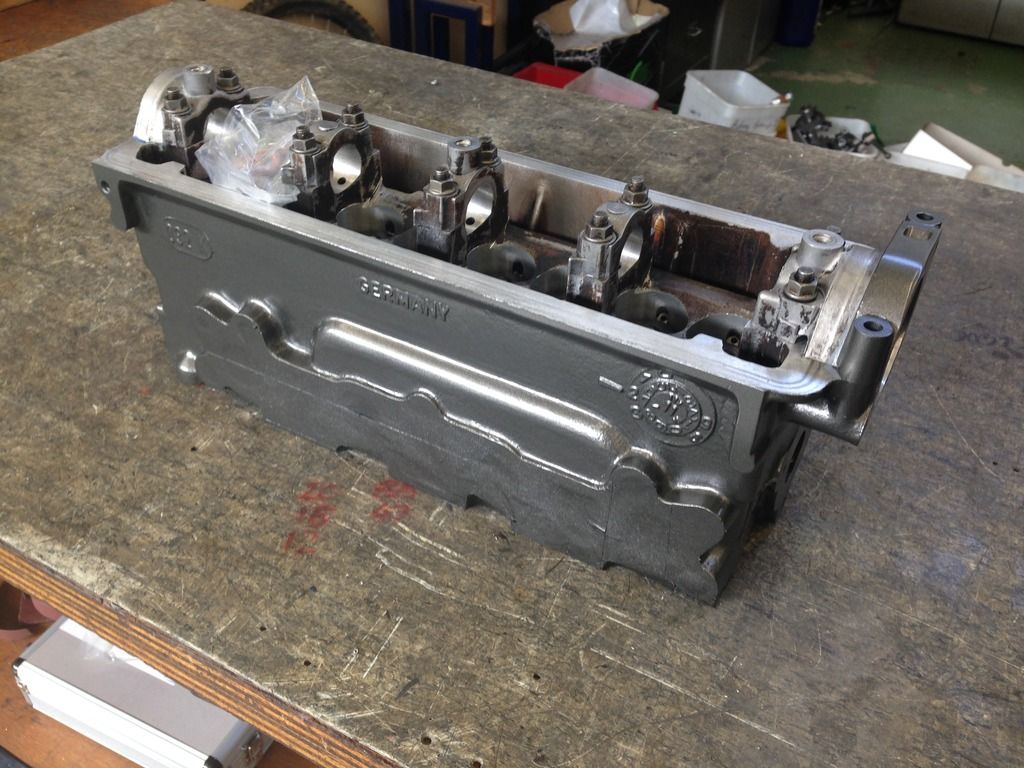 So that's the cylinder head finished. I'll get a decent picture of it completely de-masked and fitted with all its new fixings. The head was done in Plymouth (at uni), but for the last few weeks I've been back at home (where the car is). I've managed to get a few bits done on it, i'll update when the pictures have uploaded. Thanks for looking, Fungus |
| |
Last Edit: Apr 16, 2015 2:41:58 GMT by Fungus
|
|
|
|
|
|