|
|
|
|
|
|
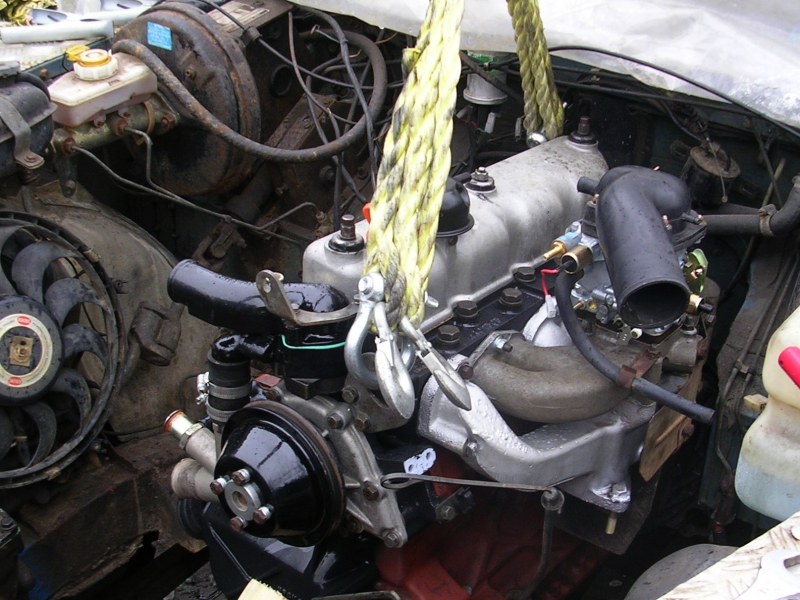
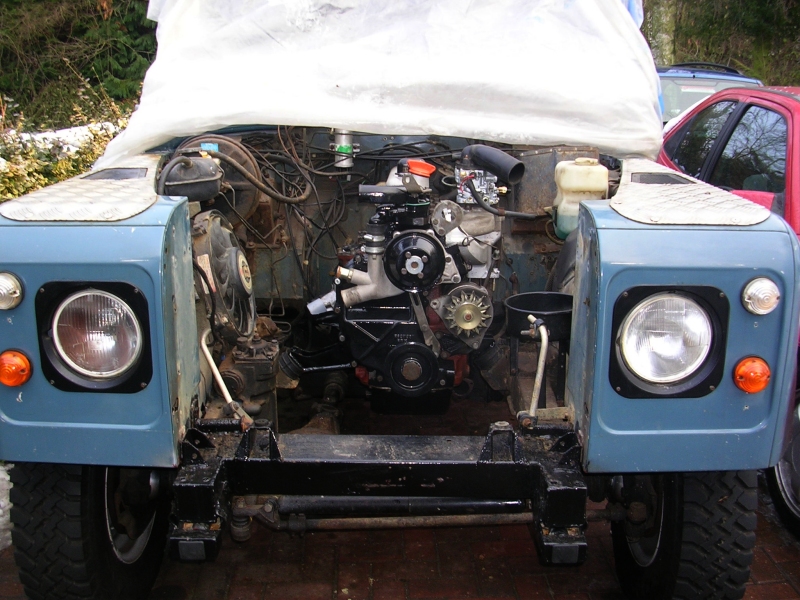
This is fantastic! So so pleased to see someone keeping the petrol block and proper wheels and tyres.
I've a Series 3 109 GS with a breathed on 2.25 petrol and they can be with a little thought be good for 120bhp. Unfortunately it's my daily driver and I can't afford the fuel bill at the moment so it is going 300TDi for a few years but will be going back as soon as I can justify it!
Keep up the good work!
|
| |
|
|
|
|
|
|
|
|
|
|
|
|
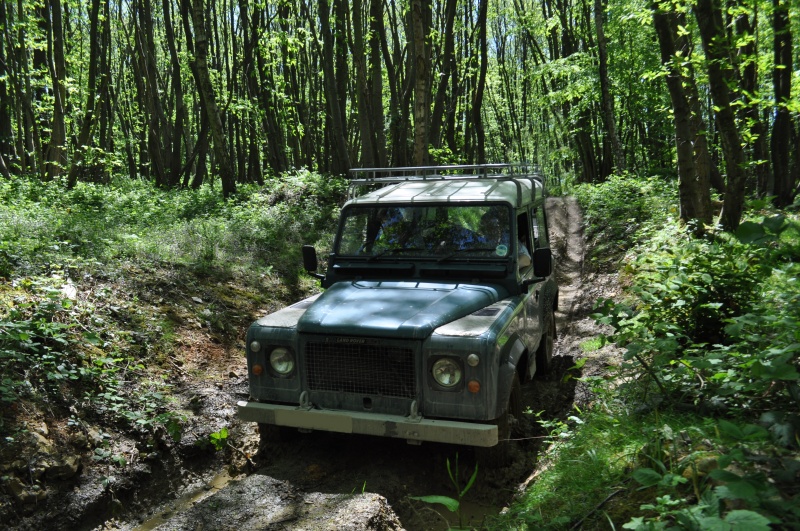
Luverly bit of articulation there!
|
| |
14 Audi A3 Sportback - Easy driver
05 Audi TT MK1 3.2 DSG - Damn quick
73 Triumph 2000 - Needs work
03 Range Rover 4.4 V8 petrol. Had to get it out of my system.
|
|
|
|
|
Jan 11, 2013 12:40:44 GMT
|
next mini project is the bulkhead top corners, a common spot for old land rovers due to plenty of water traps, miss match of metals and slack tolerances. in the course of ownership I found out that a friend of a friend of my brother in law owned this landy about 3 years before me and forwarded some old pictures over. in this crop you can clearly see gaping holes (circa 2006) yet when I bought the landy there were no holes, but the top of the bulkhead was now a different shade of blue... 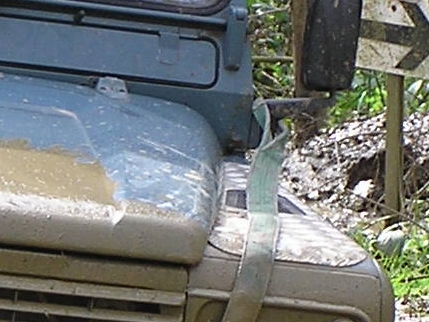 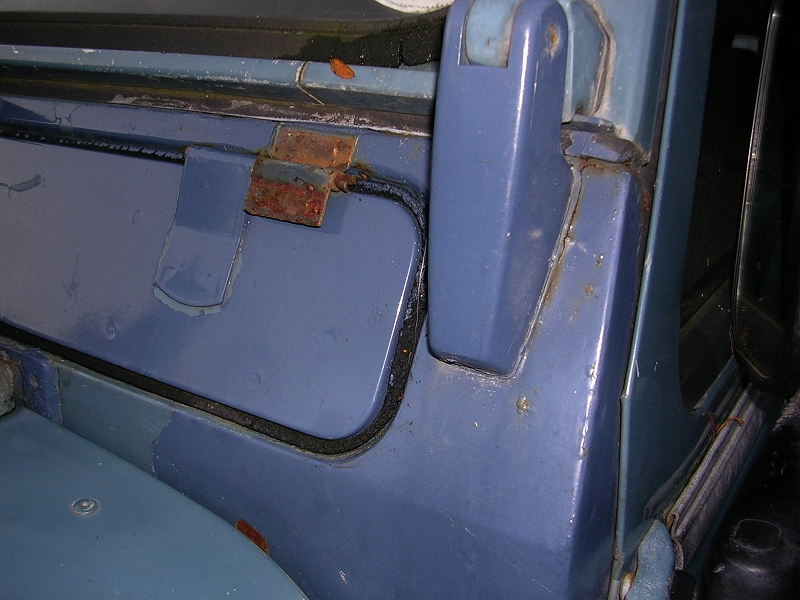 inside, just round the ends of the dashboard you can see all is not well ! 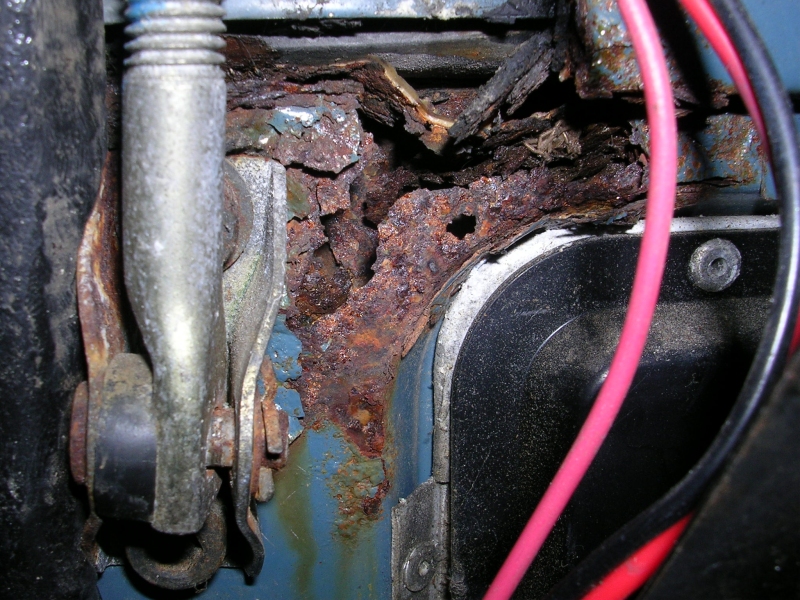 similar situation at the drivers side 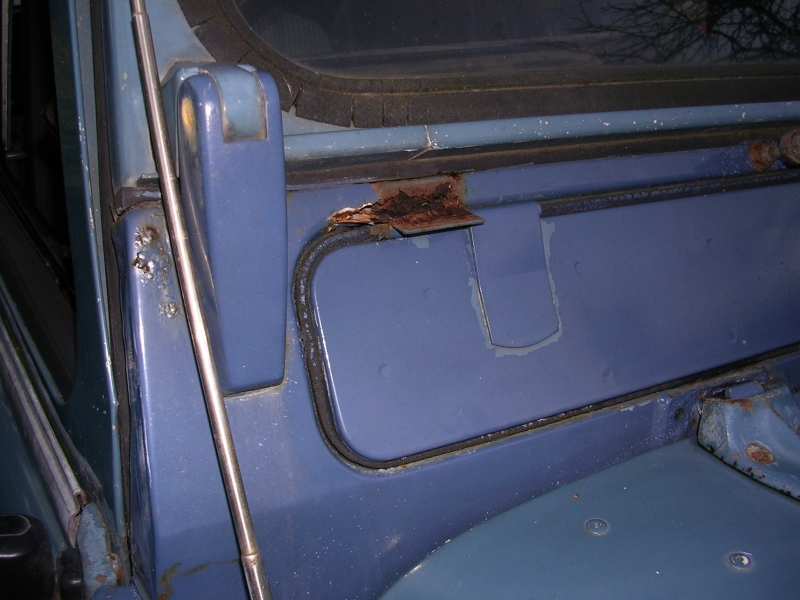 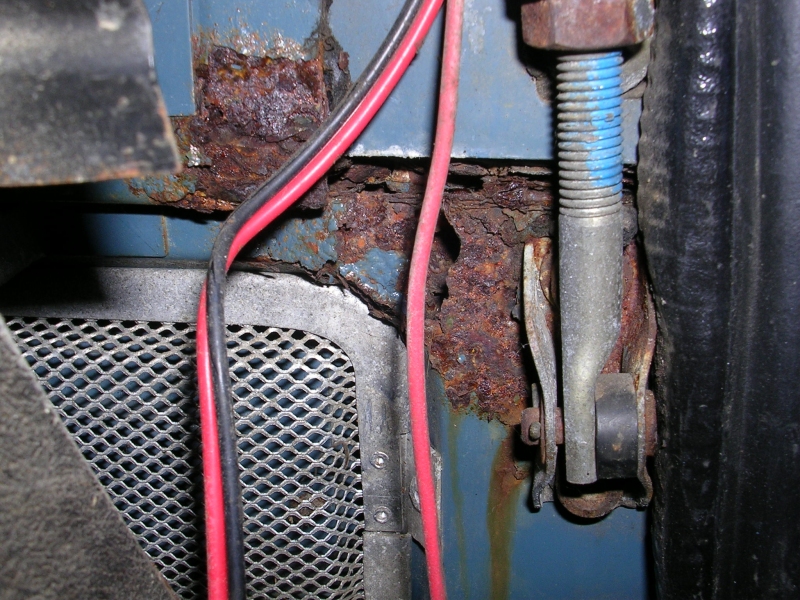 early vehicles have proper hinges so you can tilt the windscreen forward (if you have a canvas hood and want to pretend you are in namibia rather than surrey) with a bit of ingenuity and jacks I got the hard top lifted a couple inches to let the screen out. 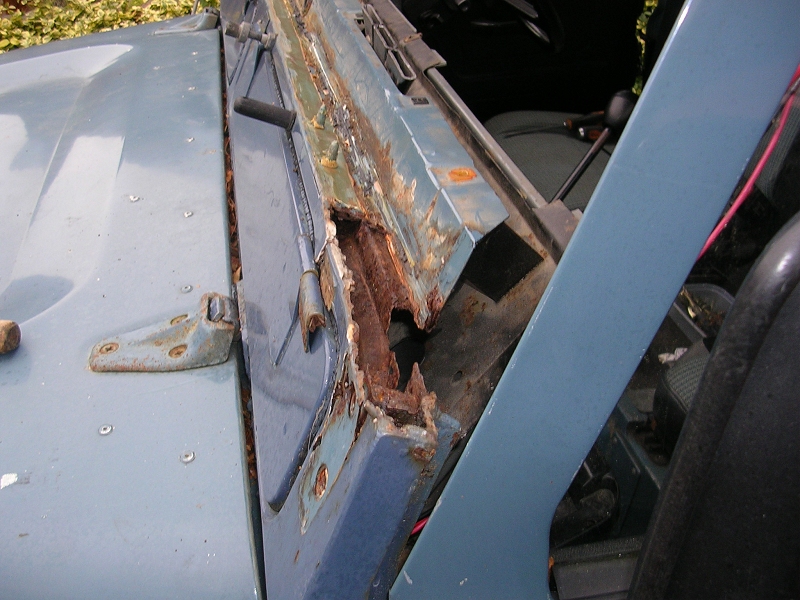 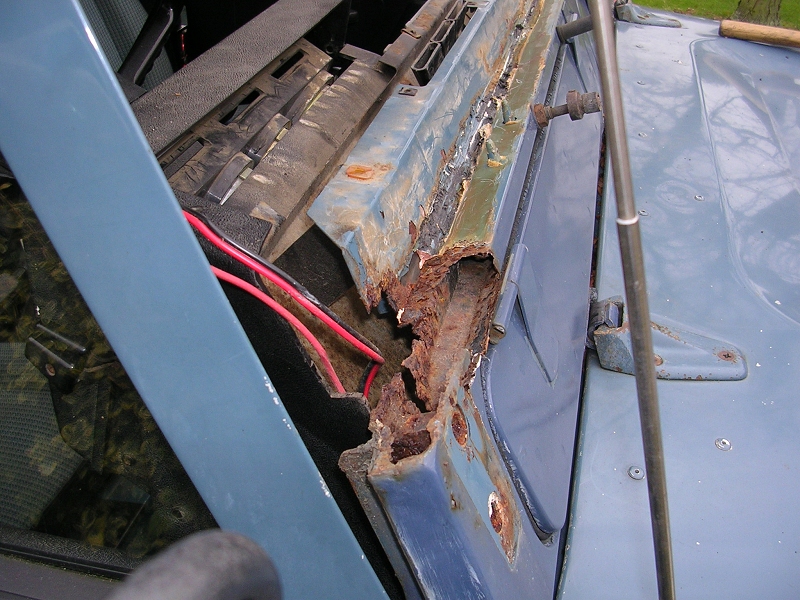 then for proper access the door hinges had to come off, they have annoying J nuts that ping out of their clips and spin round and round in the cavity with no access to the back of them. the hinges were also shafted so I slit them straight through with a grinder to speed things up. 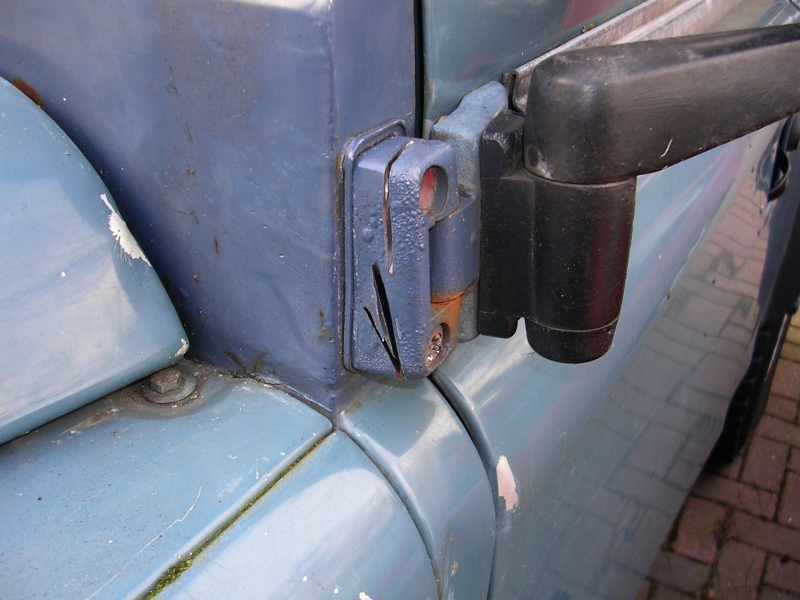 at this point I did some exploratory work sinking the grinder into the bulkhead itself. expecting sparks to fly, but got white powder and the distinctive pong of burning P40 ! 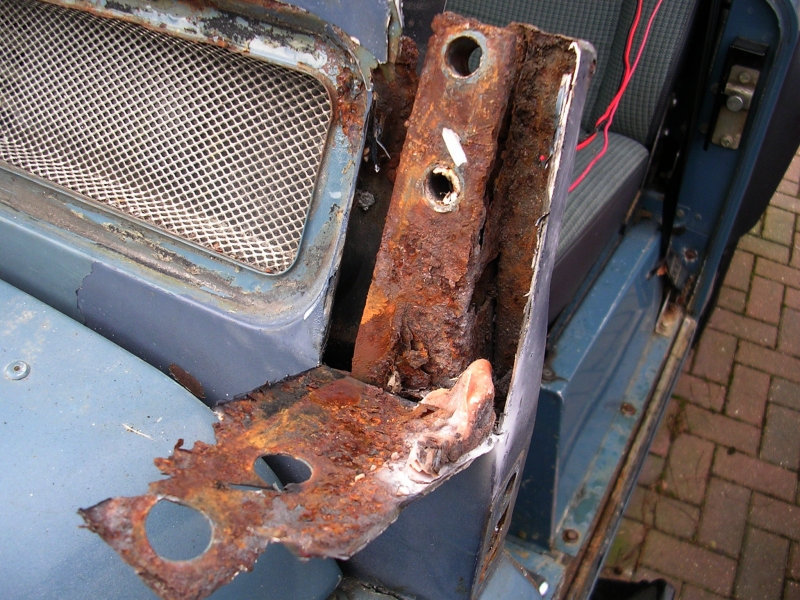 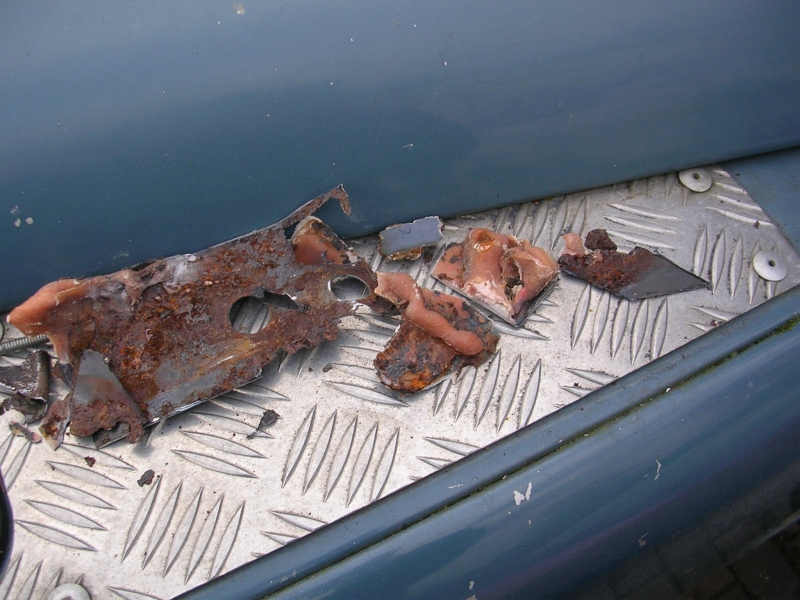 basically kept chasing until the parent metal was original thickness, and silver instead of brown ;D then I could start repairing the internal strengthener, door post and surrounding metal 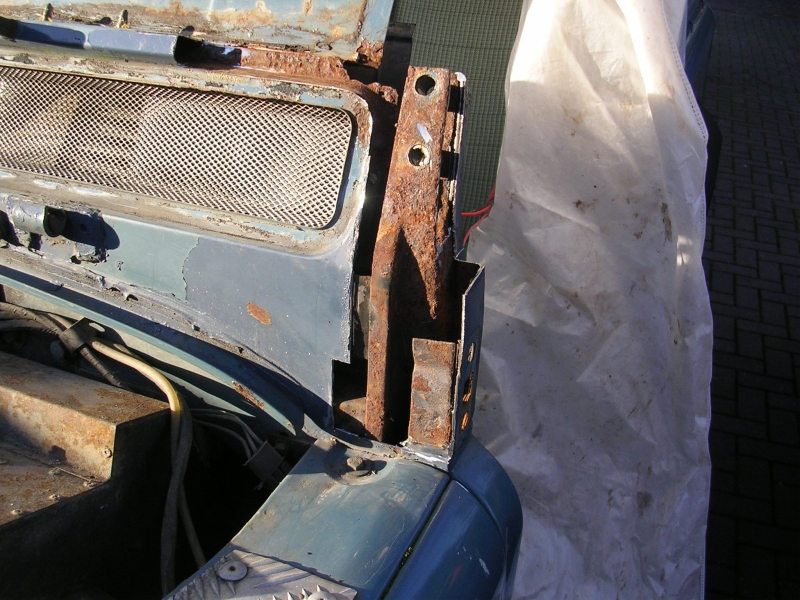 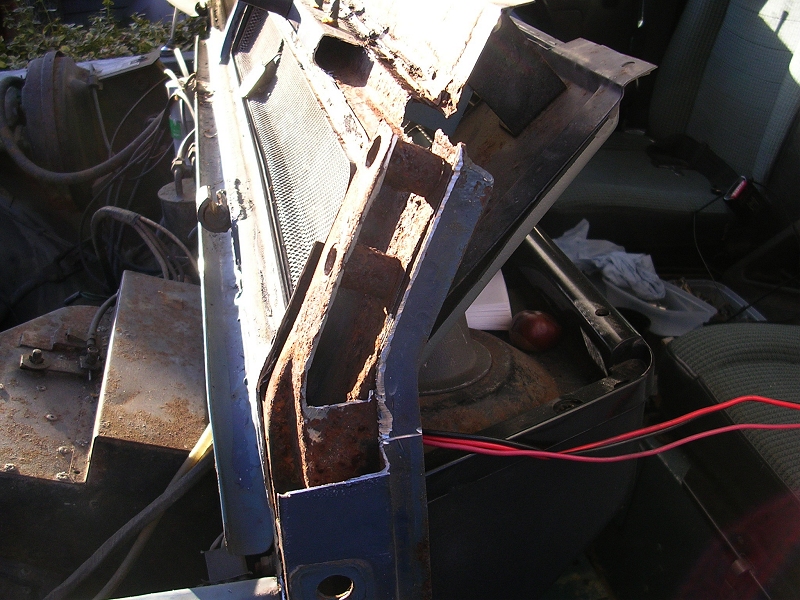 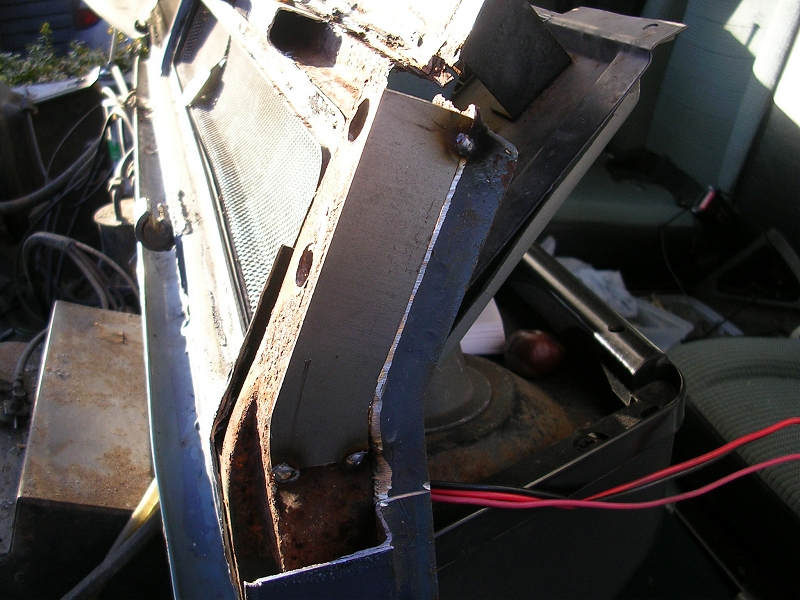 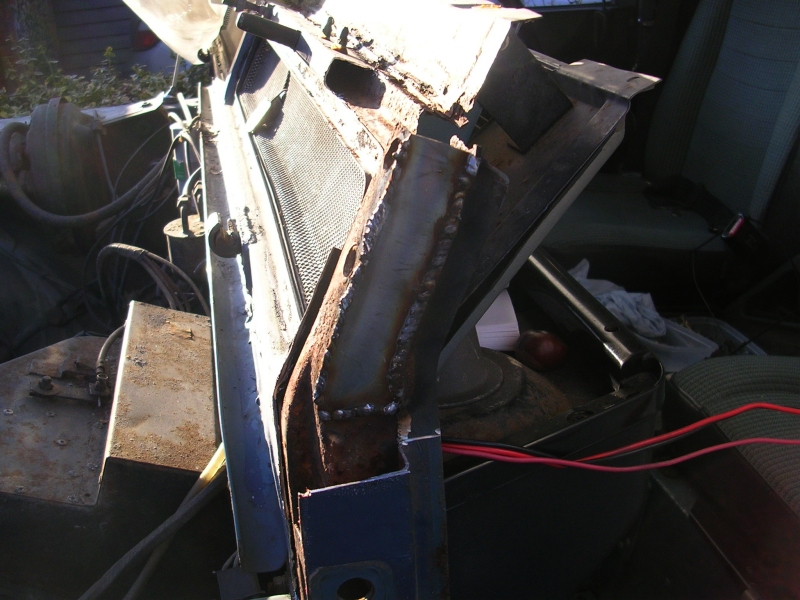 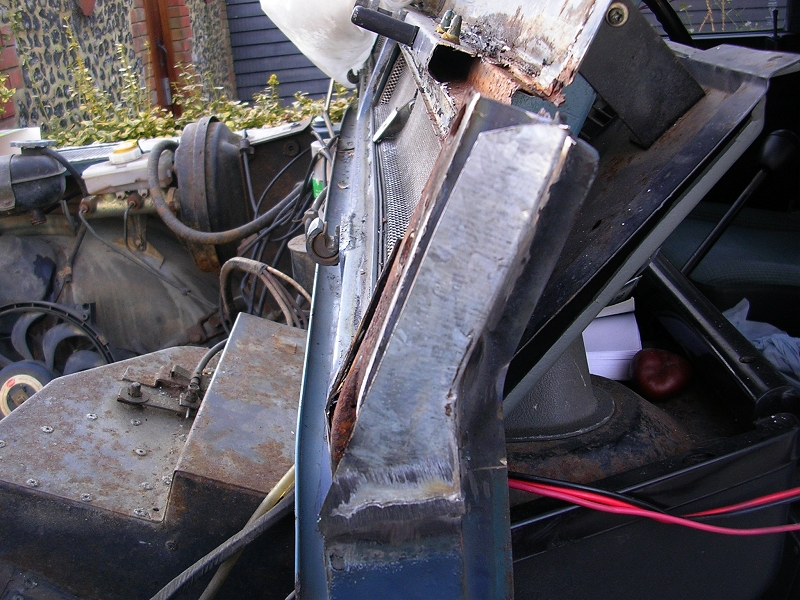 next I cut out a patch for the main fascia (i wish later I had done it in one piece) using overlapping spot welds to try and prevent warping (although this is a shonky old landrover, not a miura) 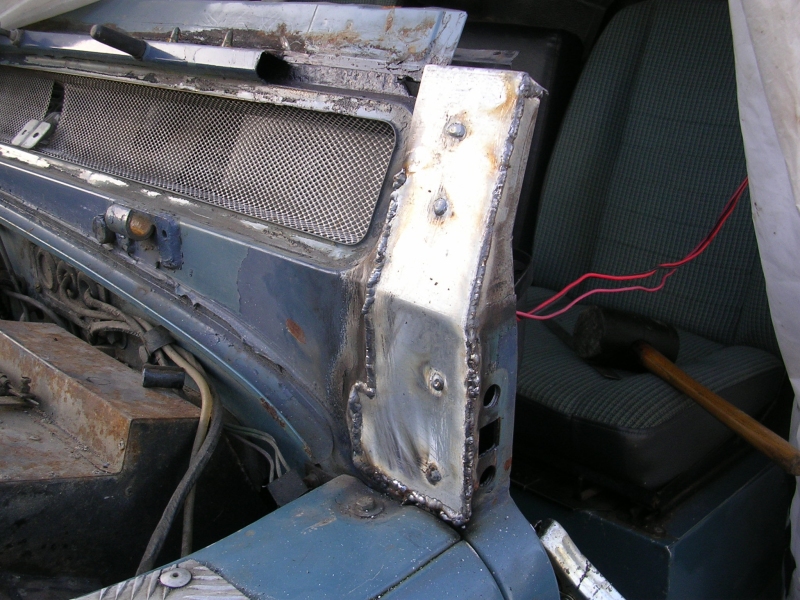 the remaining area to be fixed was a horrible double aspect, flanged and curved area around the vent aperture. it was just before I had read all the tonybmw, vauxallot and thames camper van resto, or even knew what shrinking and stretching was. basically just me with a bit of 1.2mm steel in a vice and kept bashing it until it was not quite the right shape, but used it anyway because I didnt know any better. you can see the top right isn't the correct arc, but it would look less terrible when the thick rubber vent seals are on 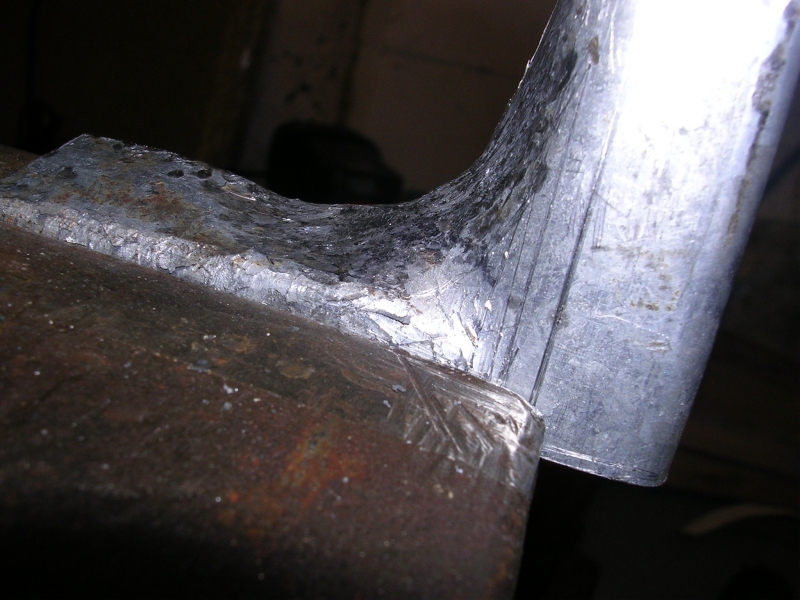 then welded it in next to the other repair (now you can see why I wish I had done it as one section, wouldve been much easier to shape, although more complicated) 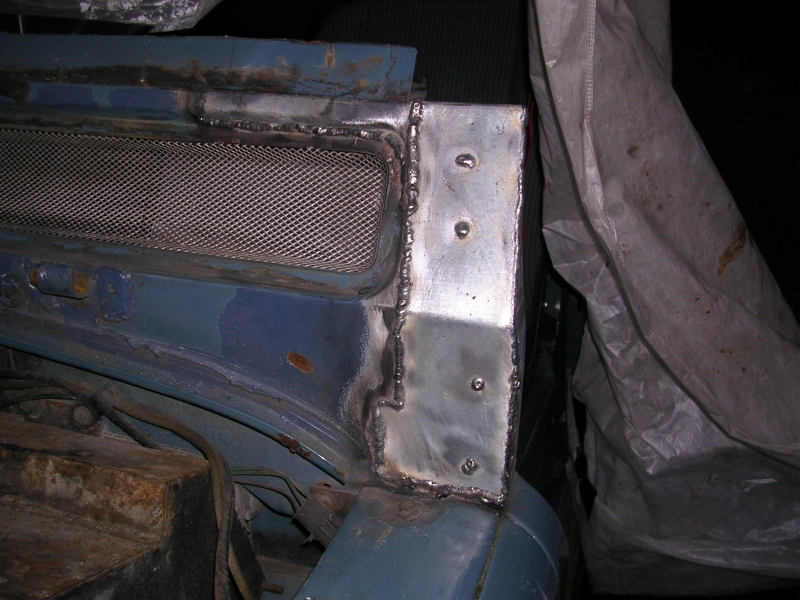 at this point I HAD just read tonybmw et all, dug out the grinding disks, flap disks and pretended to be a pro coach builder. not bad for a first attempt at bodywork, and looks brilliant...from the pub 200 yards away 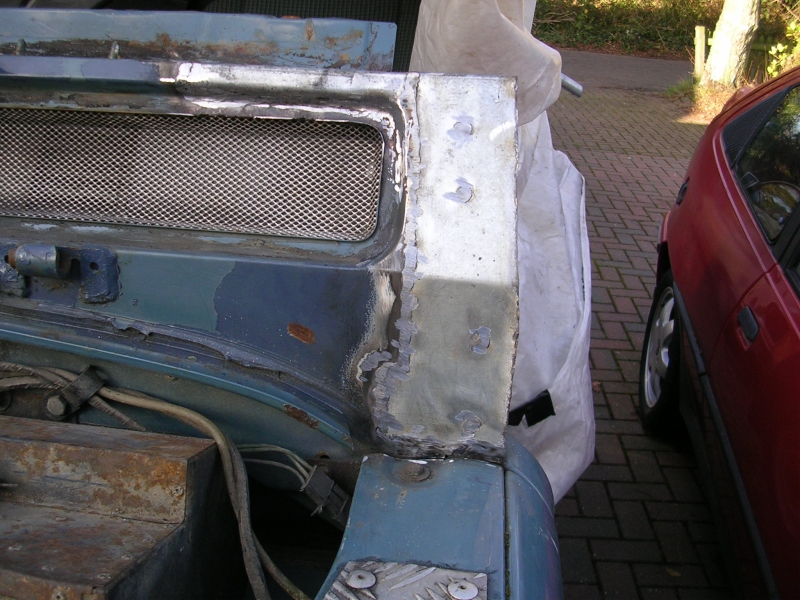 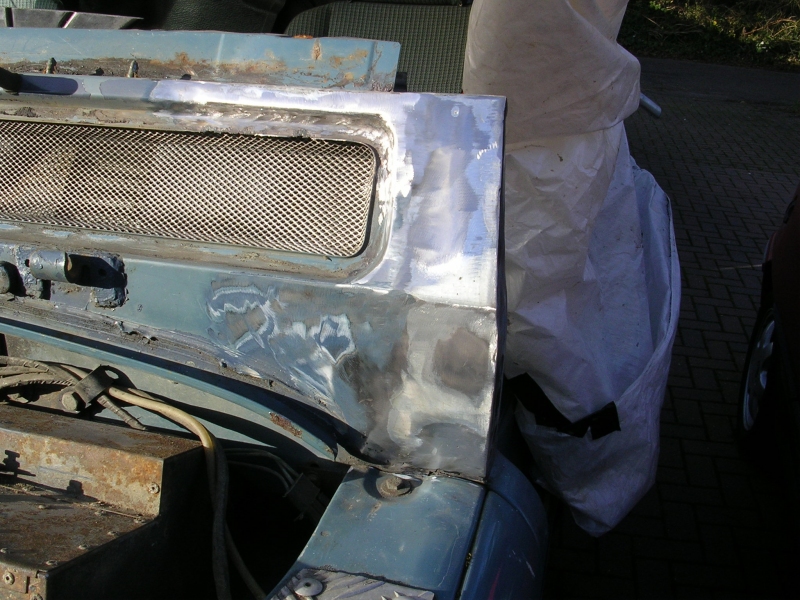 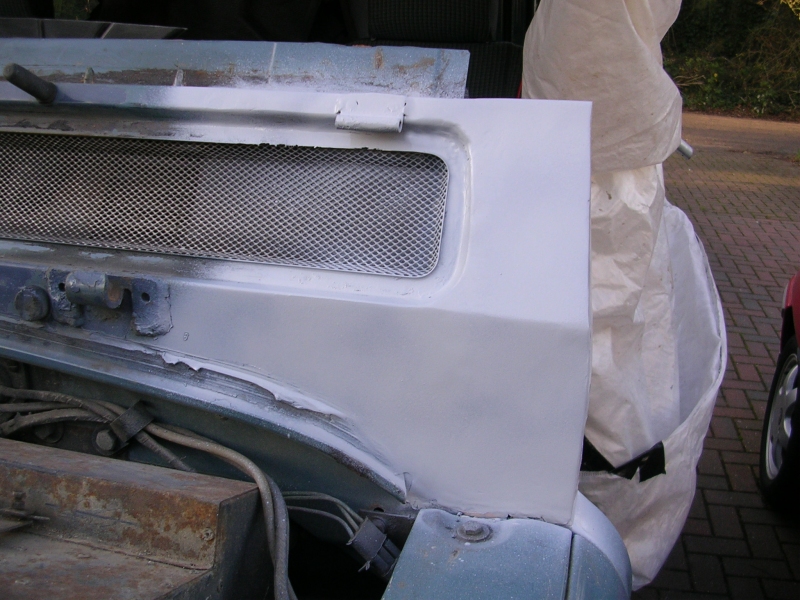 and now onto the drivers side, which I will just picture dump as its sort of the same thing mirrored. it also includes a rain channel repair in the middle of the bulkhead which was just more 1.2mm steel wrapped round a broom handle to get the shape. 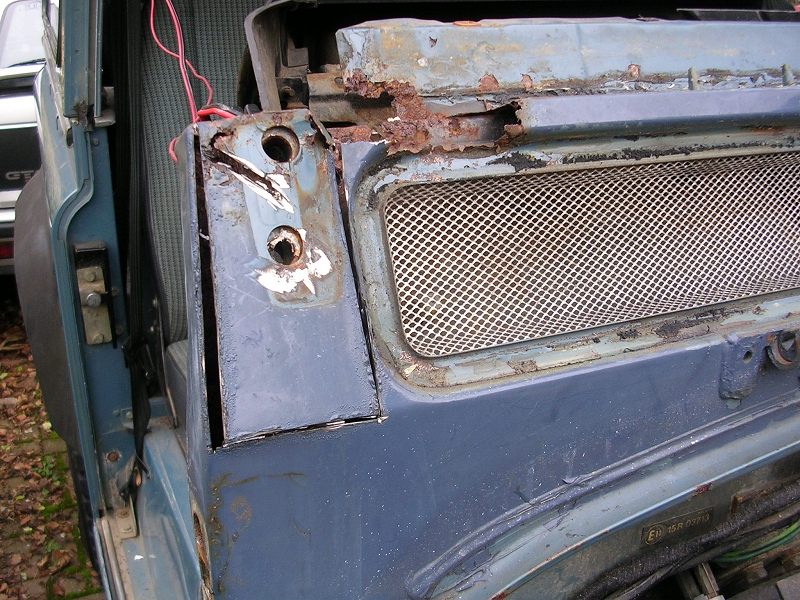 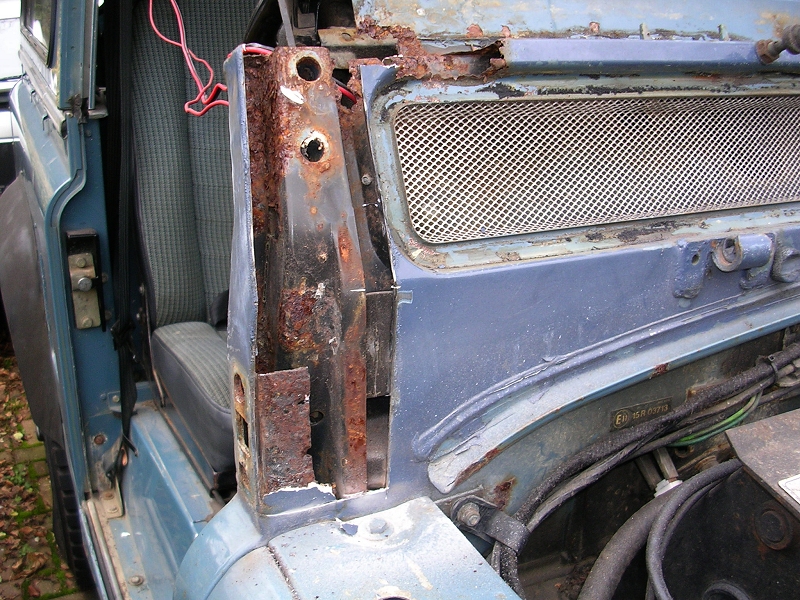 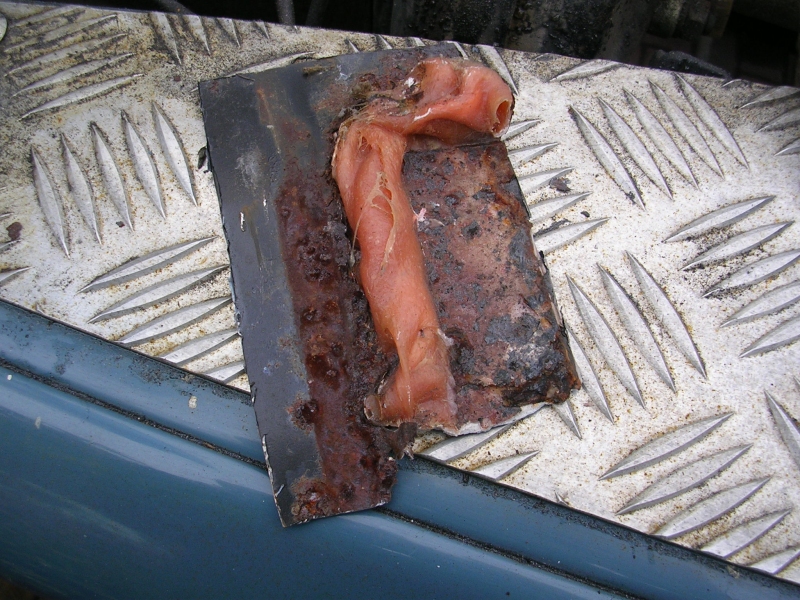 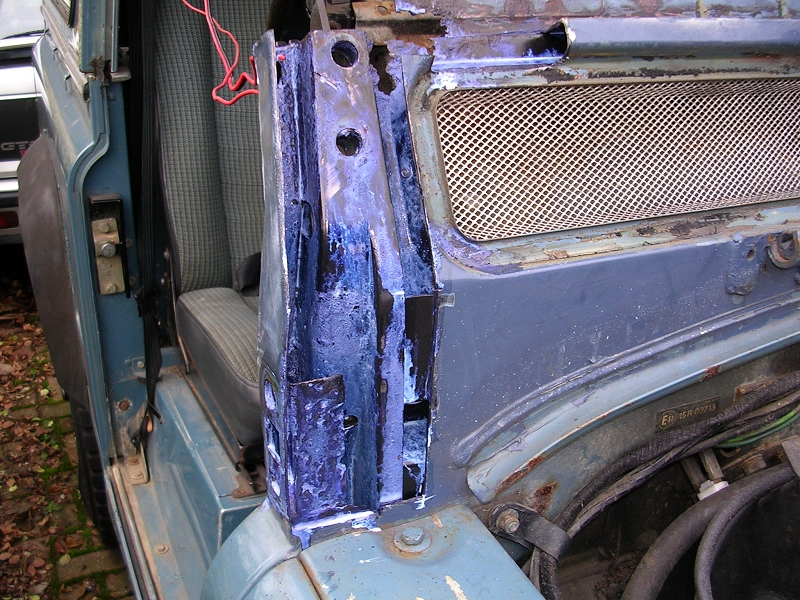 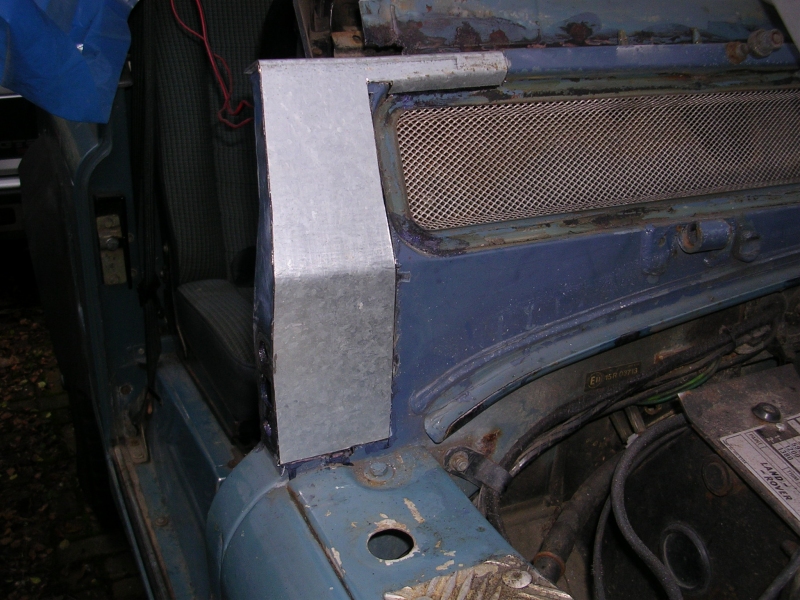 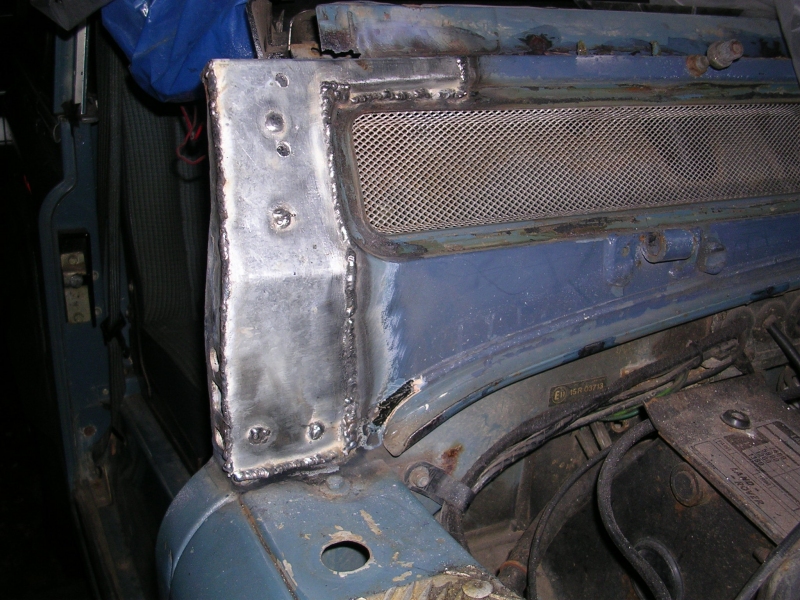 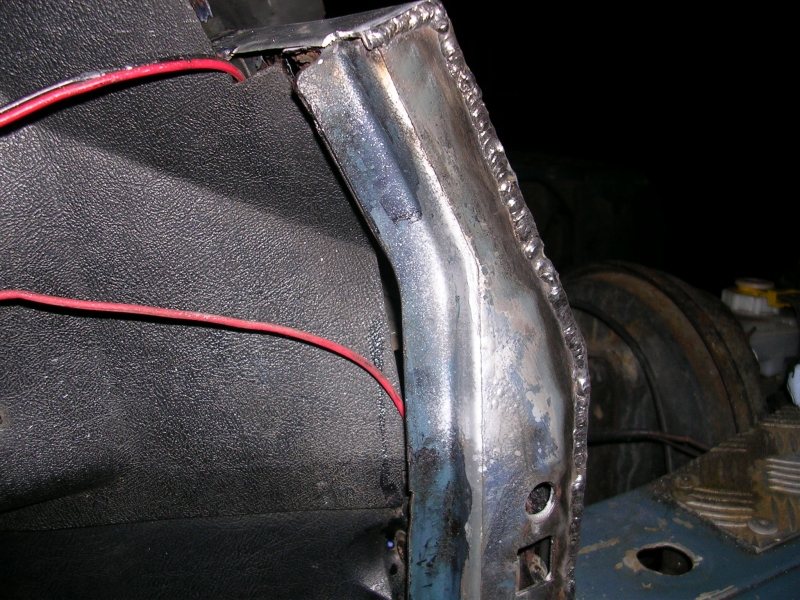 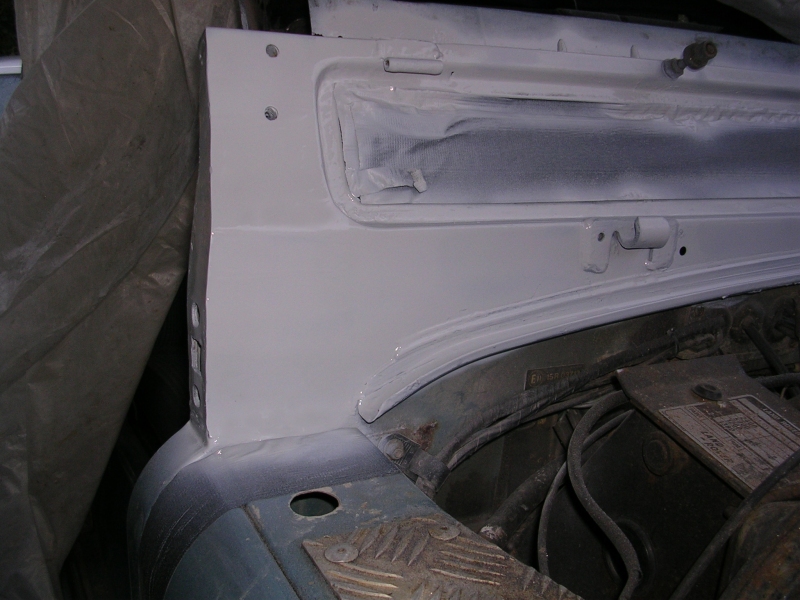 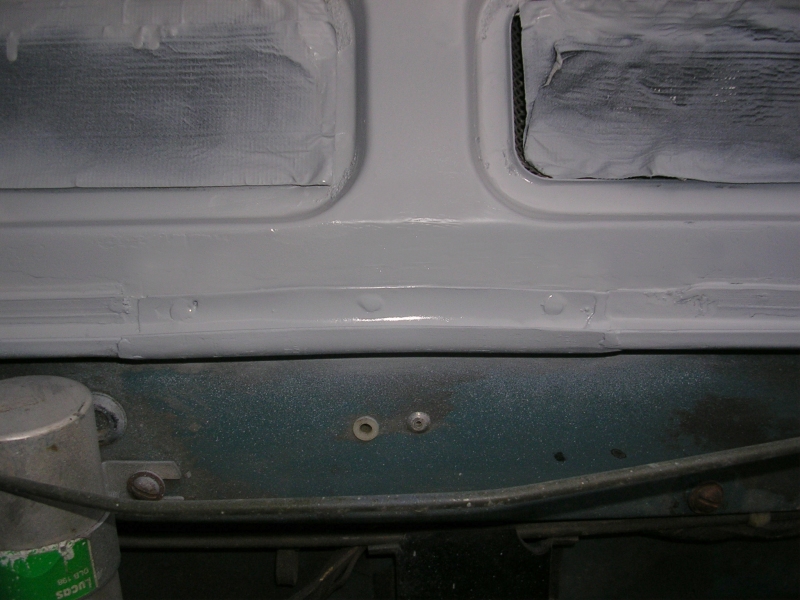 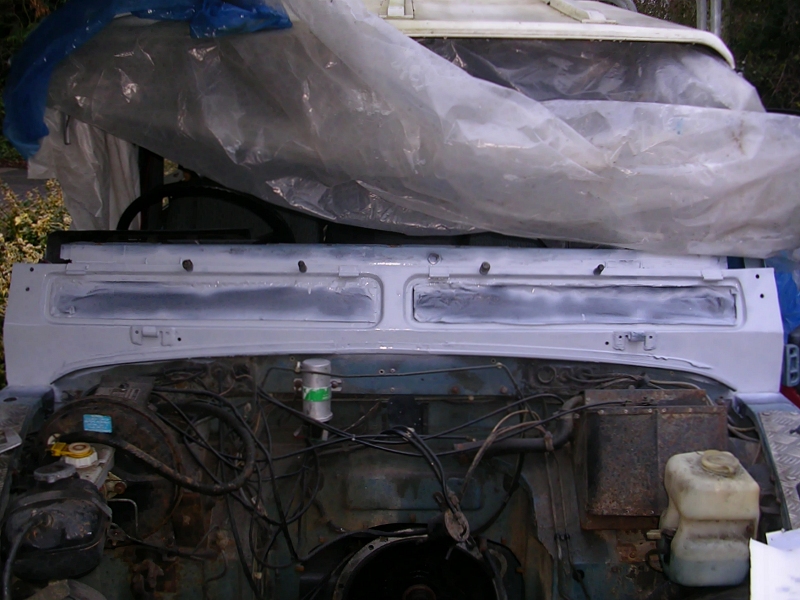 then the whole upper bulkhead was rubbed down, primed and given many coats of marine blue coach enamel over a few days.  bulkhead and vent seals fitted 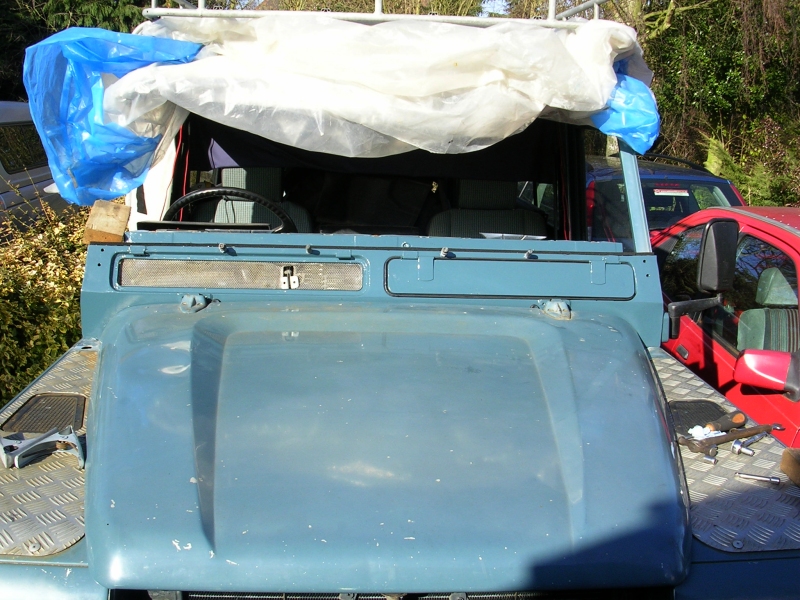 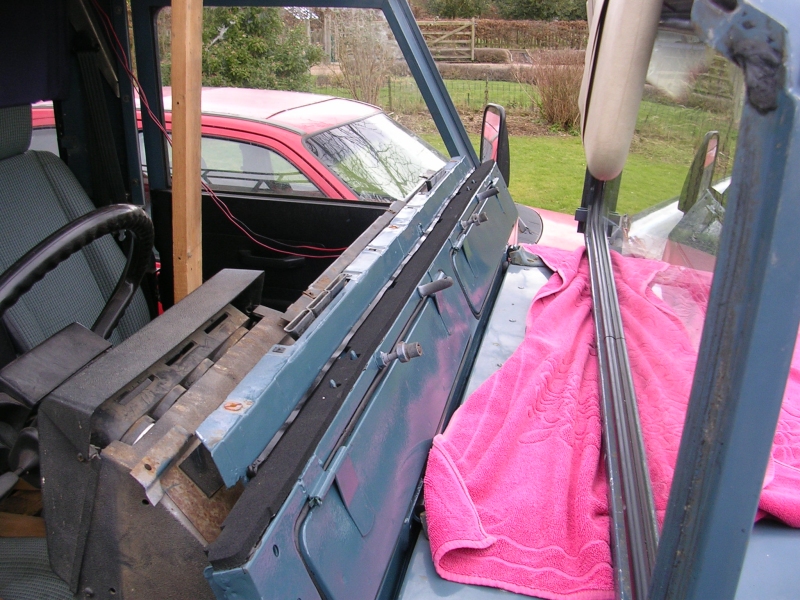 windscreen refitted to frame, and both refitted to the landy 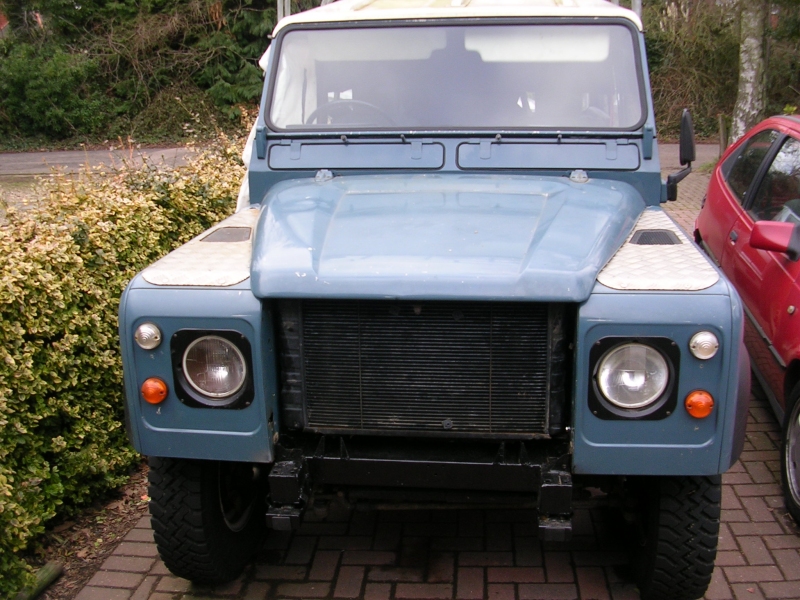 |
| |
Last Edit: Jan 11, 2013 12:45:27 GMT by darrenh
|
|
l33dwc
Part of things

Posts: 226
|
|
Jan 11, 2013 17:06:02 GMT
|
|
Nice repair you have done there.
|
| |
Current fleet
1991 Fiesta 1.1 Popular Plus - The garaged queen
2003 Shogun 3.3 DiD - The family truck and general dogsbody
2004 Audi A4 1.8t.- Project that needs Mot
2007 Nissan Note 1.4 - Business car 1
2008 Vauxhall Corsa 1.4 Auto - Business car 2
2014 Toyota Yaris 1.4 - Business cars 3
|
|
sowen
Club Retro Rides Member
Posts: 2,245
Club RR Member Number: 24
|
|
Jan 11, 2013 23:18:34 GMT
|
Good progress, you should get many trouble free reliable years of motoring once everything is done  |
| |
|
|
marsie
Part of things
Posts: 95
|
|
|
|
|
|
| |
Some people are like slinkies? They serve no real purpose in life but make you smile if you push them down the stairs!
1972 Scimitar GTe se5a
|
|
|
|
|
Jan 12, 2013 11:10:48 GMT
|
thanks for the comments guys i really appreciate them yeah there seems to be a few companies doing sections, i usually use YRM. trouble is, none of them seem to do pressed versions including the vent recess. annoying ! |
| |
|
|
stefan
Posted a lot
If it isn't broken fix it till it is
Posts: 1,598
|
|
Jan 12, 2013 14:18:00 GMT
|
|
Looking good, now the brat is MOTed I will start my series 3 project
|
| |
POWER IS EVERYTHING WITHOUT CONTROL
1985 Honda jazz
1997 Saab 93 convertible
2010 transit 280
|
|
|
|
|
Jan 12, 2013 15:01:33 GMT
|
nice stefan, i've been following that thread |
| |
|
|
|
|
|
|
|
Jan 19, 2013 16:54:37 GMT
|
next job was attending to the rust shower falling out of the doors every time you close them !!! the doors on this age of vehicle are steel frames with alloy skins bonded and folded over the edge the frame had started to rust on the horizontal rails. the window runners was also rotten and falling out the inside of the felt. I also uncovered some pretty poor repairs from previous years, I mean why would you use body filler on something structural that isn't seen ? bizarre. starting with the passenger side, strip down and investigation 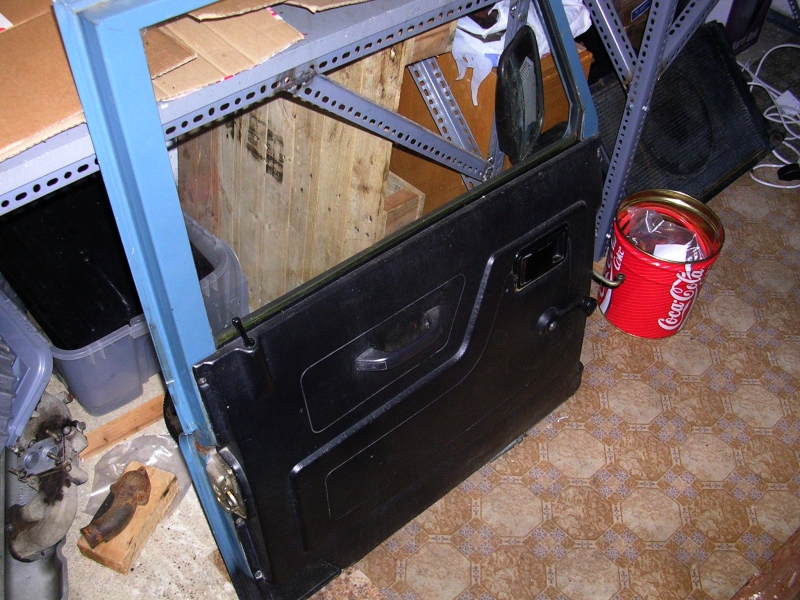  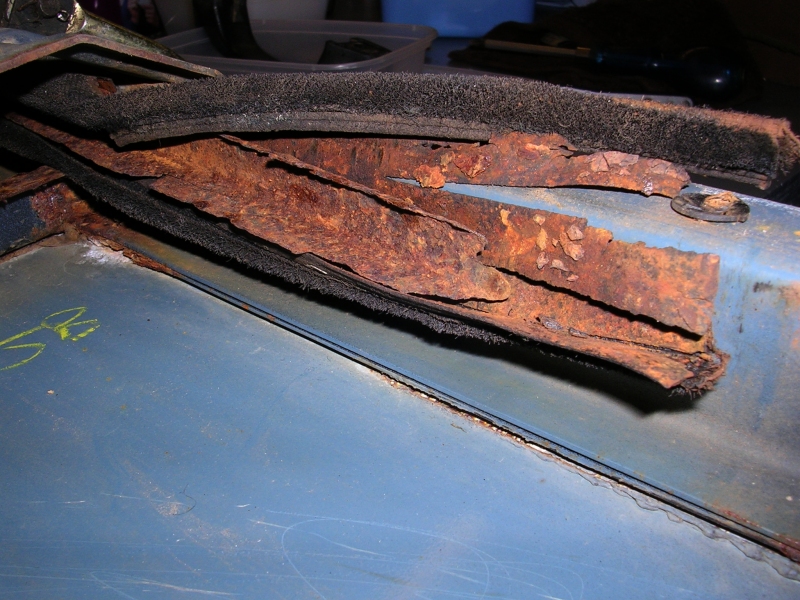 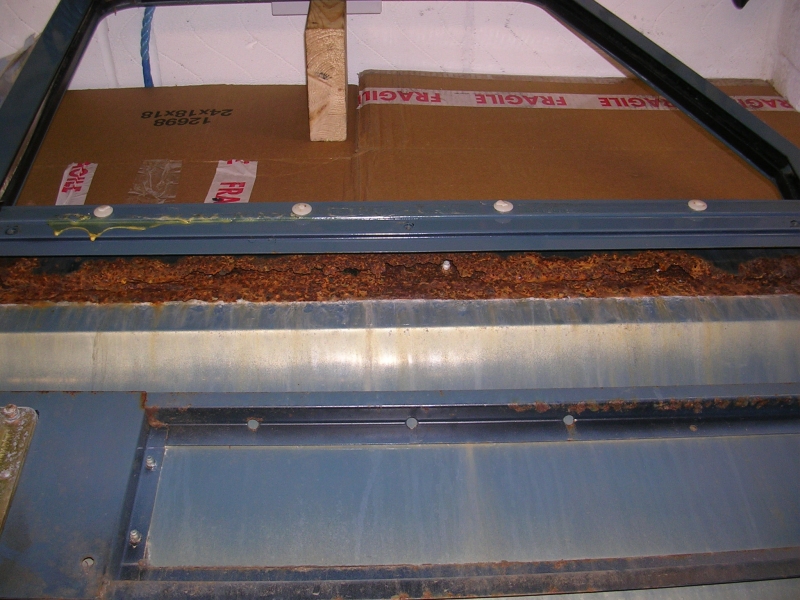 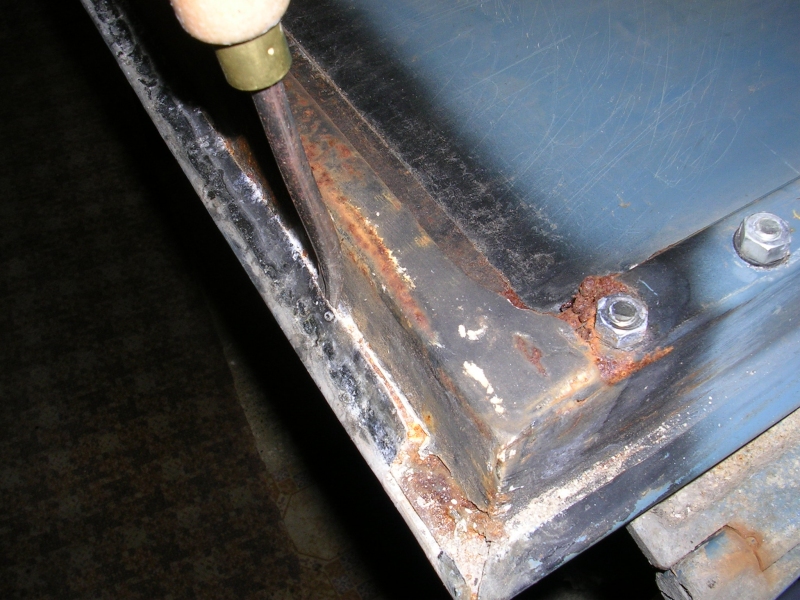 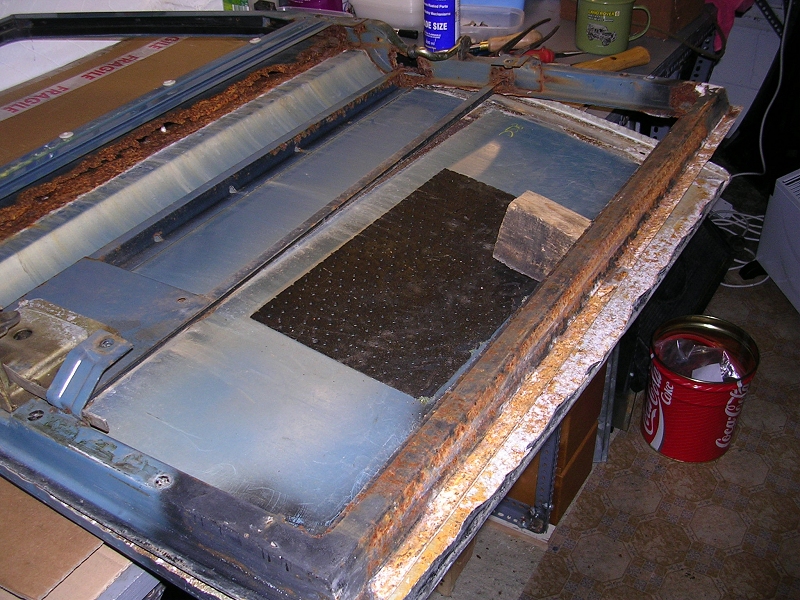 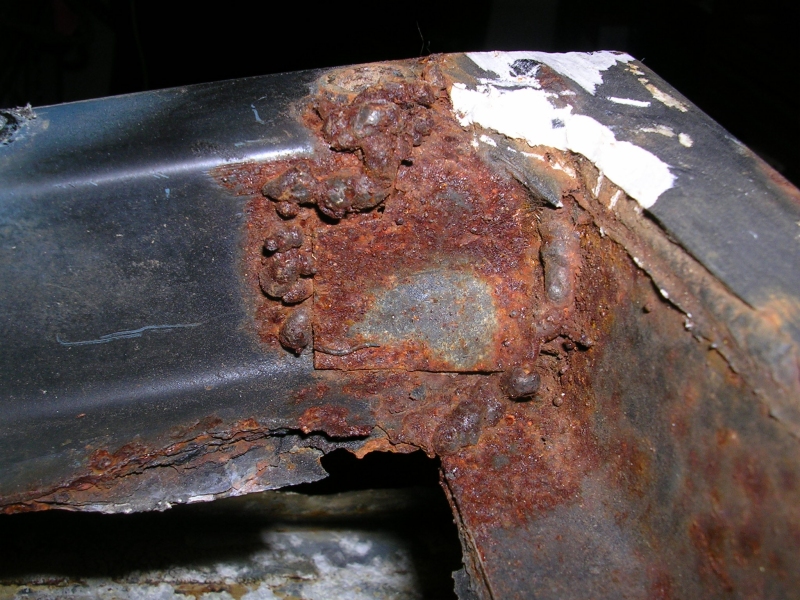 I separated the door skin, cut out the rotten/P40 corner sections of the main bottom rail, wire brushed and rust killer applied. then started reassembling and welding in new repairs with 2mm zintec, contrary to the repairs I found, I thought it would be quite novel to actually join the metal with the welds too !! 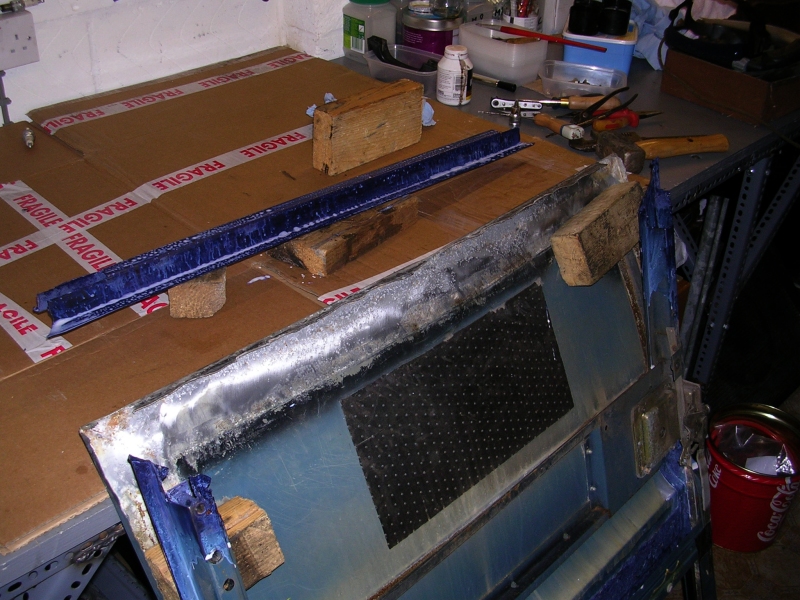 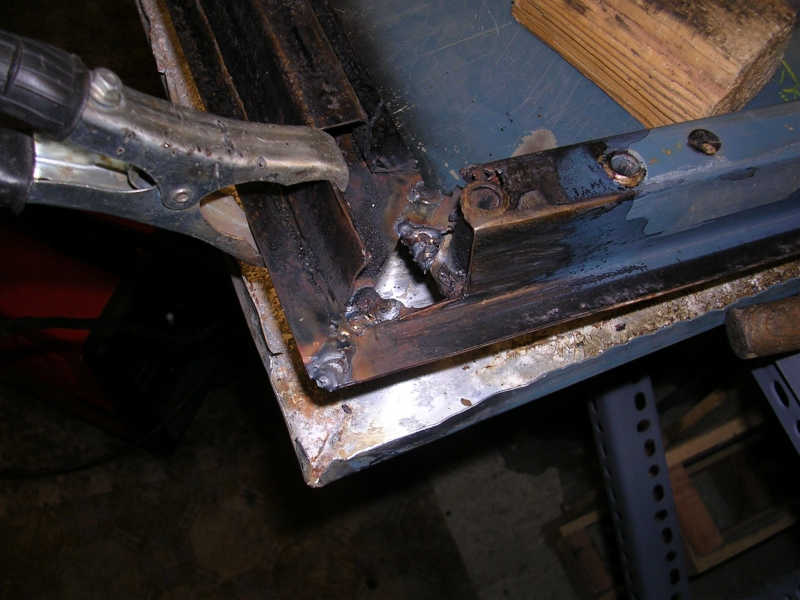 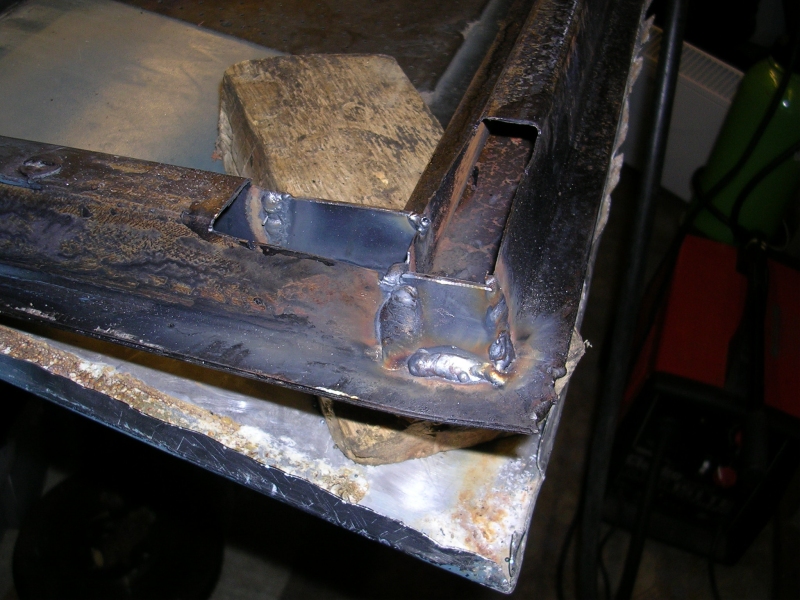 instead of making the corner a normal mitred join, I decided to triangulate to add strength 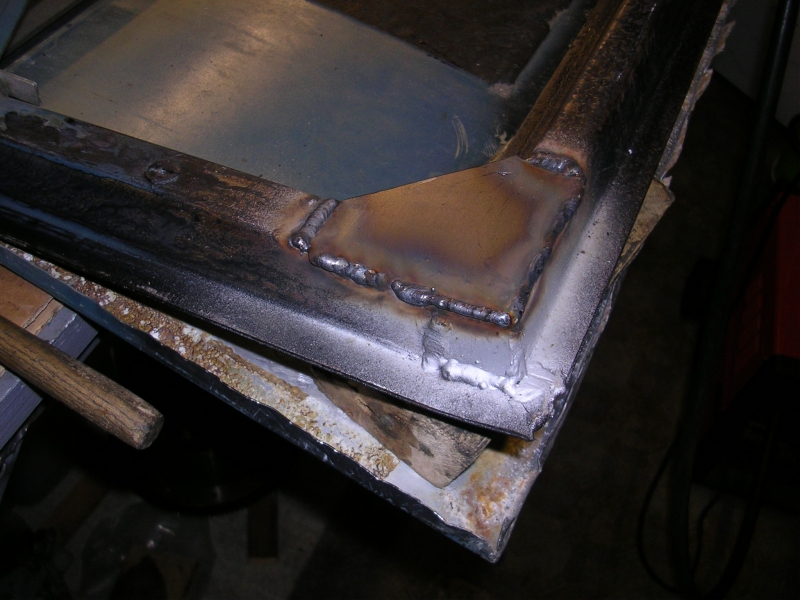 this is up at the hinged end of the door, with my triangulation counter bored and the door hinge crush tube let through it. this was basically so some of the load from the door hinge is spread along the horizontal rails 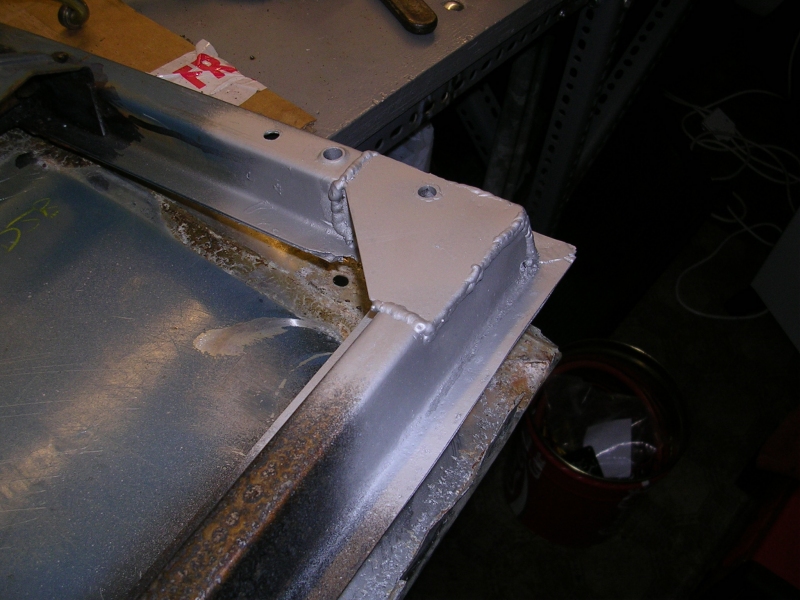 then the rail painted up with remains of the marine blue coach enamel 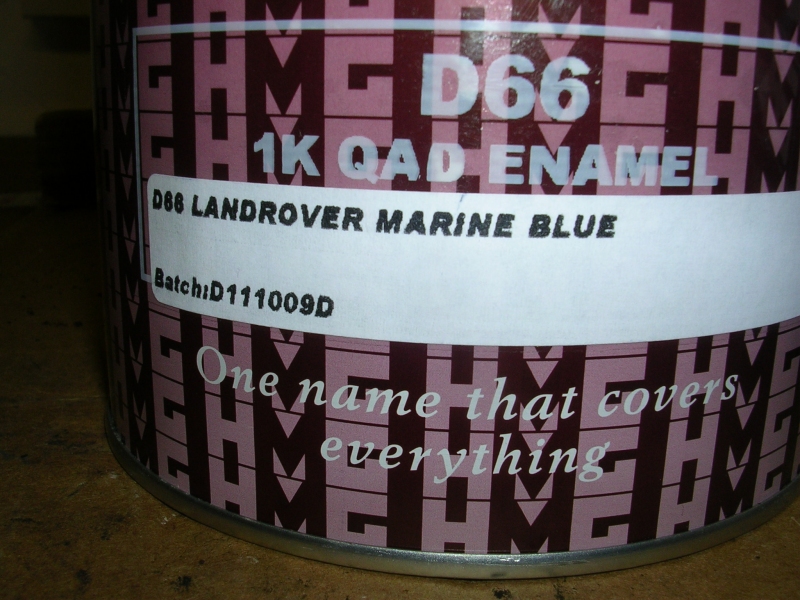 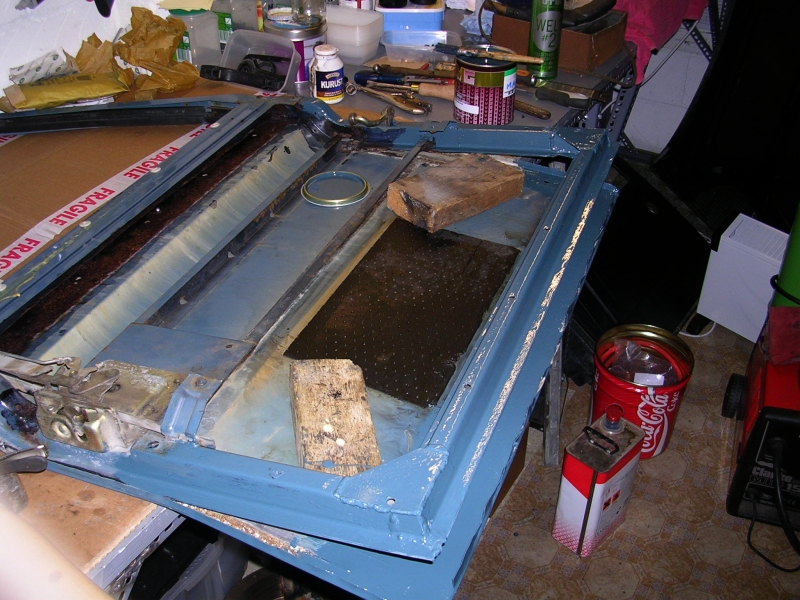 to prevent future galvanic corrosion between the aluminium and steel I put a run of damp proof course (very cheep from wickes !) between them 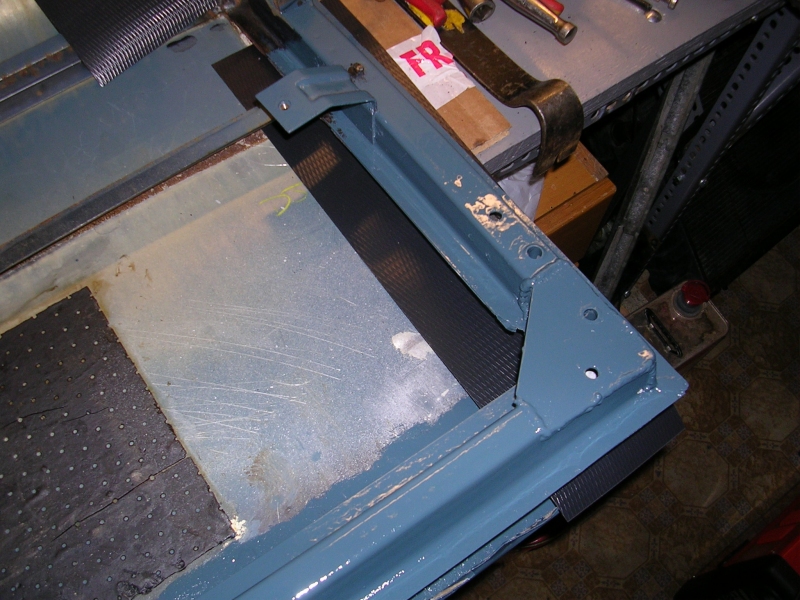 lastly for this door I tapped the alloy skin back round the door frame, note to all - make sure you warm the door skin before doing this or the paint pings off, I didn't and the paint pinged off ! I also reinstated some captive lugs to the bottom rail where the door card screws into 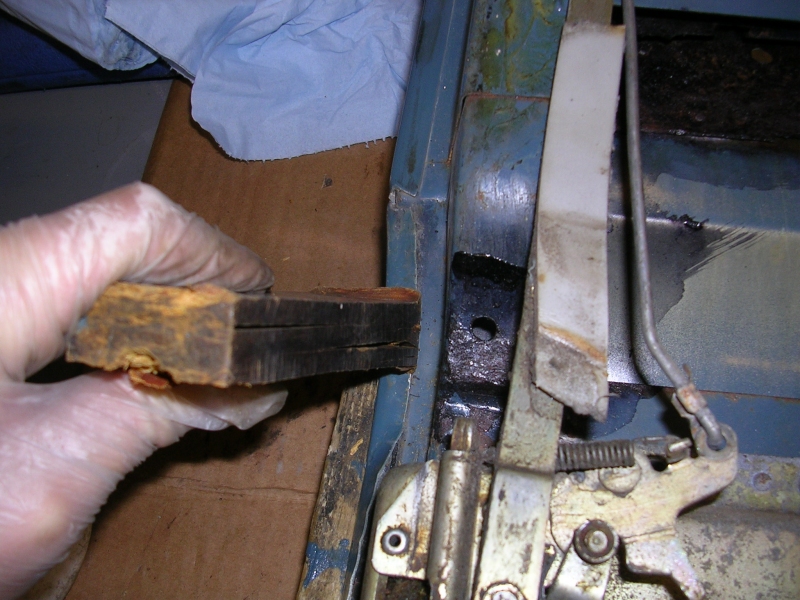 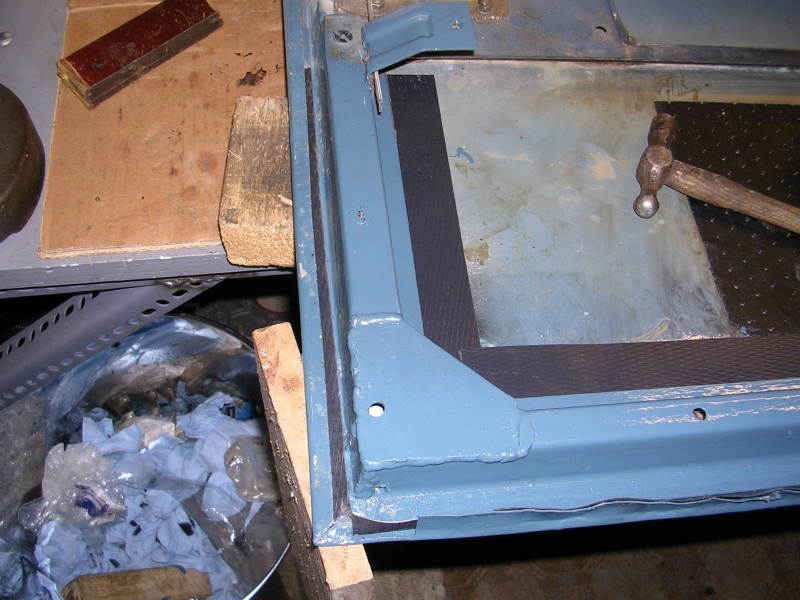 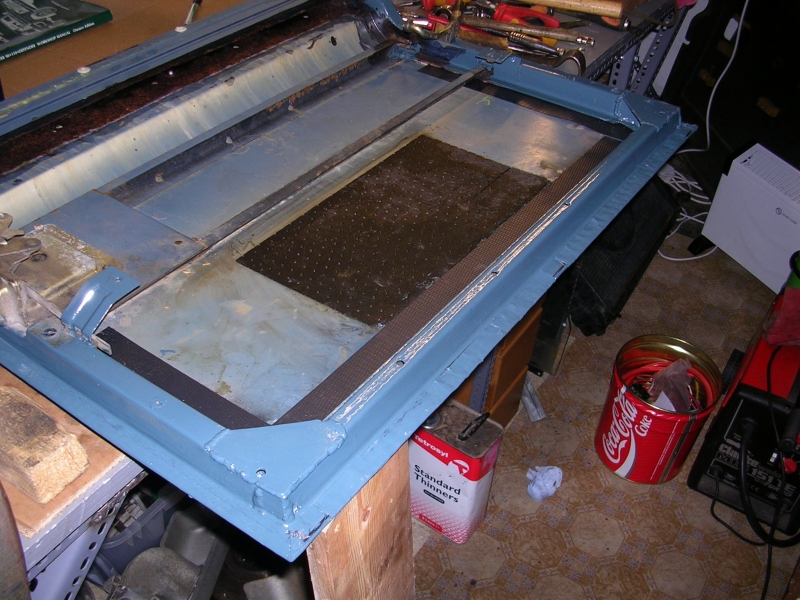 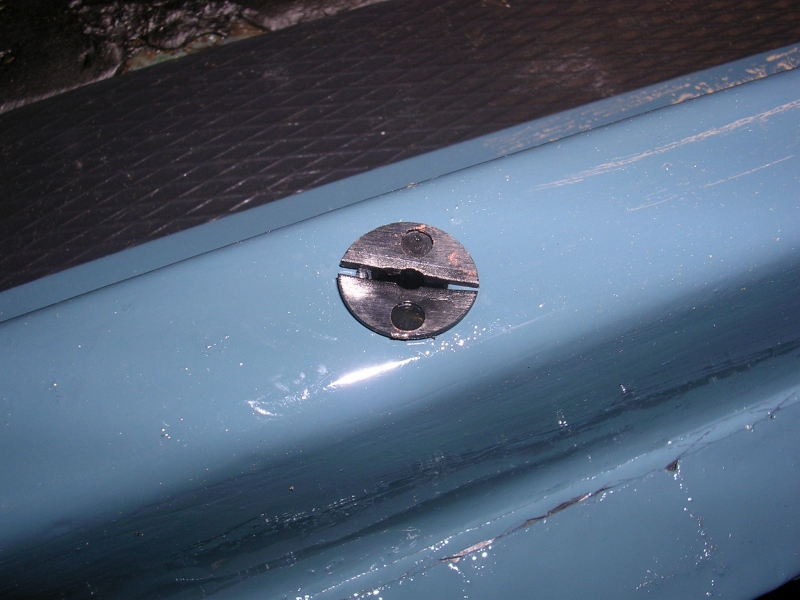 these next few pictures are reassembling the door with new glass runners, window regulator and door card. not forgetting the galvanised rub strip, new door hinges and wing mirror. 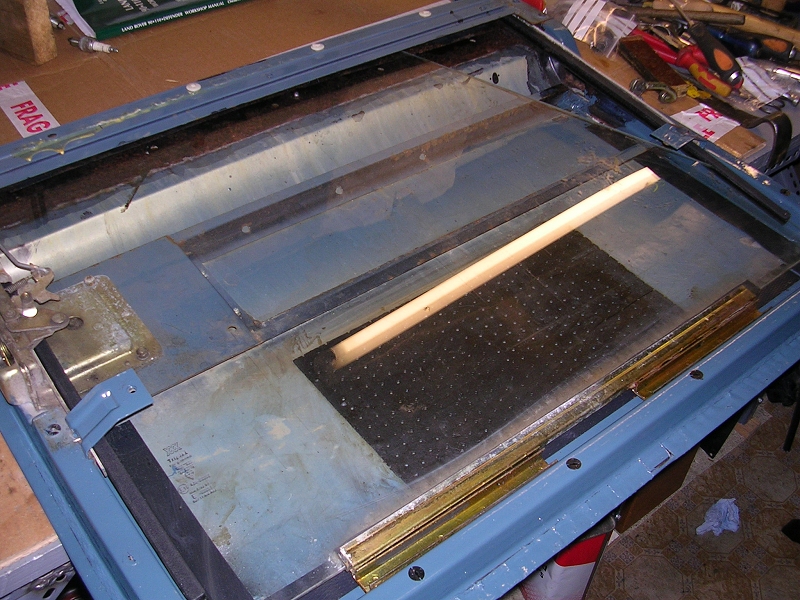  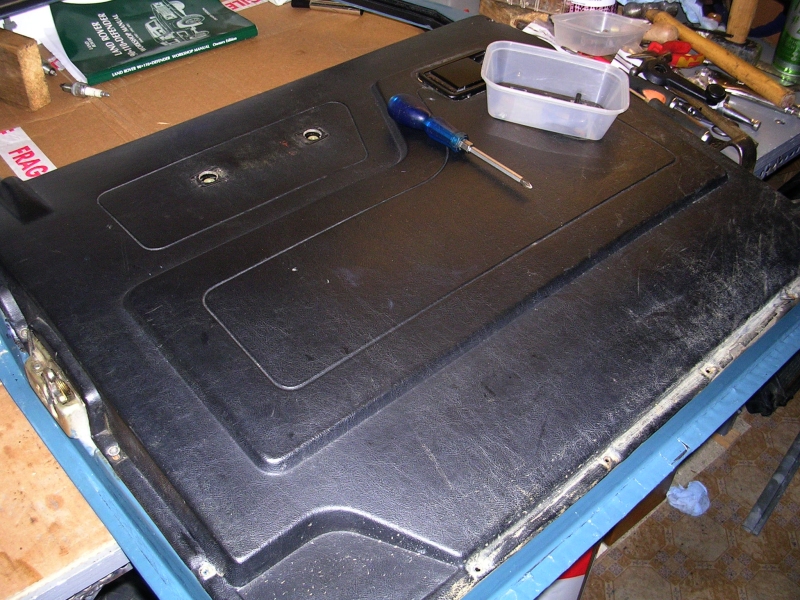   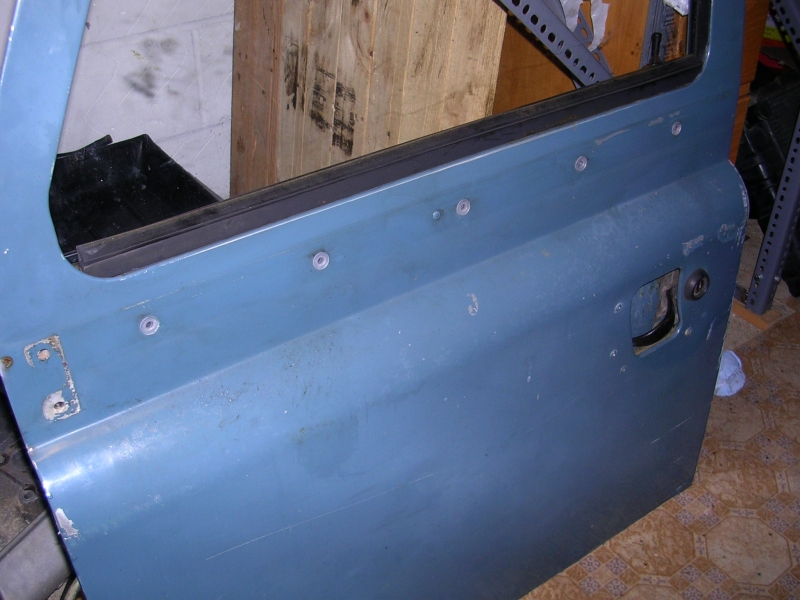 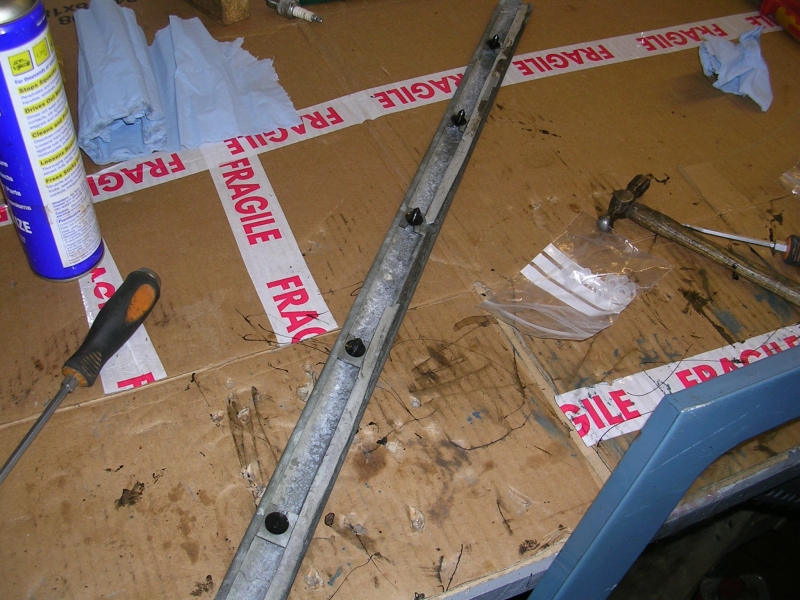 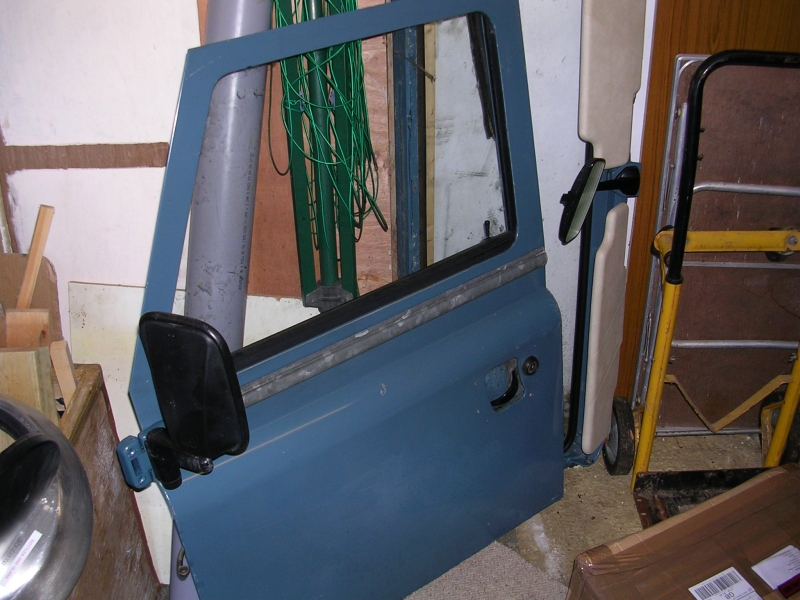 the following pictures are the drivers side door which you will see was quite a bit worse on the rust. once again found terrible previous repairs, dodgy welding, filler, satin black paint etc. in fact you can see the whole door frame was snapped off and the only thing holding it was the alloy door skin !! 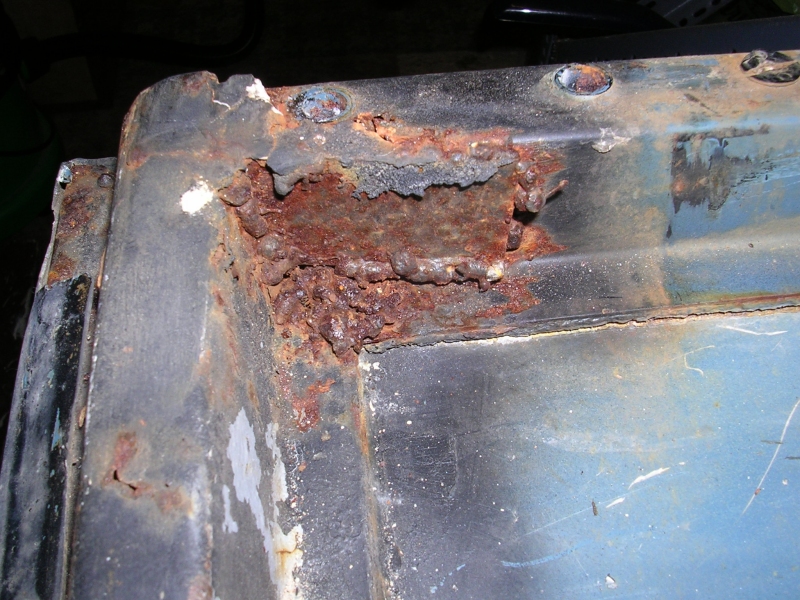 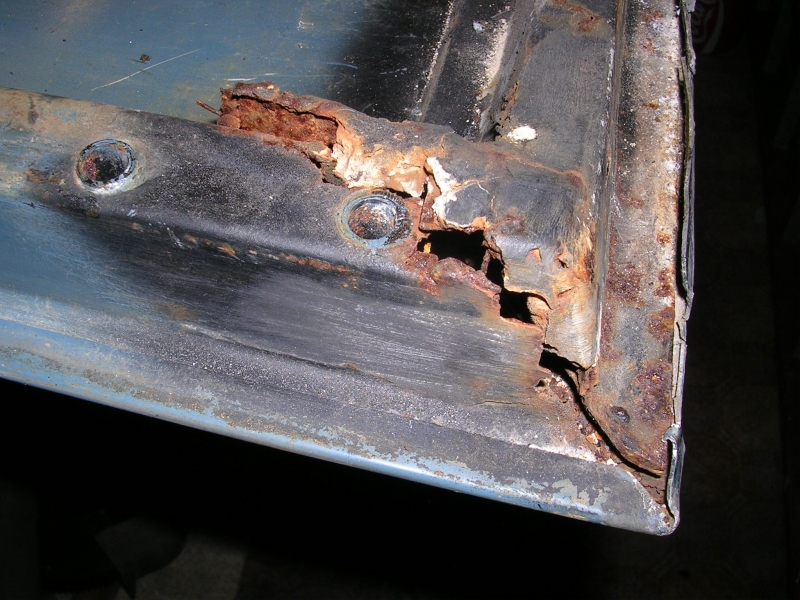 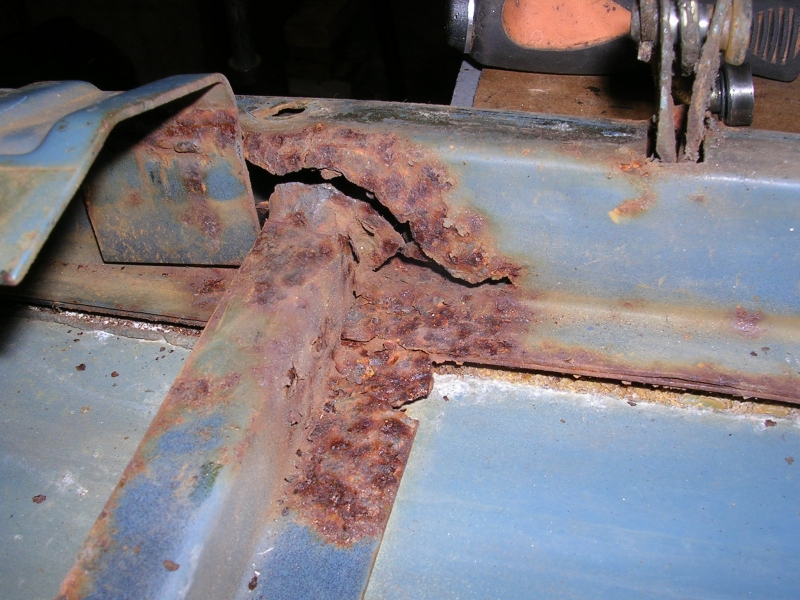 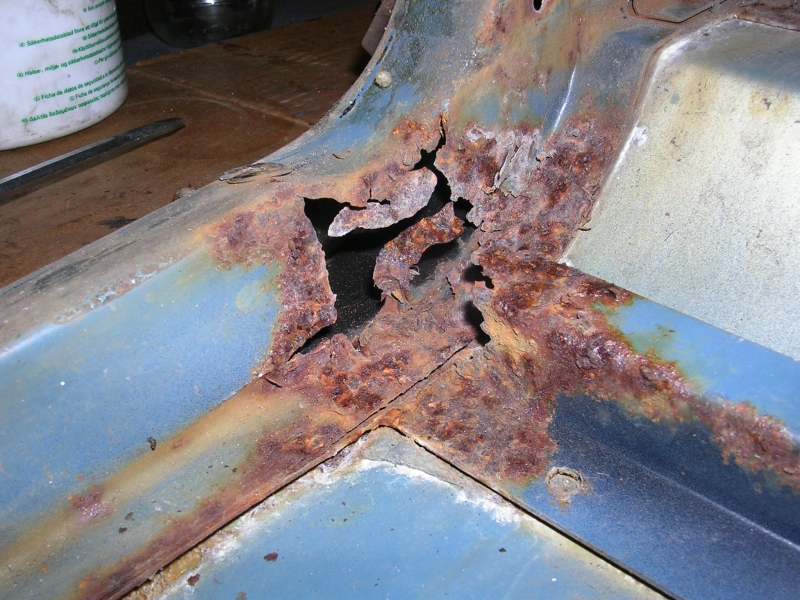 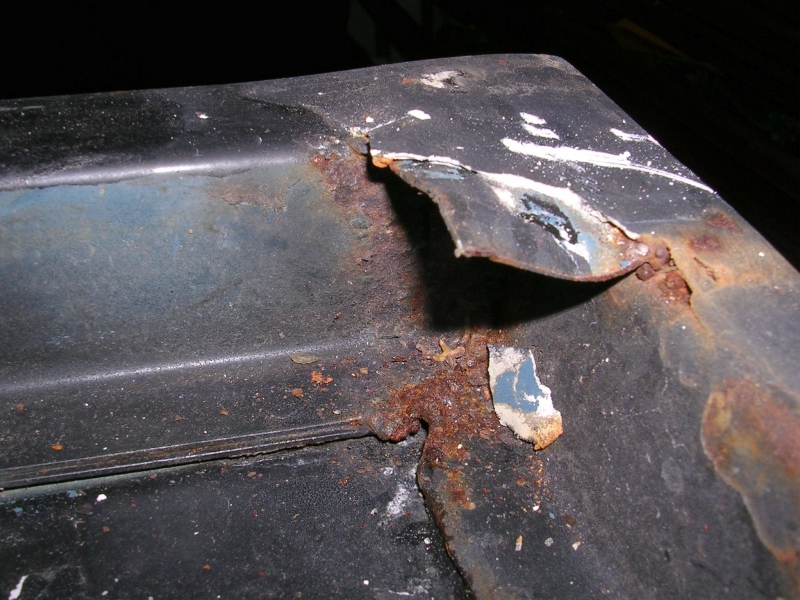 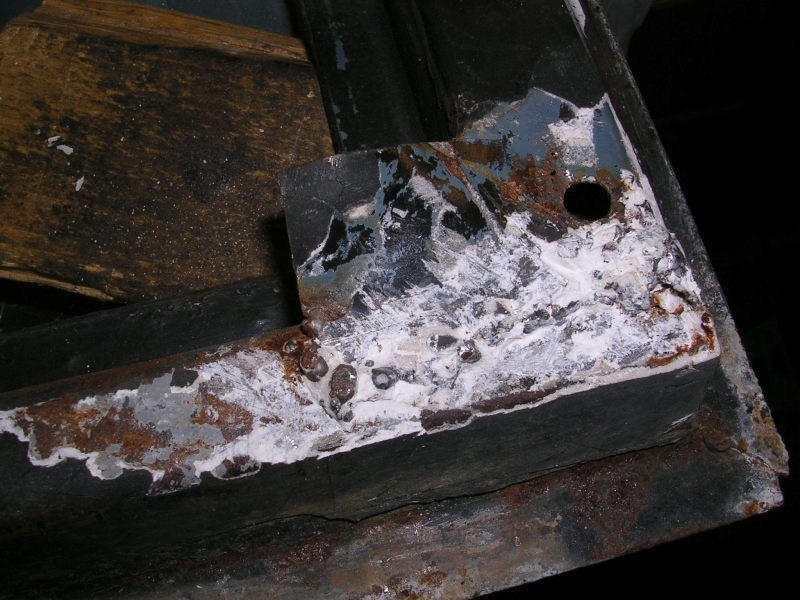 now some before, during and after of the above rot areas 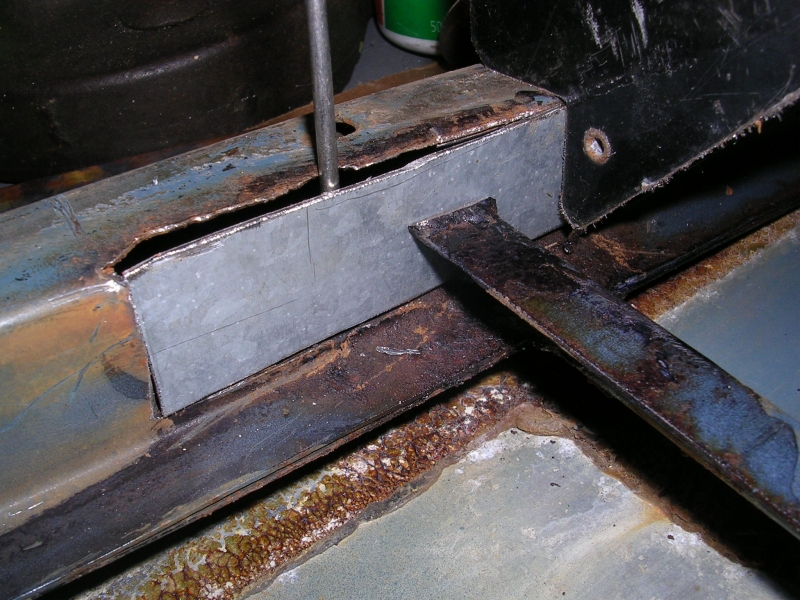 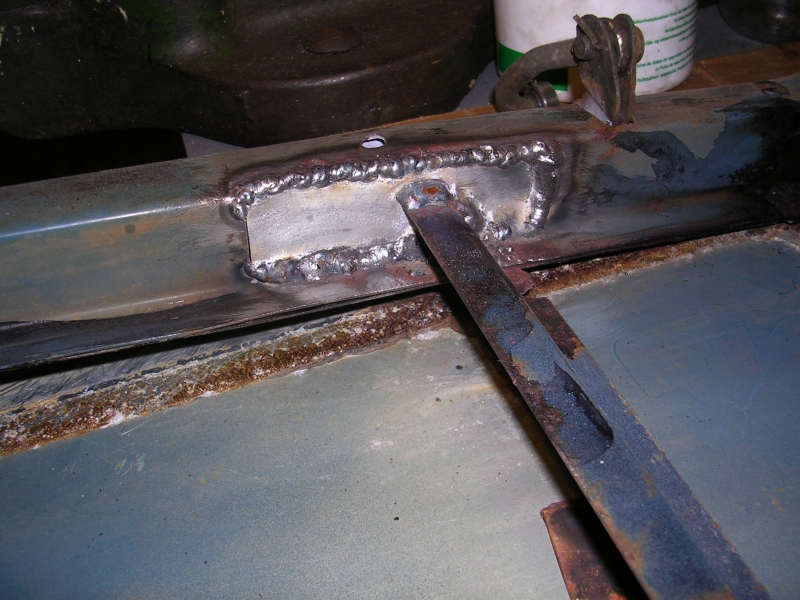 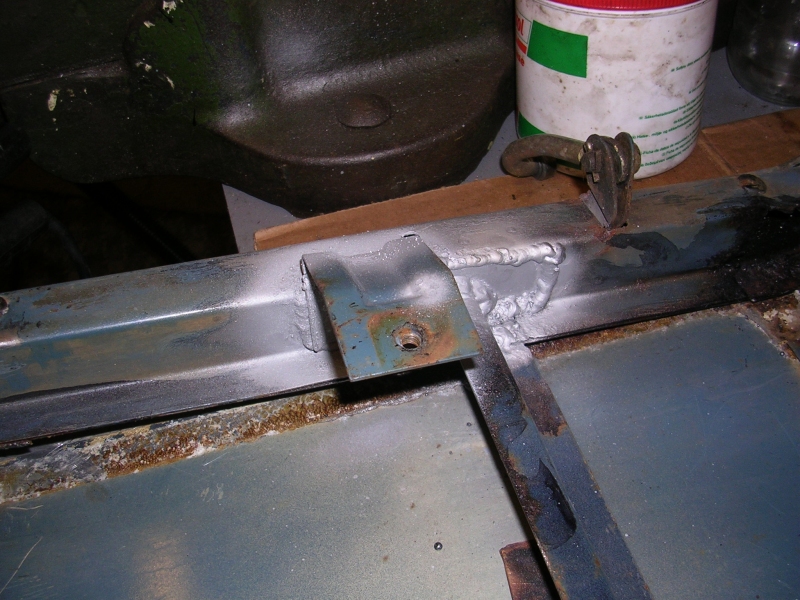 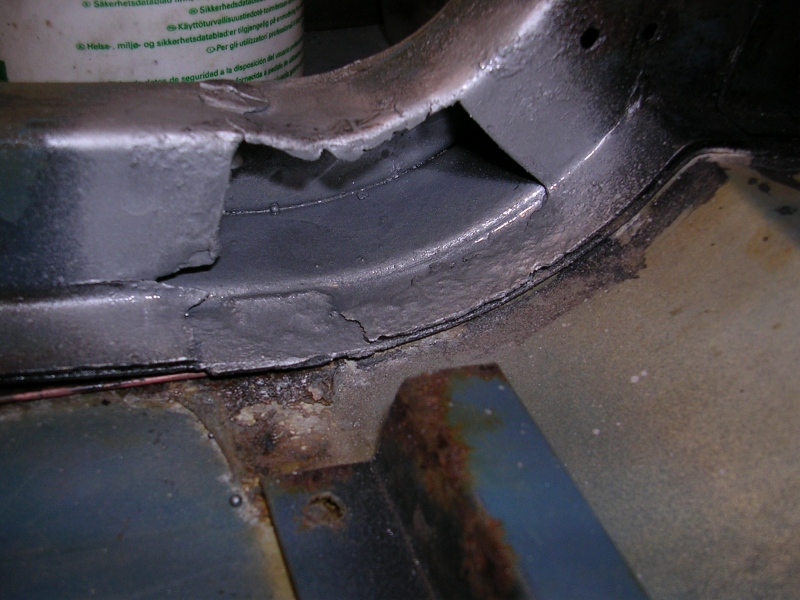 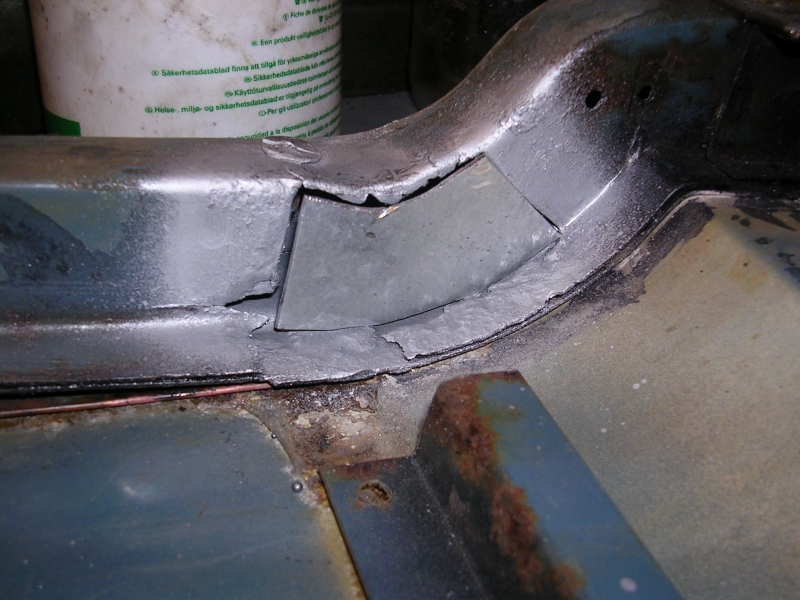 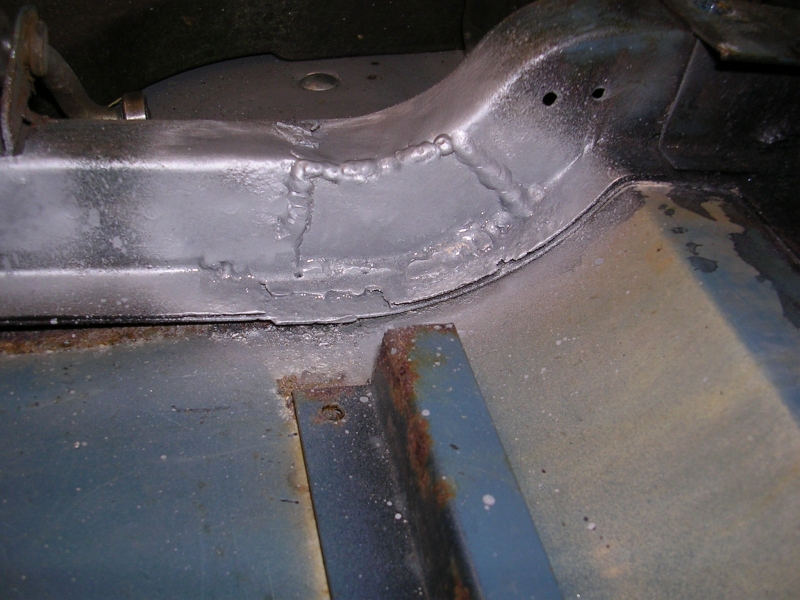 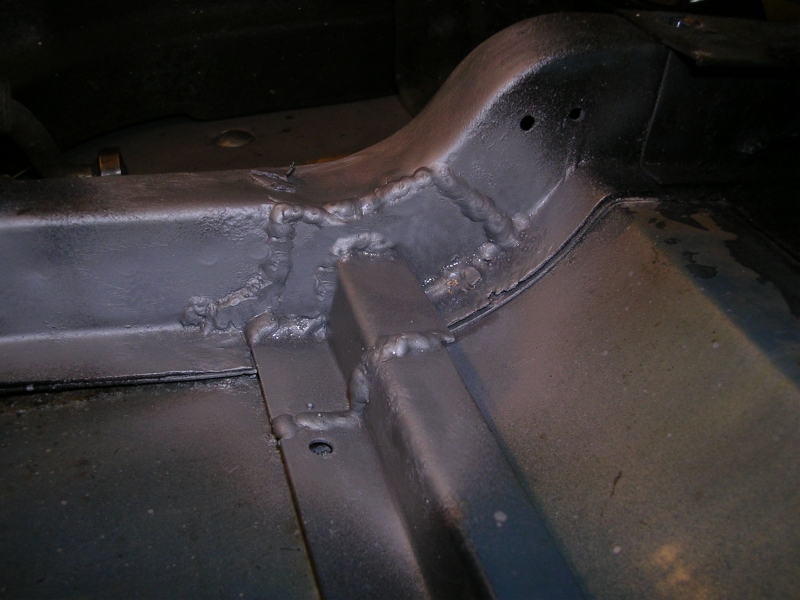 corner repairs as per passenger door. plus lots of coats of blue 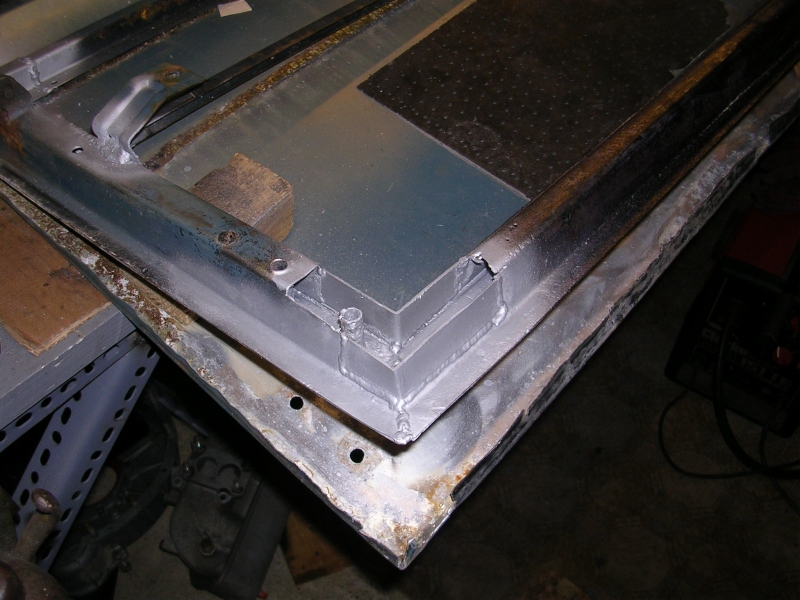 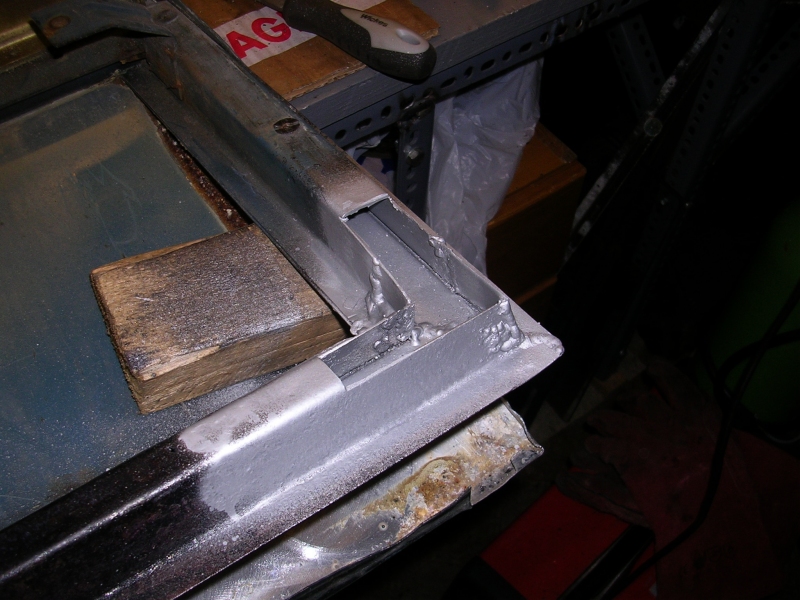 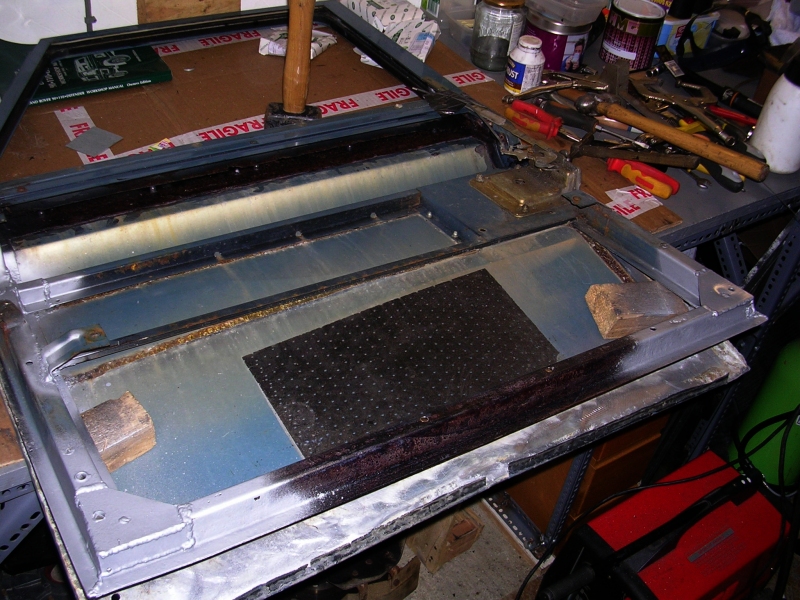 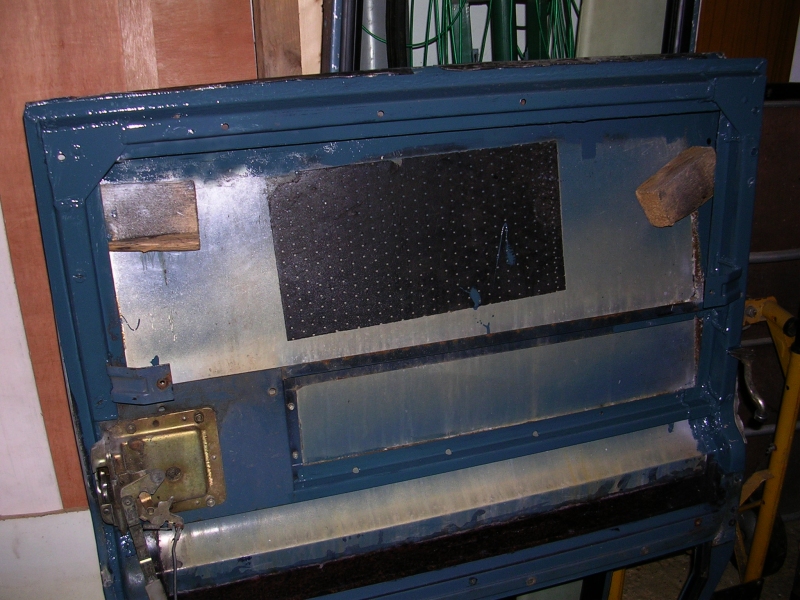 |
| |
Last Edit: Jan 19, 2013 17:00:02 GMT by darrenh
|
|
|
|
|
Jan 19, 2013 17:44:44 GMT
|
|
Good job!
Gotta love the previous quality 'repairs' ...
|
| |
|
|
sowen
Club Retro Rides Member
Posts: 2,245
Club RR Member Number: 24
|
|
Jan 19, 2013 17:51:01 GMT
|
Hats off to you for not replacing those doors with the later awful push button doors, makes me feel a bit better about tackling the spare set of those I have |
| |
|
|
|
|
|
Jan 19, 2013 18:19:01 GMT
|
thanks yeah not quite as many scene points as the 1983 split doors with slidey windows, but definitely wanted to save them. |
| |
Last Edit: Jan 19, 2013 18:19:22 GMT by darrenh
|
|
|
|
|
Jan 20, 2013 16:41:48 GMT
|
|
|
| |
|
|
|
|
|
Jan 22, 2013 15:22:35 GMT
|
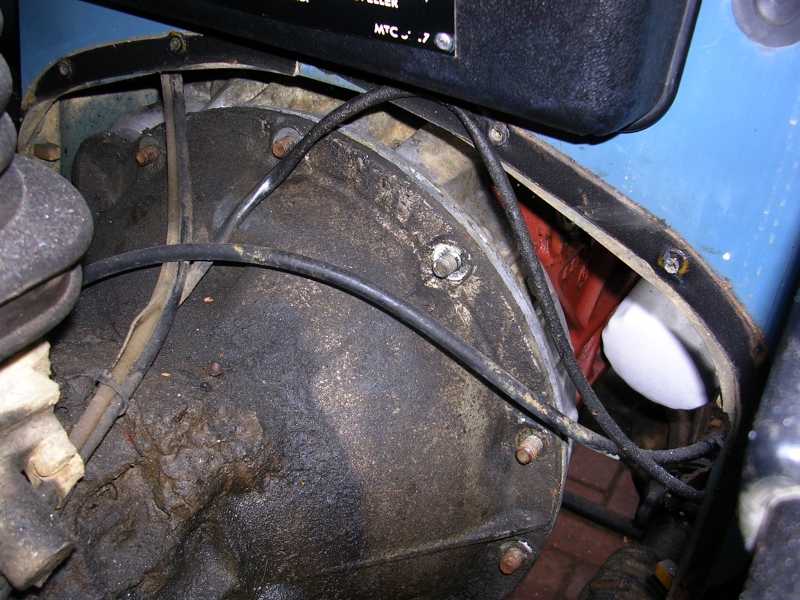
a fairly uneventful MOT revealed an advisory on fuel tank mountings. which is a fair cop... its a tube outrigger that forms the mount for the rear of the fuel tank, serves as a jacking tube (yes really !) and also supports the bodywork roughly below the drivers botty. oh and the fuel pump mount on early petrol models. 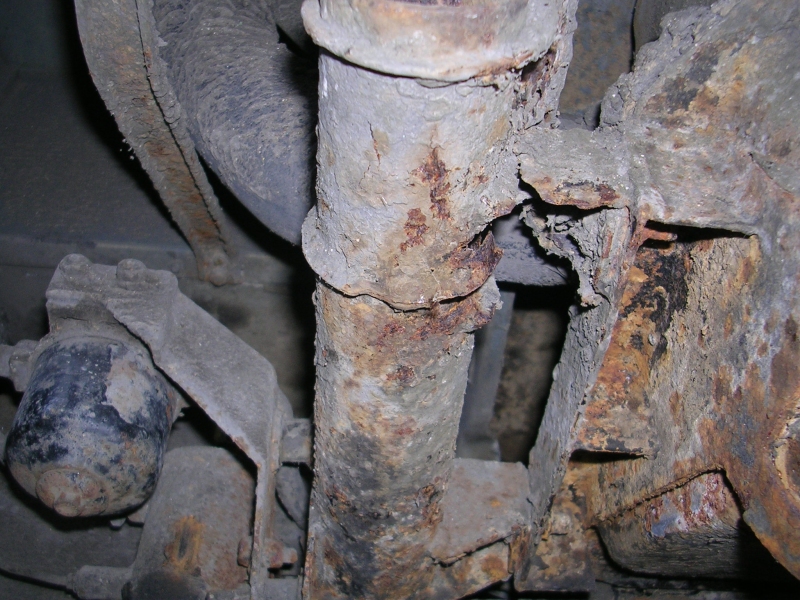 unrelated but the old facet ticker pump had been playing up, the shuttle kept jamming and i had to clout it to start the engine. so that got replaced too as its disturbed in the process 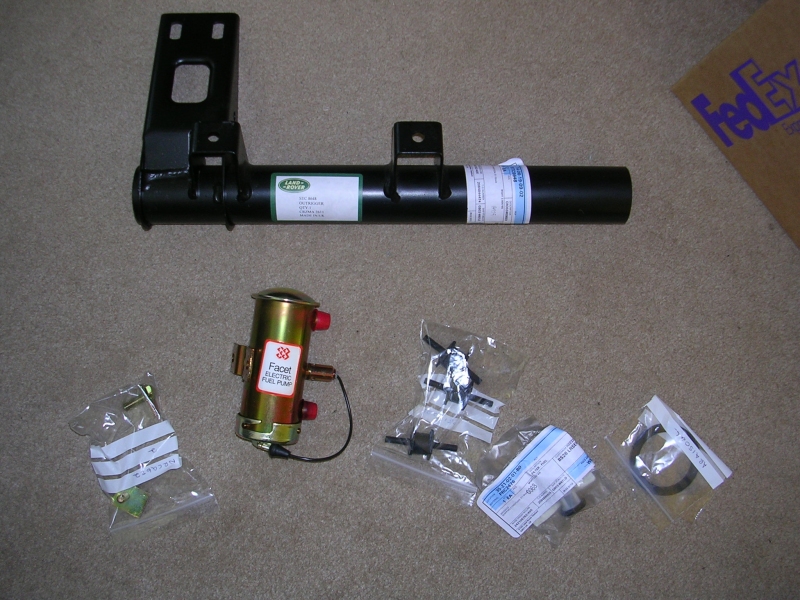 you can see after giving the metal a poke it wasn't actually attached to the tank mounts 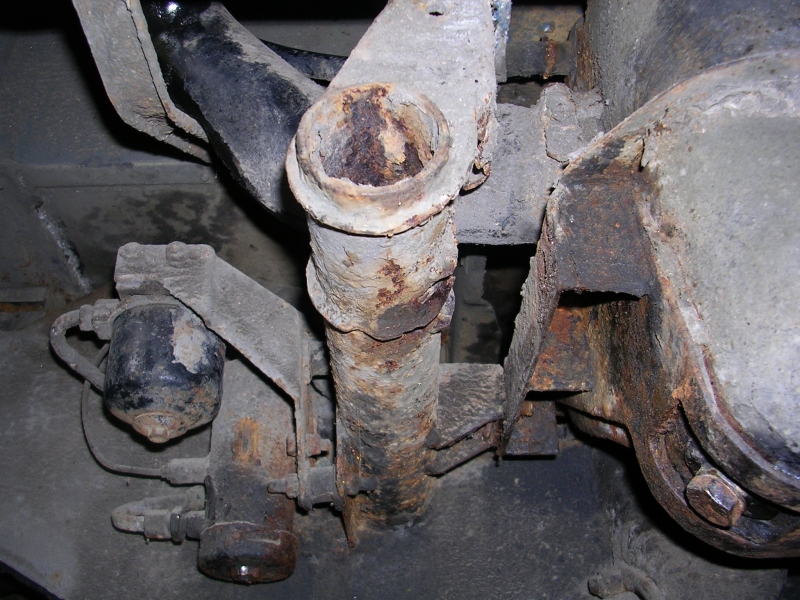 i drained and started to remove the tank  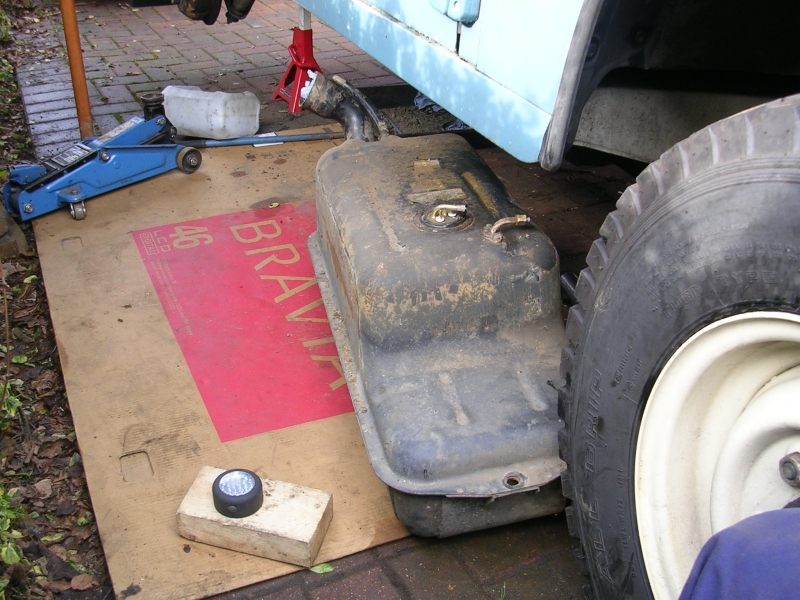 and the fuel pump 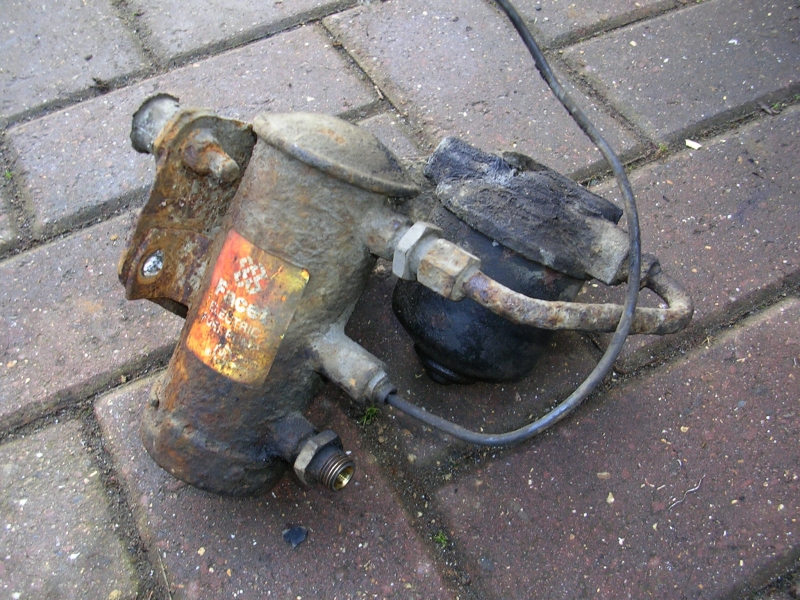 once they were out of the way started slicing the outrigger with grinder with 1mm disks 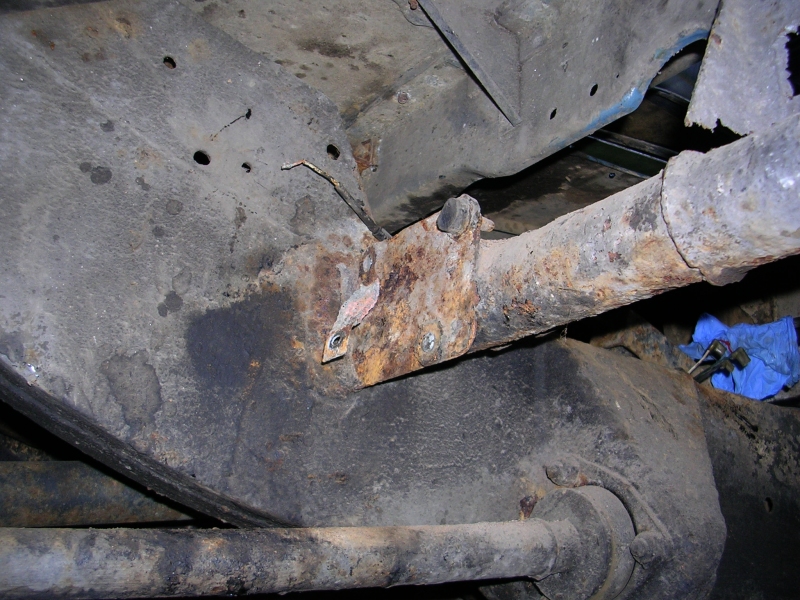 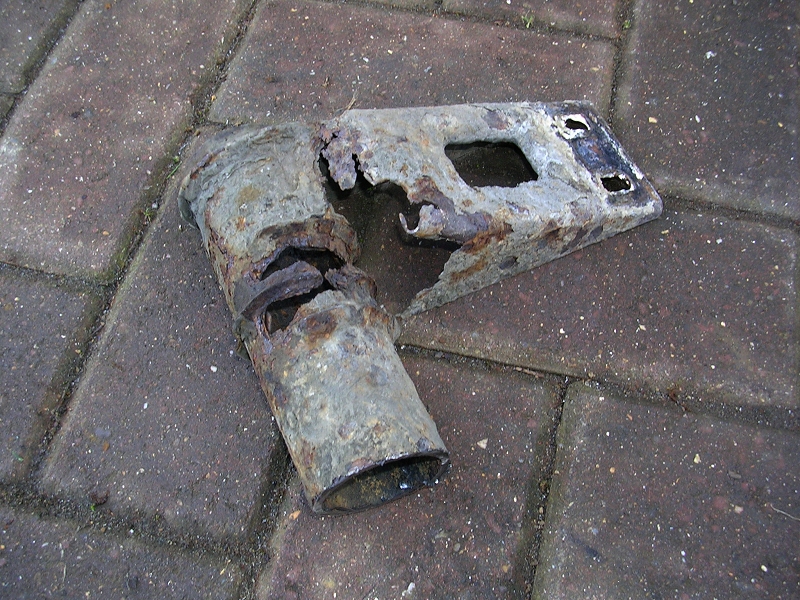 working my way closer to the chassis rail 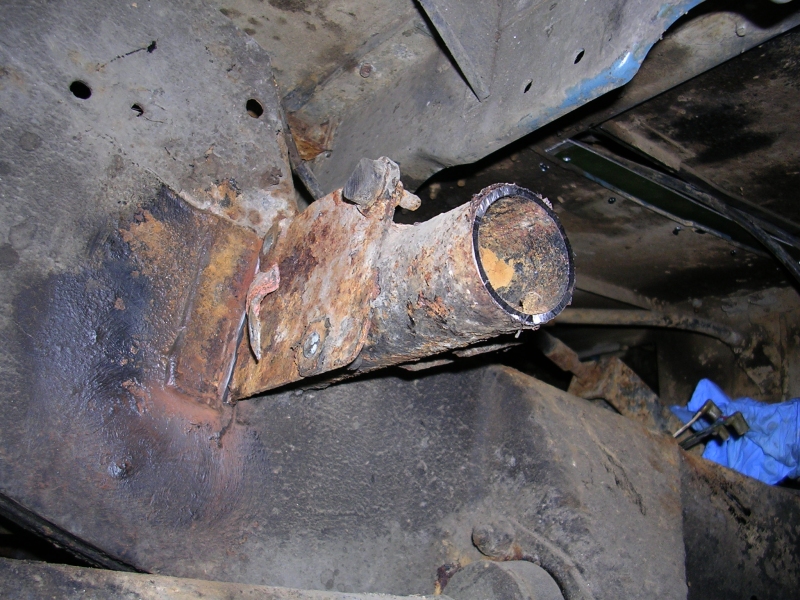 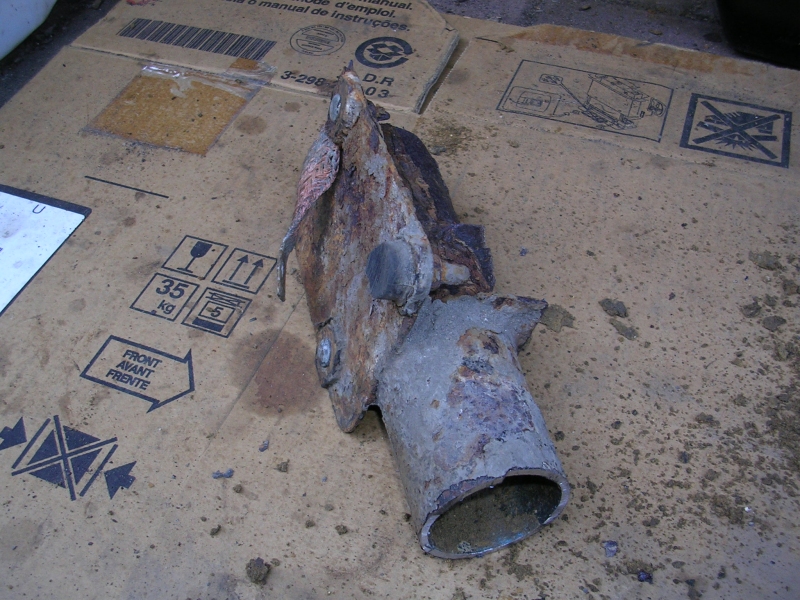 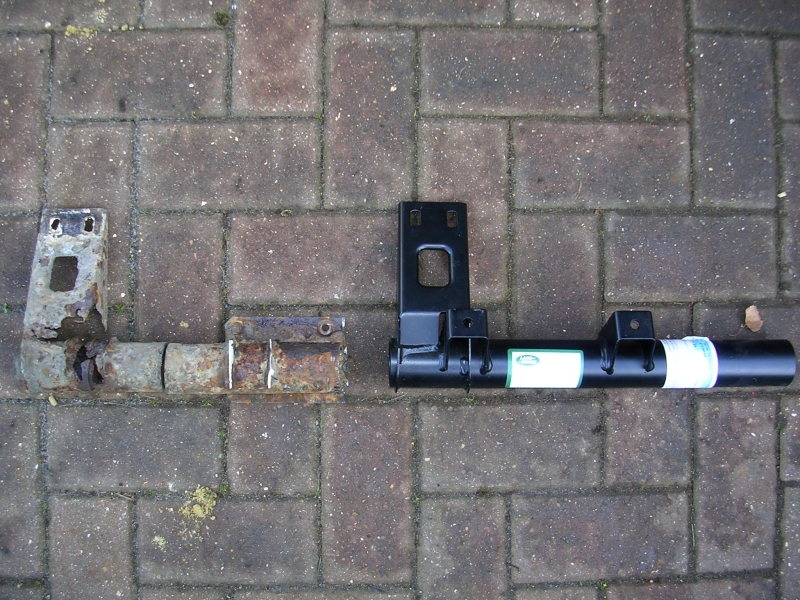 it was about here when i noticed the outrigger actually went right through the hollow of chassis rail and back out the other side, so had to continue grinding the welds to free up this section trapped in the chassis 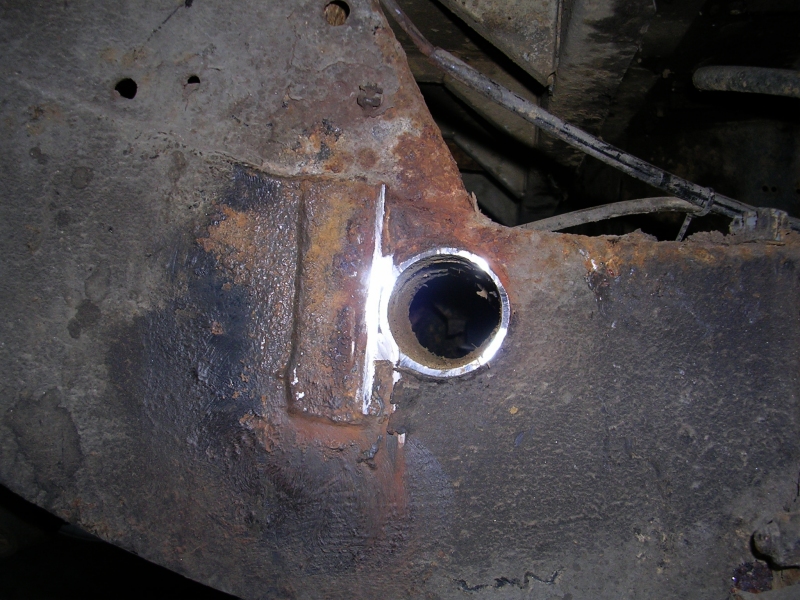 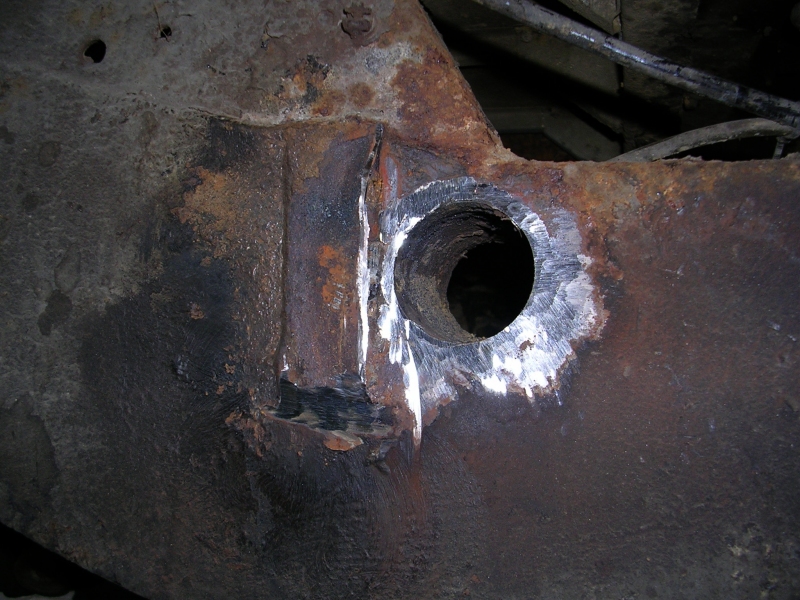 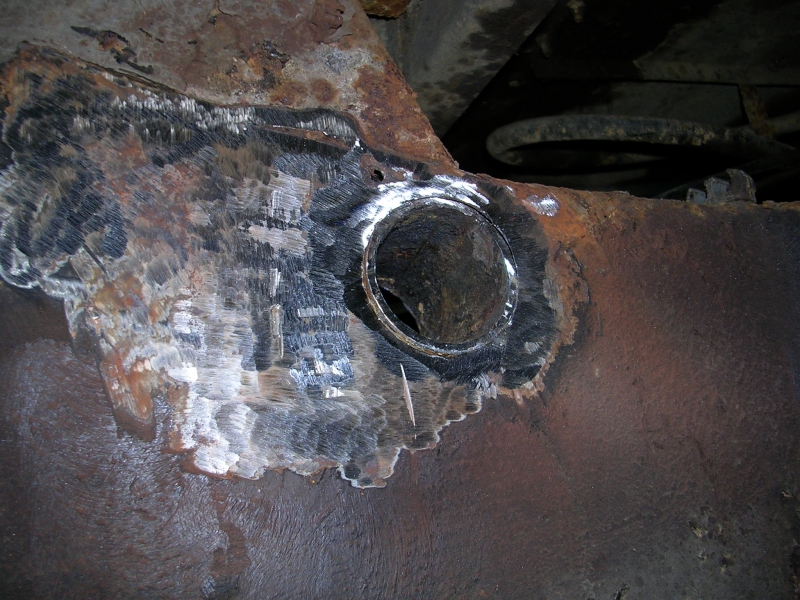 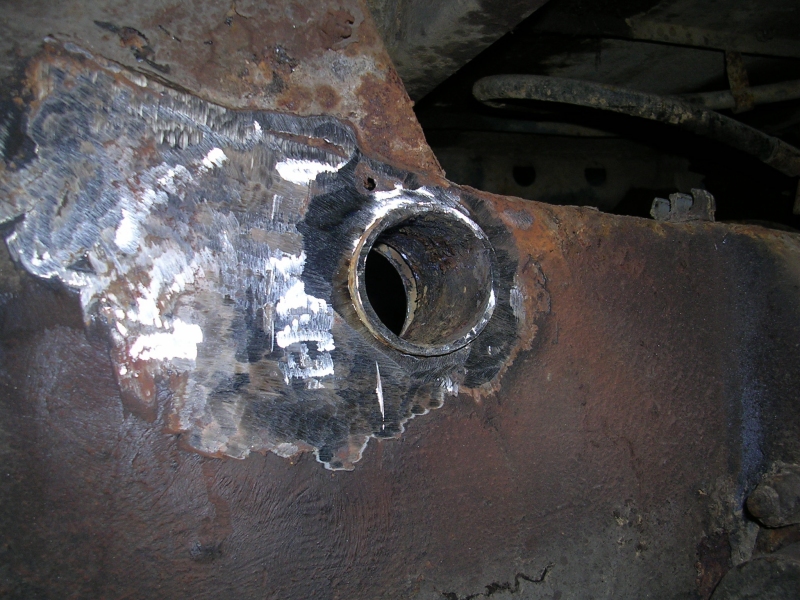 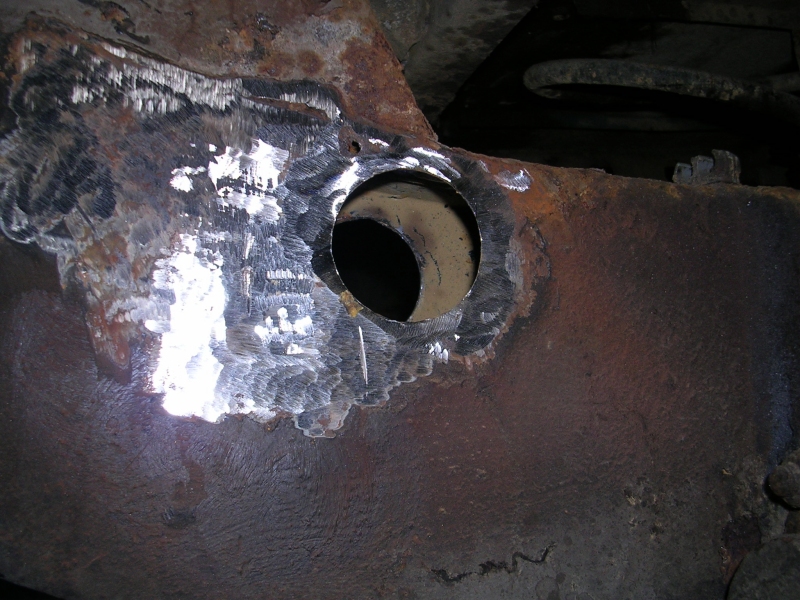 i stripped down the fuel pump base plate, cleaned it up, then added the L shaped mounting on the outrigger, which was missing as the repair section is from a later model 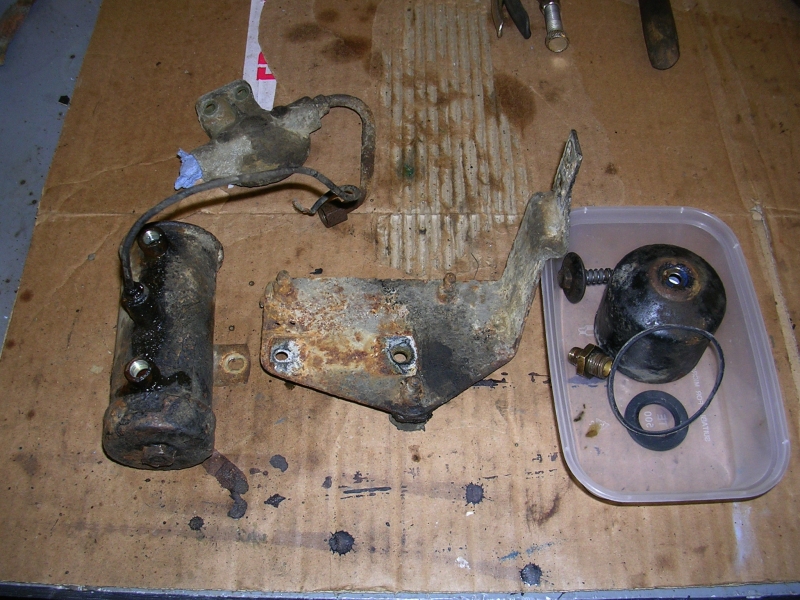 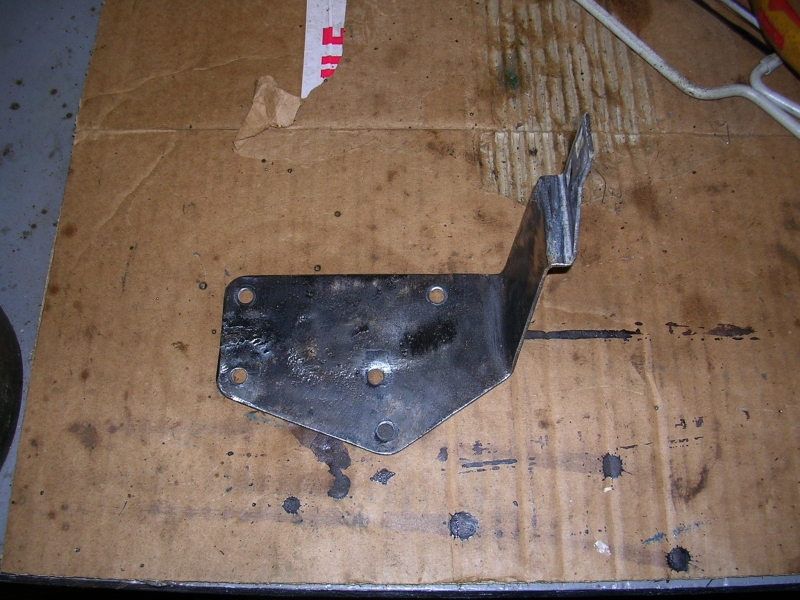 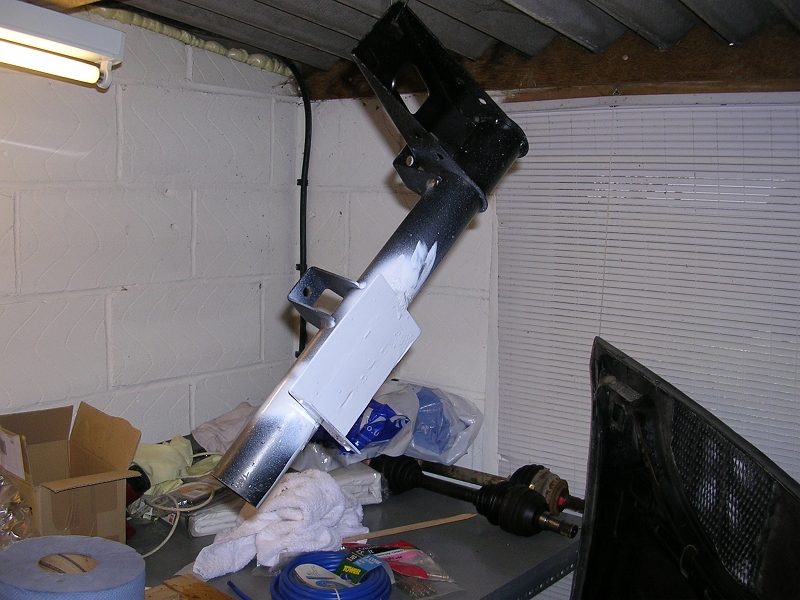 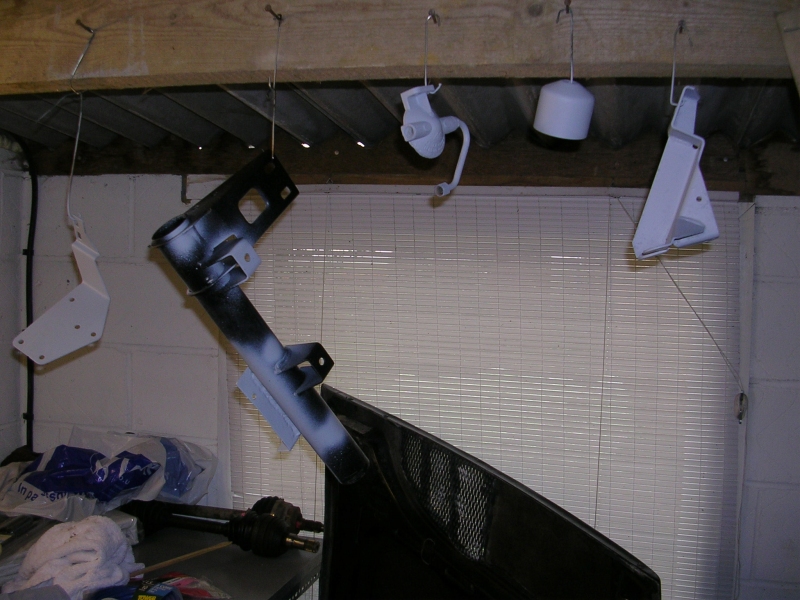 after the above i was ready to slide the new outrigger through the chassis and weld/assemble it 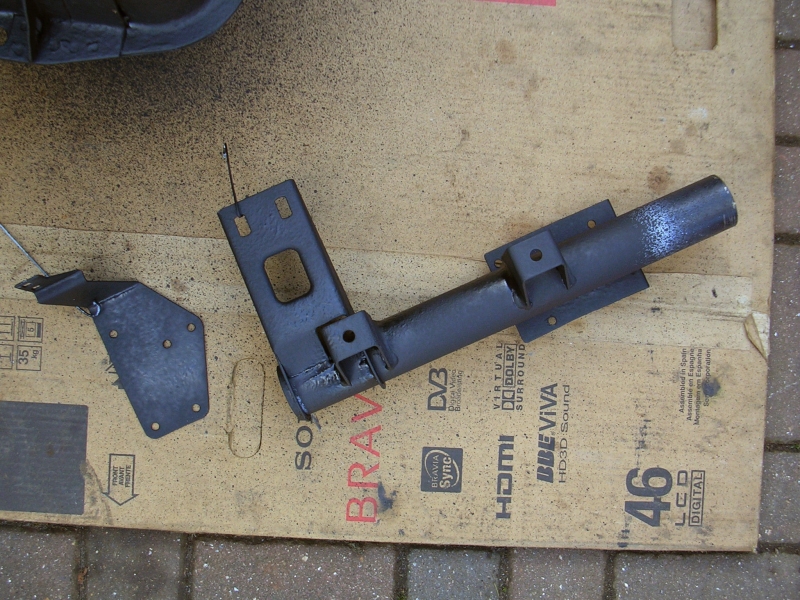 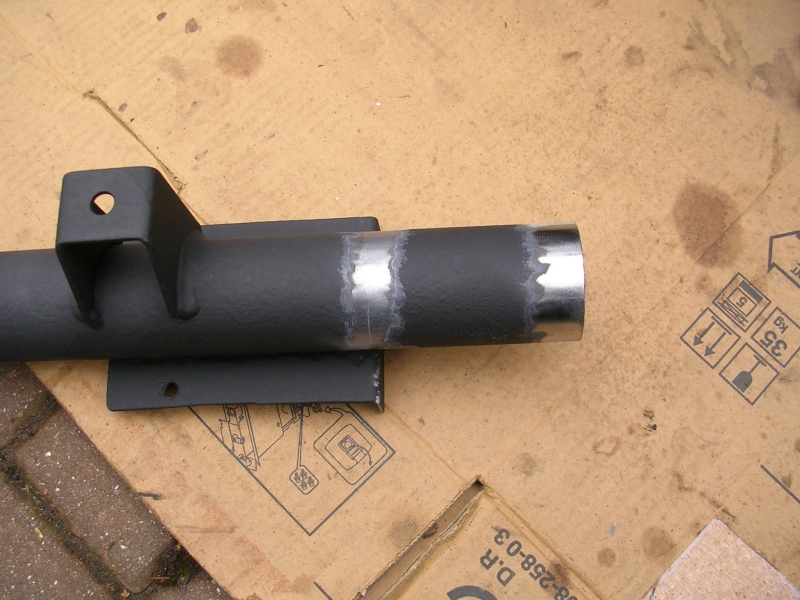 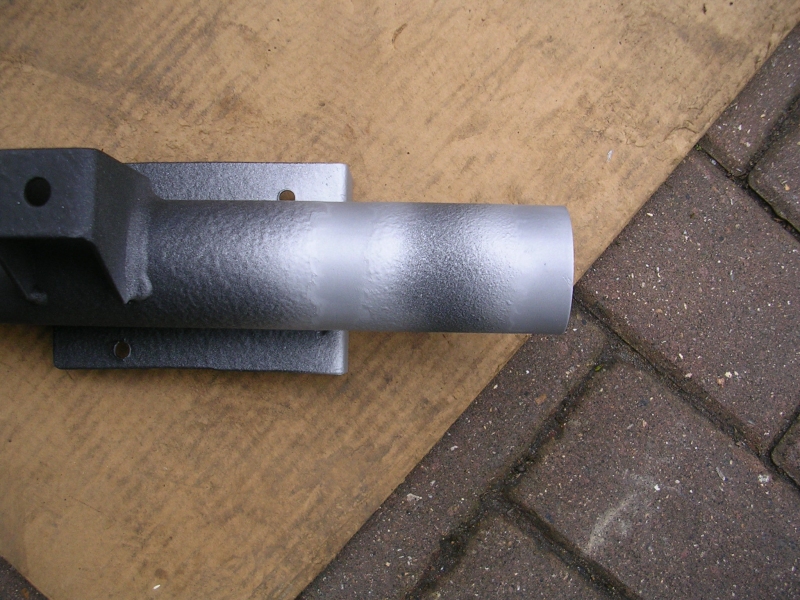 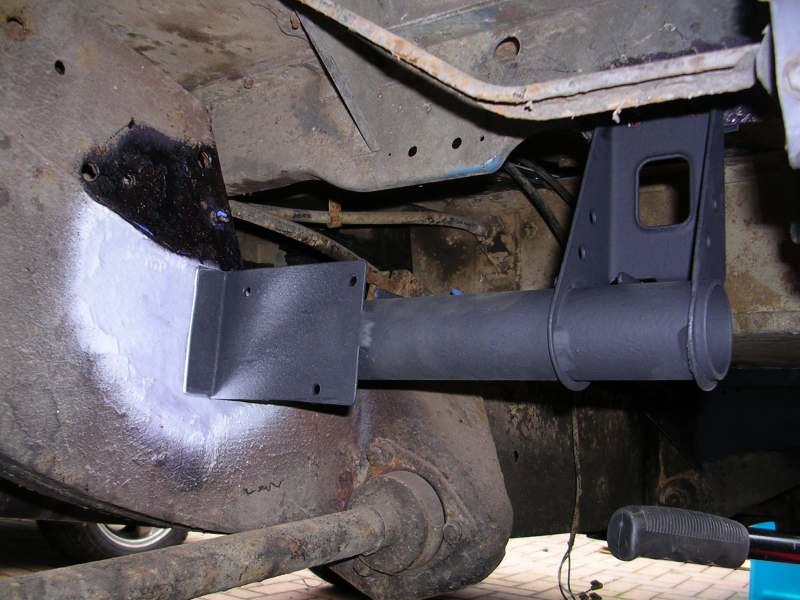 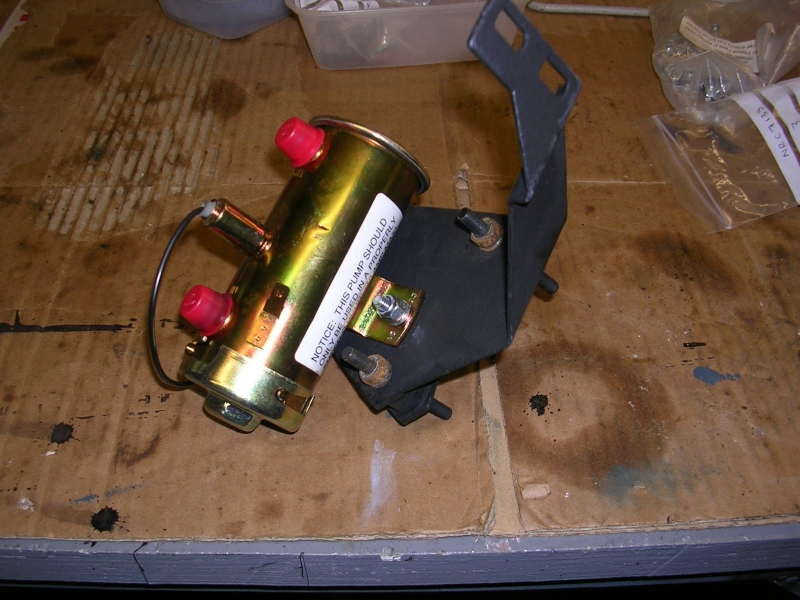 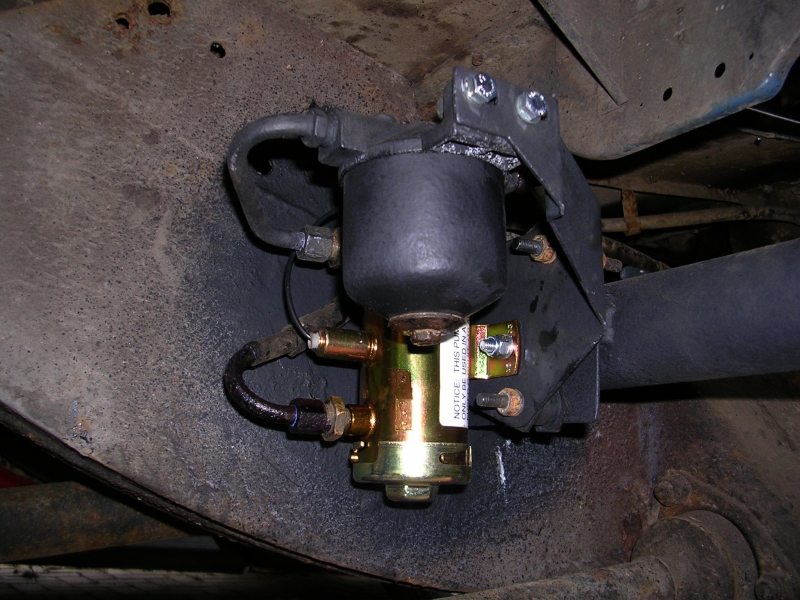 job done you'd think ? well no actually, because as i'd spent so much time under this side of the landy, it was clear the tank was actually leaking slightly. just enough to keep evaporating, but not actually drip on the floor  it seemed to be coming from between the stone guard and the tank, which didn't bode well. possibly from around the little sump style dimple at the bottom. i looked into replacement tanks but being a 28 year old vehicle, and only made in this combination of fuelling for 1 year, the tanks are unique to this model and rare. britpart reproduce one, but i ordered it and sent it back because the build quality was utterly horrific. so what now ? repair ? first of all i had to get the stone guard out of the way, which was a scary clinical precision job so's not to graze the actual tank 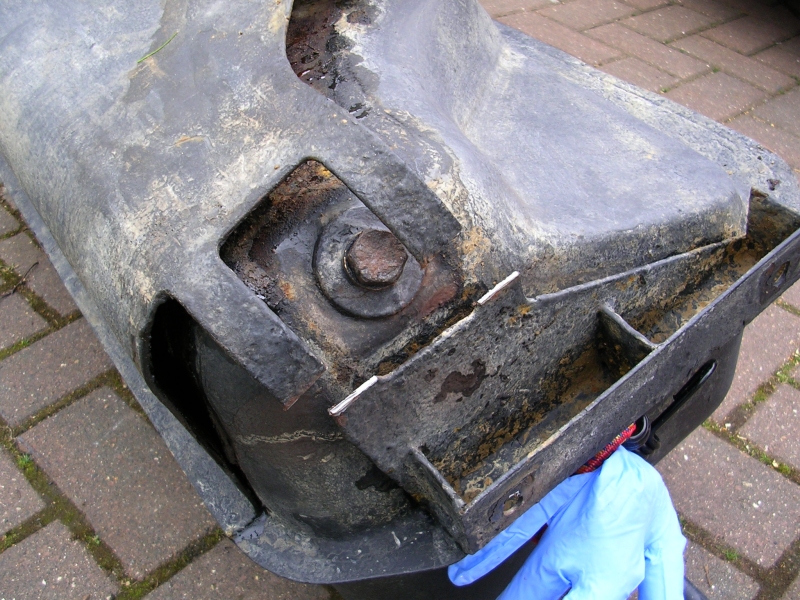 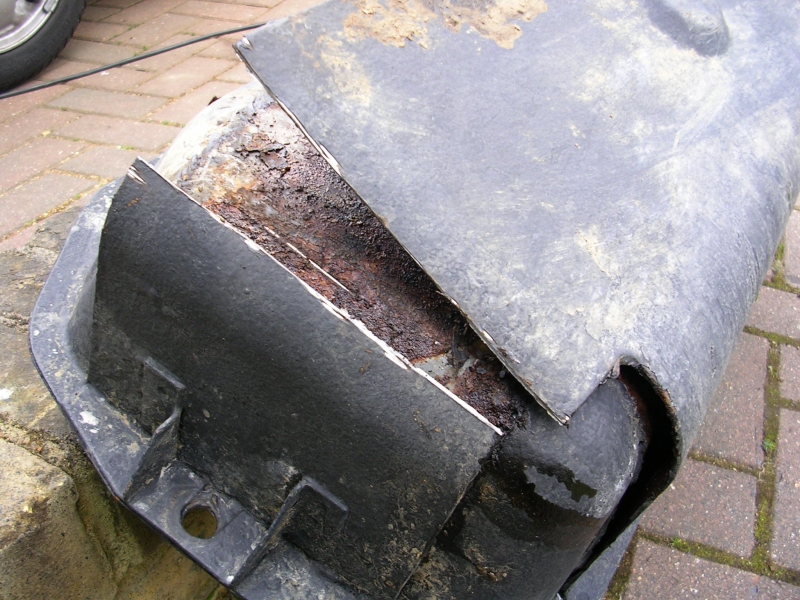 with the lower section removed it revealed the true horrors ! 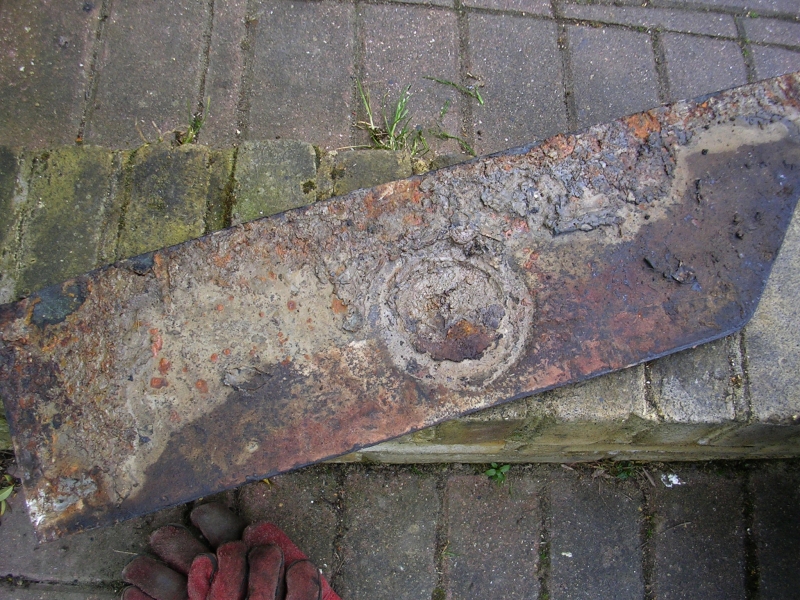 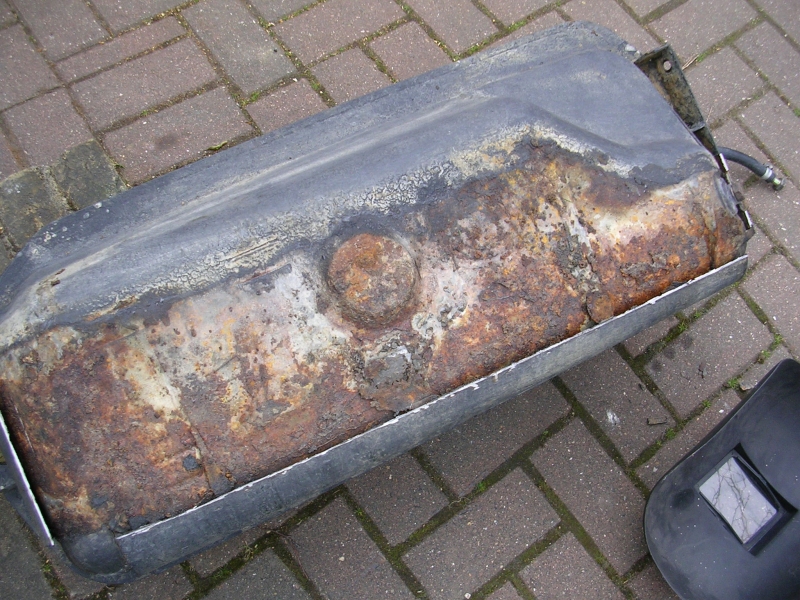 i started cleaning the bottom of the tank with a wire cup and these dimples started opening up  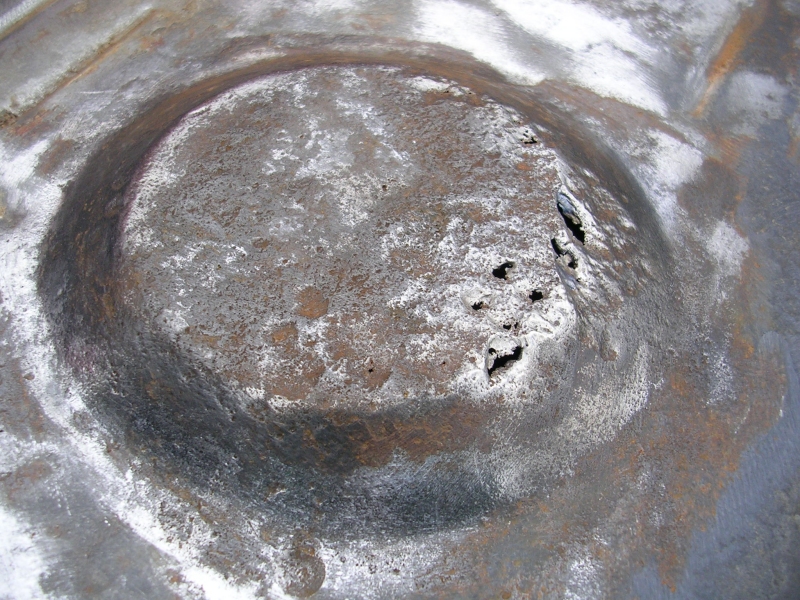 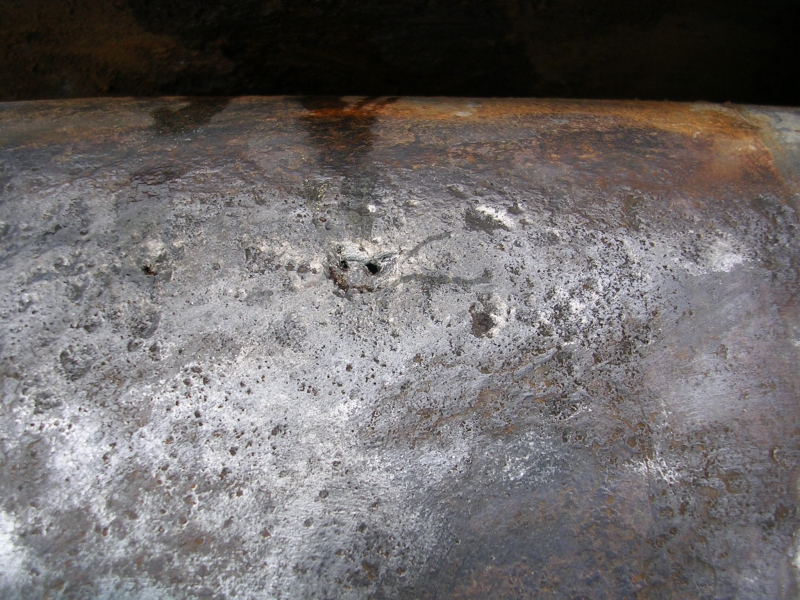 hmm, so then i started trawling the internet for what not to do when welding fuel tanks up. most of the what not to do's, were weld the tank up ;D there's a few braver folk than me who have just literally welded the tank, other bonkers Americans who run exhaust gas through a garden hose from their pickup truck (flooding the tank with inert gas) other folk said wash it out with warm water, or steam clean, etc etc. in the end i did a combination, washed it out with warm soapy water, dried with air, refilled the tank with water, then flooded the remaining area with argon (from welding set) then sliced the rotten "sump" out. 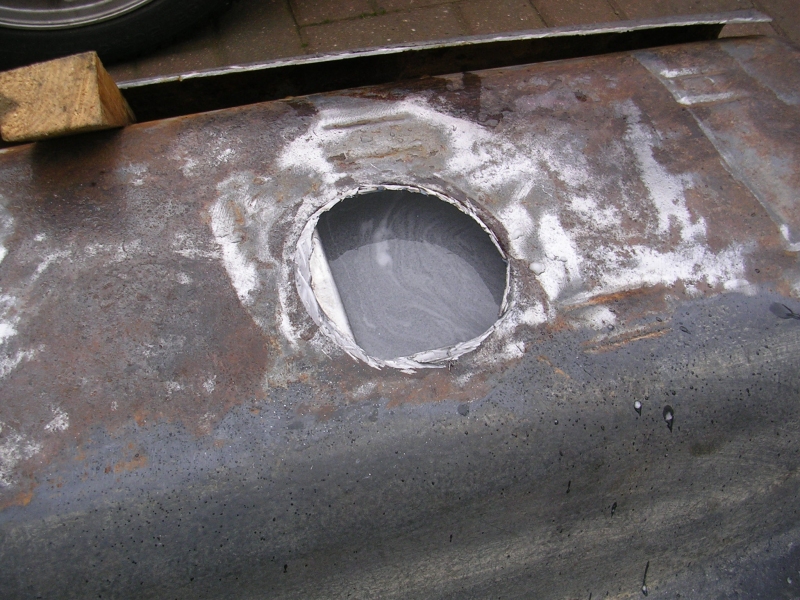 still alive and facial hair intact, i continued on! beat a new sump out of a flat piece of 2mm steel on a sand bag 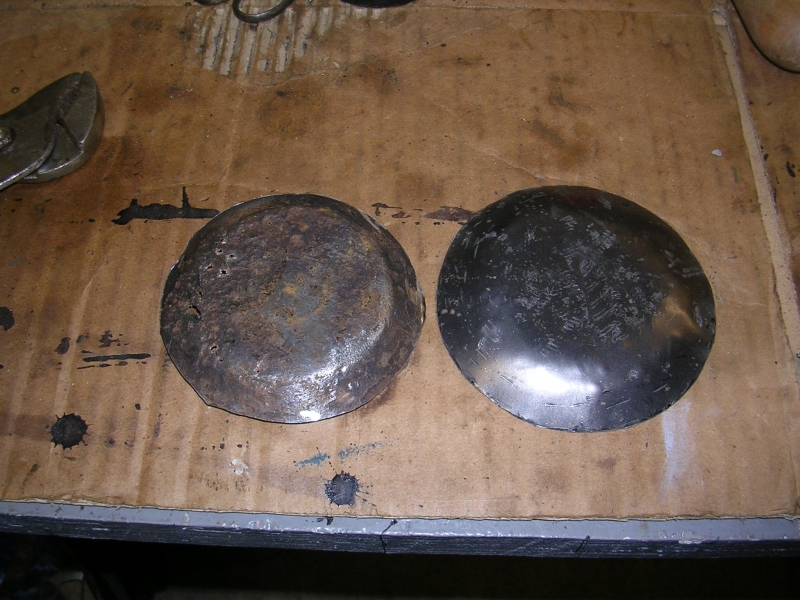 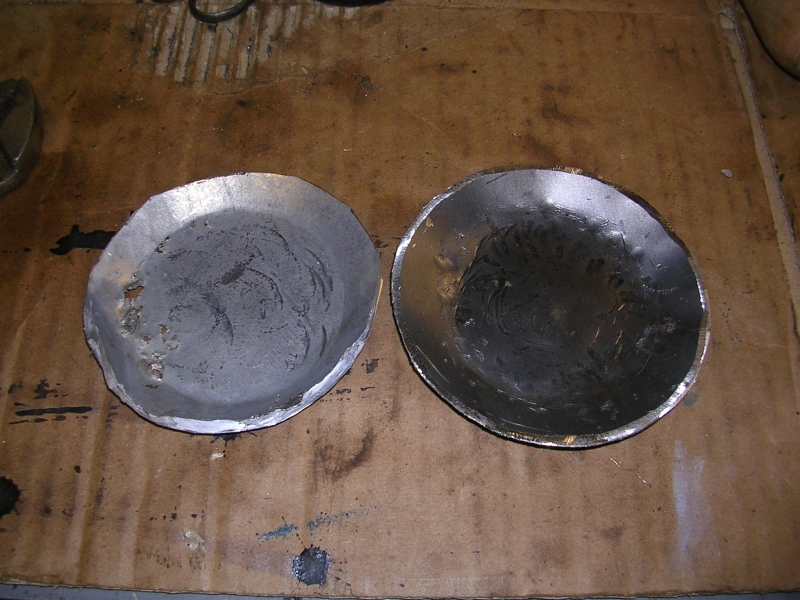 then (while still flooding with argon) used multiple runs of overlapping spots to weld the new sump on. 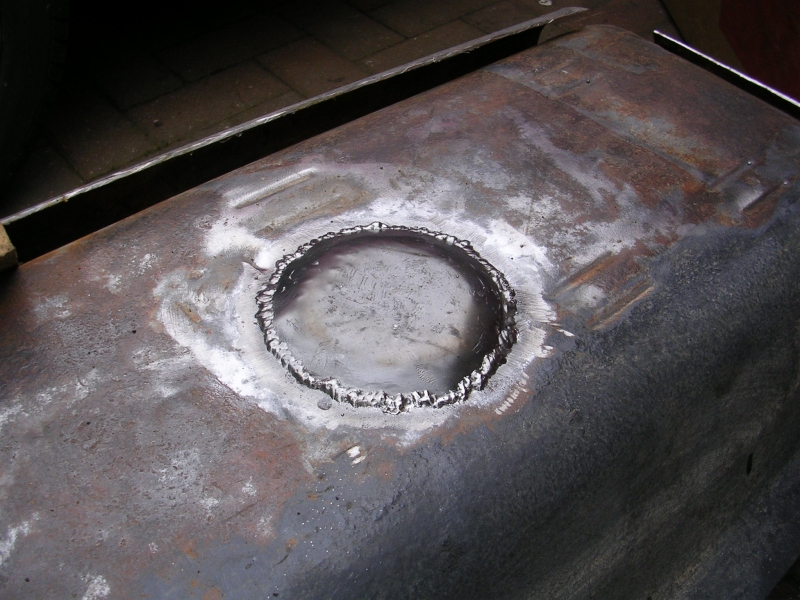 then belts and braces approach, lead caulked over the top of the welds (using plumbers blow lamp) 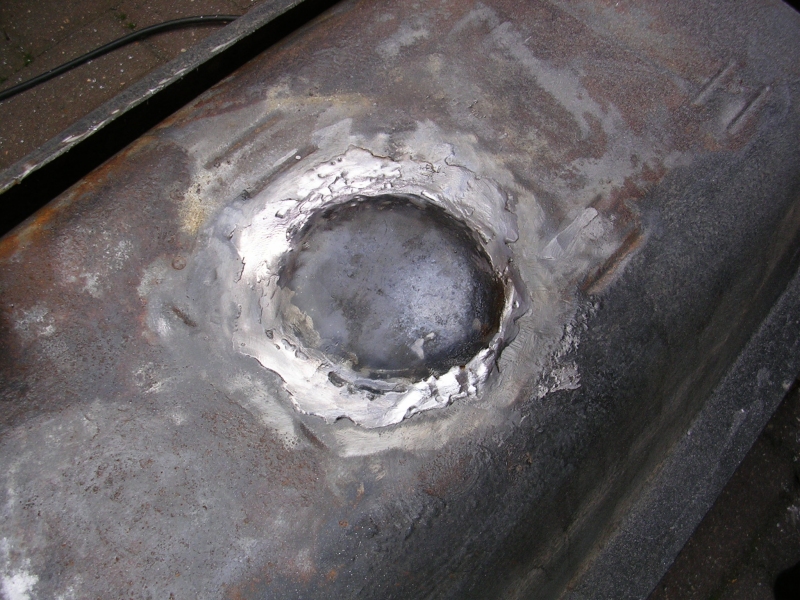 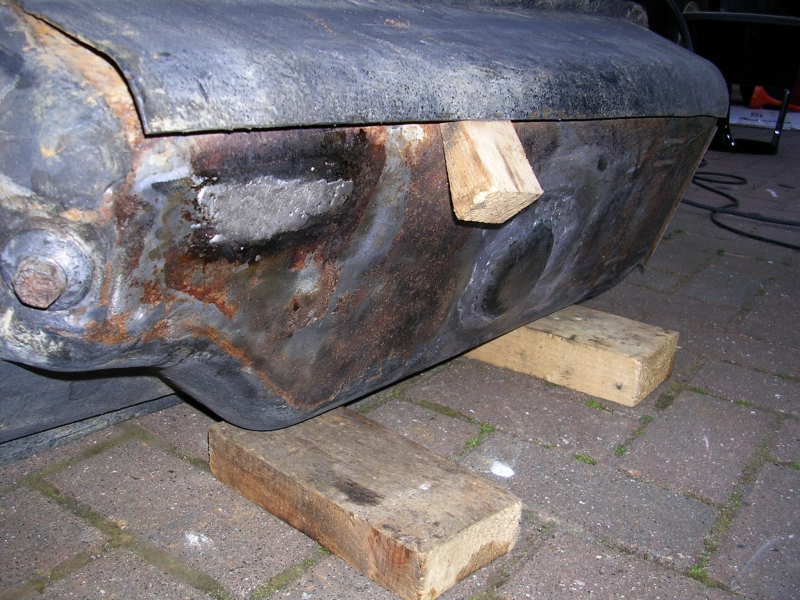 then i blocked up all the holes with old innertubes and hose clamps, hooked up the compressor to the breather hose and did simulated leak test on the drain plug with some soapy water 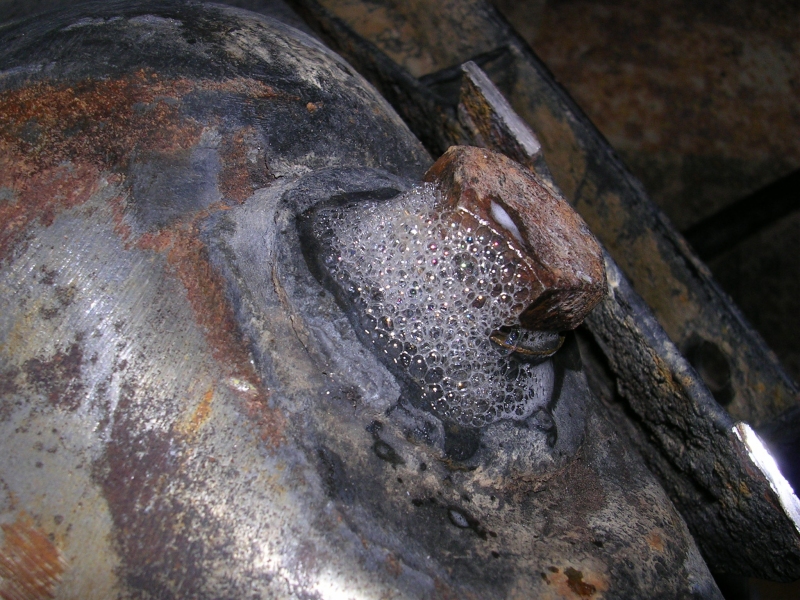 actual leak test on the repair areas comes up good ! 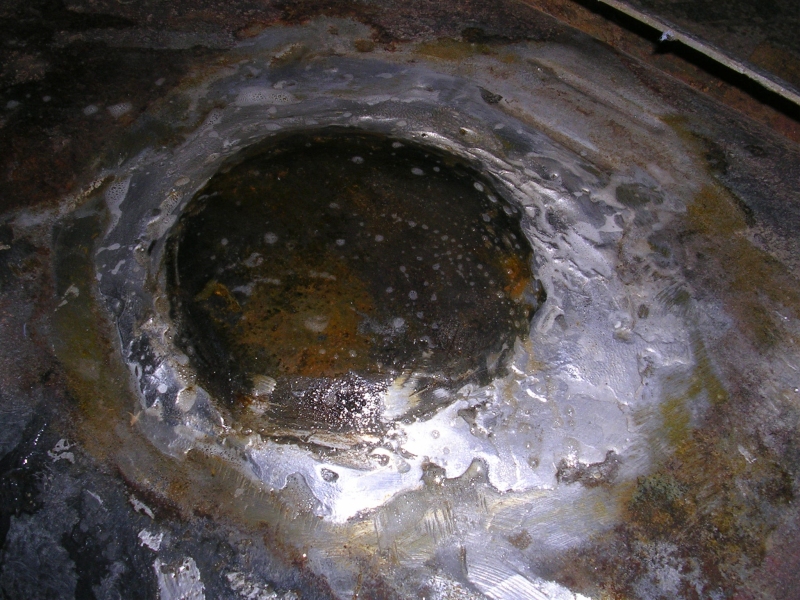 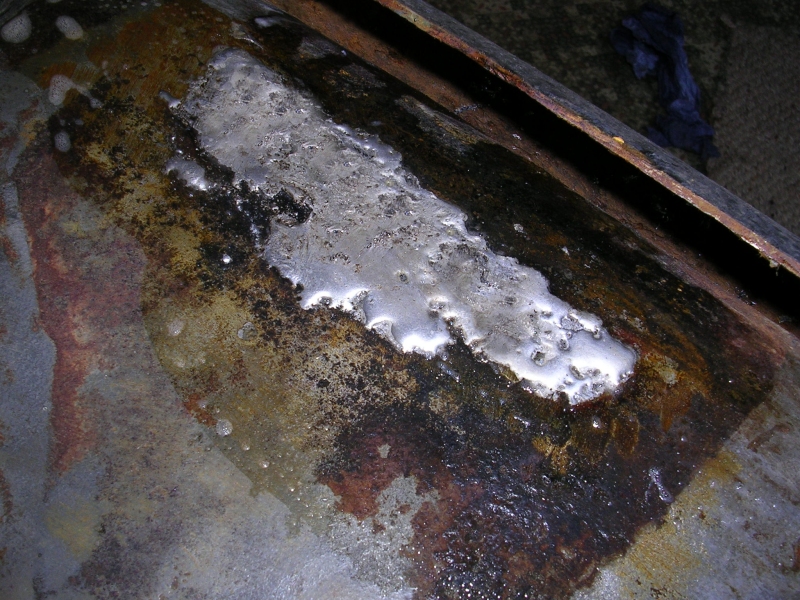 all that was left to do after that was clean, rust treat, paint, and weld the stone guard back on 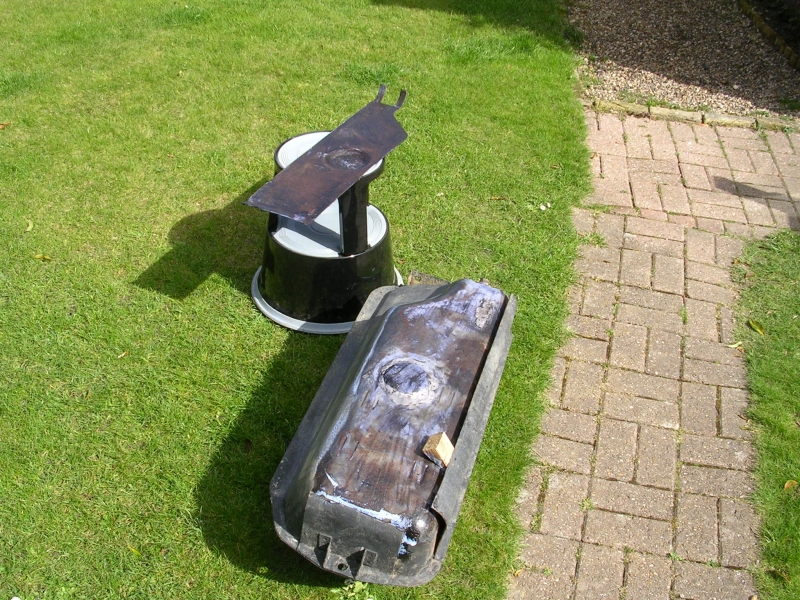  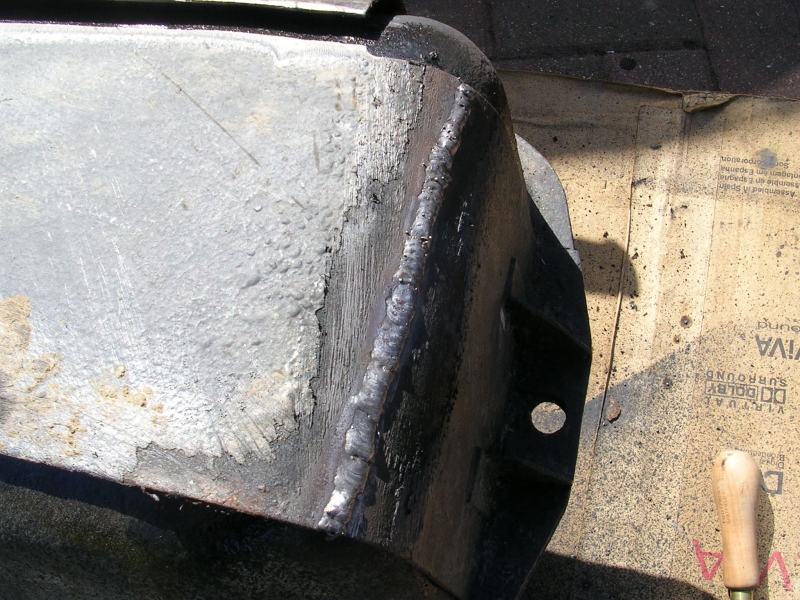 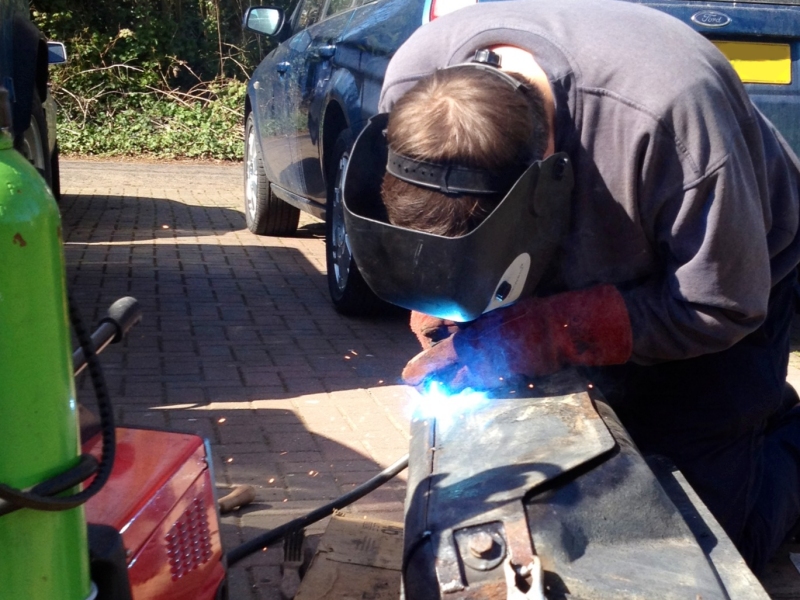 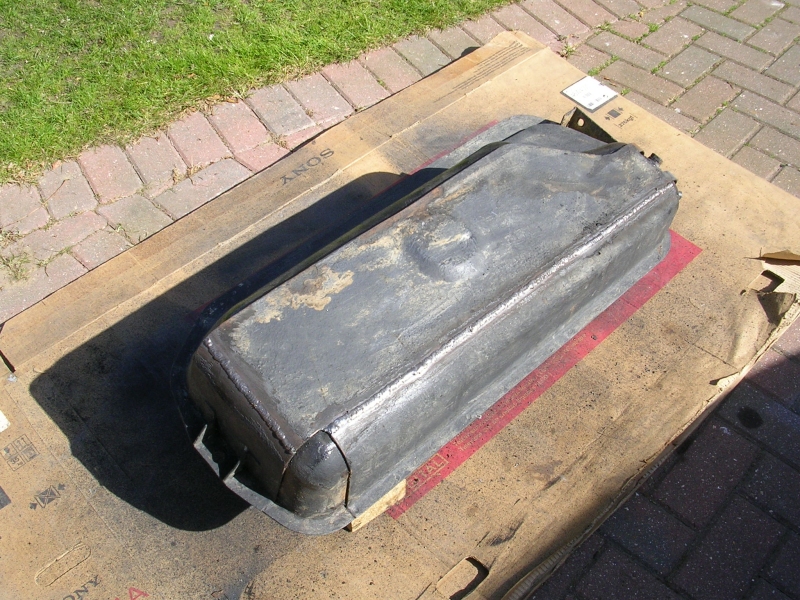 this last picture is refitted to the landy, and you can see i ran a bead of polyurethane seam sealer round all the joins to the stone guard, to keep water/mud out 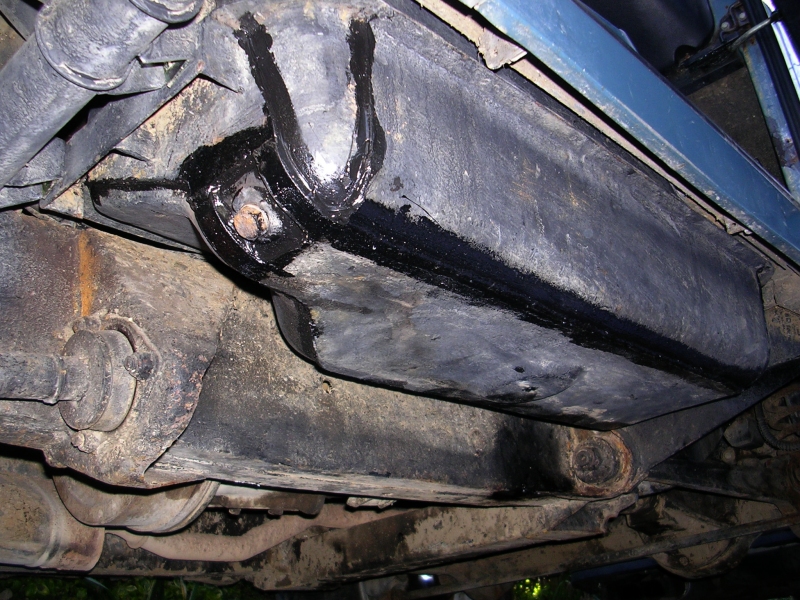 |
| |
|
|
|
|
|
Jan 22, 2013 16:21:34 GMT
|
|
Very tidy job that.
Nice to see it getting put right properly.
John
|
| |
|
|
|
|
|
Jan 22, 2013 16:51:42 GMT
|
Nice job! Braver man than me ...... (i'm with you sh*tpart quality ....  ) Reminds me of having to remove the tank on my 110 ...... but the drain plug would not undo ... so had to drop it 1/2 full of juice .... it was heavy to say the least ......... |
| |
|
|
|
|
|
Jan 24, 2013 11:48:01 GMT
|
Very tidy job that. Nice to see it getting put right properly. thanks john Nice job! Braver man than me ...... (i'm with you sh*tpart quality .... ) I was so paranoid I dressed up like an asda value bomb disposal expert, t shirt, long sleeve shirt, sweater, boiler suit, jeans, welding jacket, steel toes, full face welding mask, gauntlets ;D at the same MOT which pointed at the outrigger rot, he gave me a friendly verbal "might wanna have a look at your rear bump stops, probably just need a quick rub down and paint" headsup I thought it was a good time to also replace the rear damper bushes which were looking a bit squashed, yeah that turned out well... 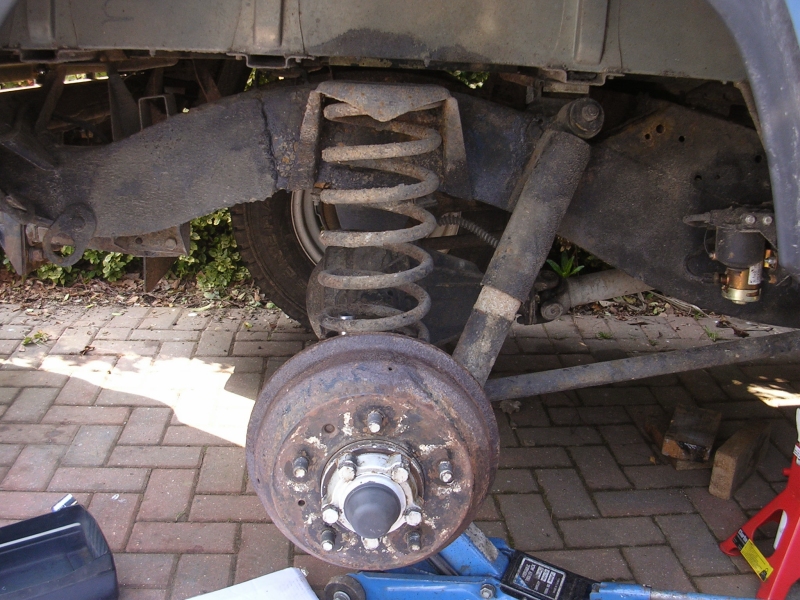 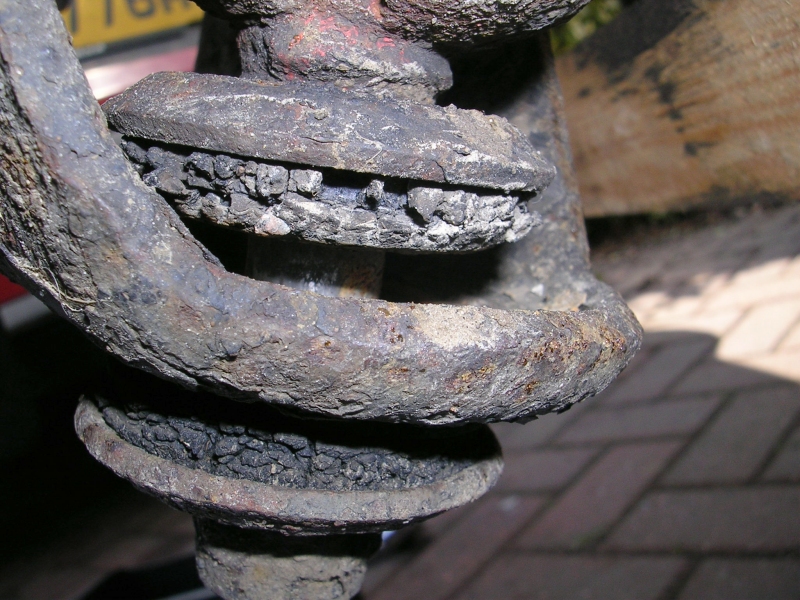  so replace bushes turned into replace dampers, had to order them and start driving the gte to work. in the meantime carried on stripping down the passenger side suspension lower spring strap removed, spring platform and the spring itself removed. err, then I went back to the MOT pass sheet and looked for the bit where it says "the thing that's supposed to be holding the spring onto your axle.....isn't." scary, baring in mind I only stripped this down to investigate a rubber bump stop on the chassis 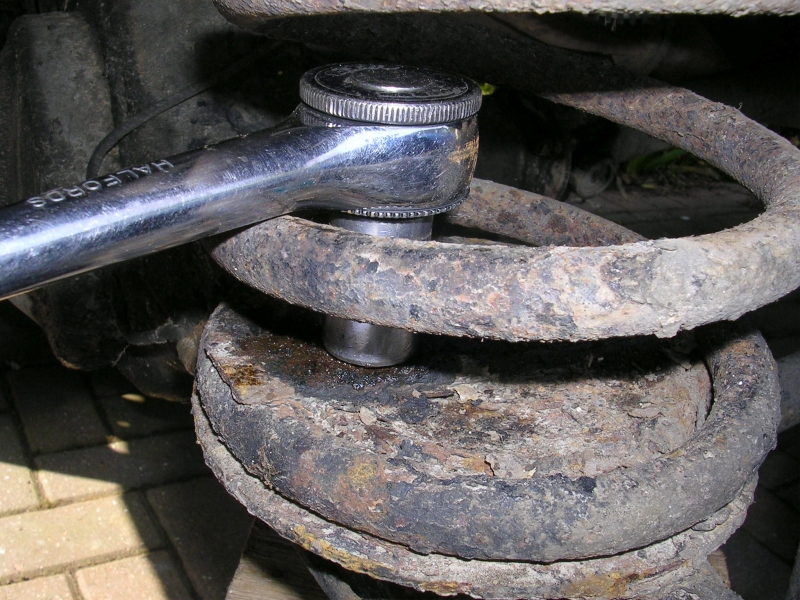 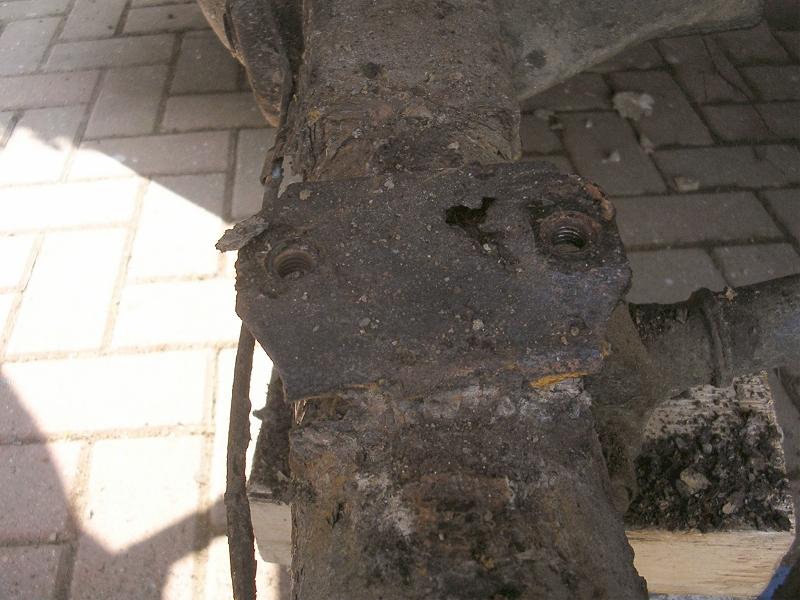 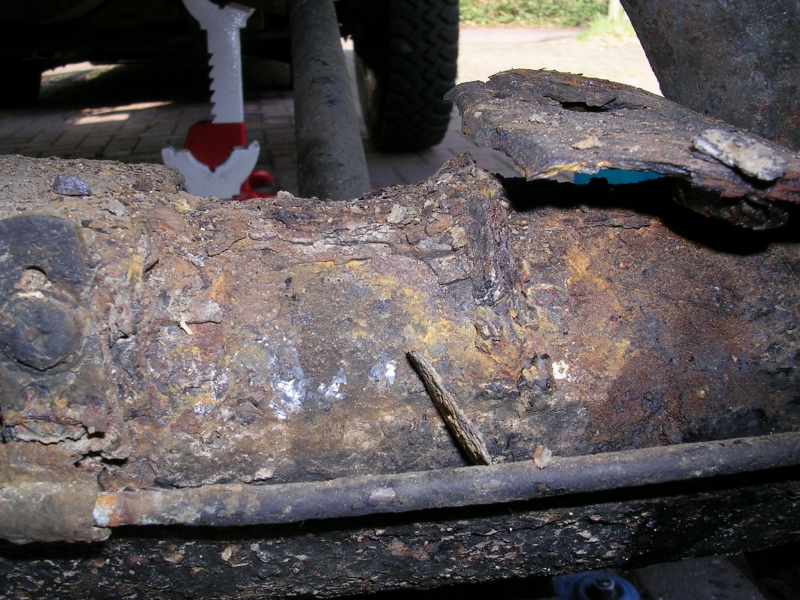 yet more stuff I don't have to hand, so just had to carry on stripping and doing the work I could, until bits arrive to save me. bump stop unbolted very easily, just a rubber block with an M-8 bolt at each end, the bracket on the chassis was in pretty bad shape, and whatever is behind it. upper spring perch looked a bit scabby, but generous material thickness that will clean up ok 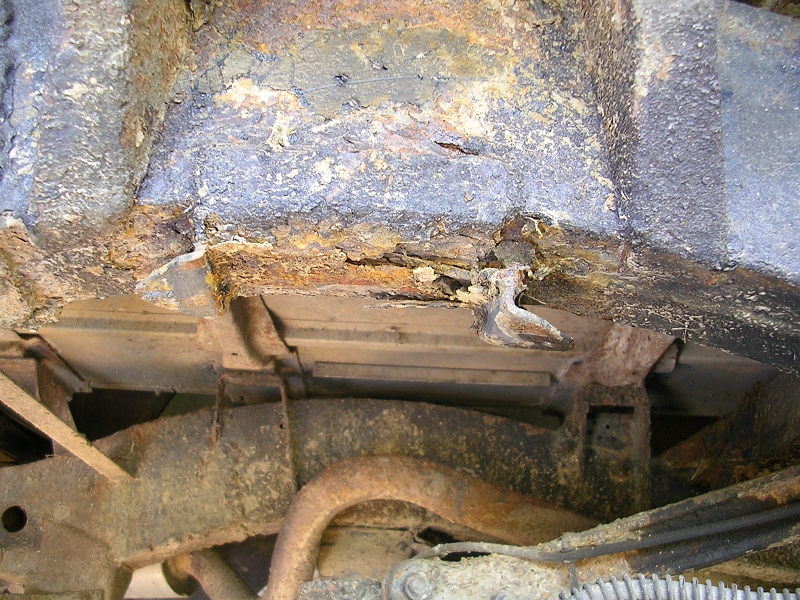 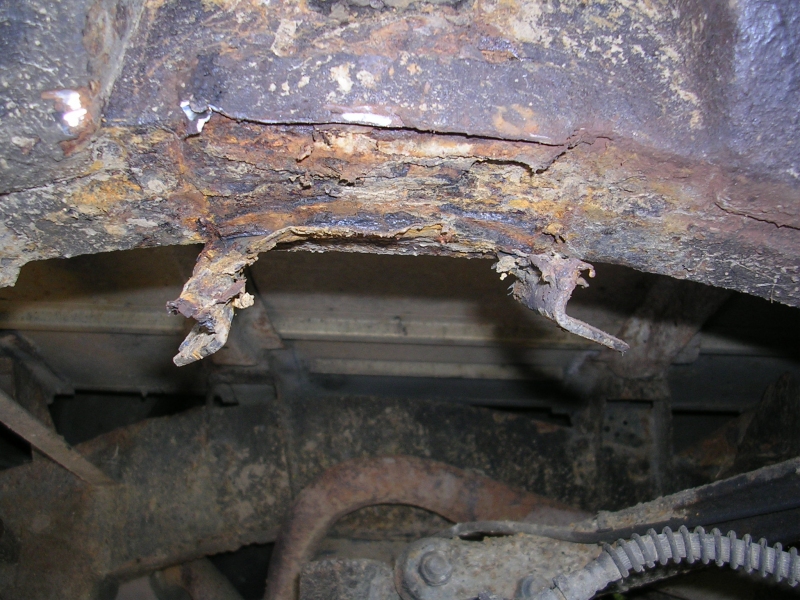 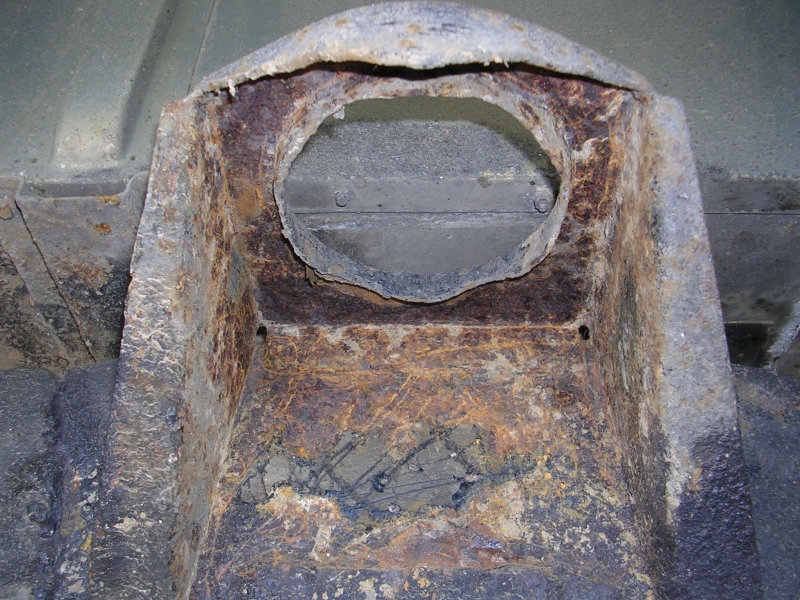 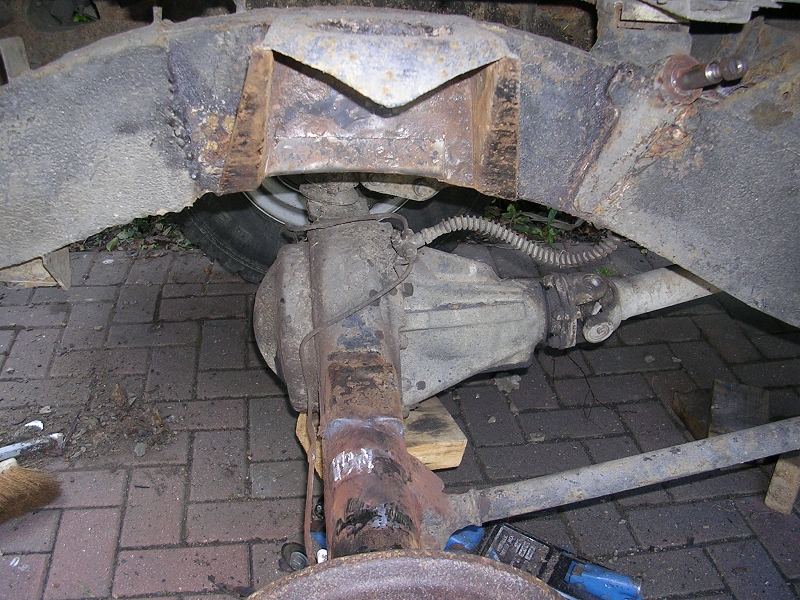 cut the manky spring bracket off the axle and prepped the area for replacement, and also chopped the bump stop bracket off and a skin of chassis rail behind it 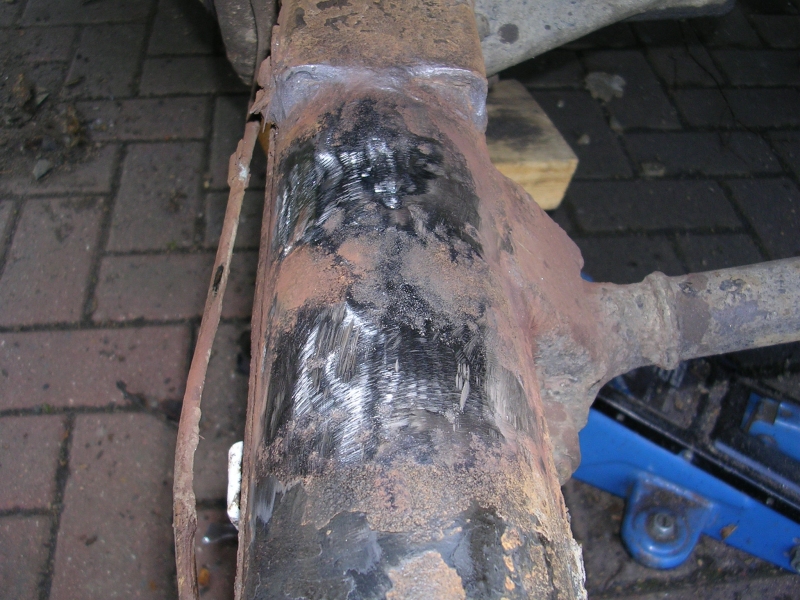 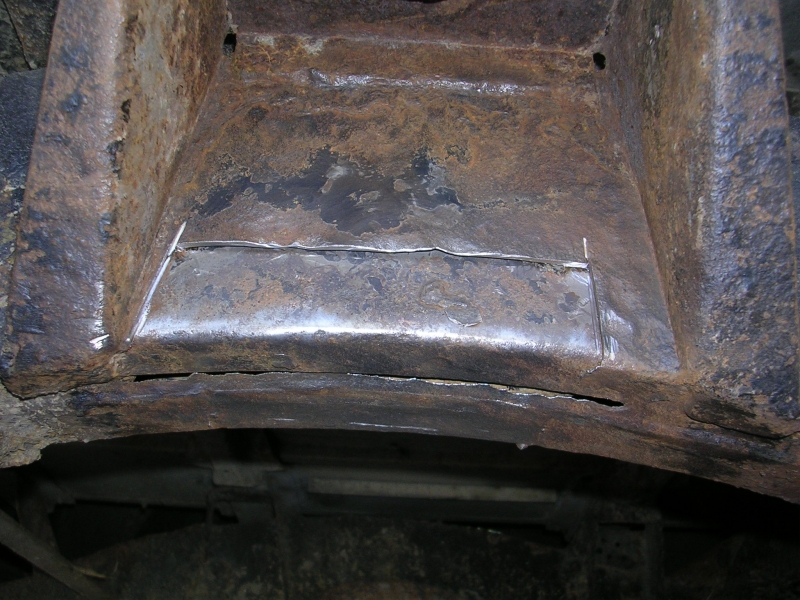 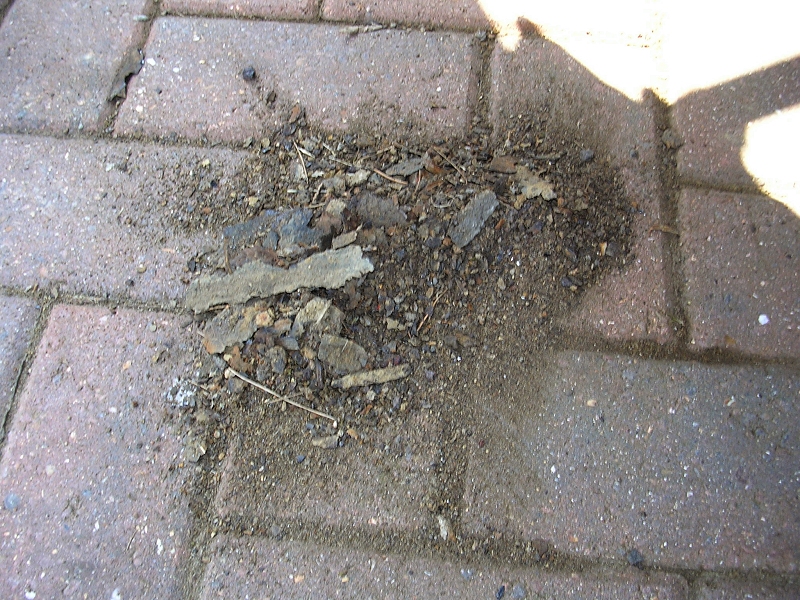 fast forward a week, new dampers turned up, along with lower spring perch and retainer, and new pressed spring bracket/bump stop bracket from YRM metal solutions (fantastic quality) 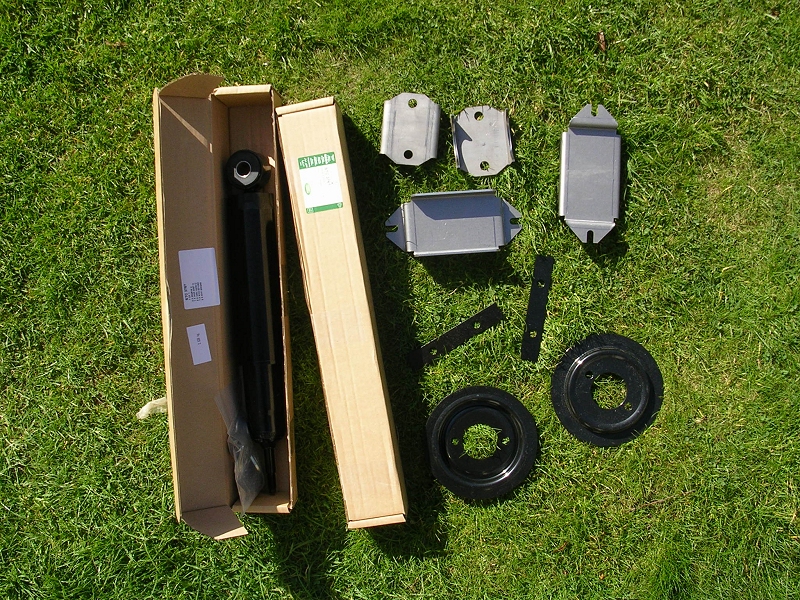 welded two M10 nuts under the spring bracket to make them captive then welded the bracket to the axle 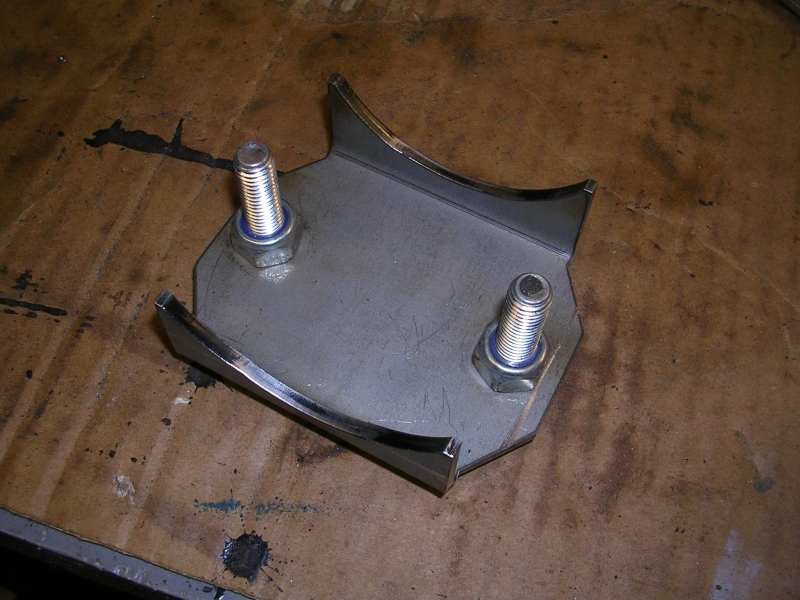 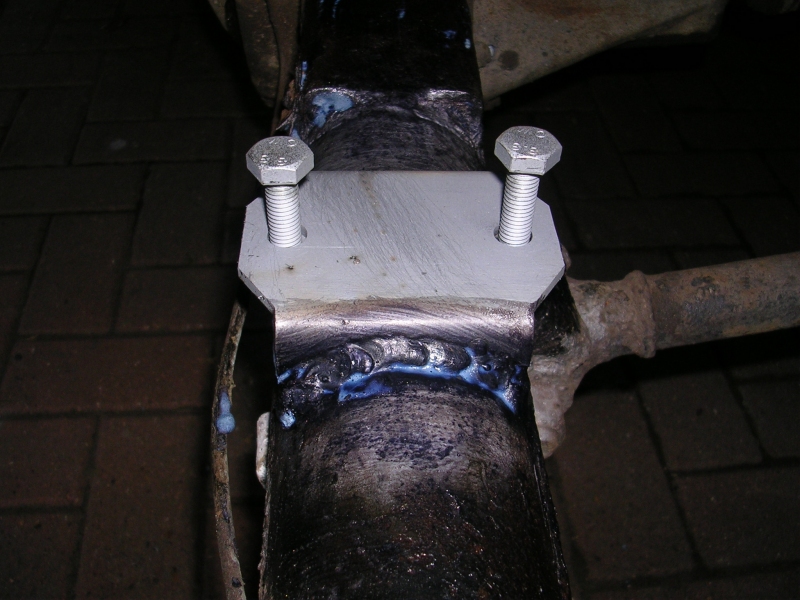 chassis round the upper spring perch got a massive wire wheeling session and rust killer 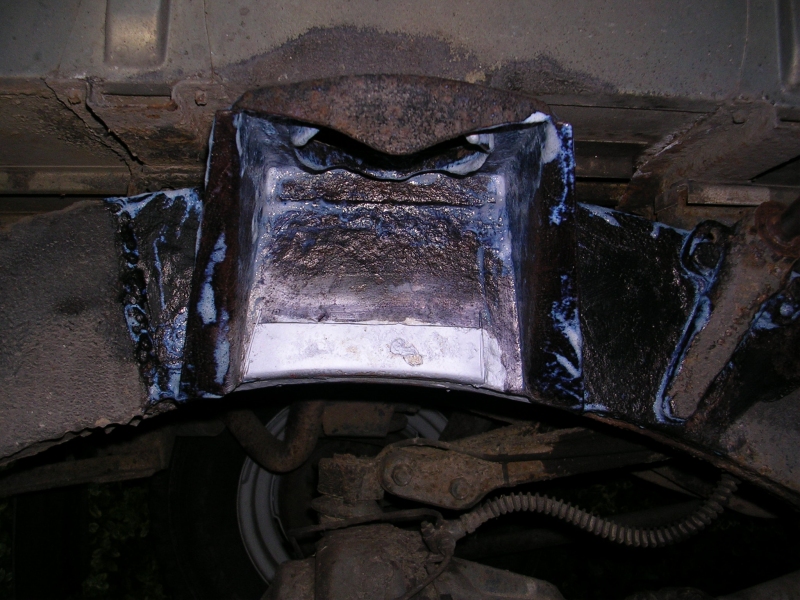 then I had to make a repair section which looked like a simple bit of folded steel, but had a bit of compound curve in it too. few holes for spot welding, and seamed around all sides. followed by weld through primer, the actual bump stop bracket, more primer, seam sealer to try and prevent it happening again. 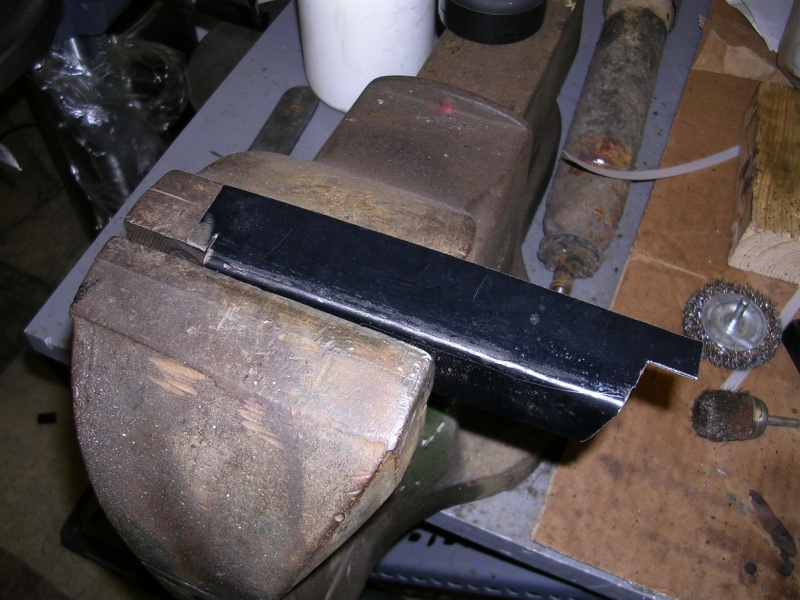 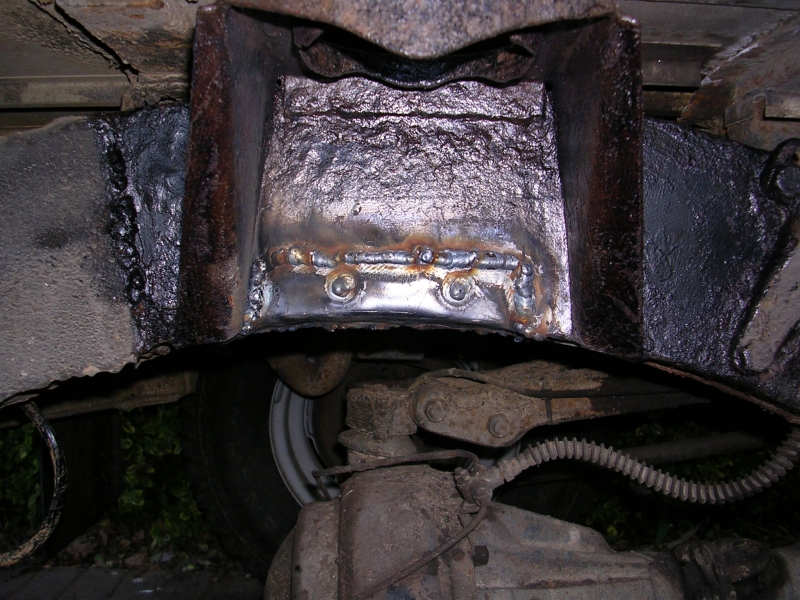 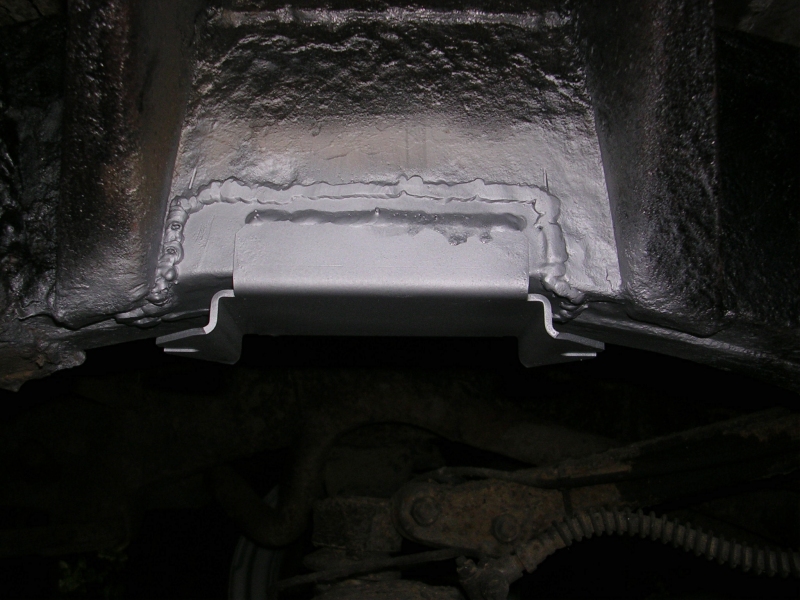  stone chip, schutz and all the new bits reassembled 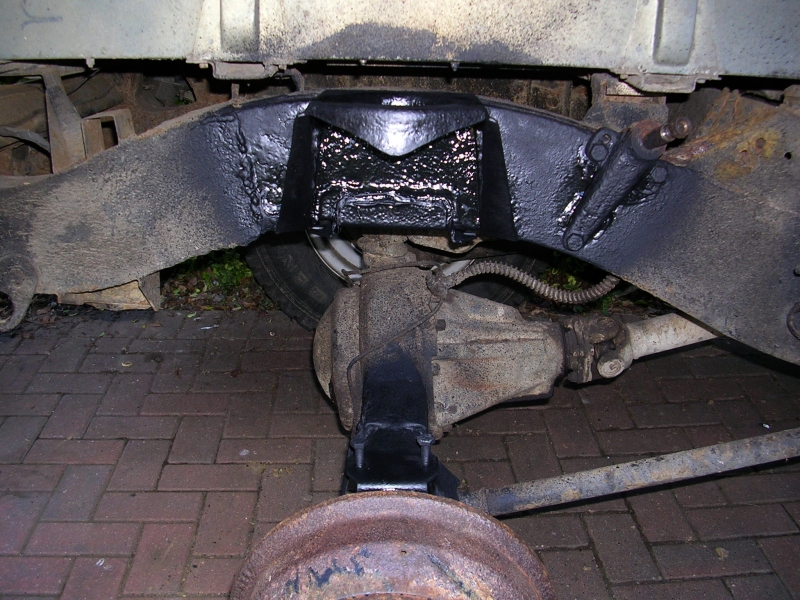 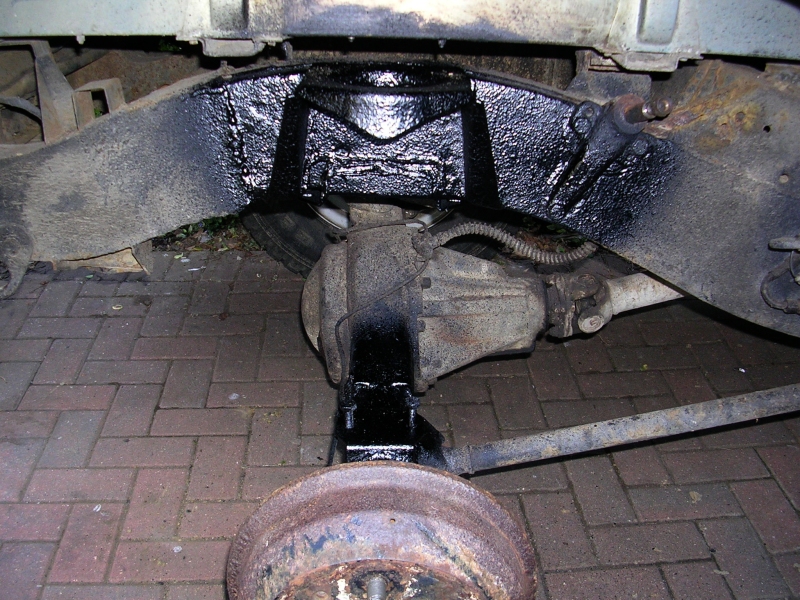 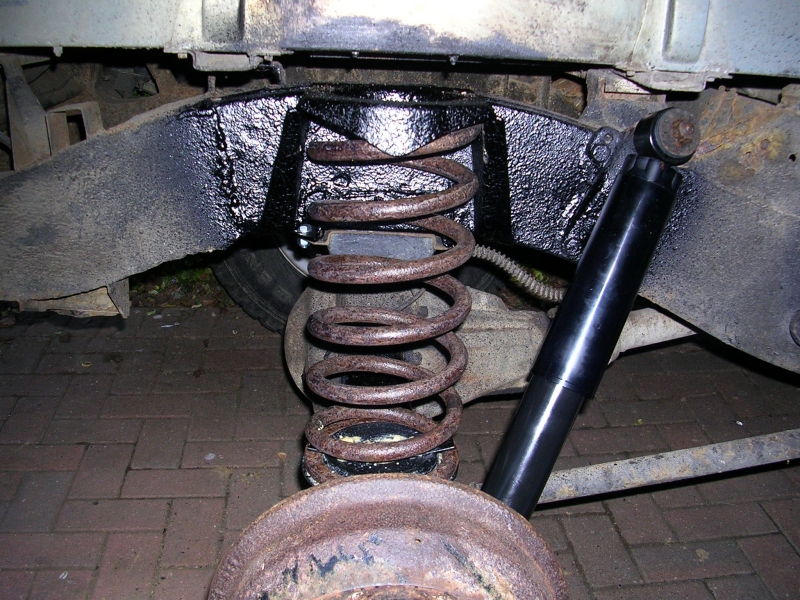 once again it all had to repeated on the drivers side, more or less the same, so picture dump as usual ! 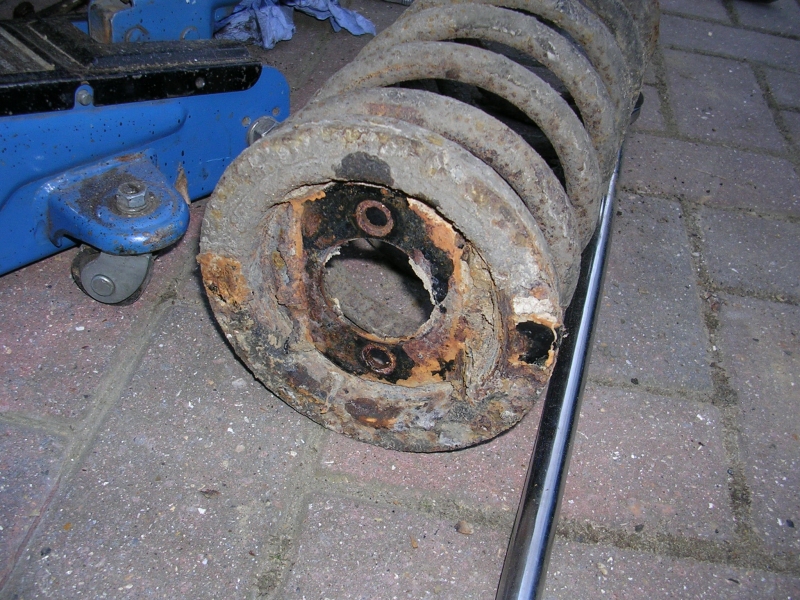 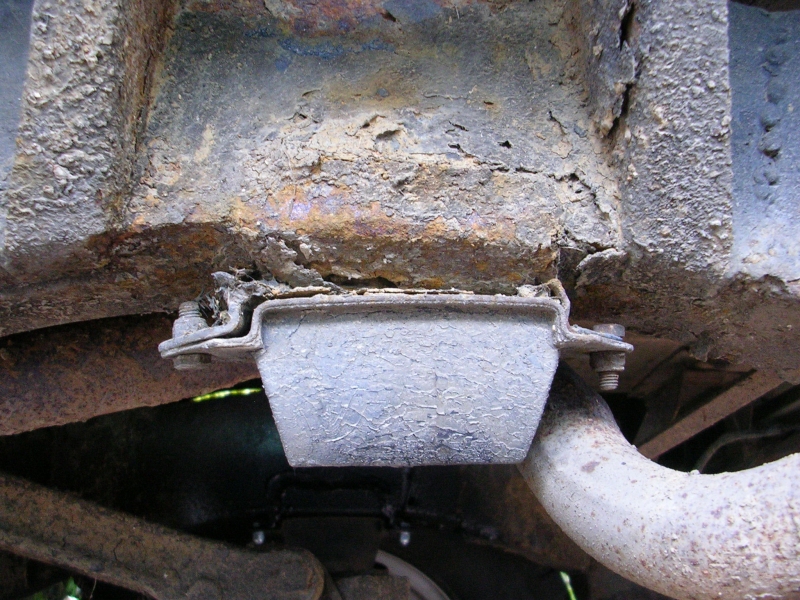 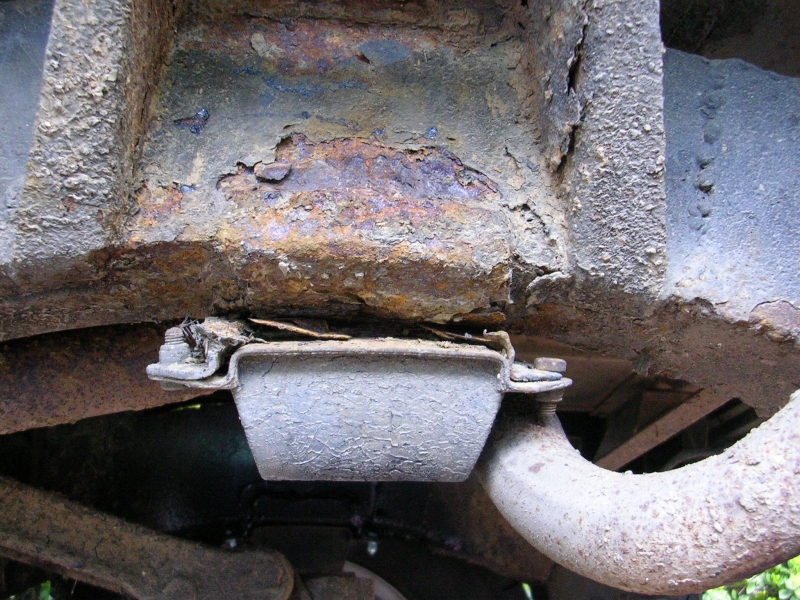 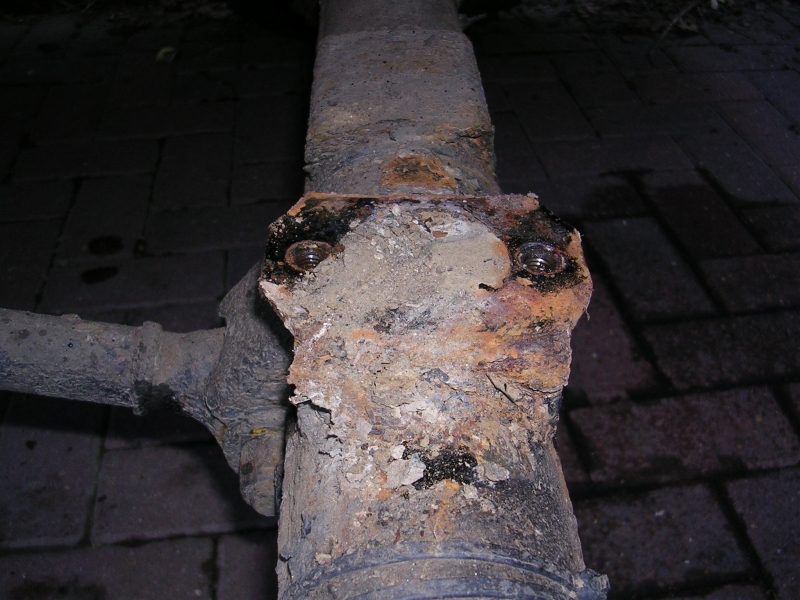 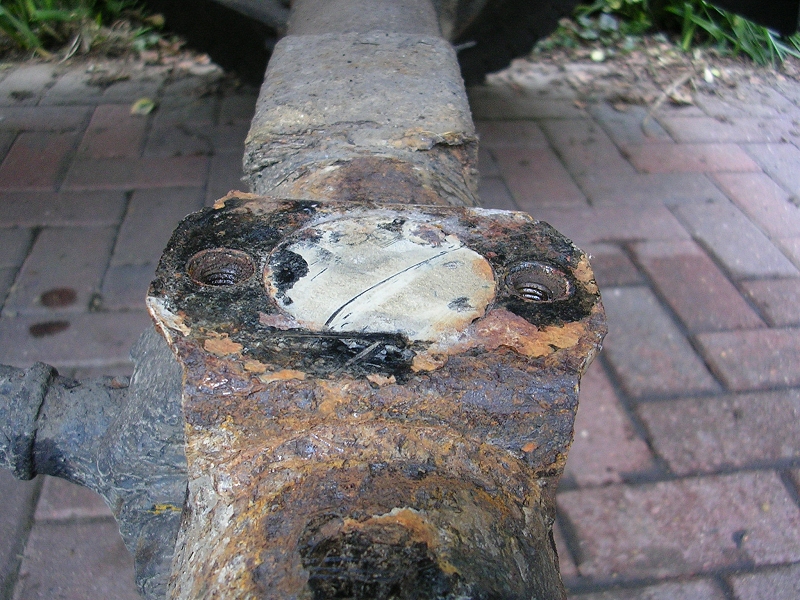 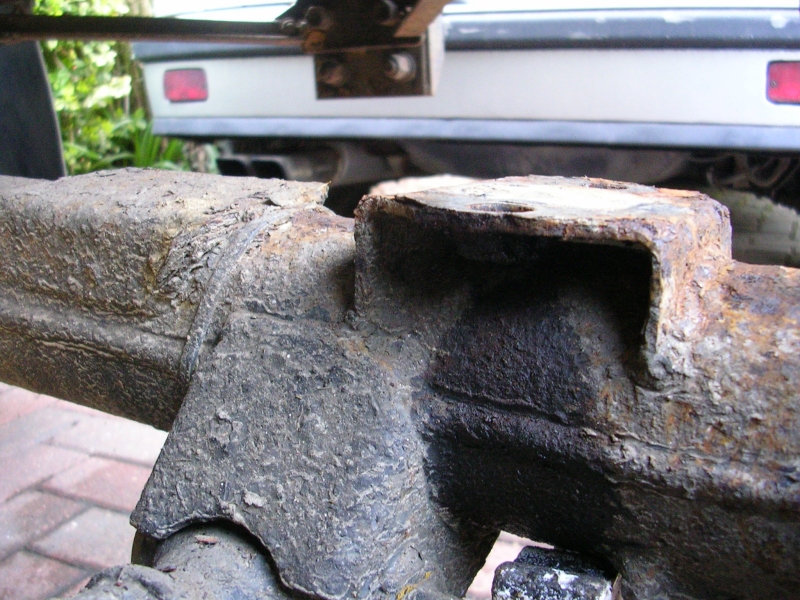 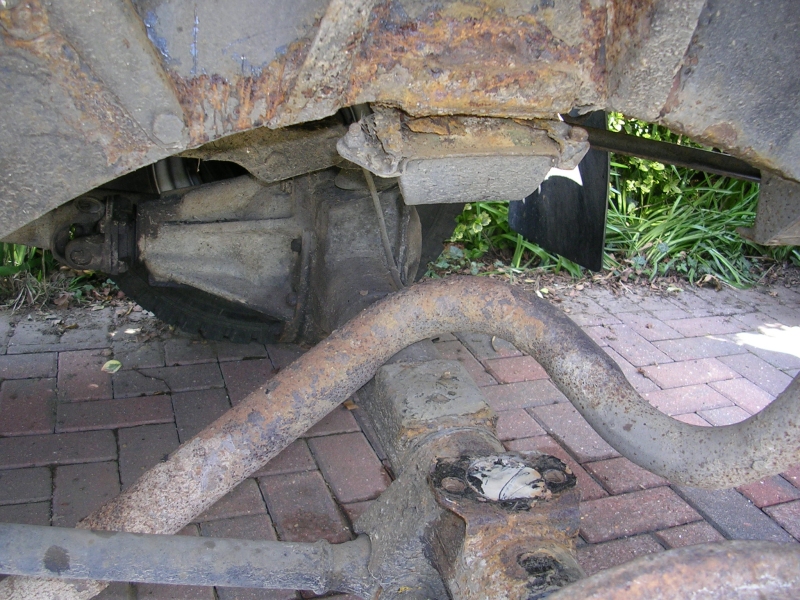 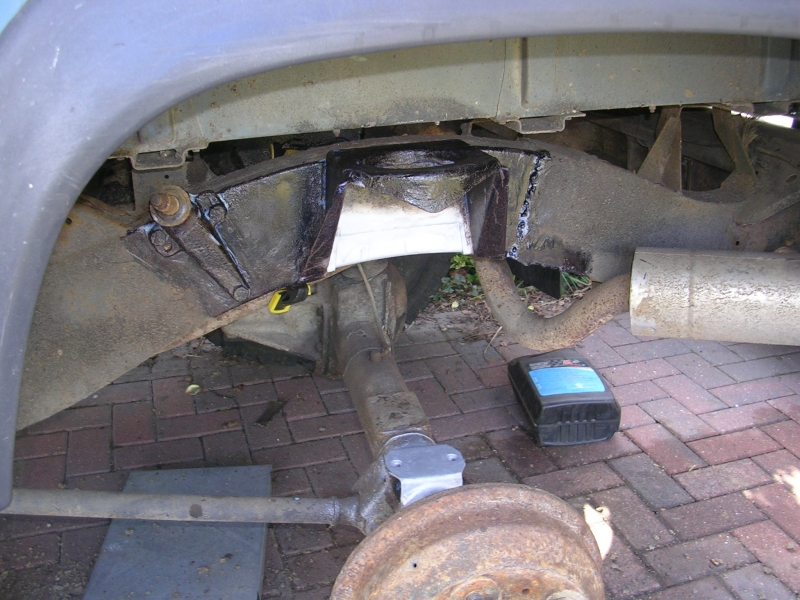 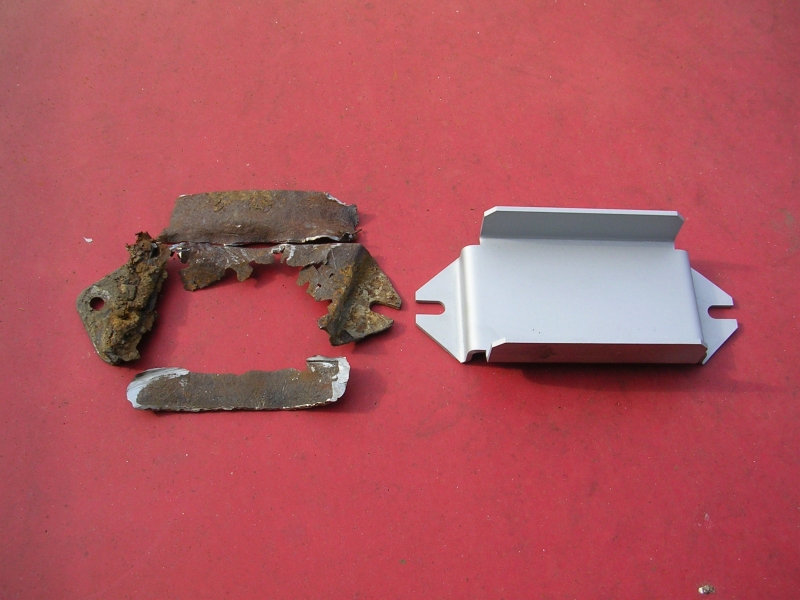 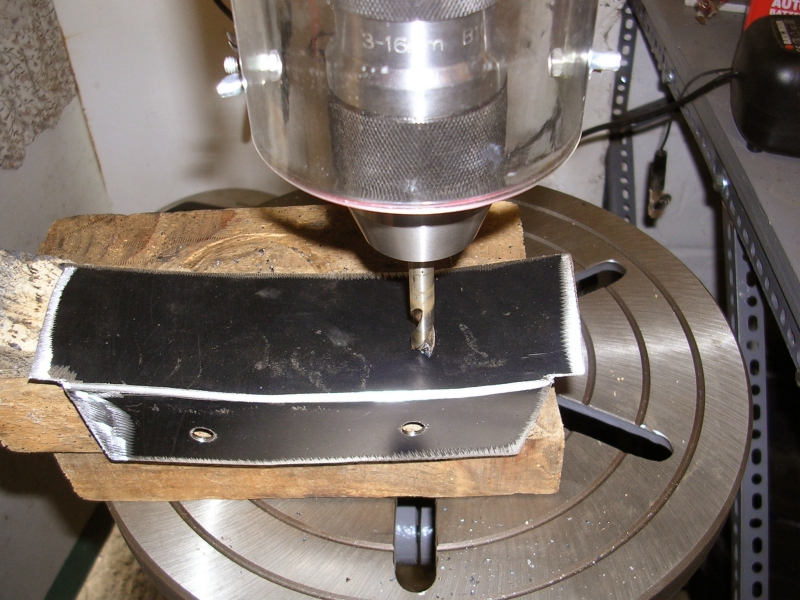 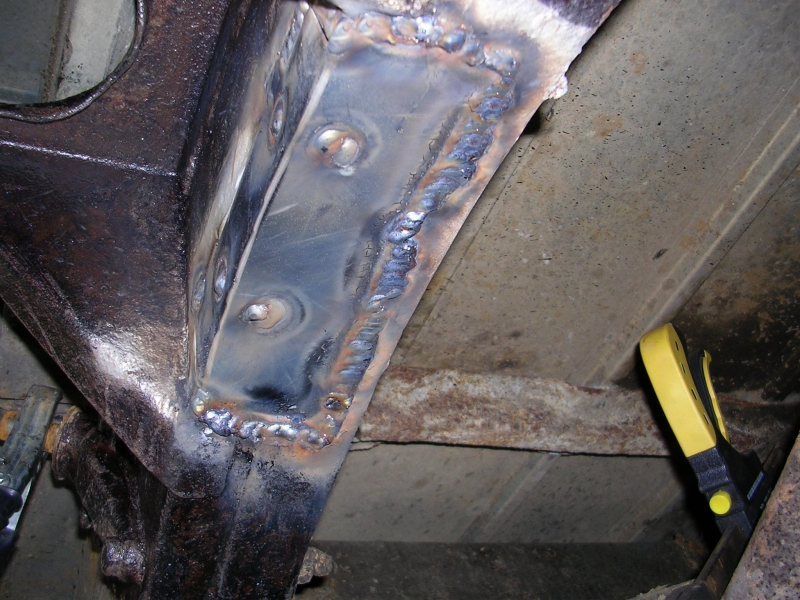 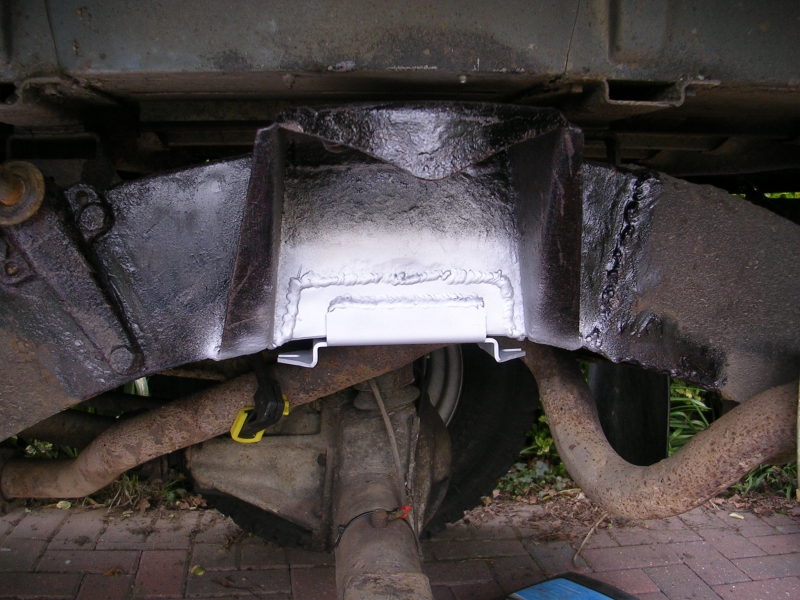 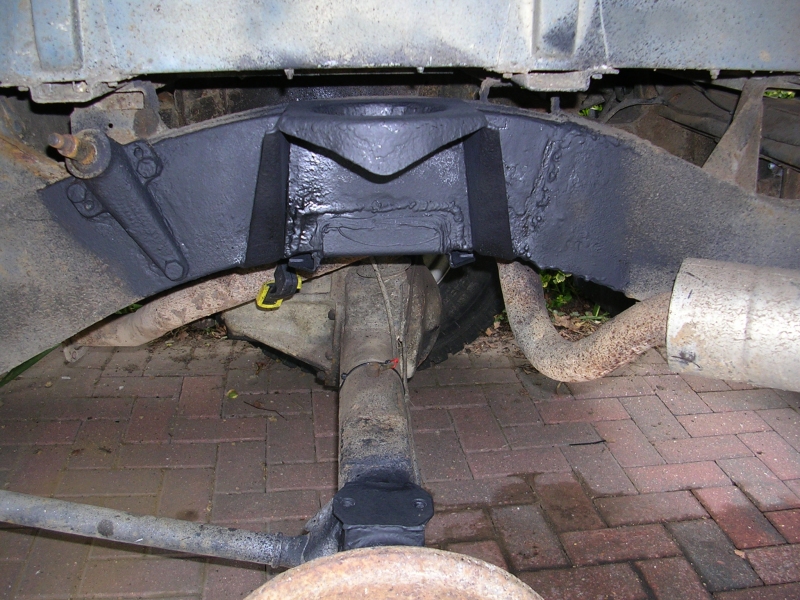 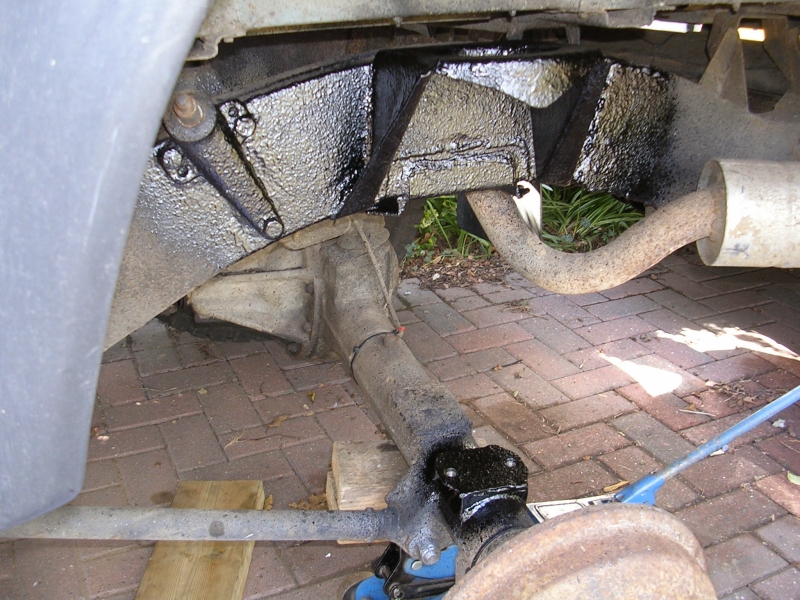 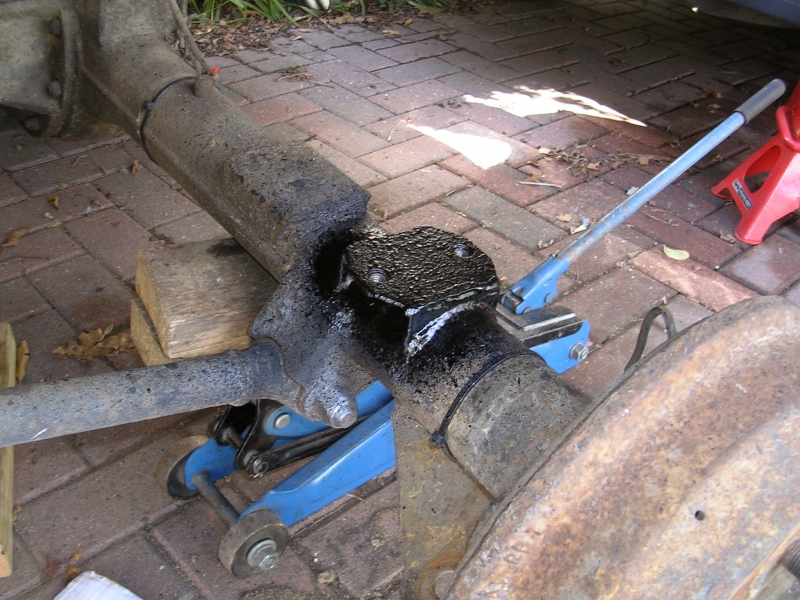 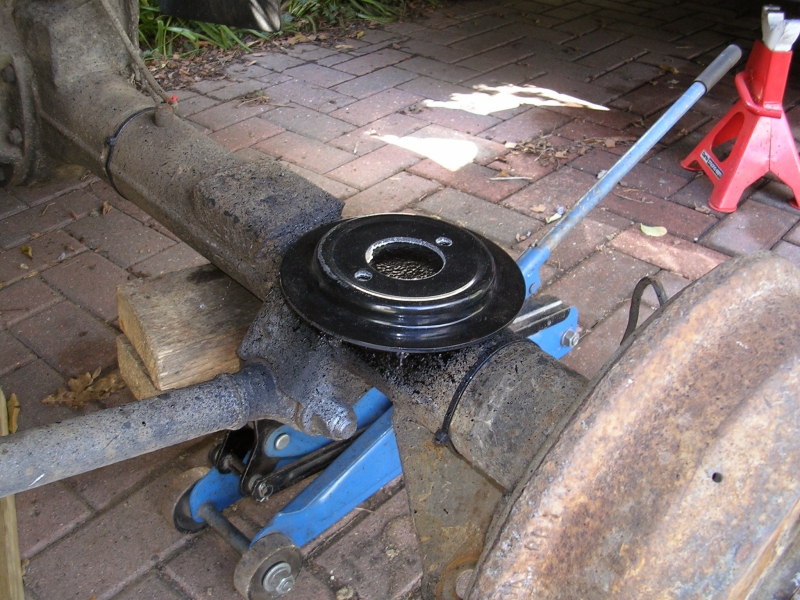 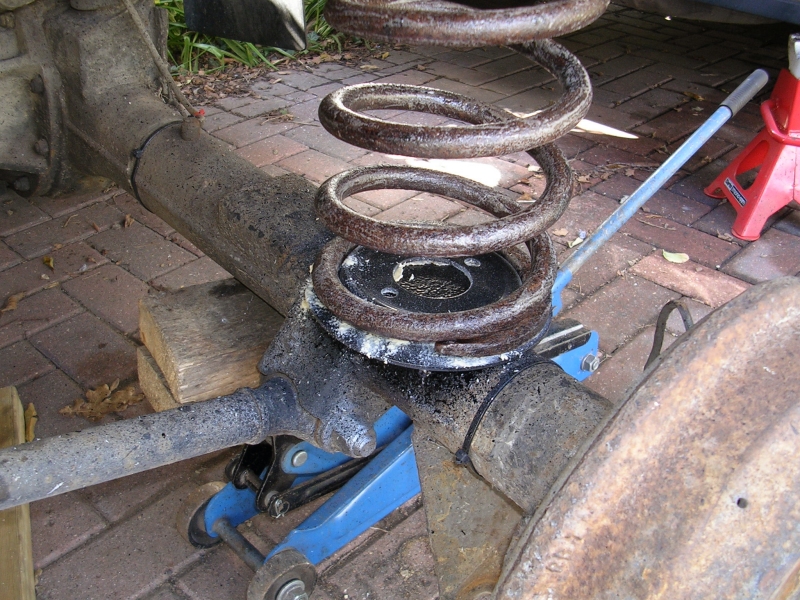 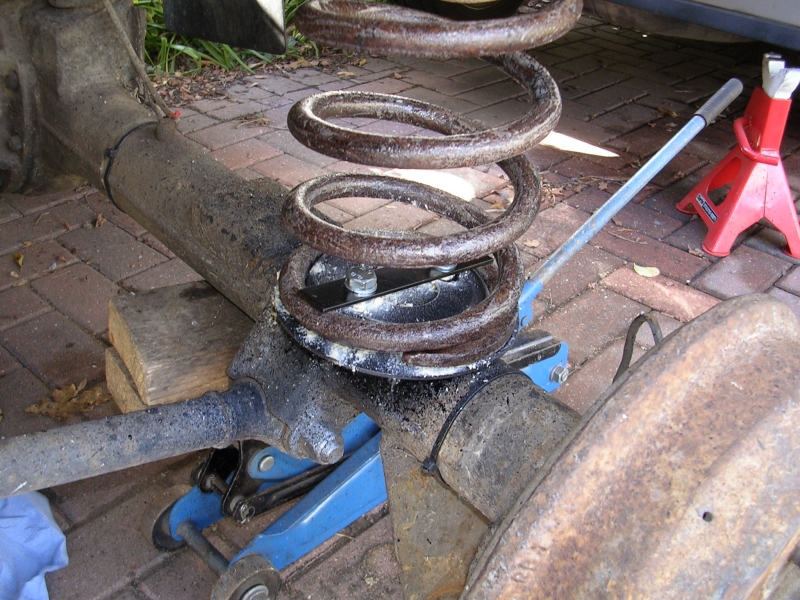 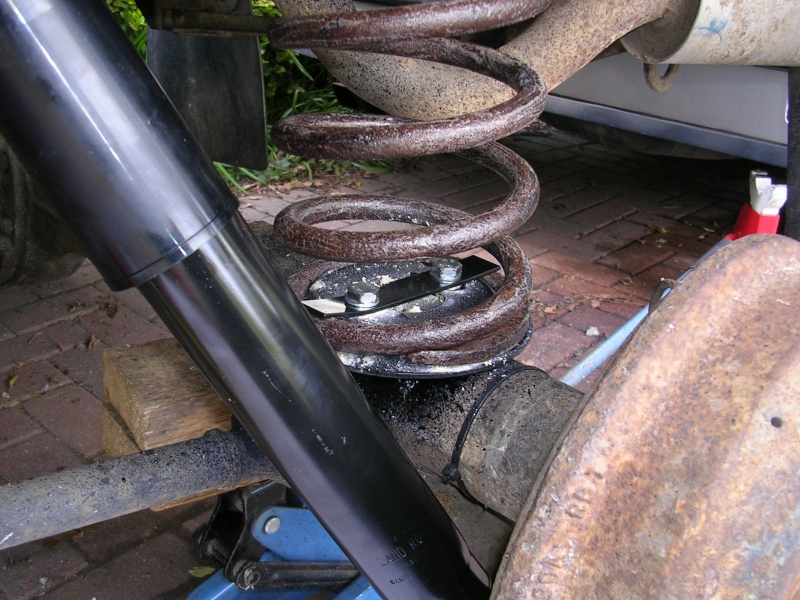 |
| |
Last Edit: Jan 24, 2013 11:59:40 GMT by darrenh
|
|
|
|
|
Jan 24, 2013 17:44:16 GMT
|
|
That brings back memories ...... although i never had to cut the mounts off. I managed to slice off the 'captive' nuts and reffited it all together with allen bolts, as i personally found them easier to use than normal bolts.
|
| |
|
|
|
|


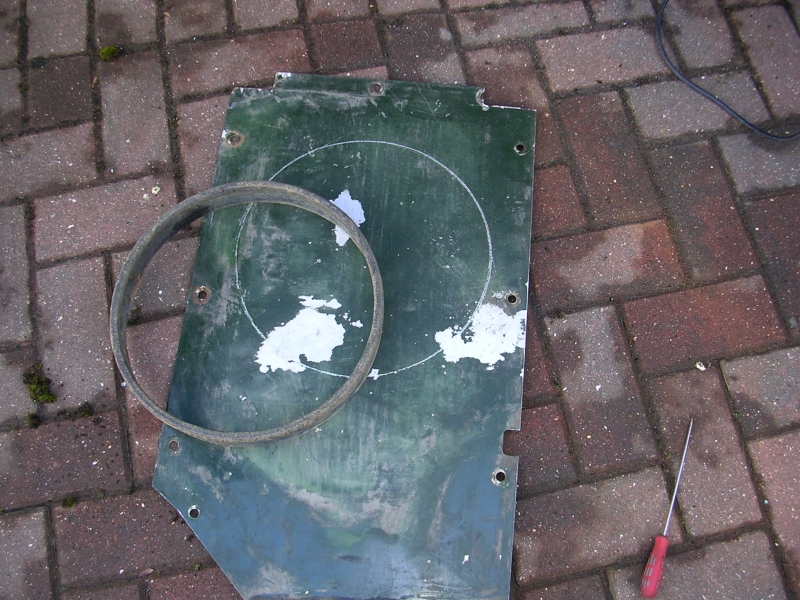
 bit of recycling i used an old alloy defender floor plate
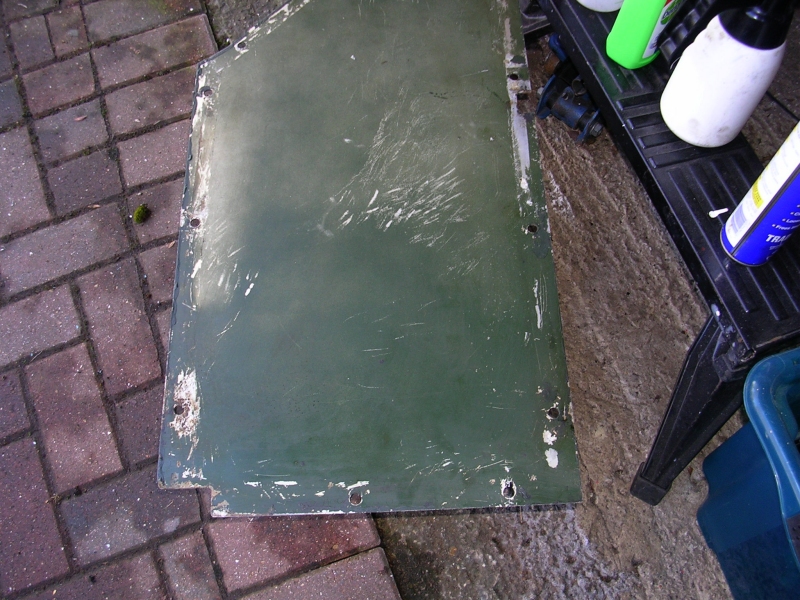


 )
)