|
|
|
Oct 26, 2014 11:52:46 GMT
|
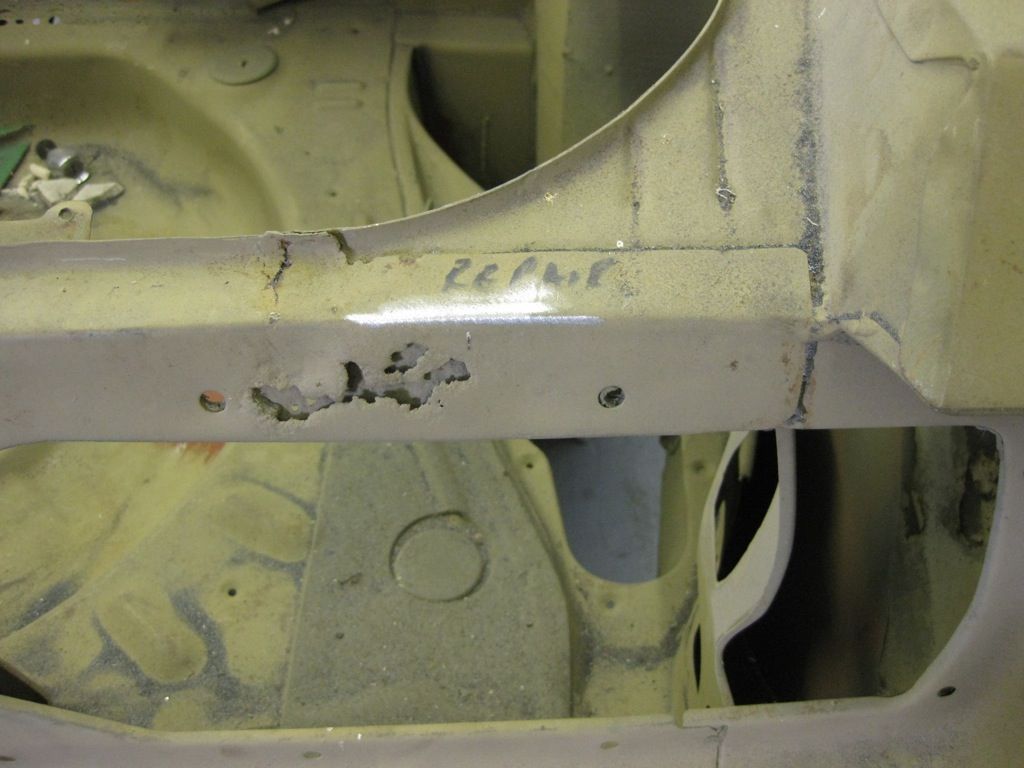
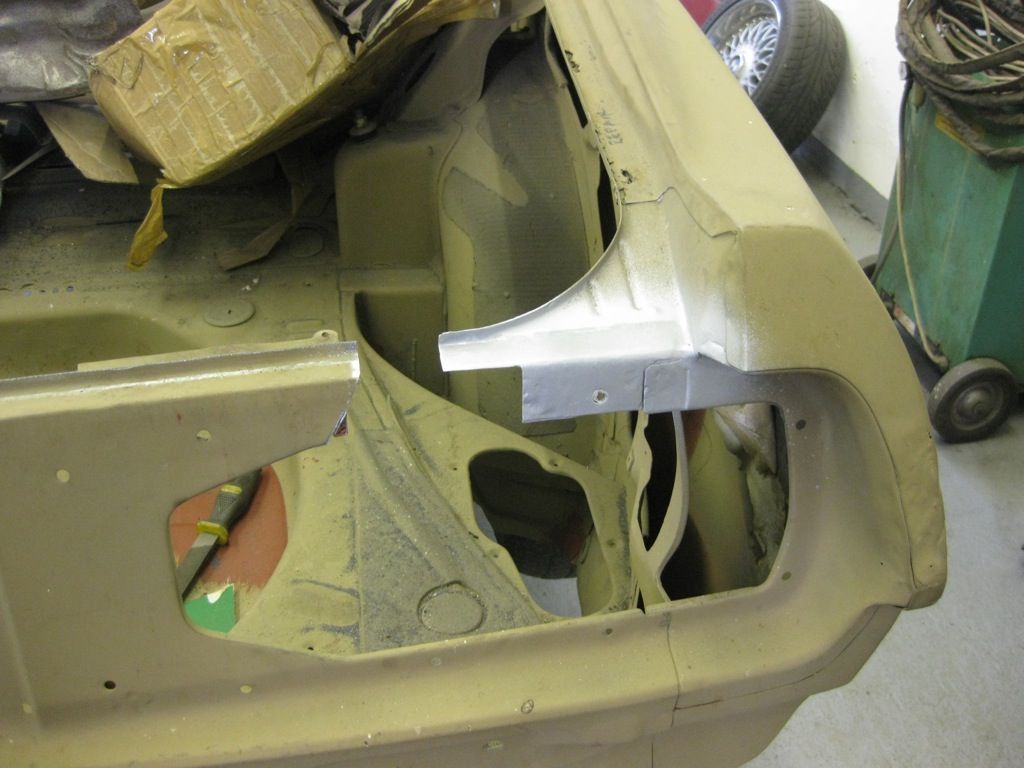
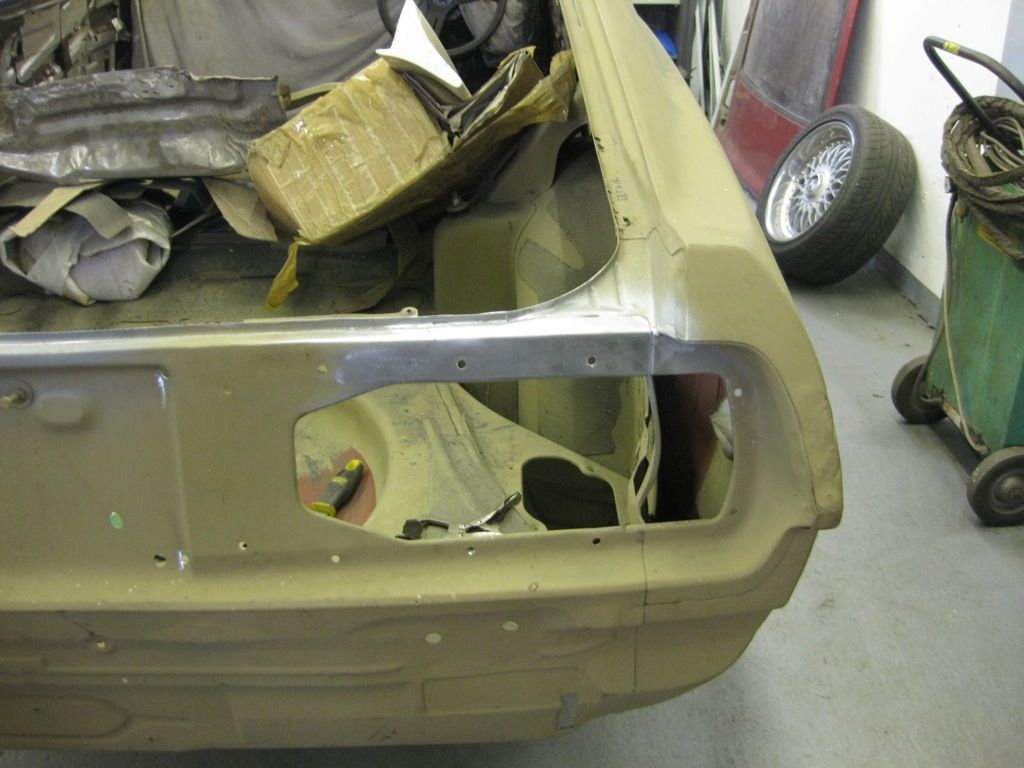
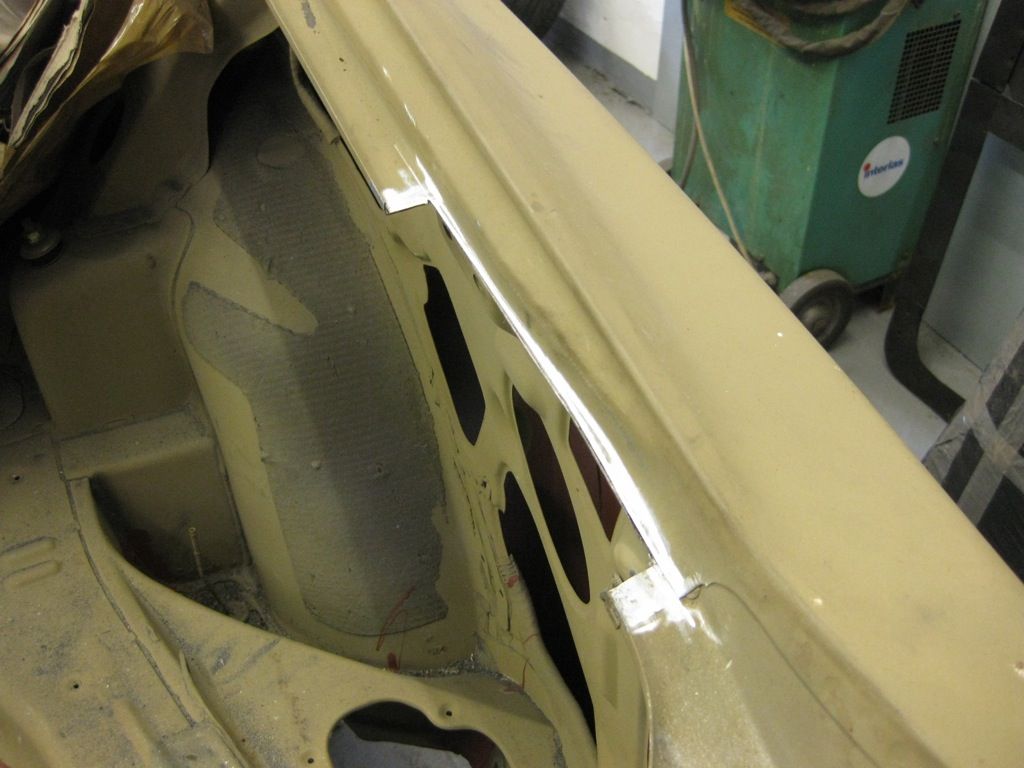
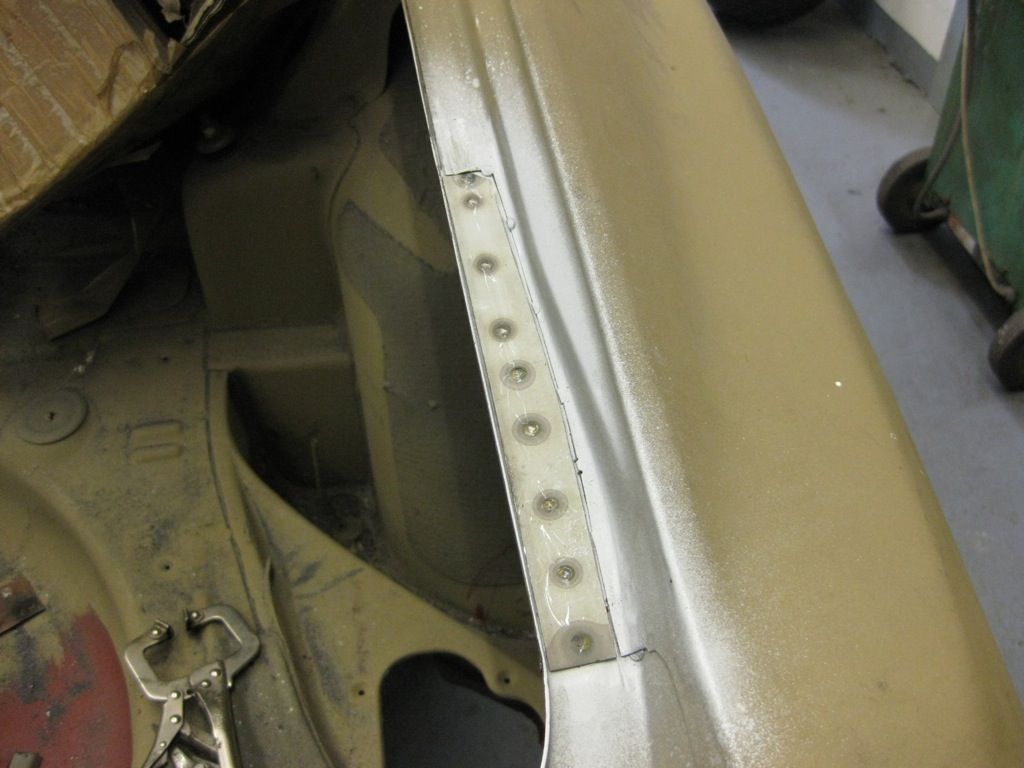
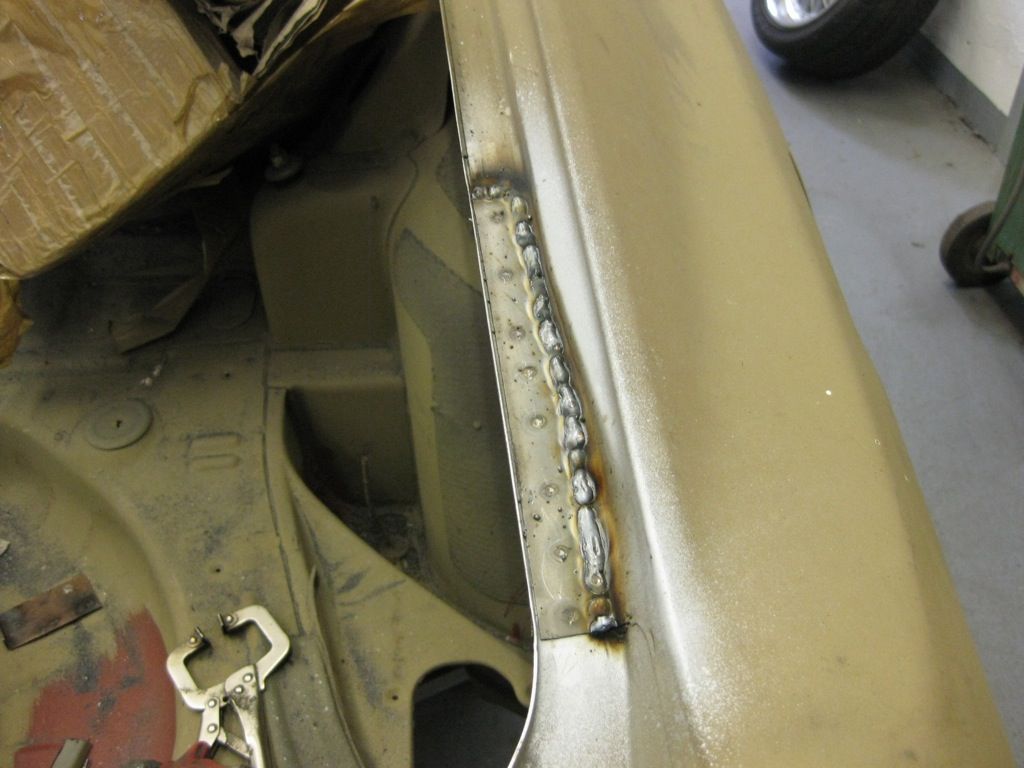
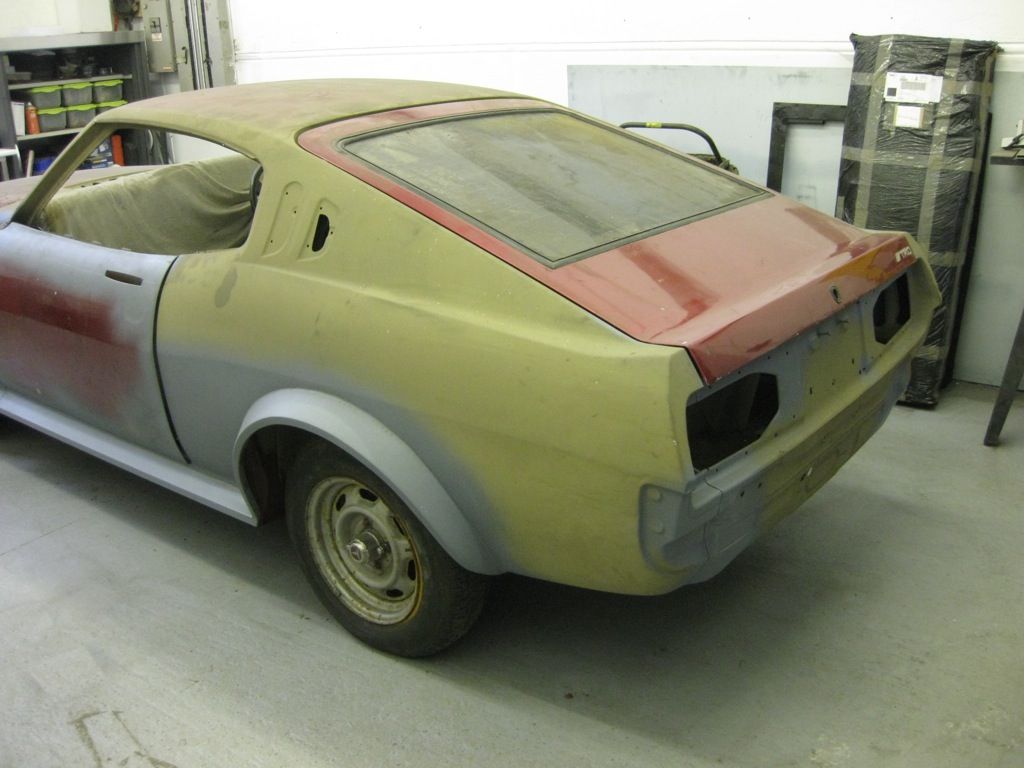
So time to start on the rear spoiler, still little unsure on what the shape is going to be like or even how I'm going to do it, but thought the best way to start would be with some identical brackets 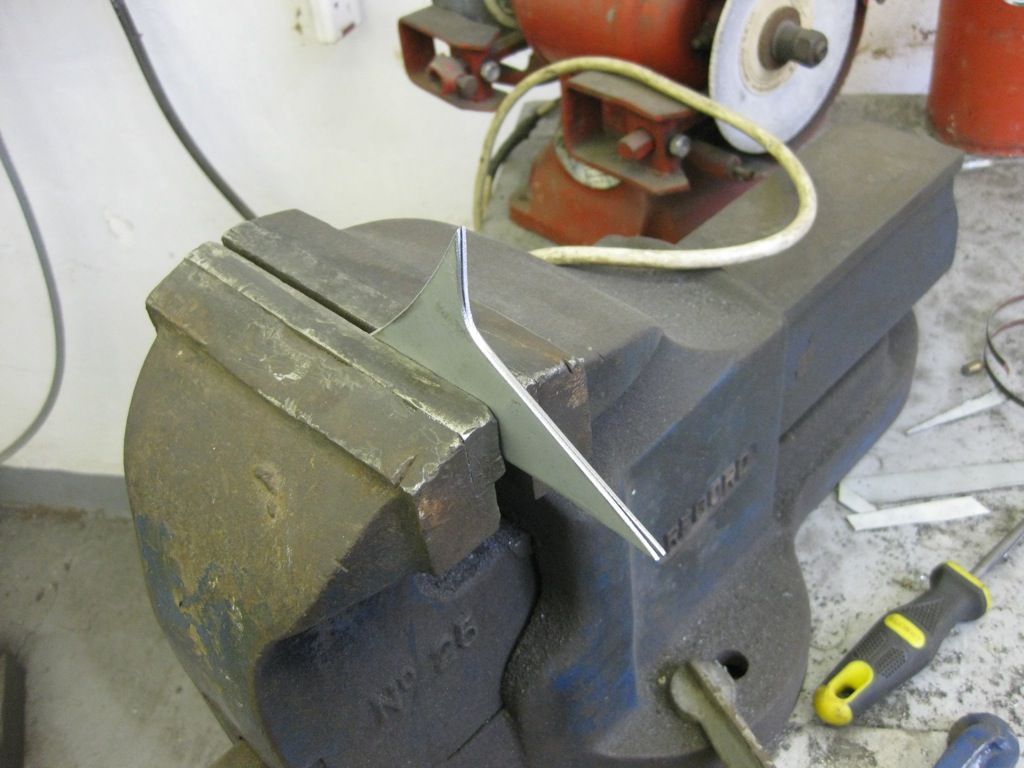  Radius of curve and length of the bracket match the front spoiler, and 20mm flat matches the arches 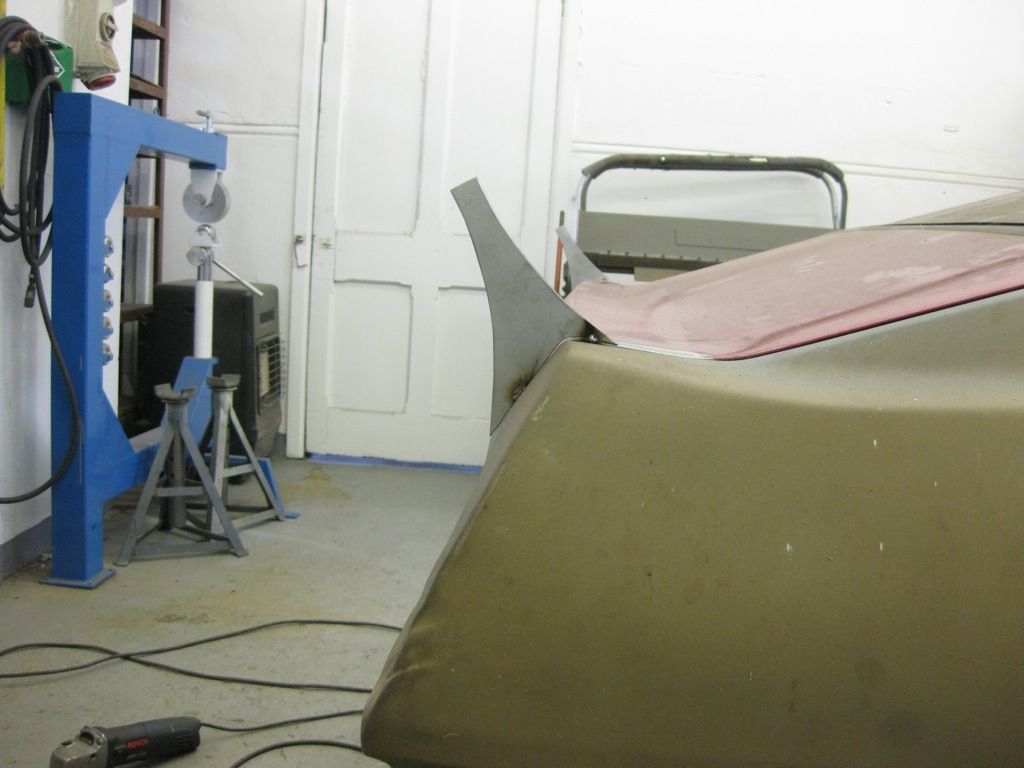 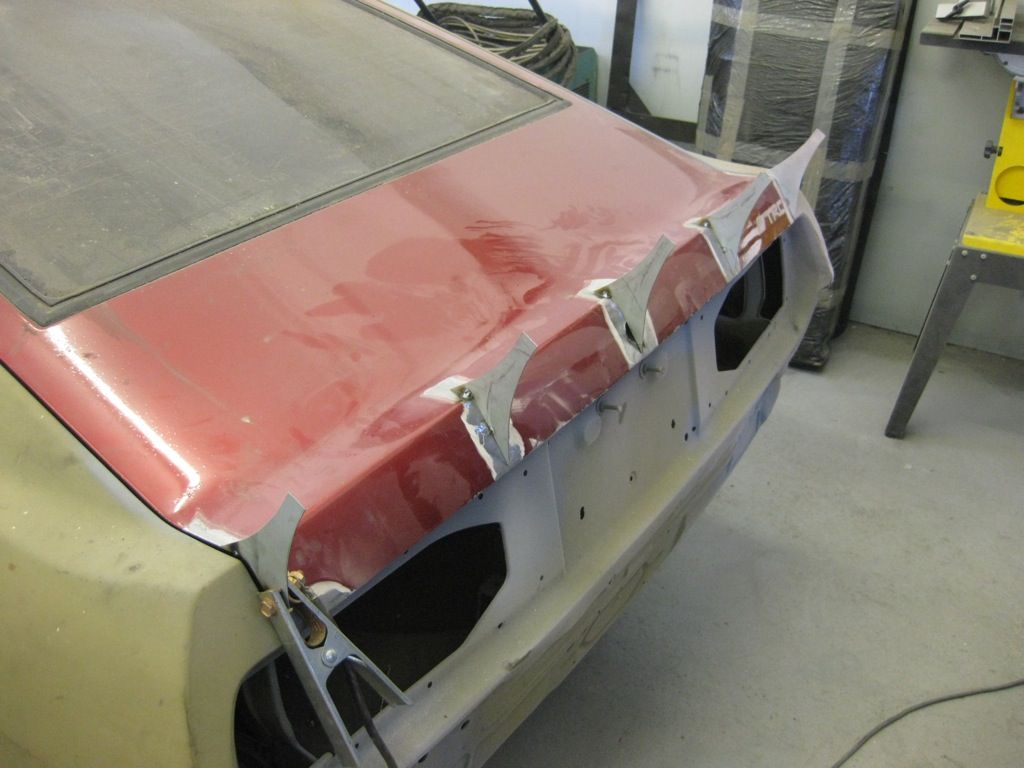 Then push it outside and mock the spoiler up in masking tape and bent wire 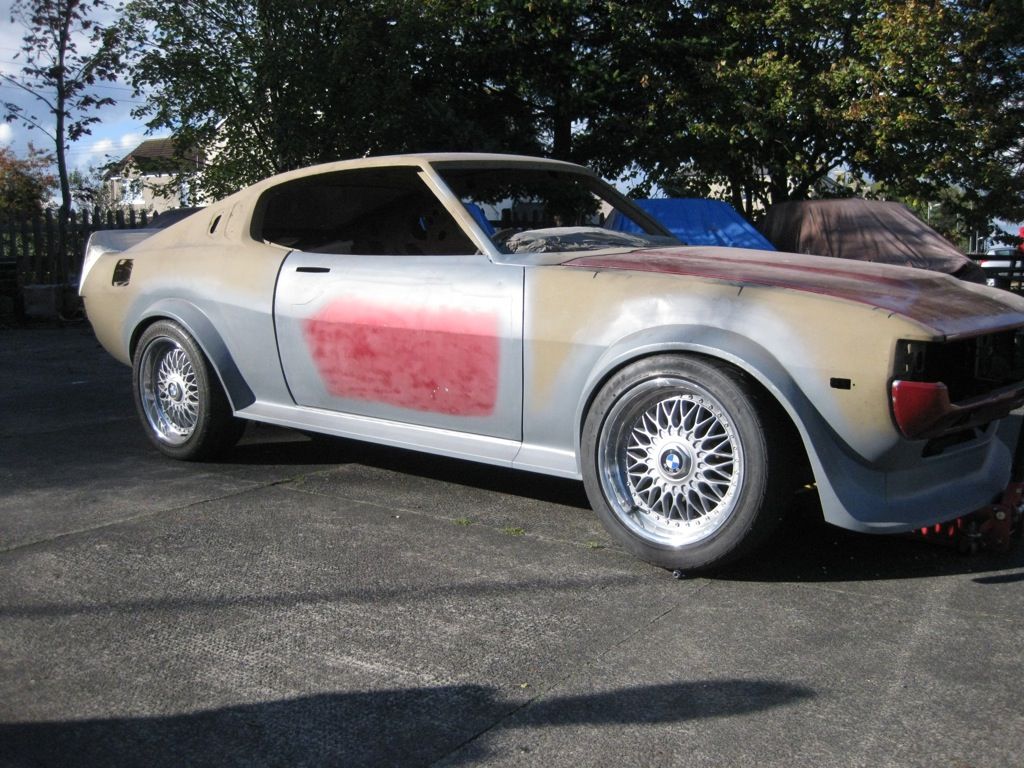      There are elements of it that I did like and some that I didn't, to me it looks a little too upright So pushed it back in ripped it all off and tried again, to create this, similar proportions, but not as upright, started by relocating the brackets   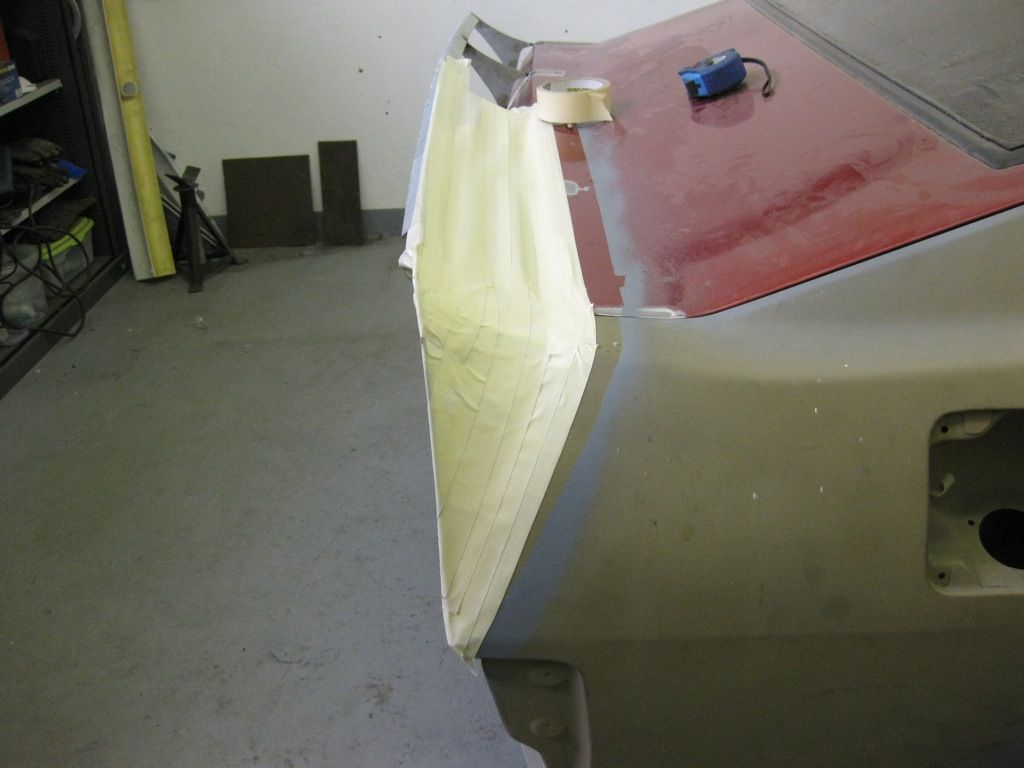 Liking the size and proportions better, but really struggling with that 20m wide strip along the top, so after much deliberation and a suggestion from my friend Jimmy, turned the flange to the rear  This also allowed me to give the side profile a bit of a curve, as the main aim had always been to not make it look like a bit of flat steel stuck on the back of the car, curved along the rear profile should help  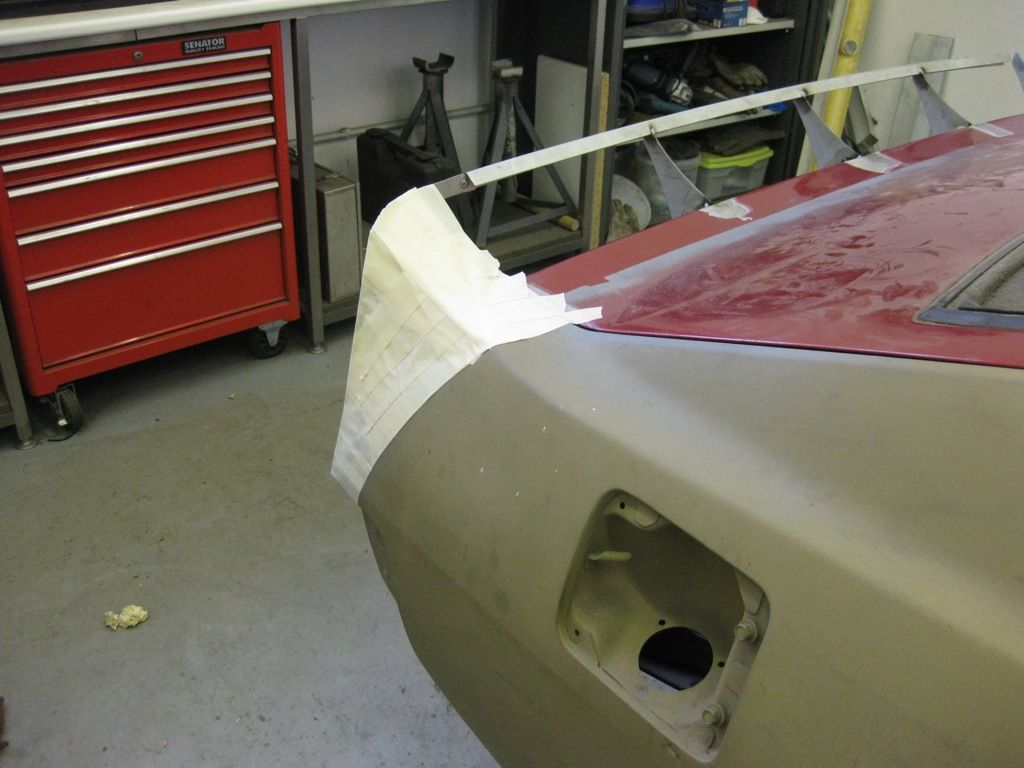 So happy with that now, started to piece it in  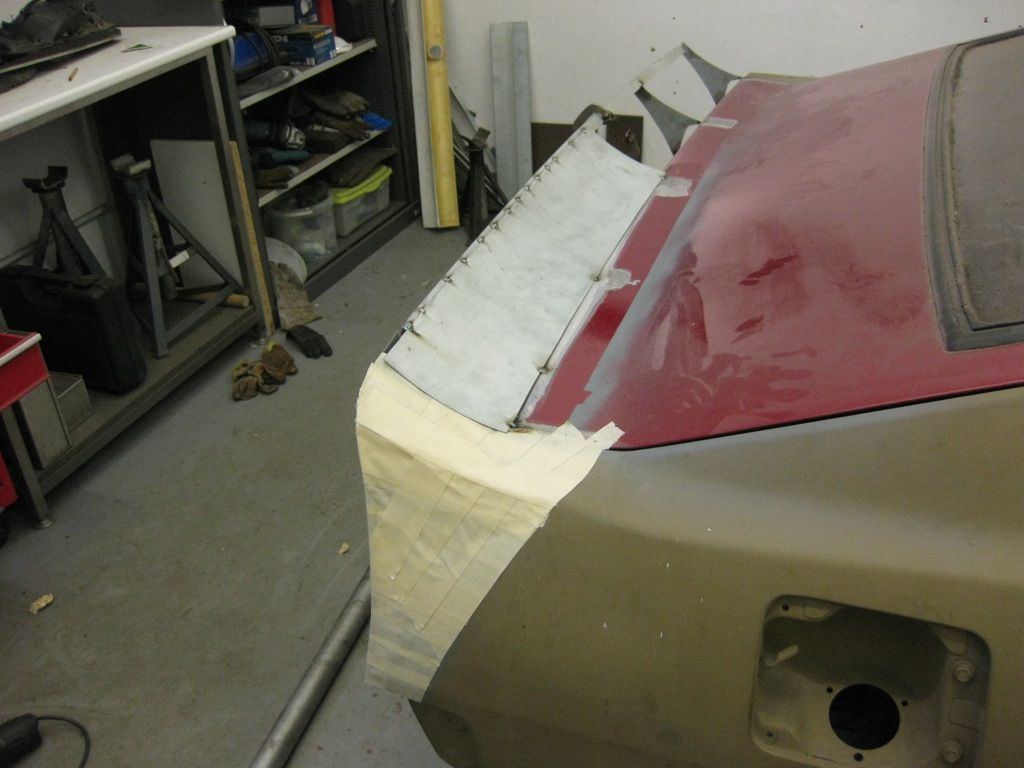 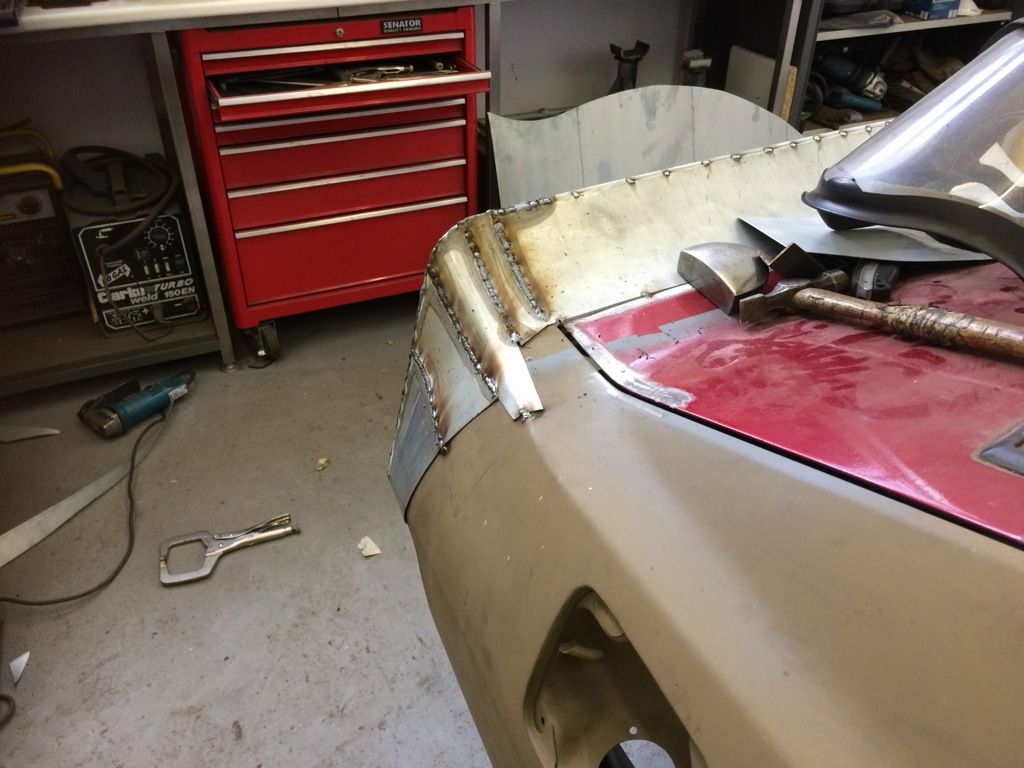 Very much being made up as I went along, but starting to take shape 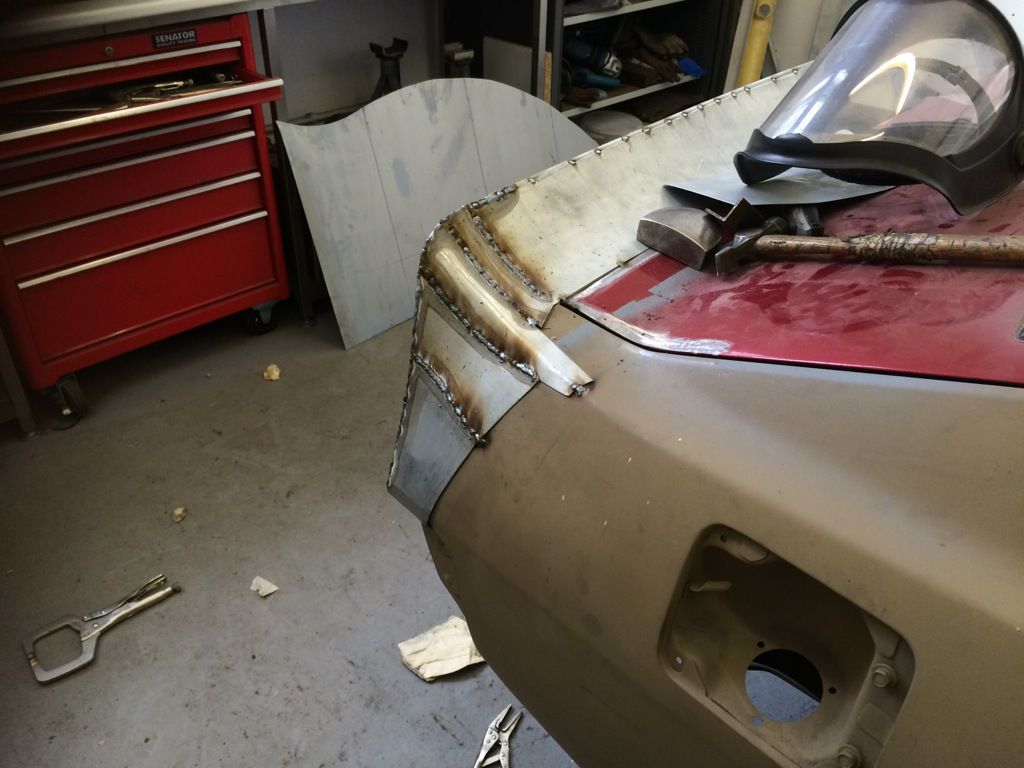 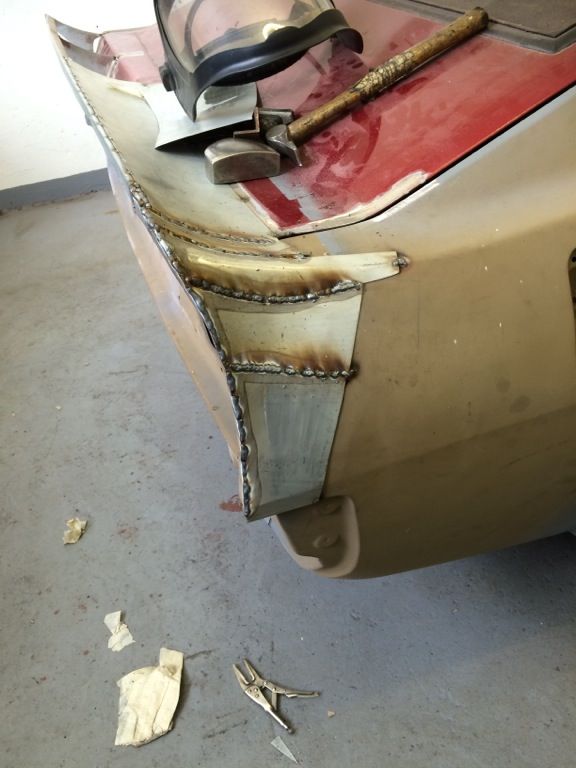 Cleaned off, and very happy with the the curve off the body swage line   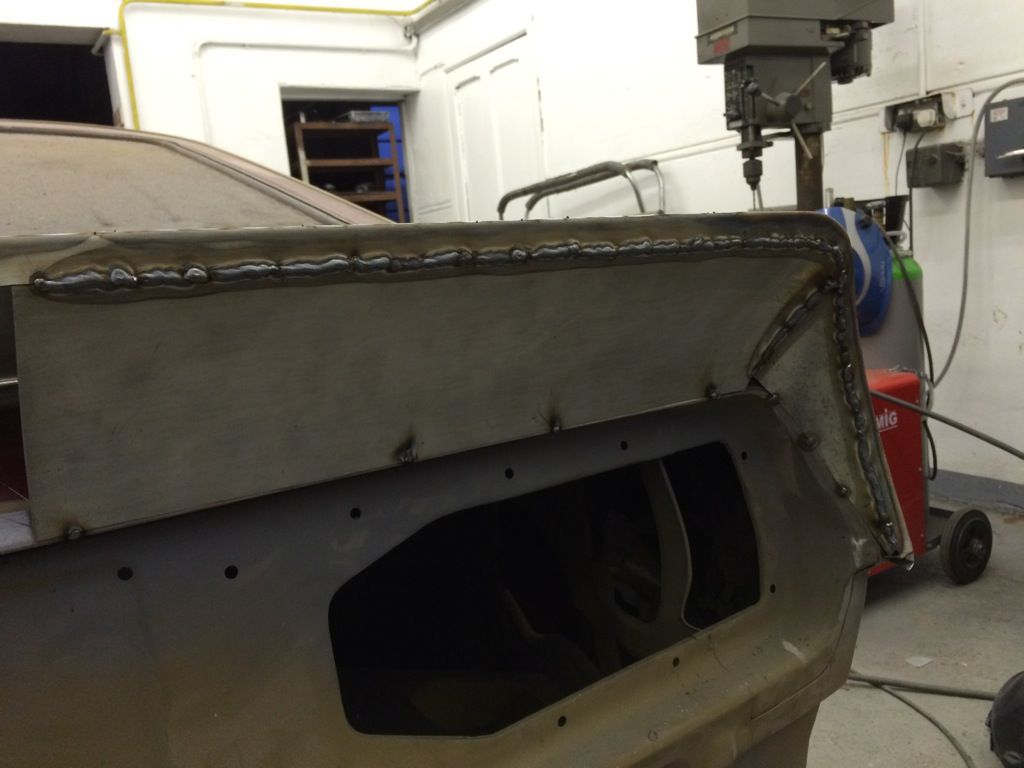 the intention is to make it all in one piece for the time being then cut it into 3 sections once its complete so that the ends stay on the car and centre section stays on the tailgate, that way can be sure that it will match up 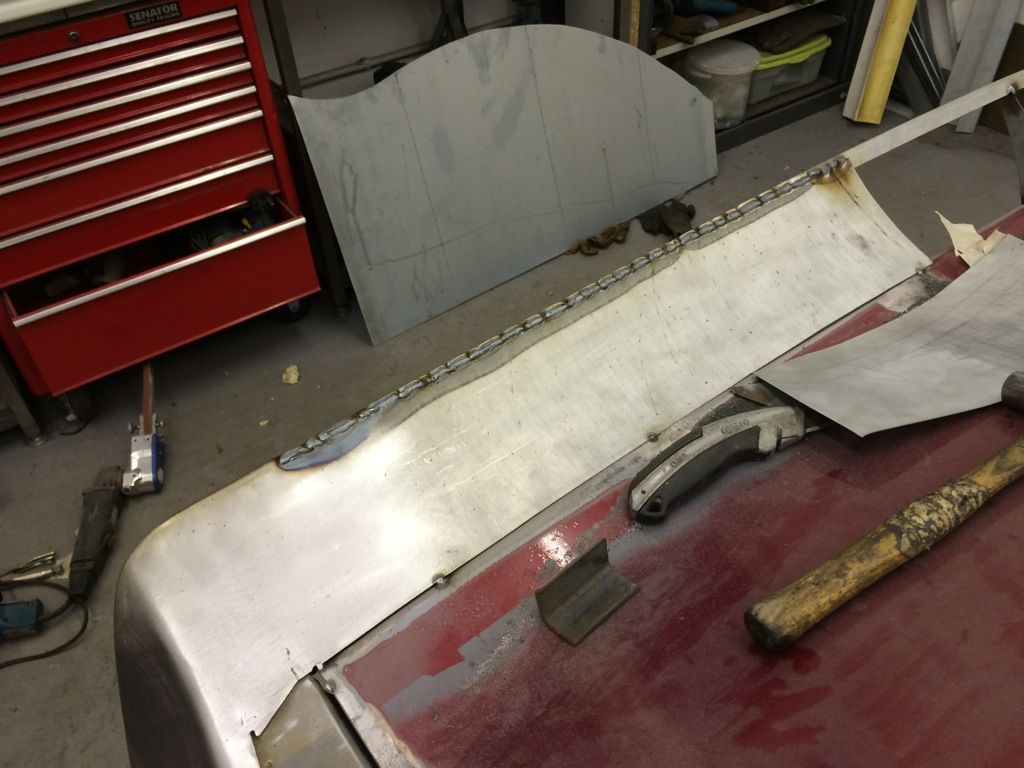 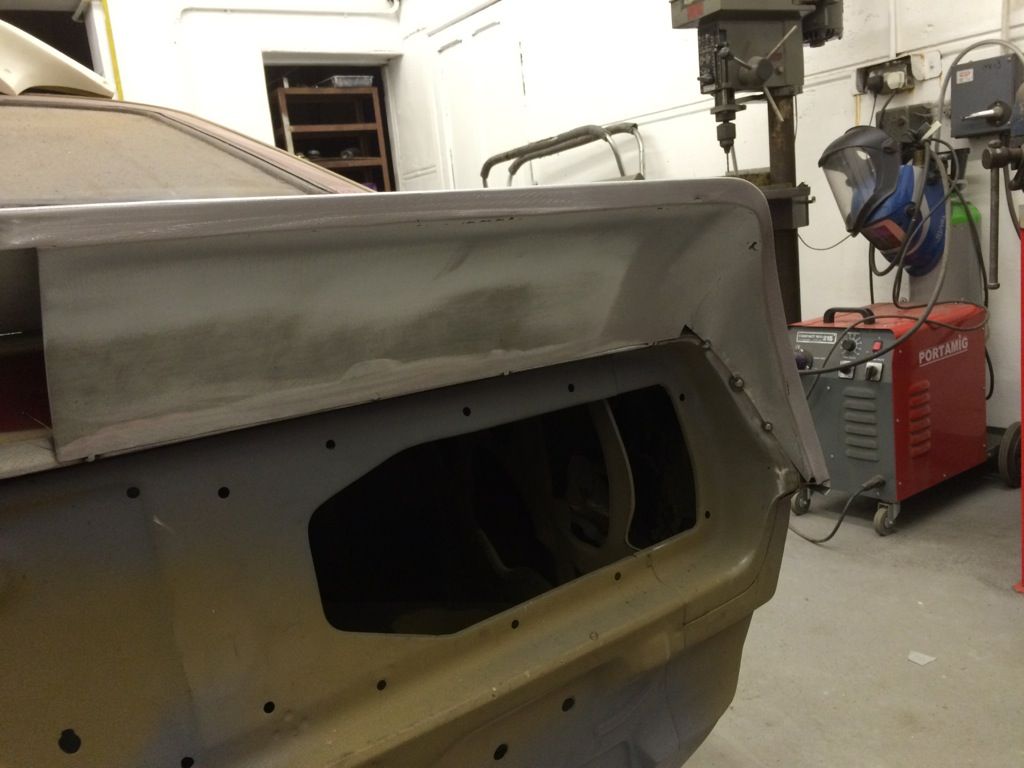 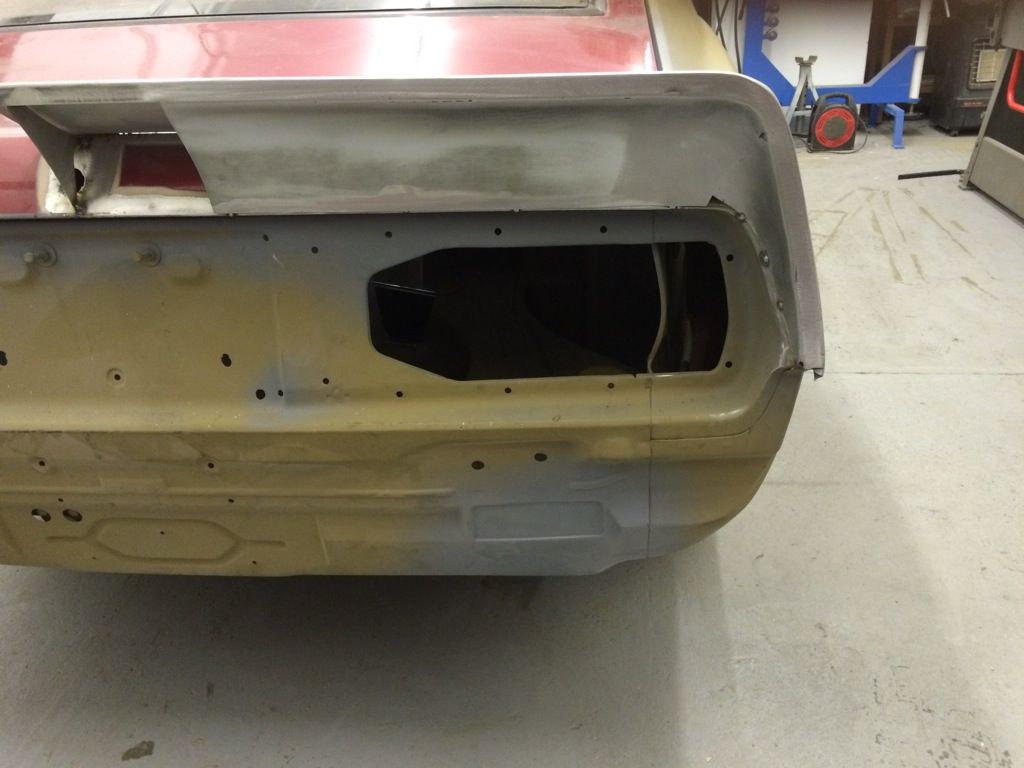   and some shots with the light in 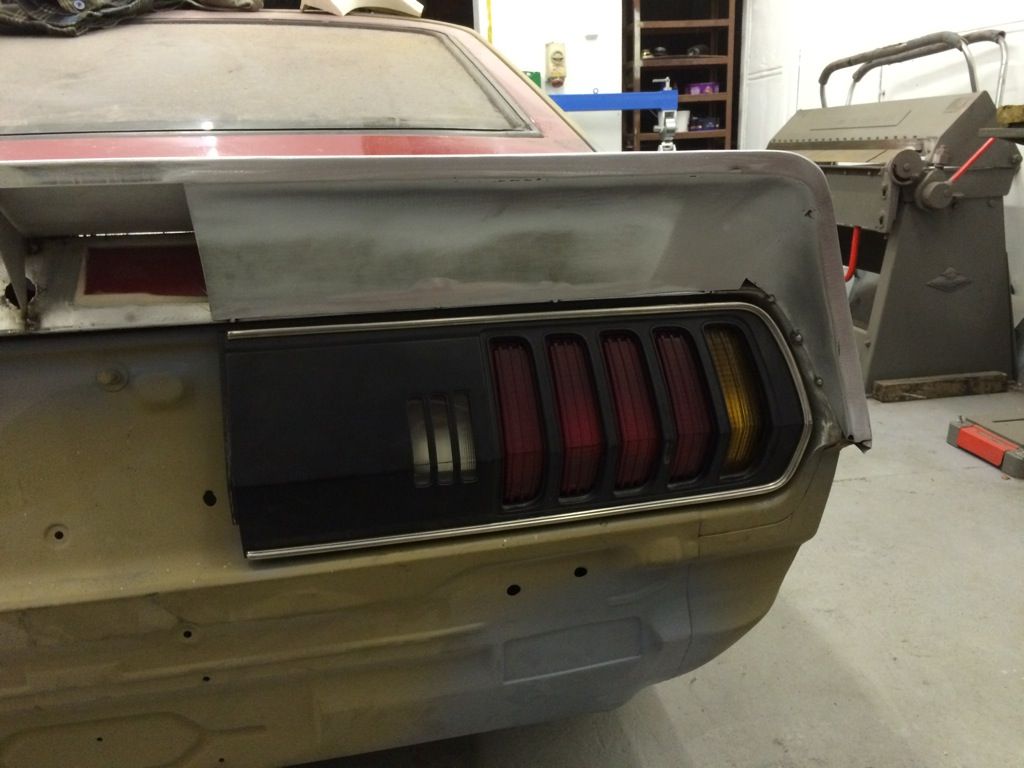 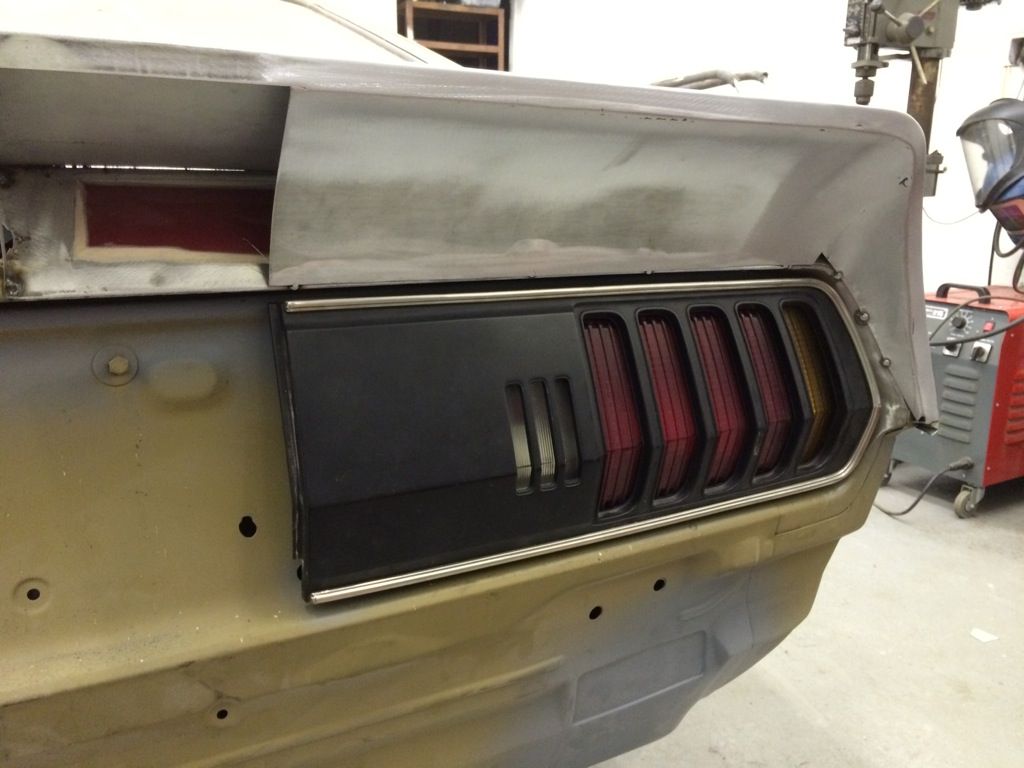 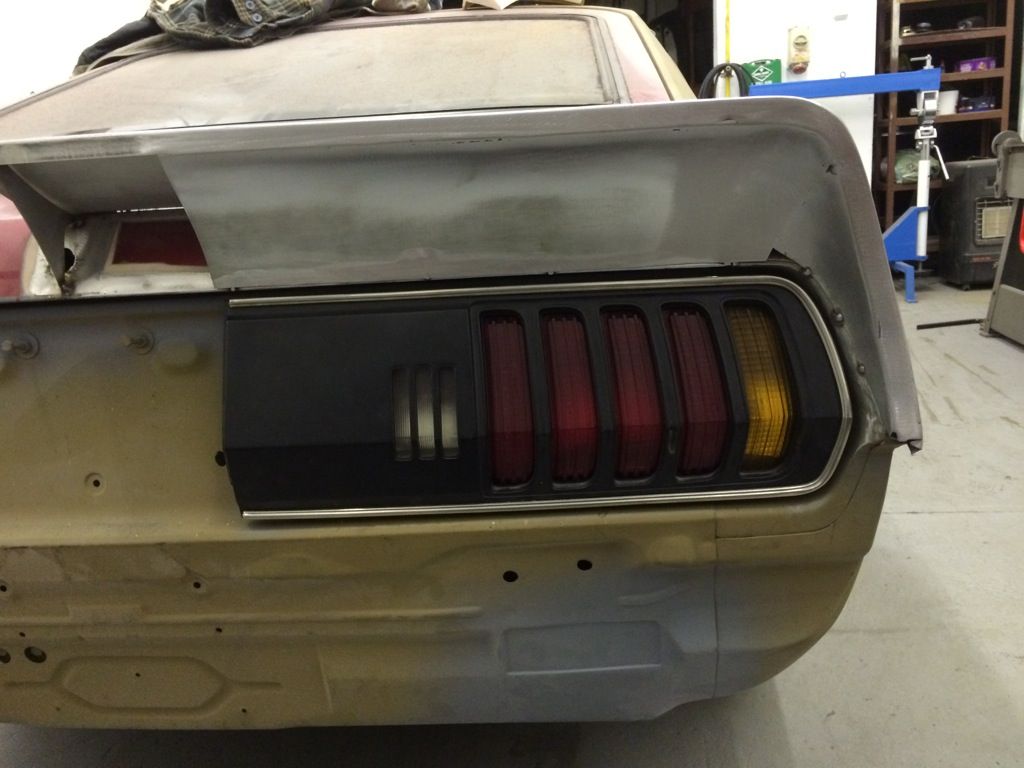 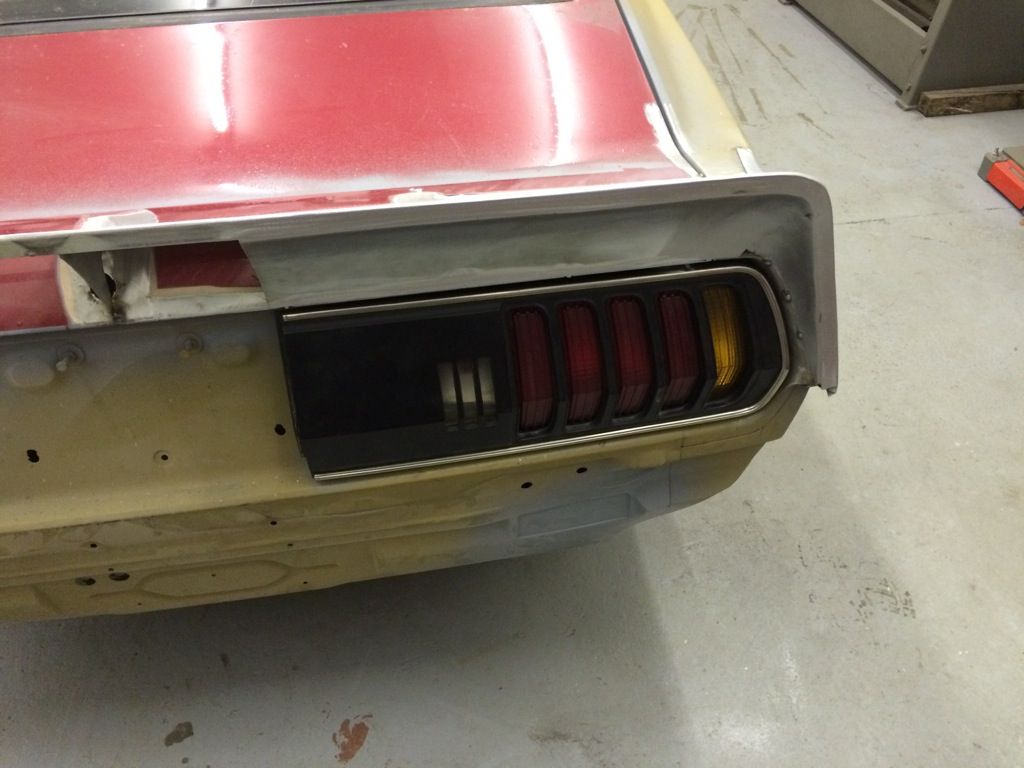 I'm happy with that so far, would be interested in your thoughts |
| |
Last Edit: Oct 26, 2014 11:59:19 GMT by tonybmw
|
|
|
|
|
|
|
|
|
Beautiful work Tony, What gas and wire do you use with your mig? Argoshield Light , its a mix of Argon and C02, it gives a much cleaner weld than just Co2 Wire is 0.6mm |
| |
Last Edit: Oct 1, 2014 5:18:54 GMT by tonybmw
|
|
|
|
|
Sept 30, 2014 18:45:29 GMT
|
|
Definitely still one of the best and most detailed builds on this forum
|
| |
|
|
|
|
|
Sept 30, 2014 18:36:06 GMT
|
Peerless as ever Tony,good work whats the final colour , black? / Thanks Broadie I think David was talking about Black, but that was a while ago, so not sure at the moment |
| |
|
|
|
|
|
Sept 30, 2014 18:20:59 GMT
|
|
|
| |
|
|
|
|
|
Sept 22, 2014 5:24:00 GMT
|
Now that I've started to weld up my rustbucket, your updates are even more inspirational than usual. Thanks to the info you've shared, shaping panels is so much easier to work out. The key thing I've learned here is that it's a really good idea to think and plan how to make something and then just get on and make it. If a mistake is made, just do it again and keep practicing until you get the hang of it. Exactly Right Mr Vulgalour |
| |
|
|
|
|
|
Sept 21, 2014 10:54:23 GMT
|
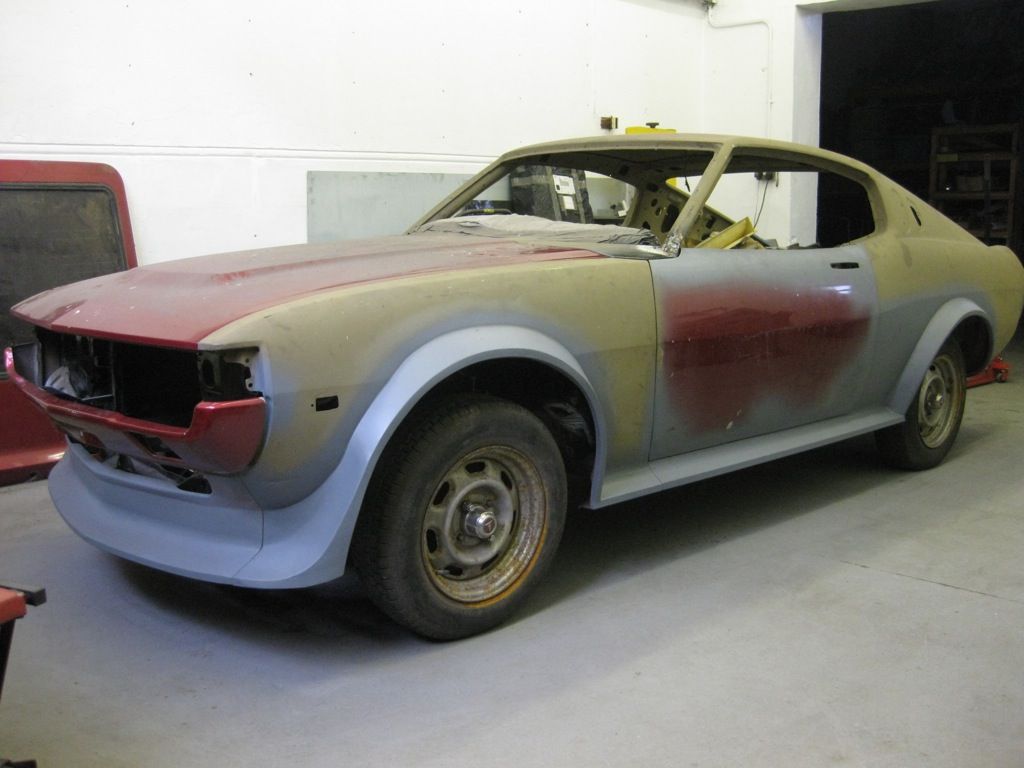
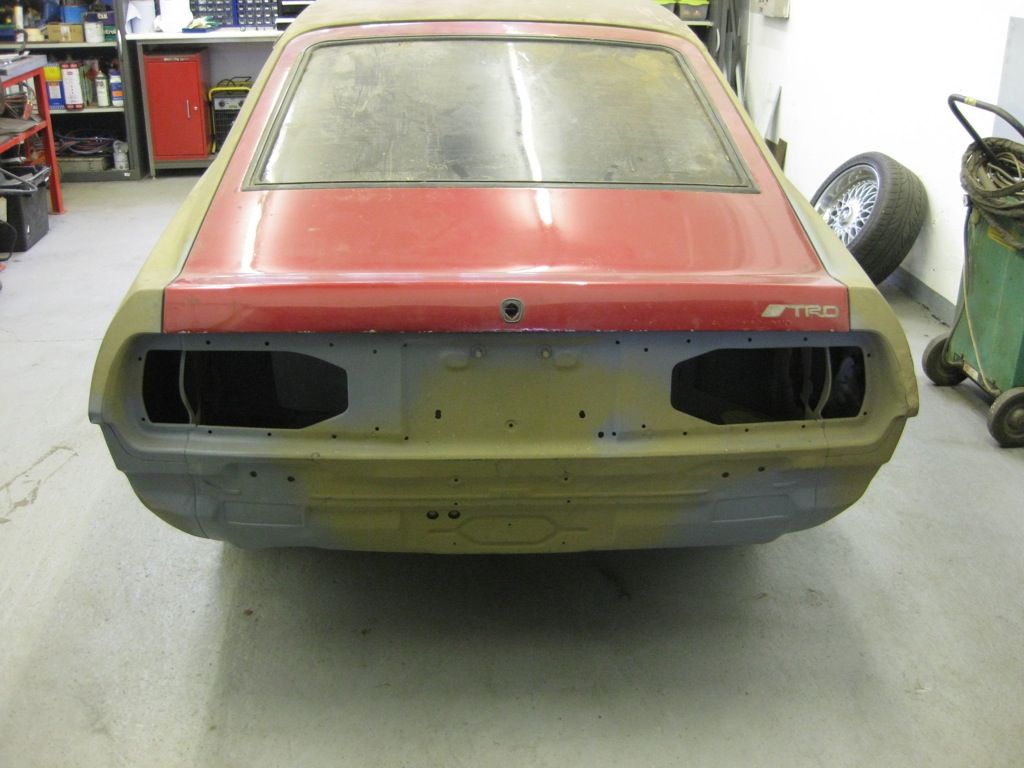
Well it seems an age since I lasted posted anything Life and work and have plotted against me to get in the way, Ive been doing bits and pieces along the way, but yesterday got a full day back on the Celica, and it felt good Once Id finished the welding on the Passenger side door, it still wasn't lining up right, so I needed to make some spacers for the hinges 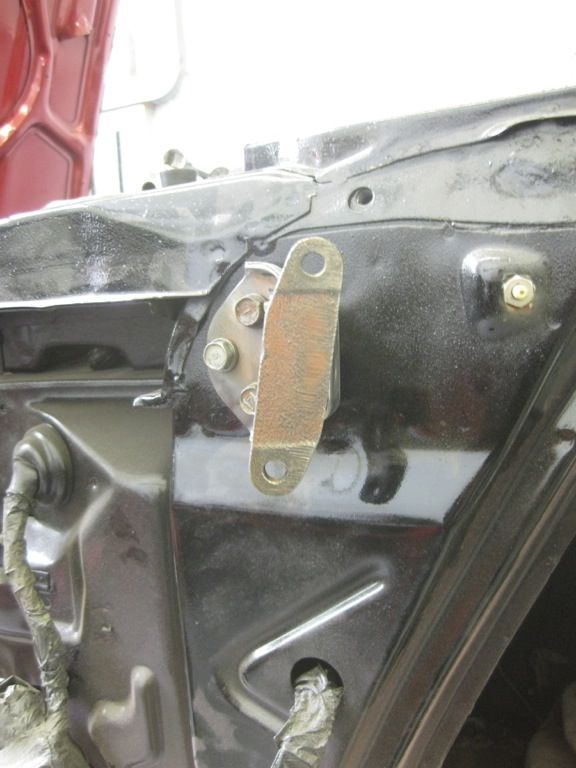  Then a bit of remodelling to the front of the door and sill 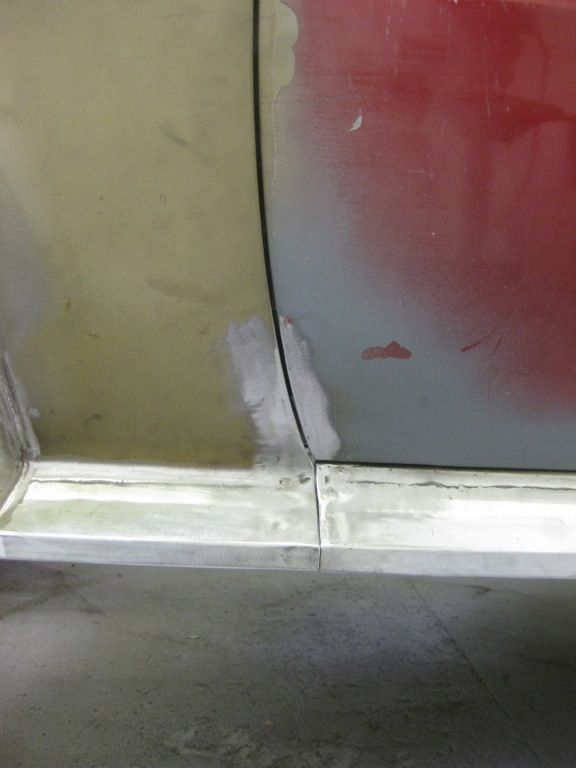 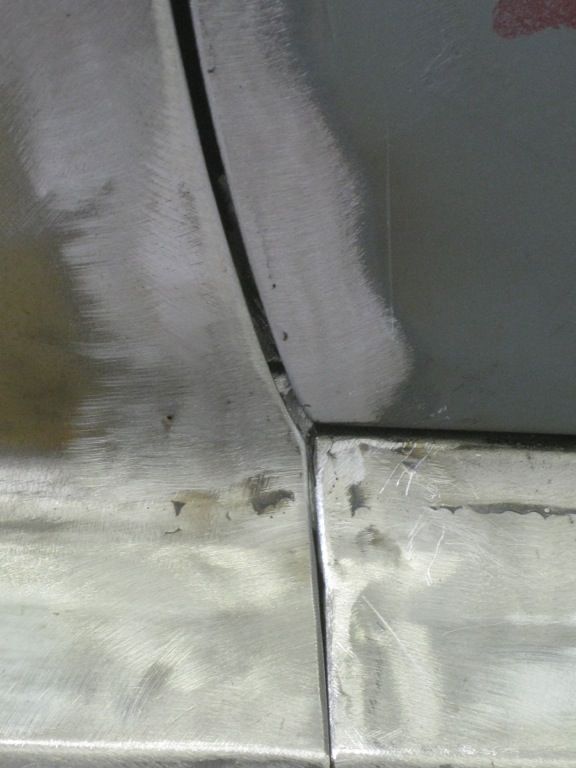 Starts to make it look right 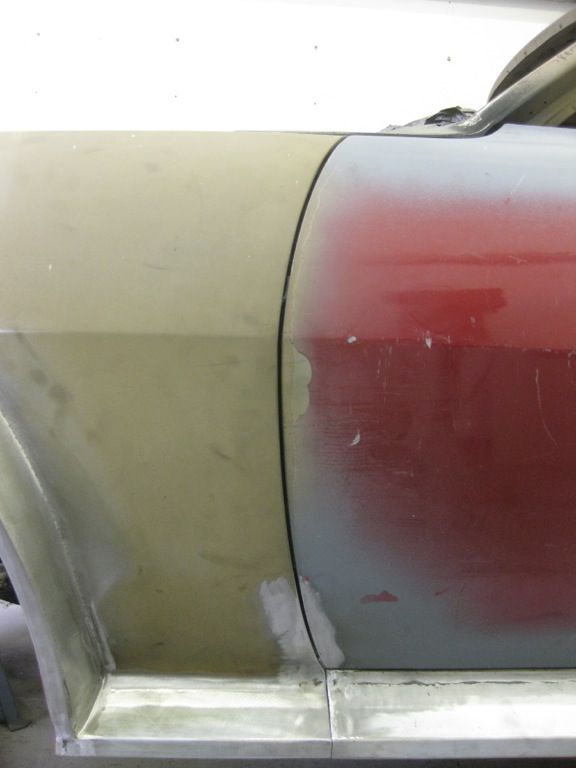  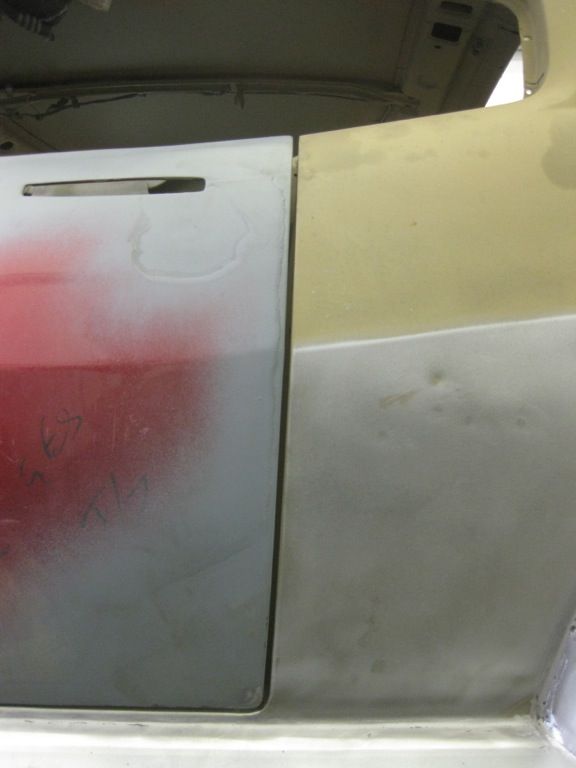 Then to complete the bodykit just this last little bit on the end to close up    so then onto some general repairs around the car, now considering this is a 1970's J its surprisingly rust free, It has been an Australian import so I guess that has helped a huge amount  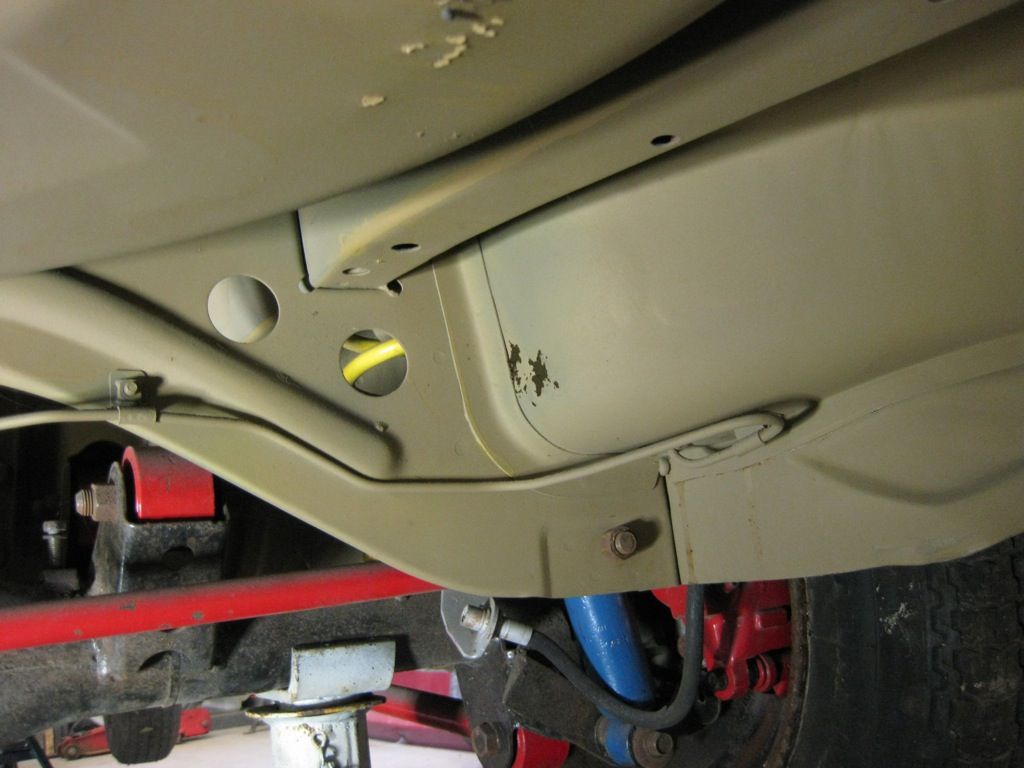 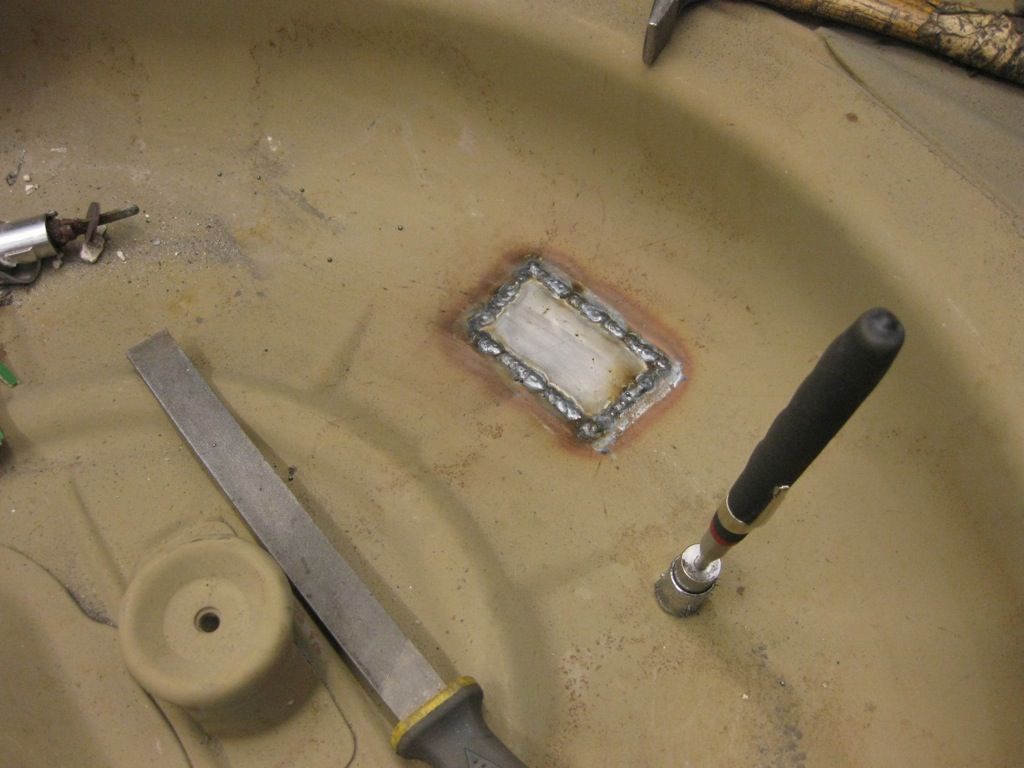 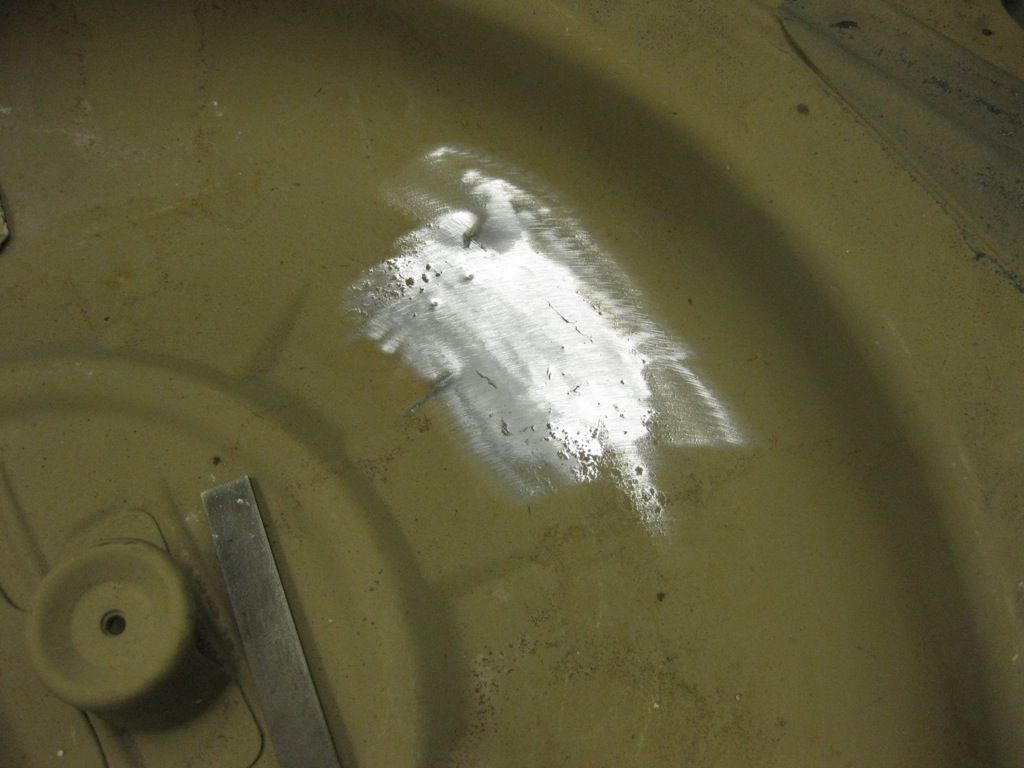 This bit on the rear lights has been patched several times before  so rather than add another repair, thought the best thing to do would be to cut it out and and make a new section     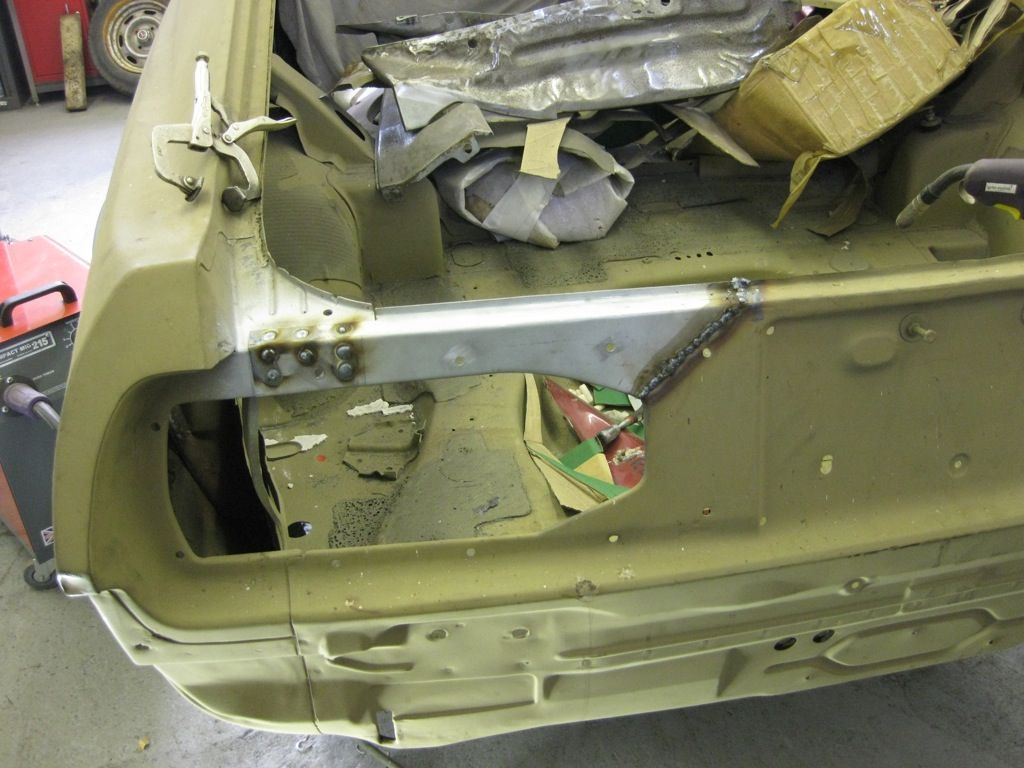  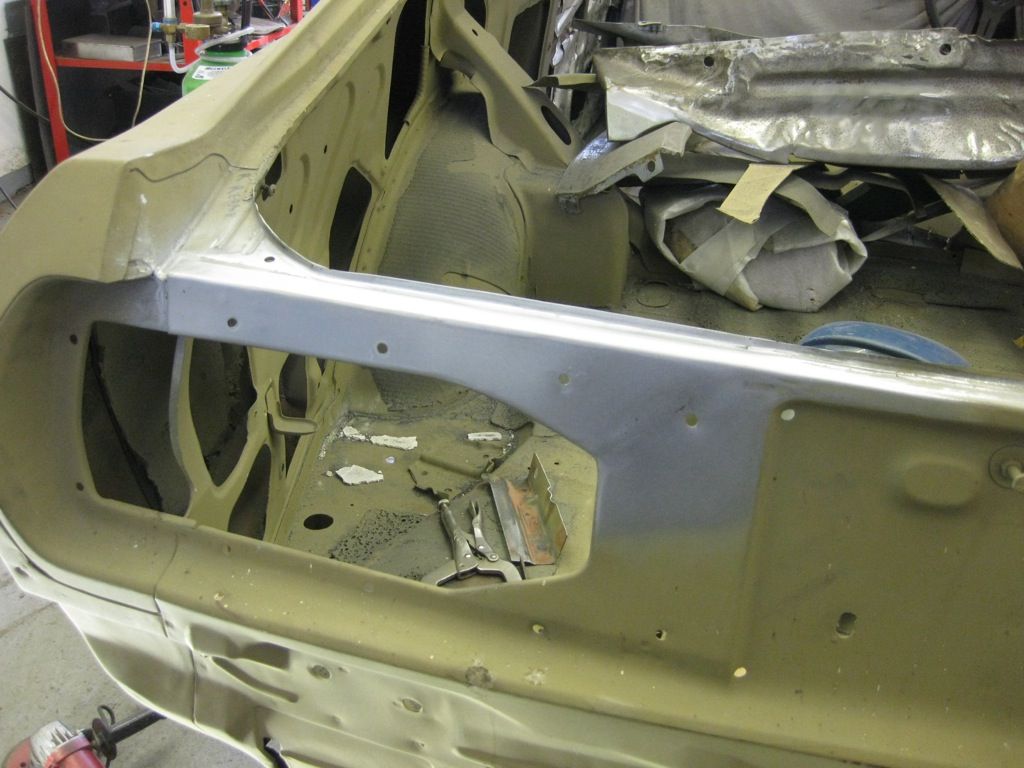 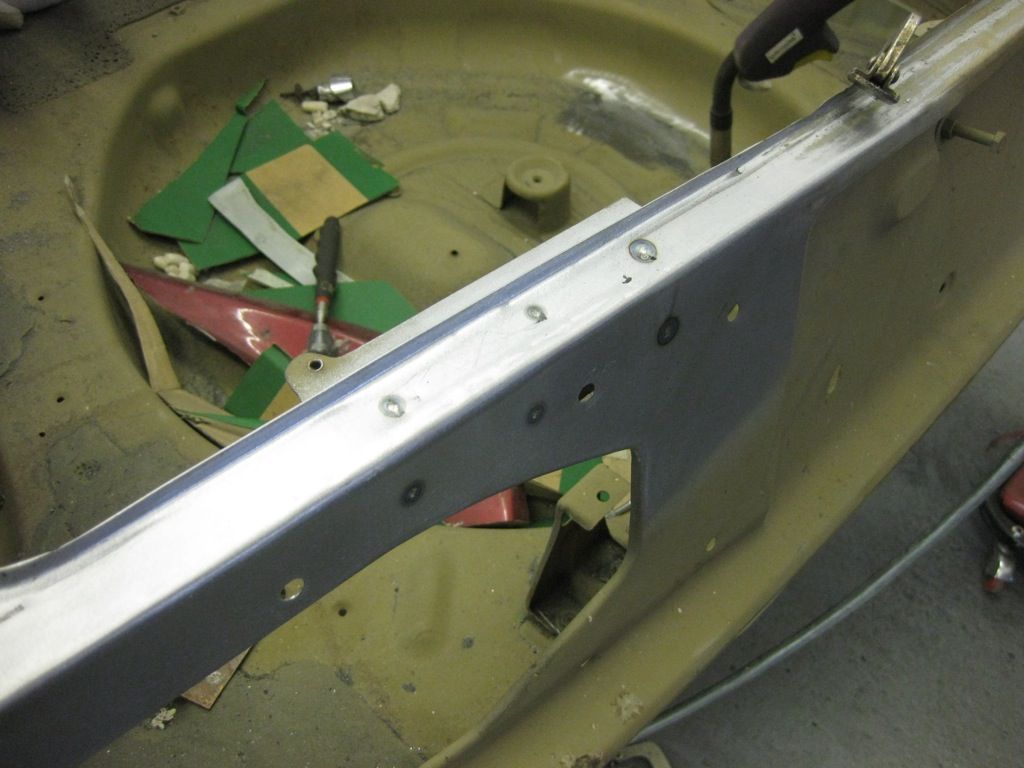 Trial fitted the light, goto love that 70's styling  Found another rust spot so cut that out swell 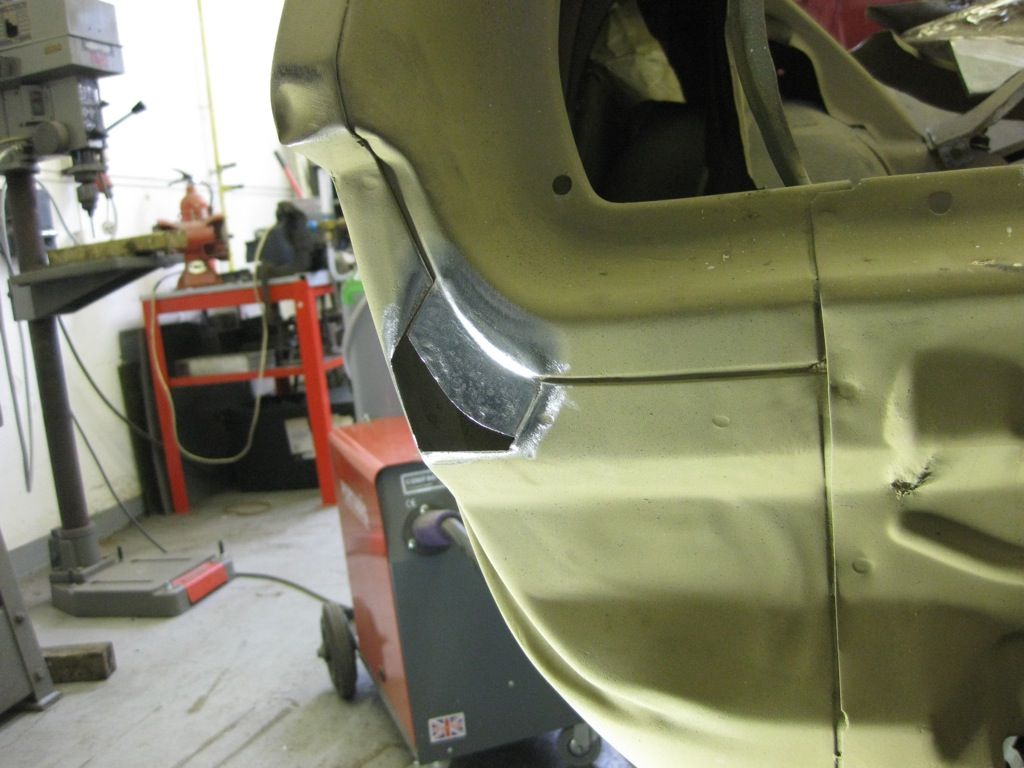  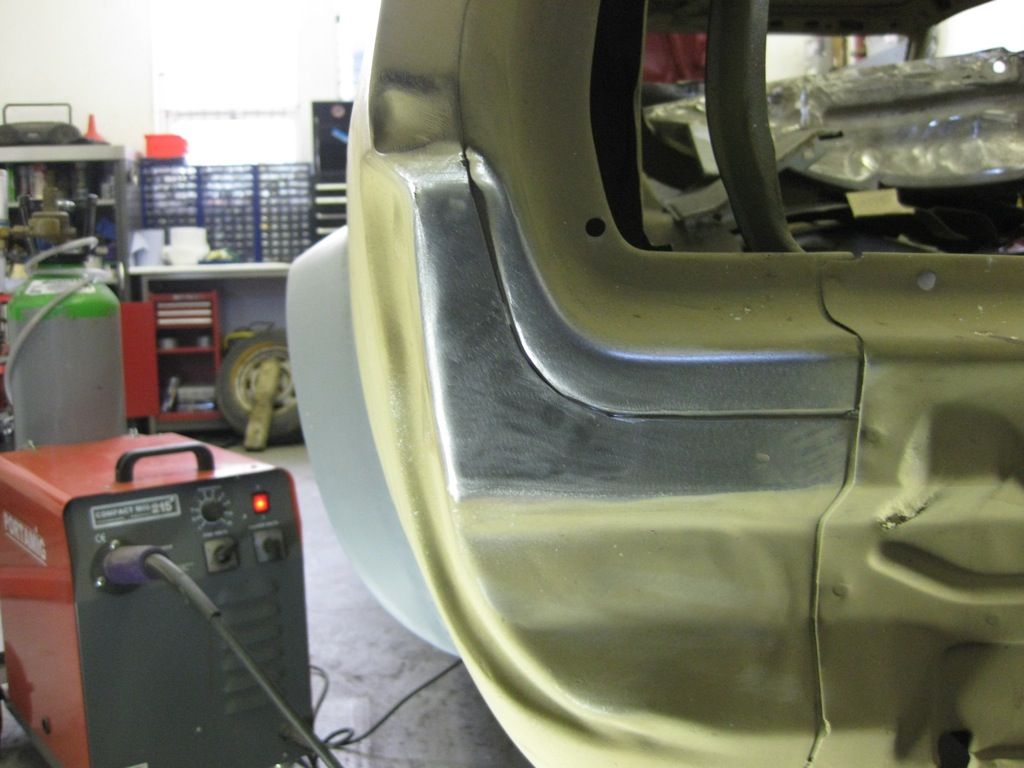 So thats that corner finished, and feels good to have made some decent progress 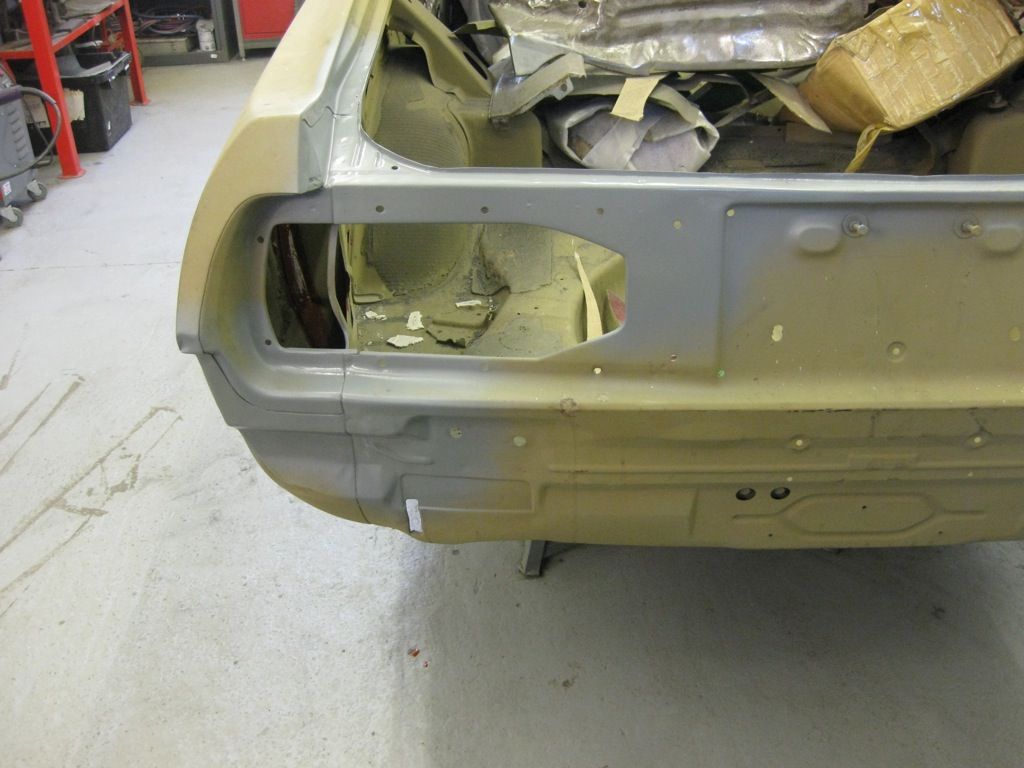 |
| |
Last Edit: Sept 21, 2014 10:56:47 GMT by tonybmw
|
|
|
|
|
Sept 11, 2014 5:47:30 GMT
|
|
Great progress
|
| |
|
|
|
|
|
|
|
|
If you go onto Youtube, there are quite a few DIY setups that have been made that would be suitable to give it a go at home
|
| |
|
|
|
|
|
|
|
|
Have you considered Soda blasting for the crankcase
|
| |
|
|
|
|
|
Aug 26, 2014 19:40:57 GMT
|
|
Good find
|
| |
|
|
|
|
|
Aug 26, 2014 19:39:55 GMT
|
|
Superb Peugeot Patching
|
| |
|
|
|
|
|
|
|
|
Lovely Car, and amazing transformation to that interior
|
| |
Last Edit: Aug 11, 2014 9:27:40 GMT by tonybmw
|
|
|
|
|
|
|
Not had a chance to make the repair panel yet. Will get at it this weekend hopefully!! However shopping at the minute and just popped into machine mart and bought this for £53.99 bargain I would say!! 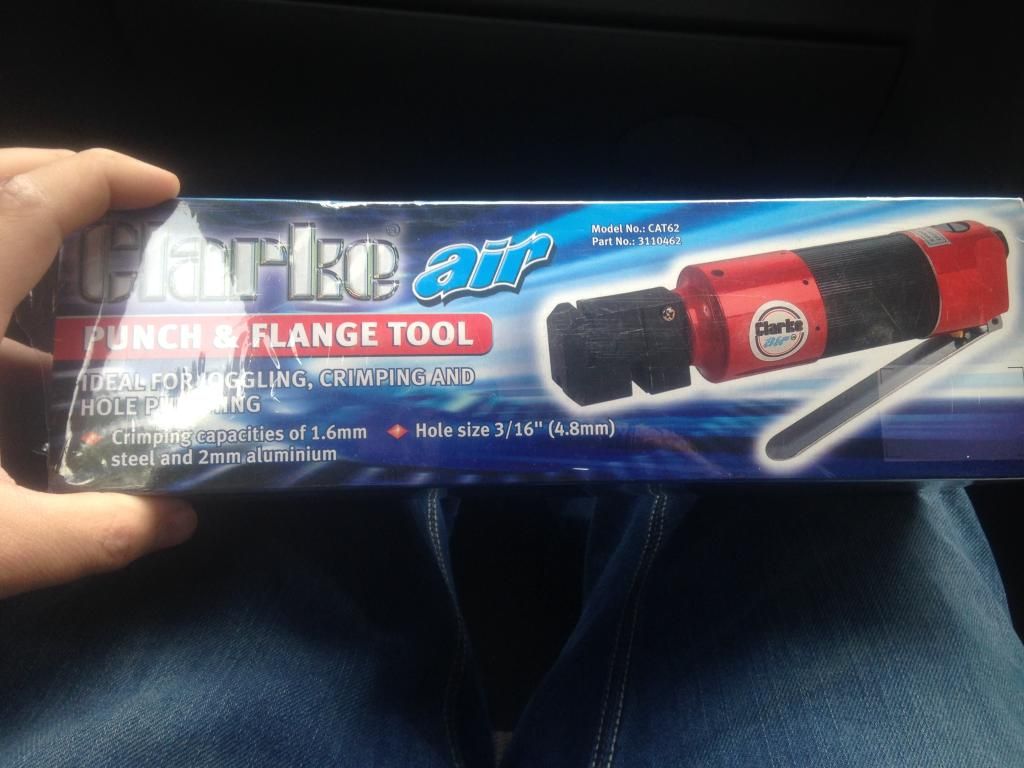 Yes they are a great tool, I use mine all the time Tony |
| |
|
|
|
|
|
|
|
|
|
in awe as usual! i have a tech question. example - where you put a few spots of weld in the pin holes on the rear lower quarter. how do you dress the welds back and avoid getting a 50p sized low spot around it as you inevitably have to remove some of the surrounding parent metal to get it perfectly smooth, no ? Darren I use the flat of the flap disc or sanding disc, that way its keeps it as flat as possible, but you have to be careful not to generate too much heat, or you may warp the panel If you use just the tip of it then you will likely create a recess But at the end of the day any indentation can be filled with a good coat of primer or a light skim of filler Tony |
| |
|
|
|
|
|
|
|
Tony, Looking for a bit of advice, I'm replacing the frame rails on the floor of my 240z (basically a section of channel steel) and was just looking for your advice on the proper procedure for protecting them from rust, I will spot weld it on the maybe seam weld every few inches to stiffen the chassis, Then use silicon seam sealer (any recommendations on brand or type) What should i coat the inside of the channel with, weld thru primer? cavity wax? Cavity wax before or after the welding, I'm sending the shell for sandblasting when it's patched so will I hold off on the seam sealer till then? Thanks in advance TonyBMW! Beershed Id paint the inside of the channel section with a zinc rich primer or POR 15, except for the flanges which will be seam welded, use a weld through primer for those DO NOT use Cavity wax before you weld, as it could catch fire and at best create difficulty welding, do this after you have done all the welding and painting, and after sand blasting also Yes hold off the seam sealer until the shell has been blasted, not sure about your reference to silicon seam sealer, you must NOT use silicon sealer, as it will not paint over, you must use a paintable sealer, this can either be brush on, or applied with a caulking gun, I don't have a preferred brand, but anything from a trade supplier that is over paintable will do the job Tony |
| |
|
|
|
|
|
|
|
Dear Tony, I have to admit that did not meet the masters of body repair such a level as you. I registered on this forum just to learn your methods of work. And sometimes quite successfully apply them. I see that you are constantly using a continuous weld butt. How is it that the metal does not bend from the heat? When I'm in a similar way to weld body parts, they will inevitably change shape. Even if I'm not stitch at a time, and different areas, giving a little to cool the previous one. Thank you. I swear, you have a lot to learn. diegomoto, your right that you do need to just stitch at a time, but the shape of the repair and the position and size of the patch, can also help to control the distortion If I was to weld a big square patch in the middle of the door, then I would also have distortion Having the welder set up to a high setting also helps, this means that the weld gets good penetration straight away, which also helps to minimise distortion and heat build up And lots of practice Tony great work as usual tony,really looking forward to working with the old girl when she comes home Getting There David Fabulous work, am I right in thinking you bend a L section up and are then shrinking/stretching the flanges to form the arch contour ? Really inspirational, thanks for sharing Brian Yes thats exactly right Brian |
| |
|
|
|
|
|
Jul 29, 2014 21:04:42 GMT
|
|
Unusual but nice
|
| |
|
|
|
|
|
Jul 29, 2014 19:50:16 GMT
|
|
I wouldn't put too much emphasis on buying expensive dollies and hammers at this stage, Even the cheap dollies can be smoothed over with a grinder if needed to work perfectly well, find a good weighted well balanced hammer is a must though
Not sure what weight mine is, I think it might have been 14 or 16oz, bought from B&Q about 20 years ago, but its weight and size just seem right for me, and the Dolly I use all the time was from a Machine Mart set, again bought 20 years ago
Ive got expensive hammers and dollies, and always end up going back to my old faithful ones, they just feel right
|
| |
|
|
|
|