sowen
Club Retro Rides Member
Posts: 2,245
Club RR Member Number: 24
|
Toylander 4x4 projectsowen
@sowen
Club Retro Rides Member 24
|
Apr 26, 2022 16:37:52 GMT
|
Now you've got me wondering whether the axles on a ride-on mower would be suitable? I'm sure they would work, I just went with the mobility scooter since they're significantly cheaper to buy off ebay in the quantity I want. You do have the added complexity of gears to deal with, which could be fine on a rwd only build, or as a central transmission? I expect I may have to build a second Toylander to save on squabbles between the sibblings old and young  |
| |
|
|
|
|
sowen
Club Retro Rides Member
Posts: 2,245
Club RR Member Number: 24
|
Toylander 4x4 projectsowen
@sowen
Club Retro Rides Member 24
|
Apr 21, 2022 20:53:21 GMT
|
Where are you getting the various bits like the scooter brakes and axles from? Just searching through ebay. After an hour of searching I'd made up a bit of a shortlist on potentially suitable donor parts then bought the cheapest and went from there |
| |
|
|
sowen
Club Retro Rides Member
Posts: 2,245
Club RR Member Number: 24
|
Toylander 4x4 projectsowen
@sowen
Club Retro Rides Member 24
|
Apr 21, 2022 18:09:48 GMT
|
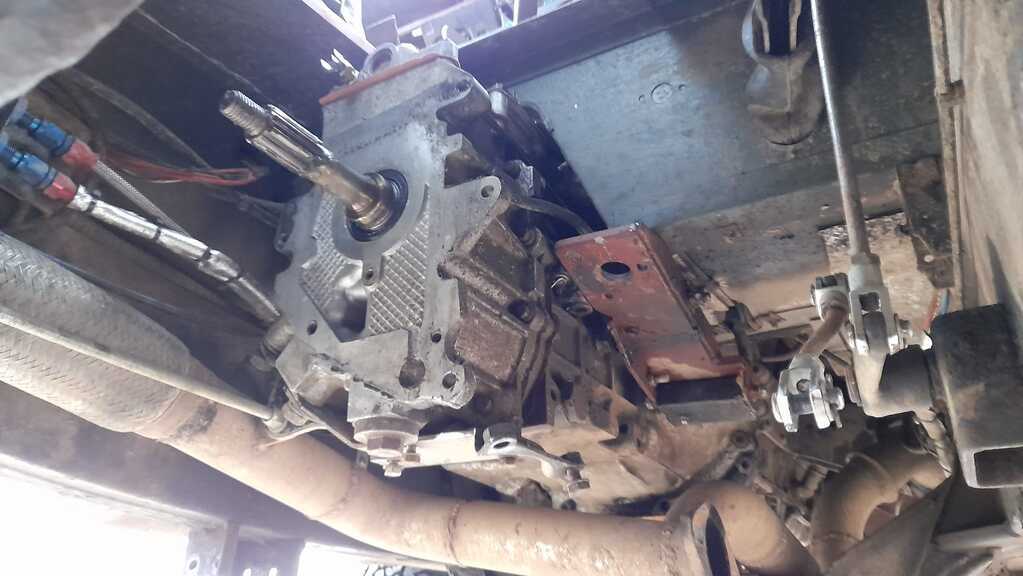
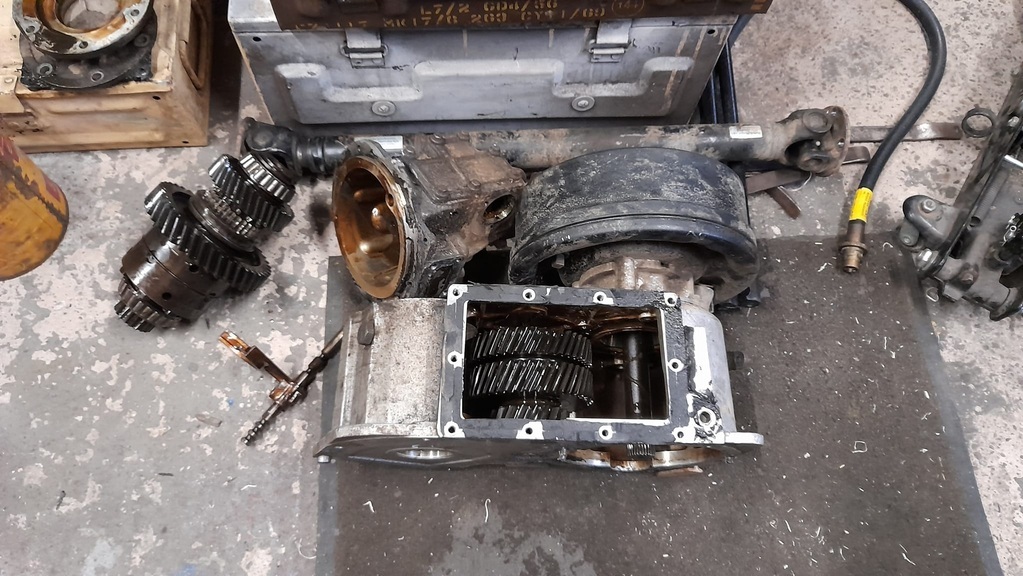
A few more deliveries came this week. Four new wheels with a slightly chunky tread, a third scooter transaxle to build a transfer box from, another set of scooter brakes so there'll be 4 wheel braking, steering column u/j's for the front axle driveshafts and a few lengths of steel tube and round bar to start making the axle cases, shafts and hubs from 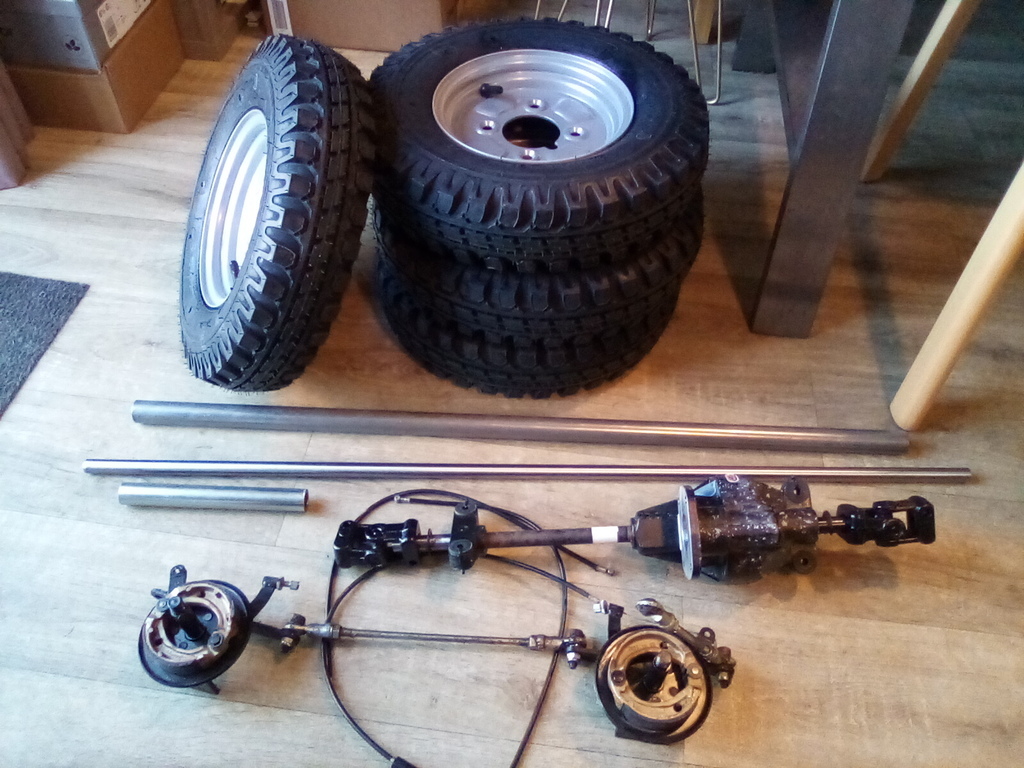 Proper fabrication will soon be starting.... |
| |
|
|
sowen
Club Retro Rides Member
Posts: 2,245
Club RR Member Number: 24
|
Toylander 4x4 projectsowen
@sowen
Club Retro Rides Member 24
|
Apr 18, 2022 12:26:50 GMT
|
I have a few projects in temporary limbo as a result of buying a property with my partner, and still have itchy creative fingers. My workshop is a short drive away, and my home has very few facilities for anything more than the most basic of car maintenance. I do however have two interested little people around me who like a more than a little involvement in my hobbies and interests, and I like teaching them that they can do anything if they really want to and put the effort in. So what I need is a small engineering construction project that can be built through the living room and garden with a little guided assistance from small hands.... After a lot of consideration, a Toylander has been chosen with the blessing of my partner 😀  Plans have been acquired and read, youtube build videos watched and the dining room table measured! Of course, I can't just build anything to the instructions so a lot of research has gone into a cheap budget and diy method of engineering in some basic extra requirements. These are full suspension on front and rear live axles, all wheel drive and proper brakes. I've made a few purchases to get an idea on the viability of building fully functional scale live axles, and have started the mocking up and measuring phase 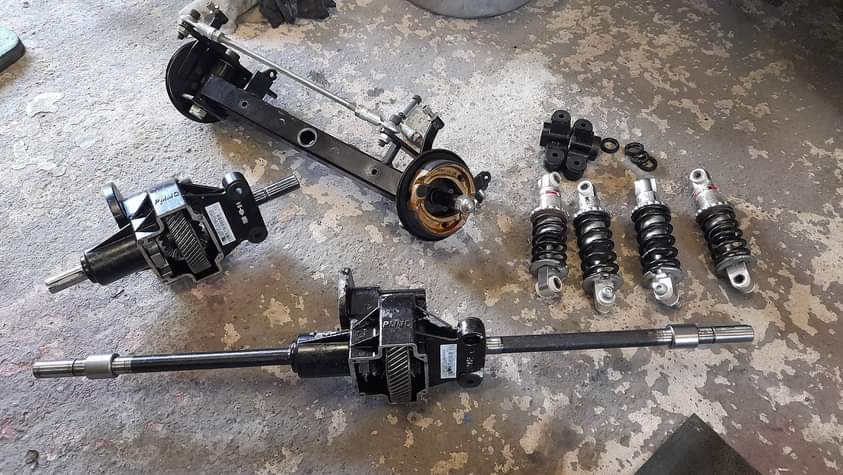 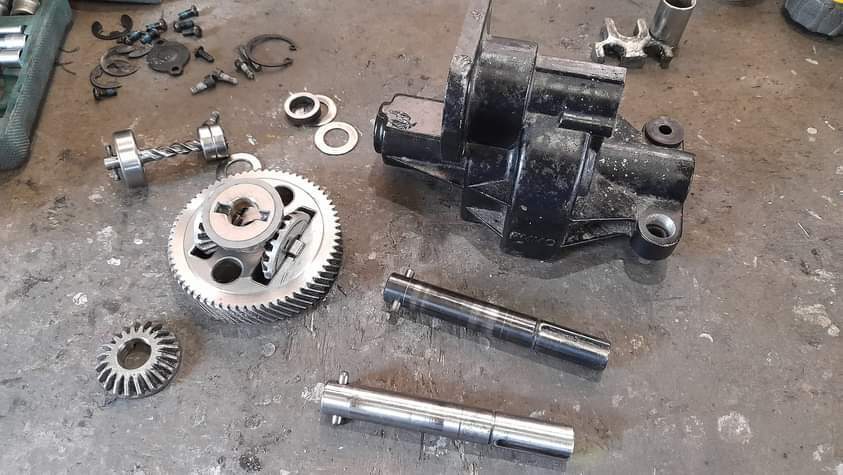 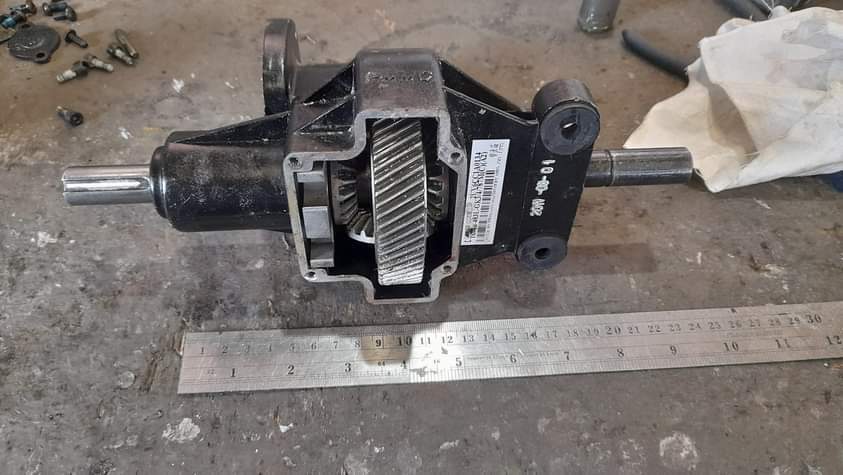 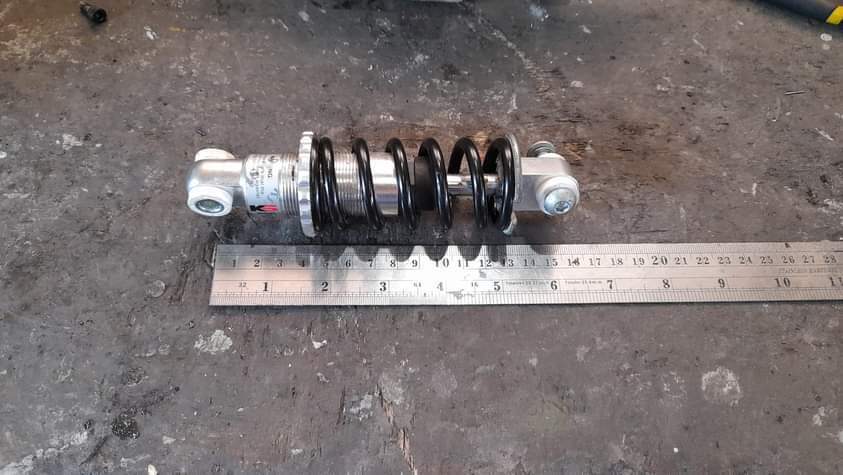 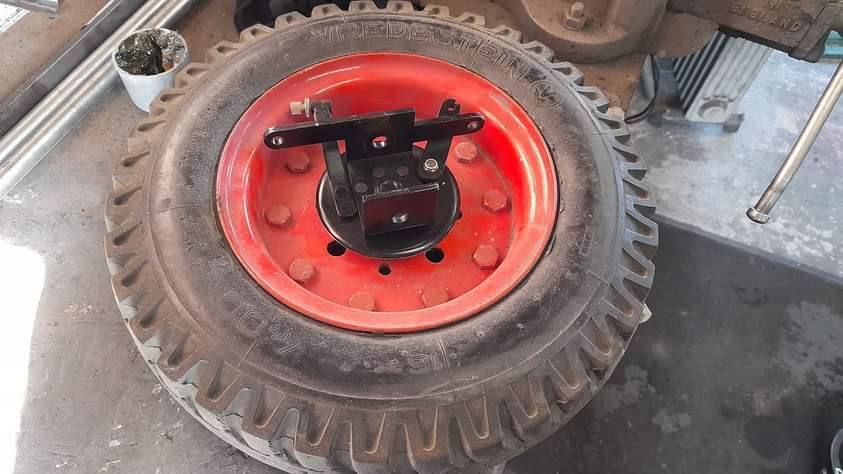 The plan is to use mobilty scooter differentials in custom made axle cases, somehow create a 90 degree drive (a set of differential planet gears may work for this), driven by a pair of driveshafts using steering column u/j's and a central longitudinally mounted mobility scooter transaxle as a transfer box driven by an electric motor or two. Suspension will be small coilovers, wheels/tyres the specified Toylander 4.00x8 but on 4x4" pcd ,on custom made hubs with mobility scooter brakes, and somehow I need to incorporate u/j's into the front axle driveshafts whilst keeping the entire axle steering mechanism compact close to the wheels. Lots of specific pieces of metal have been ordered, and I'll soon be taking a trip to one of the local builders merchants for two sheets of marine ply to construct the Toylander body..... |
| |
|
|
sowen
Club Retro Rides Member
Posts: 2,245
Club RR Member Number: 24
|
|
Mar 18, 2022 20:28:29 GMT
|
|
|
| |
|
|
sowen
Club Retro Rides Member
Posts: 2,245
Club RR Member Number: 24
|
|
Nov 16, 2021 19:58:27 GMT
|
|
My partner is quite happy to send me out to potter about in my garage odd evenings and weekends, can't think of a better word for it
She's hopeful her boy will take an interest in the future when he's bigger and follow me along for 'garage days', learn him some more skills and stuff. He already follows me about when I'm diy'ing in the home and garden...
|
| |
|
|
sowen
Club Retro Rides Member
Posts: 2,245
Club RR Member Number: 24
|
|
Oct 20, 2021 18:18:57 GMT
|
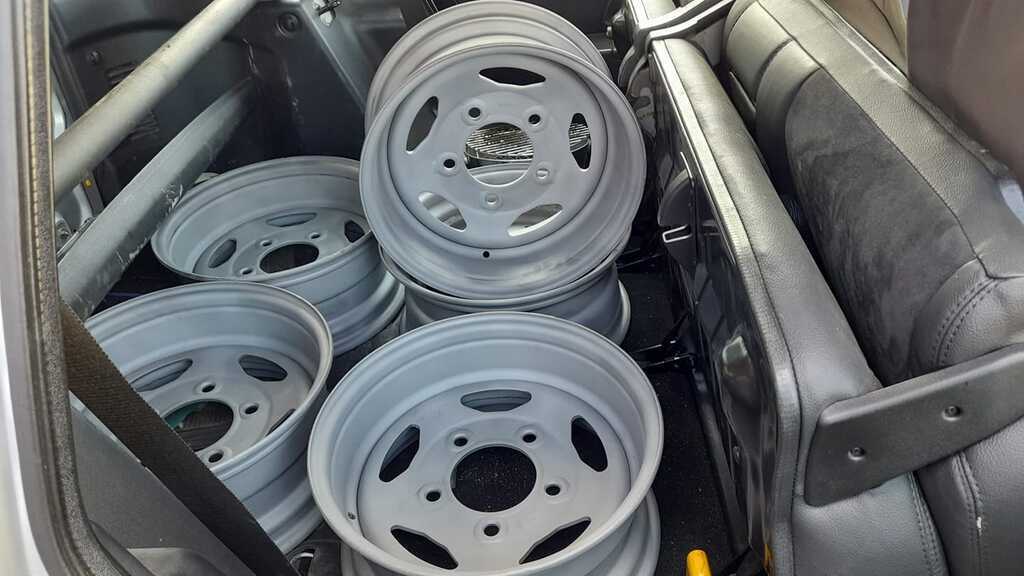
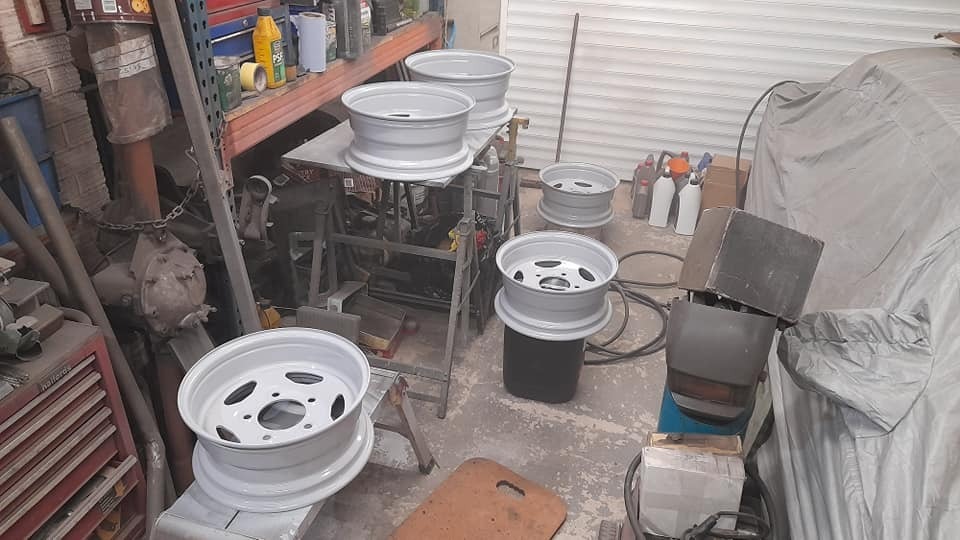
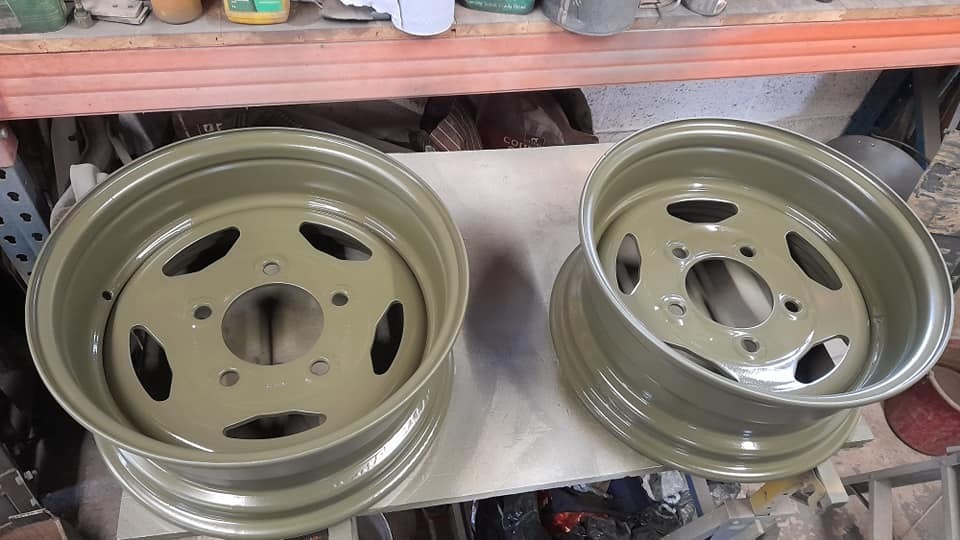
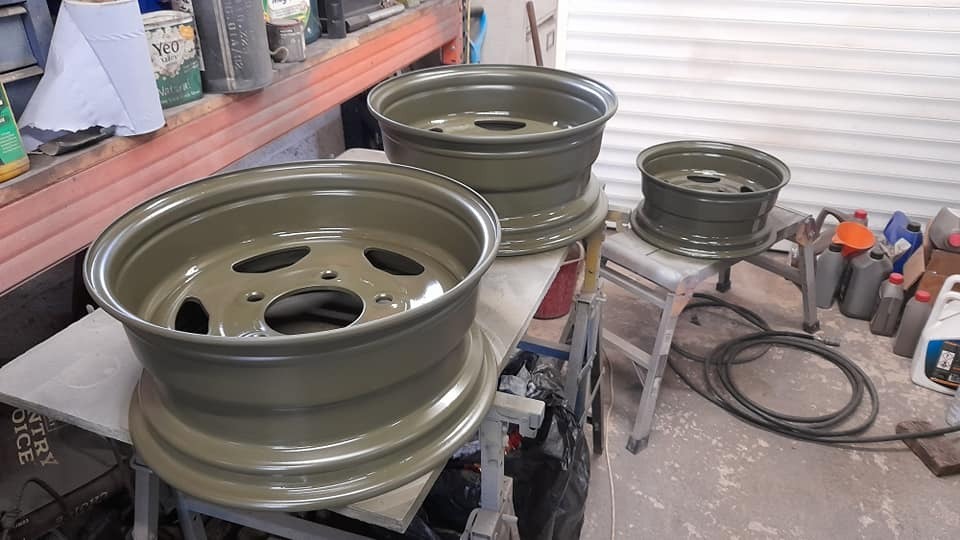
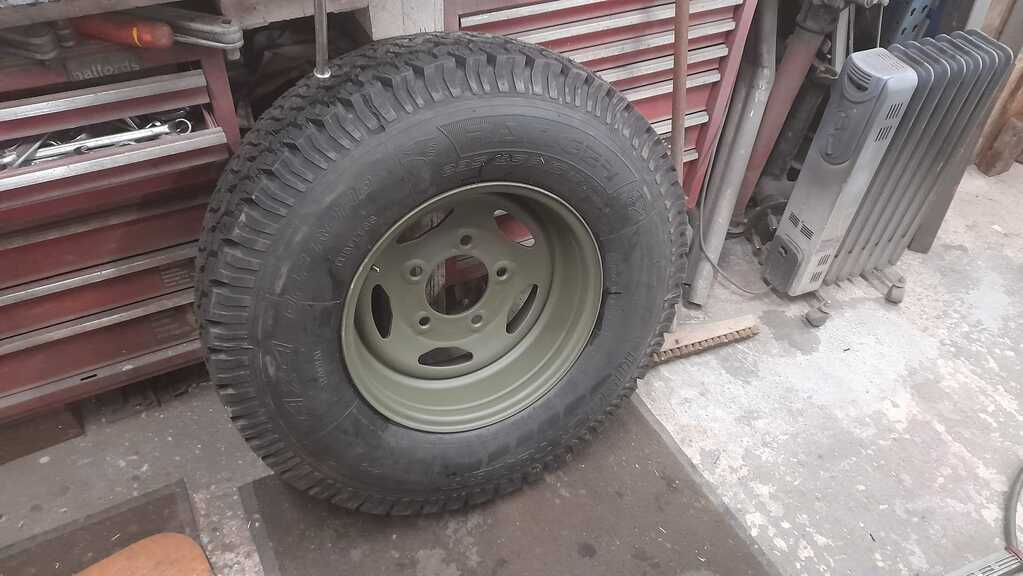
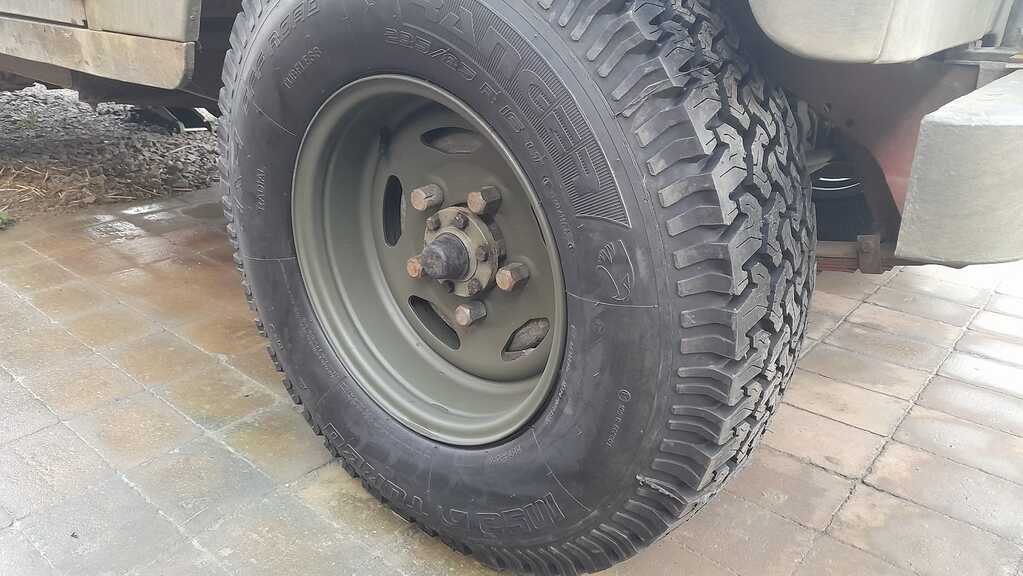
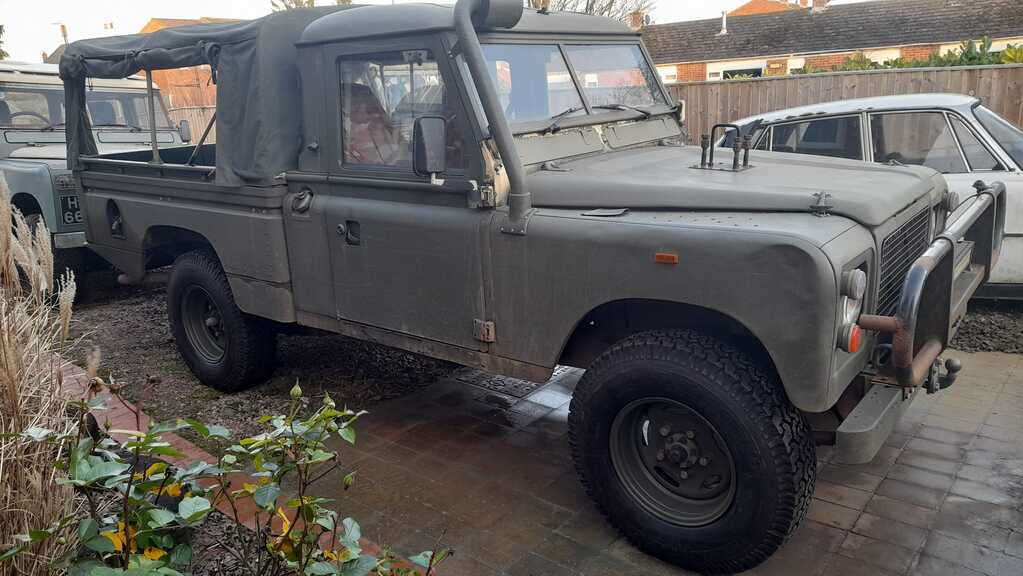
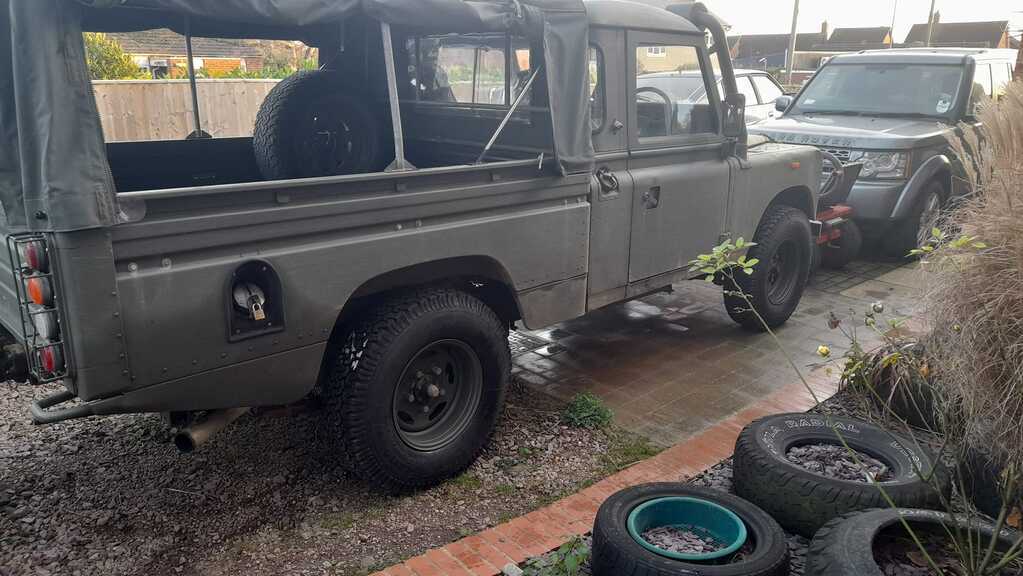
Are you going to be going for a winter tyre are just another set of "normal" ones? A new set of all terrains. The ones it's on were originally on my old Discovery many years ago. They've finally worn down enough and are starting to split so time for a new set. The reversed Disco steels are only 1/2" deeper offset than the 8 spokes already on it so shouldn't present any problems in daily (ab)use Should be picking them up from the sandblasters tomorrow.... |
| |
|
|
sowen
Club Retro Rides Member
Posts: 2,245
Club RR Member Number: 24
|
|
Oct 18, 2021 21:50:07 GMT
|
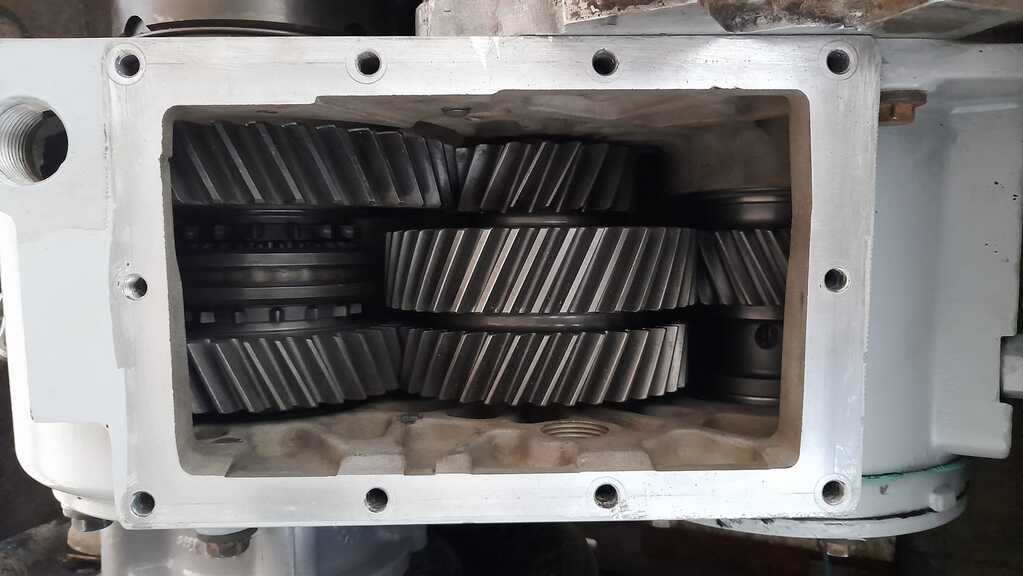
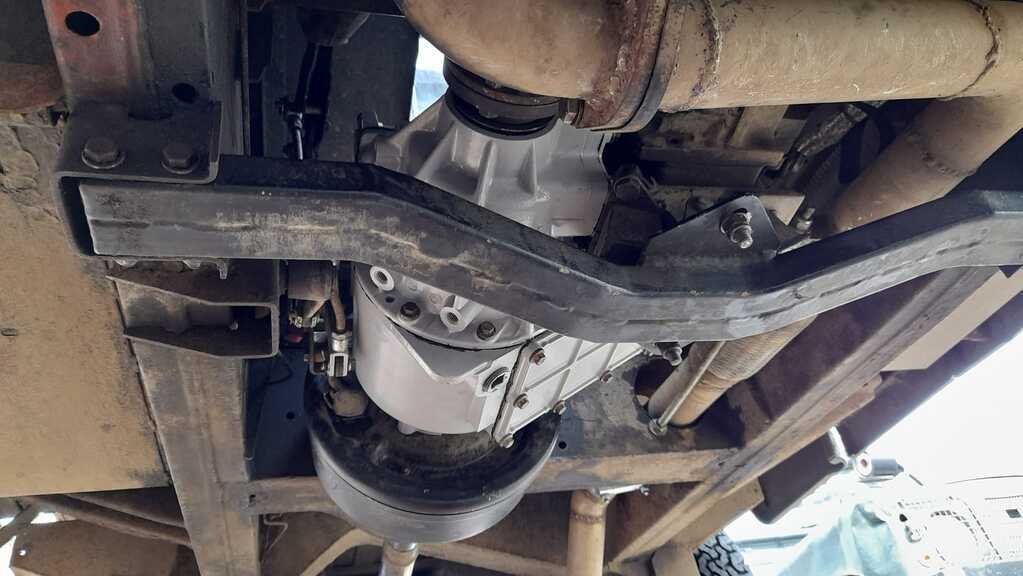
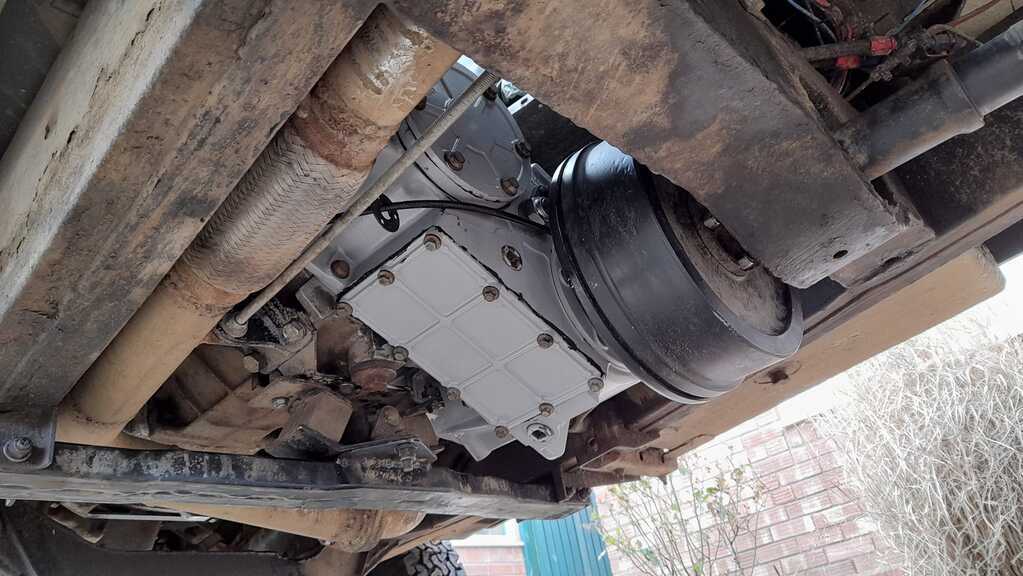
With winter looming it's the last minute panic to get some more improvements and upgrades done before the weather turns My spare transfer box is presently fully stripped ready for a 1.4 ratio gearset to be swapped in to replace the Discovery 1.2 transfer box  And I'm prepping a spare set of wheels ready for some new tyres..... 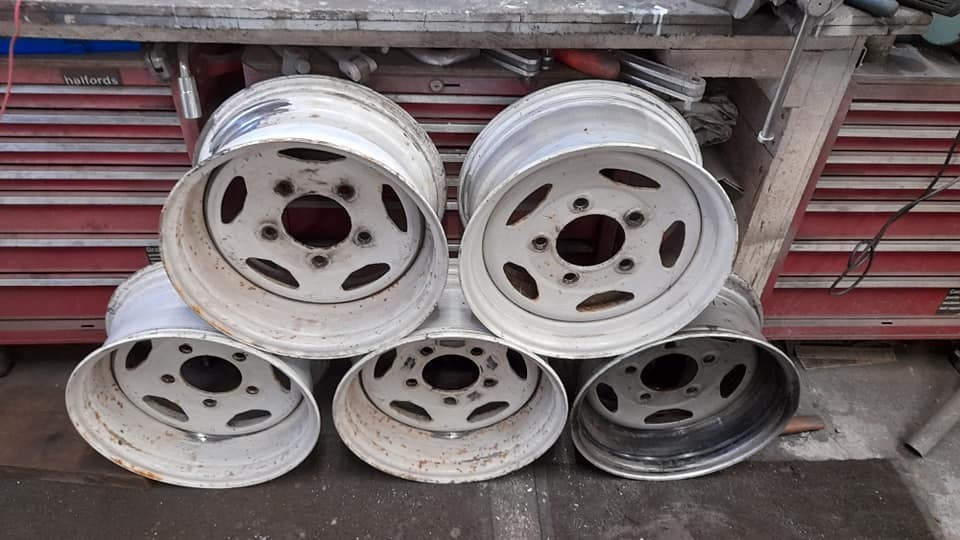 |
| |
|
|
sowen
Club Retro Rides Member
Posts: 2,245
Club RR Member Number: 24
|
|
Sept 3, 2021 17:54:35 GMT
|
Just read this from start to finish, you’ve turned your series into one serious bit of kit, front bumper looks ace and I’ve never heard of wagtail or seen it mentioned and it’s not too far from me, definitely going to check it out in the ninety. I believe it's a private site. A friend knows the landowner and sometimes organises a small group to go for a weekend. I see videos periodically posted on youtube of other small groups playing there, don't know who organises those though? |
| |
|
|
sowen
Club Retro Rides Member
Posts: 2,245
Club RR Member Number: 24
|
|
Sept 2, 2021 18:47:41 GMT
|
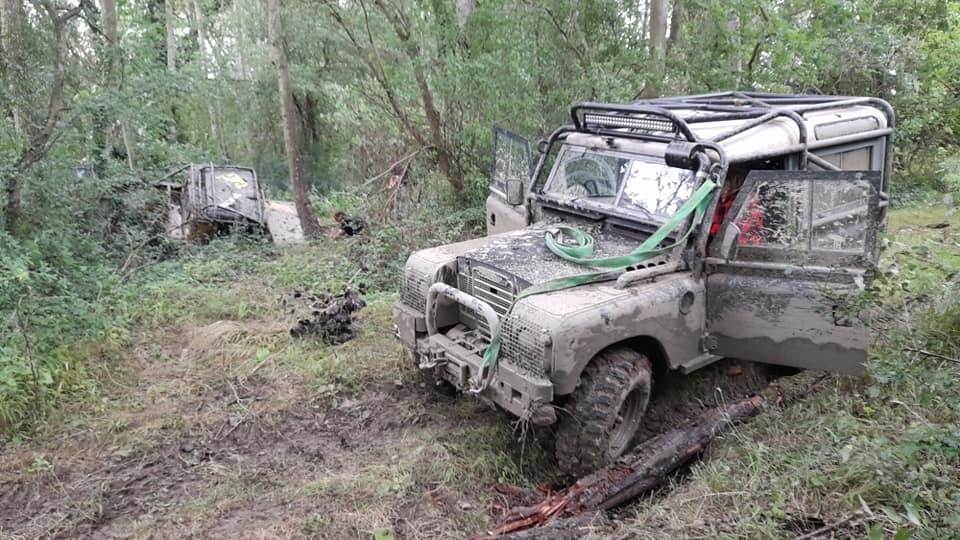
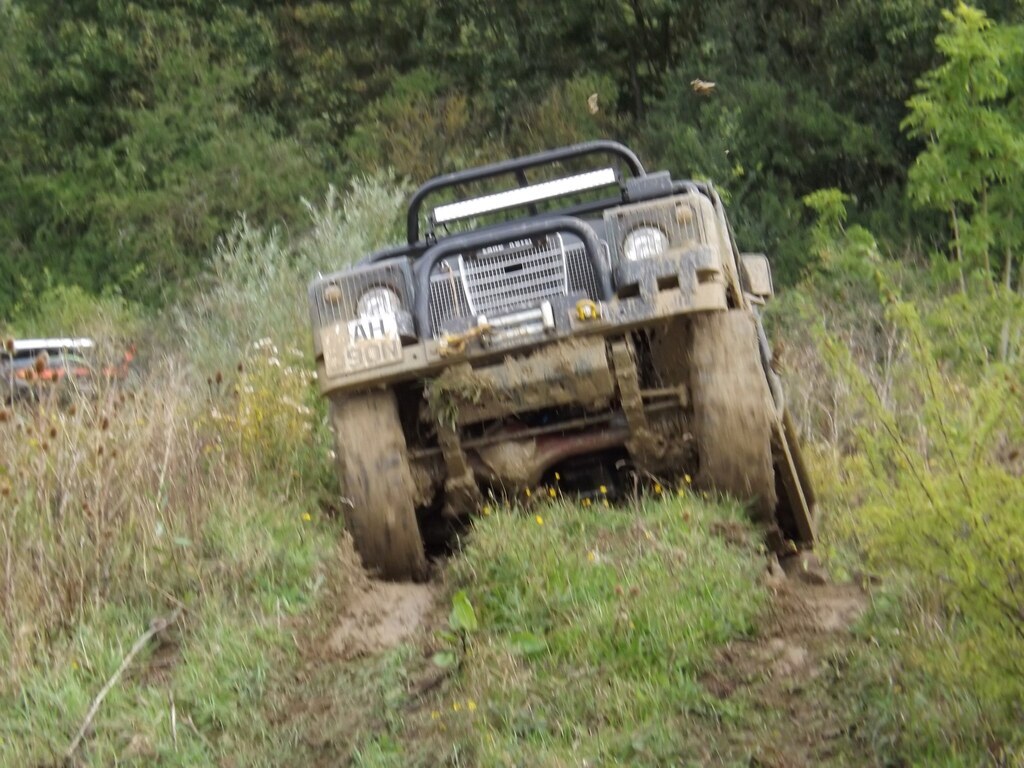
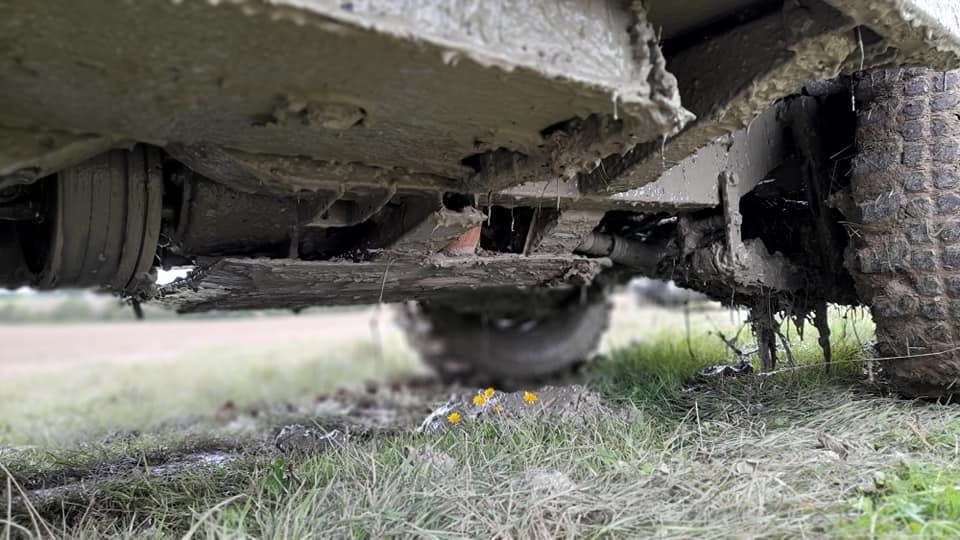
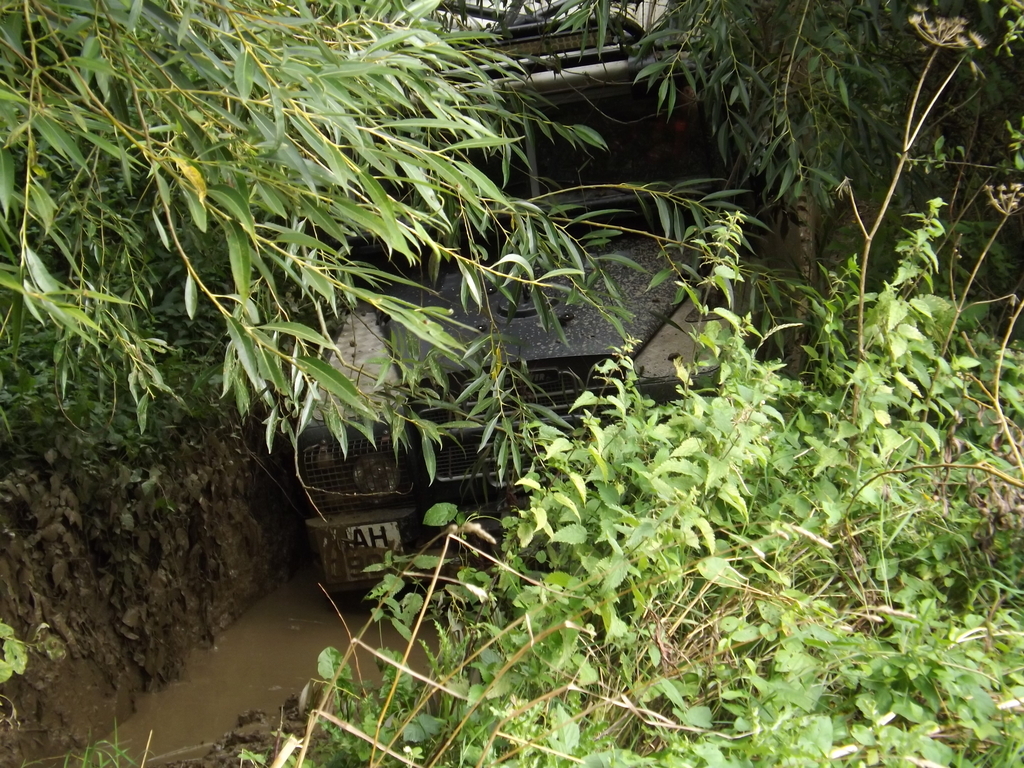
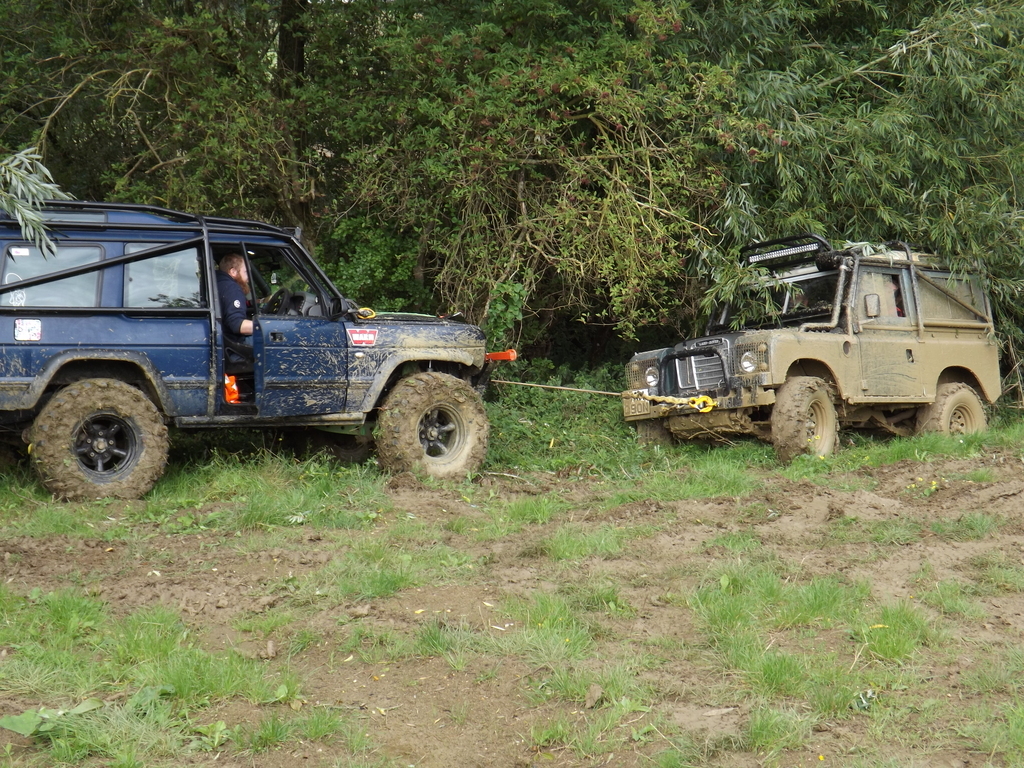
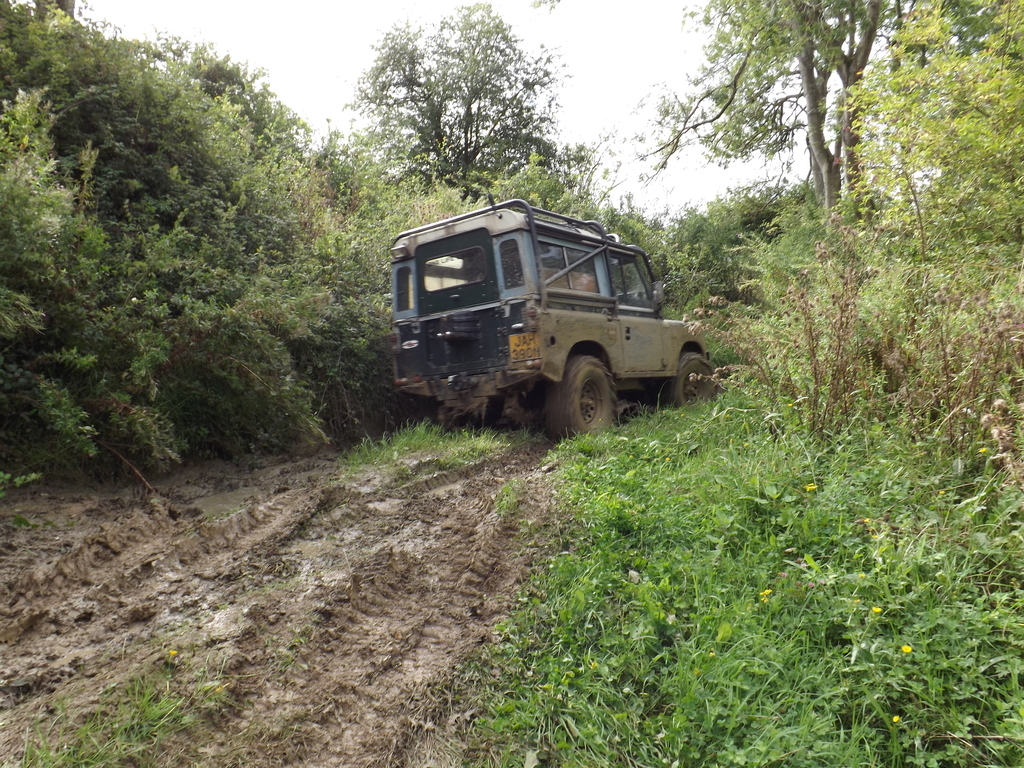
That bumper is a serious bit of kit, and the brakes look great too! Awesome machine. Thanks, I think over-engineered enough to take the abuse, with a bit of room for evolution and improvement i like the front bumper, looks more subtle. (compared to military overriders) And far stronger than an over-rider equipped bumper! So my original plan was to bring this to RRG, but chickened out in the end wanting a little more time to tinker with it and look into the slipping clutch. After a few extra days fettling I found the clutch master cylinder piston was fully in causing the clutch to permanently have a little pressure causing it to slip. Added a few washers under it and set off for an offroading weekend. Needless to say the bumper got a good test after getting partially stuck dropping down a deep drop and then sliding into a bank hard in a mudhole! 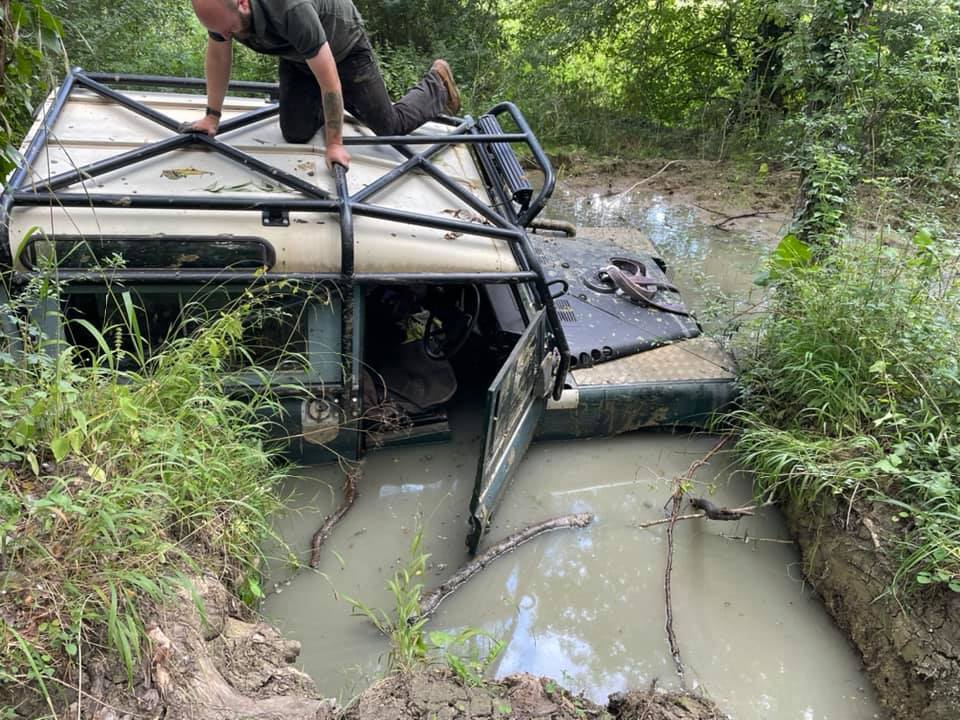 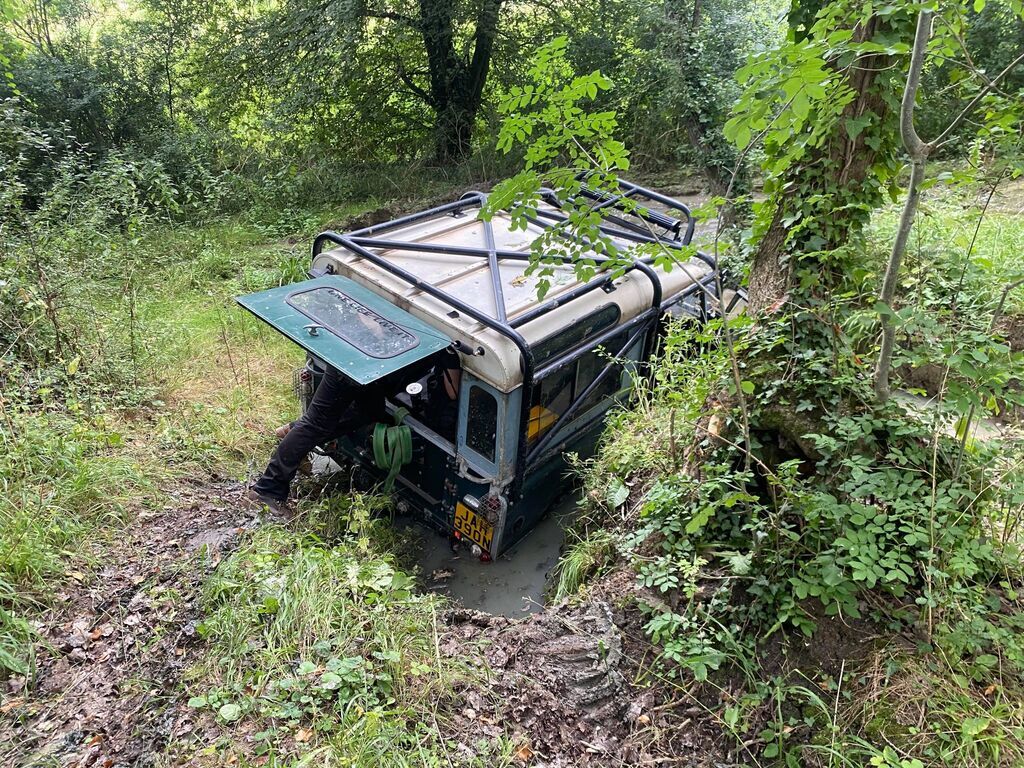 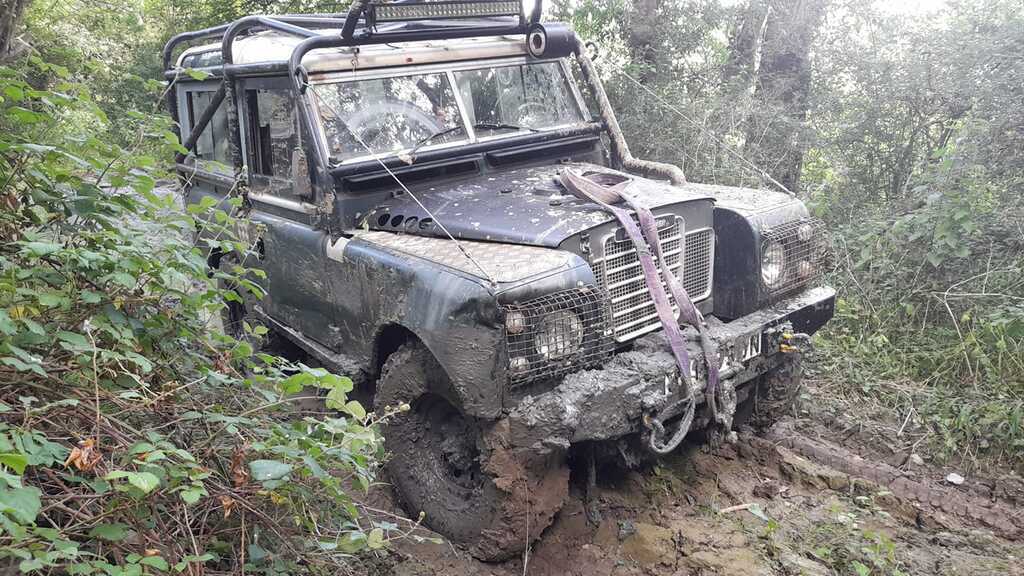 Only a little scuff on the paint of the bumper, with the front wing nicely buckled now  Only real problem I had was hot starting. I'm thinking it's ignition or switch related as it'll turn over slow like it has a flat battery, then try again and it'll spin fast and fire up.... |
| |
|
|
|
|
sowen
Club Retro Rides Member
Posts: 2,245
Club RR Member Number: 24
|
|
|
|
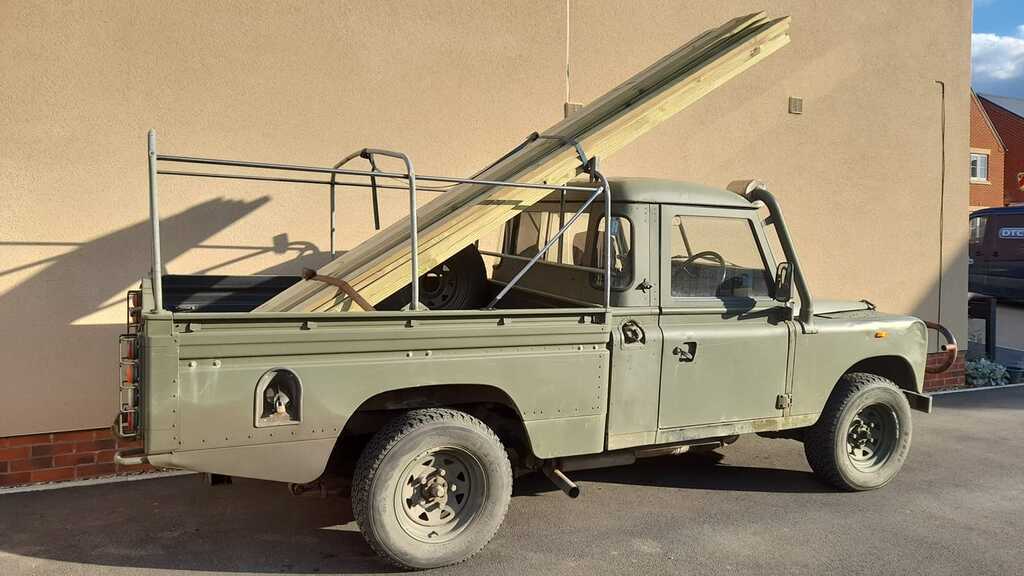
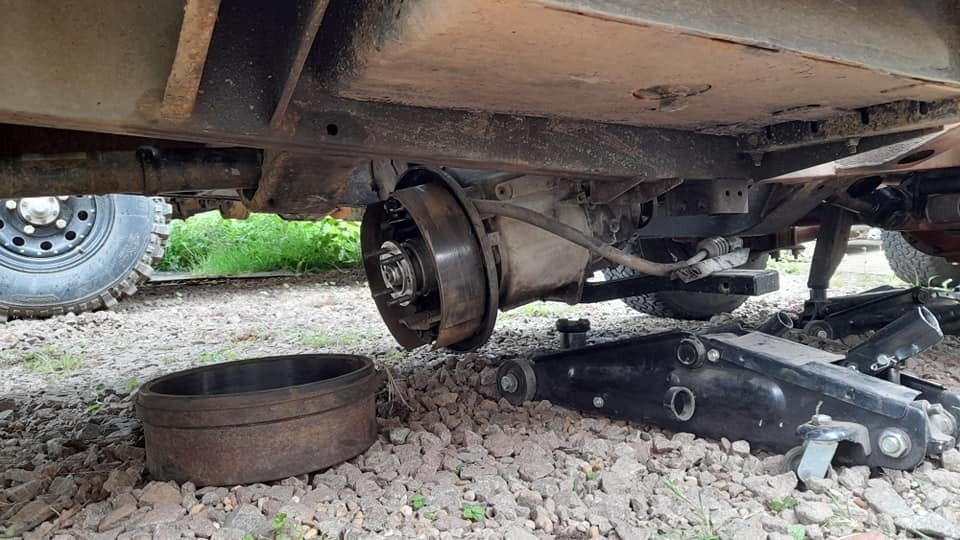
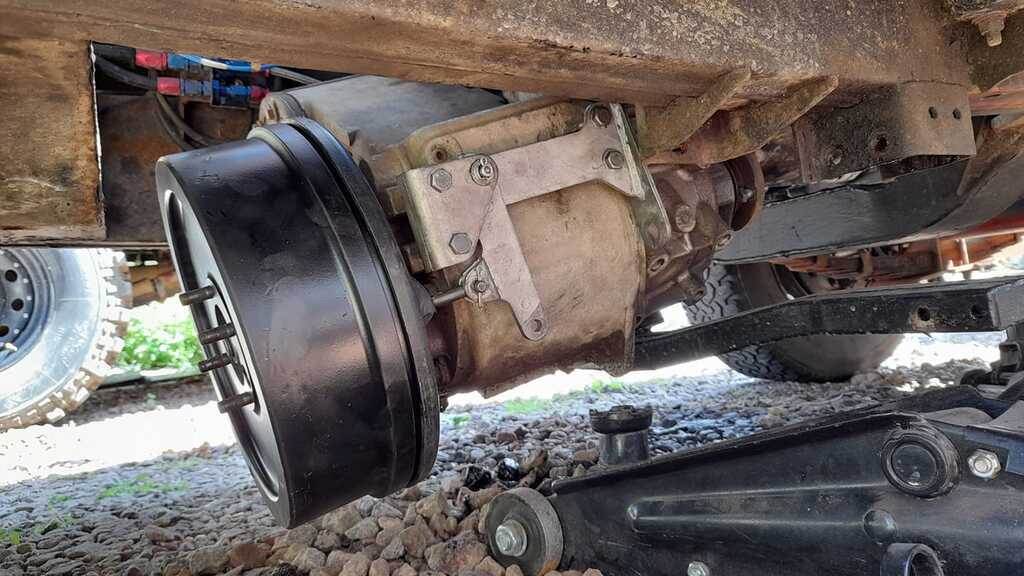
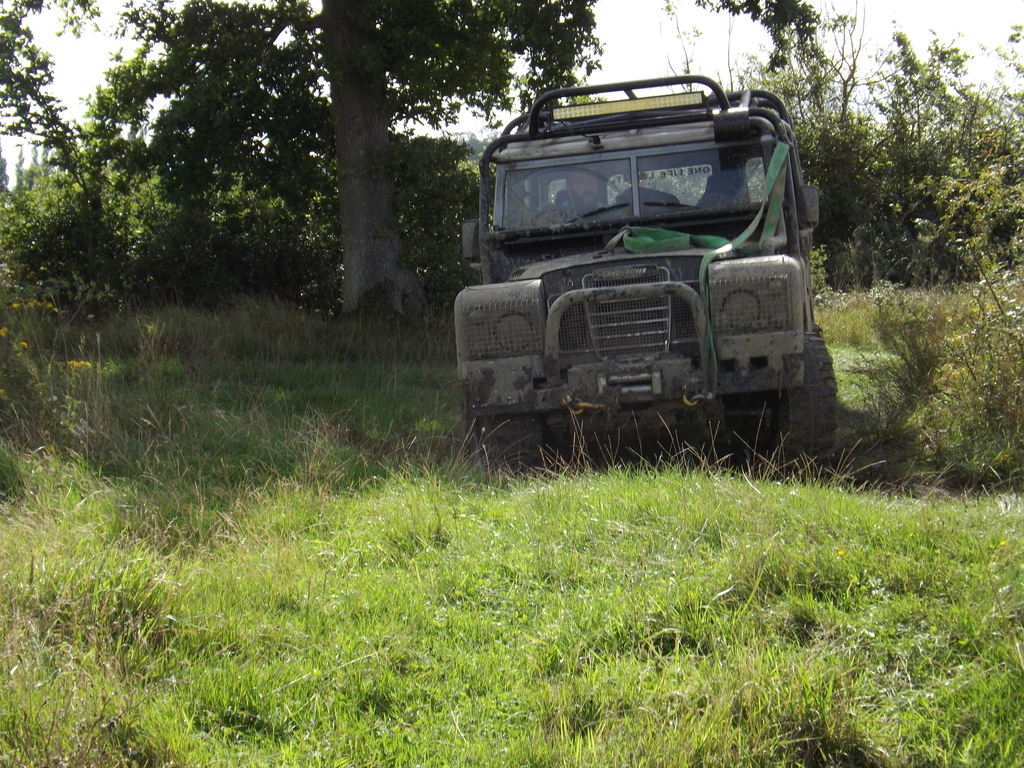
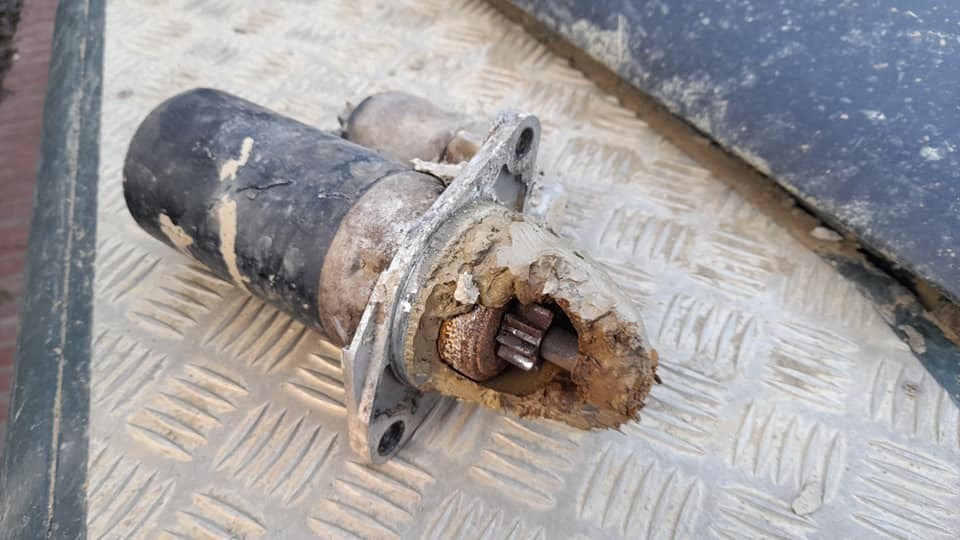
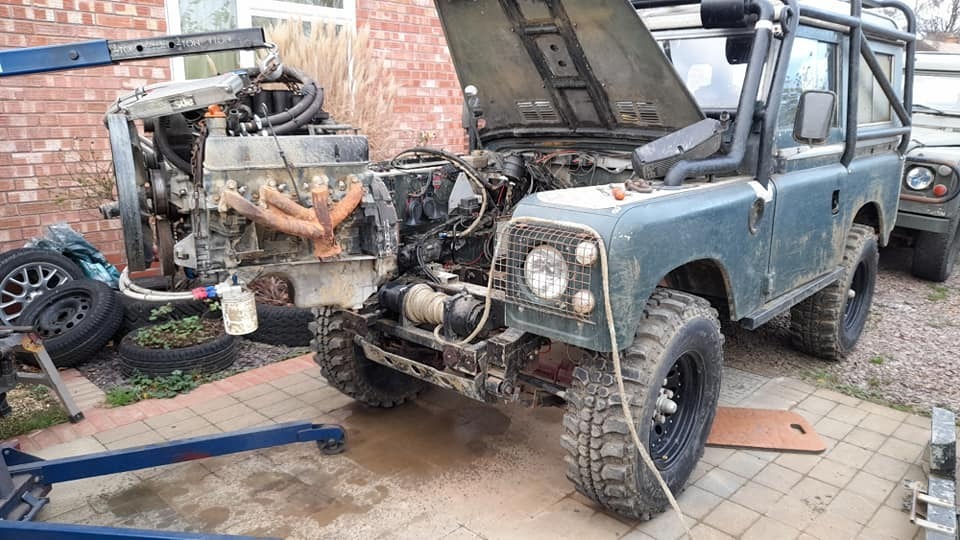
After months of prioritising other jobs on the fleet and around the home I thought I'd better start prepping the little Land Rover for possible shows and another little offroading weekend later this year. The engine install was completed, only to find it was really difficult to start. Seemed like a flat battery, but after trying to jump it I deduced it was the starter motor not working right after it's submerging in mud! New starter went in and it was back to starting happily on the key. So this left two faults remaining to fix, a very bent bumper and contaminated ineffective brakes. I bought 3m of 100mm box steel and started chopping and rearranging it onto the front of the Landy  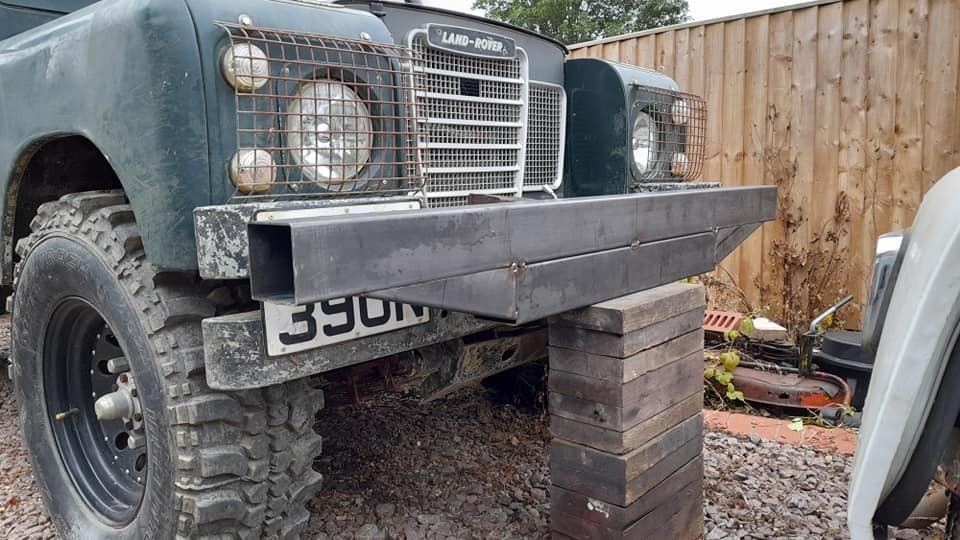 The ends were closed up, angled in and a hole cut for the fairlead then offered up to set it in position to make some chassis mounts 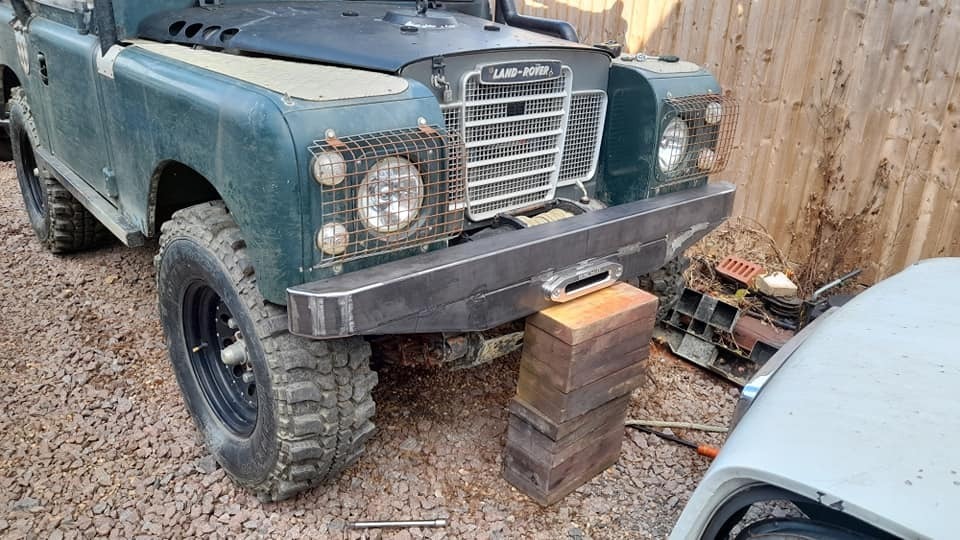 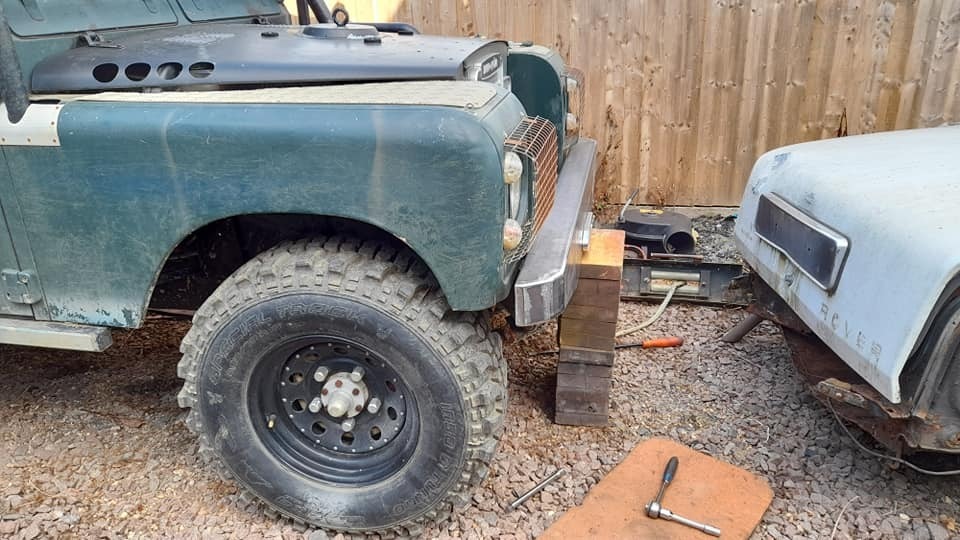 The bumper was fully welded up, drain holes added with M16 nuts welded in to block them up, and primed and painted black 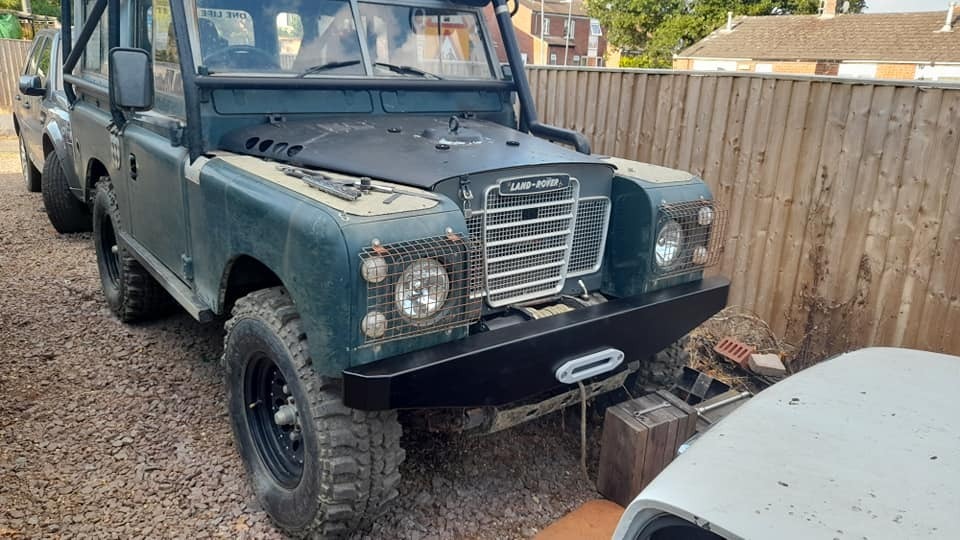 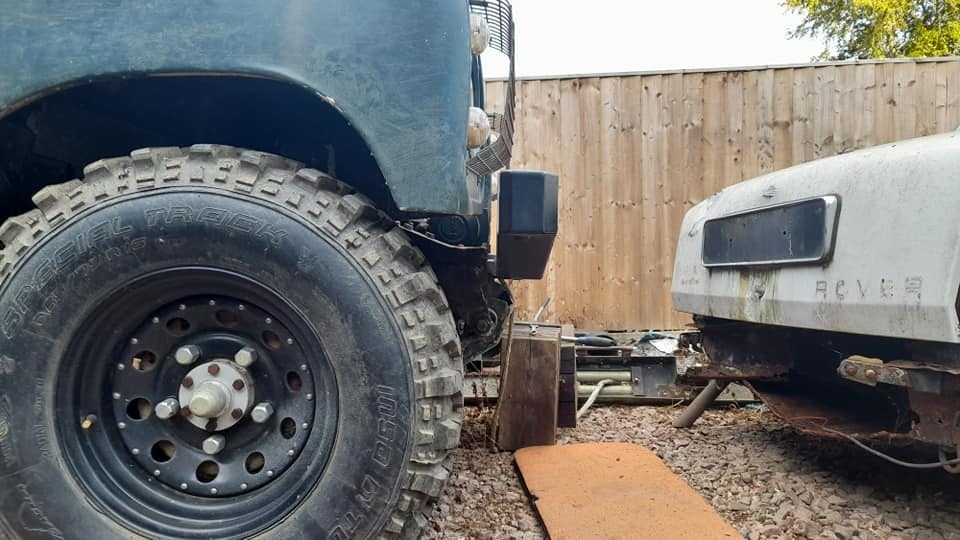 Recovery swivel mounts were welded back on as I went, with grease holes drilled and tapped for grease nipples to stop them seizing up and the original number plate screwed on the front 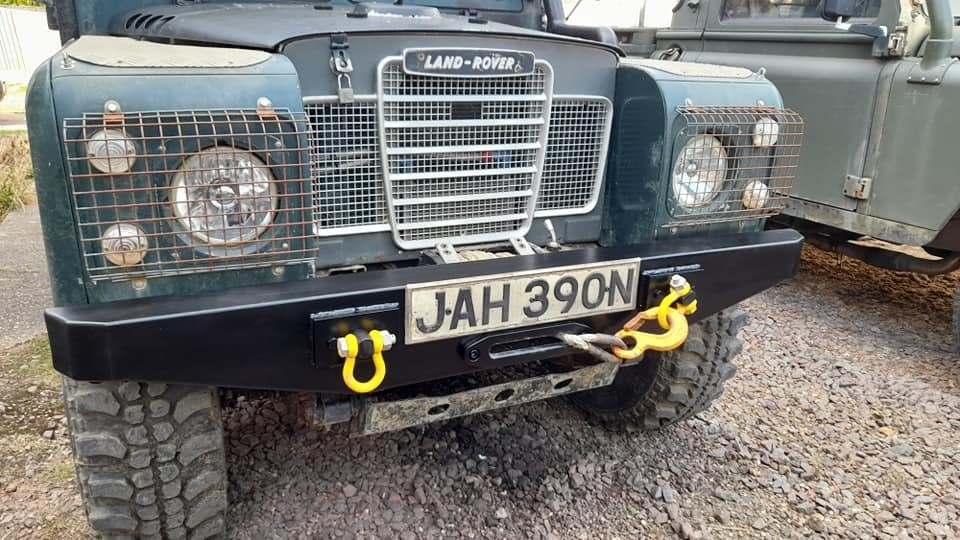  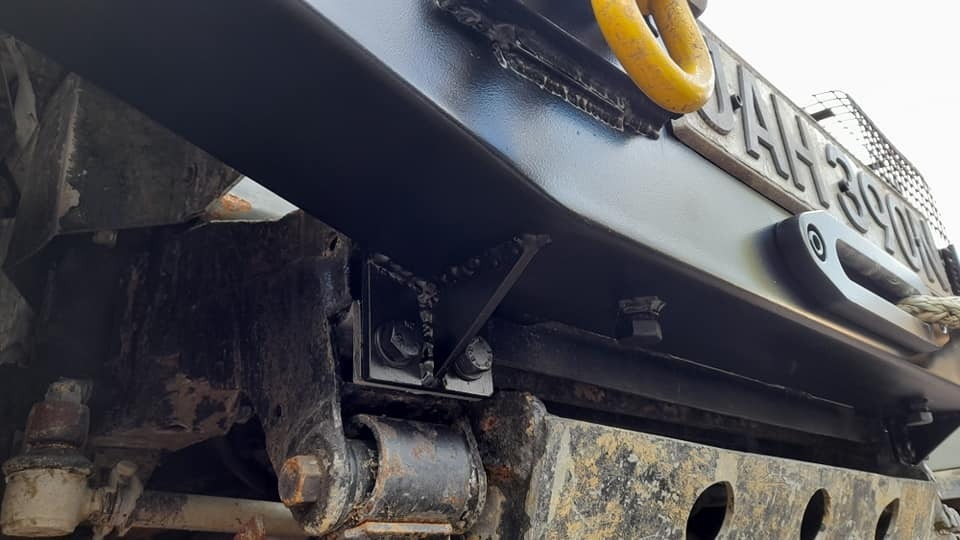 It's held on with M12 bolts which fill all the original chassis holes nicely, and not loose like the usual M10 or 3/8" bolts. It's also sitting higher and further back than standard which should help with approach angles. Now the steering guard sticks out and wants to be pushed back into the chassis! The other job was the wrecked front brakes. Design & Development Engineering that supplied the upgraded front axle stub axles and driveshafts had recently released a front disc brake conversion, so I bought the kit, bought the Defender brake parts and set about swapping it all over in a day 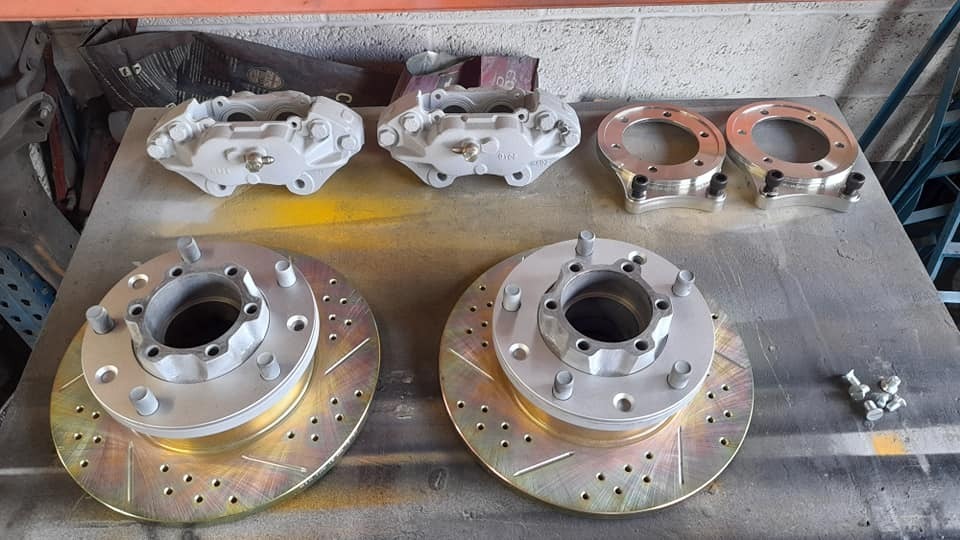 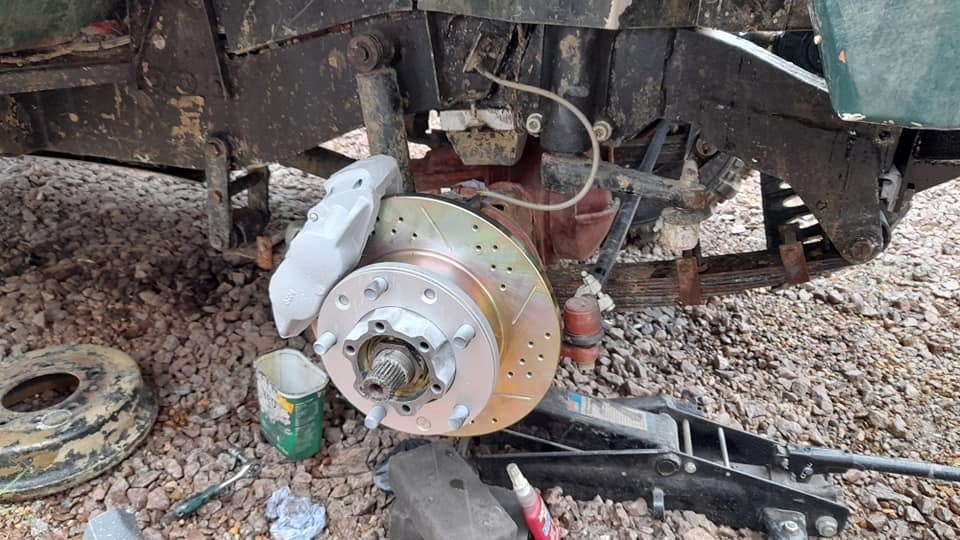  I'm pleased with the braking performance. Not a revelation over drums, but should be a reliable setup that'll tolerate abuse and neglect without near complete performance failure that the drums suffered from! With that, it was back on the road! 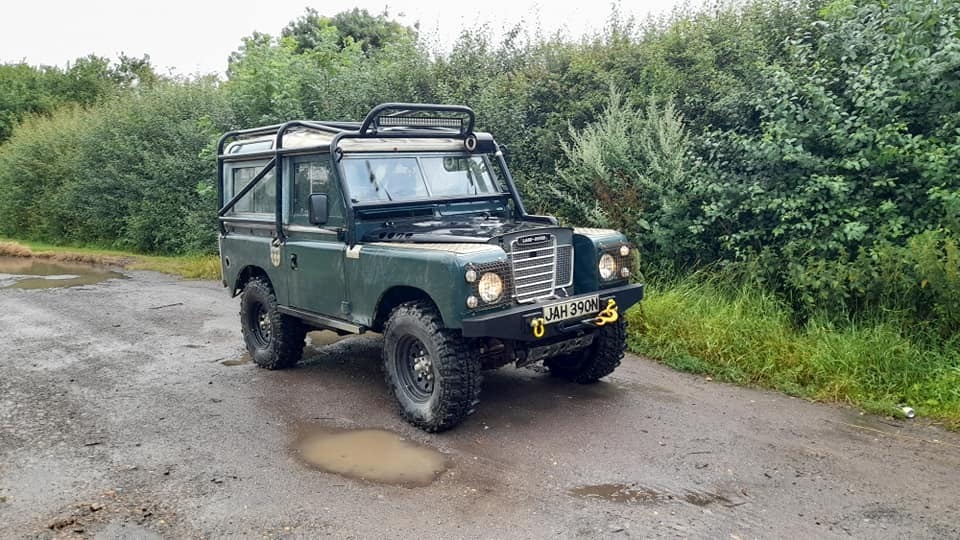 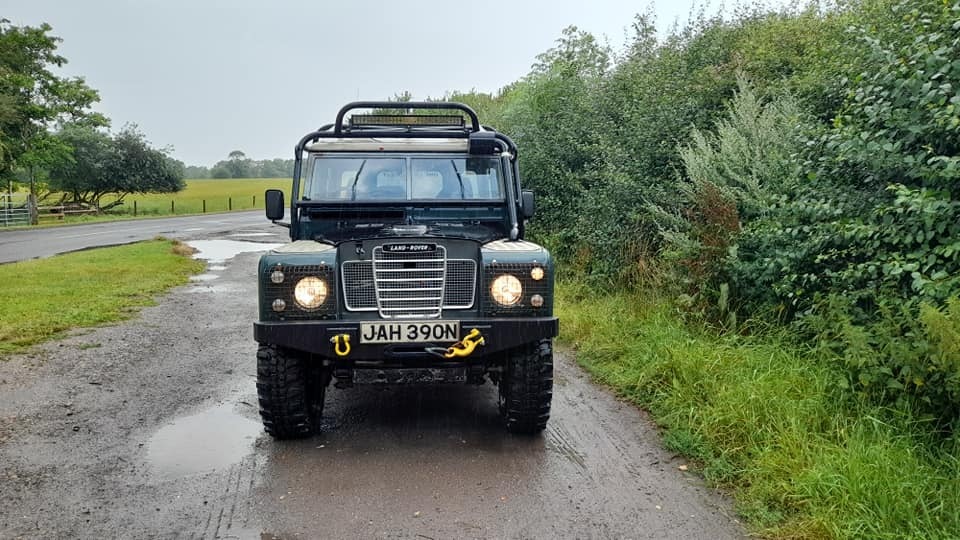 And made it to the Gaydon Land Rover show last weekend only suffering from a suspected close to failure clutch master cylinder....  |
| |
|
|
sowen
Club Retro Rides Member
Posts: 2,245
Club RR Member Number: 24
|
RRG21 Midlands standsowen
@sowen
Club Retro Rides Member 24
|
Jun 20, 2021 15:01:04 GMT
|
|
1;MrSpeedy - Mercedes S124
2;pete127 - Toyota Celica(gen 6)
3;Matestelle120 - Land Rover
4;GavinJ - MGB Sebring or MG Midget
5;sowen - Land Rover (probably again)
|
| |
|
|
sowen
Club Retro Rides Member
Posts: 2,245
Club RR Member Number: 24
|
|
|
|
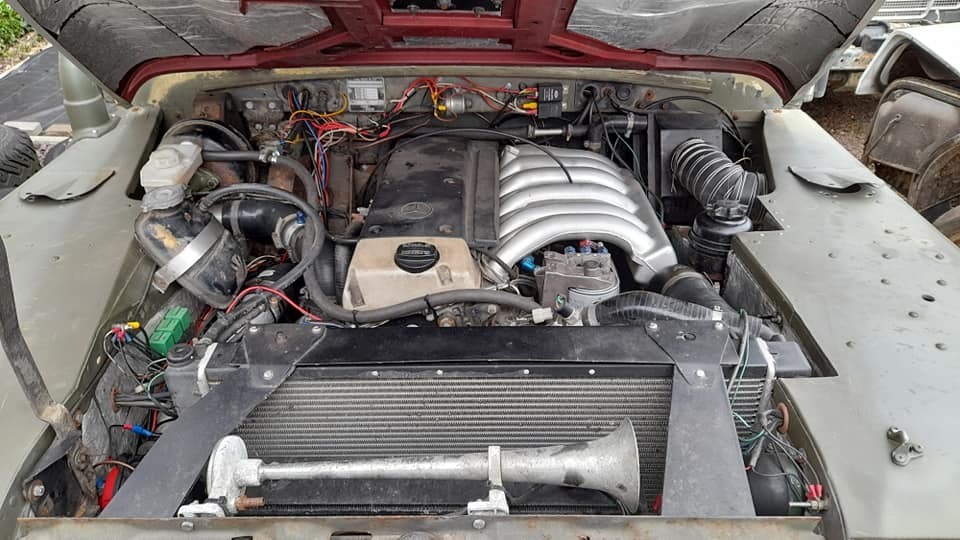
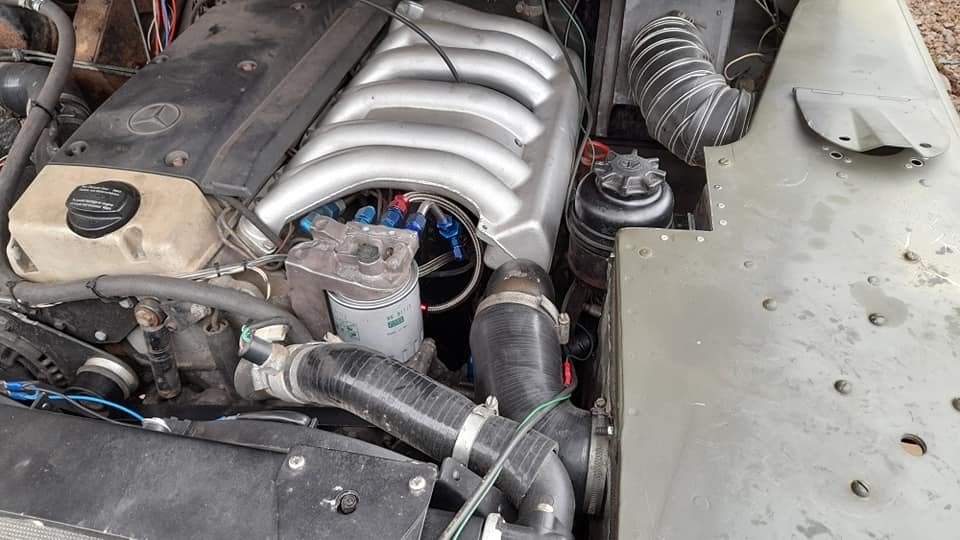
What happened with the new turbo  ? It's on and plumbed up, engine running again 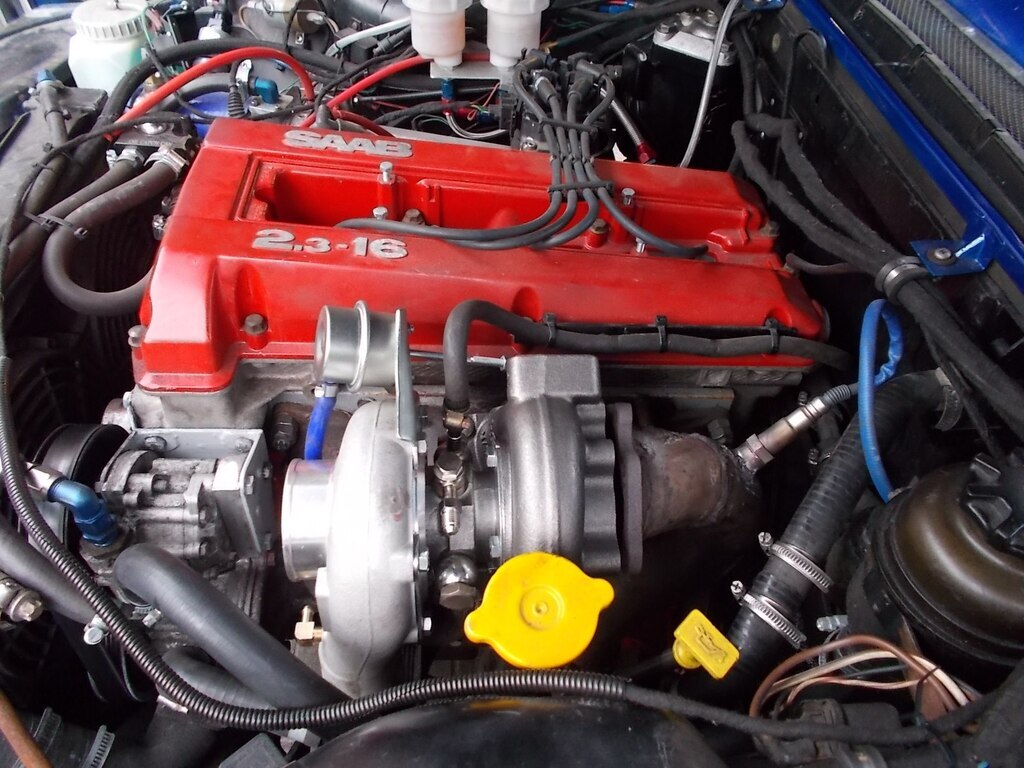 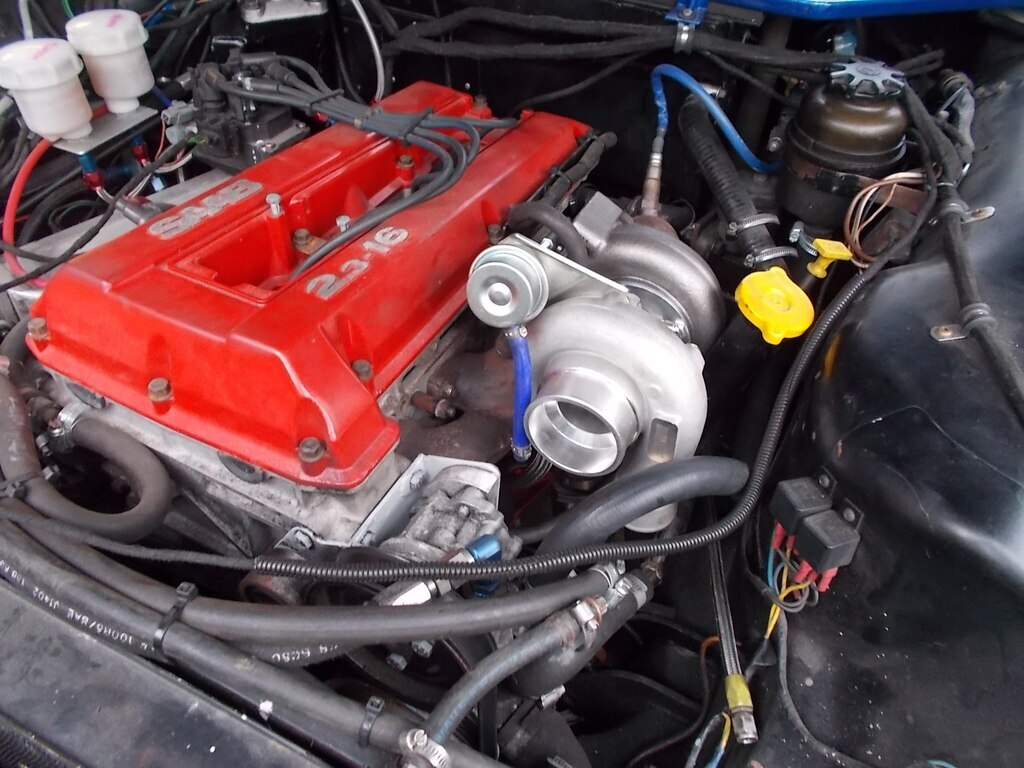 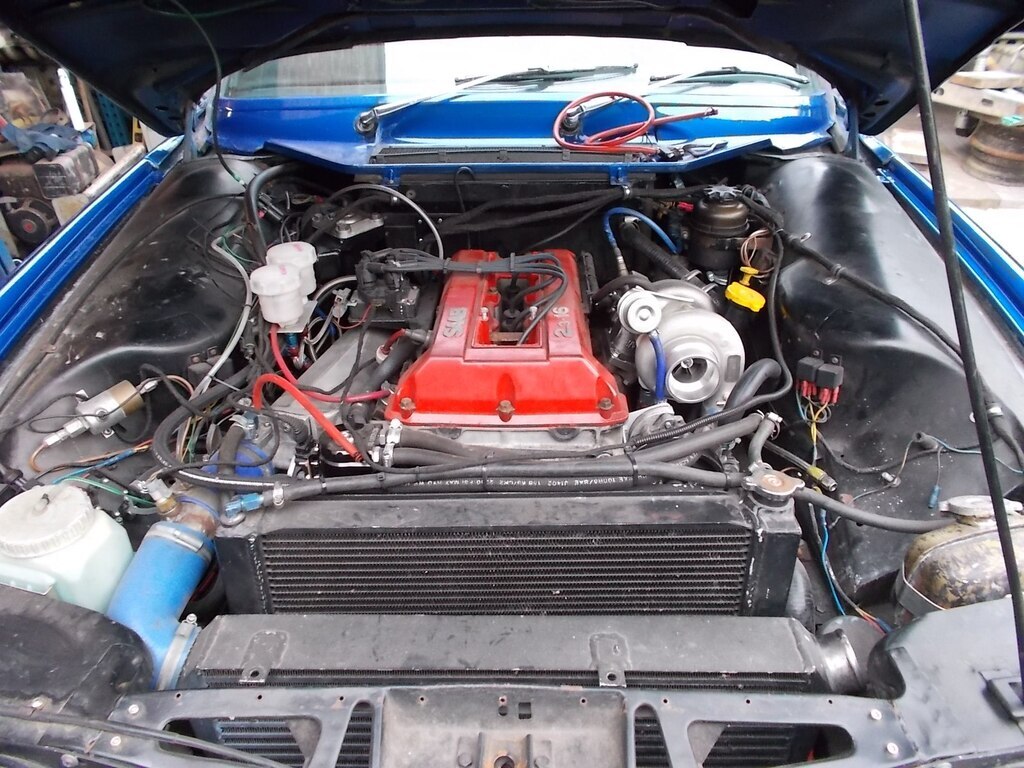 Bit of jiggling around to get the air filter back in  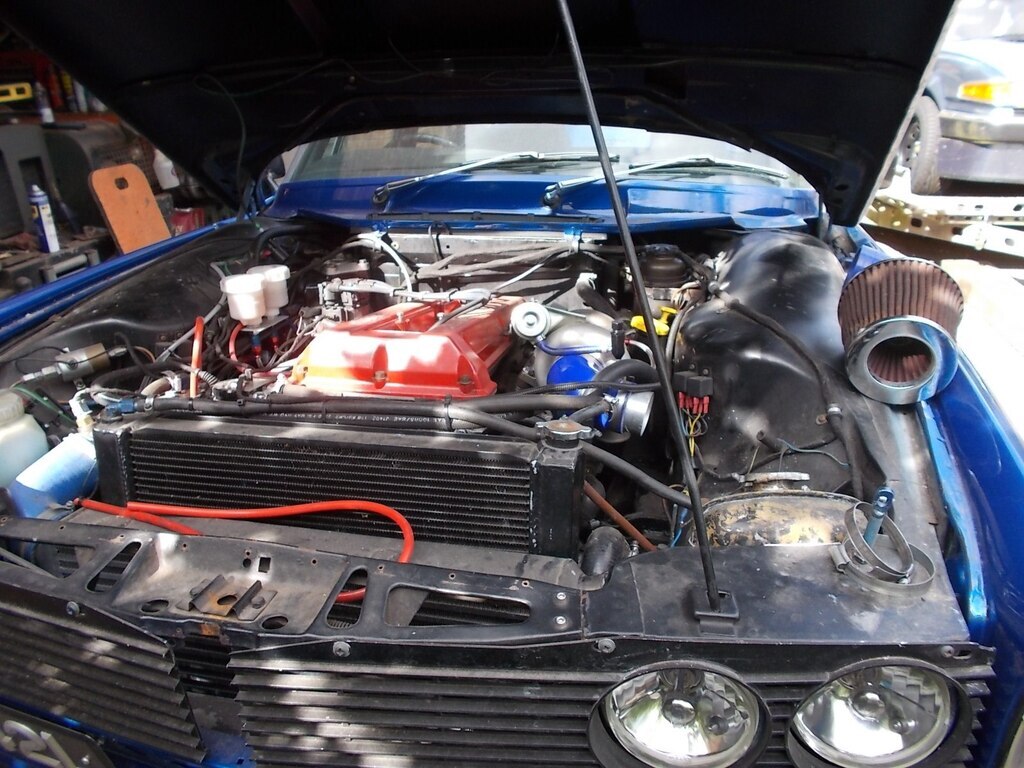 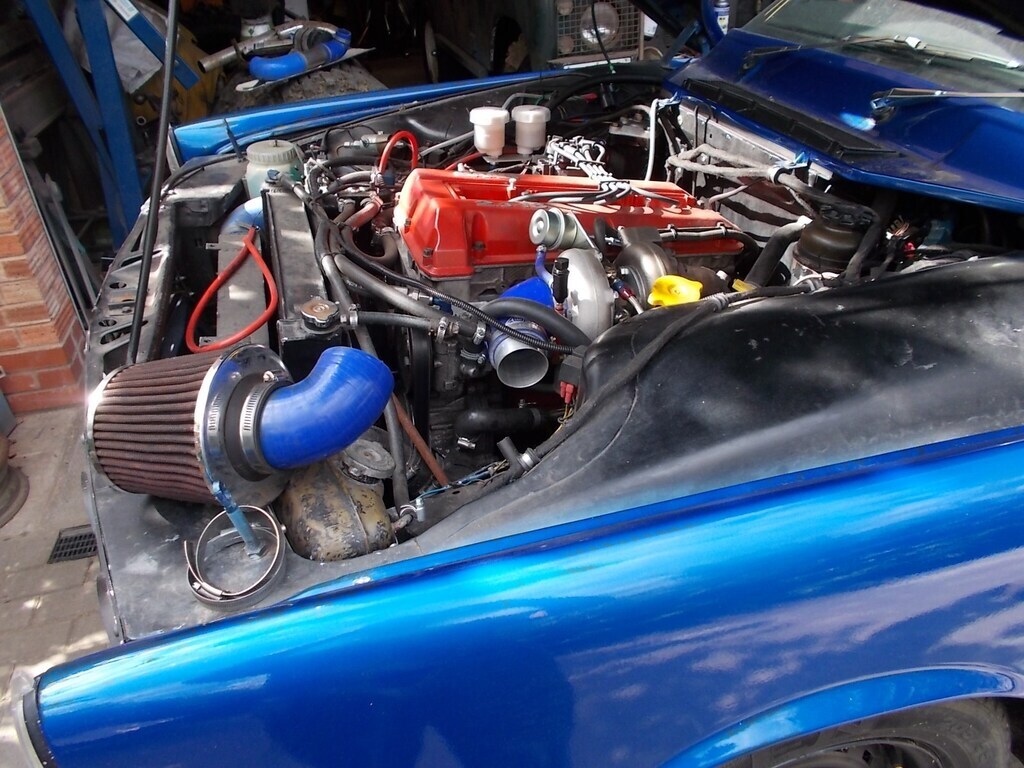 And a blow off valve has gone in 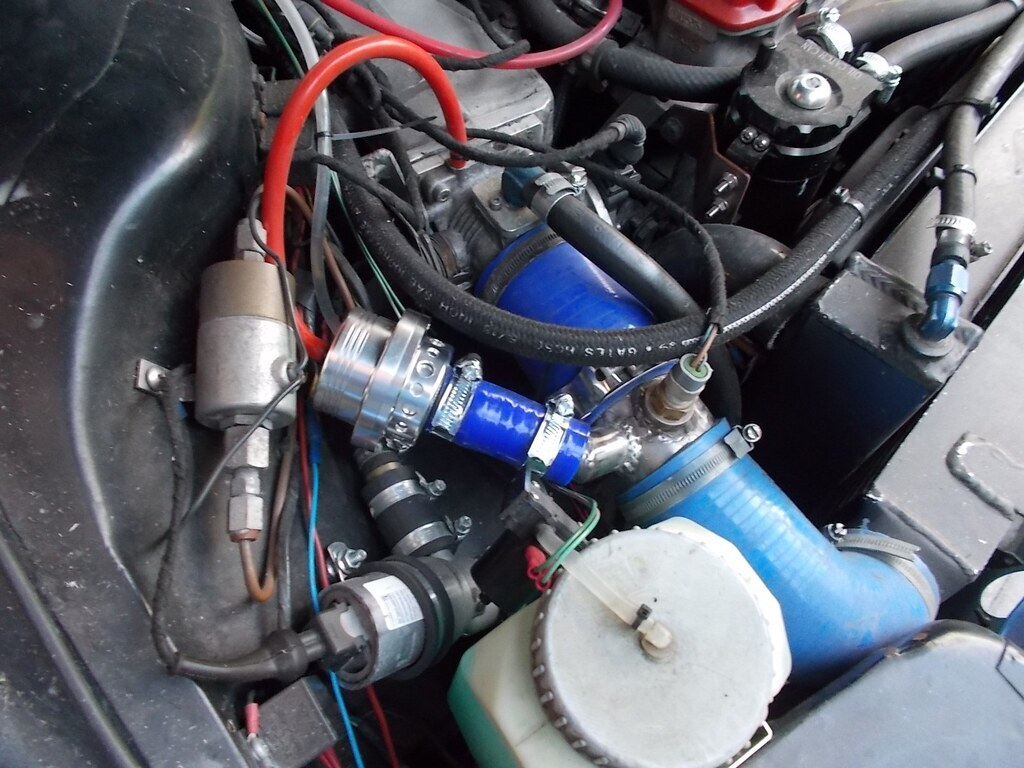 And I've also bought a replacement heavy duty clutch kit, pressure plate rated to over 400lb/ft and the friction plate to 600lb/ft from Cltchfix 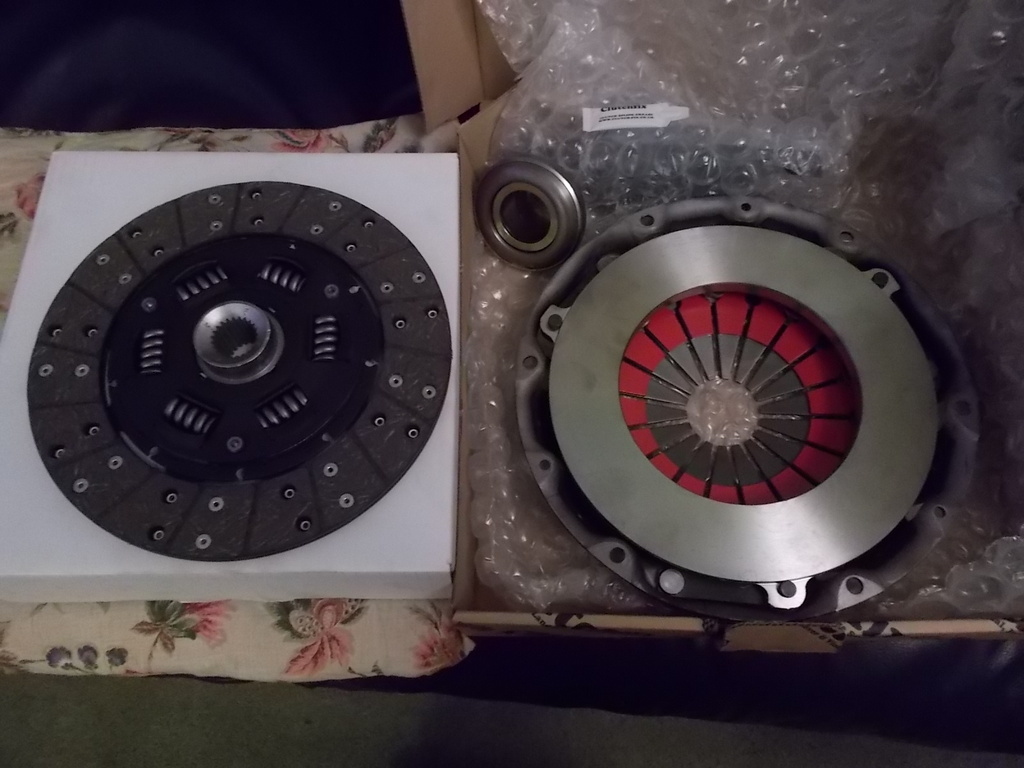 Presently the P6 is parked up in the garage under cover whilst I'm kept busy with work, home improvements and the little garage time I've had has been devoted almost solely to the Land Rover's... 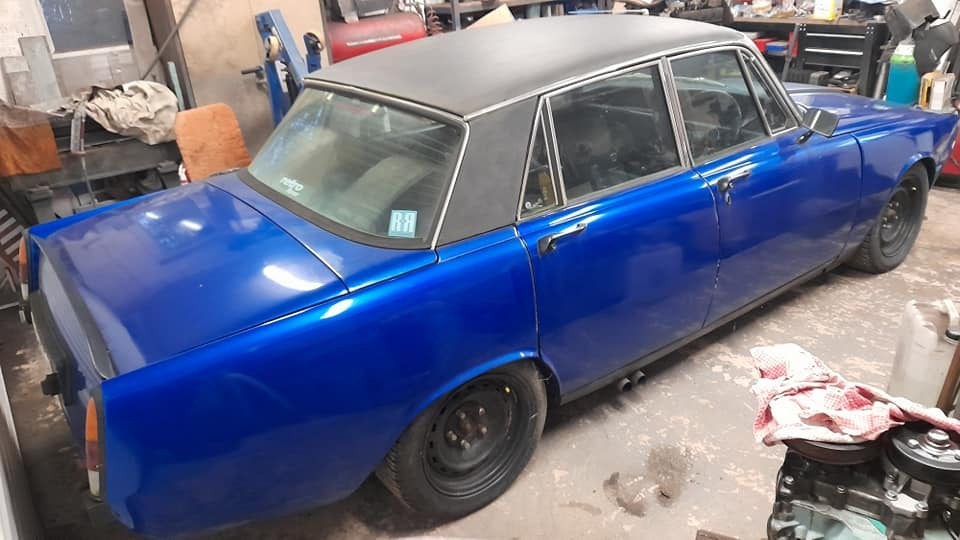 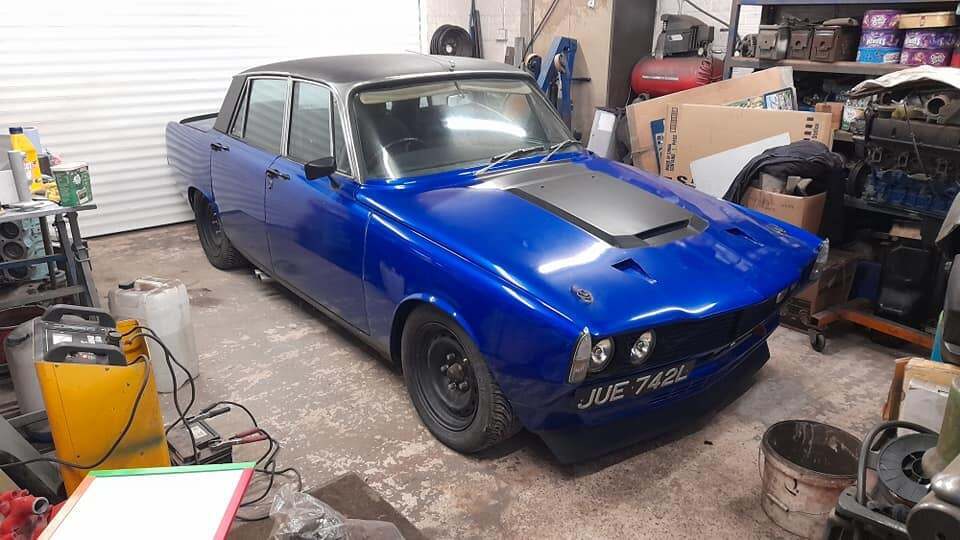 Before parking it up in the garage I may have slipped the clutch with the linelock on. With no mods done to the engine setup as it previously was with the little Garratt T25, I've gained another 5psi on the boost gauge! It previously got to 10psi and that was it, now it's 15psi without any effort  I'm hoping I can get some much needed work going on this later this year.... |
| |
|
|
sowen
Club Retro Rides Member
Posts: 2,245
Club RR Member Number: 24
|
|
May 20, 2021 18:17:35 GMT
|
|
|
| |
|
|
sowen
Club Retro Rides Member
Posts: 2,245
Club RR Member Number: 24
|
|
Mar 23, 2021 11:47:40 GMT
|
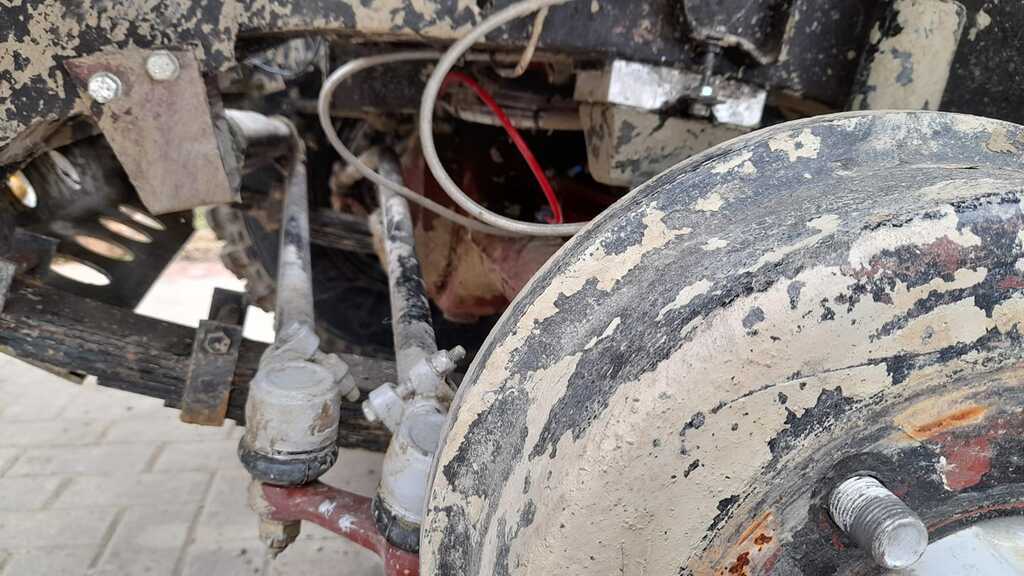
And with the front axle gutted, it was time to do the mods to the swivel balls to let the 110 cv joints fit inside 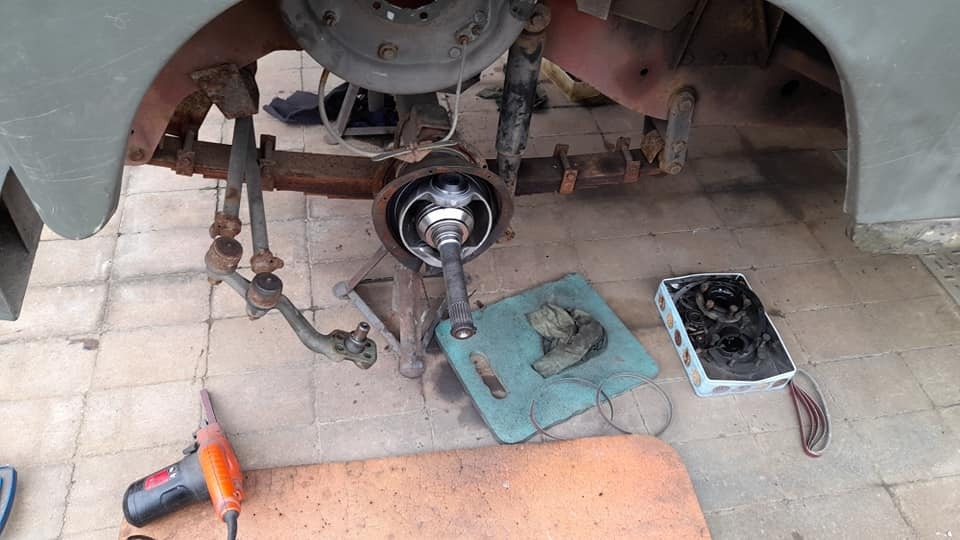 New railco top bushes were fitted with a shim underneath to give clearance on the top against the cv joint 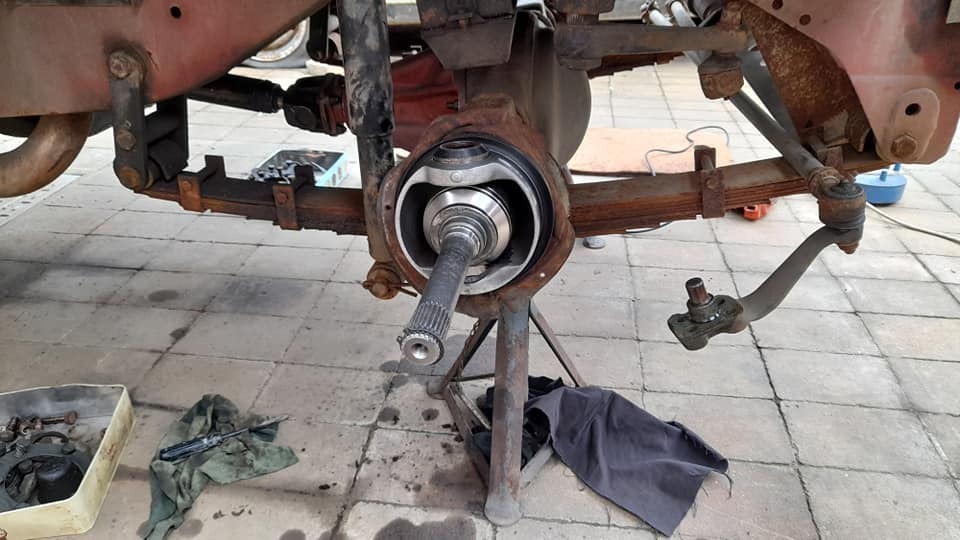 Then the hub carrier could go back on and be re-shimmed 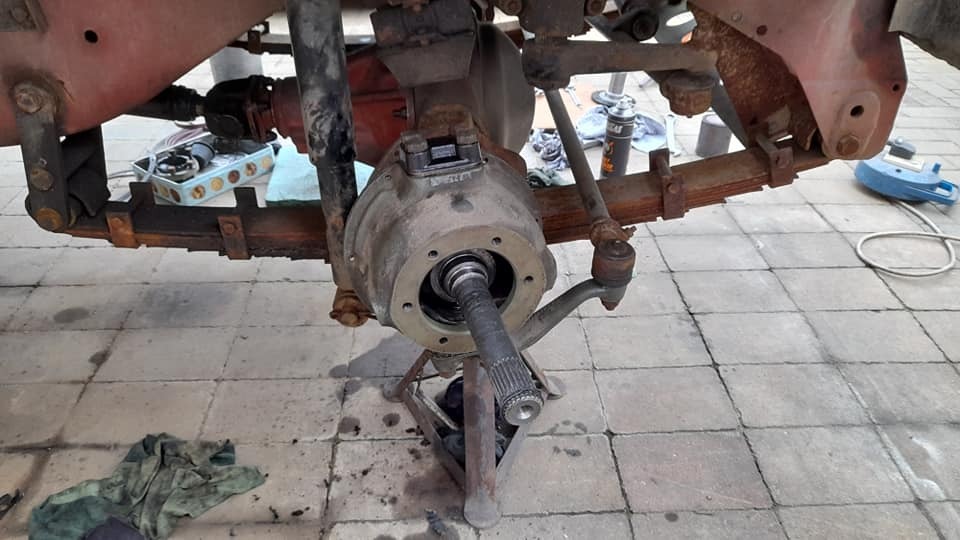 New stub axles and the brake backplates went on 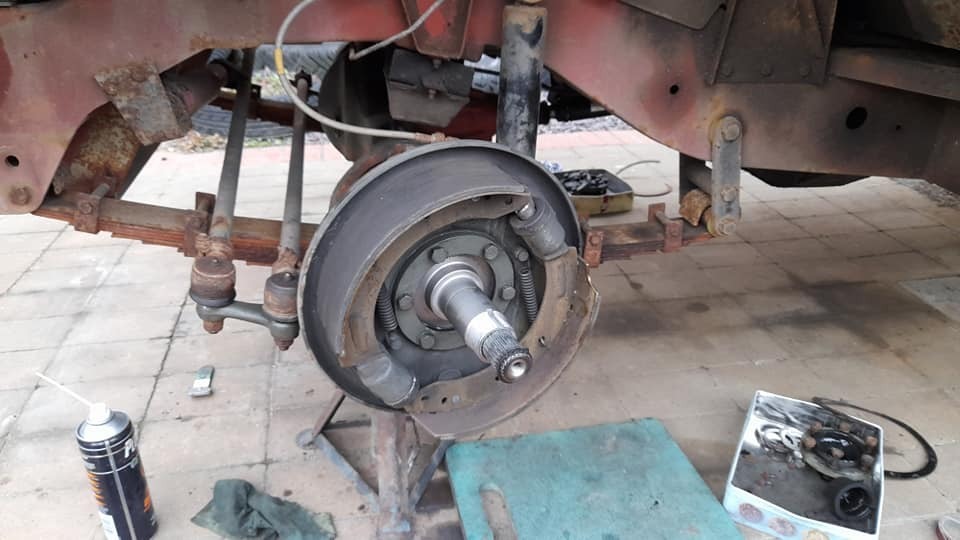 Whilst having the hubs off I pressed out the wheelstuds to fit longer Wolf studs. The standard studs are always a bit short when fitting aftermarket wheels....  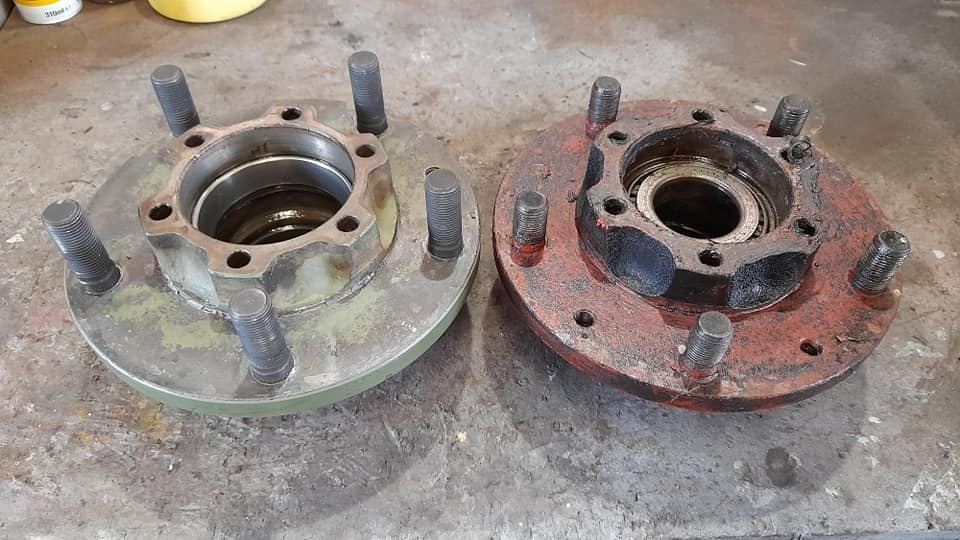 Much better, if not slightly on the long side for using longer aftermarket covered nuts! 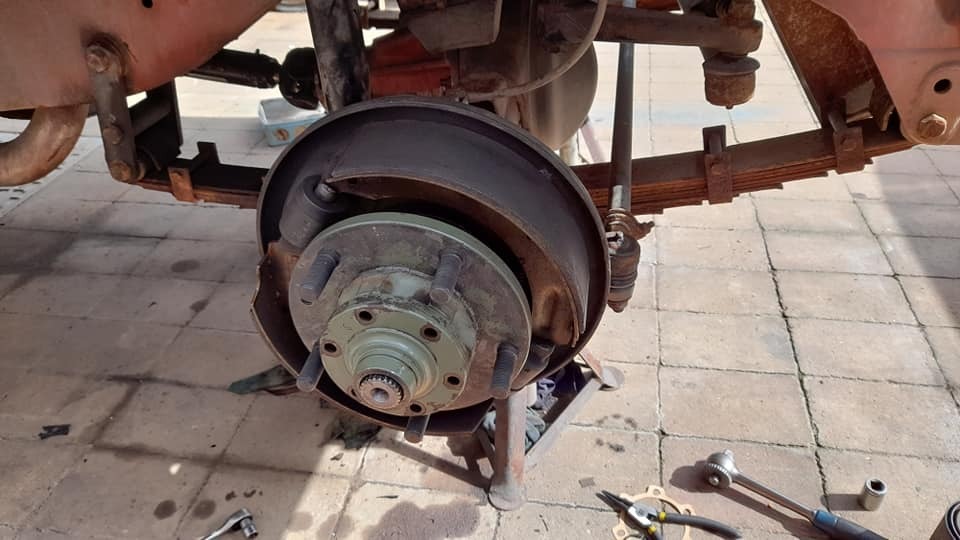 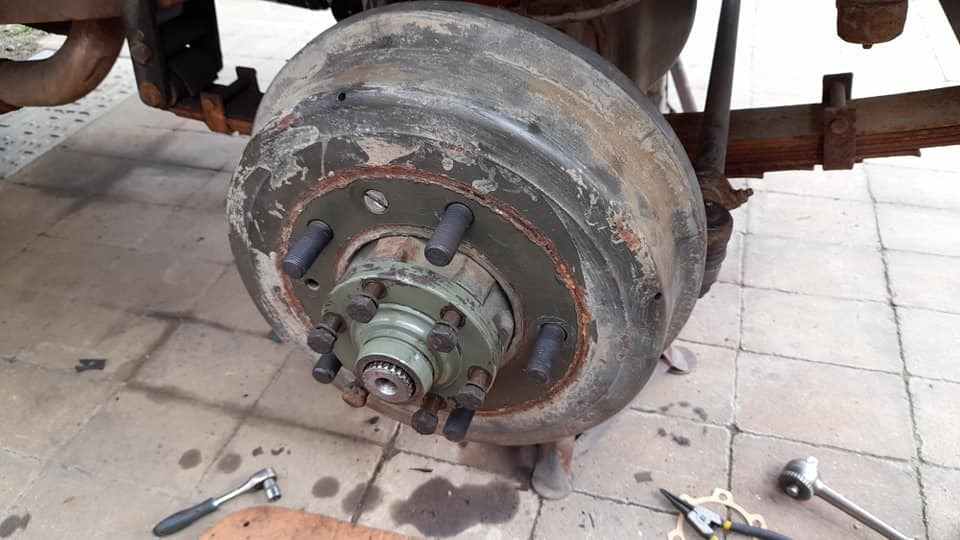 That just leaves skimming down the drive flanges to fit the cv retaining circlips and filling it all up with oil, and possibly carving up some old drums to make a set of shims so the wheelnuts don't bottom out on the studs.... |
| |
|
|
sowen
Club Retro Rides Member
Posts: 2,245
Club RR Member Number: 24
|
|
Mar 23, 2021 11:20:12 GMT
|
It's been a busy few months trying to sort out my garage, go to work and some household diy going on. But with the improving weather I've been able to tick a few more jobs off my list on the 109 First off was fitting a new transmission mount to replace the bodged up solid mounts. The rubber mount and brackets came from a 200ti Discovery and should work fine with the 300tdi Discovery engine mounts already fitted 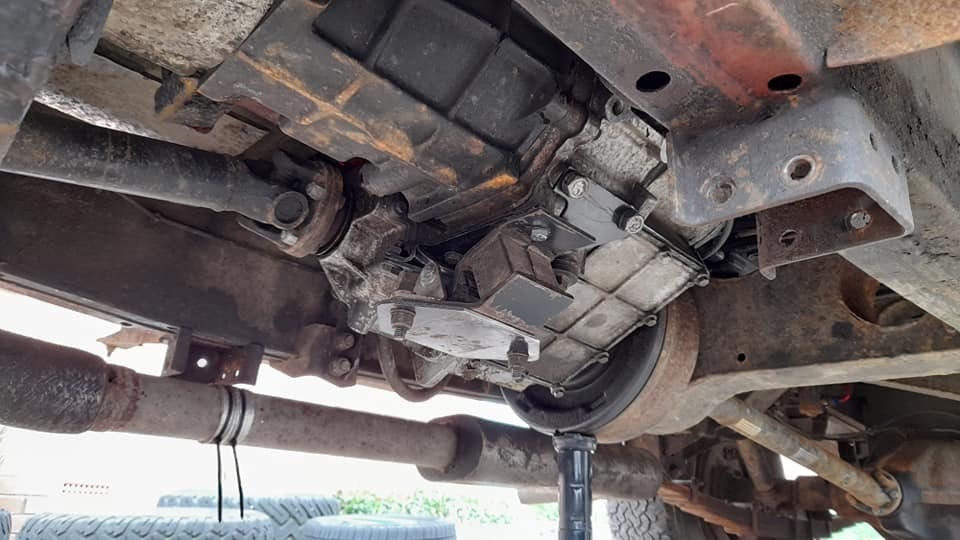 With some measurements I cut up some 30mm box steel and marked it up to cut and weld it to drop down and back from the original chassis mounts to the central transmission mount 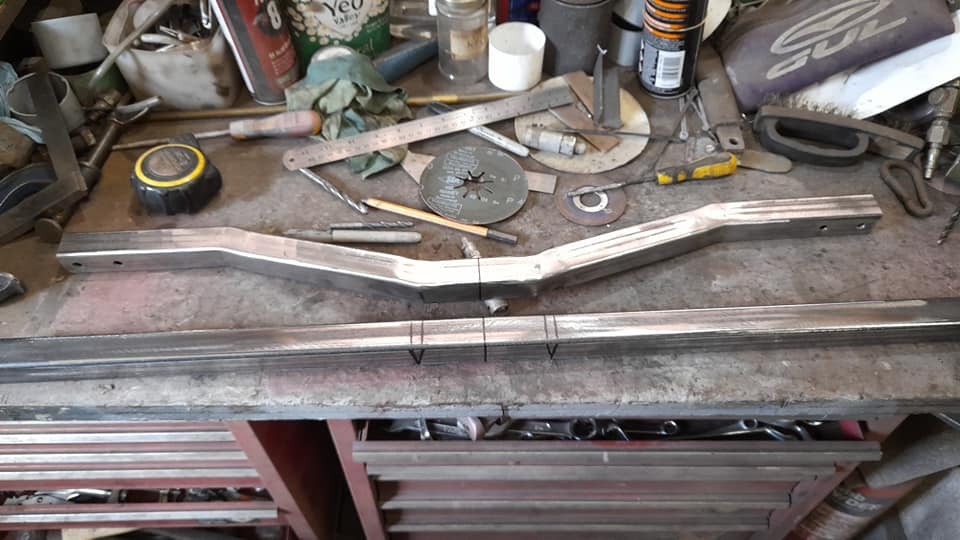 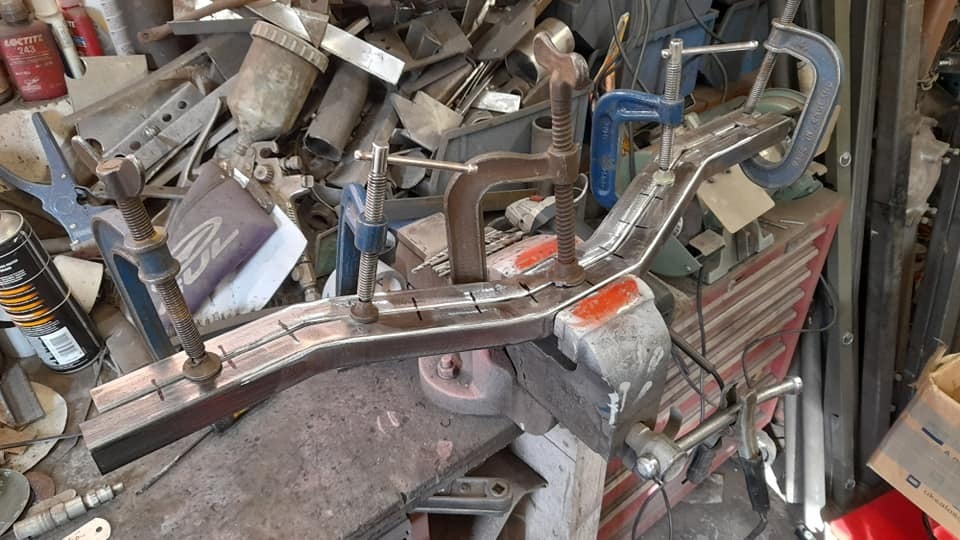 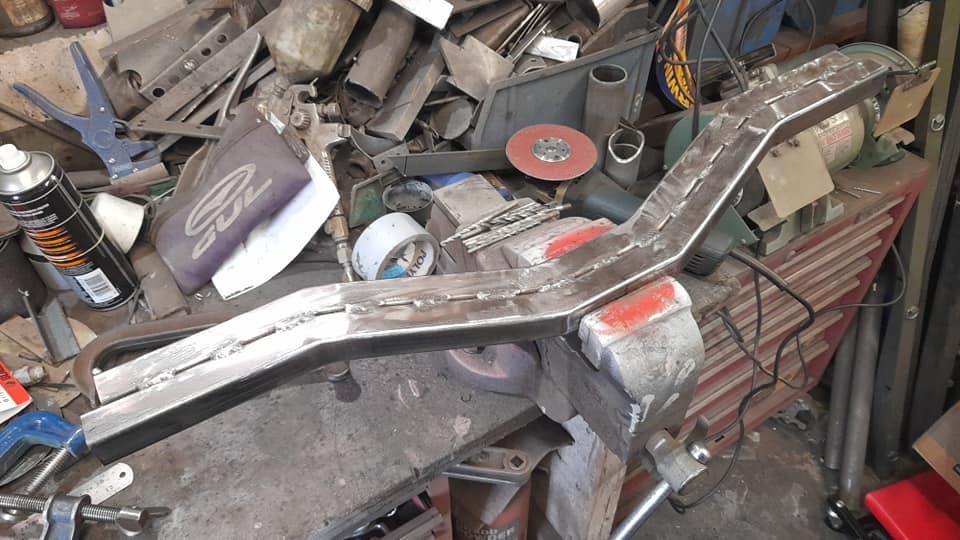  The original mounting plate was welded onto my new crossmember the it was painted and fitted 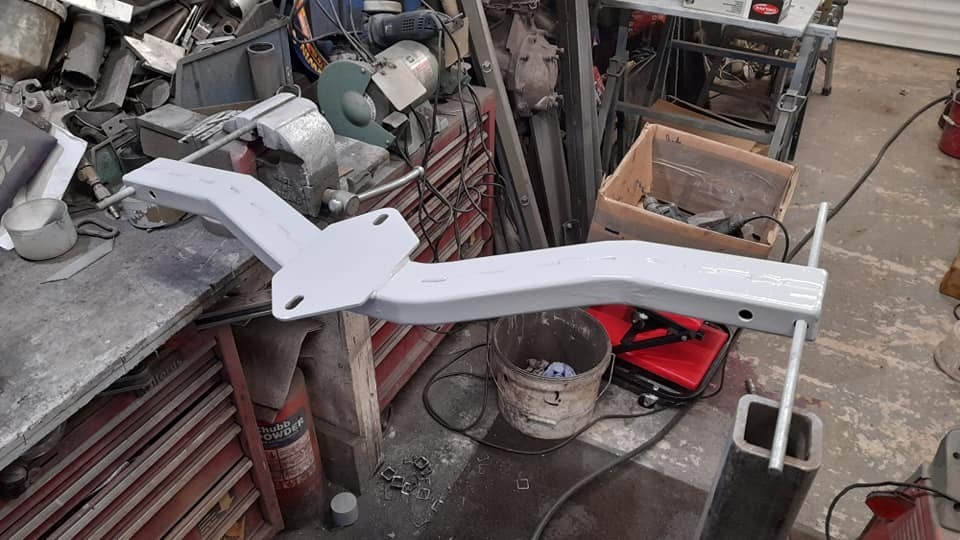 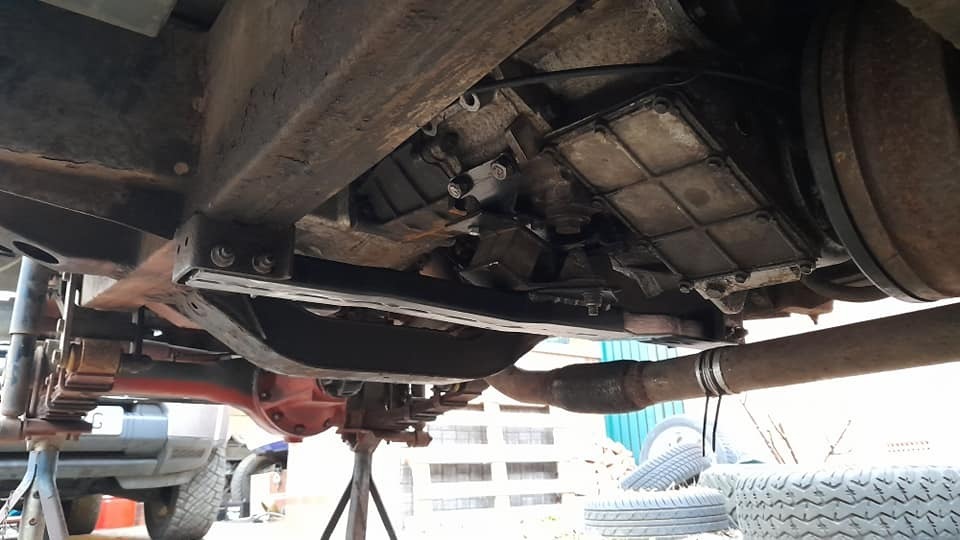 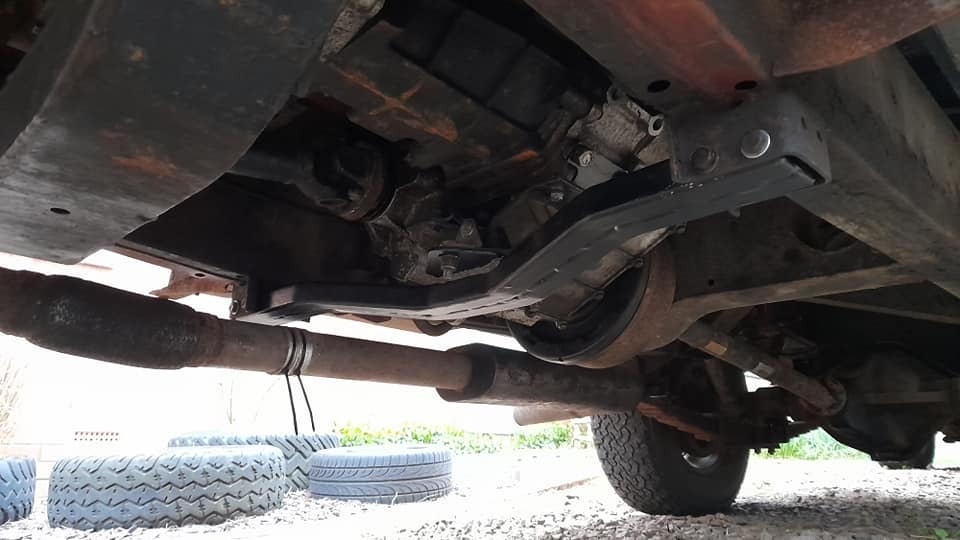 Vibrations and rattles at idle almost entirely eliminated now! Next up was tearing down the front axle to fit the Detroit Truetrac and upgraded driveshafts and cv joints 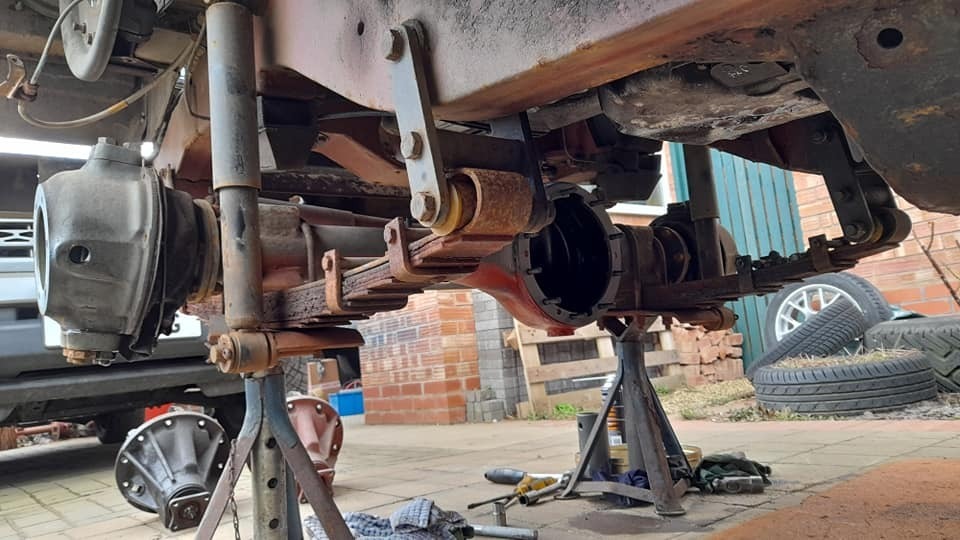 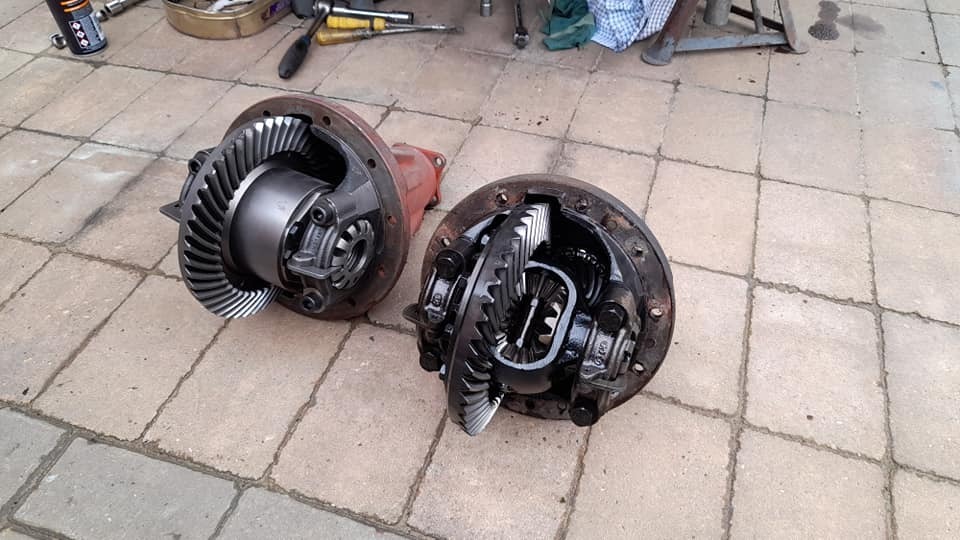 One of the front shafts is just starting to show signs of twisting in the splines 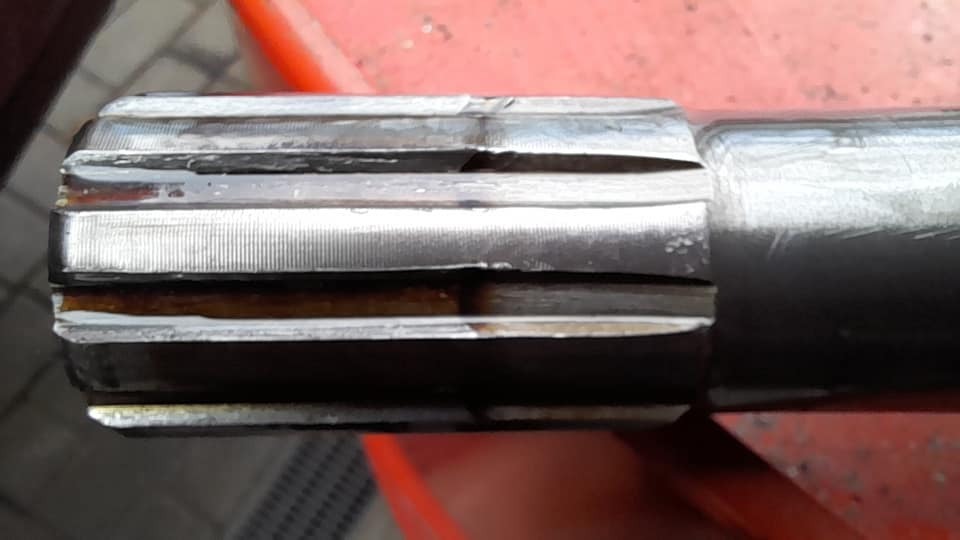 The diff has been holding up fine, nothing visibly wrong with it which I am suprised at considering how much abuse I've given! |
| |
|
|
sowen
Club Retro Rides Member
Posts: 2,245
Club RR Member Number: 24
|
|
Feb 27, 2021 20:45:58 GMT
|
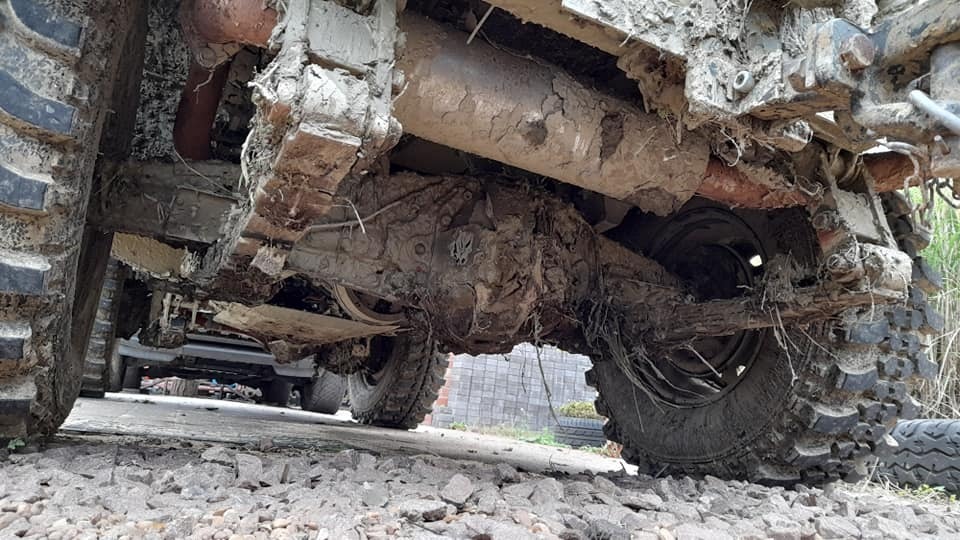
Good to see the old girl being used properly; It appears I am not alone is spending a week of spannering for every day of offroading! One advice, from experience, once you have waterproofed the bellhousing, is to install a breather pipe to this as well. I have run a 1/2" ID hose from the bell house to the air filter housing. It gets piping hot inside there and if you dunk it in deep water, it sucks oil through the engine crank seal and gearbox as well. Daan I like that suggestion, bit late since the engine is fitted and running now, but should I ever need to remove it or gain access to the back, I might add a breather there. The gearbox and axle breathers still need extending further up than the back of the engine. The cause of the mud contamination to the clutch was two holes either side of the sump pan of the P38 alloy sump  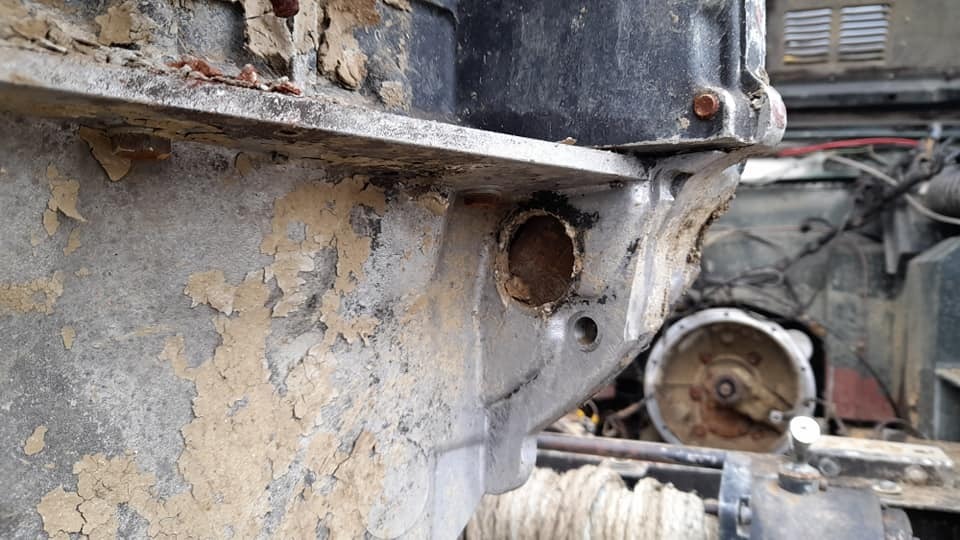 I turned up some aluminium bungs, knocked them in and welded them up. Not pretty, but water/mud tight now 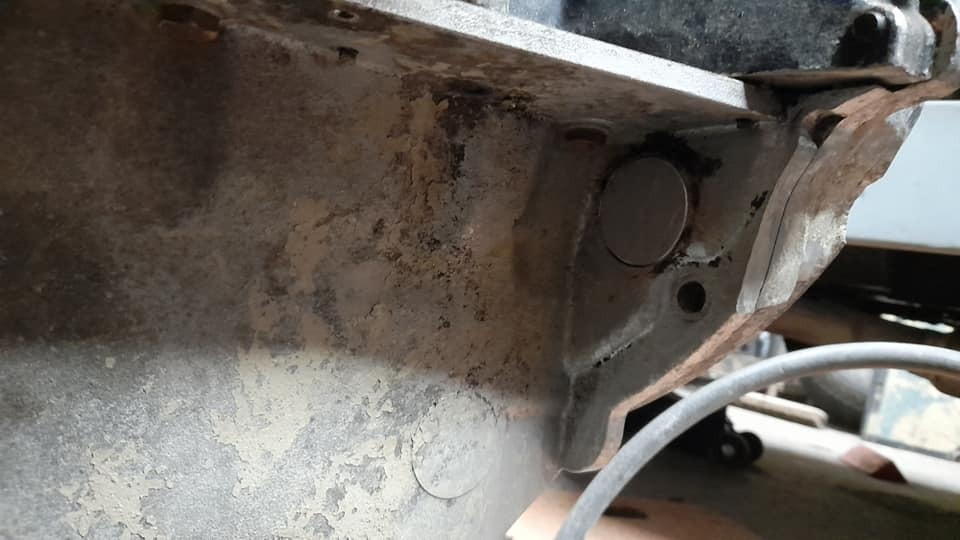 Whilst I was at it I fitted a drain plug to the gearbox adapter. Still need to make a bracket to carry the plug when not needed 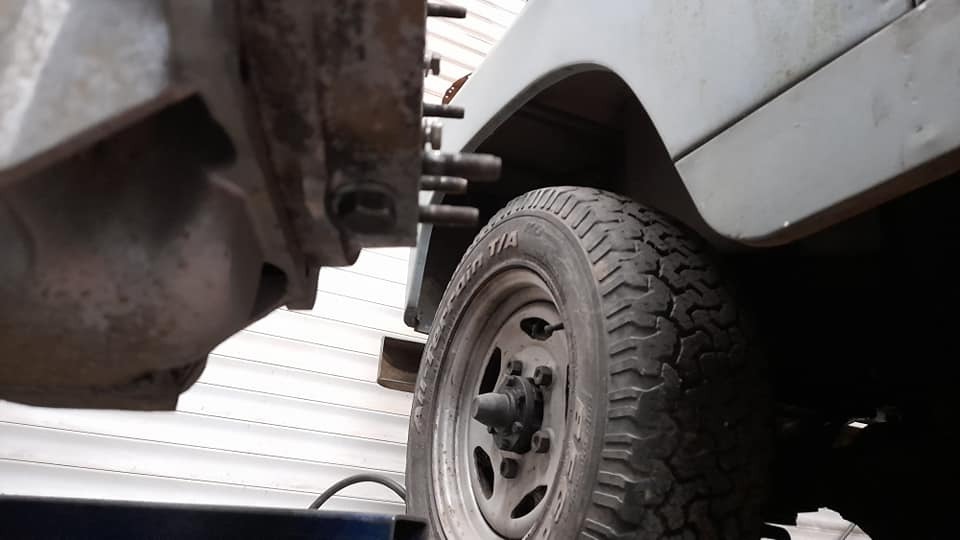 A little paint went on the bare aluminium bellhousing before that was refitted, a new clutch fitted to the V8 and that dropped back in 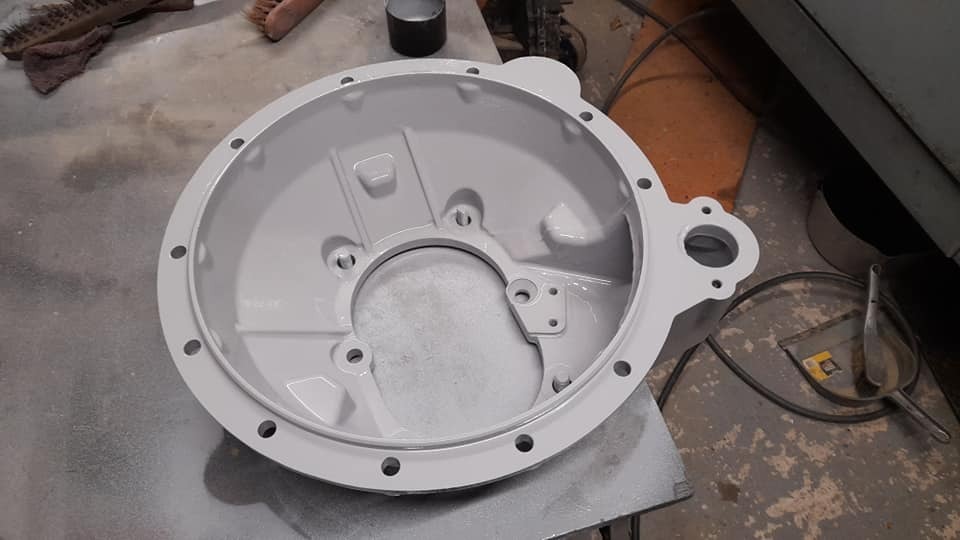 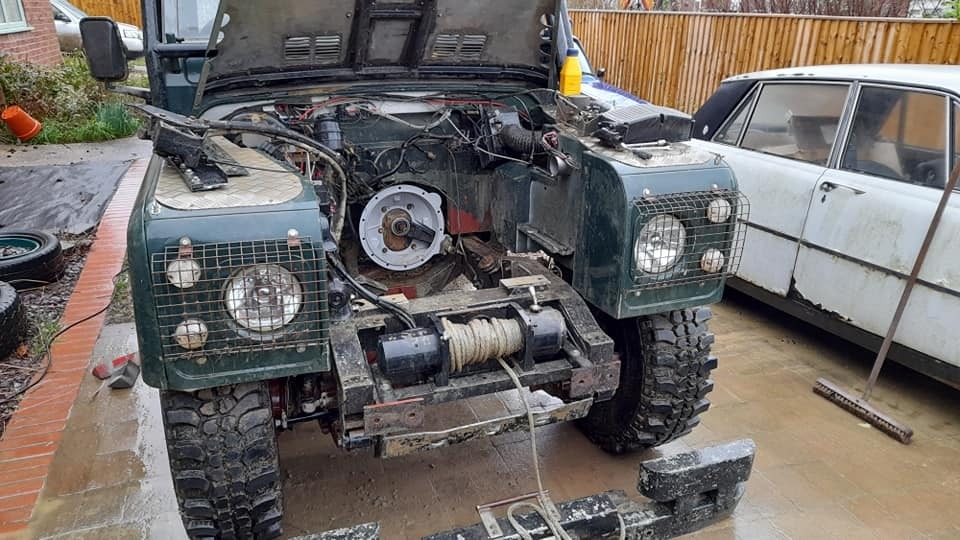 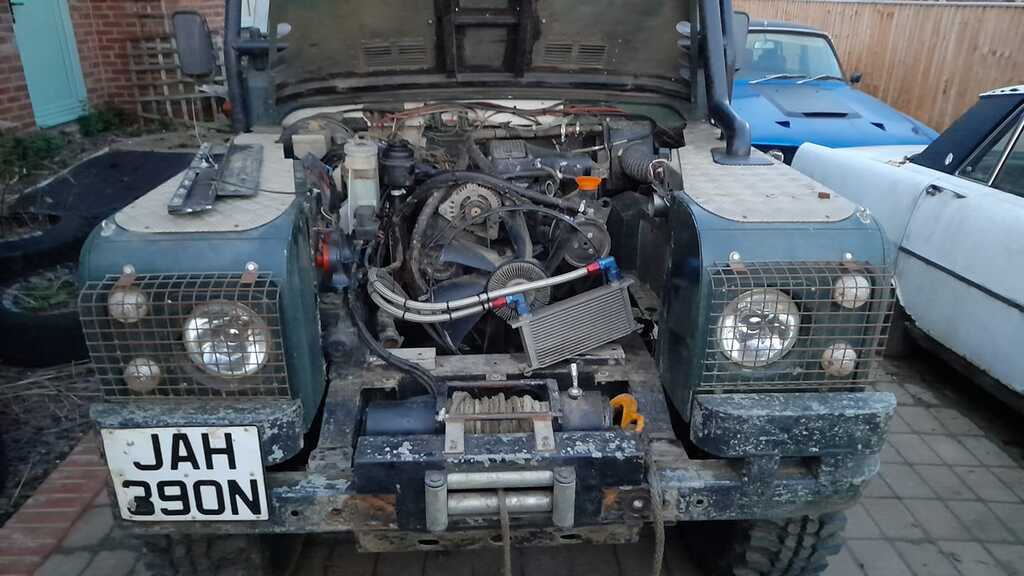 Progress is slow with lockdown and other stuff needing to be done taking priority. The weather is improving so I can start tinkering outside again! |
| |
|
|
sowen
Club Retro Rides Member
Posts: 2,245
Club RR Member Number: 24
|
|
Feb 12, 2021 18:54:57 GMT
|
|
|
| |
|
|
sowen
Club Retro Rides Member
Posts: 2,245
Club RR Member Number: 24
|
|
|
|
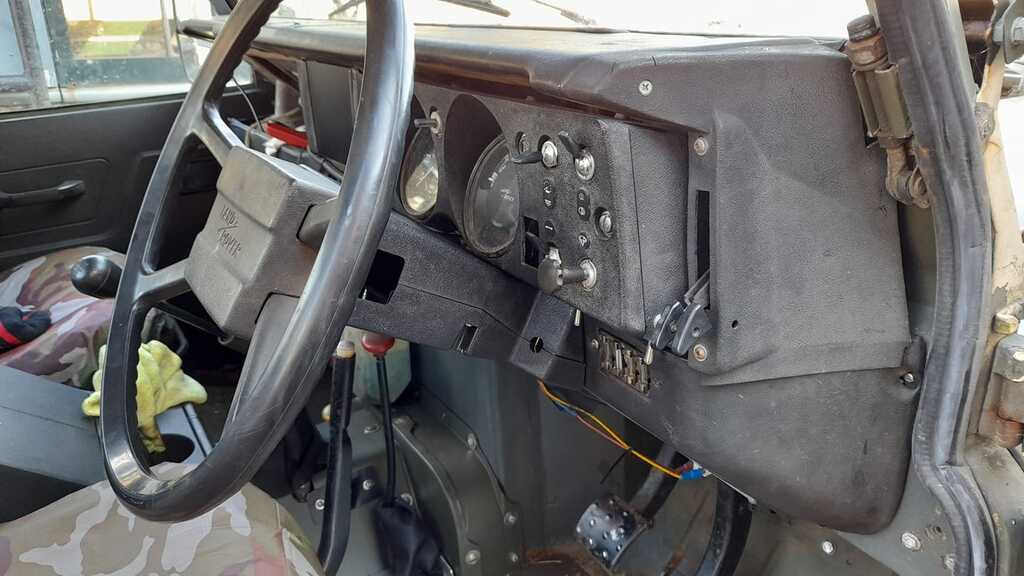
well considered mods, implemented to a high standard Thanks  Still a long way to go and a never ending list of bits to do! At least I can drive it and start using it I found some cheap usb charge sockets on ebay and put a pair of them in the dash 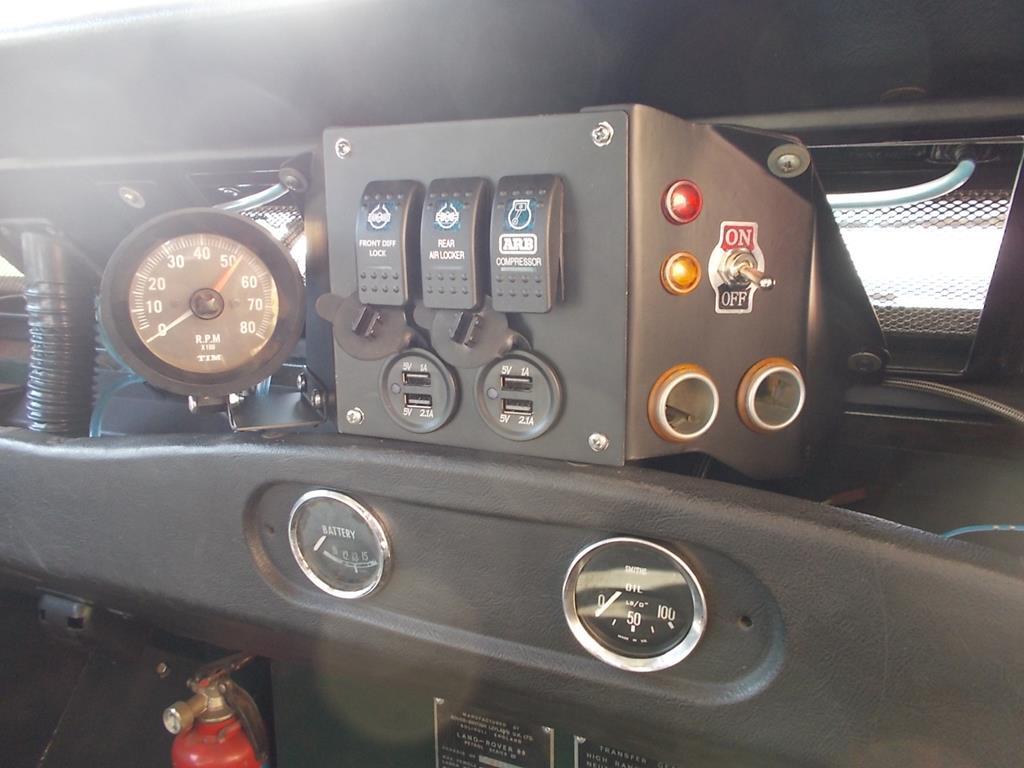 The centre gauges need an alloy cover since the oil pressure keeps wanting to sit wonky and I can fit a third gauge in the middle and then the dash is done (and maybe label the foglight switch and warning lights) And then I had a delivery of some 3mm steel sheet yesterday. I've started to make a skidplate for the underside of the chassis. From experience the centre crossmember has a habit of digging in, so I'm hoping it'll just slide over stuff instead! Bolted hard up to the crossmembers it sits about 1" lower than the axle tubes so shouldn't really cause any issues 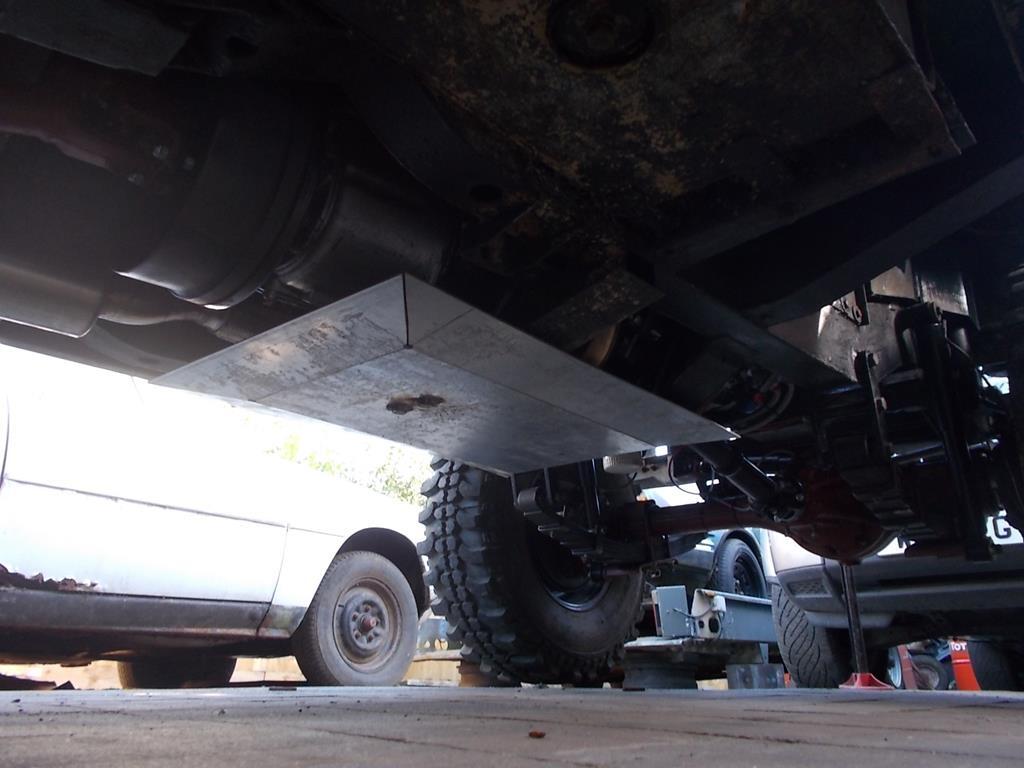 It'll probably need a bit of reinforcing to withstand rocks, but where I'm going it's all mud... |
| |
|
|
sowen
Club Retro Rides Member
Posts: 2,245
Club RR Member Number: 24
|
|
|
|
|
Could you get one of those clear resin kits and drop it in there, and make a round knob so you don't rip the palm of your hand to pieces?
|
| |
|
|
|
|


 ?
?