|
|
|
Apr 25, 2020 21:13:57 GMT
|
Right, looking for some help. Plan to use CarBuilderSolutions' Mini Bear 75mm Claw Door Latches. Before I reinvent the wheel, I want to pick your brains or check that someone hasn't already sorted a solution. I need to activate the latch from the outside but the lever works at 90 degrees to the door button movement. I have worked out how to do it using a lever and fulcrum, but this problem must have surfaced before. Is there an off the shelf adaptor or, failing that, plans for an adapter out there? Oh, and before anyone mentions it, yes, they are in need of a visit from my lightening tools :-) 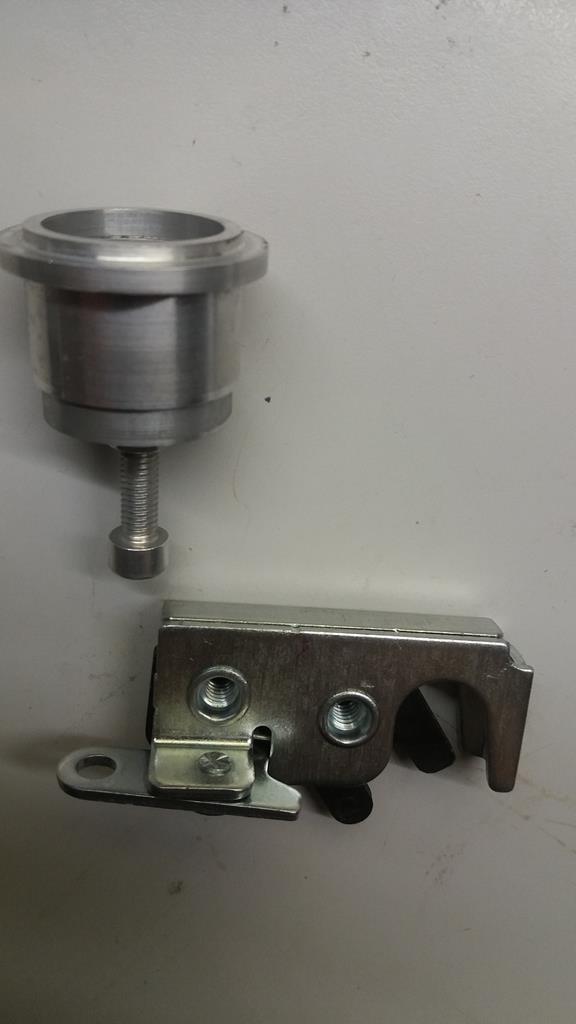 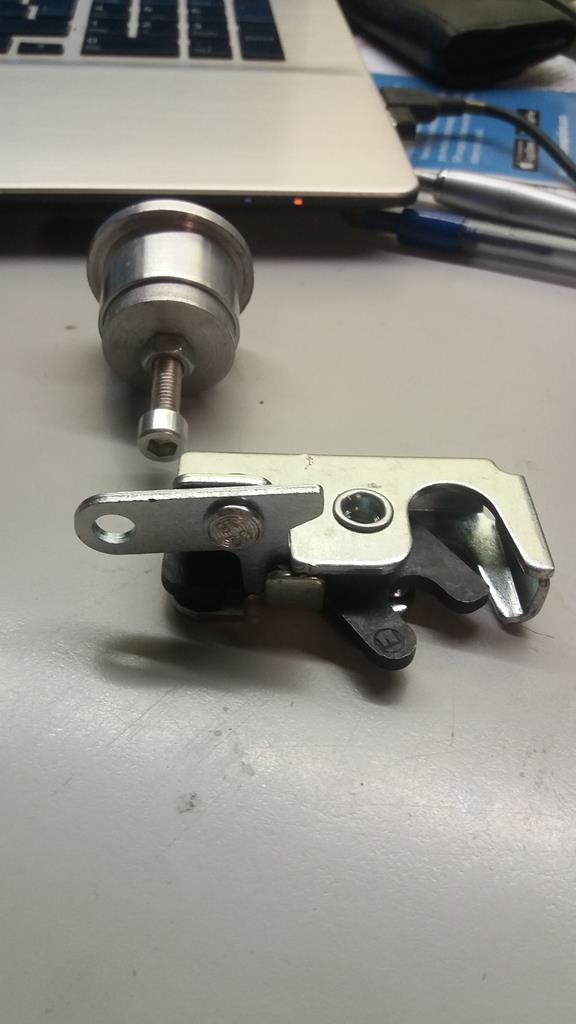 |
| |
Last Edit: Apr 25, 2020 21:34:59 GMT by nalesutol
|
|
|
|
|
|
|
Apr 25, 2020 21:07:38 GMT
|
Door carcus came out of the mould pretty easily, mainly due to it being rather flimsy :-) I just may have overdone it this time. However, I will reserve judgement until it is married to the front skin. Torsionally it is pretty good, mainly due to the steps along the edges so I think it will work........fingers crossed because it weighs as close to nothing as is humanly possible, IMHO. So far, the two pieces add up to 909gms. Factor in joining material and glue, less a hole for hinge access but plus additional stiffening in hinge areas, I reckon is will end up around 1.1 - 1.2kg. Not to be sniffed at. Grey marks caused by paint pulled off of the mould surface. Not a problem as it will be painted. 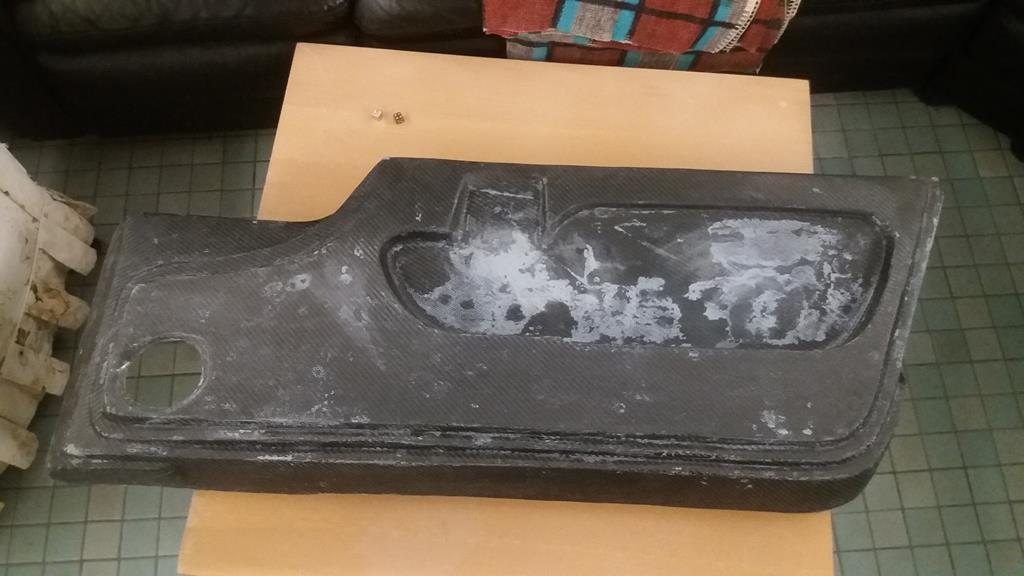 |
| |
Last Edit: Apr 25, 2020 21:08:36 GMT by nalesutol
|
|
|
|
|
Apr 24, 2020 18:49:49 GMT
|
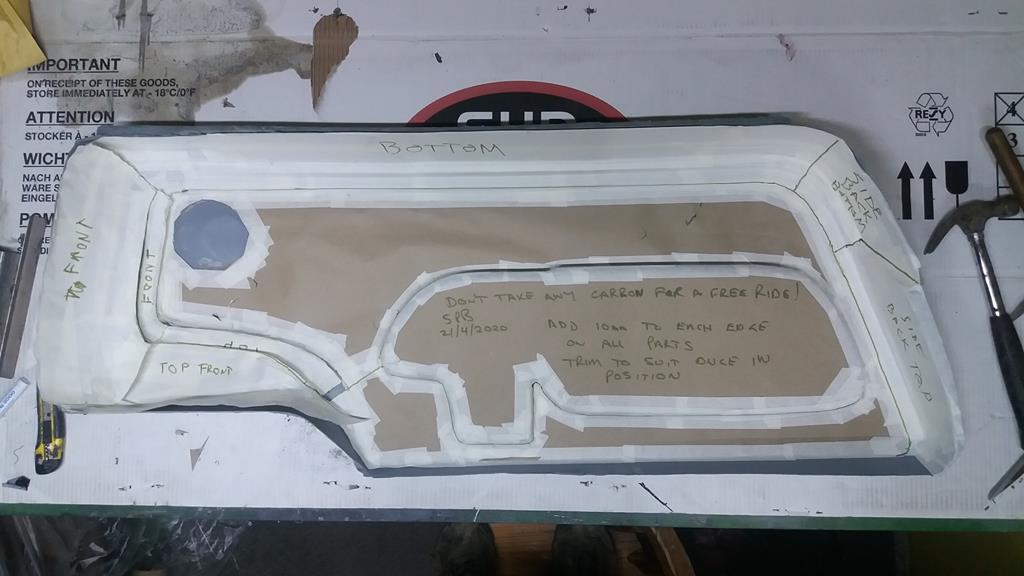
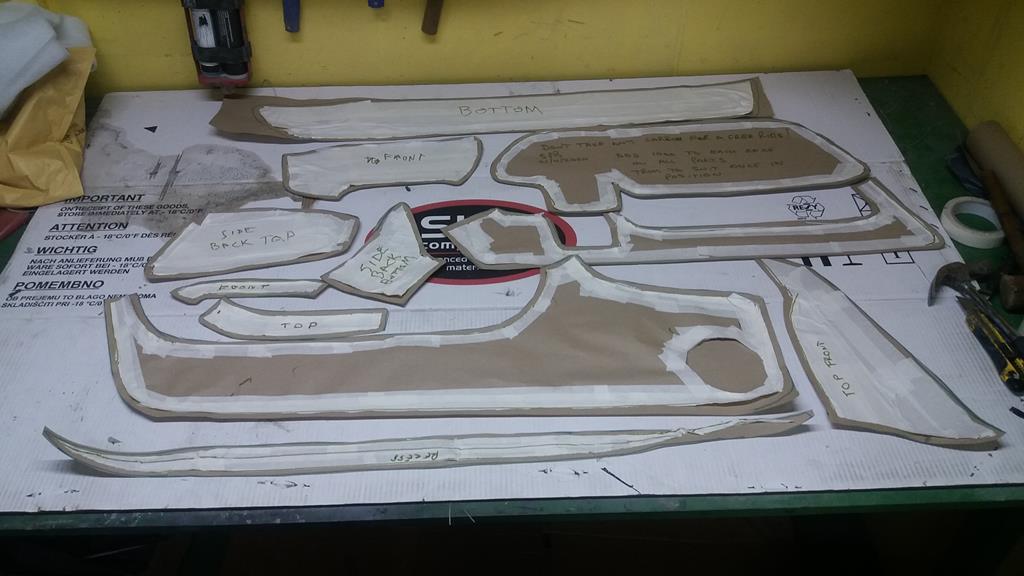
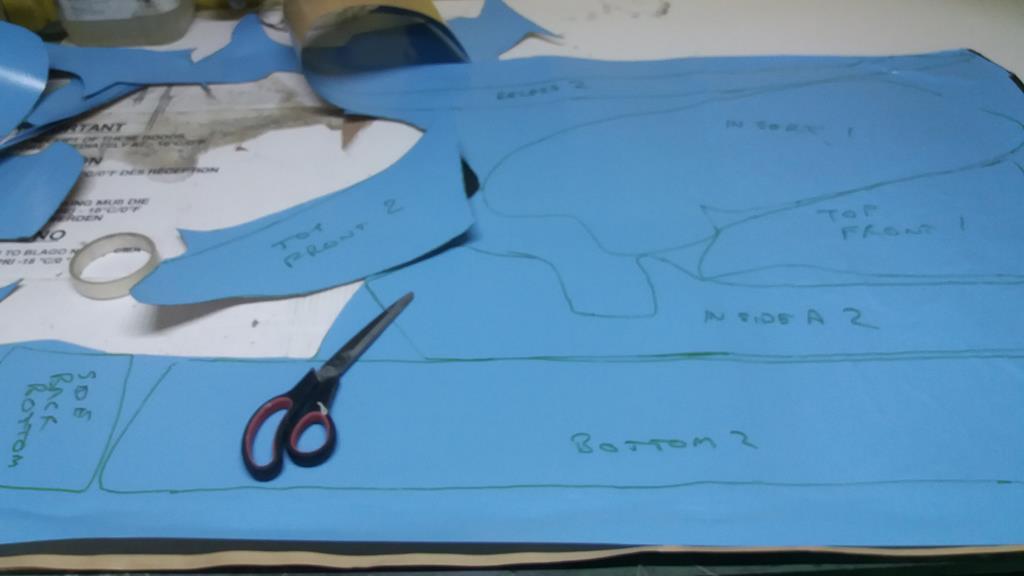
If I never see another Elan door mould it will a lifetime too early :-) This door has 47 pieces (which include strengthening plates for hinges etc) and I have just laid up the first of two layers. Trying to stick carbon to a surface that is treated with release agent is no simple task when you have a lot of angles to contend with. Lots of heat gun action was required. 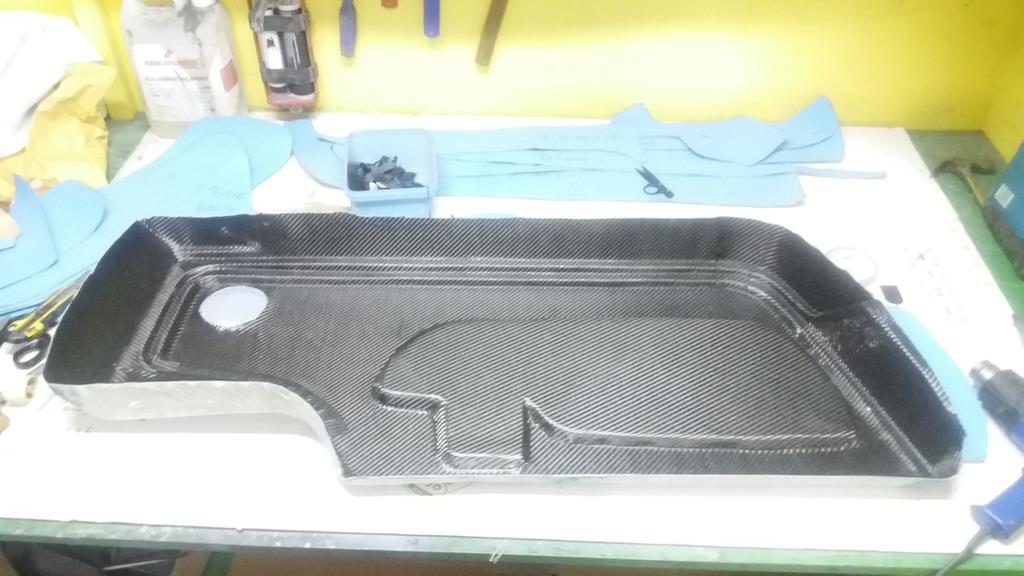 |
| |
|
|
|
|
|
Apr 23, 2020 22:57:10 GMT
|
|
|
| |
Last Edit: Apr 23, 2020 22:57:34 GMT by nalesutol
|
|
|
|
|
Apr 23, 2020 14:46:47 GMT
|
The eagle eyed, mould experienced guys amongst you will probably have noticed my schoolboy mistake. I was so worried that the mould would be a curse word to get off that I forgot about drilling holes for the attachment bolts used to join the two parts together. You drill these BEFORE you remove the mould to ensure that the two or more parts re-assemble correctly. Wally of the first order. However, the saving grace is that, as the mould came off so cleanly, I was able to re-attach it to the roof and drill the holes. Phew! 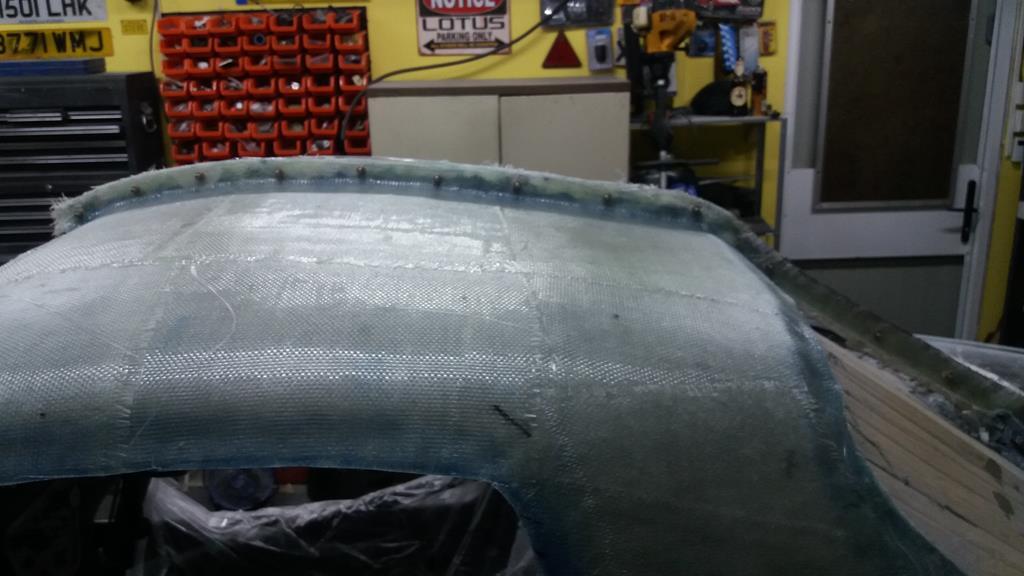 |
| |
|
|
|
|
|
Apr 23, 2020 13:29:51 GMT
|
|
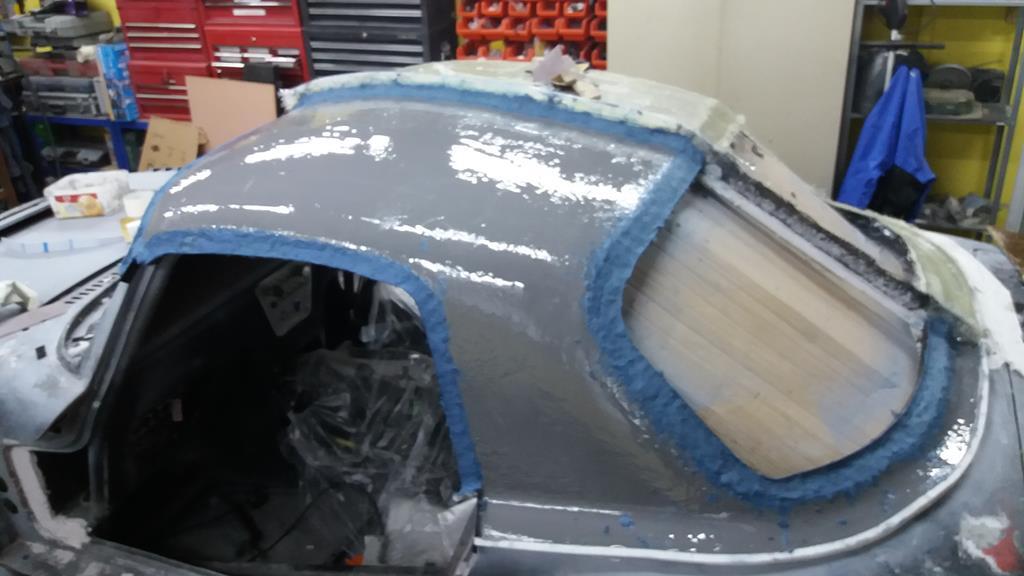
Tackled removing the roof mould this morning. I was expecting the usual sh1tfight but was pleasantly surprised. Took 45 minutes.
|
| |
Last Edit: Apr 25, 2020 7:24:30 GMT by nalesutol
|
|
|
|
|
|
|
|
Showed my effort to my prepreg supplier's tech rep and discussed the merits of 3 layers of 200gms compared to one layer of 200 and one layer of 400 for the roof as I don't think two layers of 200gm will be enough. He replied:
"That door looks really good and the weight is perfect, a 1kg door is impressive. The dull finish actually makes it easier to paint – chasing a high gloss finish is actually something of a fallacy unless the part is on display with no laquer.
3 x 200gsm will actually give more stiffness than 1x 200 and 1x 400 gsm – although there’s not a huge amount in it"
Made me feel a whole lot better :-) Onward and upward with attempting to remove the mould from the roof.
|
| |
Last Edit: Apr 23, 2020 9:13:32 GMT by nalesutol
|
|
|
|
|
Apr 22, 2020 22:44:14 GMT
|
For those of you haven't seen vacuum bagging in action, here I am doing same to the Elan's Driver's door outer skin. This was my first use of my 200gm/m2 stuff. As it was being 'persuaded' to come out of the mould I was thinking, Oooooo, this seems too flimsy, maybe I have overstepped the mark and been just a layer too ambitious (only two layers). However, once out it seems pretty good and will stiffen up once married to the rest of the door. The curve adds a lot of tension stiffness so I think that it is a goer :-) Weight? 379gms :-) I reckon I should be able to get the door very close to 1kg. Mould wasn't glossy hence the dullness. No pinholes but a few defects that I didn't notice in the mould. However, these will fill easily and be covered with paint so no worries :-) I added a couple of extra strips where the door latch button will be. 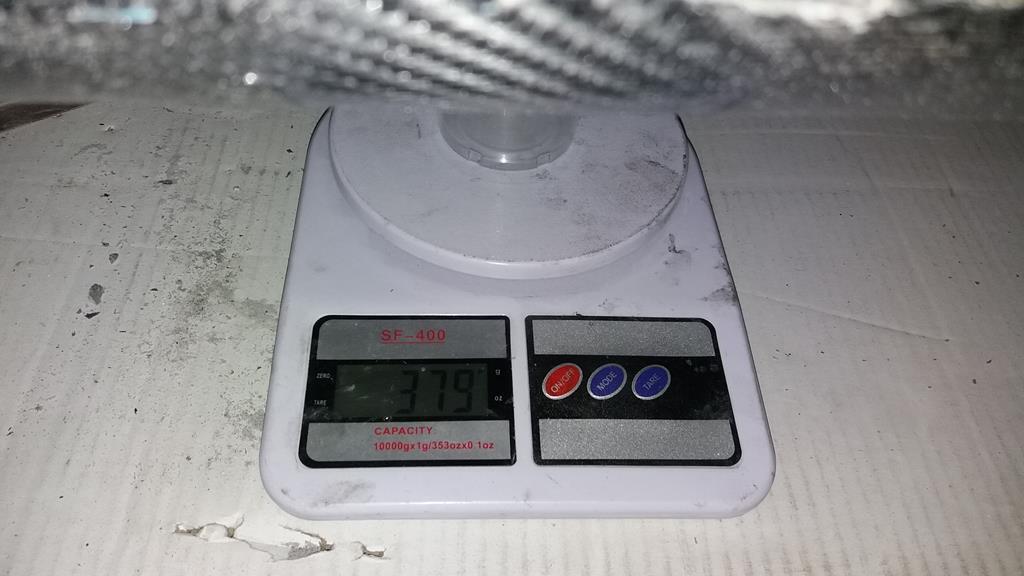 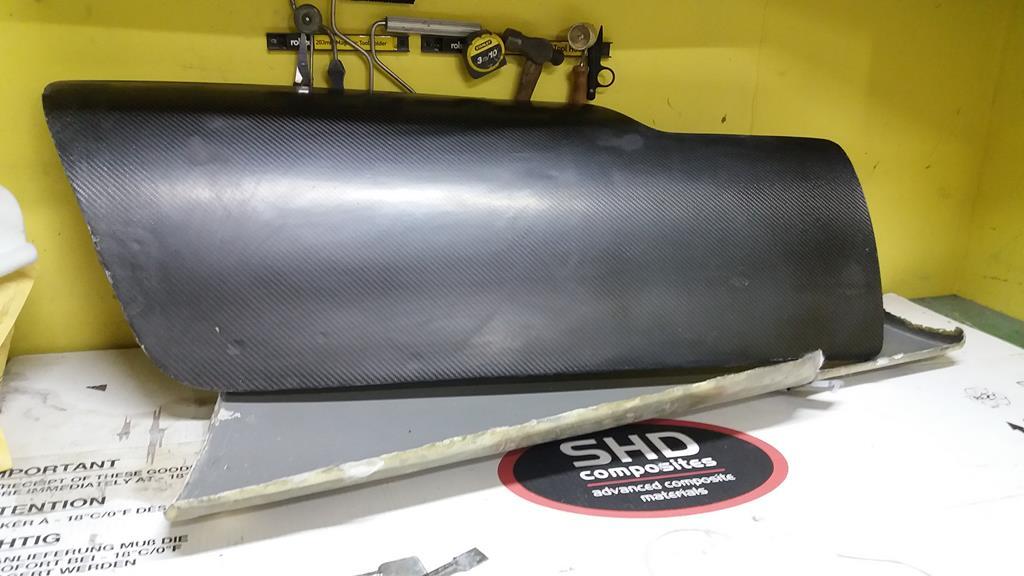 |
| |
Last Edit: Apr 22, 2020 22:47:39 GMT by nalesutol
|
|
|
|
|
|
|
|
You are never too old to learn new techniques. I have been making car parts out of fibreglass for nigh on 50 years with a lot of success.
Started off simply attaching arches to Anglias and progressed over the years to culminate in producing moulds for prepreg carbon parts including the complete front clip for the Elan.
Over the years I have used the same method - cut the FG piece to the required size, lay on a board, soak with resin, pick up and position in place. Works well if a little (OK, very) messy but I knew no better.
When making the mould for the roof I used this method for the first section, angain no problems apart from the frist layer of lightweight woven cloth being awkward with a mnd of its own. The subsequent heavier layers weren't a problem.
However, I was watching a video of an Australian guy making a mould for his race car and noticed that he brushed resin on to the pattern first then added DRY FG and brushed on resin afterwards. This was a lightbulb moment! SO much easier. I made the second part of the roof mould using this method - cleaner AND quicker :-)
It has since transpired that this is the normal way to do it and even my son does it this way! Oh well, better late than never :-)
One downside of this method is that it traps more air bubbles than the wet lay method.
|
| |
Last Edit: Apr 22, 2020 10:18:49 GMT by nalesutol
|
|
|
|
|
Apr 21, 2020 18:13:11 GMT
|
|
|
| |
Last Edit: Apr 21, 2020 18:19:32 GMT by nalesutol
|
|
|
|
|
Apr 20, 2020 17:37:20 GMT
|
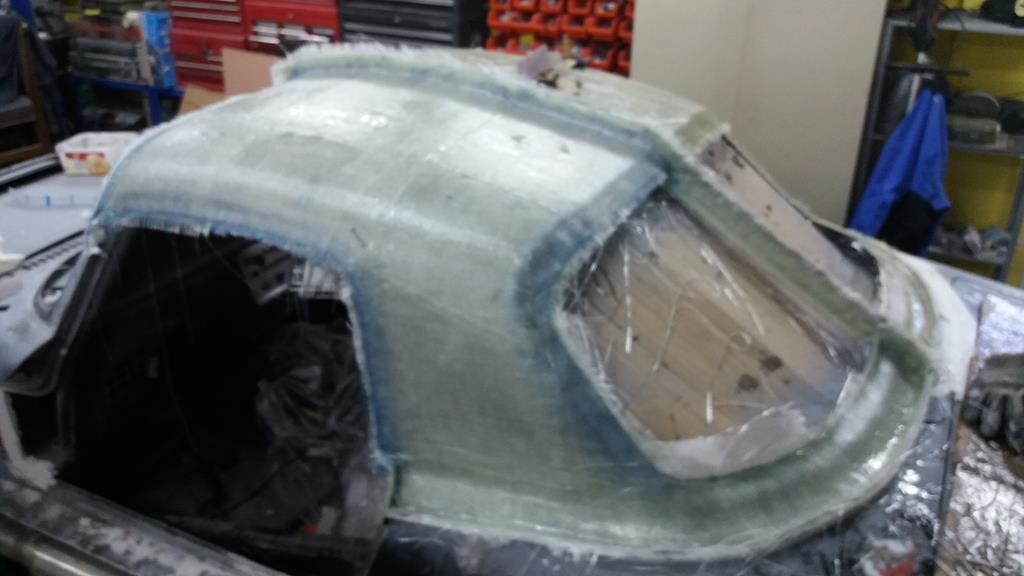
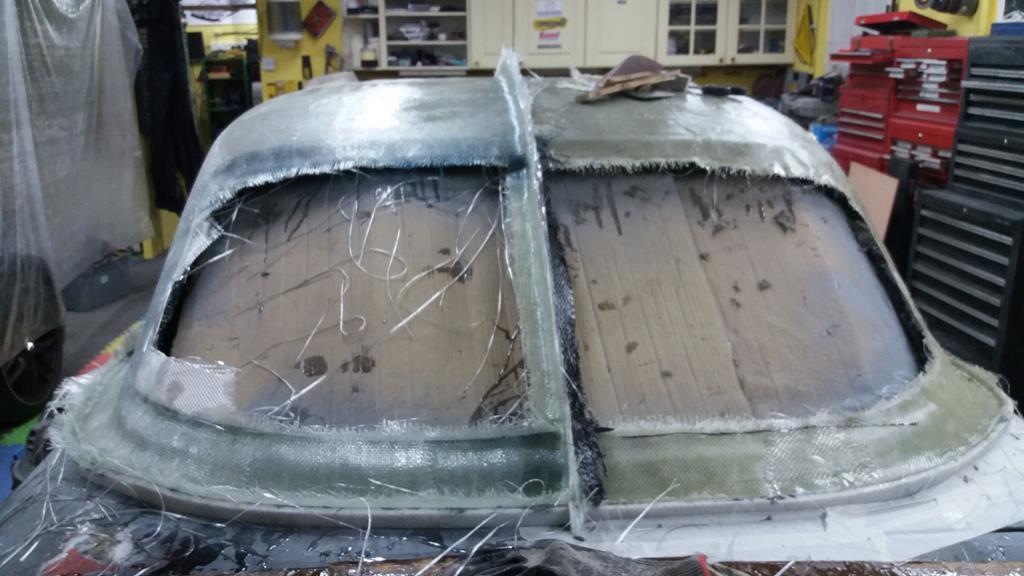
Haha I'd just accepted that as fact! Man seems to know what he's doing, if he's putting a fin on top then that must be what's needed  It may indeed seem that I know what I am doing :-) I had no plan to add a roof strake, but on fixing the vertical barrier for the first half of the mould I thought that it added a little something to the overall look. However, I still have no plan to fit one. |
| |
Last Edit: Apr 20, 2020 17:38:44 GMT by nalesutol
|
|
|
|
|
Apr 20, 2020 13:12:05 GMT
|
^^^ it will only add weight!!  Well, there is that of course :-) However, I am not sure just how flimsy the middle of the carbon roof is going to be until it is made. I have allowed for the possibliliy of having to add support struts inside on to the diagonal roll bar. If this proves necessary I could replace them with an external ridge which would do what Colin liked, something doing more than one job :-) |
| |
|
|
|
|
|
Apr 20, 2020 10:34:16 GMT
|
|
Just in case anyone thinks that I am actually adding a roof fin, I'm not! The raised section is just the flange that bolts the two halves of the mould together :-)
However, I have to say that it does change the look of the car quite considerably for just a small addition, gives it a more spiky, agressive look, IMO. I actually quite like it :-)
However, I will resist the urge.........for now :-)
|
| |
|
|
|
|
|
Apr 20, 2020 10:28:15 GMT
|
There's a different approach to land-speed record vehicles. I don't think light weight is the way to go. When we went to the Isle of Man motor museum there was a chap there who had built land speed record bikes and he'd piped lead into the swingarm to keep it stable. Thing weighed an absolute ton! Probably weighed an appreciable fraction of the whole Elan! Agreed. Weight is a consideration, but stability and aero are more important. First Rule - Stay straight, upright and alve! |
| |
|
|
|
|
|
|
|
Update, I managed to find someone selling filler, so have ordered some Evercoat Rage Gold - looking forward o trying it as have heard good things about it. Oooo, interesting. I am looking for something like this, I will see if anyone is selling it online. |
| |
Last Edit: Apr 20, 2020 6:33:05 GMT by nalesutol
|
|
|
|
|
Apr 19, 2020 20:53:43 GMT
|
Update on door window frame. Tidied it up, but will leave final detailed shaping until carbon roof is made and I can match it up to the opening. 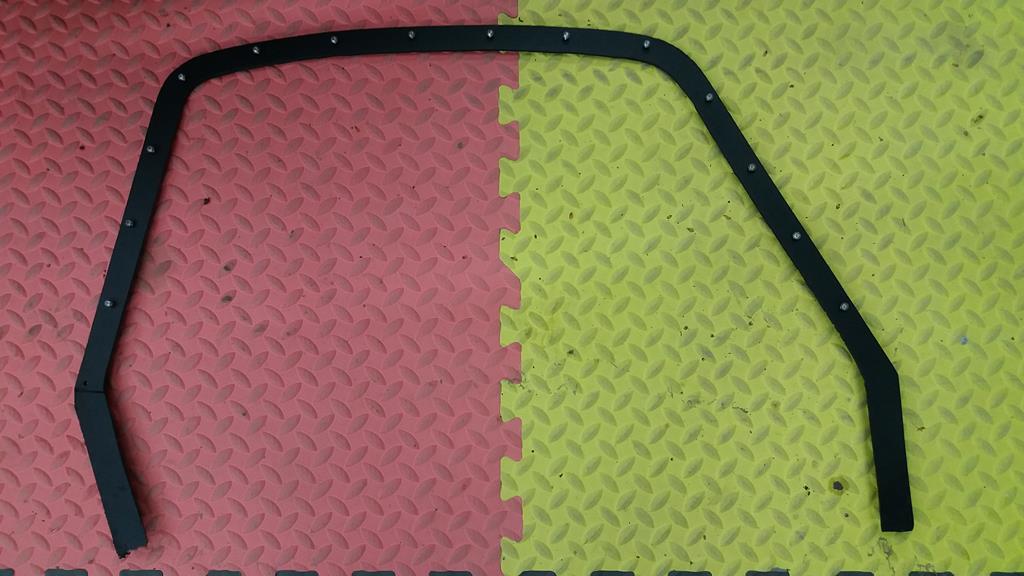 With regard to the roof, first half of the mul dhas been laid up. Luckily it has to cure for 24 hours before I can remove the central devider as I have run out of firbeglass. I will order a roll in a minute, should be here on Tuesday. 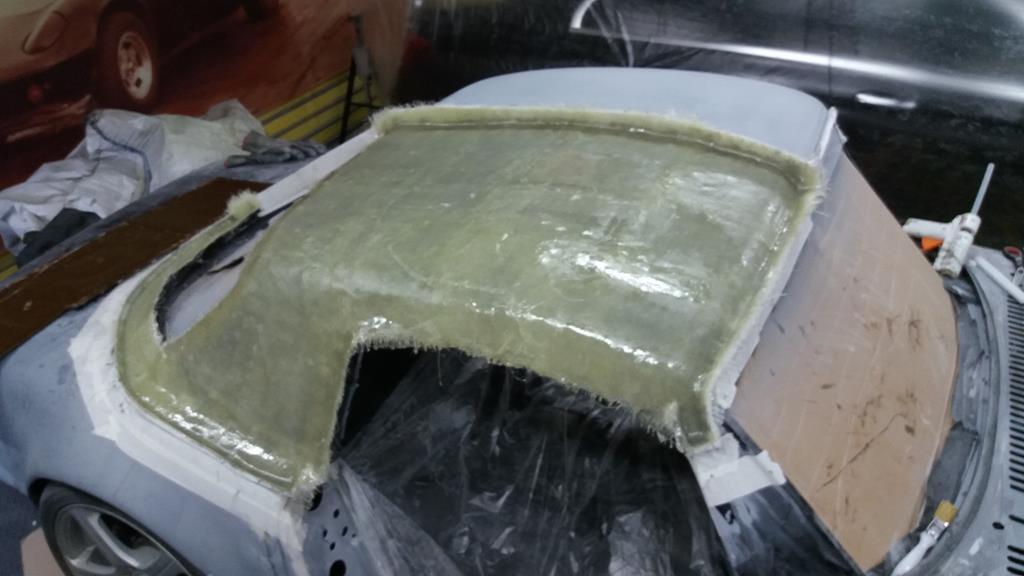 |
| |
|
|
|
|
|
Apr 19, 2020 20:46:59 GMT
|
Are you going for a land speed record with it or drag racing records? :-) I would love to run at Bonneville, or even El Mirage, but that isn't going to happen so drag racing it has to stay :-) |
| |
Last Edit: Apr 19, 2020 20:47:40 GMT by nalesutol
|
|
|
|
|
|
|
|
Started talking before video started so "Easy" should be prefixed with "You metal car boys have it" :-)
|
| |
|
|
|
|
|
Apr 18, 2020 17:45:04 GMT
|
Channelling my inner Bugatti Type 57s :-) Looking at ways of improving straight line stabilty at Mach 0.2 and this looks promising. 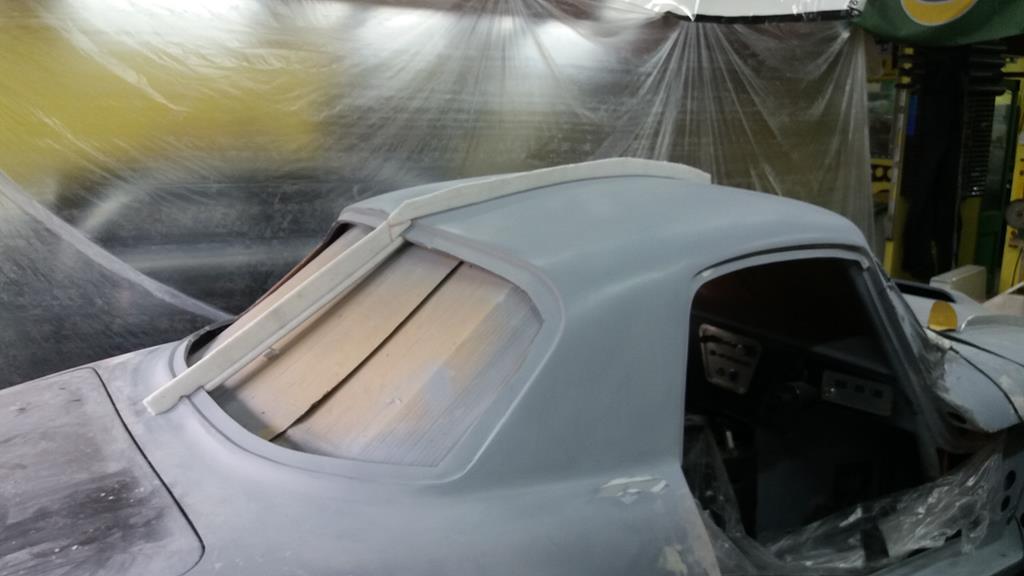 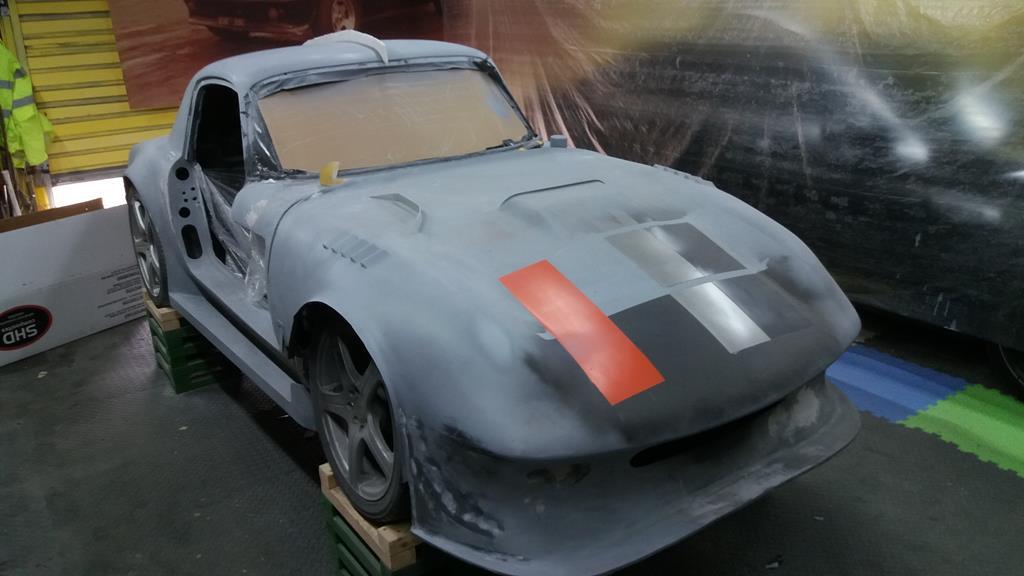 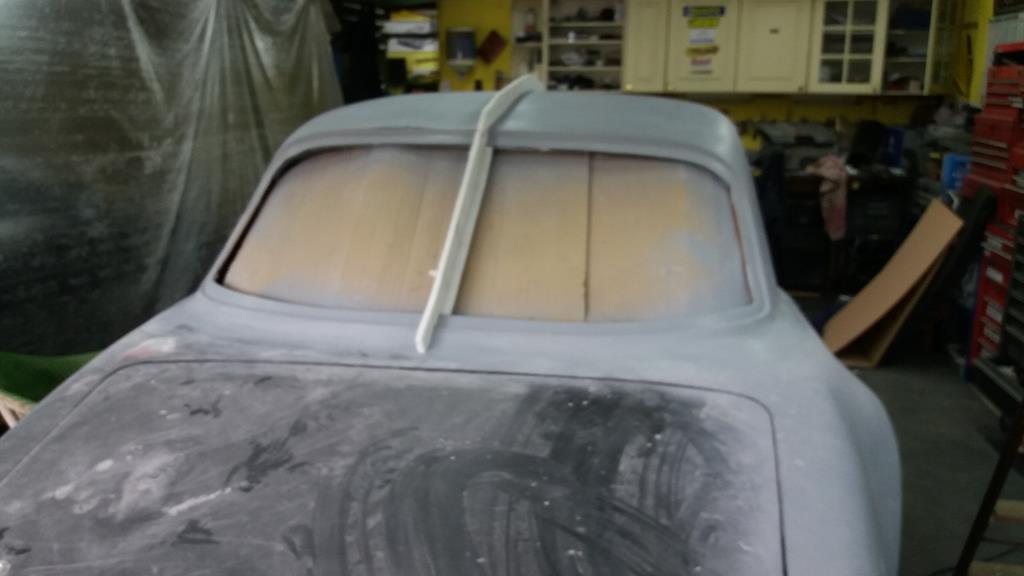 |
| |
|
|
|
|
|
Apr 17, 2020 21:26:29 GMT
|
Bagged up door window frame and slung it into my new oven. First use of oven with carbon and with full use of the programmable controller. I had to program it to raise the temp to 80 deg C at 3 deg/minute then hold for 30 minutes before continuing up to 120 and holding there for two hours. Worked pretty will although temps were around 5 deg higher than set. Not an issue but I need to work out what I did wrong. What I was impressed with the performance of the oven. Worked perfectly with very little heat loss. With 120 deg C inside the door was 19.6 with the surrounding workshop walls 16. Happy with that. Tomorrow I will tidy up and post result of many hours of fabrication. If it works then I will make the passenger side frame. However, I must get on with the roof mould. 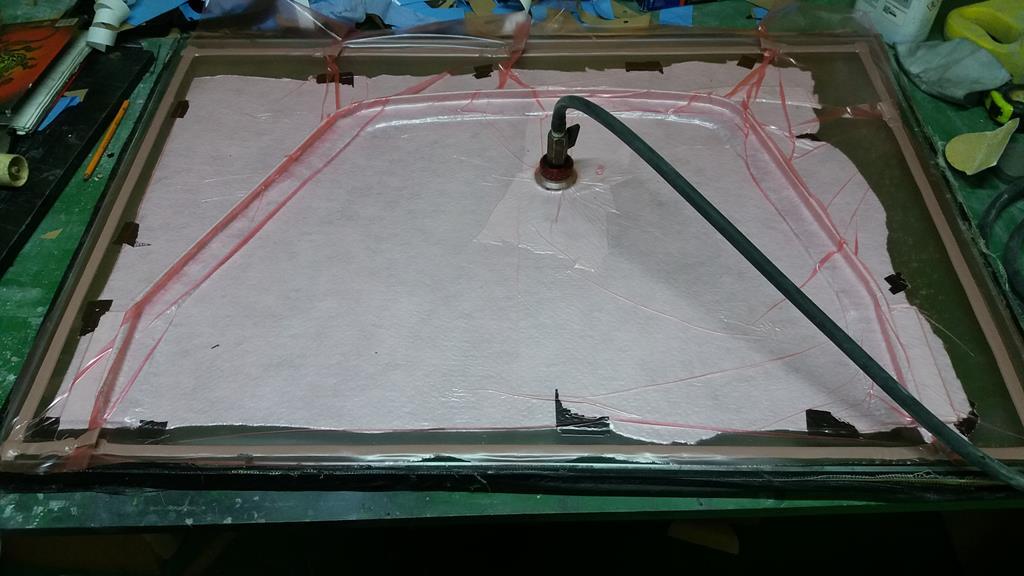 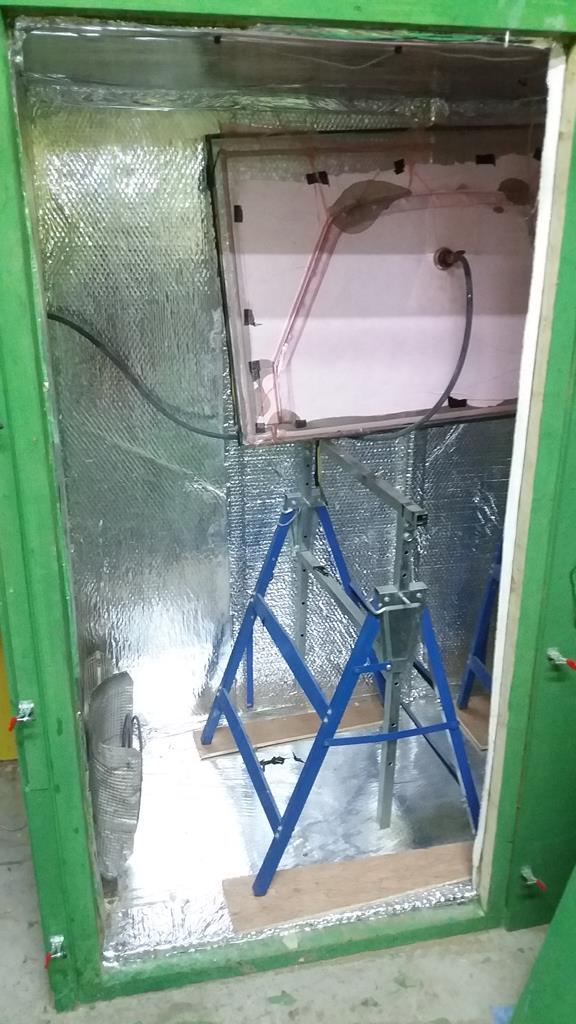 |
| |
|
|


