|
|
|
Mar 29, 2018 11:55:35 GMT
|
Filler work really is a chore to get perfect, especially for the perceived waste when you look at how much of whatever you put on has to come off to get the profile right. Is the sandblasting damage heat distortion, effectively? Common lore holds that the wavy panels from sandblast damage are from heat build-up. A bit of testing with a scrap panel and an infrared thermometer tells me that cant be the case because there is no perceptible temperature increase when I sandblast a part. What I postulate is that the sand actually compresses the top layer of the metal . In effect, this means that one side of the tin will have a smaller surface area than the other, and the panel will curve. |
| |
|
|
|
|
|
|
|
Mar 28, 2018 11:38:44 GMT
|
And the beat goes on! The answer was to pry the door-skin off the frame and try to fix it by running through the English wheel. To that end, the doorskin was gently pried off by unfolding the lip around the perimeter. Of course there are a few spots welds that need to be cut and a few welded sections that need to be teased apart, but in the end, we go t this: Remarkably rust free door shell.  And the wrinkly patient. Need to remove all the primer from both sides before I can run this through the E-wheel. Having never tried to repair sandblast damage this way, it should be interesting. Since the folded edge will constrain the shape, I have no idea how the panel is going to react. If it all goes sideways, I can always cut the lower half off and make a new repair section.  And a day without dust would not be right anymore, so got on with more sanding of filler. The DS is about 90% done. That means I still have 90% of the time to obsess about the minor imperfections before it is really done. This gives you and idea of how I play this game. I scuff the epoxy primer with a 40 grit paper to give the filler some bite and then lay down as smooth a layer as possible over the entire area of interest. Not too worried about where exactly the high or lows might be. Then I take a sanding block and go at it in an X pattern until I start to see shinny metal spots. ( see red arrows) That is your highest common denominator. Sanding past this point is counter productive in that you will just start creating waves between the metal islands. I can still see a few spots where the filler is not sanded, so I will go back and hit those with a layer of mud and repeat with another thin skin, just to make sure.  Here is the PS upper quarter before I start sanding. If you look at the previous picture, you get an idea of how much gets sanded back off. Most of it. The vast majority of the filler ends up on the floor.  Once all the filler is done, I will cover the lot with a layer of high build and block sand the whole car. Once again, sanding with the blocks down to 220 grit until the metal high spots just start to show up. Then a final coat of eposy and paint. Hopefully by June I will be ready for the paint booth. Better get cracking on finding a painter. |
| |
Last Edit: Mar 28, 2018 11:44:35 GMT by bjornagn
|
|
|
|
|
Mar 27, 2018 15:10:28 GMT
|
|
What a strange journey this has been.
In a good way.
|
| |
|
|
|
|
|
Mar 25, 2018 23:49:28 GMT
|
Moving right along. The car is flatting out nicely. Got this far today . While there is a skim over a lot of the tin, the gaps are tin on either side. You do not want a filler edge as it will eventually get a nick.  Have this anead of me. Not sure how it will play out.  Those are 1/4 or more low spots. NOT going to be filling and sanding over that sinkhole. Options: Buy new door skin.. $500 Find a new rust free door and import to Canada and have sandblasted. Peel off the existing door skin and E-wheel the ripples then re-install? Cut off lower half of door-skin and e-wheel a new lower half from a piece of tin? Panel-beat the bejabbers out of this door until it is close-enough. Stand-by for the exiting conclusion.... |
| |
|
|
|
|
|
Mar 21, 2018 15:09:01 GMT
|
|
I am well beyond spoiled with my well insulated and heated shop. I have a lot of respect for those that can do this in the cold.
|
| |
|
|
|
|
|
Mar 21, 2018 14:53:49 GMT
|
Just to give everyone an appreciation of how painful it is to get an old car straight. There is 4 hours of sanding between picture #1 and picture #2. Hard to see much difference.   Disclaimer: I am NOT an experienced body work professional. Just an amateur who muddles his way through, so these times in no way represent what the job SHOULD take to get done, only what it takes me. That said, I am happy with where I am getting. Figure another 10 hours before I am ready to shoot the front clip in black epoxy high fill. |
| |
|
|
|
|
|
|
|
Change of plans...paid the missus the $1000 fine and decided that driving the car this summer is not going to happen. Instead, I am going to finish the bodywork and get it painted. Do final assembly over next winter and be ready to roll by spring 2019. The fun has started. The car is nice ans solid. however whoever did the sandblasing did not have a clue. While there wont be a very thick layer of mud anywhere, the car is going to pretty much get slathered in the stuff and sanded smooth. Figure about 100 hours and two gallons most of which will end up on the floor and my nose. |
| |
|
|
|
|
|
Mar 17, 2018 13:41:30 GMT
|
Love the vintage drill press! Your problem solving skills are note worthy and I will admit to cribbing the odd bit for my own portfolio of future fab tricks. 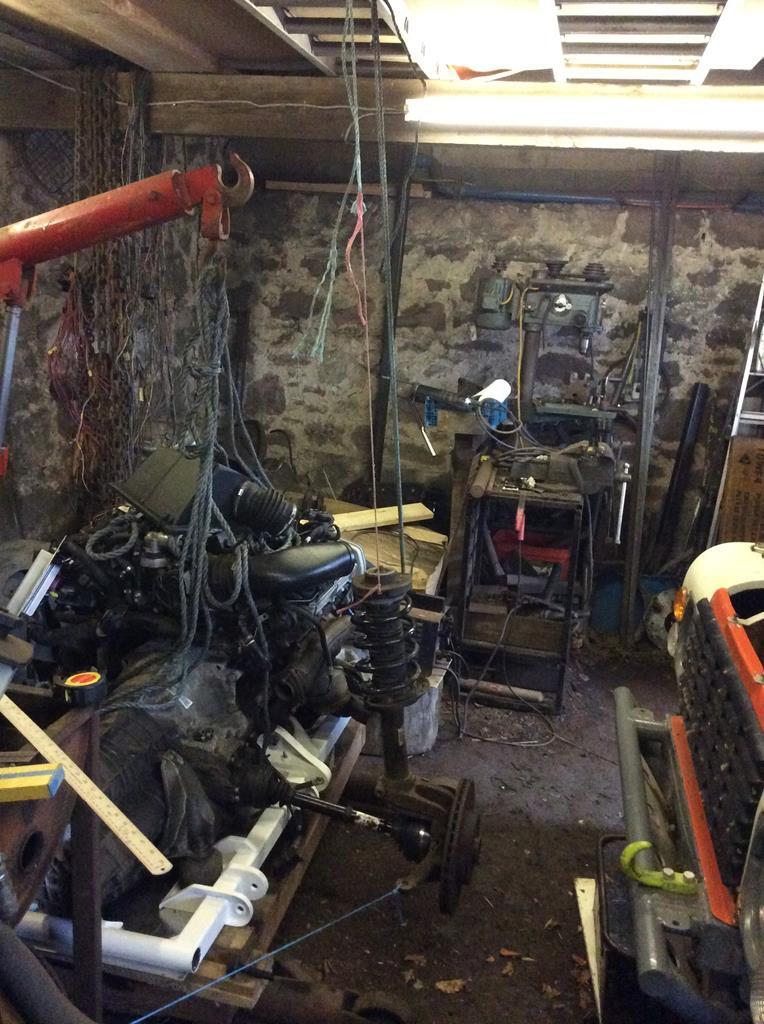 |
| |
|
|
|
|
|
Mar 16, 2018 18:16:16 GMT
|
OK, someone needs to explain something to me. How does a kit car, a vehicle that I assume only sees occasional dry weather use, get this rusty. Ever?  I live in Canada, so I know about salt and all that, but even cars that get driven in winter often don't have this much rust.Ant it was undercoated, not like it was bare metal either?! Is the air and water just more corrosive in the UK? |
| |
|
|
|
|
|
Mar 13, 2018 19:59:30 GMT
|
|
Suspense is killing me....no idea how you are handling it!
|
| |
|
|
|
|
|
Mar 10, 2018 21:11:47 GMT
|
|
80 pound for a diff cover! Entire rear axles are "come get the damn thing" around here.
Try taking the cover off and welding it off the car. You might have to cut back to solid metal, but still, cant be that big of a rust spot.
|
| |
|
|
|
|
|
|
|
|
I think that faced with your task I would have just sprayed the entire interior of the car with soft expanding foam and carved out a spot for the driver and the windshield.
|
| |
Last Edit: Mar 9, 2018 14:56:37 GMT by bjornagn
|
|
|
|
|
|
|
|
Go to the end of the wire at the taillight and disconnect from the light. Turn on the power and using your meter, see if you have 12 volts at the end of the wire. If you do, then connect the wire to the light and measure again at the connector. If it goes down, then there is internal resistance in the wire and it is not supplying enough current to do the job.
You should also measure the resistance value of the ground between the contact point in the bulb socket and the chassis ground. It should be pretty much zero ohms.
|
| |
|
|
|
|
|
|
|
|
How big are you building?
|
| |
|
|
|
|
|
Feb 28, 2018 18:55:16 GMT
|
This build feeds all of my requirements for an Epic Build Thread. Thank you for posting it here. I shall be along for the duration. If I may, a couple of questions about your fabrication methods: What are you using to slice up your steel? The inside corners do not have a hint of overcut, and the lines are razor straight. Either you are very good with the cut-off wheel or are using alternate methods? 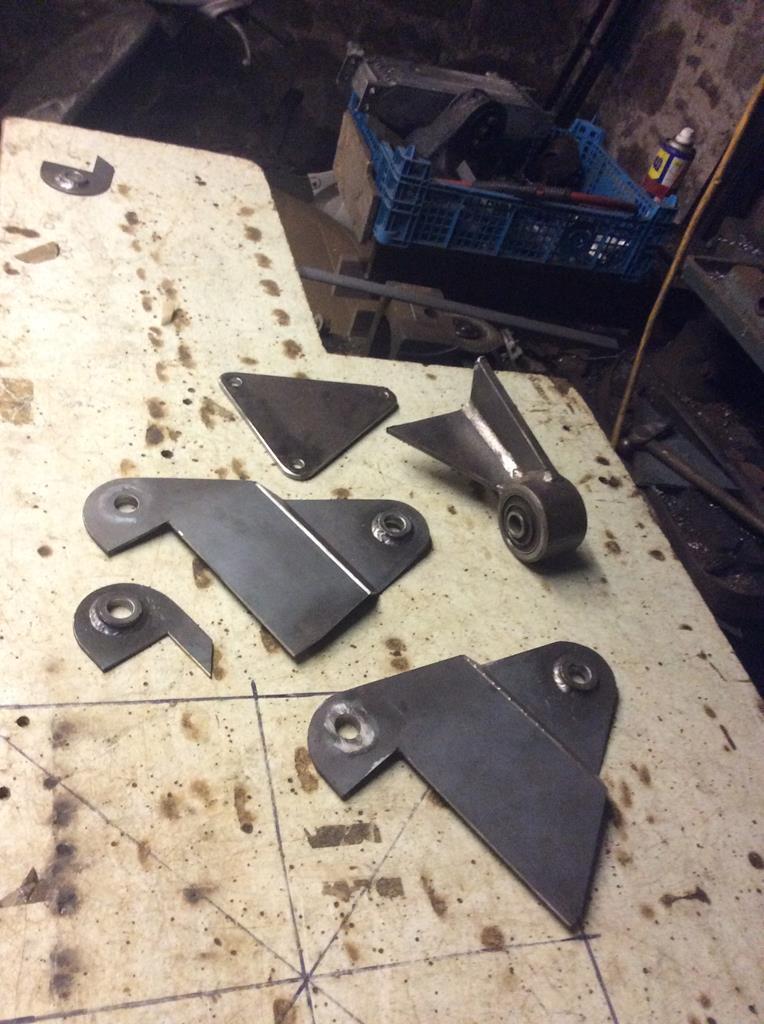 I note that you "fence" your plate fabricated brackets for extra strength. That is a nice touch that I use on occasion. Takes forever if I am doing it and somehow not as neat as your efforts. Do you have some shortcuts or are you just welding thin strips to the edge of the brackets like everyone else and cleaning up with a grinder? I noticed it right away on the plates that form the differential mounts and at first I thought it was milled plates. I would expect a lot of deformation of the plates if just welded to the edge of such a large flat surface; should have created a bowl as it shrunk the perimeter? 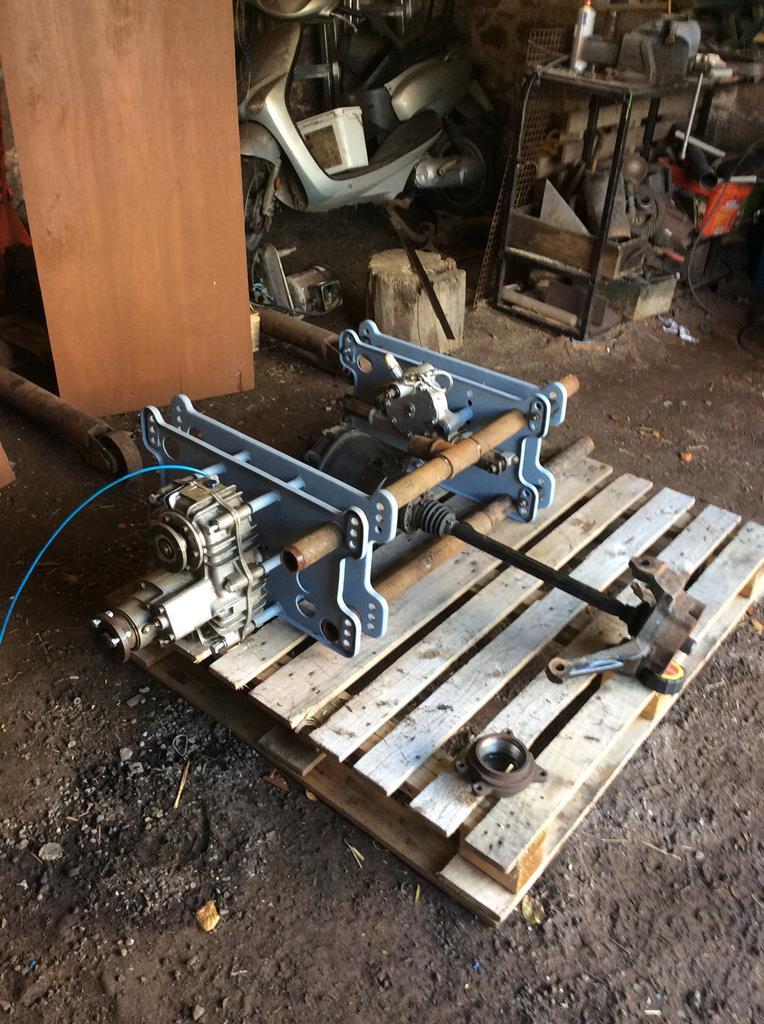 Mig, TIG or both? The weld on the angle bracket with the rubber busing looks like MIG, but the one on the metal bungs look like TIG. If they are mixed, what is your criteria for one process over the other? |
| |
Last Edit: Feb 28, 2018 18:57:01 GMT by bjornagn
|
|
|
|
|
Feb 27, 2018 21:50:24 GMT
|
You do realize that is like asking at the AA meeting if anybody fancies a Pint  Yes we very much like this stuff around here! |
| |
|
|
|
|
|
Feb 25, 2018 22:17:55 GMT
|
On a totally unrelated track. picked up a set of 16"wheels from a MINI with and ET of 48. Wheel to wing clearance will work and I like the stance with the 16" rims and a 55 profile. MAYBE a 1" drop in the future, but for now, that goes on the back-burner until I get a feel for how it rides. For a driver, this is fine.  |
| |
|
|
|
|
|
Feb 25, 2018 11:39:20 GMT
|
|
I have in the past run my GT as low as what you are showing. While I loved the look, and lived with it for several years, what I found is that the MGB suspension geometry does not like to go lower than where the lower a-arm is past level with the ground. Bumpsteer starts to become a thing.
Good move on getting rid of the bumpstops. It took discovering snap oversteer on the track to teach me the lesson.
The last straw was the day I high centered the car on the transition coming out of an underground car park.
|
| |
|
|
|
|
|
Feb 24, 2018 22:49:50 GMT
|
|
I have to wonder at it all: The UK was once the world leader of shed-build cars at both the home and small manufacturing level. It was a hotbed of creativity and industry. Now you have this IVA wibblepoo.
It would seem that today's bureaucrats wont be happy until creativity is stifled to the point where we all become homogeneous consumers.
|
| |
|
|
|
|
|
Feb 24, 2018 11:59:52 GMT
|
The jag swap is one that is being pionered by "Rocketeer" www.rocketeerltd.com/ for the Miata crowd. Very complete but not cheap. The good news is that what fits in a Miata seems to fit in an MGB, so there might be some bits to pilfer. The Miata 1.8 L swap is a good one because 1-It has been done so there is a path www.mgexp.com/phorum/read.php?40,2419629 2-It comes with a very good gearbox attached that solves the MGB's second worst sin: the gear ratios. I ike the Ford Zetec engine because it looks right when finished. Bit trickier to get a gearbox attached, but there are options to do this one for cheap. Something about a bellhousing meant for marine applications? Not sure howw this would paly out with your laws, but the MGB and the Miata share a wheelbase, and it would be possible to drop an MGB shell over a stripped Miata chassis without much trouble. This would require some Seebring style wheel-arches, but is that a good or bad thing in your mind? Not much more difficult than a floorpan repair really. This was actually going to be the plan with my GT until the VolvoP1800 came along. The poor MGB engine is shackled to mediocrity by its long stroke design with lousy rod angles and then topped by a cylinder head with a siamesed intake and exhaust system. Not that it can't do its job; with a Burgess head and kept under 4000 rpm it will plod along all day for years and simultaneously lubricate your driveway, but it will never inspire. |
| |
Last Edit: Feb 24, 2018 12:07:47 GMT by bjornagn
|
|
|
|


