|
|
|
Nov 12, 2012 11:02:46 GMT
|
|
|
| |
|
|
|
|
|
|
|
|
|
Not really for xmas but I made these toy wooden guns the other day. Not totally my idea, the army had an exhibition at Beaulieu in half term and the kids could get dressed up in army clothes and do some exercises, They had wooden guns carved from ply and painted dark colours. Simple! All those awkward leftover pieces of ply Id kept that might come in useful, take a cheap plastic gun from sons collection, the type you get from the pound shop and always break! trace round the outside with a marker, jigsaw round it, rub down smooth edges, paint with whatevers lying around, hey presto more guns for the garden more noise for the neighbours ratatatatatatatatatatat......  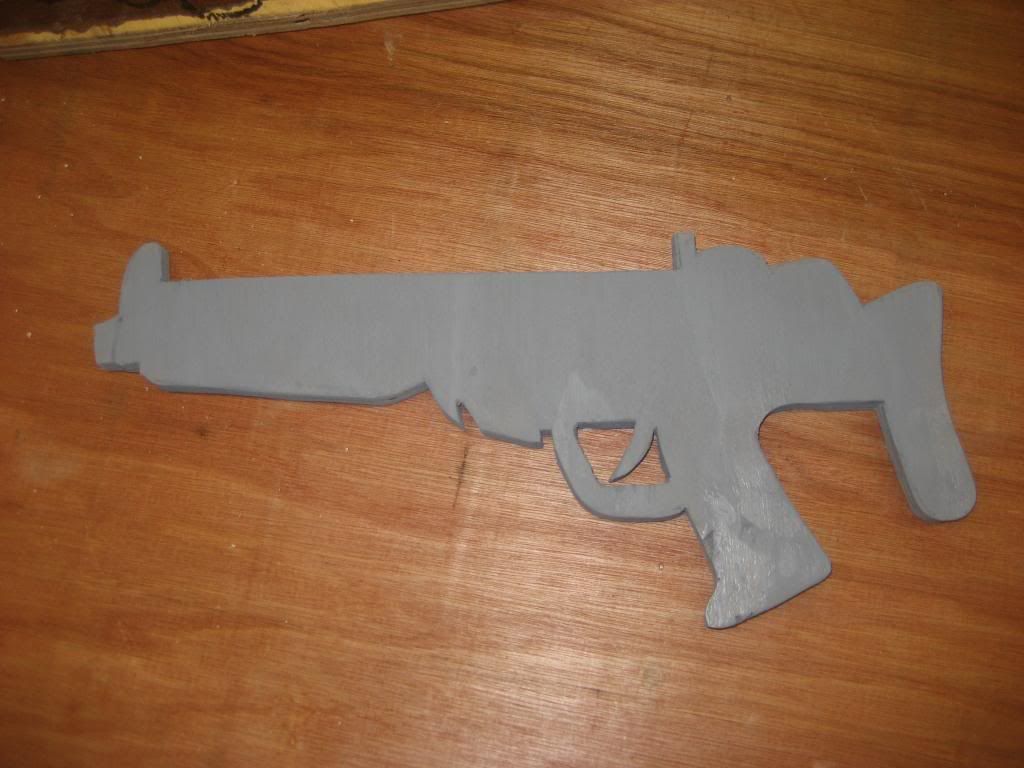 Unfortunately Jack grabbed them before I could detail them properly and drew all over them, still he was happy! |
| |
|
|
|
|
|
|
|
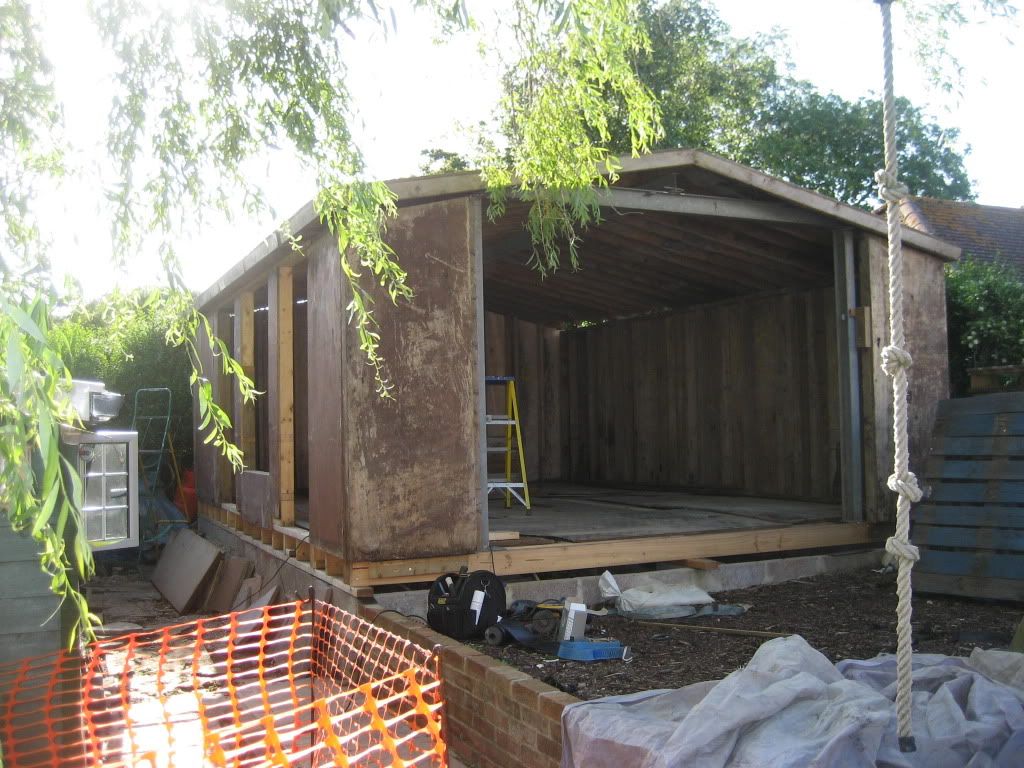
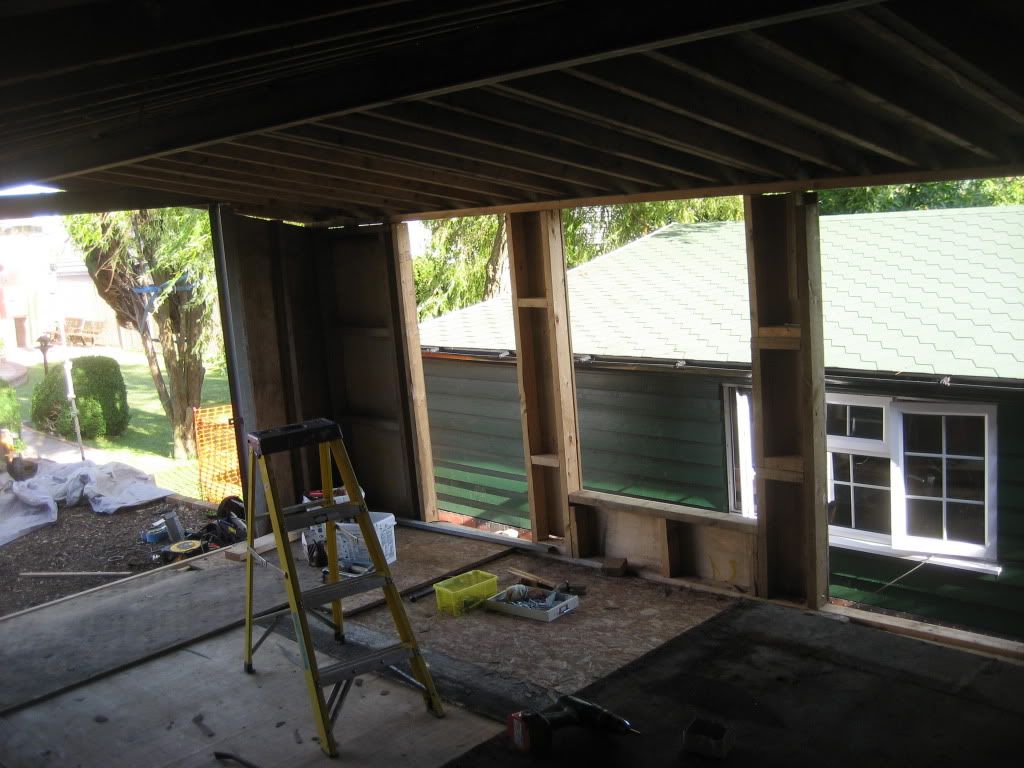
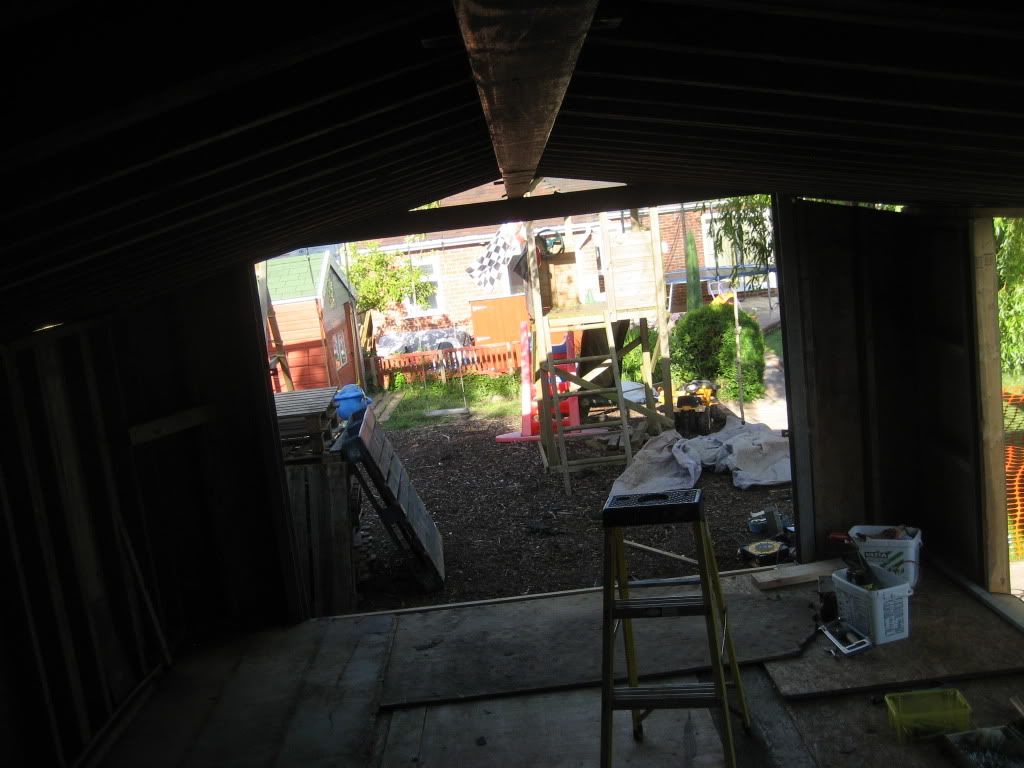
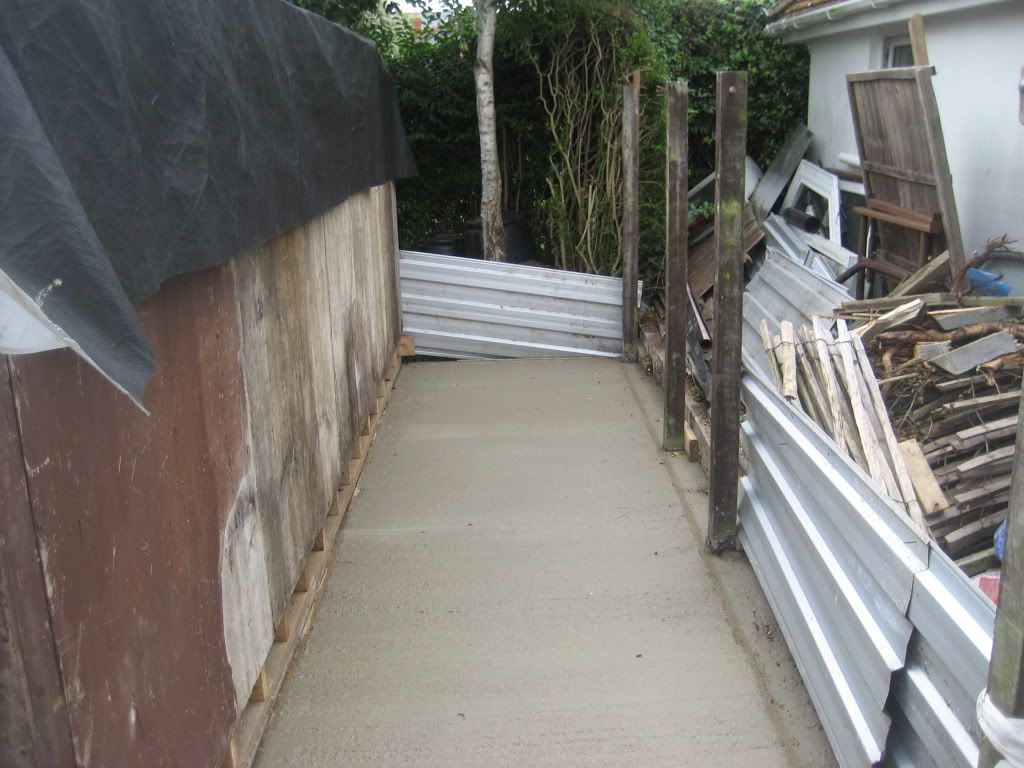
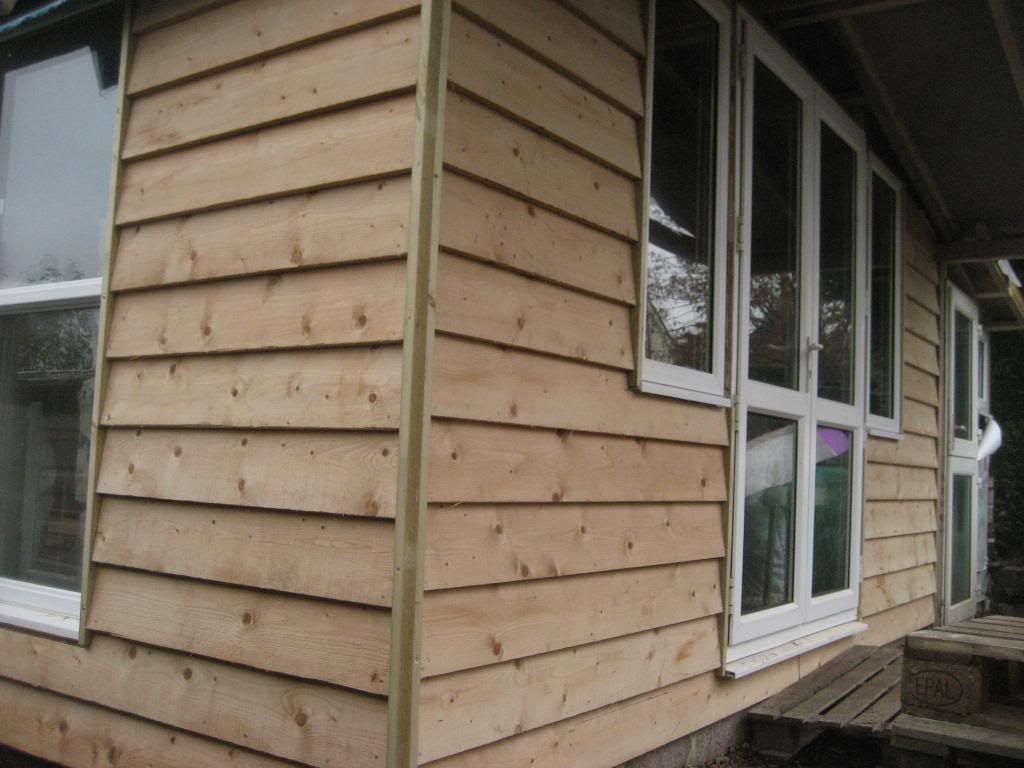
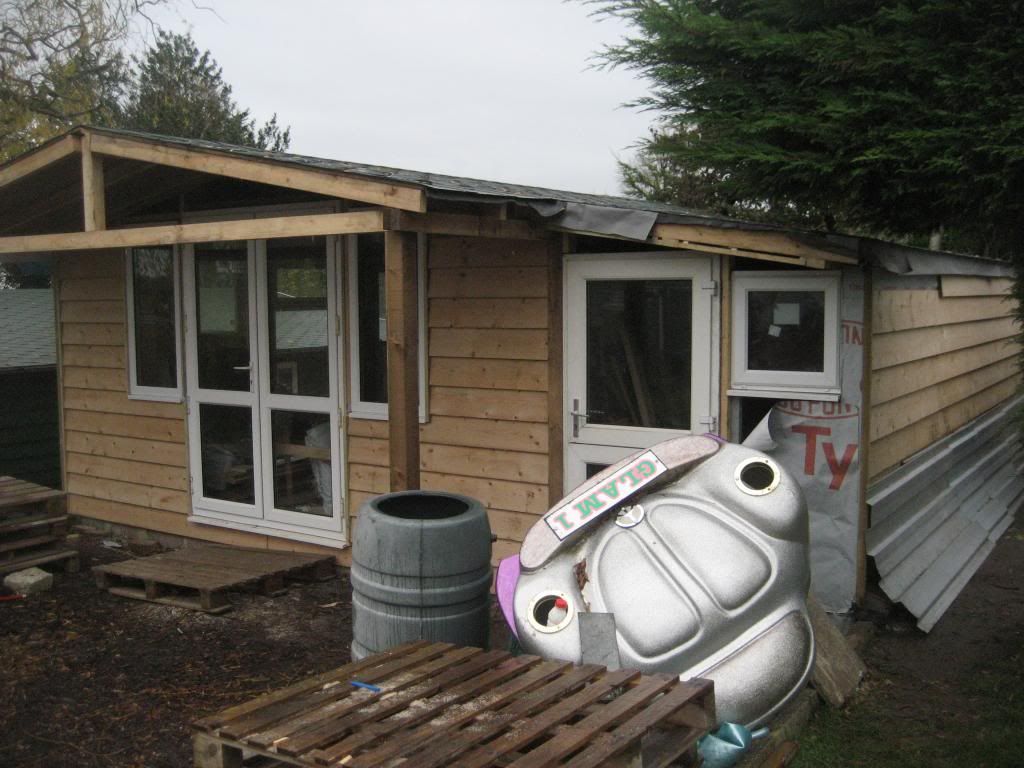
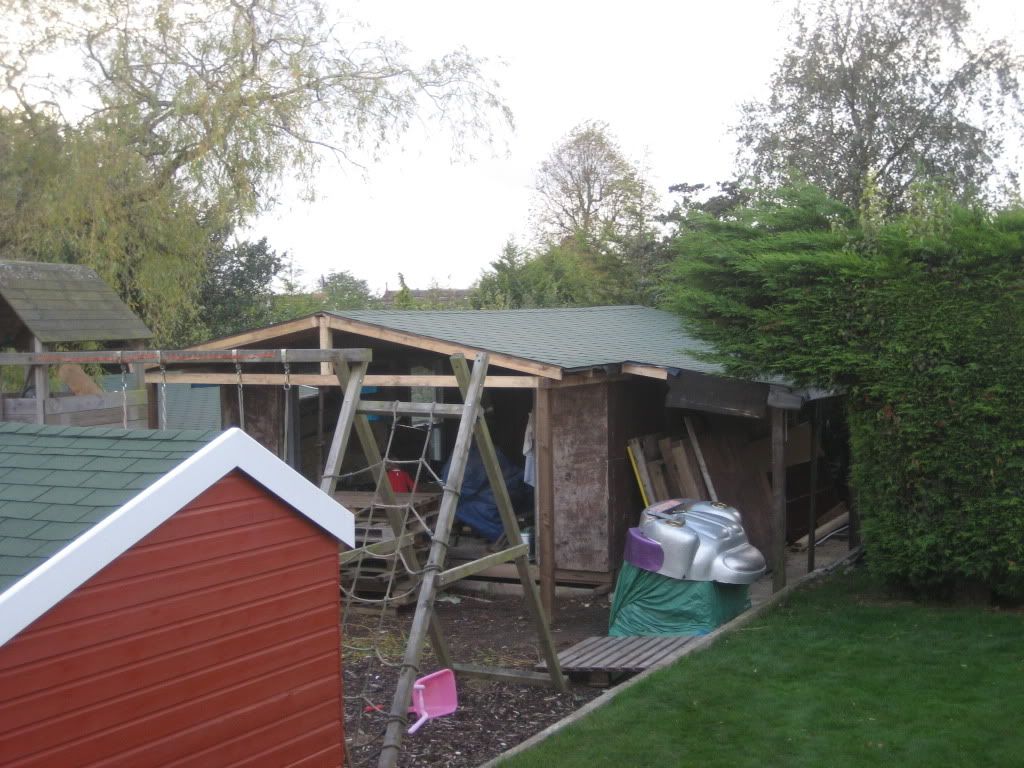
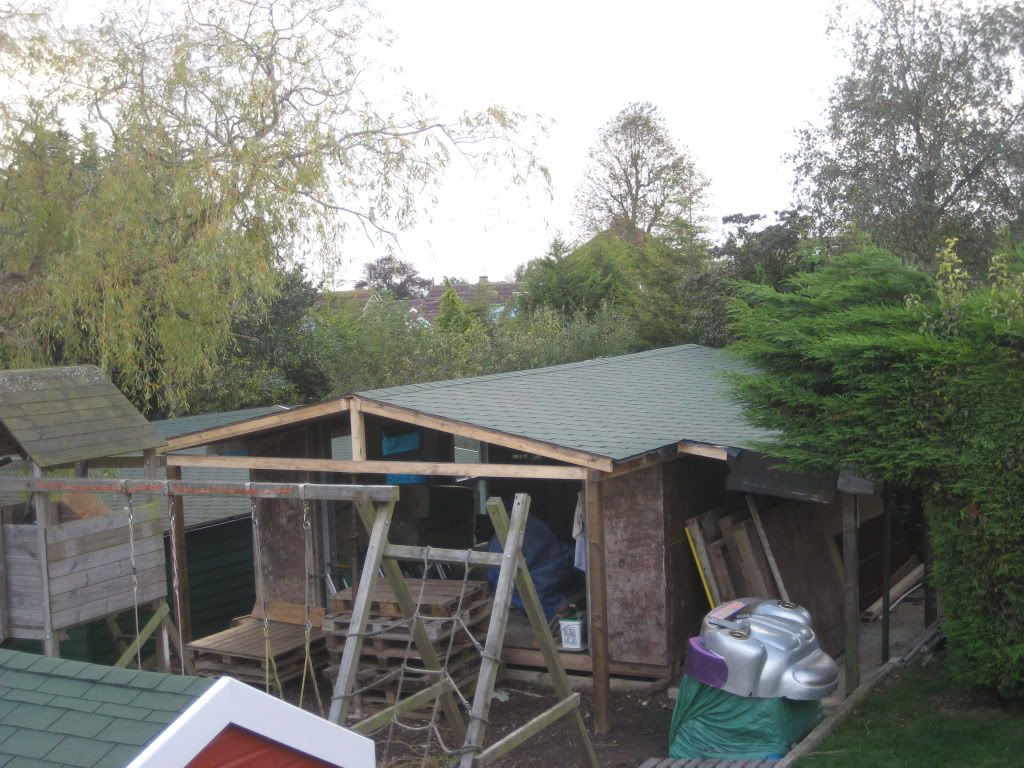
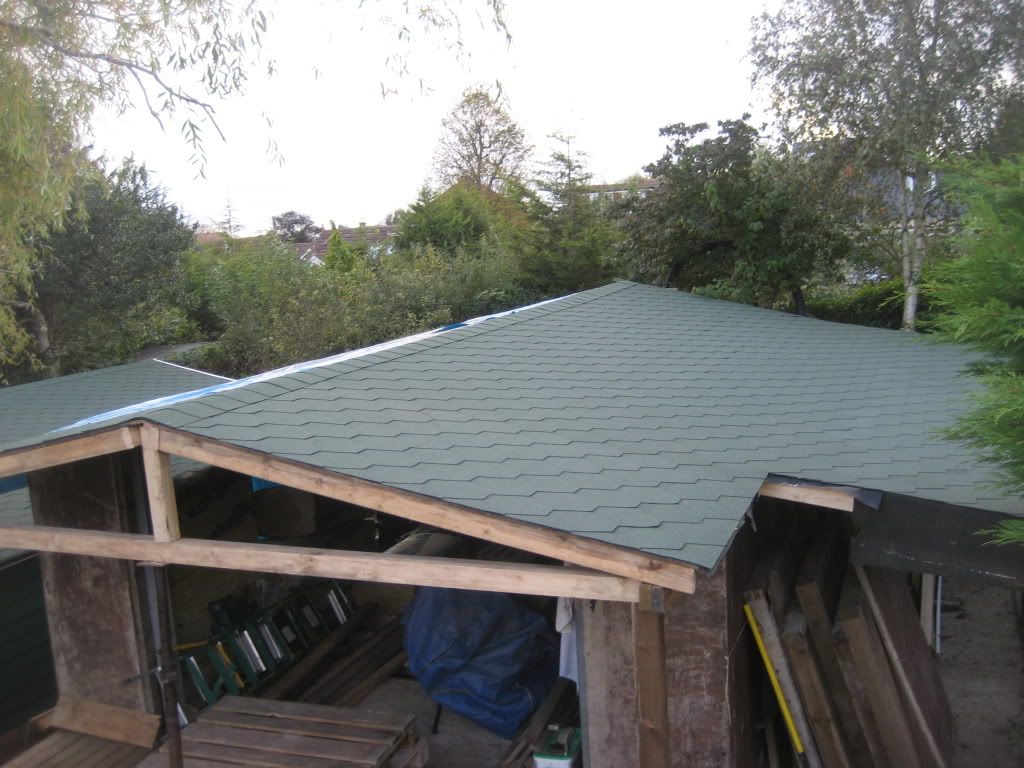
I hate it when the clocks go back! I find it difficult to remember to take photos early enough before it gets dark! The weekend before last we done a little bit. We realised that the shed area would benefit if we extended the roof out a foot further to protect the door from the weather. As usual we used what we had lying around, most of what we do is an afterthought as we mostly make it up as we go along, visualise it in our heads, measure twice, cut three times etc  Then a week later think Ah!!! We should have done it this way! Anyway I had an old gate that I found in the skip over a year ago 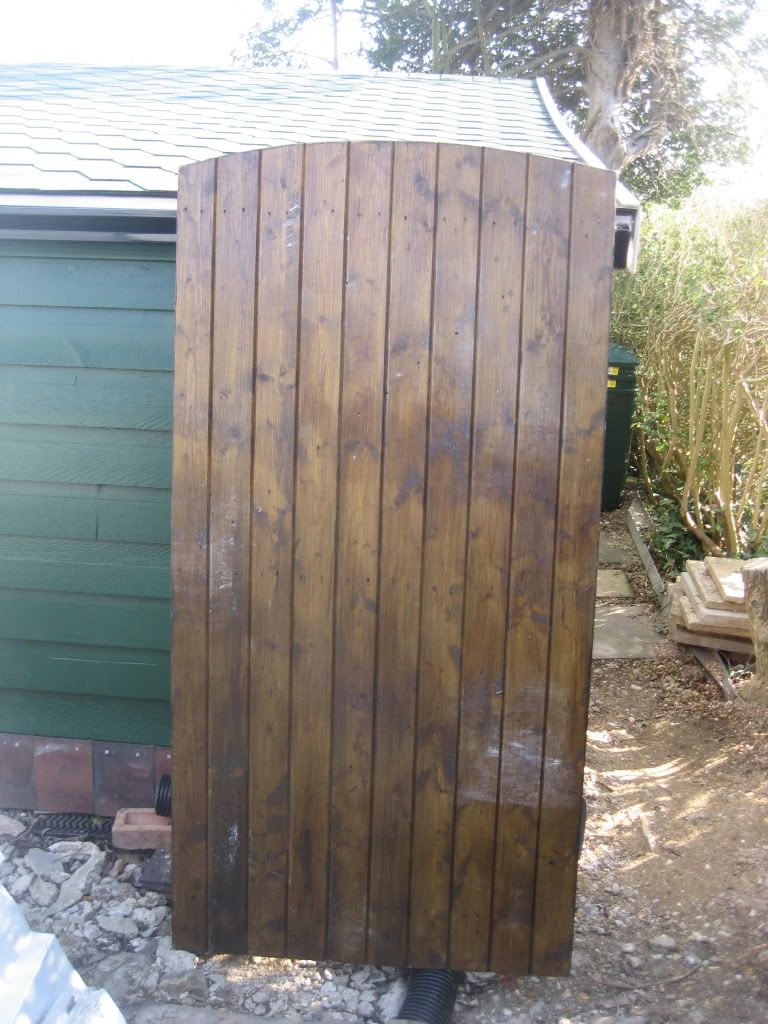 And decided this would do for the shed door, its a little curved at the top so we thought we'd turn it upside down and put a skirt on it to make it square. We made the doorway to fit the gate and then started to box in the rest when I reminded the farther in law of a small window frame knocking around in his garage! I went and grabbed it a quick measure revealed it was just too big for the hole by 15mm! No worries that was soon shaved off and it now fits like a glove! The glass was there too and it opens so I can make the shed a well ventilated area like they suggest on stinky cans of spray paint and varnish etc This weekend there wasnt much time to get too involved with much so i started to tidy up in preparation for fixing the cladding on ensuring enough workspace around the building. Her old man as bad as me for keeping that something that might come in handy one day gumpf has odds and ends of upvc frames etc and found the frsme to an old door! He said the glass was inside the shed for it and that it was unusual as it was like a stable door with top and bottom openings, pretty rare thats why he kept it when he removed it from a house..... over 20 years ago!!!! I said well wouldnt that fit the shed door instead of that gate? Only one way to find out! Dug the frame out and tried it for size! Apart from the height it fitted straight in! The same size as the gate we were going to fit! I had to take out one piece of wood at the top, 4 screws and dig the ground out a little, in it went! The door panels had a one pin missing so I made one out of an old bolt and hey presto a upvc stable door for the timber shed! 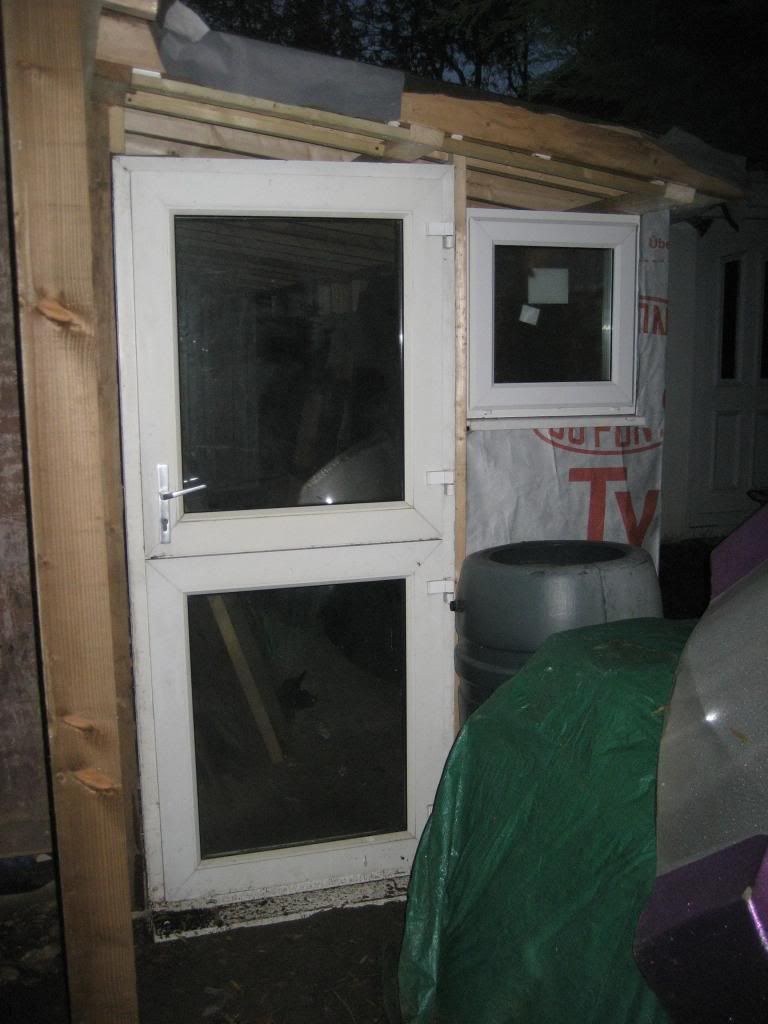 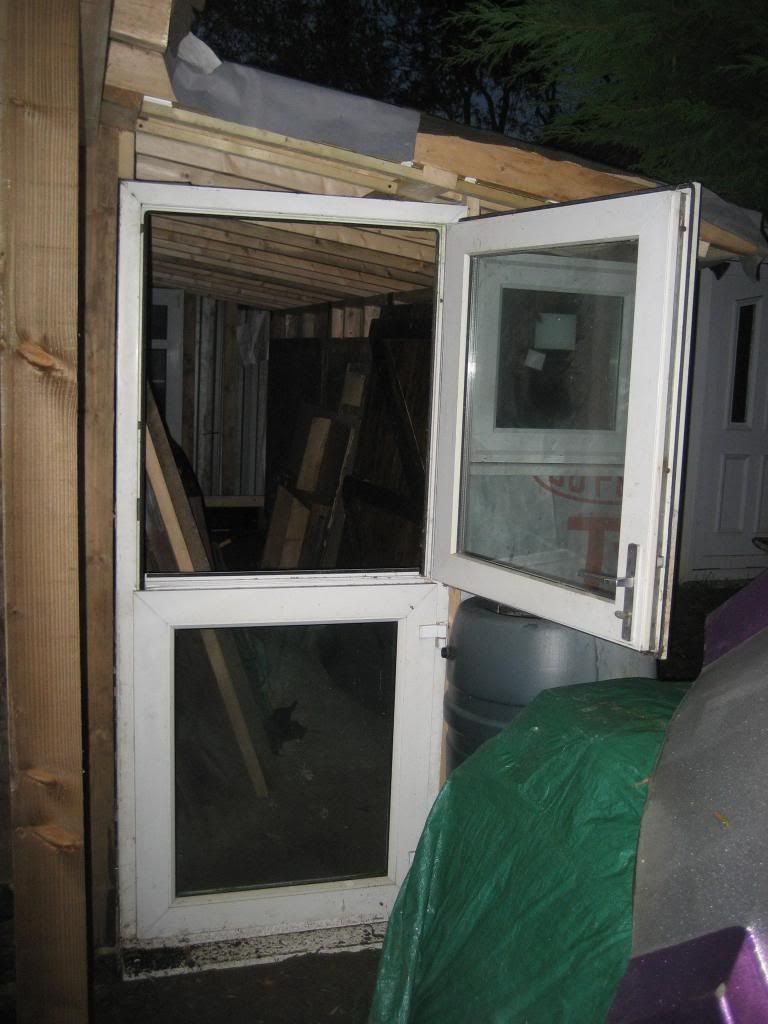 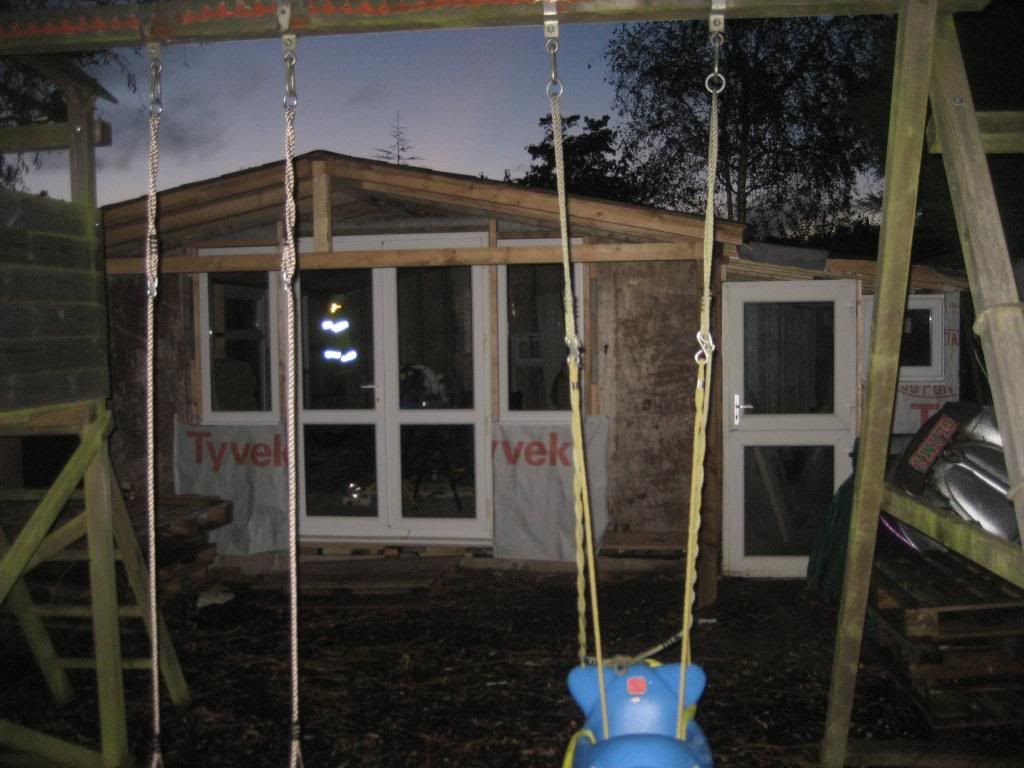 The whole building is now glazed, the extra two front windows around the patio door and the missing glass we had to re order cost £130 plus the second hand patio door the building has been glazed for £230! Thats not bad! 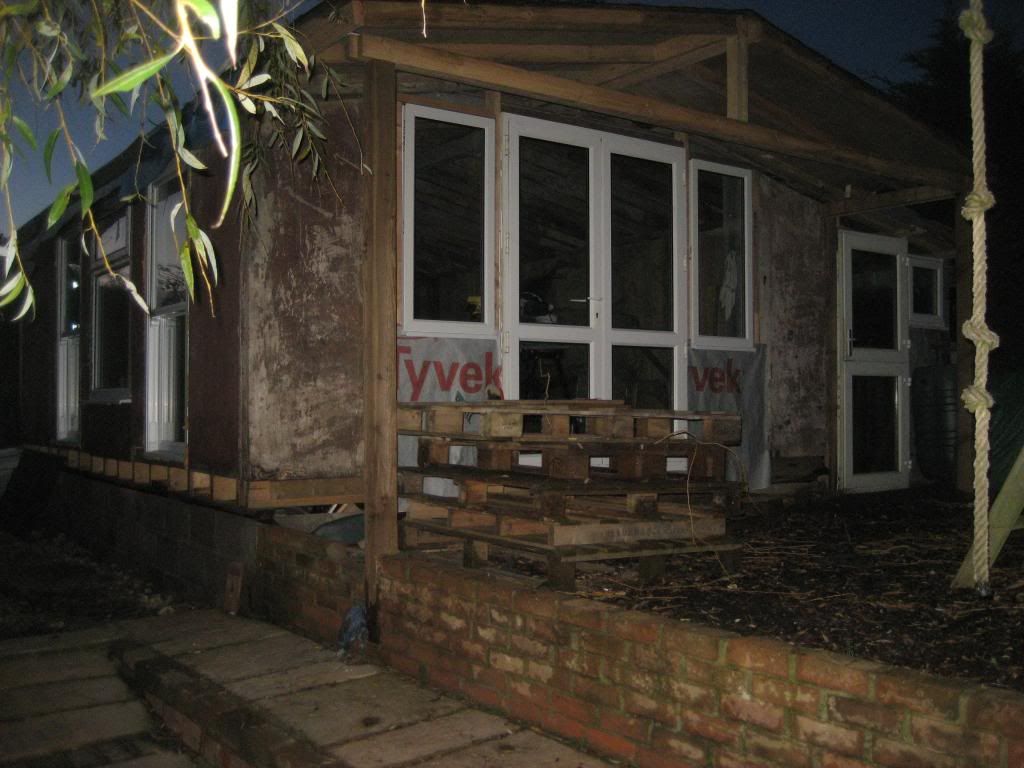 The timber has been delivered today 180m of weatherboard featheredge cladding 8" and 40m of baton £350. That hurt like hell and the Mrs wasnt best pleased but she knows I'm right It will make the building! The farther in law has been busy trying to get some odds and ends tidyied up so we can crack on at the weekend and he discovered that our usual change of plan has had the usual rob peter to pay paul effect! On the shed outside wall we turned the panels round so the inside is boarded out and we can just fix stuff anywhere we like, however on the outside we cant fix the cladding where we need to! So the vapour wrap has to be peeled off and extra noggins added where neccessary! See, make it up as you go along and then just keep refining it till it works! |
| |
|
|
|
|
|
Oct 21, 2012 20:16:10 GMT
|
Managed to find these by the skip at work. Looks like they fell off a lorry? Also someone dumped a perfectly good water butt in there, so that too will find a new lease of life! 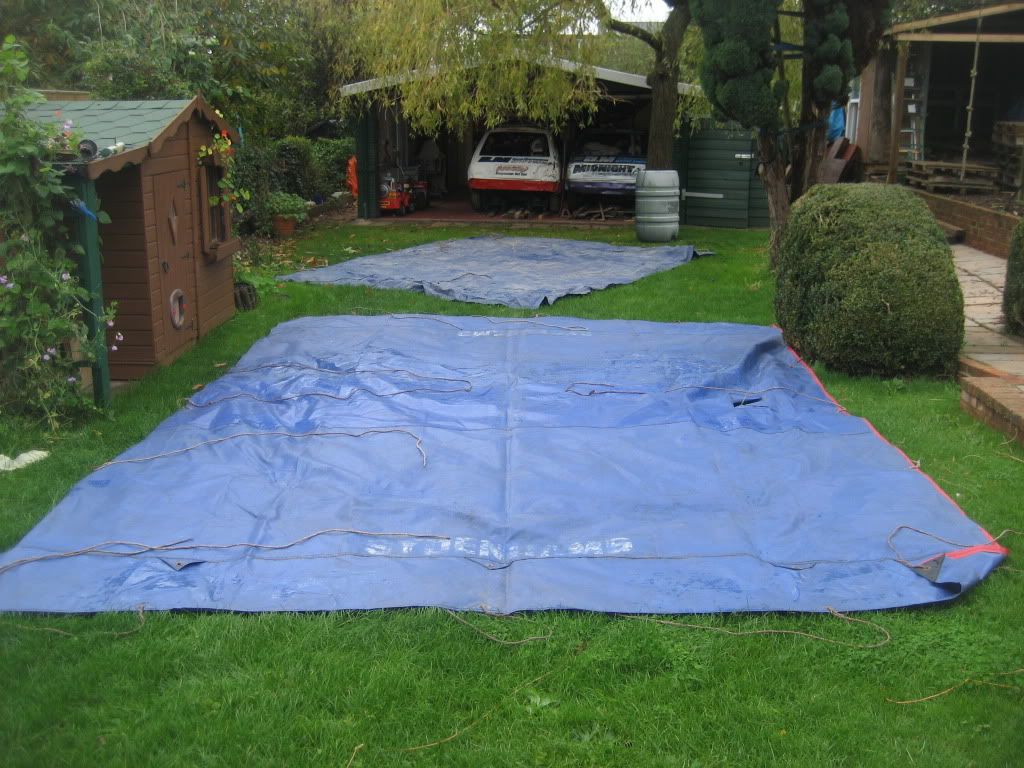 The tarpaulins I'l use on the green roof side of the gamesroom for extra protection, they're nice and thick and came just at the right time! 18ft by 14ft is the larger one, I wouldnt like to have to pay for it! We manage to finally get the patio door fitted on the front and decided that we'll order two windows to go either side to let more light in. The frame work was also made to fit the windows. I'm pleased with patio door found on ebay for £100! Believe me that was cheap most I bis on want for well over £250! 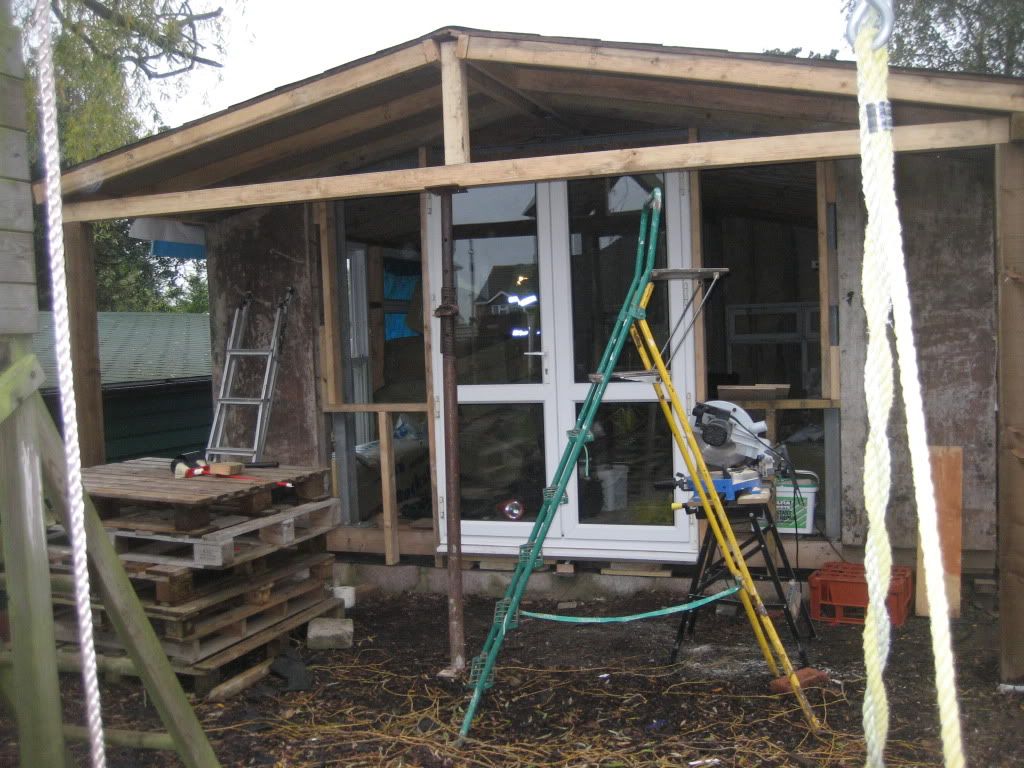 We got the panels lined up and fixed on the outside of the shed extension. I'm glad to get this buttoned up as the rain we've had its been pouring in there, it'l give an extra area to dry store more stuff out of the main room while we start work on the interior. 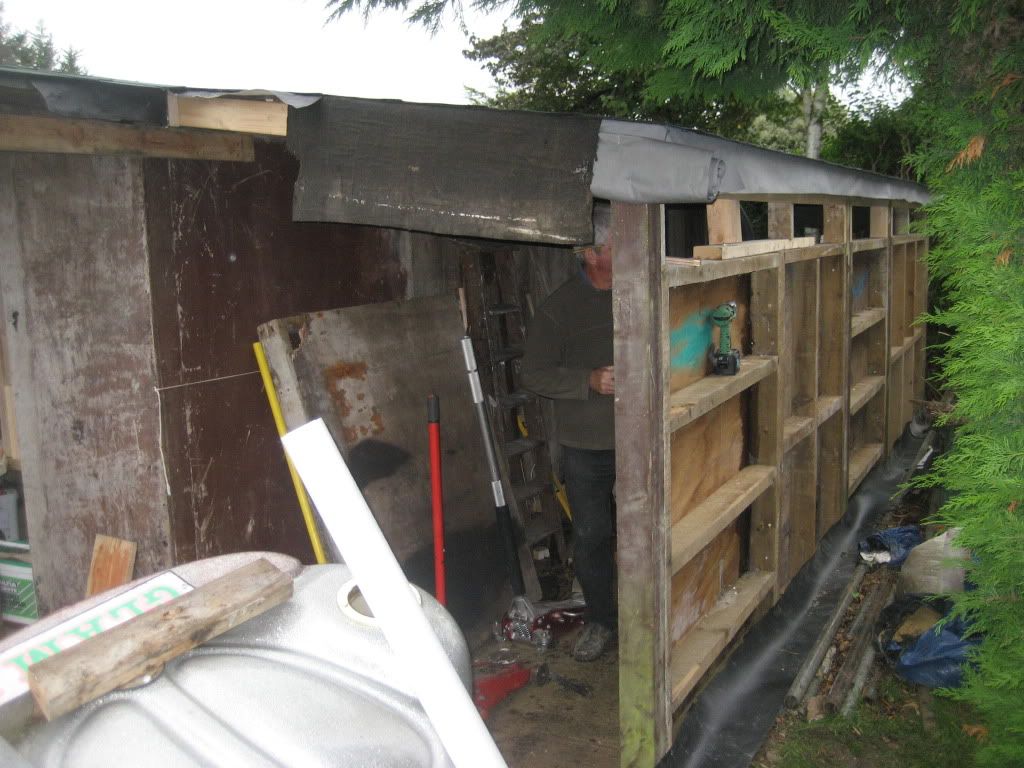 We used the panels left over from the otherside where we fitted the windows and we've turned them round so its paneled inside already and that way I can fix shelves or hooks anywhere, the outside will be wrapped and then covered with the feather edge board. 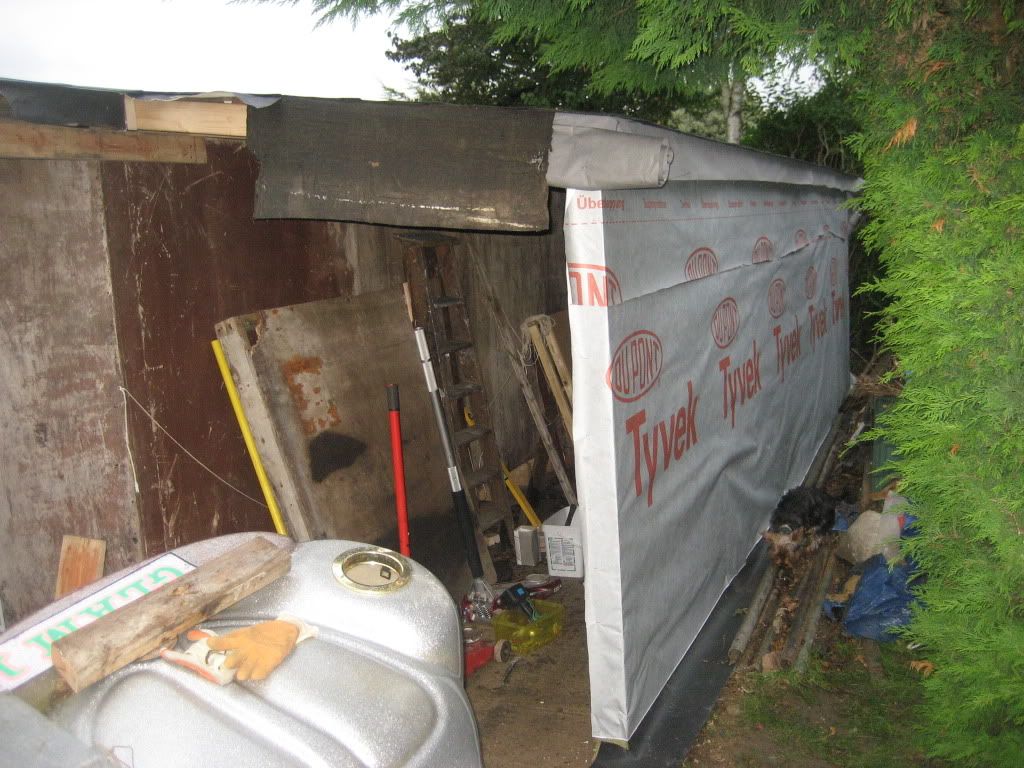 At 5pm I thought we were done but her dad was keen to crack till 6pm and was up for boxing the end in. We already had a window prepared for it, it came from my mum and dads house when they had french doors fitted. The window was too big but her dad cut the frame in half and we kept the opening side. The whole of the window tilts or opens so in effect its like a door you can walk through! Its also handy while you've already got all the tools out and your in the mood to crack on with a job as we reckoned that extra hour working in floodlight would have been a whole morning or afternoon starting from scratch! Thats it for this weekend, I don't have too much planned for next weekend as she's out all day Saturday! We plan to order the panelling for the outside so maybe it'l start to look like its finished soon!?! 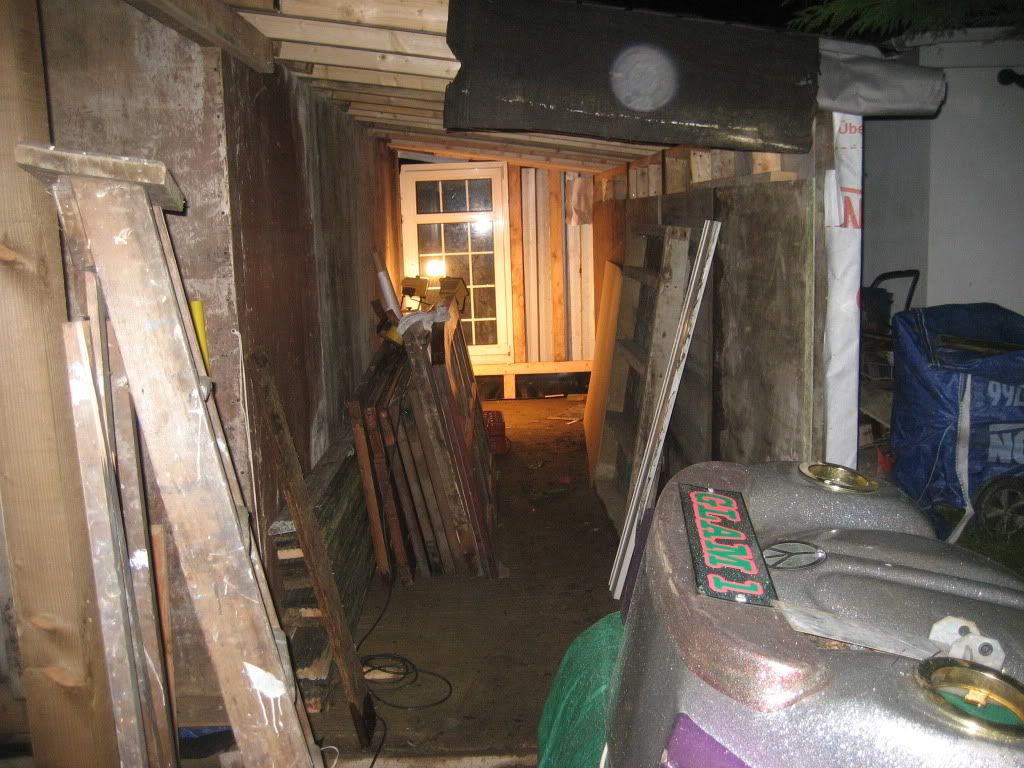 |
| |
Last Edit: Oct 21, 2012 20:19:00 GMT by ashley115s
|
|
|
|
|
Oct 15, 2012 20:25:52 GMT
|
|
|
| |
|
|
|
|
|
Oct 14, 2012 22:23:18 GMT
|
The garage is all signed off now and I have to say I'm relieved! The inspector did his usual two min inspection £300 well spent! This weekend we bit the bullet and finished off the roof extension on the front of the gamesroom. I hate to say it but I did go and buy new timber at the cost of £93! I've got loads left over so we can fit the patio door next week. 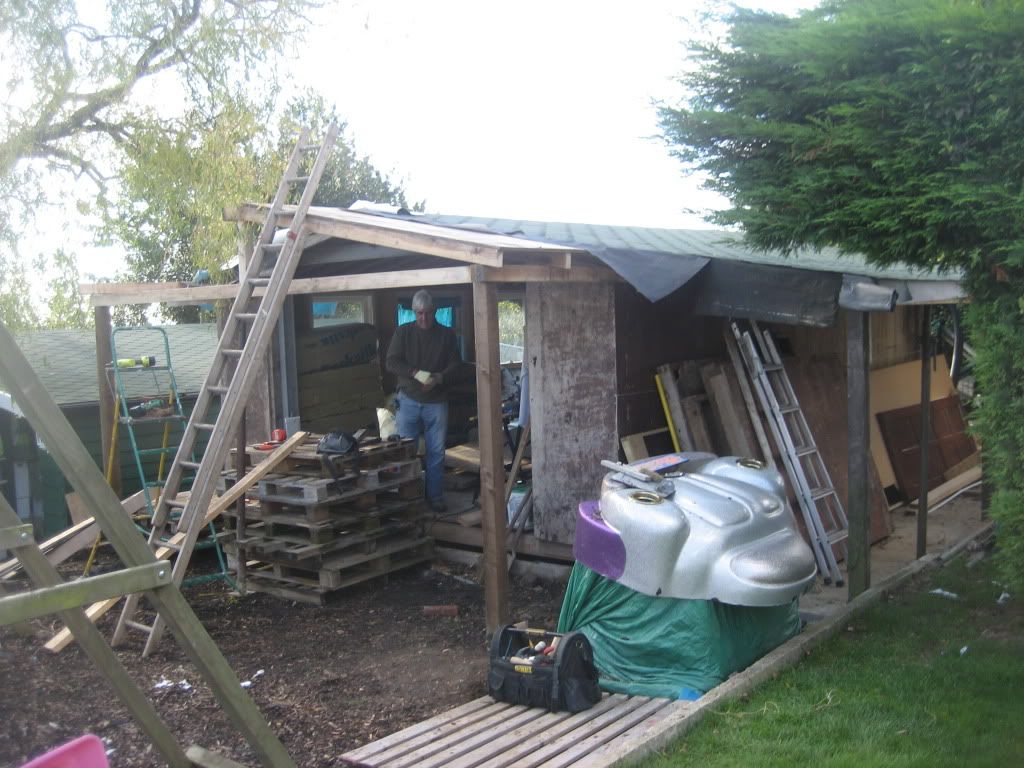  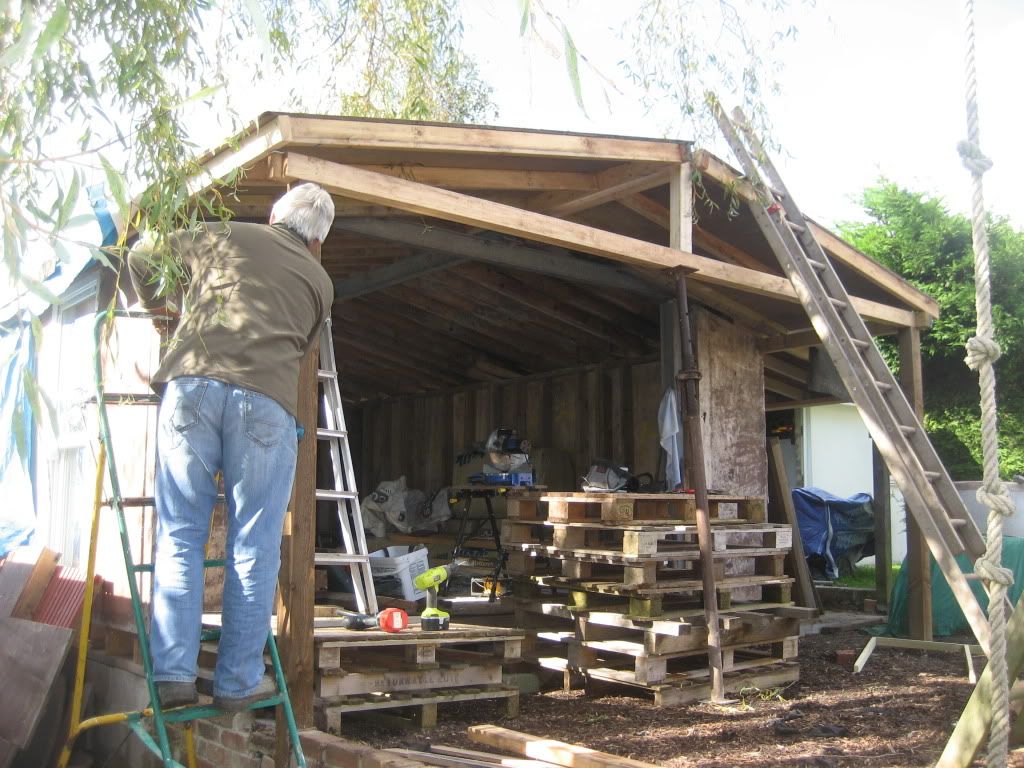 It is finished now and we tile'd it but it was getting late for some photos so I'l try and update it tomorrow. I don't want you thinking i've been lazy, I built some more of my flint wall, one more session and the flint work will be finished on this part of the build, but I've got loads left over so I'l be doing some more! 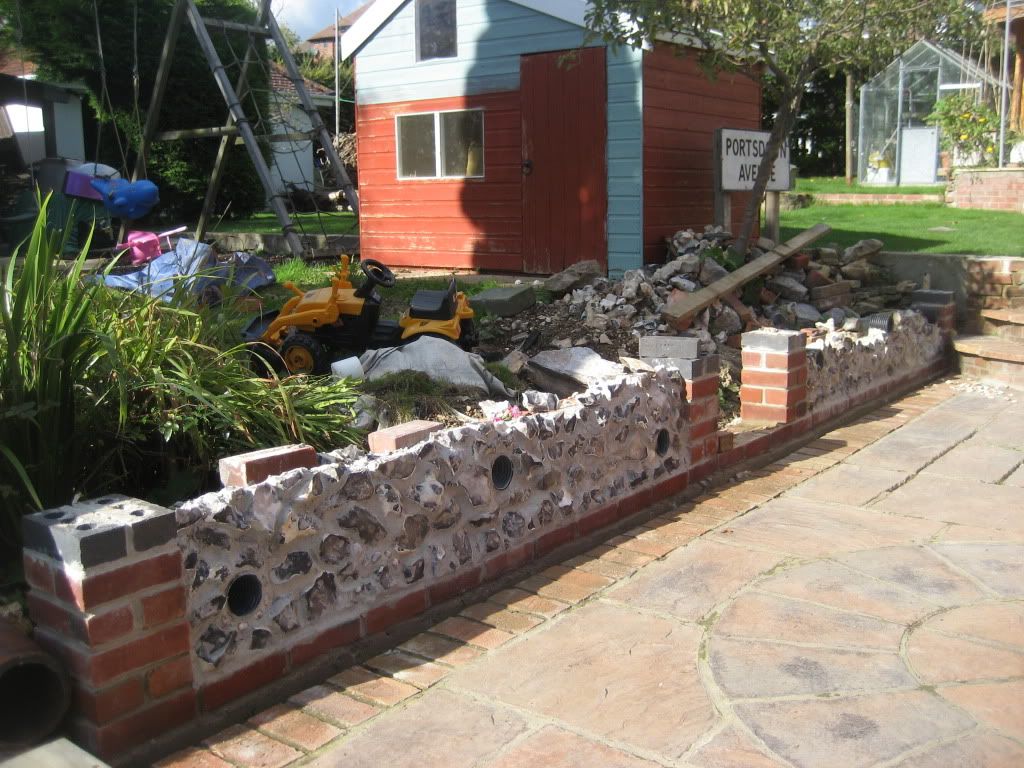 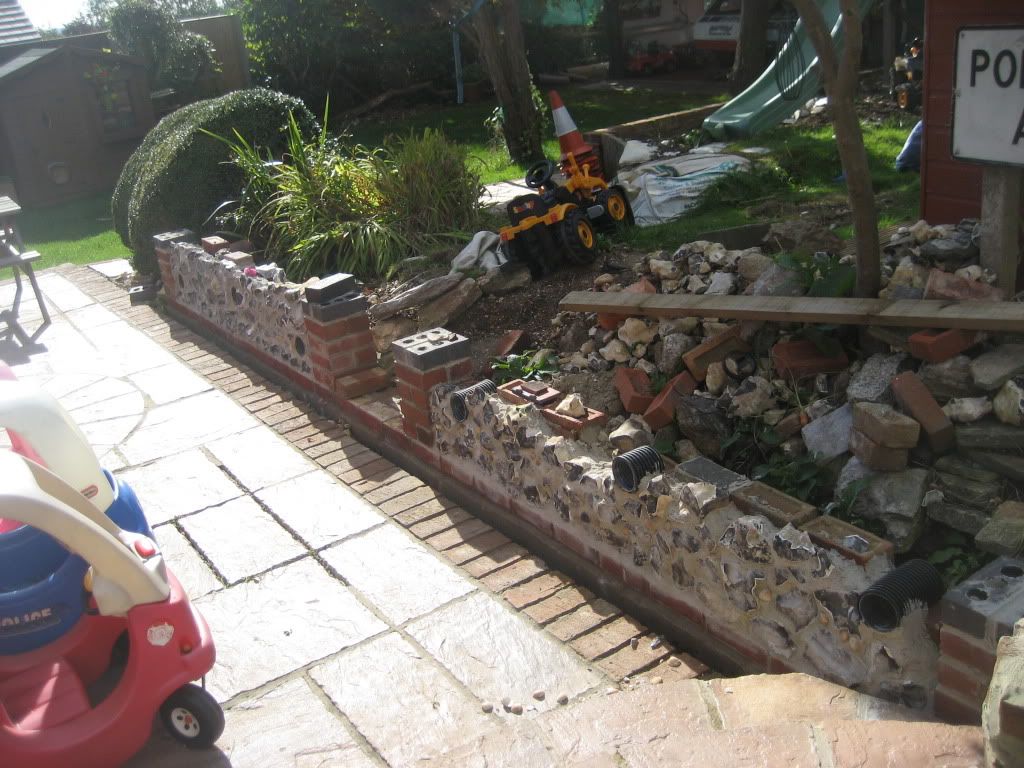 In the evenings ive been tarting up the metal cabinets in the garage. I wasnt happy with them when started to fill the garage up, they made the garage look dark and dirty and rusty after id spent so much time making it look bright and clean! I had big ideas to paint them tool box red and the stick a huge Snap on sticker over them! Only I reckon after all the hard work sticking the sticker on id probably peel the paint off! Plus paint them red might be a bit darker than if I painted them white? Only white will take many coats, but I do have lots of white gloss kicking about so it would be cheap? I decided on a compromise, red carcass and white doors. Sounds a bit cack but looks ok. I stripped the cabinets down took the doors off and rubber them down nice and smooth. I painted the carcass Red using Japlac international paint I already had a small tin leftover from touching up the race car. I ordered some white vinyl from my mate 30m for £34 and he cut them to size for each door. After a lot of buggering about I got them right using a little water, squeegey and the hot air gun to get it round the edges! Took about an hour each door to stick the vinyl on. I'm happy with the end result only it makes my tool box look shabby now! I might try T-cutting it or i'l paint it red to match! 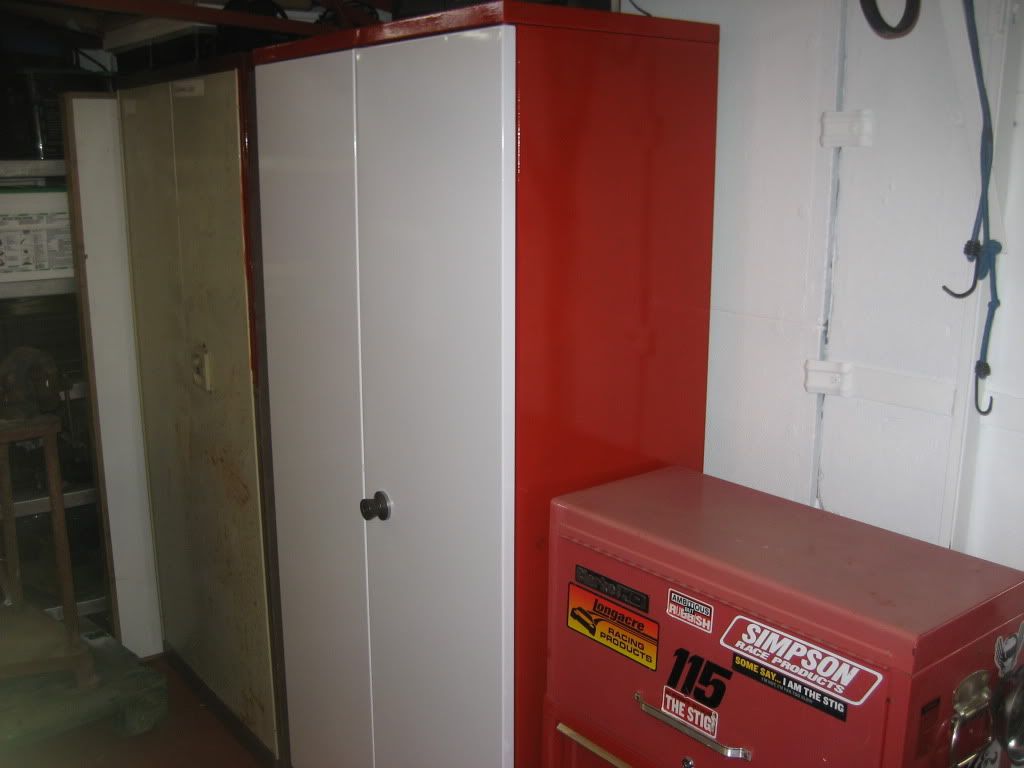 this is roughly what they look like before 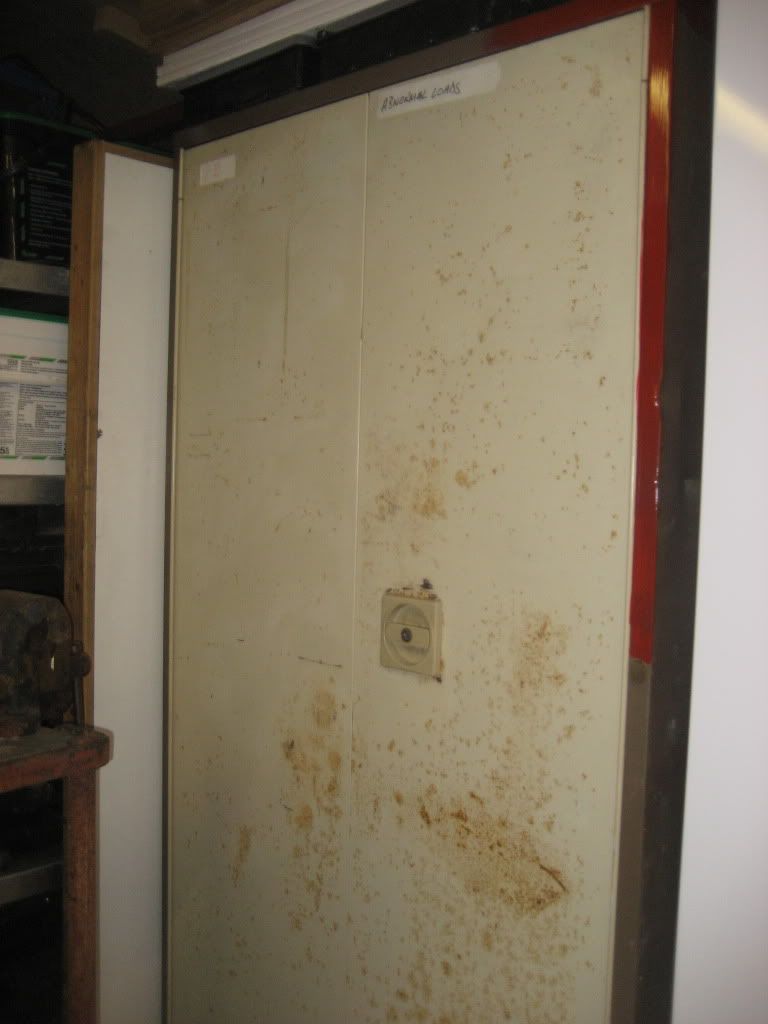 And after 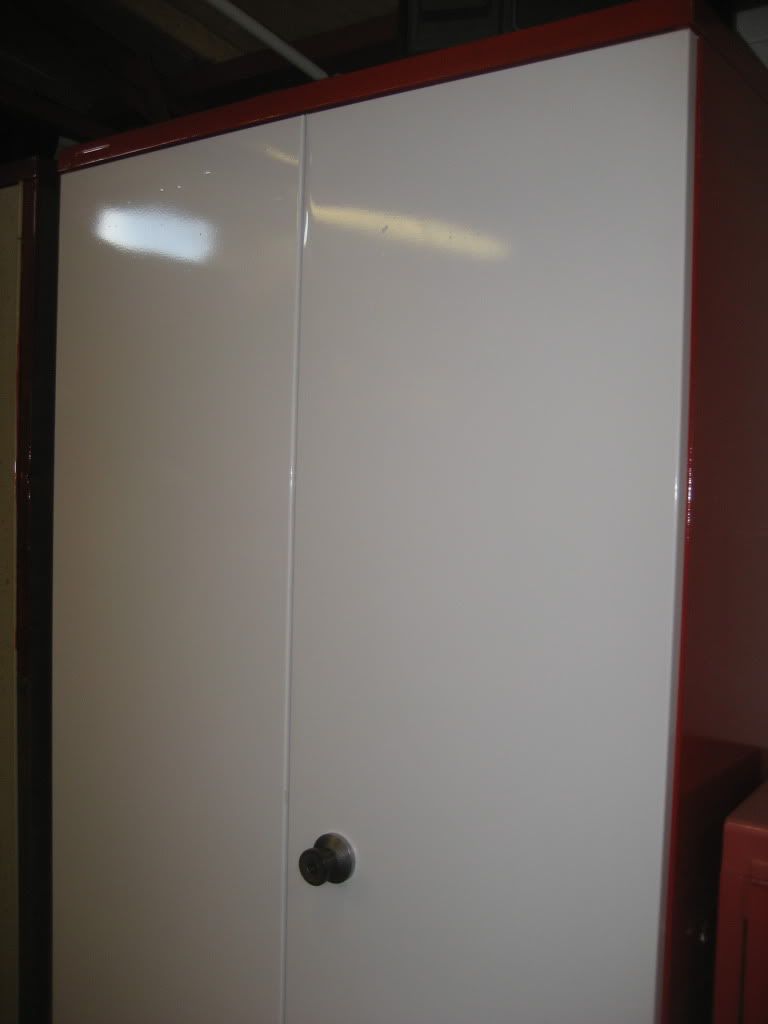 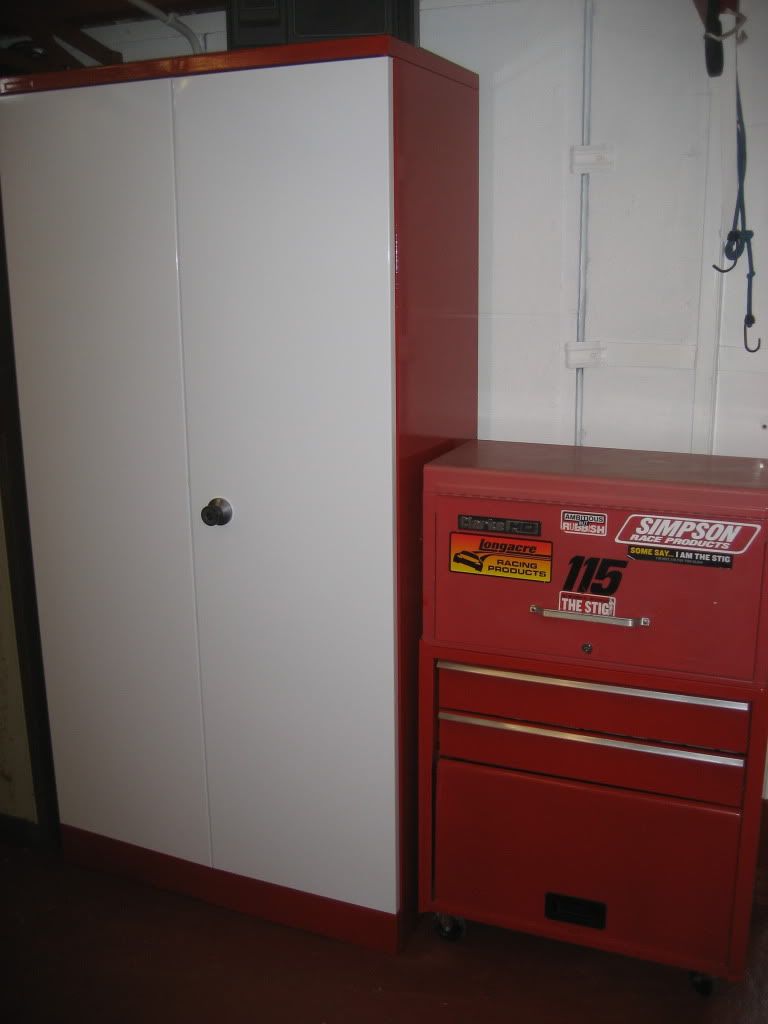 It carries on with red and white theme to match the race cars, just need to get a large Snap-On sticker made (not that I have any!) I also cut a hole in the back panel as I had a twin socket on the wall behind I couldnt use, now I can charge up my batterys for my drills and hide the stereo which frees up more worktop space. I spent three hours Friday night putting it all back together cleaning and organising and got indoors at 1am! 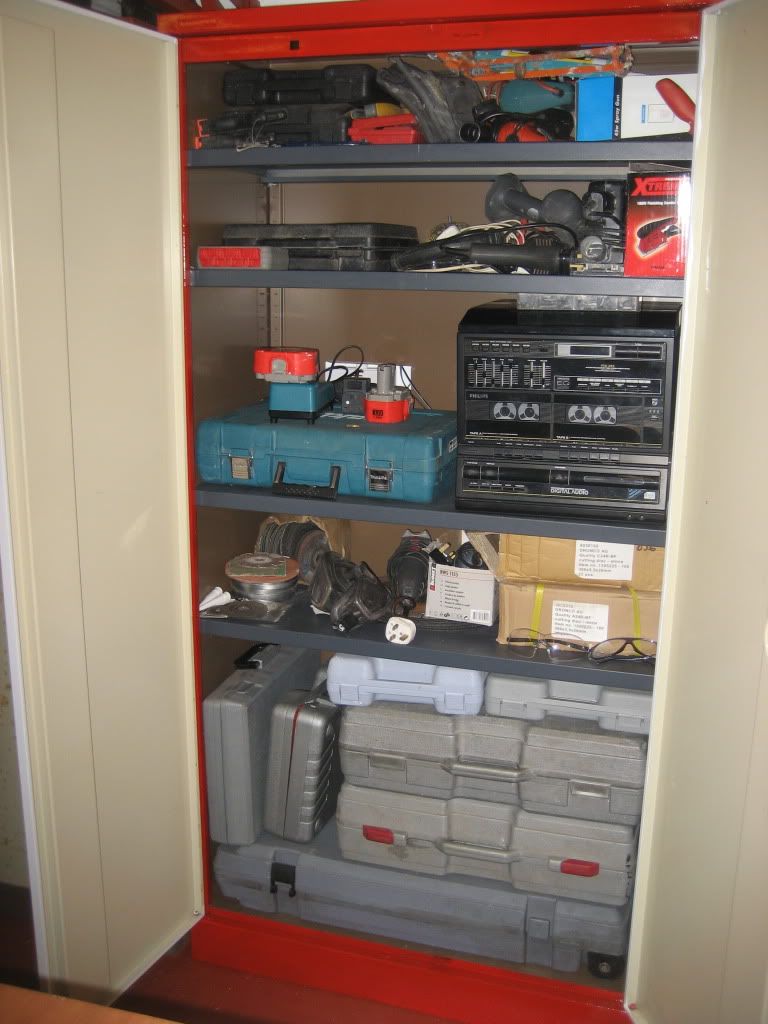 (no I couldnt be bothered to do the inside of the doors!) |
| |
|
|
|
|
|
Oct 13, 2012 16:54:30 GMT
|
|
'Nice ornaments!' said Jack as I scrolled down the page!
|
| |
|
|
|
|
|
|
|
|
We need more salvager on the box, ive seen all his programmes at least twice!
|
| |
|
|
|
|
|
Sept 23, 2012 19:40:58 GMT
|
|
I now know where the term solid as a church door comes from! The front doors I can just about move on my own!
|
| |
|
|
|
|
|
Sept 23, 2012 11:43:09 GMT
|
Yay!!! The electric certificate is all done! All was well apart from a a couple of items which they updated, all done for free too (favours to be recalled in the future;) Straight on the phone to the building inspector to find out he's on holiday till Oct! curse word! Oh well, I was trying to get the garage signed off so we can crack on apace with the games room as were making it er... a bit bigger! We extended the roof out, her old man supplied the 4x2's at £75! Which was handy I emptied his van of old window frame rubbish which covered the price of a skip! The ply we pulled up from the temporary floor inside the games room otherwise we'd have had it lying around not knowing what to do with it? Bit by bit were using up all the old timber lying around! The felt we already had too, although I think were coming up short for extension to the front! 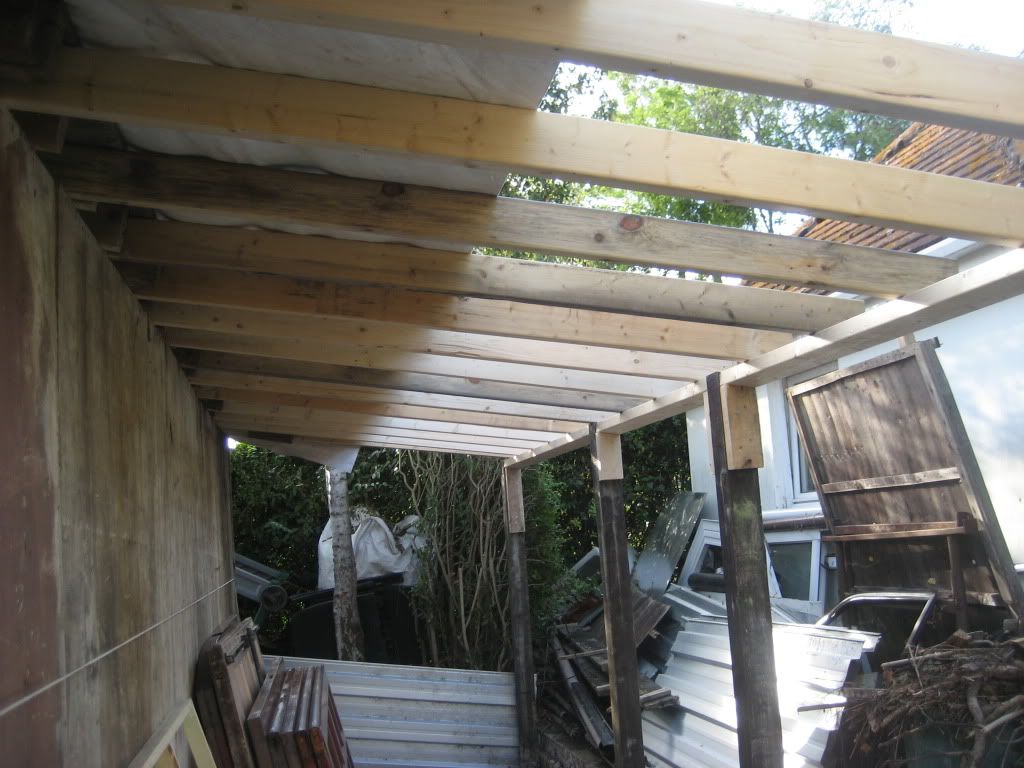 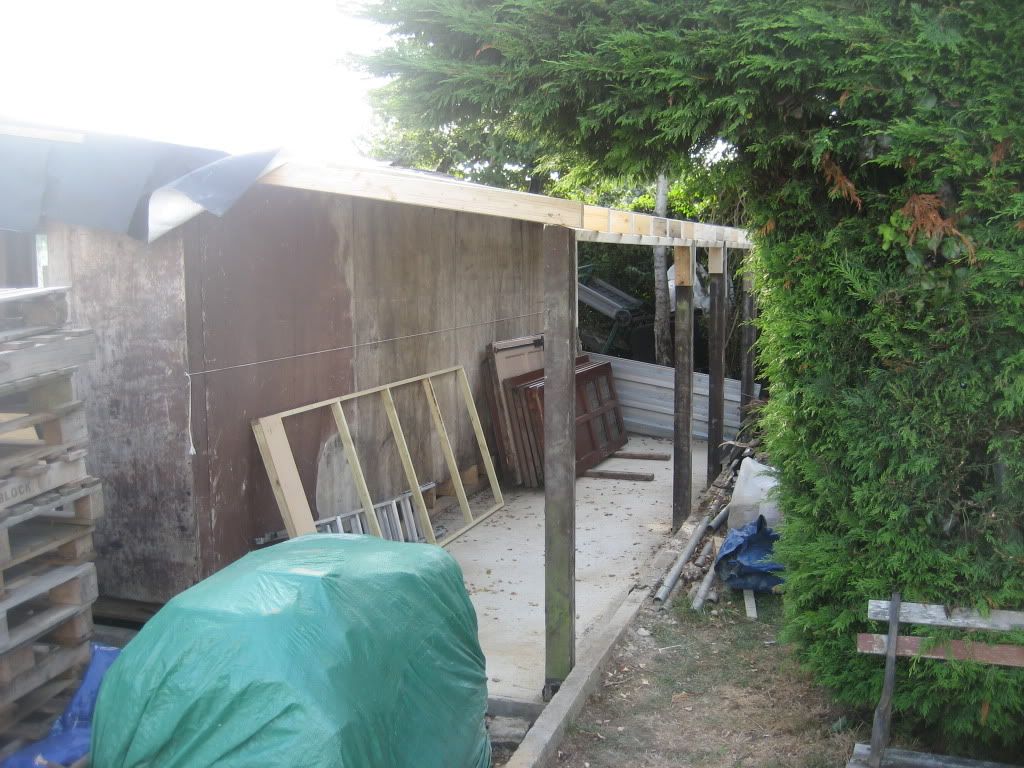 In other news I sourced these old pine doors with lead light windows from a skip at the church at the bottom of the road! There is also the old front doors which haved an arch at the top, somehow somewhere they will feature in the interior of the gamesroom as a feature wall or something!? I fancied a feature wall using timber on one end maybe using old floor boards but looking at reclamation prices that wasnt going to happen! I couldnt see good timber going to waste! I will make a donation to the church when the project is finished! 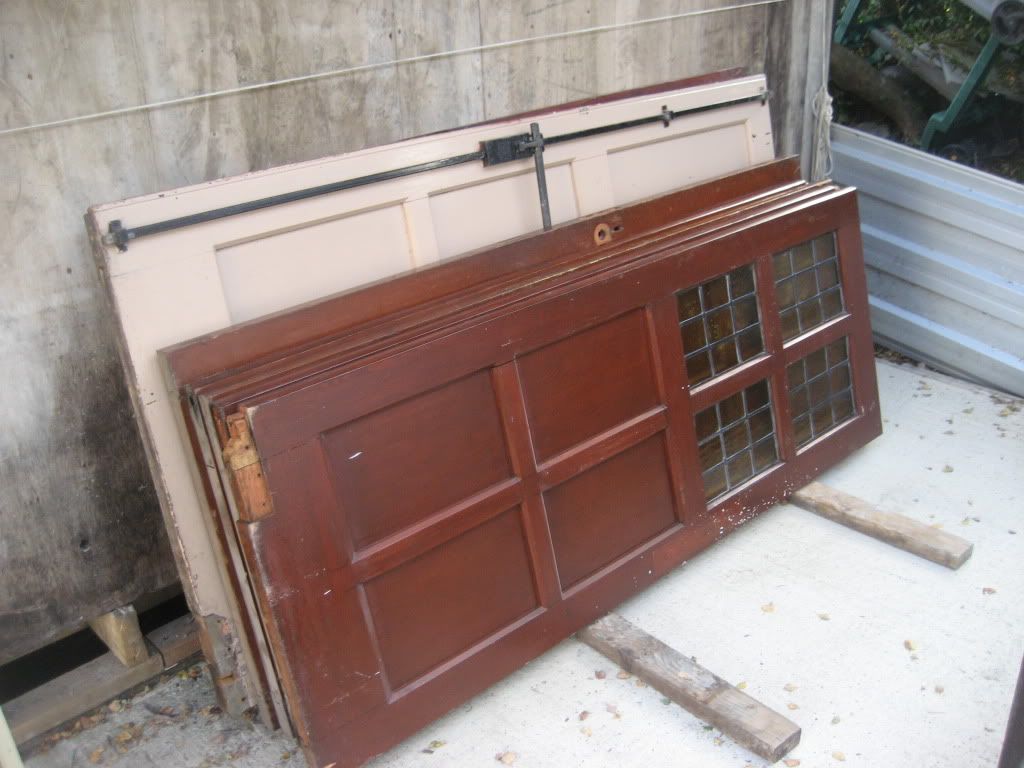 While waiting for other developments I've started to build this flint wall out of material salvaged from the foundations we dug for our extension and old leftover bricks. The only mateials I'm paying for is cement on this build! The holes are going to be for plants probably starwberries. 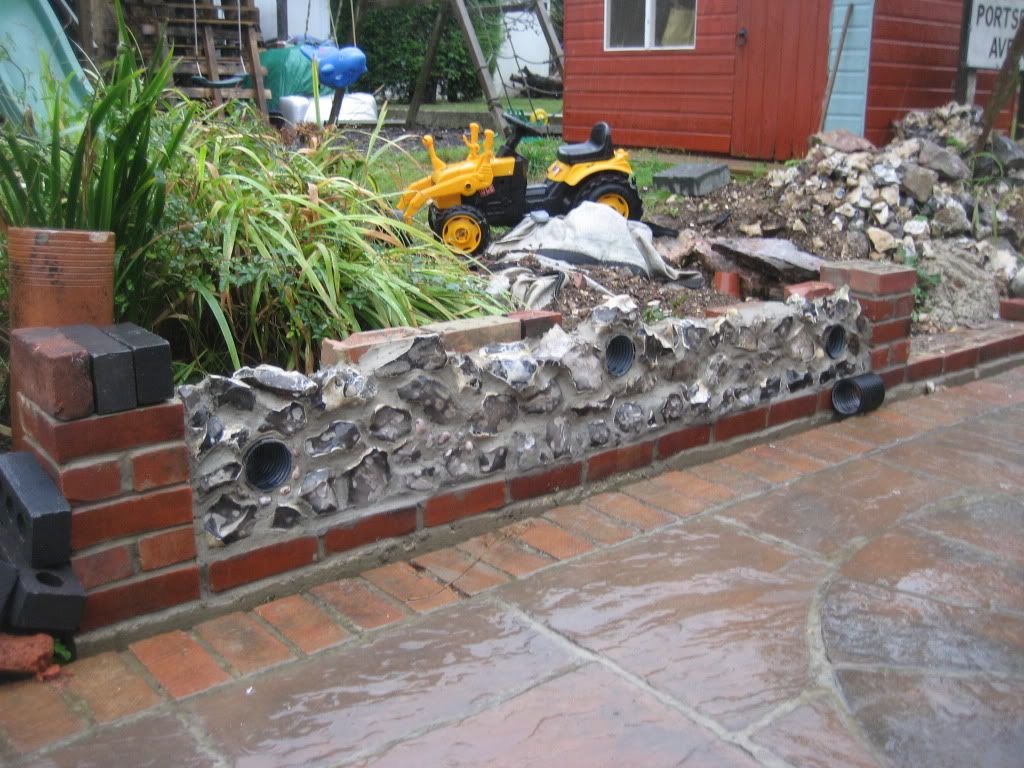 |
| |
|
|
|
|
|
|
|
Aug 27, 2012 20:23:56 GMT
|
 Thats taken a week and one day! Amazing what working nights can achieve when you get the afternoons off and the weathers good! So the hedge out took two afternoons, an afternoon of scraping the soil level another fixing batons for levels and filling with hardcore and today we poured the concrete. More useful space rather than Ivy and bindweed growing everywhere! Father in law reckons we're eating christmas dinner in the games room! So I guess that means it'l be finished??? I also had the electrics tested in the garage on Friday so hopefully when the certificate comes back I can get teh building inspector up here before we make the gamesroom any bigger;) |
| |
|
|
|
|
|
Aug 19, 2012 21:46:15 GMT
|
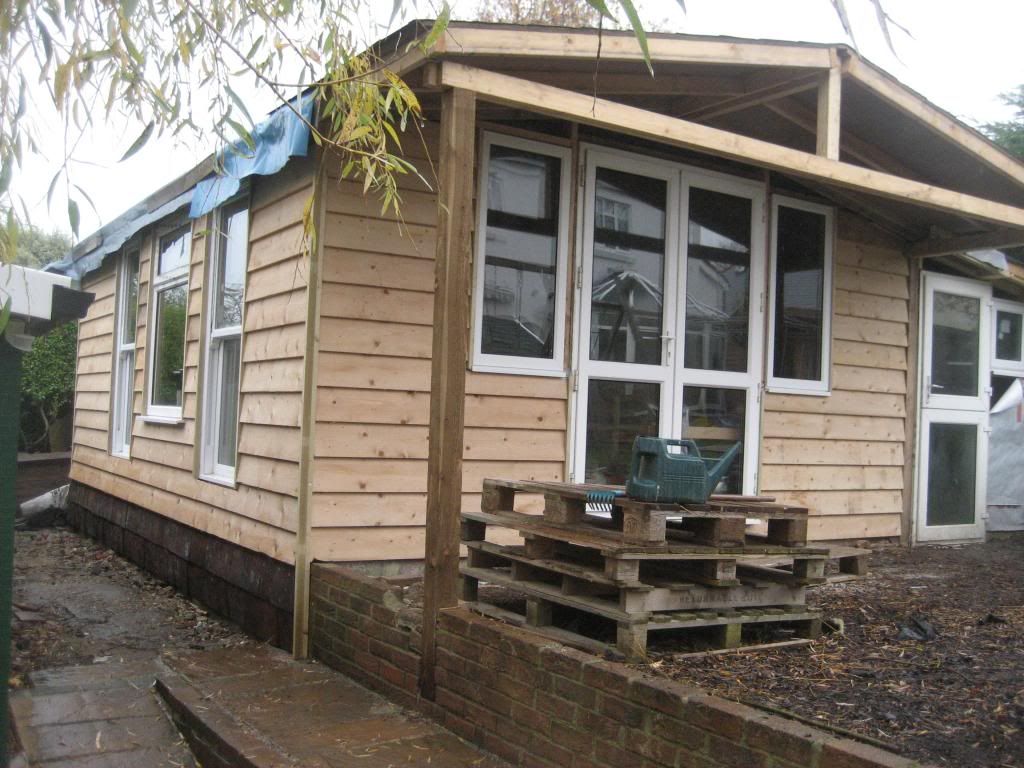
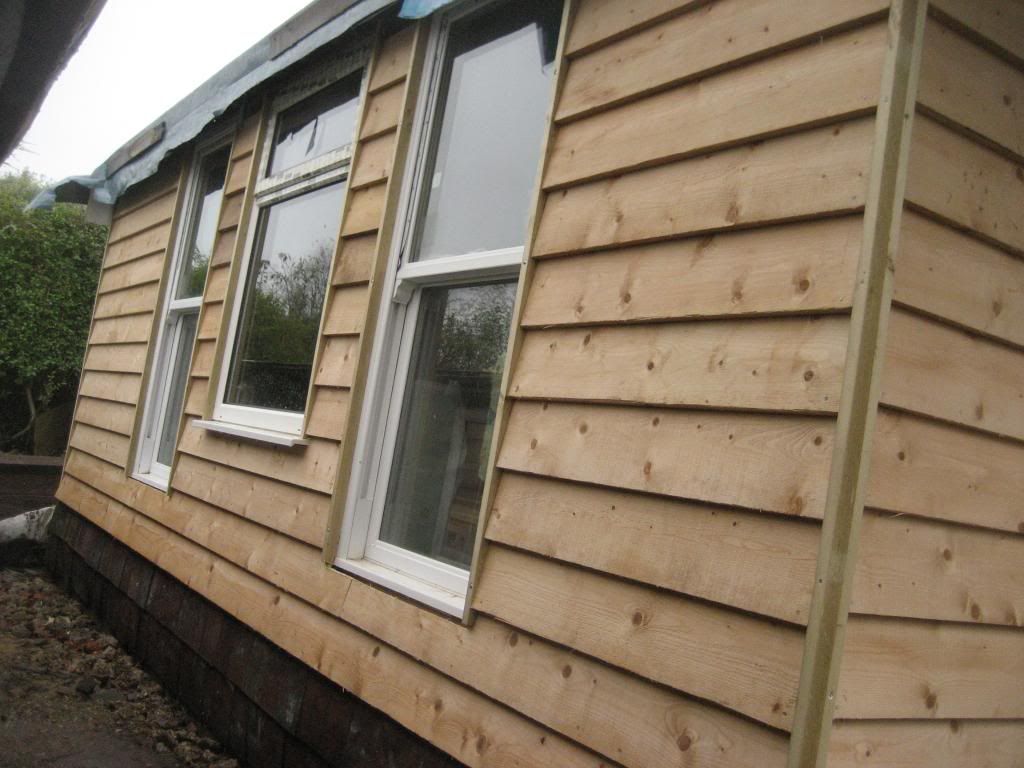
Been busy so progress is slow but hopefully September is looking like we might see some good progress! We got the windows in last month, two sash windows which were a miss measure about 5 years ago and have been sat in her old mans garage ever since! Bloody heavy too! They were £500 each to him trade so I'm glad theyve gone to a good home  The frame in the middle we found in the garage we didnt even know was there, its brand new but we don't know where the glass is for that one so we'l have to order that! We fitted all these in the pouring rain one Saturday! 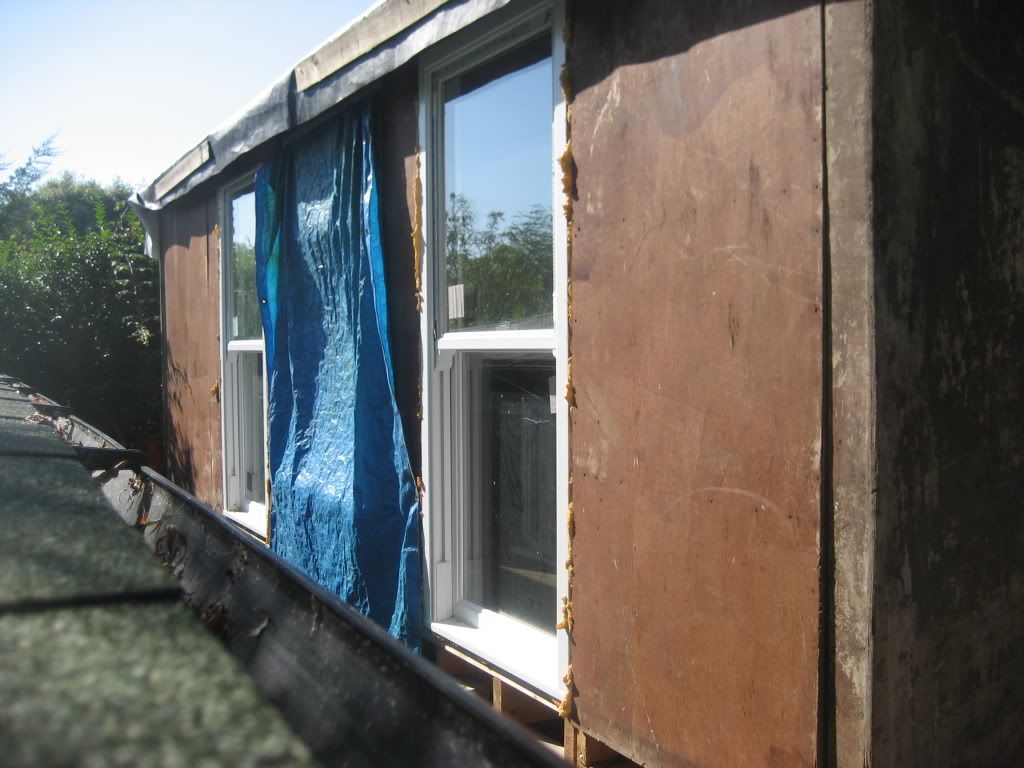 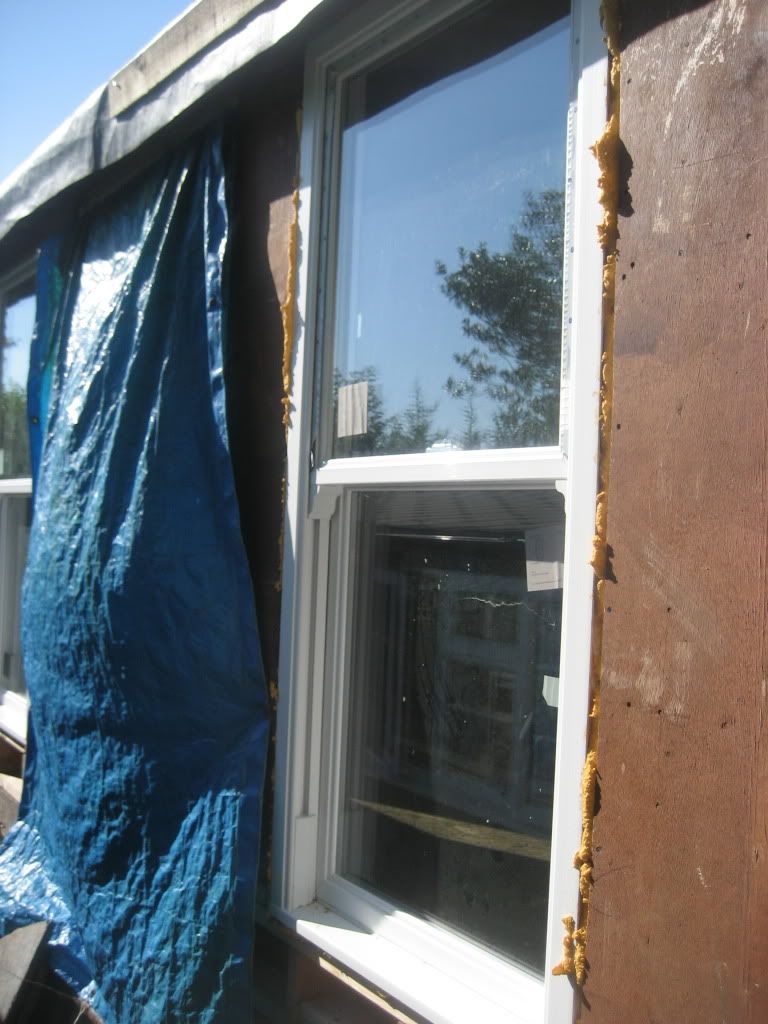 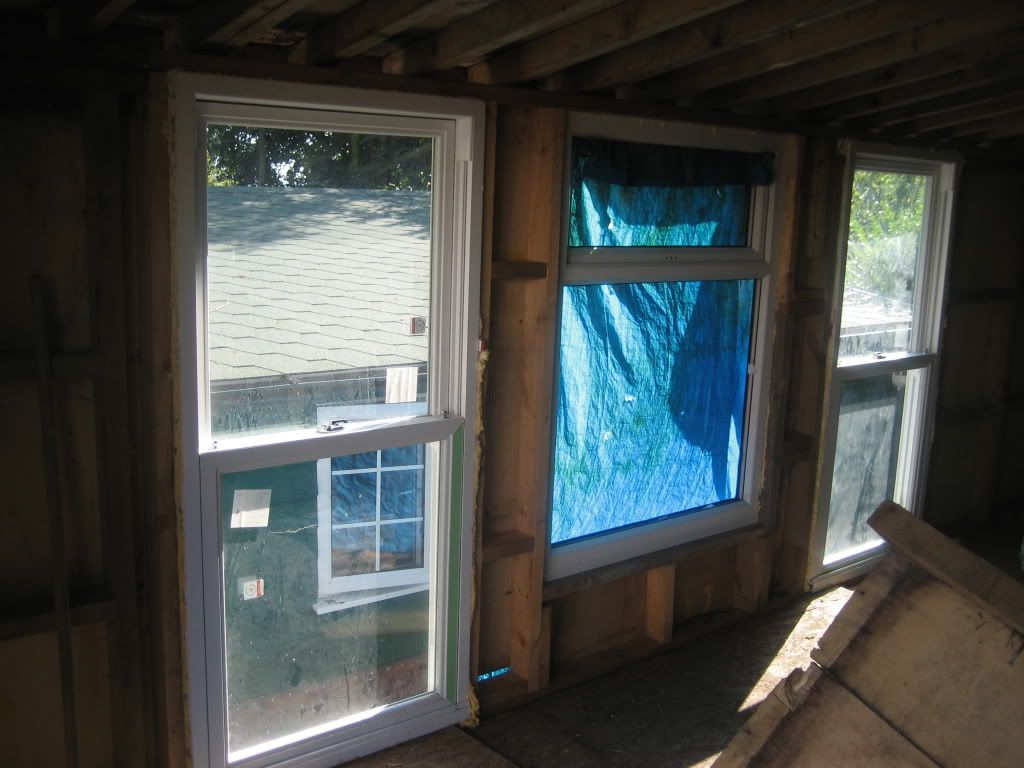 My neighbour has shed envy and had been discussing building a new one on the side of his house so I gave him a little tour. He asked if I was going to insuate the games room? Of course when I could afford it, he then offered me some free insulation he got given and had been storing in his mums garage for a few years that had to go! Which gave me 13 packets of this! 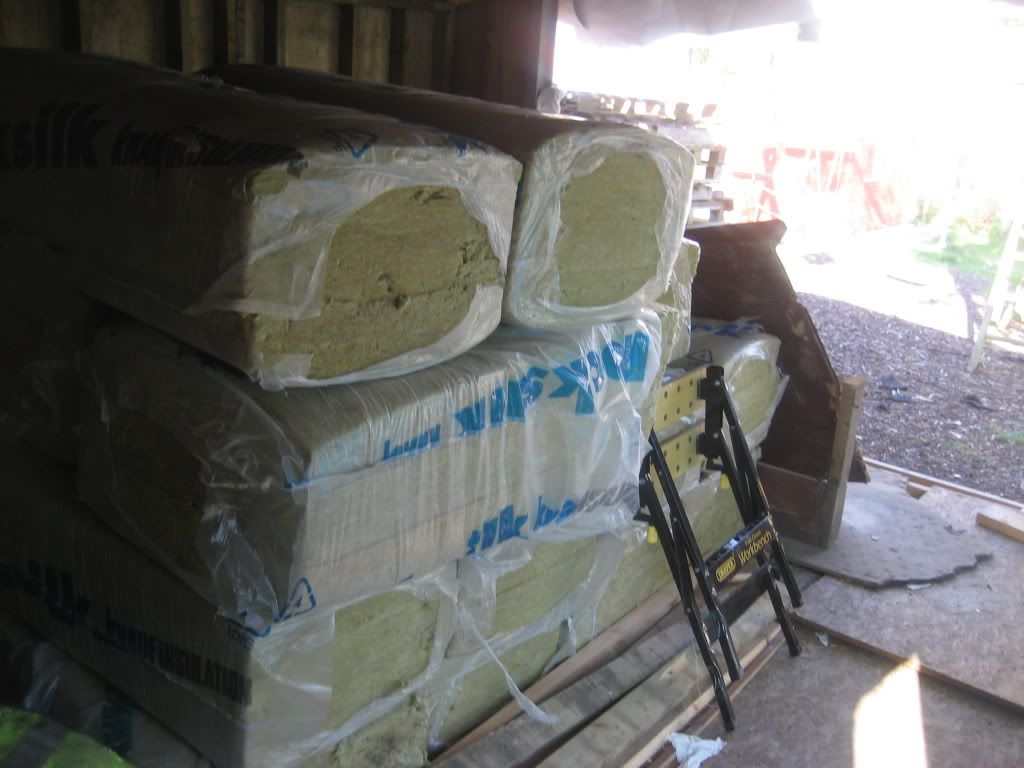 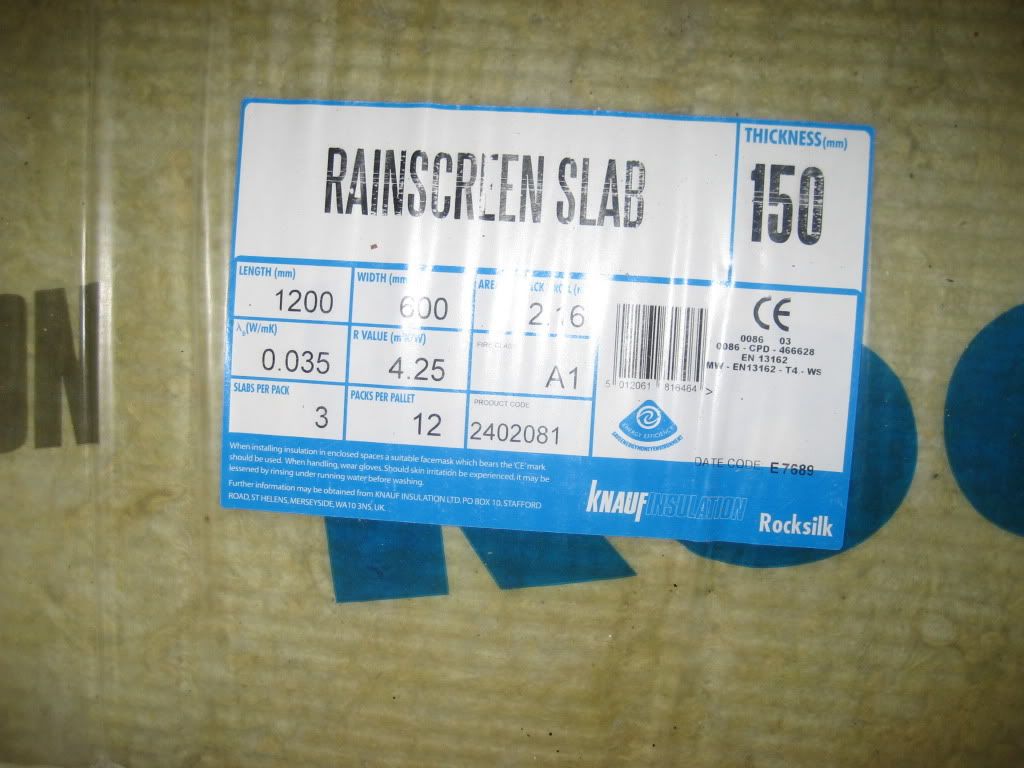 I'm no expert on insulation and I'm sure theres better stuff I could use but I'm sure it will do My farthe in law told him to build his shed right onto the boundary to make his shed a wide as possible in save him putting new fence panels up! 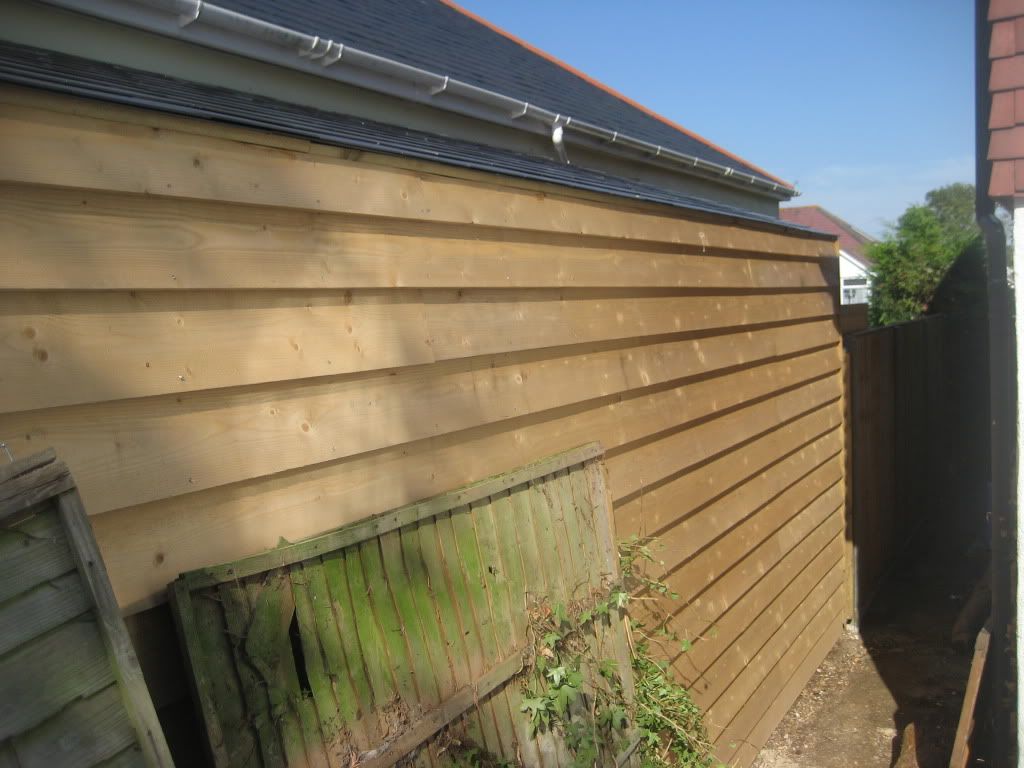 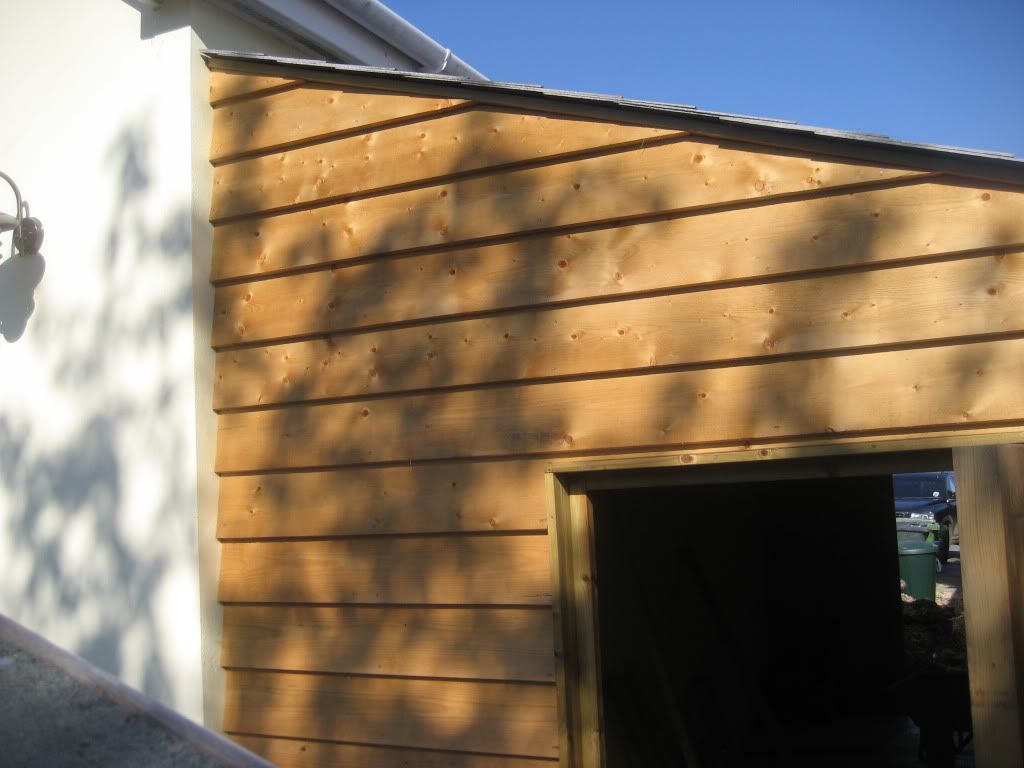 Which gave him that! Now ive got a little bit of hed envy and seeing as he's used me for inspiration I'm going to copy the look of that for the outside finish of the games room! I was going to paint green like the garage but I think i'l go fo the log cabin natural look. I was goignt o extend the roof line out to meet the hedge so I could store lengths of timber in the dry under it, a sort of lean-to. 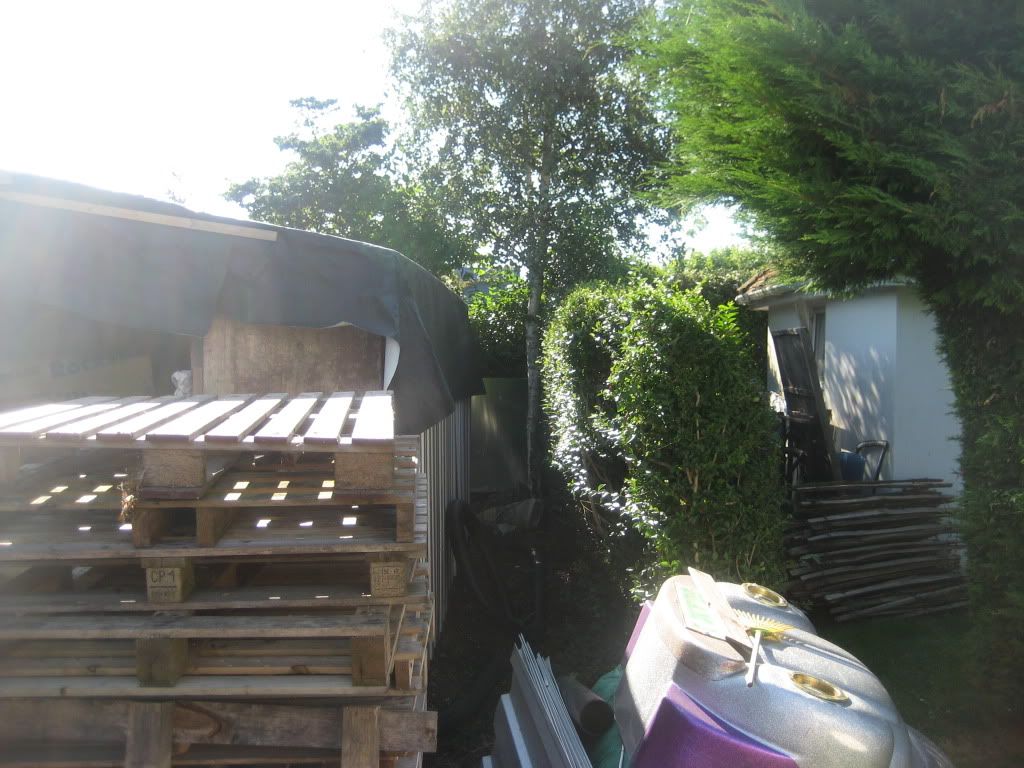 Now its off with the hedge! We'l extend the whole thing out to the boundary and make another storage area/ workshop on the side maybe just for timber keep the dust out of the garage  ) 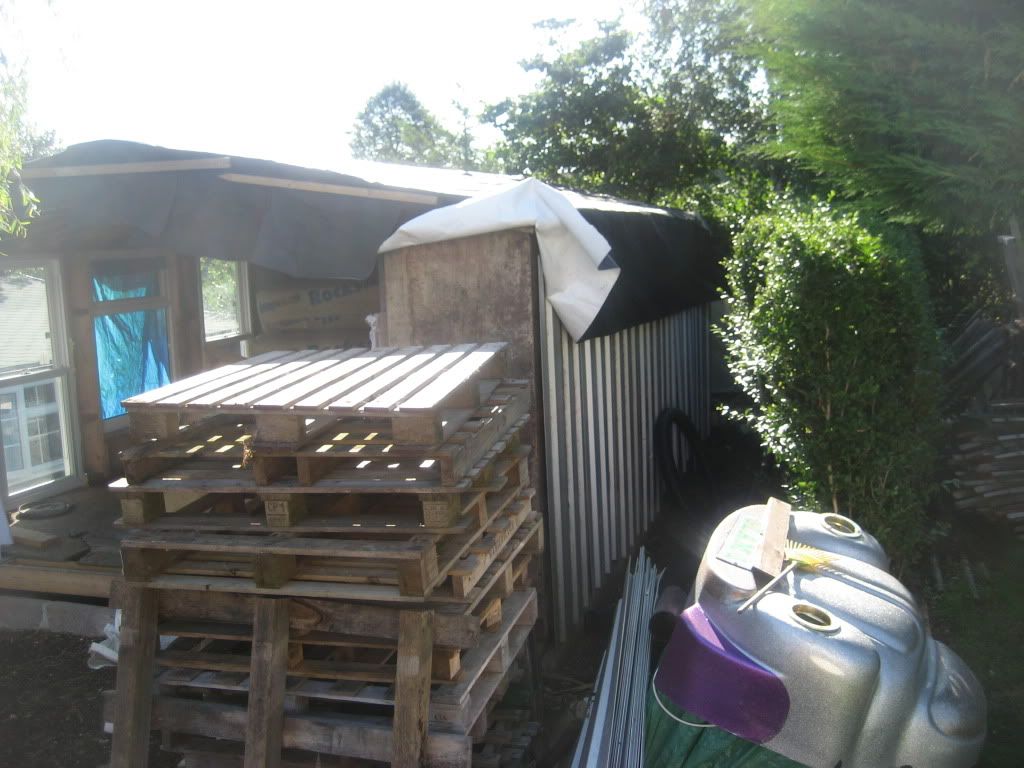 Its approximately 5.5ft wide so will be similar to the garage extension. I have enough roof tiles to tile one side the other side I'm planning on making a green roof. We did manage to felt it to keep the roof dry and ahd planned to get the tiles straight away but the extension now needs to happen first! The felt I found blowing around on the verge while patrolling the road, approx 100m long it covered the whole roof! I started chopping the hedge this afternoon using the chainsaw. The Mrs came and moaned at me for making too much noise as people were apparently trying to enjoy their gardens??? I asked her when she thought I ought to do it? 20 mins wasnt too long at 1600 was it? Maybe I should have shut the door? Anyway I ignored her and carried on and dug out the first 5ft of stumps luckily they came out fairly easily! I aim to have it out by the end of the week as I'm on night and the afternoons I can get on with it! Just need to find 2nd hand French door for the front but they go for serious money on the bay and her old man hasnt got any jobs taking any out at the moment! Thats all for now! |
| |
|
|
|
|
|
|
|
|
|
|
Looking good you'l soon be out here till midnight getting it finished!
|
| |
|
|
|
|
|
|
|
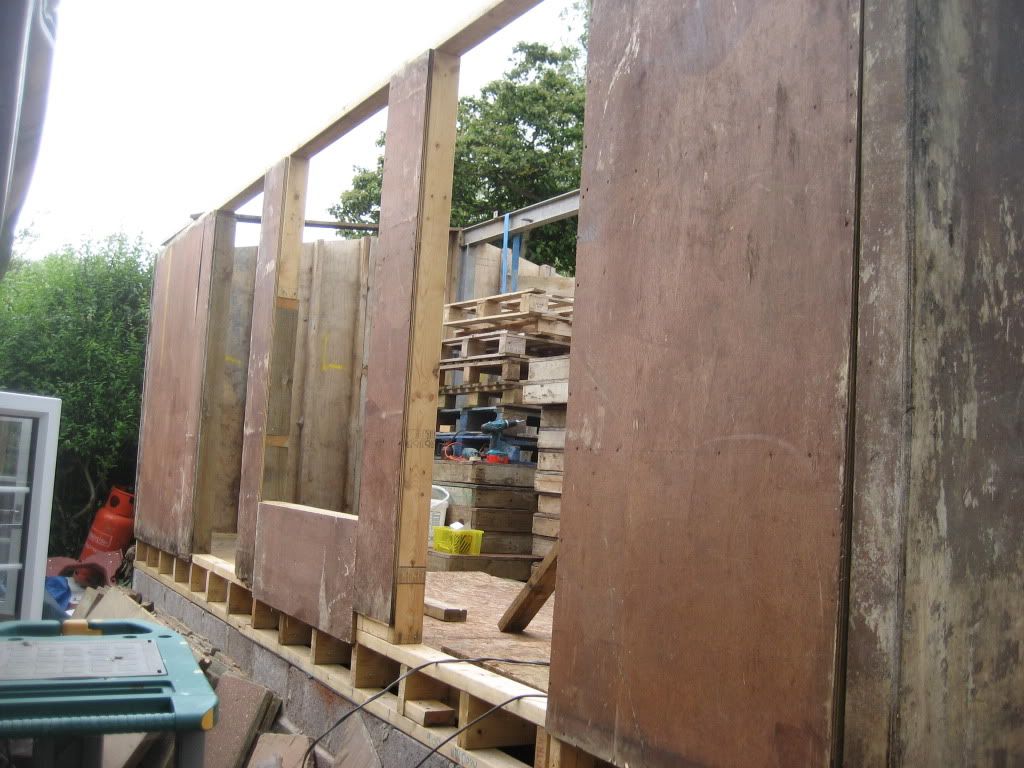
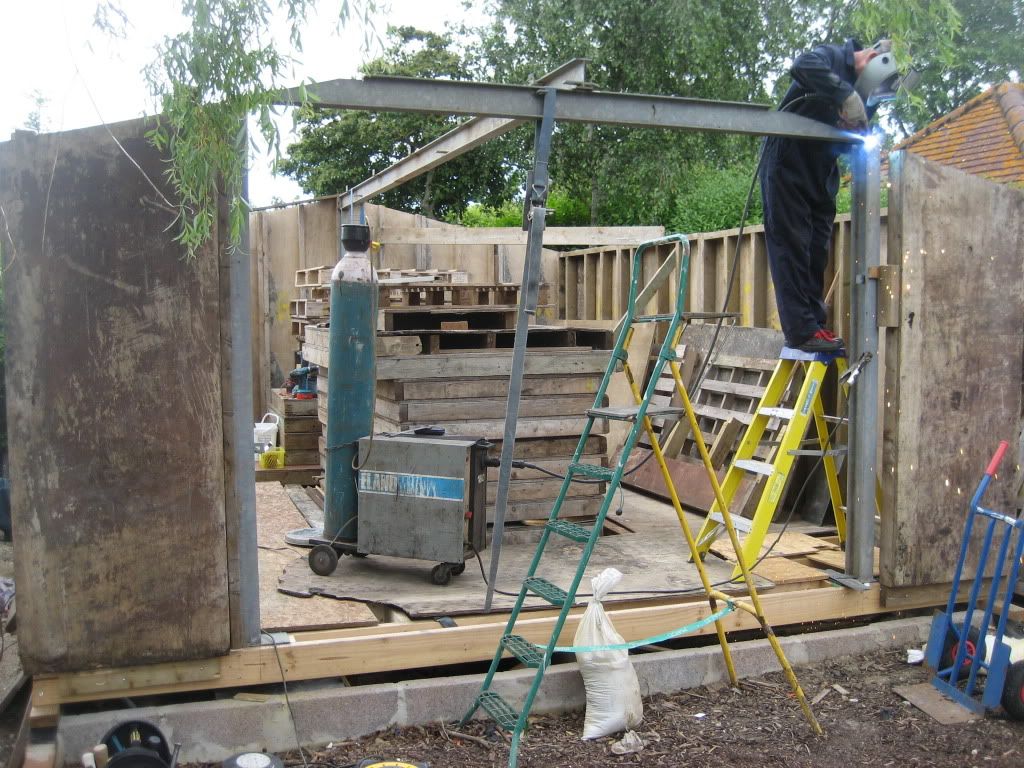
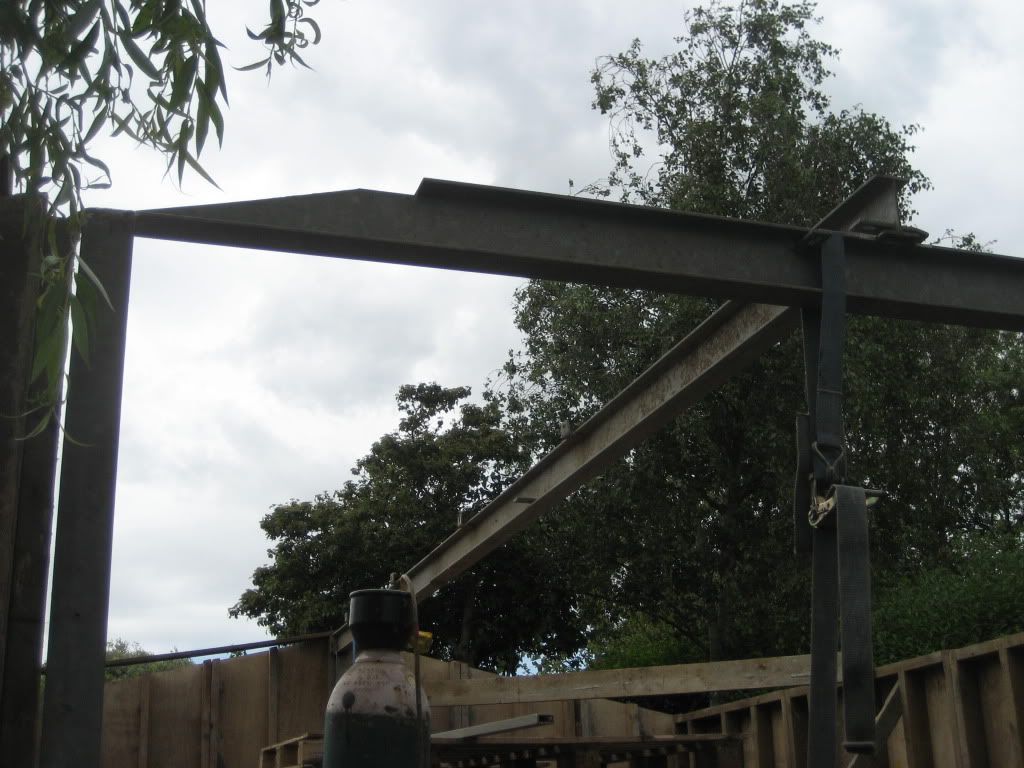
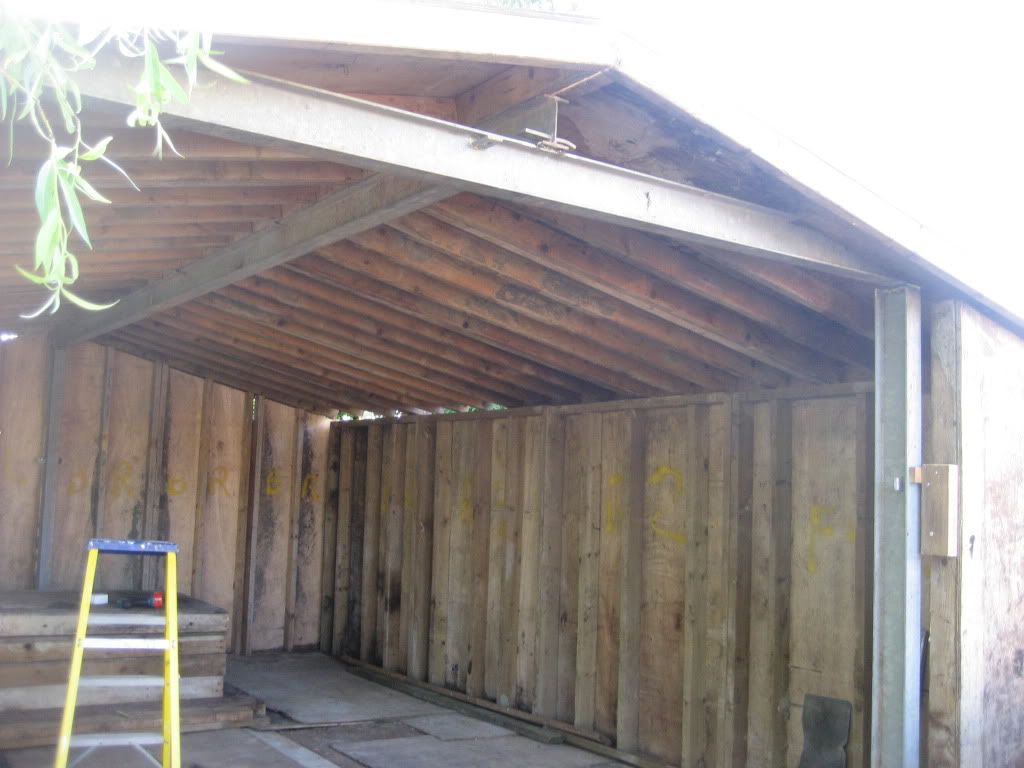
While her Madge has been living it up we've been busy! No street partys here! Got the timber for the floor on Friday and after loading 15 lengths of the wrong length on the van we finally got 32 lengths of 6" x 2" at 3m and 6 4" x 2" at 4m £280! 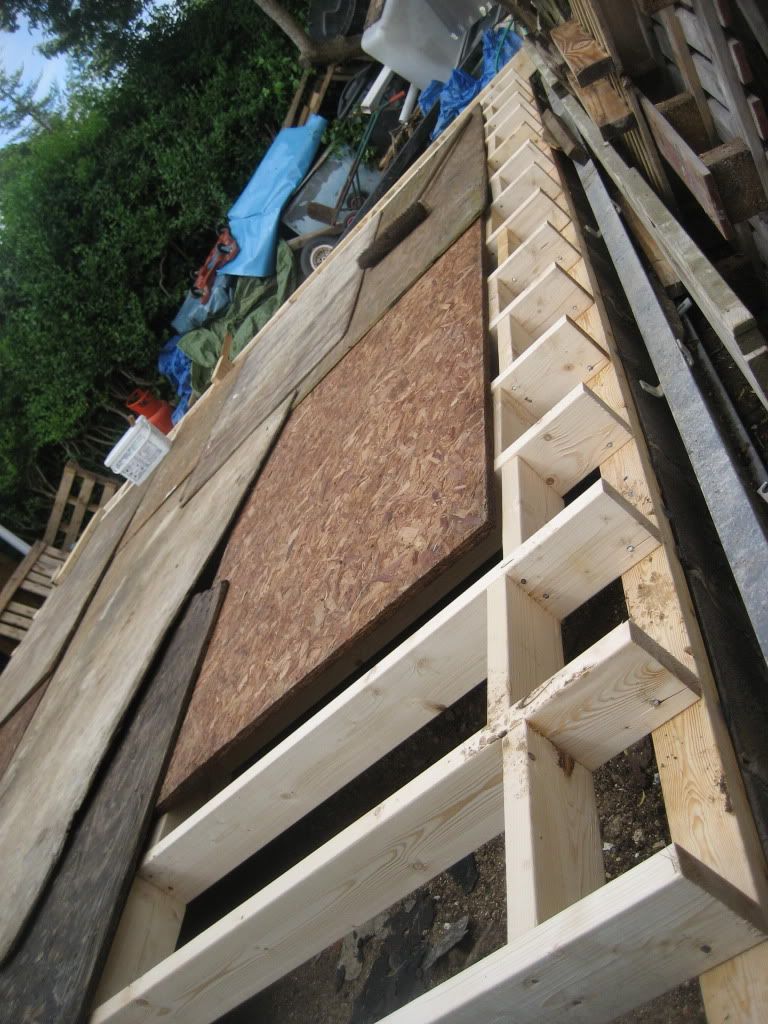 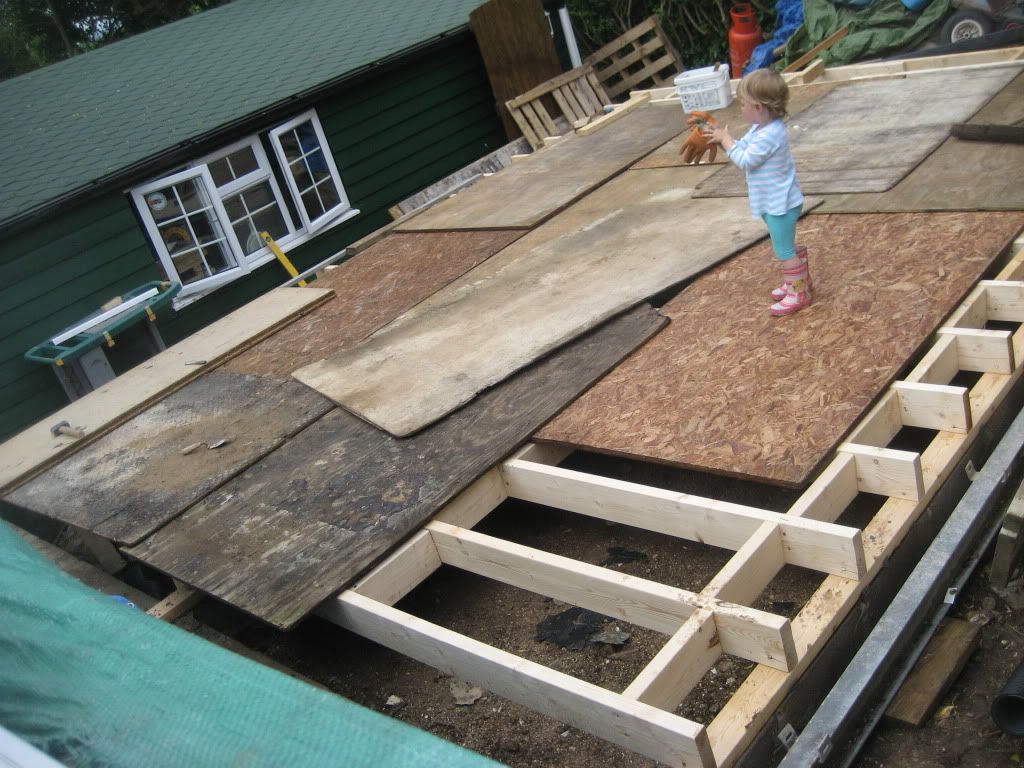 After Ferne had her site induction she was raring to go! 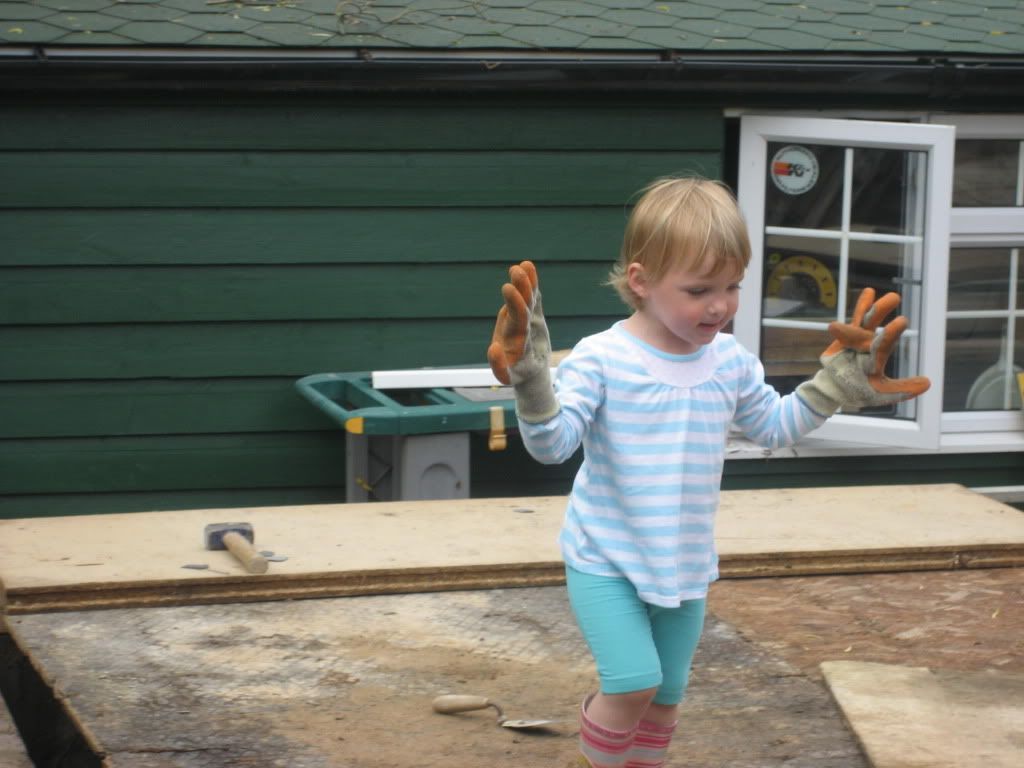 One or two the panels had some rot but the majority are fine, nothing we can sort, it will all be hidden in the end! 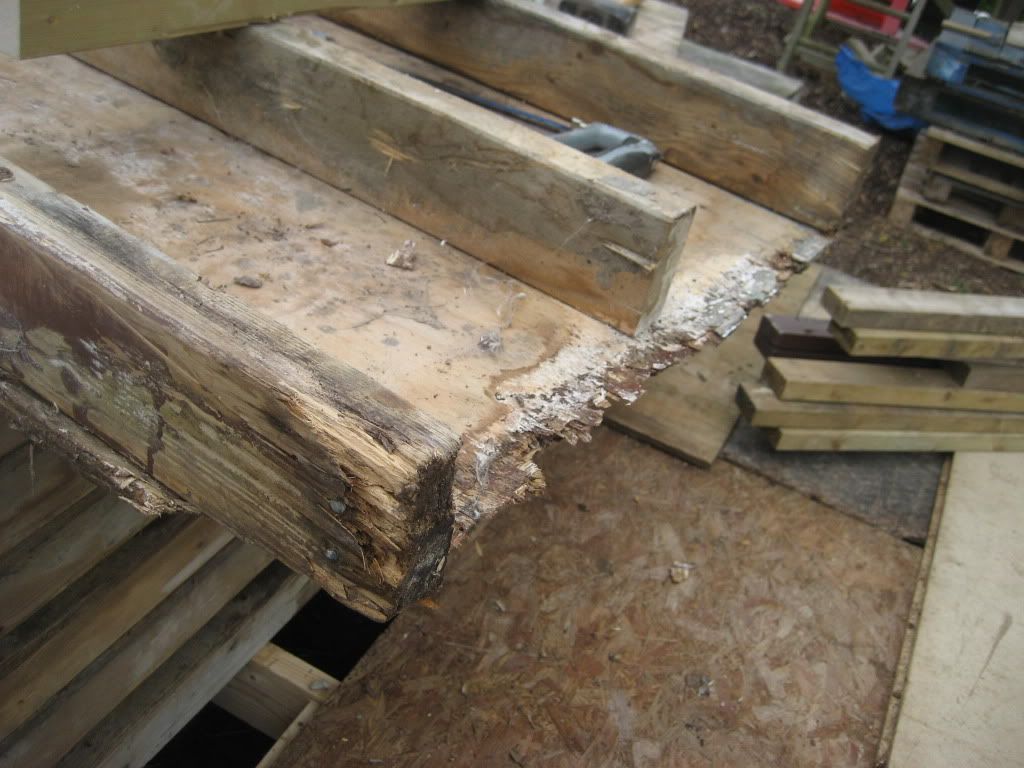 Plenty of spare wood salvaged from other projects to repair. 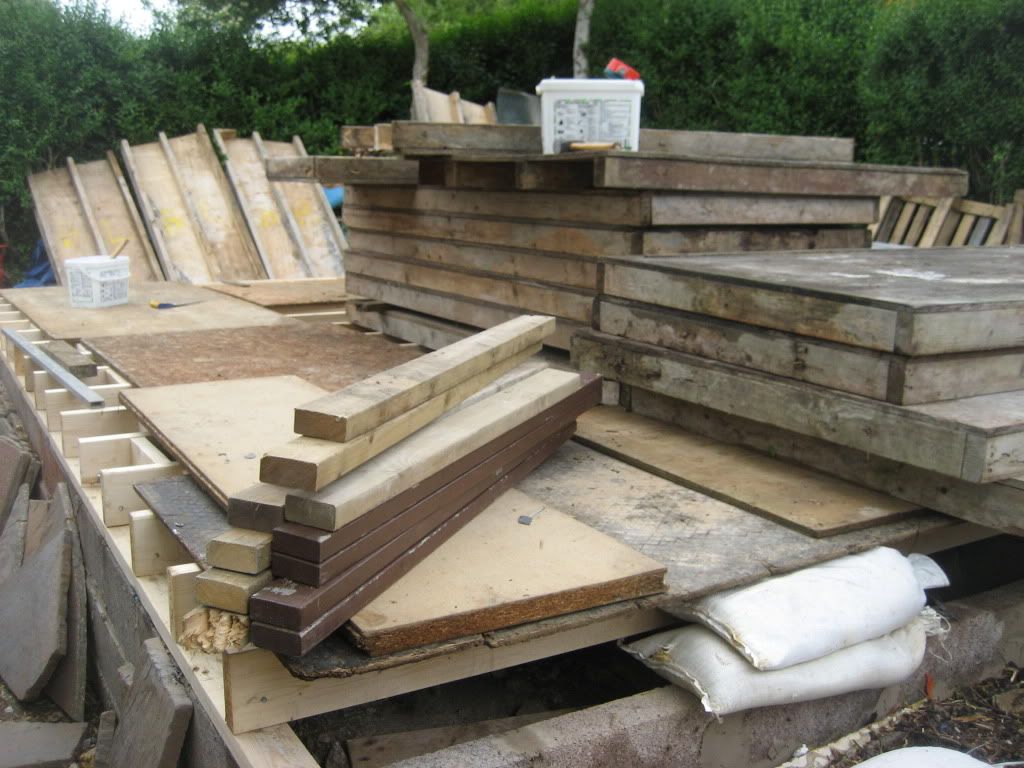 Getting it ready its been a while since we last saw this! Taking plenty of photos before dismantling has certainly helped. 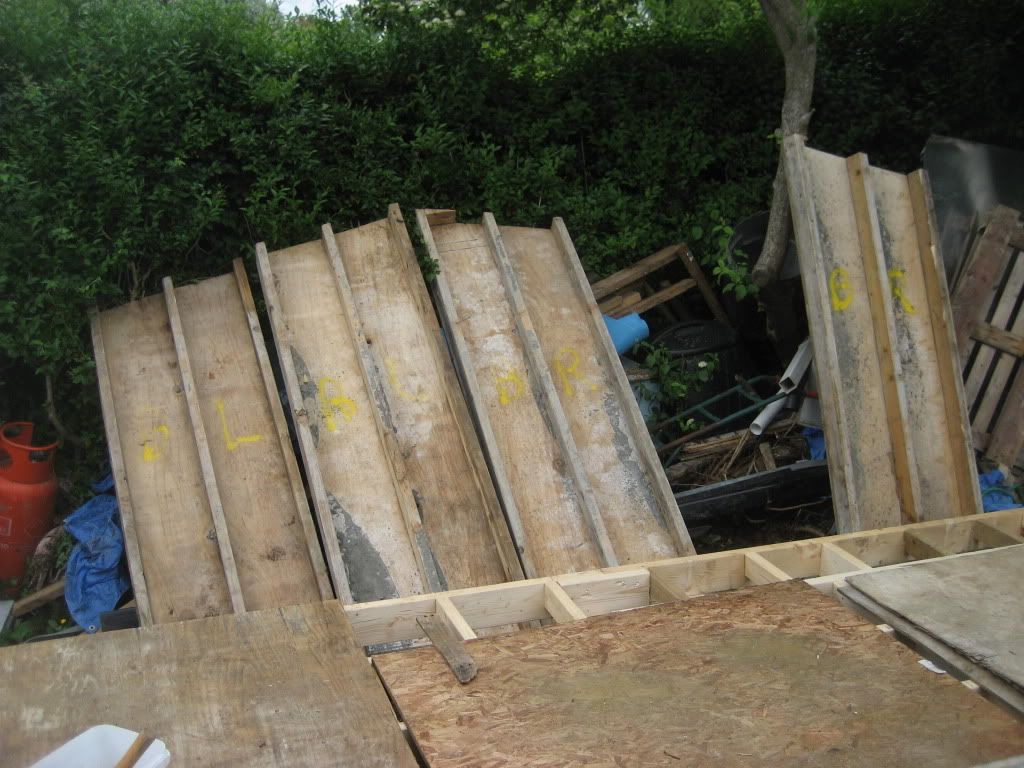 Back all up, plenty of tidying to do when its finished! I plan to have a row of compost bins out the back against the hedge. 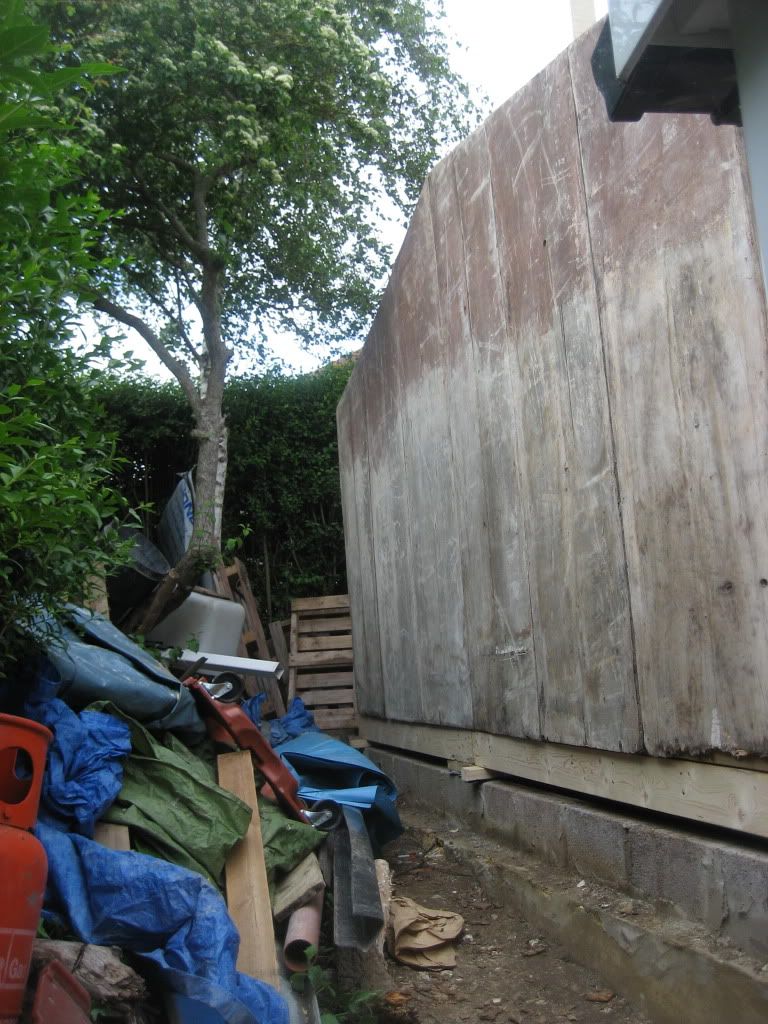 And heres where we are today one side done and the back done. We could have done both sides but the south side is going to be mainly double glazed to let in plenty of light. We've got two sash windows that are almost full length to fit in that were miss measured when they were made..£500 each! And another new unit to go in the middle to balance it out. We'l fabricate this side to fit around the new frames, the front will have a patio door on it hopefully a customer is ordering a new set of french doors and we get hold of the old ones which are only a few years old! 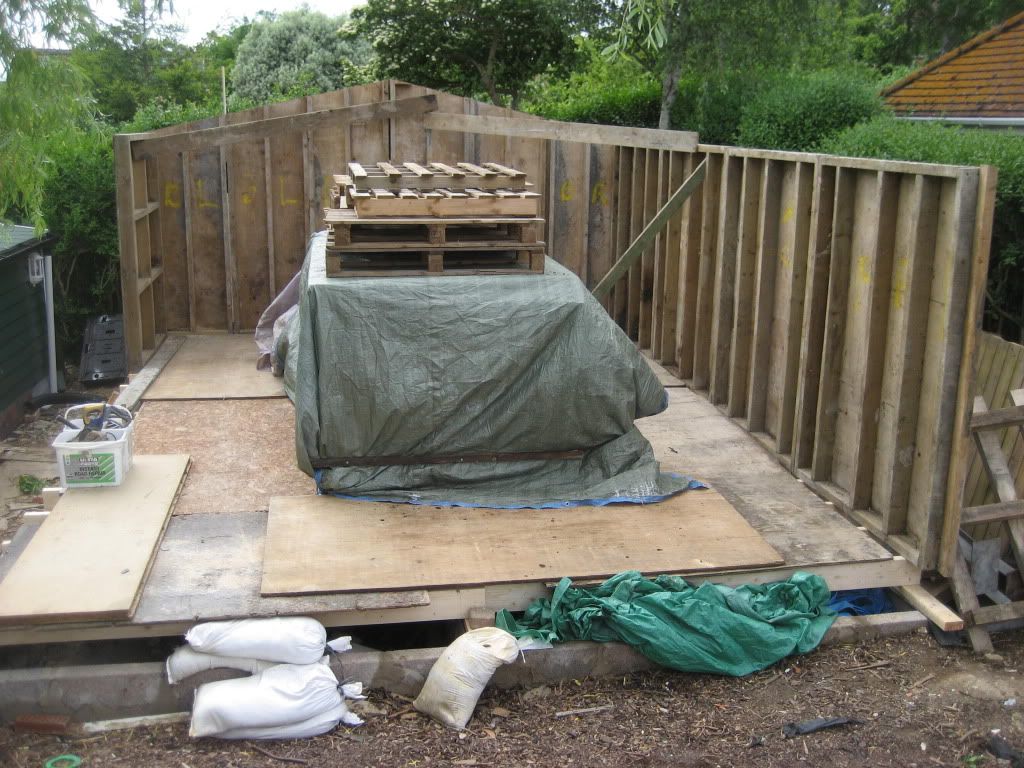 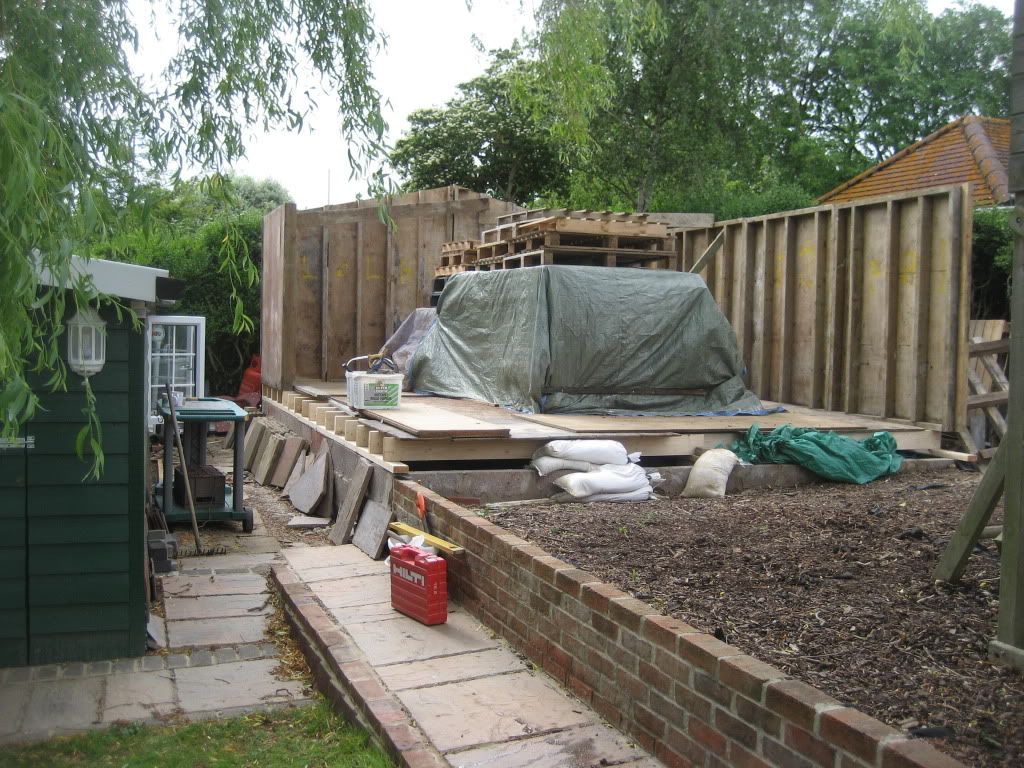 And thats it for now! Fabricating the othe side and then getting ready to fit the RSJs down the middle so we can hang the roof on it should be fun! |
| |
|
|
|
|
|
|
|
Forgot to post this picture yesterday! 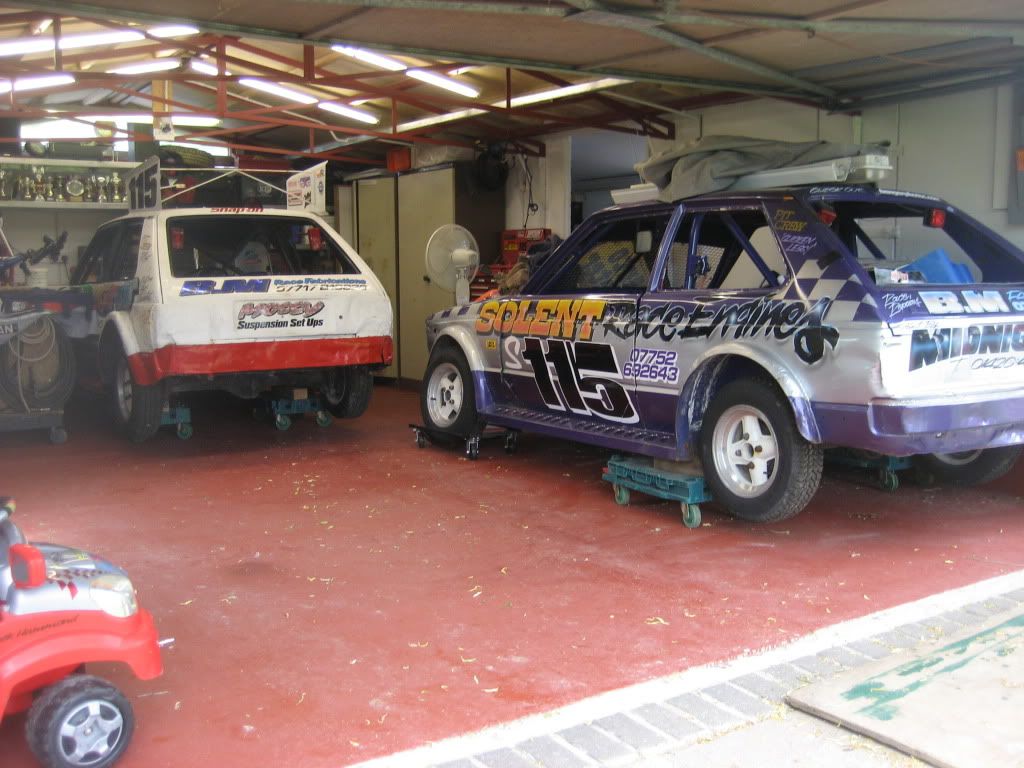 |
| |
|
|
|
|
|
May 31, 2012 15:22:57 GMT
|
I finally got round to painting the garage door green. In this lovely weather were having I thought it would be a good time. The door has a metal frame with a basic ply fascia. Its starting to go a little bit on the bottom but its got plenty of years left in it yet! I didnt want to waste too much time on it and I only had just over an hour to do it anyway in one of those mad rush I shouldnt be doing this but I'm doing it anyway type of scenarios! So after a quick rub down (which broke the sander right at the end) it got toshed over in under 45mins with the leftover masonary paint I had for the exterior walls. The woman at B&Q swore blind that the masonary paint on wood would just fall off! Well heres a test for that theory and at £40 it was a risk worth taking! 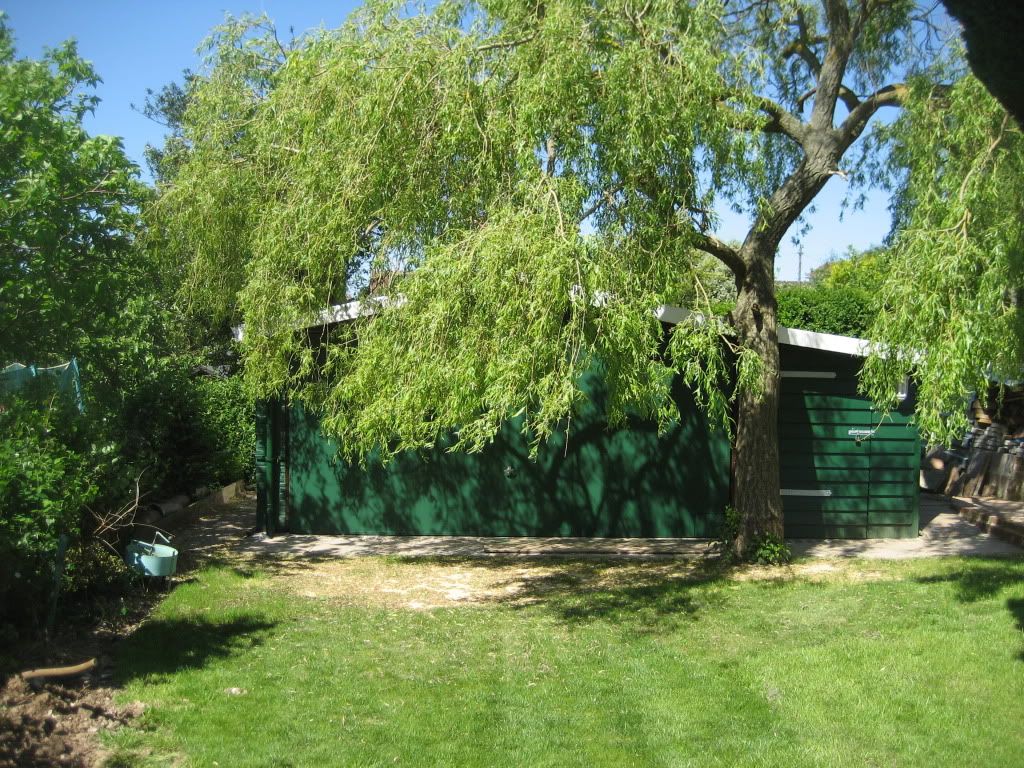 I had been distracted building this wooden play house in time for my daughters 2nd birthday. It was salvaged from a friend up the road who used it as a rabbit huntch for a year then replaced it with a log cabin! It was destined for the skip and knowing the value of these things done them deal on removing it and all they're rubbish I extended the roof line using leftover ply and added the trellis area pinched from nextdoors old trellis pagoda patio. The roof tiles were leftover from the garage and the guttering I took out of the skip at work. I've connected it up to a 100 litre water butt I hadnt got round to connecting upto the garage and hid around the otherside out of sight. I collected 100 litres of rainwater in those heavy downpours in 3 days in April! And that was just the one side of the roof! I used old fence paint that I borrowed from the old neighbours I never gave back because I knew they were too damn lazy to use it! The fence panel behind is really close to the shed so I replaced it with an old one I found on the side of the motorway at work years ago as its a similar pattern the rest but it doesnt matter if it detieriates as you only see the top quarter of it. I layed the shed on old council pavers set in a dry mix of sand and cement and old fence posts levelled up for the floor to sit on. Hopefully it will last some time. It might get painted a nicer shade when money isnt so tight! 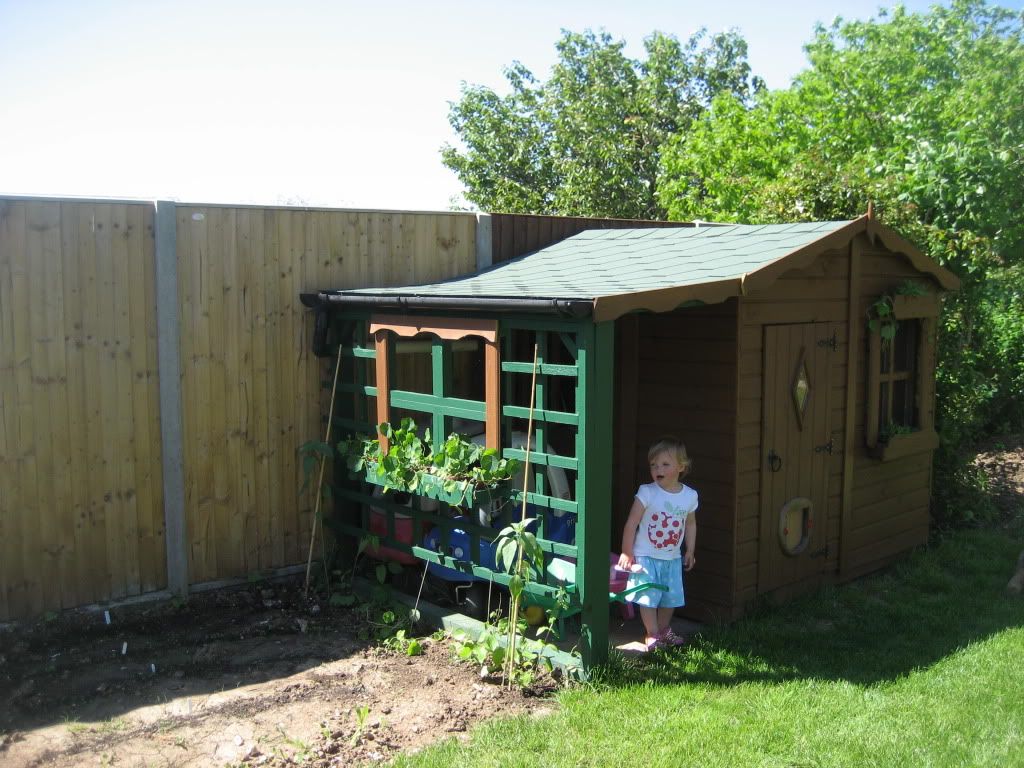  Anyway back to the garage! I finally got the second car in at the weekend! After sitting on the trailer for over two years untouched and with a fresh battery a little fiddle with points and some wet and dry seh started up and drove in no problem! I also managed to get the trailer on the drive for the first time ion ten years after telling everyone it wouldnt go up there it went up in one go easier than ever! My dads pleased to have his drive and garage back!  On the same dollie set up as the other car pushed tight together ive still got 5.5ft spare at the side and 11ft at the front! 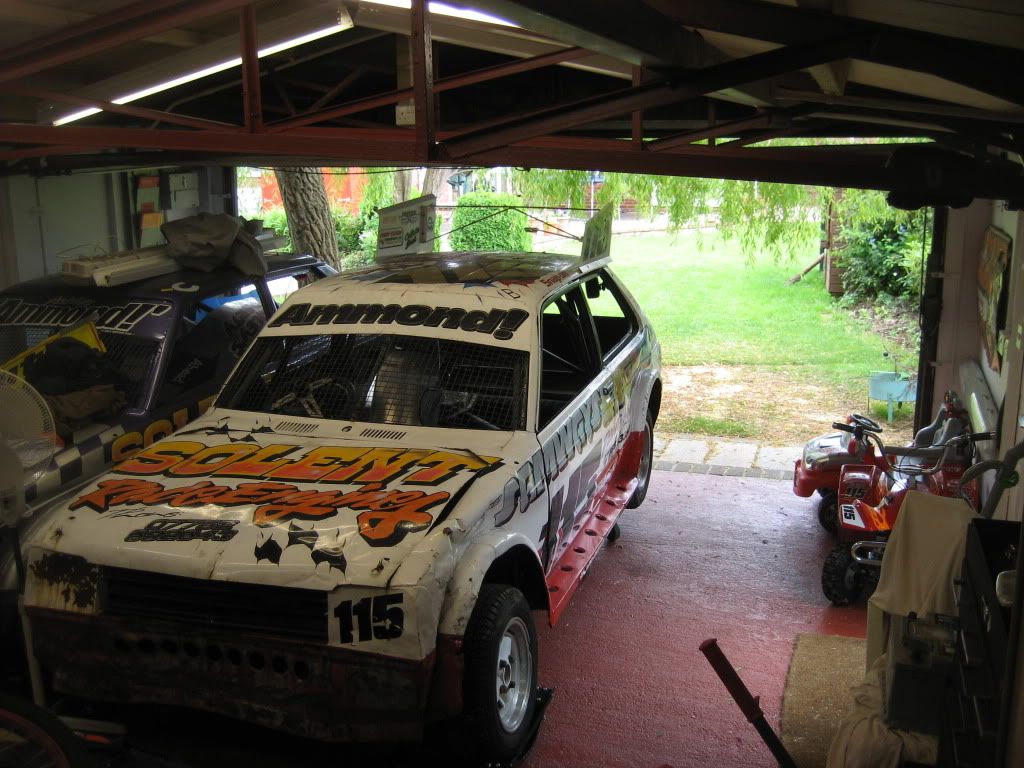 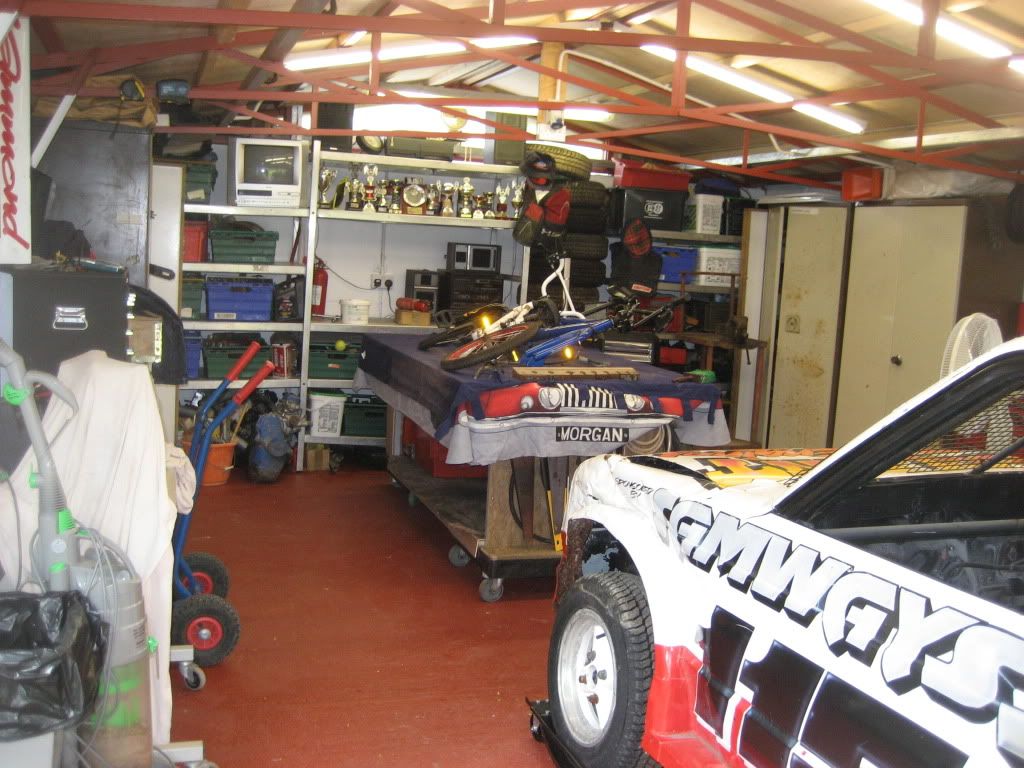 I can still get the car across the back so three can go in easy enough. 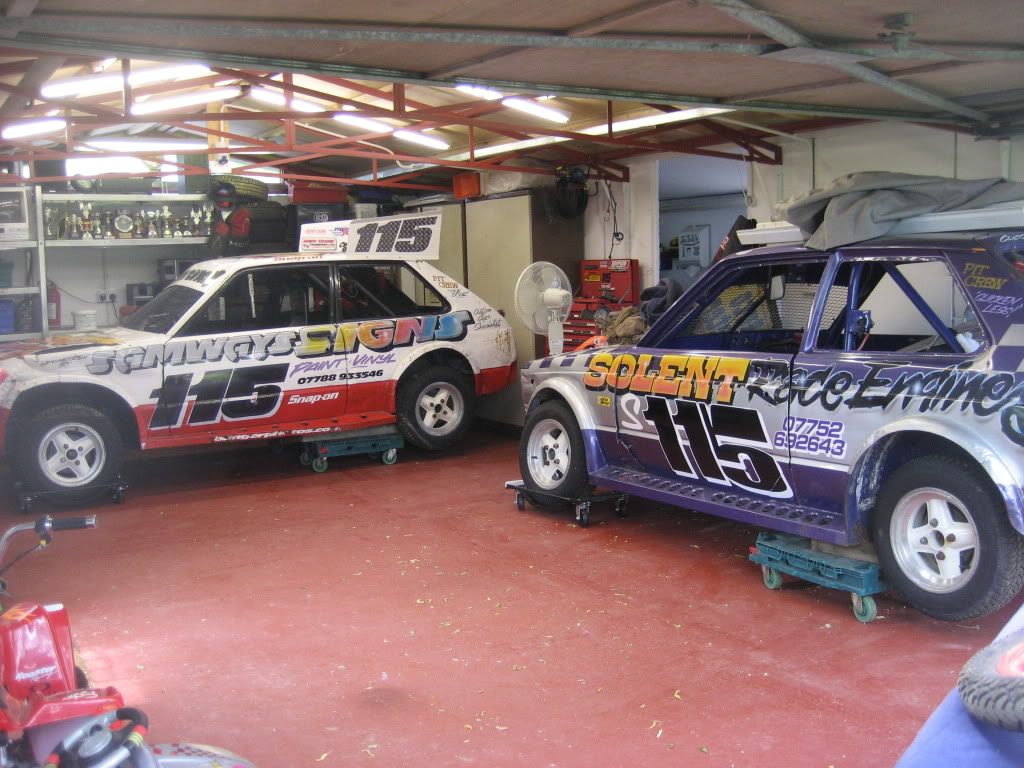 And I can turn the cars around to drive out all by hand on my own without straining! 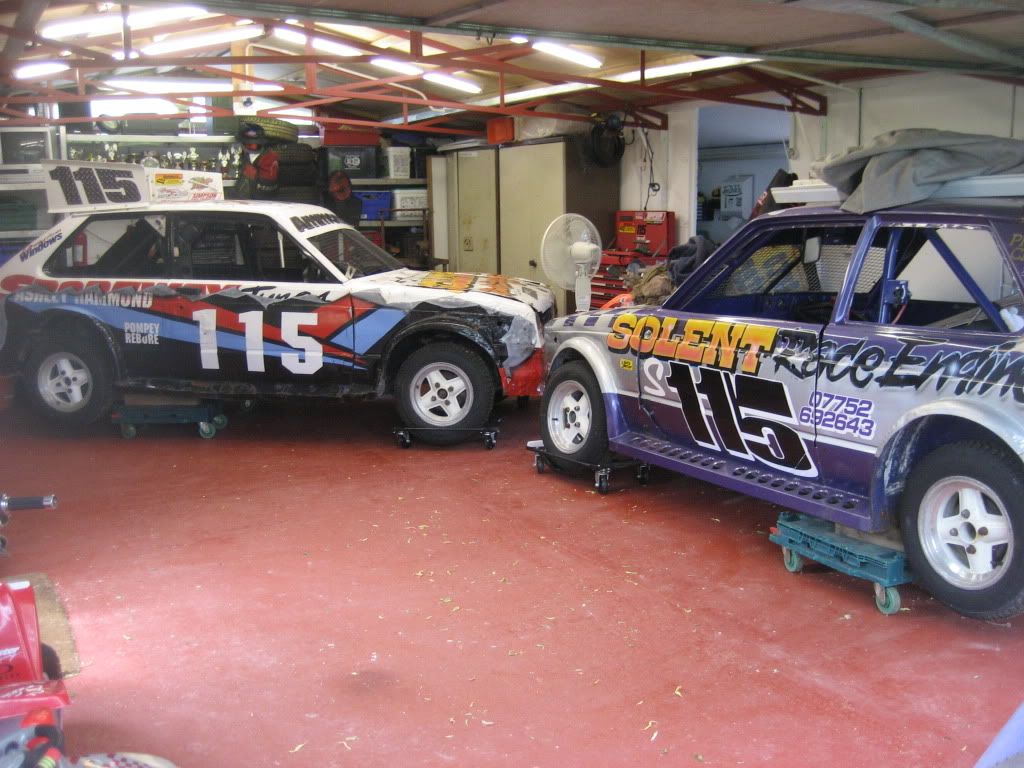 Its half a foot short of fitting two front to back with shelving across the back but if I took the lower shelves out I could get them front to back so in thoery it can take 4 cars! I'm over the moon about it! Unfortunately an old competitor died of a heartattack aged 39 last night so I might come out of retirement with a memorial paint job on the black side of the car? In good news this week the gamesroom has been given the green light and we start this weekend! Weve already moved the playarea four foot forward so we can start dismantling the pile! Watch this space! 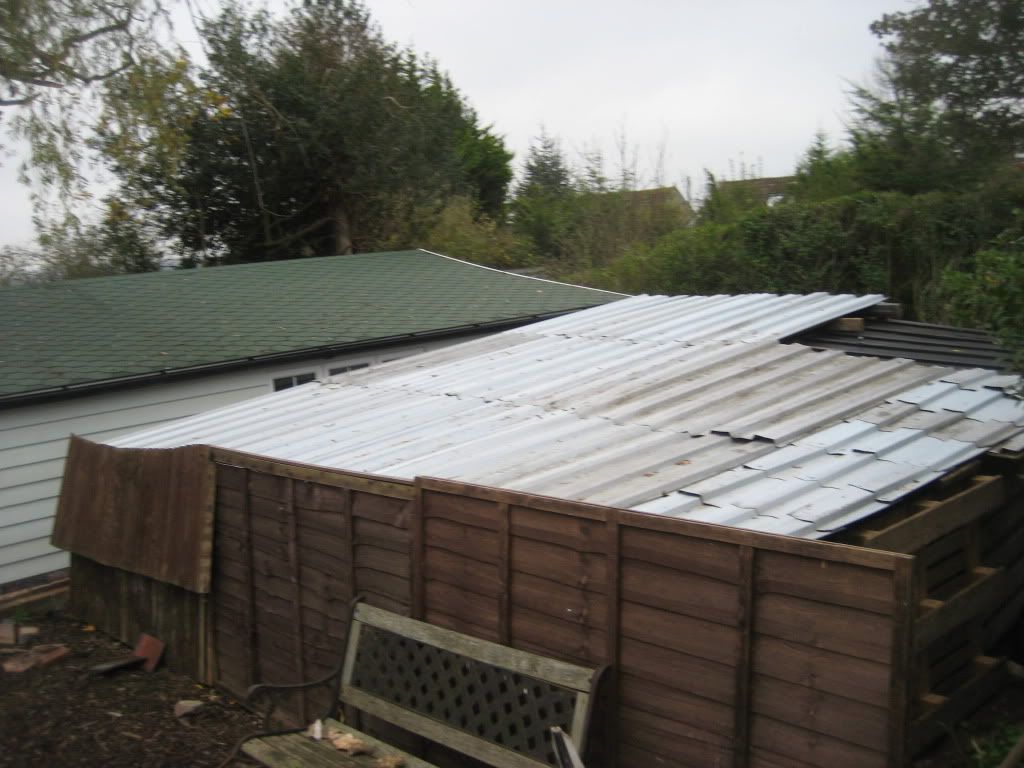 |
| |
|
|
|
|
|
May 15, 2012 12:04:10 GMT
|
 My old bed cover from when I was 5! My mrs wanted to throw it away and to be fair its a bit musty but I don't throw things away that easily as you know! Its been sat in my garage for some time and its going to be used as a dust sheet on here! 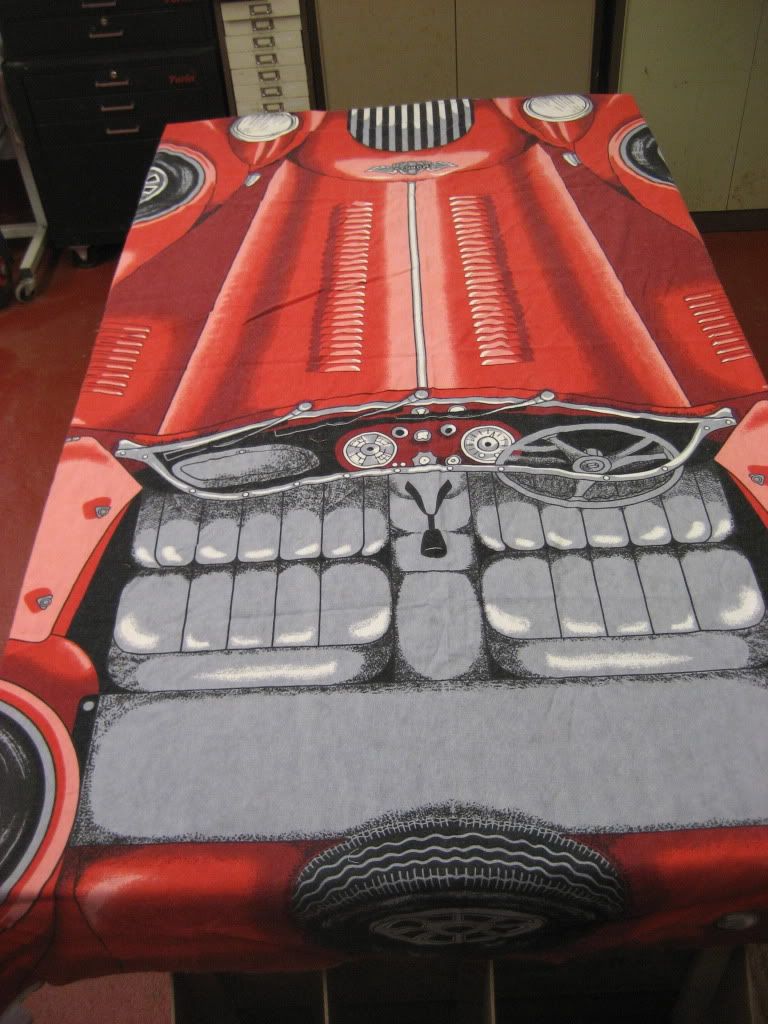 How could any man throw this away? 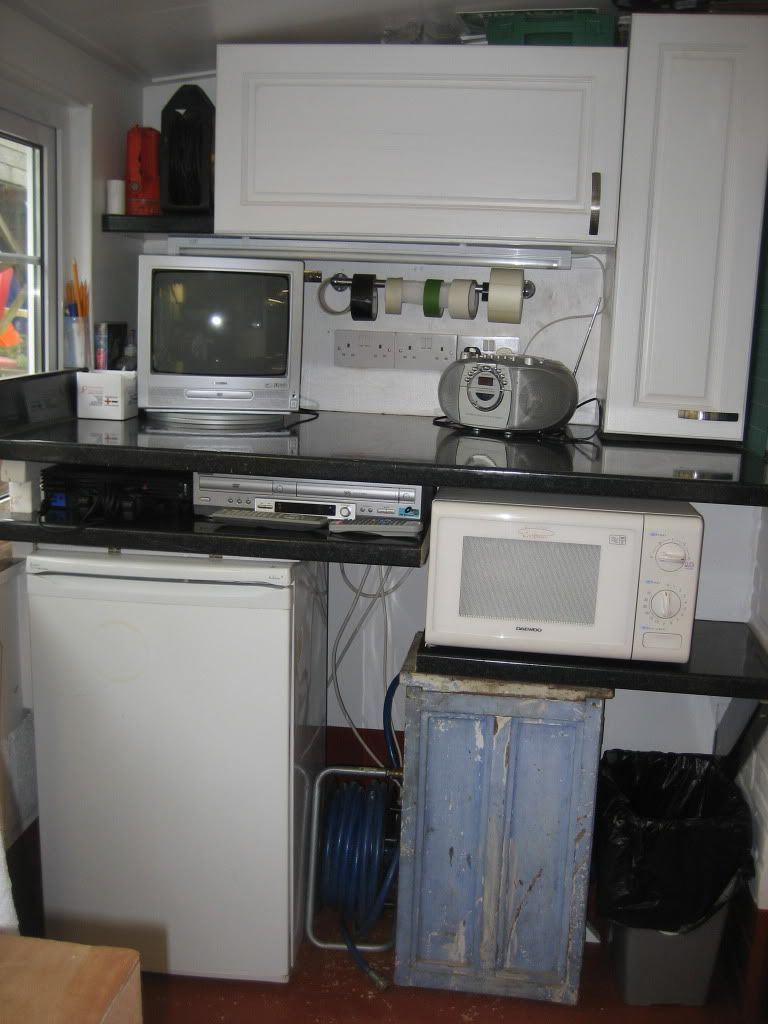 Upgraded the kitchen area, after a bit of chopping around the old blue cupboard that I found in Grandads garage fitts under the microwave, I'l paint it later no doubt! And I finally fiited a new shelf under the worktop for the PS2 and video, freeing up valuable worktop space, hiding loads of cables too! 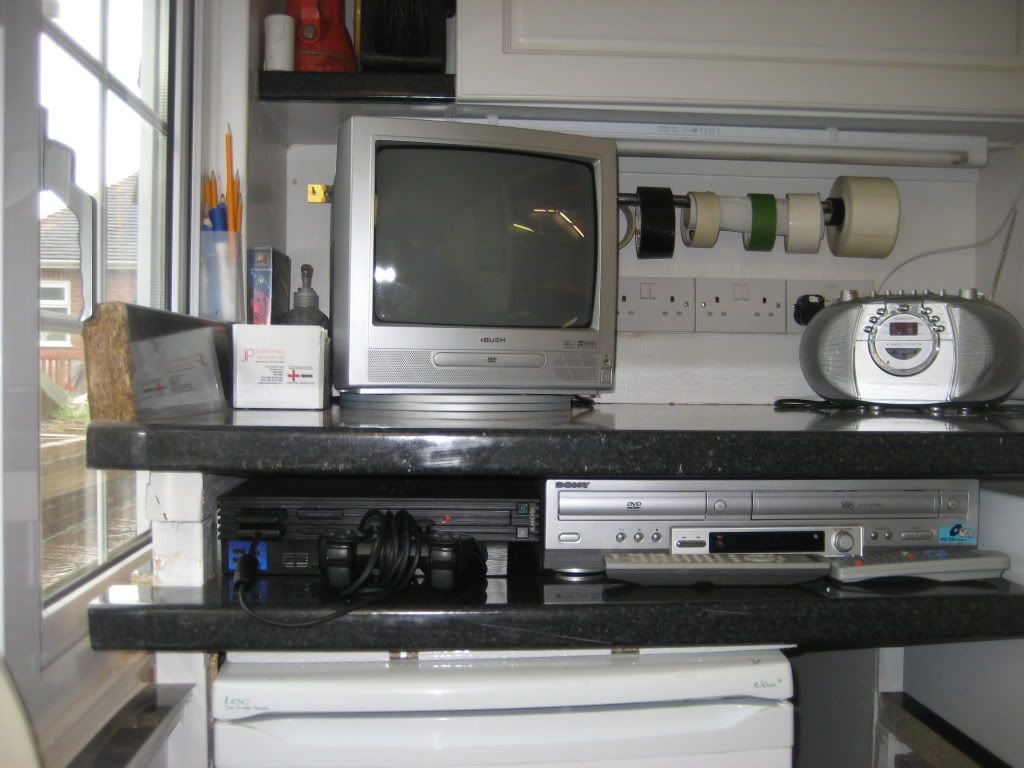 I know a Ps2 in your garage is a bit weird but it was sat in the attic doing nothing! The worktop was the last big piece kicking about so I'm glad thats out of the way! Ive tried to get as much of the chopping and sawing done before I get the next car in which should be next week. Then I'l start on the metal cabinets getting them all painted up. 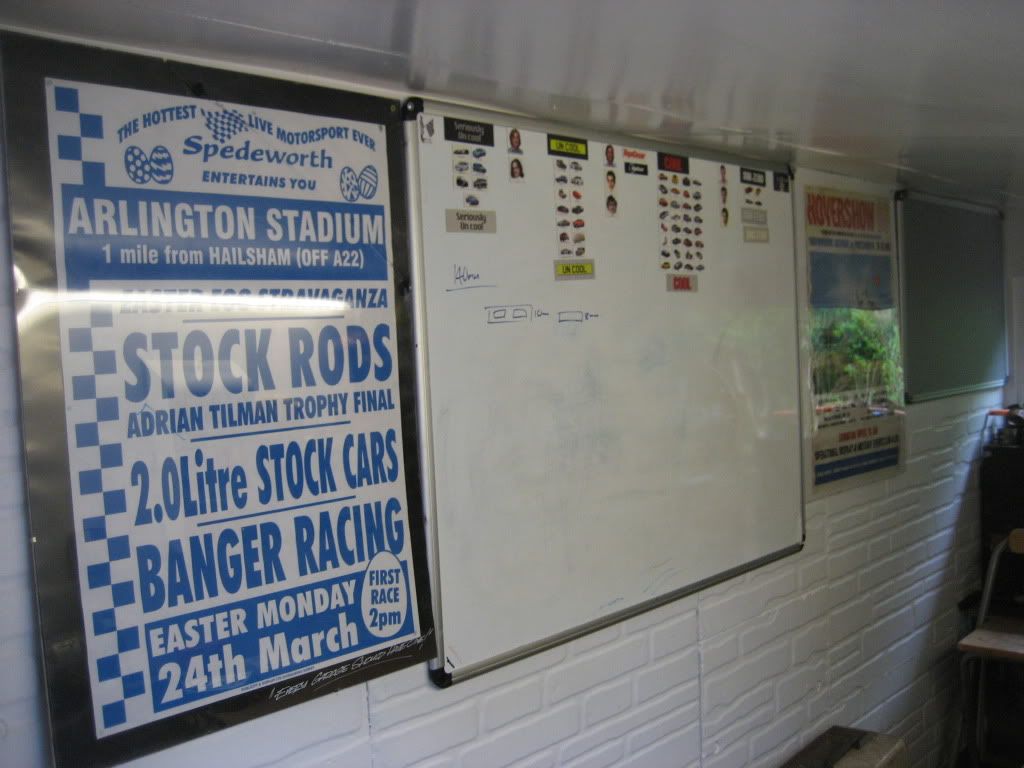 I filled this wall up in go! The big white board I found errrrr kicking about somewhere.... it had a little bit of damage in the corner and they ordered a new one to replace it and left this wanting a new home in the corner of their office so I did my good deed for the day! The Hover picture I found in my grandads garage rolled up, I never knew it was in there until I cleared it out and thought it was pretty cool! 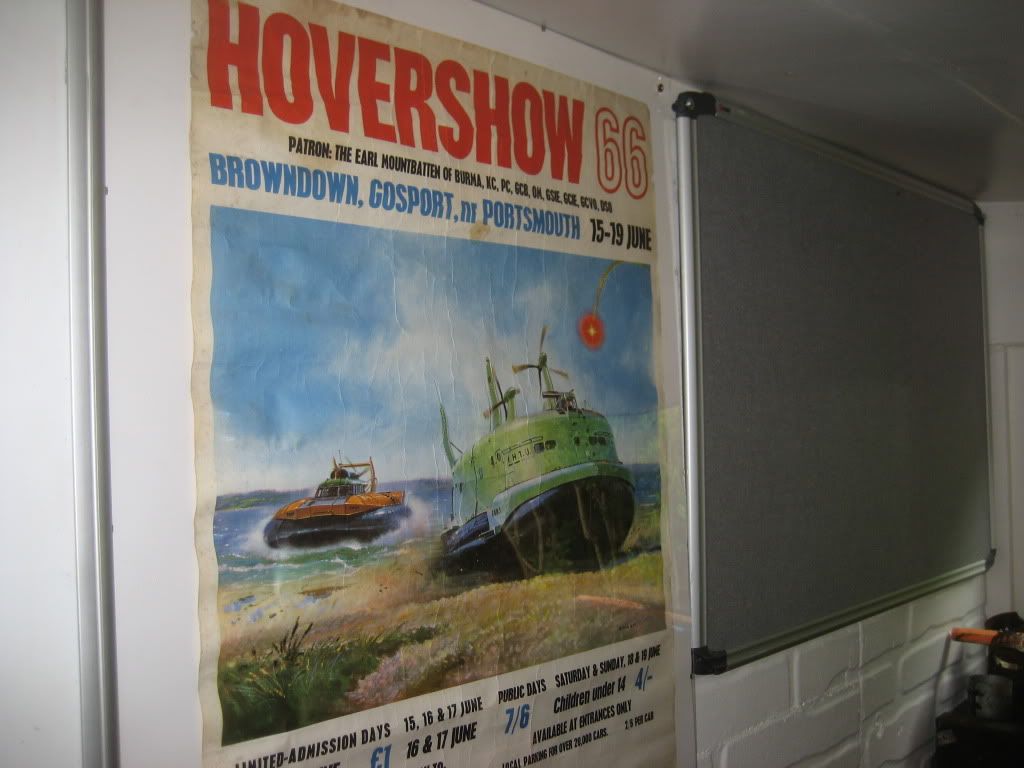 The pin board fills the last bit up, I cleared this from an old work site, agin its been moved about twnety times in the last ten years knowing i'l have a use for it somewhere soon! The whiteboard being made of metal is also useful for magnets so up goes the Top gear cool wall! 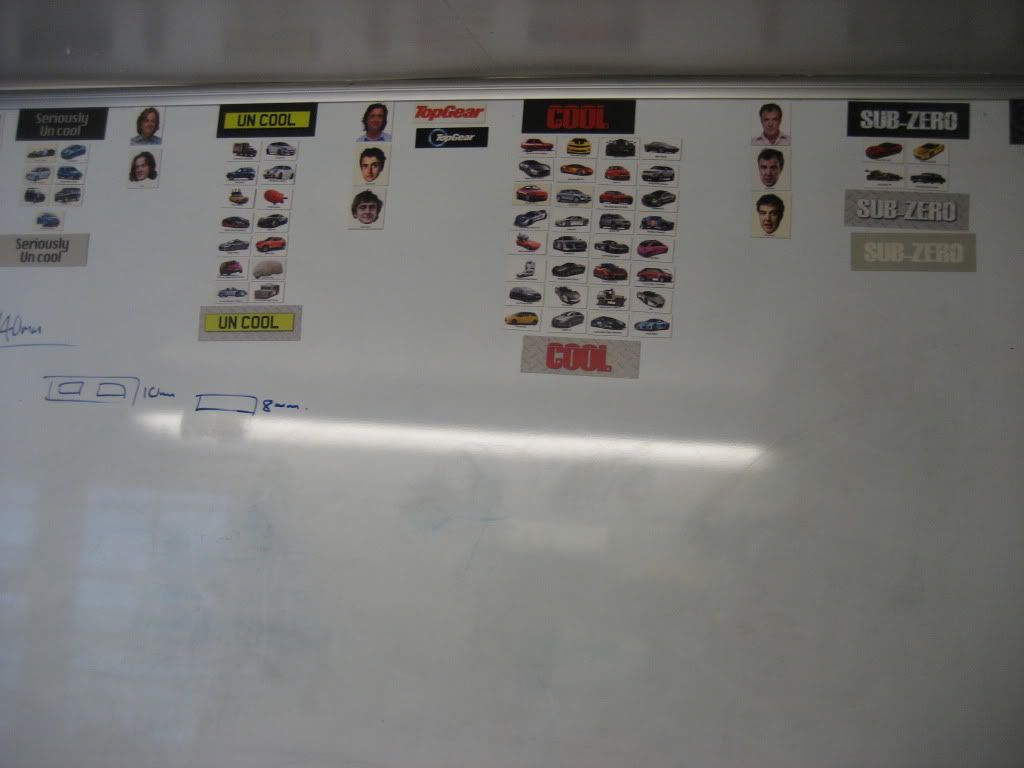   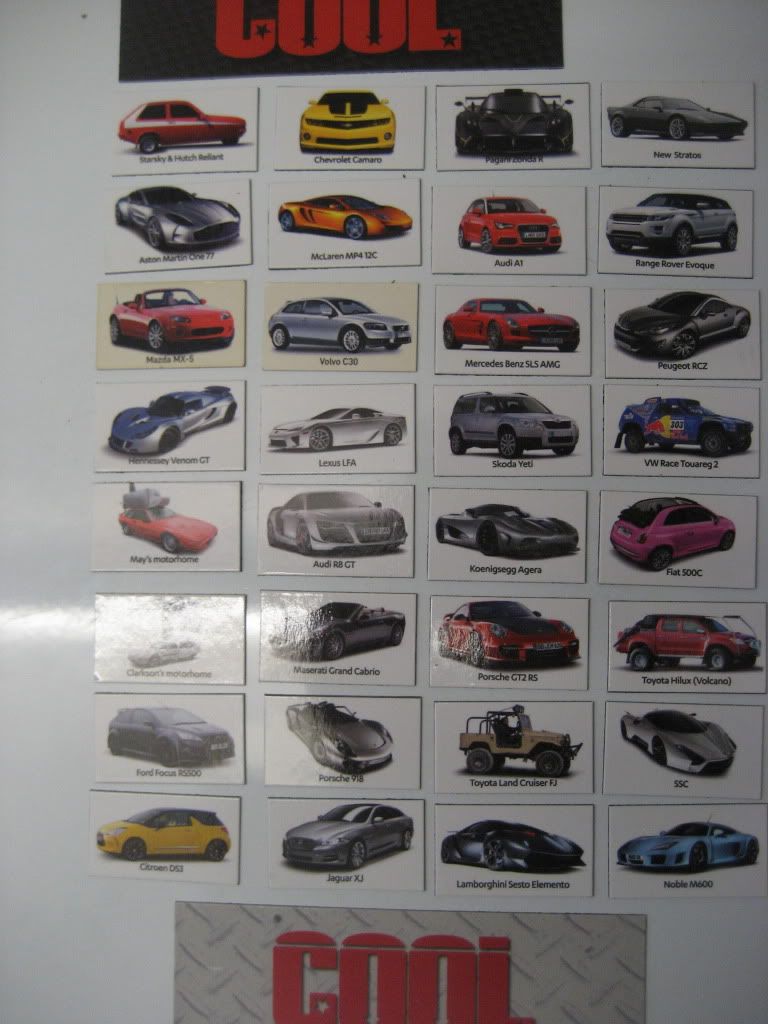  And that is about it for the minute! |
| |
|
|
|
|
|
May 15, 2012 11:26:55 GMT
|
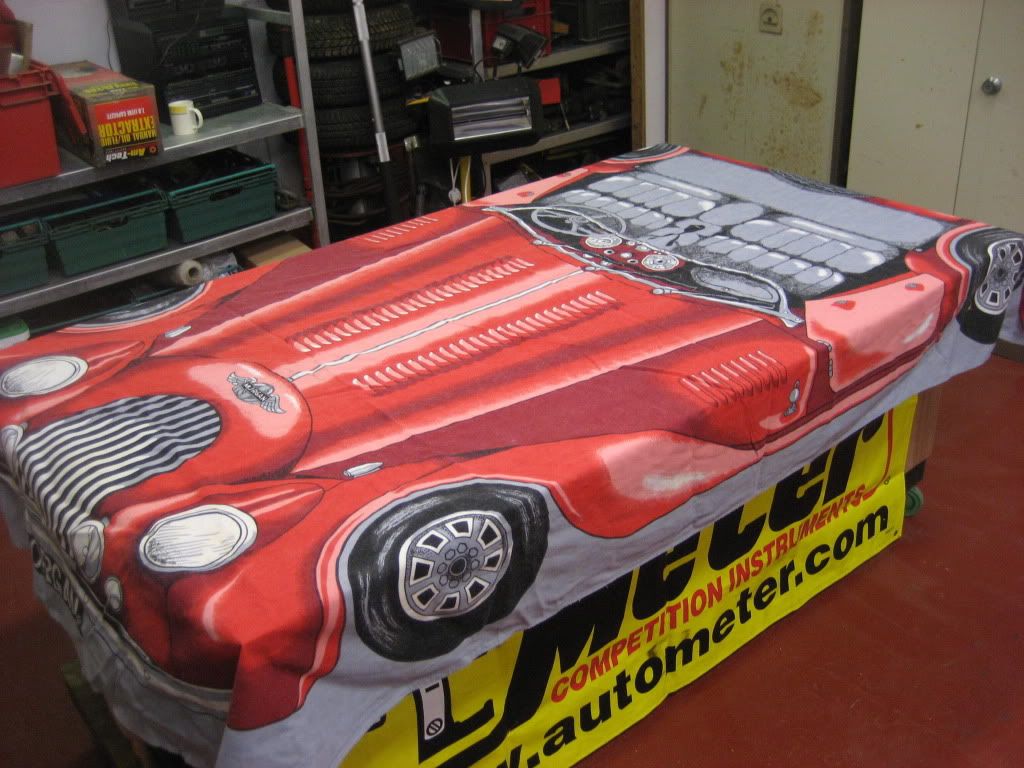
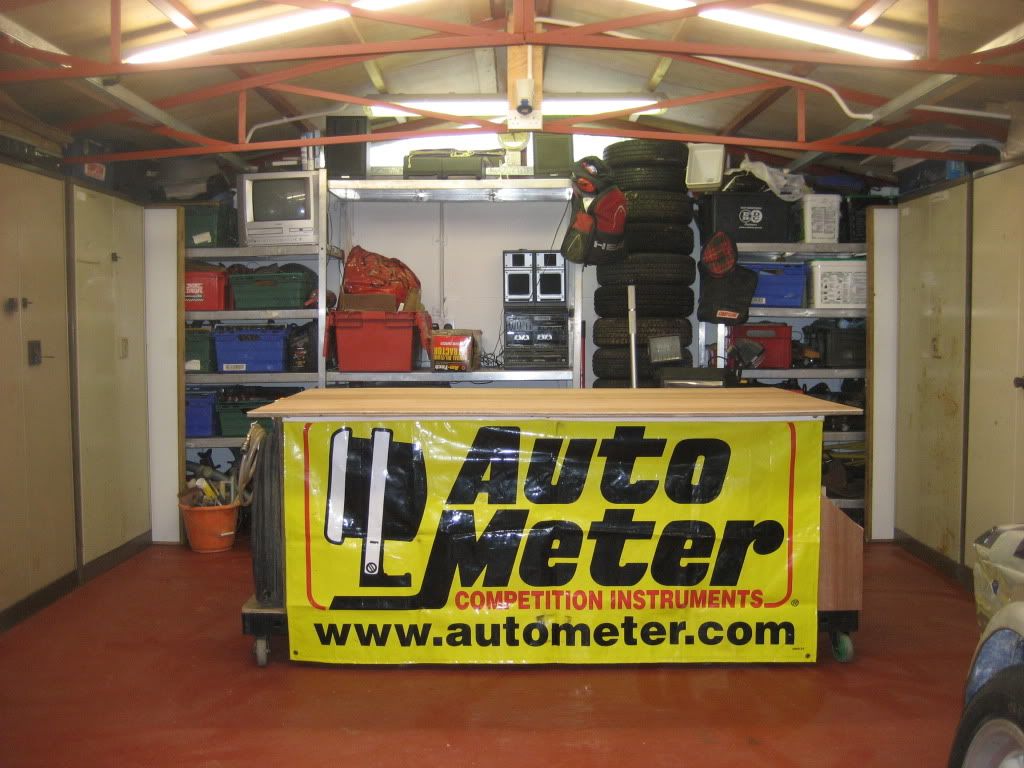 Not a great deal going on recently just tidying up and more tidying up! Working out what lives where and then the week after deciding no! It needs to live over there! I keep starting other little projects too and all the time the garage wasnt organised these jobs take longer because I couldnt find anything! I built another wooden wendy house in the garden and spent most of the project working with tools out of a wheel barrow which turned into a nightmare! So here is mobile workbench MK2! I found some better supemarket dollies that had four rotating castors rather than the two fixed two rotating. This gives greater flexibility, one quick shove in any direction and it just moves. 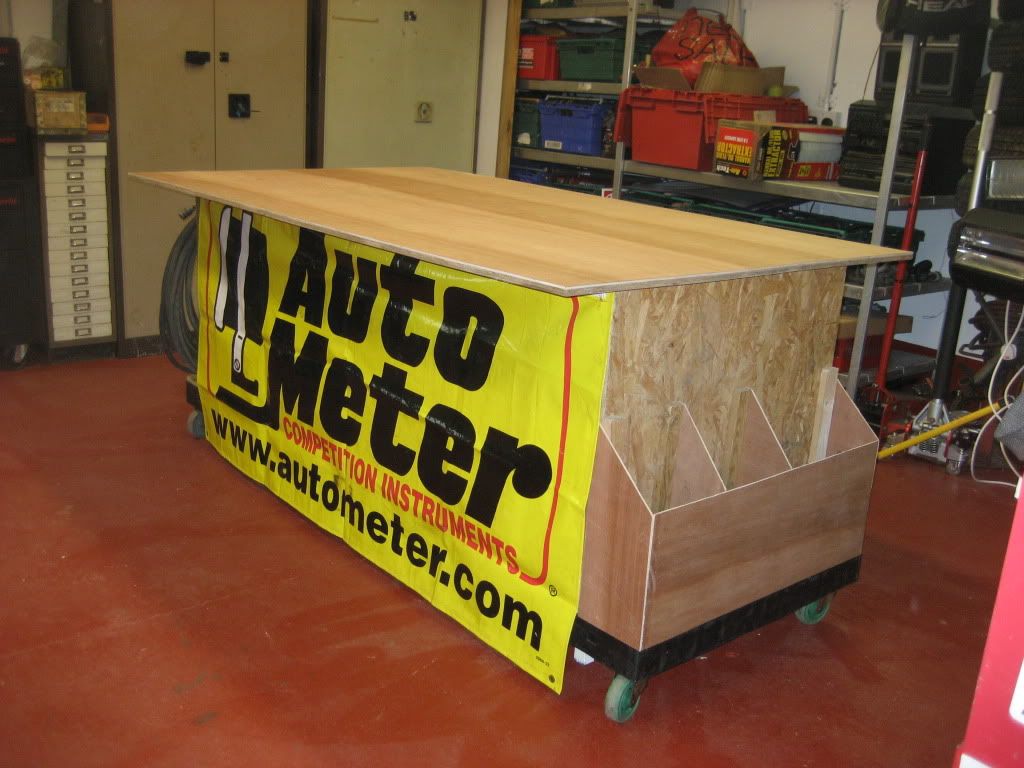 I had some ply left over so I boxed in the old table and made storage boxes for tools on the side and put a new cover on it to tidy it up. The Autometer Banner I bought off ebay years and years ago for the garage project and it fits on here a real treat! Lucky as I had nowhere else that it would hang easily. The other side I used some old gutter brackets to hang saws and air line. I was going to use old metal shelf brackets but the kids are often in here running about and thought the plastic ones might be safer. 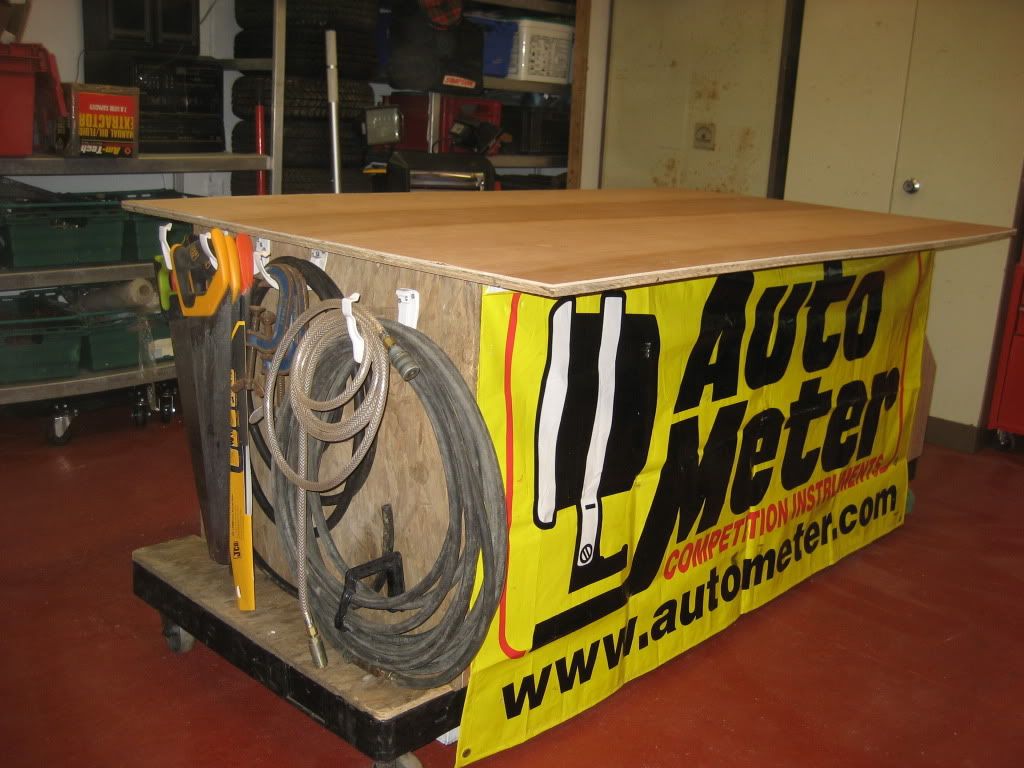 I made a shelf underneath which i'l probably put my garandads old tool boxes on ( the kids like going on a ride under here while i spin them round!) 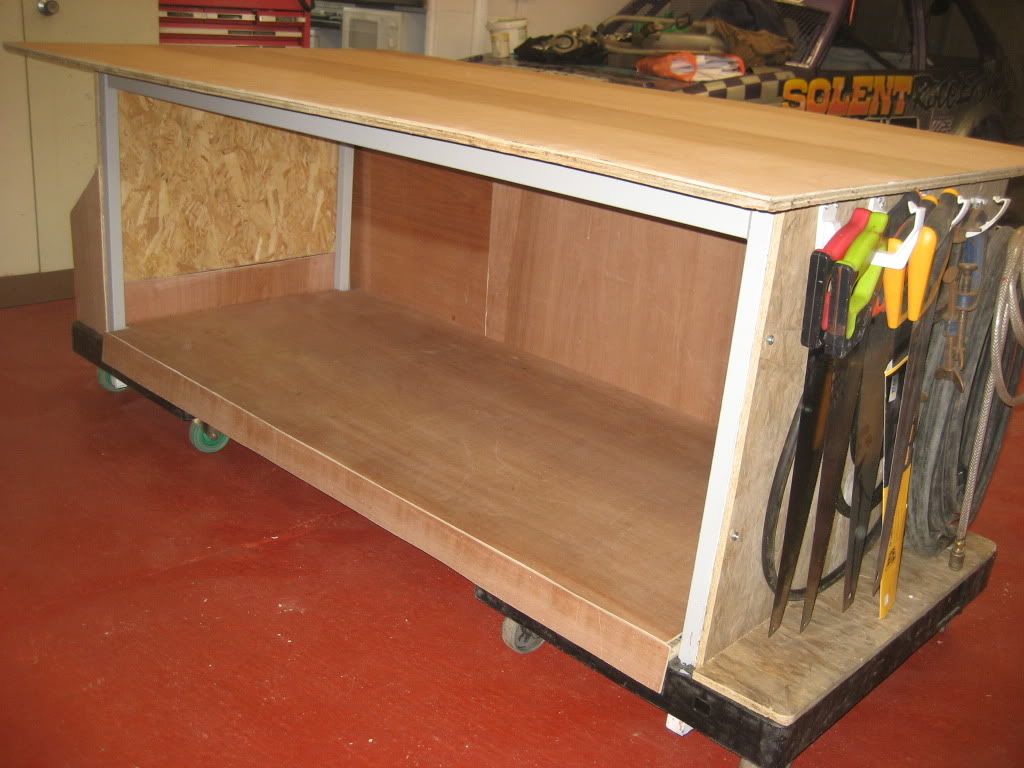 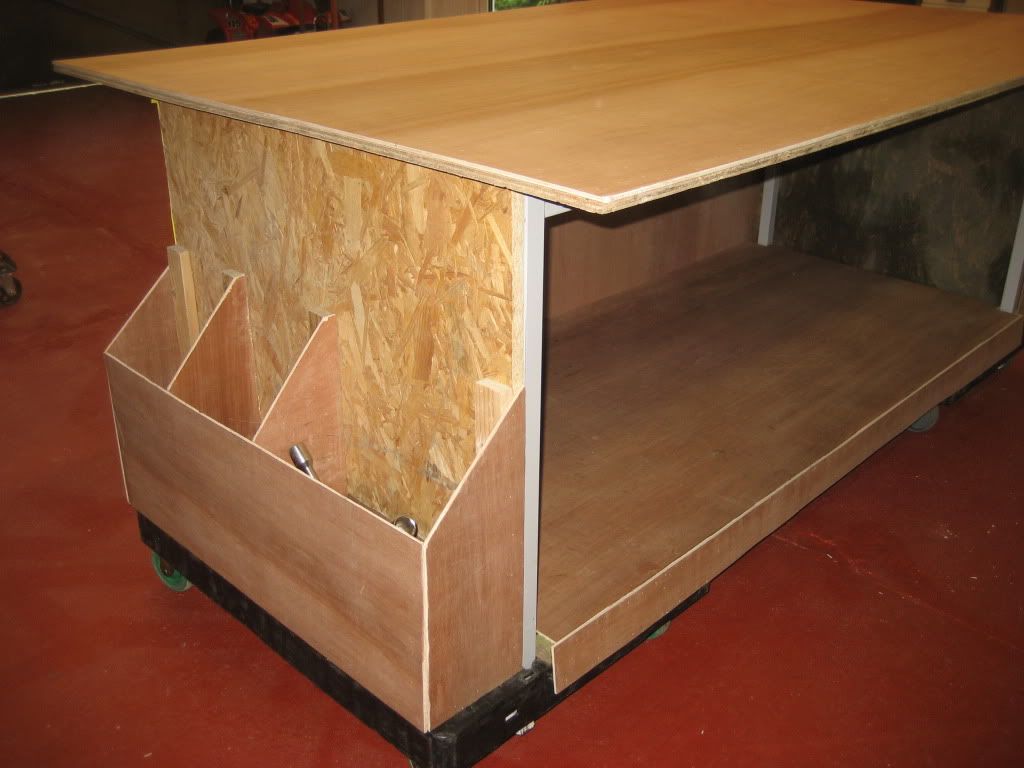 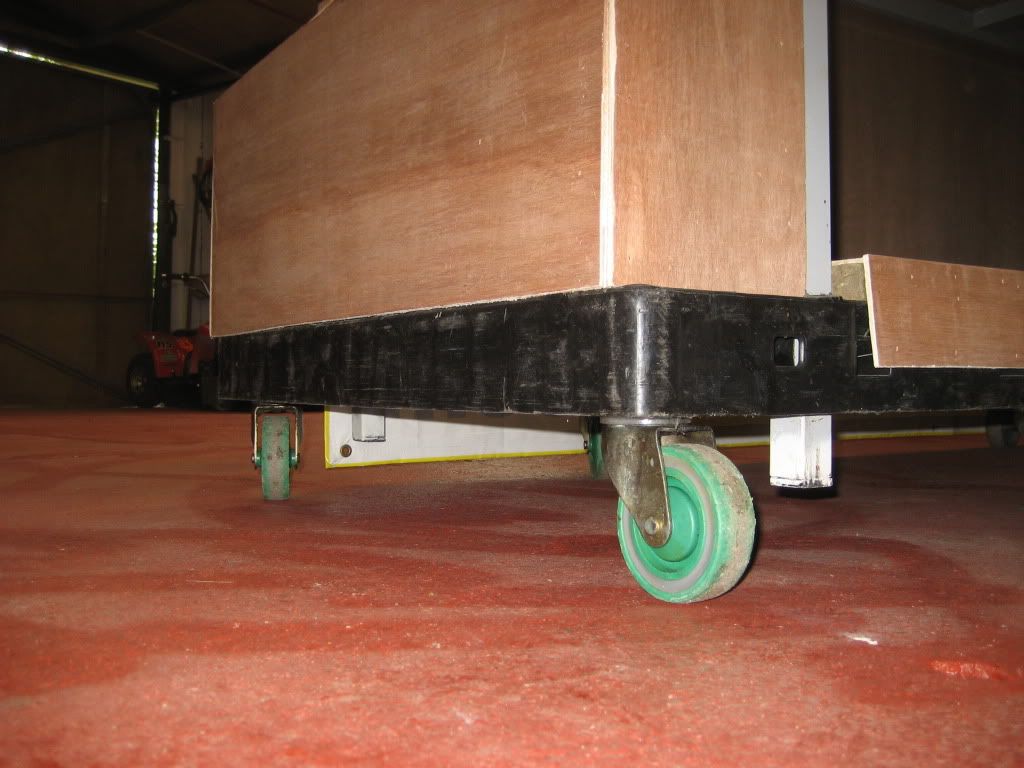 The only problem is tha the castors arent locking but I didnt want to spend any money on this because I'm a tight curse word! I have the other solid old workbench in the other side for the big tough jobs this just (for show) for light work. 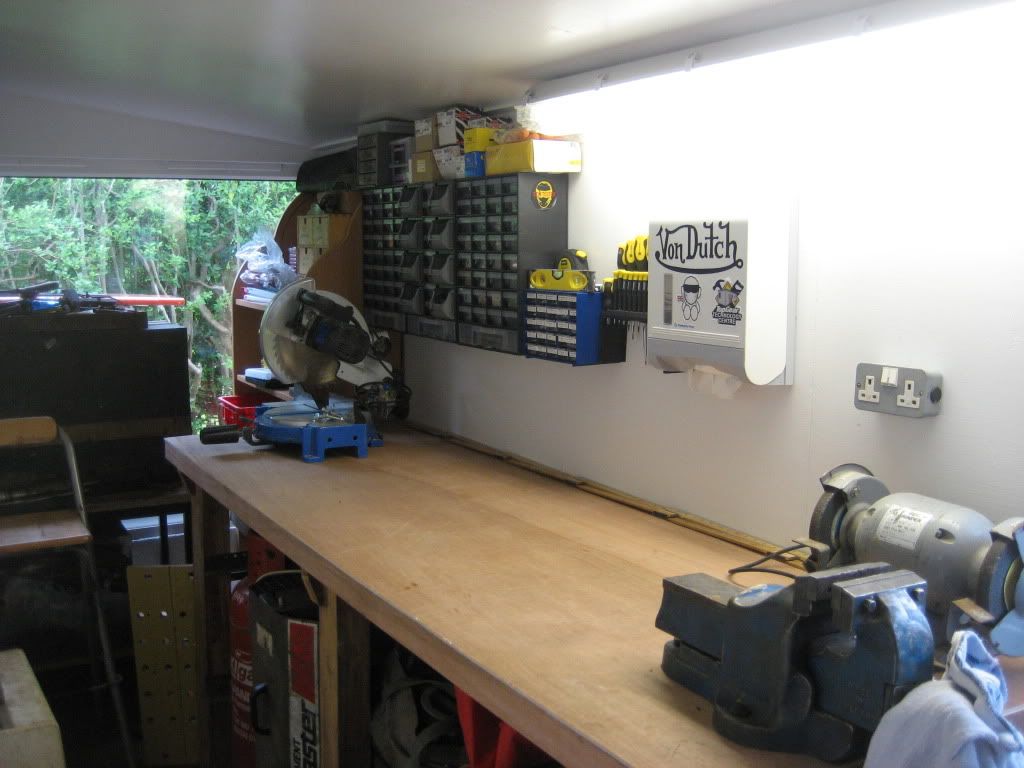 Sorting all the nuts, bolts and screws etc out took me a day! Now theyr'e all here and on the shelf in the corner using some organisers bought from Aldis last summer. Its satisfying when things you've bought with certain jobs in mind and you've been moving from place to the other finally get their final home! |
| |
Last Edit: May 15, 2012 11:44:58 GMT by ashley115s
|
|
|
|
|
|
|
|
I like the drive through idea, always good to keep your options open! Although I wonder what the trade off is for storage space for all your 'stuff'?? I can see an update coming for this in a years time with the extension! You can build a concrete panel one for the same price (second Hand) as mine cost the same. Good job though.
|
| |
|
|


 Then a week later think Ah!!! We should have done it this way! Anyway I had an old gate that I found in the skip over a year ago
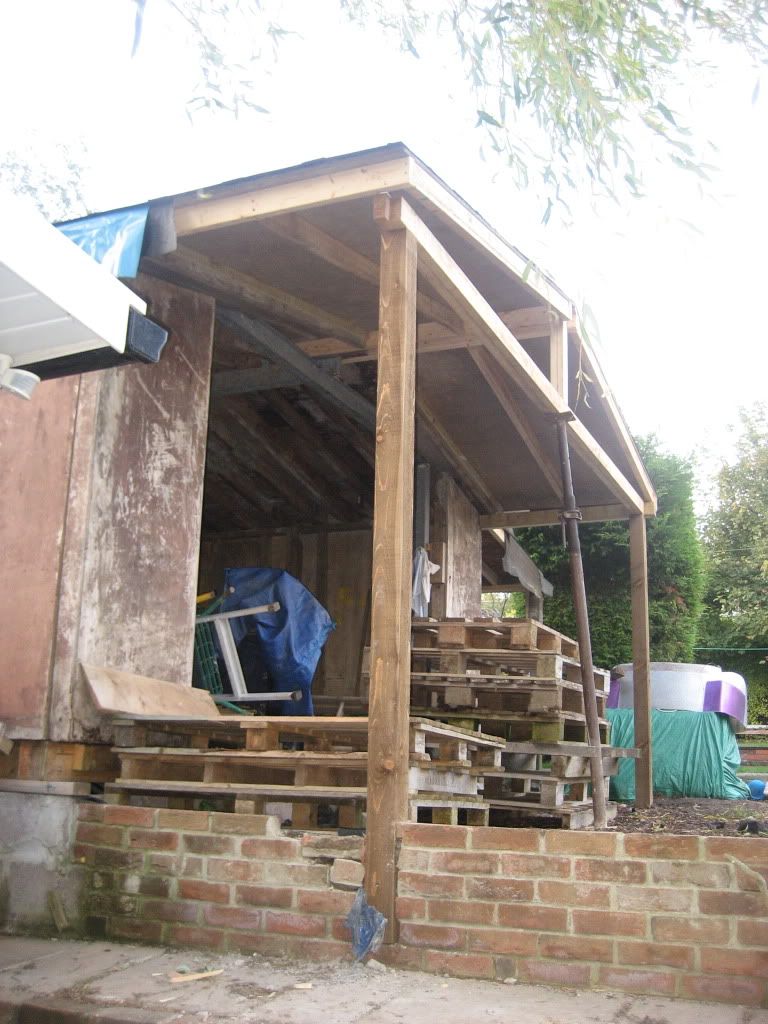

 The frame in the middle we found in the garage we didnt even know was there, its brand new but we don't know where the glass is for that one so we'l have to order that! We fitted all these in the pouring rain one Saturday!
 )
)