Well today was a special occasion, for the first time since I have owned it I've put my 200sx in a garage. What's so special about that you're probably wondering. Well, it's a garage I've built and I thought you might like to see how I've done it....
Firstly, I apologise for the terrible pictures. I do wonder how half of you lot manage to stop work, compose a fantastic SLR mid progress picture at every crucial stage, I seem to get carried away and before you know it the job is done (or not done in most cases!) Anyway, pictures are courtesy of my iphone, quality is poor at best but hopefully you should get an idea of what's going on
Well, I've lived in my house for a few years now and I've long wanted a space to store and work on the fleet. I'm lucky in the fact the house has a gated rear access road behind it. I'm also quite lucky because as a day job I design roof structures and timber frame buildings (more on this later).
Anyway, stage one was to get a rough design sorted, so out with the tape measure and a quick walk around the garden and a foot print of 6.5m long x 4.5m wide would be a good size for what I needed.
The groundwork was something I didn't undertake, this was in trusted to a builder friend as quite frankly, I couldn't be bothered!
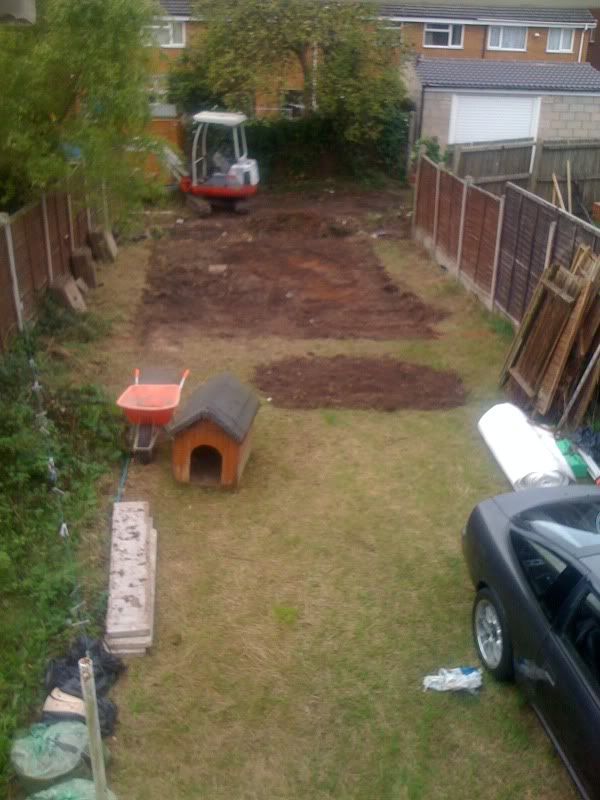
First stage was to excavate, que mini digger!
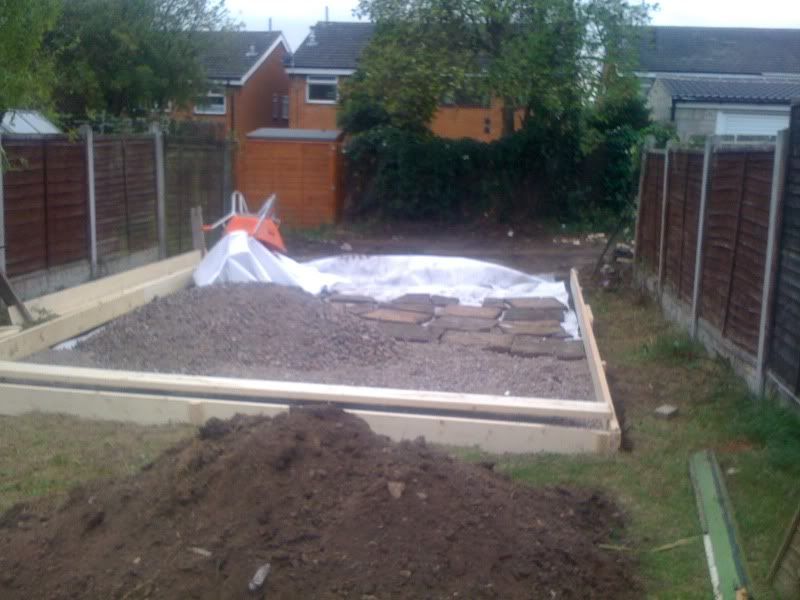
Next stage, drop in hardcore. This seemed to consist of broken paving slabs, bricks and stones followed by the timber shuttering ready for the concrete


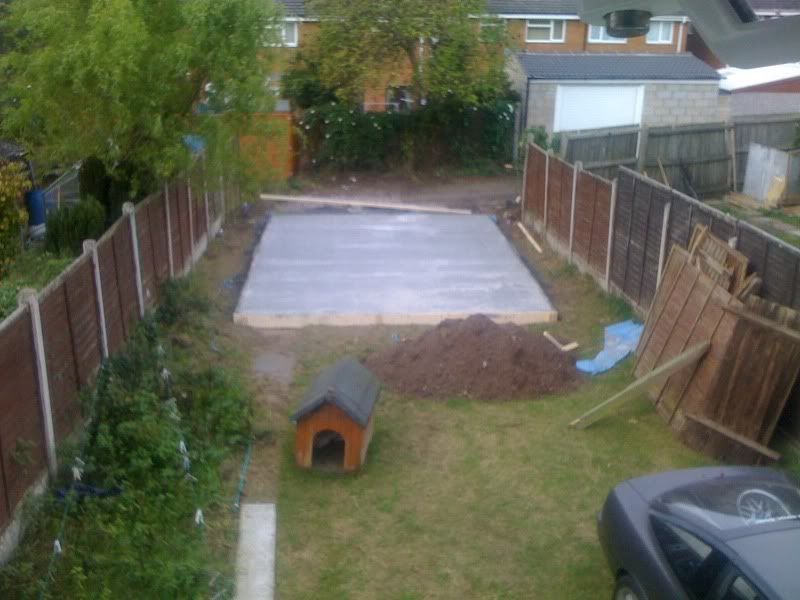
Next is the concrete pour. It's 150mm deep and has an approx 75mm upstand off the ground level
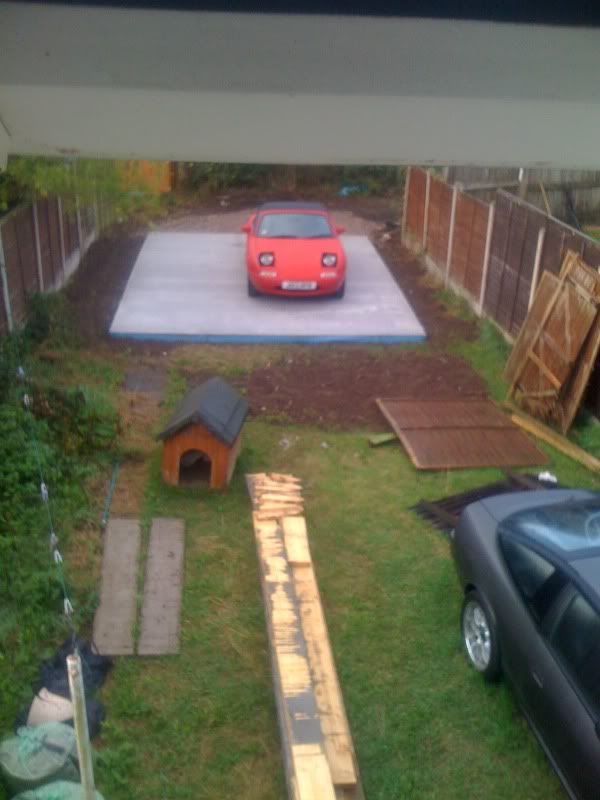
Testing the pad! This worried me slightly as when I put the MX5 on it looked MUCH smaller than I expected....
So, this was in September. Progress kind of stood still for a little bit while I fleshed out the design and tried to pester my mates into helping me build it!
Design wise its a box with a flat roof and 18mm ply deck. It has barn doors to the front and rear for all round access
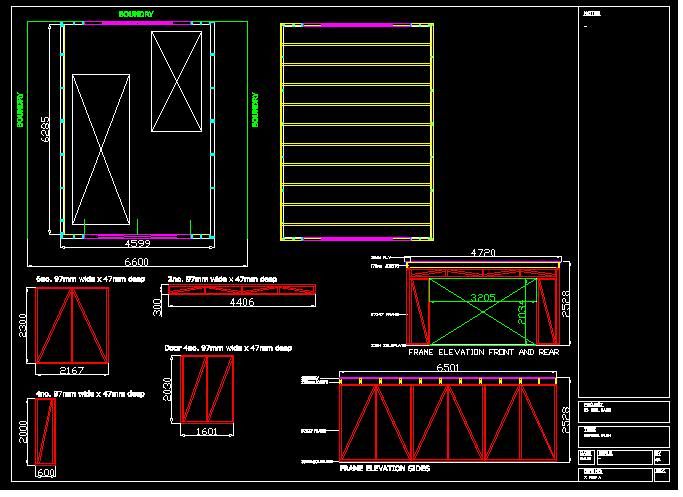
It has been designed and fabricated in kit form so each side is made up of 5 panels, each panel is triangulated and is constructed in 50x100 timber.
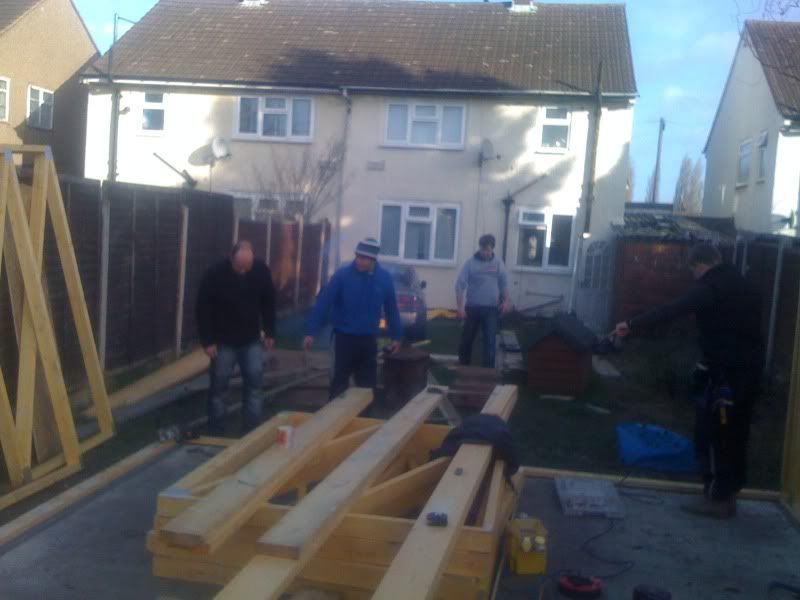
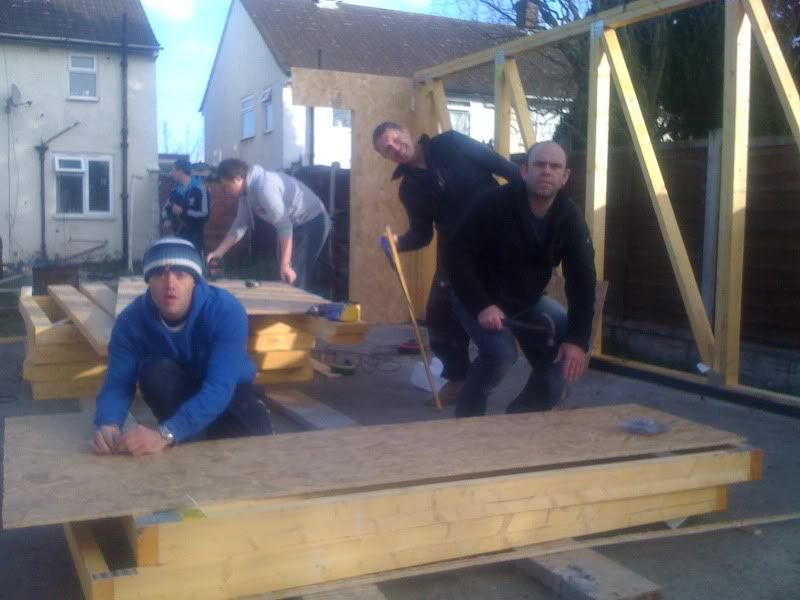
Anyway, fast forward to January and the crack team of erm, idiots is assembled. My aim was to have the shell knocked up in a day....
Here is the kit, doesn't look much does it!
Looks a bit more when it's spread across the garden!

The A team!
The first stage is to lay a soleplate. this is a timber that is fixed to the concrete and the walls are fixed on top of it. It's fixed over a DPC to stop moisture getting into the timber. We've fixed the soleplate @ 600 centres with hammerfix anchors into the concrete. Fingers crossed it wont blow away!
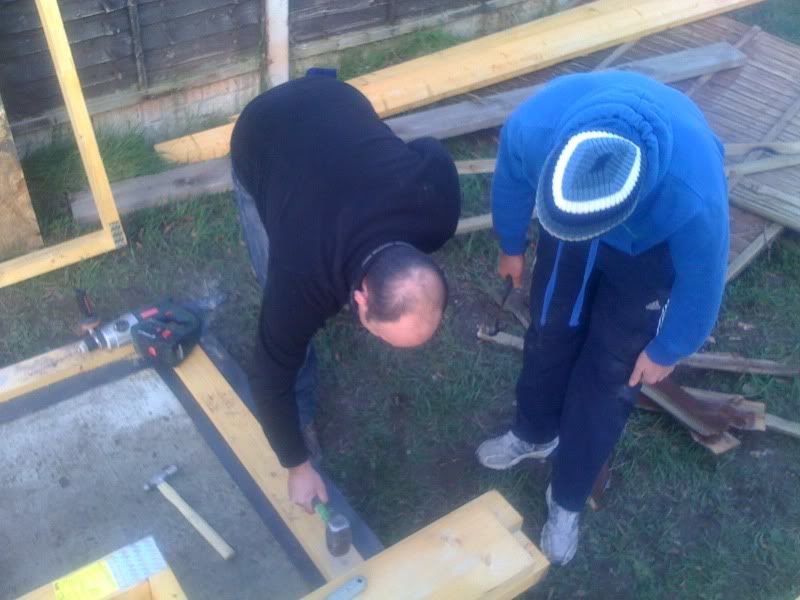
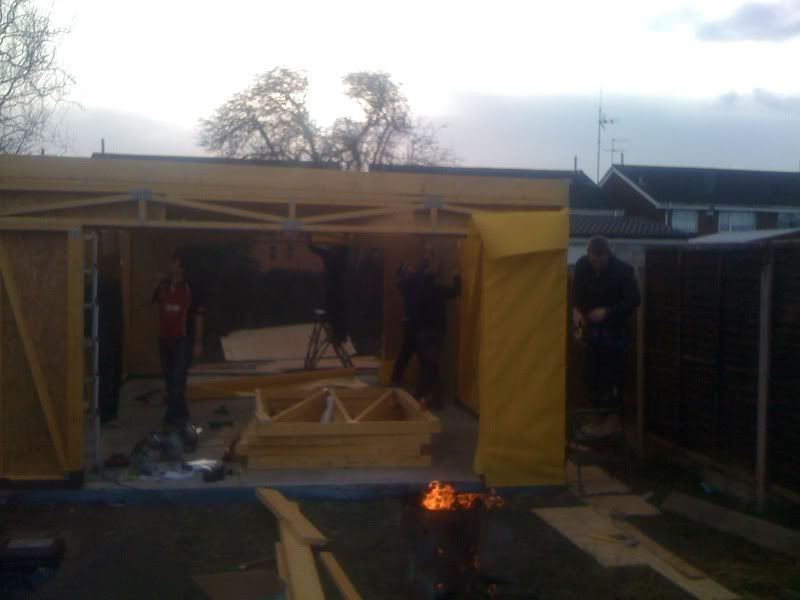
So once we fixed the solepate we could simply position the walls on top and screw them down into the soleplate (and to each other)
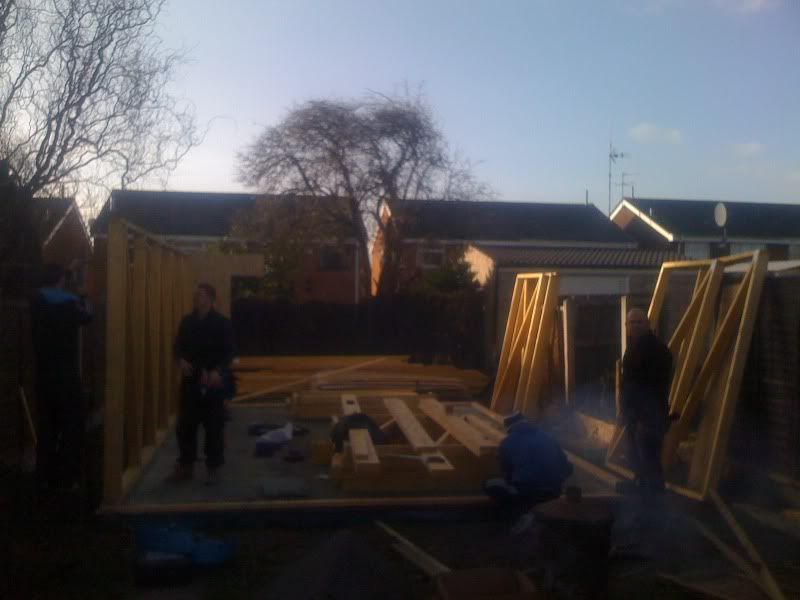


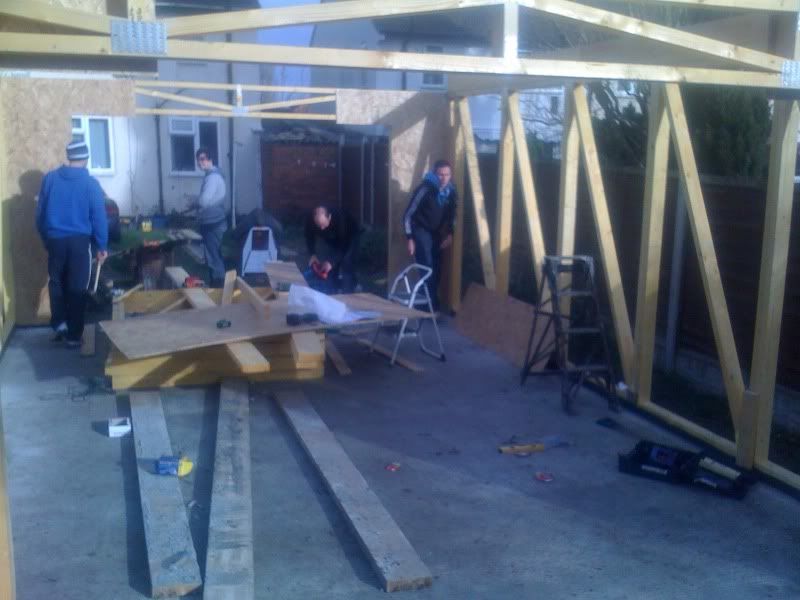
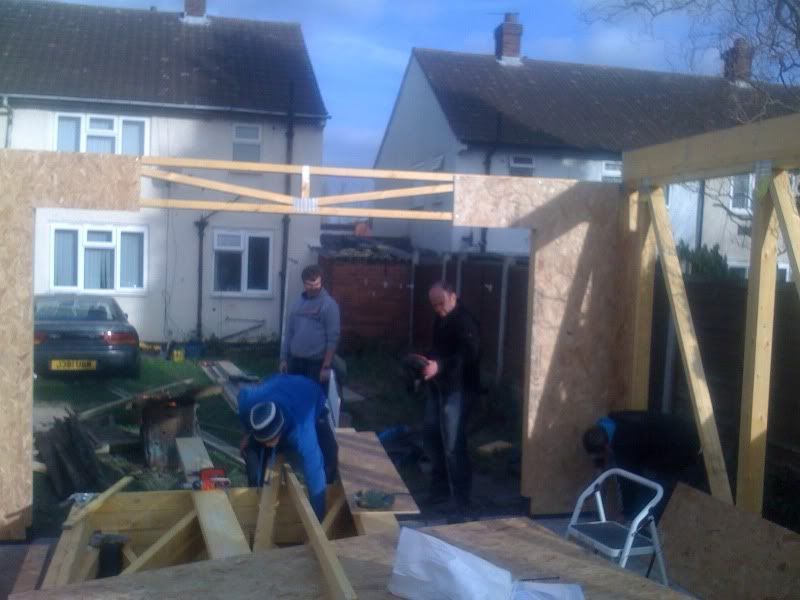
So once we'd got the walls up we added sheathing to the inside of them, 10mm OSB, this makes it a little more secure and a bit more rigid too

Due to me not being able to count there wasn't enough OSB to finish all the walls, this still needs sorting!
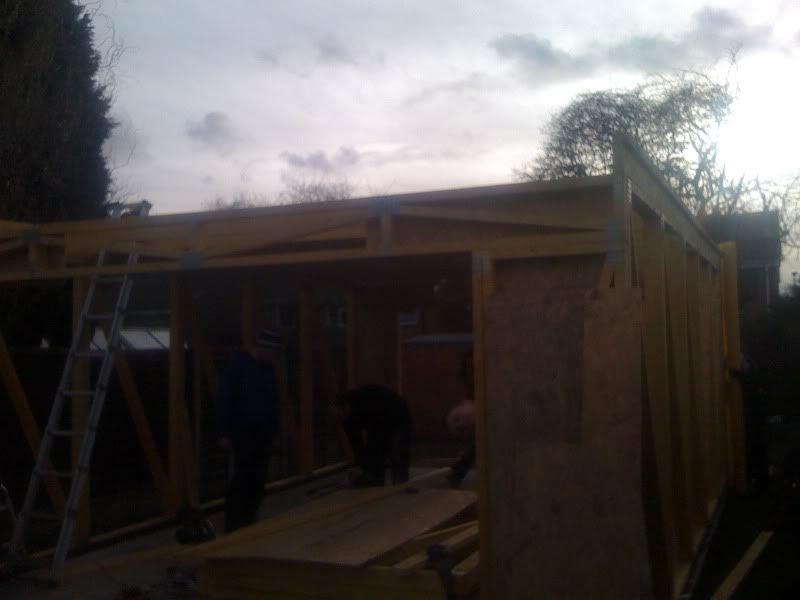
The roof is 50x197 joists @ 600 centres with a fall for the water run off. The decking is 18mm ply
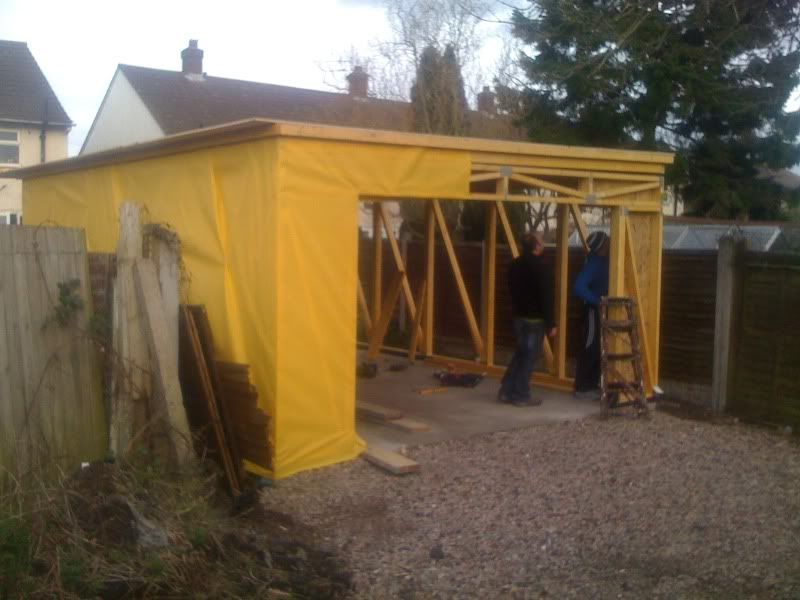
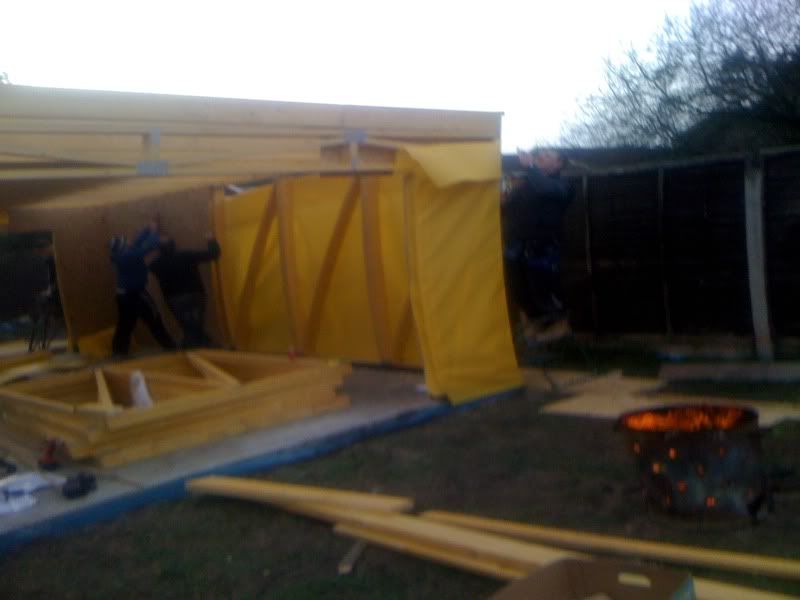
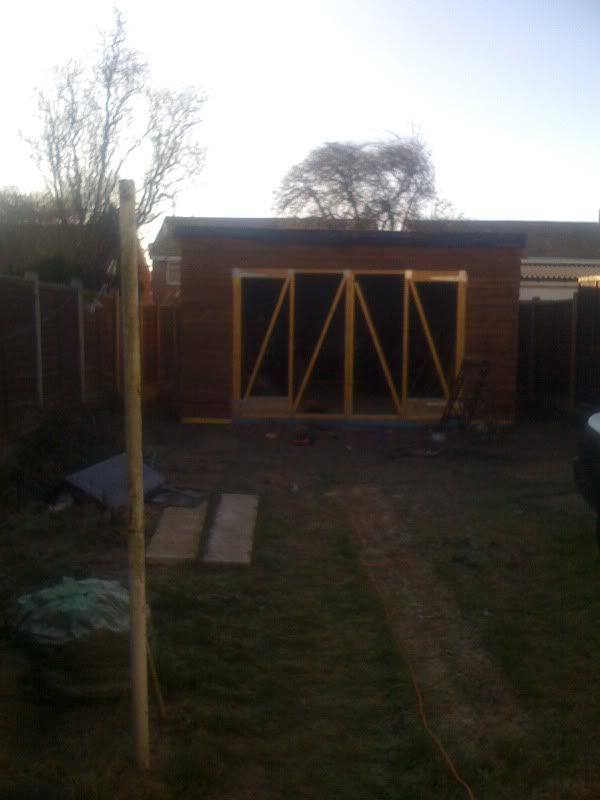
The yellow stuff is breather paper, this is water resistant and breathable so offers a bit of protection till it's finished.
Well, that little lot took 8 hours. Pretty good going as that included breakfast and lunch too!
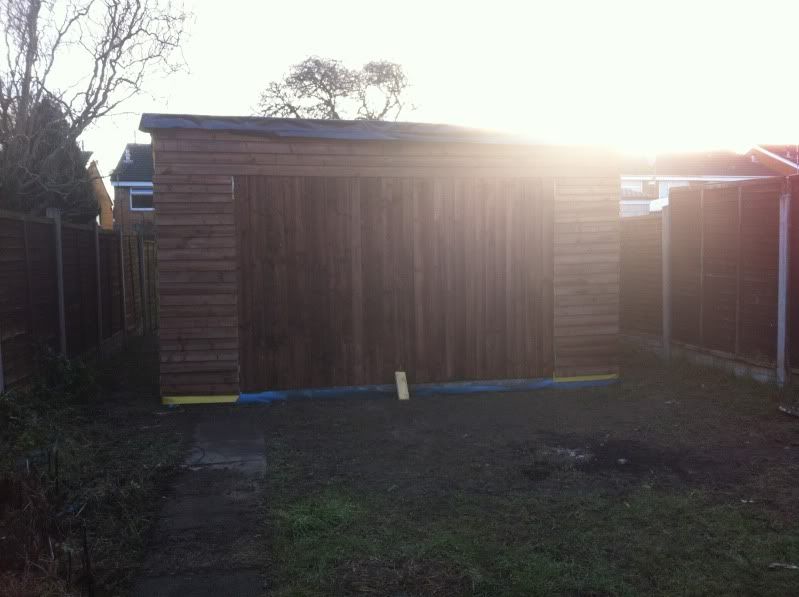
It seems you can spend serious cash on cladding. I didn't have any cash left so went with feather edge board, it turned out like this
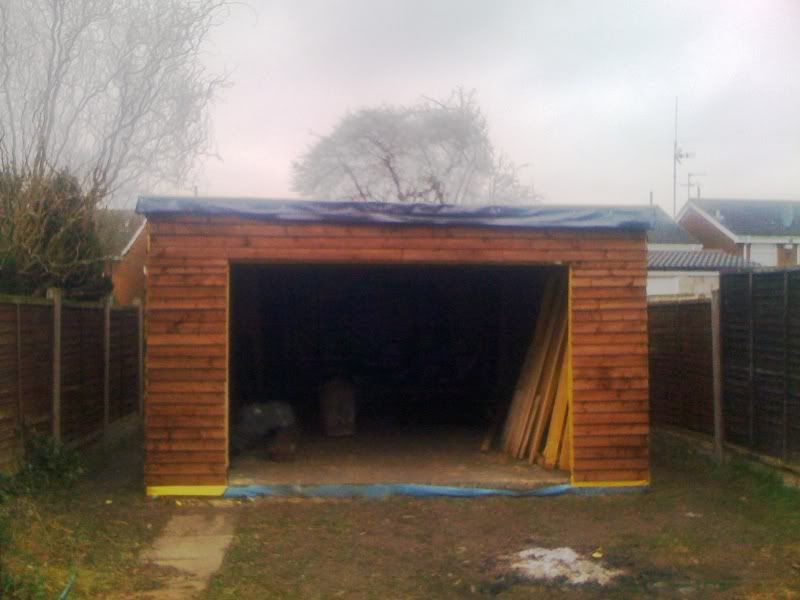

I'm pretty pleased with how it turned out, more expensive cladding might have looked a bit nicer but for the money it's good stuff.
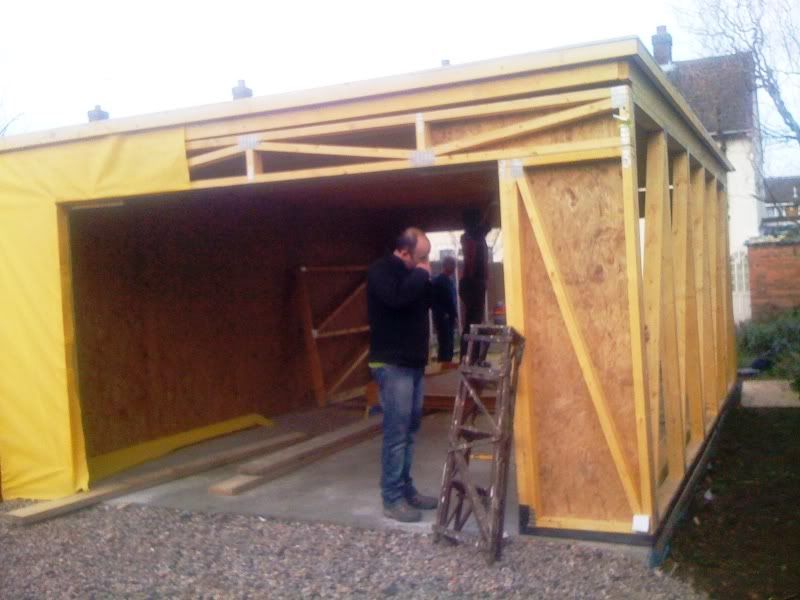
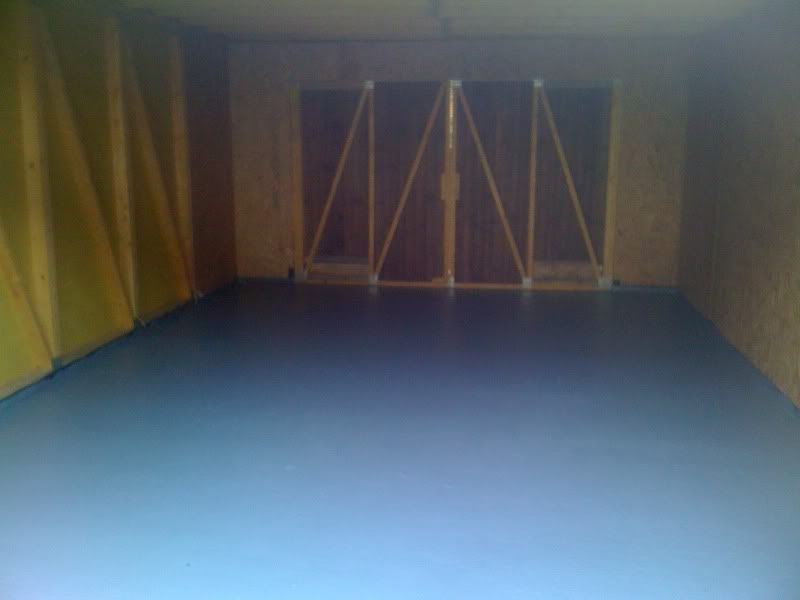
Next are the doors, not much to say here. Same style frames as the walls with heavy duty hinges top and bottom
The roof, this took quite a bit of researching but in the end I went for a Wickes' cold lay flat roof system. Cold lay means it doesn't use a blow torch but bitumen adhesive. Horrible sticky black stuff, looks like what comes out of oil tankers when they hit the rocks. There are no photos of this stage I'm afraid! I used wickes traditional felt underlay, nailed on. Wickes traditional cap sheet, glued on. It actually went ok, messy but not too tricky. If you're thinking of doing this job it's well within the skill set of anyone with 2 hands
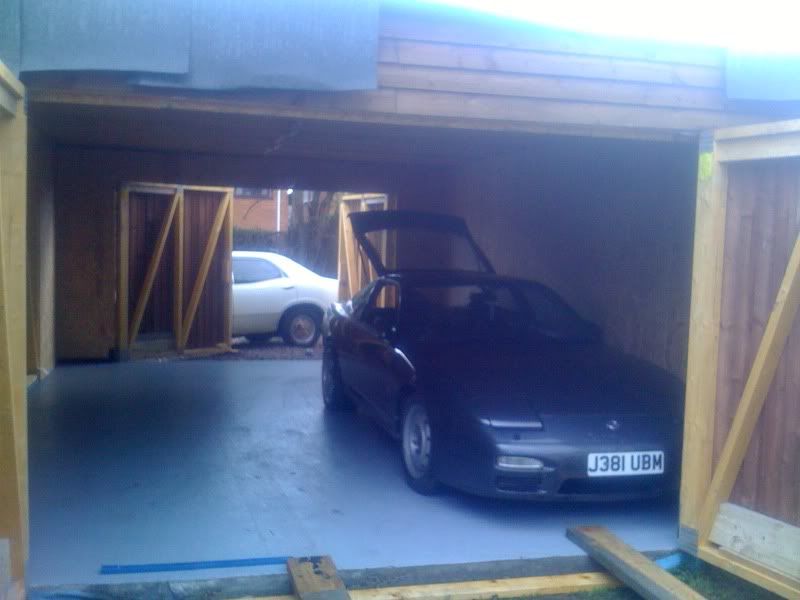
So the floor, three coats of Ronseal garage floor paint. I'm not convinced by this stuff, I'm pretty sure that even with light use its going to chip off. It does look good though
And there we have it, it's not quite finished yet. I still need to finish the roof and the OSB but today I really feel like I've achieved something ;D
Firstly, I apologise for the terrible pictures. I do wonder how half of you lot manage to stop work, compose a fantastic SLR mid progress picture at every crucial stage, I seem to get carried away and before you know it the job is done (or not done in most cases!) Anyway, pictures are courtesy of my iphone, quality is poor at best but hopefully you should get an idea of what's going on
Well, I've lived in my house for a few years now and I've long wanted a space to store and work on the fleet. I'm lucky in the fact the house has a gated rear access road behind it. I'm also quite lucky because as a day job I design roof structures and timber frame buildings (more on this later).
Anyway, stage one was to get a rough design sorted, so out with the tape measure and a quick walk around the garden and a foot print of 6.5m long x 4.5m wide would be a good size for what I needed.
The groundwork was something I didn't undertake, this was in trusted to a builder friend as quite frankly, I couldn't be bothered!
First stage was to excavate, que mini digger!
Next stage, drop in hardcore. This seemed to consist of broken paving slabs, bricks and stones followed by the timber shuttering ready for the concrete
Next is the concrete pour. It's 150mm deep and has an approx 75mm upstand off the ground level
Testing the pad! This worried me slightly as when I put the MX5 on it looked MUCH smaller than I expected....
So, this was in September. Progress kind of stood still for a little bit while I fleshed out the design and tried to pester my mates into helping me build it!
Design wise its a box with a flat roof and 18mm ply deck. It has barn doors to the front and rear for all round access
It has been designed and fabricated in kit form so each side is made up of 5 panels, each panel is triangulated and is constructed in 50x100 timber.
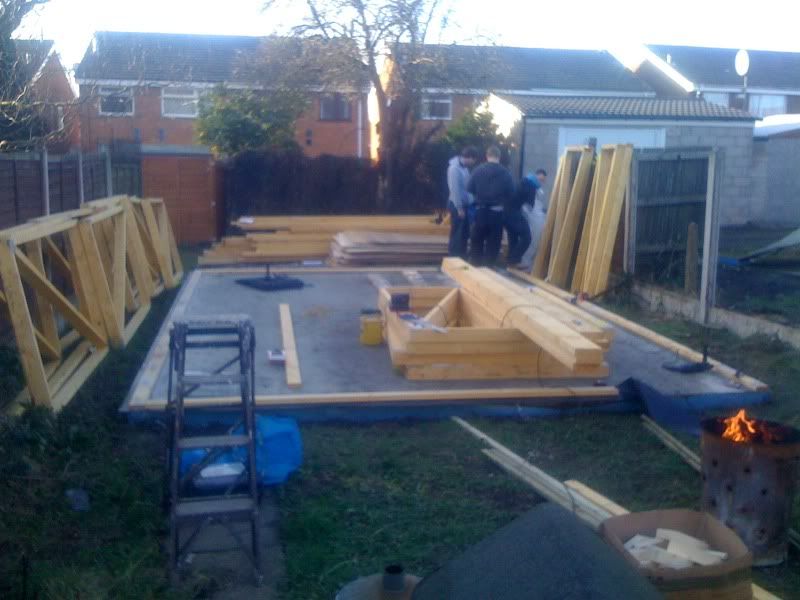
Anyway, fast forward to January and the crack team of erm, idiots is assembled. My aim was to have the shell knocked up in a day....
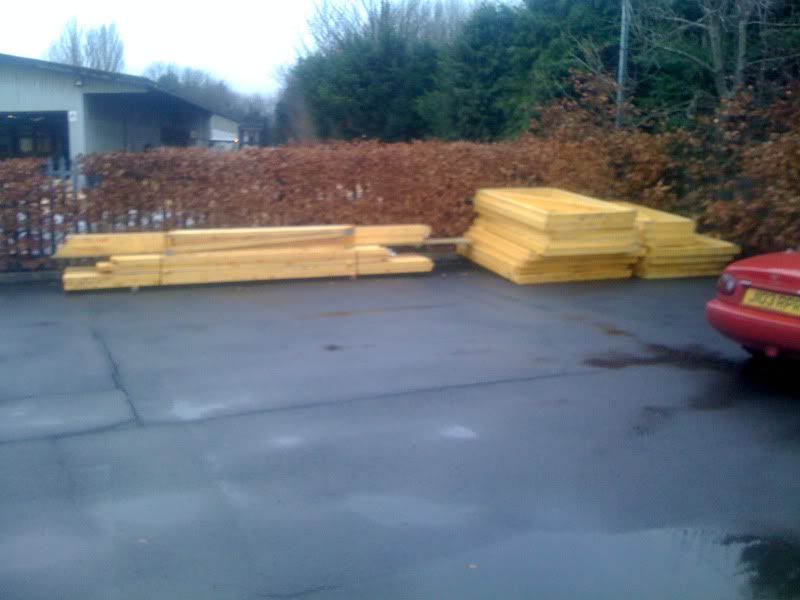
Here is the kit, doesn't look much does it!
Looks a bit more when it's spread across the garden!
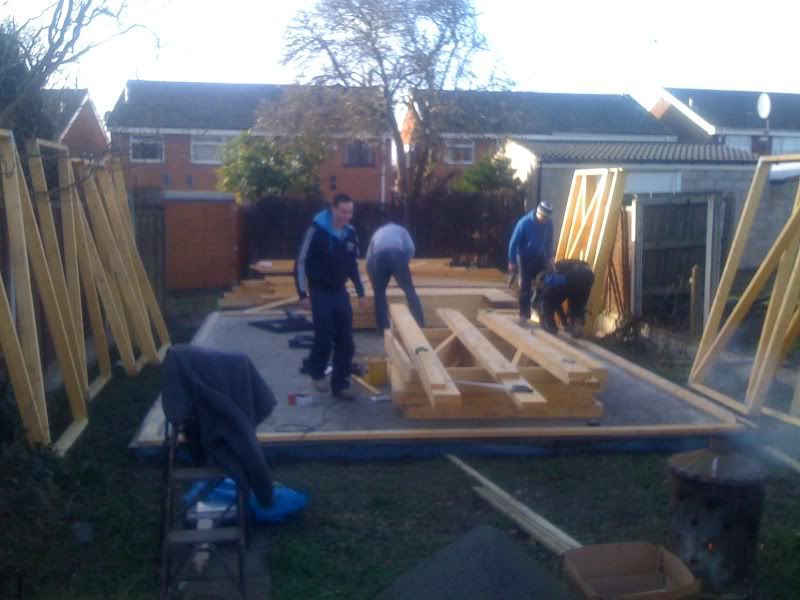
The A team!
The first stage is to lay a soleplate. this is a timber that is fixed to the concrete and the walls are fixed on top of it. It's fixed over a DPC to stop moisture getting into the timber. We've fixed the soleplate @ 600 centres with hammerfix anchors into the concrete. Fingers crossed it wont blow away!
So once we fixed the solepate we could simply position the walls on top and screw them down into the soleplate (and to each other)
So once we'd got the walls up we added sheathing to the inside of them, 10mm OSB, this makes it a little more secure and a bit more rigid too
Due to me not being able to count there wasn't enough OSB to finish all the walls, this still needs sorting!
The roof is 50x197 joists @ 600 centres with a fall for the water run off. The decking is 18mm ply
The yellow stuff is breather paper, this is water resistant and breathable so offers a bit of protection till it's finished.
Well, that little lot took 8 hours. Pretty good going as that included breakfast and lunch too!
It seems you can spend serious cash on cladding. I didn't have any cash left so went with feather edge board, it turned out like this
I'm pretty pleased with how it turned out, more expensive cladding might have looked a bit nicer but for the money it's good stuff.
Next are the doors, not much to say here. Same style frames as the walls with heavy duty hinges top and bottom
The roof, this took quite a bit of researching but in the end I went for a Wickes' cold lay flat roof system. Cold lay means it doesn't use a blow torch but bitumen adhesive. Horrible sticky black stuff, looks like what comes out of oil tankers when they hit the rocks. There are no photos of this stage I'm afraid! I used wickes traditional felt underlay, nailed on. Wickes traditional cap sheet, glued on. It actually went ok, messy but not too tricky. If you're thinking of doing this job it's well within the skill set of anyone with 2 hands
So the floor, three coats of Ronseal garage floor paint. I'm not convinced by this stuff, I'm pretty sure that even with light use its going to chip off. It does look good though
And there we have it, it's not quite finished yet. I still need to finish the roof and the OSB but today I really feel like I've achieved something ;D