Enbloc
Part of things
 
Posts: 398
|
|
|
|
The front sections of the chassis were pretty much done but there were a few loose ends still to tidy up. The body is held to chassis by captive nuts up and down its length. Amazingly all mine were still present and functioning. 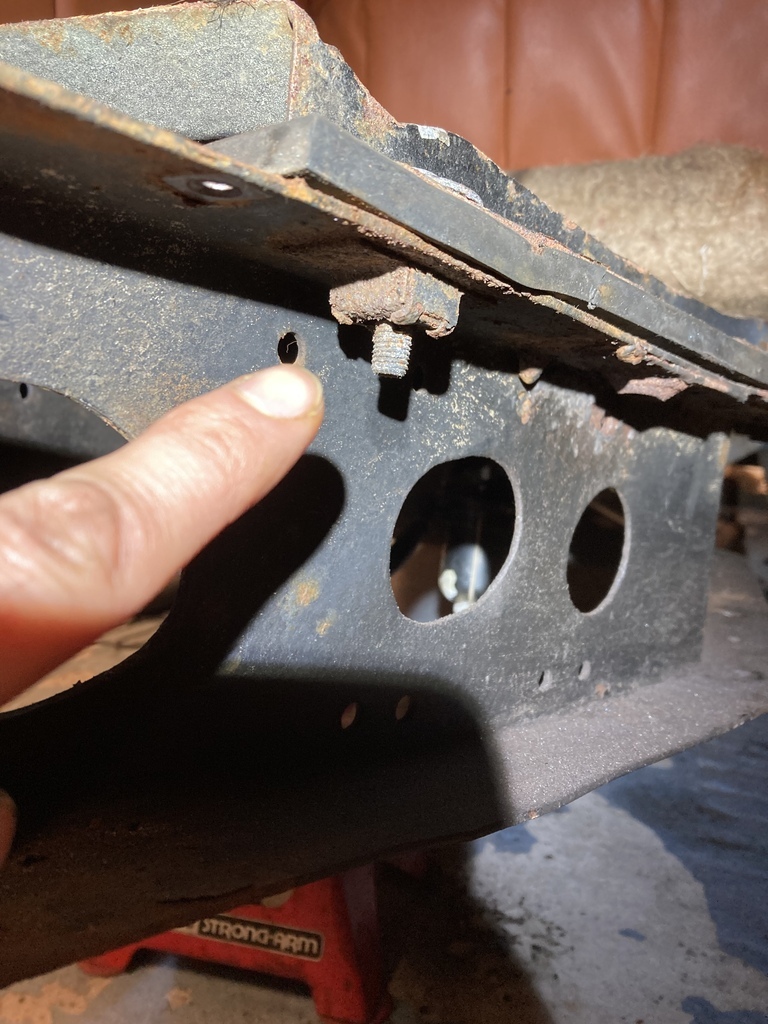 I was most unhappy to discover that 2 on each side of the chassis had been lost when the centre crossmember was modified and replaced with nuts and bolts. 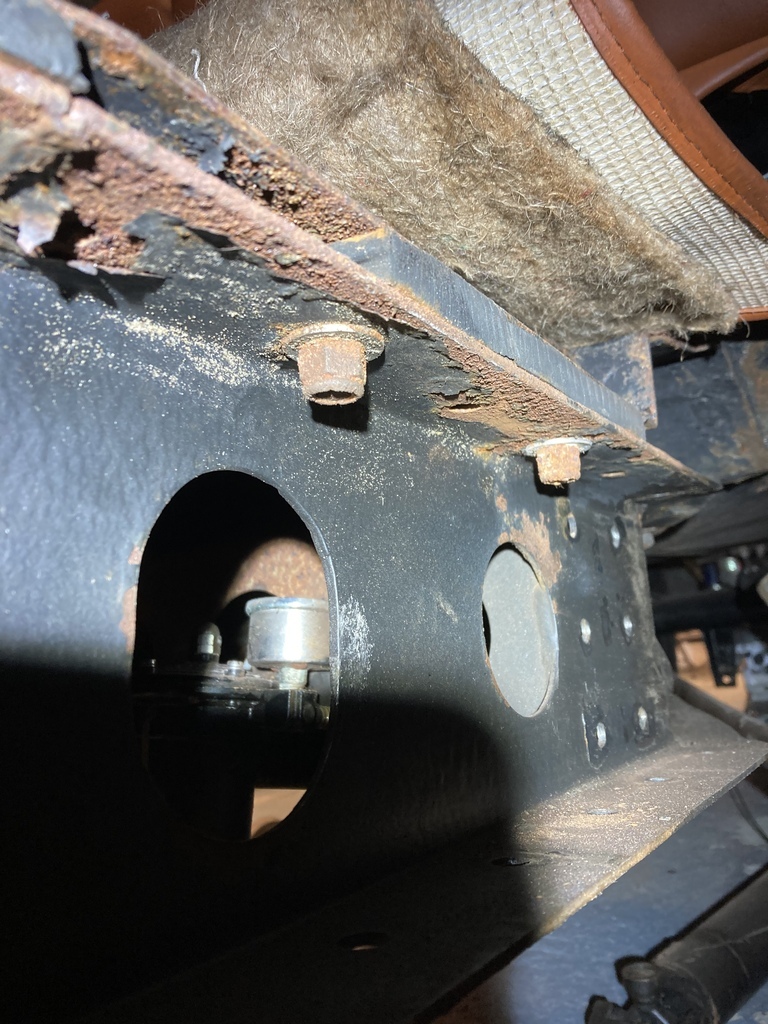 First job was to remove the bolts so I could get the rubber body pads out. Another reason these had to come out was to address the rust that can be seen in the previous picture. 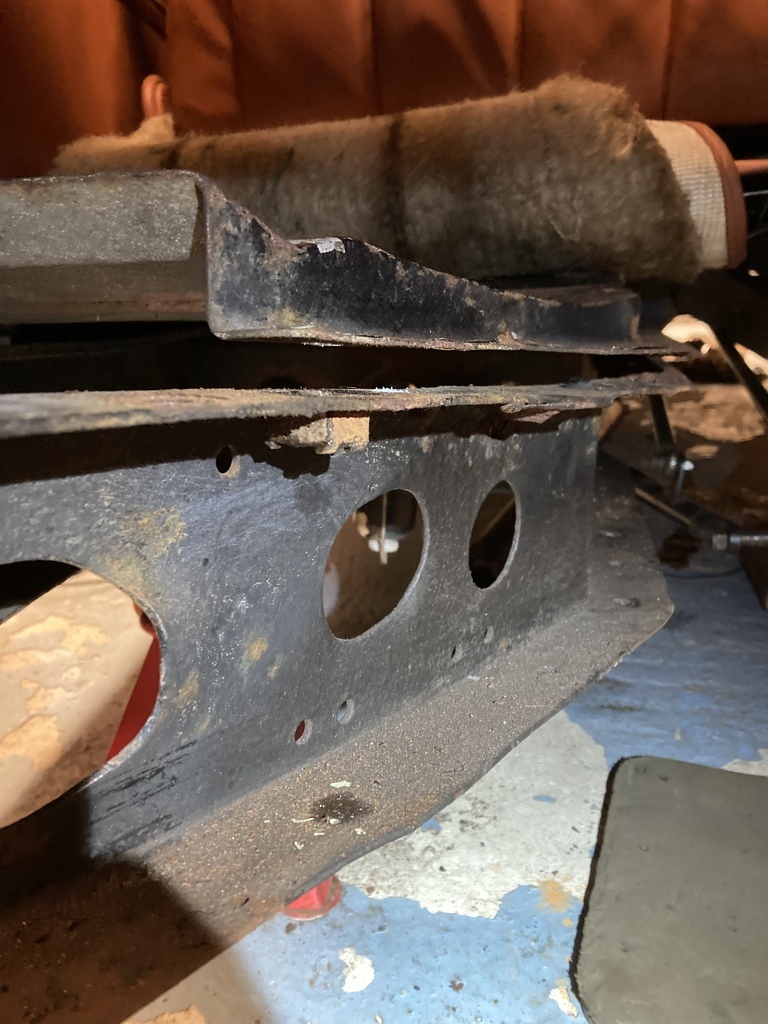 I was sure I had the correct 5/16 UNF cage nuts in stock and after much rummaging I could only find three, I needed four. Why the Allen key? I found my 5/32” Allen key in the hardware box that had been missing for 18 months! I hate losing tools. 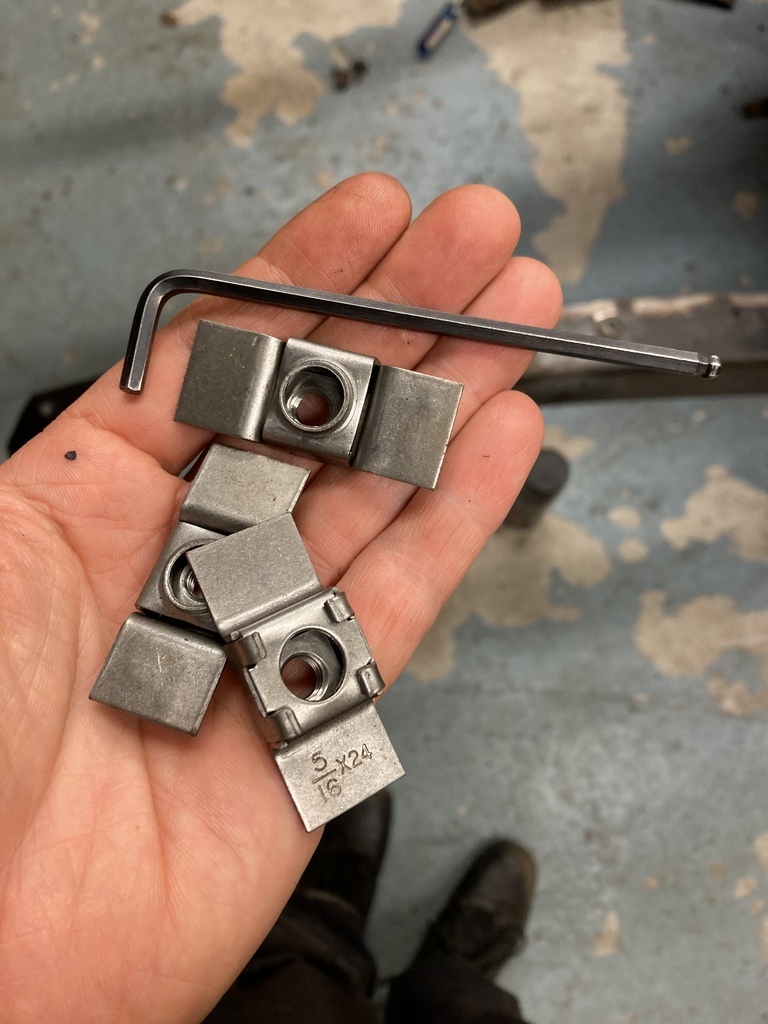 Luckily my dad came through with the fourth cage nut as he also had some in stock! The cages have this neat feature of an up stand that locates the cage dead centre to the hole. The current hole in the chassis wasn’t quite big enough and I couldn’t just run the drill from the top as the floor sat over it and I didn’t want the hole in the floor opened up anymore. With some luck I managed to squeeze the drill with the right angle adapter and a stubby step drill into the chassis section. 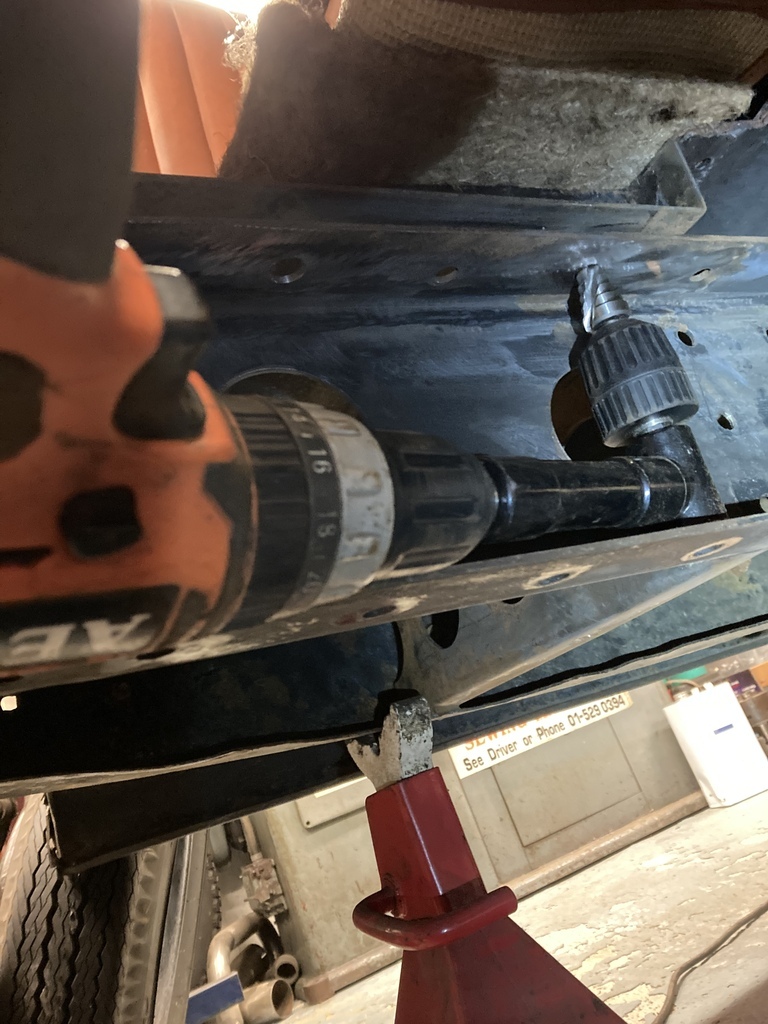 After a good derust of the area the cages were welded on. 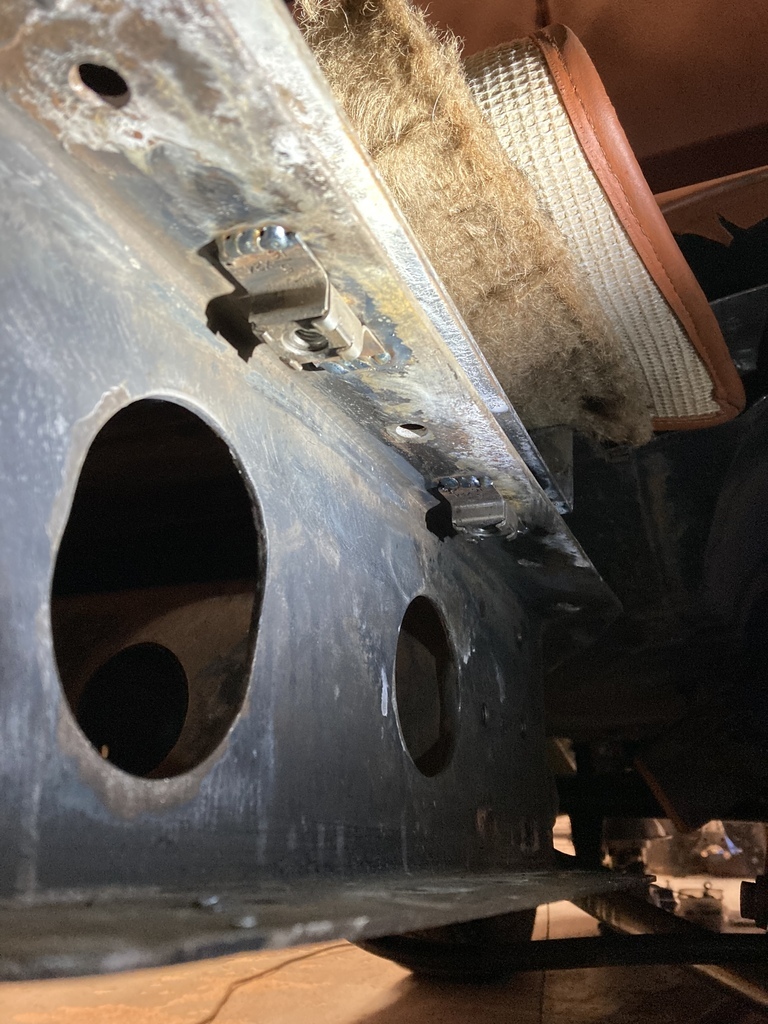 Another area to repair was this. 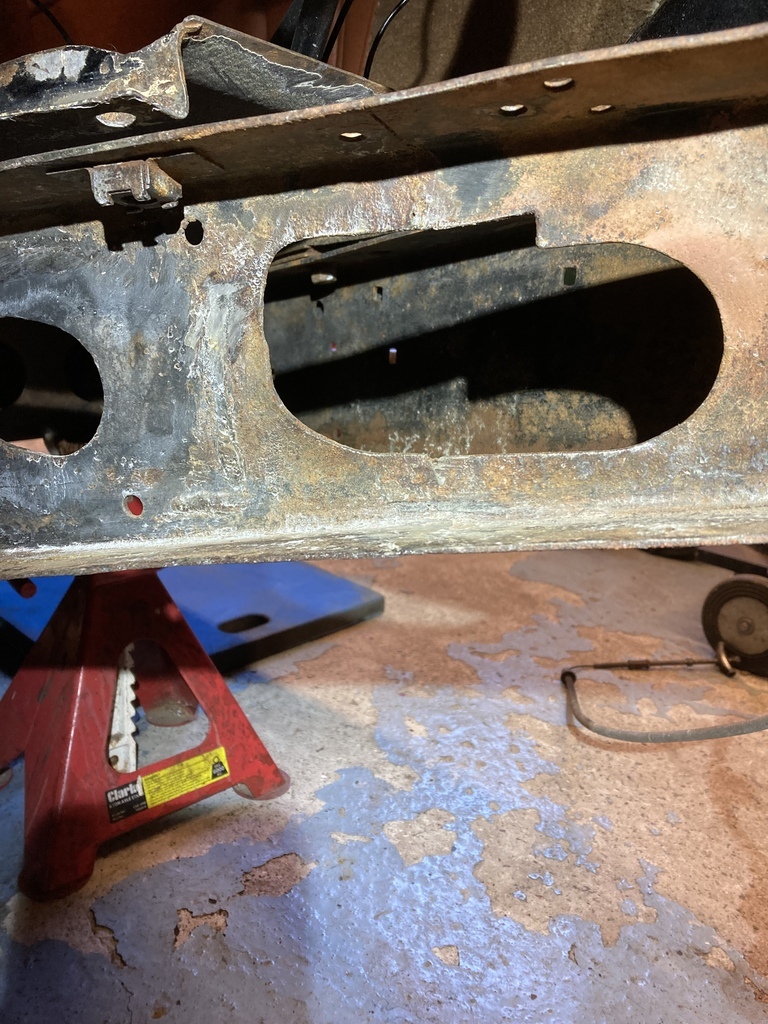 This was something I did many years ago, I’m not proud to say. My fuzzy memory of this was I had clearance issues with one of the many pedal assemblies that have been fitted over the years. It consisted of working upside down, through the hole in the footwell with some sort of power tool. Anyway, it’s not needed now. What the picture doesn’t show is the oval hole is actually flared at each end in opposite directions. First I made an oversized patch to replace the missing metal. 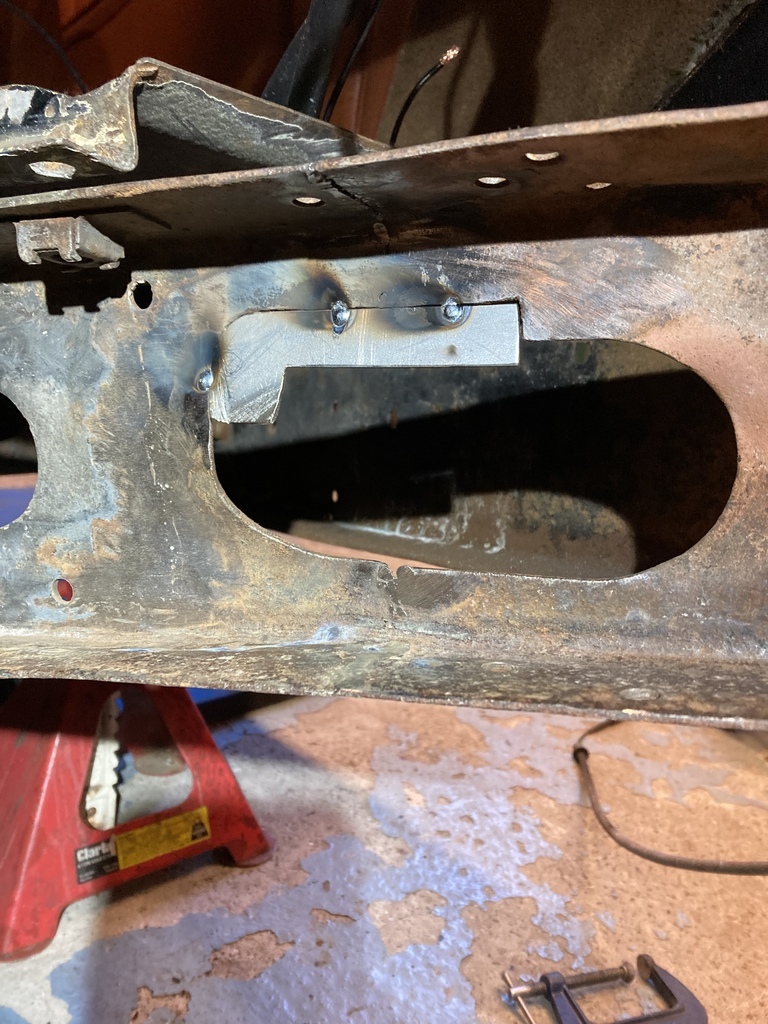 A little more shape. 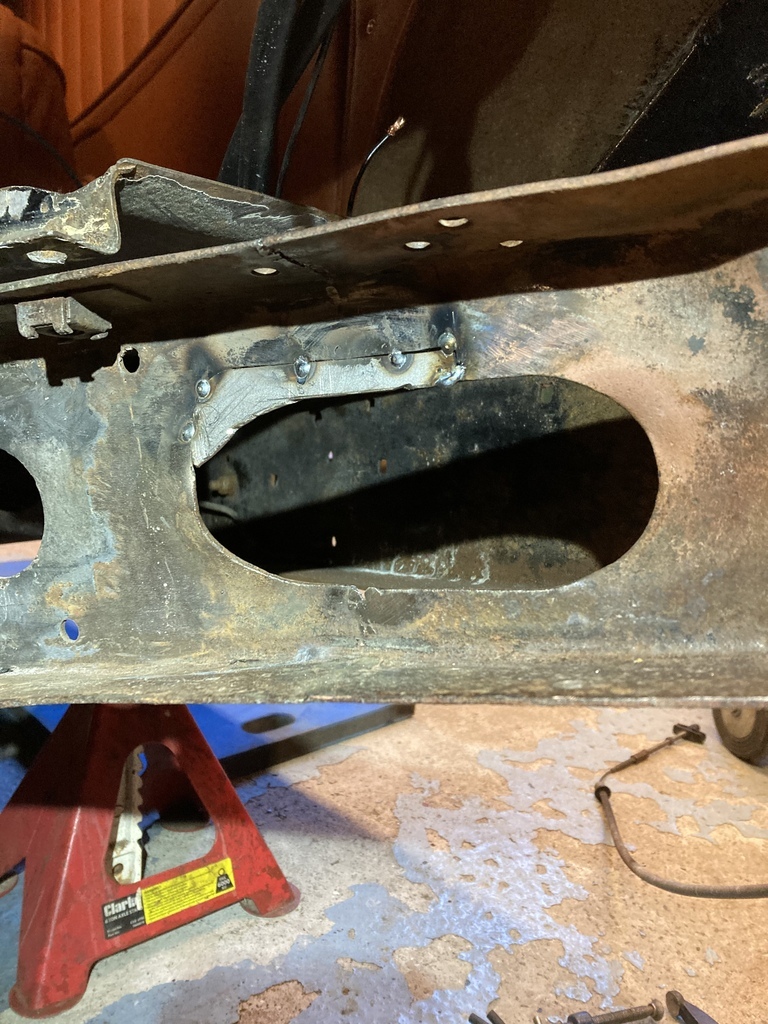 I put some heat into it with a blow torch and then started to pull the flare into it. I just used a small adjustable spanner to do it. 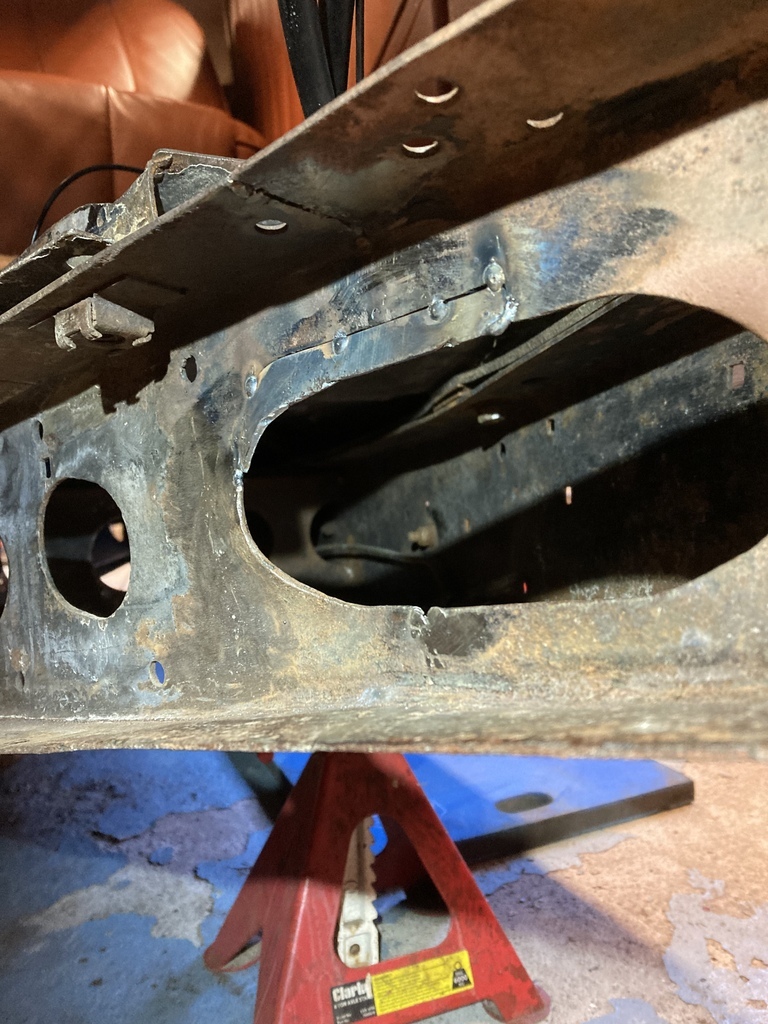 Almost there I started to fill the gaps and my welding went to curse word. My first conclusion in this scenario is usually operator error but no amount of knob twiddling improved matters. The wire just kept balling up and running back into the gun. 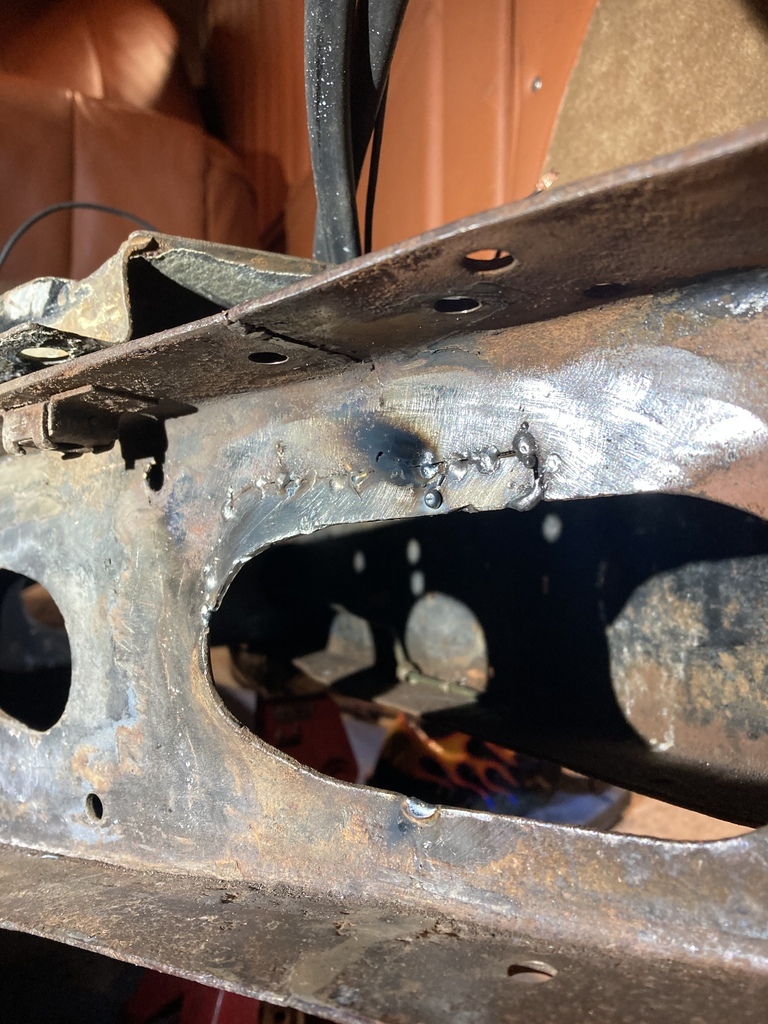 I summoned that it must be a wire feed problem and chased it all the back to the motor. The motor seemed to running erratically and then promptly died in my hands. RIP Its been a good welder. I was given it many years ago and it was old then. Time for an upgrade. 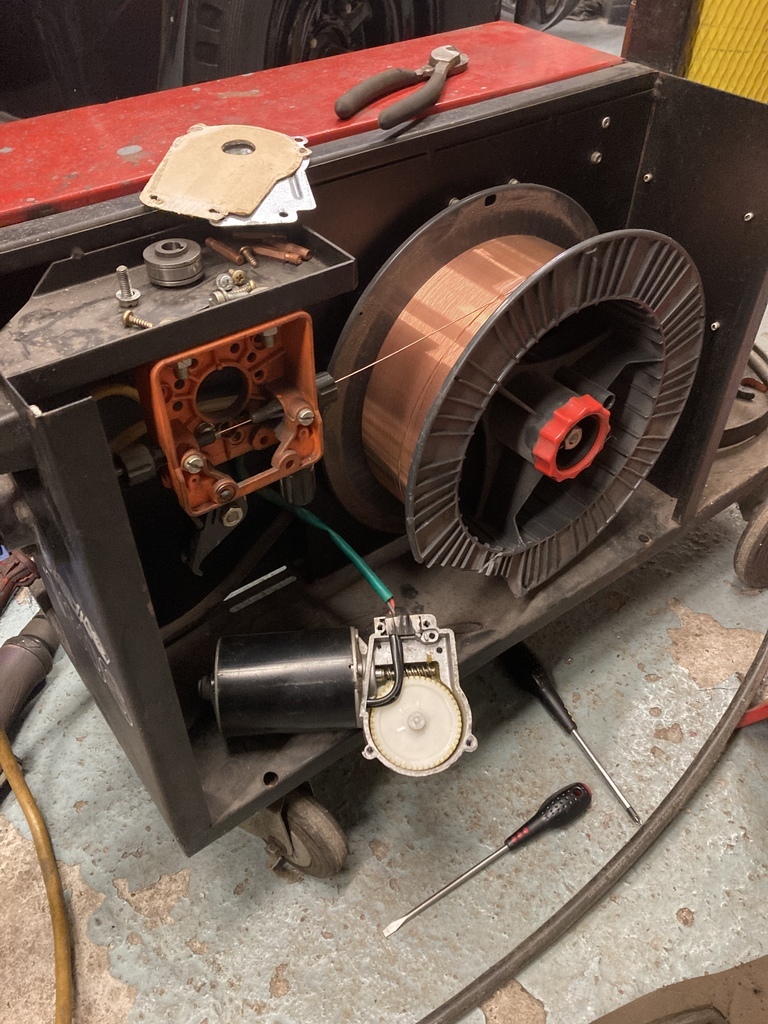 With the welder out of action I started to clean up the front crossmember and steering box bracket for paint. 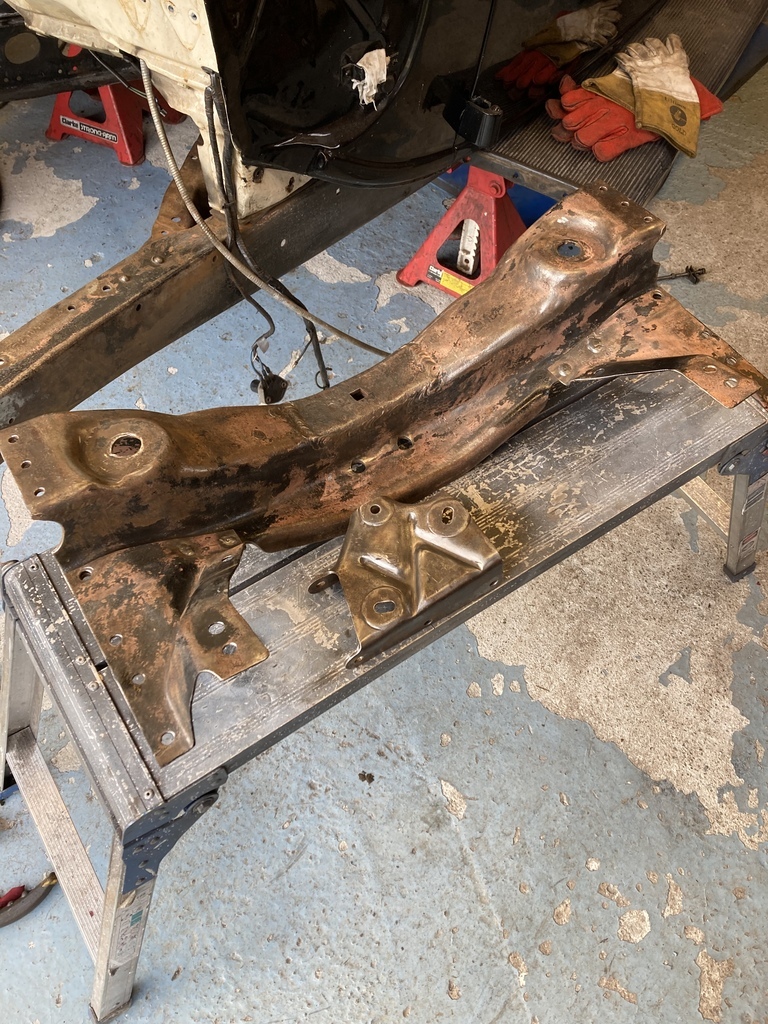 It all looked a bit boring, so…. More holes! 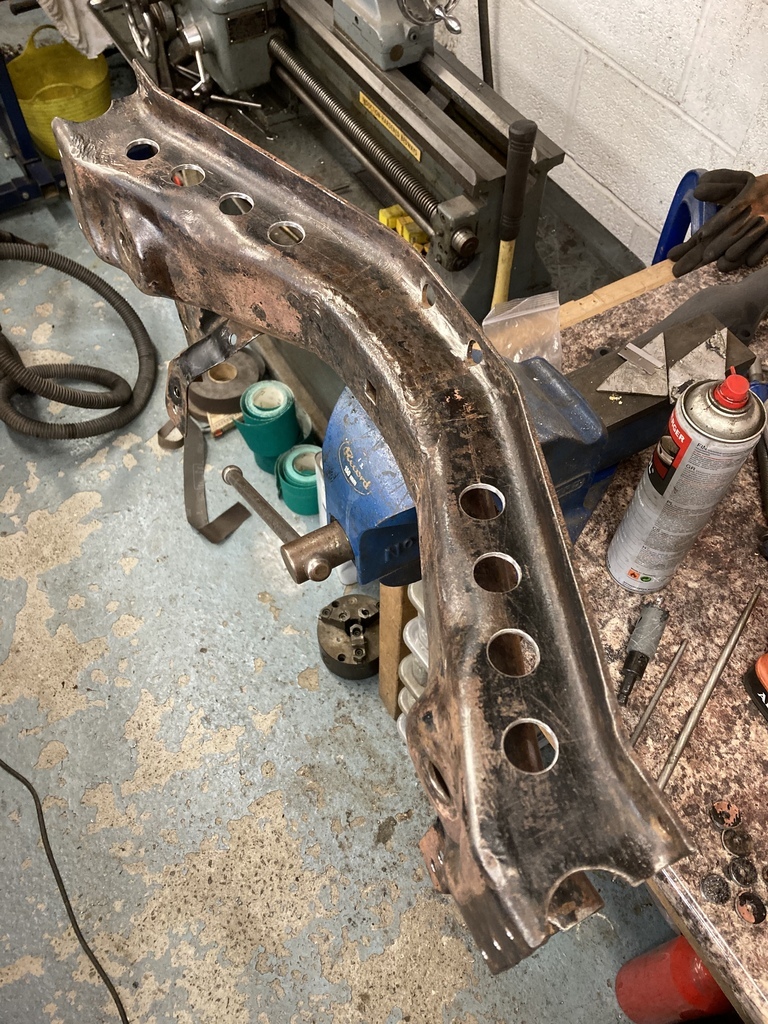 And a few on the other side for good measure. 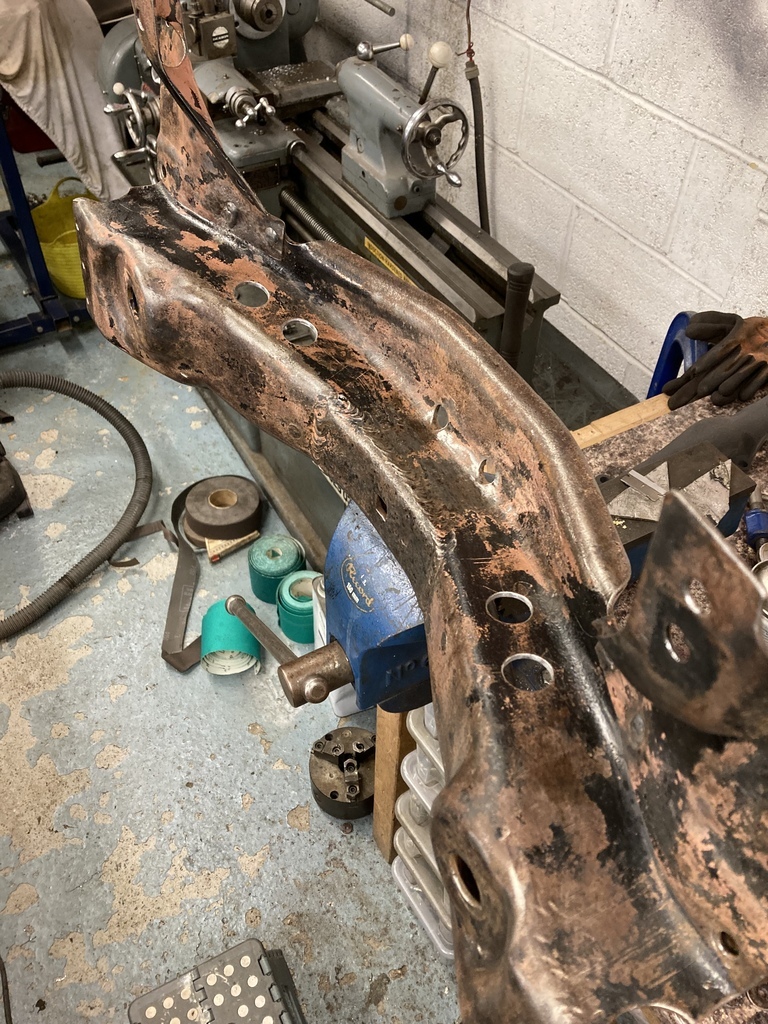 My new welder arrived. 😁 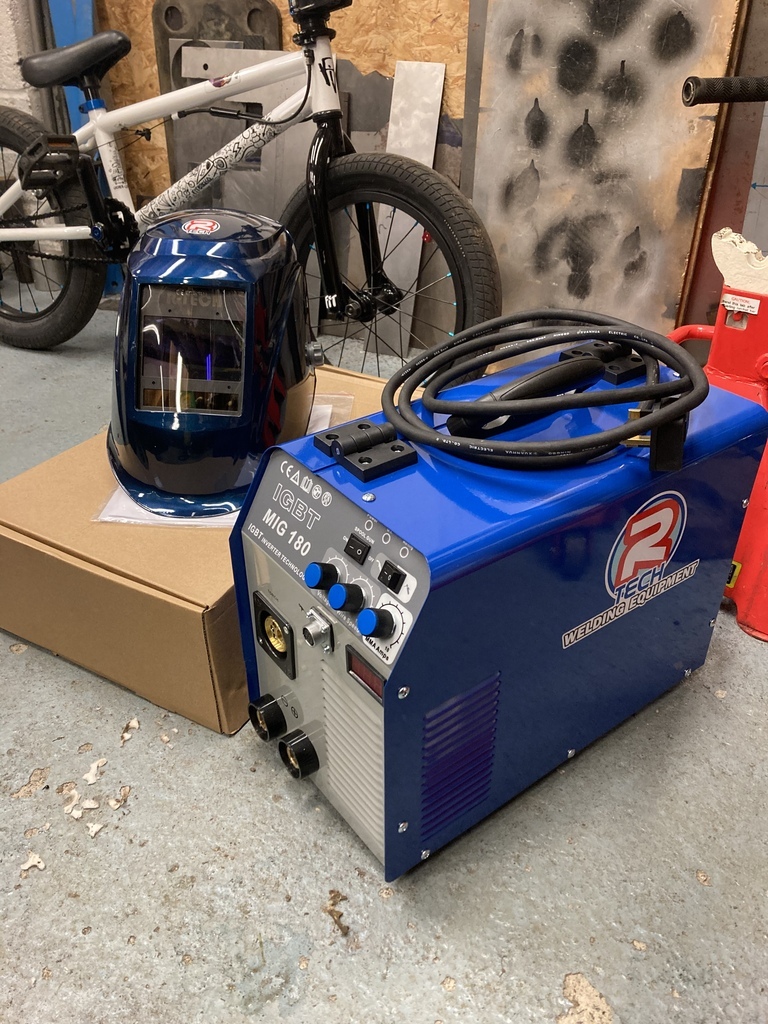 I didn’t have a trolly. This will do for now. 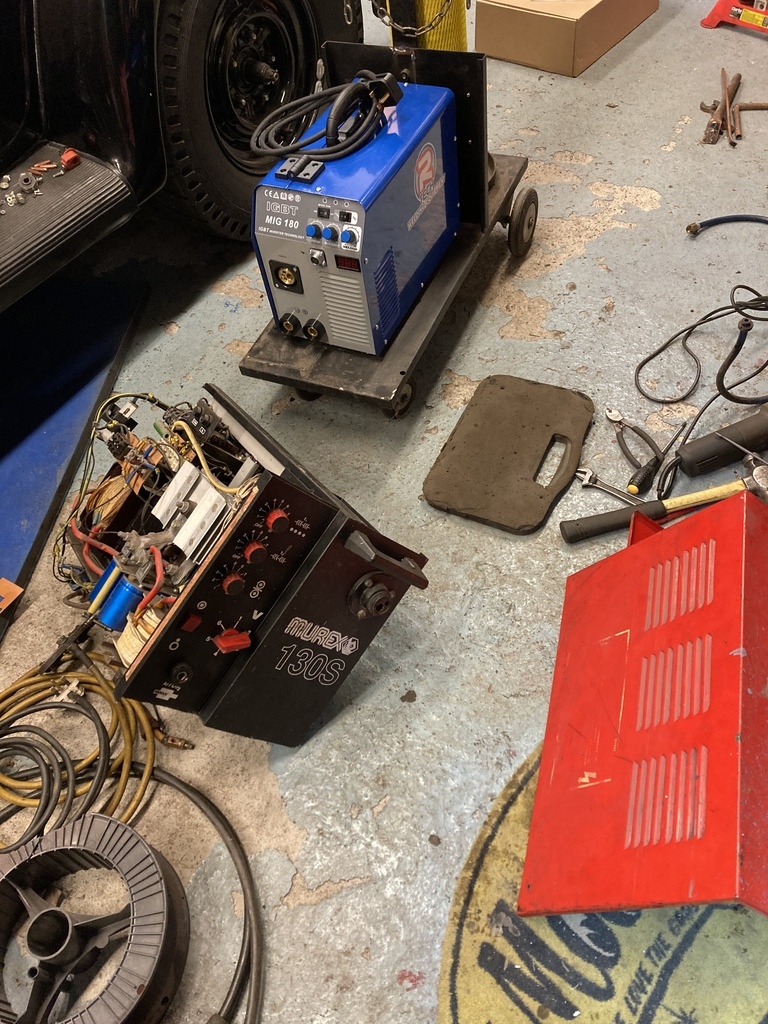 I finally got to finish my patch. 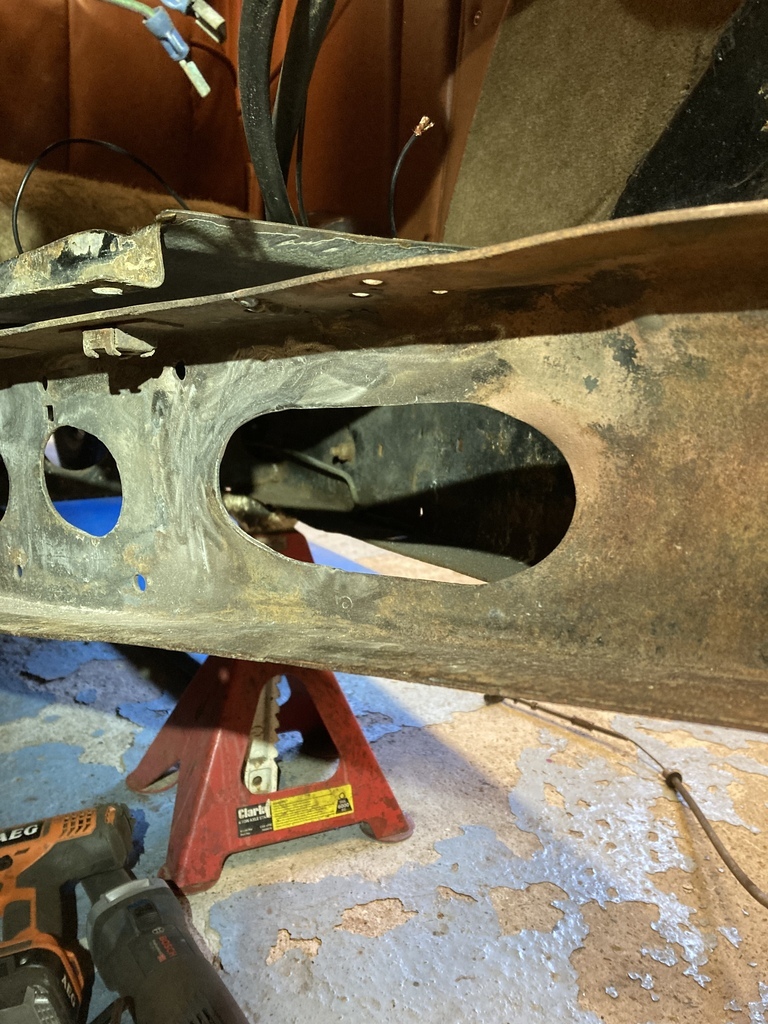 |
| |
Last Edit: Jan 5, 2023 23:22:30 GMT by Enbloc
|
|
|
|
Enbloc
Part of things
 
Posts: 398
|
|
|
|
With some rust protection between the two sections I now had to squeeze them back together. The two sections easily closed up with a G-clamp, so I tried a few in series but unsurprisingly wasn’t very successful as the metal was stretched I could only go as far as the two pieces touching which it needed more than that to return to its original position. 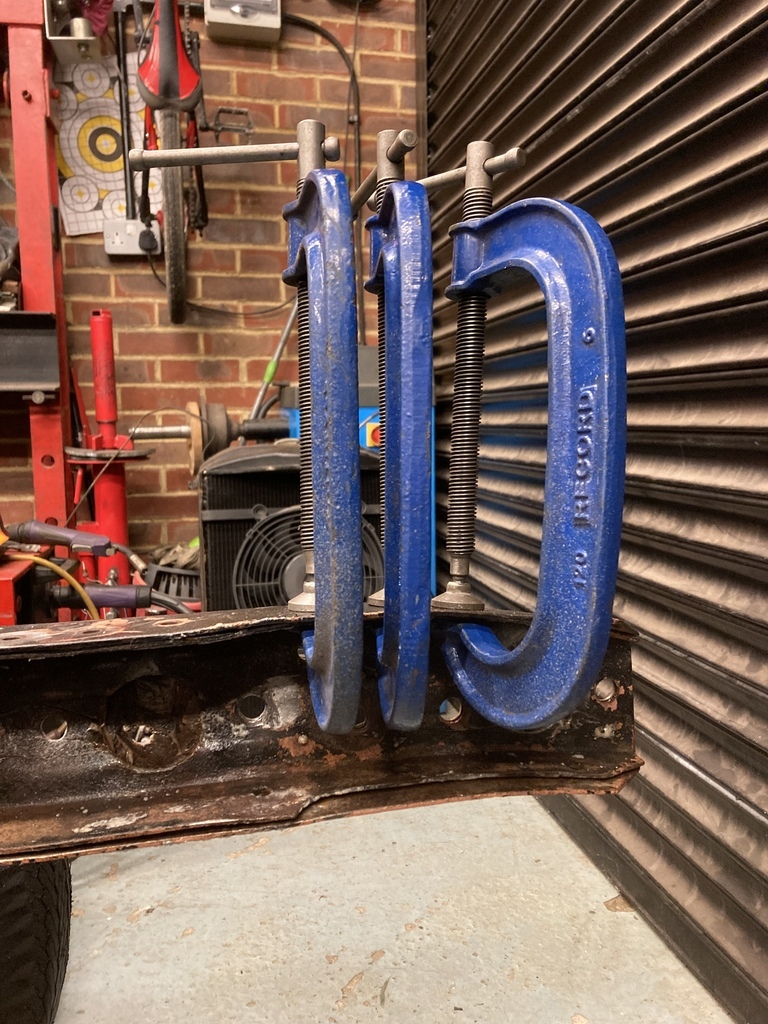 I really needed to glue the two together. V2 was to nut and bolt every hole of importance so I knew that they were all correctly lined up and then clamp together a section of chassis at a time so it could be seam welded. 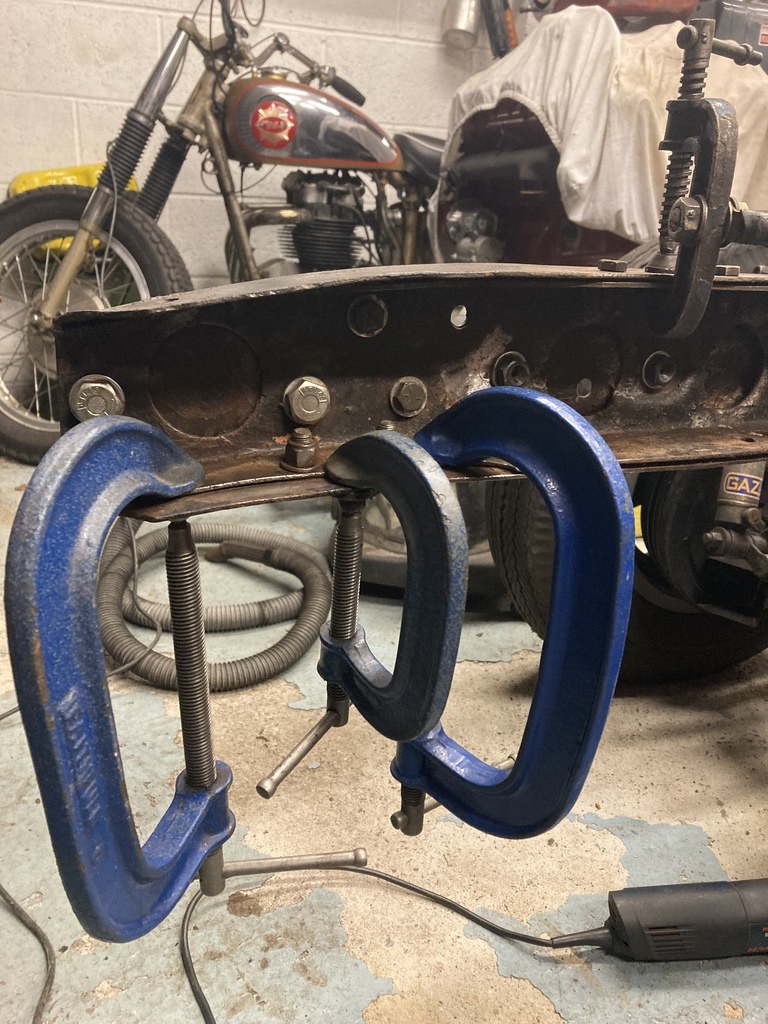 I then proceeded to weld every 3 or 4”, top and bottom, back to the start of the centre crossmember legs. The same procedure and positioning was copied on the other side so they matched side to side. 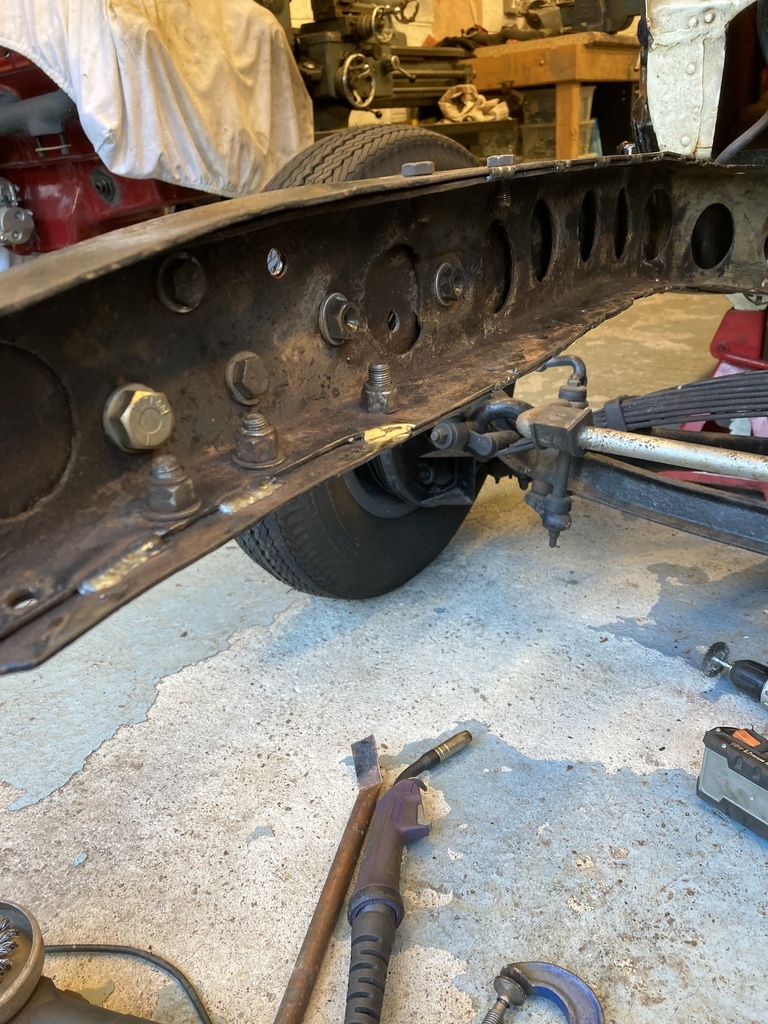 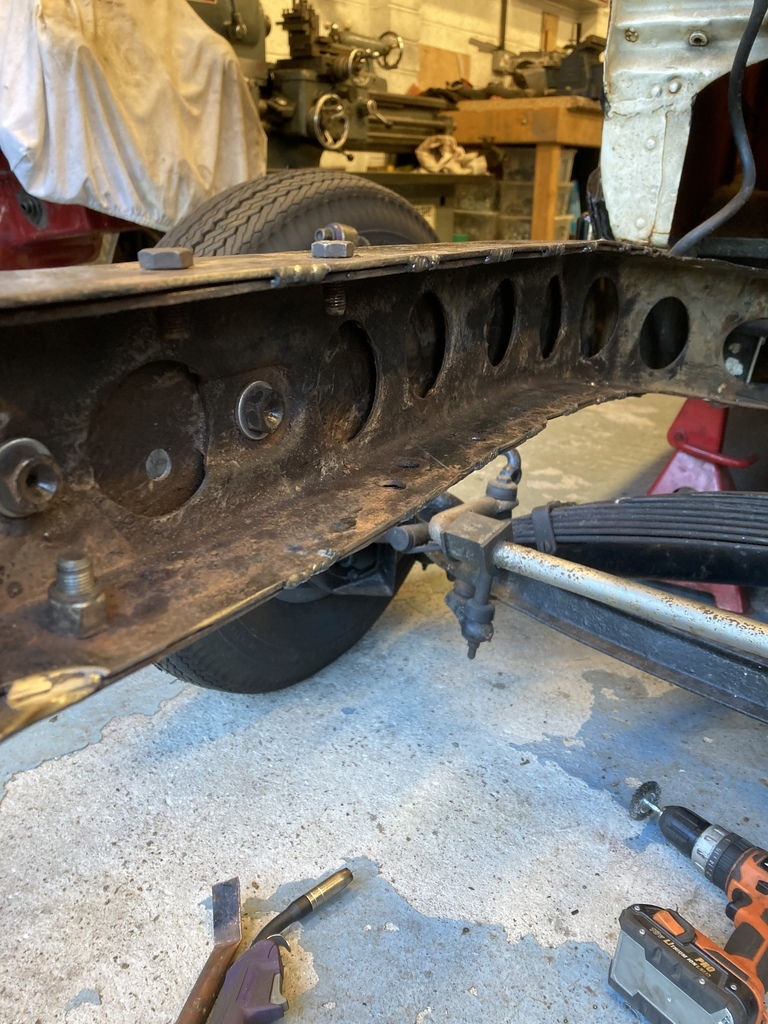 The final outcome was pretty impressive. Before the seam welding I could get ahold of the end of each chassis rail and twist them along their length a significant amount with not a lot of force. With no other change than the seam welding they were now solid. I’m getting curious now to see how all these small improvements will translate on track! Something I had noticed was the front crossmember reinforcement had cracked in half. 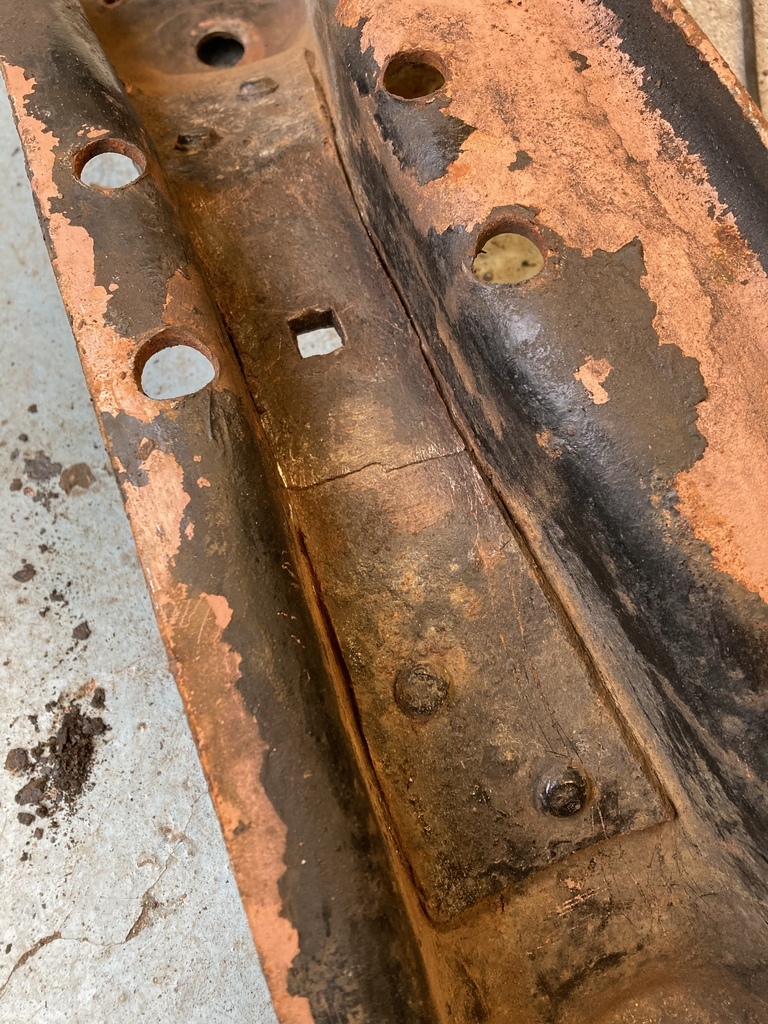 Contrary to how this looks I’m fairly sure this is a factory retrofit. Fords of this era are notorious for the crossmembers and chassis’s cracking and Ford was always modifying production of these parts during the various years and models. I ground out the crack about halfway through the thickness of the reinforcement. 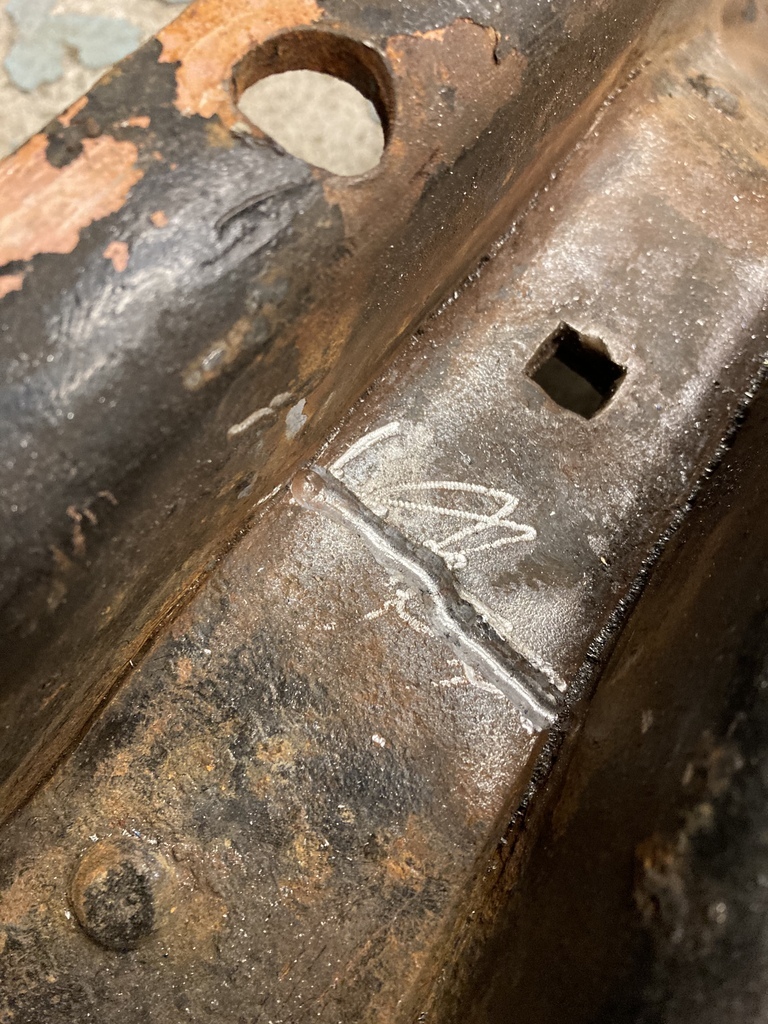 My welder was right on the limit of its capacity so I preheated the area first and turned the welder up to 11. 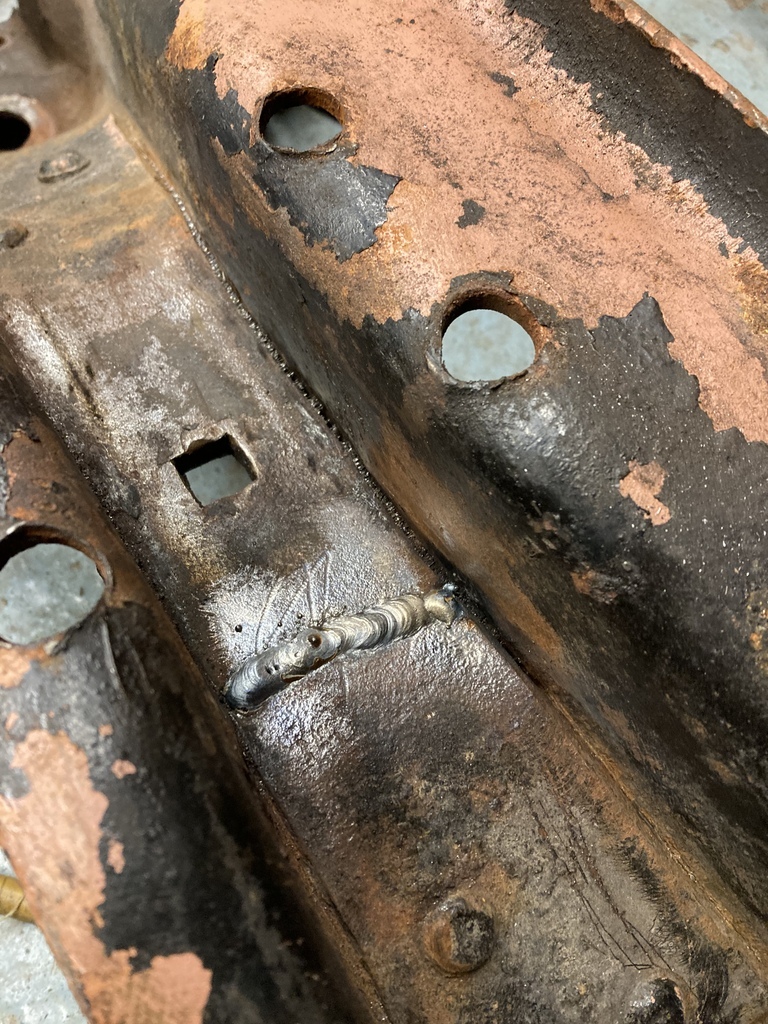 I’m not sure the repair will last long term as welding fatigue cracks is a bit hit and miss due to the material around the crack being compromised. For the moment it’s repaired. 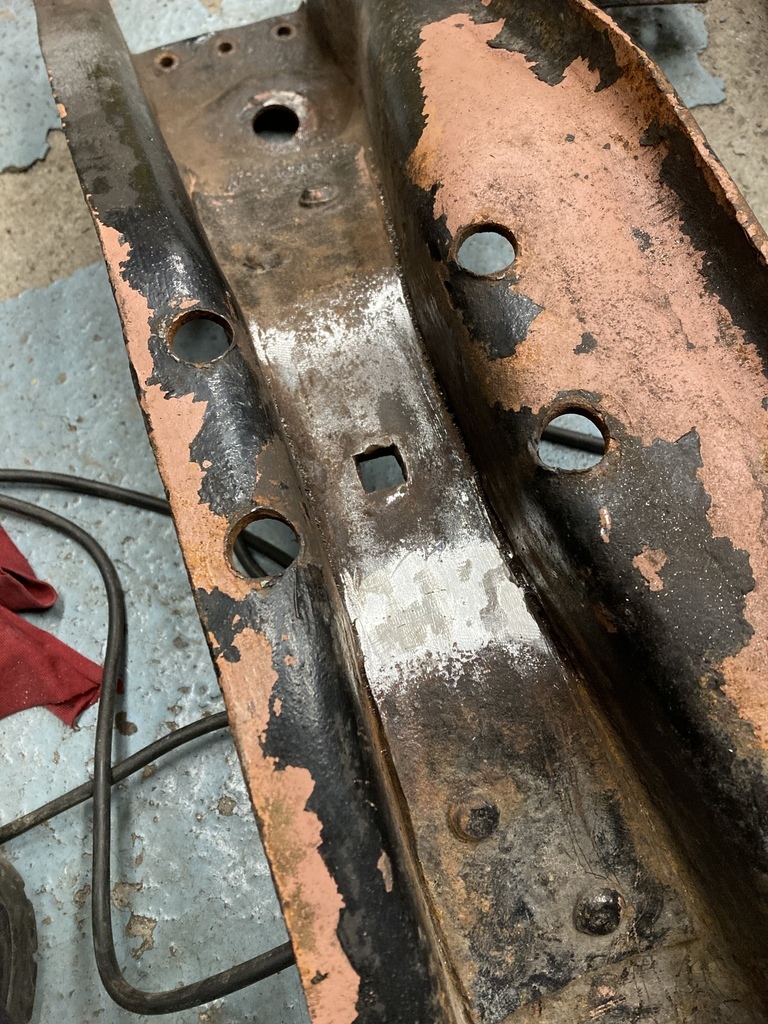 |
| |
|
|
Enbloc
Part of things
 
Posts: 398
|
|
|
|
With the chassis rails cleaned out of grot I could get on with repairing a few bodged sections along the rails. The first was the shock mounts. For some reason a third hole had been drilled next to the original, same for both sides. 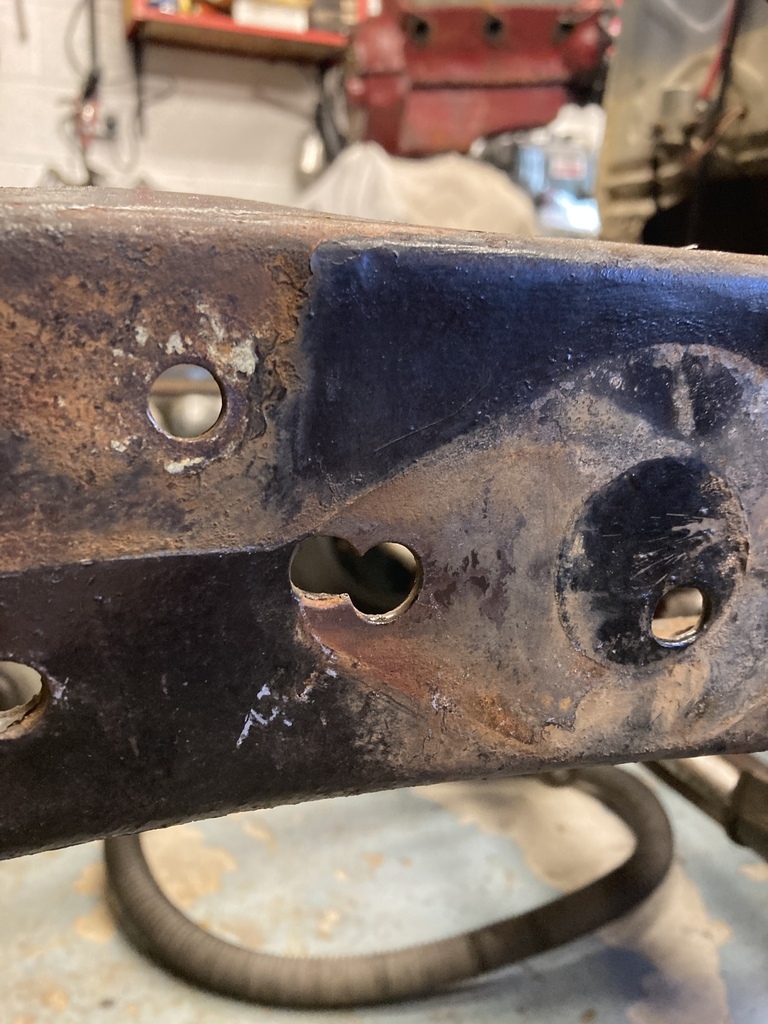 Repaired. 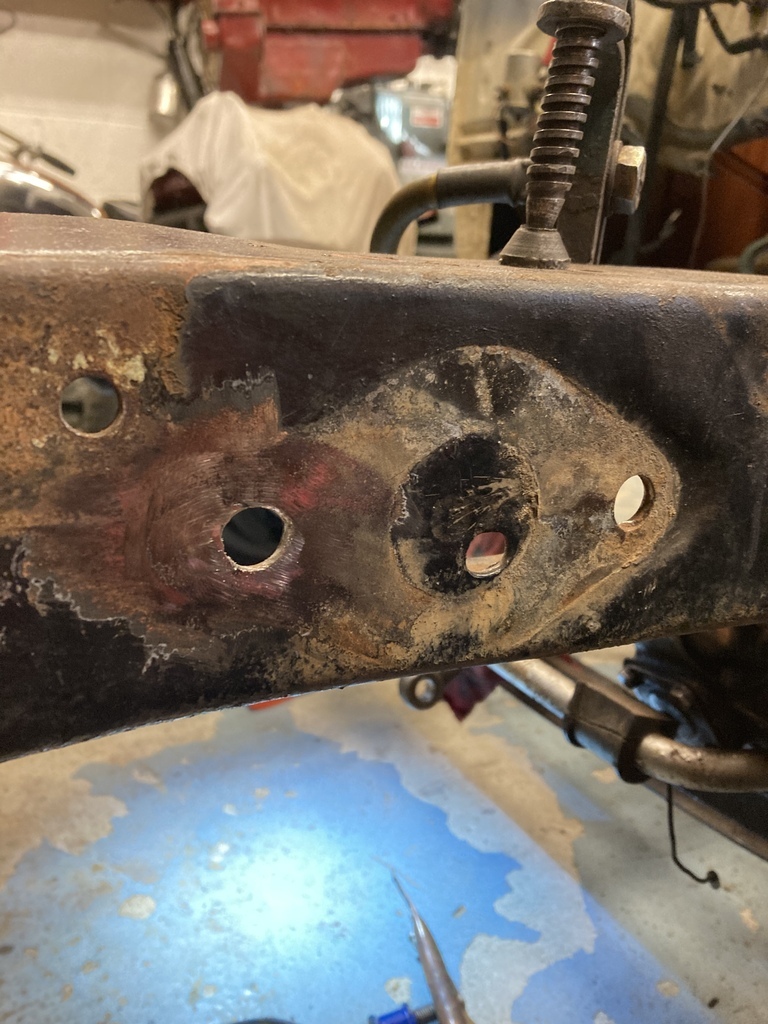 There are fours holes in a row along the top of the rail that the inner arch panel bolts to. The second hole in from the front on both sides had been hogged out from their original 5/16 (8mm) size. The drivers side was worse. Looked like it had been opened up with a gas axe. 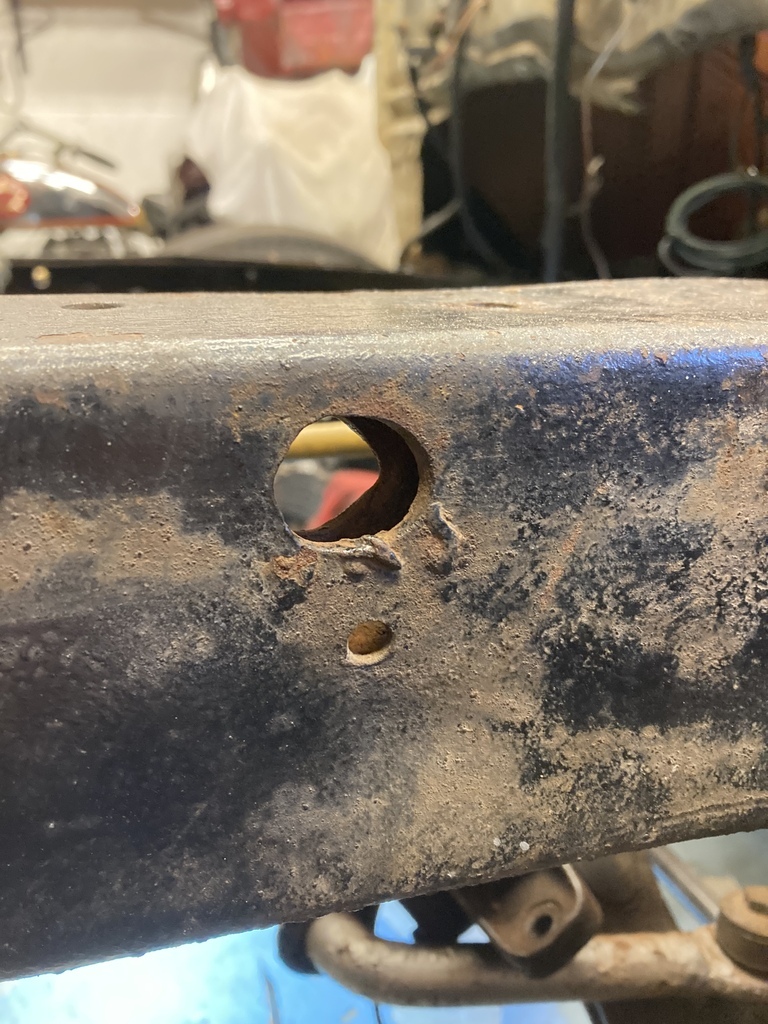 I was feeling lazy or possibly cocky and decided to back it with copper and just plug weld it. 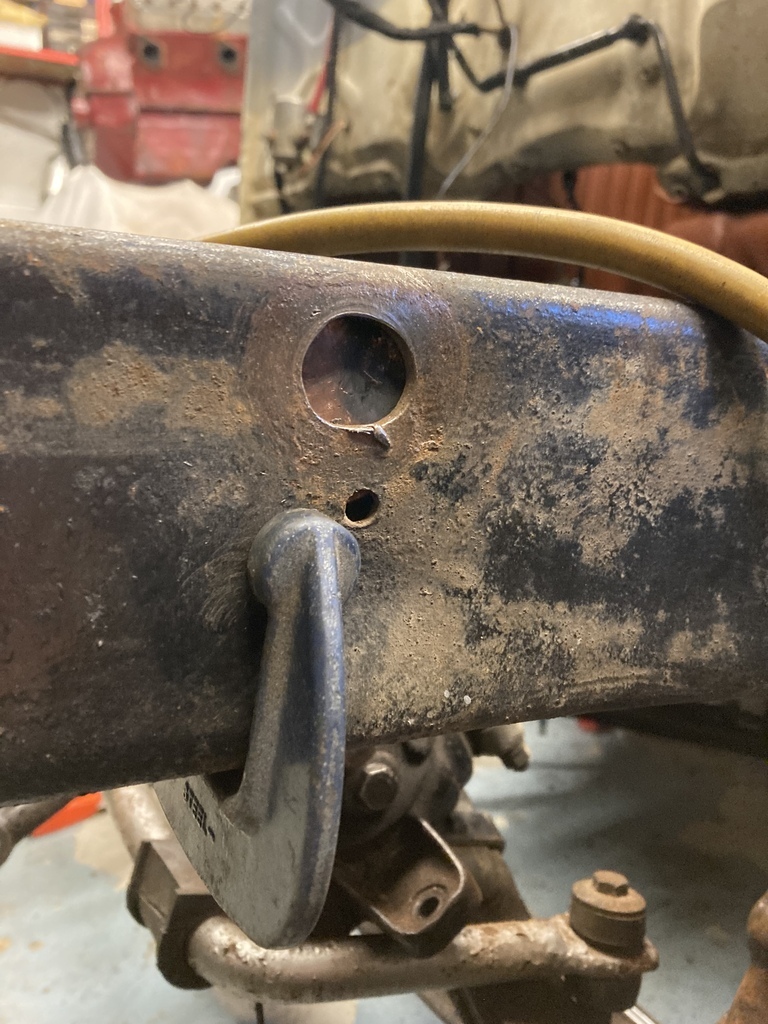 In hindsight this was a stupid idea as it was much too big but I did manage to fill it! 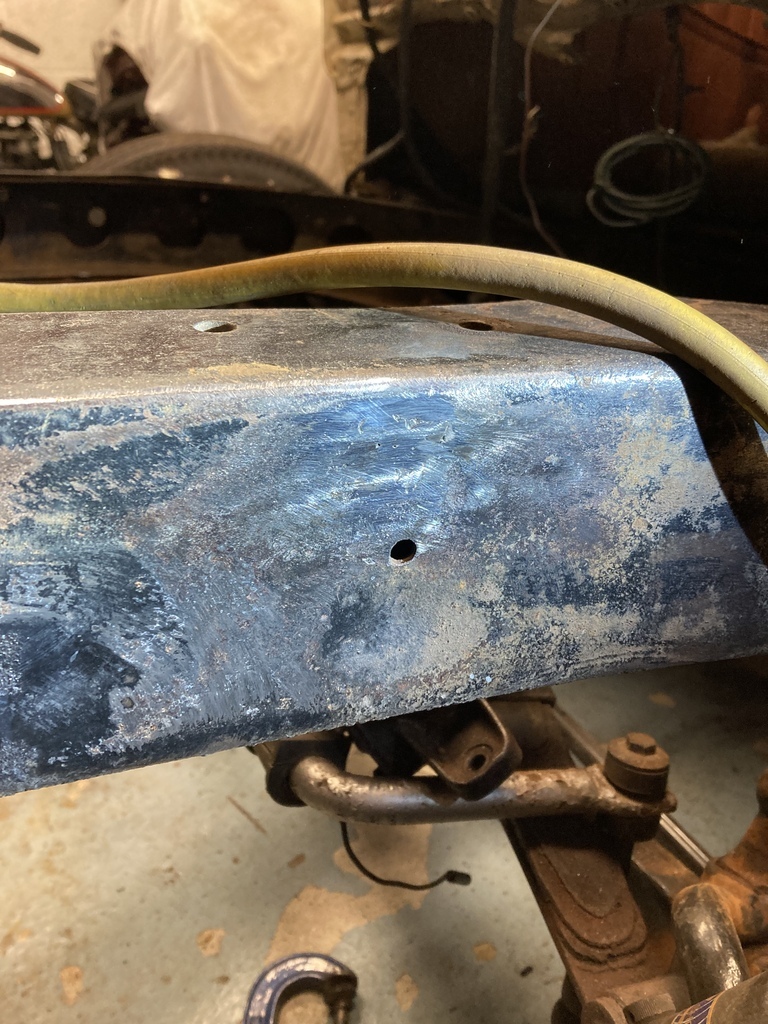 The reverse side needed the same repair. 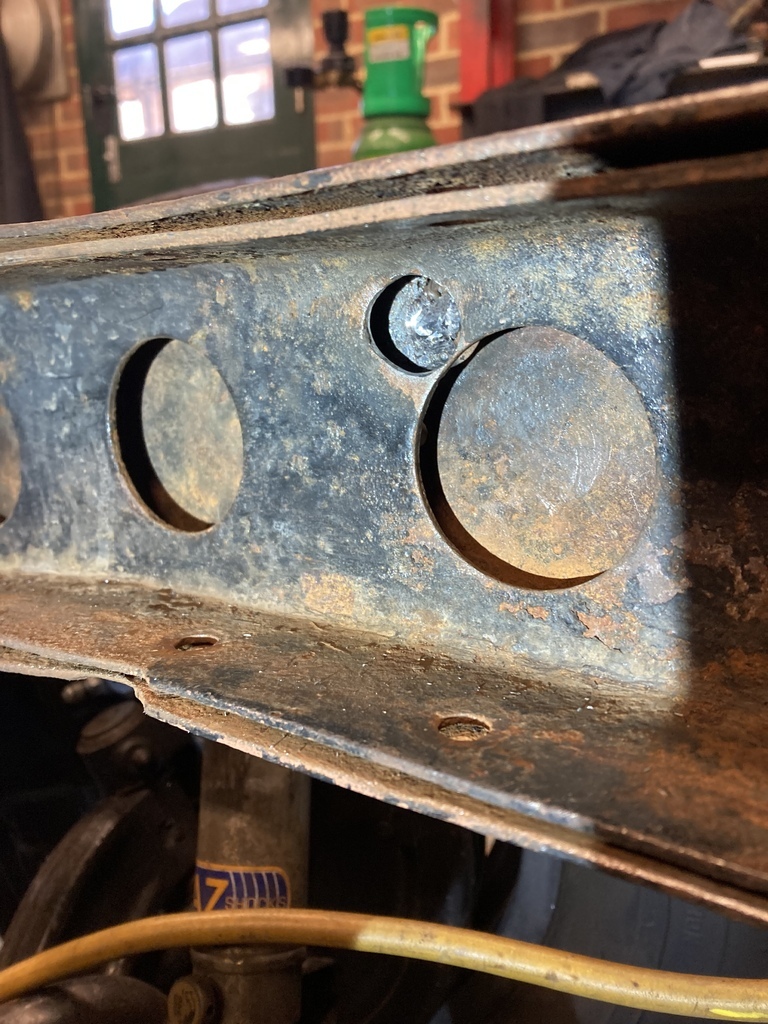 I decided to do this side properly (!) and made a paper template which I transferred to some scrap 2mm. 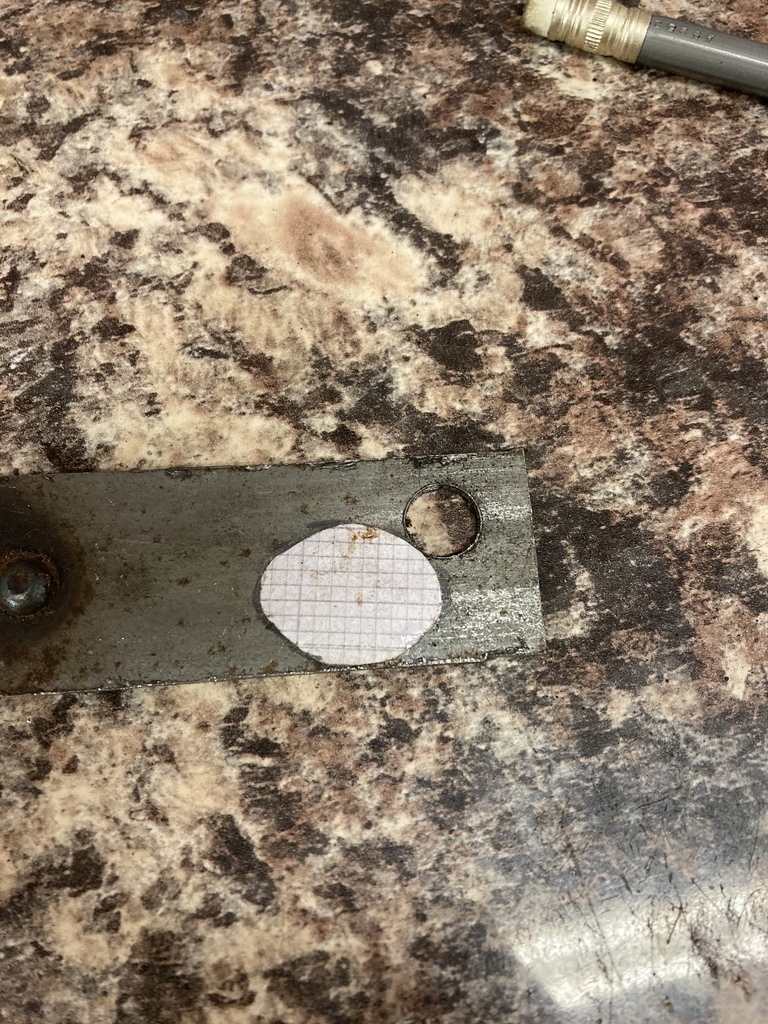 Much better. Burned in and cleaned up. 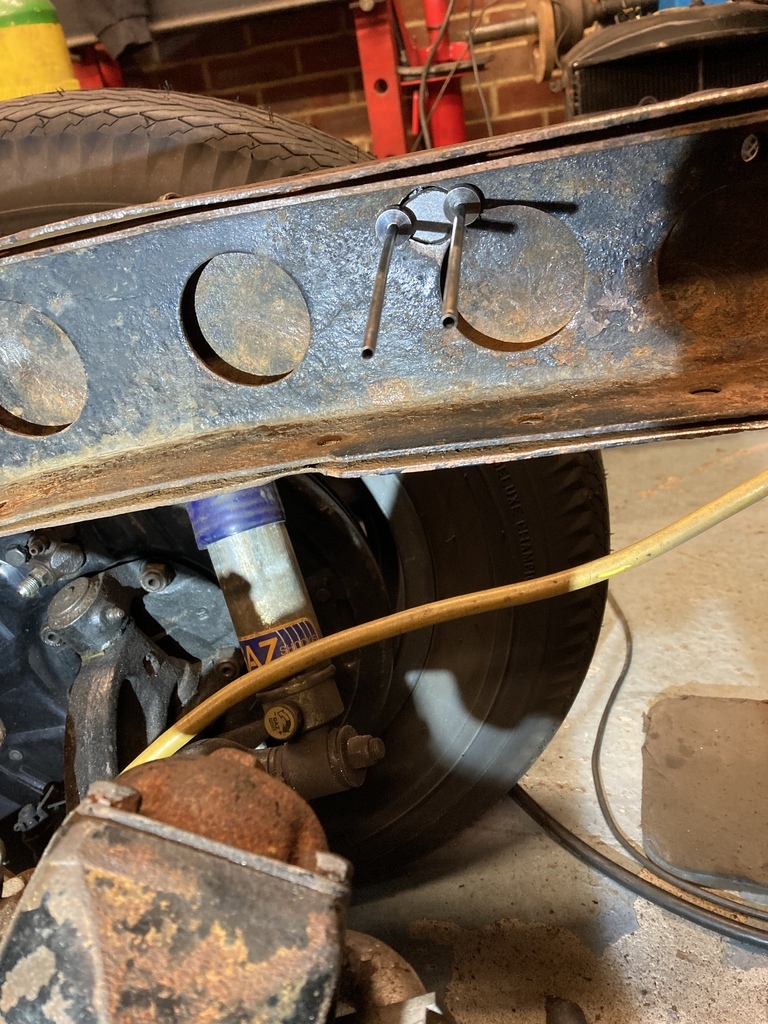 On to the passenger side rail. The hole on the left shouldn’t be there and the one on the right is the opposite inner arch panel hole from the other side. They were feeling all fancy on this side with the use of a drill to hog it out. 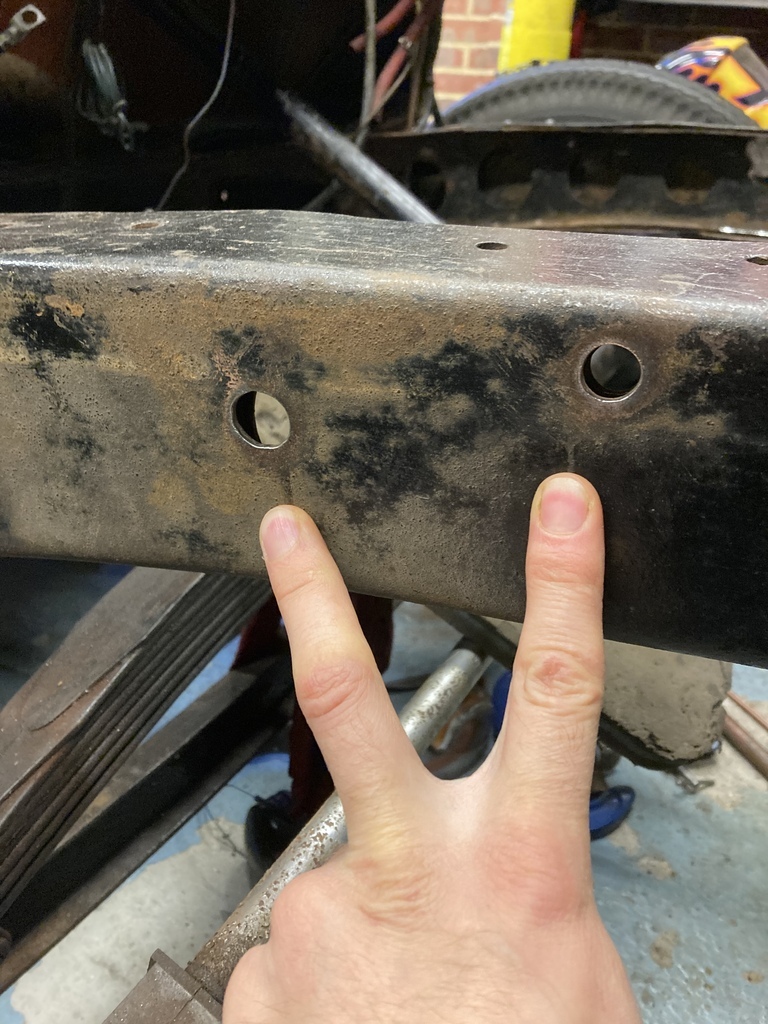 I needed a pair of circular patches. I used a 20mm hole saw to drill through a piece of scrap wood. 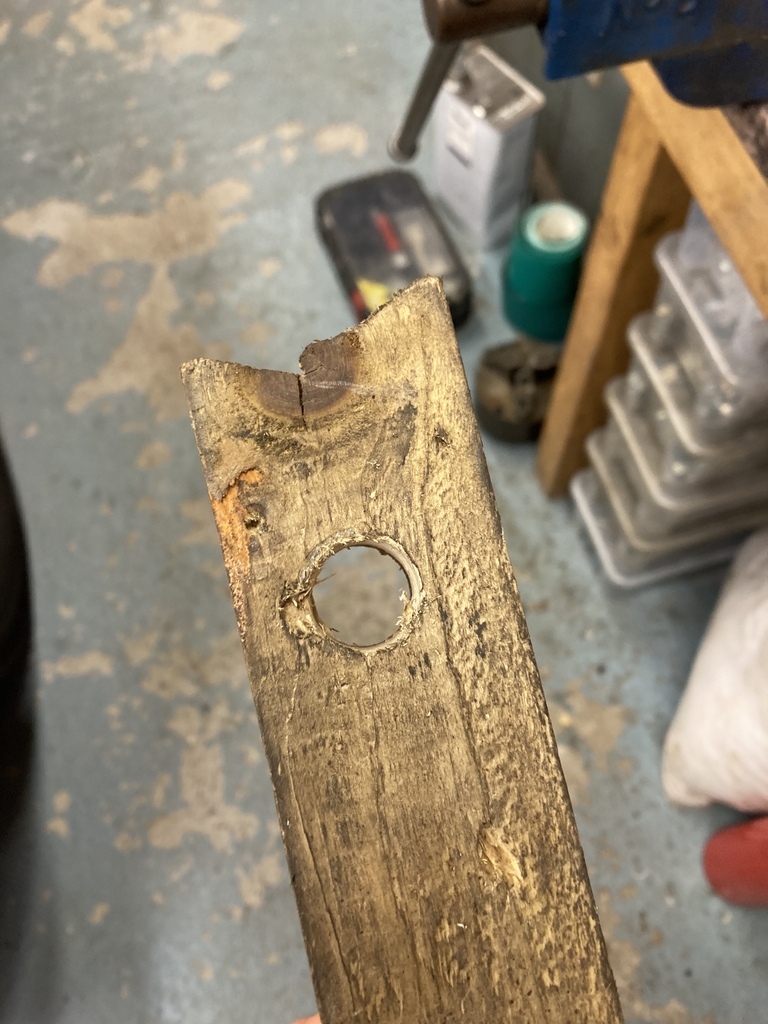 Clamped in the drill press with some more 2mm scrap. Hole saw is lined up with the previous hole and the centre drill removed. 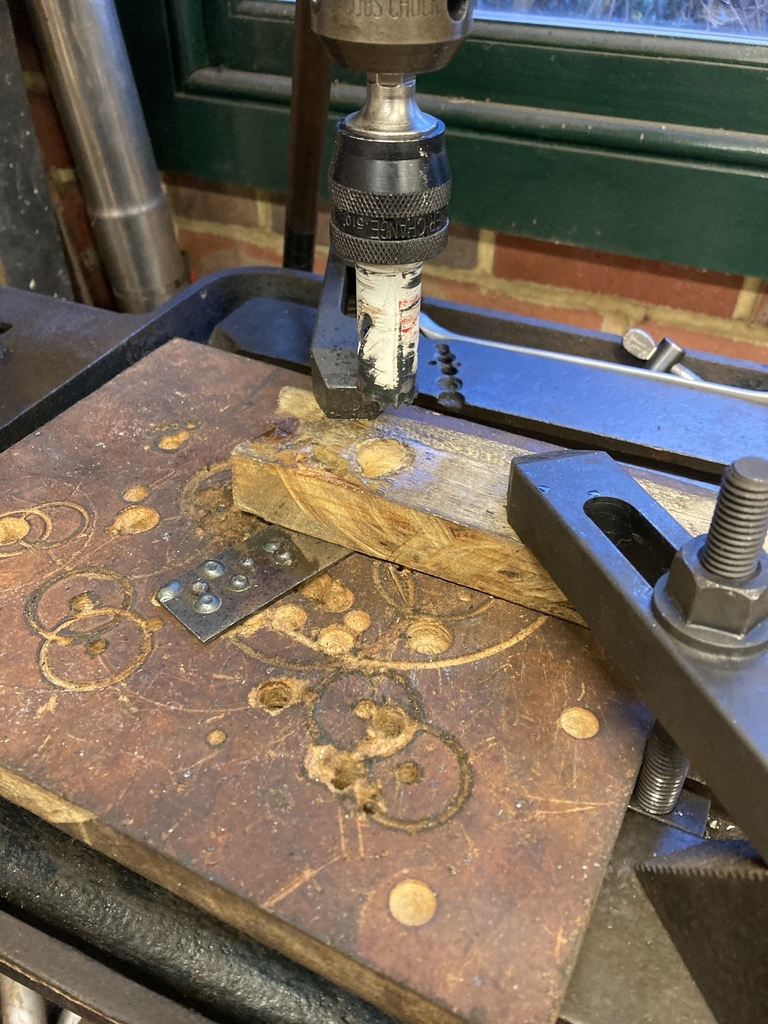 That will work. 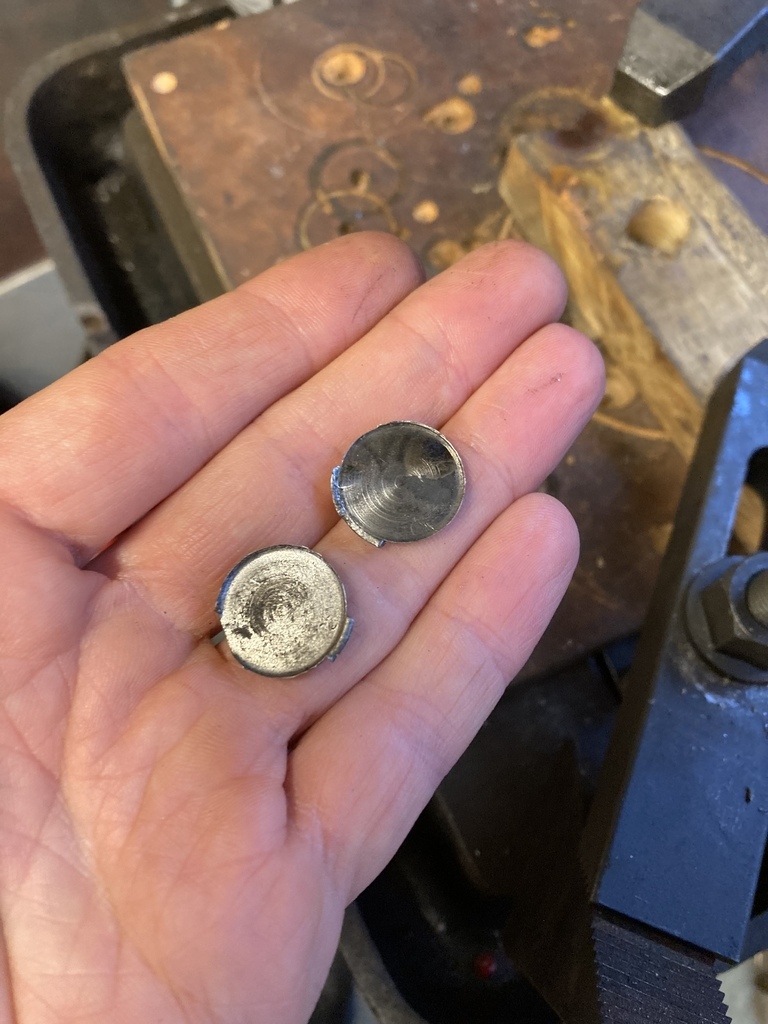 Cleaned up and ground to size. 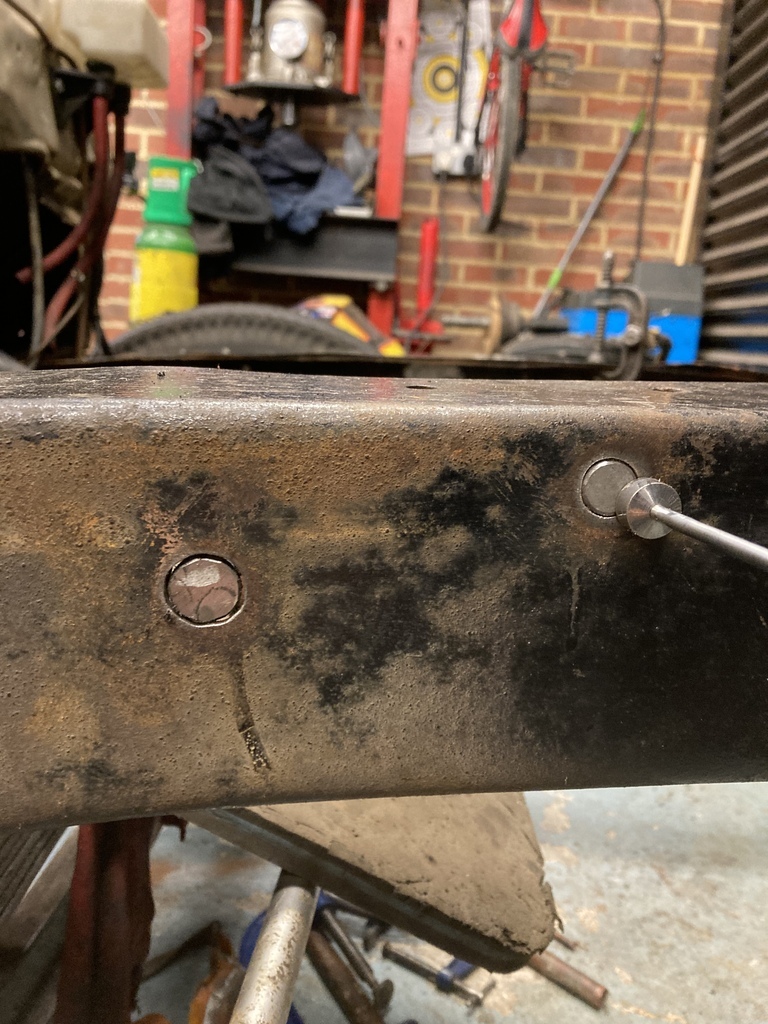 Welded and finished. 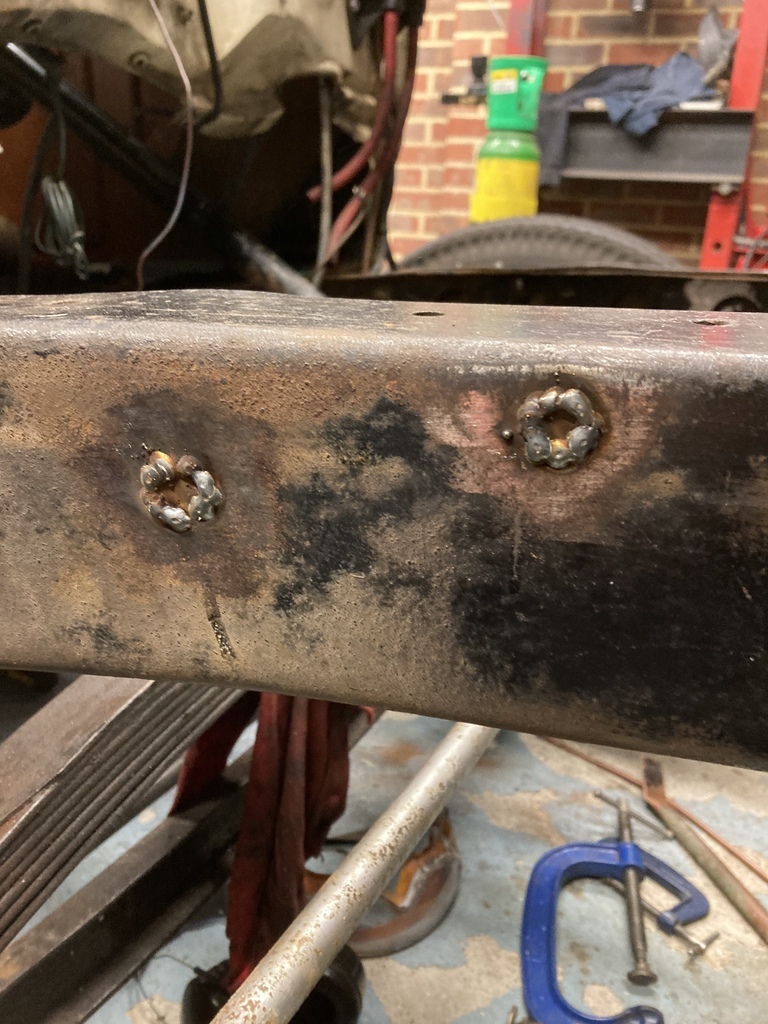 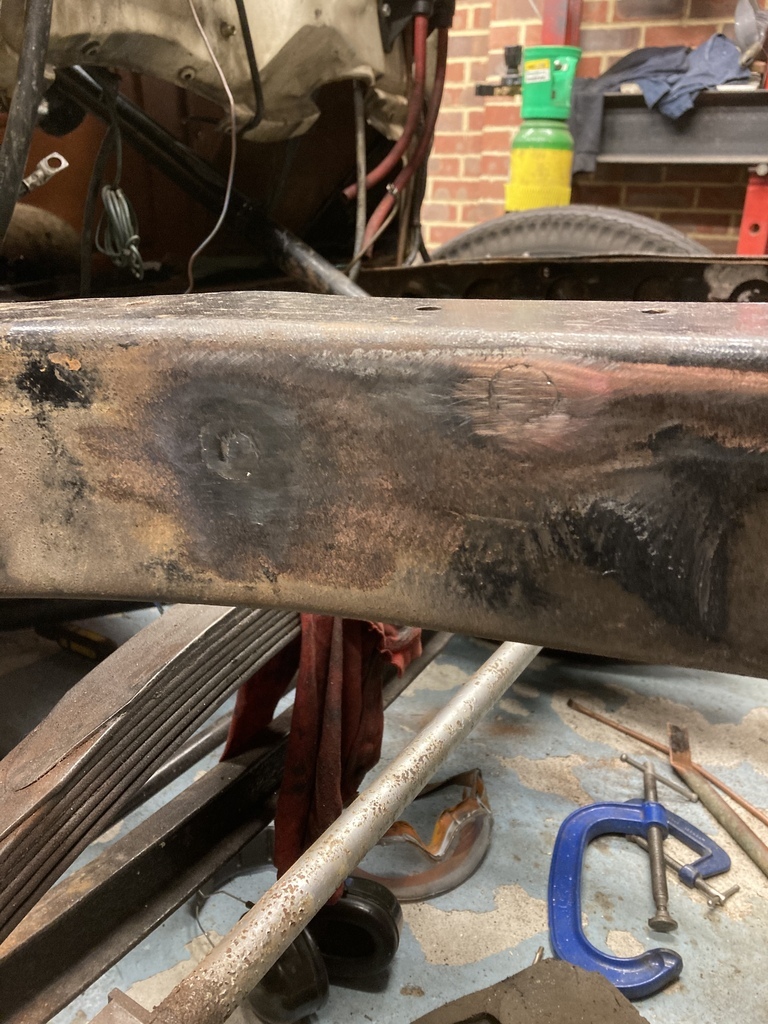 With the chassis rail repairs done and before I addressed reattaching the two chassis rail skins I wanted try and get some rust protection between the two using the opportunity that they were already spread apart. Some aerosol Waxoyl sprayed into the gaps and holes and then worked inwards with my universal homemade chiv. Something has to be better than nothing. 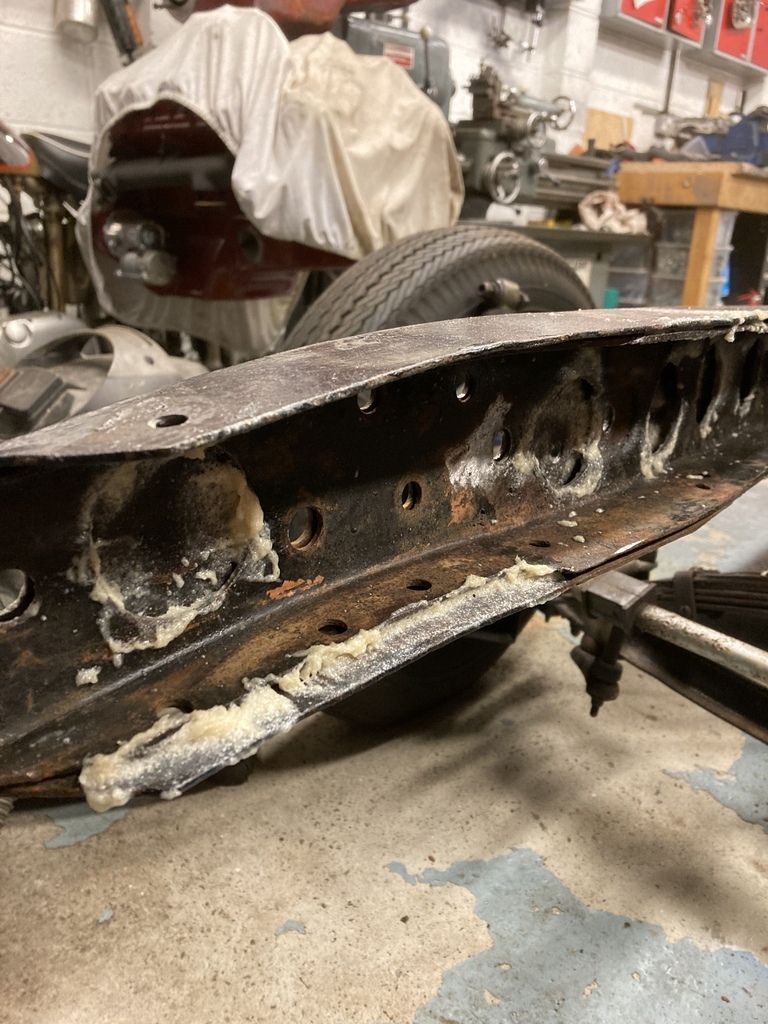 |
| |
|
|
Enbloc
Part of things
 
Posts: 398
|
|
Dec 29, 2022 20:31:55 GMT
|
There were two reasons for stripping the chassis back to its bare rails. Firstly I never truly knew how well it had been bolted back together in regards to quality of hardware and tightness of the fixings as they had long since seized. The other more compelling reason was the rot had started to take hold. The chassis construction consists of a double skinned ‘C’ section which as you can imagine can be quite the rust trap and they have a habit of rotting from the inside out. My chassis had always been good in this respect but again the exposure to the salt water of Pendine had rabidly accelerated its downfall. 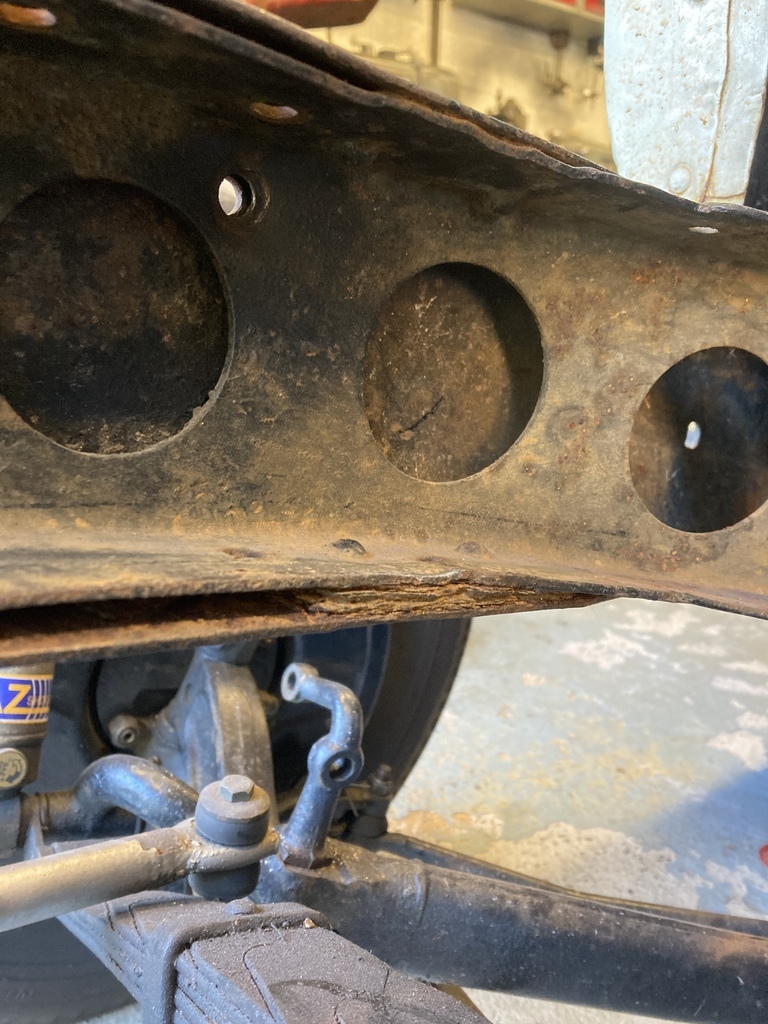 The other side had the steering in the way. Removing the steering box and bracket gave me complete access to the other side. 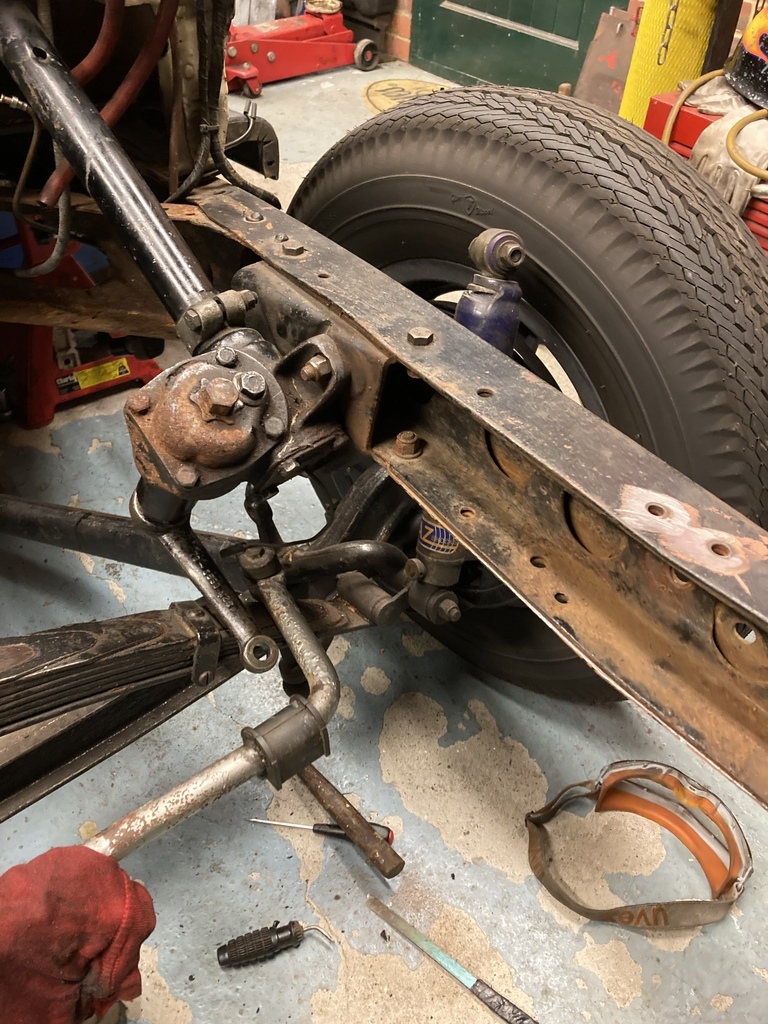 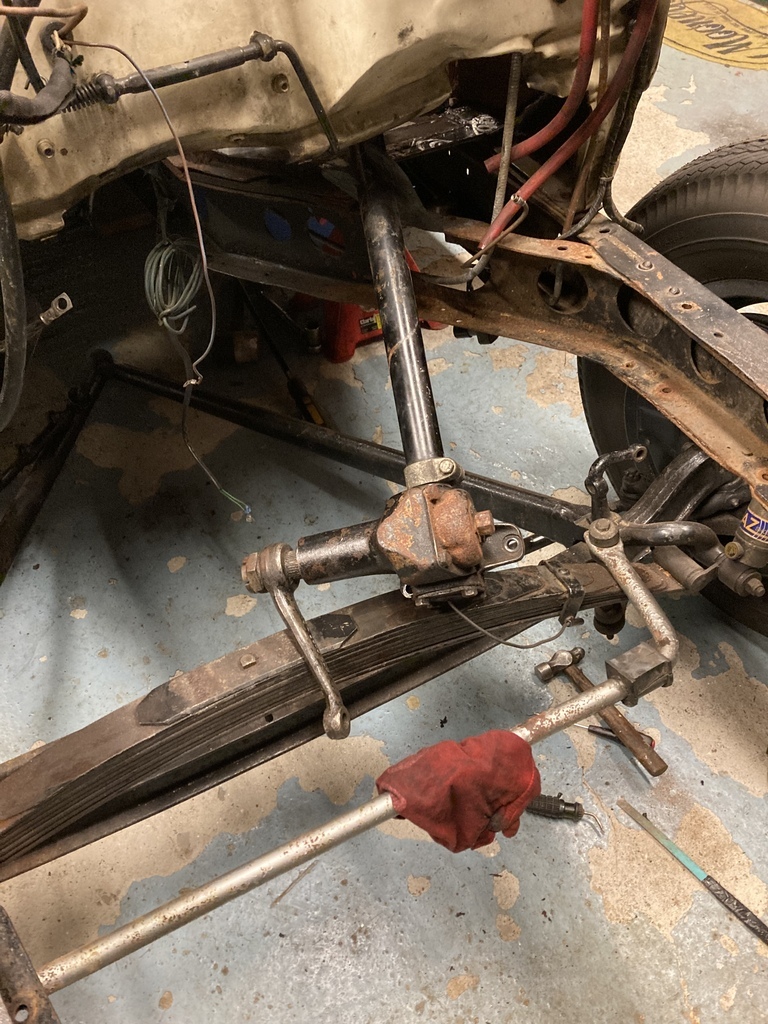 The main corrosion seems to be contained to the upper and lower sections in and around the engine bay as this area had the most exposure. The joints had stretched away from each other as the rust expanded. 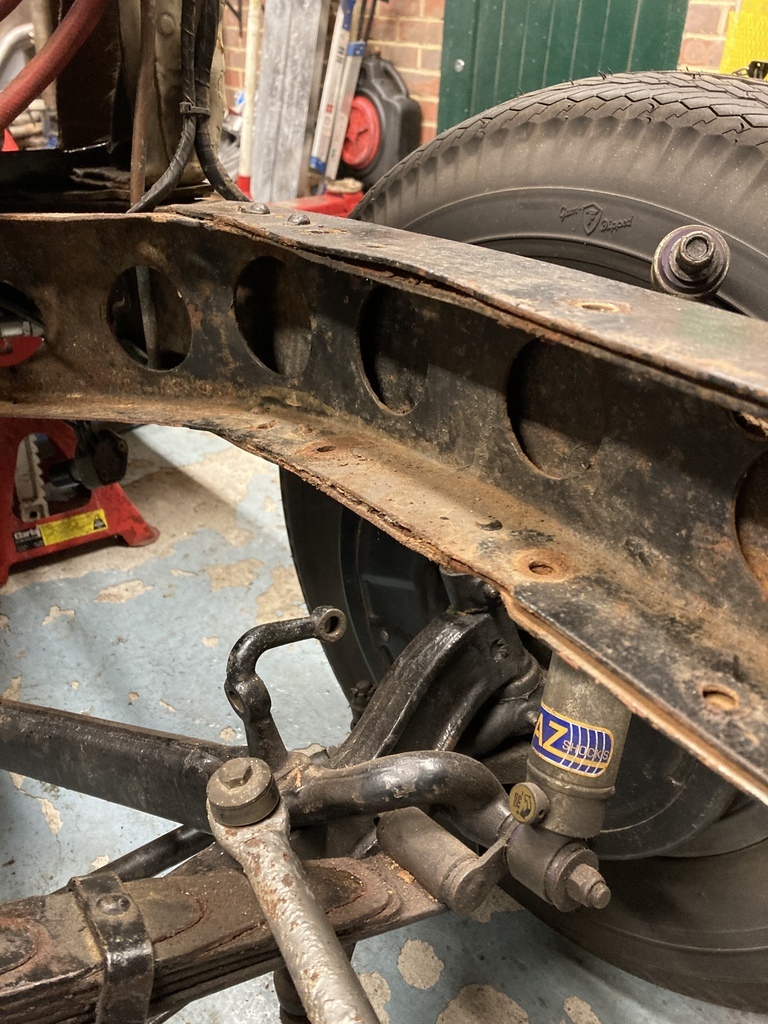 I think the back portions had fair better only because they were so clogged up with mud, sand and paint. 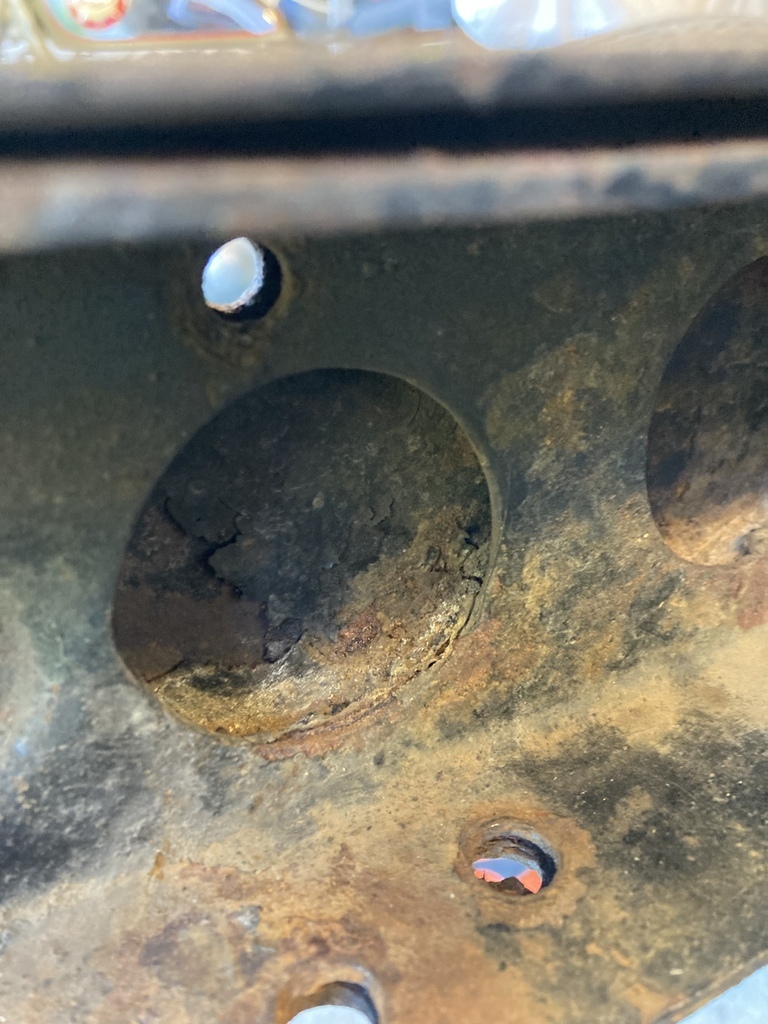 A cursory prodding with the screw driver revealed that a lot of it was loose and could be scraped out. To be able to get right to the back of the ‘C’ section to scrape out out the worst of it I needed something long, flat and sharp. 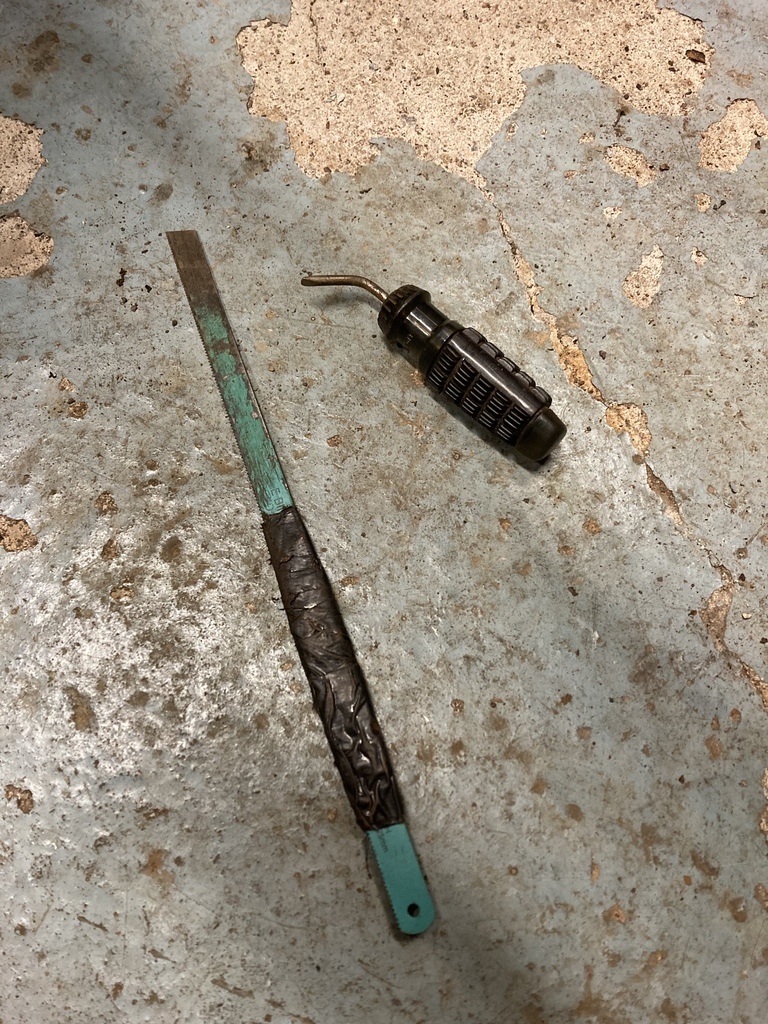 I put together something that can only be described as a prison chiv! A hacksaw blade with the end ground down and a gaffer tape handle. It worked brilliant for scrapping, had the ability to saw through any tough spots and as the end teeth dulled could be reground to fresh ones. I also bent and ground an old screwdriver for getting in around the holes and managed to get the wire wheel in for the final blitz. 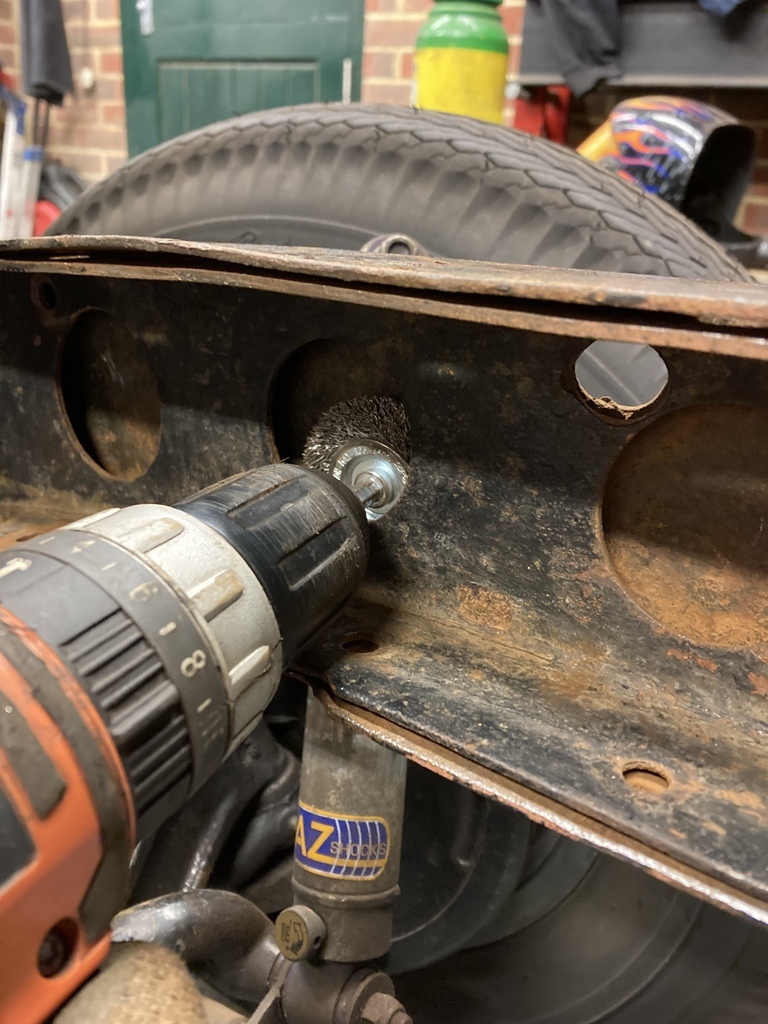 It took many, many hours to clean out the rails but much to my surprise there seem to be very little damage to the metal. No rust through or even any sign of heavy pitting. The only issue was the aforementioned joints that had been stretched open. |
| |
Last Edit: Dec 29, 2022 20:43:11 GMT by Enbloc
|
|
Enbloc
Part of things
 
Posts: 398
|
|
Dec 27, 2022 16:40:31 GMT
|
With the gearbox finished I could carry on with the chassis. The front crossmember is bolted in, this isn’t factory as it should be riveted. It has always been this way since I’ve had it and going by how natural it all looked had been like that a long time. Luckily, whoever did it had done it very well as they had carefully removed each rivet without cutting or damaging anything else. Because the crossmember was now bolted in, it gave me the opportunity to be able to remove it from the chassis rails, clean any grot behind it and replace the hardware for new. Before I removed it I made some repairs while it was still bolted in it’s original position. The front crossmember has these wing extensions that serve as the radiator mounts. 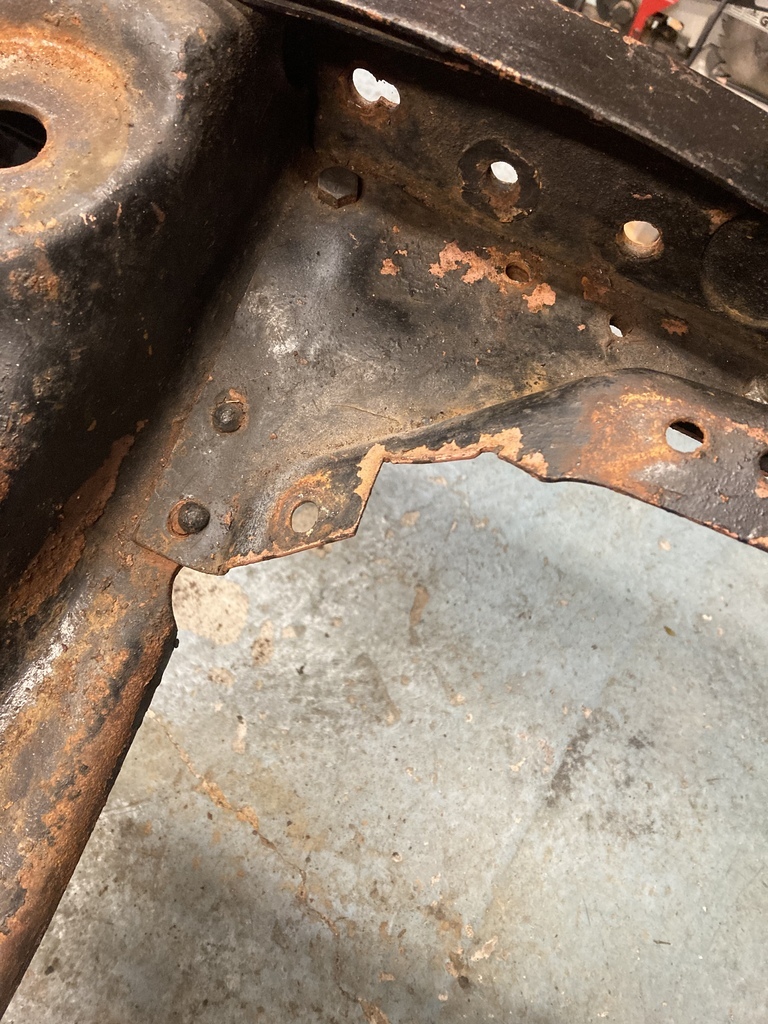 For some reason a section had been crudely cut from each side. A simple flat piece of 2mm repaired the first one. 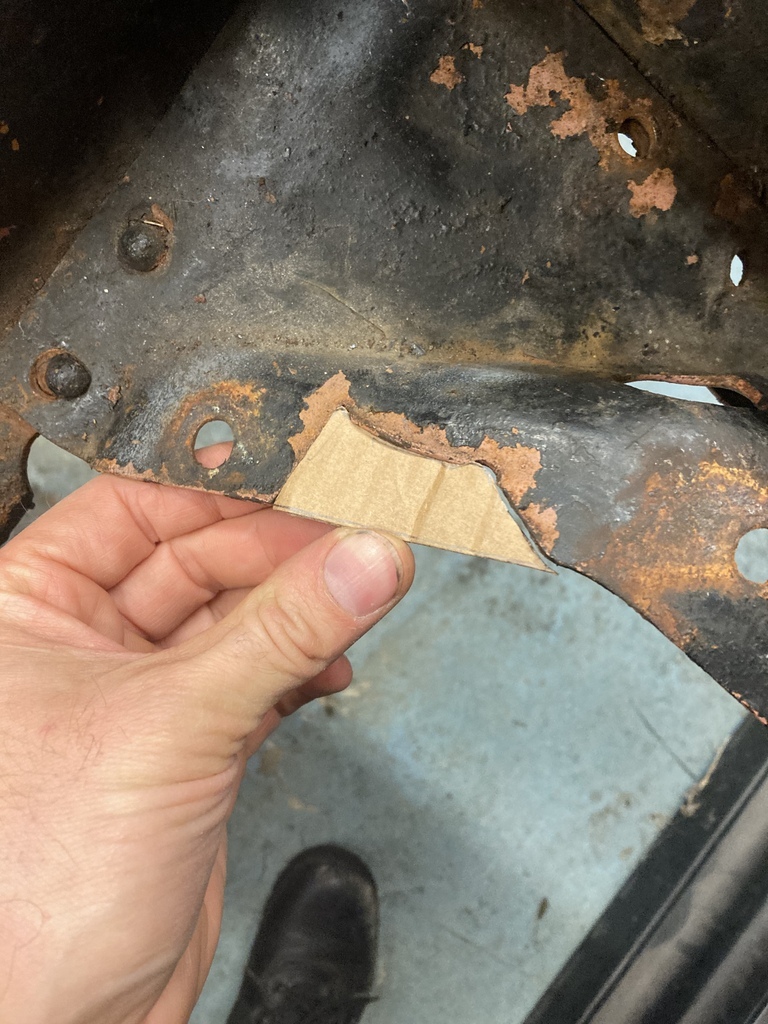 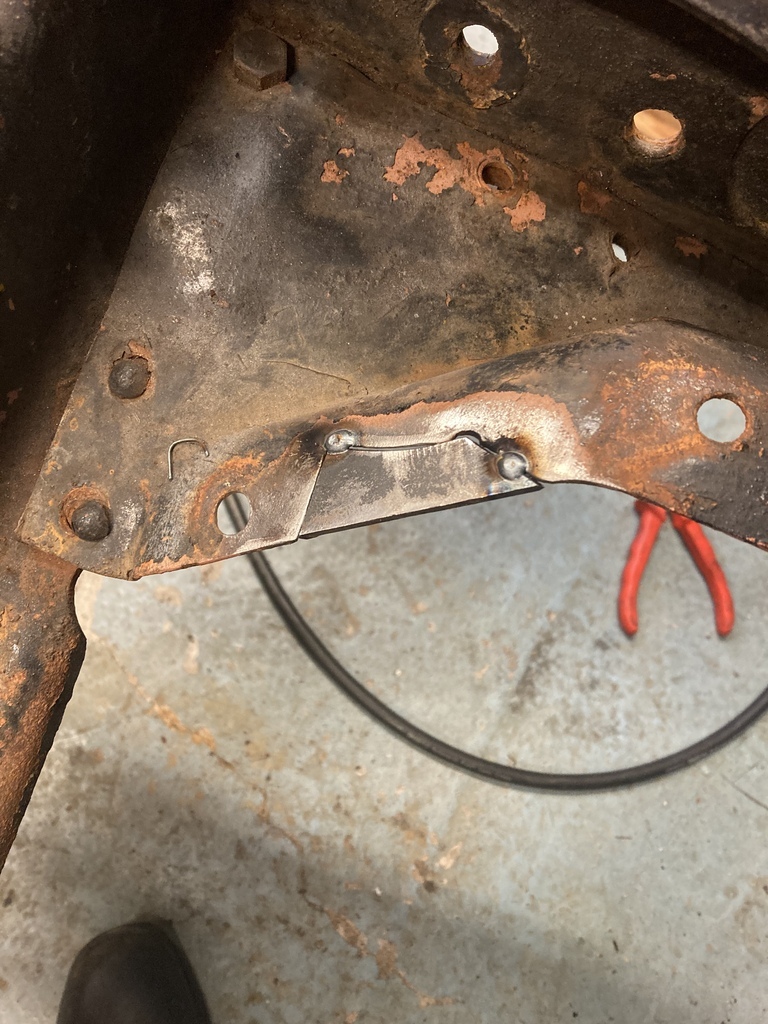 The other side needed a little more shape to it. Also some repair work needed to the elongated mounting hole. 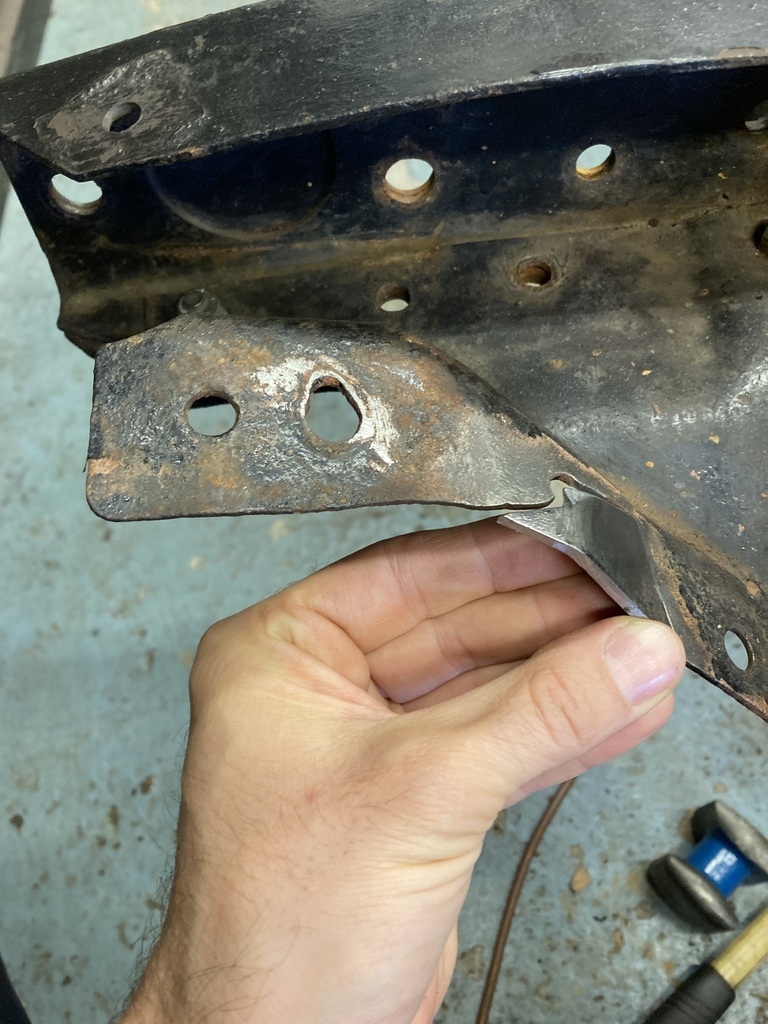 Finished up. 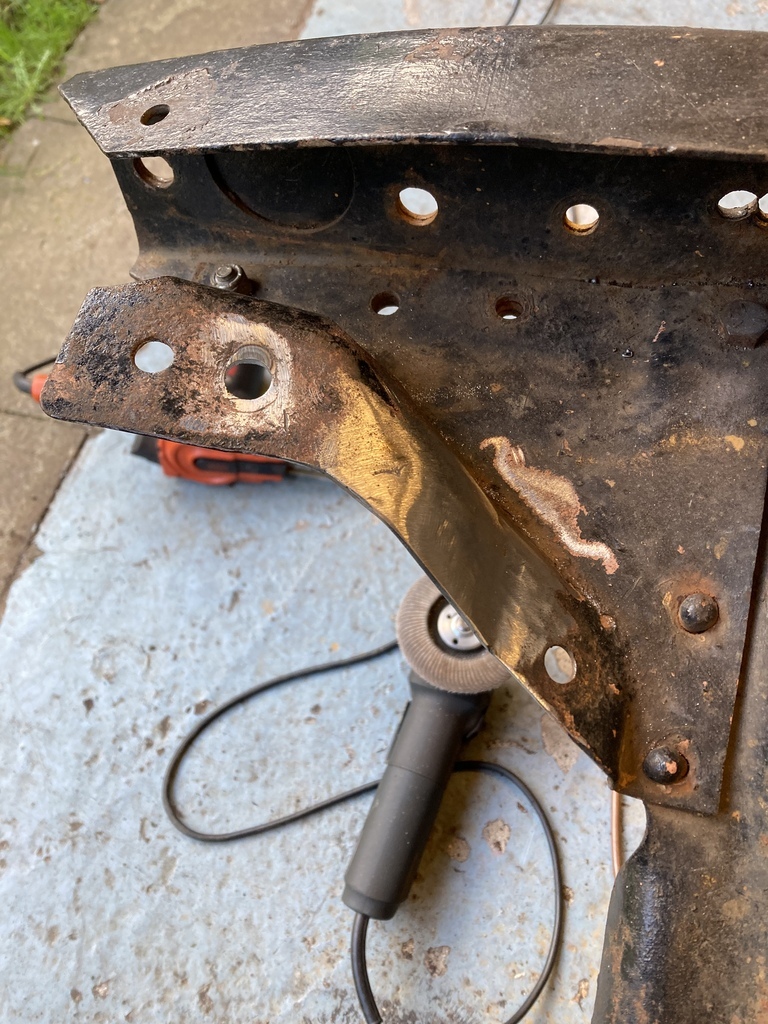 There were a few remaining factory rivets left holding the wings to the front crossmember. These were dead and just rattling in their holes. They had the heads ground off and knocked out. 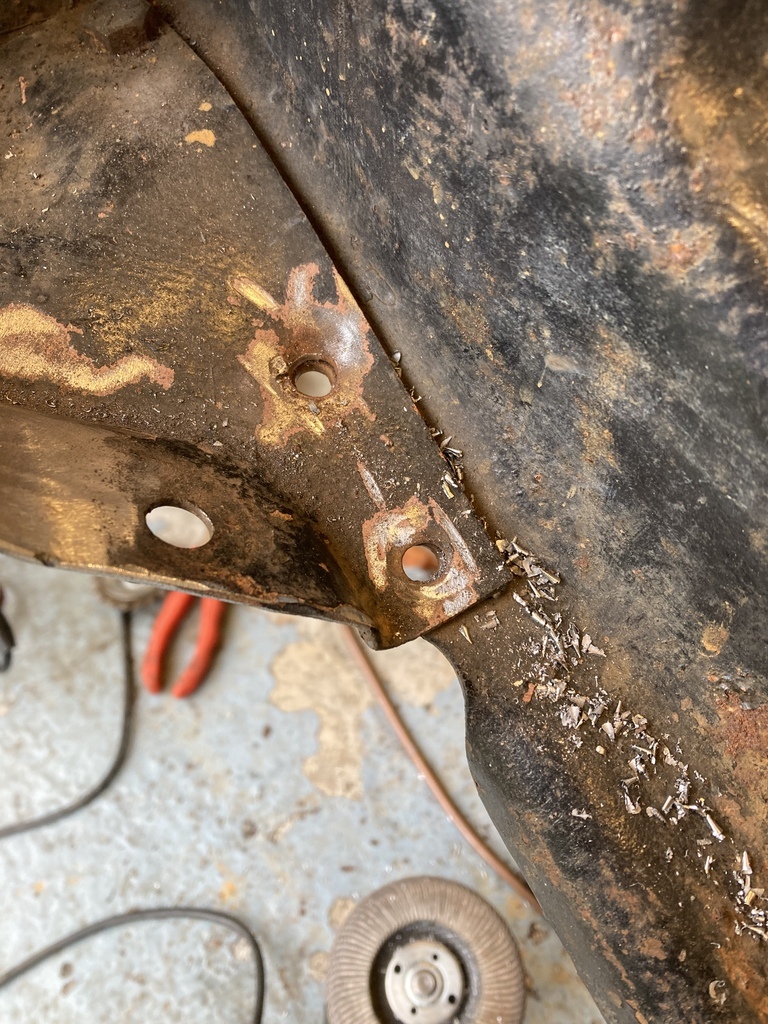 The wing section off showing why I wanted to break it all down. 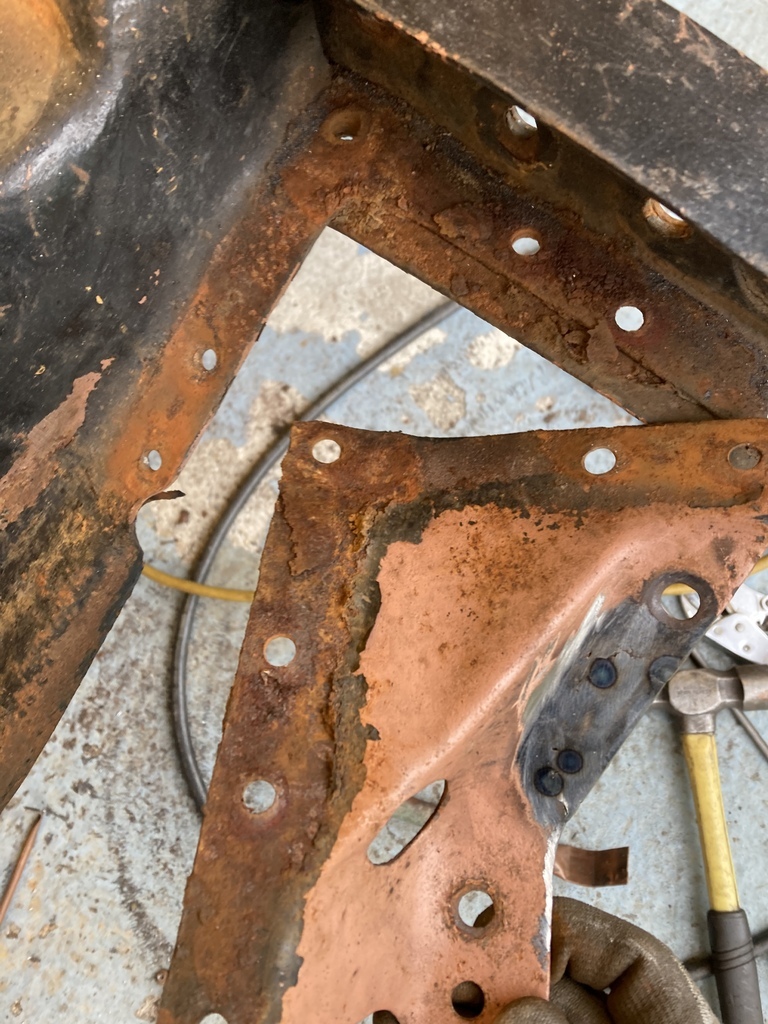 Cleaned and painted with Por-15. 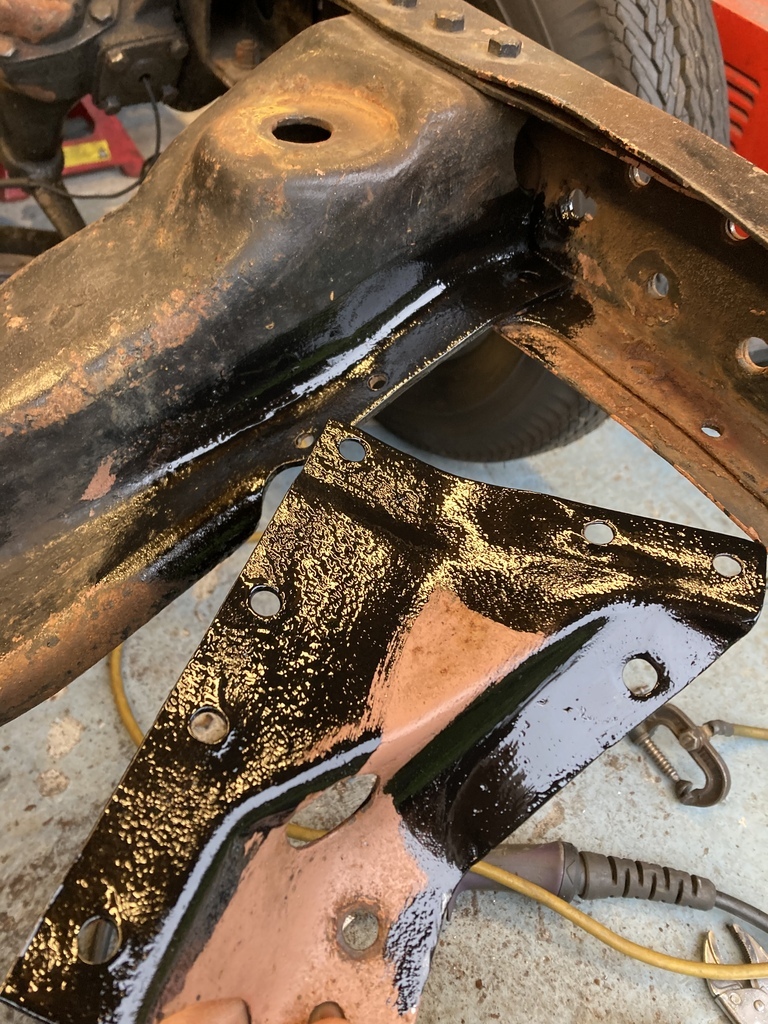 With it lined up again the old rivet holes were plug welded close. This alone made such improvement to the rigidity. 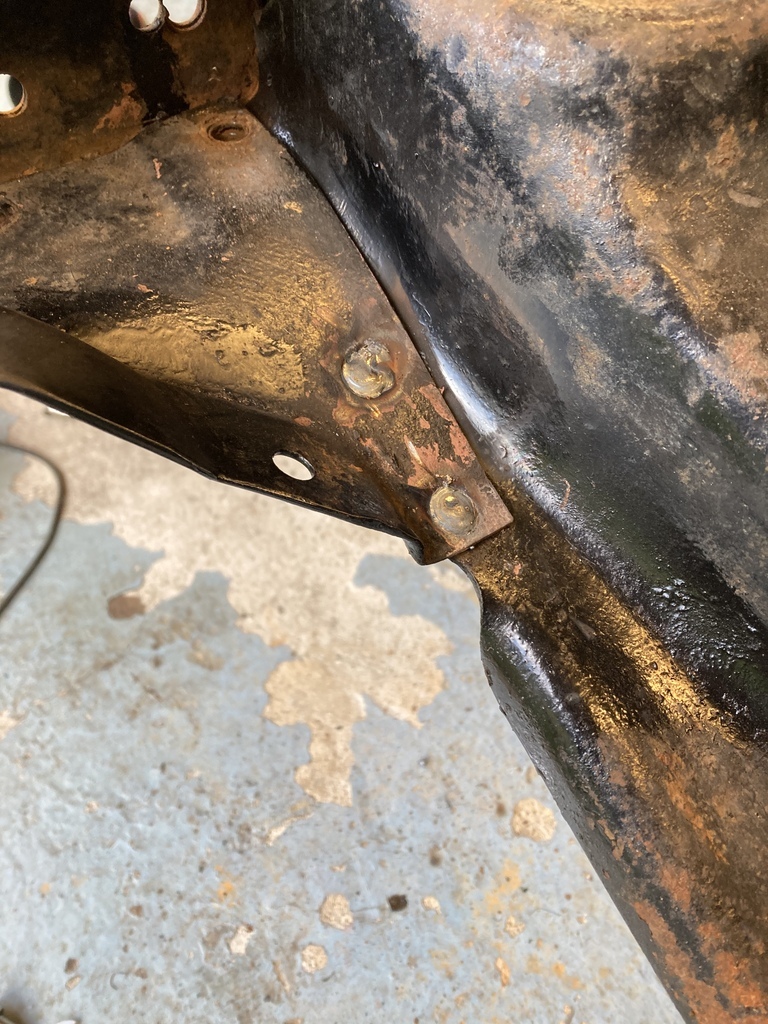 With the crossmember repairs done I could now remove it from the chassis. 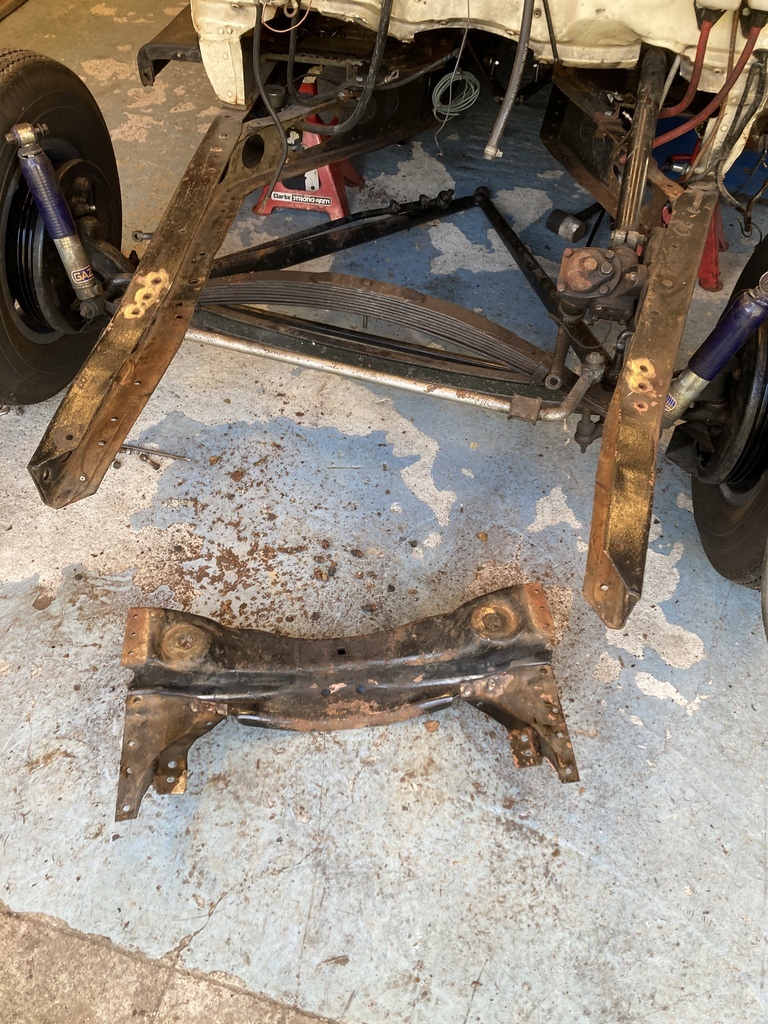 |
| |
|
|
Enbloc
Part of things
 
Posts: 398
|
|
Dec 24, 2022 19:23:55 GMT
|
After a couple of weeks my gearbox parts arrived. 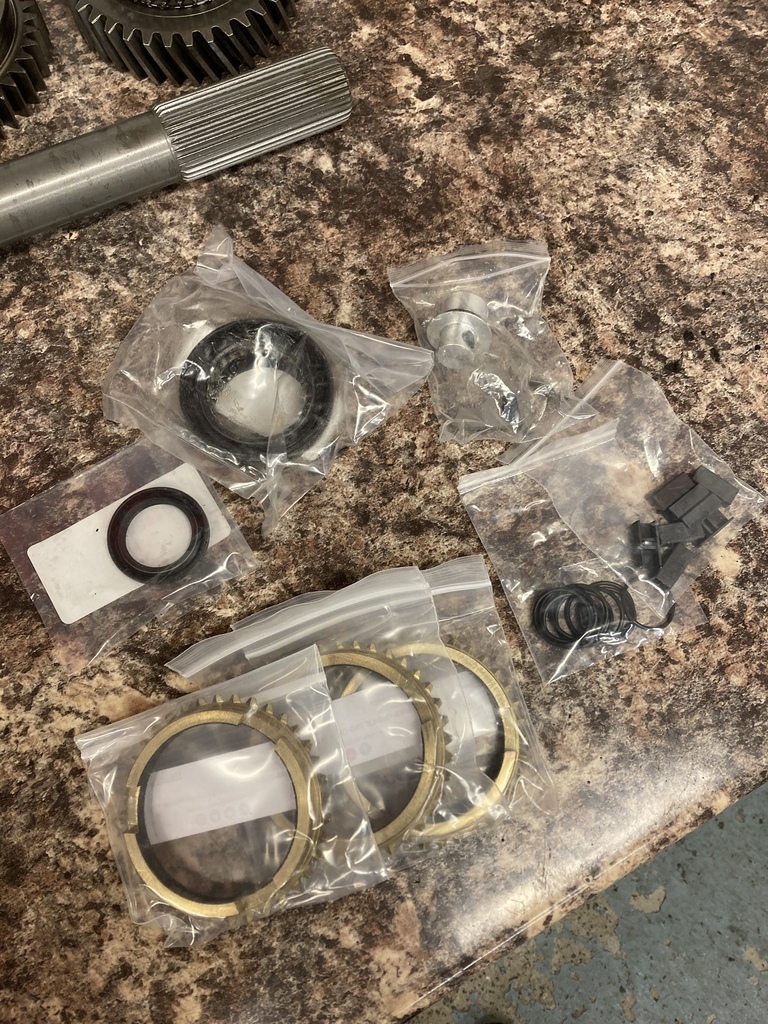 The only parts I really needed were the synchro rings as the gearbox was in such good condition. You’ll notice there are 3, where the gearbox has 5 in all. Basically you don’t need one on 1st or 5th because they don’t see high rpm shifts or hopefully they shouldn’t see high rpm shifts! What I also added onto the order was a replacement input shaft seal, output seal, plastic shifter fork pads and 6 O-rings that seal the 3 shifter rails, 2 on each. None actually needed replacing but they were cheap so I might as well while I’m here. All the parts came from Hanlon Motorsport in Pennsylvania. They are a one stop shop for all the US 5-speeds (T5, TR3550, TKO, TKX) and are brilliant to deal with. I also purchased one of Hanlon’s speedo drive block off’s. Here’s the magic. Carbon lined synchros. The difference with these is massive. With the stock brass ones its really hard to get them to ‘bite’ on the cones but the carbon ones grip almost instantly. 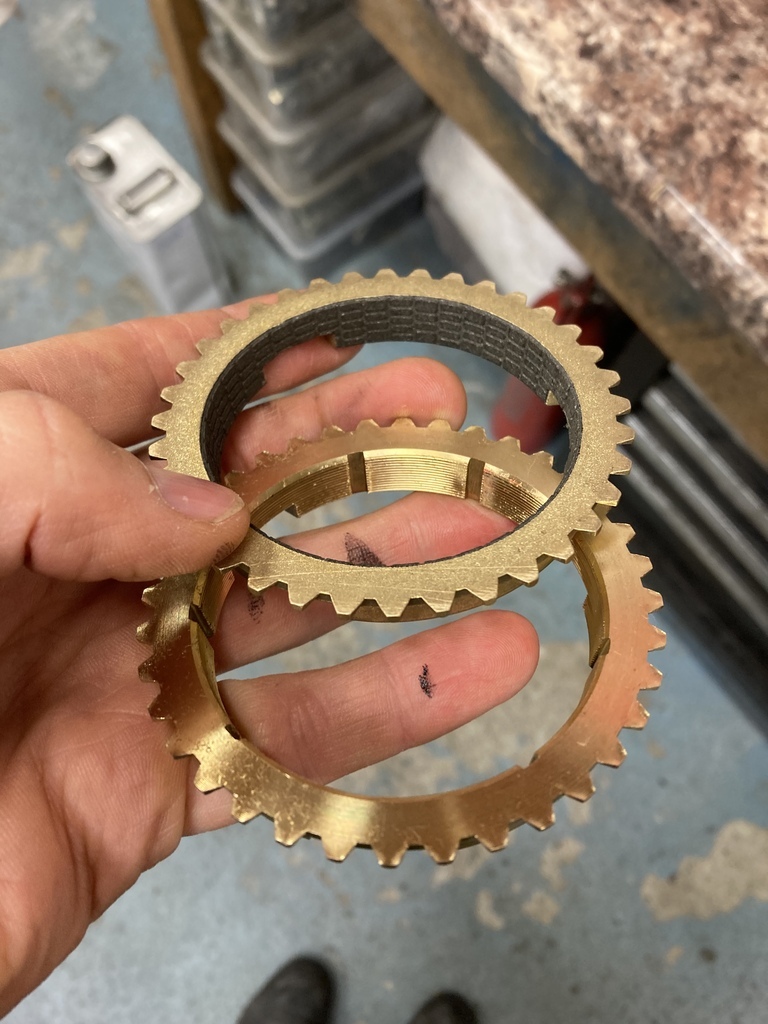 Output shaft seal out… 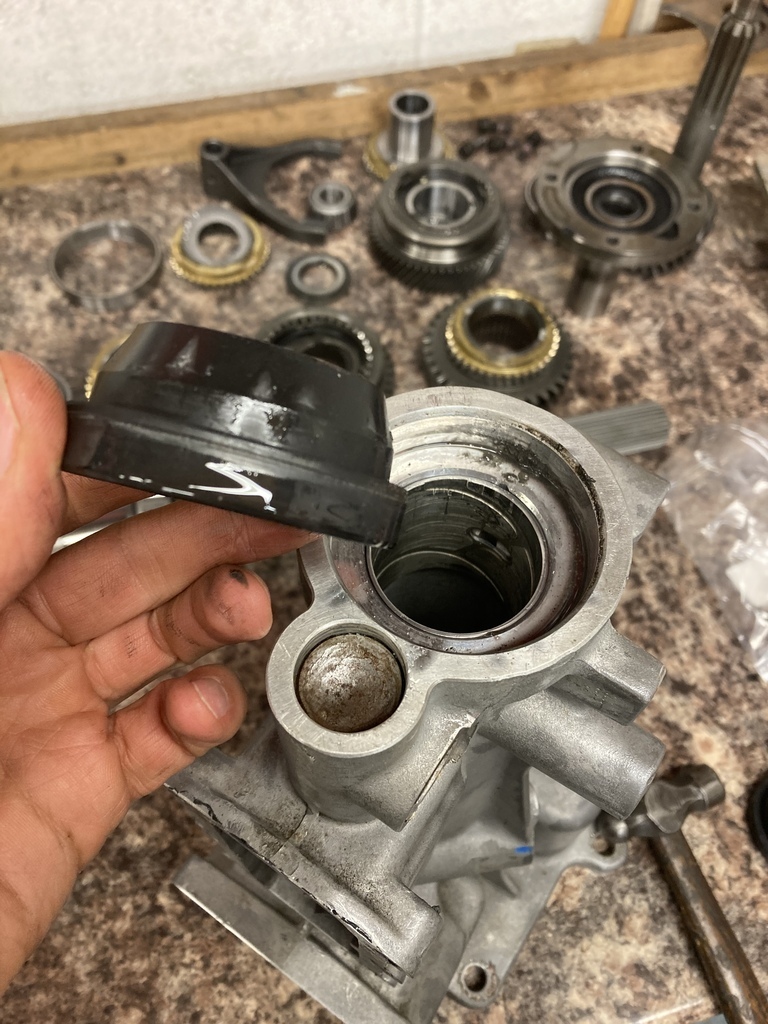 … New one in. 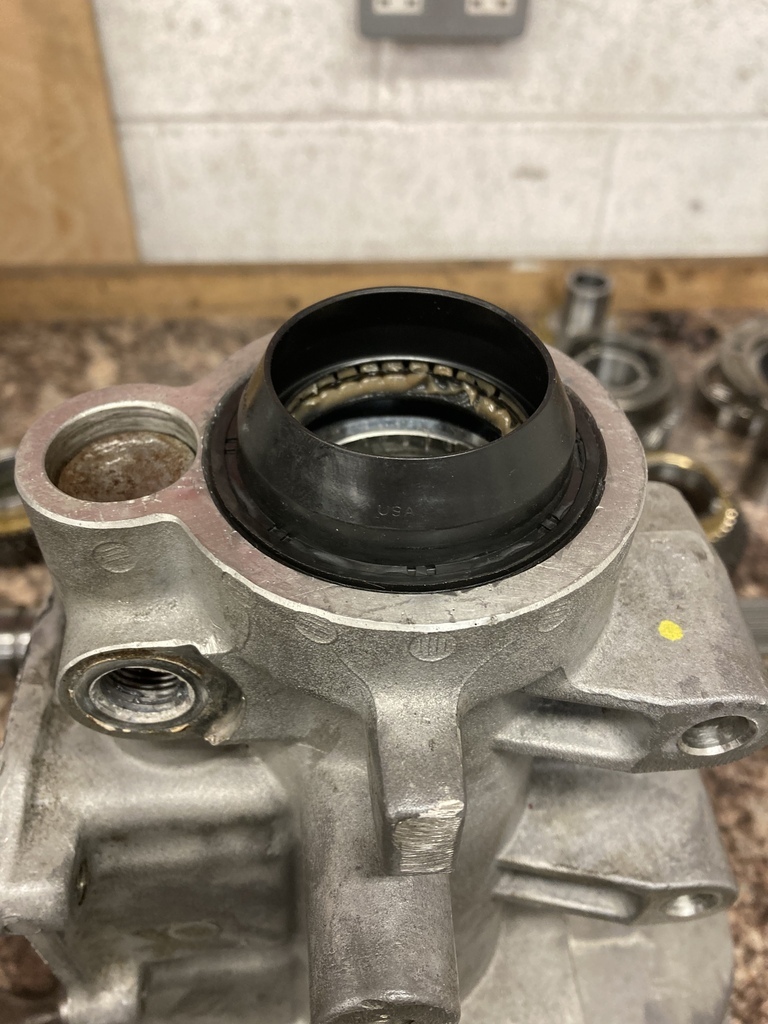 Input shaft seal replacement. 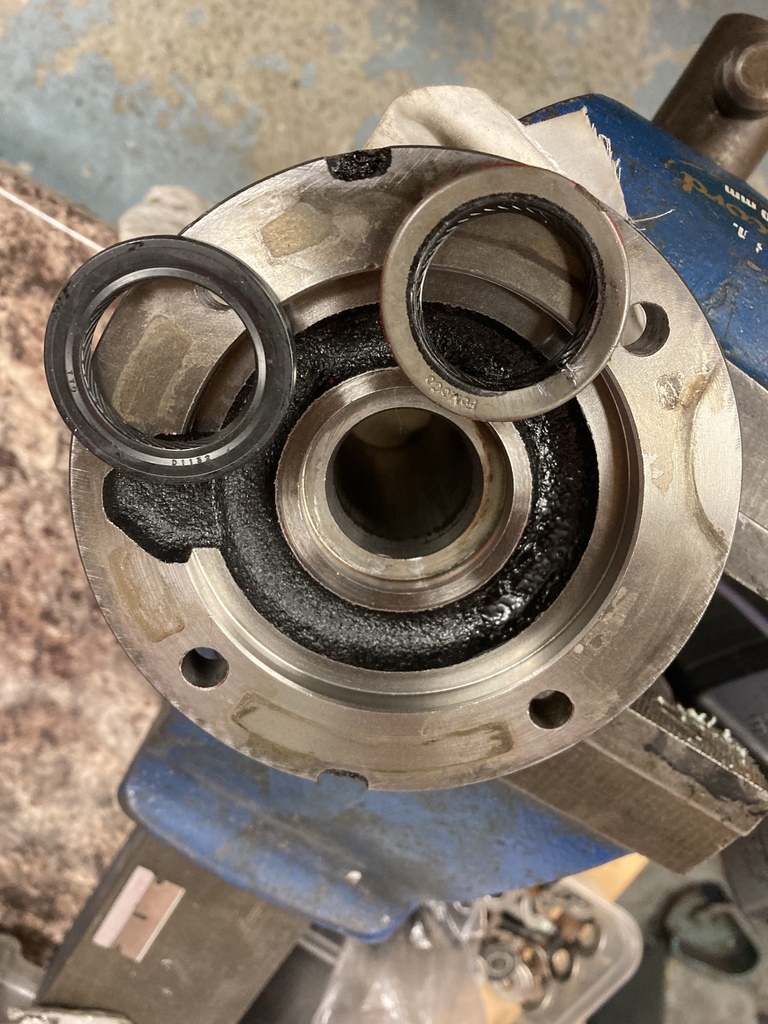 Assembly is, as always, disassembly in reverse. One word of warning. There are no gaskets just sealer. The sealer has to be an anaerobic sealer. Anaerobic means it sets with the ABSENCE of air. Resistant to pretty much everything and also works as a thread locker. It’s bloody expensive stuff but because it doesn’t air dry means that when you leave it for a time it not all dried up in the tube so you get maximum usage out of your investment. It’s pretty much my go to sealer on most things now. 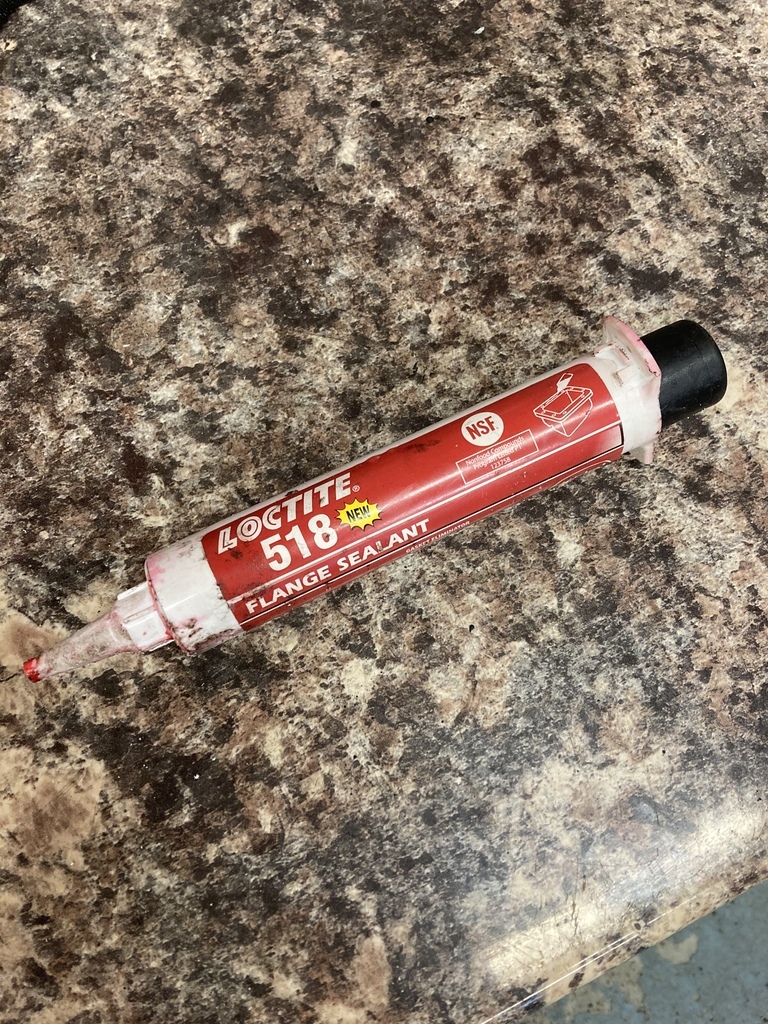 I put together an extended timelapse to show the process. The electrical switches went back in their relative holes. I usually change these out for proper blanking plugs if not being used but the plug on the neutral safety switch was trashed due to salt water exposure so it got trimmed flush instead. 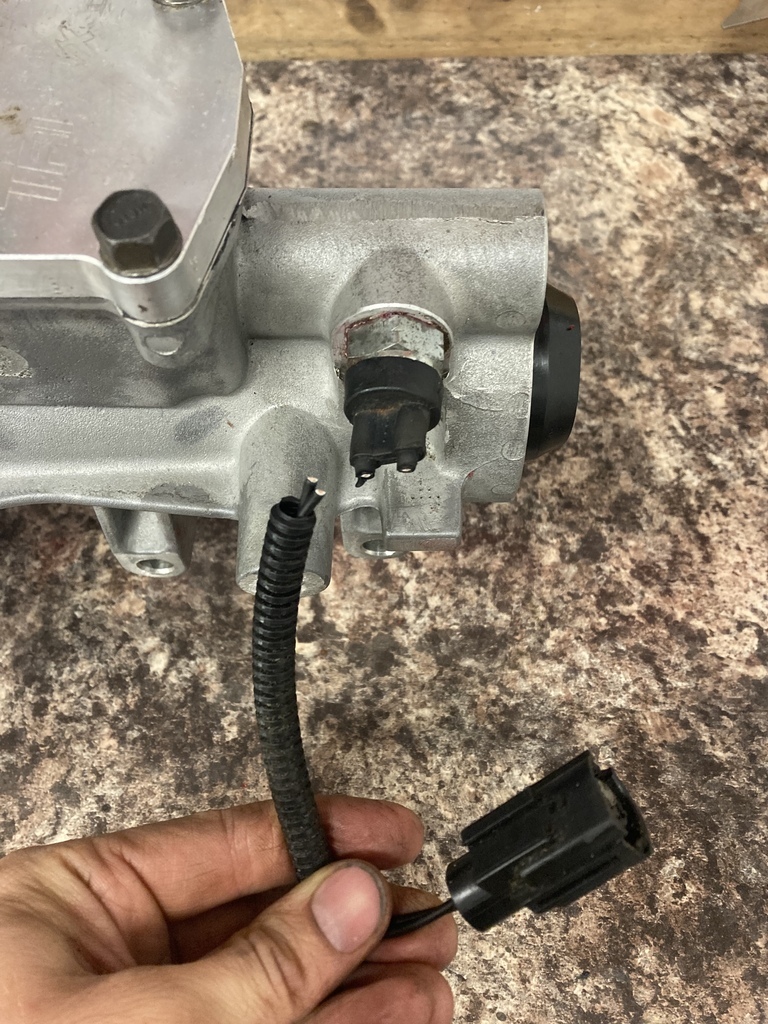 Finally the proper speedo blanking plug was fitted. The whole time the gearbox has been in the car it’s just had, I assume, the rubber shipping bung in the speedo hole. It’s miracle this hasn’t leaked or fallen out! 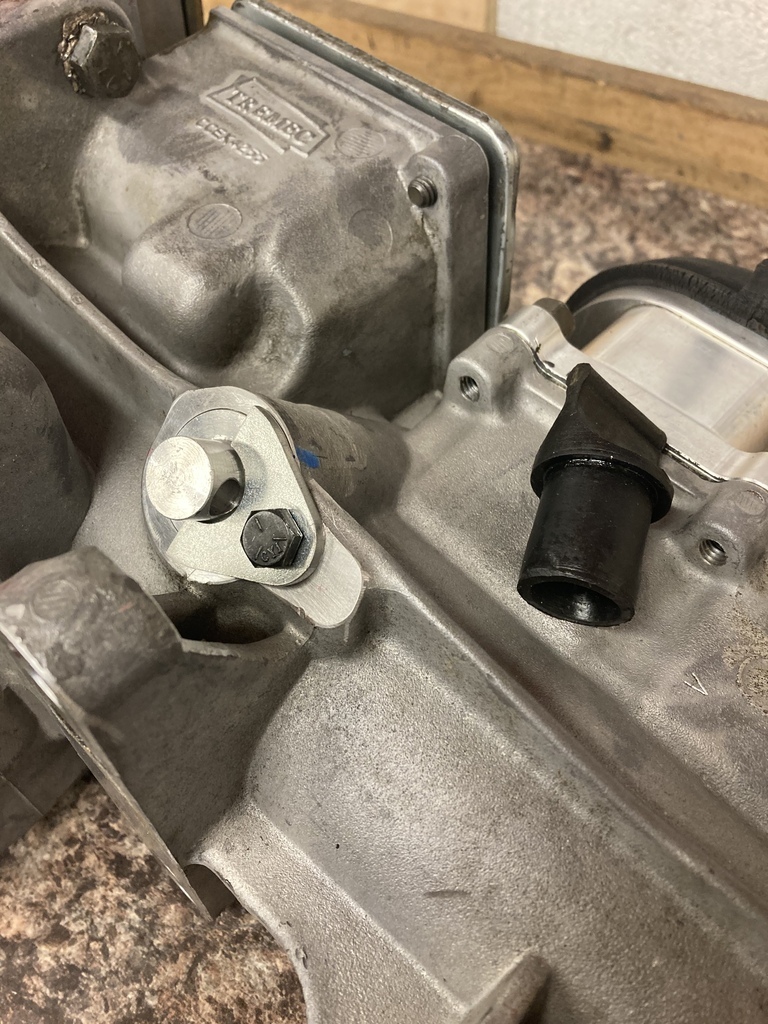 |
| |
Last Edit: Dec 24, 2022 19:58:55 GMT by Enbloc
|
|
Enbloc
Part of things
 
Posts: 398
|
|
Dec 23, 2022 19:44:49 GMT
|
With my order for gearbox parts placed I got cracking with this mess. 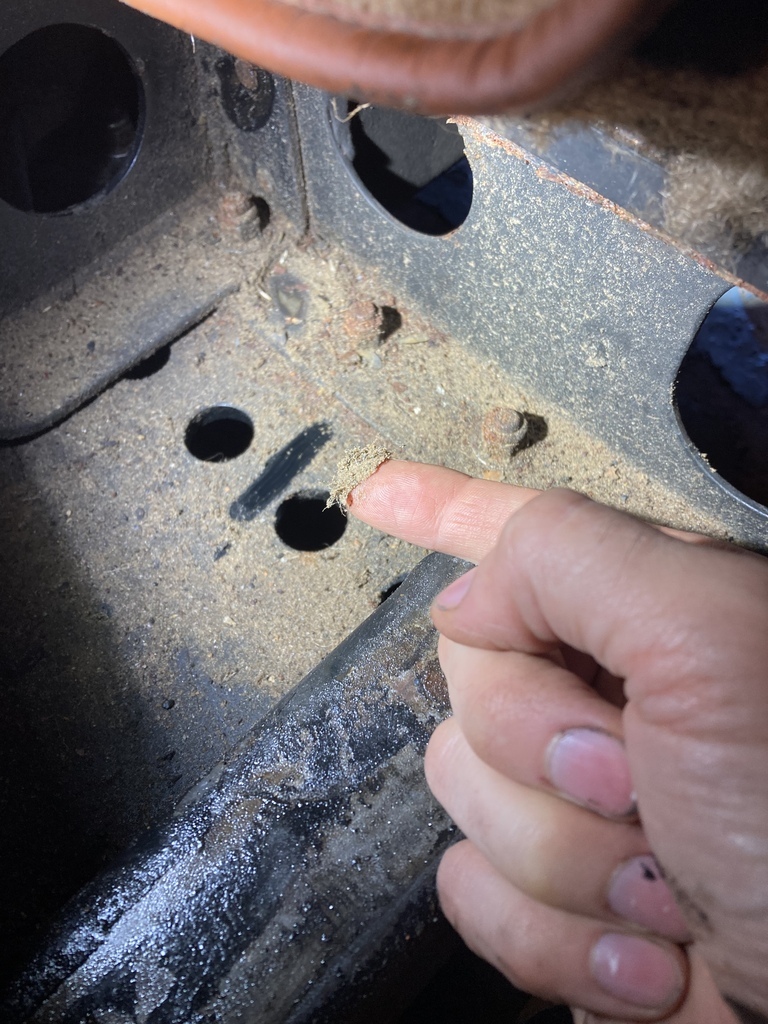 The only way to get this properly clean and to access any hidden rot was to remove the centre section of the chassis. The original, which this isn’t, is a riveted together structure and isn’t removable. Mine is now bolt in as it was replaced by Royal Kustoms when they converted the car to a 5-speed. Like the gearbox this had never been out since it was originally fitted. The centre section that ties the two sides of the chassis together came out fine, I thought this one might be troublesome as it’s a very tight fit. The bottom plate proved more problematic as both the front and rear suspension are tied into it. 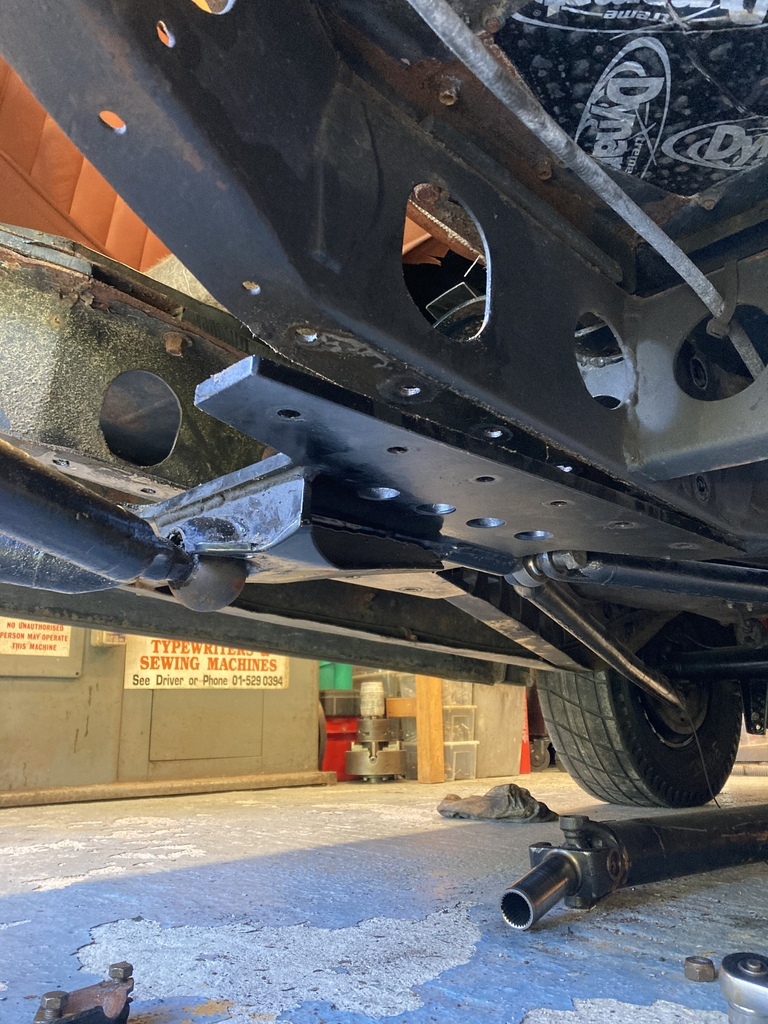 In the end I had to roll the whole front end out to gain enough clearance to be able to drop the plate. I used this opportunity to also unbolt another load of stuff like brake lines, anti-roll brackets, shocks mounts etc. ridding the chassis of as much paraphernalia as possible. 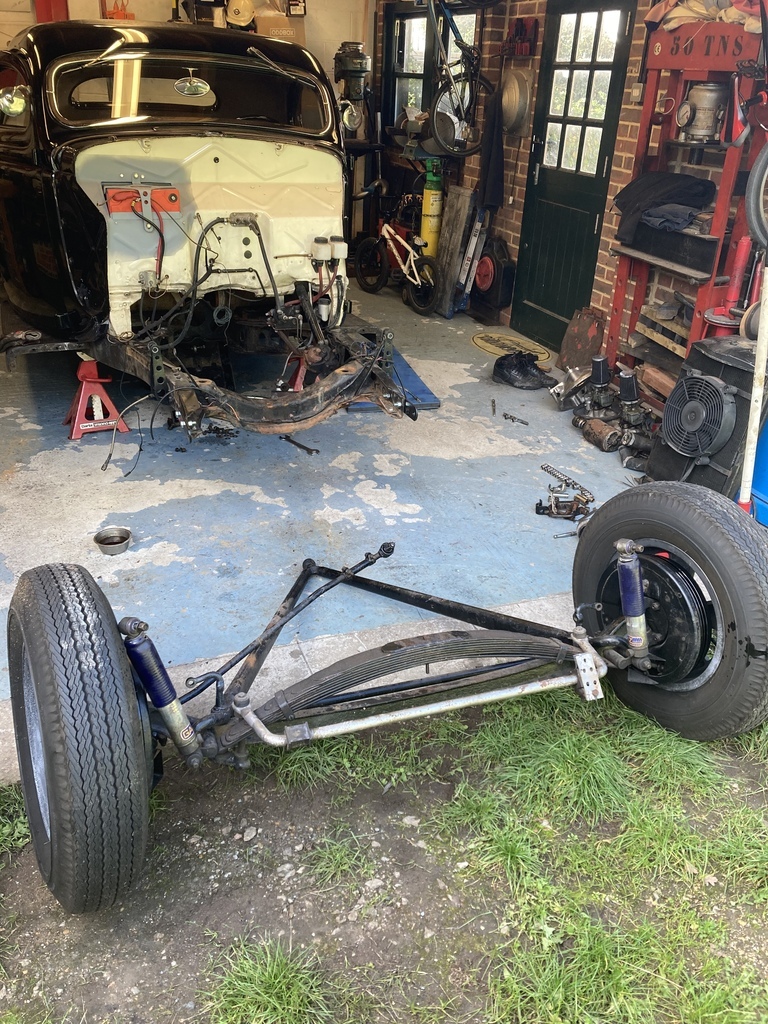 Here’s the centre crossmember pieces out and cleaned up. They are lovely things but were missing something. 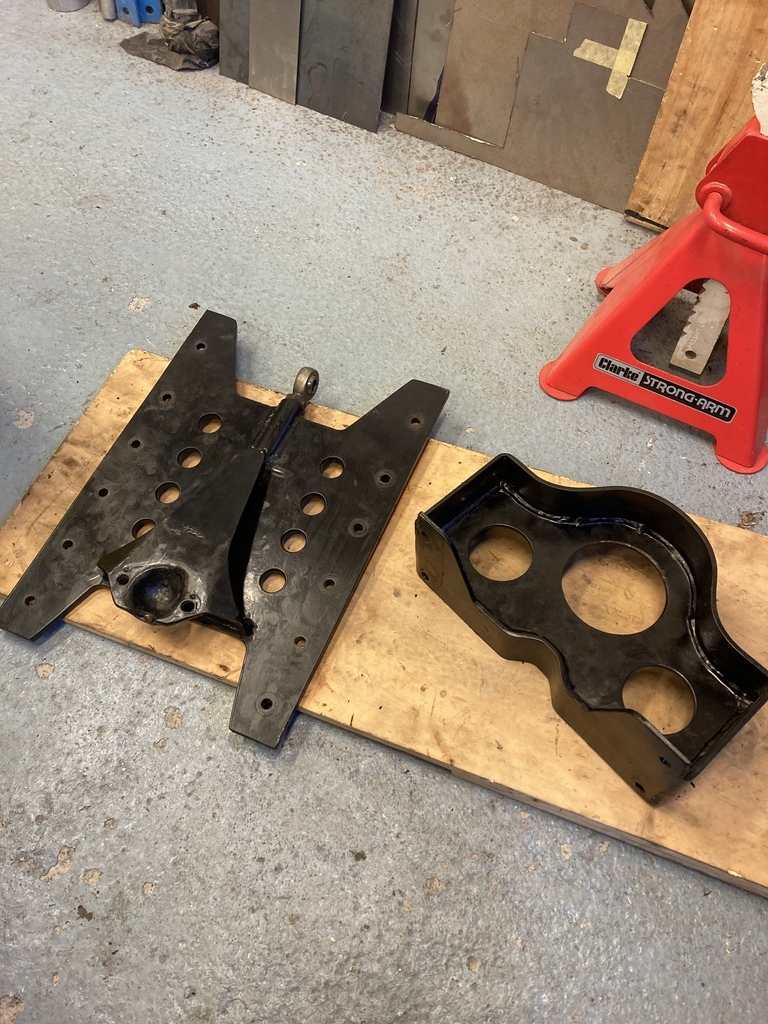 Here’s how much sand washed off just the hardware alone! 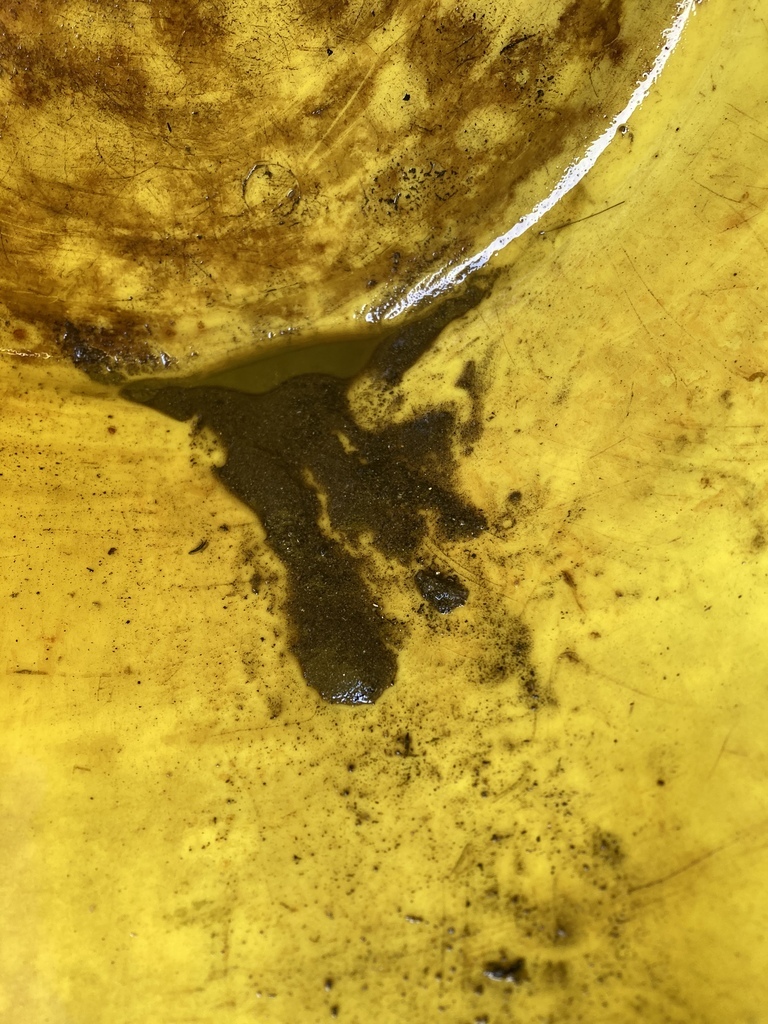 What the crossmember was missing was holes, lots of lovely lightweight holes! But before that I needed to know the starting weight. 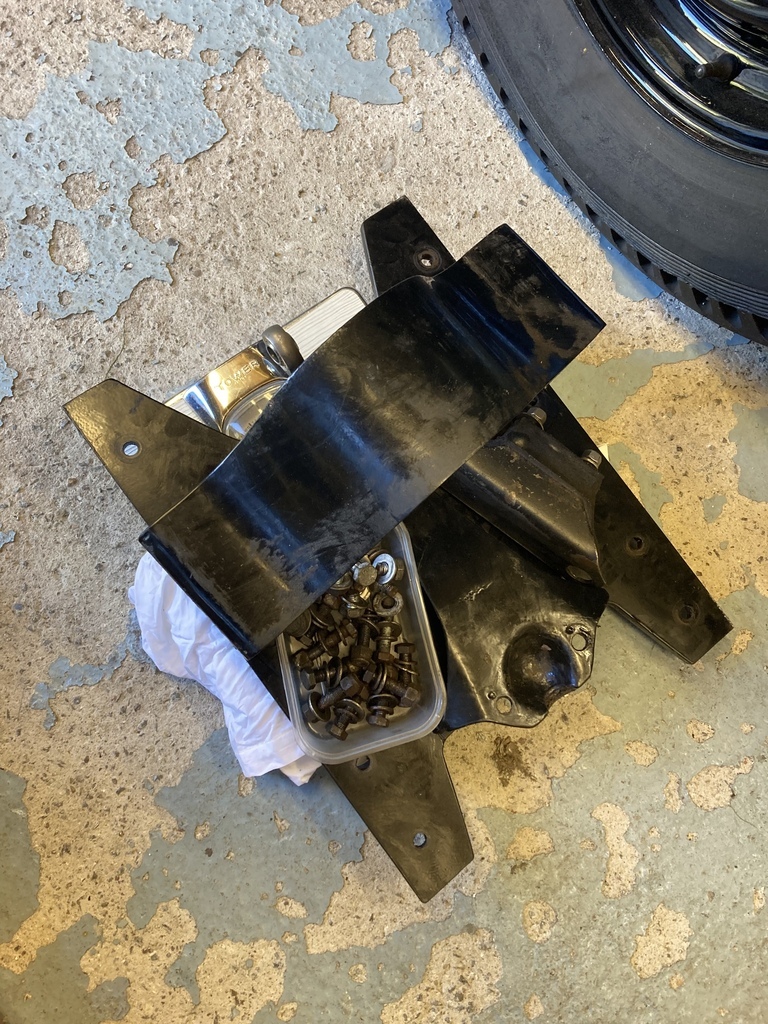 16.7kg or as accurate as converting our imperial bathroom scales can be. After some holes were drilled I realised that the two crossmember pieces overlapped in some spots. You can’t just have misaligned holes so it all got a little silly and I started transferring the hole centres between the two pieces. 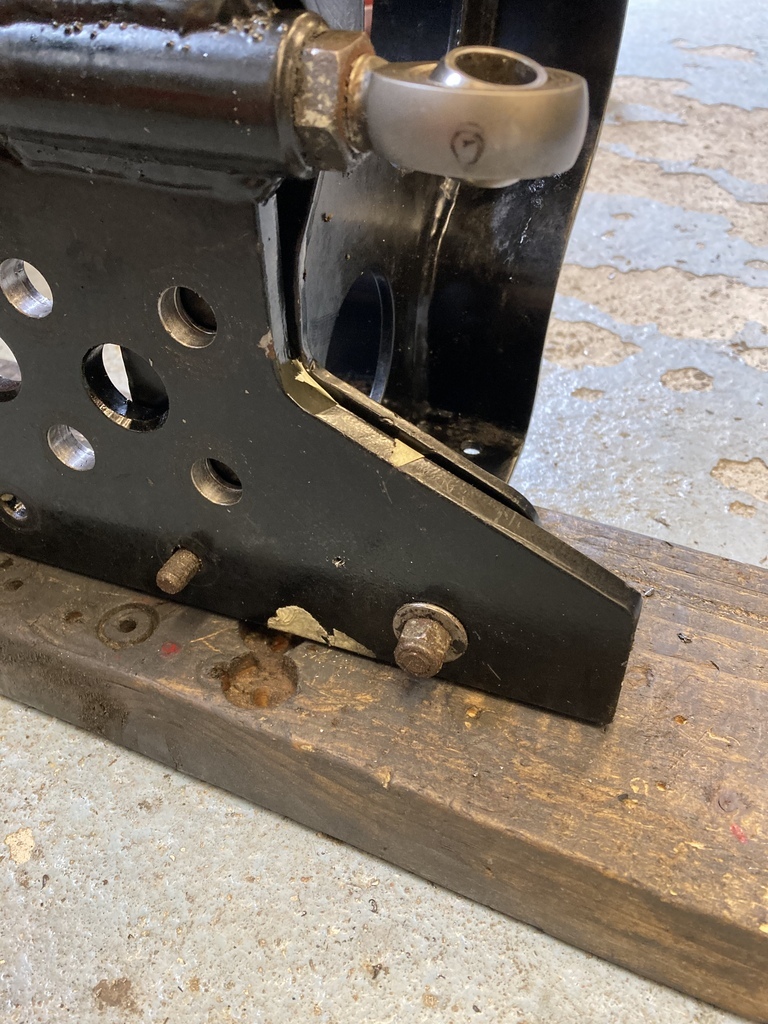 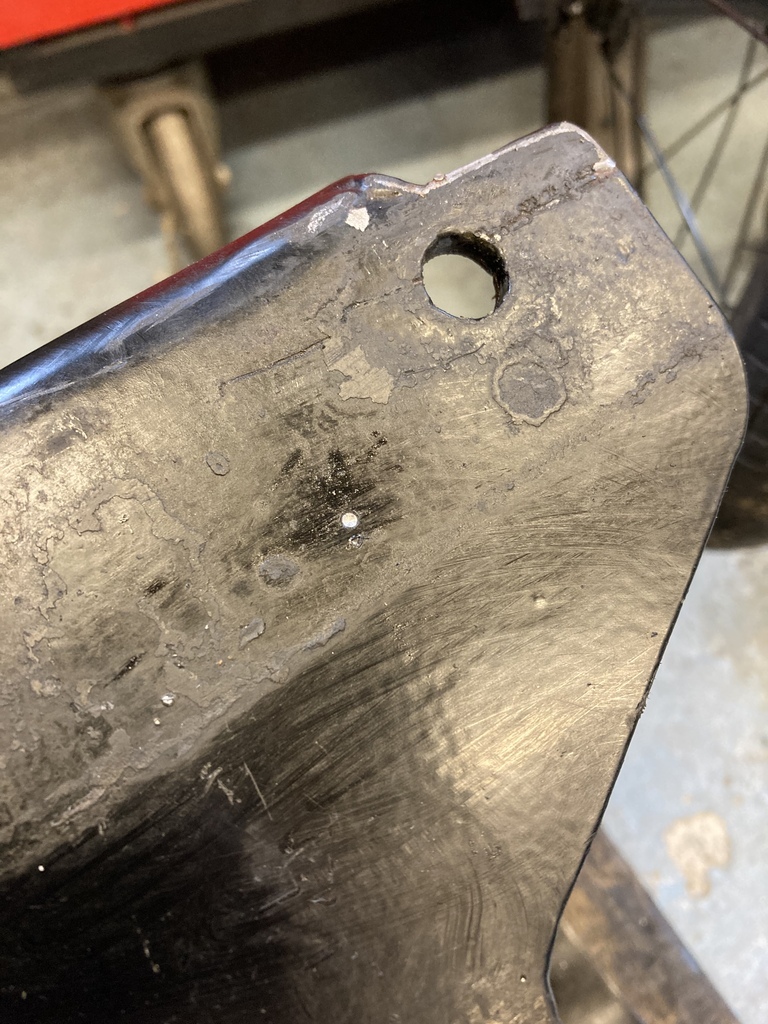 There was no way I was hand drilling all these holes so I had to get creative supporting the parts in the drill press. 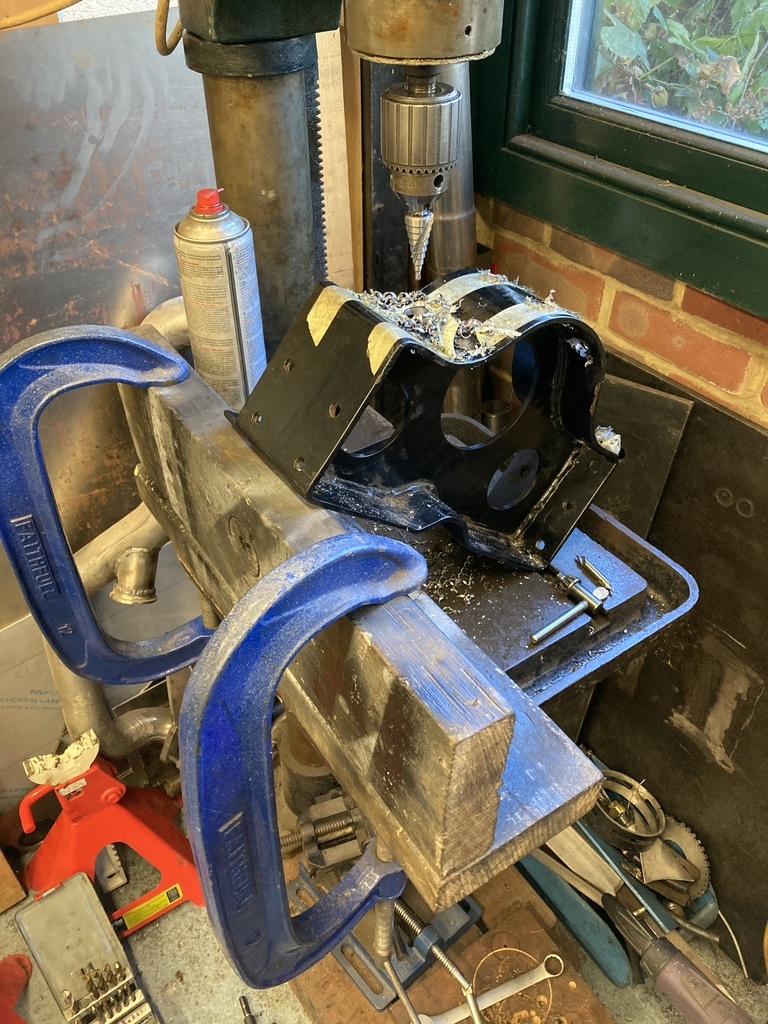 Interesting way of deburring the holes on the inside. 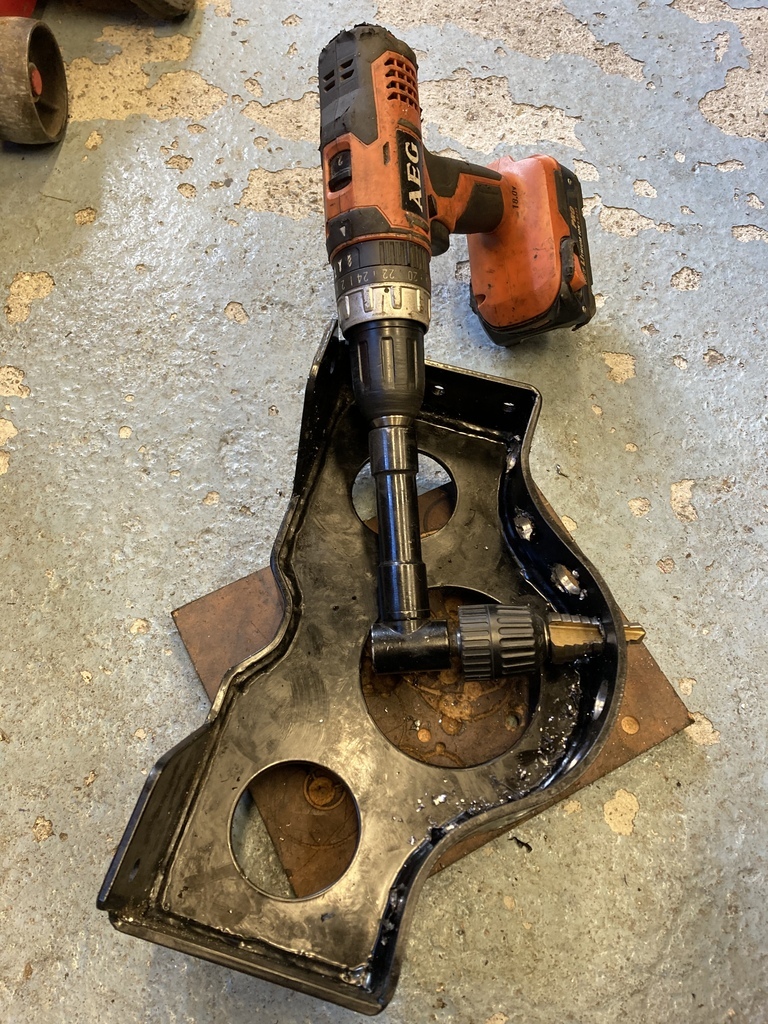 Oh yes. 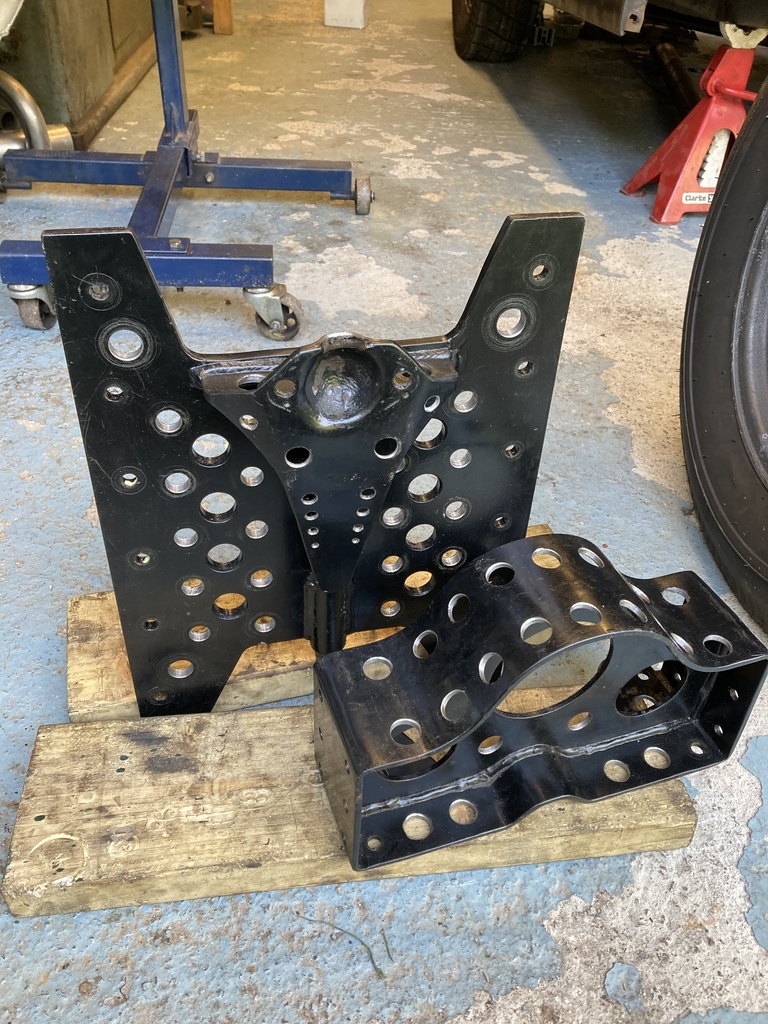 And the finished weight 15.8kg. A nats under a kilo, I’ll take it. |
| |
Last Edit: Dec 23, 2022 23:17:07 GMT by Enbloc
|
|
Enbloc
Part of things
 
Posts: 398
|
|
Dec 22, 2022 22:28:53 GMT
|
|
I've just finished ploughing through all 62 pages.
I think I need a lie down...
|
| |
|
|
Enbloc
Part of things
 
Posts: 398
|
|
Dec 22, 2022 12:41:35 GMT
|
As I mentioned a couple of times already these TKO’s are known as poor shifters, which they are. There are a few reasons for this and you have to delve into their history for the reasons why. The gearbox was originally conceived in the early 90’s by Tremec as a universal gearbox for commercial vehicles. Because of this they were built beefy for strength and also due to their intended low rpm usage a 3-rail shifter system and all brass synchro rings were specified. At some point they became the go to 5-speed in the aftermarket performance world mainly for their inherent strength. This is were the problems start. Their beef means they are quite large for a 5-speed which can prove troublesome with retro fits. The 3-rail system is quite complicated with many gates, springs and plungers which don’t like to be rushed with fast shifting but the real issue comes from the all brass synchros. These were already out dated by the early 90’s with carbon lined synchros in common use by this time. The factory fitted brass synchros used in the TKO’s are actually lifted straight from the Ford top loader of the 1960’s! This is the main issue for the poor shifting. With the gears being so much bigger than a top loader means more mass and inertia which the synchro rings were never designed to slow down, so at higher revs with a fast shift you end up with missed shifts or crunching gears. This is all solvable it just means the whole gearbox has to come apart… First to come out are the reverse switch (left) and neutral safety switch (right). Neither were connected. 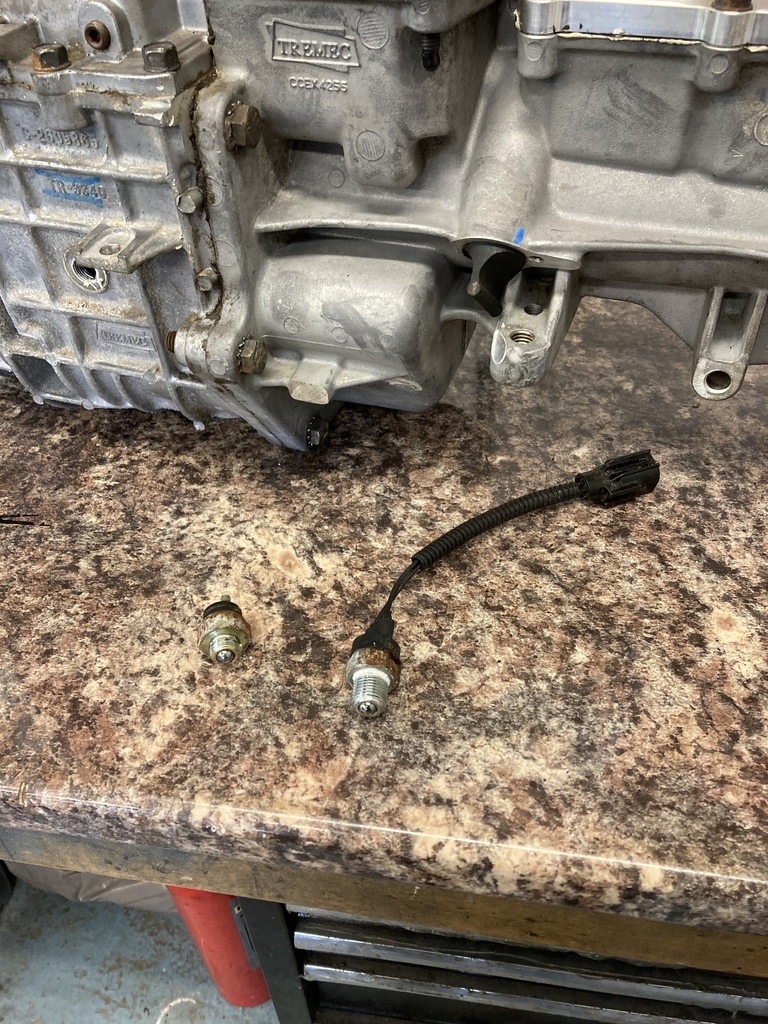 Shifter top and cover plate off. Notice the two shifter ball sockets. The shifter can be mounted in two alternate positions with no modifications. A shifter is also available to put it directly over the shifters. 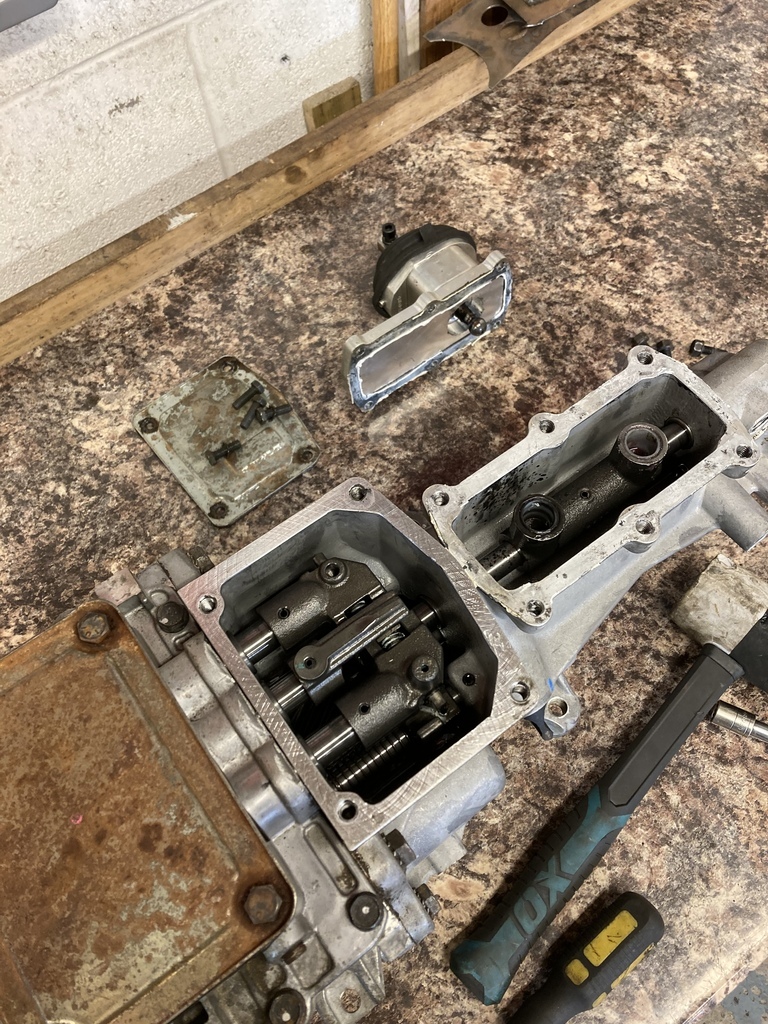 This gives access to the shifters. These are held in with roll pin through each one. The roll pins need to be knocked out to free the shifters from their shafts so the rear housing can be removed. 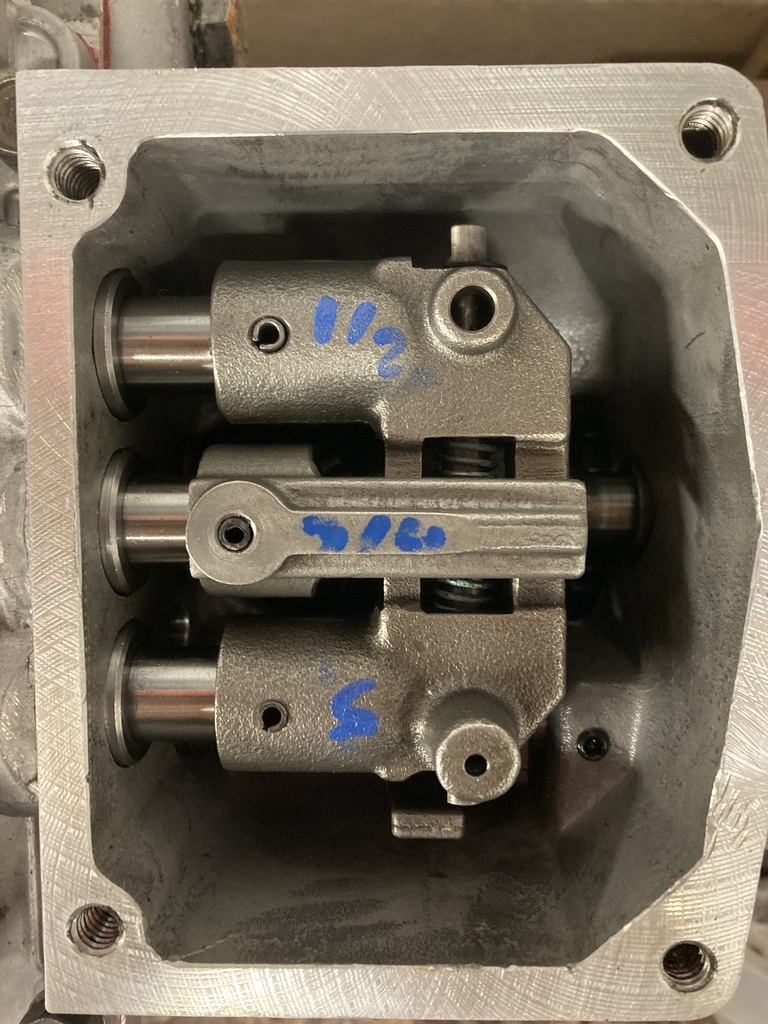 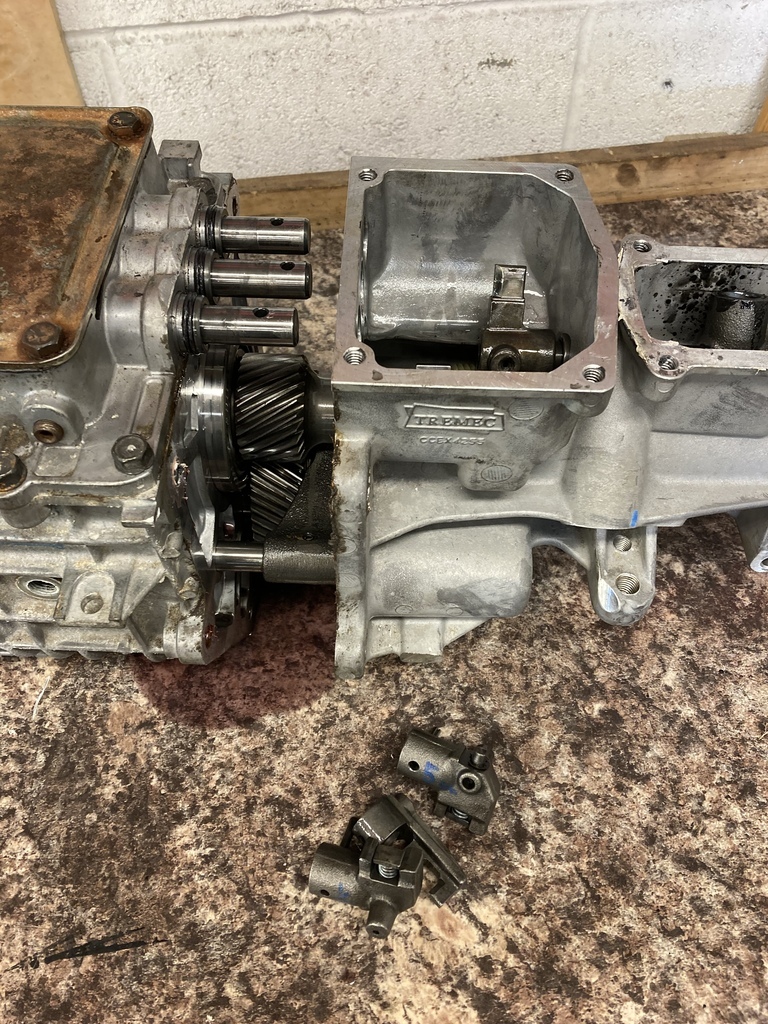 This is the first time the ‘box has been apart and was absolutely minty, minty inside. Notice on the countershaft that there is provision for a mechanical and a electronic speedo, attesting to its universal fitment. 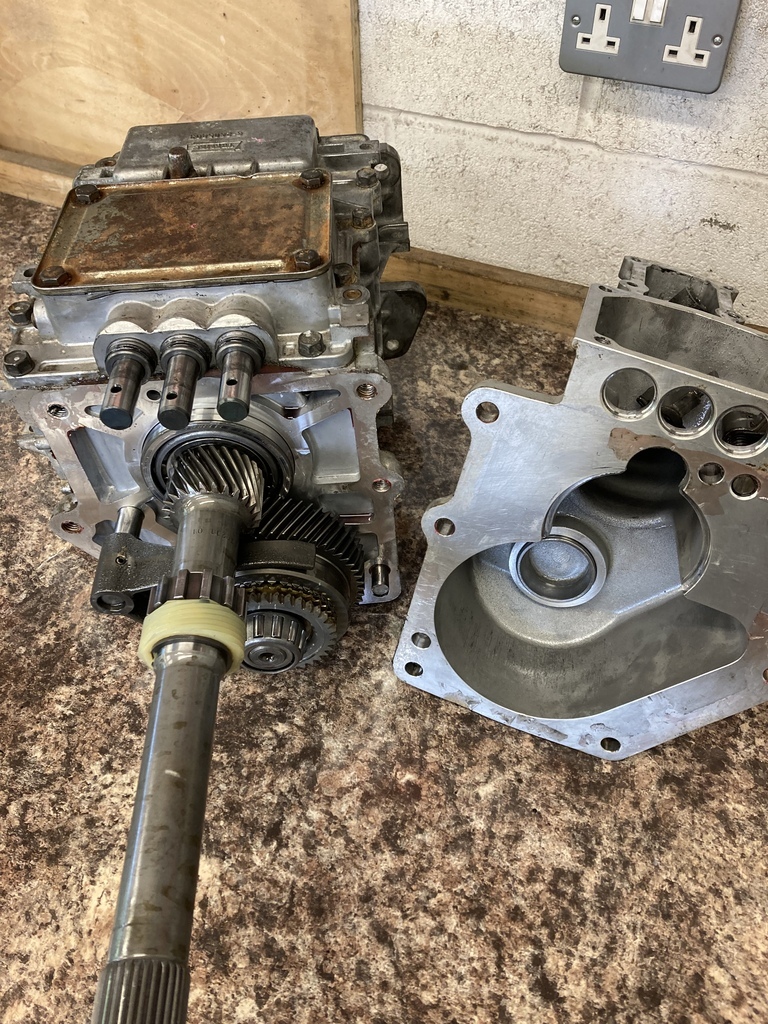 Next the lid has to come off. These gearboxes have no gaskets and are assembled with an anaerobic sealer which also acts as a thread lock. To save stressing the threads of the aluminium casing the joints are hit the flame gun to burn the sealer out. 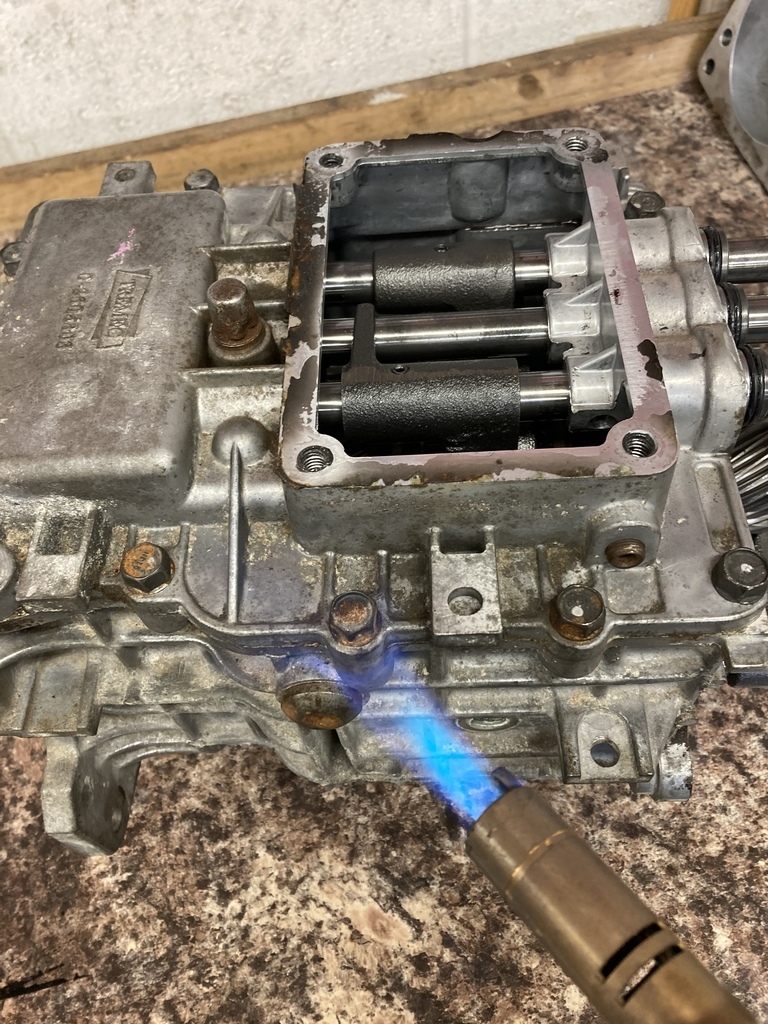 And use the handy dandy prying point to lift the lid. 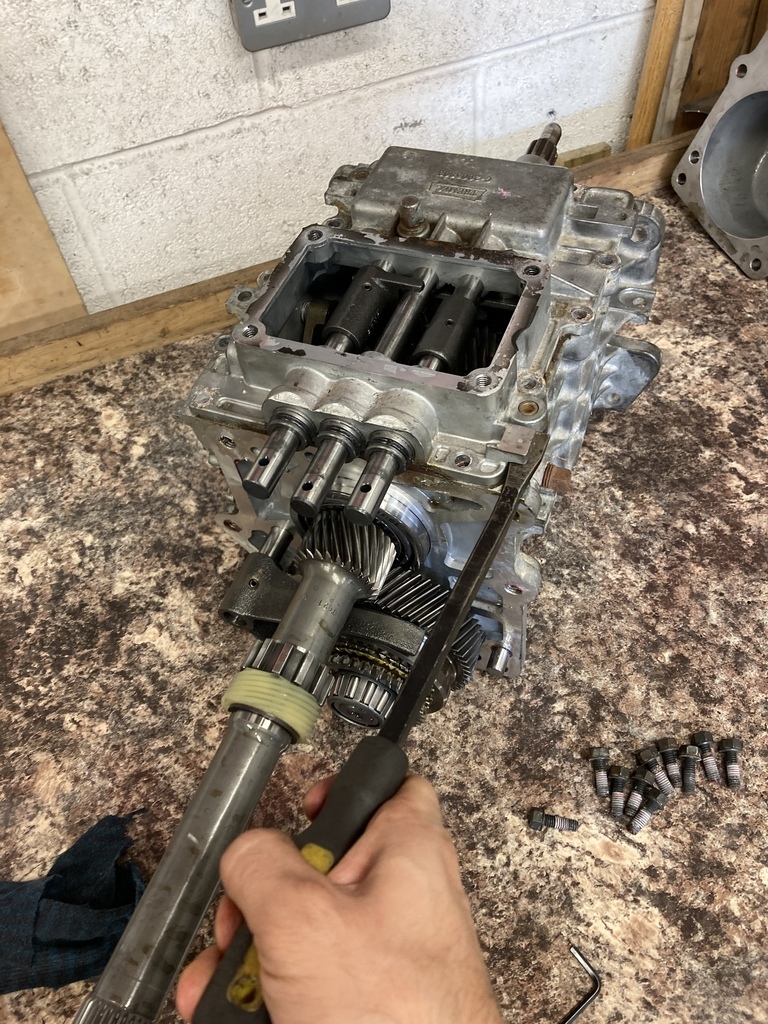 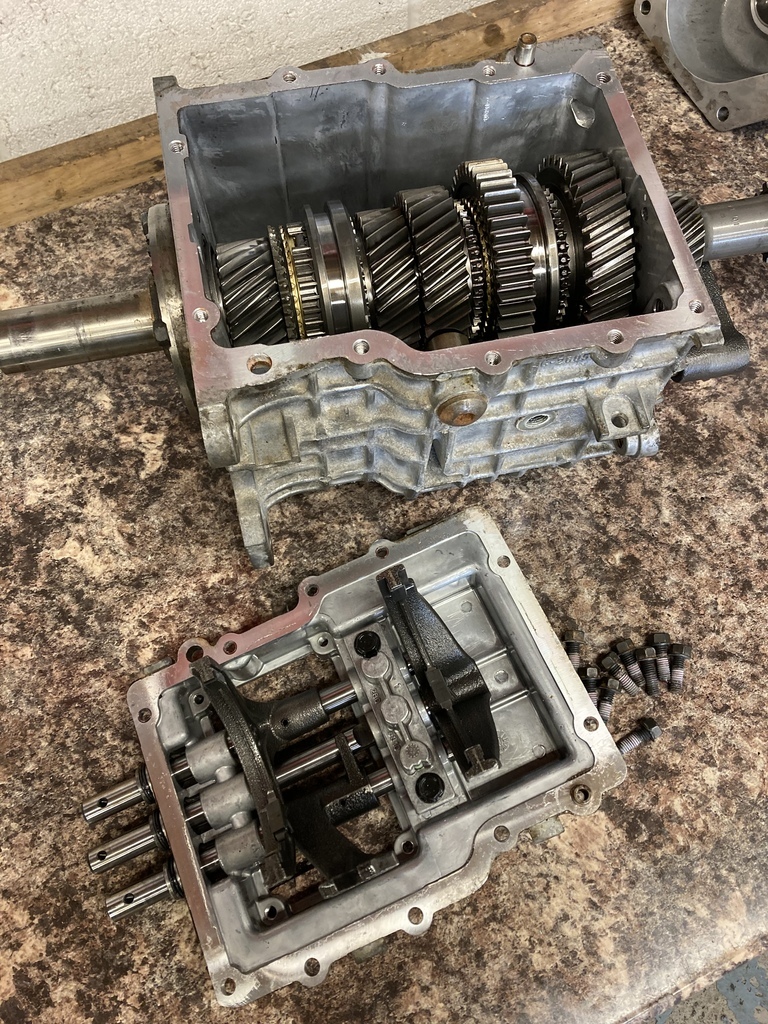 Next the input shaft can come off making sure not to lose the individual needle rollers. There are shims behind the race that goes in the front retainer. These set the end float on the counter shaft. 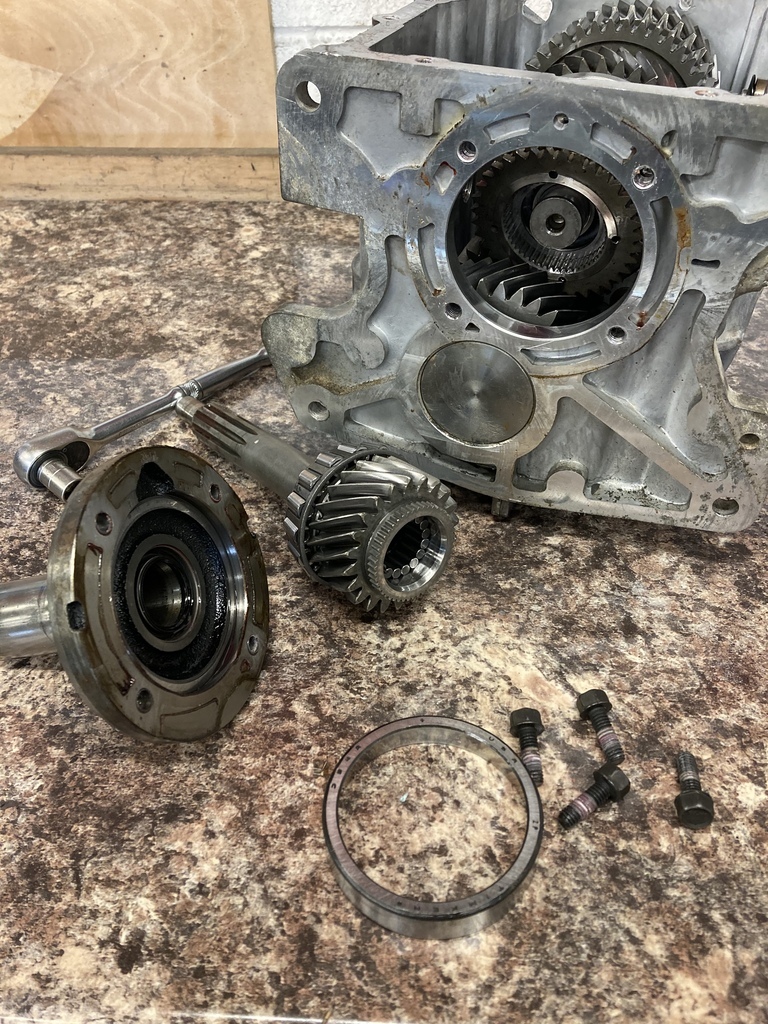 Back to the rear again. 5th gear hub removed collecting up all the needle rollers that fall out. 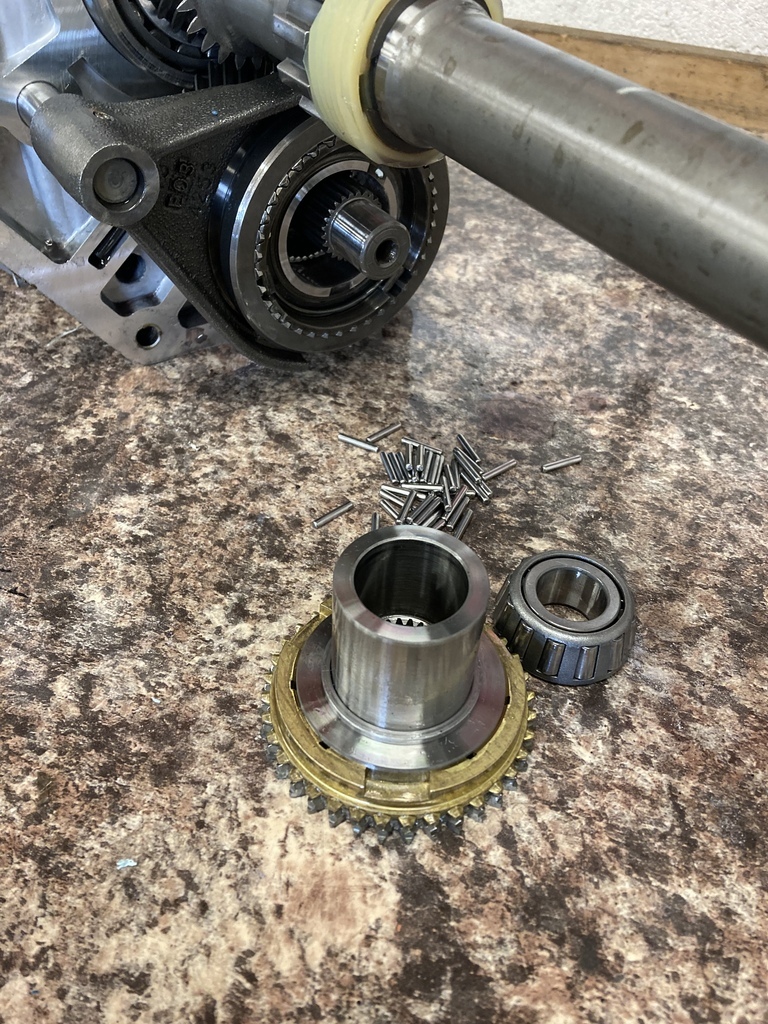 The roll pin holding the 5th gear shift fork is knocked out which allows the the 5th gear/hub assembly to slide off. Picking up all the needle rollers again! 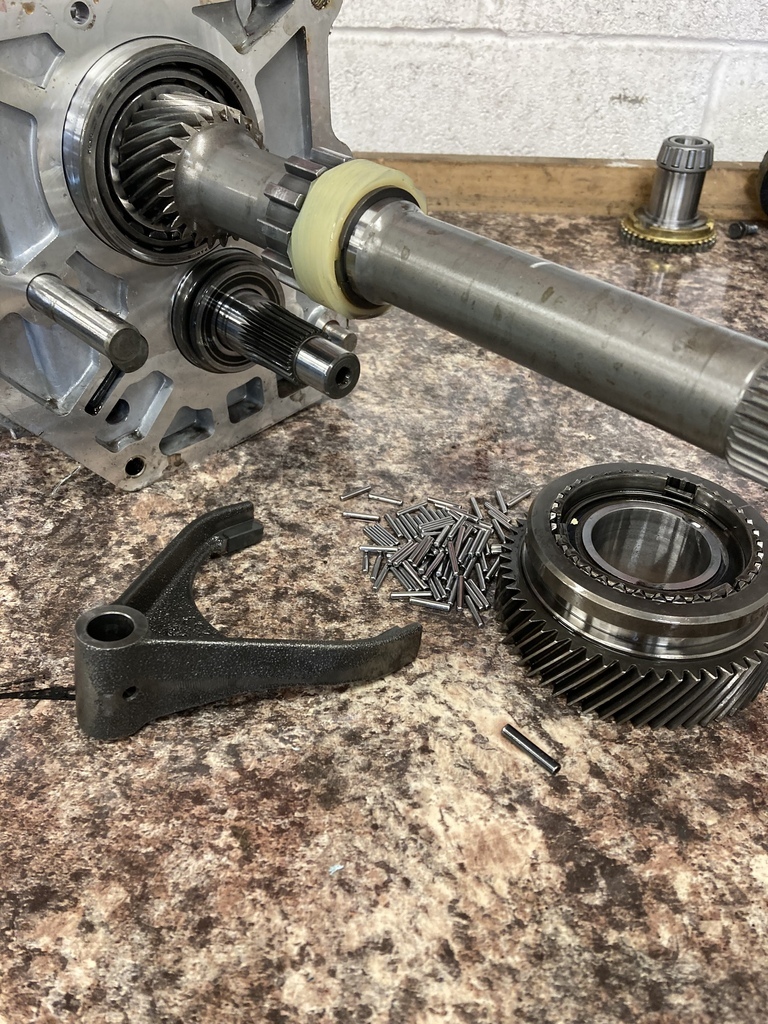 The counter shaft assembly can now come out. It’s quite a lump. 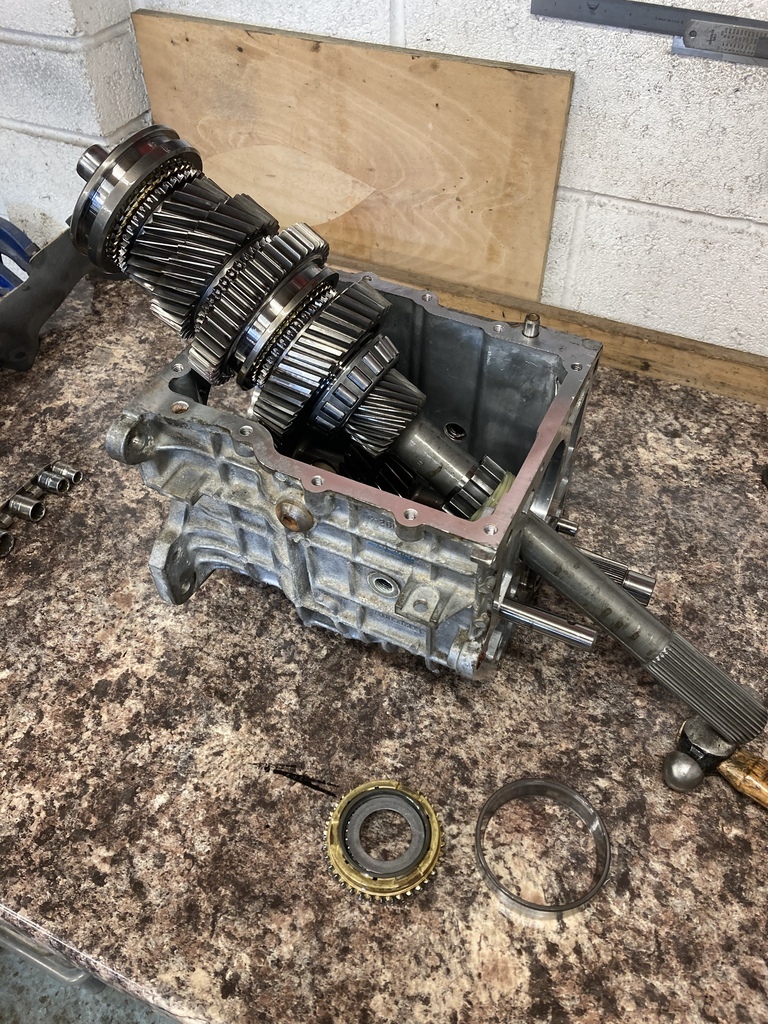 Minty Mcmintison. 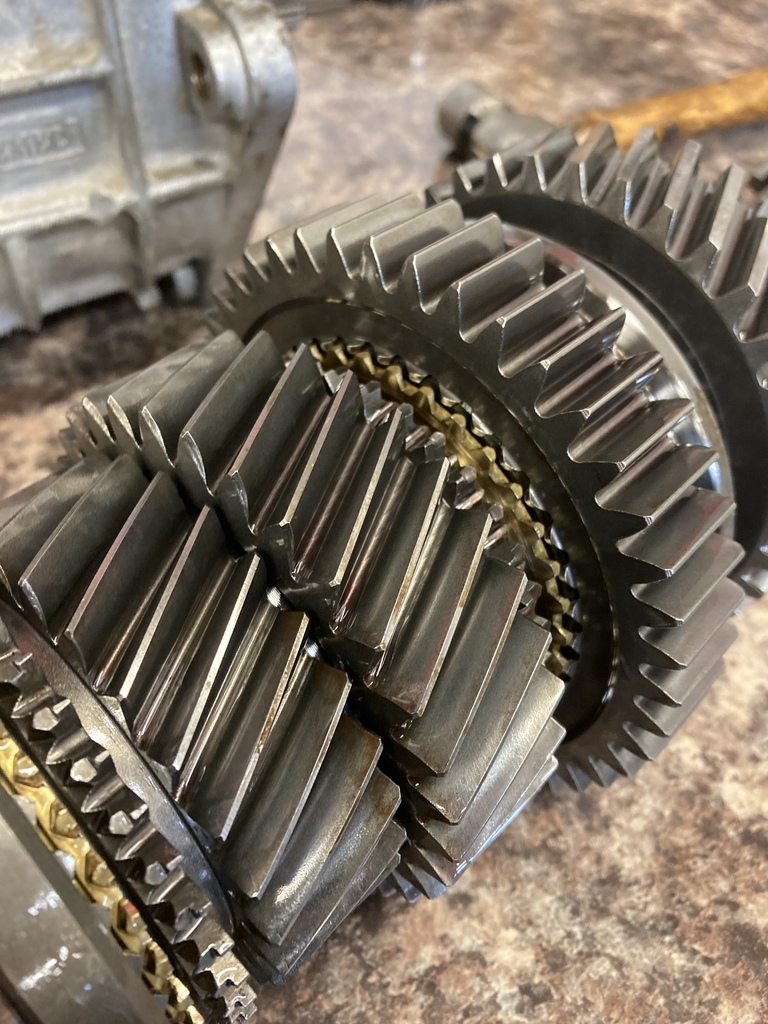 This is where I stopped in the disassembly. It was only the cluster gear and reverse idler left and these would only need to come out if damaged or worn bearings which this had neither. 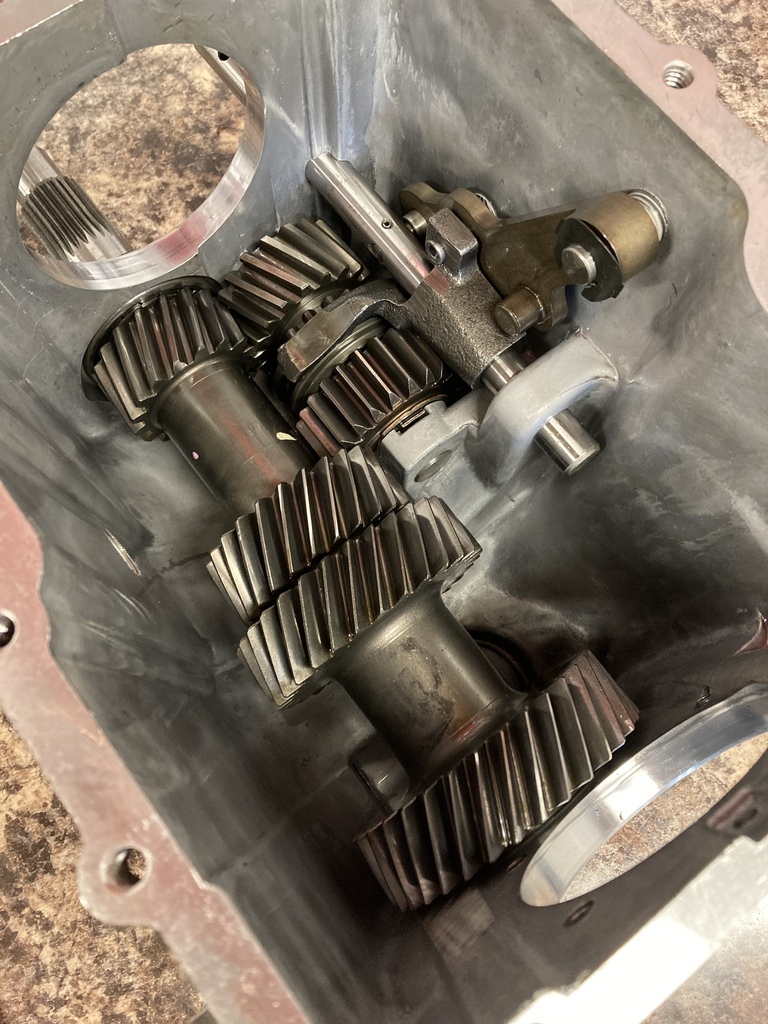 What I did do was reset the end float on the cluster which should be 0. To do this the 5th gear hub and bearing goes back on and the tail housing bolted back on to the case. The end float is set with shims behind the race in the tail housing. 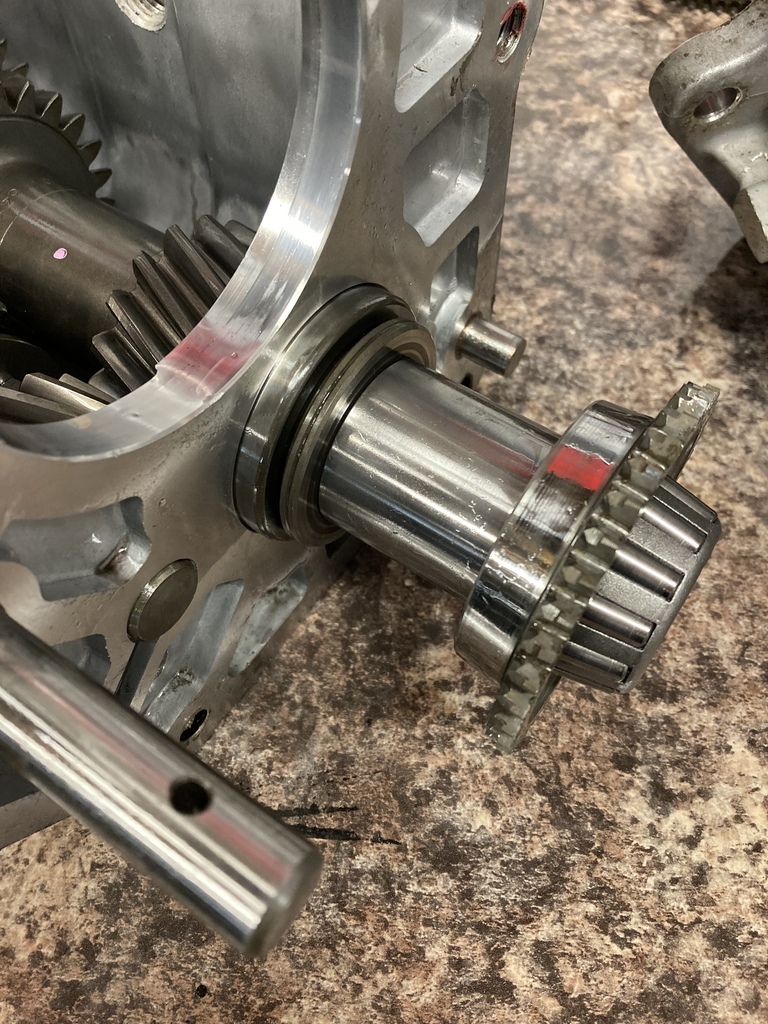 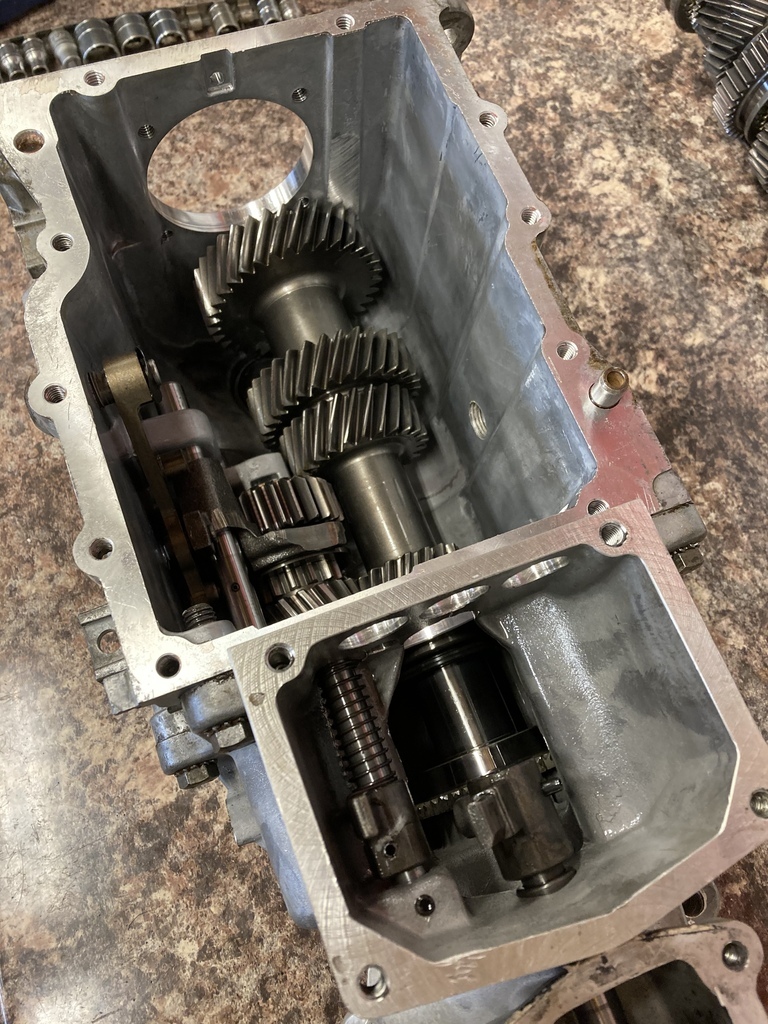 On to the counter shaft. 3/4 synchro hub assembly and 3rd gear synchro ring. 4th gear synchro ring has already come off when the input shaft is removed. 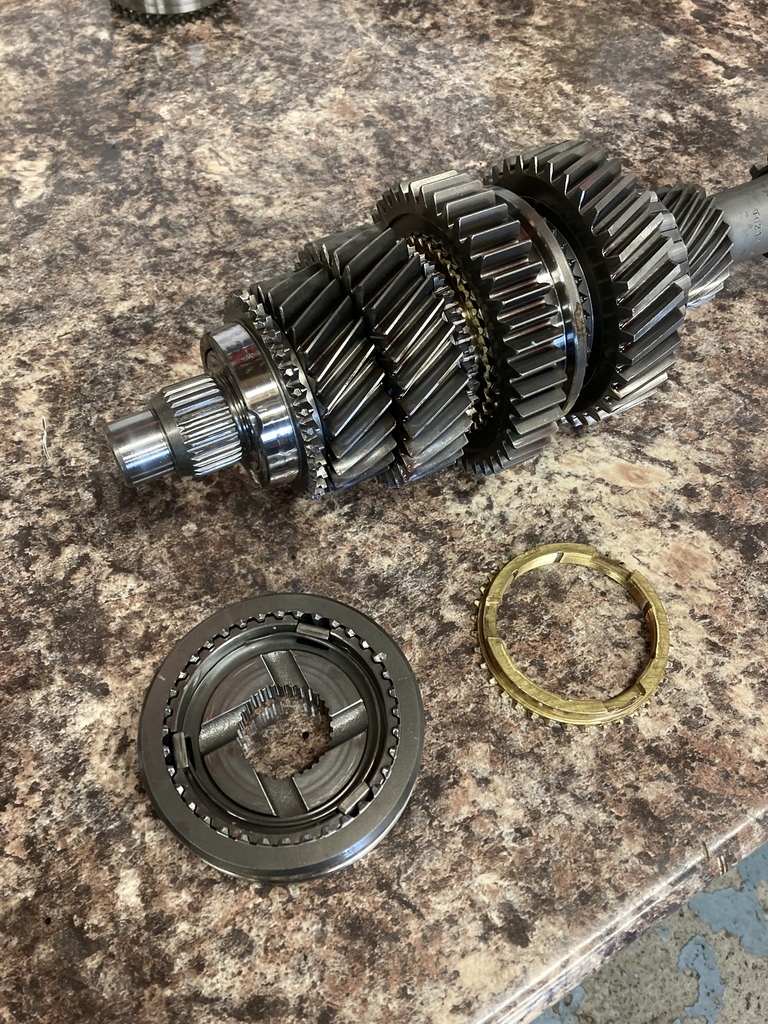 3rd gear with its bearing/spacers. 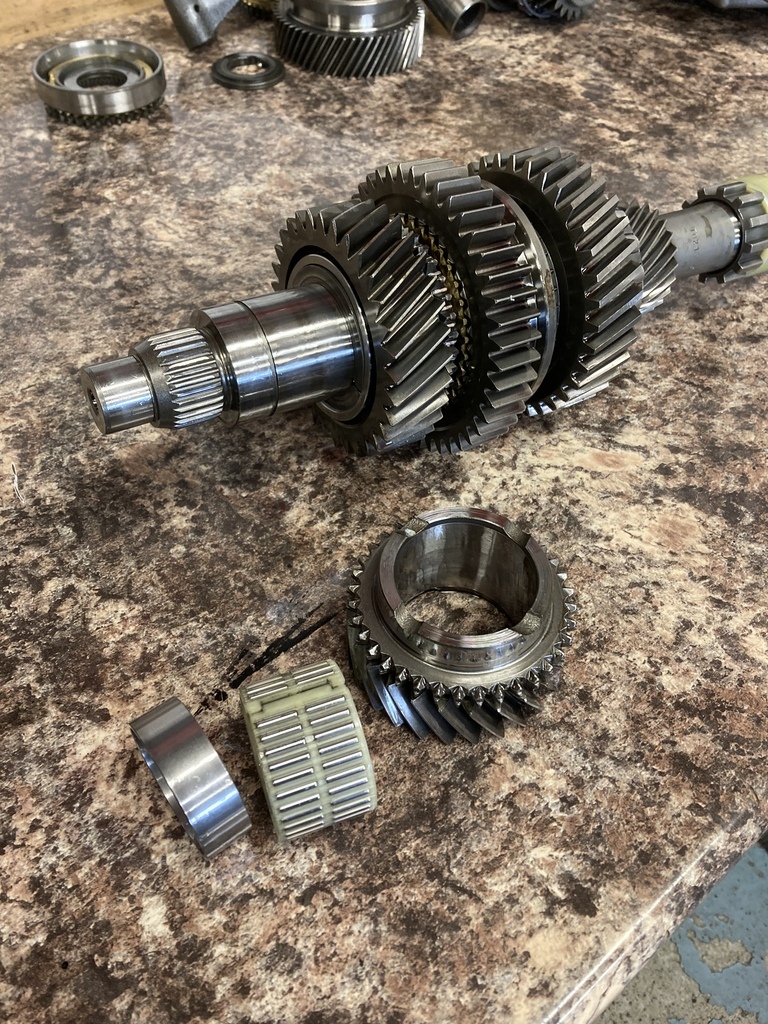 Split ring retainer and anti rotation ball. 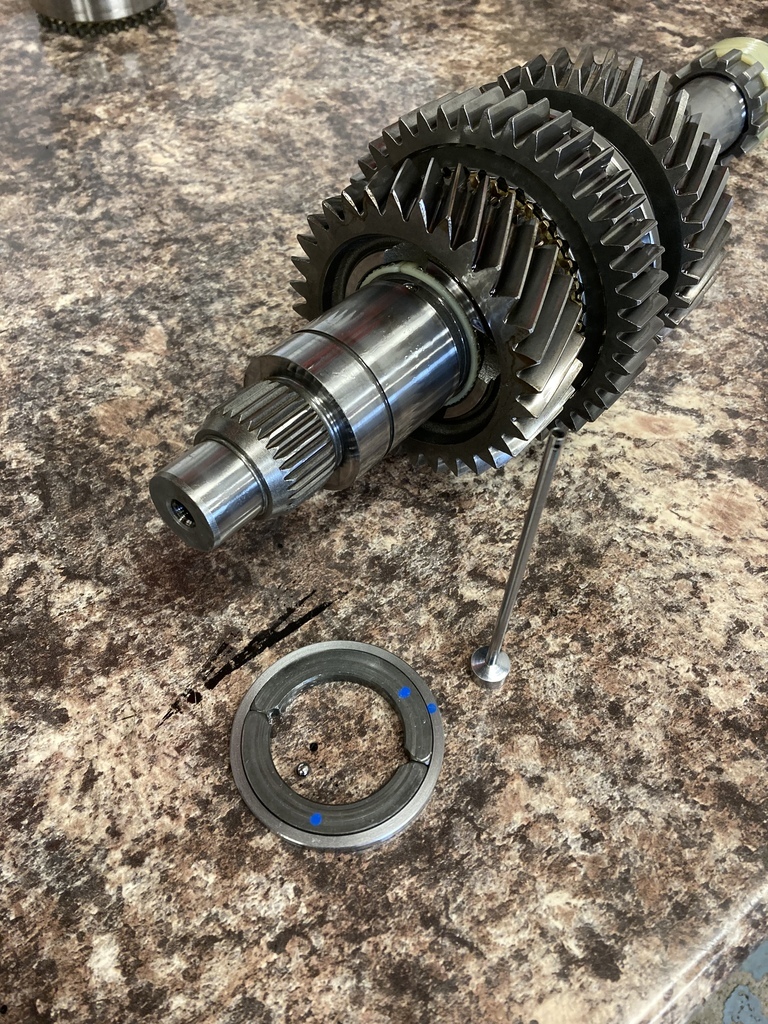 Followed by 2nd gear, synchro ring and bearing. 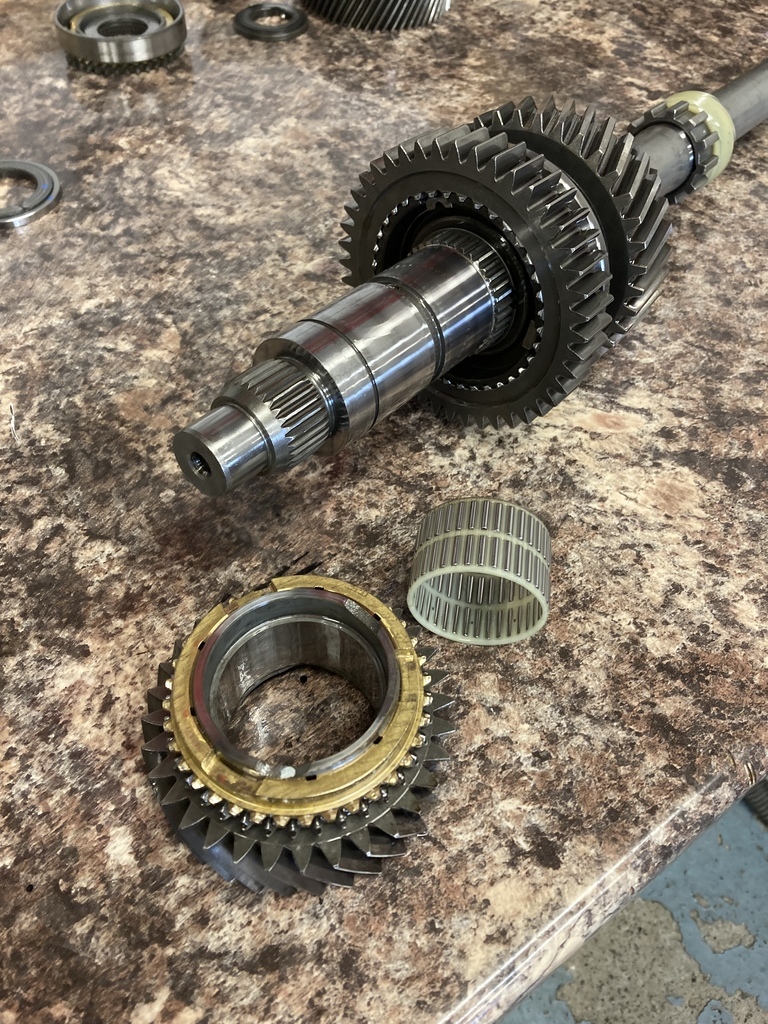 There is a snap ring that holds the 1/2 assembly in. I splashed out on a proper pair of snap ring pliers which after I had ground the heads to something reasonable worked great. 🙄 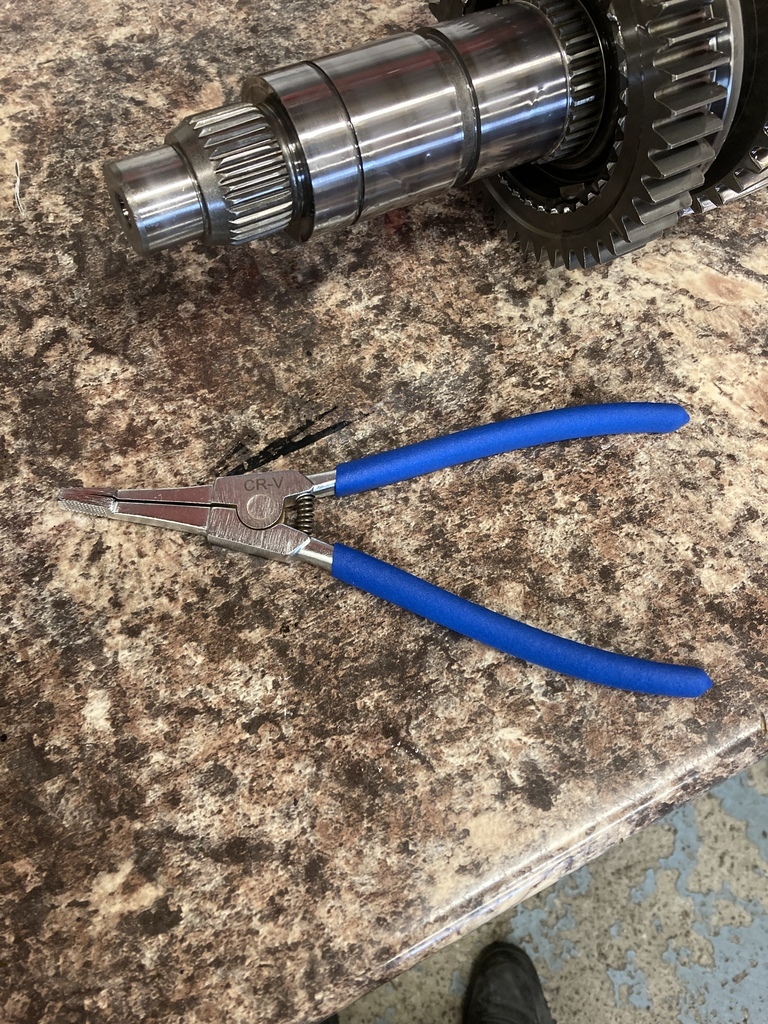 Snap ring removed allows the 1/2 synchro hub assembly to slide off. 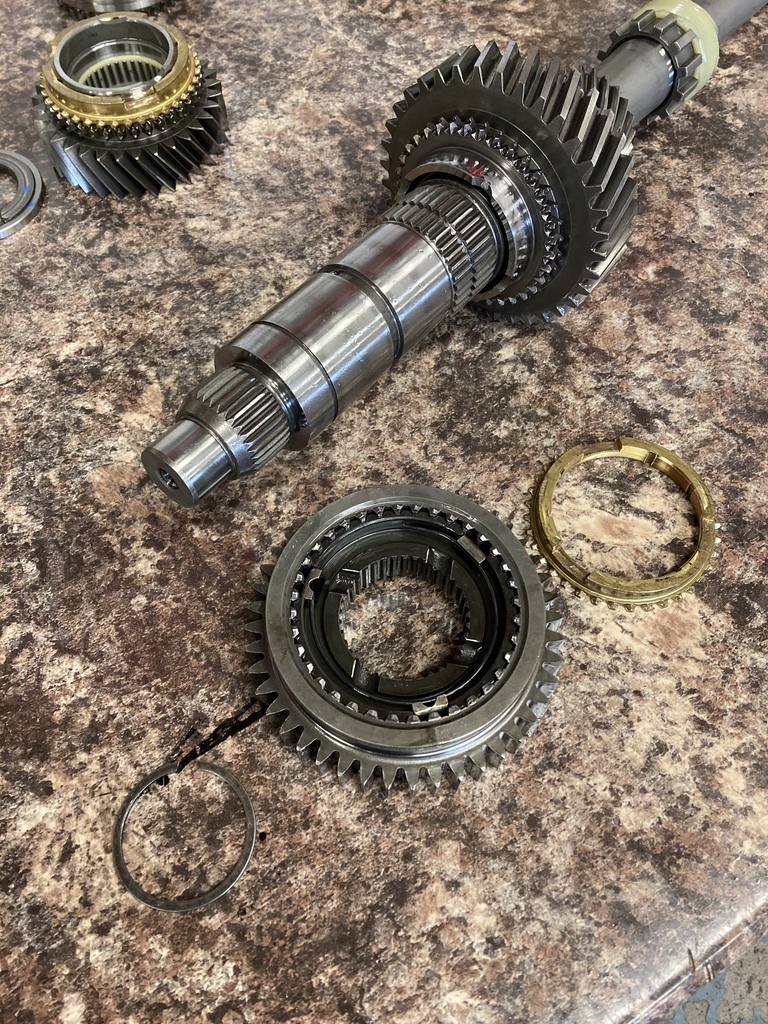 And followed by 1st gear and the final synchro ring. 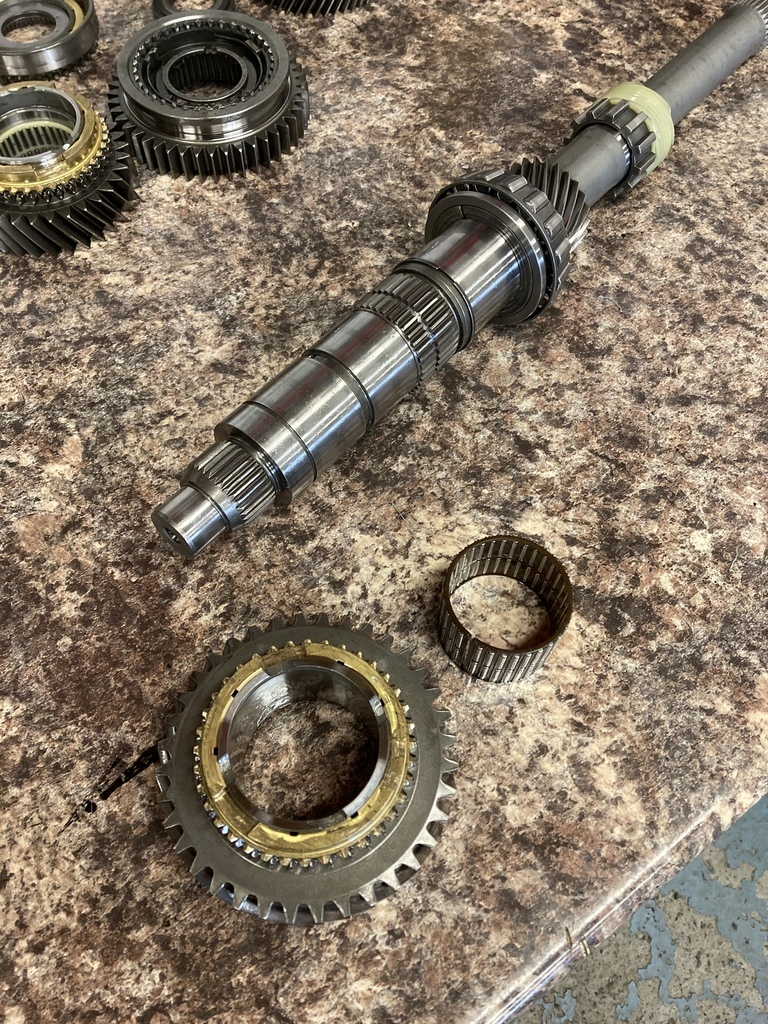 This left another split ring retainer and bearing but again this didn’t need changing so was left. 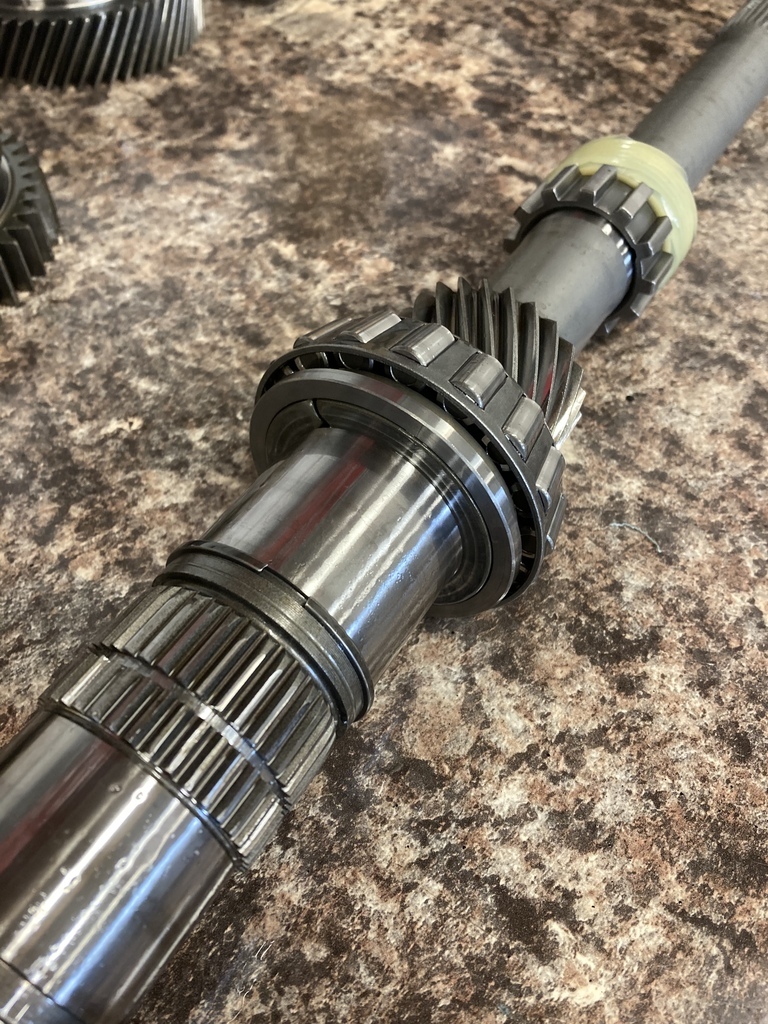 All in all I was rather pleased that everything was in such good condition and my only real out lay would be the replacement synchro rings. |
| |
Last Edit: Dec 22, 2022 14:08:48 GMT by Enbloc
|
|
Enbloc
Part of things
 
Posts: 398
|
|
Dec 22, 2022 11:37:42 GMT
|
I nearly went to an auto after spending a day getting my bell housing within spec. At 0.006“ I would be tempted to call that good….. P.  Oh hell yeah. I’d send it all day long at 0.006”! Hopefully it’s that good on the turbo motor. |
| |
|
|
|
|
Enbloc
Part of things
 
Posts: 398
|
|
Dec 22, 2022 11:36:26 GMT
|
This is a very nice topic! I really like the upgrades on the Flatty! I'm currently rebuilding a Ford Abeille flathead at my work. 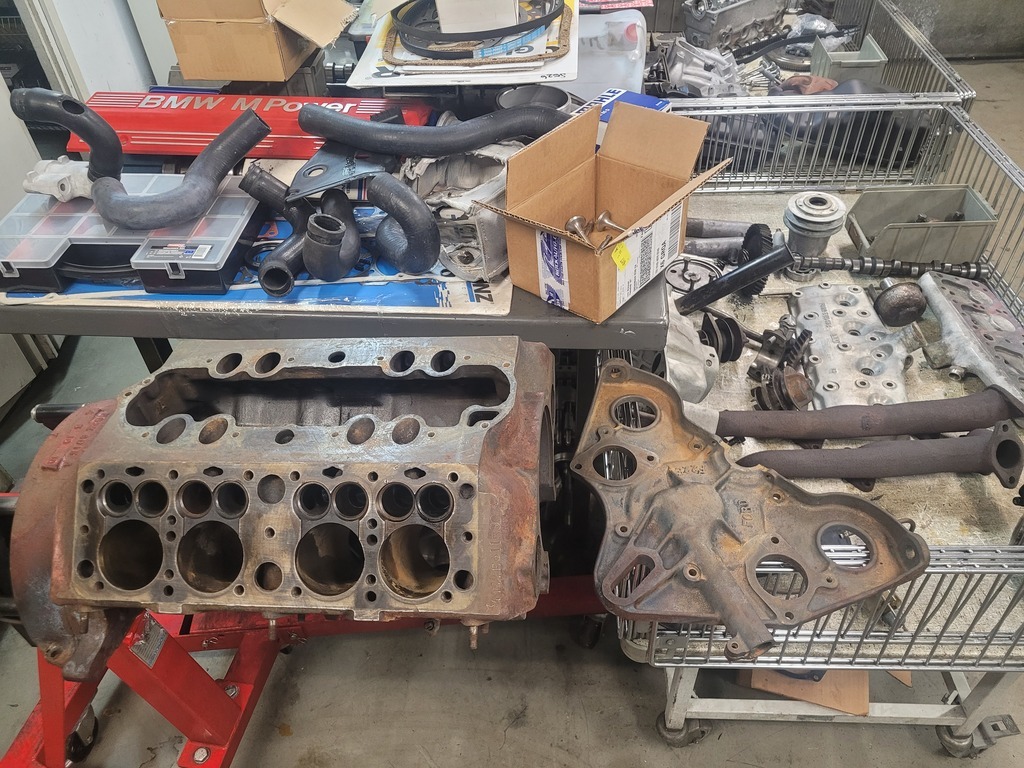 Cool, a little V8-60. What’s it going in? Vedette? |
| |
|
|
Enbloc
Part of things
 
Posts: 398
|
|
Dec 20, 2022 20:43:39 GMT
|
I thought I’d get cracking on the gearbox straight away as I knew I’d be ordering parts from the States. First job was to give it a good clean to get all the sand off and hit it with the brass wire brush to knock the bulk of corrosion off the casing. 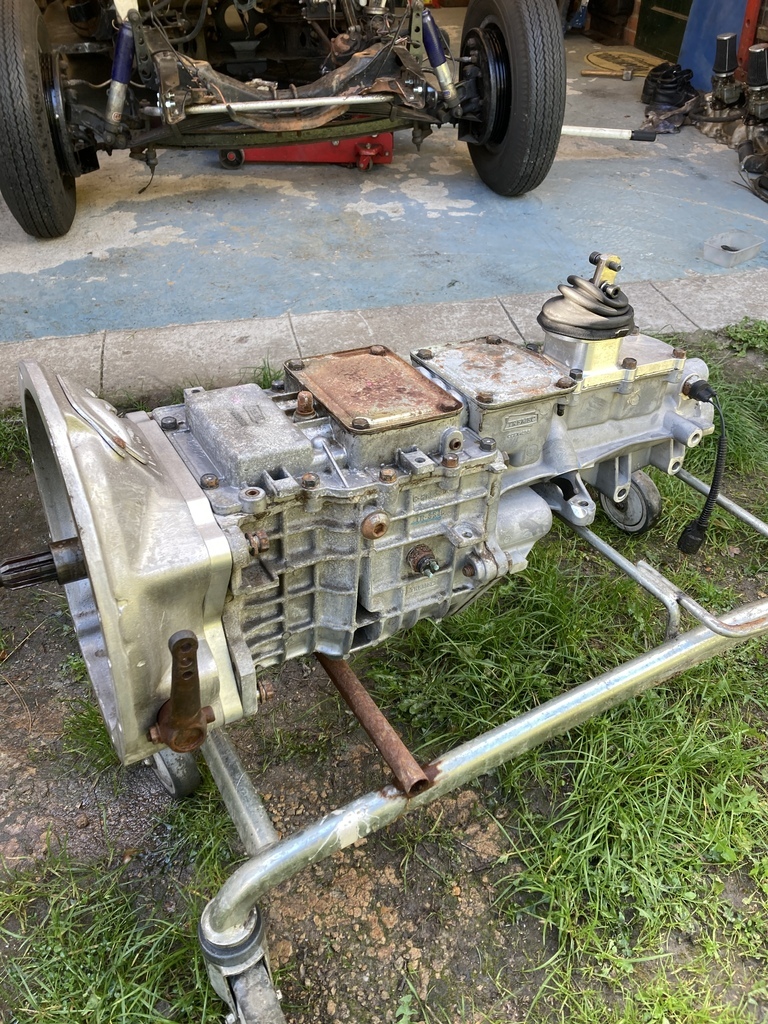 I was a bit miffed that the ID tag read “TR3550”. I was always told mine was a TKO, the TR3550 is the earlier version of the TKO. I need not worry as all the TKO’s come with the TR3550 Part no. The easiest identification is the TKO has a symmetrical shifter bolt pattern compared to the earlier asymmetrical one. Apart from that they are pretty much the same. 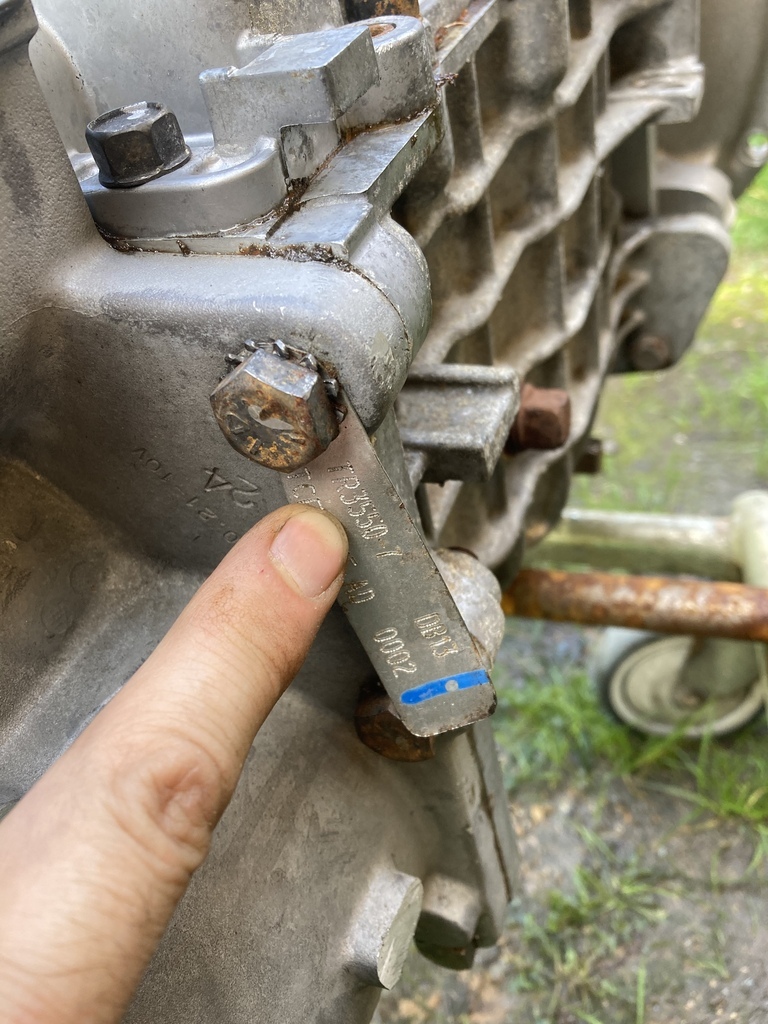 The throw out bearing was tired but I already knew this as it was getting noisey. 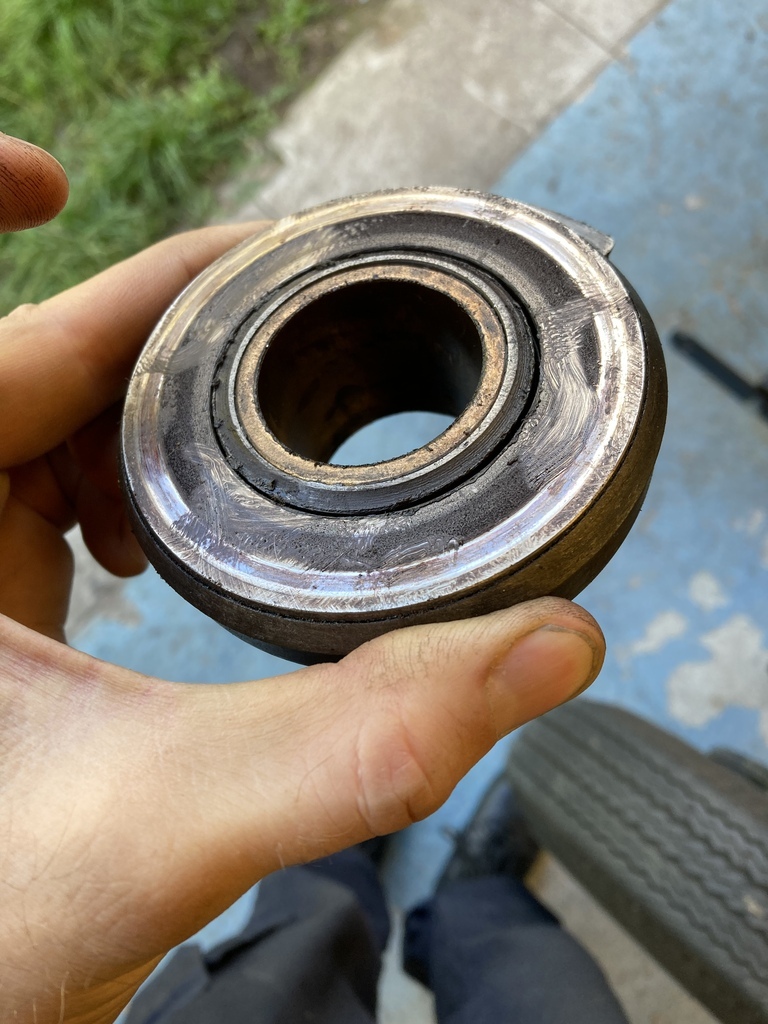 I hadn’t realised but the clutch throw out shaft was partially seized. It needed an adjustable on the end of the arm to be able to move it. Obviously, this wasn’t helping with clutch operation. 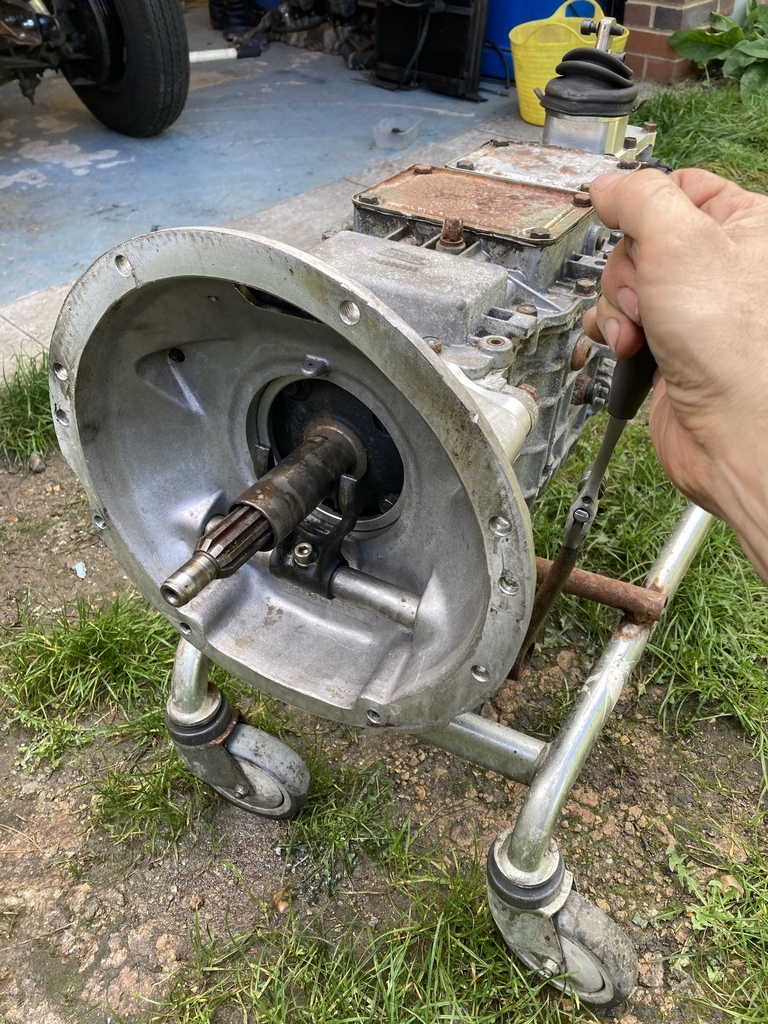 I’ve pretty much made up my mind on going to an internal slave set-up. I’ve generally avoided these in the past but having a Tilton setup supplied for the Falcon, I’m a total convert. The Falcon clutch is hands down the best cutch I’ve ever used, so I’m going to replicate that setup. This meant all the mechanical throw out assembly had to come out. One of the bushes was seized to the shaft. 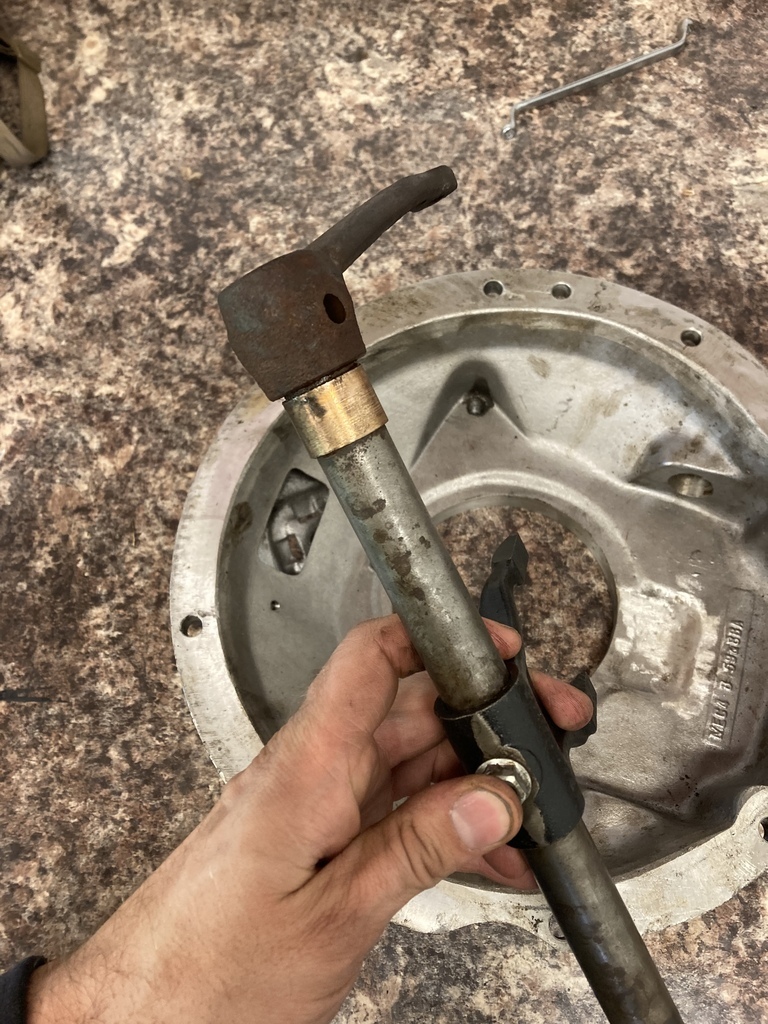 I wanted to get the bush free rather than just chuck it in the corner. Getting that thin wall bush off without damaging it maybe be easier said than done. I used the clamp from my bearing race puller set and with a lick of heat around the bush it slid straight off. Result. 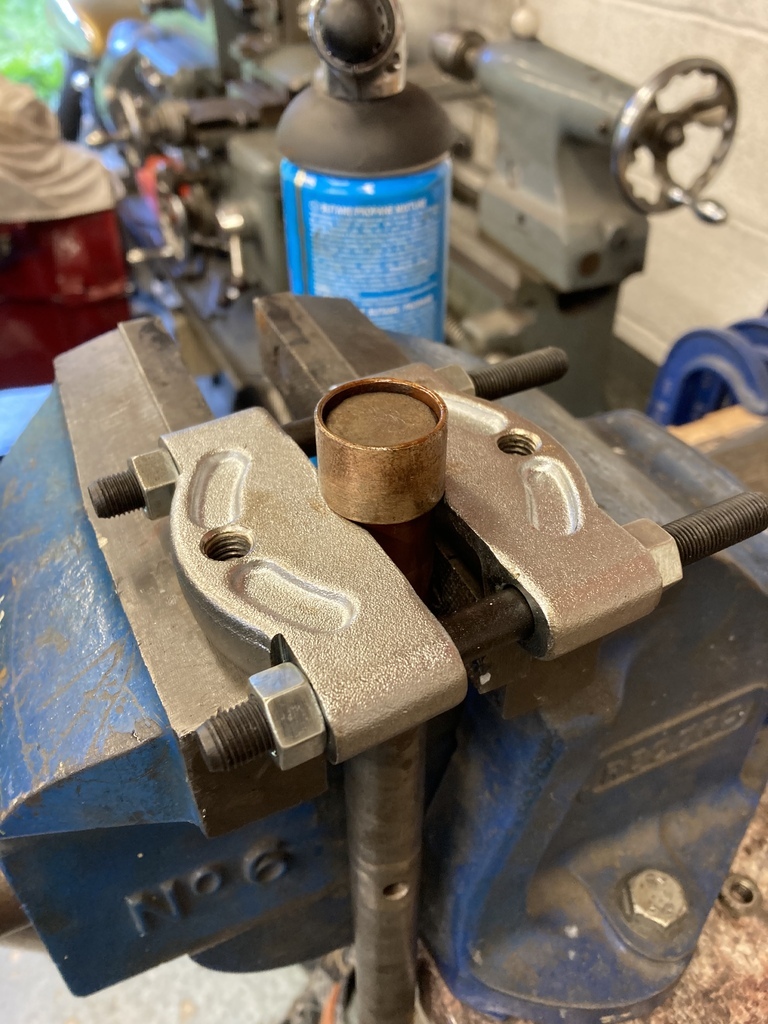 The final thing I wanted to check was the concentricity of the bellhousing on the previous engine. Purely for my own sanity. It was something that had never been done on this car and can be a major cause of poor shift quality if it’s excessively out. Try as I might I couldn’t get the magnetic dial gauge to attach sufficiently to the pressure plate fingers. Unsurprisingly. 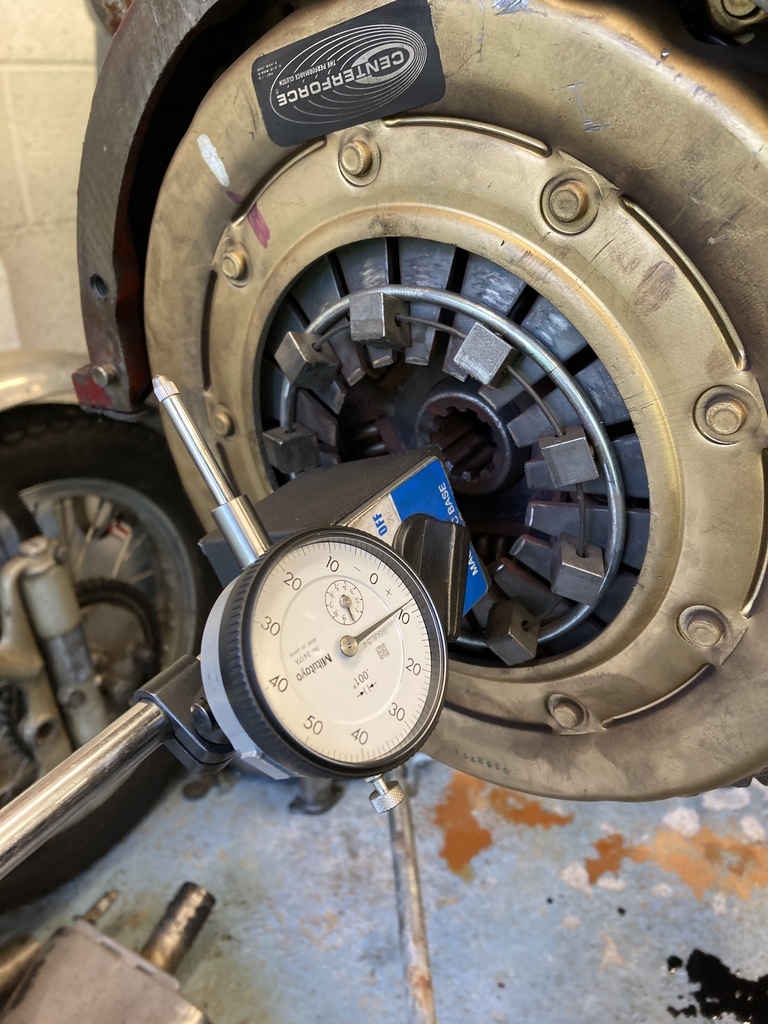 Just drop the pressure plate off, right? Because the integral bellhousing of the block the only way to get the pressure plate and/or flywheel off is to drop the sump off. This is getting rather involved for a quick out of interest check! 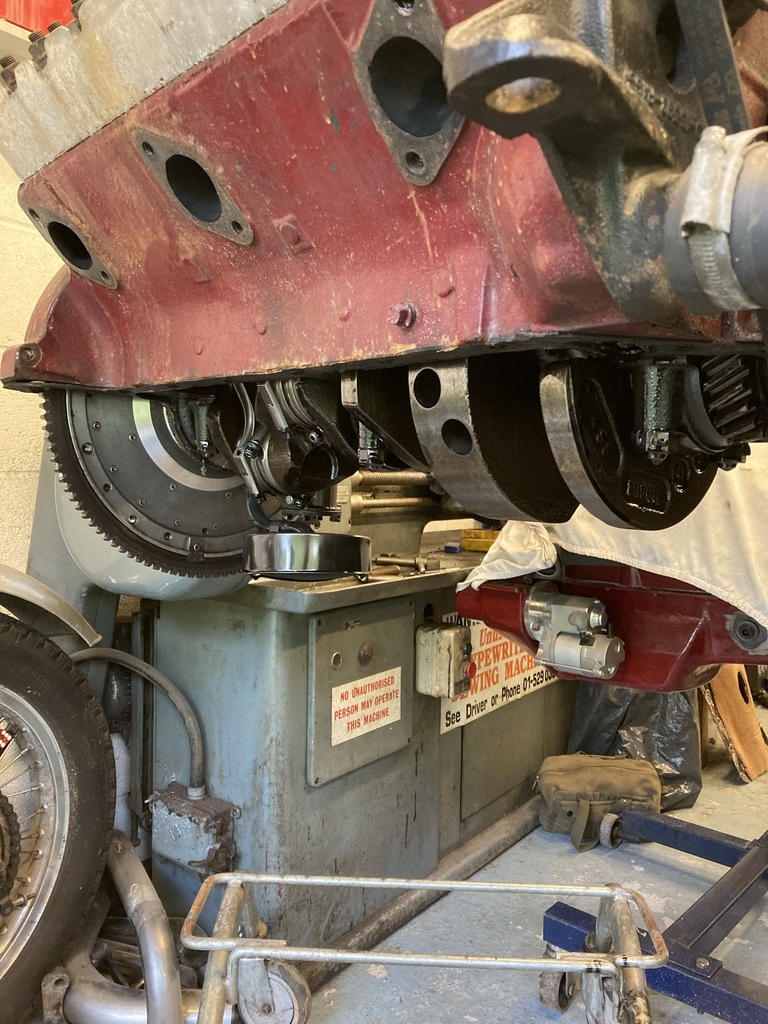 Sump off followed by the pressure plate to leave a nice flat surface for the magnetic stand. It was a shame to break the seal on this take out but it did me a opportunity to peak inside and the sump gasket was leaking anyway so I’m not to cut up about it. 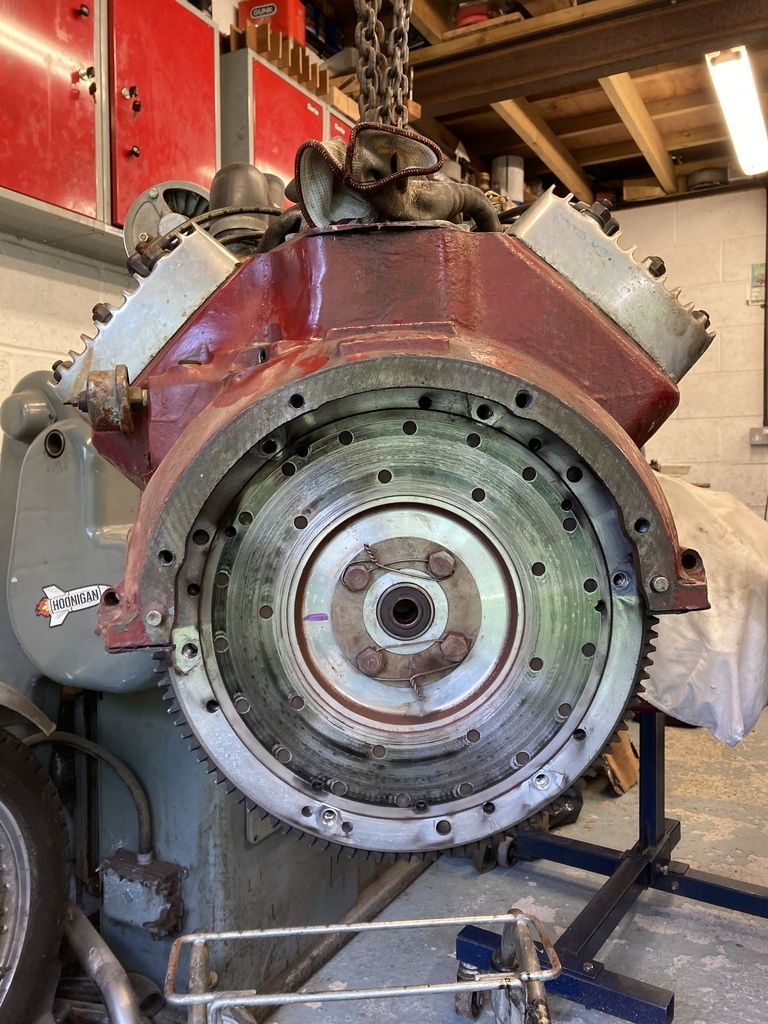 What you want to see is less than 0.005” run out, I had 0.006”. Pants. I was adamant it was miles out. Well, at least that’s one potential issue eliminated. 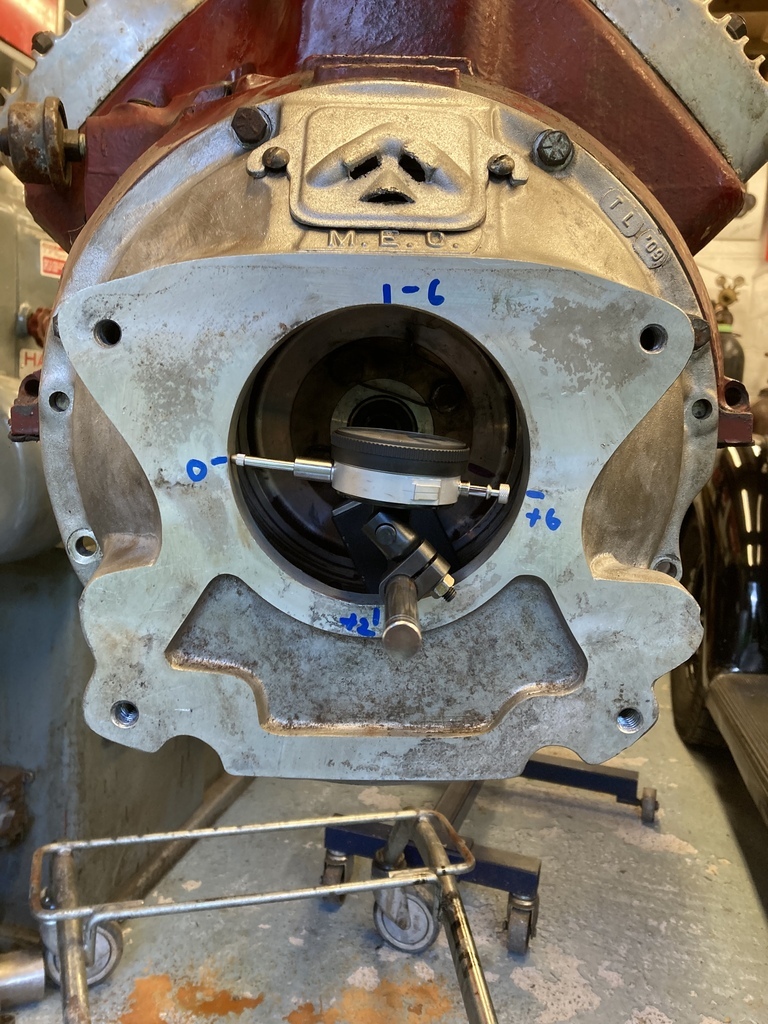 |
| |
|
|
Enbloc
Part of things
 
Posts: 398
|
|
Dec 19, 2022 20:15:04 GMT
|
First job was to remove the freshly painted front clip… again. I did mention earlier it comes on and off a lot! Luckily our new garden patio proved a handy storage area. 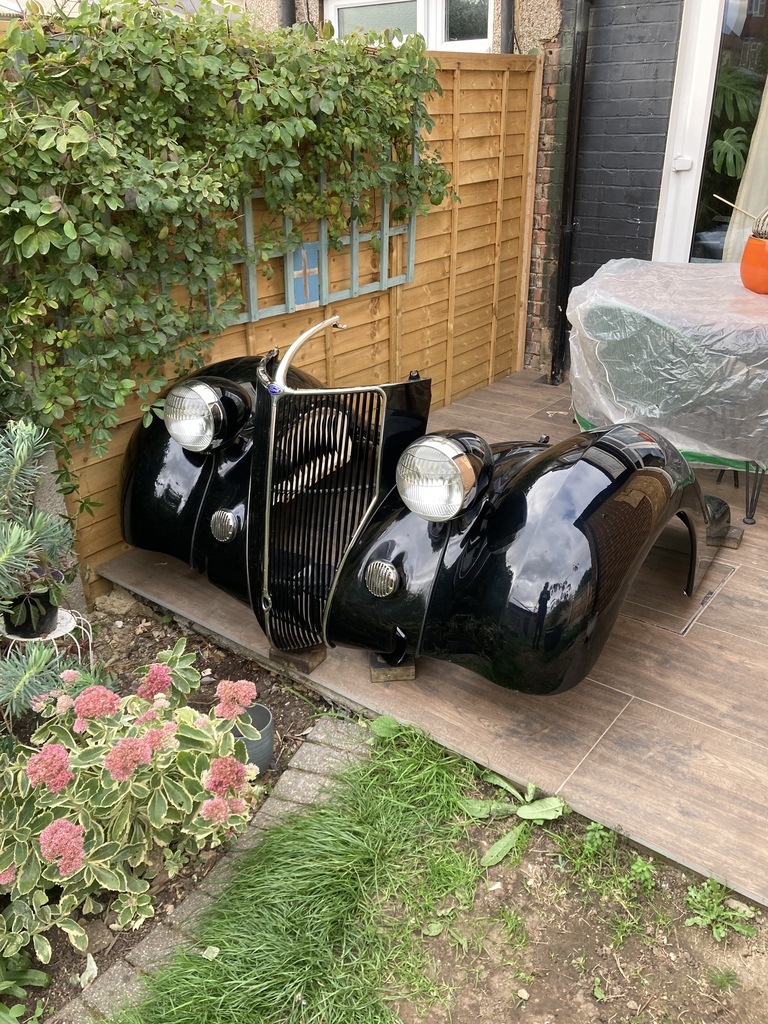 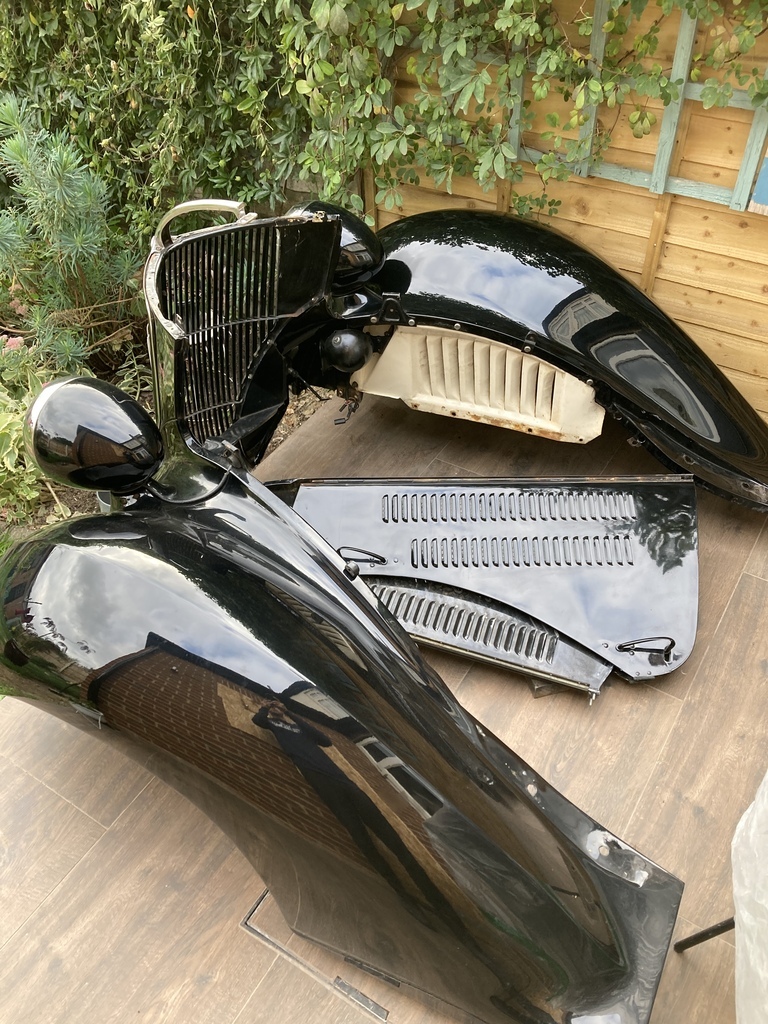 Leaving this. 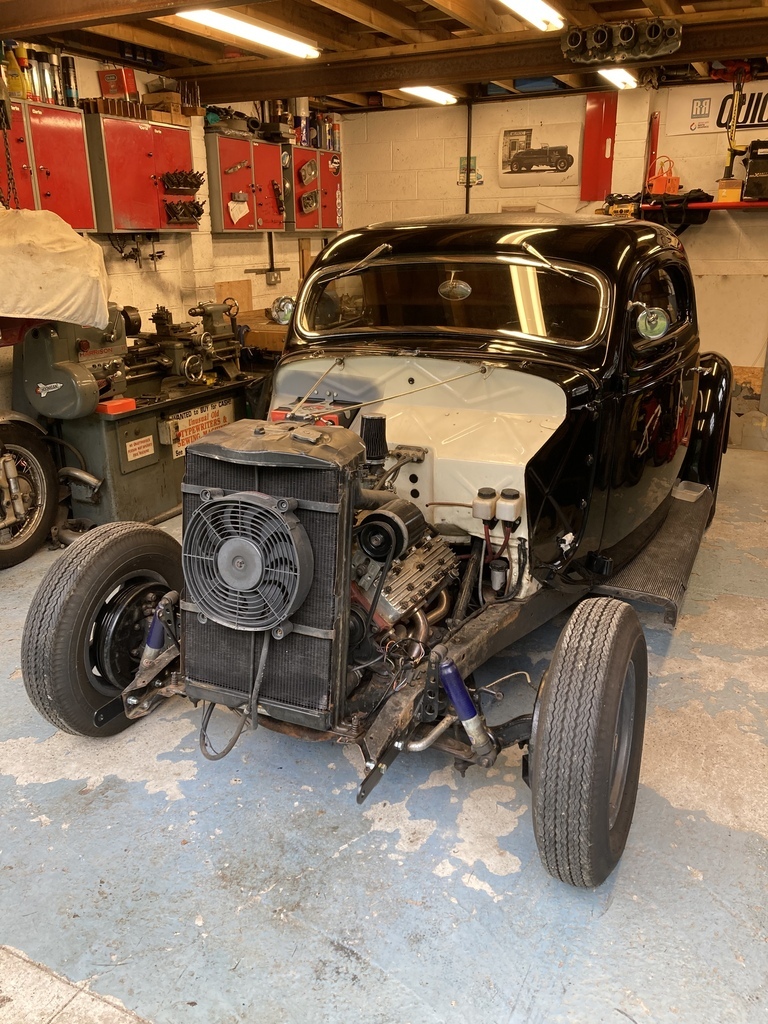 Dashboard, interior and floorboards up. 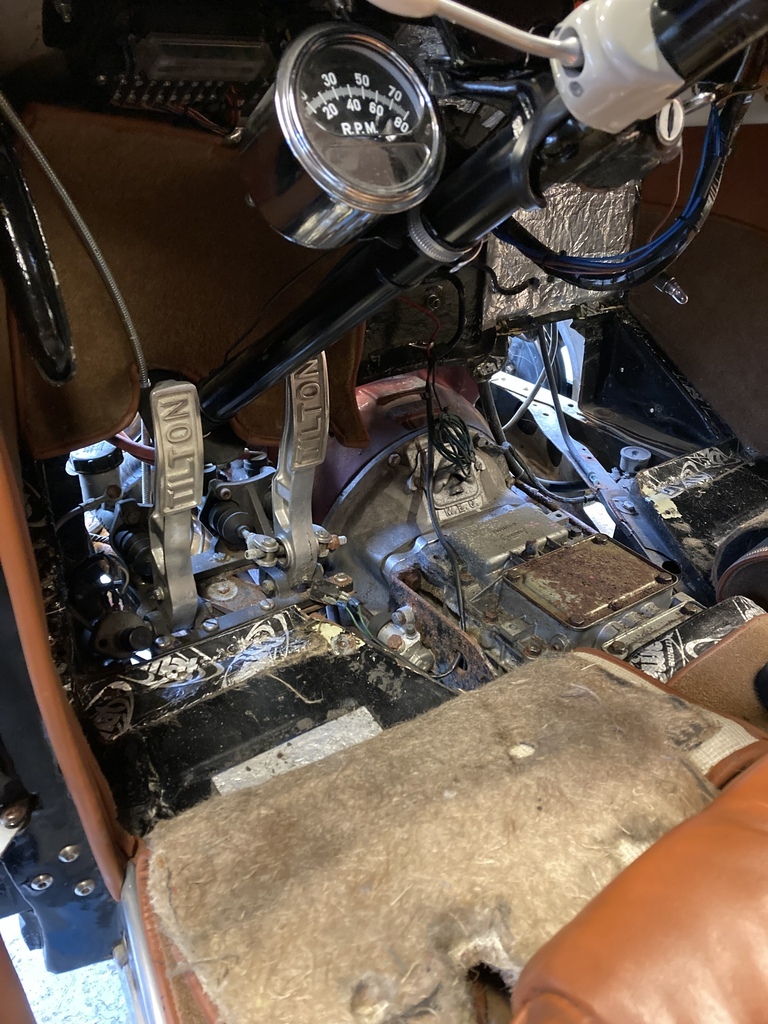 Inlet was removed so I could use my lifting plate. Then the first wtf moment. The inlet gasket had broken and pushed out at the back of the valve chest. I had no idea why it would do this and or even that it had done it as it wasn’t visible being tight up against the firewall and hadn’t leaked a drop of oil either, amazingly. 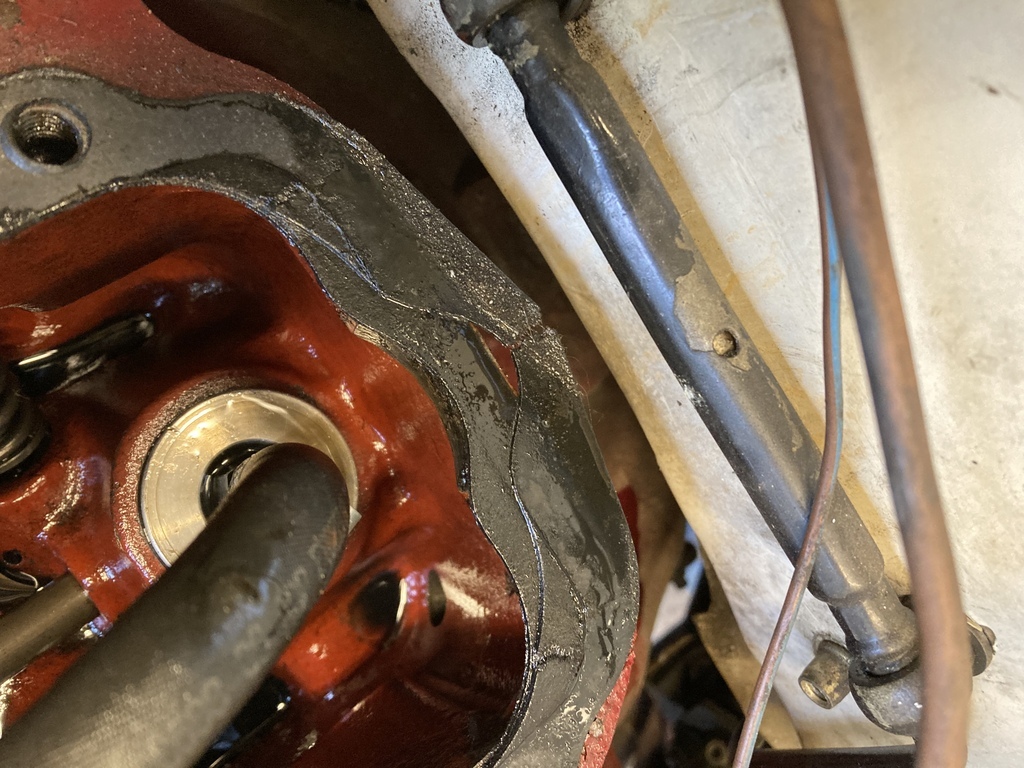 I let it be and moved on but it was obviously playing on my mind as a day later I had a brainwave. The Flathead has an open breather at the back of the inlet manifold because of this I’d been pulled up one too many times by scrutineers (when they notice!) because you can’t race without a closed breather system or catch can. What I did, some time ago, was cobble together a sealed breather that fed into a catch can. Obviously it never breathed sufficiently enough causing a buildup of crankcase pressure which found the weakest point, the thin area of gasket at the back of the inlet. I guess I also found the source of the fumes that had randomly appeared or not so random it seems. Engine out meant the gearbox could follow. 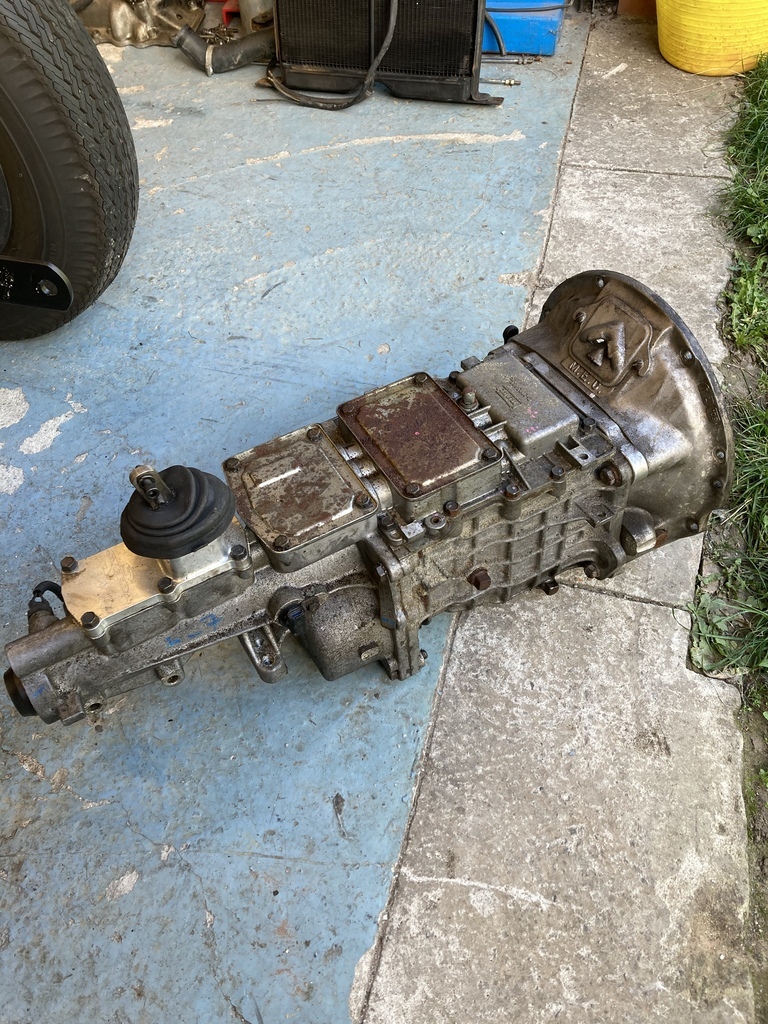 Sand and salt. 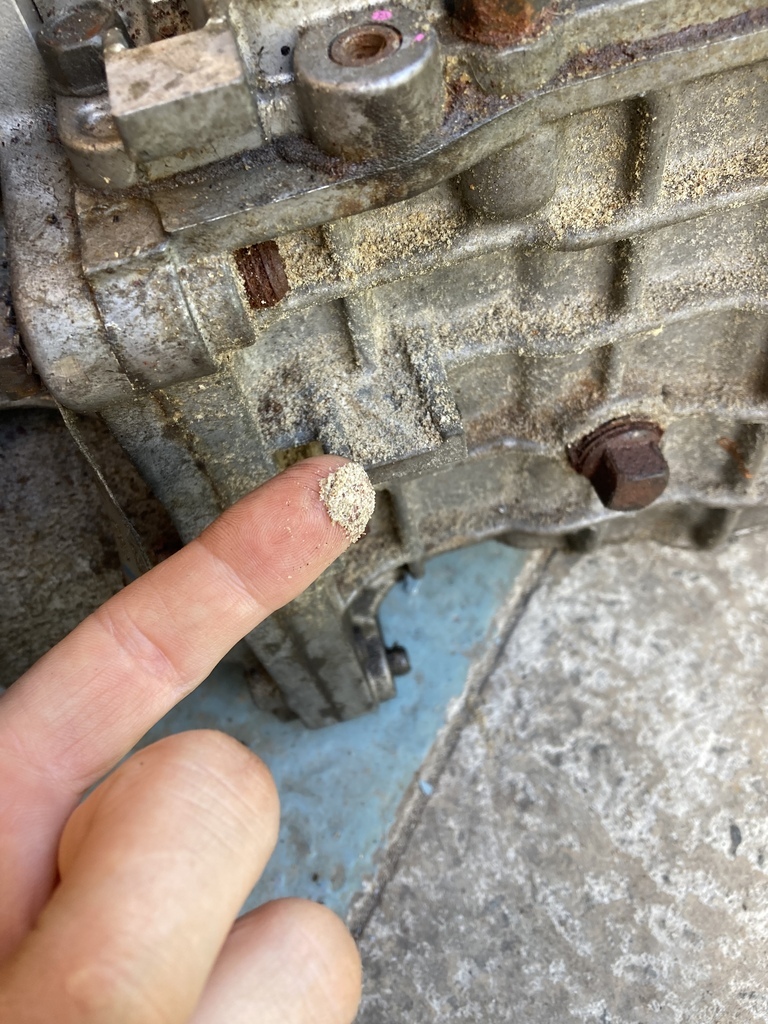 With the engine and ‘box meant I could get inside the chassis. Oh dear… More sand and salt. 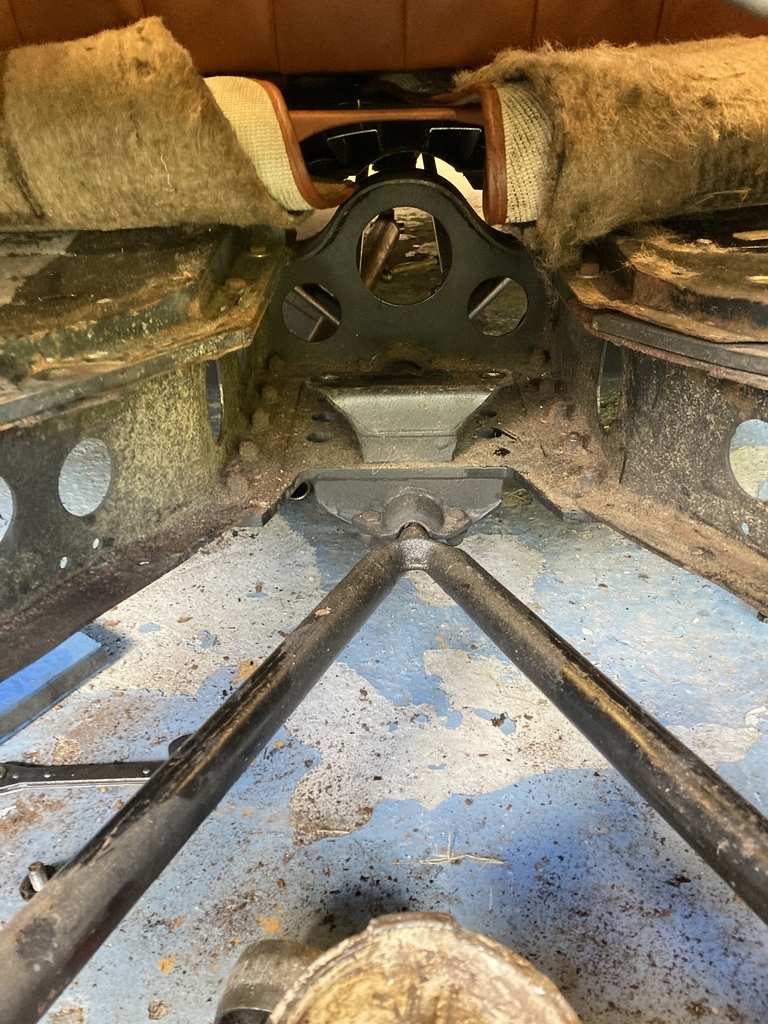 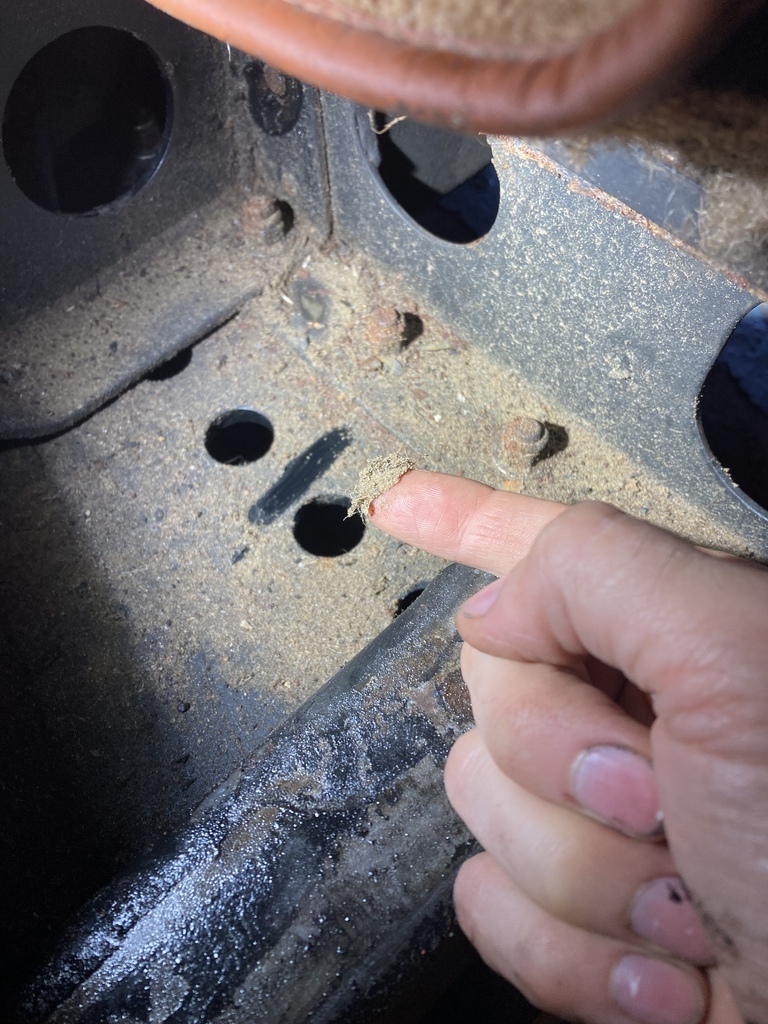 Bare in mind that everything you see was new/restored, painted and clean. Everything that was inline of the front wheel sweep is trashed. 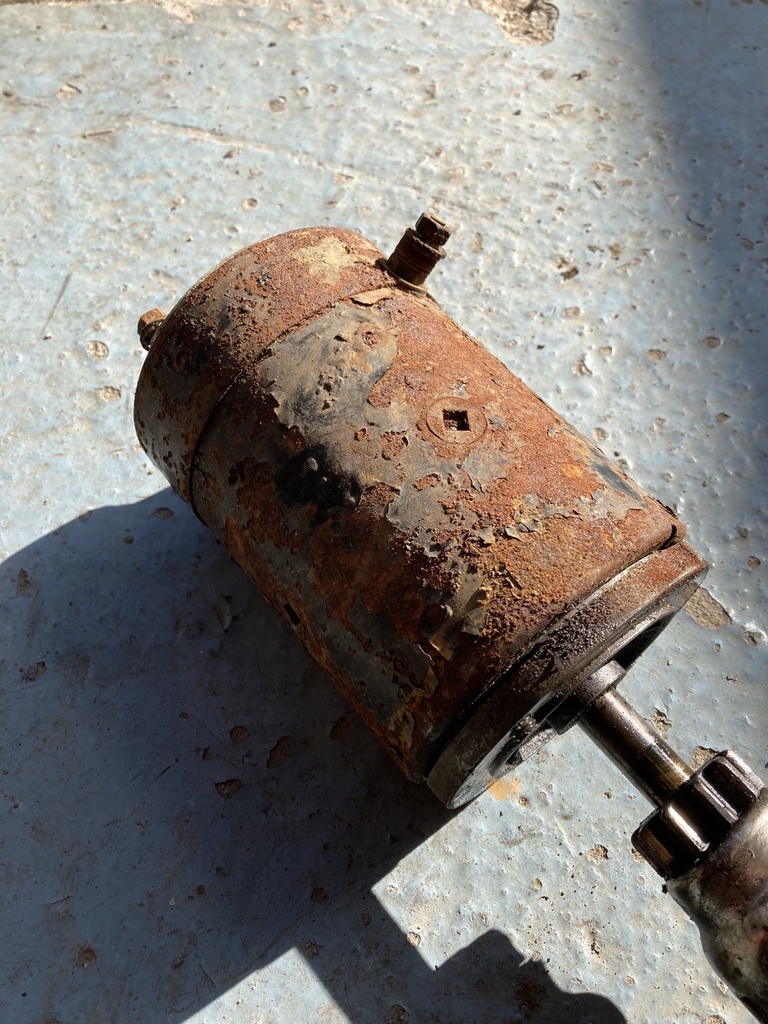 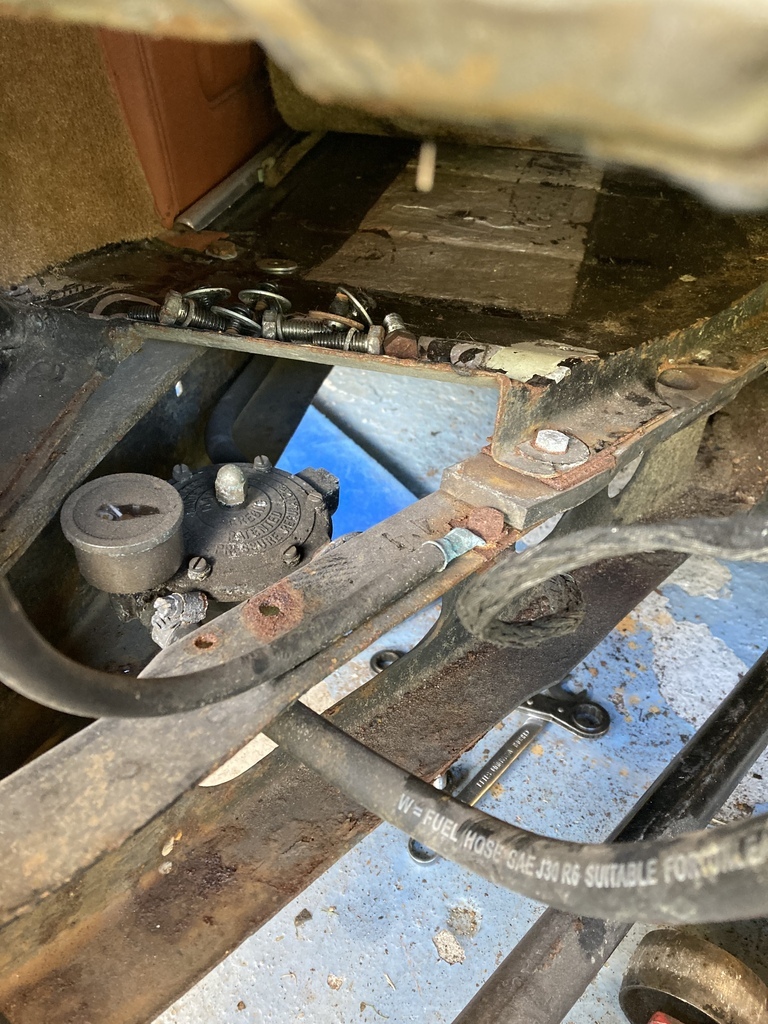 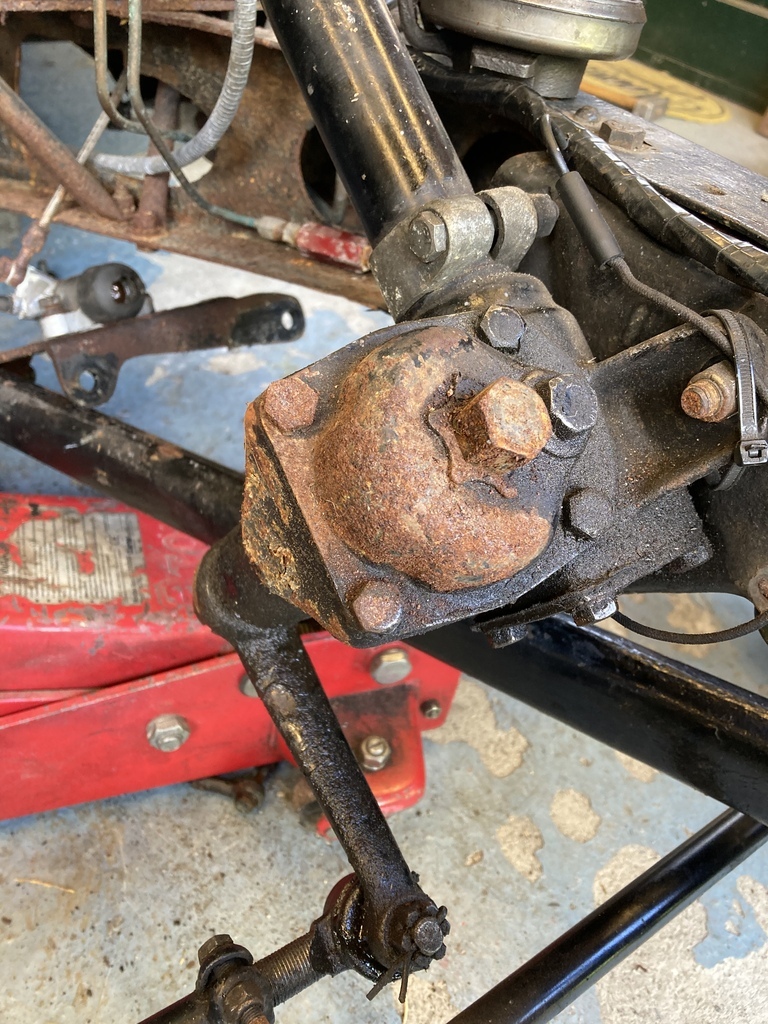 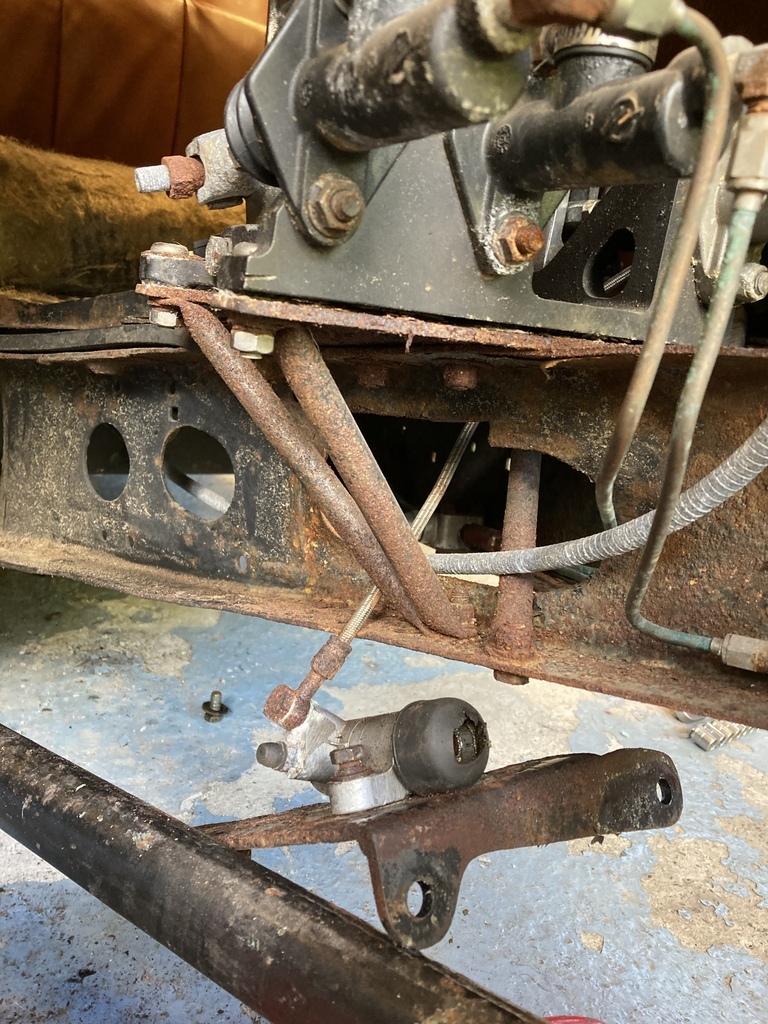 The to do list is growing. 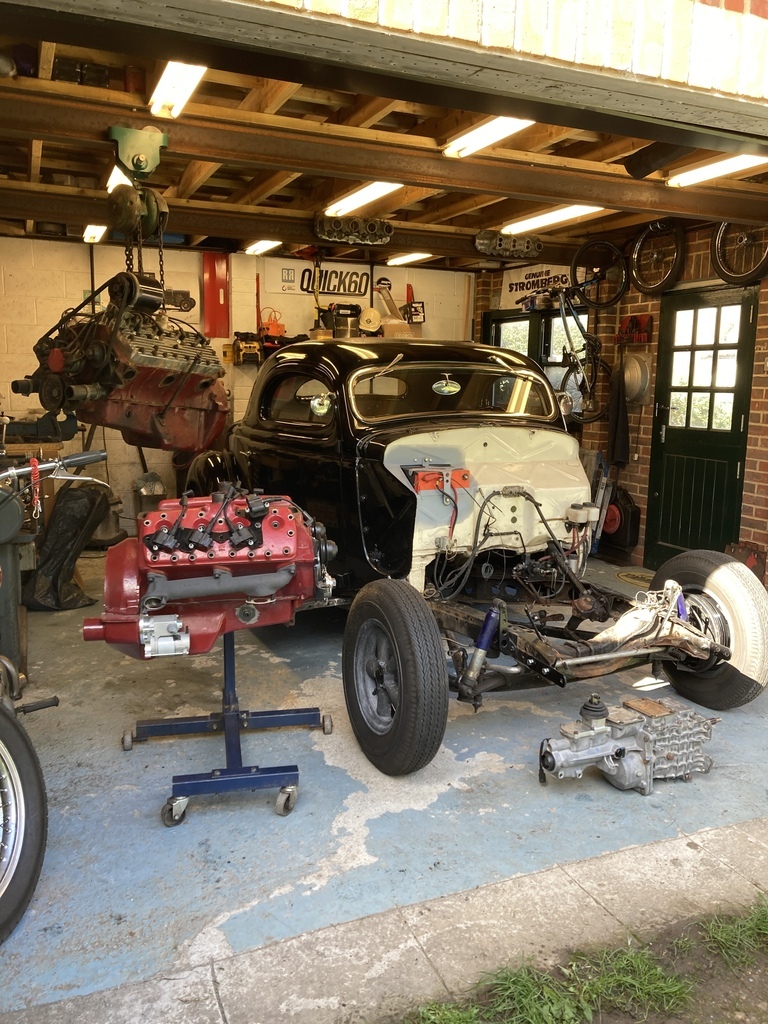 |
| |
Last Edit: Dec 19, 2022 20:15:58 GMT by Enbloc
|
|
Enbloc
Part of things
 
Posts: 398
|
|
|
|
Sounds like an ideal time to move the nostalgia styling on a touch and fit a Mustang 2 front end and 350/350 combo hahaha. I’d rather drop a Chevy on my nads before I ever dropped one in this car. 😮 My dad’s Caddy motor that I built, that very nearly made it in! |
| |
|
|
Enbloc
Part of things
 
Posts: 398
|
|
Dec 18, 2022 19:49:09 GMT
|
Complete rebuild and update? Indeed! |
| |
|
|
Enbloc
Part of things
 
Posts: 398
|
|
Dec 18, 2022 14:57:15 GMT
|
After all the work bringing the ‘36 up to scratch I hadn’t done anything with it since the end of July and it was now the end of September! The opportunity arose to venture south of the River and attend the Detonator’s CC breakfast meet so this was as good excuse as any to give it a run out. 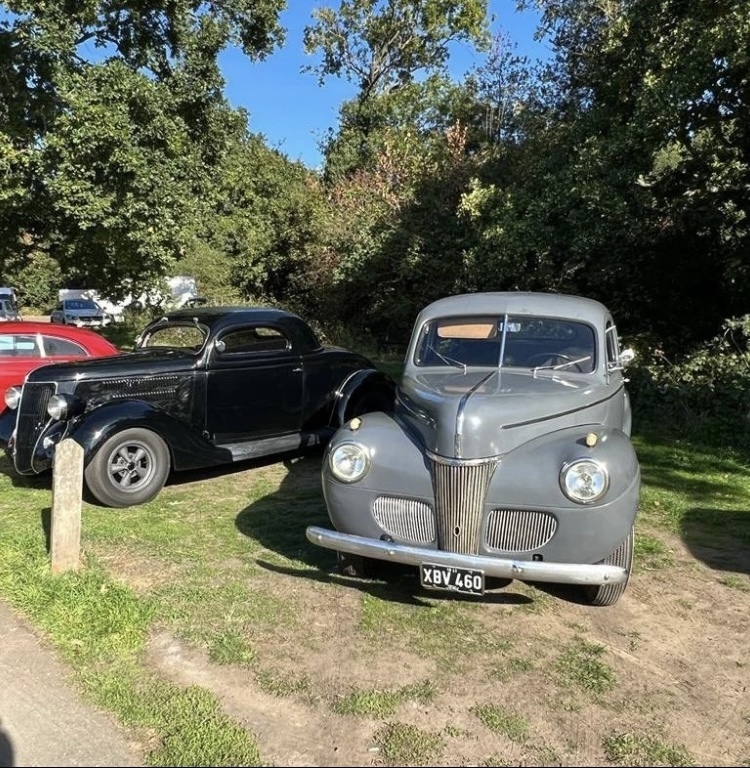 What I finally realised was how much I hated driving this thing! If I’m being brutally honest this feeling has been brewing inside me for a while and is probably why I’ve used it so little in the past couple of years. To add insult to injury I managed to thump the rear light stalk on a wooden post parking up which trashed the lens, bezel and bulb in the process. Great having no bumpers! 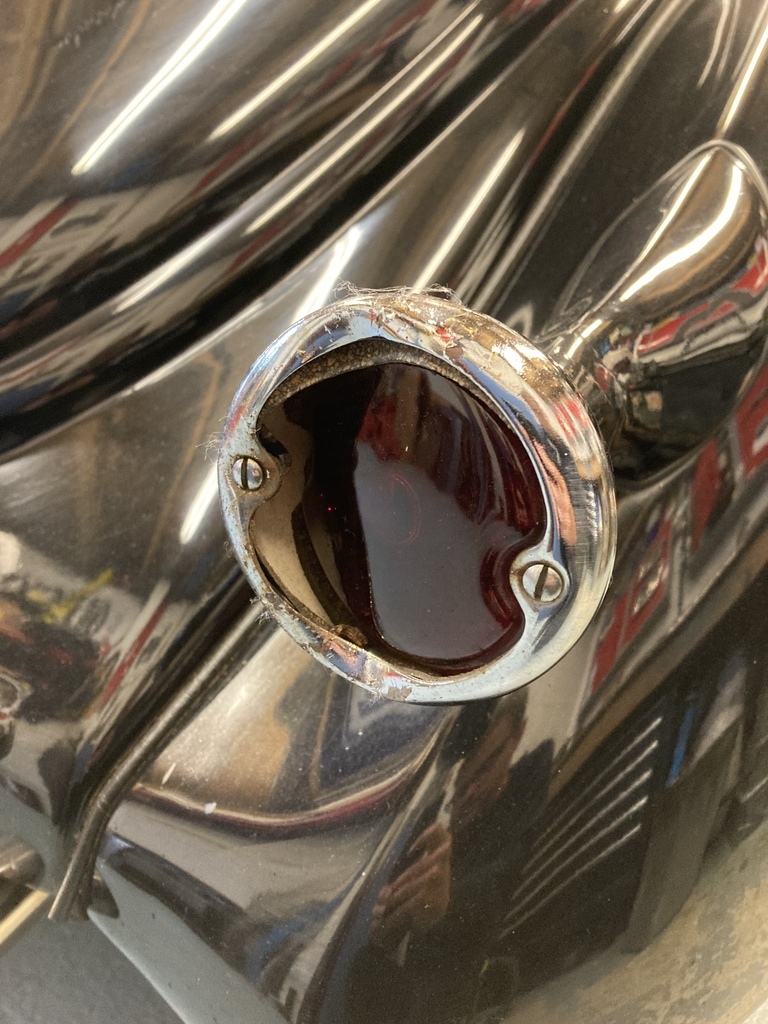 If that was the only damage I’d got off lightly but of course it’s only ever the tip of the iceberg. After another look the rear wing looked odd. It had bowed out in the centre where the light stalk had pushed the wing back and it had no where to go. Some brute force managed to get it back into shape without anymore damage. I thought I was out the woods but every time I’d walk past the back of the car the light stalk still looked out, like it’s pointing downwards. I think I’ve distorted the stalk as well. 😩 Looking for a lens, bezel and maybe a stalk. 👍 Why all the hate towards the driving experience? Brakes: The car brakes well but the pedal has little movement and is fairly hard. This was by design as I used to like a short, firm pedal but now my tastes have changed and I prefer the opposite. Nothing that a master cylinder resize wouldn’t sort, if it wasn’t for the pedal assembly. Pedal Assembly: I fitted a Tilton bias-box many years ago which is a cool piece and functionally fine. I’ve come to the conclusion that bias boxes are a waste of time on the road because you never adjust them. I’ve never moved this one since I got it where I wanted it when it was first fitted. They are over complicated for something you don’t use, a pain to bleed the brakes on and in the case of mine meant it ended up in a weird position under the floor board which many holes and slots had to be cut in the floorboard for clearance resulting in heat and fumes from the engine bay. Fumes: This is a weird one as the car was never fumey but in recent years had become so. Clutch: The clutch has been a disaster since day one. The problem is it’s half mechanical and half hydraulic. The throw out bearing, release fork and the release arm on the side of the bellhousing are original factory Ford. An unknown external slave cylinder has been adapted to the original arm and then up to the clutch master connected to the Tilton pedal. No amount of cylinder size changes or pivot point changes has ever really helped the situation. I think the problem is that there are just too many ratio changes happening and none of them are compatible with each other. The clutch has always been very heavy and like an on/off switch which makes it very tiresome to drive, not helped by the flywheel. Flywheel: I’ve had a lightweight aluminium flywheel forever in this car. Great on track but on the road it’s kangaroo city at low speeds. The flywheel is fine it’s just badly matched to a full bodied street car. Gearbox: It has a Tremec TKO 5-speed fitted. These were the stronger, replacement ‘box to the T-5. They were very popular in the aftermarket for awhile but fell out of favour because, well, they’re a bit sh*t. I don’t think they even make them anymore? They have a few design flaws which I will expand on later. When I had the front sheet metal off for paint it became apparent that the chassis and mechanics, especially around the front of the car, weren’t looking to healthy. Rust was taking hold in many places, a situation I believe greatly sped up by many years of running at Pendine sands. And the final issue was that if I was to ever finish the turbo motor it needed to fitted to the car which meant engine out giving access to everything else mentioned above, sooo…. |
| |
|
|
Enbloc
Part of things
 
Posts: 398
|
|
Dec 17, 2022 23:44:50 GMT
|
You’re gonna buy Mark Biggin’s old speedster then? No, I accept YOUR challenge of getting to the Quick60.  |
| |
|
|
Enbloc
Part of things
 
Posts: 398
|
|
Dec 16, 2022 23:32:49 GMT
|
If your thinking of taking part, just do it. One of the most accessible motorsport events there is. OK, OK, i'm working on it. Then you won't have the oldest car... Challenge accepted. |
| |
|
|
Enbloc
Part of things
 
Posts: 398
|
|
|
|
The power steering hose had fractured for the second time. Once is unlucky, twice is a pattern. It might be hard to see but here is where both hoses had broken, right on the flare of the steel hardline. 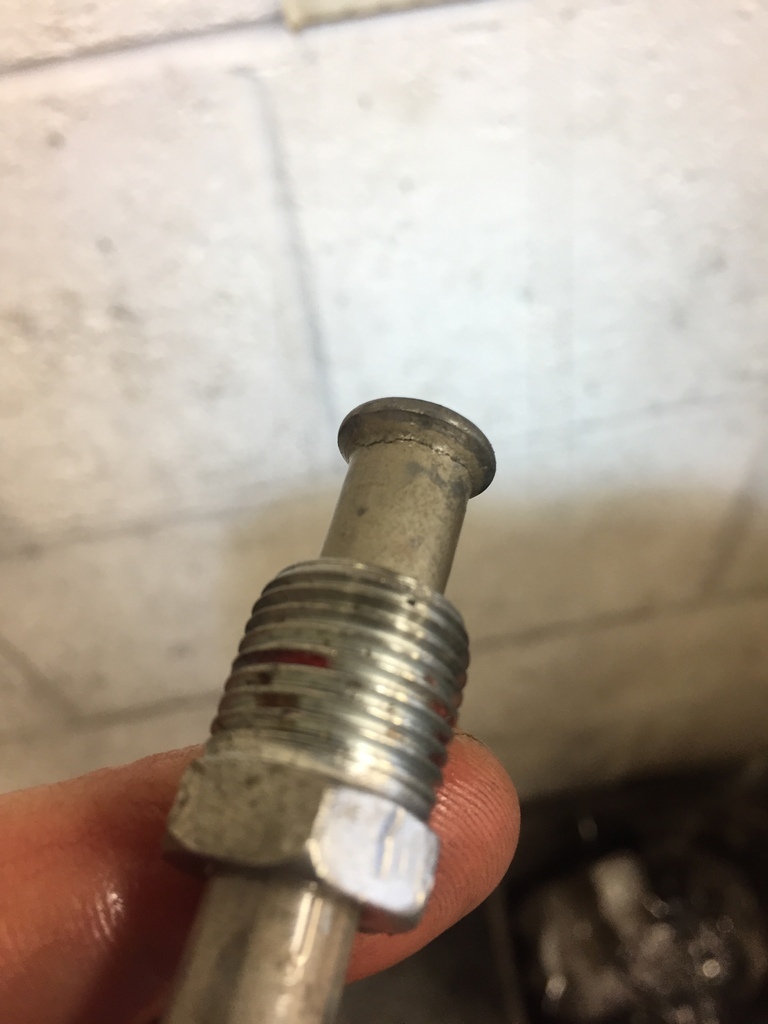 While I was dropping the power steering belt in the paddock at Mallory some guys came past and we got chatting which led to me finding out that of them was a power steering hose specialist! We discussed a custom hose that could possibly eliminate the hard line issues. This seemed like a great solution at the time but the more I thought about it the more I came to the conclusion that it may not be that simple. The OEM hose is quite a complicated affair that has to have the hardline in it and the hardline also has to very accurate to original as it all gets very tight in places. If it was you I spoke to, thank you, but I decided to go in a different direction as you’ll see. 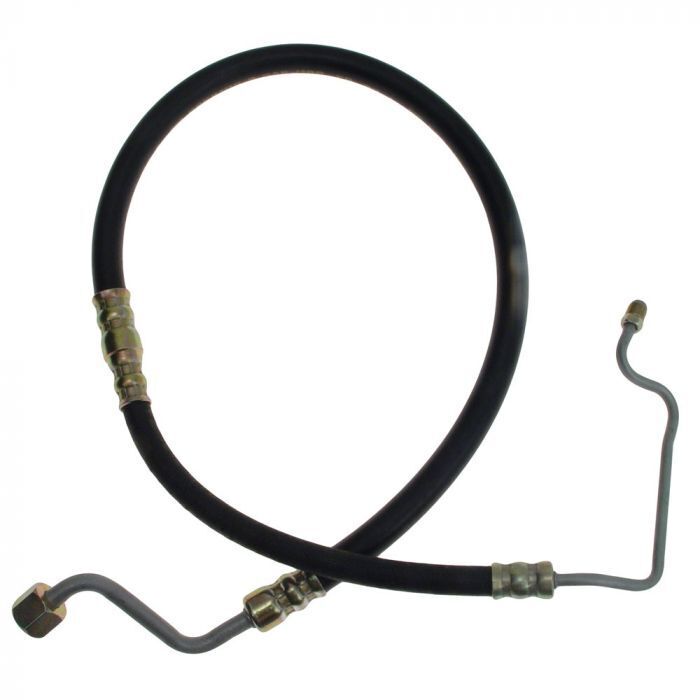 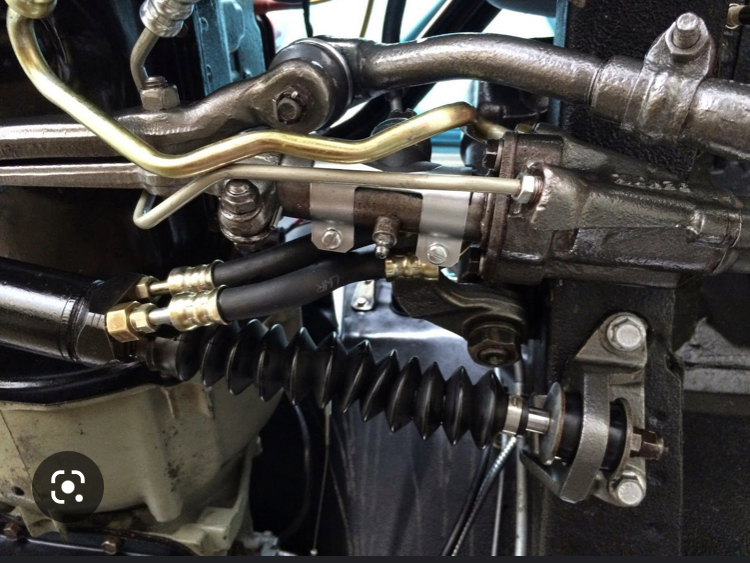 This is how the hose sits when fitted to the pump. It’s basically got all the weight hanging off the flare. Not a great design but not an issue with a stocker. The higher rpm when racing seemed to be causing some sort vibration/harmonics that were causing the flare to fail prematurely. 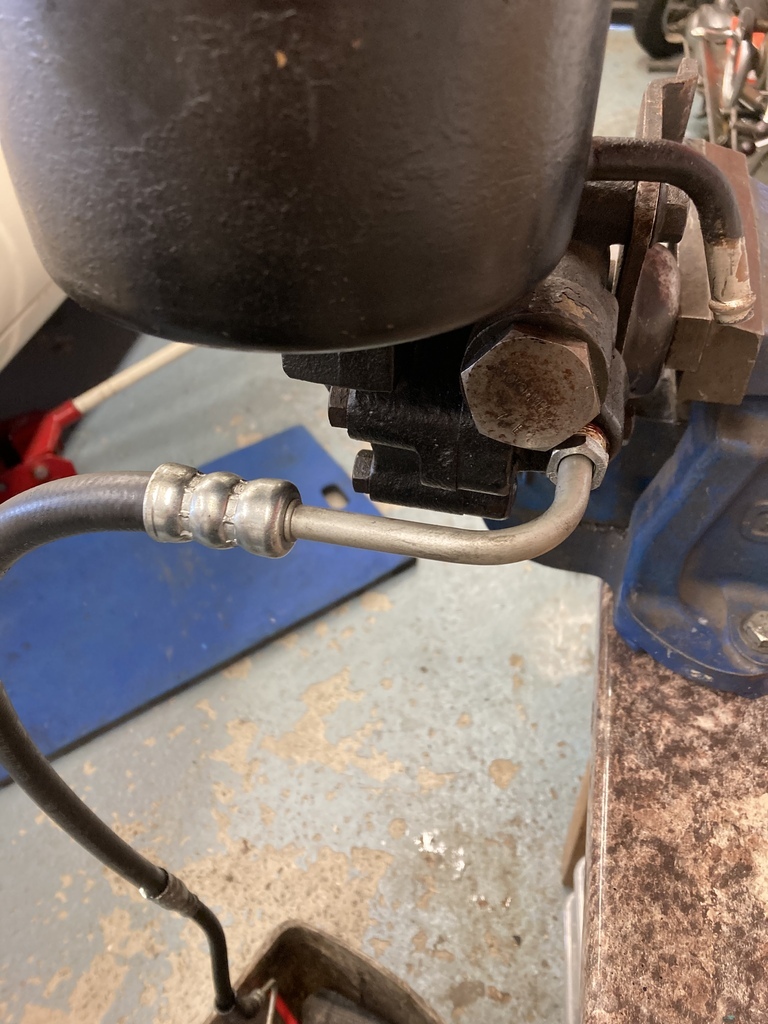 My idea was to keep with the OEM hose as their cheap and easily available but build a bracket that would support the hardline. I dug out some 6mm plate as this mirrored the pumps 1/4” factory mounting bracket. The plate got shaped around the pump and the pump body bolt positions transferred to the bracket and a couple of longer UNC bolts used to replace the originals. 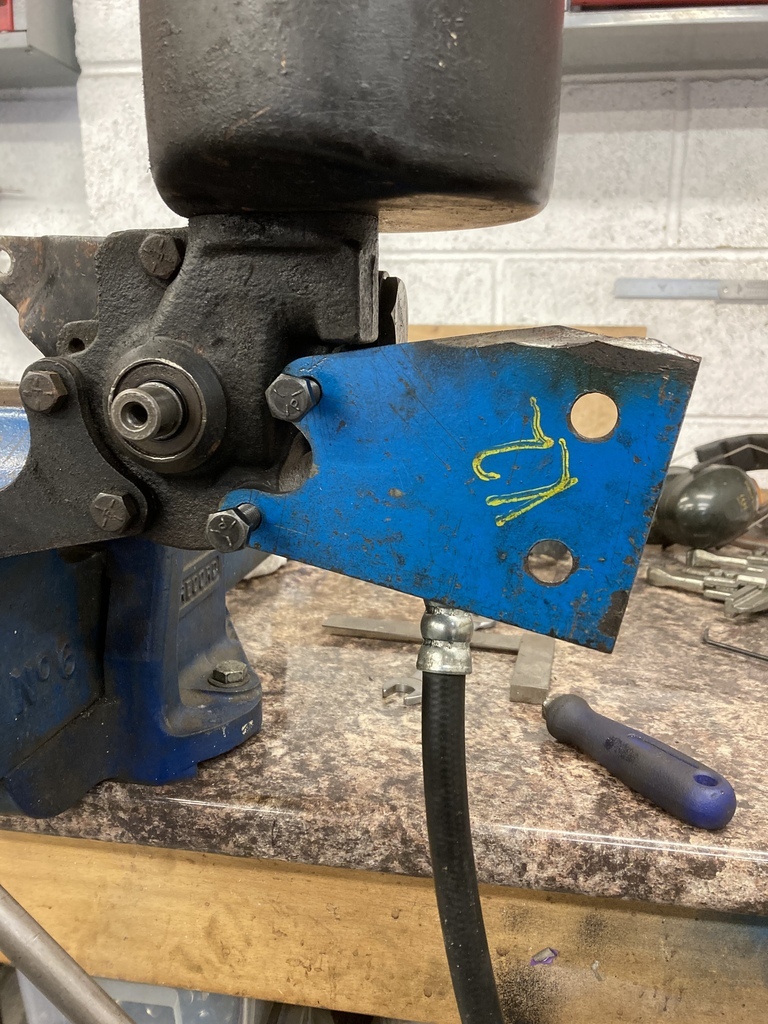 Once I had the bracket position set I could then start to create a cutout for the hose to pass over. 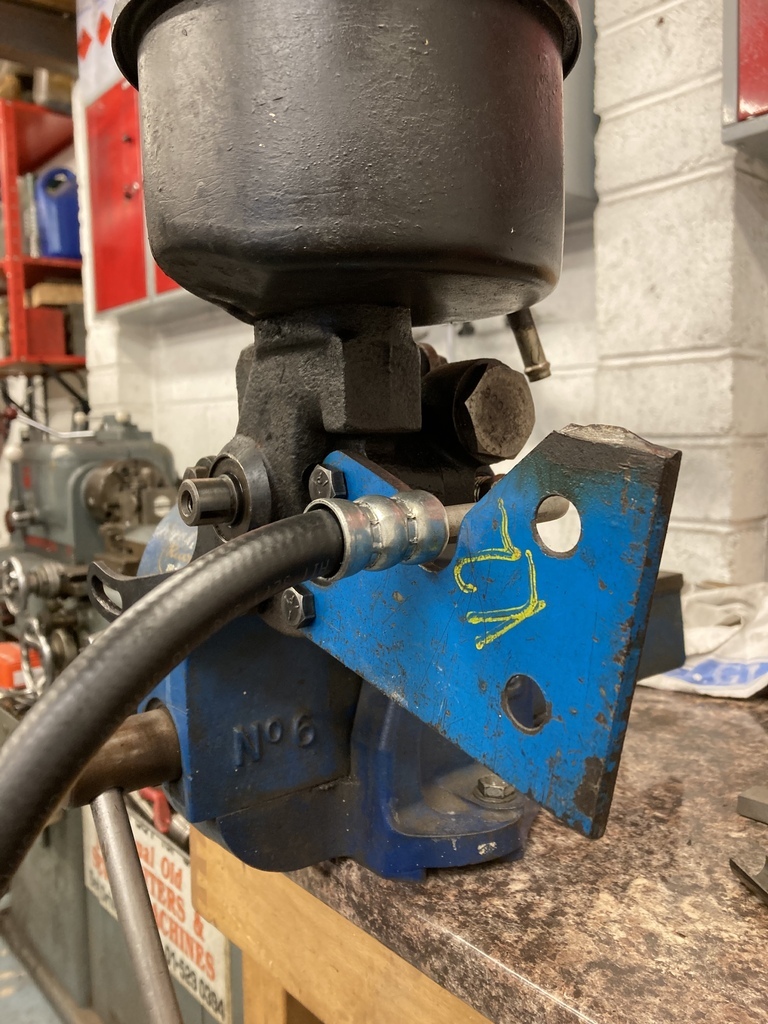 I cut a piece of tube in half to act as a tray under the hose. This would support the hardline and give me a position to place a jubilee clip to hold it all tight. 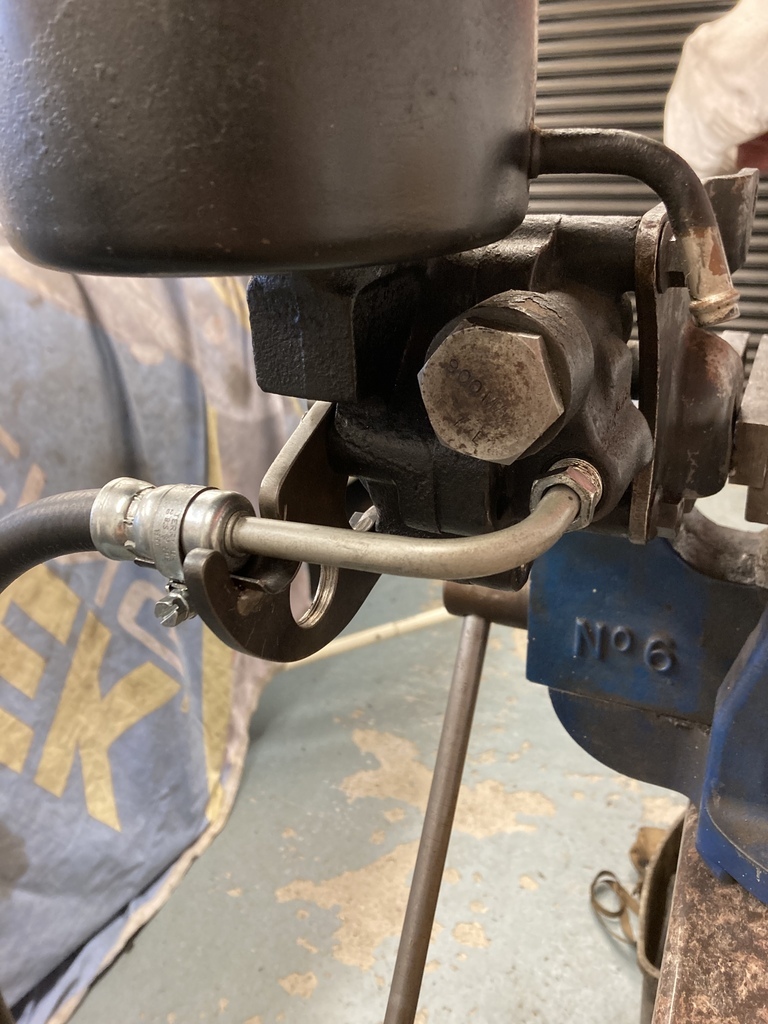 Cleaned up with a lightening hole for good luck. Time will tell if it’s successful but I’m happy for now as the hardline is fully supported but the hose still has full flexibility without it pulling on the fittings flare. 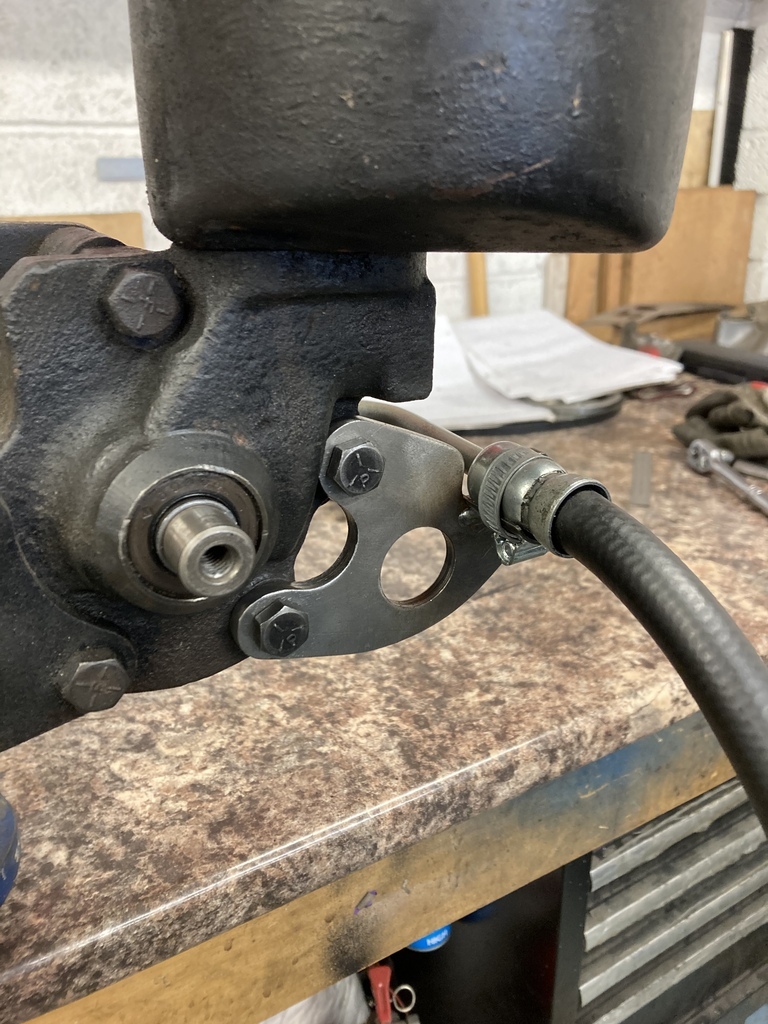 |
| |
Last Edit: Dec 14, 2022 3:09:35 GMT by Enbloc
|
|
Enbloc
Part of things
 
Posts: 398
|
|
Dec 10, 2022 23:03:13 GMT
|
The axle proved trouble free for a week so it was off to the Gathering we went on Friday. The Gathering moving to Mallory was an absolute joy because it meant we didn’t have to go on the M25 at any point of our journey there! We camped which was brutal due to how cold it was over night. I got up early, leaving the rest of the family, because I needed to be in the paddock bright and early for the Quick60. The car was covered in ice (!) so the long drive around the perimeter road gave me a chance to get some heat in the car. We were given promotional Sun strips which were comically large, so much so that laying it across the windscreen meant I had about 3” to look through along the bottom! It got moved to the back but still needed excessive trimming. 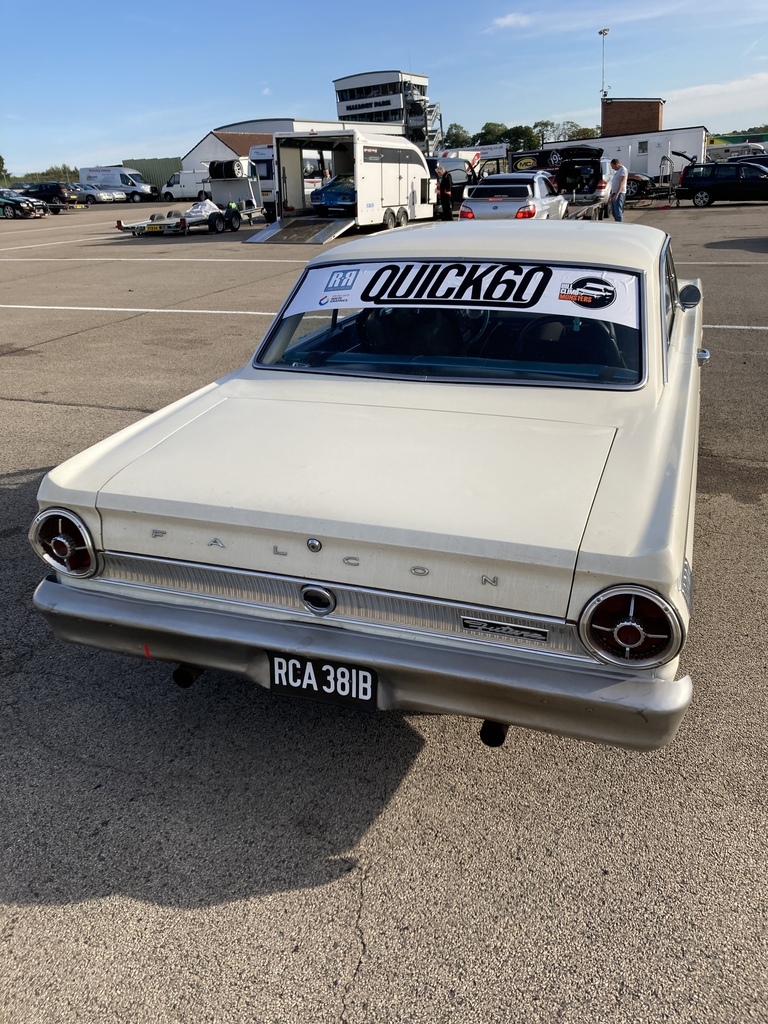 Scrutineering, noise check and drivers briefing all went plan so it was time to hit the track. 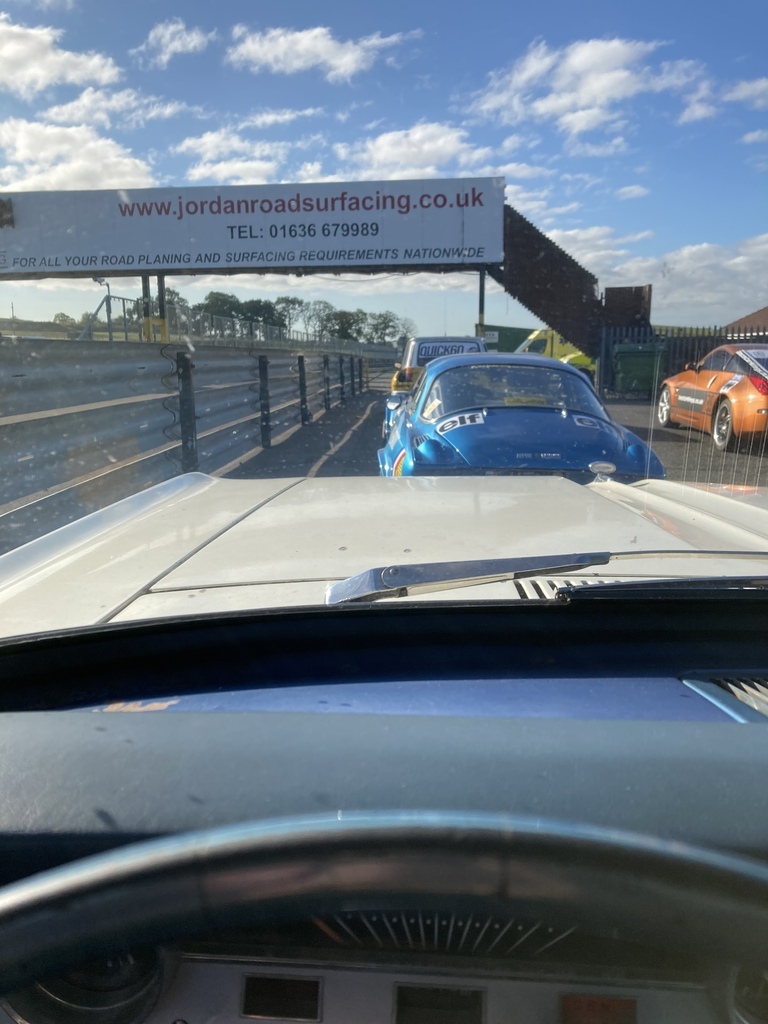 It was my first time at Mallory and it was most excellent but the spectator viewing was even better and really bought the two events together. It was great to have some more classics out to play including Alpine 110, Alpine 310, TR8, Ren 5 Turbo 2 and 280sx among others.  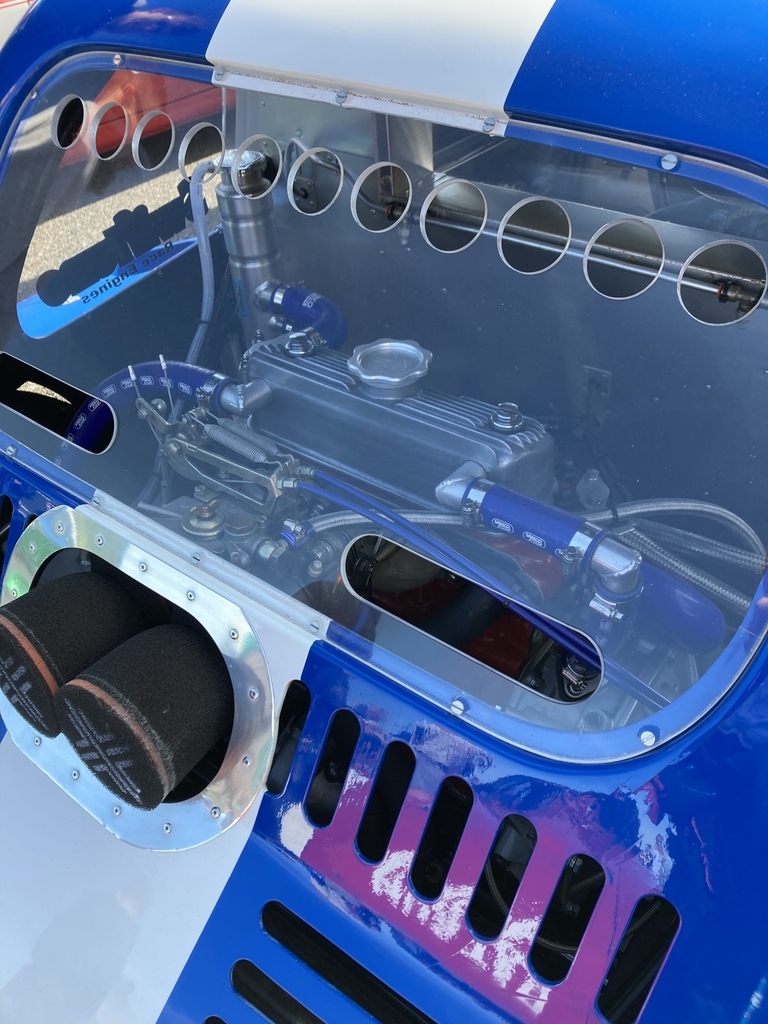 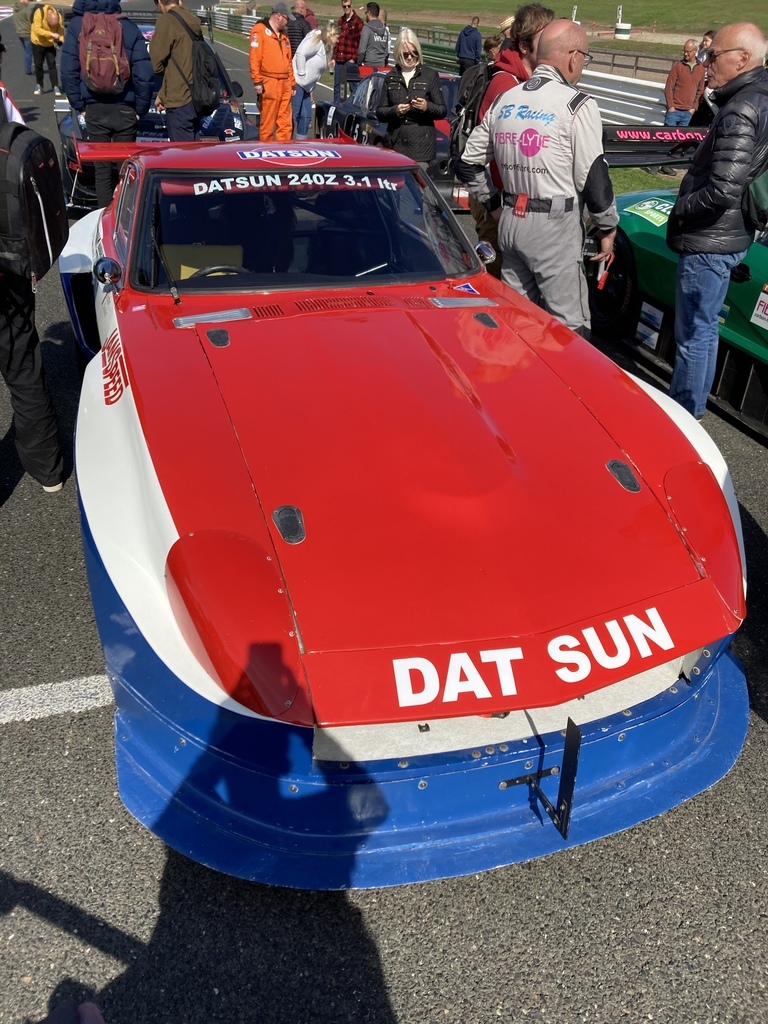 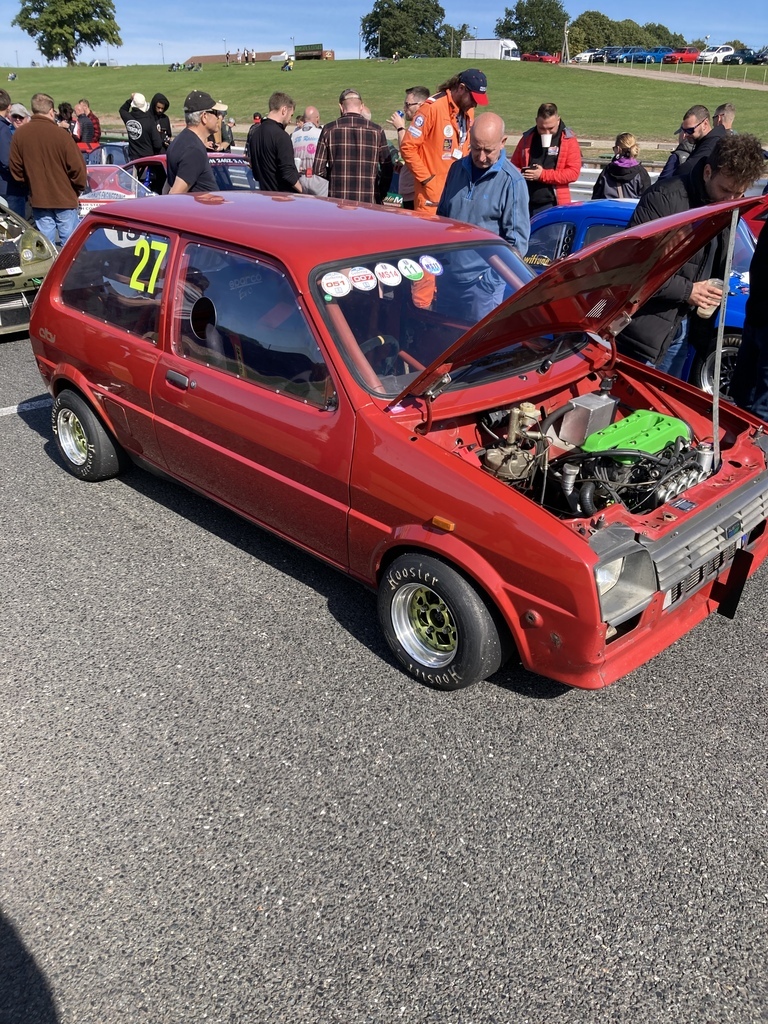 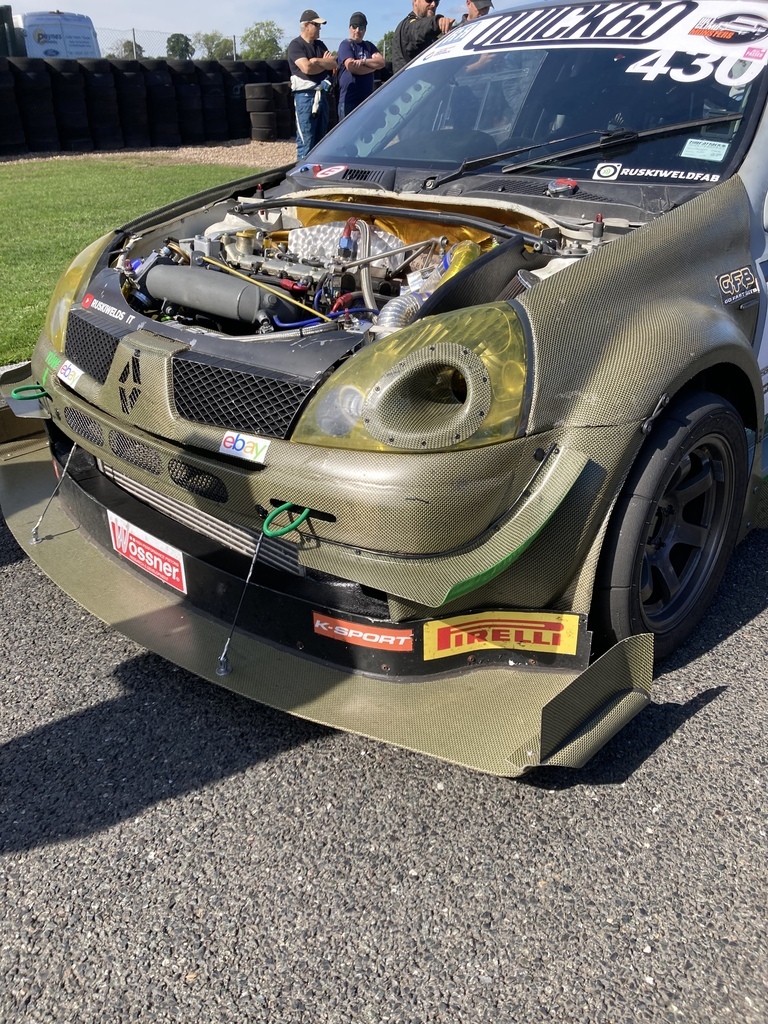 I competed in the inaugural running of the Quick60 the year before at Shelsley, which I’ve already mentioned my frustrations there that led to all the work with the rear springs. There was another issue that happened that day that led to me getting black balled from the event. After making my way through the first round of eliminations there was a distinct trail of rainbows on the wet tarmac leading my way. What I found was a fractured power steering hose, pressure side. And, just for the record, there was a lot of oil dropping that event which had fingers pointing my way because, I can only assume, I had the oldest car there. It wasn’t from me until it was from me of course. 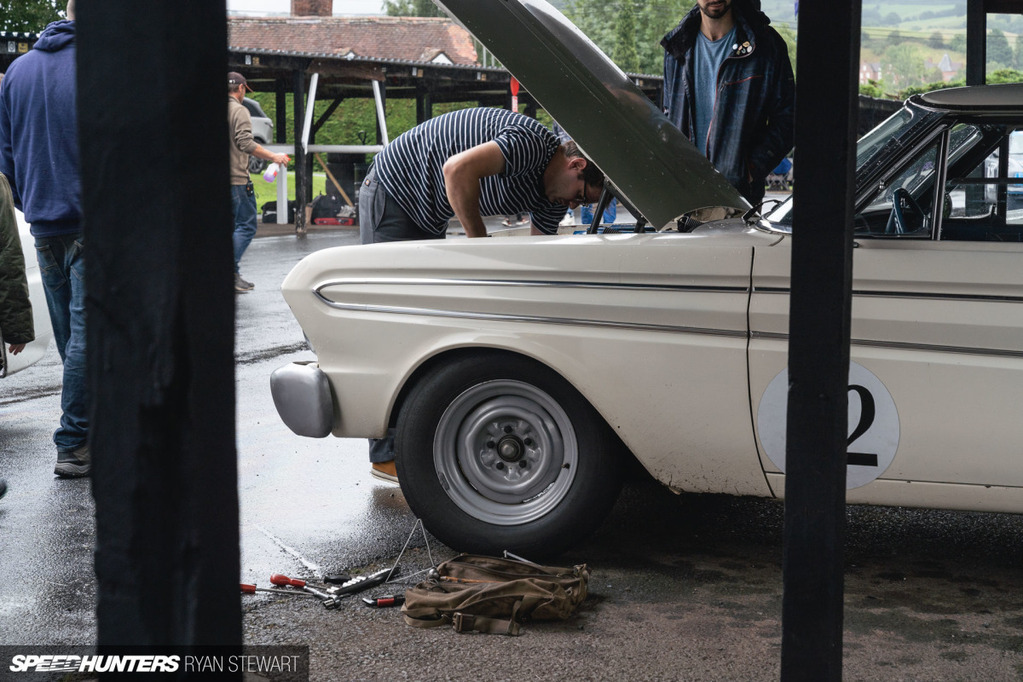 So, getting back to this year. Everything was going great until again returning back to the paddock from the first elimination runs I walked pass the car and noticed an ominous puddle until the car. Yep, the power steering hose had fractured again. Same event, same point and almost a year to do the day. Out again. 😞 Because I have to drive the car home I have to drop the belt from the power steering pump and run without assist. This isn’t as bad as it sounds as the assist is a piggy back system so without it the steering is heavy but still drivable. I’m getting quicker at this. 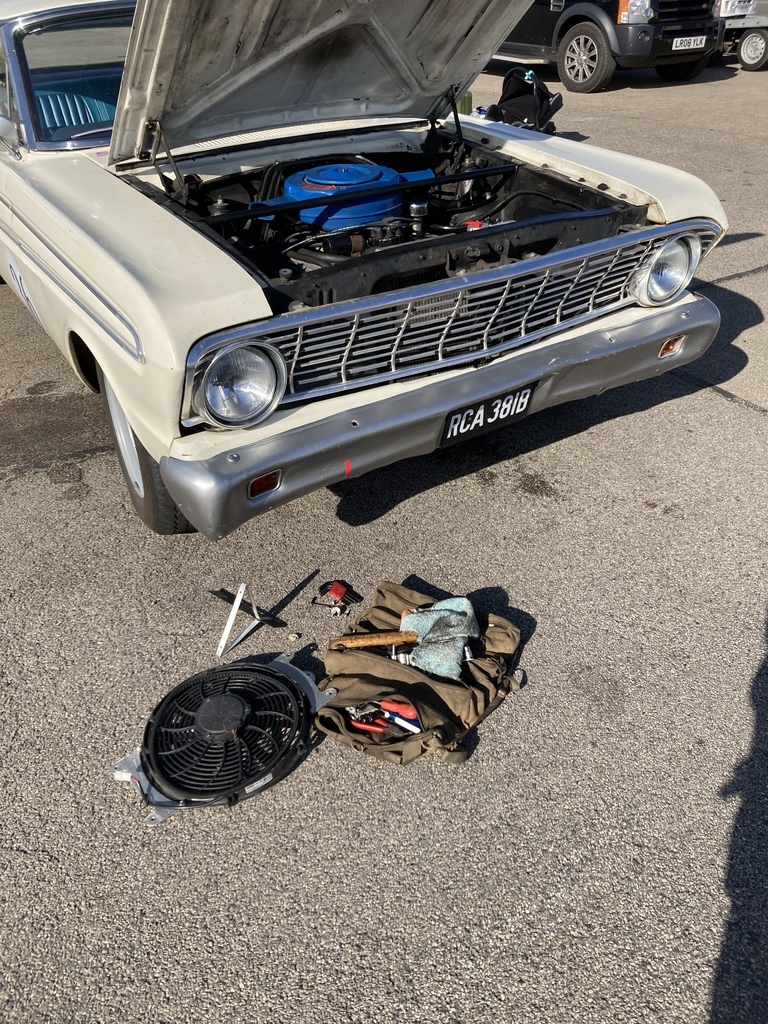 That wasn’t all, the pressure gauge on the fuel pressure regulator had ruptured internally spraying fuel down the inner wing. Managed to repair this with an 1/8” NPT plug from the TR8 driver pitted next to me who was a plumber and in his work van! 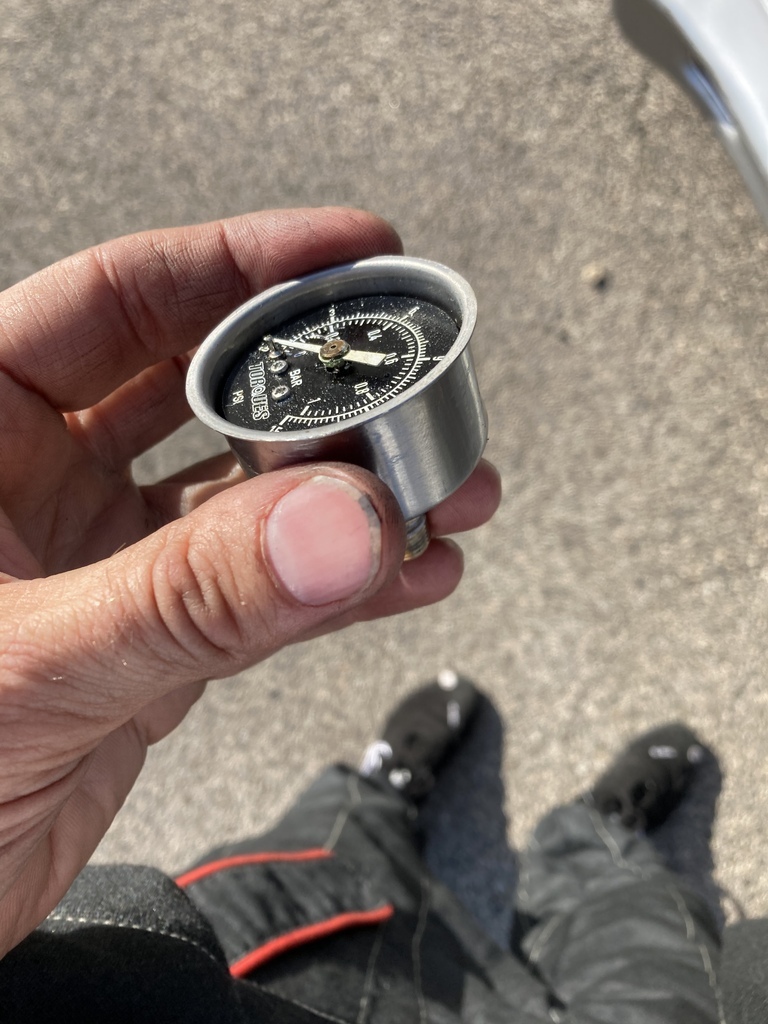 Another disappointing end to my new favourite event of the year. Here’s a video of one of my better laps taken from the Hillclimb Monsters live feed. If your thinking of taking part, just do it. One of the most accessible motorsport events there is. |
| |
Last Edit: Dec 10, 2022 23:11:57 GMT by Enbloc
|
|
|
|


