LowStandards
Club Retro Rides Member
Bigging Up The Sum Sum Man Since '99
Posts: 2,644 
|
|
|
|
More plates cuts Clutch cover, rear seat mounts (adjustable) and 2 jackshaft mounts 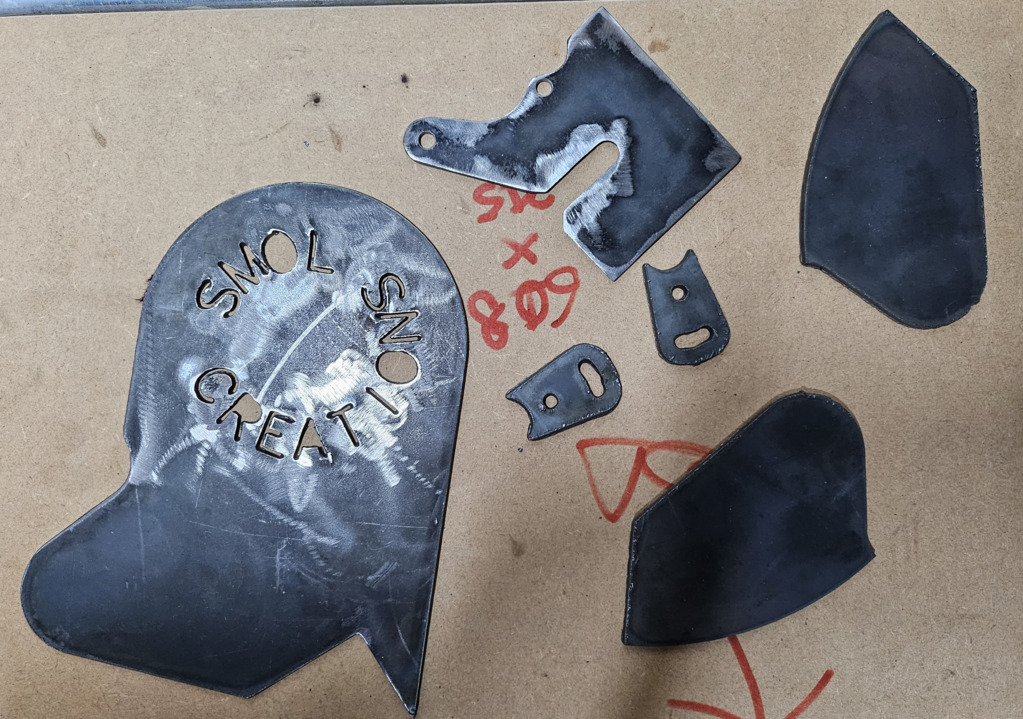 The jackshaft mounts and clutch cover come together like so and hold the bearings 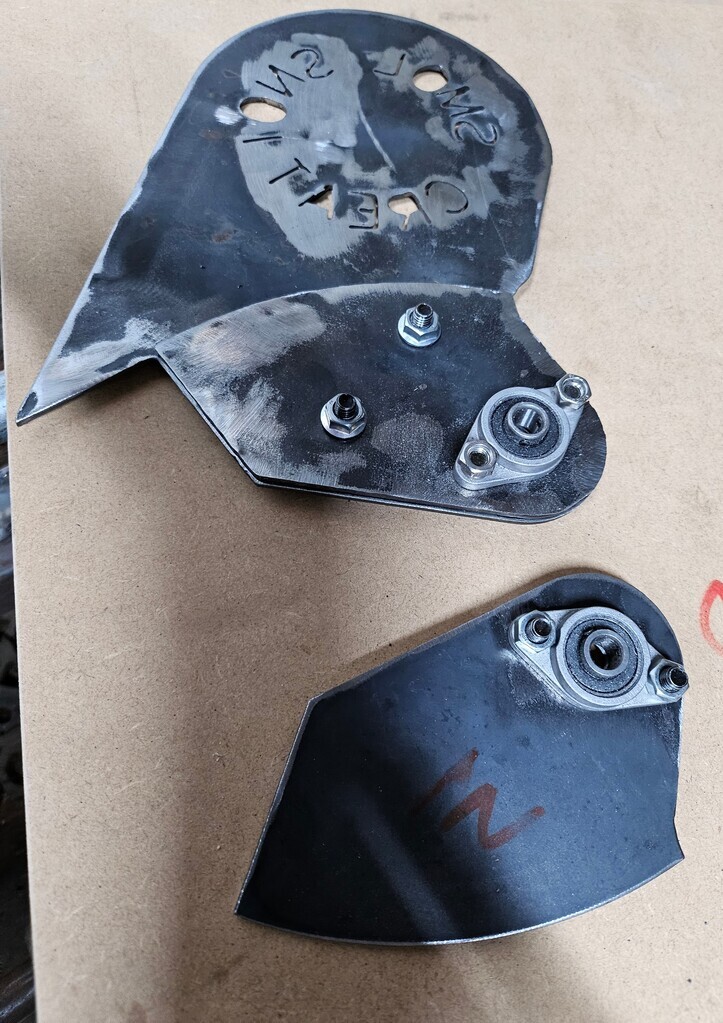 They got welded in here, which is an awful picture. I've also just realised i've not knocked any of the slag off the welds in these pictures. Don't get me wrong, i'm still re-learning Arc, but it's not as bad as they currently look  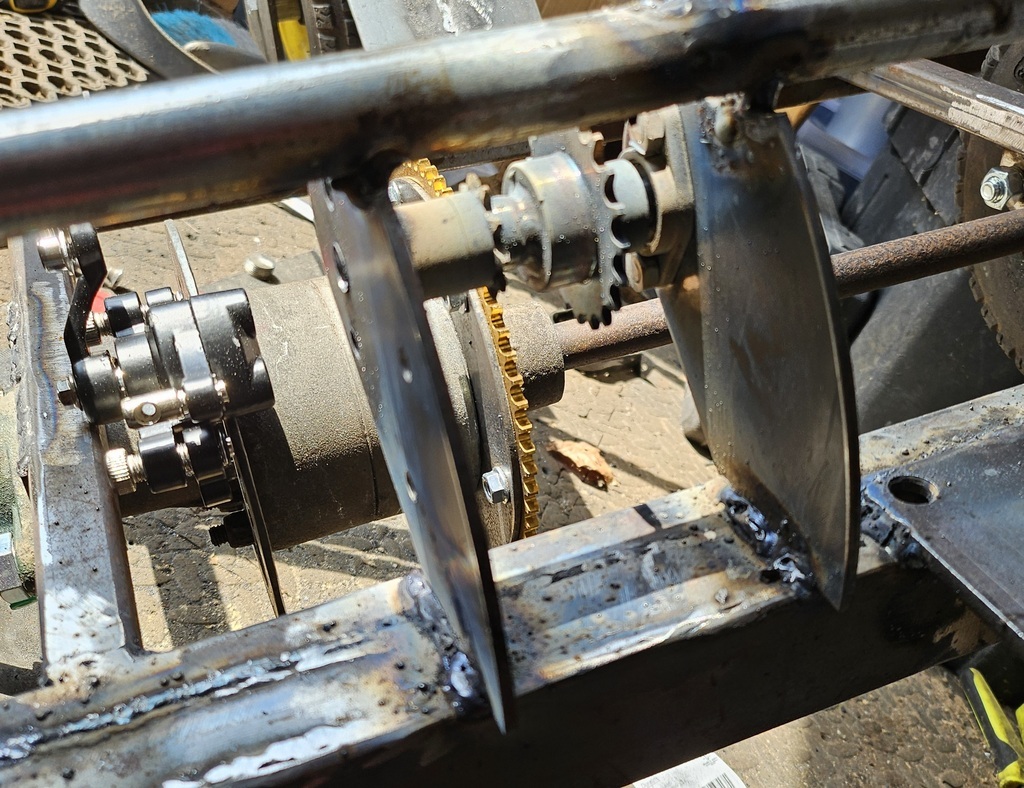 And the clutch cover got a band rolled and welded in. The text has worked out so much better using a single line font 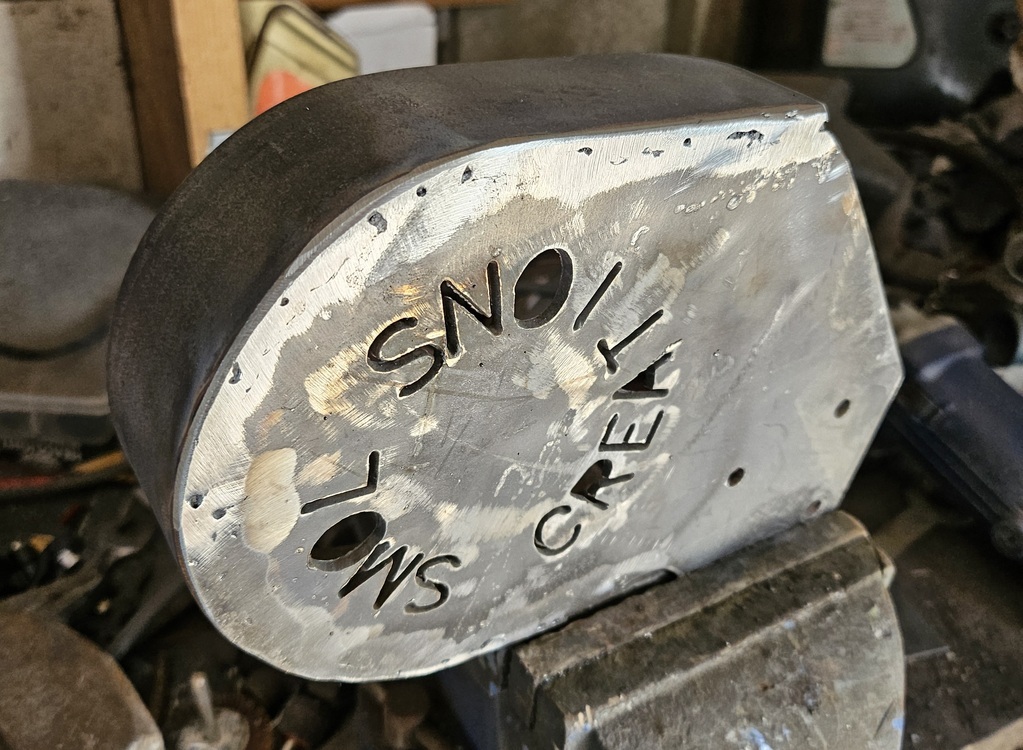 |
| |
|
|
|
|
LowStandards
Club Retro Rides Member
Bigging Up The Sum Sum Man Since '99
Posts: 2,644
|
|
Apr 30, 2024 12:44:37 GMT
|
Decided on right hand steer, it's my strongest grip - i've been training for years Lets look at the brake lever / throttle Many ideas have ran through my head, but the easiest and most comfortable is a left hand lever you pull back for the brake. I also happened to have a nice vintage twist throttle from an old moped, so that's what i've gone with. 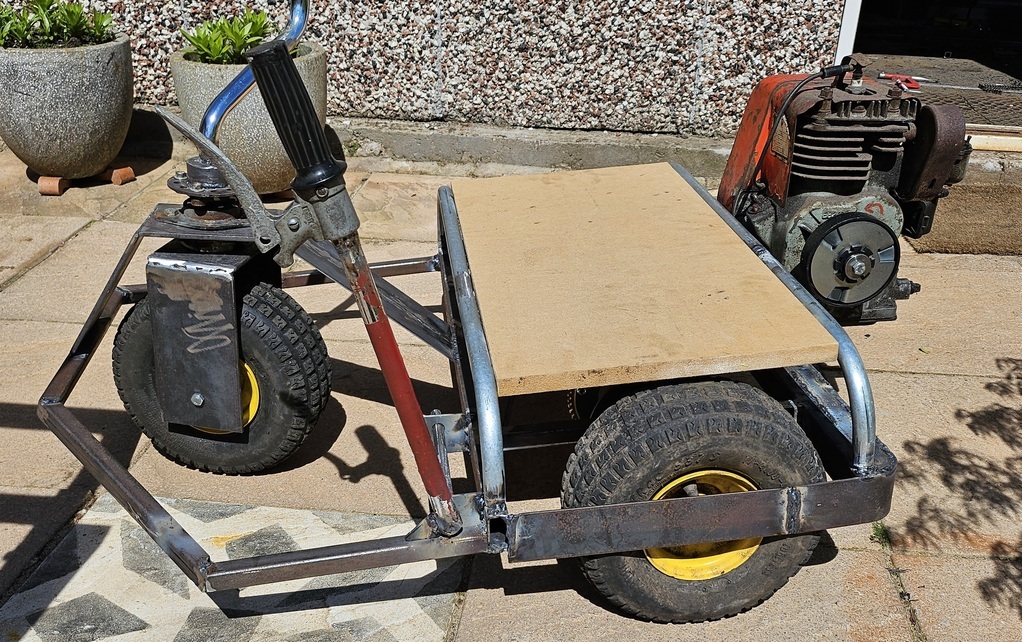 Nice and simple, just a bit of 10mm round bar through a couple of plates. I'll add a cam to this bar which will pull on the brake caliper 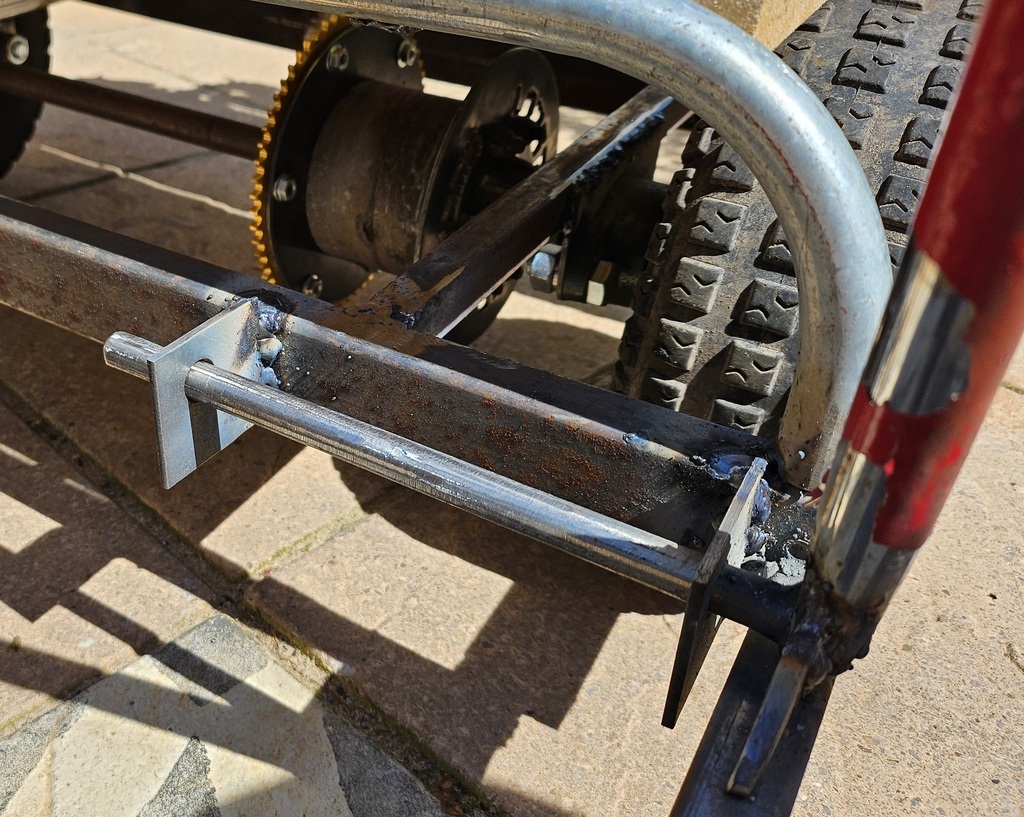 I've cut the base for the seat, I need to make up a back rest as well. I've ordered some foam and vinyl fabric, so I can get the seats made up of an evening 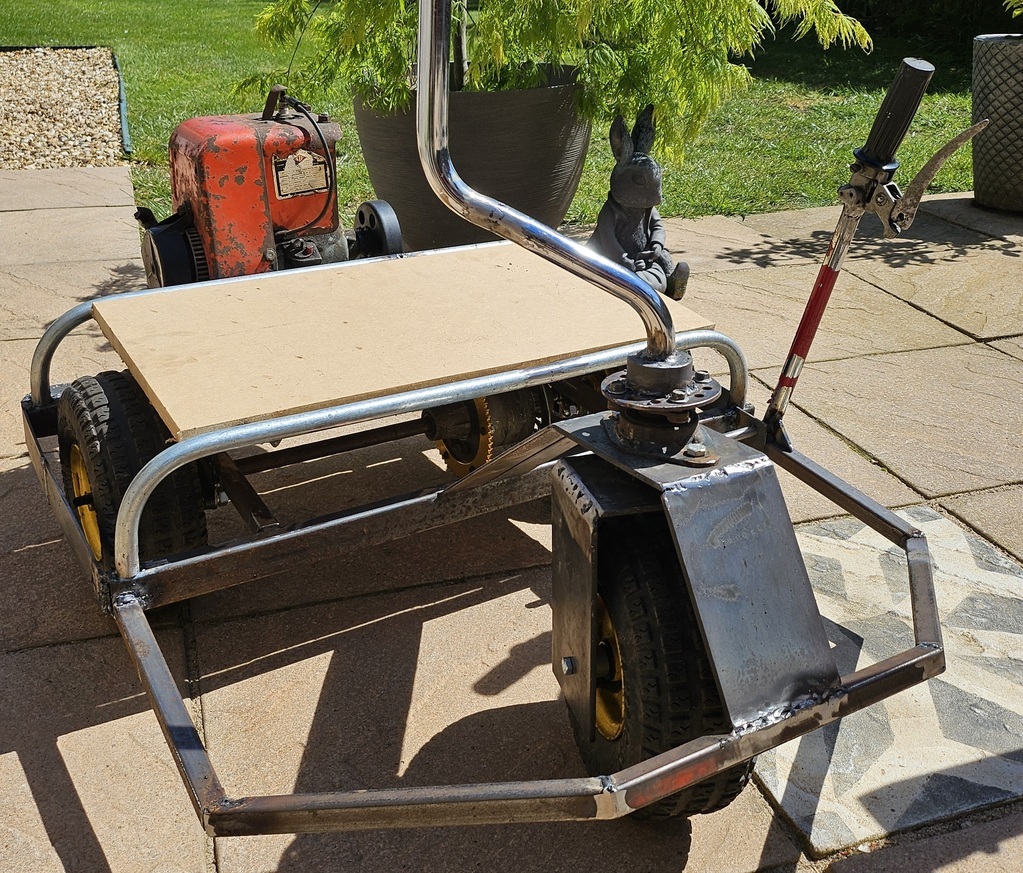 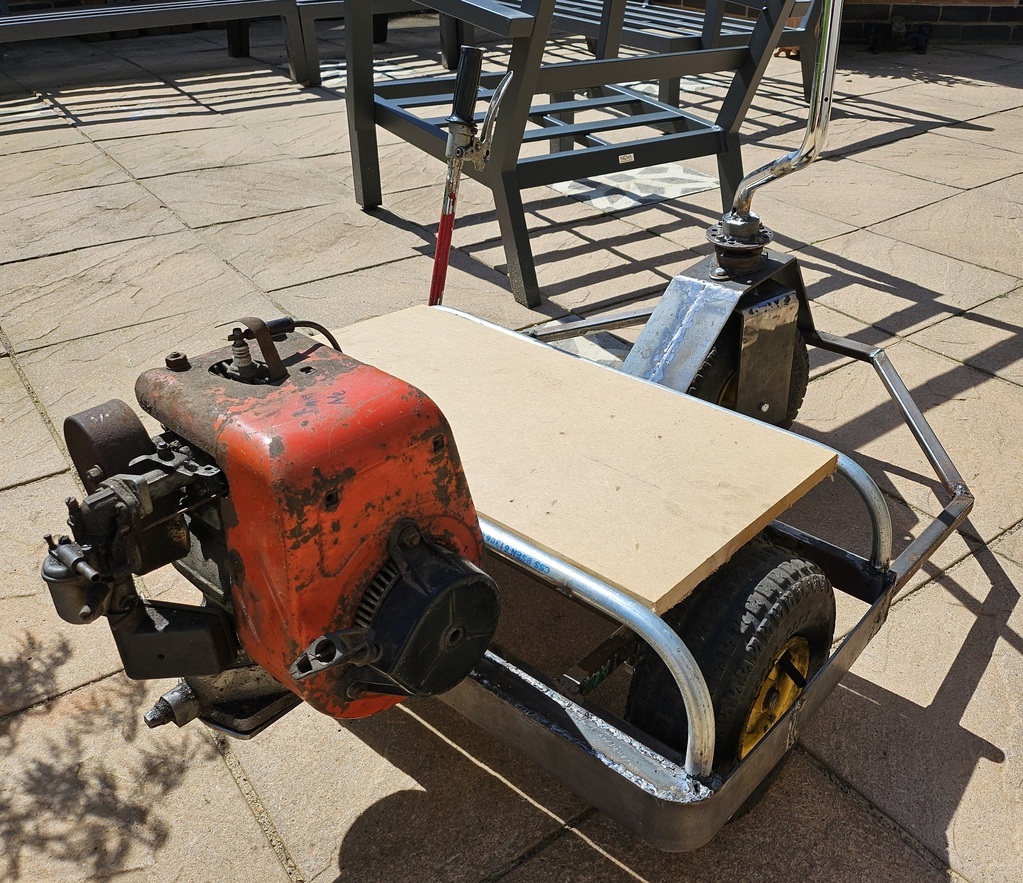 There's a plasma cut clutch cover being made as well, as I don't like how modern it looks And i'm looking for an early peanut tank which bolts to the top of the engine, annoyingly you can buy the whole mowers for about £20, but people want silly money for parts, so hopefully I can find one reasonable. I've got an ally pullstart off the earlier engine to fit as well Pic for reference of the tank and pullstart 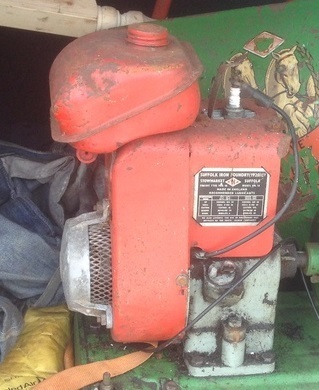 |
| |
|
|
LowStandards
Club Retro Rides Member
Bigging Up The Sum Sum Man Since '99
Posts: 2,644
|
|
|
|
|
|
| |
|
|
LowStandards
Club Retro Rides Member
Bigging Up The Sum Sum Man Since '99
Posts: 2,644
|
|
|
|
It does at the minute, but I fear I may need to add stops as a 90 degree wheel would stop the thing dead Maybe that could be the brake |
| |
|
|
LowStandards
Club Retro Rides Member
Bigging Up The Sum Sum Man Since '99
Posts: 2,644
|
|
Apr 29, 2024 12:32:31 GMT
|
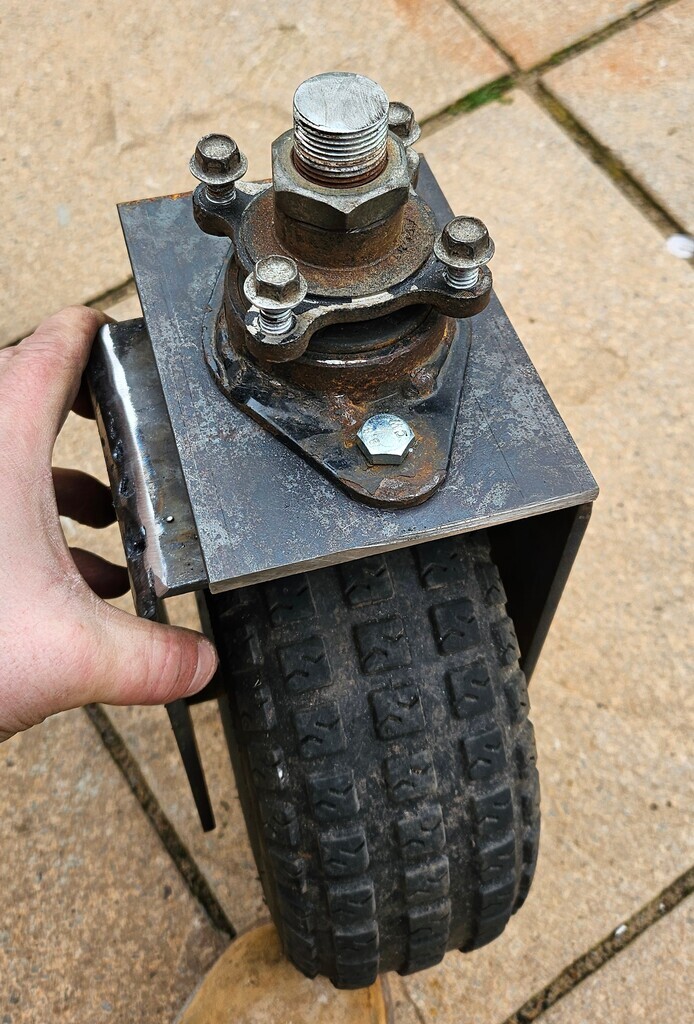
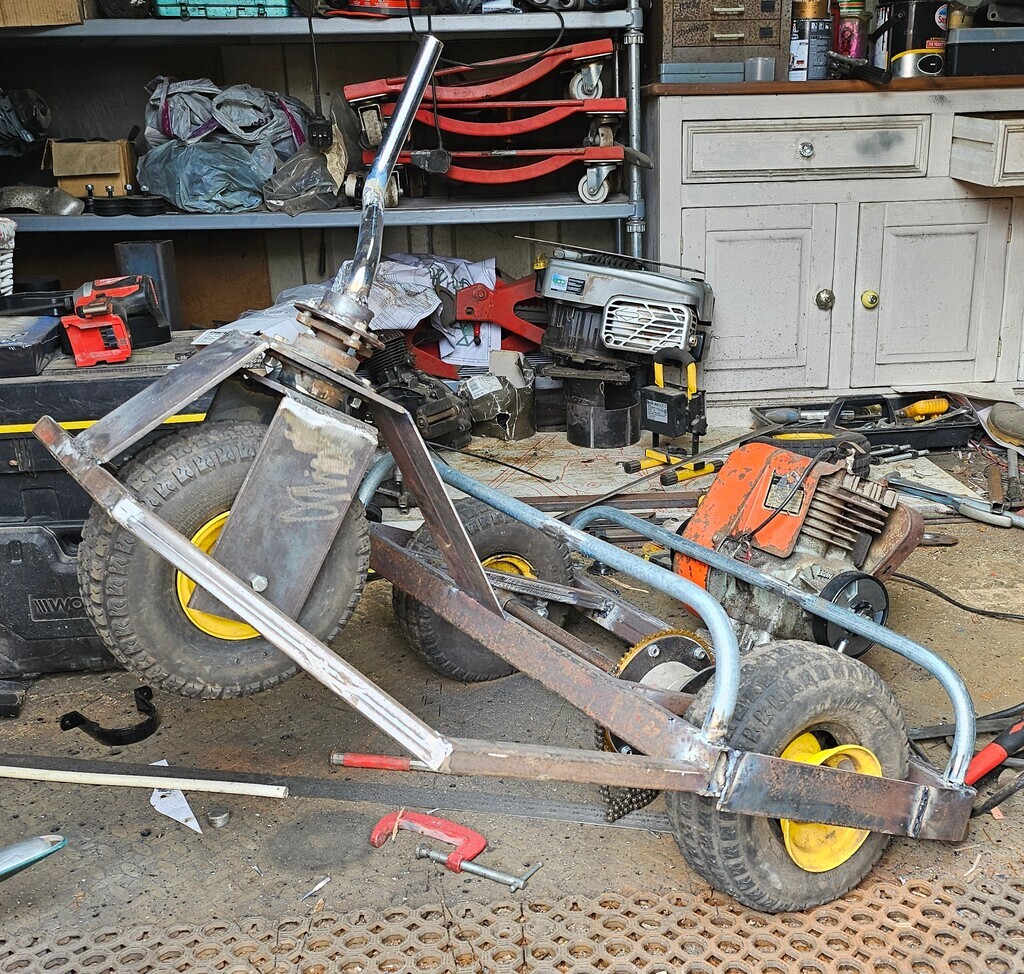
Quick half hour lunch Made a tiller, still haven't decided if i'll steer left or right handed as I still havn't decided on the throttle or brake 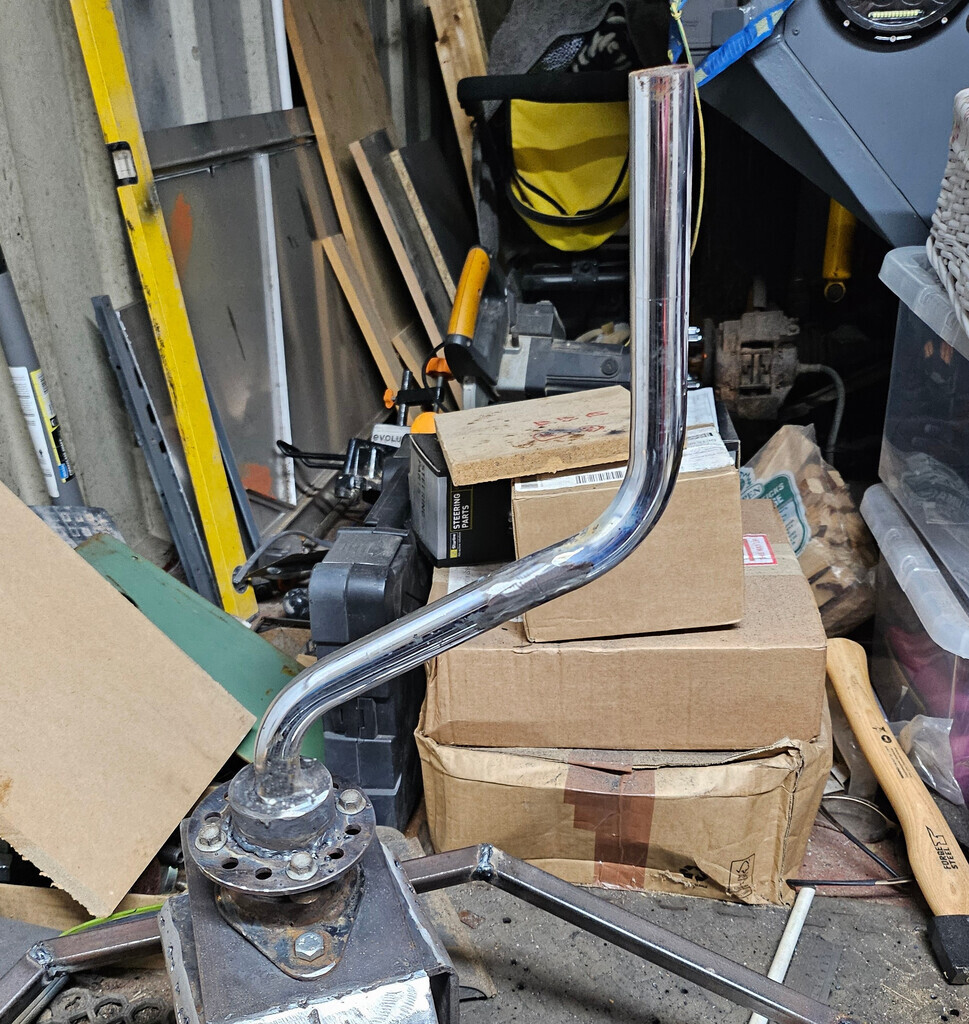 I'm leaning towards a thumb throttle on the tiller and a pull lever for the brakes Welded up the rear, just a bit of flat bar to make up the shape and mounted the engine in place 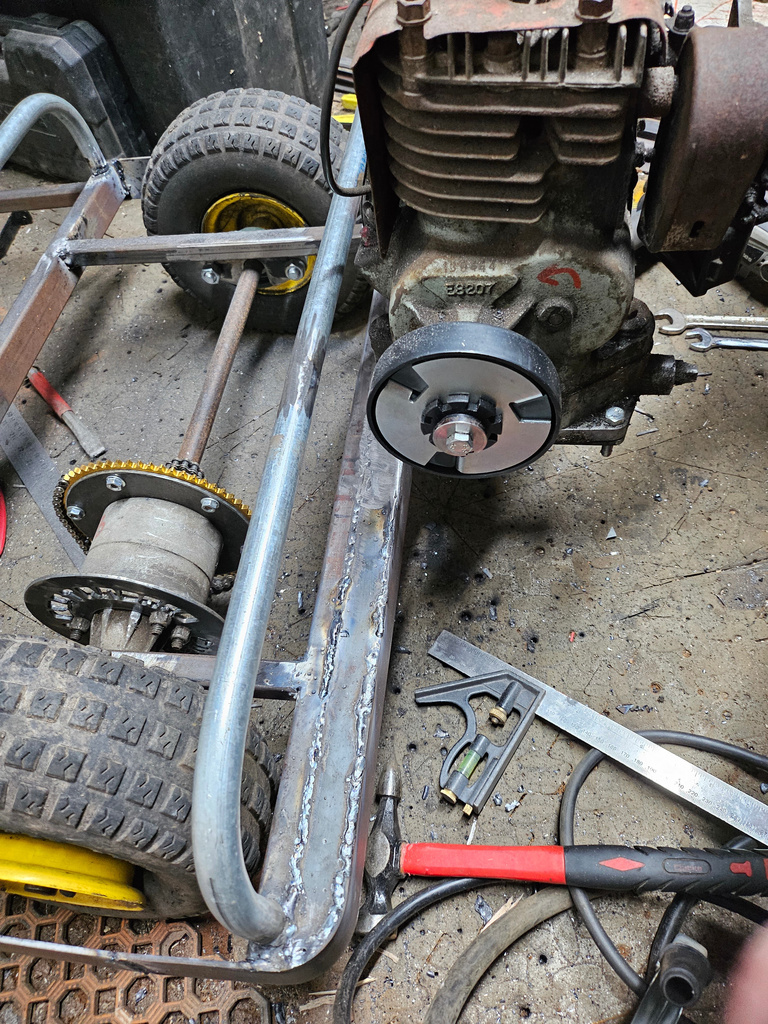 There's a slight weight distribution issue  , i'll fix this by leaning forward when I want to steer, because wheelies are hella fun. Or maybe a basket out the front full of beer  I'll have to make up a wheelie bar on the engine mount as the oil drain on these engines sticks out the back and would get damaged |
| |
|
|
LowStandards
Club Retro Rides Member
Bigging Up The Sum Sum Man Since '99
Posts: 2,644
|
|
|
|
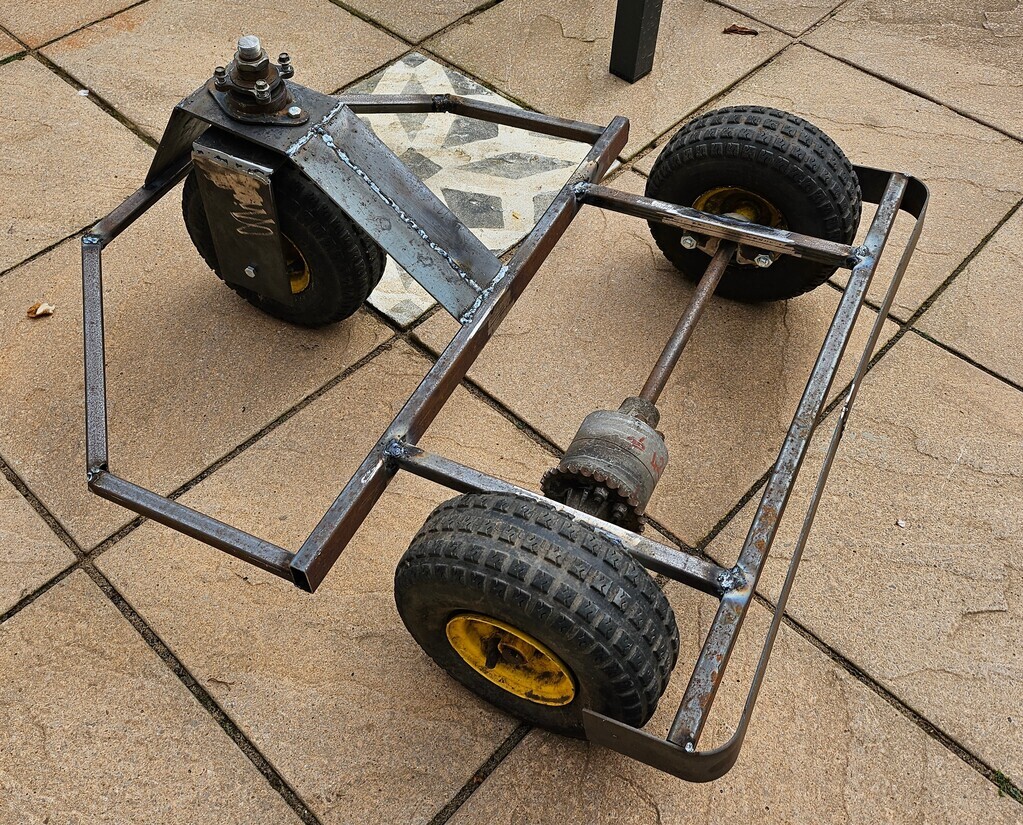
Smol update that took some time These engines are not designed for clutches, the shaft is 3/4 which is the same as Honda GXs so at least the clutch fits the shaft, but the shaft is much much shorter So I needed to take up that space Grabbed an old bit of axle and turned it down on the lathe to make up a plug. I had to them machine a keyway into it to fit the keyway on the clutch. Ignore the extra keyway on the larger part, that's from the bit of axle I used, we don't waste things 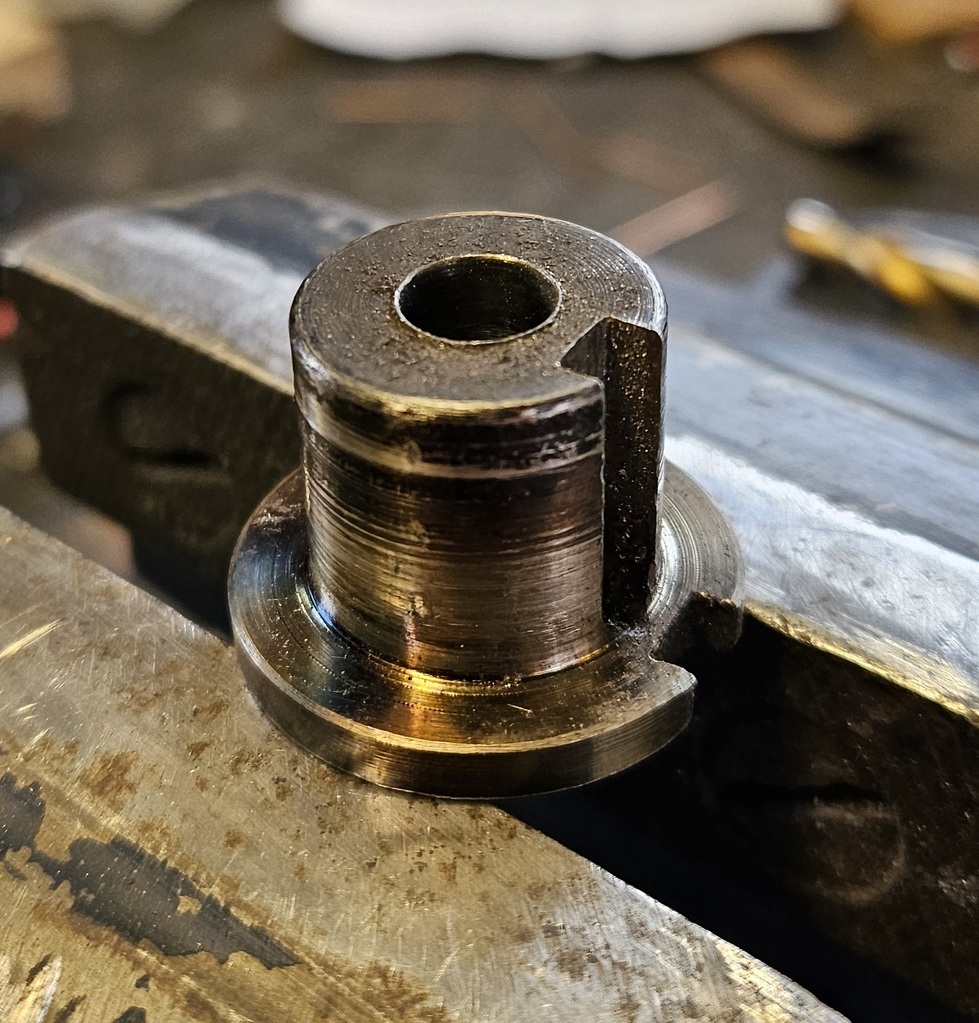 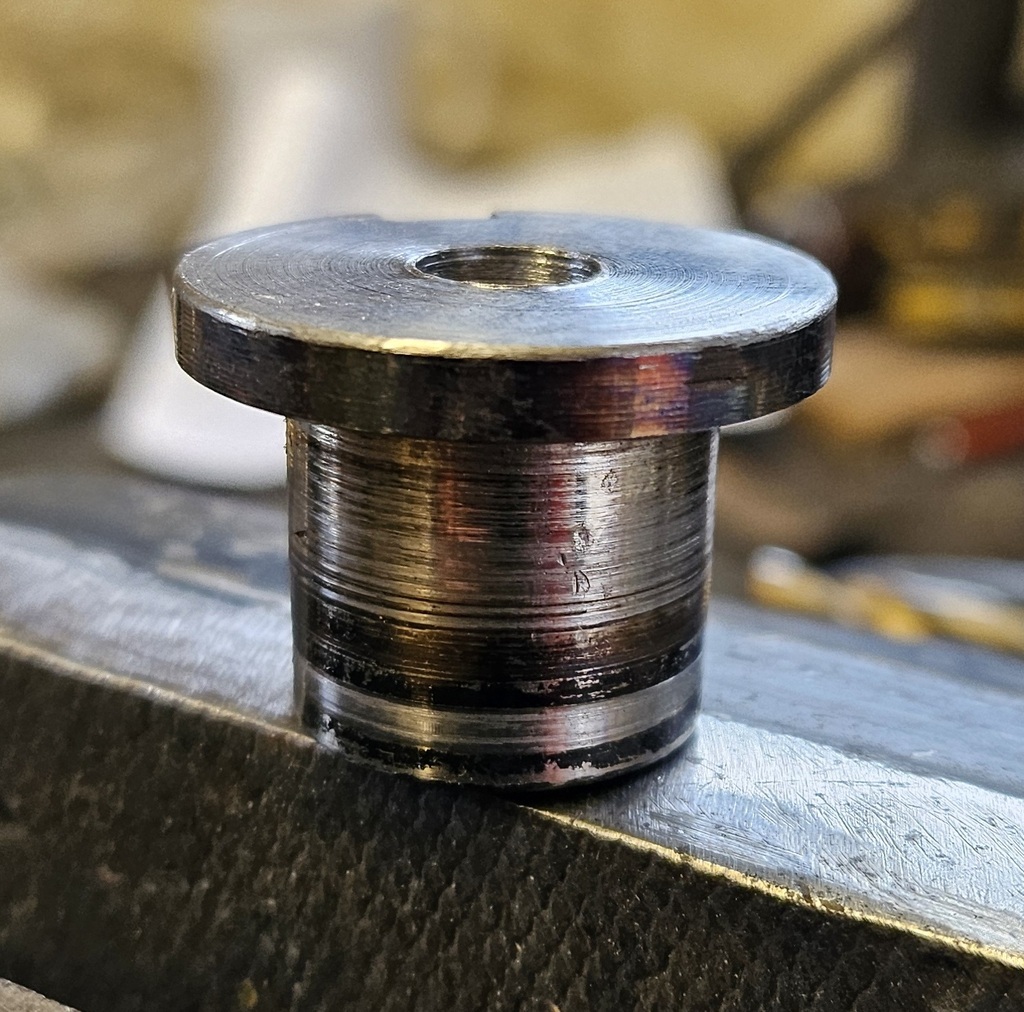 I then drilled and tapped the shaft to M8 and fitted it all up - another job ticked off 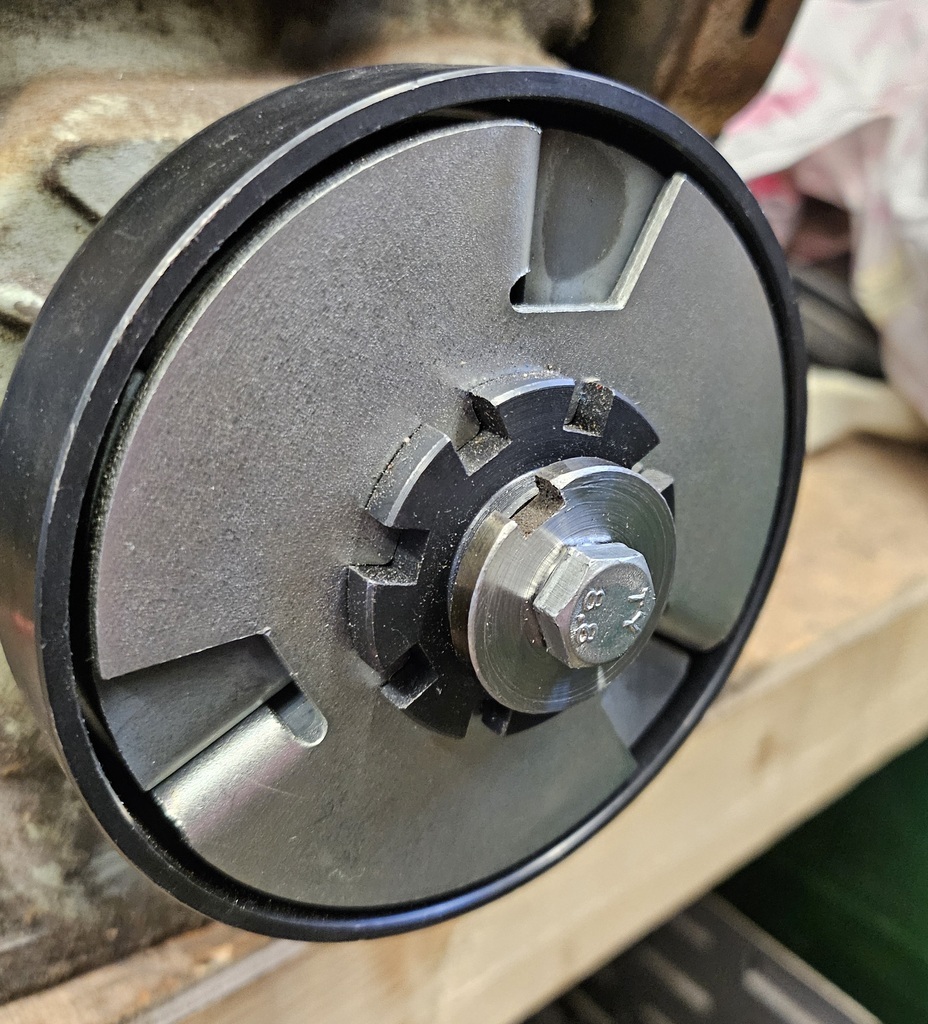 |
| |
|
|
LowStandards
Club Retro Rides Member
Bigging Up The Sum Sum Man Since '99
Posts: 2,644
|
|
|
|
Disc is 3mm wide I've been eying up the really cheap cable calipers which are adjustable in width. It wont need a huge amount of stopping power 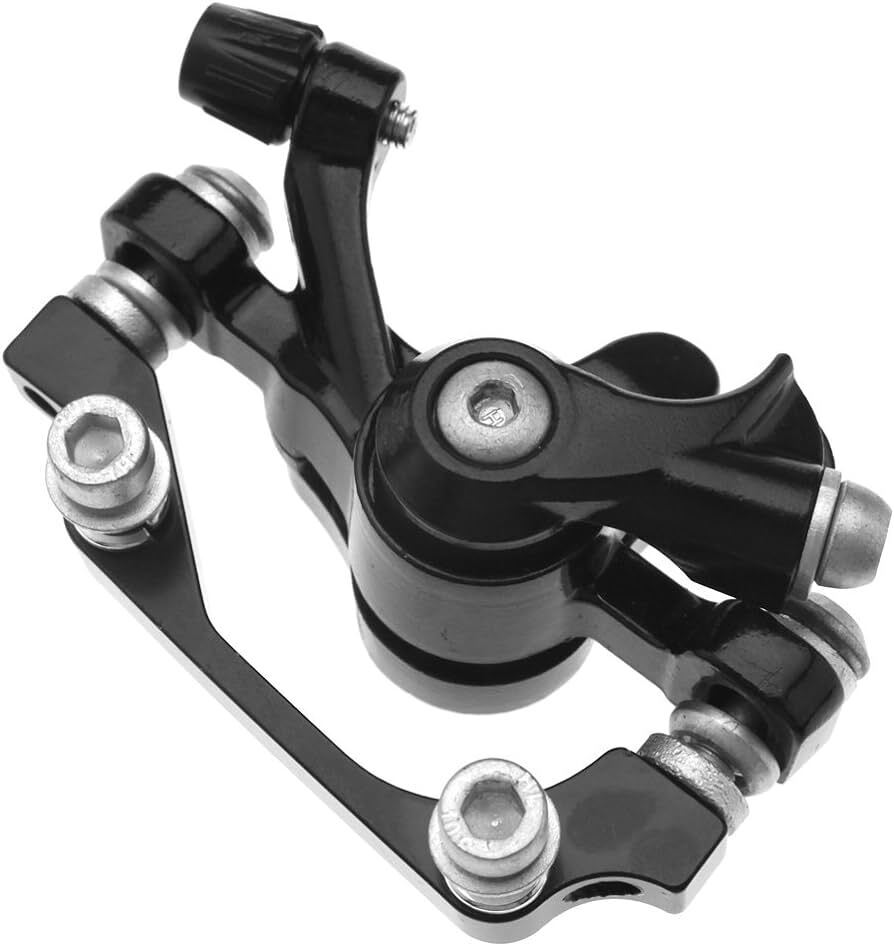 But then at the same time you can get a pitbike rear brake full setup for £20 on eBay, master cyl, hose, caliper and mount I say I don't like pedals over rough terrain, but I really mean the throttle as you tend to on/off/on/off it as you hit bumps, but as you're pressing on the brake the pedal works fine. 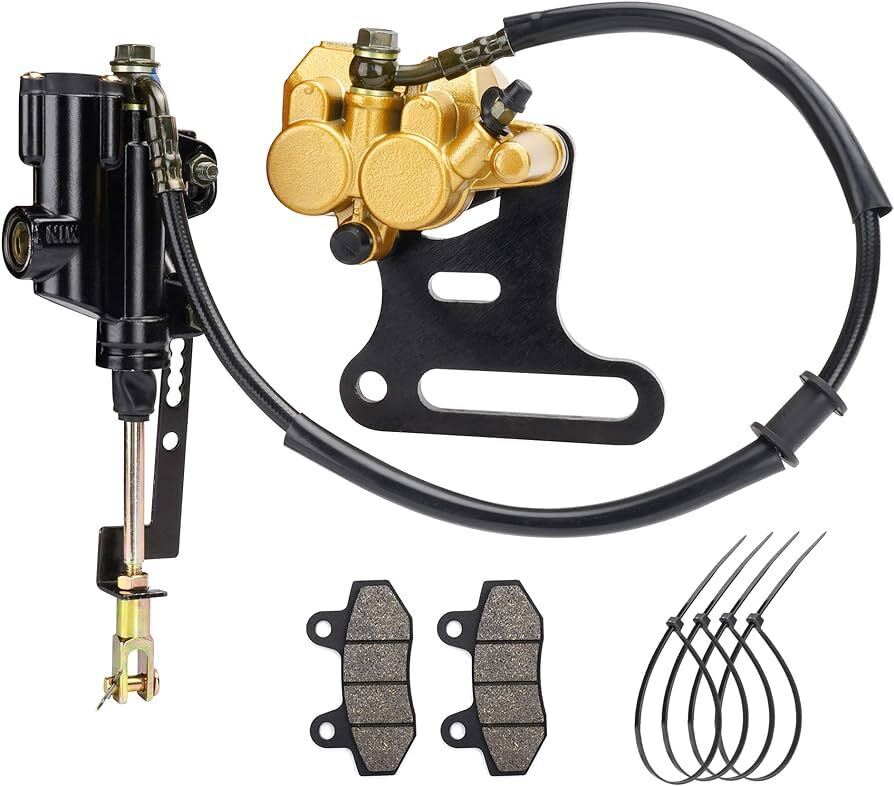 A lever on the left, push for go, pull for stop would be awesome, but there's some things to work out to stop cables etc being stretched |
| |
|
|
LowStandards
Club Retro Rides Member
Bigging Up The Sum Sum Man Since '99
Posts: 2,644
|
|
Apr 25, 2024 21:00:58 GMT
|
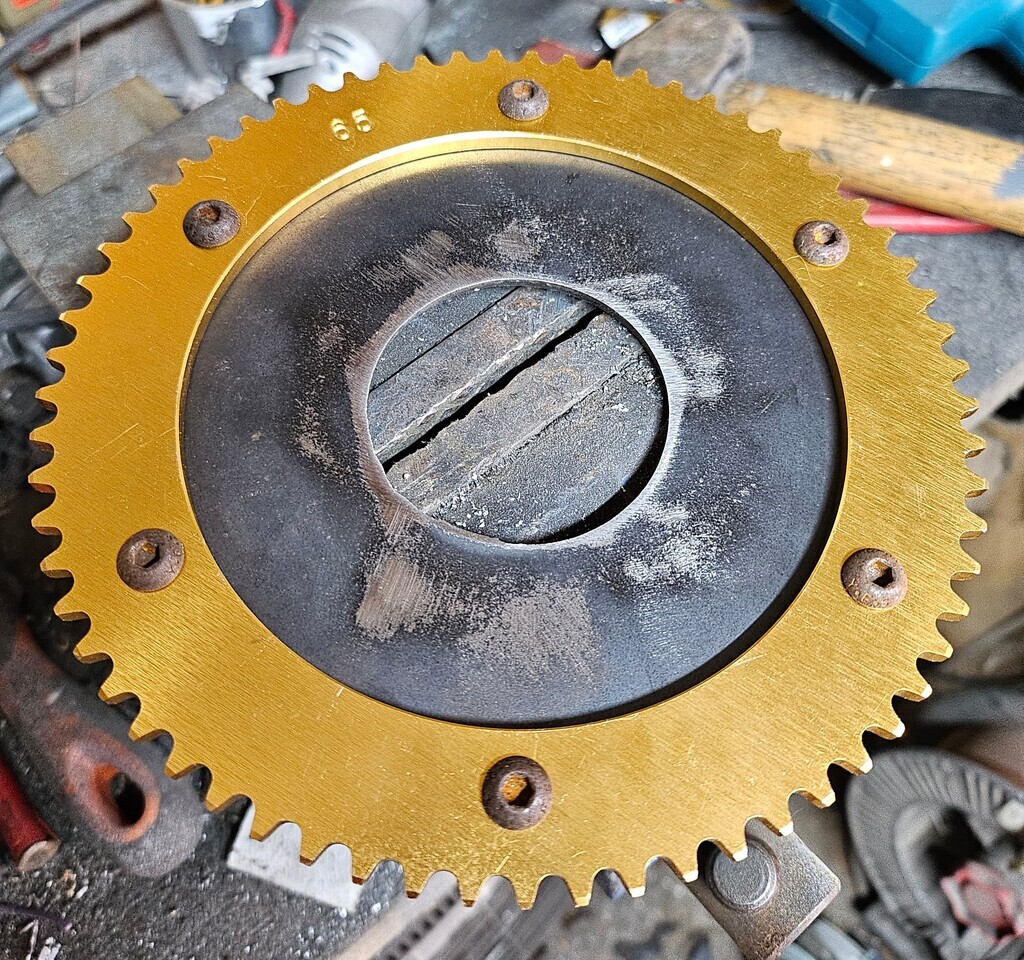
Little and often The axle had a very small ratio, yet very large pitch gearset on it and it lacked a brake as they're built into the gearbox on mowers. All I had to do was take it apart, mark up and drill the holes and I now have 219 pitch chains which are standard kart stuffs and the brake. The savvy will note I swapped the sprocket to the other side of the diff as I wanted the brake closer to the bearing as the kart and I will produce more braking torques than the lil engine can produce forward momentums 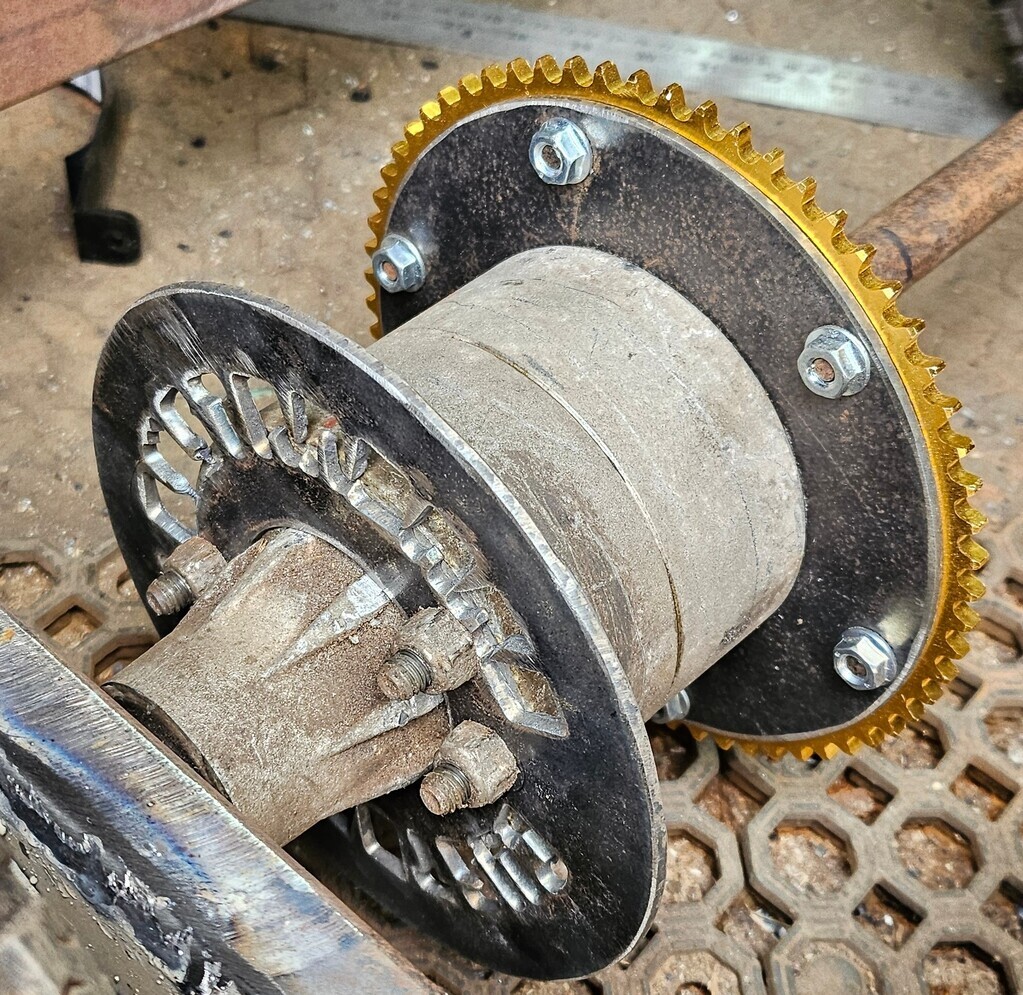 I also played with the idea of rear steer, but I'm leaving it as an idea 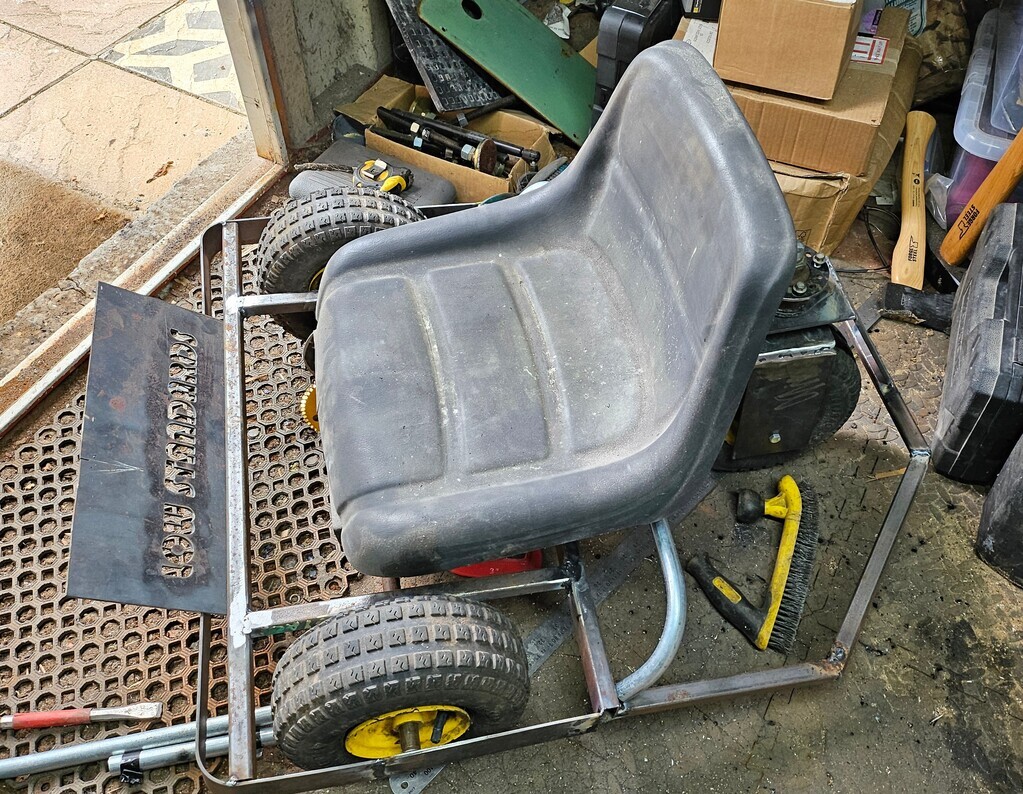 I will build one, but the engine will sit over the rear wheel and rotate with it and the front axle will be 2 separate axles as steering will have to run through the middle of it. The clutch has been ordered and the bearings for the jackshaft have arrived. I guess the main bits to do now are mount the engine and the tiller, seat, floorpan Any ideas on throttle/brake. I'm not keen on pedals over rough surfaces |
| |
|
|
LowStandards
Club Retro Rides Member
Bigging Up The Sum Sum Man Since '99
Posts: 2,644
|
|
Apr 23, 2024 17:53:59 GMT
|
|
|
| |
|
|
LowStandards
Club Retro Rides Member
Bigging Up The Sum Sum Man Since '99
Posts: 2,644
|
|
Apr 23, 2024 17:42:00 GMT
|
How about building it backwards, with steering wheel at the back, and the two driving wheels at the front Ttfn Glenn We've already discussed and I will build another like that when I have more time as it's a little more complicated |
| |
|
|
|
|
LowStandards
Club Retro Rides Member
Bigging Up The Sum Sum Man Since '99
Posts: 2,644
|
|
Apr 22, 2024 19:26:29 GMT
|
Super quick one just to say I love lathes Marked out the pcd diameter of the sprocket on the carrier, now once I've drilled 1 hole in the line, the others will easily follow Few spacers An axle! I made an axle, just drilled and tapped and sized up, but come on, I used a proper tool and didn't just shove a random bit of scrap in a hole and made do... 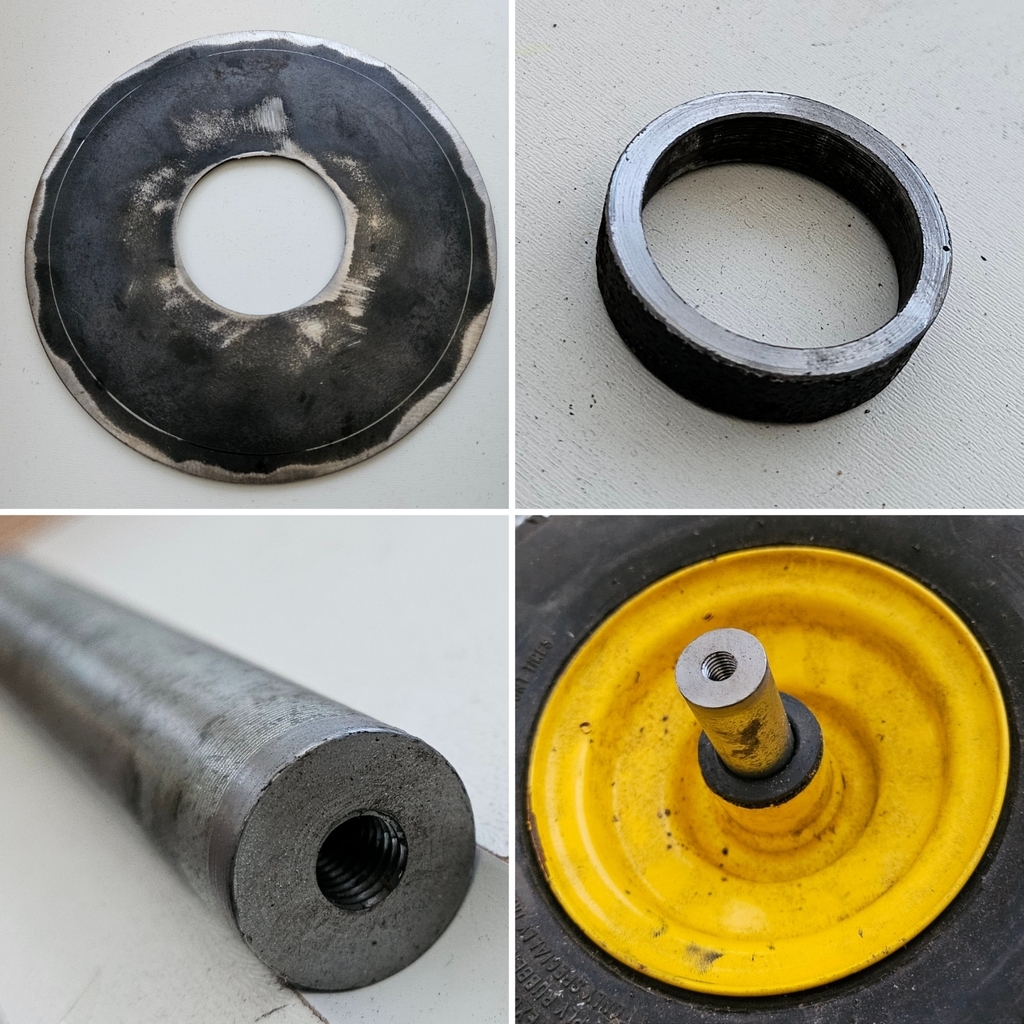 |
| |
|
|
LowStandards
Club Retro Rides Member
Bigging Up The Sum Sum Man Since '99
Posts: 2,644
|
|
Apr 19, 2024 12:45:15 GMT
|
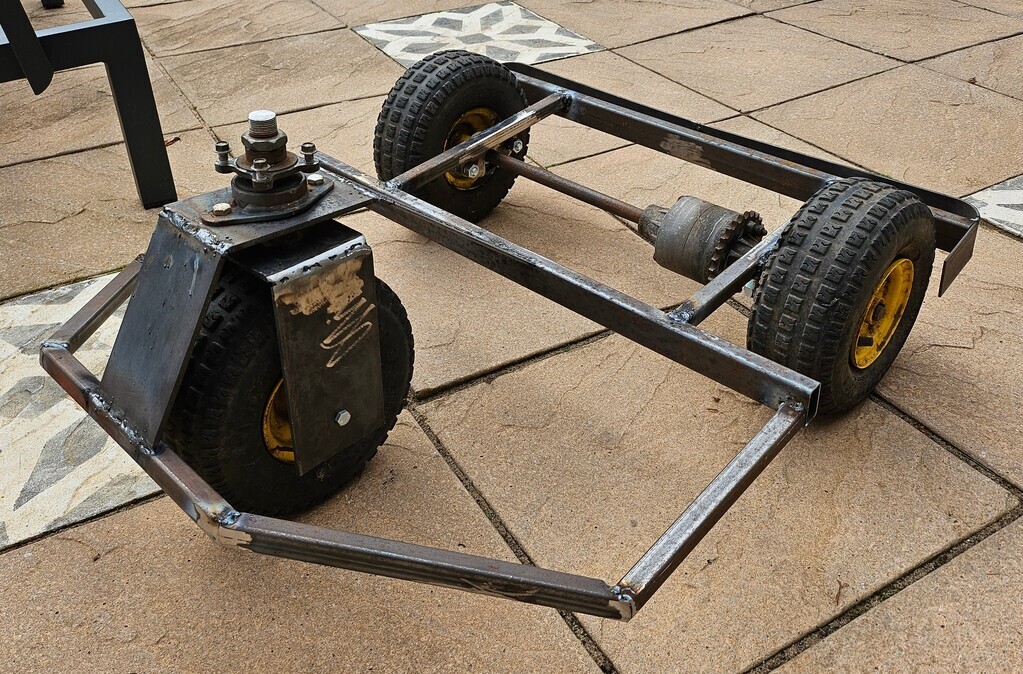
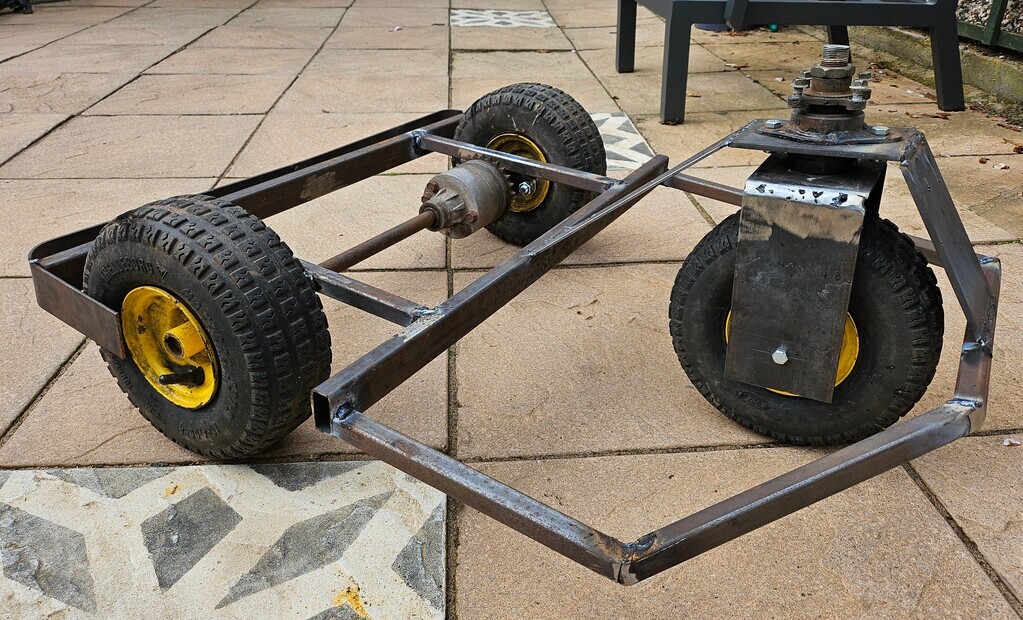
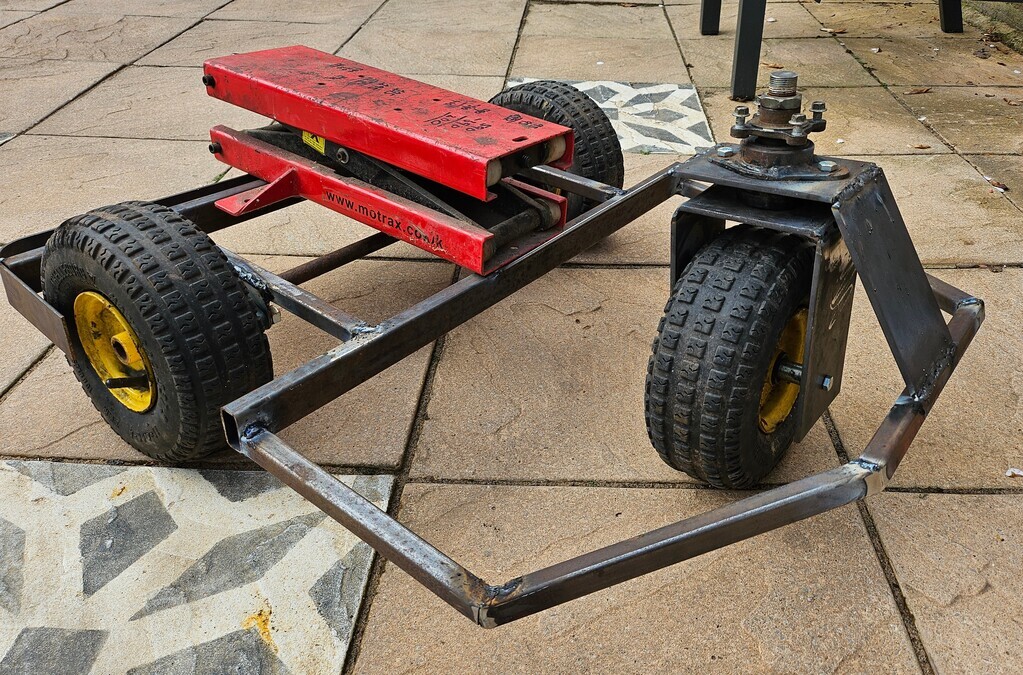
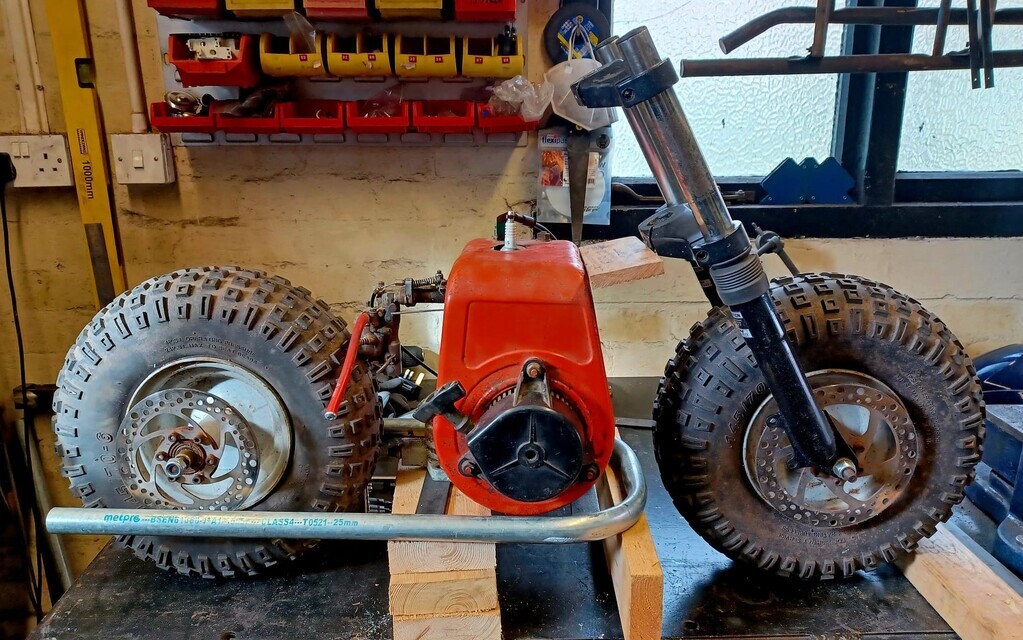
So, I wasn't overjoyed with how the box section looked, so I cut it up and did this 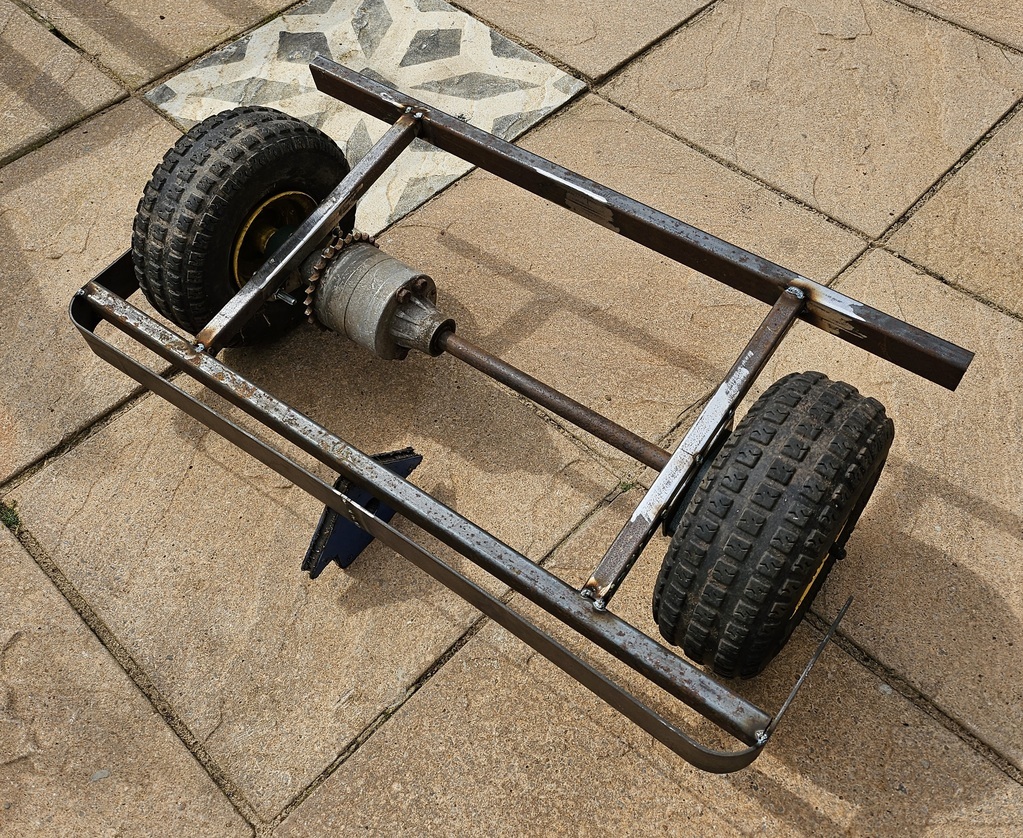 And then I did this 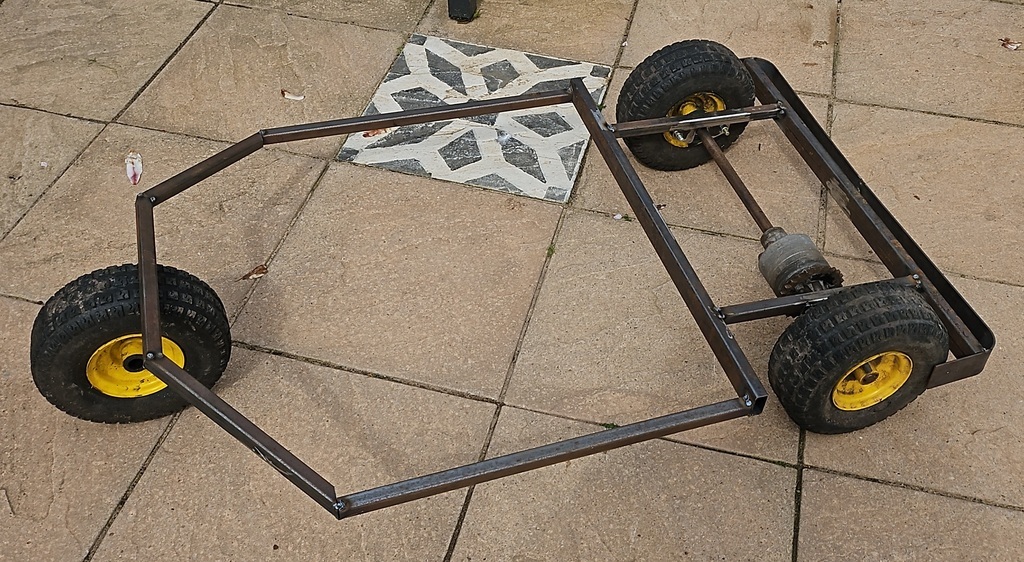 I'd sat where the seat was goin to be and that was how long it would have to be for a human man to sit and drive it. It's huge, I was unhappy, this is meant to be a mini mountain goat, but I guess you can't help but need to fit on it. I pondered, I went back to the mini bike trike idea, just a plain mini bike etc, but no, I then had the idea of siting the seat over the rear wheels with the engine hanging out the back. Granted it wont look as intended, but it just might work. So... 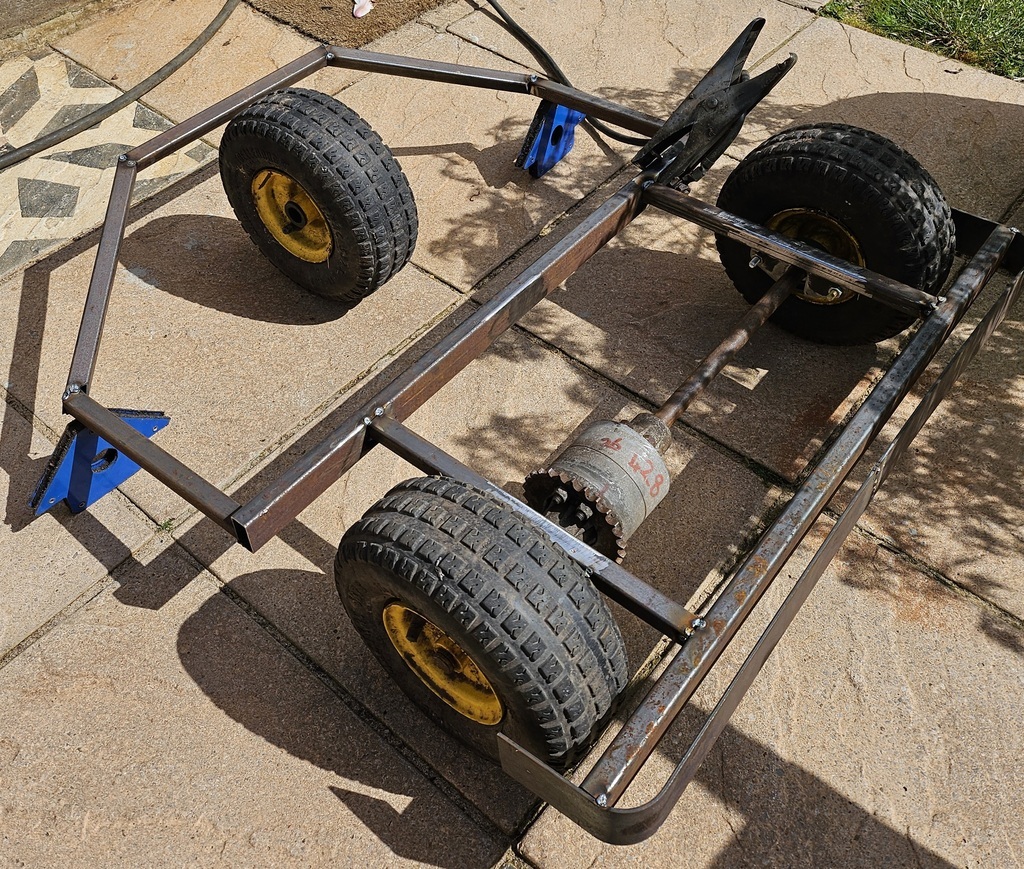 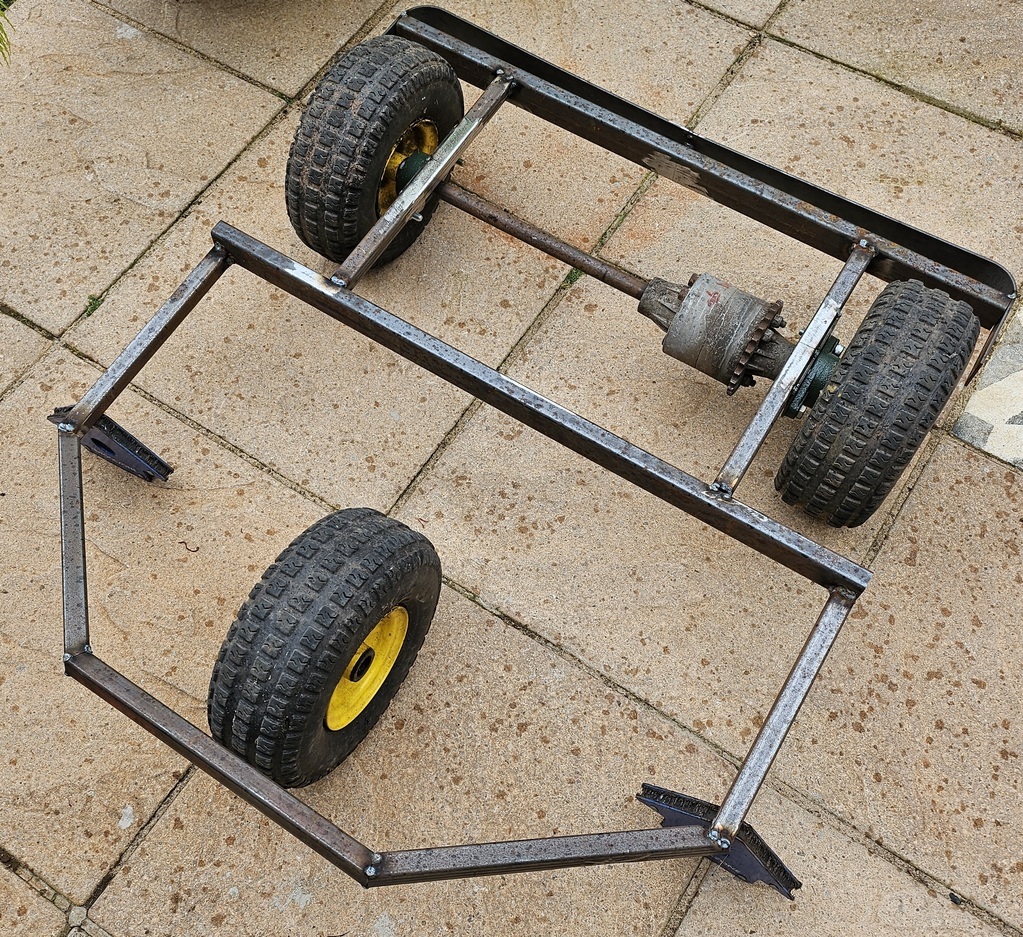 Looks much better proportioned. I also moved the front wheel inboard to further shorten it. I grabbed an old quad axle and cut the bearing from it and hacked a bit of the axle up to come up with the steering box 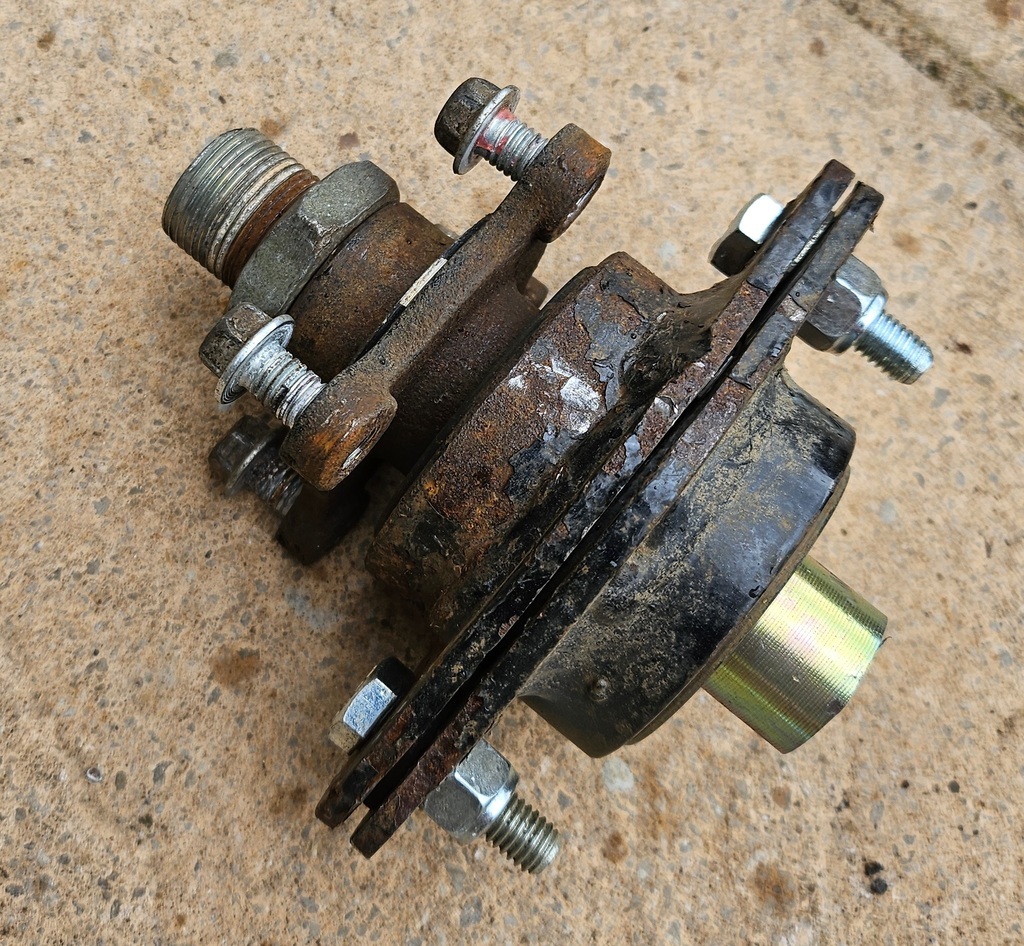 That's it for now. I don't think this will make it to RRW, we'll have to see |
| |
|
|
LowStandards
Club Retro Rides Member
Bigging Up The Sum Sum Man Since '99
Posts: 2,644
|
|
|
|
|
Go see if the doors are open and the ignition etc is intact
It does look a bit like IronMighty says, dumped to see if anyone reclaims it.
Even if it had broken down, you wouldn't leave it for weeks
|
| |
|
|
LowStandards
Club Retro Rides Member
Bigging Up The Sum Sum Man Since '99
Posts: 2,644
|
|
|
|
|
I'm not sure anyone has any right to tow and crush a vehicle, sounds a bit like scaremongering to me. It will end up in a compound somewhere whilst the owner is contacted.
I'd be tempted to just leave it be, you move it, then you've stole it right?
|
| |
|
|
LowStandards
Club Retro Rides Member
Bigging Up The Sum Sum Man Since '99
Posts: 2,644
|
|
Apr 12, 2024 12:42:55 GMT
|
Grabbed a few mins Bearings came, plates bolted up perfectly 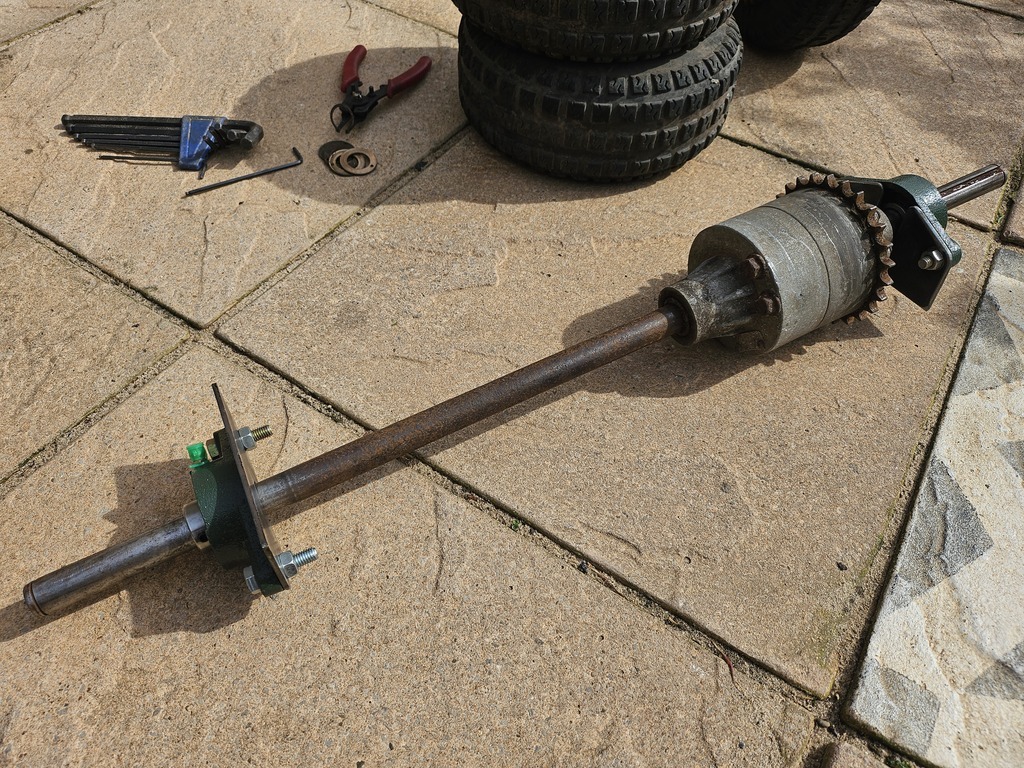 I seemingly got too involved and missed taking photos as I made the box section frame up round the rear. I made an engine plate up, no plasma this time, just traced round it onto some 150x5mm flat bar 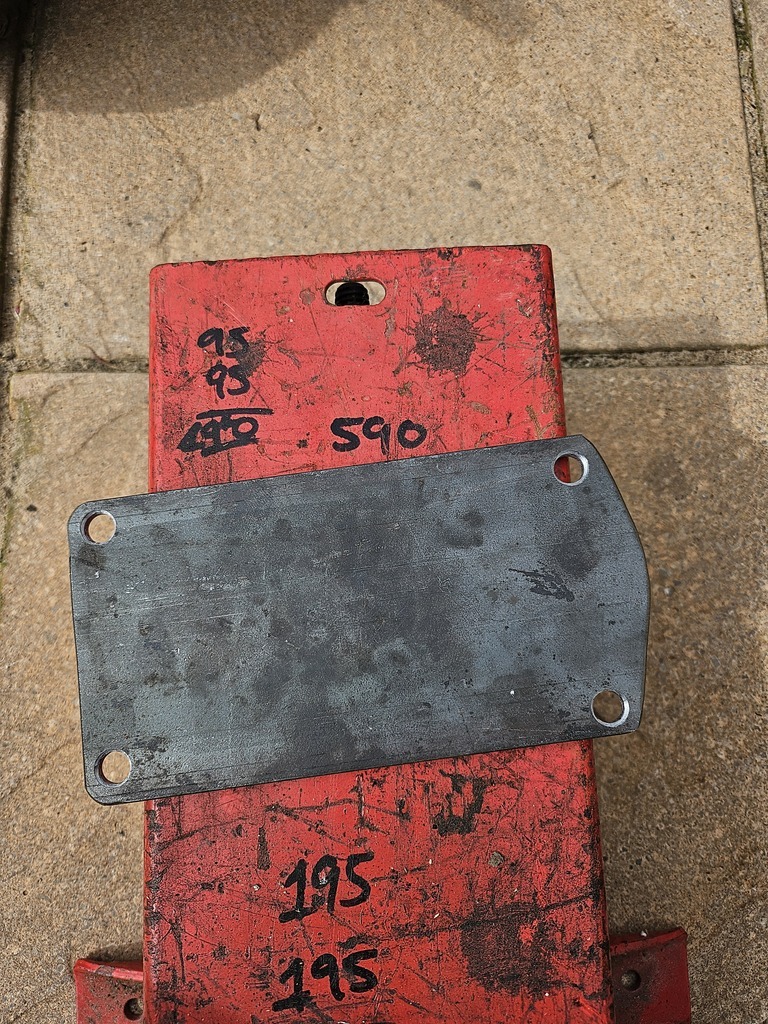 Tacked it to the frame, i've ran out of gas, so it will all be tacks until I buy some more 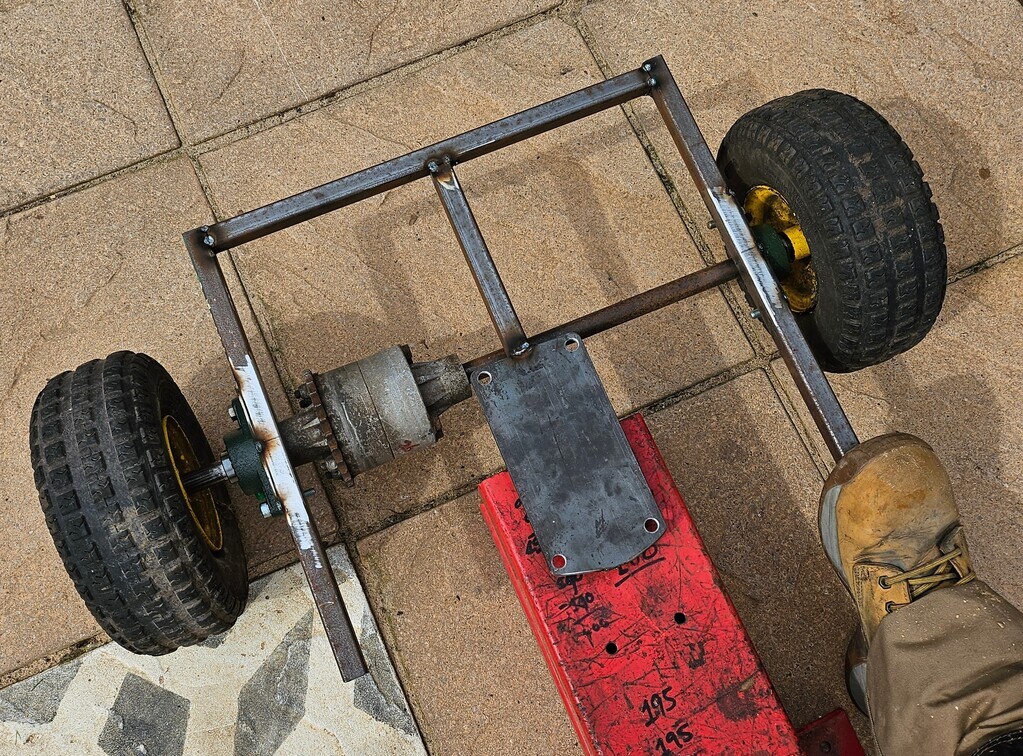 You can see the frame will hold the engine out the back, the axle etc. This is the last of the box section, it all has to be in tube now, so will get a bit more tricky. Quick shot of the engine in place, it's all very tight 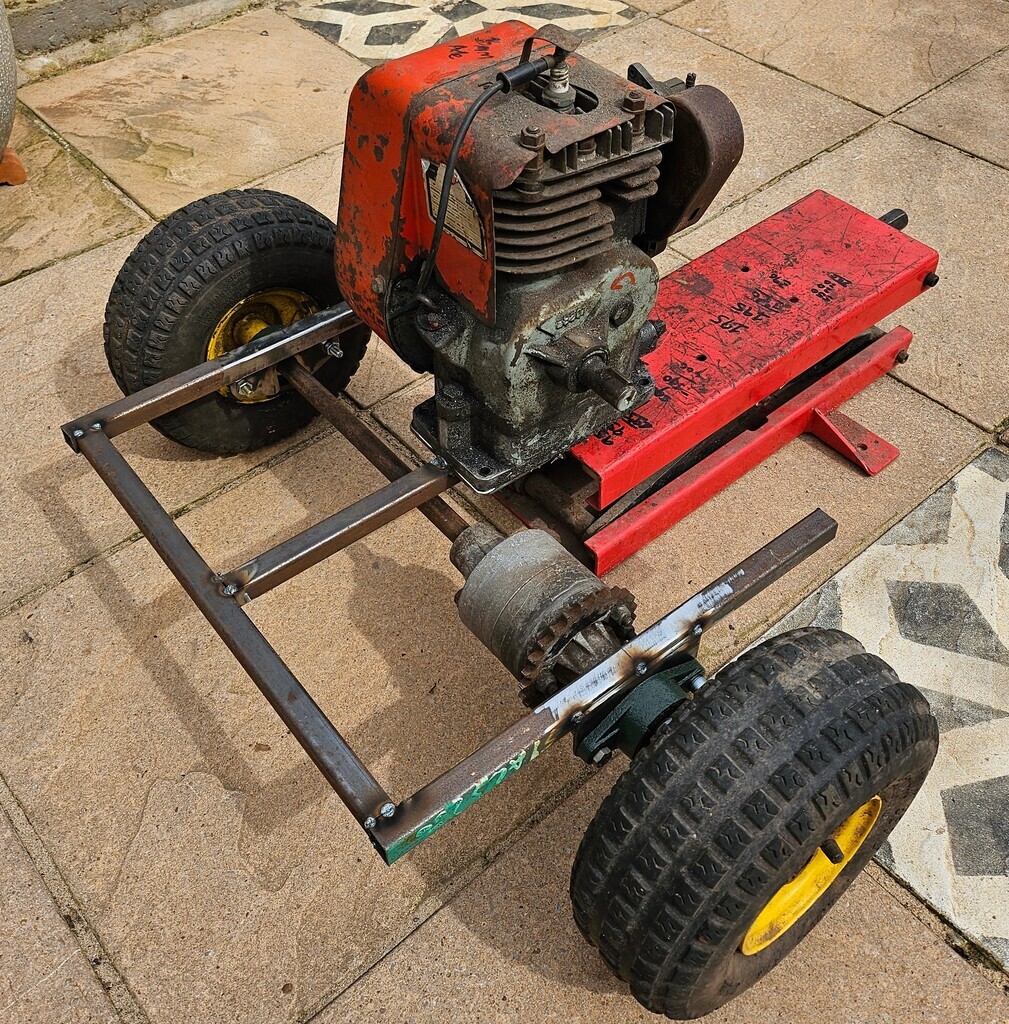 My jackshaft gears arrived, just little 219 pitch pilot bore sprockets, nice and cheap. I was hoping for a 10mm bore, but they're 8mm, not sure that will be strong enough, so might drill them out to 10mm They're teeny look, pen for scale 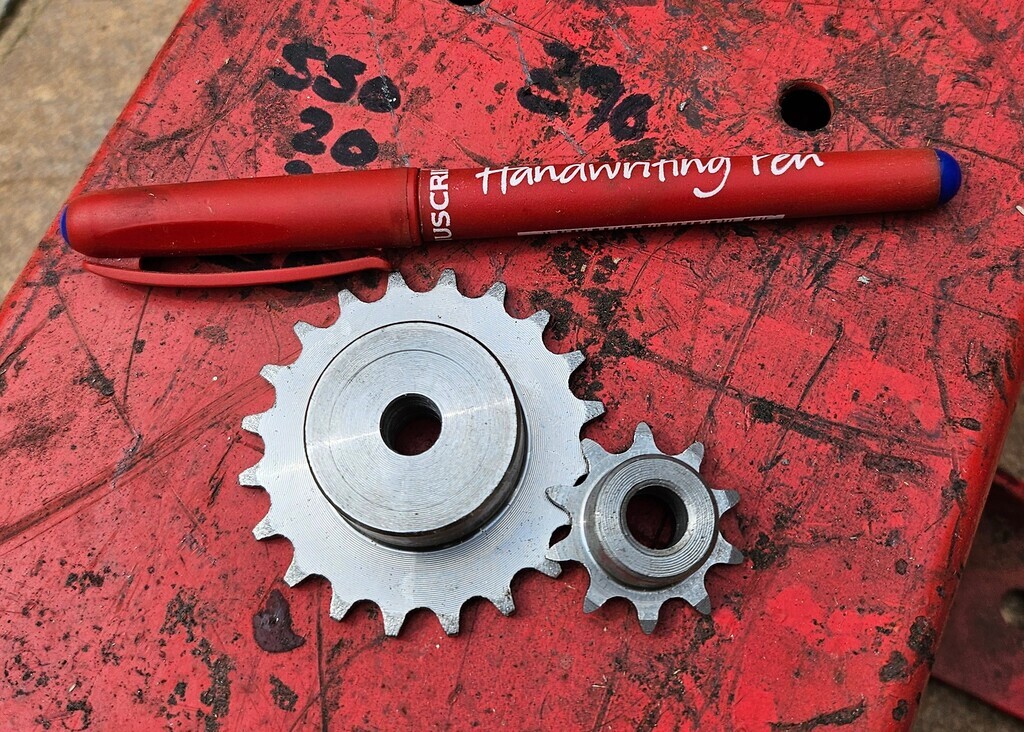 The engine sits perfectly down the centre, but I may move it over as it would be easier and stronger to weld the jackshaft sprockets directly together and it will need to be offset to accomodate this. |
| |
|
|
LowStandards
Club Retro Rides Member
Bigging Up The Sum Sum Man Since '99
Posts: 2,644
|
|
Apr 12, 2024 10:10:49 GMT
|
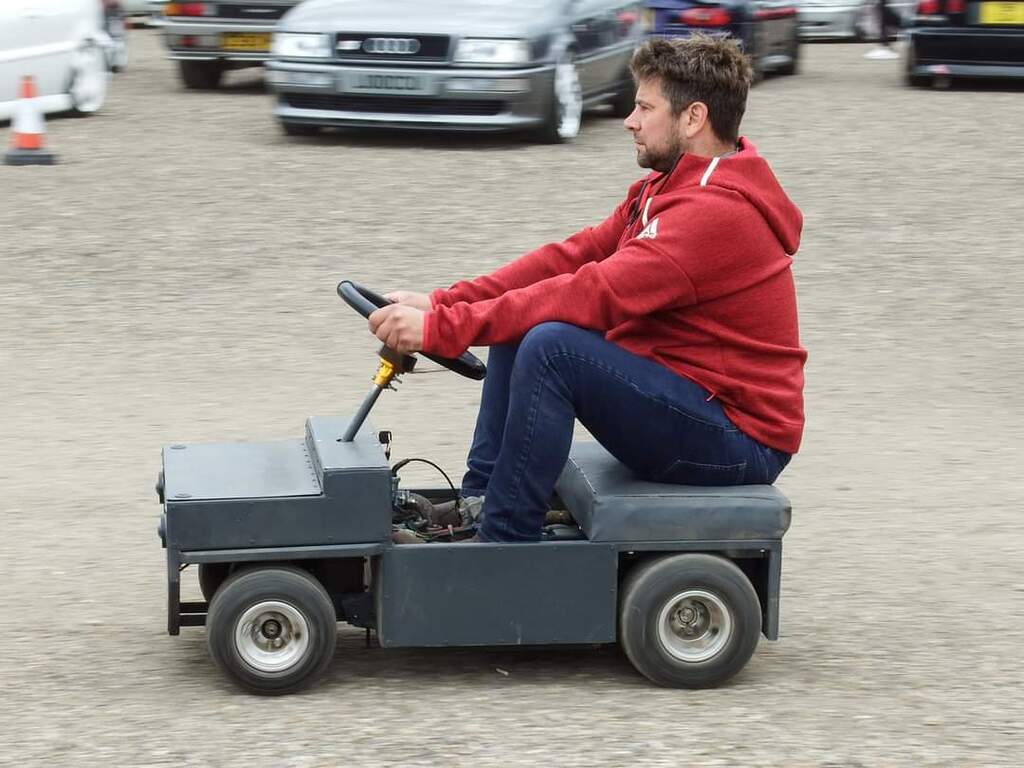
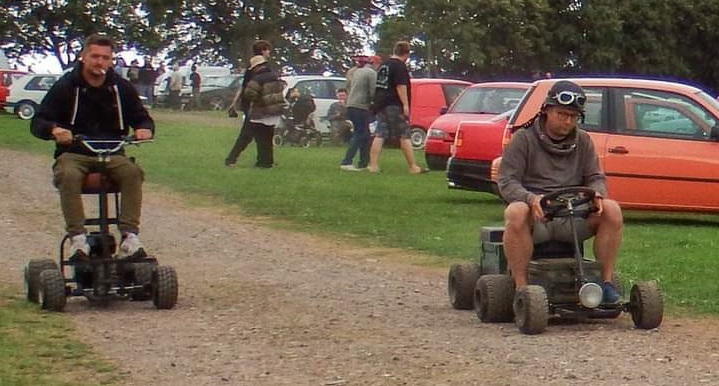
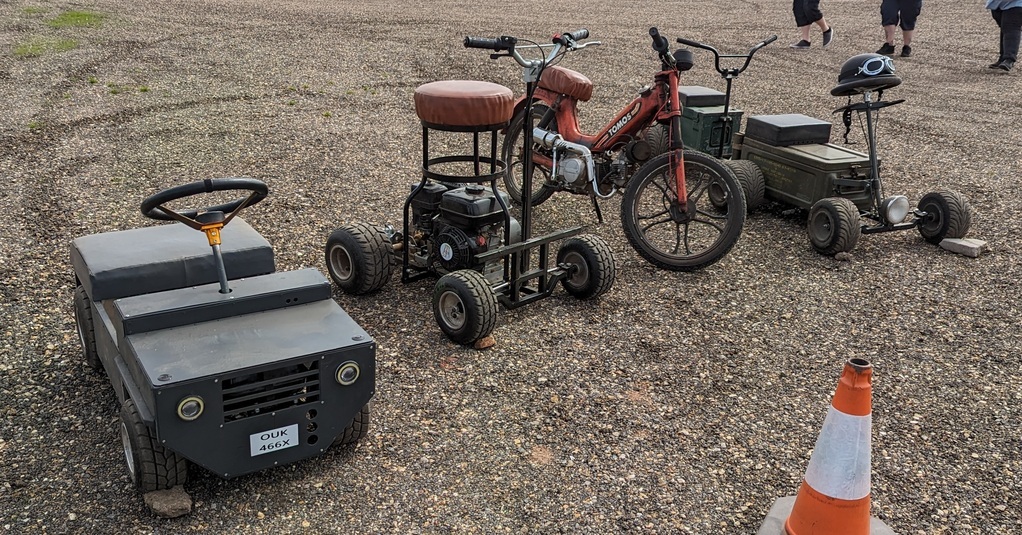
The Little Scamp still works just fine, was riding round the estate the other day It's not good with bumps though and I remember Goodwood campsite being a ploughed field last time I went  You'll have to wait for barstoolracer for info on the Plasma device, he built it |
| |
|
|
LowStandards
Club Retro Rides Member
Bigging Up The Sum Sum Man Since '99
Posts: 2,644
|
|
|
|
 No panic then, just a few weeks to go and I have to build a complete kart and also find a trailer to fit all our other sh*te! |
| |
|
|
LowStandards
Club Retro Rides Member
Bigging Up The Sum Sum Man Since '99
Posts: 2,644
|
|
Apr 11, 2024 22:09:03 GMT
|
I installed the normal 15mm plastic pipe you get from screwfix with push fit fittings about 5 years ago, still good, no leaks, no explosions that s what ive been looking at recently, how did you get from the 15mm to air fittings? thanks Used the brass tap end fittings that screw to the wall with a threaded adaptor down to the quick release airline fitting. All plumbing parts from screwfix |
| |
|
|
LowStandards
Club Retro Rides Member
Bigging Up The Sum Sum Man Since '99
Posts: 2,644
|
|
Apr 11, 2024 13:11:52 GMT
|
|
I installed the normal 15mm plastic pipe you get from screwfix with push fit fittings about 5 years ago, still good, no leaks, no explosions
|
| |
|
|
LowStandards
Club Retro Rides Member
Bigging Up The Sum Sum Man Since '99
Posts: 2,644
|
|
|
|
Mr Low I hear you cry, but isnt this a whole host more complicated than building a mini bike? Well, no. The mini bike will be built, but axles and jackshafts and steering stems etc are a whole host more complicated than using something I already have. It's about 3 weekends away you know. Frames get built up real quick once you get started and this is 90% frame. Anyways, barstoolracer sent me a message last night - lets go cut these plates - but I was in the bath, so he had to do it alone. I asked for vids and weirdly, so did he... Plates cut 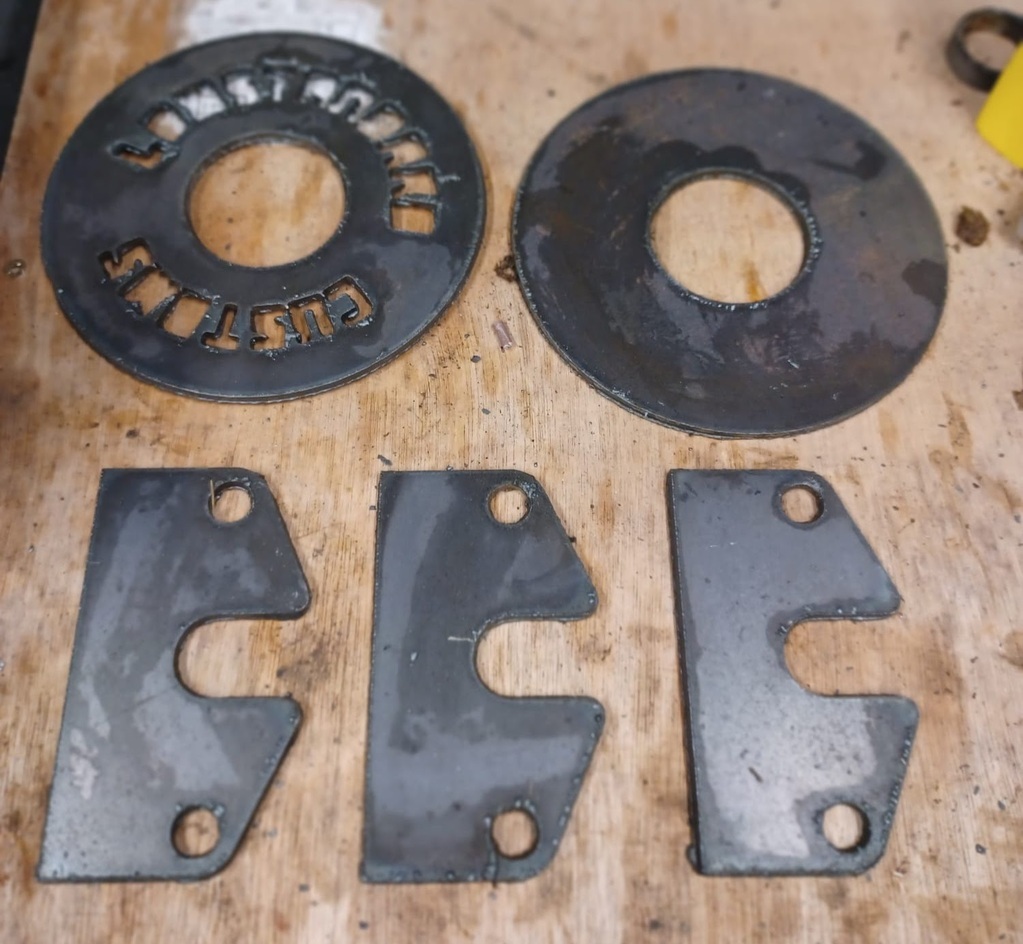 Had a go at some wording on the brake disc. We're very new to this cnc plasma lark, so next time we'll add a bit more space between the letters to prevent the burn through between them and choose a better font with some more definition on things like the W. But hey, it's a brake disc, so we're not cutting another one. 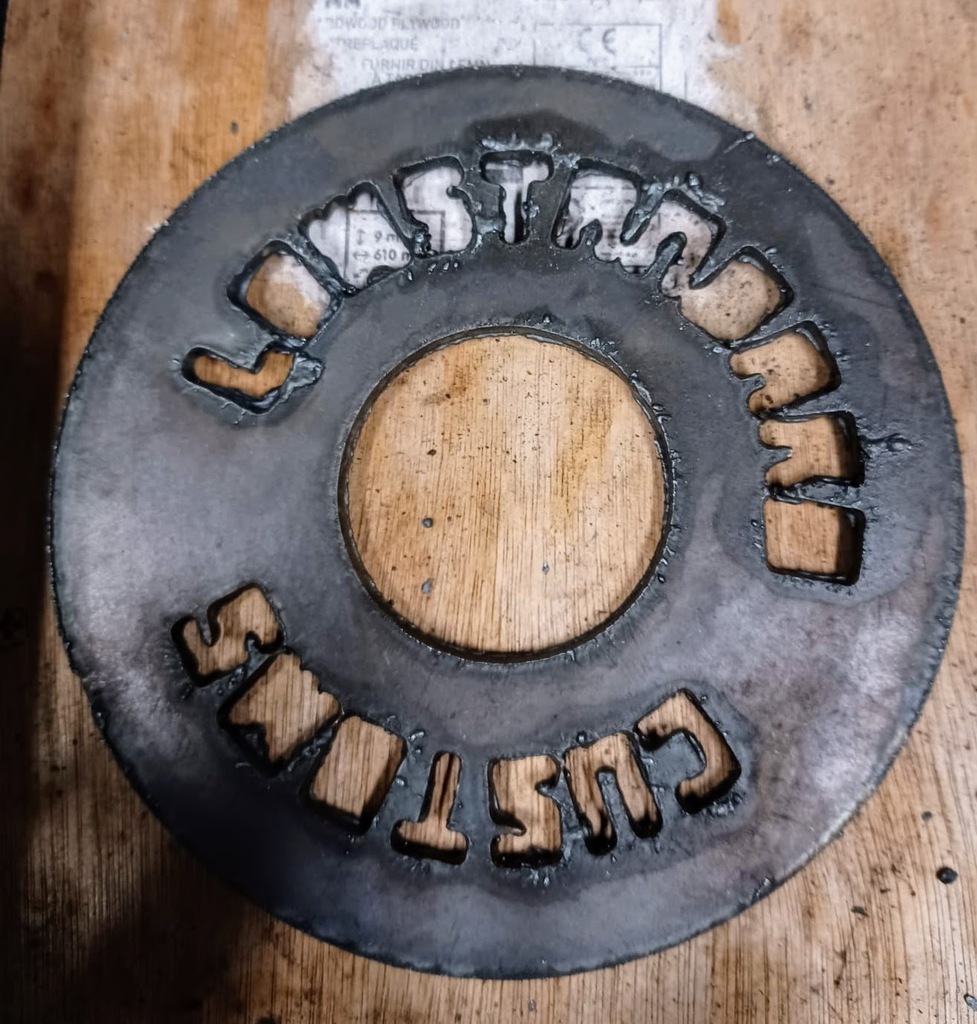 Here, have a vid. The whole setup was a smidge over £200 iirc |
| |
|
|
|
|


 , i'll fix this by leaning forward when I want to steer, because wheelies are hella fun. Or maybe a basket out the front full of beer