|
|
|
Jun 26, 2012 11:06:41 GMT
|
Didn't want to hack your thread anymore, so here are some more photos of my car and the first-aid kit on my own. retrorides.proboards.com/index.cgi?board=readersrides&action=display&thread=131908Thanks for the help, another thing, how do you carefully take the instrument cluster out - I want to grease my gears on the speedometer, it makes noise in the morning. Also, what can I do about noisy lifters in the morning at start-up. Quiets down in 5 seconds. |
| |
 you, you and you, Panic! - the rest of you, come with me! |
|
|
|
|
|
|
Sept 13, 2012 22:02:17 GMT
|
I would have that back it was, and looks like it still is, a great car Since buying the car from you, it's had the following done: 1. Proper service, including new fuel, oil and air filters, fresh oil and coolant. 2. Pair of new rear tyres. 3. New battery (not cheap!). 4. Sony MP3 headunit and 6x9 rear speakers. 5. Exhaust re-hung as it was squeaking. 6. Replacement M Sport side trims. I don't think the mileage has increased by more than 5k. Matt rarely drives it hard. The only time it gets a spanking is when I take it out for a spin. ;D The only thing that spoils that car is the steering. Due to the wide tyres it tramlines too much and feels too sticky around the centre. I like it but I prefer my MR2. He doesnt want a near mint 5 door Golf Gti and a MX5 does he??!! retrorides.proboards.com/index.cgi?action=display&board=want&thread=136712&page=1#1652117 |
| |
|
|
|
|
|
|
|
|
Read this thread ages ago and often wondered if the car is still about. Some day I'm going to have to sort myself out a W123 although anything decent is now getting very expensive.
|
| |
|
|
|
|
|
|
|
Read this thread ages ago and often wondered if the car is still about. Some day I'm going to have to sort myself out a W123 although anything decent is now getting very expensive. Hi there. I got banned from this site about two years ago, hence the lack of updates. The W123 230E is still going strong, currently undergoing restoration. See here: forums.mercedesclub.org.uk/showthread.php?p=1244219#post1244219All the best. Peter C |
| |
|
|
|
|
|
|
|
|
Cheers for that . Must sign up for the Mercedes club and have a nosey although don't have one at the moment I have had three 190s in the past. Good to hear the cars still around.
|
| |
|
|
|
|
|
Dec 28, 2014 17:26:30 GMT
|
|
Hi peter96,
I saw your post on the Mercedes Benz forum, good to hear from you.
I have expanded my fleet, as well as the 230E, I now have a R129 500SL, a W124 E220 and for daily duties there's a 2014 BMW 420d M-Sport coupe on the drive (with the optional 19 inch alloys), althought that's more my wife's car.
Whilst I was banned I sometimes had a look at the For Sale section of the forum, just to see what I've been missing. I did see one or two amazing cars, some cheap tat and the usual I can't afford it / my wife won't let me buy it curse word.
Stay in touch mate.
Peter C
|
| |
|
|
|
|
|
Dec 28, 2014 20:07:02 GMT
|
|
Cheers. Signed up on the Mercedes forum so have had a good gander at the W124 and R129 and made a couple of posts. Ps nice workshop.
|
| |
|
|
|
|
|
Oct 30, 2016 11:46:12 GMT
|
I've noticed recently that a little bit of engine oil seeps past the oil filler cap. I removed the air filter, which revealed that all the crankcase breather pipes are clear. However, I didn't remove or clean this part of the system: 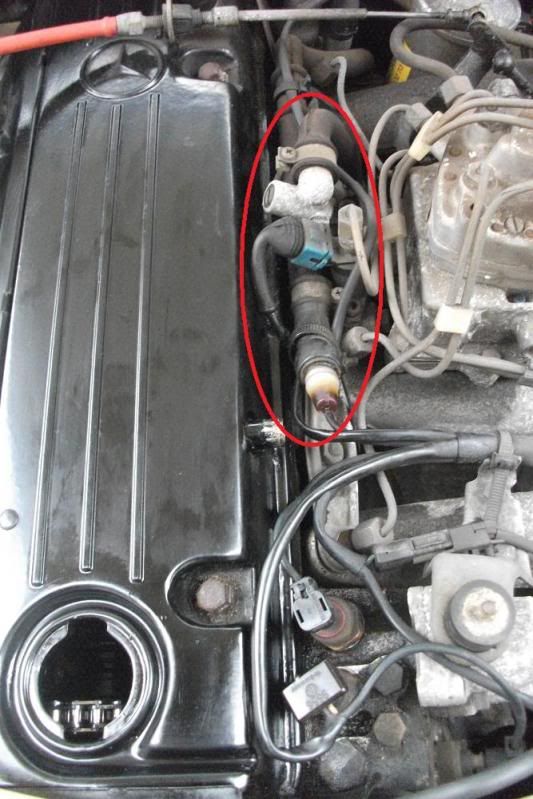 Any idea what is inside these plastic bits and pipes? The cap oil seal looks ok but the cap does twist on and off a bit too easily. Perhaps it's time for a new cap or seal? 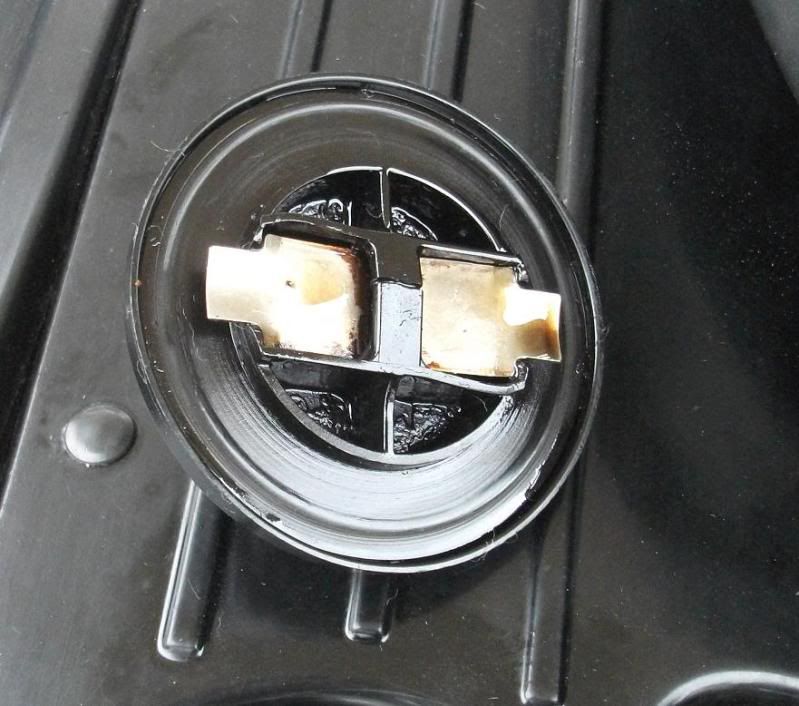 The engine has only done 103k miles, has very good oil pressure, doesn't smoke and pulls well, which gives me hope that the problem is not caused by excessive crankcase pressure, which could potentially be caused by worn piston rings. |
| |
|
|
|
|
|
Oct 30, 2016 11:48:29 GMT
|
|
So did you ever find out what these hose are for the crank breather pipes leading from the oil breather of the valve cover?
I would love to clean them but have no idea where to start..
Thank you
|
| |
|
|
|
|
|
Oct 30, 2016 15:53:26 GMT
|
So did you ever find out what these hose are for the crank breather pipes leading from the oil breather of the valve cover? I would love to clean them but have no idea where to start.. Thank you Hi. I did clean the pipes out although they were not particularly clogged. There is a vacuum in the pipes, which I assume means that eventually the contents get sucked into the inlet manifold but I did not investigate further. You can read a lot more about my W123 on the Mercedes Benz forum. Peter C |
| |
|
|
|
|
|
|
|
|
|
So did you ever find out what these hose are for the crank breather pipes leading from the oil breather of the valve cover? I would love to clean them but have no idea where to start.. Thank you Hi. I did clean the pipes out although they were not particularly clogged. There is a vacuum in the pipes, which I assume means that eventually the contents get sucked into the inlet manifold but I did not investigate further. You can read a lot more about my W123 on the Mercedes Benz forum. Peter C |
| |
|
|
|
|
|
|
|
|
so I guess the excess carbon, oil and gasses get sucked through here and recycled back into the intake. If blocked the air filter would suck harder....?
|
| |
|
|
|
|
|
Oct 31, 2016 16:58:27 GMT
|
so I guess the excess carbon, oil and gasses get sucked through here and recycled back into the intake. If blocked the air filter would suck harder....? Not sure if blocking the air filter is a good idea. |
| |
|
|
|
|
|
Sept 9, 2018 12:39:22 GMT
|
I'm going to resurrect this thread and update it with content posted on a Mercedes Benz forum a couple of years ago. There will be new updates in the near future as I am planning to carry out further repairs this autumn. Also, this is my thread related to a W124 200E that I acquired earlier this year: forum.retro-rides.org/thread/204912/1991-mercedes-benz-speed-manualBack to the W123, in case you've forgotten what it looks like, here's a reminder: 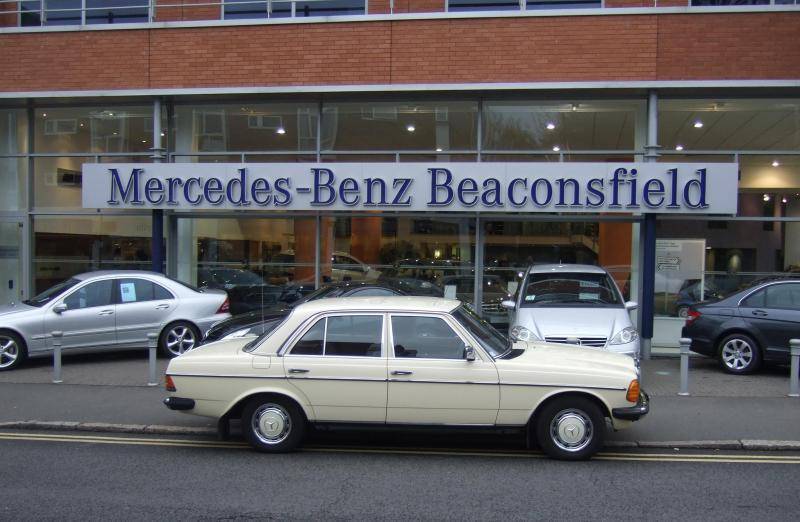 Four years ago I gave the bodywork and engine bay a bit of a spruce up. With the bonnet and radiator removed, you can see the filthy engine bay. There are localised (surface) rust spots that will need to be dealt with. I have purchased sanding tools, a pot of POR15, aerosol cans, tin of Gunk, a few tooth brushes, masking tape, old news papers... I think I'm ready! 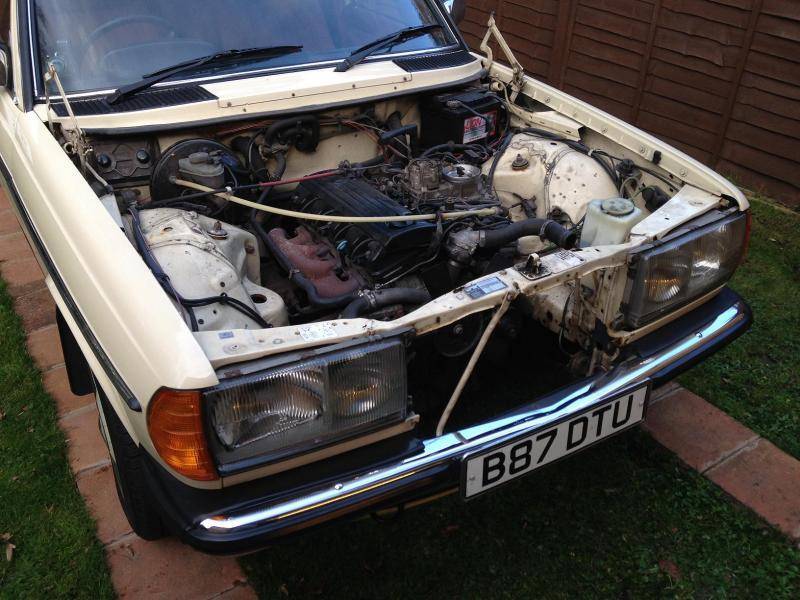 The low level part of the front offside wing is rotten. A few years ago I removed as much rust as possible without creating a huge hole, skimmed the wing over with filler and painted it with aerosols. Rust eventually came through again and new metal is now needed. 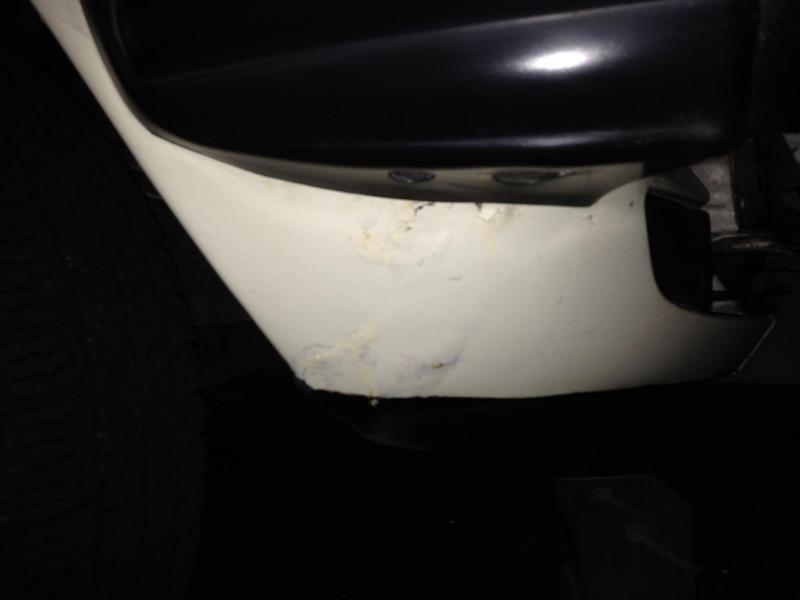 The rest of the wing is a good fit and a good colour match (both wings have been replaced at some point in the past). I have purchased a replacement (non-MB) wing for £75 (inc delivery). 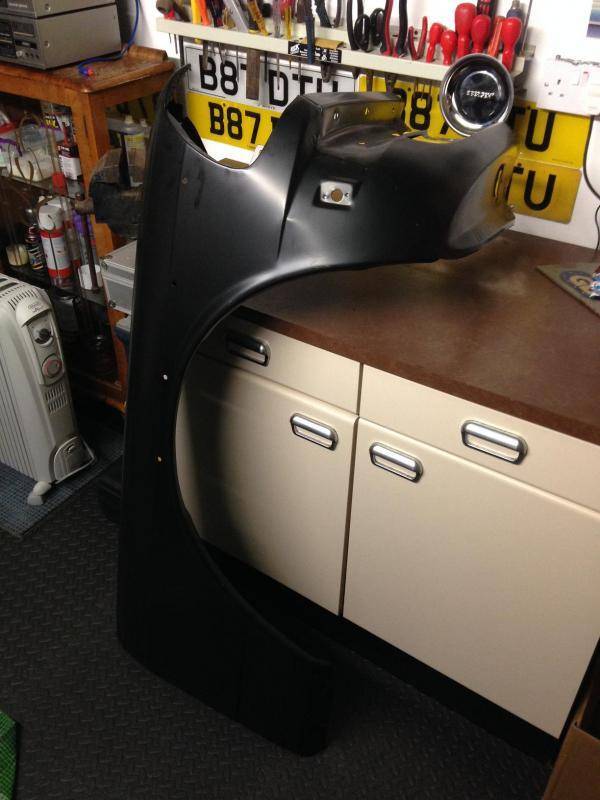 I've read all about how these wings don't fit properly (and seen that episode of Wheeler Dealers!) so rather than try to replace the whole wing and risk that it won't fit or the colour won't match, I propose to cut the existing wing and the new panel and make one good panel out of two. Whilst the joint will be filled, 90% of the joint will be concealed by the bumper. 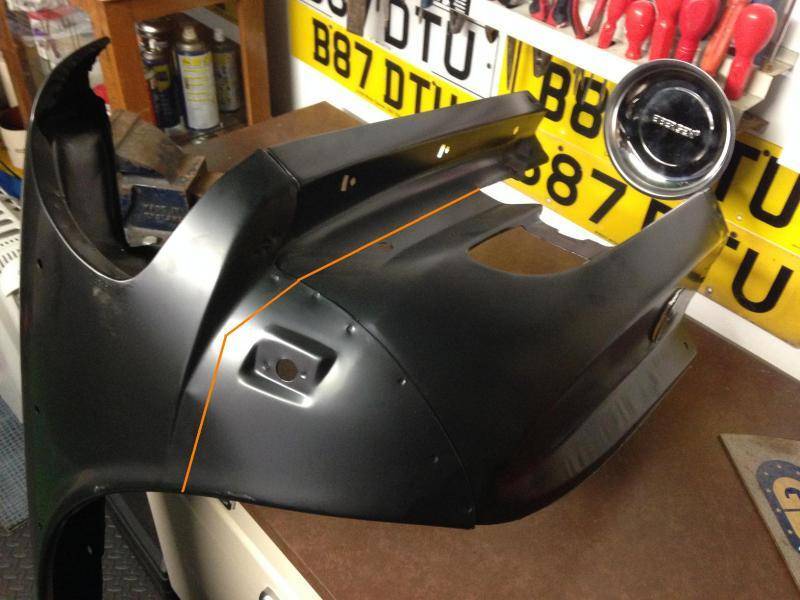 The wing on the car needs a lot of work and the replacement part only cost me £80. If I get it right, result. If not, I've wasted £80 and will have to come up with plan B. The purpose of this thread is to share my experiences with the world and use it as a point of reference if I need advice. I will be working mostly at weekends (I work Mon-Fri, have a wife and 5 year old son) but hopefully progress will be swift. I hope to finish by the 1st of April 2015, which is when my car was first registered, 30 years ago. |
| |
|
|
|
|
|
Sept 9, 2018 12:44:28 GMT
|
|
Great to see this thread revived. Still my favorite Mercedes and nice to see a W123 still wearing steels and hubcaps.
|
| |
|
|
|
|
|
Sept 9, 2018 12:47:44 GMT
|
I have stripped the majority of panels and parts from the windscreen forward as necessary to enable the proposed works. 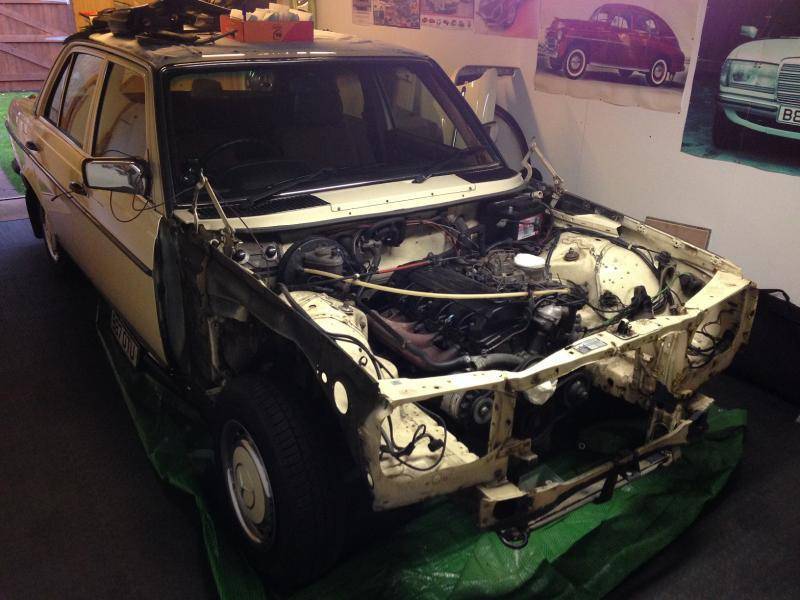 The nearside front wing is in great shape. 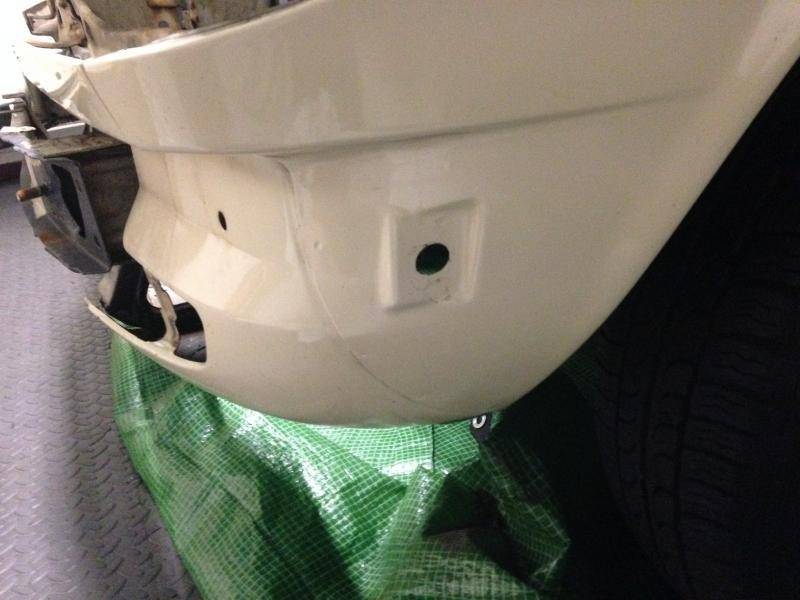 And the offside wing is as bad as I expected it to be. 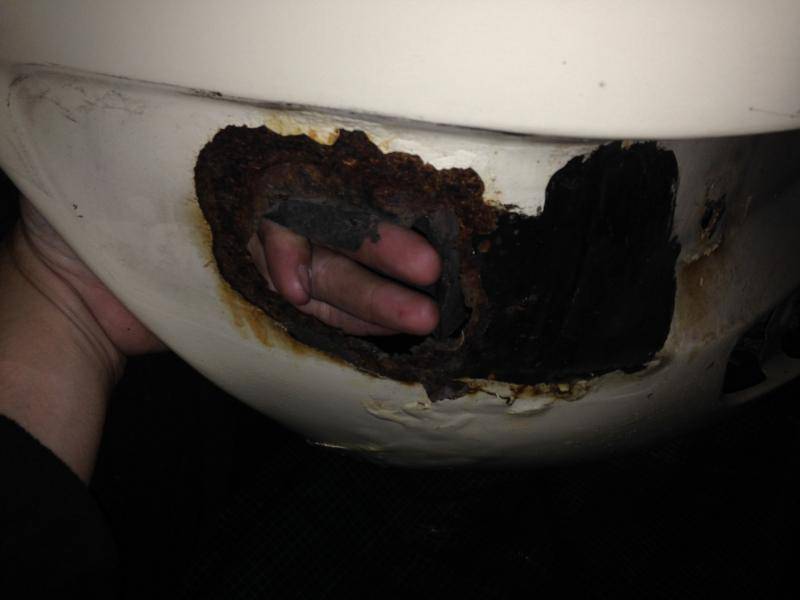 Having inspected the offside wing from both sides I am pleased to confirm that my proposed method of repair is still viable. Elsewhere, the nearside inner wing has a bit of surface rust along the centre. 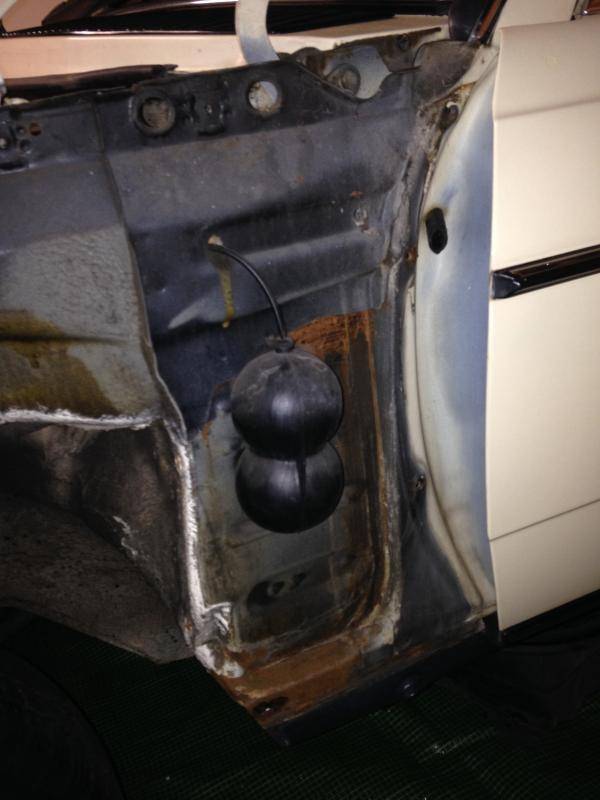 Unfortunately, the nearside front box section of the sill has a small rust hole. I have filed this area down and this is the full extent of the problem. I will cut out more metal and chemically weld a metal plate over the affected area. 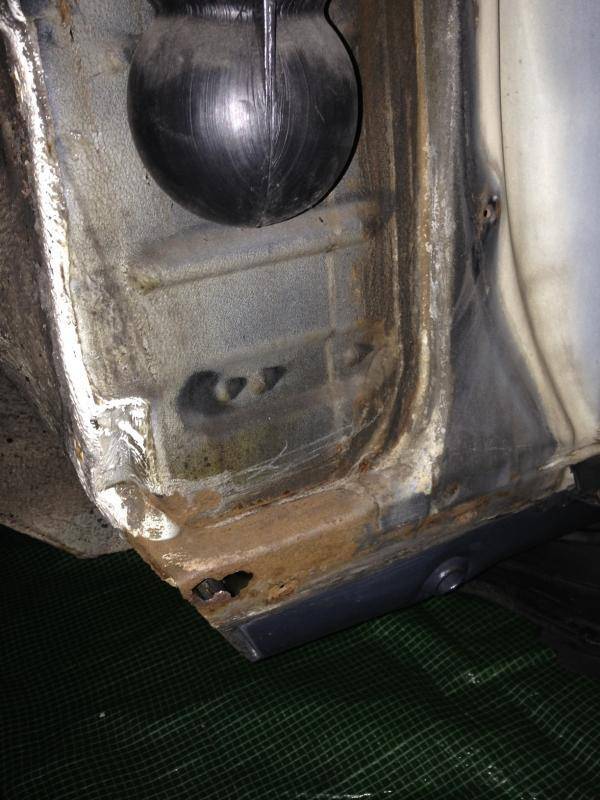 Aside from a bit of surface rust the other side (offside) is totally solid. 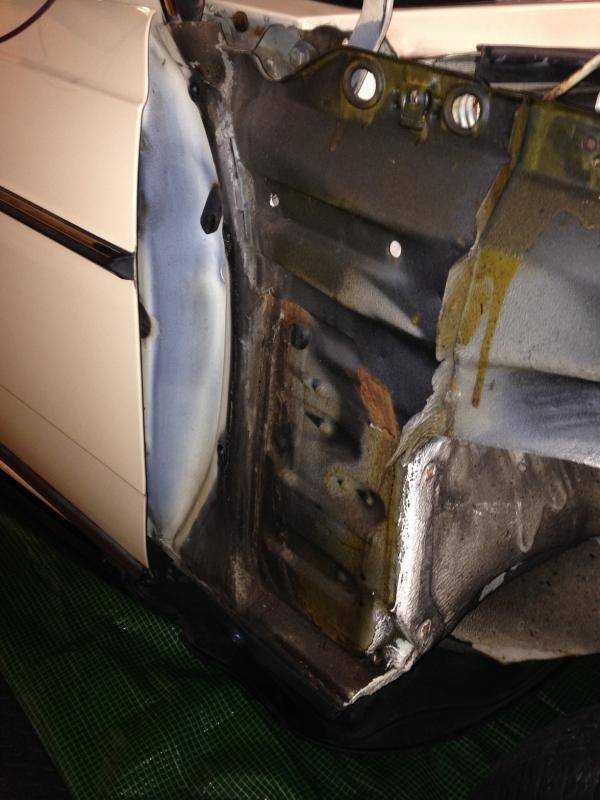 With the front end of the car stripped, I exposed the most rusty areas. This is the joint between the nearside inner wing and front panel. 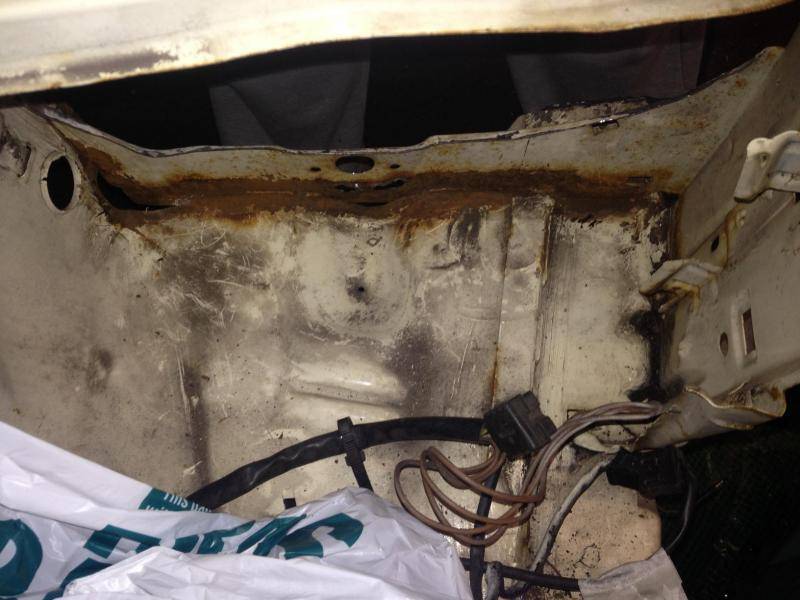 The seam sealer must have failed, water got into the joint and the results speak for themselves. Once cleaned up and the sealer removed, this is the damage. The circled area will be plated before painting. All rusty metal has been cut out. 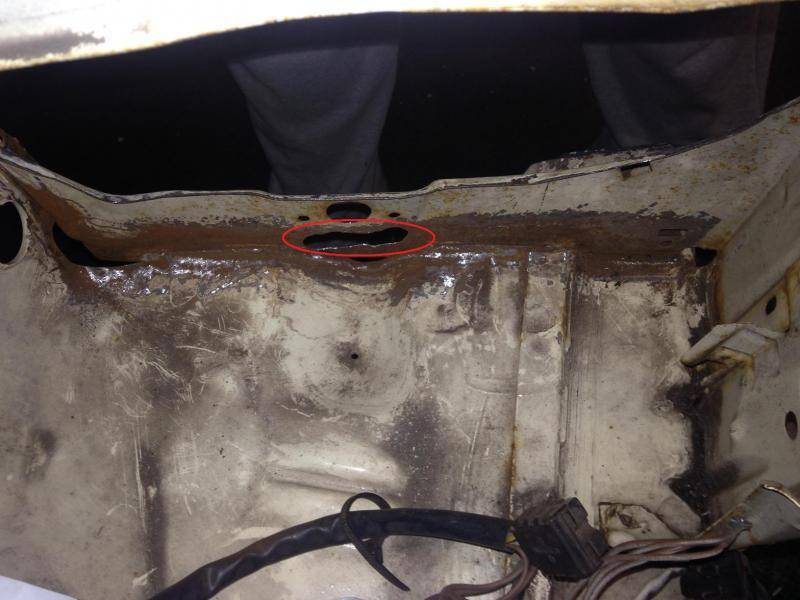 Oddly enough, the same joint on the other side is 100% original and solid. On with the wing repair. I cut the rusty section out of the offside front wing. 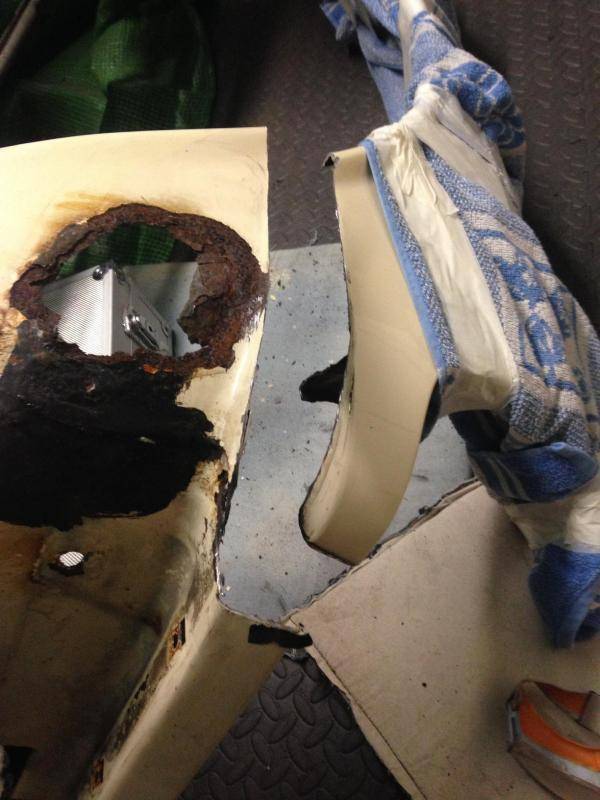 Then I cut the replacement wing along the same line, or at least as close as possible. The spot welds and folds between the two sections that form the wing are not the same and whilst cutting it was clear that the original wing is made of thicker metal. 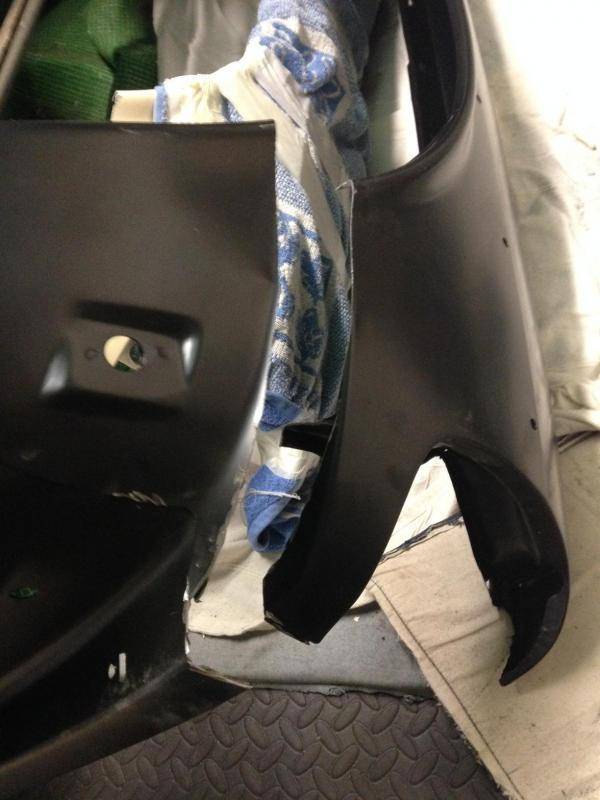 And this is the plan. 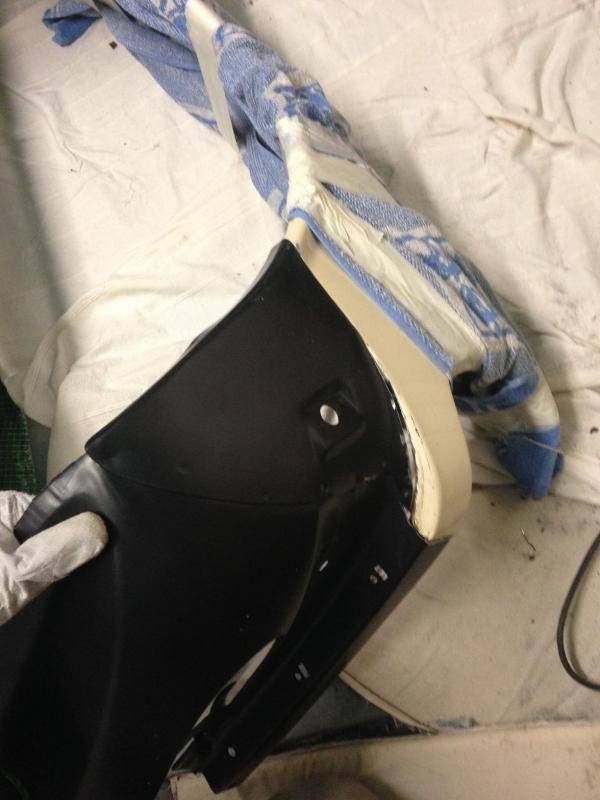 Note the wing is wrapped and taped with towels. This is to prevent damage to the paintwork. Once cut, I prepared the edge of the panel to ensure the adhesive bonds well. 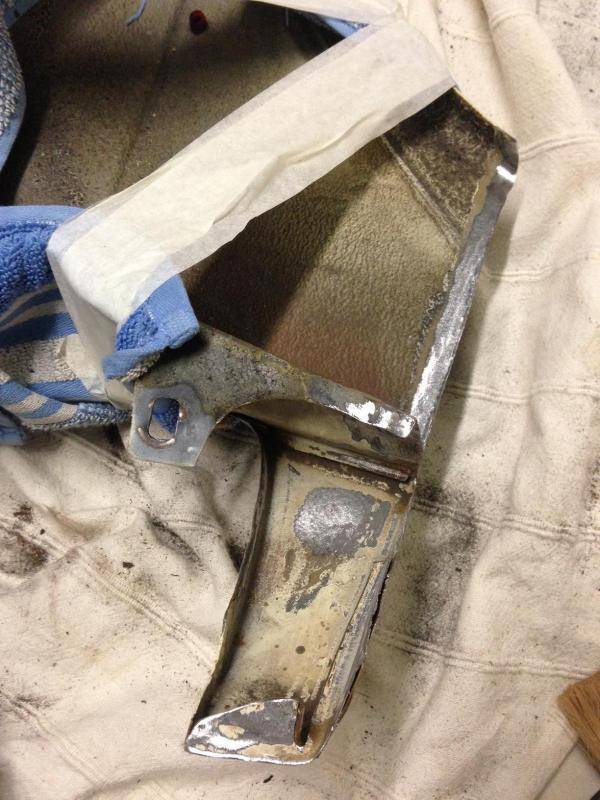 I used an old Mercedes A-Class petrol filler flap to fabricate strips of metal, to be used to glue the two sections of the wings together. 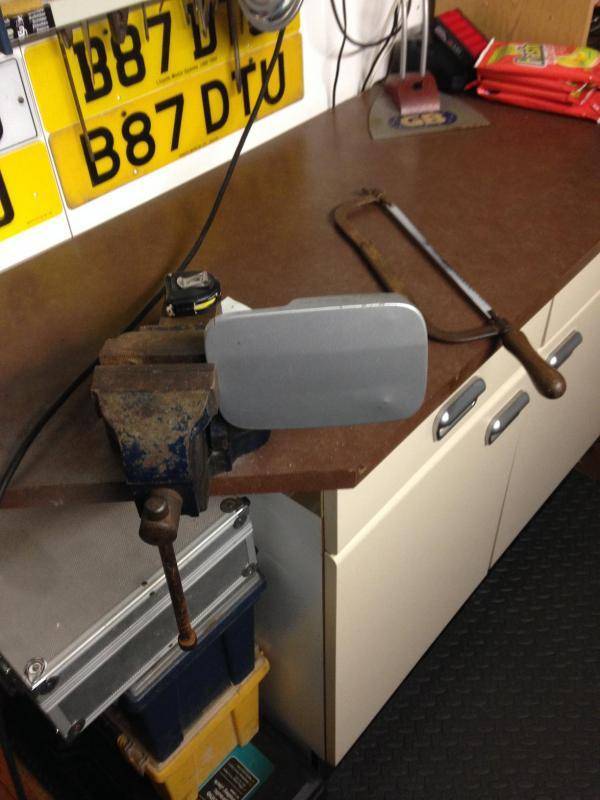 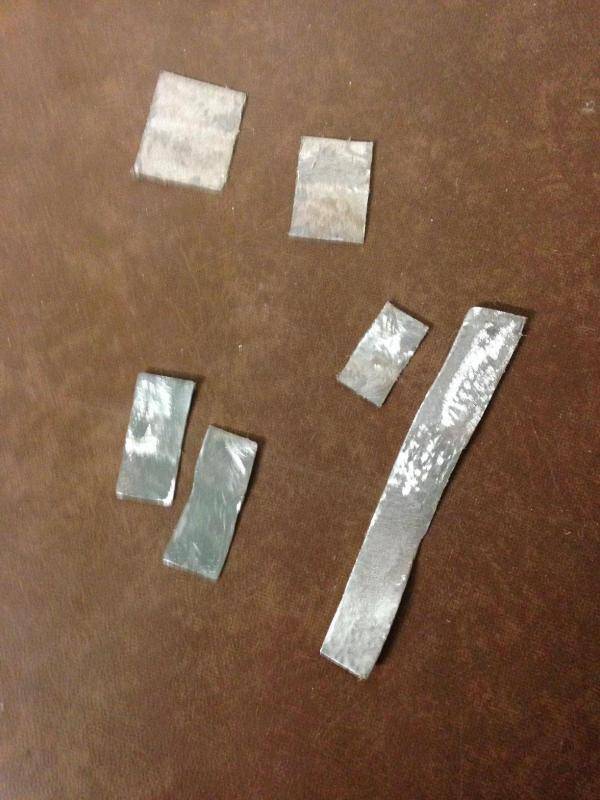 I used JB Weld to bond the strips to the wing. 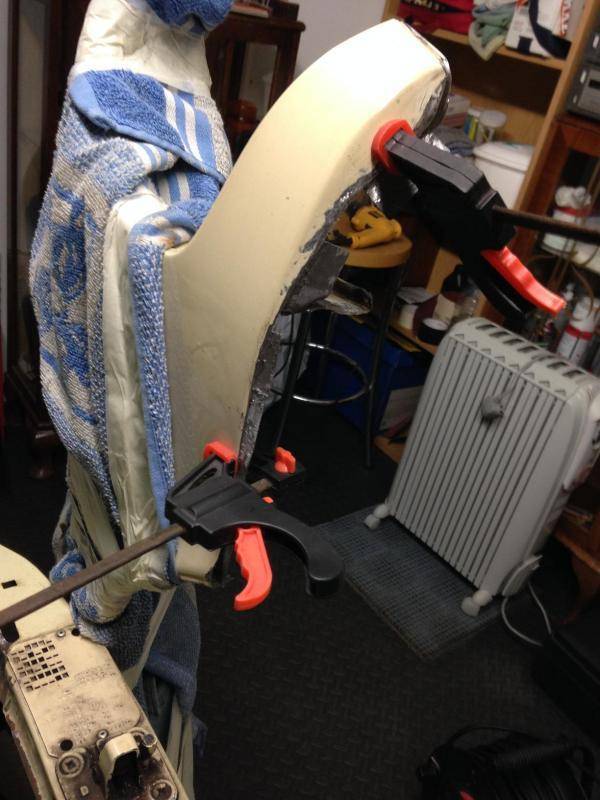 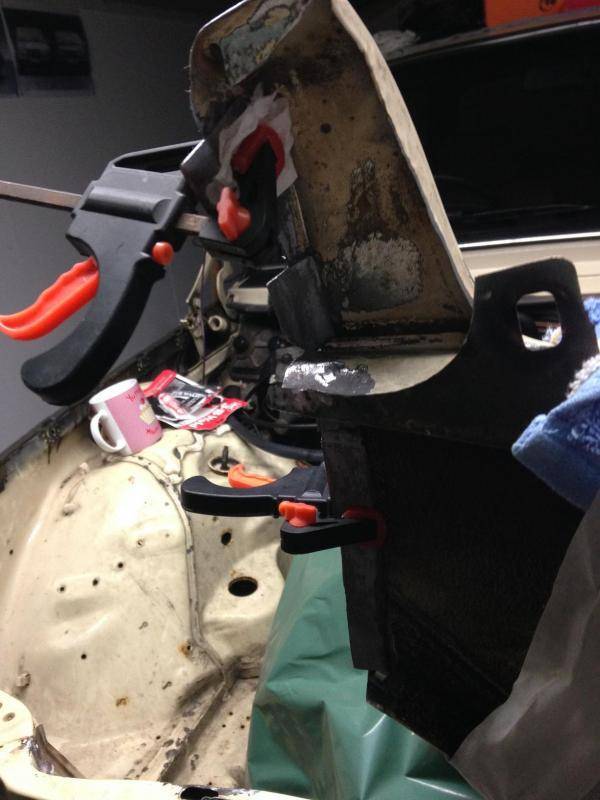 I propose to chemically "weld" the two parts of the wing together because for one I can't weld and also I am concerned that welding the panels together would cause distortion and damage to metal and paintwork that would require far more making good than I propose. With the plop (filler) removed, this is the state of the old wing! 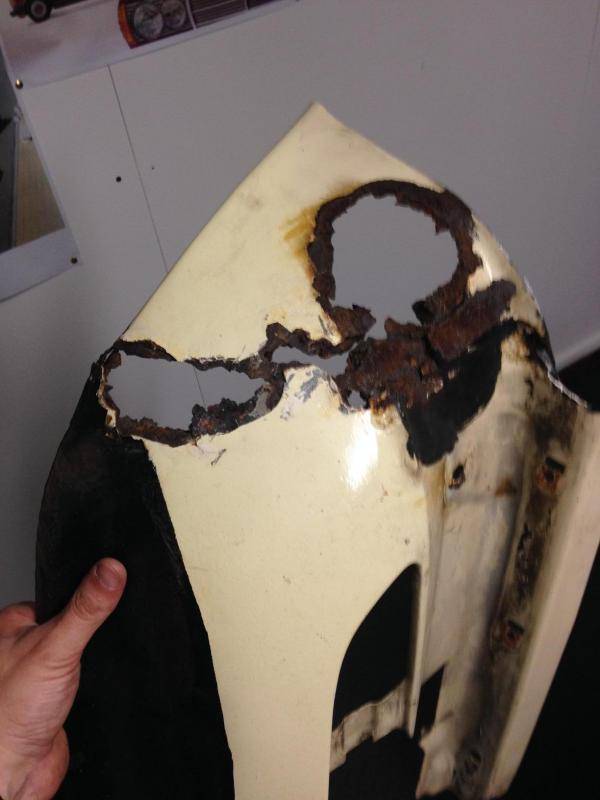 |
| |
|
|
|
|
|
Sept 9, 2018 12:59:01 GMT
|
I gave up on the idea of fixing the repair section to the wing with adhesive. I tried and it couldn't be done. Instead, I took the parts to my friendly mechanic who kindly welded the two panels together for a mere £30. Job done, I can now make further progress. 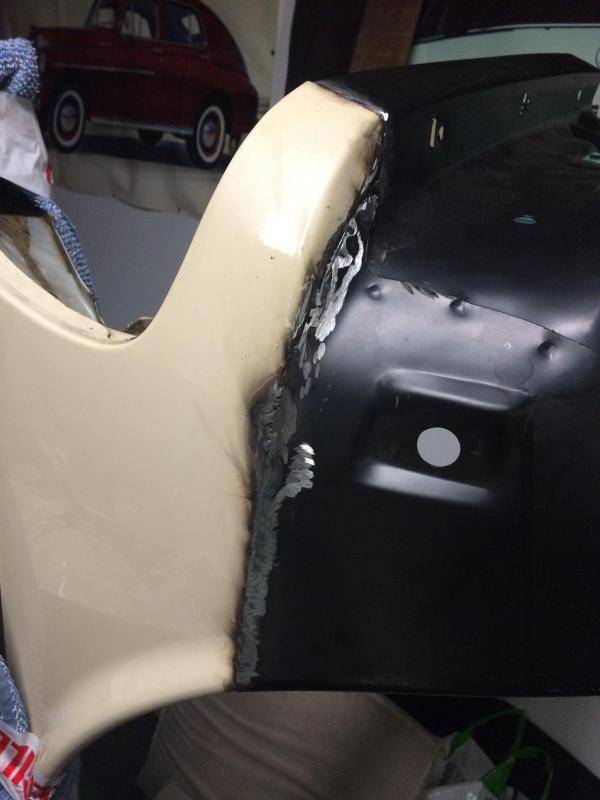 I wire brushed (drill attachment) the rusty sections of the underside of the bonnet. 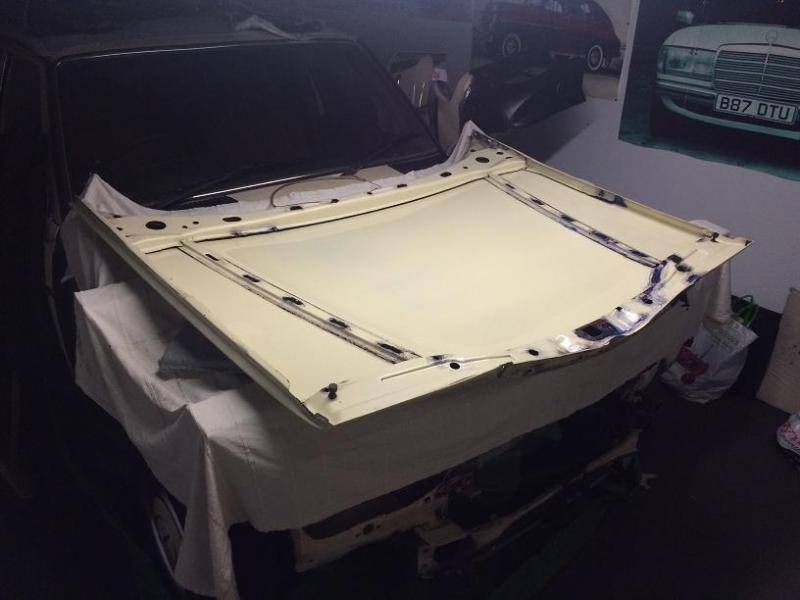 I applied rust inhibitors to the affected areas and left the chemicals to dry over night. Today I painted the rusty areas with POR15. 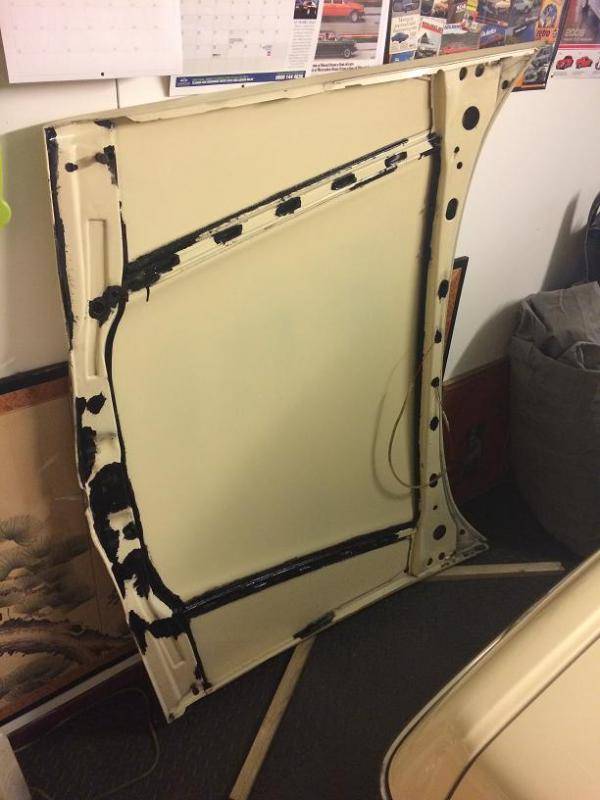 I did the same with the inner wings, front panel, inner side of the valance, pretty much the entire front end of the car. 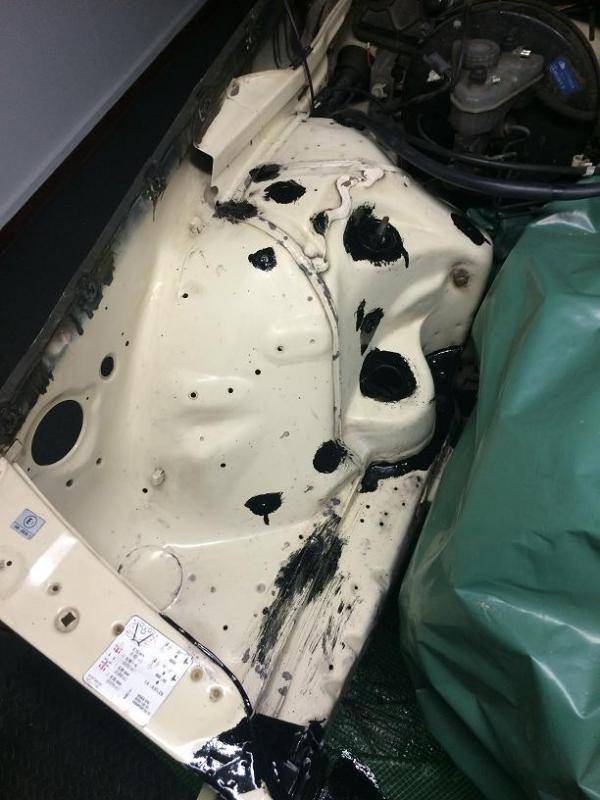 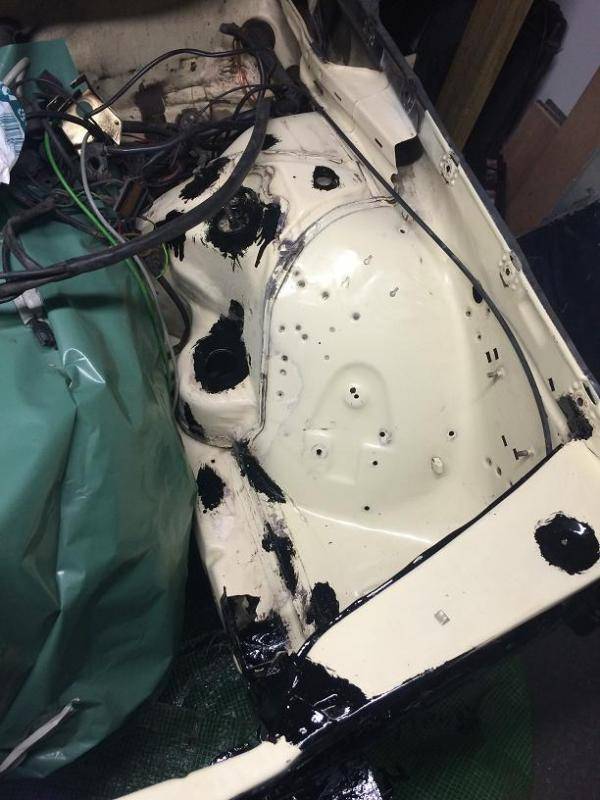 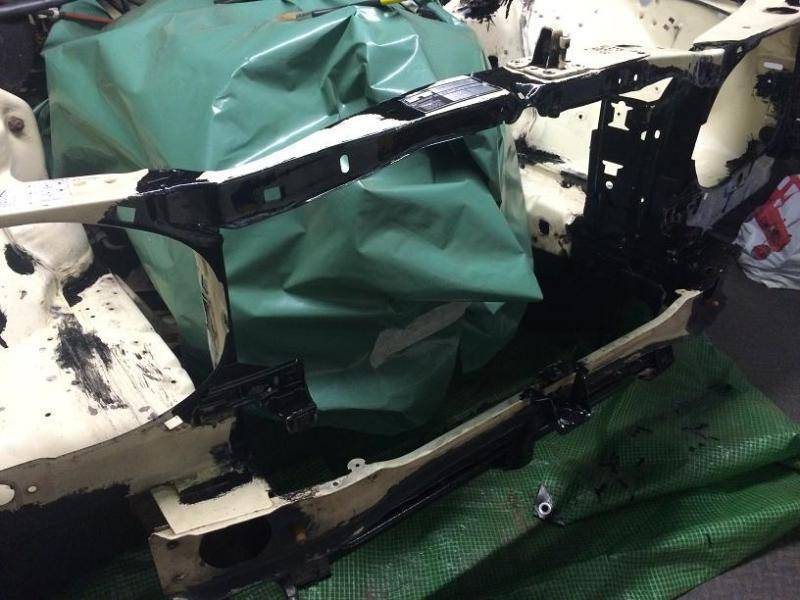 I stripped most of the rust and paint off the air filter housing. Some people prefer to leave the air filter housing paint-free and shiny. That's great if there is a Hemi sat under the housing but an M102 just doesn't have the same effect. 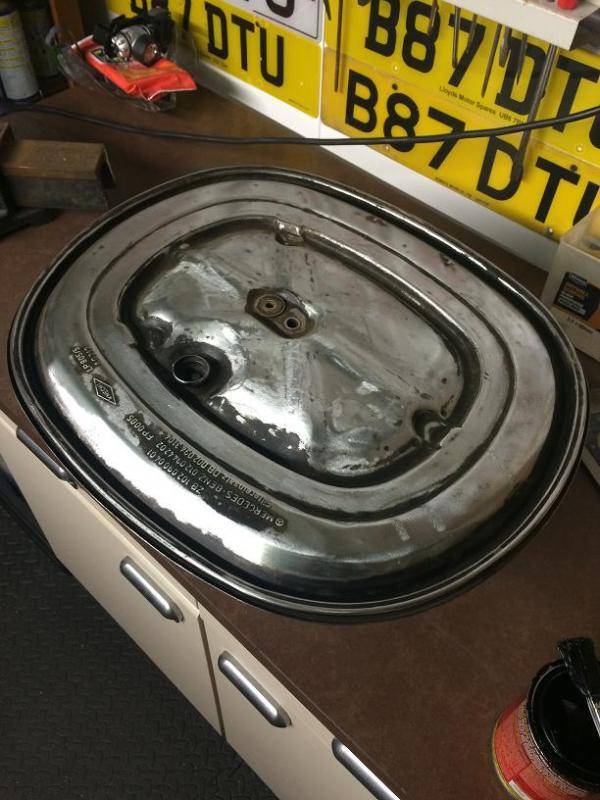 I painted the housing with POR15. The finish looks great, no brush marks, smooth and shiny. 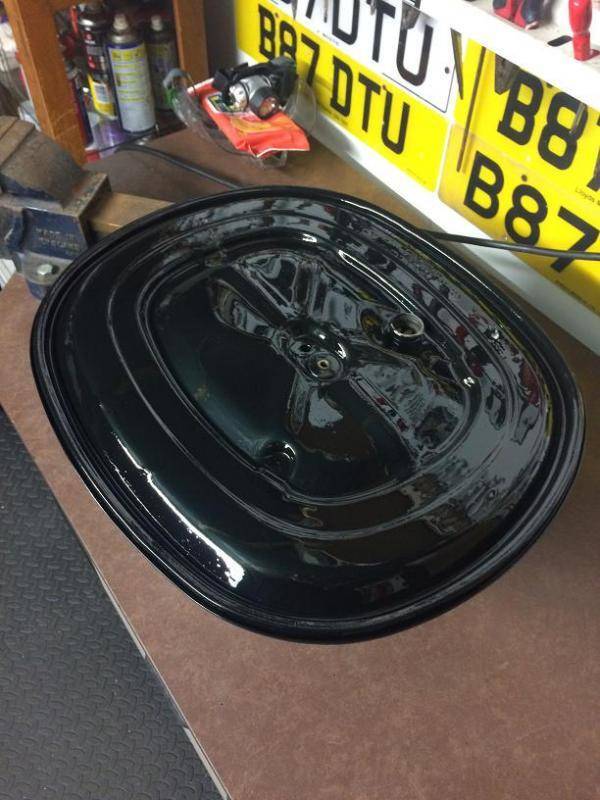 The underside of the bonnet was sprayed with primer. 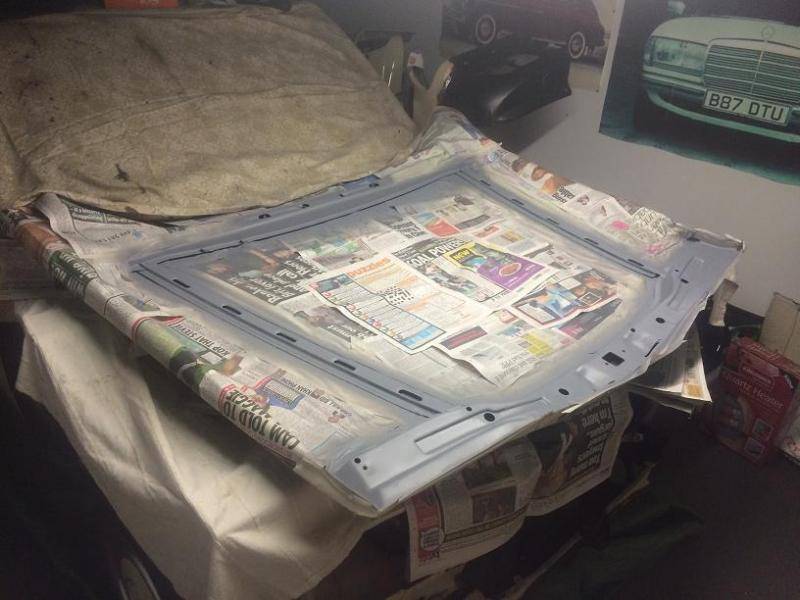 Then painted (with aerosols). 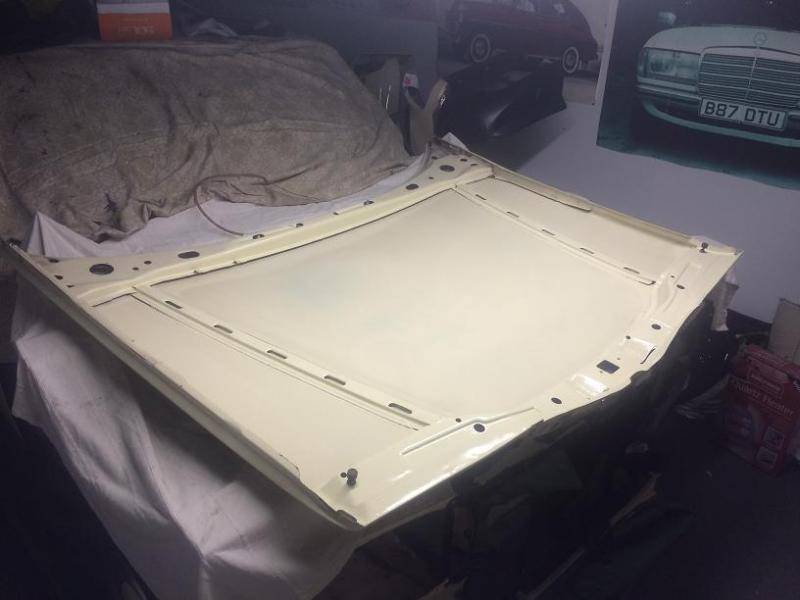 Next I primed the engine bay and front panels. 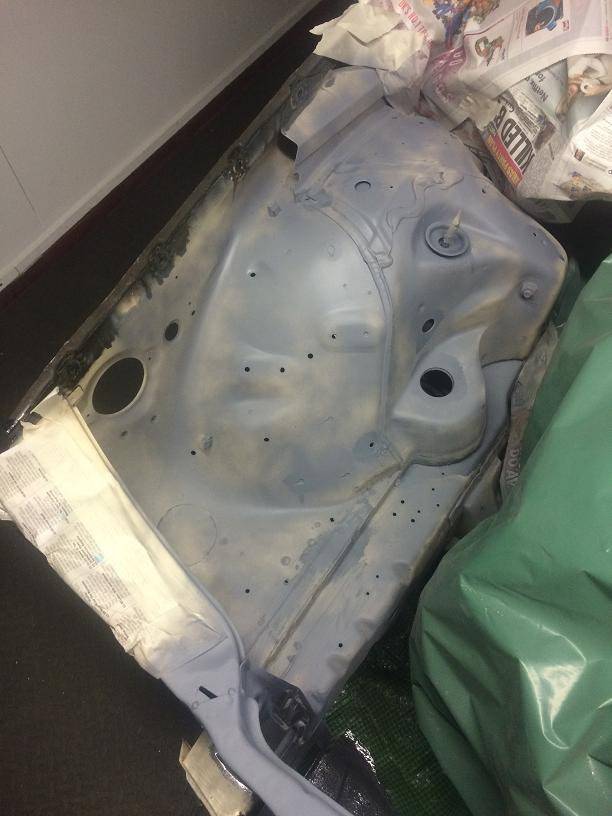 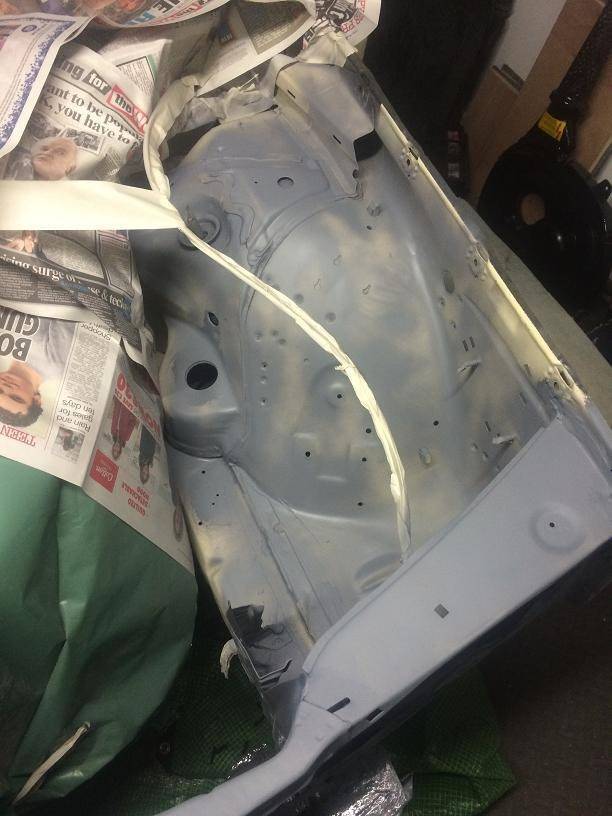 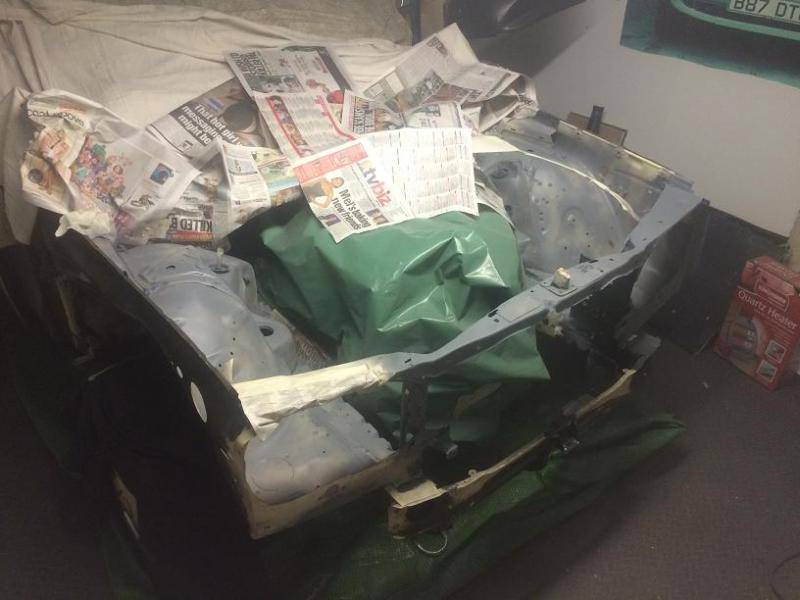 And sprayed the lot in the original colour. 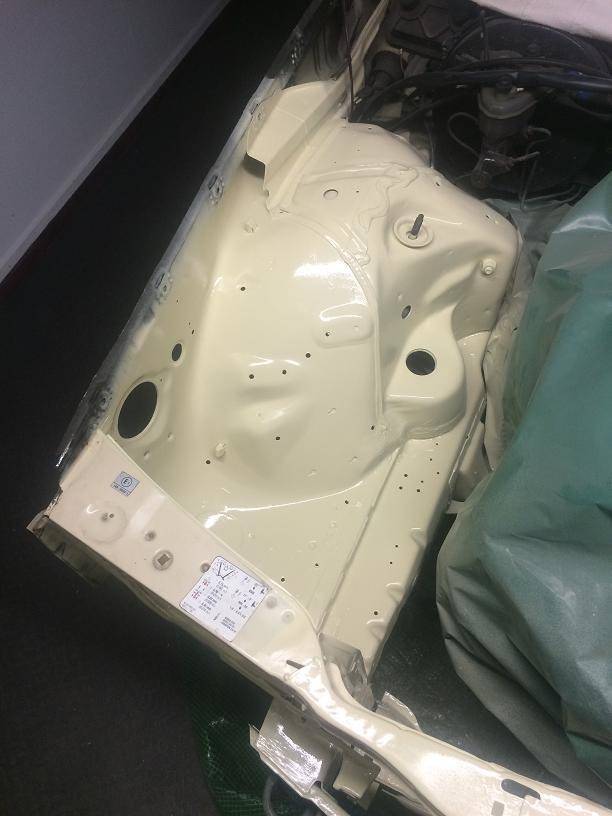 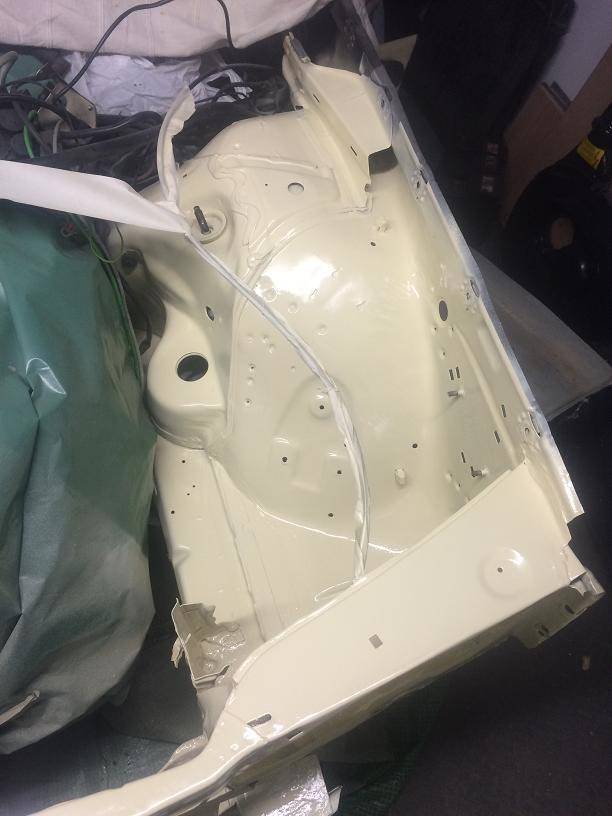 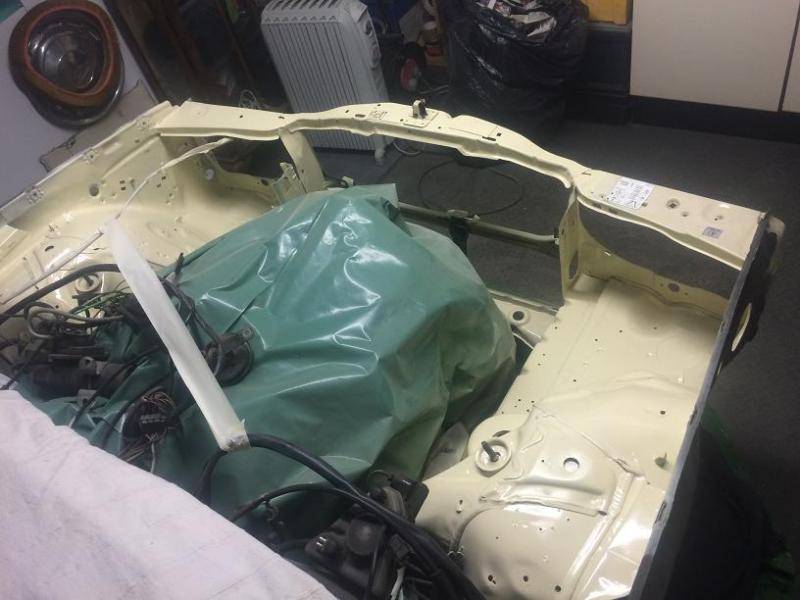 I started to re-assemble the engine bay wiring, radiator, etc. I cleaned everything as I went along. 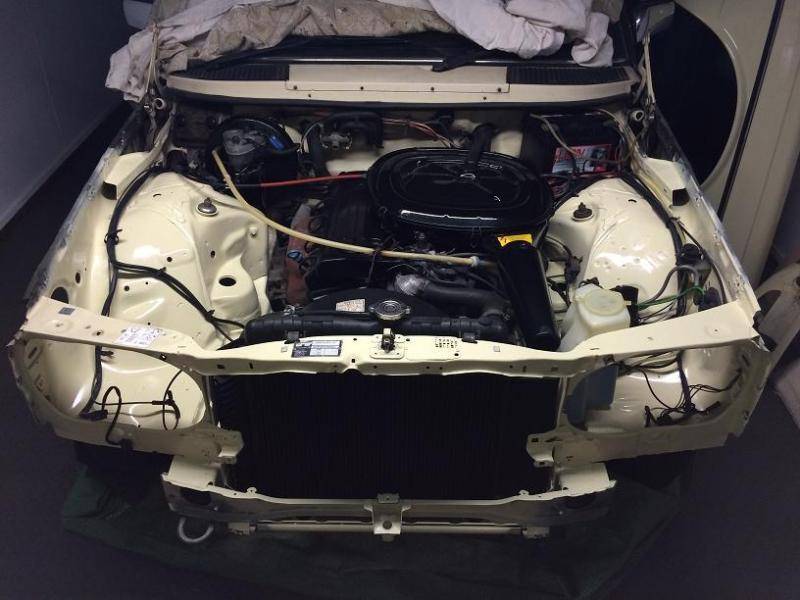 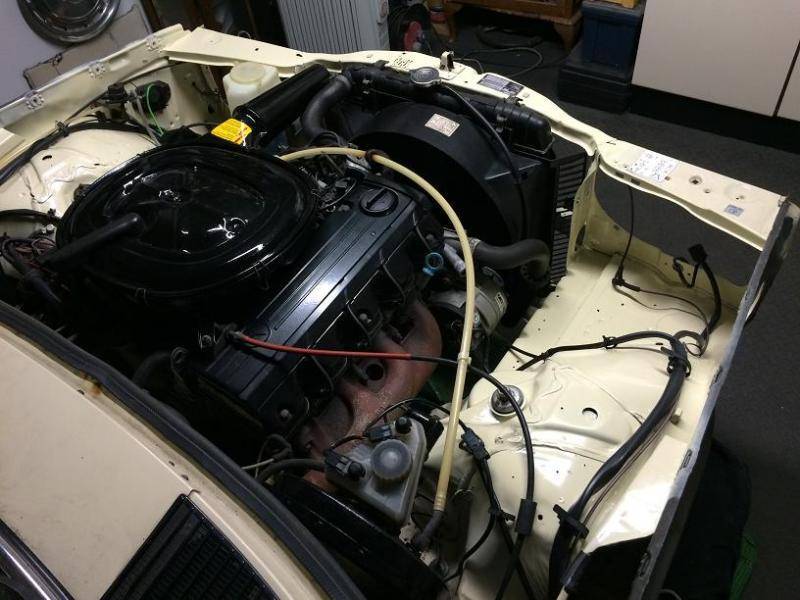 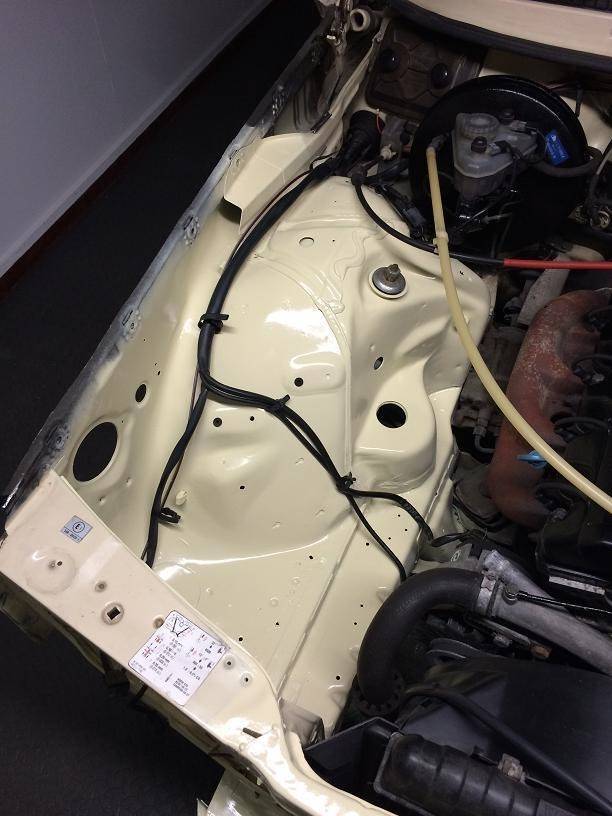 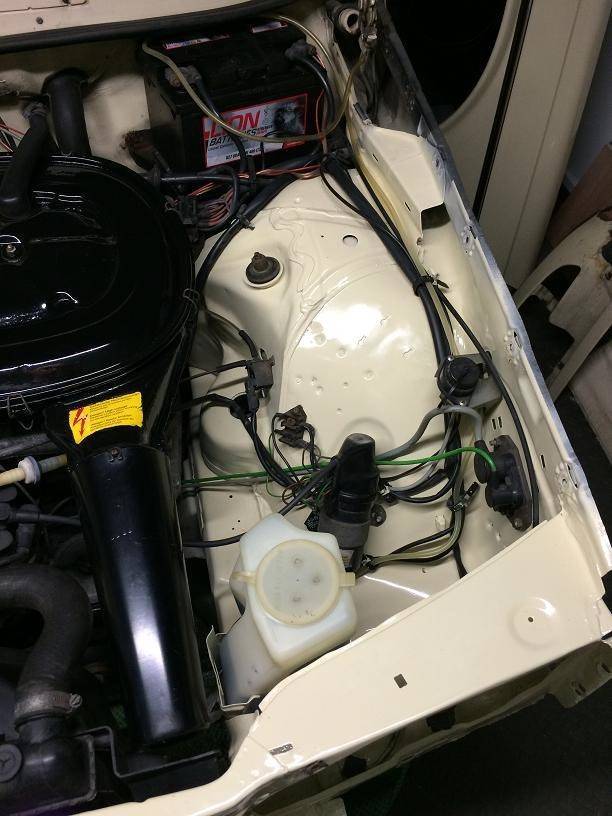 I re-connected the battery, pulled the king-lead off, cranked the engine for 10 secs to build up oil pressure, re-connected the king-lead, cranked the engine again and it started immediately and ran perfectly. Impressive, considering that it hasn't turned over in 4 months. 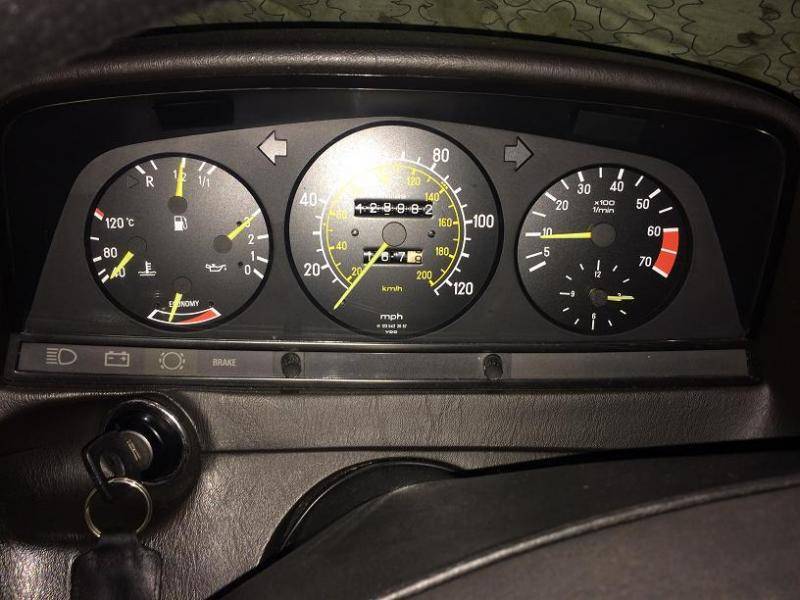 I trial fitted the welded wing and everything around it fitted perfectly. 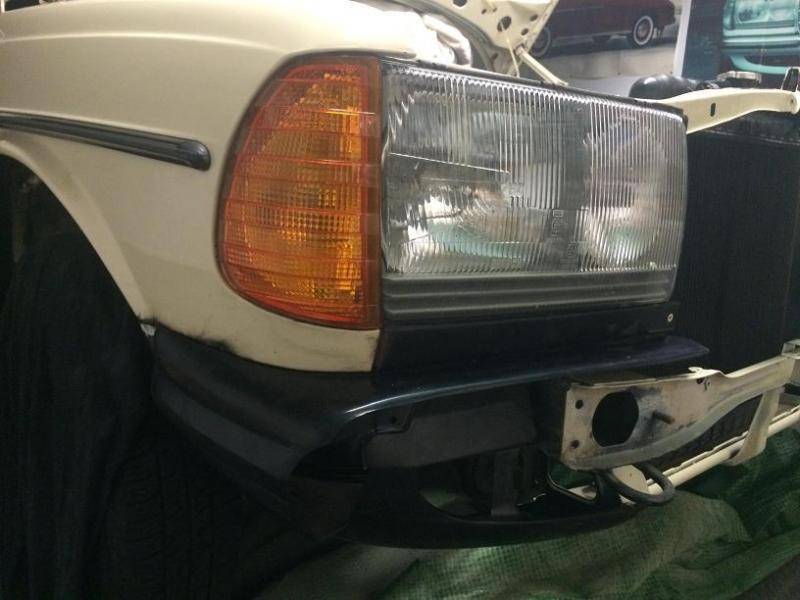 I then skimmed the joint with filler. 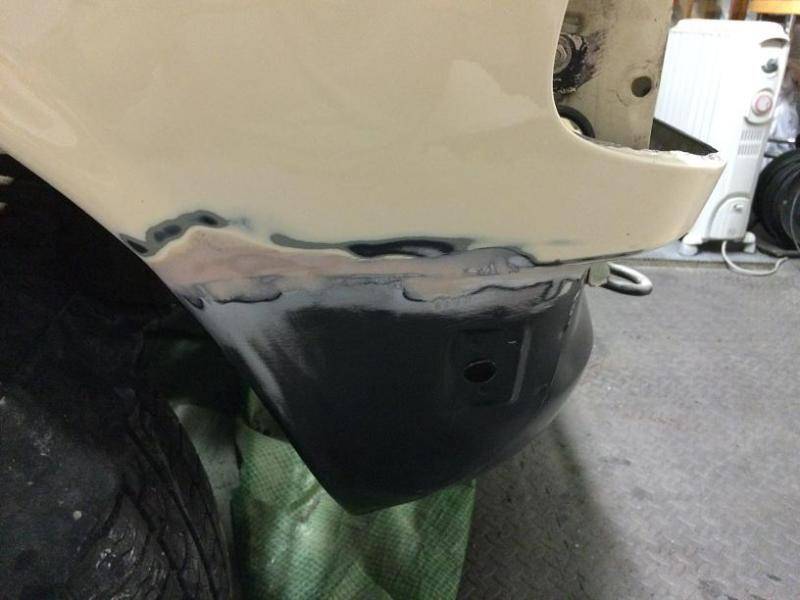 Sprayed the repair with an aerosol can, flattened the paint with 1500 grade paper and polished the wing, which achieved a good result. 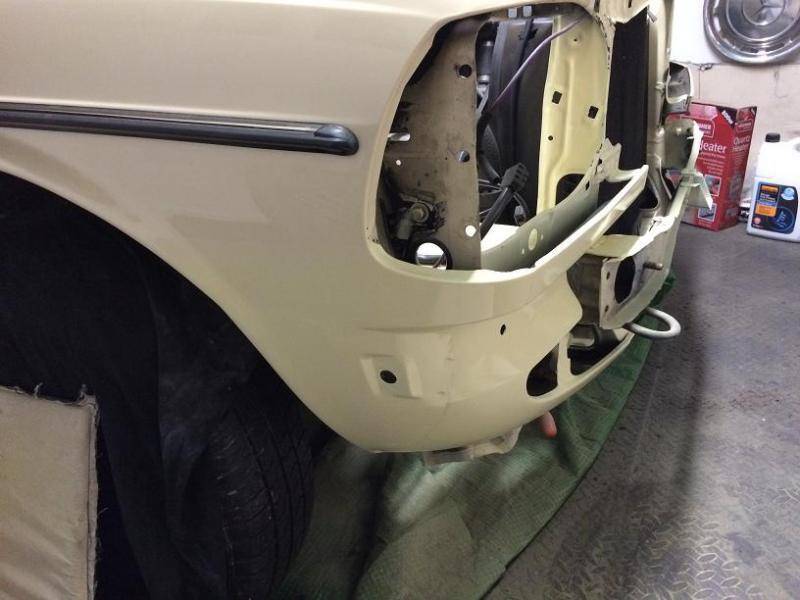 After 4 months stuck in the garage my 230E saw daylight for the first time. 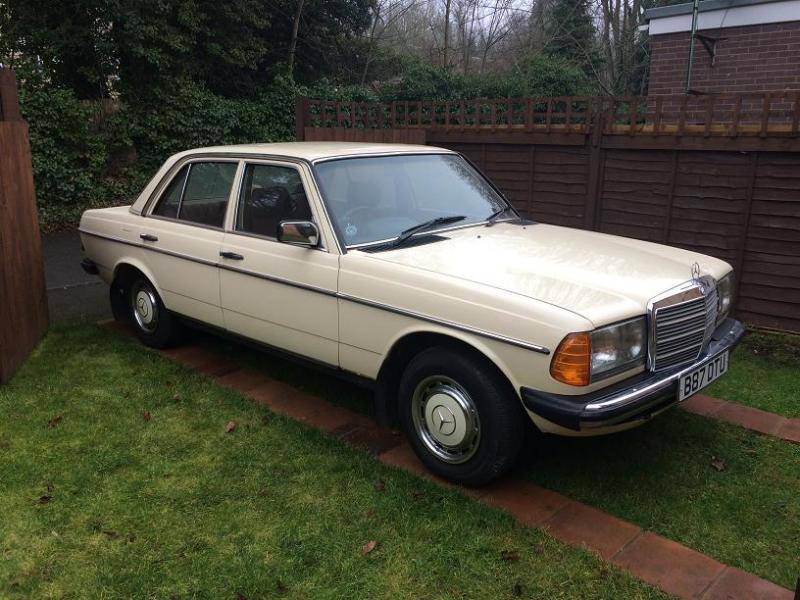 Looking good! 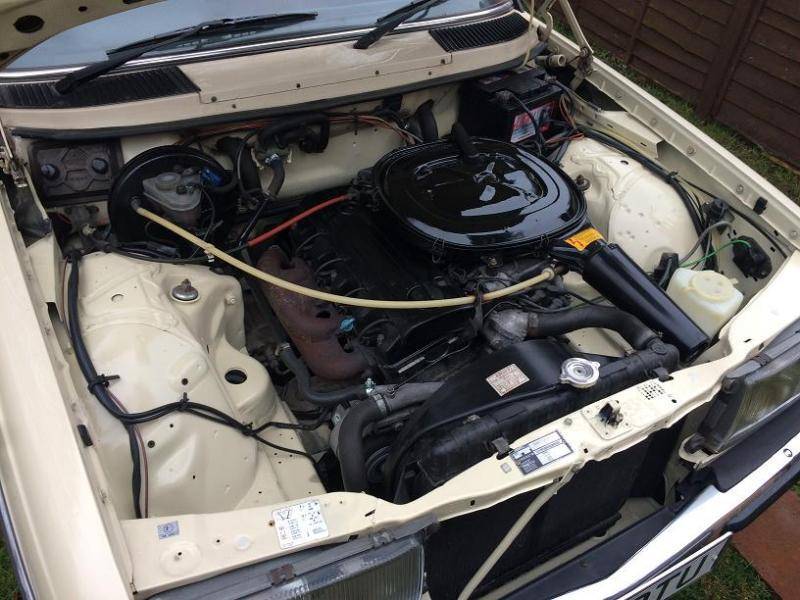 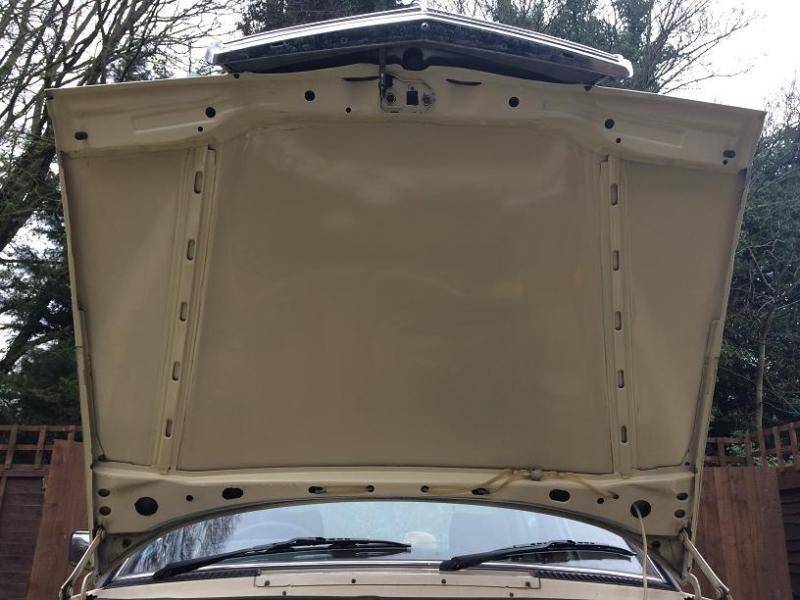 All done, I gave the car a good wash and that concludes this little story. 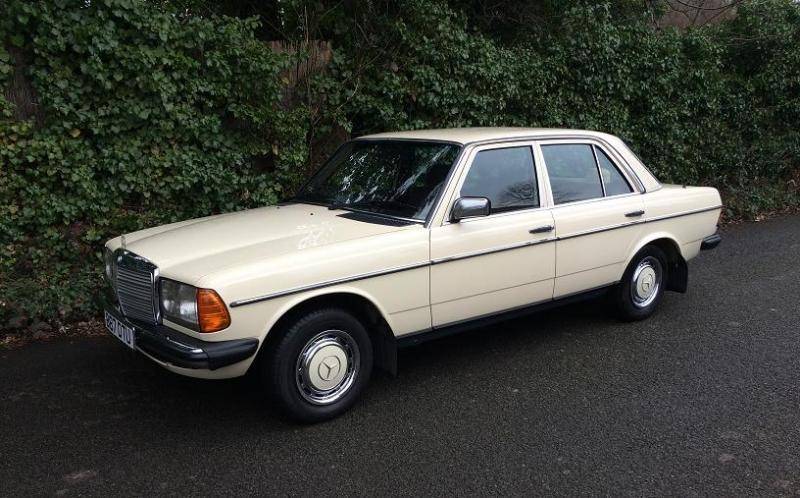 |
| |
|
|
|
|
|
Sept 9, 2018 18:36:46 GMT
|
|
I started doing something similar with my Morris Minor last year and still haven't gotten it back together!
|
| |
|
|
|
|
|
Sept 9, 2018 20:43:52 GMT
|
|
Youve done a great and very worthwhile job there - even more so with the lack of facilities, i.e. welding and sprayguns/compressor. Just shows what a bit of patience and well planned work can achieve
|
| |
|
|


