bryn
Posted a lot

Posts: 3,913
|
|
Jan 28, 2011 21:34:00 GMT
|
I was reading the first couple of paragraphs thinking, result, then you get to the end... Absolute shocker. All credit to you cracking on, I've only done this amount of welding on one car... And it didn't deserve it, glad to see this does. My grandmother had an Amazon from new in 63 until 1998 when she sold it to a dealer, I heart these cars  |
| |
Volvo, Buggy, Discovery and an old tractor.
|
|
|
|
|
|
|
Jan 30, 2011 19:45:59 GMT
|
I know, its got loads of history so it wants me to keep it going even more as it will be ashame to loose that history. Well its all welded in now, cleaned up the outside welds the best i can but have left the insides as they are for added strength. Got the first coat of primer inside the rails. 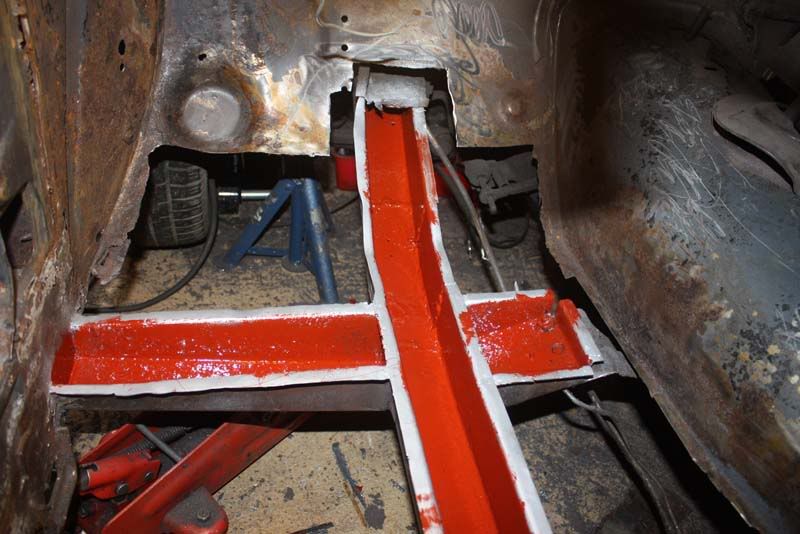 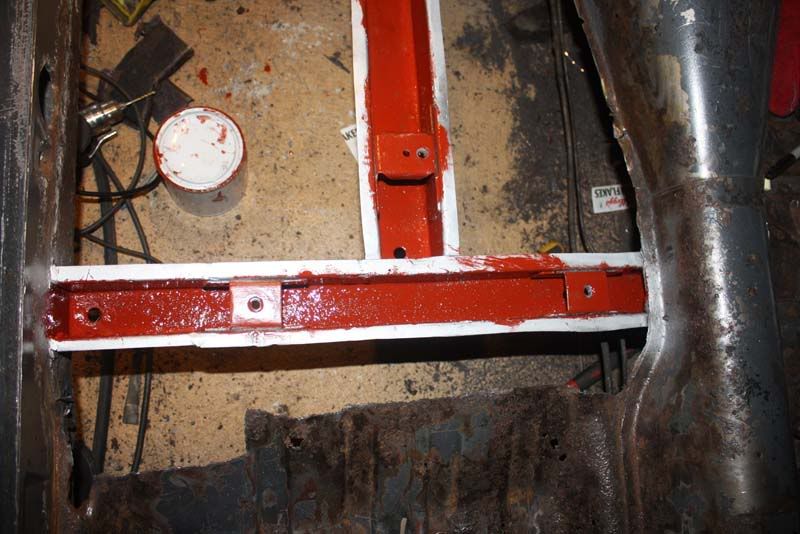 Any recomendations for what type of paint to use inside them? Tomorrow, second coat of primer and start to make the patch for the top of the rail, then will start on fitting the floor. |
| |
|
|
MK2VR6
Posted a lot
Mk2 Golf GTi 90 Spec
Posts: 3,329
|
|
Jan 30, 2011 20:04:02 GMT
|
|
Hats off to you, proper labour of love - keep up the good work!
|
| |
|
|
|
|
|
Jan 30, 2011 20:17:59 GMT
|
|
I'd use a zinc rich primer for inside the chassis rails, it wont burn off when you weld the floor in and it tends to have a self healing capacity as well
|
| |
|
|
|
|
|
Jan 30, 2011 20:42:34 GMT
|
|
Done the lip in zinc rich primer, do you mean to do the entire thing in zinc primer? If so is it not porus like normal primers?
Using red oxide at the moment.
|
| |
|
|
|
|
|
Jan 31, 2011 19:33:20 GMT
|
Done the lip in zinc rich primer, do you mean to do the entire thing in zinc primer? If so is it not porus like normal primers? Using red oxide at the moment. According to the Bilt Hamber literature, it can be used without being top coated, and I have always found their products to do exactly what they say on the tin www.bilthamber.com/electrox.htmlTony |
| |
|
|
|
|
|
Jan 31, 2011 21:36:55 GMT
|
|
Thanks for that Tony. May get some to do the underside with, it does have different reviews though, some say its great, some say it flakes off quite easy.
I know primer, stonechip, primer, topcoat works well too.
|
| |
|
|
|
|
|
Jan 31, 2011 22:00:55 GMT
|
|
I don't think there is any doubt that painting over it will be the better option for the underside, but it should be fine by itself inside the chassis legs.
|
| |
|
|
|
|
|
Jan 31, 2011 22:17:48 GMT
|
|
Hi.
Another happy Volvo owner who still doesn't know if his car drives but starts to restor it anyway...
And i know why...Volvo's are for life....
I have a '73 164 and it happen the same thing, it just wouldn't start ... had fuel in the carbs, spark in the spark plugs but still wouldn't start...
So one day I thought and went to by new spark plugs...
It started first try... a bit lumpy but started after being 8 years parked in a garage with no doors...
So keep up the good work and in no time it's done...Then it will slide it's tail on the corners from joy....
|
| |
|
|
|
|
|
Jan 31, 2011 23:13:25 GMT
|
|
Well with regards to the engine its been unofficially declared terminal. We believe the rings have stuck with the years of being sat around especially as you only require one hand to turn the engine over and there is no real difficulty in doing so, same force near enough for a full turn.
It will be looked at more once its out but i believe I'm going to go straight for the engine swap while I'm doing the restoration.
|
| |
|
|
|
|
|
|
|
|
|
Right another update. Ive been working on it but had a few issues, one my plasma cutter went bang and wasn't reparable so had to order a new one and second is the weather, everything takes so much longer to dry. There is progress though, the chassis rails are finished and top coated and the lips are in zinc primer ready for welding. I have got the front floor section to fit in but i still need to pull it over to the sill a few mm so there is no gap but thats easy enough to do i think i need to trim somewhere. Made a start on the rear floor... its been quite interesting to fit as i cant remove the entire rear plate as the rear floor from factory also goes across the prop tunnel to the other side as well as having strengthening plates and the handbrake mount on it so careful trimming has been required to clear those areas and also to allow me to weld them together. Tomorrow hopefully the rear floor will fit perfectly and ill make a start on getting it ready to weld. Front section  Rear section  Where I'm having to replace the lip, also you can just see the continuation of the floor under the prop.  |
| |
|
|
|
|
|
Feb 22, 2011 20:35:00 GMT
|
Well the floor is now in, not fully welded but its in. All the box sections have been painted on the inside and drain/wax-oil holes added. 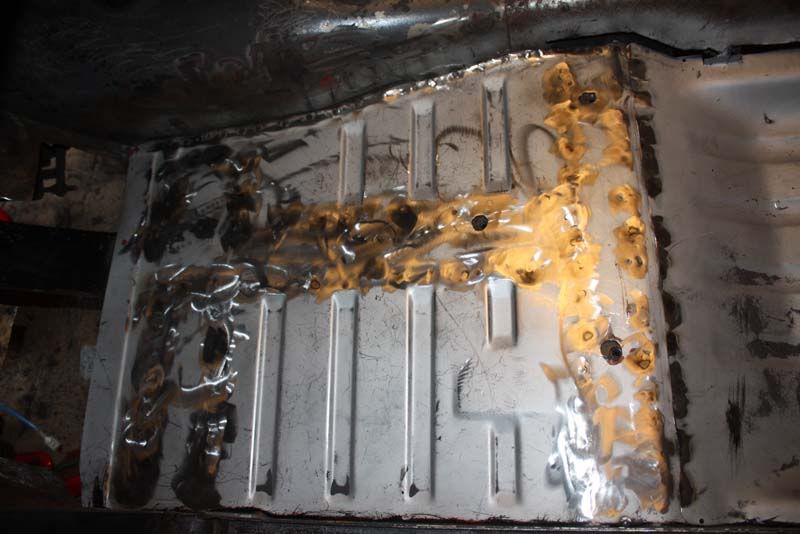 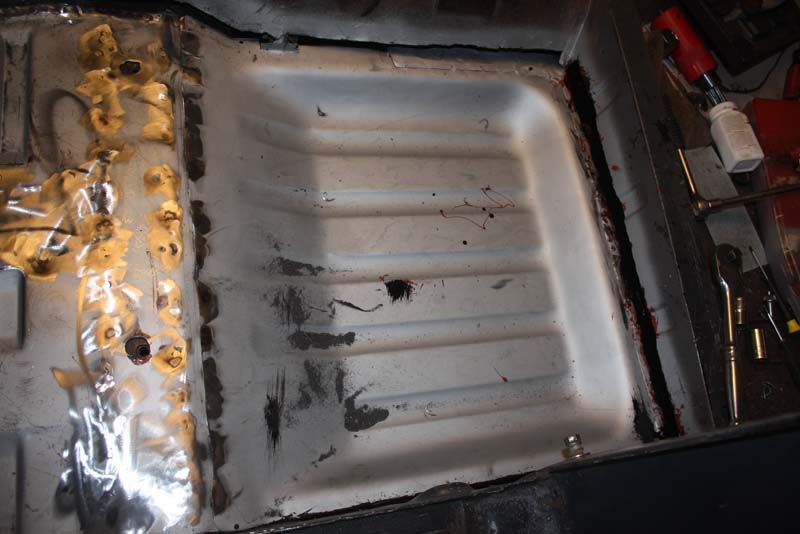 Rear lip has been recreated and welded in too.  Removed the rear section of the headlining and found this.  I really hope thats not what it looks like. Either way the headlining needs replacing but i hope i don't find anything hiding away up there. |
| |
|
|
luckygti
Posted a lot
I need to try harder!
Posts: 4,912
|
|
Feb 22, 2011 21:03:47 GMT
|
Epic epic rebuild. Looks like a mountain but you seem to have made a pretty good start on it. My dad had an estate when we were growing up. It was luxury for us, a family of 5 who had a Mini Clubman estate before  ^^ Yep, reckon there may well be some unwanted visitors in there  |
| |
|
|
|
|
|
Feb 24, 2011 20:21:50 GMT
|
|
WoW you have some work to do there, be worth in thou.
Wonder if you could advice me, I have a Volvo 122 speedo i want to put in my car. What i would like to know is that the speedo cable screws in to the right hand side of cluster but dose the cable screw directly to the cluster or is there an angle drive attachment to eliminate any tight bends
|
| |
|
|
tosh
Part of things
Posts: 165
|
|
Feb 24, 2011 20:35:42 GMT
|
|
your doing some awsome work there pal, don't give up on it like i did, i still shed tear's for mine.
keep up the good work mate, good luck
tosh
|
| |
|
|
|
|
|
Feb 24, 2011 21:16:57 GMT
|
|
Keep up the good work...
I'm sure when you finished it it will pay you back in awesomeness....
|
| |
|
|
|
|
|
|
|
Elpassata sorry for not replying sooner, i will have a look at the speedo cable tomorrow and put a reply here. Well... on monday i noticed a small pinhole at the front of the transmission tunnel so i created a small patch to fix that, however my small patch didnt go well as the original metal was just too thin to weld to correctly so i put my tools down after spending a day making the repair and actually went back to the problem today. Cut out the repair and some more and made a repair panel then welded it in. Then i made a start on the door post, created two repair panels and cut out the old metal. Start on the floor/finish door post tomorrow. Some pictures The repaired lip finished. 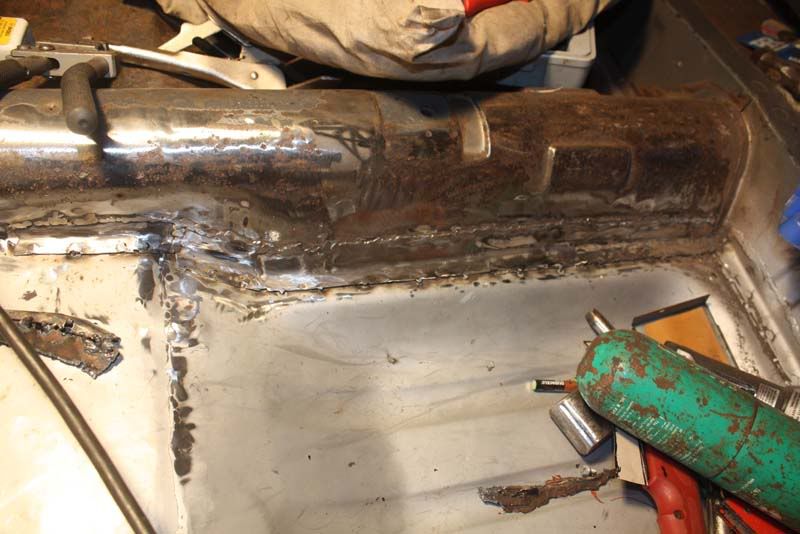 The repair, needs the welds finishing off. 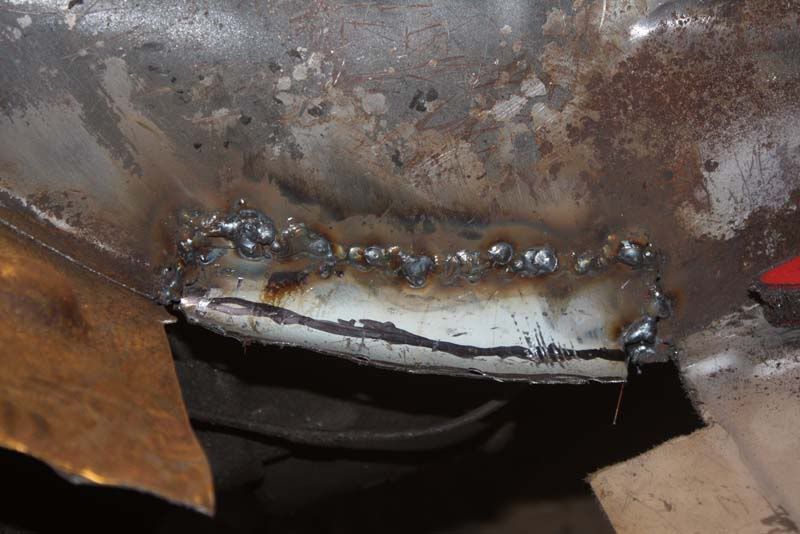 The door posts  Repair panels.  |
| |
|
|
|
|
|
|
|
|
I love this sort of resto. I don't think I'd have a clue where to start though.. with so much rust, how do you find any datum points to rebuild from?
|
| |
...proper medallion man chest wig motoring. |
|
|
|
|
|
|
|
Its not as difficult as you think (Well not in my mind anyway)
I normally create a template before cutting out the rot, then once ive cut the rot out trim the template to the correct size and tack in before fully welding as i tack and check its all correct. If its structual/flexable ill support it before cutting and if required take measurments to check its going back the same.
This time I'm bagging nuts and bolts as it will make my life easier than going through boxes lol.
|
| |
|
|
|
|
|
|
|
template before attacking with the plasma. That would be where I've struggled then  |
| |
...proper medallion man chest wig motoring. |
|
|
|


 ^^ Yep, reckon there may well be some unwanted visitors in there

