|
|
|
Nov 29, 2010 21:29:28 GMT
|
Hi, Been around for a while on here mosltly reading but thought it was about time I posted somthing on my car. Not strictly retro I know. Well the cars been built for a Good 3 years, used it for 2 seaons of road rallying, trackdays & daily driving, got laid up mid this year after braking the engine and running out of rallying funds  but its going to be resurected to play again in 2011 Here's part of the shell build. Started life as a very solid shell I was given my a mate, Gutted it Stitch welded Engine bay 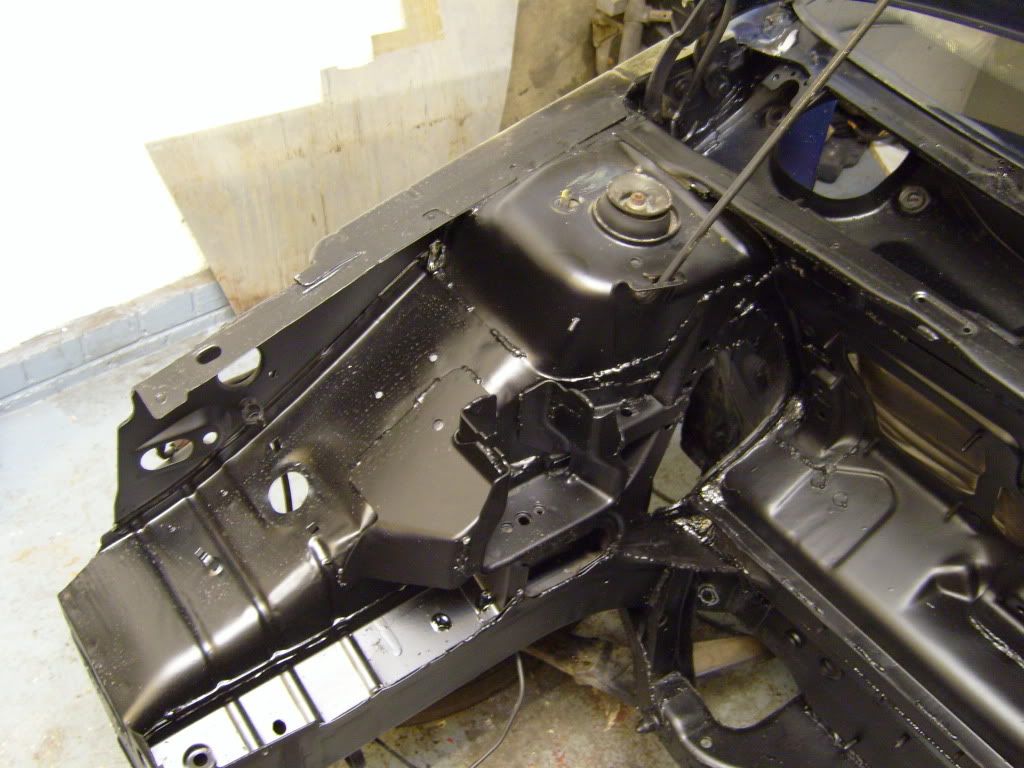 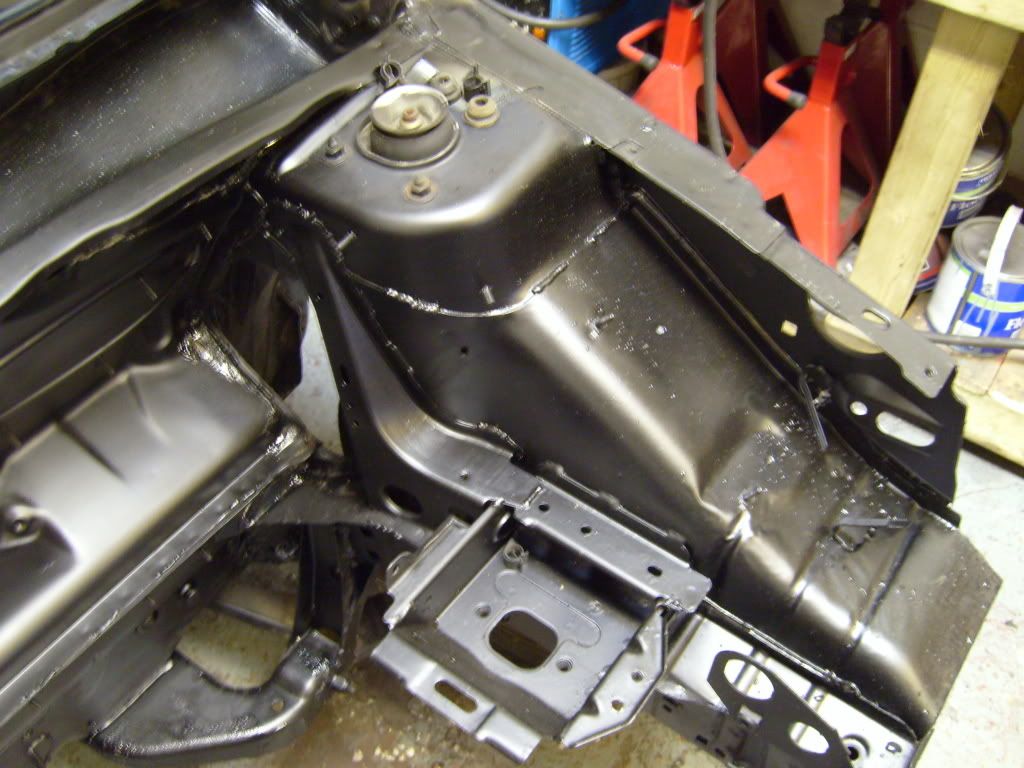 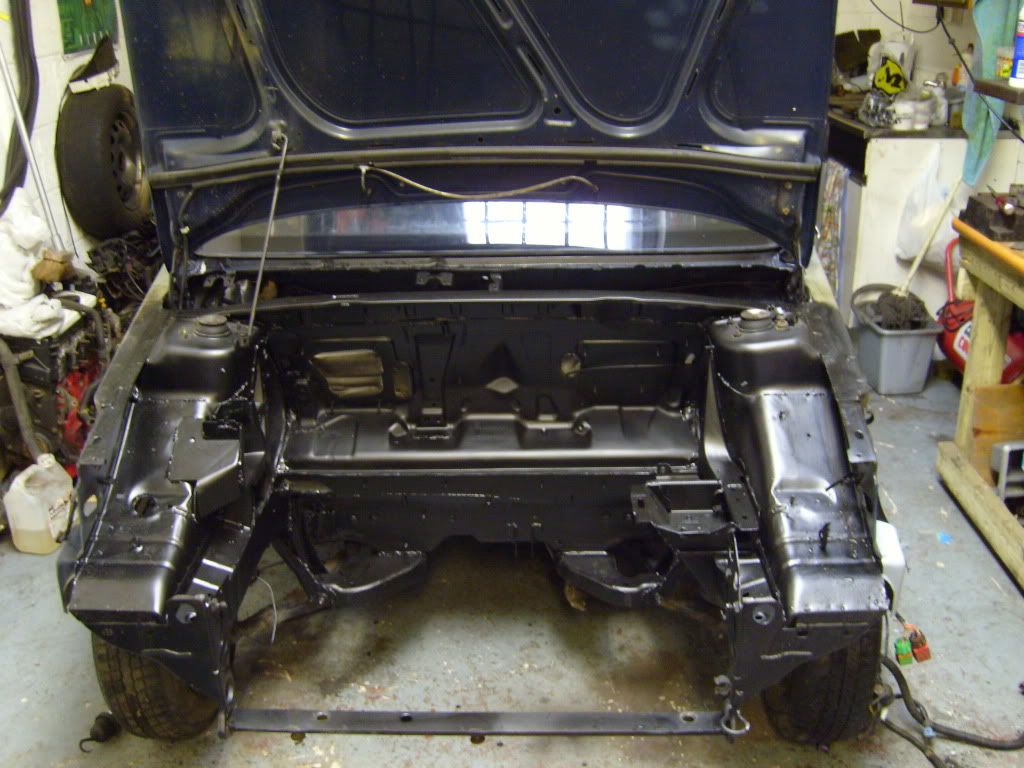 then moved onto the inside.. Hydraulic hand brake bracket, removed from a C2R2 no less. (retains origonal mech hand brake) 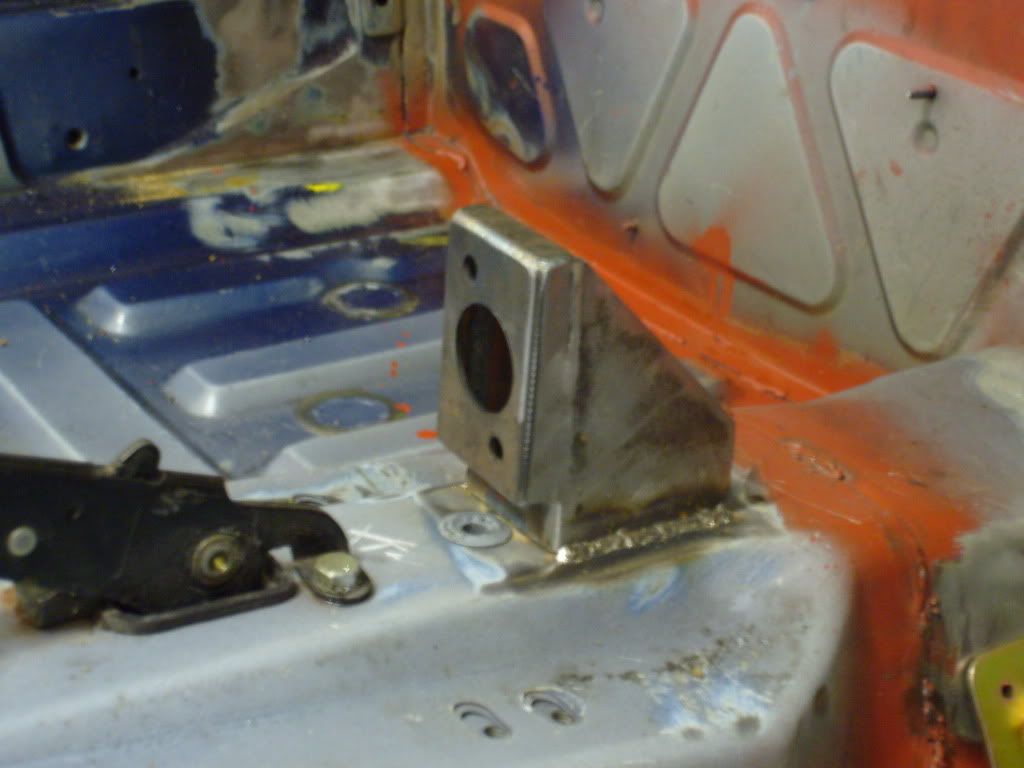 then the Cage, a light weight weld in CroMo OMP cage...weighs in a 19Kg!! 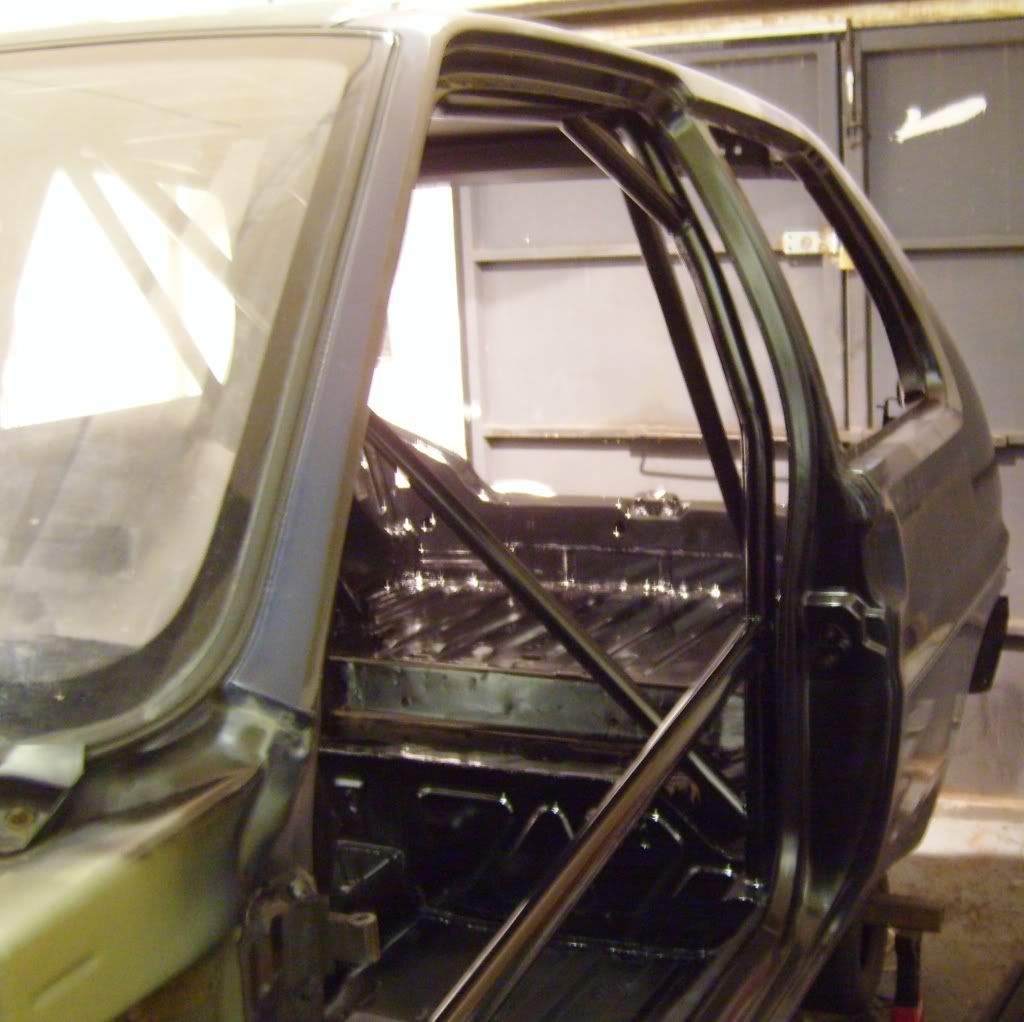 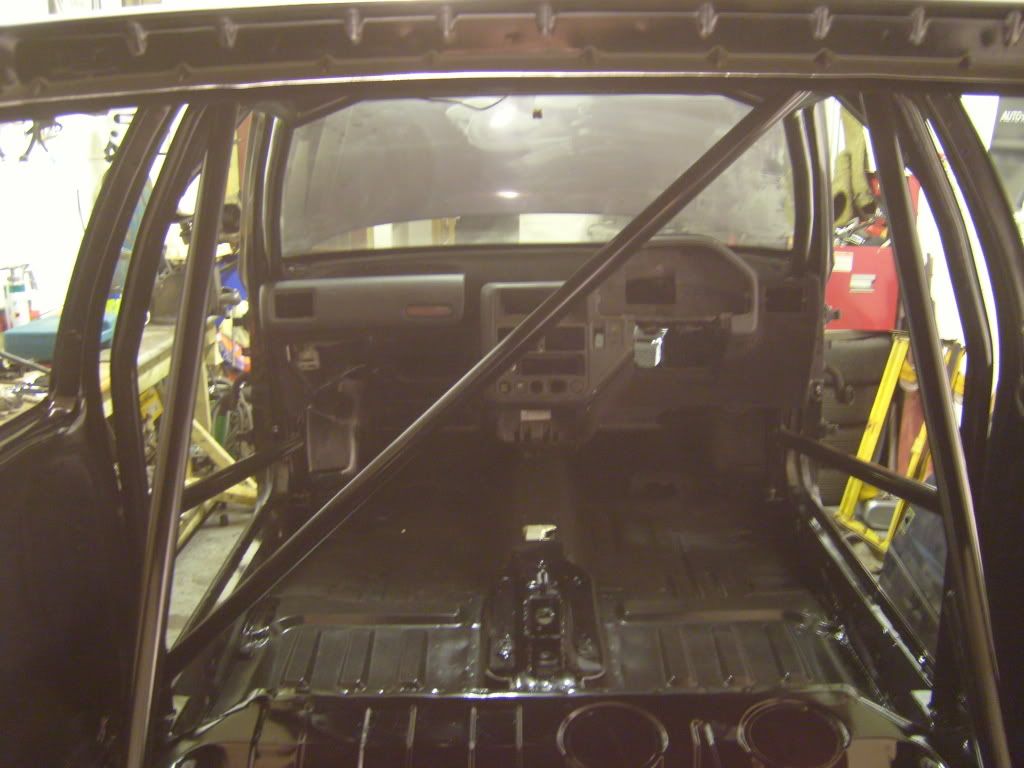 Flocked dash? - This wasn't quite what i was looking for and had been hacked about by someone else. so sold it on 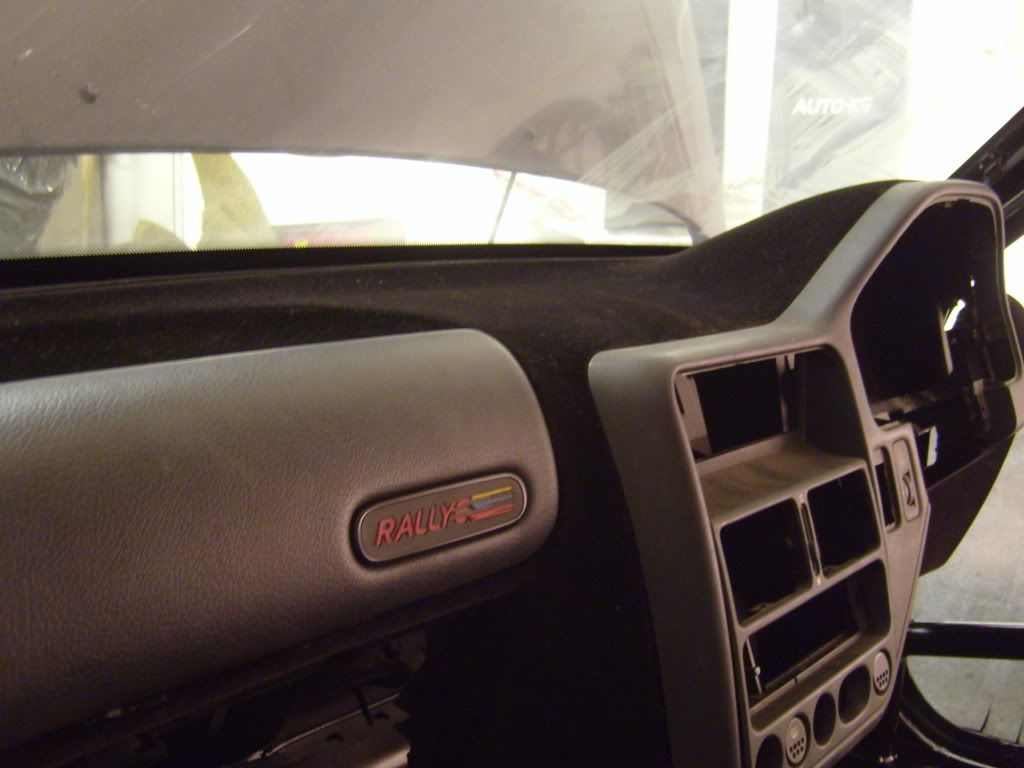 in supposed final finish: 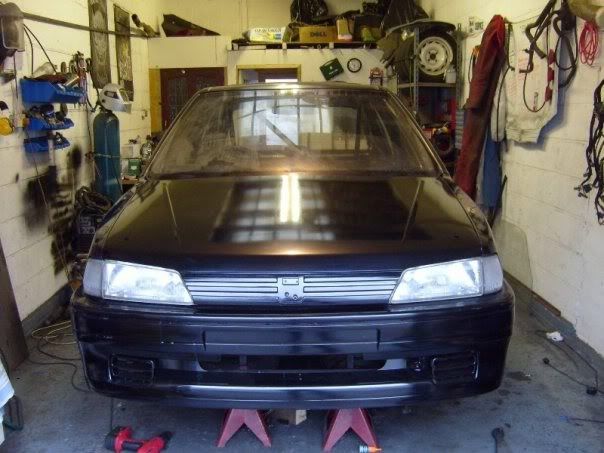 Apologies about the choppy nature of the photo's I'm more of a get on with the job and do it person rather than take pics. anyhoo the paint reacted whilst in the sun at French Car show 2007 and went patchy crazed matt black, so got some NATO spec Matt black paint and put that on (badly), After the Bruce Robinson Road Rally 2008 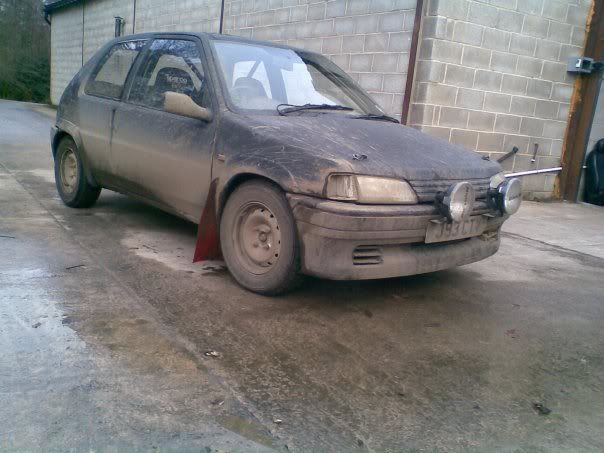 in action www.mandh-photography.co.uk/events/BruceRobinson/090215_147.htmwww.mandh-photography.co.uk/events/vk2009/vk09-.281.htmwww.mandh-photography.co.uk/events/vk2009/vk09-.289.htmwww.mandh-photography.co.uk/events/Oaks09/oak09-159.htm |
| |
Take the Next slot right coming up on the left.
|
|
|
|
|
|
|
Sept 15, 2016 12:25:39 GMT
|
So it seems after 6 years since my last post the 106 can actually be defined as retro.... lots have happened to the "Flying Blackboard" has its now been dubbed i'll give a potted history of what I can remember!(sorry there are no pictures) I designed, developed and fitted a spherical bottom ball joint conversion in early 2009 following a spate of the car eating balljoints due to ovalised balljoint holes. To say I’m pleased after 6 years of being used and exposed to the very worst Derbyshire whites (farm tracks) have to offer, pressure washed after every event for only one of the spherical joints has a very slight play is an understatement. So on with this merry tale... En route to the Jackson Trophy rally in 2009 a horrendous knocking from the engine occurred under power, wasn’t a big end knock, got it back to the 'shop and subsequently discovered one of the little end bearings had nipped up. Then came the lay up for most of 2010 lack of rallying funds dictated this. finally fitted a 75k mile 106 Gti 16v engine i picked up for what was then cheap (£175 iirc) Fitted it to and got back into road rallying. Now the MA gearbox fitted to 106 / Saxo's etc isn’t known as the cadburys gearbox for no reason, IF you rebuild them at the 1st sign of whining, struggling to get in gear with new bearings, balk rings etc then they seem to last at least a season or two of abuse. however my pockets didn’t run that deep so my gearbox’s were rebuilt from sweepings up from the workshop from varous MA gearboxes that were acquired and stripped over time. Got fed up with this and gathered the bits and appropriate info to do a BE4r conversion from a picasso with a hybrid gearset that gives a very good close set of ratios that transform the car, from something relatively quick into something perfect for the lanes that surprises a lot of other crews. Not to do thing by half it was decided that since we had the front end in bits id convert my coilovers to take 306 hubs, and proper inverted bilstein gravel dampers. The car competed like this regulary with mixed success for a few years (2nd in class on the Clitheronian rally with a broken engine mount) That brings us more or less to this year, decided to retire the car and me for a year to concentrate on some other projects. (206 gti Rally car build, house DIY etc.) Decided the engine bay was looks very Grotty, the Extrior paint was Grotty and had been getting more and more on my nerves over the last few years but because of the rallies we were doing, moving house, moving workshops and life generally getting in the way I never got round to sorting it out. Whipped the engine out to be faced with this.    Pressure washed and Stripped the accumulated gloss paint (yes yes I know but It was free and I didn’t know any better) with Langlow Prostrip which is a brilliant product. Smells properly potent and stings if you get in on your skin, (I got it from Sheffield Refinishing supplies). Mighty pleased with the lack of rot after the last 8-9 years of being rattled around the lanes and whites.  Then it all went tits up a bit….. The front suspension was getting tired and needed new dampers and a spot of paint…..so decided to convert some new struts currently gathering parts. |
| |
Take the Next slot right coming up on the left.
|
|
|
|
|
Sept 15, 2016 12:28:12 GMT
|
|
|
| |
Take the Next slot right coming up on the left.
|
|
|
|
|
Sept 15, 2016 12:30:39 GMT
|
ACTUAL RETRO CONTENT!!! Was given this.   1971 Reliant Scimitar GTE SE5 it’s been sat outside since 2009 it’s got the original Essex v6 in, has the Laycock overdrive fitted, very damp black interior, it’s pretty complete, missing a few odd bits of trim on inside, a 3 litres badge on the Pass side and a I from the scimitar badge on the back. Nothing much going to happen with it for 6 – 8 months as ive got far too many other car and workshop related projects to get finished / moved on. but looking / prodding its going to be a full body off resto.. |
| |
Take the Next slot right coming up on the left.
|
|
|
|
|
Apr 11, 2017 14:50:42 GMT
|
Been a while since I've updated this.. My mojo has returned. The Scimitar has been hidden away in a mates lock up, and the DAMN GODAWFULLY put together saxo has been broken for parts & shell scrapped. Bought a very good and very heavy twin wheel trailer off a mate who I service crew for on stage rallies, he replaced it with a fancy enclosed race shuttle...which reminds me I need to get some NASA Stickers before we go to the Manx National... Said trailer is quite a large thing and takes up a good amount of floorspace. So following disussions with another mate and motorclub memeber who navigated for me in the 106 when it actually ran reminded me hsi trailer lives vertically... Gentlepersons of retro rides I give you: The Trailer Winchy Post thing.    cheap ebay 240V 1600Kg winch, 4 bits of 50X30 box, stitched together, some 10thk plate and jobs a goodun. I need to get the centre of gravity better when lifting as its a bit sketchy but no one has died yet... plan is to lighten the trailer with some aluminium recovery truck bed plates ive got hold of. |
| |
Take the Next slot right coming up on the left.
|
|
|
|
|
|
|
Progress has been made.   Welded these up, removed the conversion tubes from my old struts, (they were welded on and have been cut off hence the shortness, but its not going to be a ground hugger, Tig'd (badly) in a ring of stainelss exhaust tube I had laying around. fitted them to my previously grit blasted, converted to run inverted bilstein inserts and painted struts. Just waiting on the hubs to be turned down so I can fit them. (air exit holes need to be drilled in the bottom plate to stop them pumping up)  I really need to match the threaded tube length up, not seen them together till I took this photo, its now doing my head in.  Engine bay fully stripped, De-curdded, sanded down. Then last night etch primed it after breaking my large spray gun (was an El-Cheapo one that has done quite a bit of work, Over zealous tightening of a air connector split the handle), luckily Ive got a small detailing gun which was better for getting intp the nooks and crannies. Then hit it with the gloss black.   Yes its a bit non slip in places, but my workshop is a bit of a dusty place, AND its goingt o spend the rest of its life mottled in whatever particular shade of mud: brown / Beige - Derbyshire Weirdy brown orange that when its baked on is the hardest substance known to man...ahem - Lincolnshire Sticky lumpy brown - Yorkshire. Yes i could have painted the scuttle panel - but thats going satin black. I'll paint the lower bits of the chassis rails etc in Stone Chip before the rebuild begins. (i really should have damped down the floor, but i got excited about making progress and got carried away. when i get round to painting the shell ill get a cheap Geezbo and make a hillbillybooth. |
| |
Take the Next slot right coming up on the left.
|
|
|
|
|
|
|
SO this Happened. 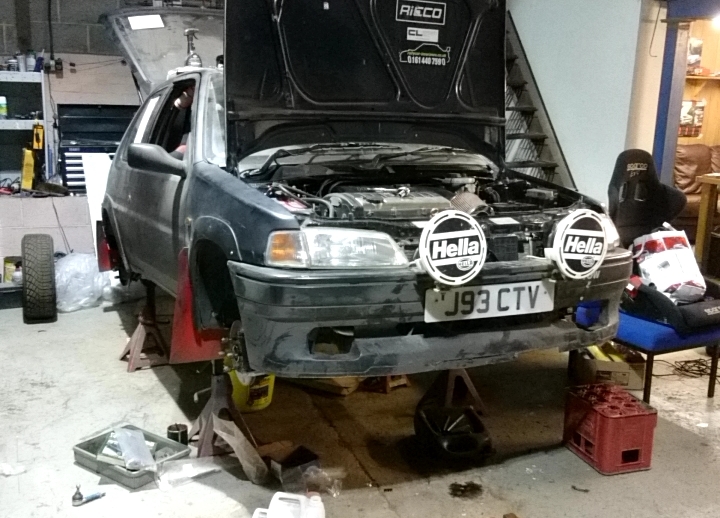 not without issues. bit of exhaust needs fabbing up & welding in. Problem. 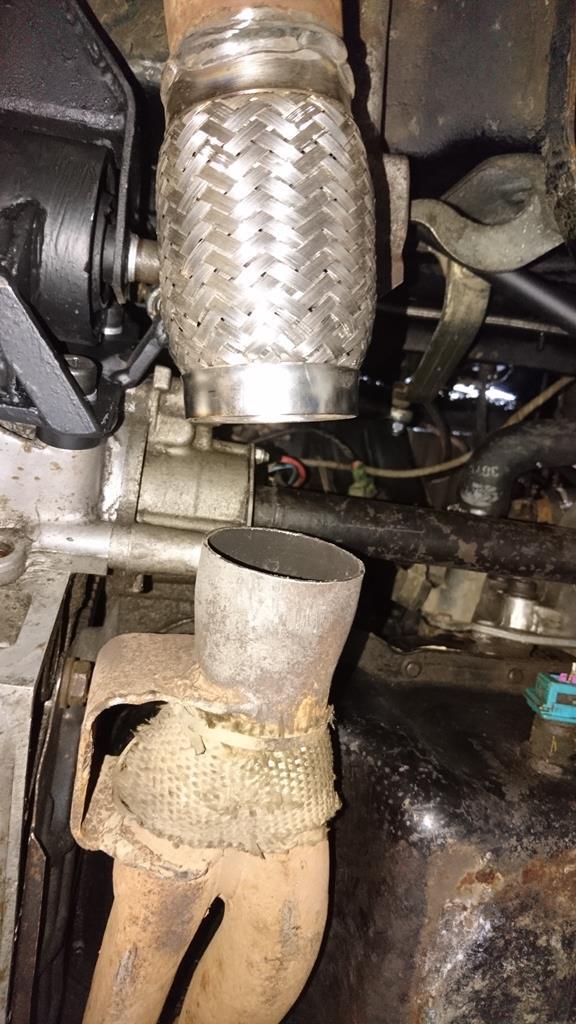 "easy just need a bit of tube...curse word ive not got anythe right size" more hunting around the workshop. "I do have a bigger bit" Solution. take one perfectly serviceable if too big bit of stainless tube, 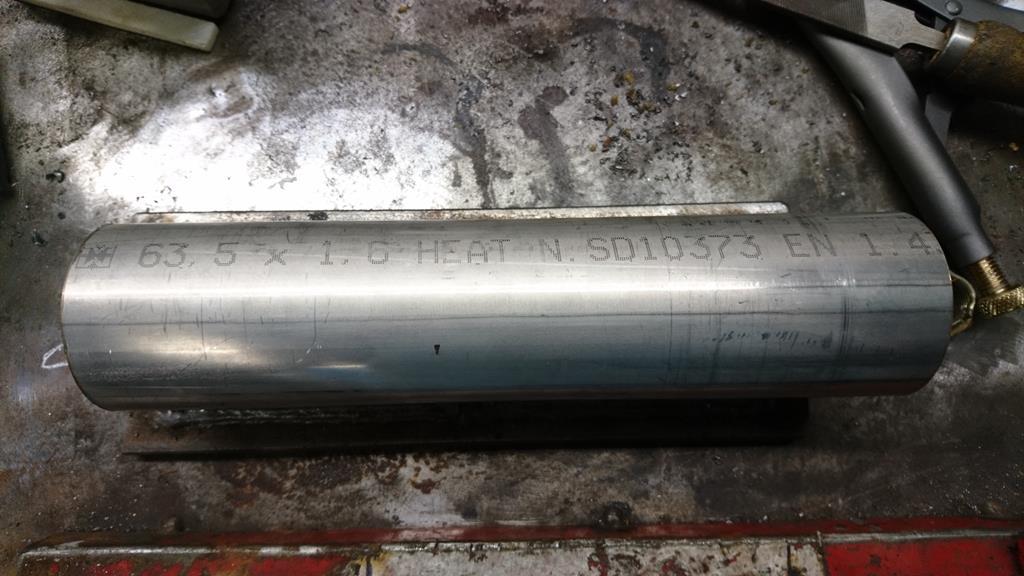 Ruin it. 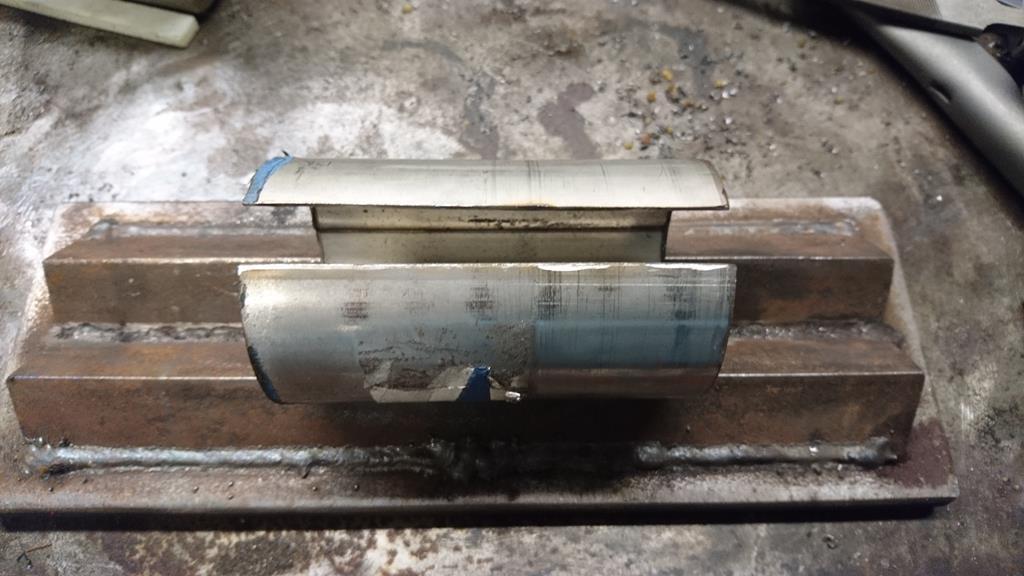 clampy, clampy, dress round with hammer 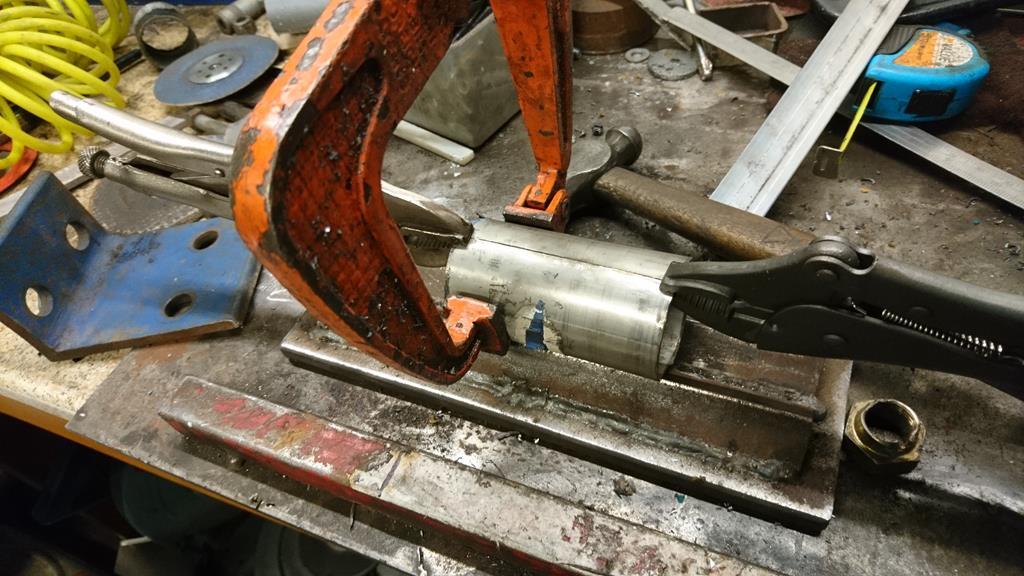 weld it up. 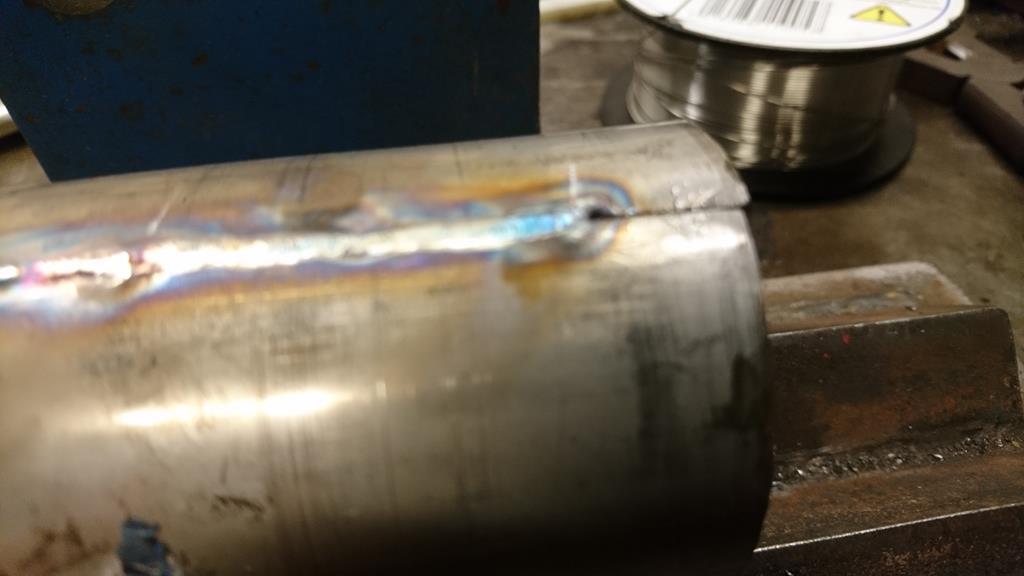 then trim to suit, forget to take pictures and discover problem 2 once iverefitted everytrhing. Problem 2 car runs on 2 cylinders...its got 4. bizzarly its the inner 2 that don't fire, que lots of stripping down the inlet to get to the injectors whilst swearing, test the wires, build the curse word back up, mess around swapping fuel pump relays. SUCSESS! it runs on 4... Oh wait, no it doesnt, get angry have a Mug of Tea and a biscuit. "..Right bugrit engine looms coming off.." - several years of rattling round the countryside, a small oil fire, water, heat more water and being elderly and french wont be helping. thus far i have the loom off and hiding in a box under the car. The current plan is to have the car ready (in its badly painted, scabby bumpered glory) for the BHP & BBQ car meet the motorclub are putting on (see events section!). |
| |
Take the Next slot right coming up on the left.
|
|
|
|
|
|
|
So Naked loom. 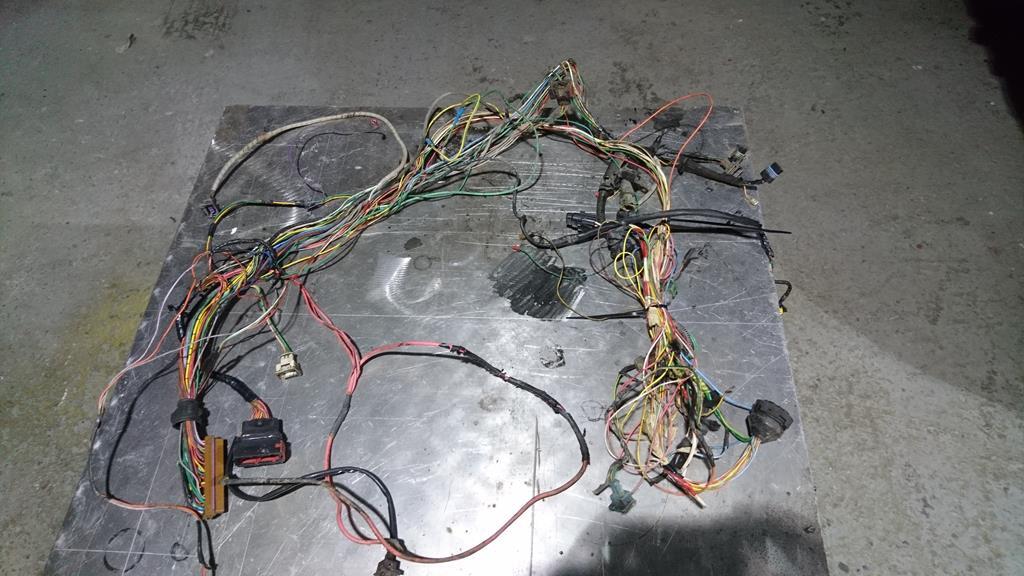 it seems some muppet has been here before me or even before it got converted to work in an S1 106 (many moons ago by Cobblers of this very parish) 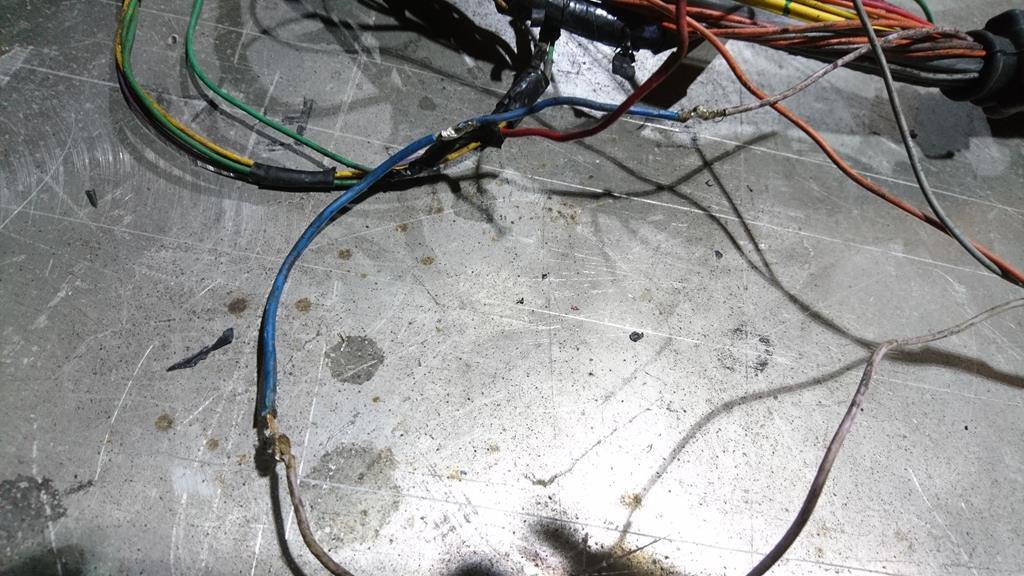 bit more hunting around the looms, repairing odd bits, went to look for a bit of wire in the Big-Box-of-Many-Many-Peugeot-Looms. to my suprise found a very very clean 106 Gti loom i purchased ages ago and had started to convert it to an S1 106. delved into it and it has not been curse word around with in any way. HHhhhuuuzzzzzahhh! que a few hours of me unpicking both looms and finding what goes where. hopefully more loom solderyness this eve after ive finished thebrakes off on my brothers Modern Swift. |
| |
Take the Next slot right coming up on the left.
|
|
|
|
|
Aug 25, 2017 12:28:44 GMT
|
Well progress has been made. it only chuffing runs on all 4 cylinders! however the engine bay looks like this 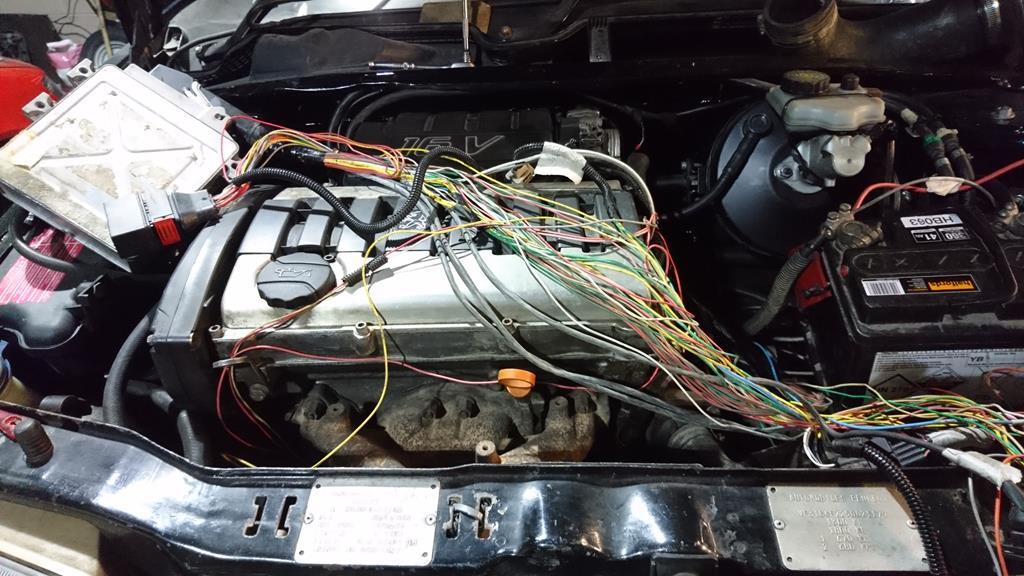 To Do list currently is thus. do a few loom alterations - extend the map sensor wires to let me re-route the loom thro the bulkhead and keep the ECU & Injection relay in the cab. re attached the rev counter and speedo (its been converted to run 106 GTi clocks with electric speedo drive) Rewrap the loom get all the curse word etc thats fallen onto the sumpguard off. ride height. tracking. MOT legal tyres insure & MOT! |
| |
Take the Next slot right coming up on the left.
|
|
Fossilfish
Part of things
  Thank fossils for fuel!
Posts: 653
|
|
Aug 25, 2017 13:09:50 GMT
|
|
Well done at keeping up with the project it can't be easy with all issues you've had. You don't like to keep things simple do you.
Keep the faith my son
|
| |
Thank fossils for fuel!
1996 Jeep XJ Sport 2.5 Manual
1975 Scimitar 3.0 V6
|
|
|
|
|
|
|
Sept 4, 2017 10:46:21 GMT
|
You don't like to keep things simple do you. Not sure what you mean by that? its all pretty simple, no wheel re-inventing going on.  I had a pre converted engine loom to reference to, and a very good unadulterated loom to adulterate. Traced all the wires back to their connectors, bit of cross checking with the haynes book of lies, solder and heatshrink, loom is partly re wrapped now just need to make sure it all fits where i want it to. |
| |
Take the Next slot right coming up on the left.
|
|
|
|
|
|
|
So after a perlonged general car / workshop based project pause. missed deadlines (rallies car shows etc), due to DIY / Building work, weddings (both of which wern't mine)empty wineglass induced finger injury which required stitches and nerve re-attachment, the usual irregular and irratic progress can resume.
Problem.My Navigator has a pechant for occasionally booting the fusebox as he climbs into the car, this fusebox bracket was a masterpice (ahem) crafted from the finest Saxo fusebox brakety thing and given a healthy dose of cutting and welding. (it actually mounted the other way up) 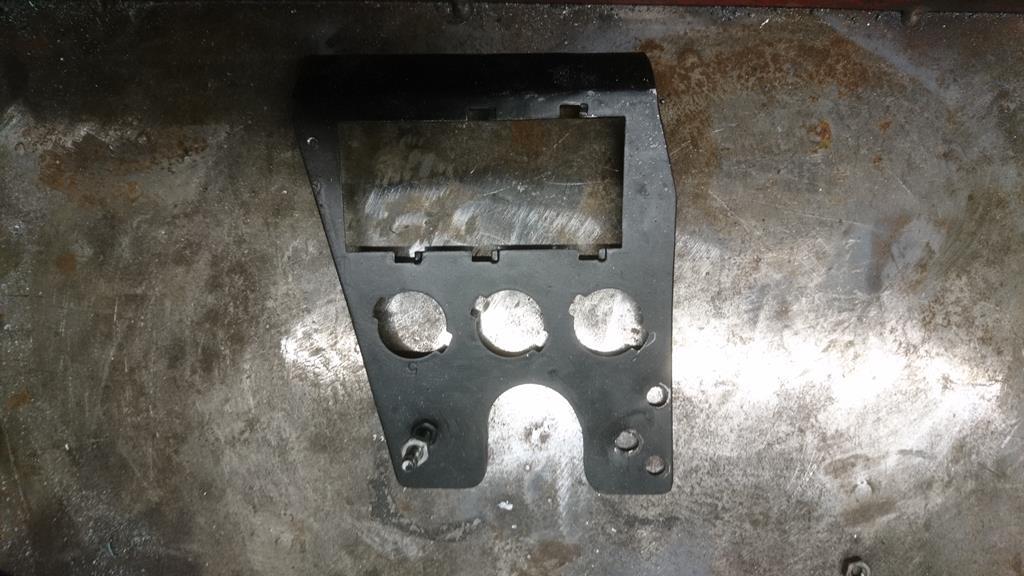 Solution. Solution.do a bit of CAD mockery uppery, forget to take foto's of said grubby bit of carboard. Reproduce from a bit of aluminium I had laying around. 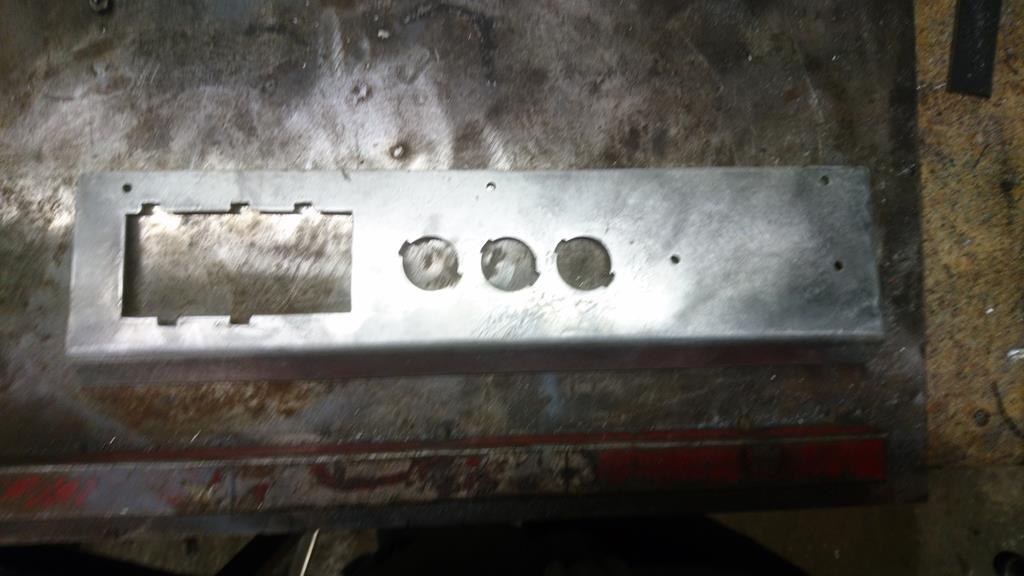 and offered up with a spare std relay plug (yes welshpug i know its a engine bay realy plug and i have a S2 106 hazzard switch...  ) and fusebox in, the Aux fuse box and captive nuts will be added later this week at some point (I hope) 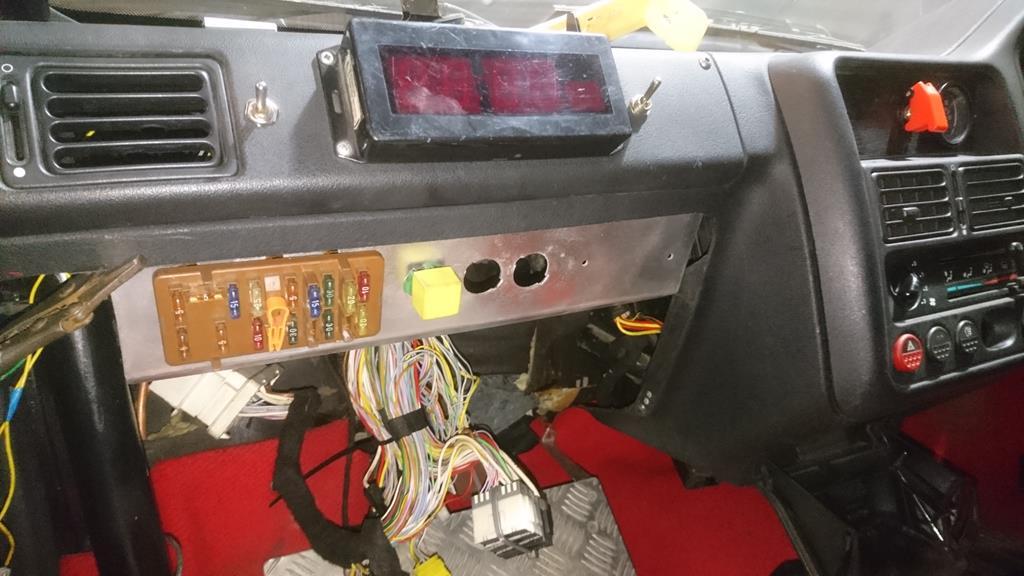 Hopefully this will clear his Size 10's - if not he's going rallying in flip flops. Aftera bit more fettling and filing of the relay mounting slots I can then carry on with operation - tidy-the-curseword-wiring-up. Then check the mechanical side of things are right, Set up the suspension & steering. Drive it up the road, decide the gear change is pants, take it apart again fix it, MOT/ Rally the wheels of it.  |
| |
Take the Next slot right coming up on the left.
|
|
|
|
|
|
|
got a little thurther on with the dash panel. I need a Riv nut tool, so... Find a bit of round bar in the scrap pan, chop it to length, throw it in the lathe face it off and poke a hole through it. 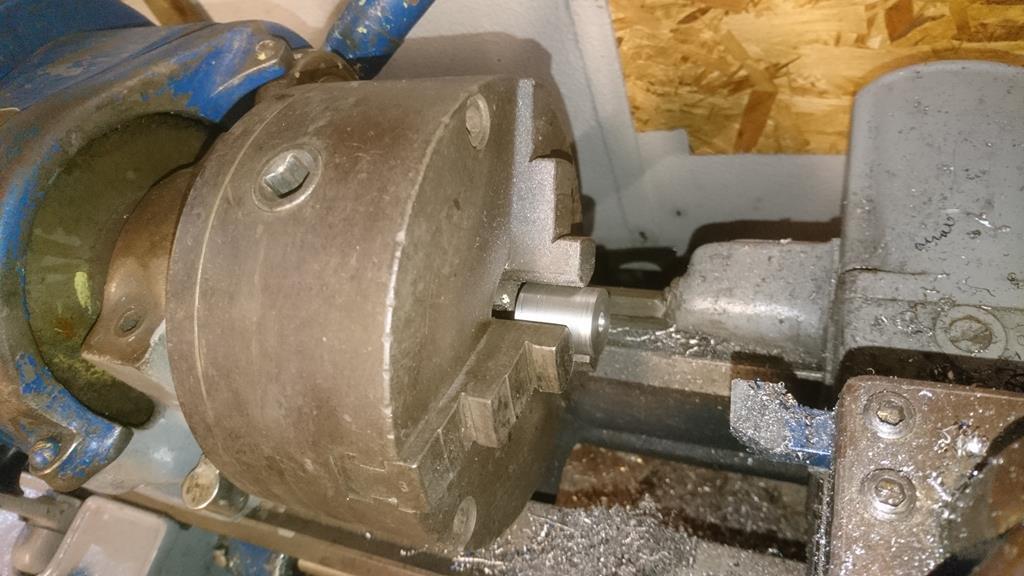 need a handle. Oooh a bit of a previously butchered 106 steering arm will do, clean it up file a radii in the top. 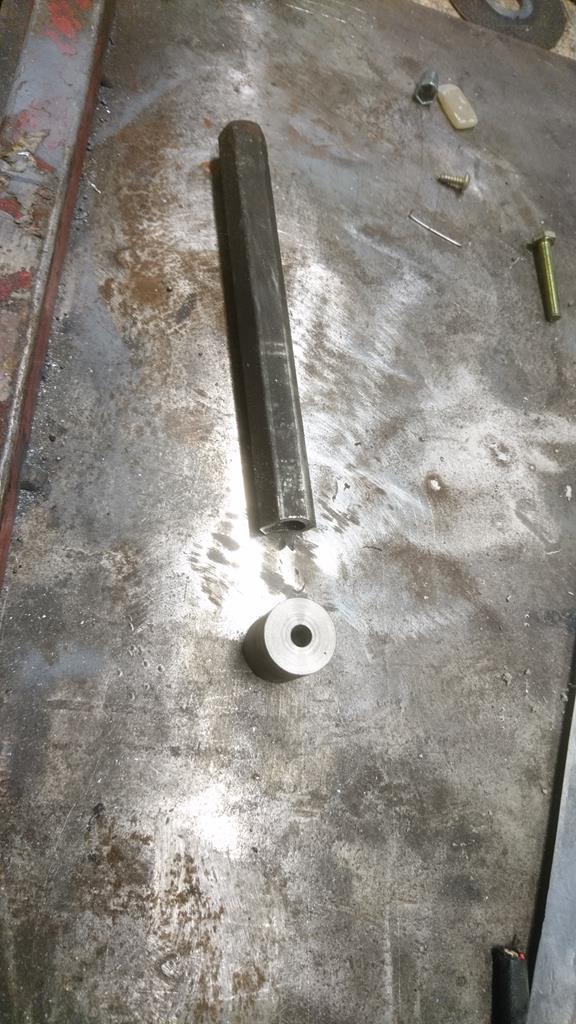 Fire up the BigMig and glue it together 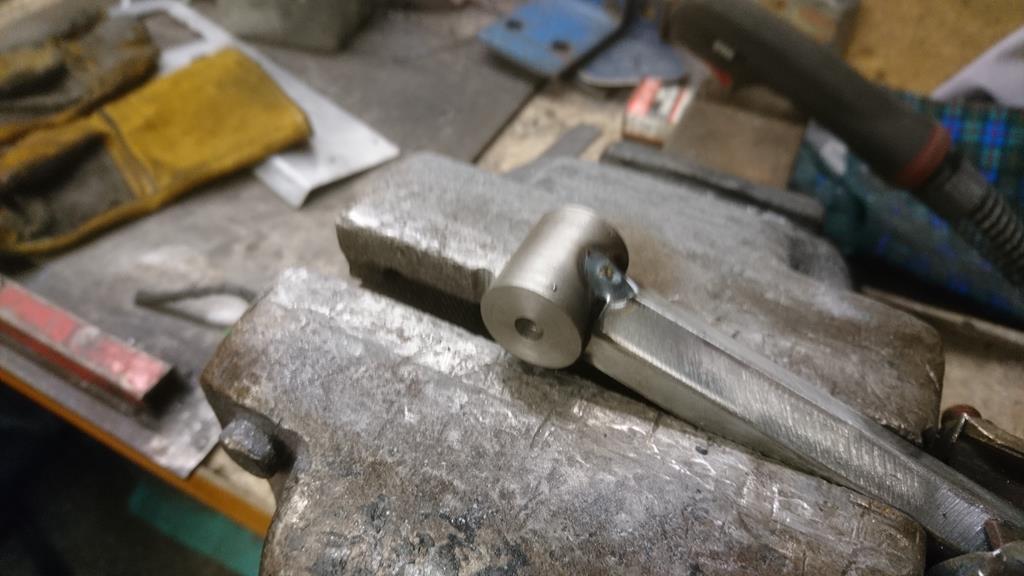 bit of M6 bolt,rivnut and ratchet action later.....the vice mountyness works well. 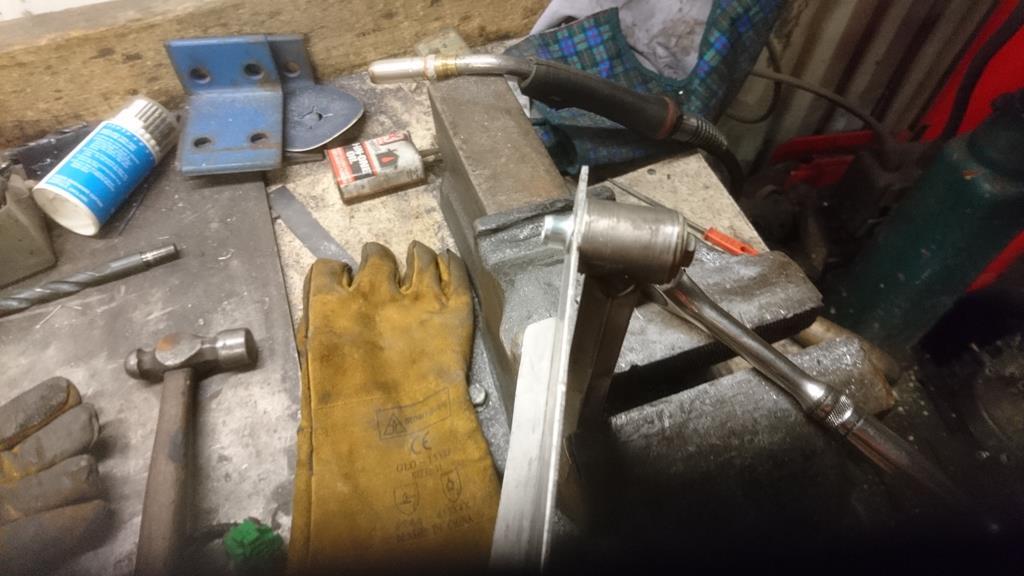 Huuzzzzahh! we have a totally rivved nut. 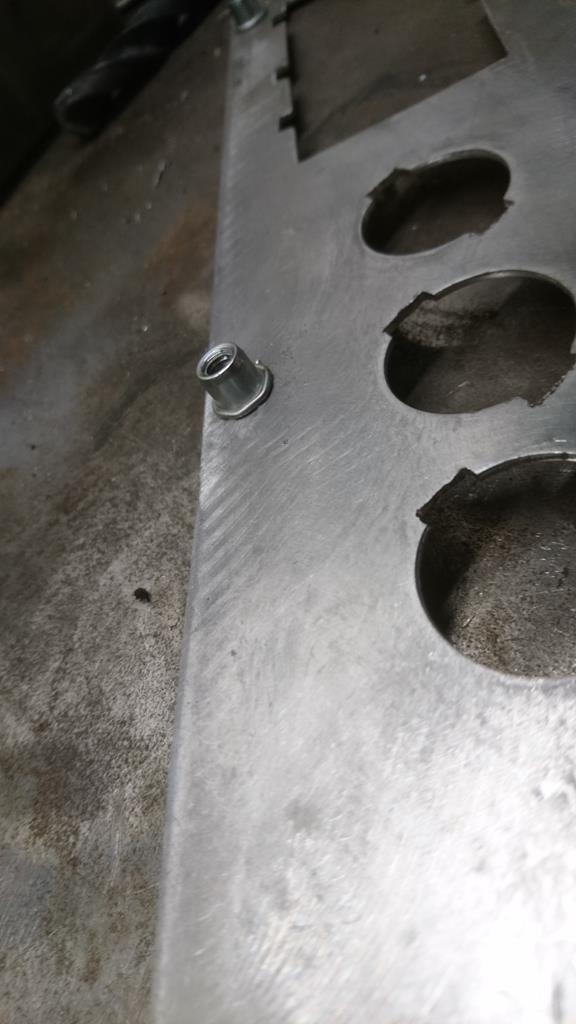 more progress later, involving paint, swearing, more paint and freezing my extremeties off in the workshop...  |
| |
Take the Next slot right coming up on the left.
|
|
|
|
|
|
|
So, another update, before the truck bed paint based fiasco another bracket was made to stiffen up the panel against the dash - this should result in a lack of dash mocement as we go over jumps.. installation commenced. 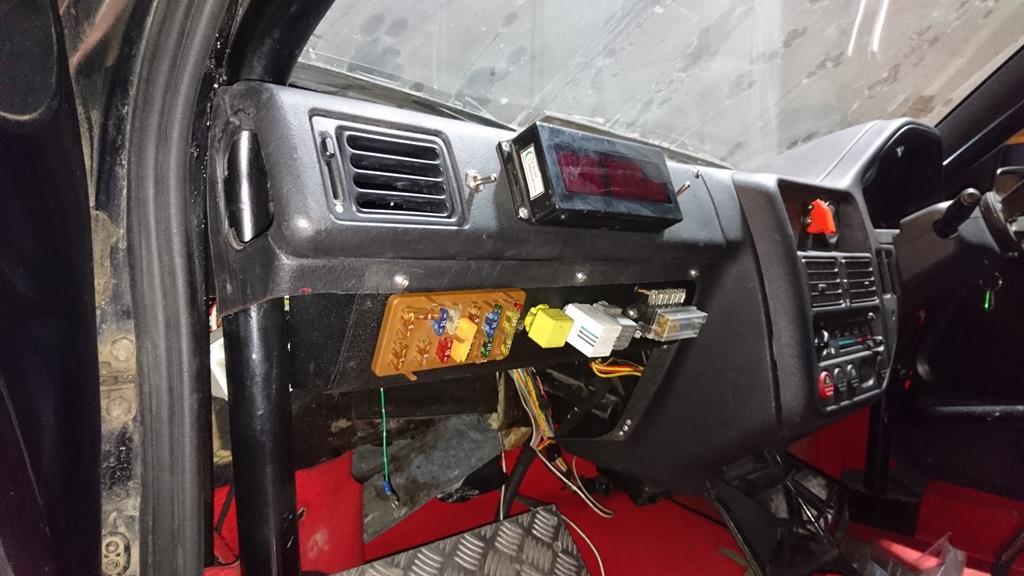 This was after much swearing, tidying up of wiring - Have I mentioned I HATE Wiring, well actually doing fresh custom made wiring, going where you want it is quite pleasent once you have got over the inital fear of it never actually working again. what i do infact HATE with a sodding passion is modifying / rerouting OEM wiring, - however time and thurther procrastination avoidance constraints have caused me to use what ive got. just need to wiring in the Aux bits abd bobs, fit a cover for the Buzzbar, Oh and sort out the engine loom and ECU mounting....did i mention my Mild dislike of OEM wiring? |
| |
Take the Next slot right coming up on the left.
|
|
|
|
|
|
|
It appears the 106 is increacing its retro points score, yes that dreaded tin-worm (my previously mildly boated about rot-free shell, Oh theres surface rust but no actual rot...) Oh the car moves under its own steam BTW, the brakes were diabolical and the gearchange was appaling (as predicted) so i manouvered the car out of its corner and onto the ramp, via close call with a camper van parked in the yard (lack of brakes) and having to hold the damn thing in reverse (horrible gear change) got it in the air and removed the sumpguard, to be showered with ends of tiewraps, offcuts of loomwire, tape, loom wrap, a teaspoon (I'm confused abut that also) and a long lost 10mm socket. had a quick mooch round under the car to check the state of it, looks Ok..oh drivers side inner rear wheel arch looks a bit baggy...prod..crunch..curse word  but as i find bodywork and grot removal theraputic..I'm going to rather enjoy this ended up being faced with this after a session with the knotweel of truth, and attack of the killer permanent marker. 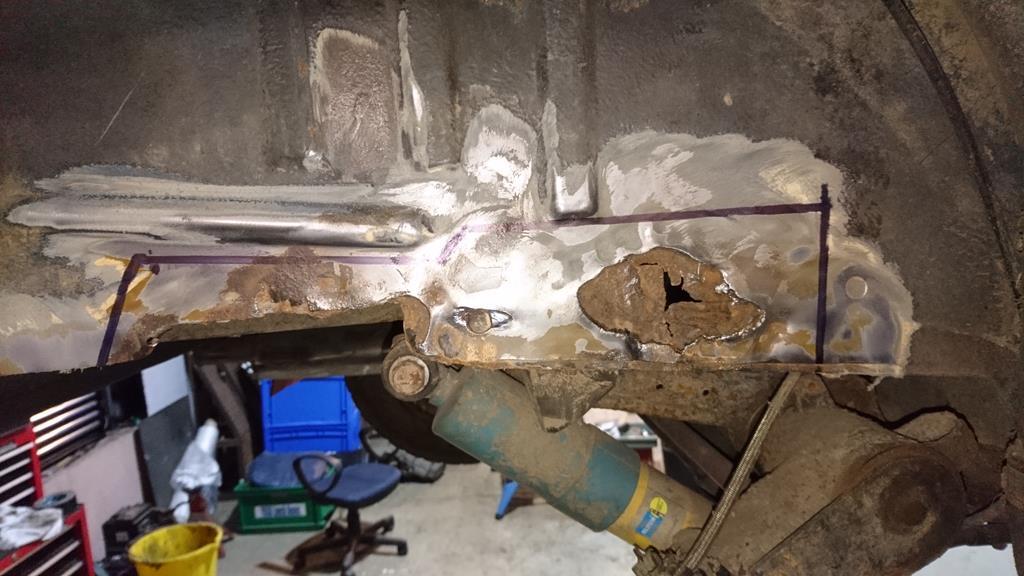 part way through playing Chop The Rot 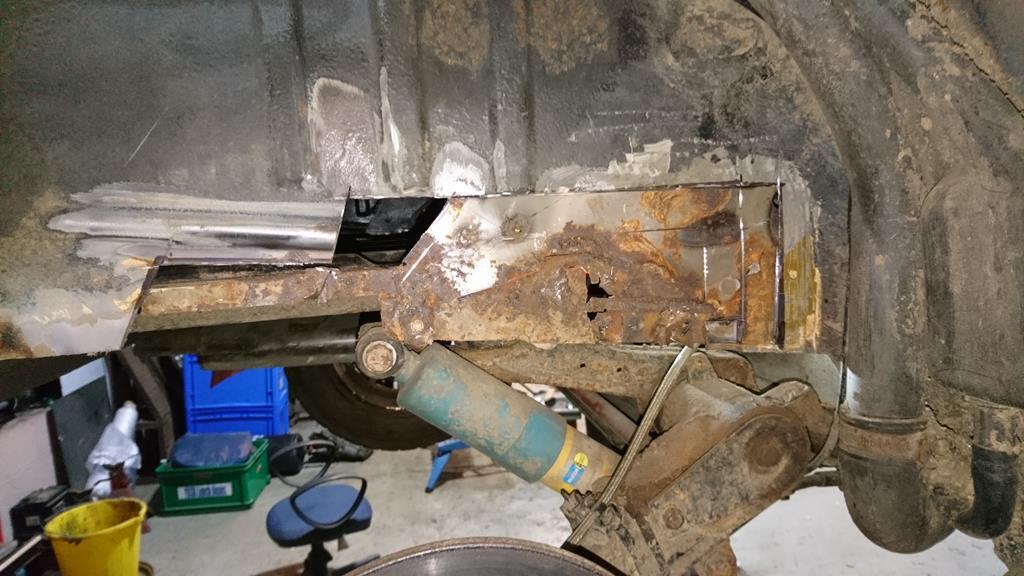 you know the socre, CAD, Make in steel, splash the weld thru primer about. 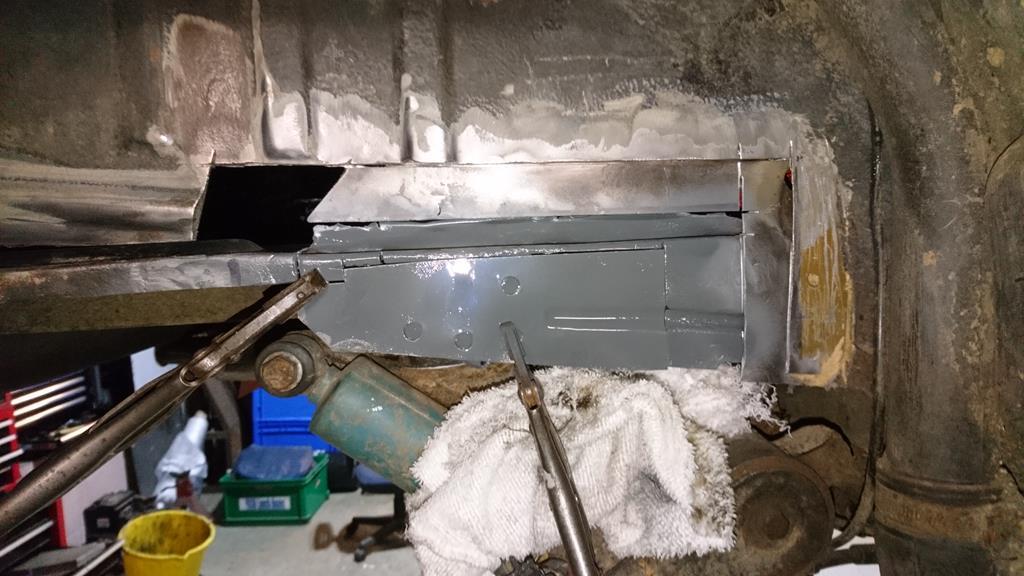 This is #1 of 3 plates, nothing new on a 106, ive done this repair many times (I did the Navs side wheni built the car), glad I caught it when i did as it hasnt spread to the boot floor. This is far as I got last night, was getting late and I couldn't face welding bodywork with 0.8mm wire or changing the BigMig* over to 0.6mm wire and the accociated wire feed headche and swearing. * the BigMig is an industrial 3phase 305Amp Beasty which if provoked badly can make things Glow rather brightly and make metal dissapear in a pall of smoke and sparks*  |
| |
Take the Next slot right coming up on the left.
|
|
JoshO
Part of things
 
Posts: 337
|
|
Mar 22, 2018 10:32:35 GMT
|
|
Looks like some good progress you're making man. Nice to see one being used for its intended purpose!
|
| |
|
|
roosie
Part of things
 
Posts: 20
|
|
May 26, 2020 12:09:58 GMT
|
|
is this project still ongoing,
have you got any parts left from the old stock hatch motor ie suspension or torsion bars?
|
| |
|
|
|
|
|
Oct 29, 2020 13:23:19 GMT
|
is this project still ongoing, have you got any parts left from the old stock hatch motor ie suspension or torsion bars? sorry all the stock hatch bits are long gone Oh the 106 is a never ending cycle of repair & improvement, but light on rallying recently. lastest saga involves: - me buying and fitting a plate differential  - driveshaft destruction,  - the shortest competitive distance I have ever done, ever  - much going backwards and forwards on powersteering set ups  - modifying the bulhead to fit a powersteering setup of a S2 106 * Saxo, making the bracket for the pump work, and then removing it all  - finding and fixing more rust.  - building and fitting an EPas column and it works  Details and pics to follow.... |
| |
Take the Next slot right coming up on the left.
|
|
|
|
|
May 27, 2021 14:31:01 GMT
|
Right update time.... so - Buy and fit a used and unknown ramp angle or condition Gripper Plate diff...
- re-learn how to drive car with said plate diff
- decide that no matter how much a grimace or wrench at the wheel I'm really going to stuggle to drive this thing round any tight corners, I mean its fine on the lanes and open roads but its horrible on the tight low speed stuff.
- decide I need power steering - proceed to fit a S2/Saxo electic PAS pump and rack to the S1 106
now that sounds simple right? Got the rack, column, and pump mounted (had to modify the pump brakcet and make a mount to mount the bracket to, wired and plumbed, bled and working.... Erm. the steering arm TW@s the rack on full lock. Curses! much reading of the Peugeot Sport 106 build manuals later, AH the steering arms on the struts are different lengths.. EVERY STRUT I HAVE HAS NON PAS ARMS ON. they have ALL been modified to take either inverted 40mm Bilstein dampers or similar. chat with a mate. more curse words, a mug of tea, a sit down (on a gravel tyre, a highly recommended workshop seat) have a Chat with Tom who shares the workshop... "...you still got them 'lectric columns..." "...Yep, up on the Mezz.." "...get 'em down, lets have a look.." i get you the MG TF column and the Aygo column. we lay the MG & Aygo columns down next to a spare 106 column... "...curse word me that Aygo column will almost bolt on..." |
| |
Take the Next slot right coming up on the left.
|
|
|
|
|
May 27, 2021 14:43:31 GMT
|
after an evening of measuring, cutting, turning and a bit of welding I produced this. 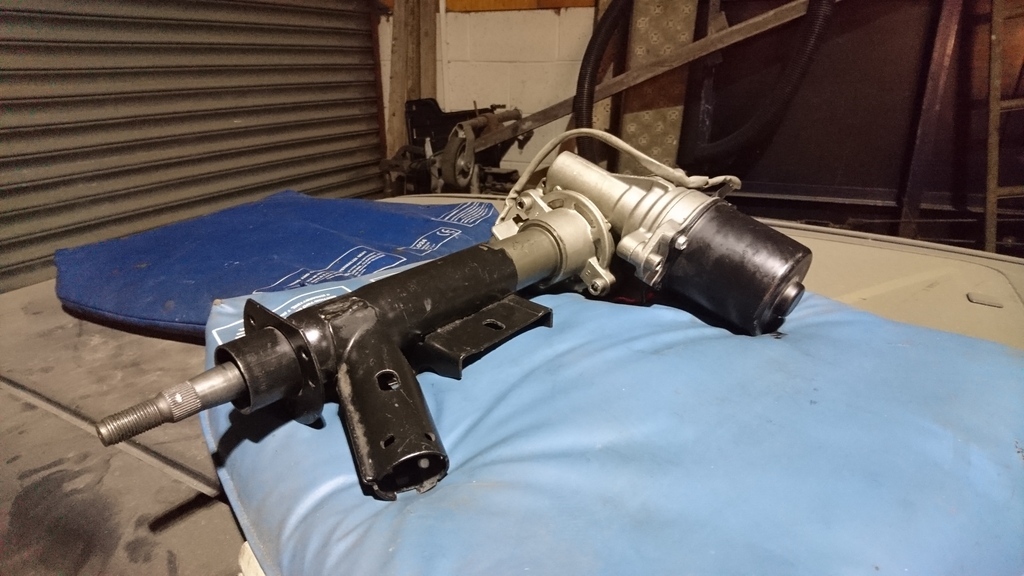 which is the marriage of 106 and Aygo columns. and it fits like this.. 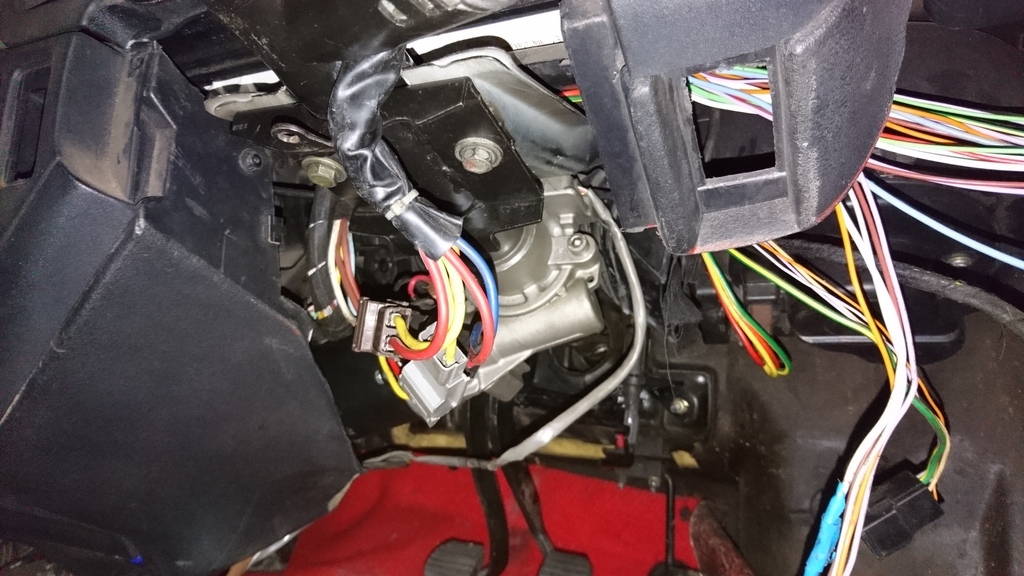 wired up the Column Ecu (its torque sensing so the harder you turn the wheel the more it assists) it only bloody works. and very well too  nicely weighted all the feel in steering its allways had and not over assisted and it works as it should. then when I had the car on the lift I found this, 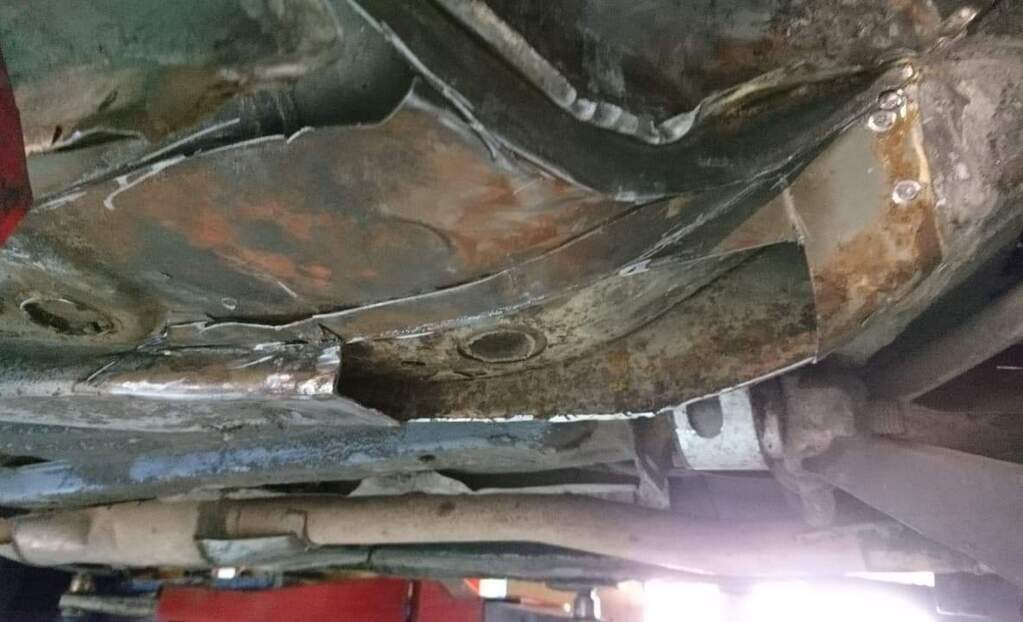 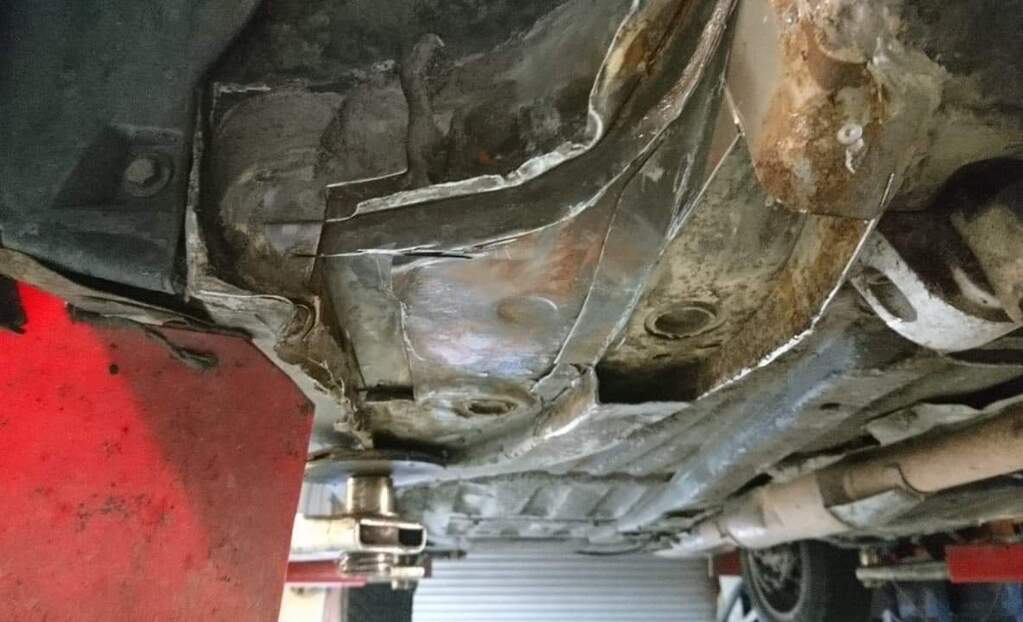 well after I cleaned the grot off. Its a repair I've done before but never to this extent. and you cant get the panels anymore. so I made one. 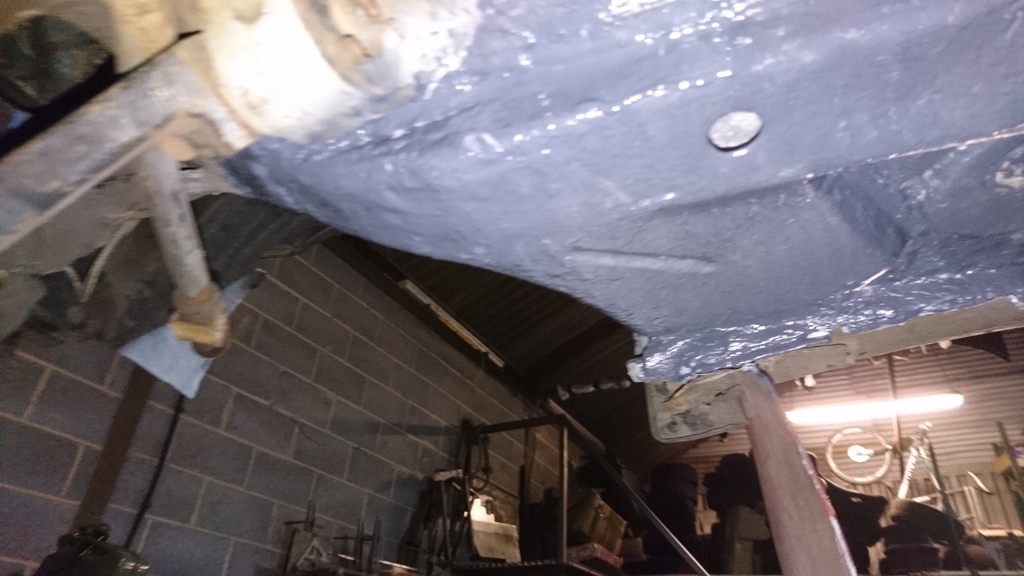 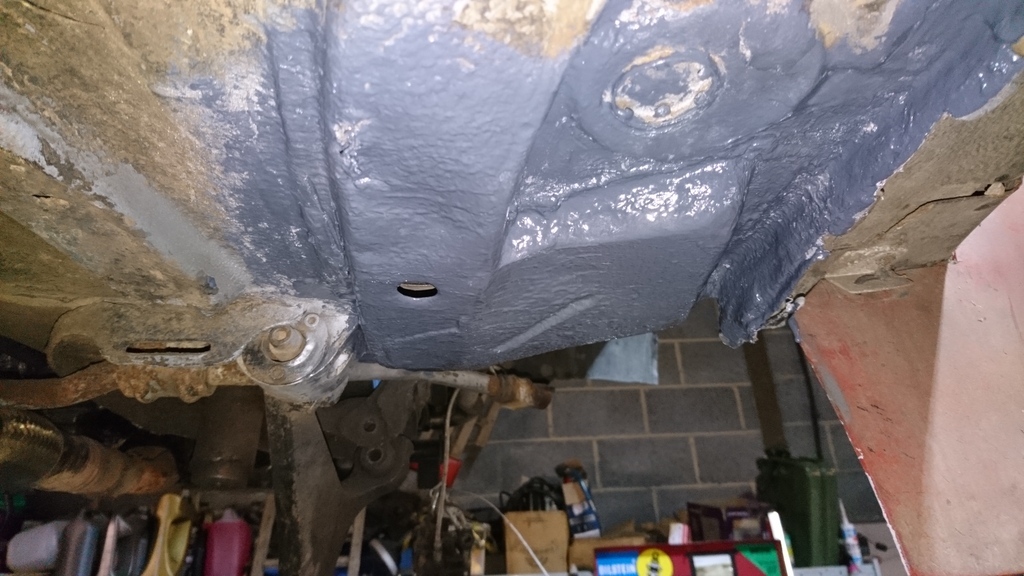 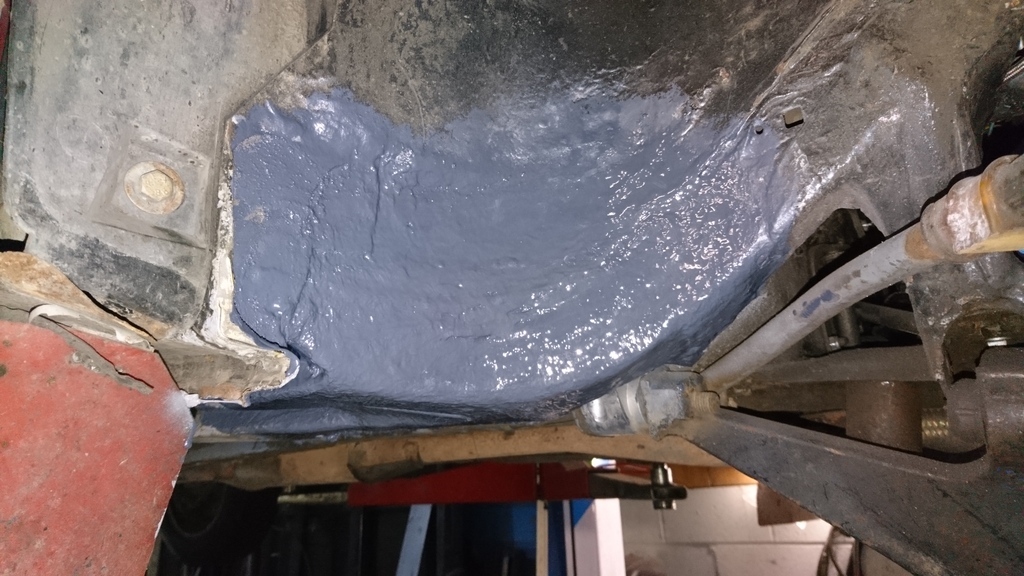 That'll do |
| |
Take the Next slot right coming up on the left.
|
|
|
|


 ) and fusebox in, the Aux fuse box and captive nuts will be added later this week at some point (I hope)


