bryn
Posted a lot

Posts: 3,913
|
|
May 10, 2011 18:17:51 GMT
|
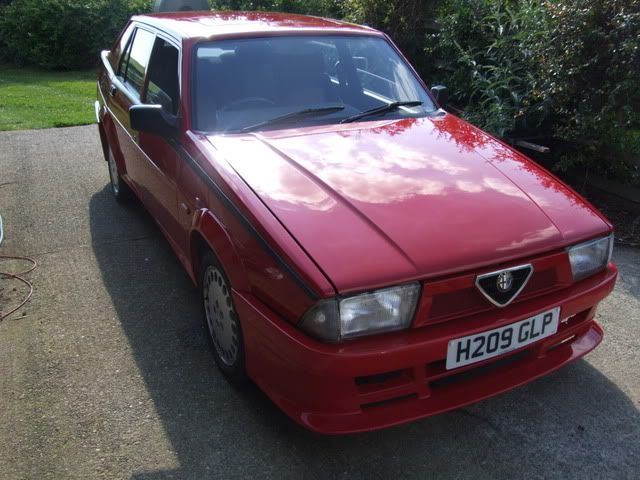
Sound, should be fine, I wonder if Bryn ever changed the pipes or added a shield on FEA? I did 5000 miles with no probs and I think hes put a few on since then. Another thing, Max was saying flipping the column made quite a bit of difference to the dp clearance and that it was worth the effort. Great skills here, like the way it's turning out. I didn't change anything on FEA and never had a problem, including a 3000 mile round Europe blast in ten days. Both water feed pipes to the turbo split because of engine movement, but that's no biggy... I look forward to seeing this finished, one day FEW will be melded with my 'strip club' estate... one day  FEW?   ;D I think that may be some sort of Freudian slip. FEA  |
| |
Last Edit: May 10, 2011 18:22:17 GMT by bryn
Volvo, Buggy, Discovery and an old tractor.
|
|
|
|
|
|
|
May 16, 2011 16:57:44 GMT
|
Cheers guys, and Bryn, cheers for the comment, i met you at ppc when you took delivery of FEA. Glad to hear you still have it - that car and sutermans build thread very much inspired me to do this project. ---------------- Random update again... Started cleaning off the waxoyl and soundproofing from the floorpan (the whole interior "metalwork" will be sprayed satin black) 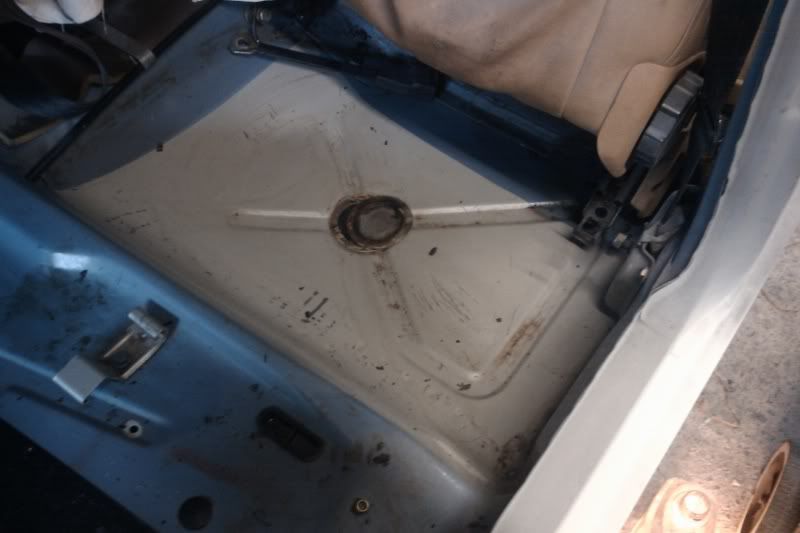 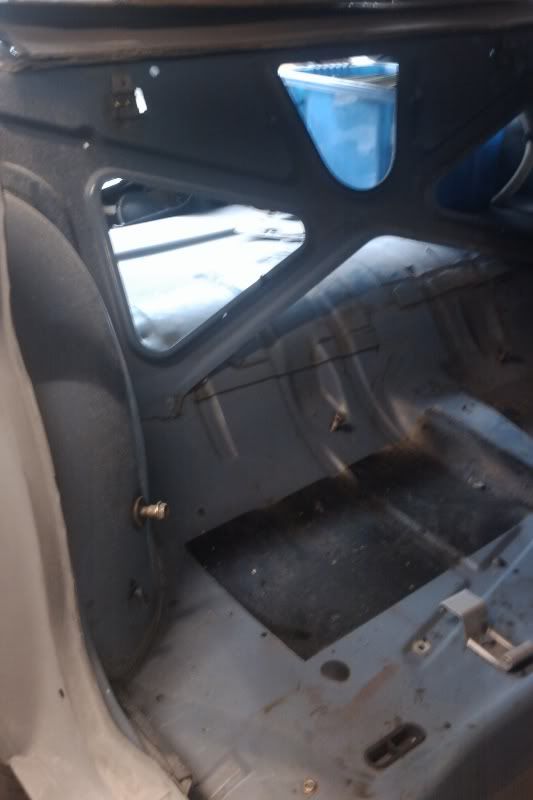 Got some filler in some dents 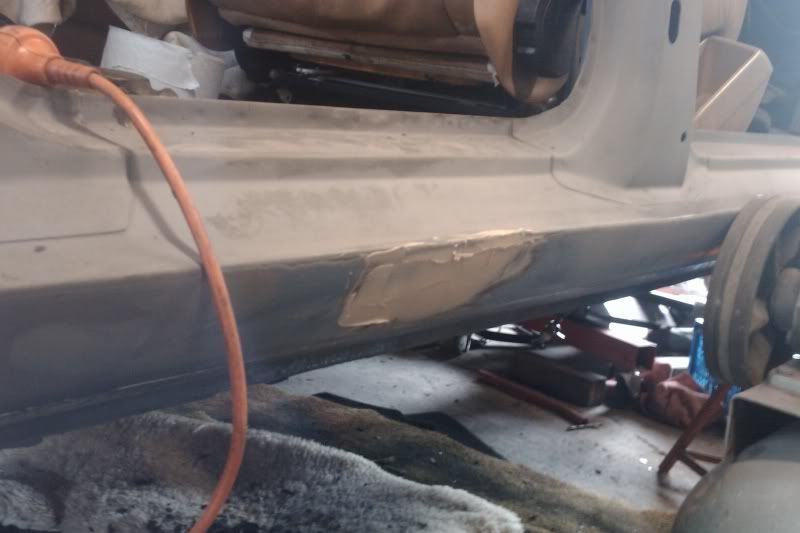 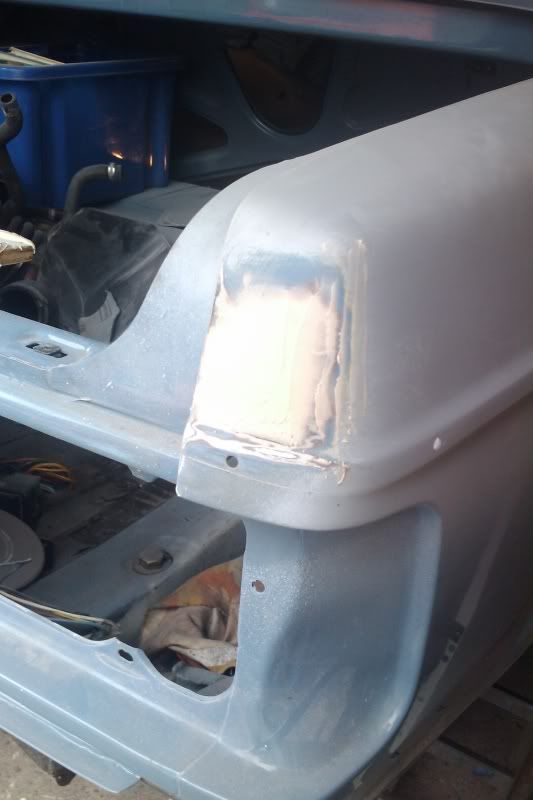 ...and a bit of surface filler where I'm removing the c-pillar trim 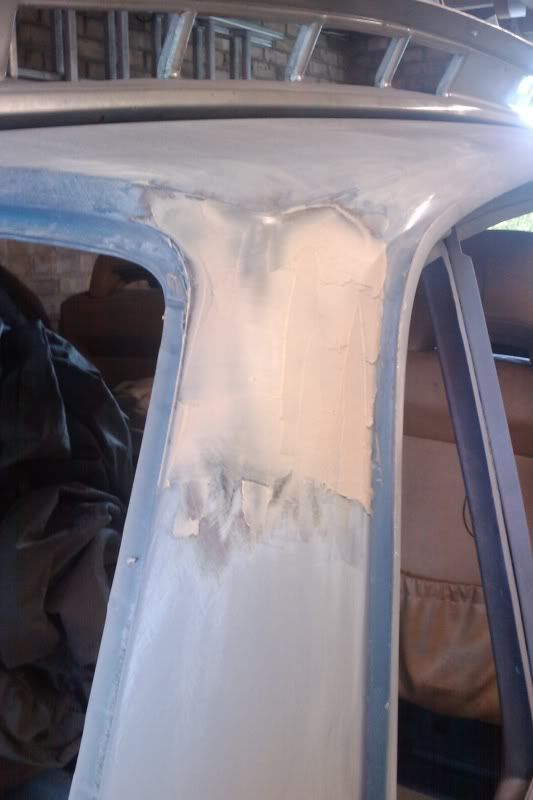 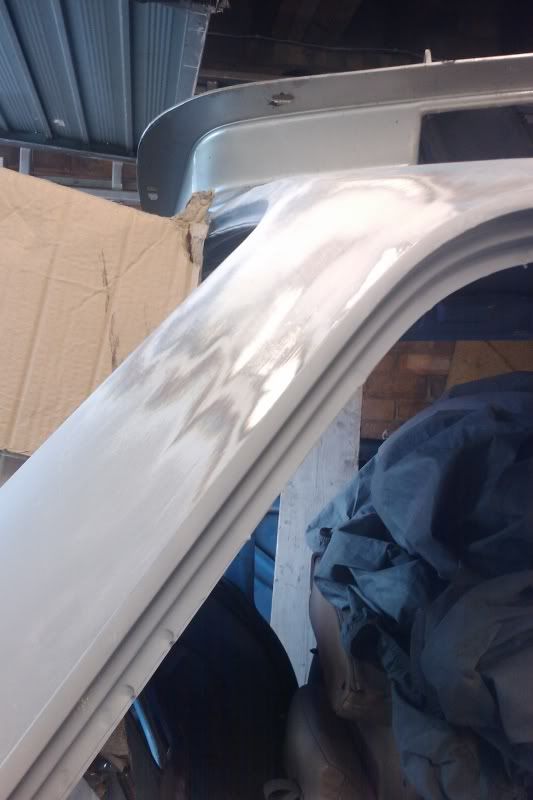 Bit of primer....   ...and had a fool about with the spray gun, again! 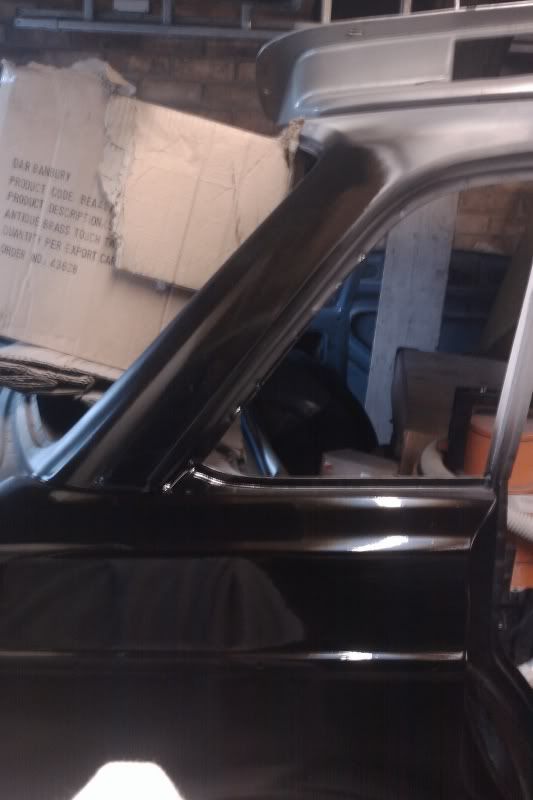 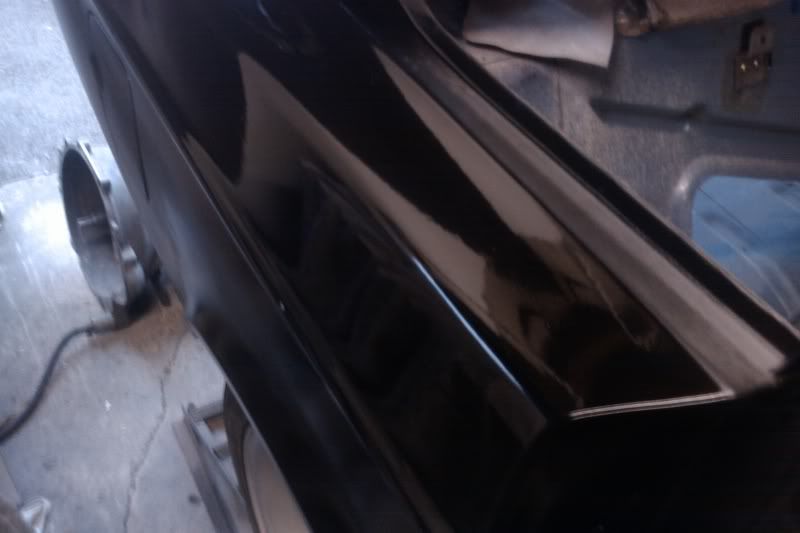 More soon. Steve |
| |
Thor: 1980 - 244DL - B21A - M45.  CLICK ON THE PICTURE BANNER FOR MY PROJECT THREAD! CLICK ON THE PICTURE BANNER FOR MY PROJECT THREAD! |
|
|
|
|
May 22, 2011 18:01:40 GMT
|
Changed my mind, for the last time. This car is going to be orange. Been through a slightly de-motivated phase where i couldnt be bothered changing the colour, but after a petrol-headed weekend at practical performance car in the park at mallory park, I'm re-motivated and this shall be the colour scheme that Thor will get....DEFINITELY.  But probably this orange... www.r3vlimited.com/board/attachment.php?attachmentid=38707&stc=1&d=1298239880Steve |
| |
Thor: 1980 - 244DL - B21A - M45. CLICK ON THE PICTURE BANNER FOR MY PROJECT THREAD! |
|
qwerty
Club Retro Rides Member
Posts: 2,410
Club RR Member Number: 52
|
1980 Volvo 244 R-Sport turboqwerty
@qwerty
Club Retro Rides Member 52
|
May 22, 2011 19:54:05 GMT
|
|
Just read through the entire thread. Awesome progress! Love the work thats going into this and can't wait to see it progress more.
|
| |
|
|
|
|
|
May 22, 2011 21:10:16 GMT
|
|
Cheers matey!
|
| |
Thor: 1980 - 244DL - B21A - M45. CLICK ON THE PICTURE BANNER FOR MY PROJECT THREAD! |
|
|
|
|
May 29, 2011 16:23:33 GMT
|
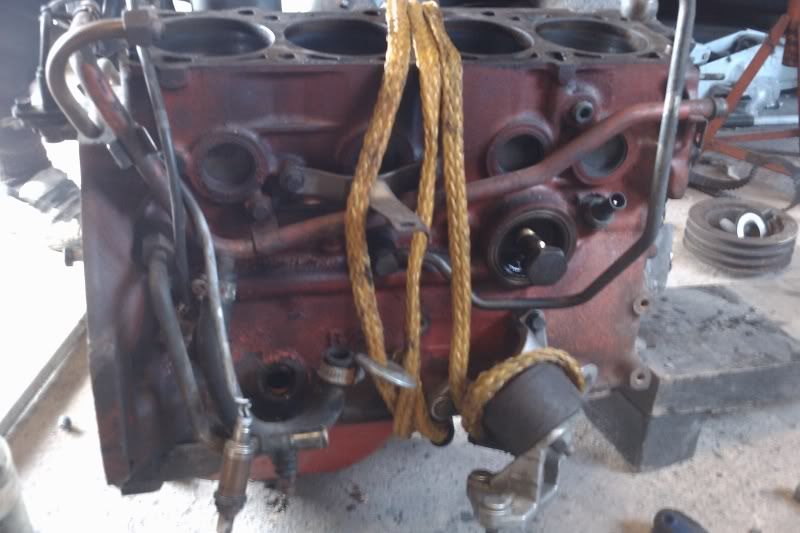
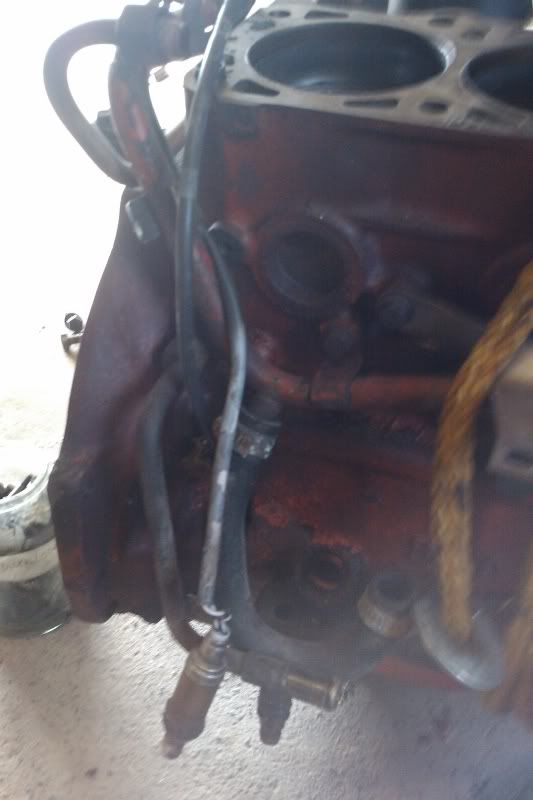
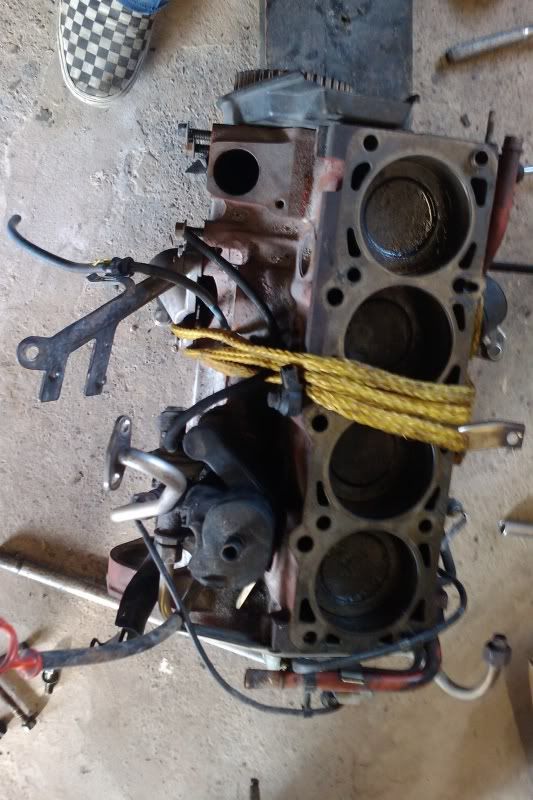
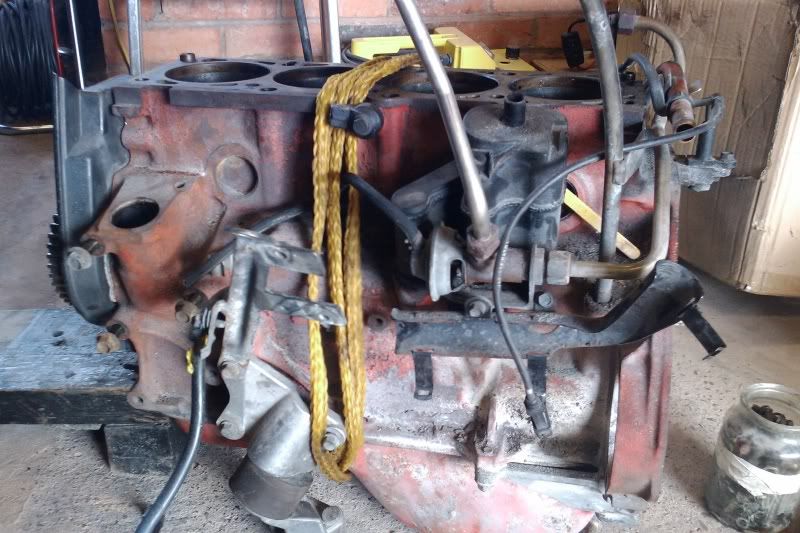
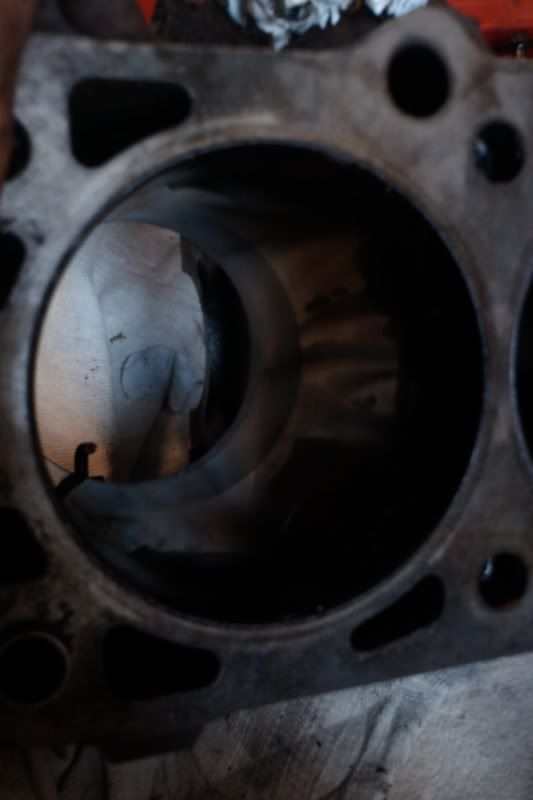
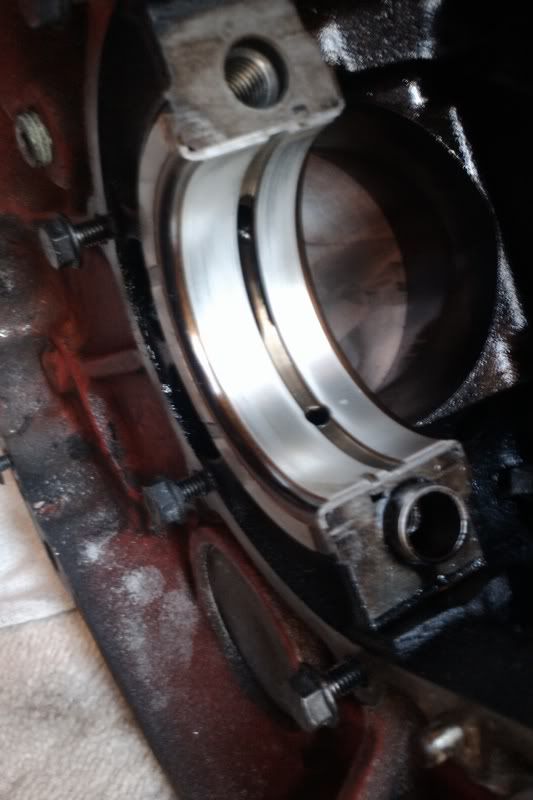
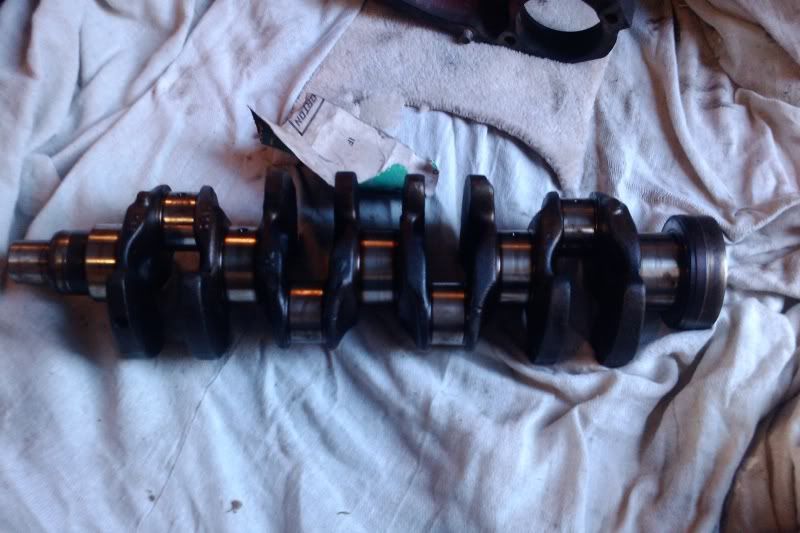
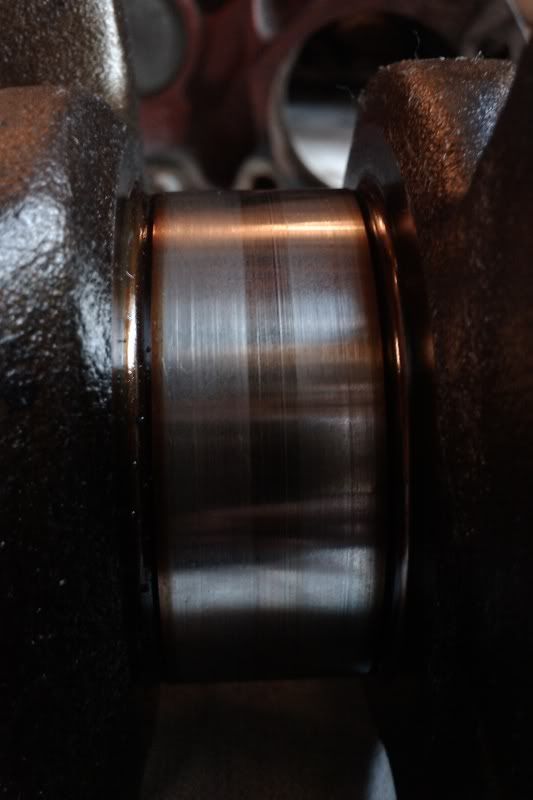
Engine rebuild has started!! I properly cannot wait to see this lump sitting at the side of the car waiting to be fitted in the newly painted engine bay! 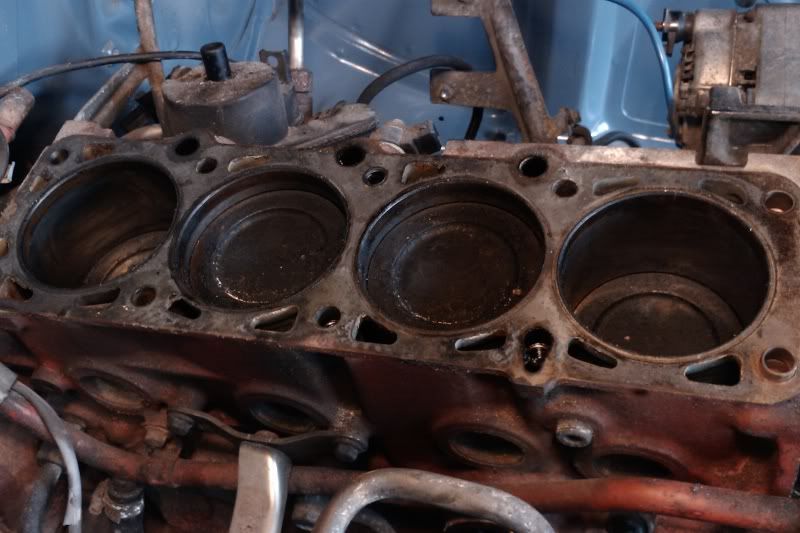 Barely any wear 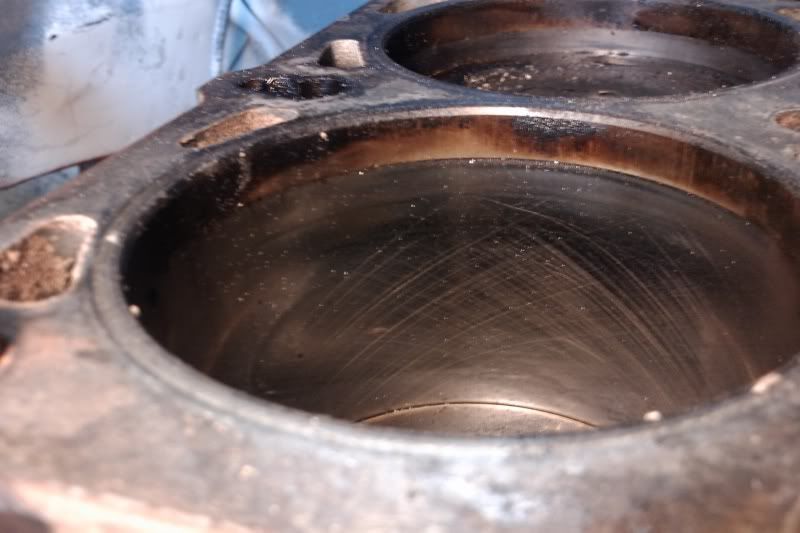 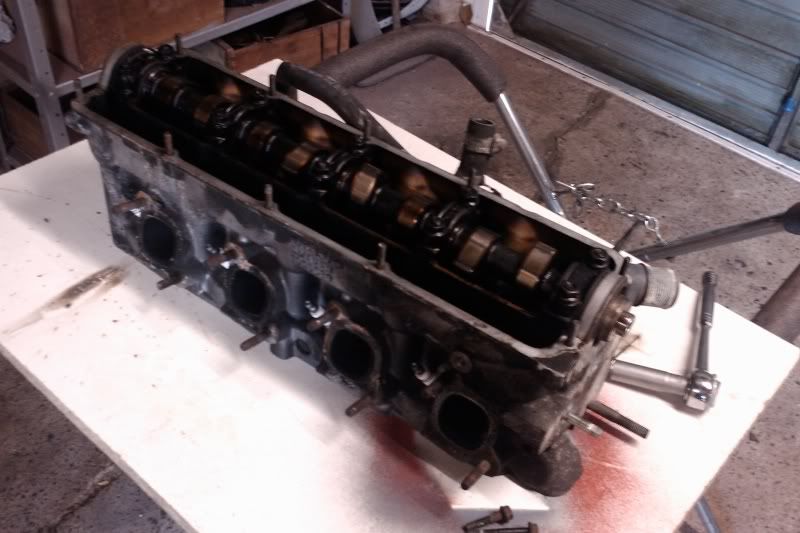 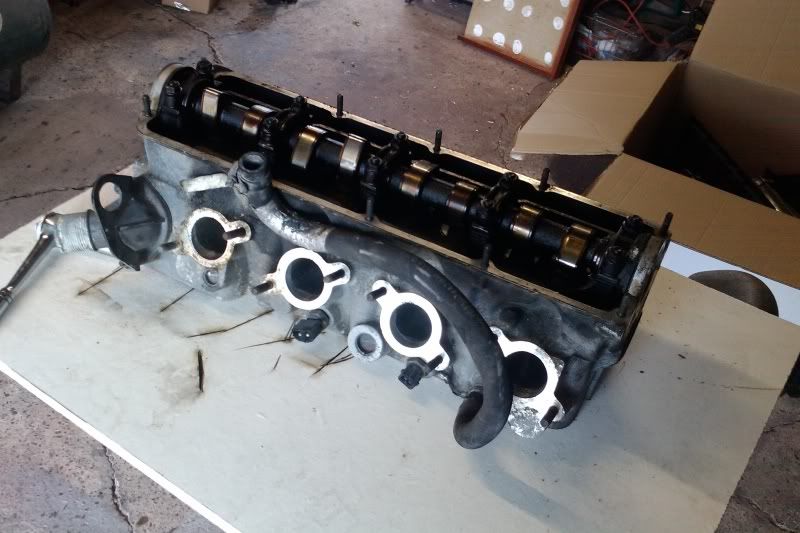 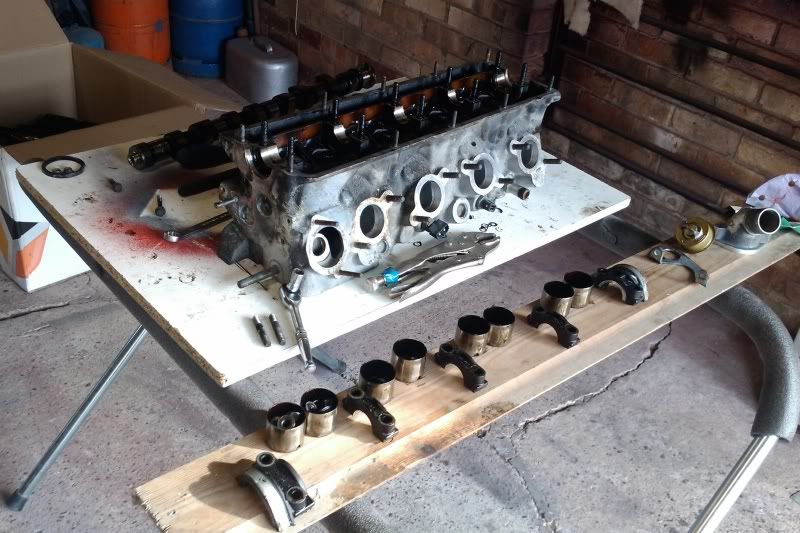 Back in my territory haha 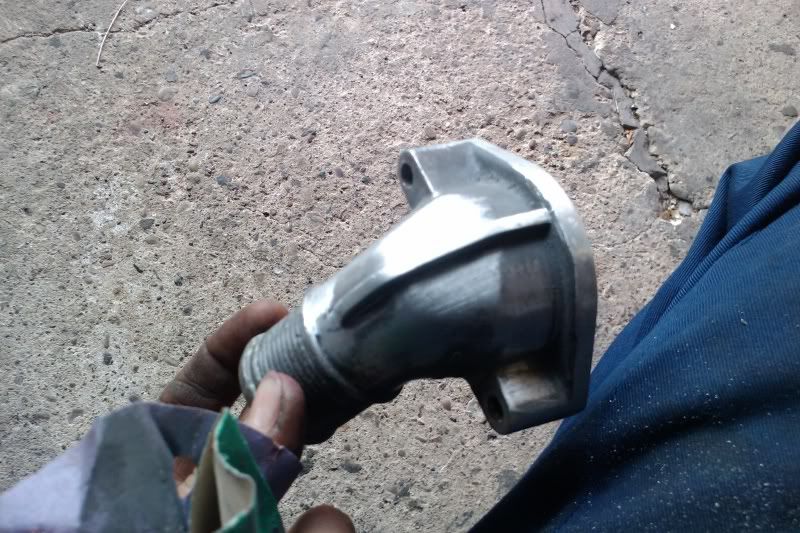 Got all the studs out as I will replace with new (probably cravingboost stainless ones). Some of them were real buggers to get out - had to weld on nuts (and even the welds broke once or twice!!) onto the studs and wind them out with a 6 sided socket and strong bar! 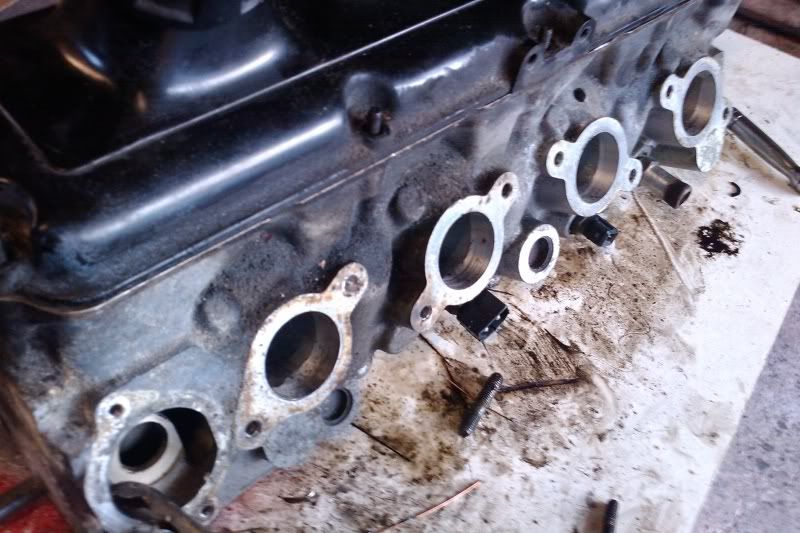 Head is off for cleaning and skimming this week, then its time to lap in the valves and rebuild. I need to get hold of an A cam for it. Then I'm gonna strip the block and fit new bearings and 'rings and clean everything up. Possibly a new oil pump for safety's sake. Steve |
| |
Thor: 1980 - 244DL - B21A - M45. CLICK ON THE PICTURE BANNER FOR MY PROJECT THREAD! |
|
|
|
|
May 29, 2011 16:24:11 GMT
|
Rightio....more lovely engine build pics Stripped down the head and cleaned up all the parts. Mr muscle oven (engine  ) cleaner is the daddies!  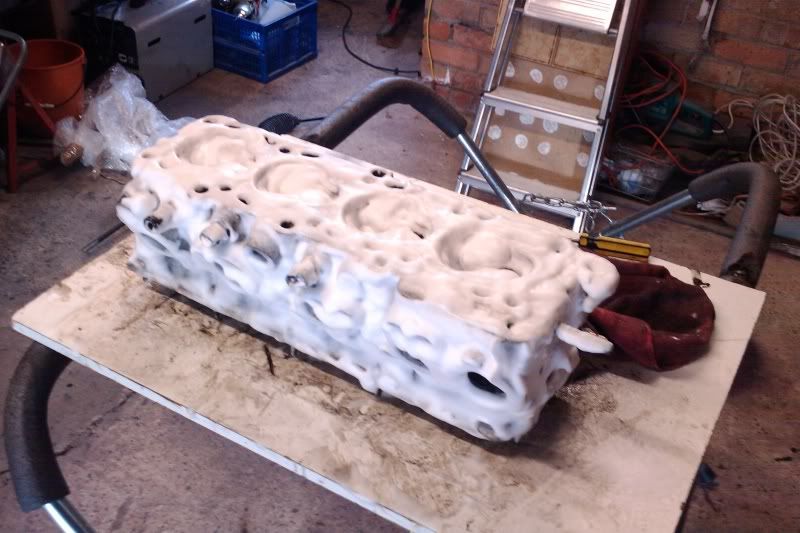 My nan took a pic of me grinding the valves in! haha.... 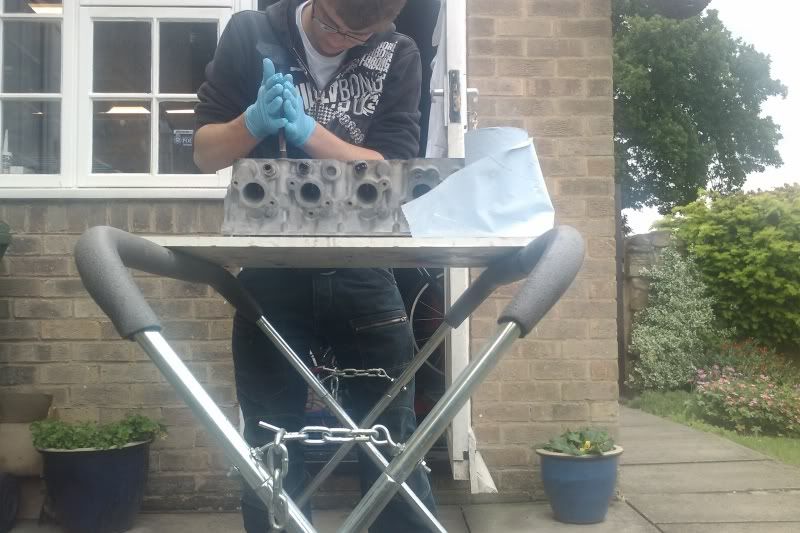 One of the valve seats after "coarse" 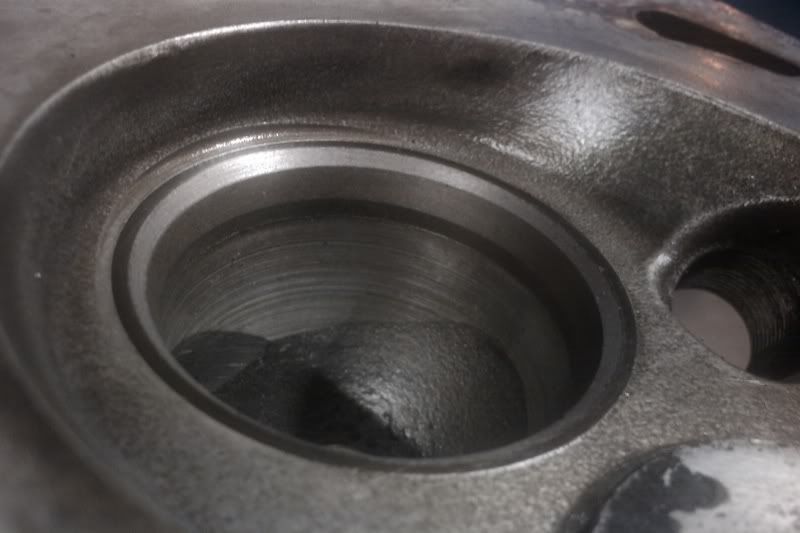 ....and them all finished after "fine" 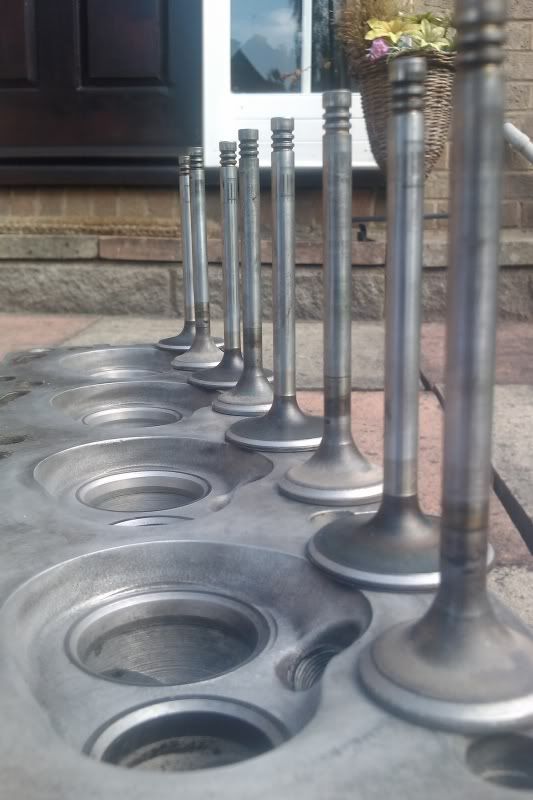 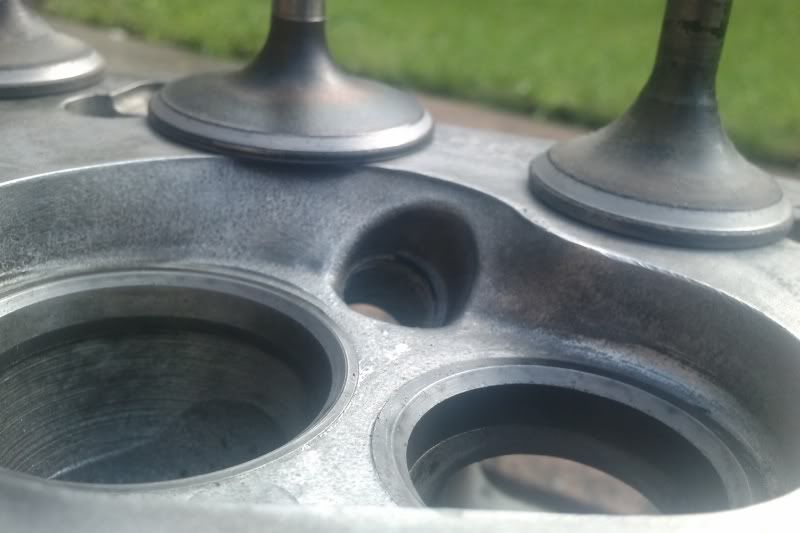 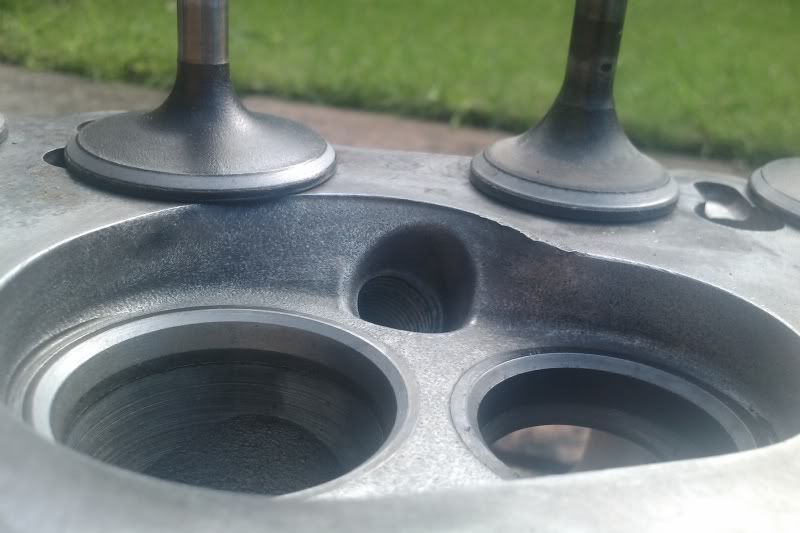 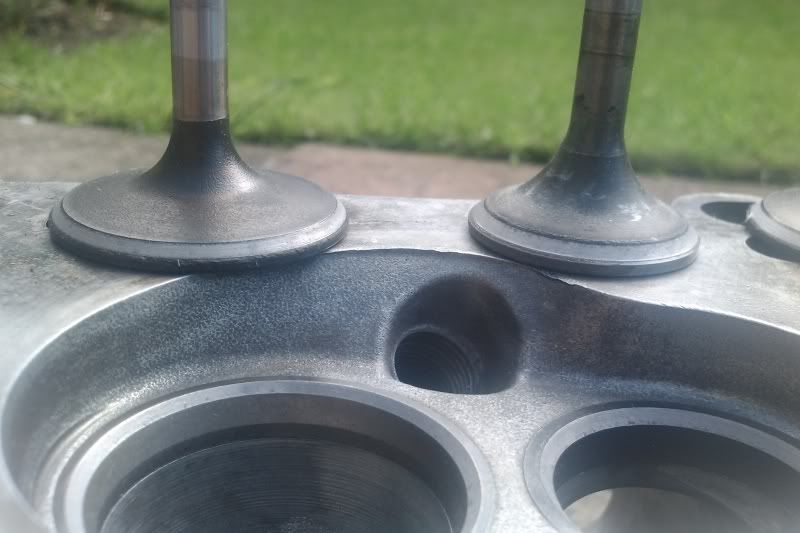  Now i need some research/advice of porting and polishing. I think I'm going to match the ports to the manifolds, although i neeed to research how to do this correctly. Also i think I'm going to do some polishing, but I'm also told that its better to leave a slightly textured surface on the inlet side (i.e. sanded with 240 grit paper) but on the exhaust side it is good to get the ports nice and shiney. Advice and comments encouraged... Steve |
| |
Thor: 1980 - 244DL - B21A - M45. CLICK ON THE PICTURE BANNER FOR MY PROJECT THREAD! |
|
|
|
|
Jun 10, 2011 19:57:03 GMT
|
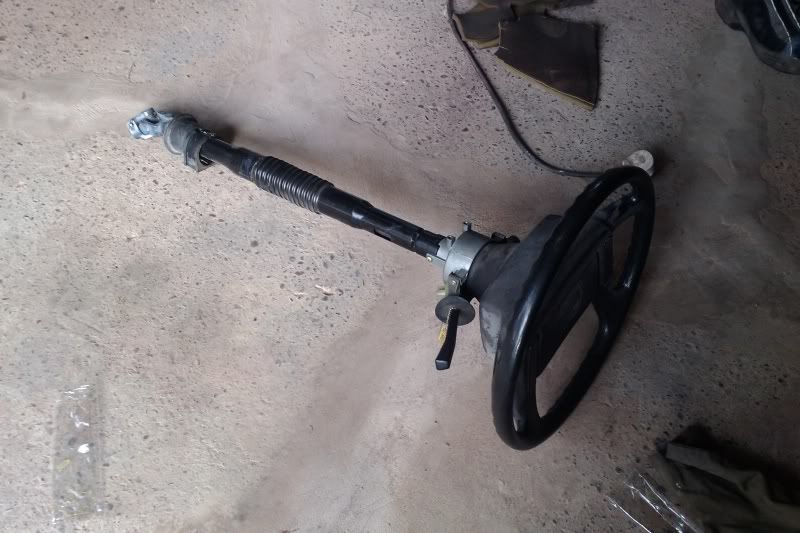
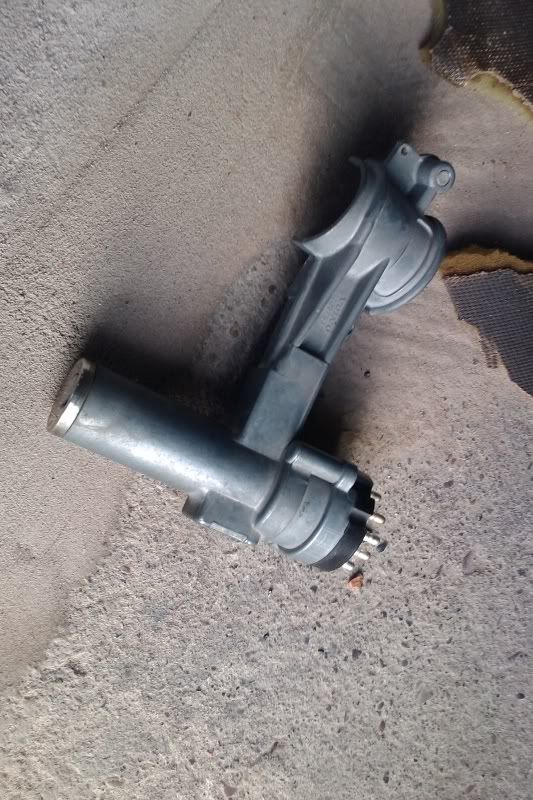
Bit of a mini update... If anyone was watching that reconditioned steering rack on ebay, i won it, so  Had a bit of a crappy finish on it so i resprayed it gloss black 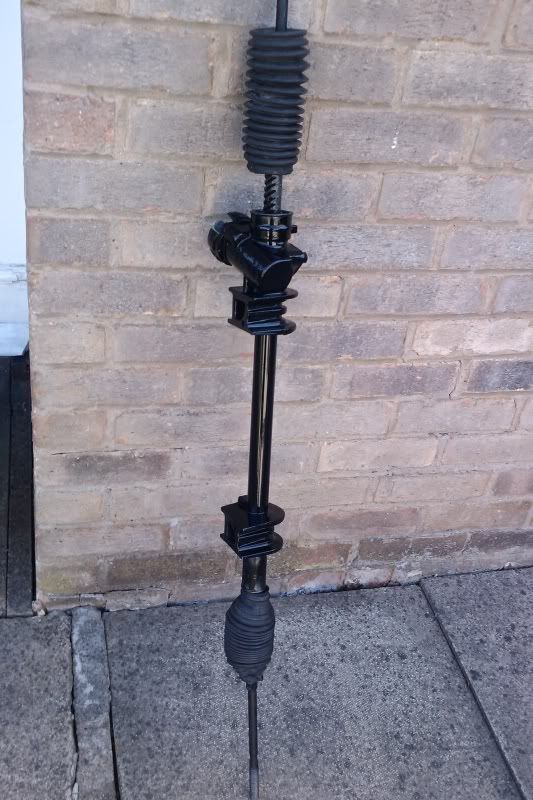 Painted the brackets 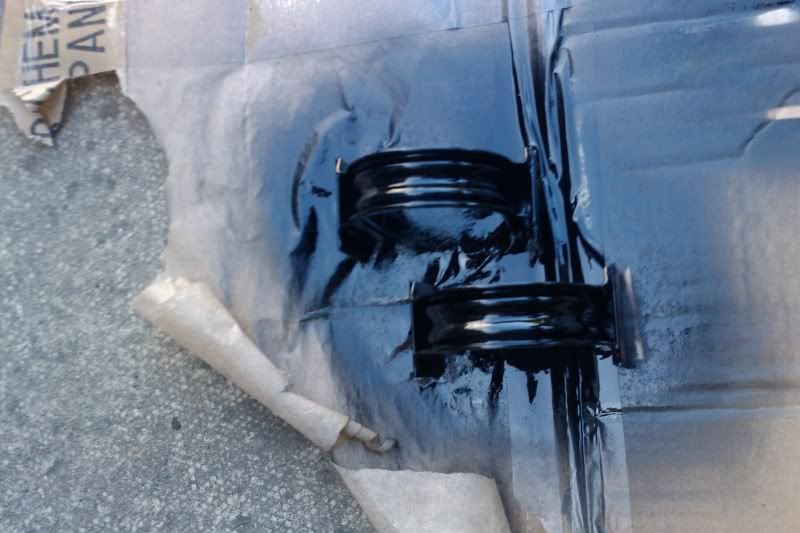 Got myself these seats (for very little!). Mazda MX5 mk1 seats, complete with small subwoofers in the backrests and speakers in the headrests. I want a decent sound system in Thor, but one thing i really hate it when the boot is filled with tacky boy racers amps and subs. I think these will work well to make it sound good, in addition to the seats being the right size for me, they are comfortable, and they have good side support and are all foam, rather than creaky springs like the original 240 seats. 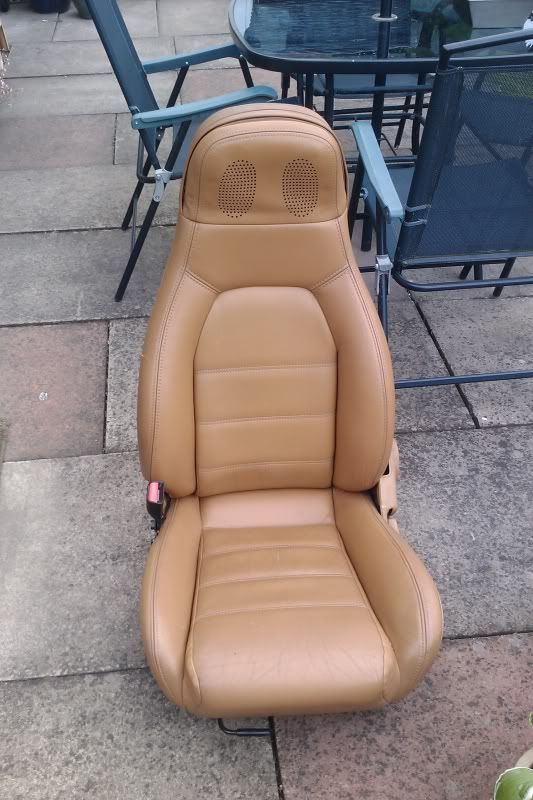 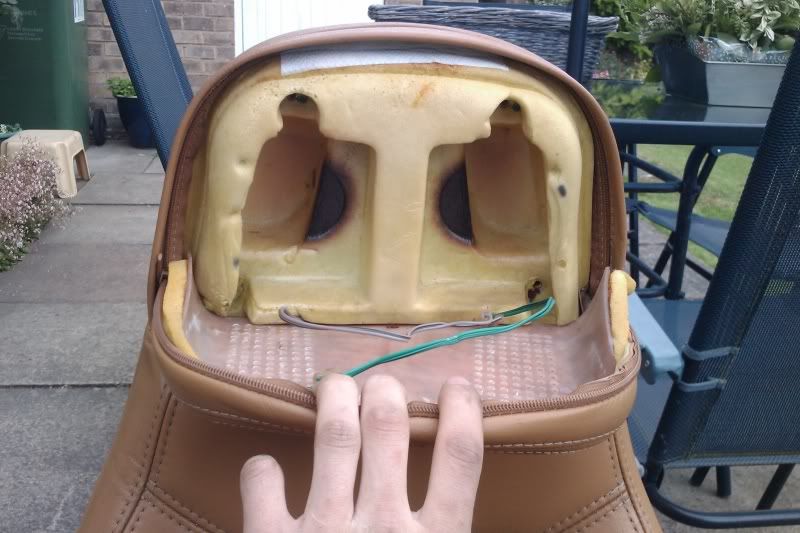 The outer leather will be re-dyed black, and the centres retrimmed in grey alcantara. Steve |
| |
Thor: 1980 - 244DL - B21A - M45. CLICK ON THE PICTURE BANNER FOR MY PROJECT THREAD! |
|
|
|
|
Jun 10, 2011 21:23:15 GMT
|
|
They are cool seats for sure
|
| |
|
|
|
|
|
Jun 14, 2011 22:36:06 GMT
|
Mini update again keyed up the rear panel... 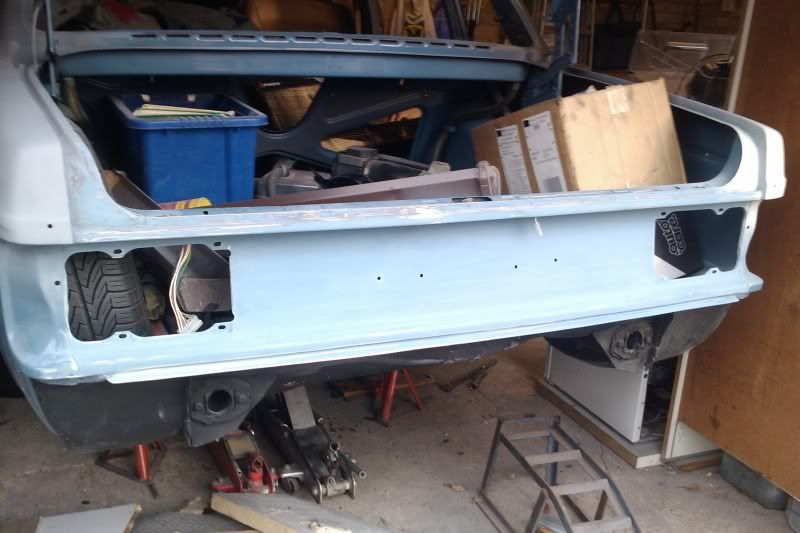 ...therefore turning myself into a smurf! 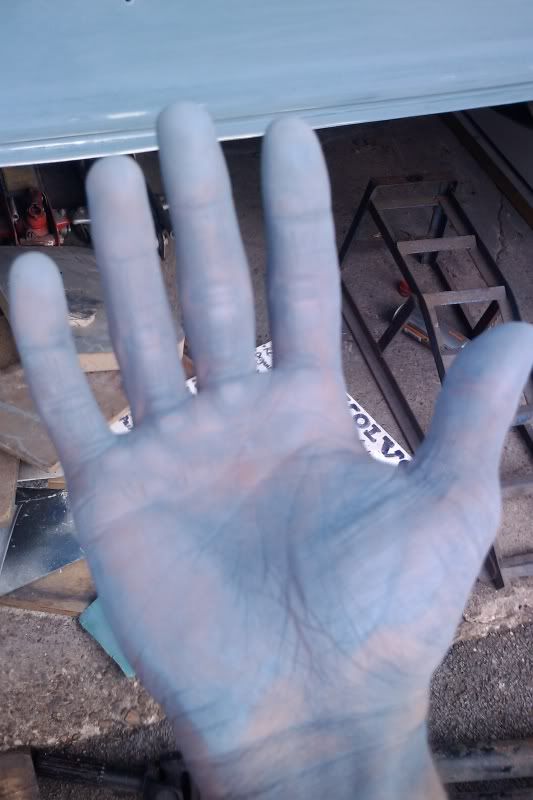 etch primer... 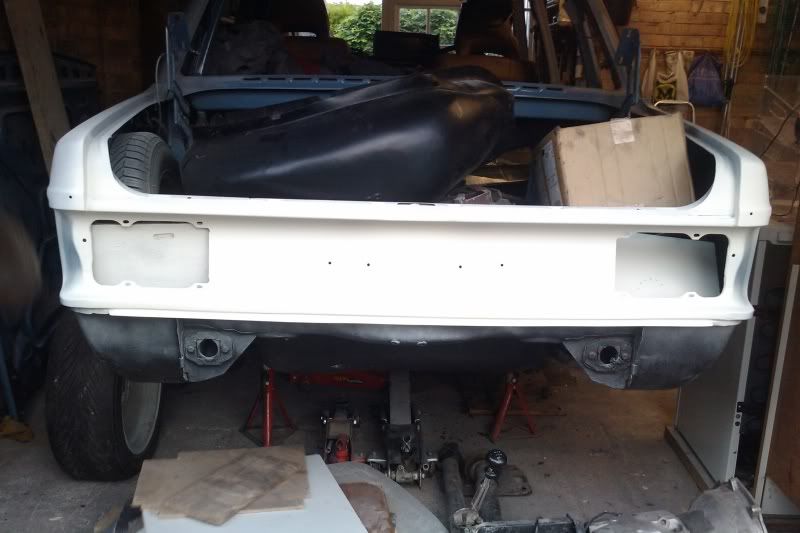 The project is looking pretty brutal at the mo'. Things are gonna start teo turn around soon though - I have sourced my roof panel and also the front end will be back on the floor soon and hoping to paint the engine bay in the next couple of months. 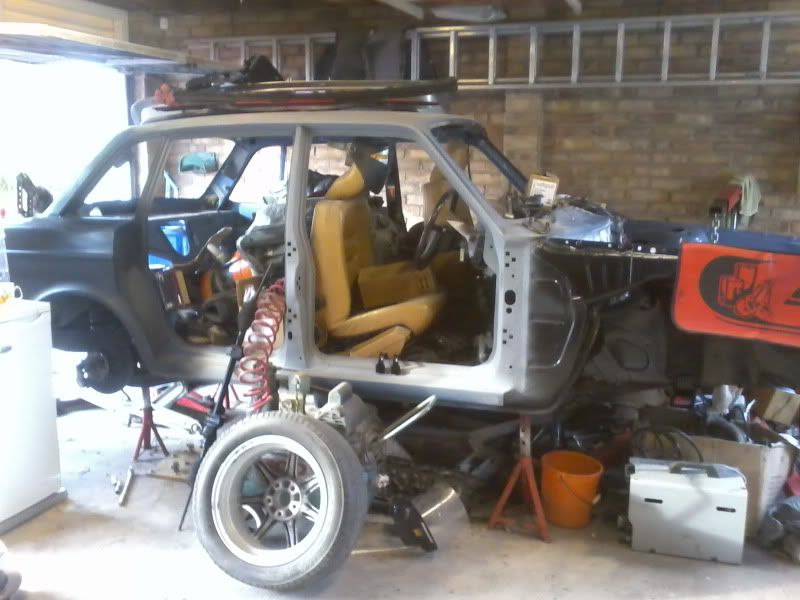 Also, repainted my lil bro's BMX frame for him today. Turned out good 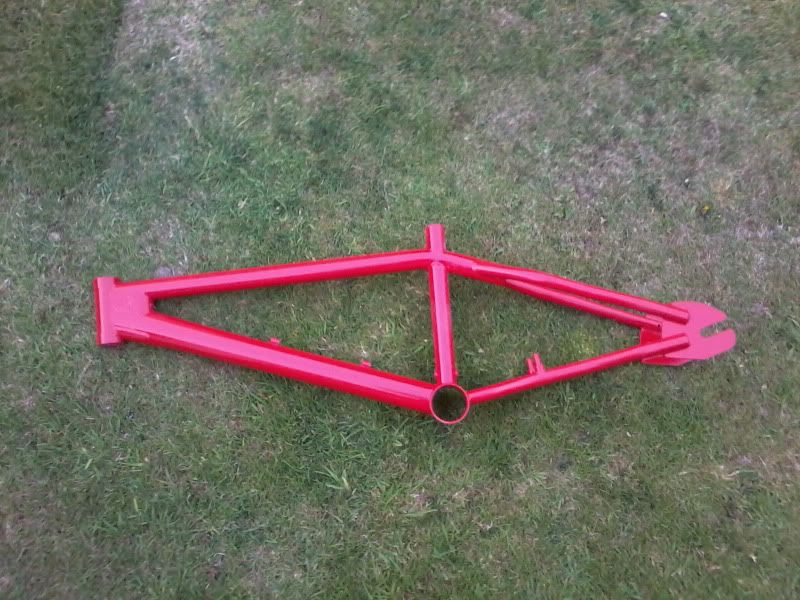 More tomorrow probably Steve |
| |
Thor: 1980 - 244DL - B21A - M45. CLICK ON THE PICTURE BANNER FOR MY PROJECT THREAD! |
|
|
|
|
|
|
Jun 15, 2011 20:26:06 GMT
|
ok, next installment. slow and steady progress Painted the steering rack brackets  Cleaned up the rubber mounts 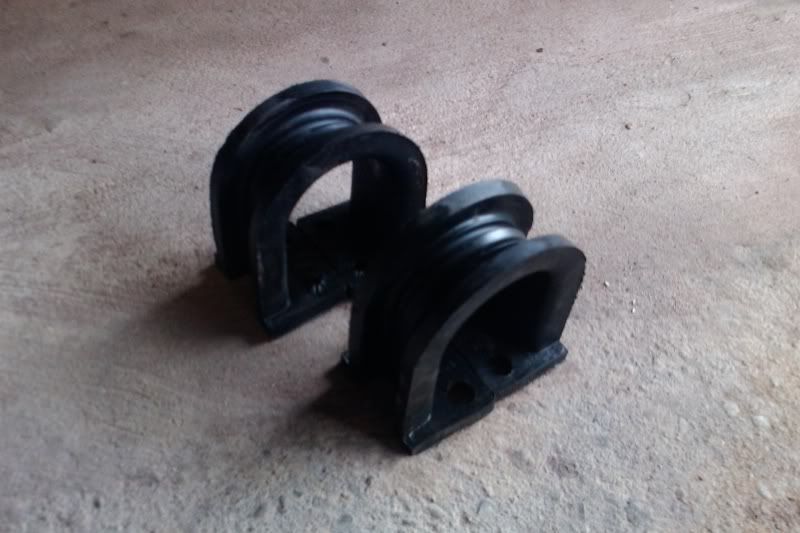 And installed the steering rack (only loose for now, itll come back off for me to finish off refurbishing the crossmember when the engine is out). All the little painted bits come together to make a nice finished product  Ground out some filler along the weld line along the back wing to check for any rust developing. None to report....but.....read on. 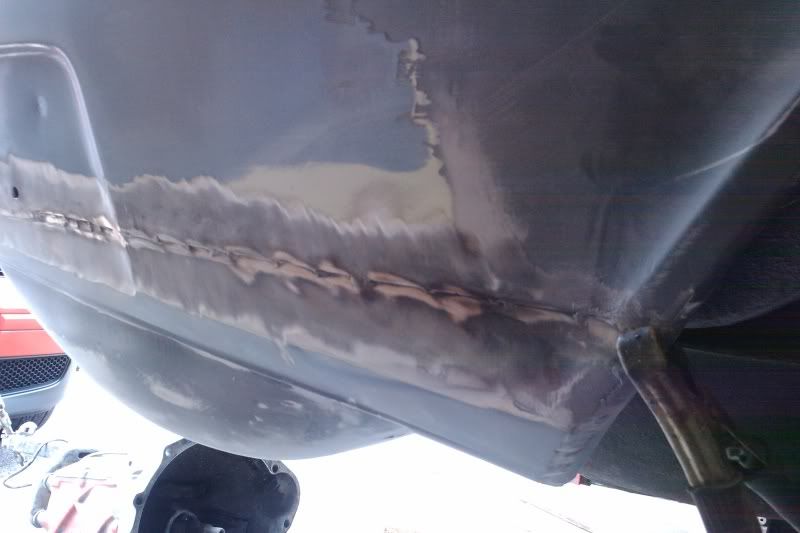 ....added some more welds as i didnt think there was enough. I am however contemplating re-doing this repair. I'm not happy with it for various reasons a) there is a lot of filler on top of it b)weld thru primer wasnt used when it was repaired and I'm afraid it might rust under the new paint. Opinions? It will be a bit of a challenge for me, but id be damned proud if i did it well. 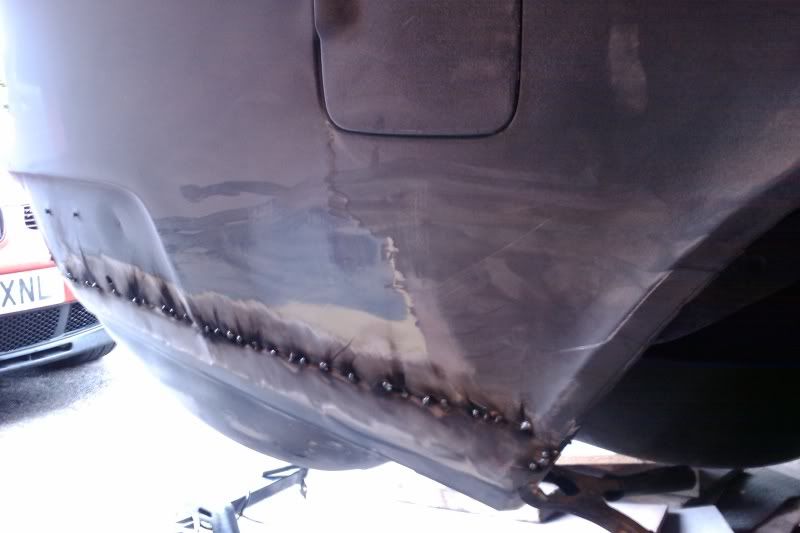 Continued to repair the dents on the leading edge of the bonnet 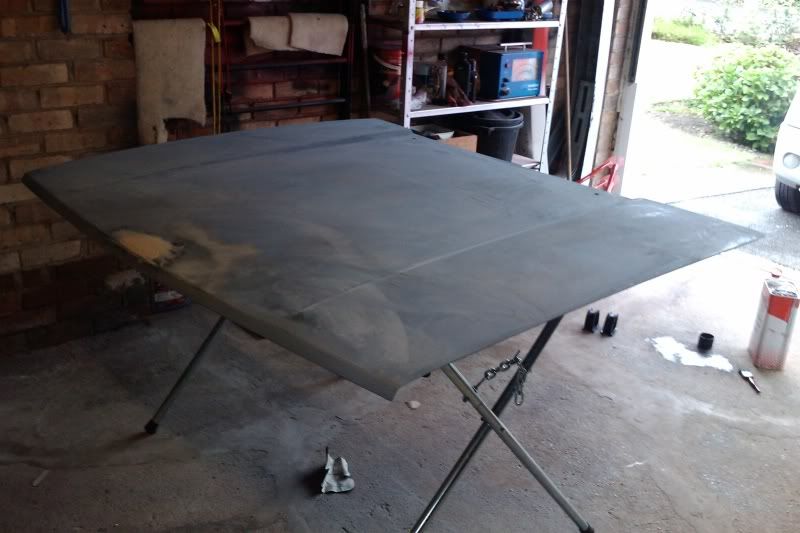 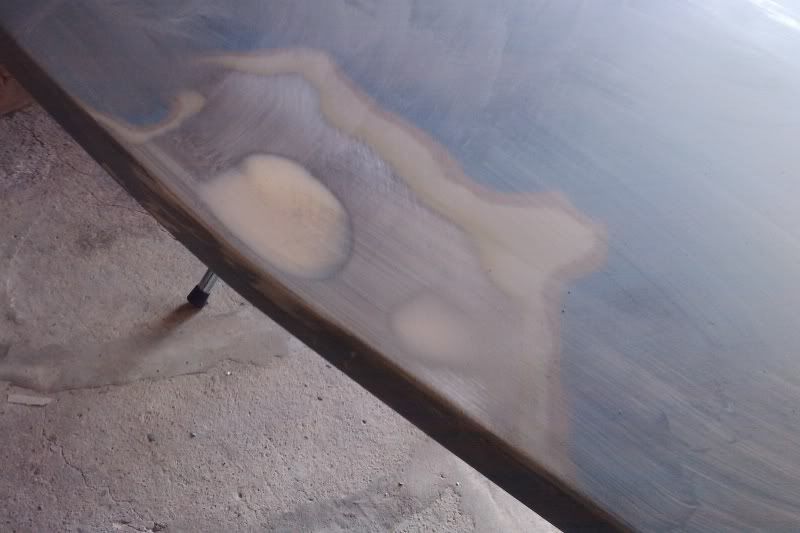 and finished and in etch primer 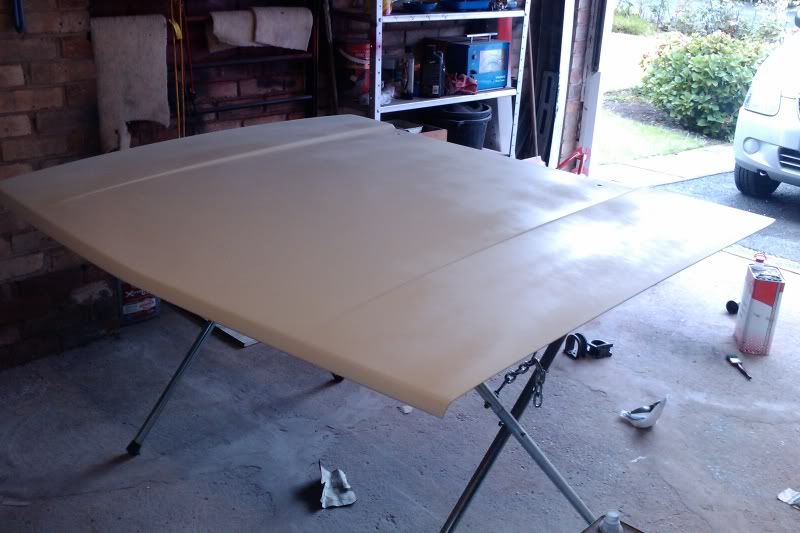 again, more soon. Steve |
| |
Thor: 1980 - 244DL - B21A - M45. CLICK ON THE PICTURE BANNER FOR MY PROJECT THREAD! |
|
75nut
Part of things
Posts: 512
|
|
|
|
|
Loving your work! Nice stuff
|
| |
90 Alfa 75 3.0 V6 Cloverleaf
79 MGB Roadster
88 Saab 900i Convertible
94 MK1 MX5 1.6
05 Volvo V70
|
|
|
|
|
Jun 16, 2011 14:49:02 GMT
|
|
Nice work mate,
Enjoying this thread, looking forward to following as the project progresses,
|
| |
BMW E39 525i Sport
BMW E46 320d Sport Touring (now sold on.)
BMW E30 325 Touring (now sold on.)
BMW E30 320 Cabriolet (Project car - currently for sale.)
|
|
|
|
|
Jun 19, 2011 23:03:27 GMT
|
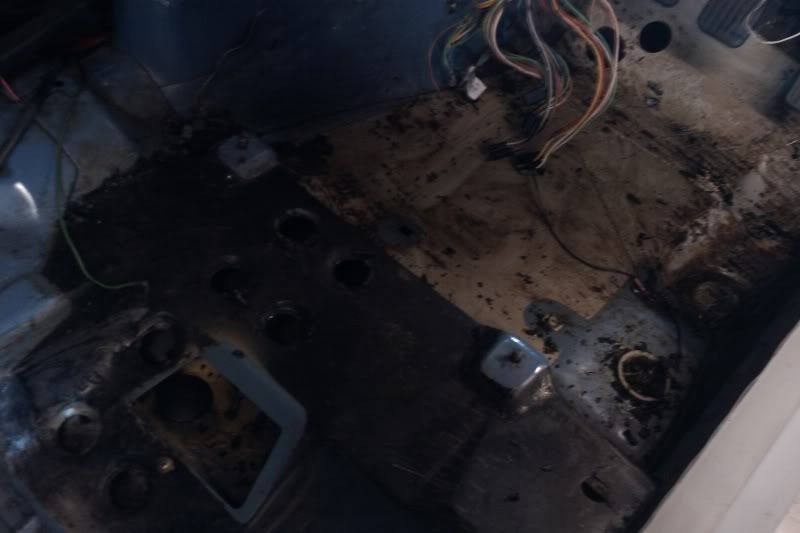
Mini update again, quite a lot of work but not much to take pics of. Been concentrating on getting the engine bay ready for being properly painted, so ive started on the wire tuck. I'm tucking all the headlight and other equipment wiring under the wings. The engine loom will stay in the engine bay though as that tucks nicely around the engine. I love how simple the old engine wiring loom is, haha 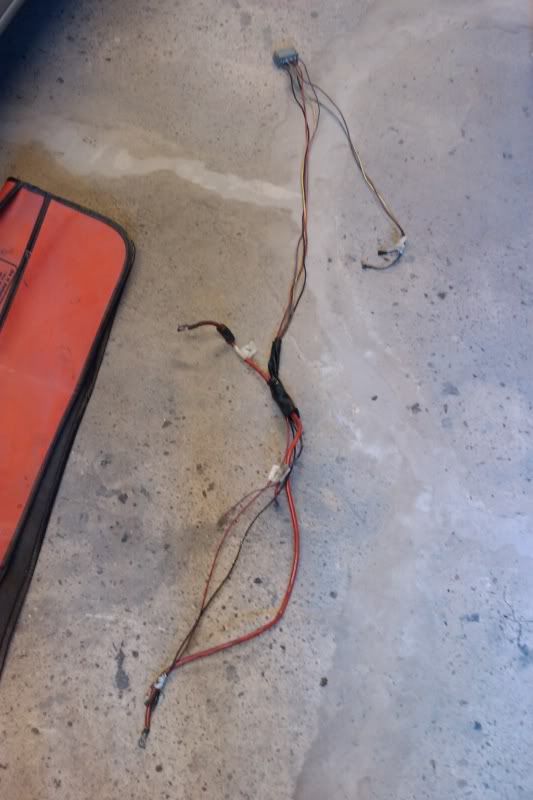 Unpicked and labelled up all the connections. Have pulled them back through the bulkhead and wrapped them up ready to be tucked under the wings. Also the headlamp stepper relay will be relocated to under the dash, as will the auxiliary connections junction box (connections straight from battery) as this will be replaced with an auxiliary fuse box located under the glove box with plenty of spare connections for extra wiring to go to. 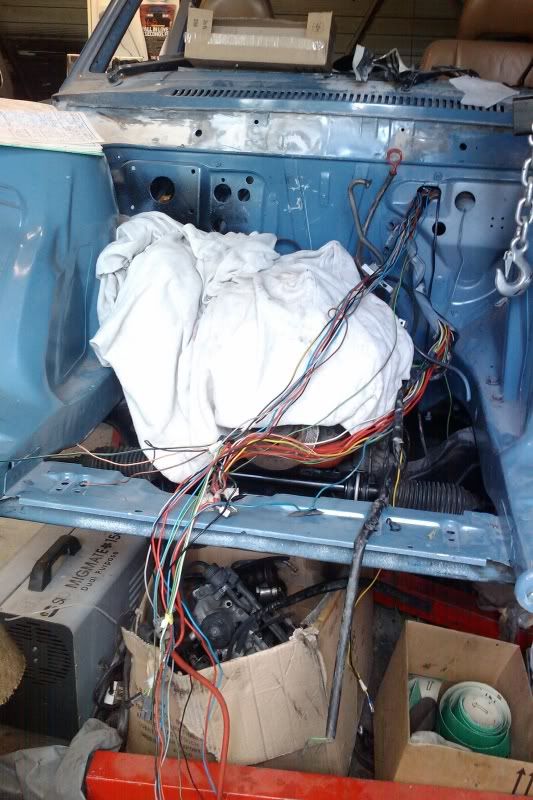 Also, while unpicking the loom, I found this - a connection made by my grandad in the wiring to the coil. He mounted a secret cutoff switch as an "immobiliser" but the connections are uninsulated cut off ring terminals. I'm an auto electrician by trade, so thats really really bad in my eyes, but even to the average DIYer, thats bad workmanship. 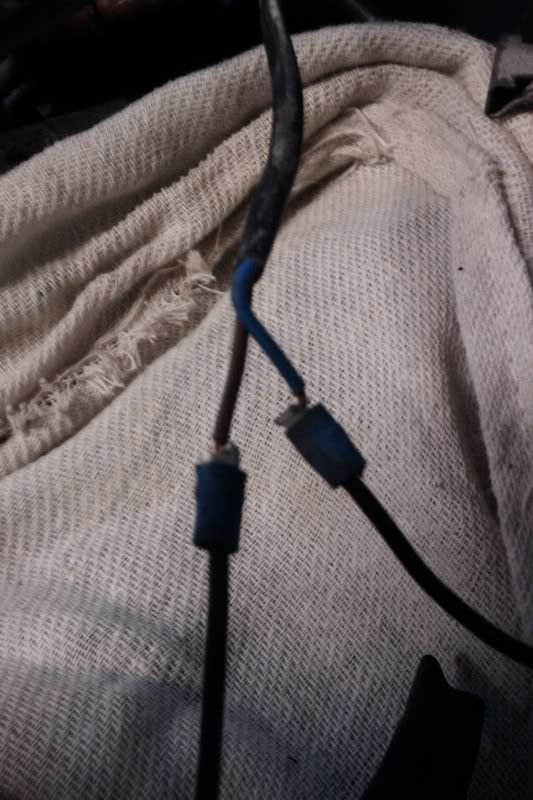 There are a few examples of this on the car, so I'm making a point of removing any wiring modifications that my grandad did and returning the wiring to factory spec. Then anything I add on top of that can come from the auxiliary fuse box I mentioned before, and be wired neatly and correctly. I'm also going to tidy up the original volvo wiring as some areas arent that good, e.g. under dash. Lots of note taking went on today and wiring diagrams, which I actually quite enjoyed. Steve |
| |
Thor: 1980 - 244DL - B21A - M45. CLICK ON THE PICTURE BANNER FOR MY PROJECT THREAD! |
|
|
|
|
|
|
|
I need to find a garage to build something.
This thing is going to be awesome.
|
| |
Jealous of whatever you drive. Because I live in America and we don't get cool cars.
|
|
|
|
murran
Part of things
Posts: 610
|
|
|
|
|
just read all this thread. excelllent work your doing!
couple of things i noticed....
the konis are gas shocks. you don't need the strut cooling oil in legs.
also i wouldnt go stripping the new bottom end.... it'll all be in very good order. strip the outside down and paint the block, wire brush the piston CROWNs, add some crank seals if there are any signs of them leaking etc. other than that id leave it alone.
if your not finding rust under the underseal underneath the car id stop wasting the time stripping it off. plus you stripping it off may cause rust in the future.
id get on with thinking about what your doing with the hole in the roof.
|
| |
|
|
|
|
|
Jun 20, 2011 22:49:31 GMT
|
|
Thanks for the comment.
The konis do need the fluid (coolant, not oil) as it said so in the instructions and i also did my research on this and it definitely is the case that it should be there.
don't worry i will be dealing with the hole in the roof - just recently bought the new roof panel.
Re-deundersealing, i don't agree, i hate underseal, it looks disgusting, and in my opinion can cause as much rust as it supposedly prevents and also does a cracking job of hiding it. itll all be well painted under there, and depending on what the use of the car turns out to be when its done, it may well get a nice new even coat of black waxoyl (not underseal) before it gets MOTd
re- the engine - in general, i would agree with you , but this is also a massive learning process for me, and i want to do my first engine rebuild.
|
| |
Thor: 1980 - 244DL - B21A - M45. CLICK ON THE PICTURE BANNER FOR MY PROJECT THREAD! |
|
|
|
|
|
|
|
Hey Steve! Lovely work you're doing here.
I just have to chime in regarding the undersealing discussion. I look at it like this- my 780 has been in the upper midwest of the US for its entire life, driven winters every year since 1988. It has been de and re-undersealed twice. I just did it again this past winter, and you know what I found? Nothing! Clean metal, with the exception of the bits that had been exposed to an exhaust leak for 1000 miles. I'd say that if we drove Rovers or Vauxhalls, or anything Italian from the 70's, you'd be right to be worried. But we don't- we drive Volvo's, and Volvo knew and still knows how to keep a car from rusting, as long as you can do as good a job as Volvo did (as we can't account for bodges, can we?).
I'd find out if you can replicate the factory finish on the underside, and if you can maintain it with regular cleaning as I do, I'm sure it'd be a great way to preserve the hard work you're already putting into it.
|
| |
Last Edit: Jun 21, 2011 3:41:54 GMT by Brickborg
|
|
|
|
|
Jun 26, 2011 22:24:20 GMT
|
|
|
| |
Thor: 1980 - 244DL - B21A - M45. CLICK ON THE PICTURE BANNER FOR MY PROJECT THREAD! |
|
|
|


 ;D I think that may be some sort of Freudian slip. FEA


 ) cleaner is the daddies!