|
|
|
Apr 19, 2018 15:03:49 GMT
|
Those wheel have to go on the car!  But first - other things... Last couple of days I've been rather lazy, only worked a couple of hours. First of; I ditched the "reversed" air filter housing, it's too out of round to re-align the three parts. At least if they should fit together well and be sealed to the outside. Especially the inner part around the carburetor is almost impossible to re-align (there's an o-ring inside a groove in the lid that seals of the center). Though it would fit, there's nothing in it's way. But... I finished the plumbing of the engine.  Then I adjusted the valves and primed the oil pump.  Turned it over until I had oil pressure... Put the leads back on the ignition coil, and after a few adjustments to the distributor it ran  Only let it run a couple of seconds, since I had not installed the exhaust yet.  But - she's a runner!! Yay! And of course - there's a big leak. I mean - why not? And I knew that's a risk - I just hoped it would not happen. One of the new core plugs sprung a major leak...  Out with the alternator, out with the core plug - let the coolant drain...  Ordered new ones. I had installed them with a bit of sealant, don't know what went wrong. I think the new one I'll try and "spread" a bit and use a different type of sealant, which is more like a glue. In between I slapped some filler to the door an sanded it back down. I was lazy, so I used the orbital sander...   Then I organised the stuff required for painting. I had bought a cheap set of HVLP guns, worst thing is they spray like a rattle can. Best case scenario they work just fine for my requirements.  So I erected a temporary spray booth...  ...put on a painters jumper, 3M mask, spilled a lot of paint (FFS - I HATE paint!) and eventually some found it's way through the little gun.  First time I ever used this gun. Or any spray gun at that  Briefly thought about a practice run - but then opted to dive in head first... Not overly happy with the result (which is quite obviously what you get if you don't know sh!t about painting with a gun). But - it'll do.   ^big runner It's a bit dull and has of course lots of dirt in it... To paint the outside, I'll do a bit better prep work on the floor (wet news papers). 'Cause this time - I was too lazy for any. And then came the part with cleaning the spray gun. Sigh. Painting is just not my world. I think I get along with it, but it's nothing I'm overly euphoric about... And that is all. Paint needs to dry, then I'll flip it over and paint the outside. I set up my spray booth in a way I can still park the Mini inside without moving the painted door. Ain't I smart, eh?  Cheers, Jan |
| |
|
|
|
|
|
|
|
Apr 19, 2018 16:43:56 GMT
|
|
Great mechanical work on the Mini. I am also not a big fan of painting jobs but you can achive a good finish with polishing afterwards. I did the wood panels on my Rover and also had a fair bit of dust particles. Make sure the paint is thick enough and after it has hardened, take sandpaper grid 2000 or 3000, sand the dust out and then polish it with 3M. You can achieve excellent results with this but it takes a fair bit of time.
Keep up the good work
Peter
|
| |
|
|
|
|
|
Apr 20, 2018 15:25:58 GMT
|
Early this morning I applied some filler. Let it dry, sanded it down. wet, 400, 600, 1200 and 1500 grit (dry). Degreased everything, let it dry for a while. Filled the spray gun and blasted on some paint. Looked nice & even when it was still wet, I hap put on two coats. However, a couple of hours later.... I hate paint.  Looks like no prep work at all... FFS! Don't think I can save this. But I'll try. I've ordered some 3000 grit wet paper (can't seem to get it locally). But I fear I have to paint this again. Don't know what went wrong, maybe think the filler was the wrong type, or wrongly advertised (maybe just a mere primer). If I can't save it, I'll use a different type of (high build) filler. Sigh... At least it looks like the colour match is quite good. And there's only very little orange peel. Which is also bad, since it doesn't match the rest of the car  Argh. I hate painting. Did I mention this before? Cheers, Jan |
| |
|
|
|
|
|
|
|
|
Are you using actual degreaser, or a prep wipe?
|
| |
|
|
|
|
|
|
|
|
Real degreaser, I cleaned/degreased it 3 times, always with new rags. I think the main problem is, that my supposed "filler" is just a primer without any "filling" capabilities (basically paint). Sigh. I'll re-spray the door. I think that's the best approach to fixing this mess... Annoying.
Cheers,
Jan
|
| |
|
|
|
|
|
|
|
|
What we call degreaser over here, is not ideal for painting as it leaves residue. I'll generally get a wax and grease remover as they evaporate.
Are you using acrylic based paint on acrylic based primer/filler?
Or enamel on enamel, etc.
Even if it was just a paint, it shouldn't react like that, it just would take more coats to fill!
|
| |
|
|
|
|
|
Apr 28, 2018 12:54:47 GMT
|
So, I tried to sand it back with 1200, 2000, 3000 and 5000 grit wet paper, then a metric ton of cutting compound with the electric polishing machine - no luck. In some spots I went through the paint and many scratches still visible. So back to 1200 grit...  ...erect another spray booth and blast it with spray filler.  No survivors! Poor little bug...  I let it settle until monday - then sand back to smooth and try to paint it again. We'll see... Cheers, Jan |
| |
|
|
|
|
|
Apr 28, 2018 15:40:59 GMT
|
So, that's about the same spot as highlighted before: I think this might work out better... 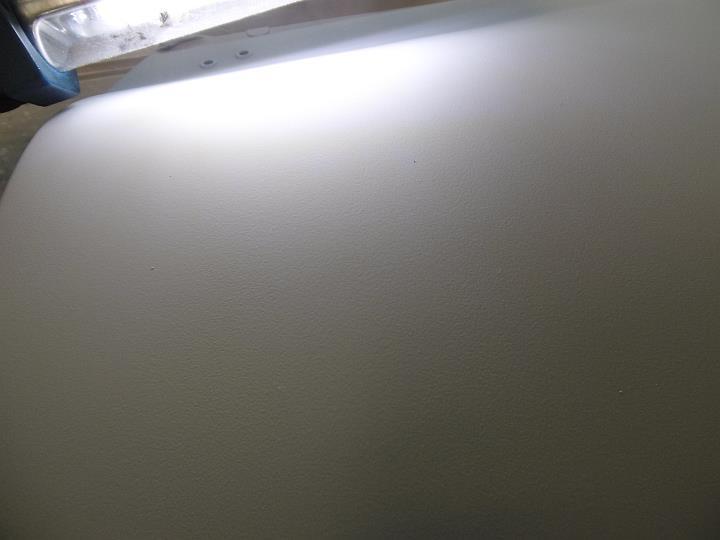 |
| |
|
|
|
|
|
Apr 28, 2018 15:56:53 GMT
|
|
my buddies that run a body shop would suggest more coarse grit for primer(anything in the high 100s) and save the finer stuff for your finish/clear coats (anything in the 1000s)
I think the reason for this is primer adhesion. it needs a good texture to hang on to.
Ill bet, after your last go of smoothing, you will get fantastic results!
nice work, the engine bay looks great. Your first attempts at painting are pretty good, actually...once you put on the final coat and clear, you may never go back to spray cans again!
JP
|
| |
I know its spelled Norman Luxury Yacht, but its pronounced Throat Wobbler Mangrove!
|
|
|
|
|
Apr 29, 2018 22:27:30 GMT
|
|
Read this entire thread earlier and picked up a great tip with the home built spring compressor and went and put it to the test this afternoon reassembling a cylinder head back together. Brilliant as I had been messing about with a g clamp and a homemade gadget that really wasn’t the best so thanks from me 👍🏼
|
| |
14 Audi A3 Sportback - Easy driver
05 Audi TT MK1 3.2 DSG - Damn quick
73 Triumph 2000 - Needs work
03 Range Rover 4.4 V8 petrol. Had to get it out of my system.
|
|
|
|
|
|
|
Apr 30, 2018 10:26:46 GMT
|
|
I'm about to attempt to tart my estate up a bit. Nice bit of practical advise there.
Bought a bunch of el cheapo painters plastic sheeting to make my "spray booth".
I'd love a mini one day. Both of my older brothers restored mini's, before learning to drive in them.
I eagerly awaited doing the same, but my dad had had enough, and it never happened.
|
| |
|
|
|
|
|
Apr 30, 2018 10:40:30 GMT
|
Thank you guys!  So today I wet sanded the spray filler down until it looked & felt very smooth. And then... Let's try it once more. 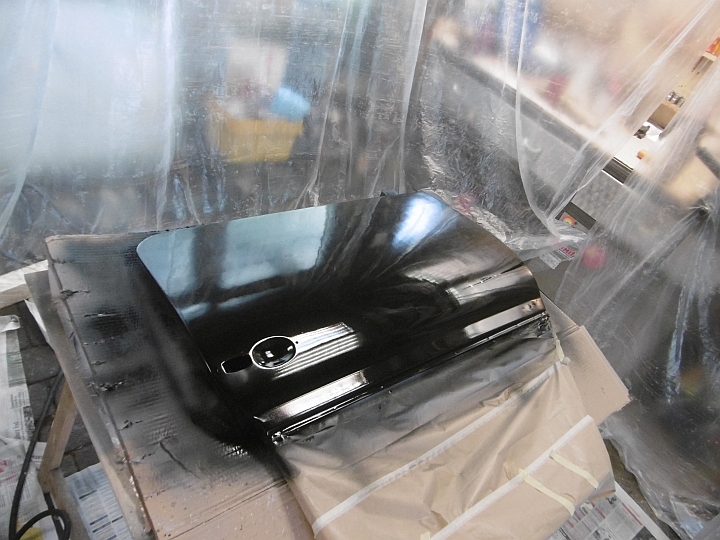 I didn't re-paint the frame, it's good enough. Now that the paint has settled a bit, I can still see some minor scratches - but you know what? I don't care. I'll wet sand them with 3000 and 5000 grit paper, polish and that's it. There's also a lot of dirt in the paint, it was no good idea to paint on a very windy day. Albeit I had all doors closed, layed out the floor with wet news paper and closed my "spray booth". Last time I had only very few dirt particles in the paint - this was on a very calm day under same conditions. Just tells you how much cr@p flies through the air... Maybe not the best time in the year for painting. Lot's of pollen & strong wind. Well... The biggest part of "paint" is "pain"...  Btw; see how "milky" the plastic foil is? That's all dust just from spraying! Cheers, Jan |
| |
|
|
|
|
|
|
|
Installed the door today, no dramas. 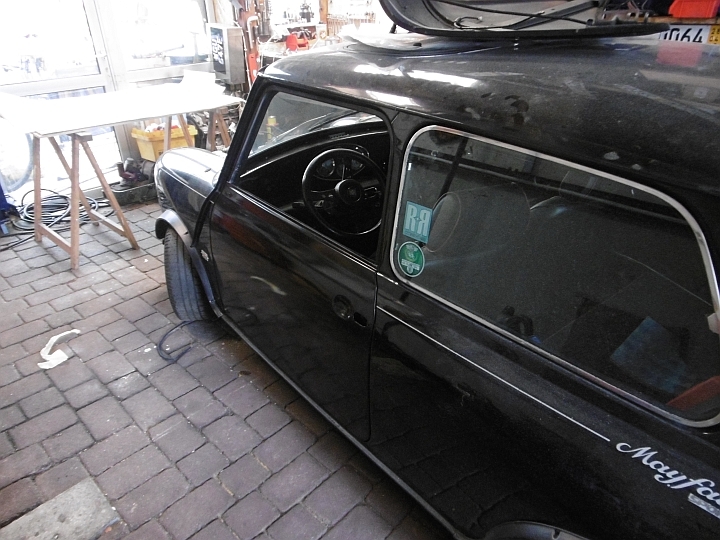 My initial plan was to make an adapter plate to mount the mirror, but - I changed my mind and drilled new holes. Riv nut in, all good. 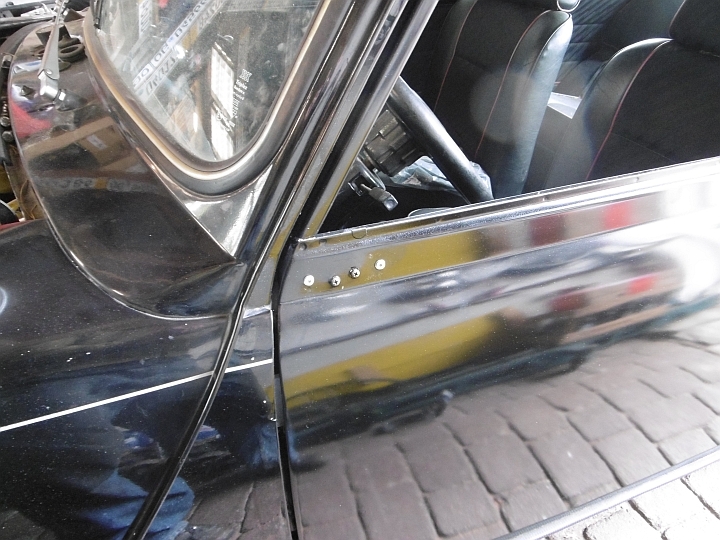 And then I could not resist to give it a quick polish. I didn't go into full-attack mode, just a slight, quick skim with the electrical hand-numbing-machine. 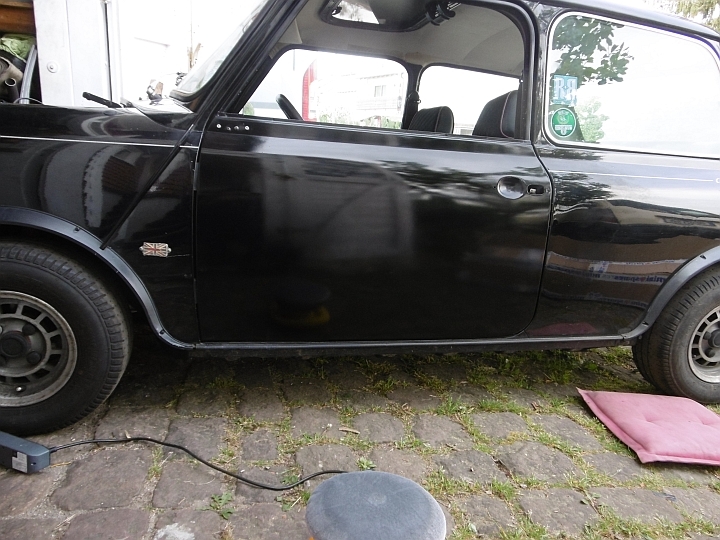 I think this is going to be fine. Monday evening it looked terrible, almost the same reaction in the paint again. But - as of today, it's almost invisible, almost disappeared again. Paint is weird stuff... I think the problem was the epoxy filler I used to fill some dents. 'Cause it only reacted in the areas where I used it, everything else is fine. And as said - it has disappeared almost completely. Something learned. I have used the exact same filler many times before, but with rattle cans. Never had an issue. Anyway, door's on. I let the paint harden for a couple of weeks and then attack it withsome cuting compound to make it shine. And I got some suspension bits from Minispares... 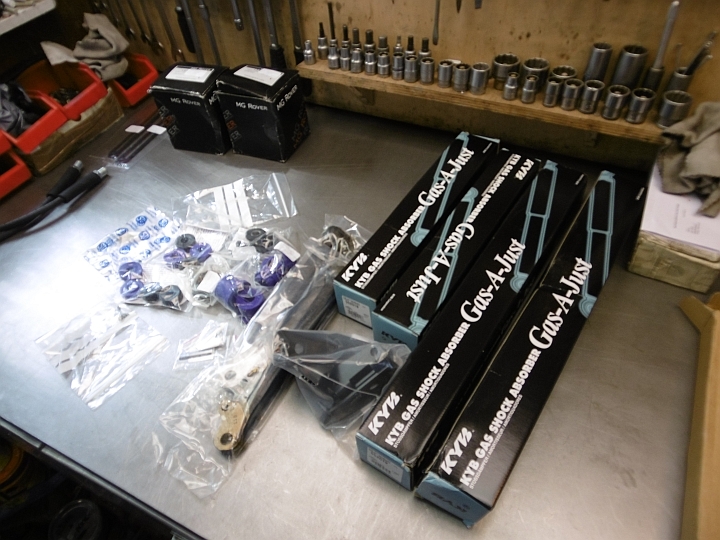 And that is all for now. Cheers, Jan |
| |
|
|
|
|
|
|
|
Installed the negative camber lower arms today, with new bushes + poly-bushes on the front of the tie bars (better braking stability). All went well, bar one shock absorber, the bush was a bit stuck on the shaft. But no huge issue... 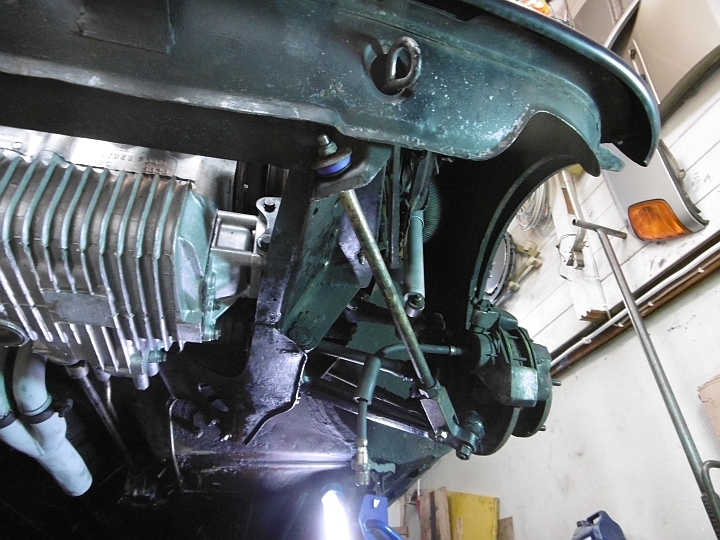 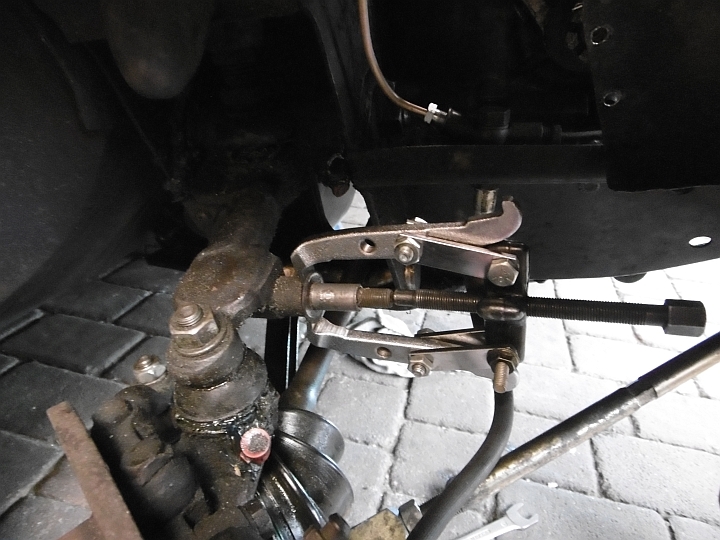 Also wanted to replace the brake hoses - but I had totally forgotten that a Mini has copper rings... Didn't order those of course. Bah. So lowered it back on it's wheels - and that's finally the grown up stance I always wanted on this car. Positive camber looks ridiculous... Still have to install the rear adjusters, but that's for another day. I fear a lot of broken bolts, since I never touched the rear suspension... 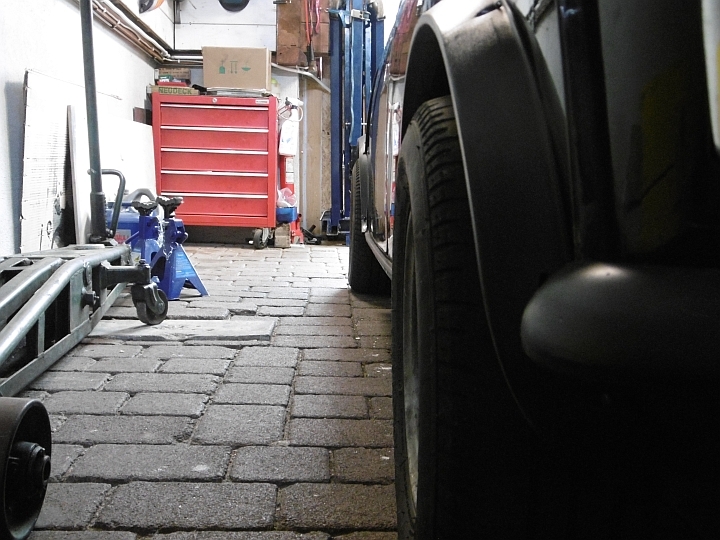 And with the tyres pointing inwards instead of outwards, I don't think the 6" Remotec will be an issue. TÜV might be one, though...  Cheers, Jan |
| |
|
|
|
|
|
|
|
I gave the door another good polish, it's starting to get there...  I fitted the pin stripe now, because I hope with polishing over it may start to look a bit more like the old ones. Next I drained the fuel tank. Because... Well, see for yourselfes:  That's no good. Doesn't even burn well... I hate gasoline. Old diesel fuel is far less problematic. Next I removed the fuel tank. And found the reason why it always smelled of petrol inside. That'll explain it well:  Then I went to install the rear shocks and camber/toe adjusters. I feared I would have to remove the brke lines in order to loosen the inner nuts for the radius arms. Turns out, Mercedes invented just the right tool for the job:  Perfect!  That's a wrench that came in the on-board tool kit of 2-valve 4-cylinder W201s and W124s. It's meant for the belt tensioner. Anyway, shocks & adjusters fitted, no big dramas or snapped bolts.  Bar one. Same guy who did the messy flares was also tasked with replacing the radius arms. Oh well.  I was able to repair the thread, all good. Pushed the car out and had a look. Erm well, it will need quite a bit of adjusting   The very first thing I did in the morning though was to install another core plug. In the evening I filled topped the engine up with coolant, so far it seems like there are no new leaks. This time I used a glue-type sealant that's meant for permanently installed parts.  That's all for now. I also wanted to finally bleed the brakes - it was then that I realised I still had not ordered new copper washers for the brake hoses. Hnnrgh. Cheers, Jan |
| |
|
|
|
|
|
May 13, 2018 15:50:45 GMT
|
|
Love seeing the methodical and detailed work and write ups .
|
| |
|
|
|
|
|
|
|
Hi! 2.5 years later - and it's stil not on the road. In fact - nothing has changed since the last update. Except I stole the alternator for the Clubman Estate. Ordered a new one yesterday. And I finally started to fix the rustyness of the rear valance...    Bif of welding and we are one step closer for a fresh TÜV stamp. Not this year, though. But I'm determined to have this road worthy come spring! I'll be selling the Clubman Estate soon, as I didn't drive it a single mile this year. And it's due for TÜV test for 10 months now... This should tell you how much time I have left for this car. But - my mojo is starting to come back! Cheers, Jan |
| |
|
|
craig1010cc
Club Retro Rides Member
Posts: 2,998
Club RR Member Number: 35
|
|
|
|
|
Great to see your feeling the love for this again 😀
|
| |
|
|


 Only let it run a couple of seconds, since I had not installed the exhaust yet.


 Briefly thought about a practice run - but then opted to dive in head first... Not overly happy with the result (which is quite obviously what you get if you don't know sh!t about painting with a gun). But - it'll do.


 Only let it run a couple of seconds, since I had not installed the exhaust yet.


 Briefly thought about a practice run - but then opted to dive in head first... Not overly happy with the result (which is quite obviously what you get if you don't know sh!t about painting with a gun). But - it'll do.


