|
|
|
Mar 22, 2011 23:01:26 GMT
|
|
Realy enjoying these updates, Bruce. As I'm sure is the case with many that have been to A52 since you bought this, I've seen some of the progress - but far from all of it.
Looking forward to the next update(s). ;D
|
| |
|
|
|
|
Ditch
Part of things
 
Posts: 283
|
|
Mar 22, 2011 23:14:28 GMT
|
|
Those wheels work so well, fab choice and looking forward to updates.
|
| |
|
|
|
|
|
|
|
The next morning it is discovered that Robs car is still patchy despite the three coats of paint. Rob did seem a bit nervous with the spray gun so I reckon he must have missed a few bits on the second and third coat. Painting when very tired and not with the nest lighting set-up in the world (lack of daylight too) probably didn't help? Another good coat with the benefit of daylight rather than relying on the striplights....and the Midget is done. After an hour or so with the heaters on in the booth, it's dry enough to pull outside to start reassembly. It's 1.30pm and we should really have been at this stage 24hrs ago! Dave can't resist but get some shots - it does look good. 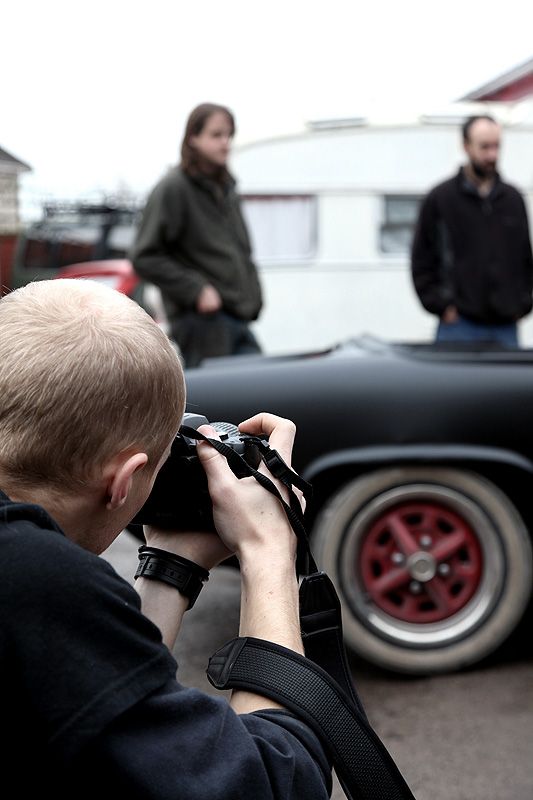 We try and convince Rob that he should just fit the lights and drive it like that. It looks awesome as a Speedster. Rob isn't totally convinced seeing as it's his daily. 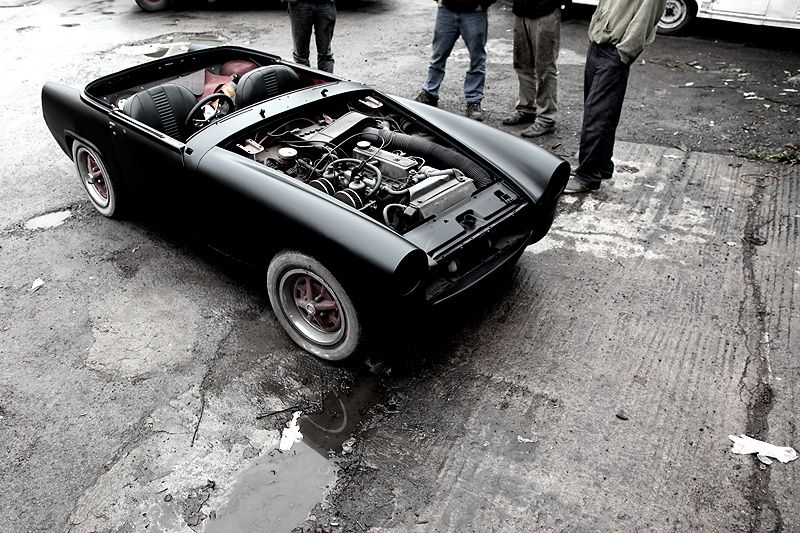 Mine finally comes out of the corner and edges towards the spary booth. I've only ever sprayed one car before (my Delica) so I am starting to get a bit nervous now!  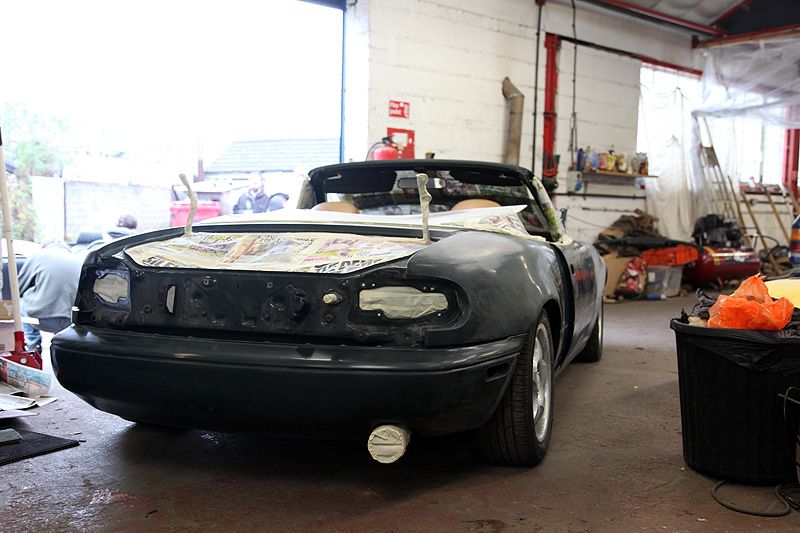 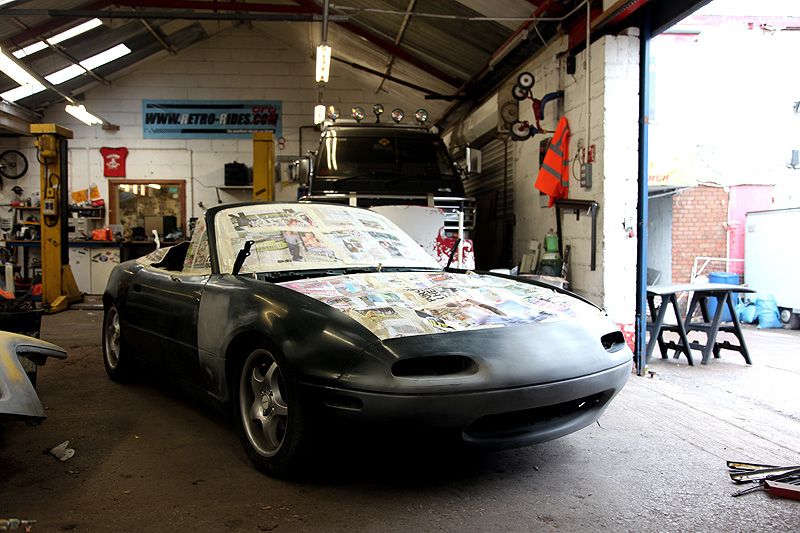 4.30pm and it's finally in the booth. Quite a few people have had to head home, but the rest of us get the final masking done on the MX5 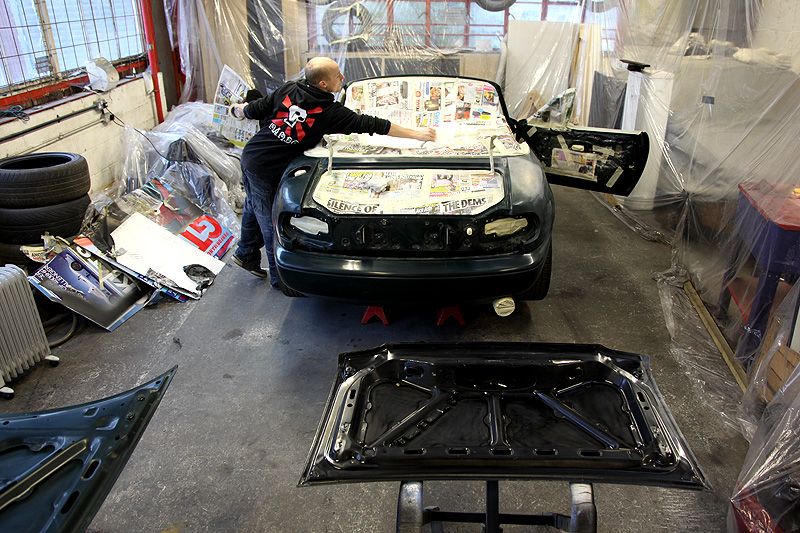 Because it's on coilovers and therefore a bit nearer the floor, we put it up on axle stands so that I can get to the sills & under the arches better (nice suggestion Alan) 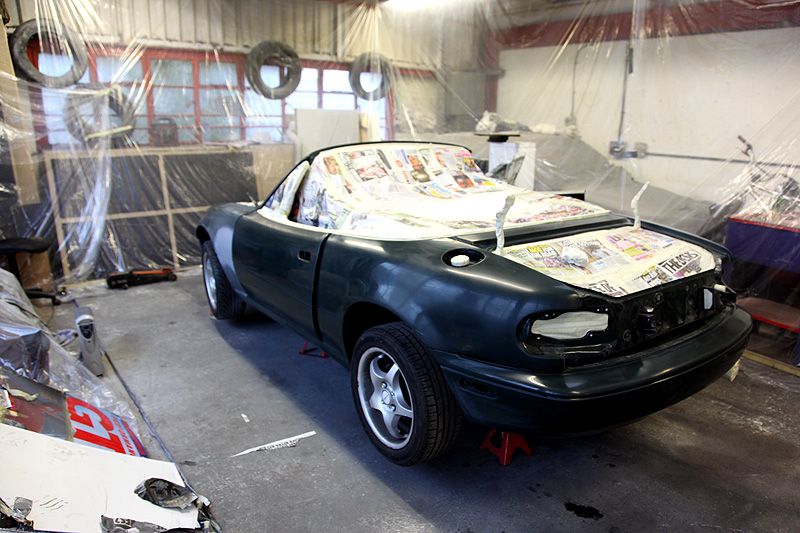 Panel wiped off, the car is ready to go....but time is getting on and Rob needs a hand to get his car back together, so it's all hands on deck with the Midget. The Dirtbag will just have to wait a little bit longer. 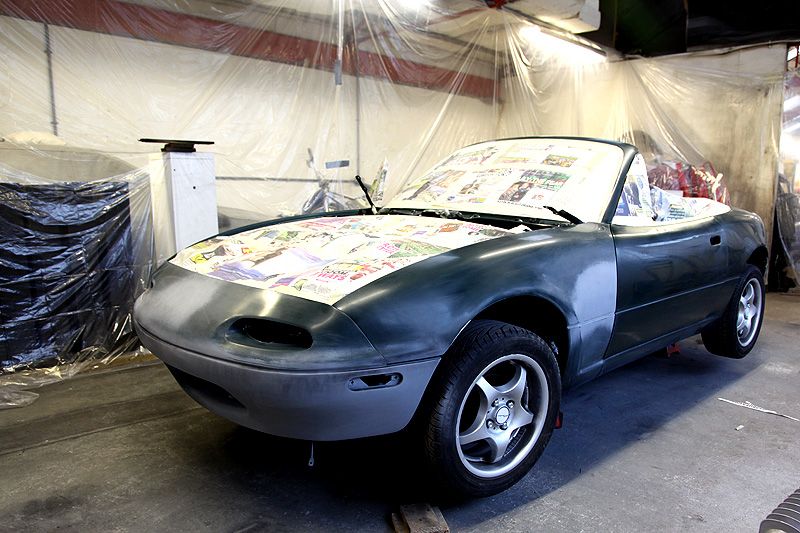 I was so busy over the next few hours that I didn't really stop to take any photos (dificult to do when you're painting!). Rob's car is finally ready to drive by 11.40pm - the expression on his face says it all. He is happy with how things have gone and is finally able to drive his newly painted car home knowing he did the spraying himself. A real achievement. 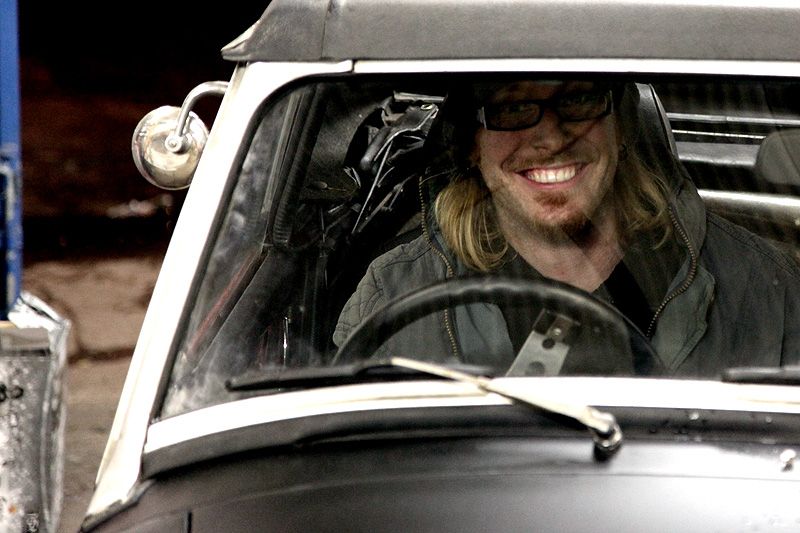 Just before midnight, I take some snaps of my car. It's been a bloody long weekend, I only finished spraying about 11.30 and I'm bloody tired. 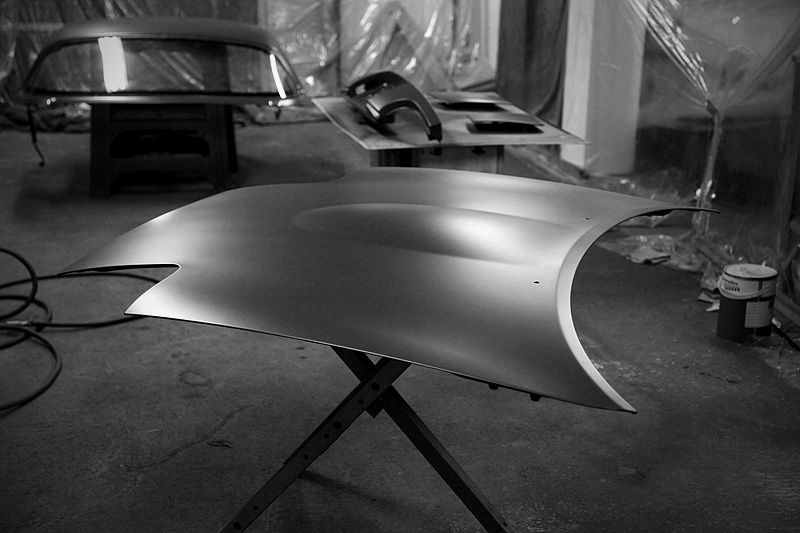 Three long days, two cool cars and lots of hard graft in the company of good friends. Some traumas along the way, but nothing to dampen the spirits....as many laughs were had as beers were drunk and the end results were very satisfying. Happy days. |
| |
|
|
Ian
Part of things
 
Posts: 977
|
|
|
|
|
Great update, looking forward to the next instalment!
Do you guys collect peoples newspapers when they put them out for recycling, just on the off chance its a painting weekend!
|
| |
|
|
|
|
|
|
|
Do you guys collect peoples newspapers when they put them out for recycling, just on the off chance its a painting weekend! Ben happened to snag a massive bag full of newspapers that his Gran was about to chuck out, so we had enough to do both cars and then wrap the whole northern hemisphere if we felt like it!! A lot of people think I came up with the name Teenage Dirtbag because it reflected the ratty look of the original red car. This is not the case, the name was decided before I'd even bought an MX5. I wanted to modify an MX5 that would look a bit like the smaller ba****d little brother of my Delica. The Delica is all big & tough and I figured it would be fun to have a car that kinda complitmented it with a similar look, but different at the same time. It sort of makes sense in my head anyway! Teenage Dirtbag was always intended to be an angsty reject relative of this: 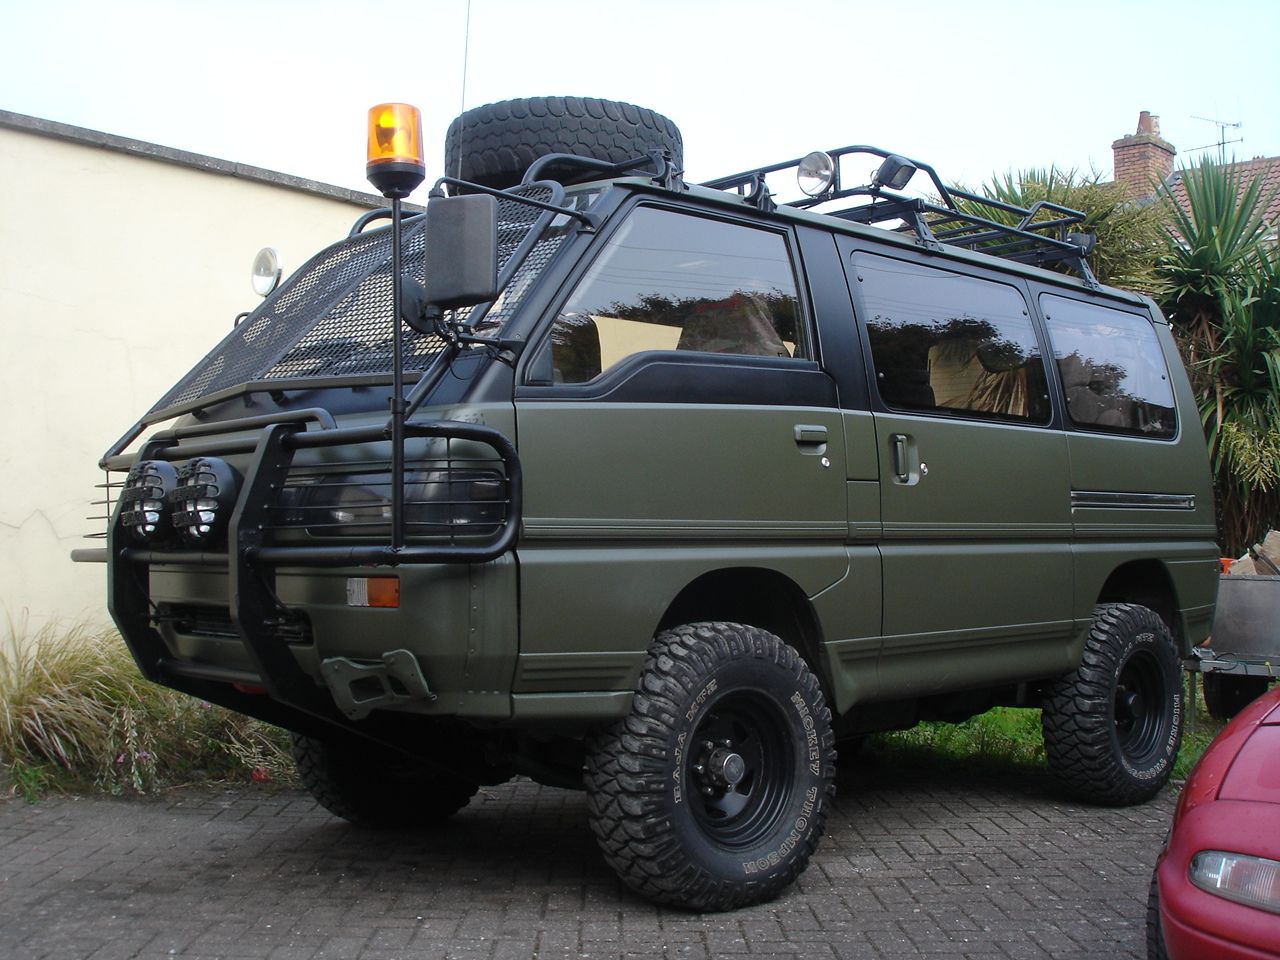 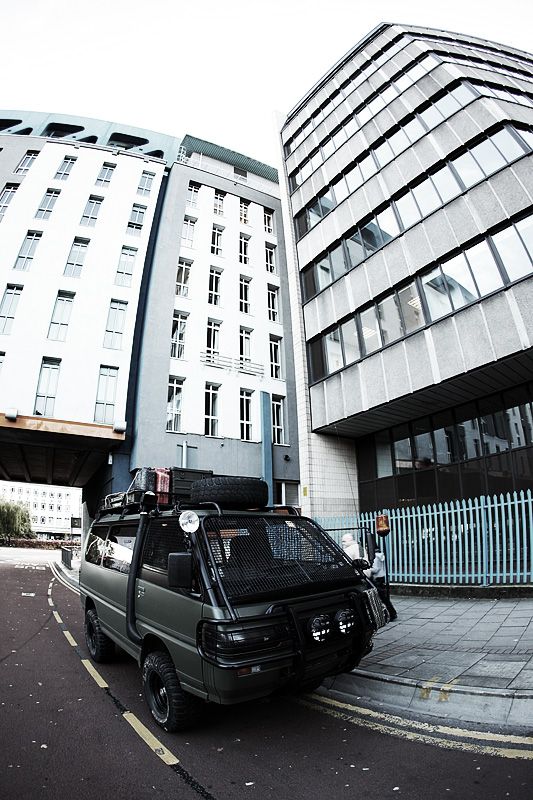 So that's why it ended up the same colour: 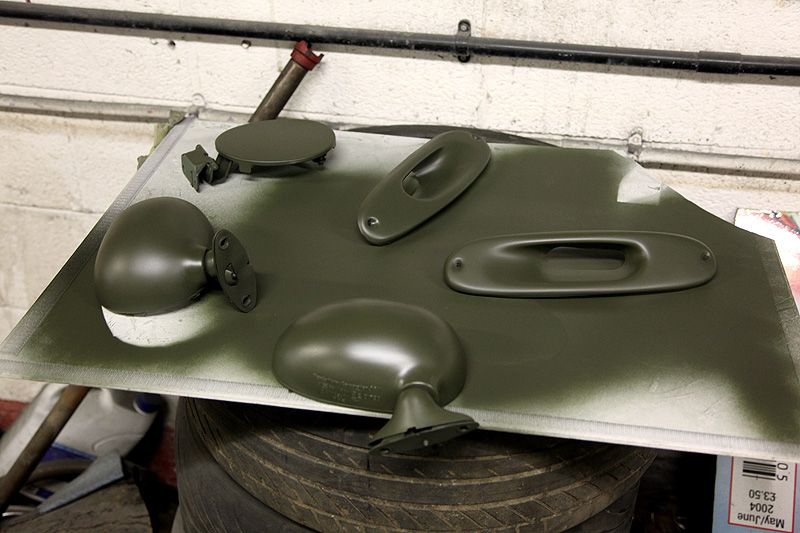 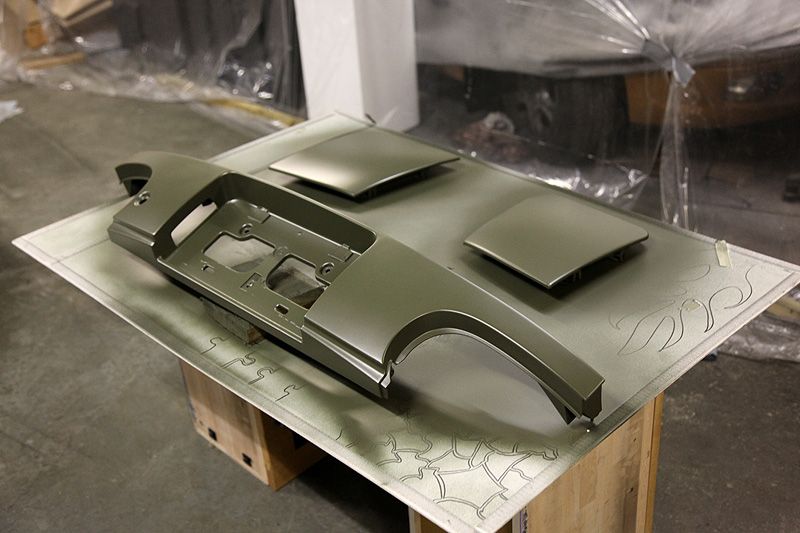 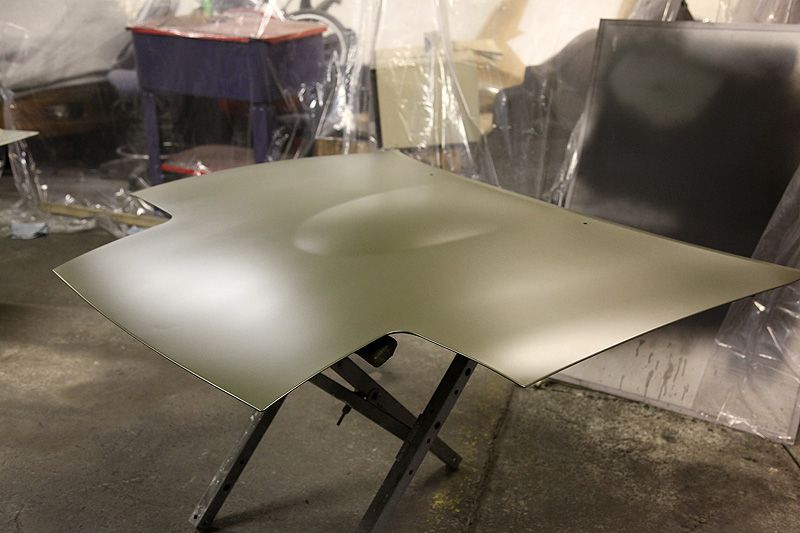 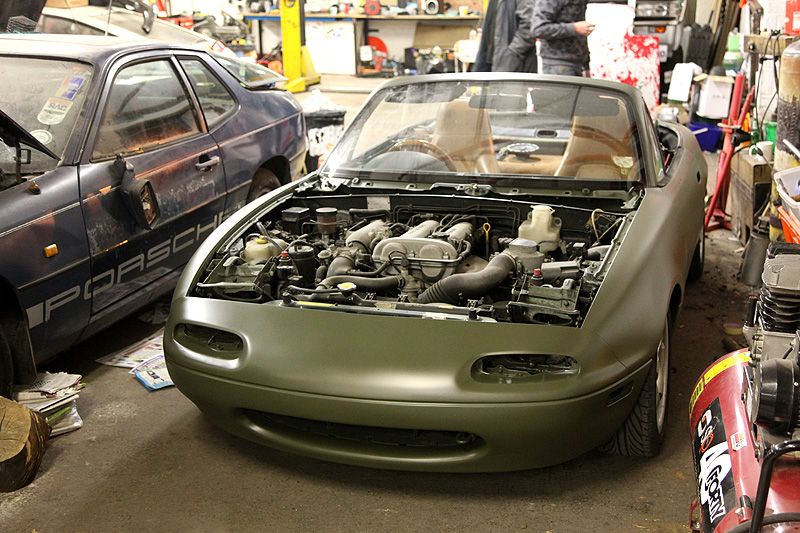 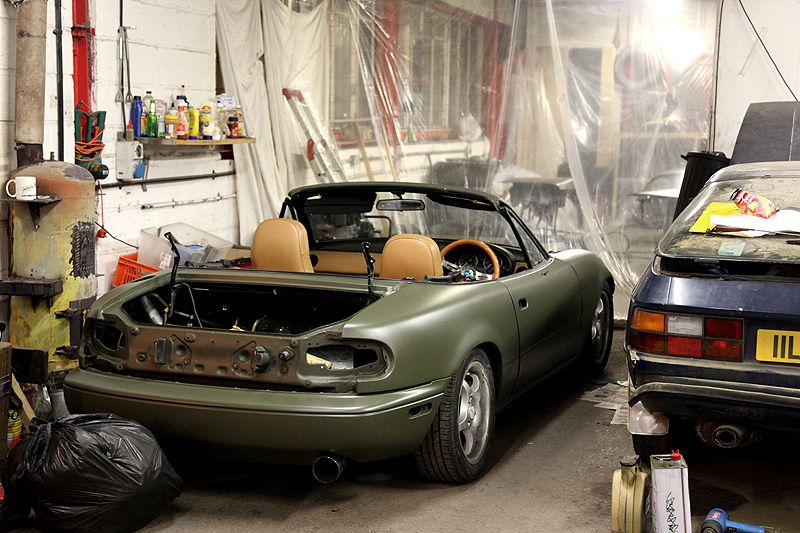 |
| |
|
|
|
|
|
Mar 23, 2011 10:09:37 GMT
|
As the bodywork starts to be reassembled, the interior starts coming out 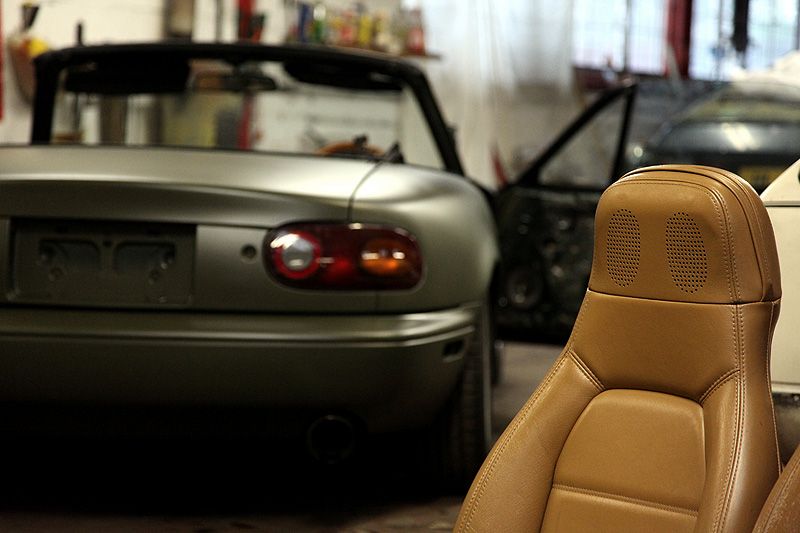 Last time you'll be seeing it looking like this  Tan, tan EVERYWHERE!! 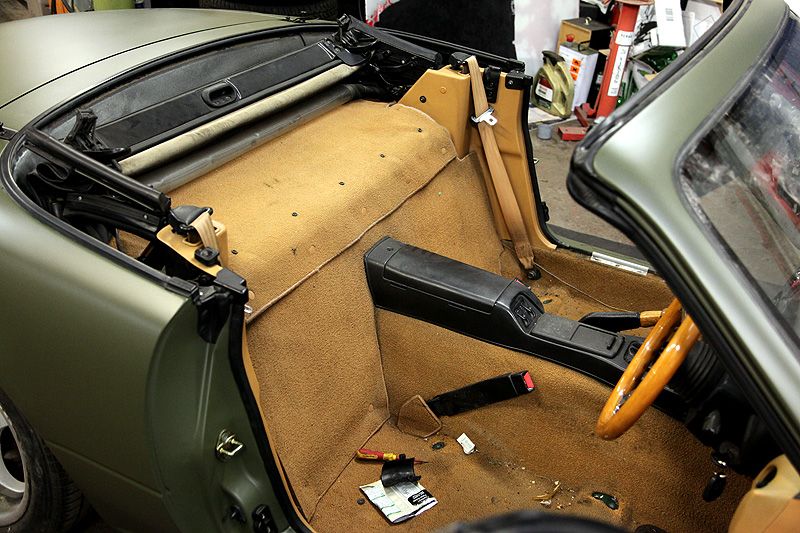 While taking things apart I discover some photos of the previous owner in the ashtray, along with some melted boiled sweets stuck to the bottom and some money. The money will come off the budget total. AWESOME! 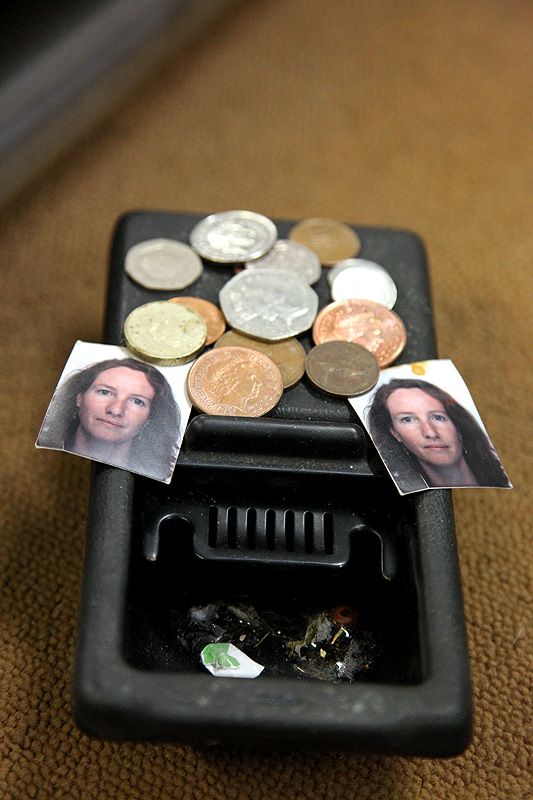 Under the seats - MORE money! Never found this much change in a car before  Tucked under the carpet by the seatbelt catch/stalk thing was a bit more. I'm RICH!  Dash now out. That centre bolt on top of the dash...what a complete curse word to get out! Easy in the factory before the screen goes in, not so easy in a unit when you're freezing cold and tired.  Some changes will be going on under the skin of this car.....none will be noticable once complete, but they will make a difference. 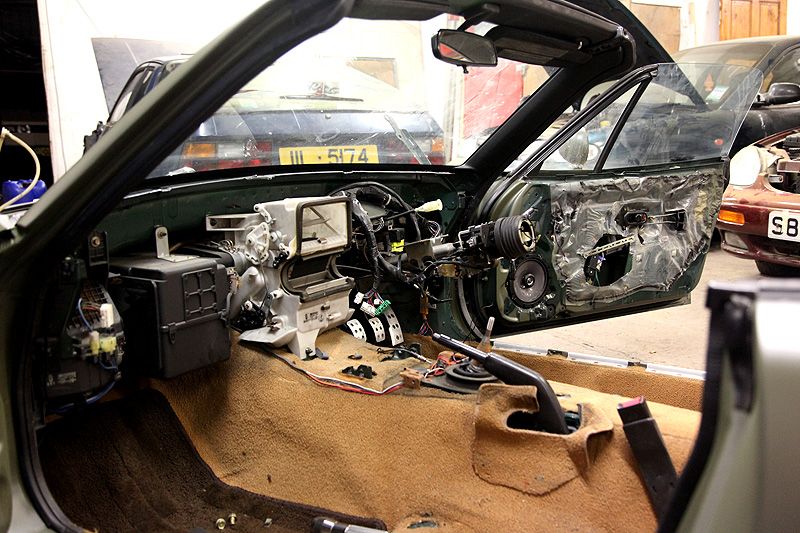 Lee (Ratters) pops in and lends a hand to get the wiring loom off the tan dash and swapped over onto the black dash that I pillaged from Seth's red breaker MX5 in London 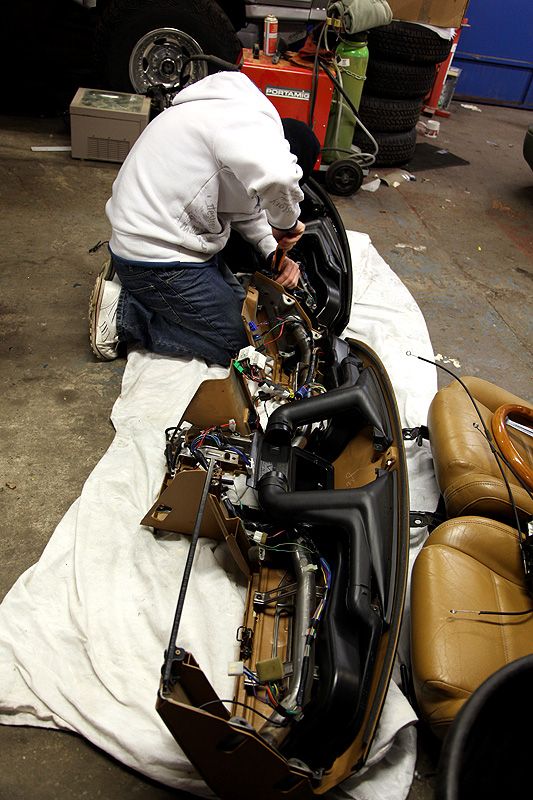 I did consider keeping the original loom from the black dash, but seeing as it was from a 1990 UK car and mine is a 1993 import, I figured it best to swap them...even though they looked identical (bar the third plug by the stereo for the headrest speakers) 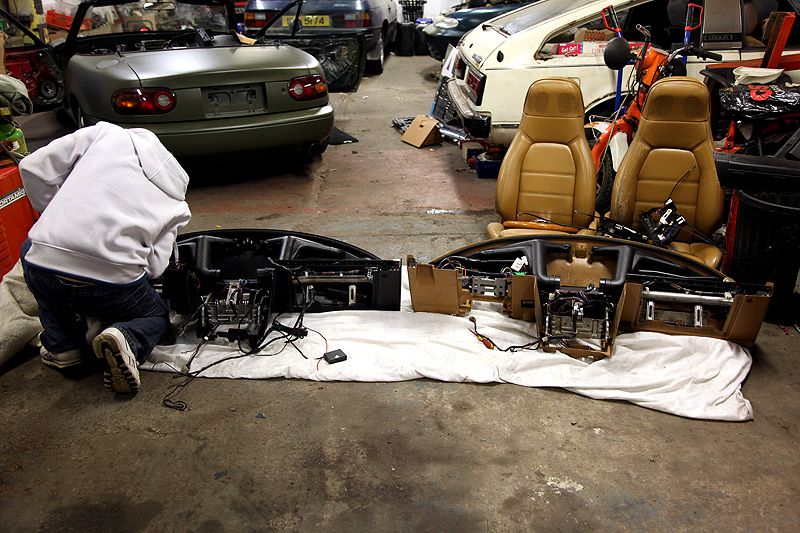 Tan dash now devoid of wiring. Trying to get all the clips off without breaking any was a challenge, but we managed it. 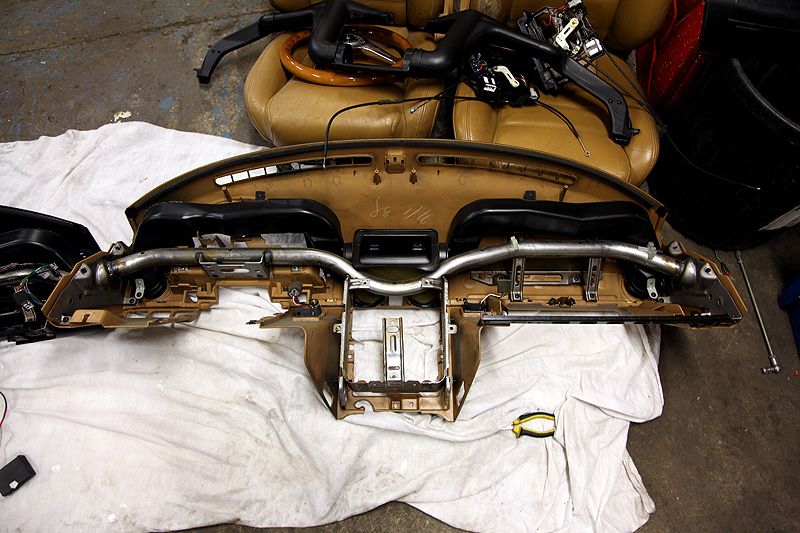 Ready to be fitted to the black dash 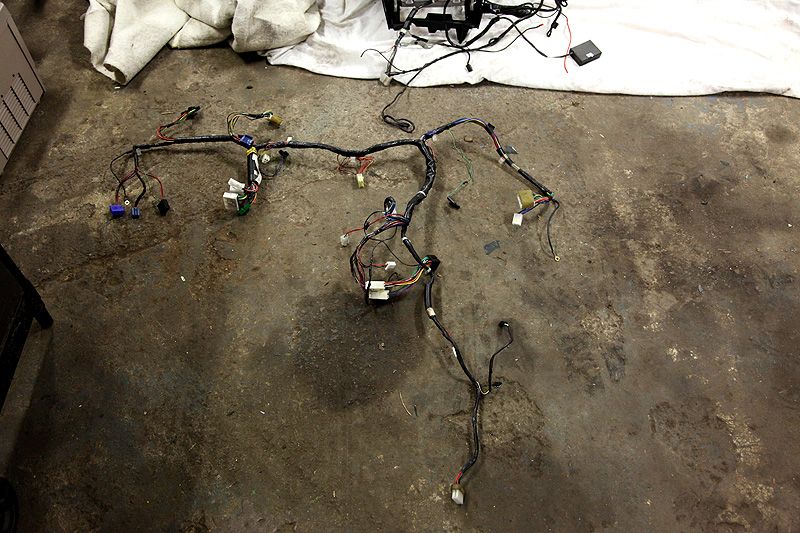 Keeping the loom in the black dash and only removing each part as I put the new loom in. That way I can make sure everything follows the correct route 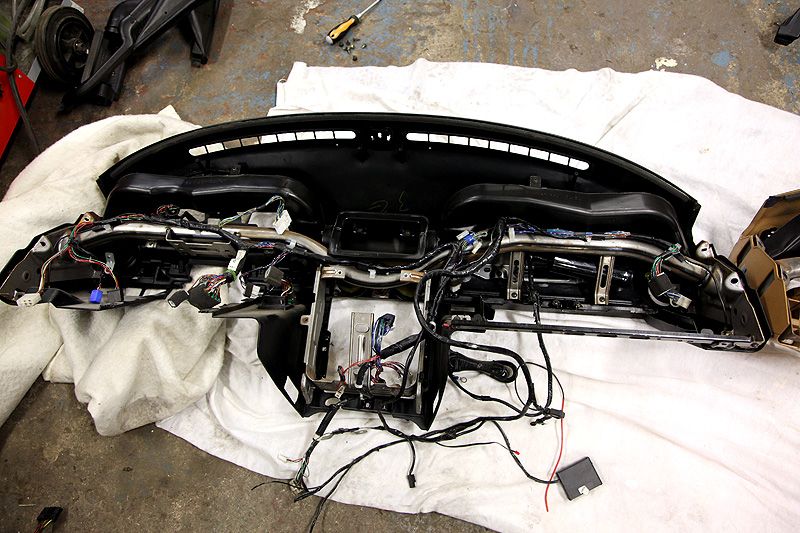 Spaghetti anyone? This dash seemed to take a long time to do because I didn't know all the plugs and cable routing etc....That was back in November, but now I can pretty much tell any part of the complete MX5 wiring loom just by looking at the plug. I reckon I could change a dash loom in a fraction of the time now than I took to do this one. 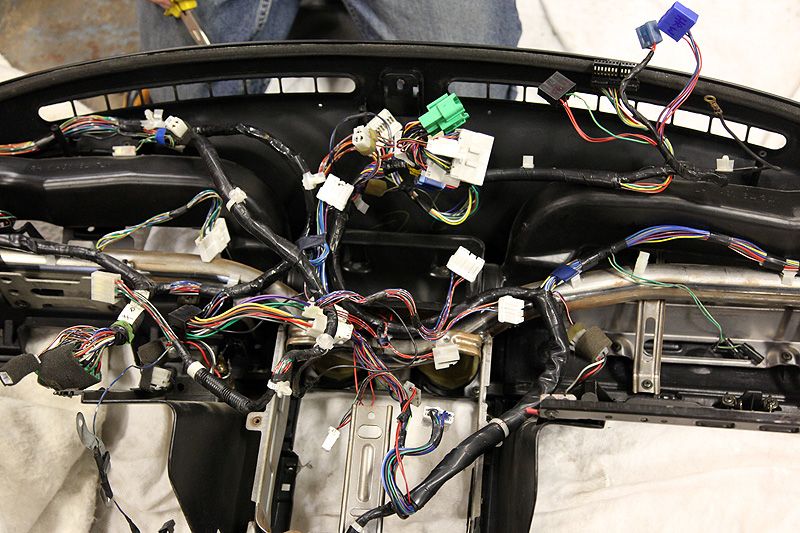 Once the dash was re-loomed I put it to one side ready for the next part of the interior work. Details of which to come. In other news, my 15mm fisheye lens arrived on this day too. Not a lens I'll use a lot, but it's great for the odd atmosphere or fun shot. A few I took around the unit after swapping the dash looms Wide angle MX5 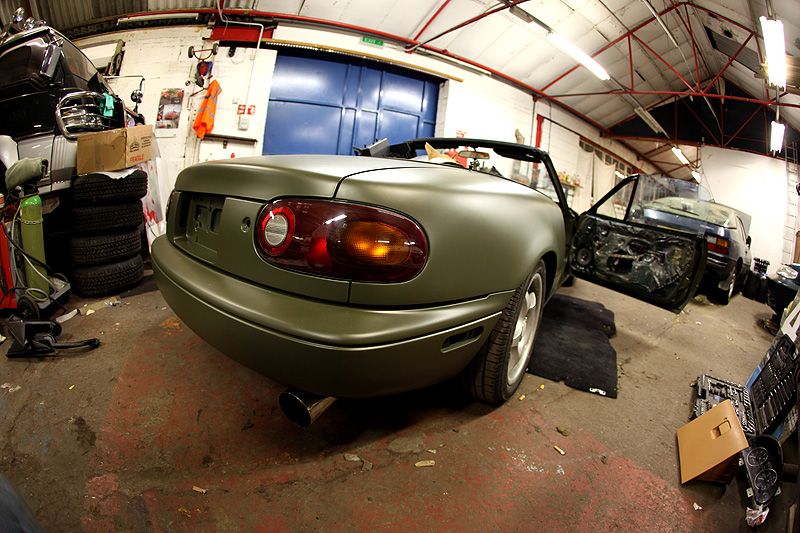 The workshop itself 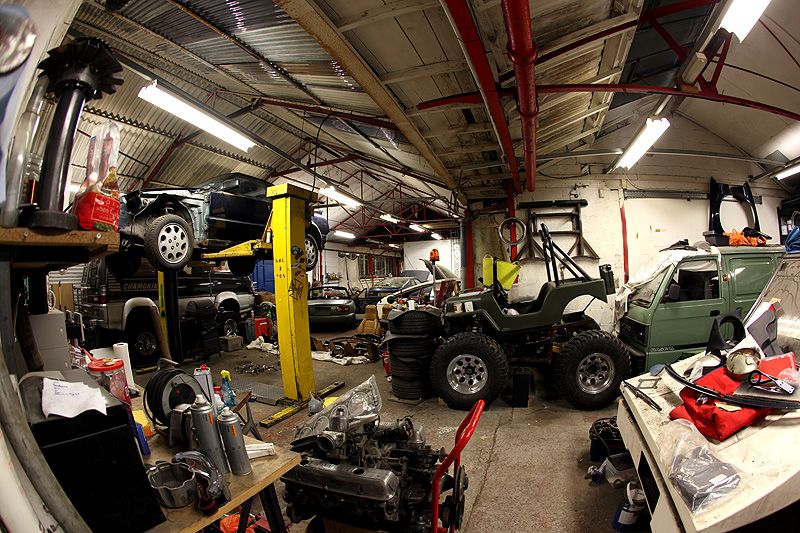 The snug has never looked so tidy! Reminds me that I need to give it a good clear up & clean! 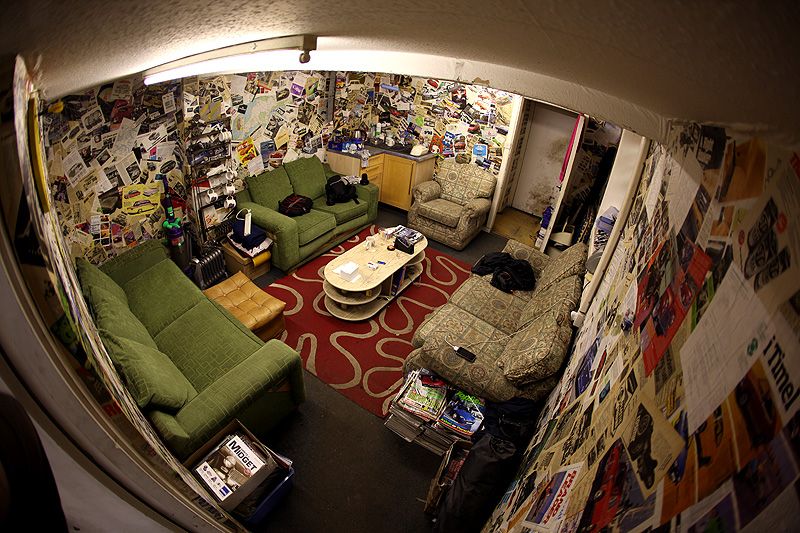 |
| |
|
|
VIP
South East
Posts: 8,302
|
|
Mar 23, 2011 11:06:23 GMT
|
... and mine is a 1993 import... [cough]Your thread title needs updating[/cough] |
| |
|
|
|
|
|
Mar 23, 2011 11:14:44 GMT
|
|
The tan interior is a lovely contrast.
|
| |
|
|
cianha
Part of things
  aka VDubbin
Posts: 923
|
|
Mar 23, 2011 11:20:11 GMT
|
|
Are you putting those seats back in? Unworn tan seats are sought after, the rain tends to drop down on the drivers side bolster, which causes the leather to soften and wear quite badly.
OD scheme looks deadly, BTW!
|
| |
Last Edit: Mar 23, 2011 11:20:41 GMT by cianha
|
|
nconst
Part of things
  funky fresh since 89'
Posts: 447
|
|
Mar 23, 2011 11:42:10 GMT
|
|
loving it bruce !
|
| |
|
|
|
|
|
|
|
Mar 23, 2011 16:15:46 GMT
|
|
just joined the forum having been reading this at work.
well impressed i want one now plus the colour sceme is amazing.
keep up the hard work.
|
| |
Mini 1.8 VVC Conversion to come
|
|
Wreckit
Part of things
  MK1 1200 bandit, T120 Boneville, E39, NB MX5
Posts: 674
|
|
Mar 23, 2011 17:02:25 GMT
|
|
whats the exact colour name and code you used on the MX5 i cant get hold of any specific details at work any idea's ?
|
| |
new workshop incoming
|
|
danneh
Part of things
 
Posts: 65
|
|
Mar 23, 2011 21:27:58 GMT
|
Looking good Bruce. I do have to admit that i quite liked the tan interior with the nato green paint  |
| |
2004 C2 - The Daily
1992 Shogun - The offroad toy
1991 MX5 - The new project
|
|
|
|
|
Mar 23, 2011 23:58:17 GMT
|
[cough]Your thread title needs updating[/cough] Thanks Dan, didn't even think about that! Will change it in a mo.... Are you putting those seats back in? Unworn tan seats are sought after, the rain tends to drop down on the drivers side bolster, which causes the leather to soften and wear quite badly. OD scheme looks deadly, BTW! Cheers Dude, Can't tell you what's happening with the seats yet...it was all planned out in my mind before I got the car, but will only be revealed once I get to that stage of the build. The seats themselves are in pretty good nick, there is some bolster wear to the drivers side, but nothing too bad. Thanks Dude, wasn't sure if you'd like the colour being a BRG/V-spec man yourself  just joined the forum having been reading this at work. well impressed I want one now plus the colour sceme is amazing. keep up the hard work. I'm very flattered that you've just joined and posted on my thread, glad you are enjoying the build and many thanks for the comments. I just hope you like the finished product? The tan interior is a lovely contrast. Looking good Bruce. I do have to admit that I quite liked the tan interior with the nato green paint  I can't tell you what's happening with the interior yet, but the masses of tan was just too much for me I'm afraid. I just had to do something about it.... |
| |
|
|
|
|
|
Mar 23, 2011 23:58:44 GMT
|
Now you see it.... 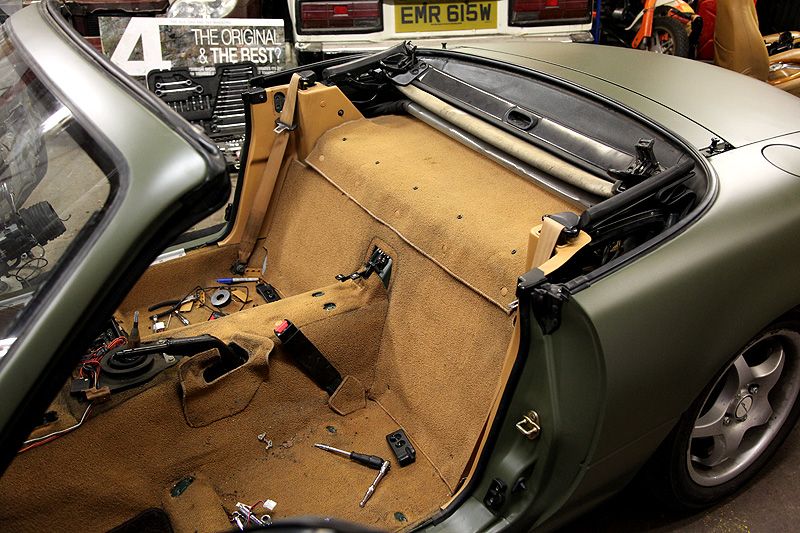 ...now you don't 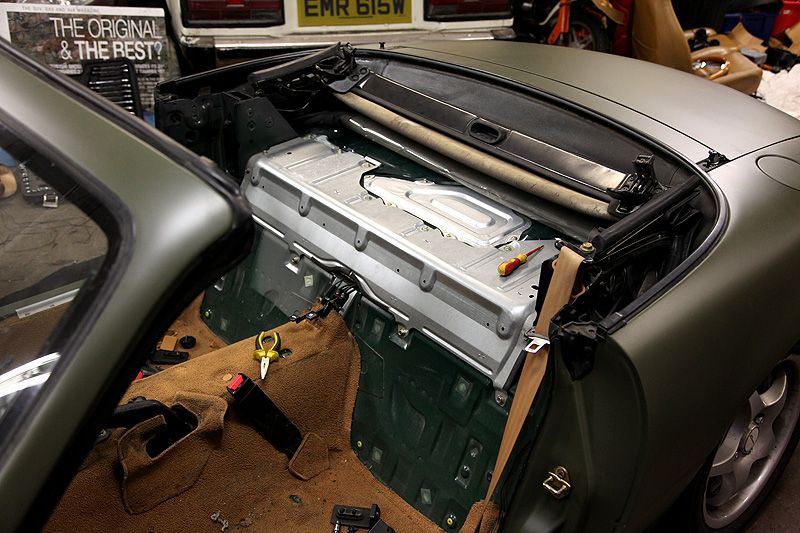 The plan here was to have a closer look at how my roll bar mounted. It's a lovely solid bar, well made and probably fairly protective, but no use if it isn't mounted to the body too well. Even though it was only bolted with M5 bolts....there were quite a lot of them as well as the seatbelt tower mounts but I still wanted to have a closer look at the metal they were going into to check if there was enough strength. With all the carpet and panelwork removed I could get a better look: 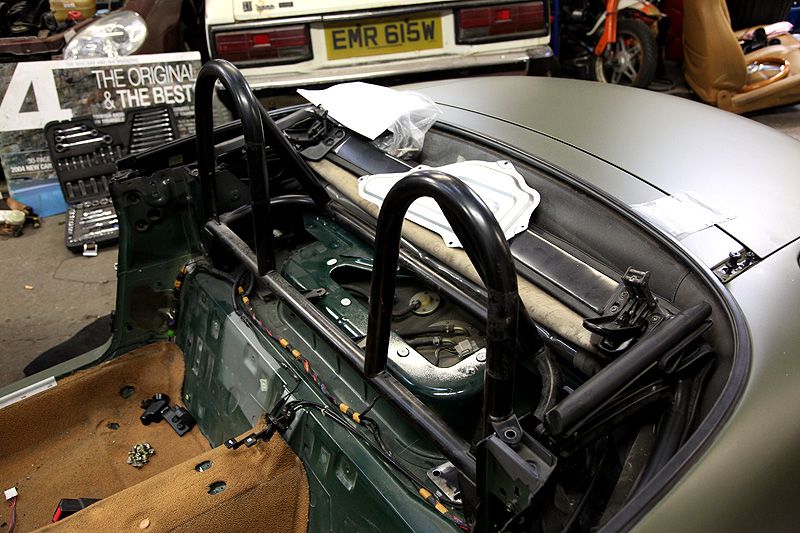 No mounts in the seatbelt towers, just a hole. I could either cut the roll bar bracket off and extend it to the seatbelt mount itself, or fab something up for it to mount to through this hole? 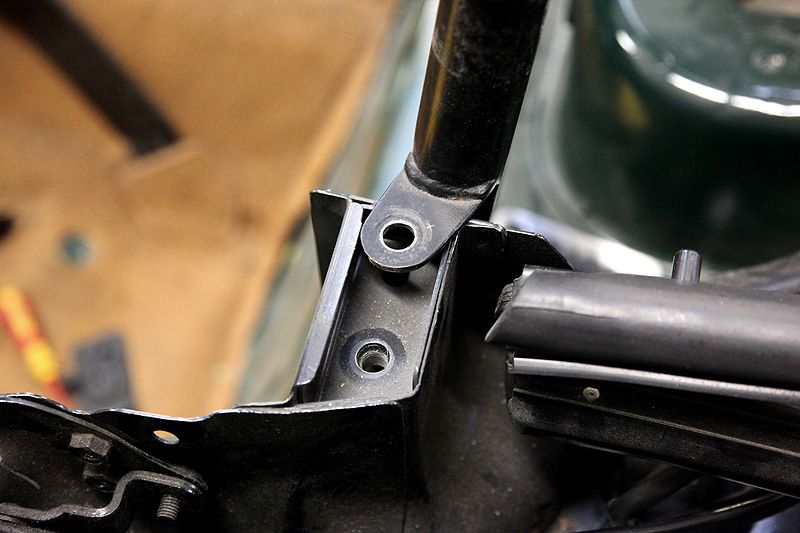 It gets worse....these mounts go into the cover for the petrol tank. Flimsy metal is an understatement. Some mods here will be in order... 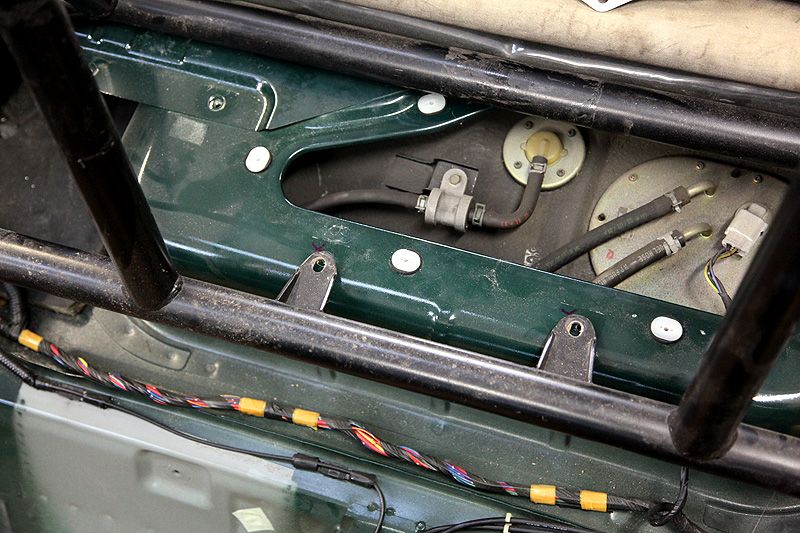 Where the 'X' is marked is where another mount goes (one each side) and this metalwork is pretty pathetic too....you can flex it quite easily with just your hands. As well as the seatbelt tower mounts, this corner is where most of the strength needs to be so I'd better get making. 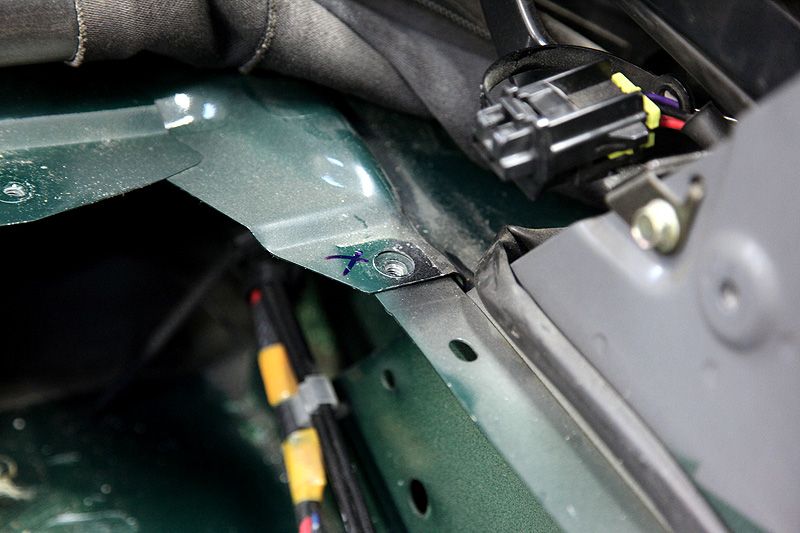 After a rummage through the metalwork, I have a selection of 5mm plates. I could cut some from scratch, but why go to all the hassle when something can be made from existing parts. Time saved & all that....  After lots of offering up, measuring, checking and double checking (probably about 2hrs of testing things out) I fire up the welder and melt some metal together 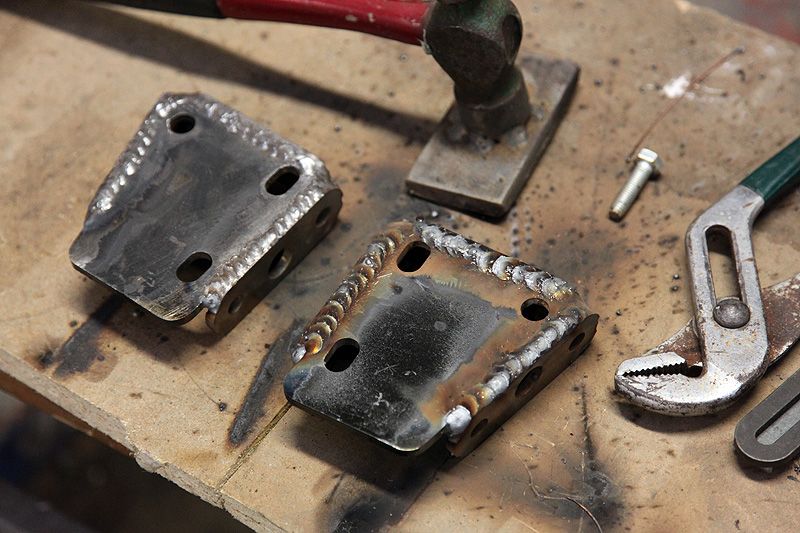 Flat the welds back to enable it to mount better 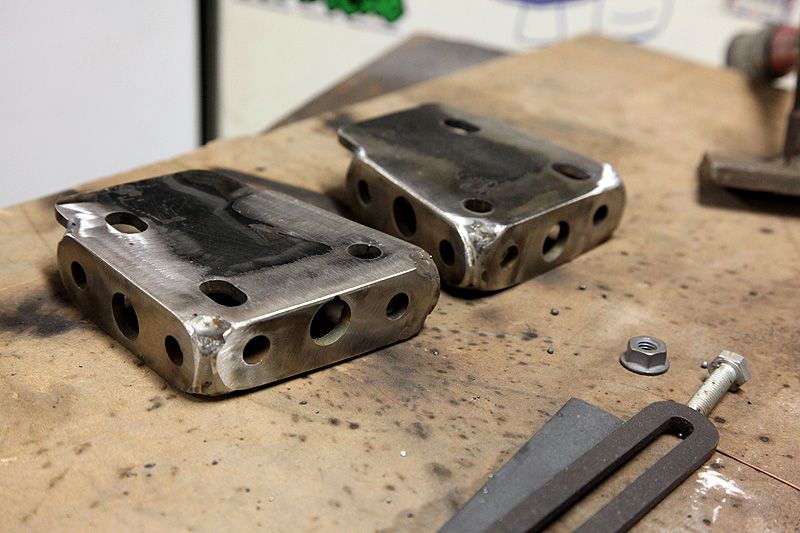 Larger captive nuts welded on the inside....a lot stronger than the existing mounts 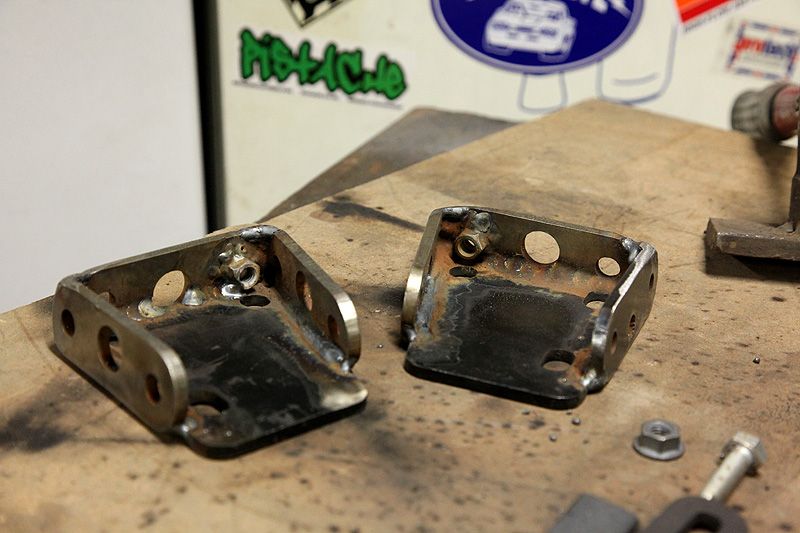 I also drill out the captive nuts from the fuel tank area 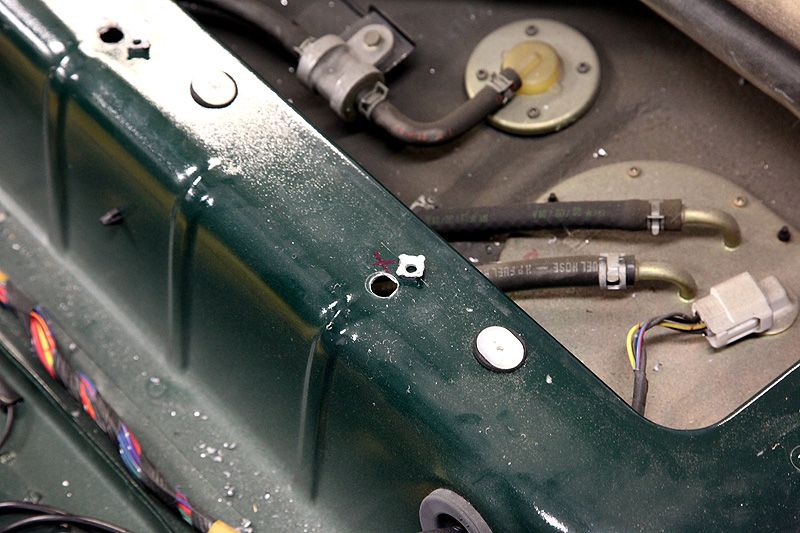 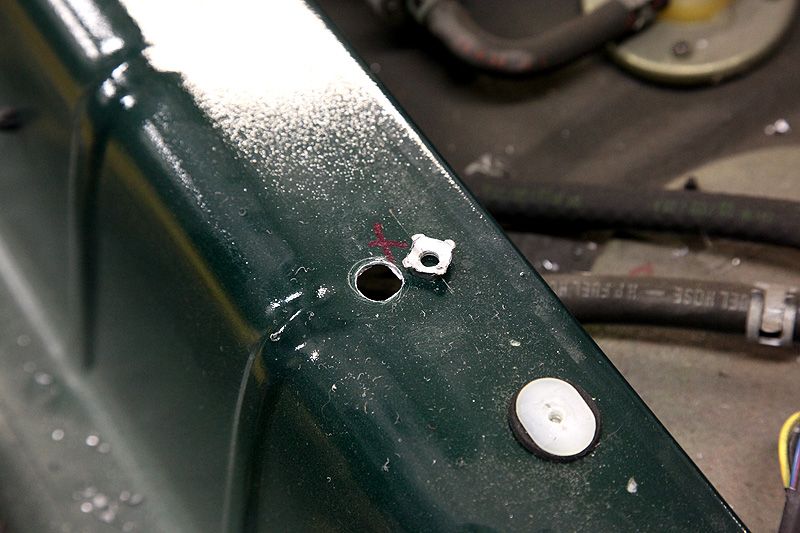 ...and weld up a bracket for that too. This one will be more of a spreader plate. It won't be mega structural, but it will be strong and certainly won't pull through like the original captive nuts would have done 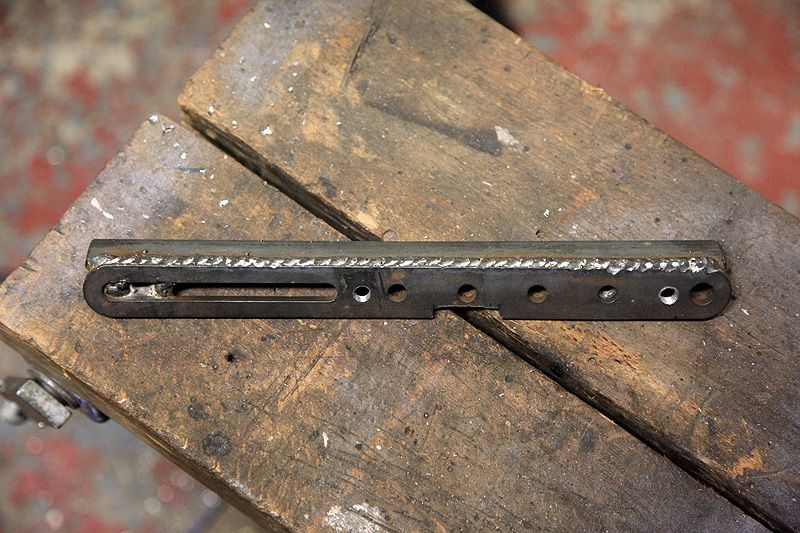 The main brackets are welded in place. Seam welded around the perimeter, plug welded through the holes in the back and also fully welded into the lip above them (where the shelf sits) 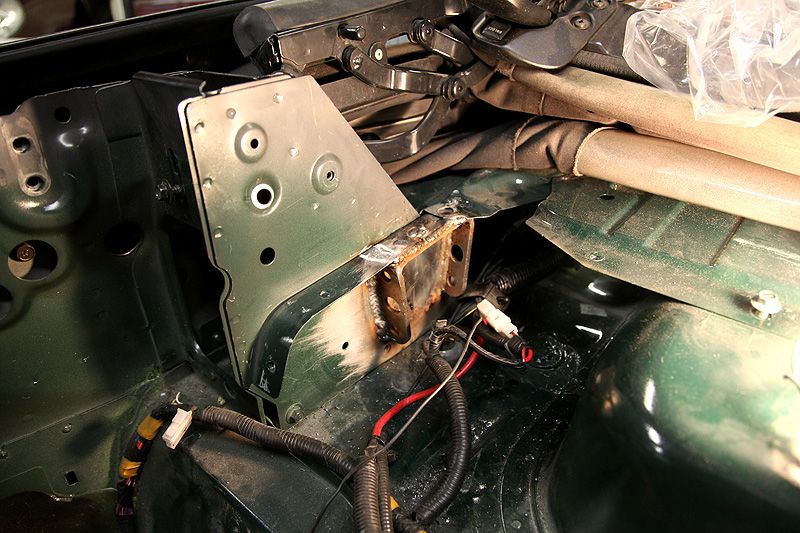 I tested it by hitting it hard with a hammer and it sounded very, very solid. If I was ever to be in a crash big enough for this to give, I'll have far greater things to worry about! 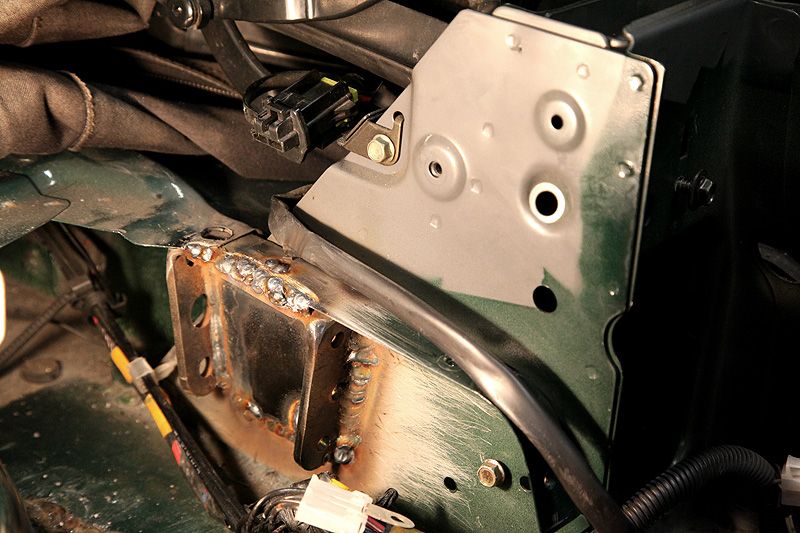 Some more welding 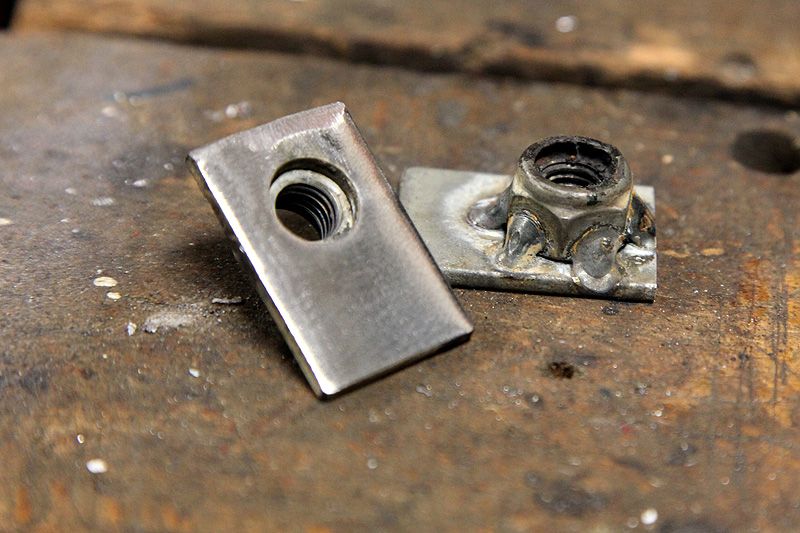 Followed by some drilling 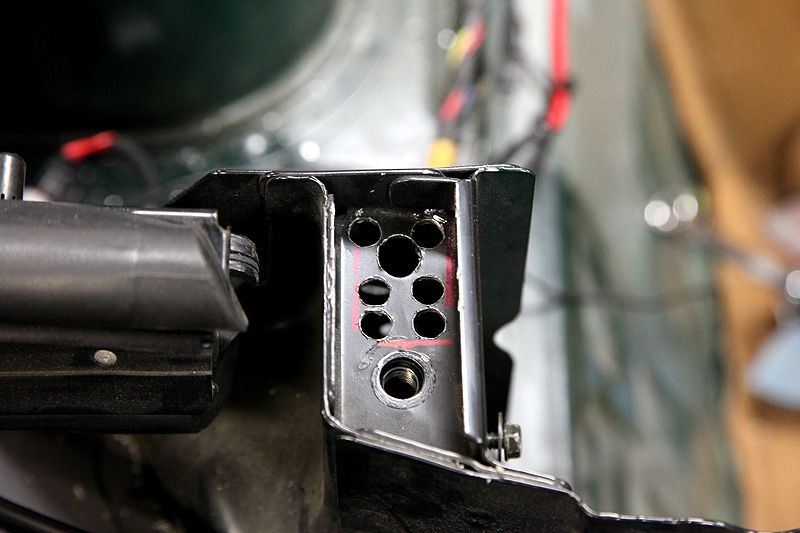 Then some more welding....and I have a nice captive nut complete with spreader plate under the seatbelt tower. 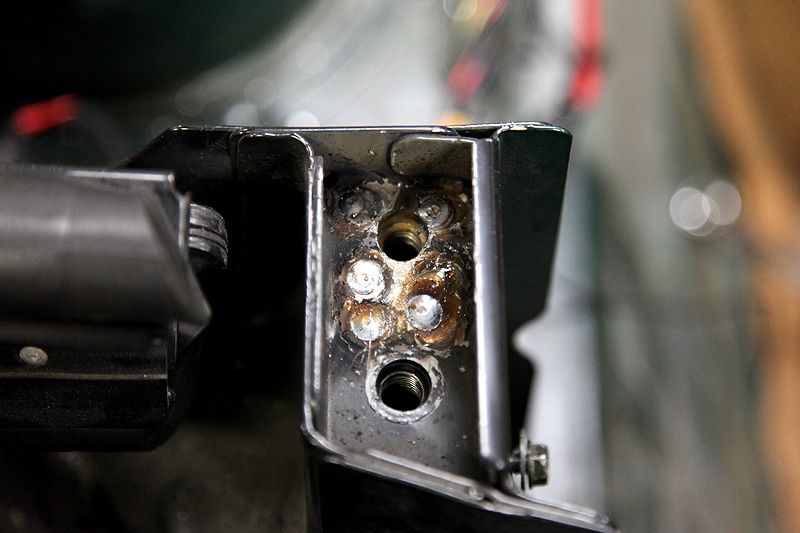 Test fit of the roll bar. I've made a spacer to sit in there to lock everything together rather than have the end of the bracket under tension, I just didn't fit it for the photo 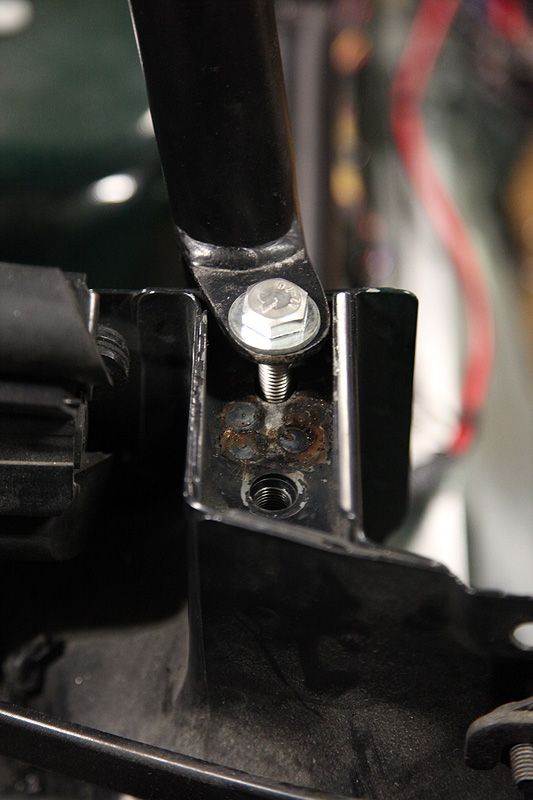 Fuel tank spreader plate fitted. Held in place with bolts because I wasn't to keen on welding it in so close to the fuel lines & tank. It makes the whole mount SO much more solid! 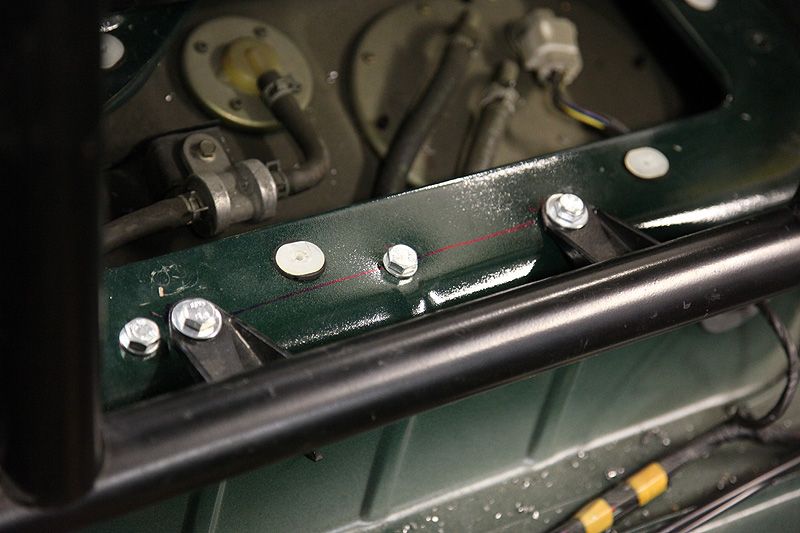 More to come soon..... |
| |
|
|
|
|
|
|
|
|
you need to join slamburglar.com, :-)
|
| |
|
|
|
|
|
|
|
I tested it by hitting it hard with a hammer and it sounded very, very solid. If I was ever to be in a crash big enough for this to give, I'll have far greater things to worry about! I can confirm this - it sounded just like hitting a solid workbench vice with a hammer, not 5mm plate welded to sheet steel. ;D |
| |
|
|
ZXRob
Europe
Posts: 1,200 
|
|
|
|
|
This build thread is amazing! The car looks so cool! The wheels are a great choice the way the car looks is a great new take on the tried and tested wheels and drop combo!
|
| |
|
|
|
|
|
|
|
whats the exact colour name and code you used on the MX5 I cant get hold of any specific details at work any idea's ? Sorry, I somehow missed this last night! Colour is NATO green from the BS381c colour chart which is the colour range for all military paints. If you literally google BS381c it'll come up with lots of results showing the colour chart. NATO green is colour 285 from the chart. Hope that helps? |
| |
|
|
backzilla
Part of things
  0 - 60 in 5.3 ............in the wet
Posts: 151
|
|
|
|
|
looking good. love the matt green
|
| |
|
|
|
|




 [*]
[*] [*]
[*]


