jin
Part of things
  http://quantumforum.proboards.com
Posts: 69
|
|
Nov 26, 2010 20:06:14 GMT
|
stabbed with a Stanley knife doused in petrol nearly lost an eye with an electric hacksaw no not the plot for the next hostel movie, just me trying to fit my exhaust ;D after discovering id fit the center Dog leg section wrong leaving me with 1" ground clearance by looping it underneath the gear selector, i faffed about today trying it set to both the left and right concluding that it fitted better to the right, so... nose down 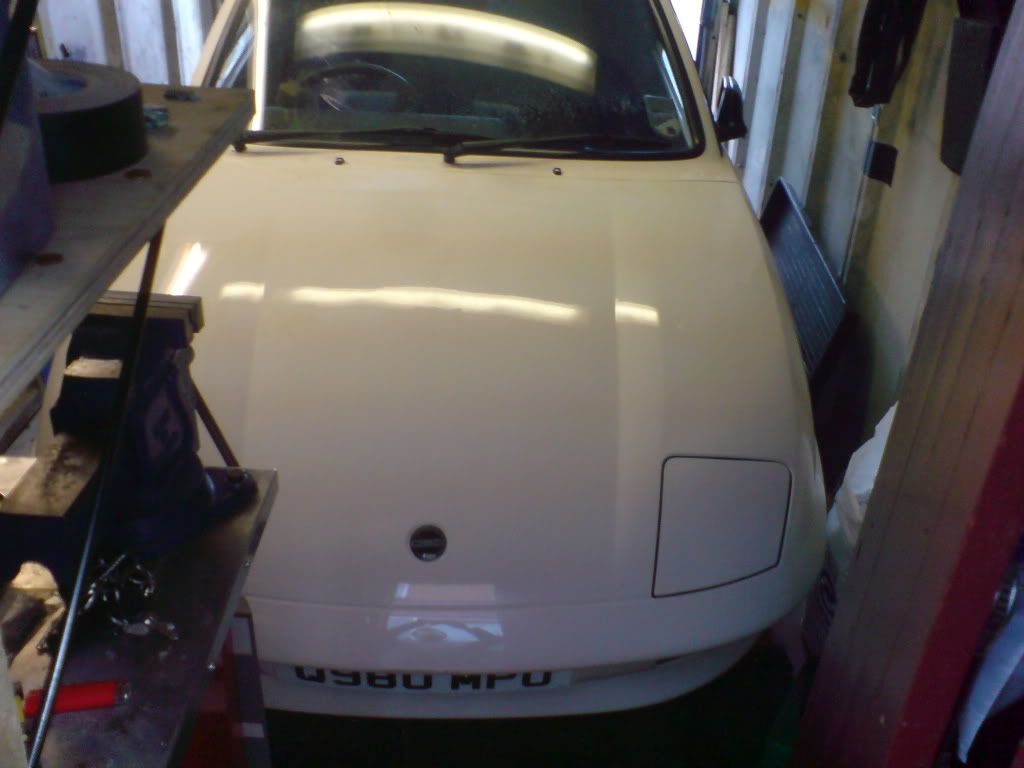 bottom up 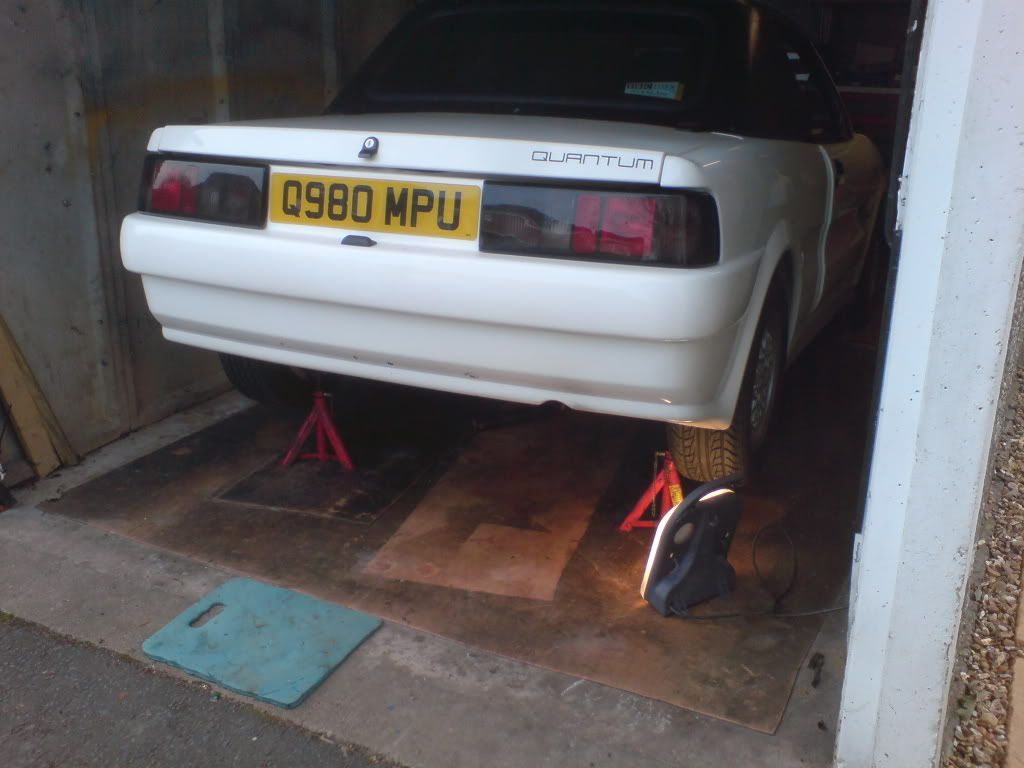 crawled underneath and removed the rear and center sections then set about sorting everything, the old brackets needed to come off and as the original engine was a small crossflow they didn't line up to be reused, didn't like the look of em anyway 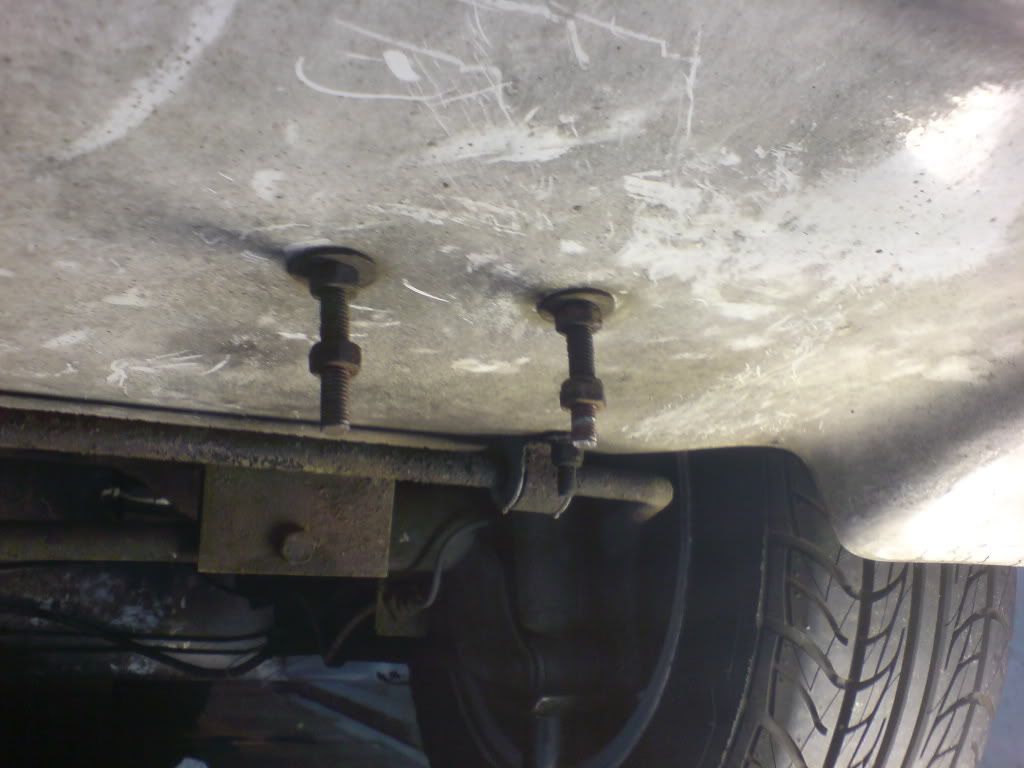 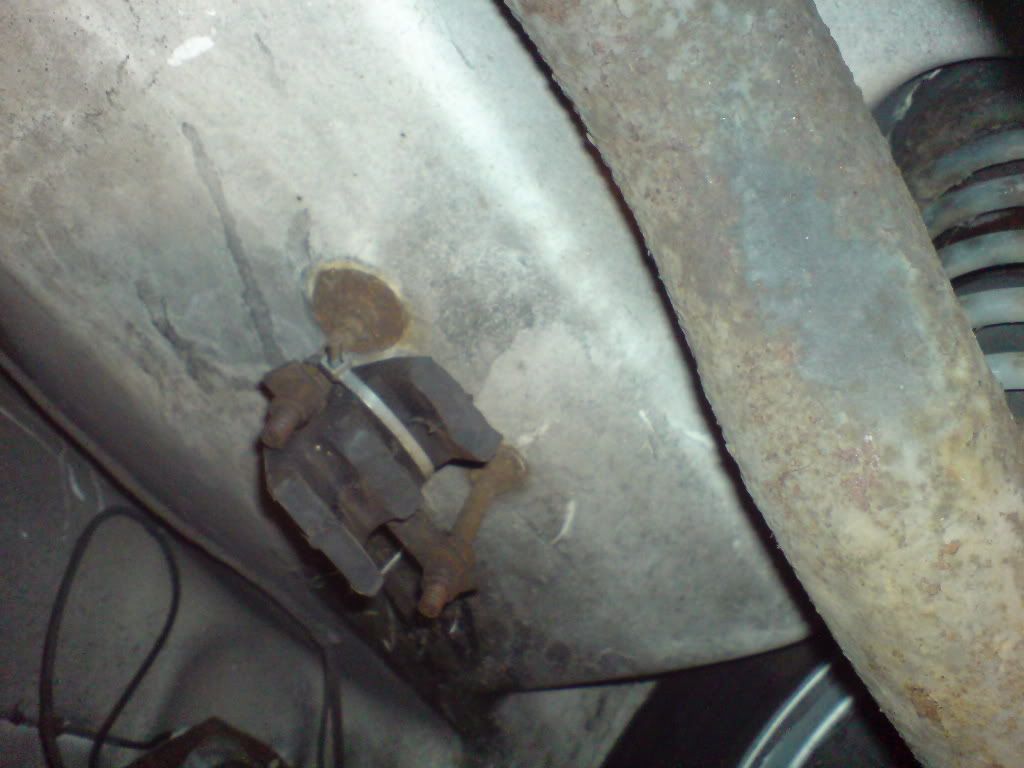 so out they came, the rubber left from the old mount was tough to get off (hence Stanley knife incident) and the threaded studding had to come out, easy on the rear most as i could access both sides, but the one further in was bolted into the rear bulkhead box section, with no helper to hold the one end while i undid the other i slacked them off as much as i could and decided to cut them off to remove them, used a reciprocating saw that worked on one stud a treat but the blade shattered on the last  missing my eye by a fraction (i know i know, should have been wearing goggles, ive got some too) so i had to cut the remainder off by holding a 12" hacksaw blade in my hand as the saw frame wouldn't fit in, hands are now a bit sore to say the least. so then to mount up the rest of the system with the rear section, 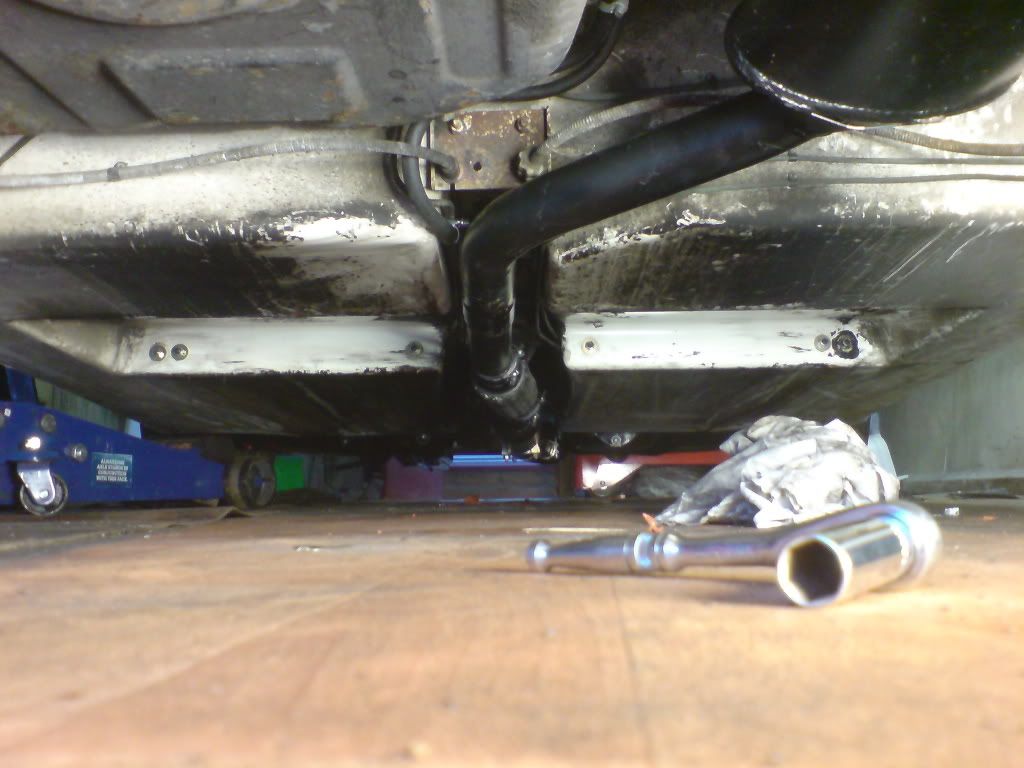 so i held it up with a cable tie to check fitment and noticed the fuel hose jubilee clip was fitted to it fouled the exhaust, so i removed it, and got a petrol shower, with that cleaned up i could concentrate on mounting it properly to the chassis, so ive mocked up a bracket here which could work but before i drill the chassis with yet more holes i want to mull it over a bit more to be sure I'm doing the right thing 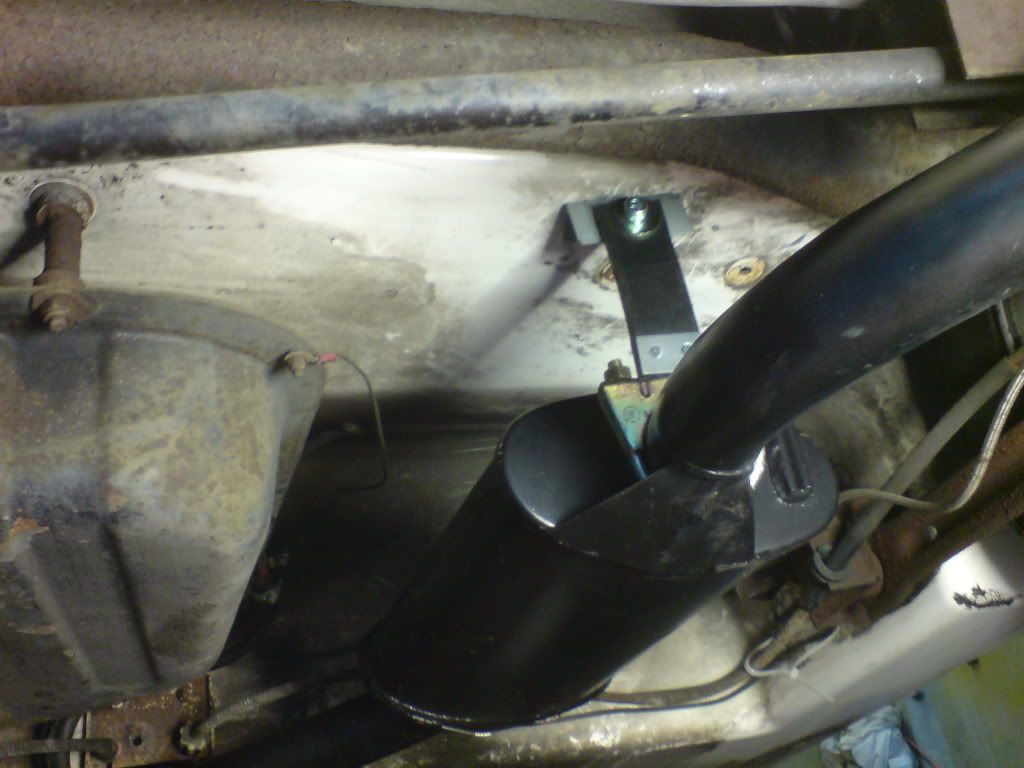 does anybody else have any tips before i give it some with the drill? it looks like potentially i can mount it where i have put that one strap just behind the back box and also just off the handbrake bracket at the rear of the central tunnel and even just by the tail pipe, hows yours done? ill be glad when this is done as its the last big job before next year and i decide to pull the back end apart which needs doing since the anti roll bar mounts look a bit too flimsy |
| |
|
|
|
|
|
|
|
Nov 26, 2010 21:31:21 GMT
|
|
Hangers for ours was always a bit of a bodge. Yours looks tidy, but have you any bobbins, etc. in it to allow for movement?
It's hard to get the ideal : too stiff on the mounts and you risk fracturing something : too much movement and it'll end up rattling off the tunnel.
Your plan for a support off the handbrake bracket sounds good. The whole rear section has a habit of twisting in position under its own weight if only supported at the offset rear section, and that lets the middle of the exahsut twist towards the ground. Your handbrake bracket mount should prevent that.
It's a good solid looking exhaust. Hopefully once it's in you'll not have to come back to it for a while.
Darryl
|
| |
|
|
jin
Part of things
  http://quantumforum.proboards.com
Posts: 69
|
|
Nov 27, 2010 10:19:12 GMT
|
cheers mate ive added a flexi section to the exhaust just after the front silencer, not ideal but only place it would fit so that should help reduce the chance of any cracking, I'm also only planning to mount the rear section after the flexi to the car to help also the type of mount i have is the strap type that are used on old minis and land rovers and old cortinas etc, it should be ideal as it allows easy movement for and aft which wont hit anything but little movement side to side which i don't want I'm not too keen on bobbins since they can be too stiff but then once the rubber wears they just part company, mine you ive not used any for a while?  |
| |
|
|
|
|
|
Nov 29, 2010 11:31:11 GMT
|
|
That all sounds like a good plan. I agree, sideways movement in a Quantum 2+2 is be avoided. If your flexi is ahead of the gear linkage box, you should be able to avoid the dreaded knocking on the tunnel.
Now why didn't I think of that.
Also, just curious : you mention a front box. XR2 systems only have a rear box, nowt up front. Are you using a system for one of the other Fiesta models?
Darryl
|
| |
|
|
jin
Part of things
  http://quantumforum.proboards.com
Posts: 69
|
|
Nov 29, 2010 19:35:47 GMT
|
cheers mate the flexi is just to the side of the linkage, you can just see it in the 5th pic above, as for the front box its the Ashley system I'm using which has a small box at the front, never knew the standard exhaust never had a front box, must be better for clearance? if i could do it again id fit a spring loaded ball / socket type welded to the manifold / down pipe, but still what ive got should be ok, the old crossflow exhaust used to touch in about 3 places even on idle, whereas i think the closest gap ive got here is 5mm to the side of the linkage / selector cover, provided i mount it solidly enough side to side i should be OK, time will tell  |
| |
|
|
jin
Part of things
  http://quantumforum.proboards.com
Posts: 69
|
|
|
|
the problem (ok not a problem but i don't like it) with the Quantum is the filler neck / cap meets the bodywork at an angle 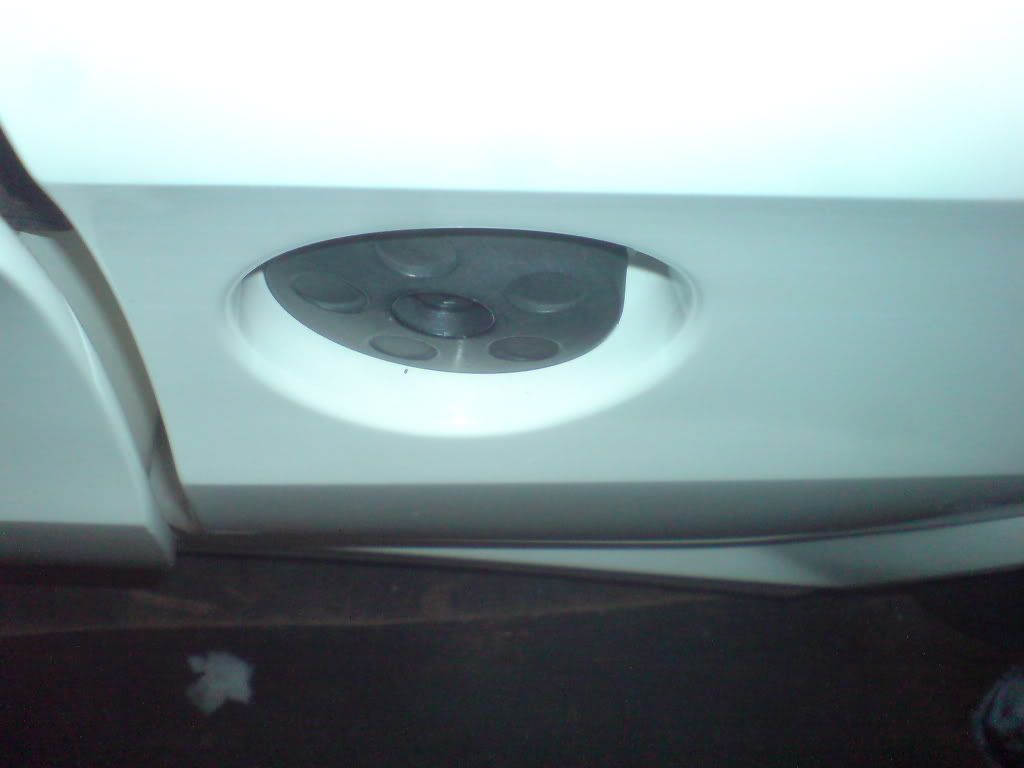 the old cap is flat so it looks a bit odd to me, the back of the new cap is laid out as such that it can only go in one way round 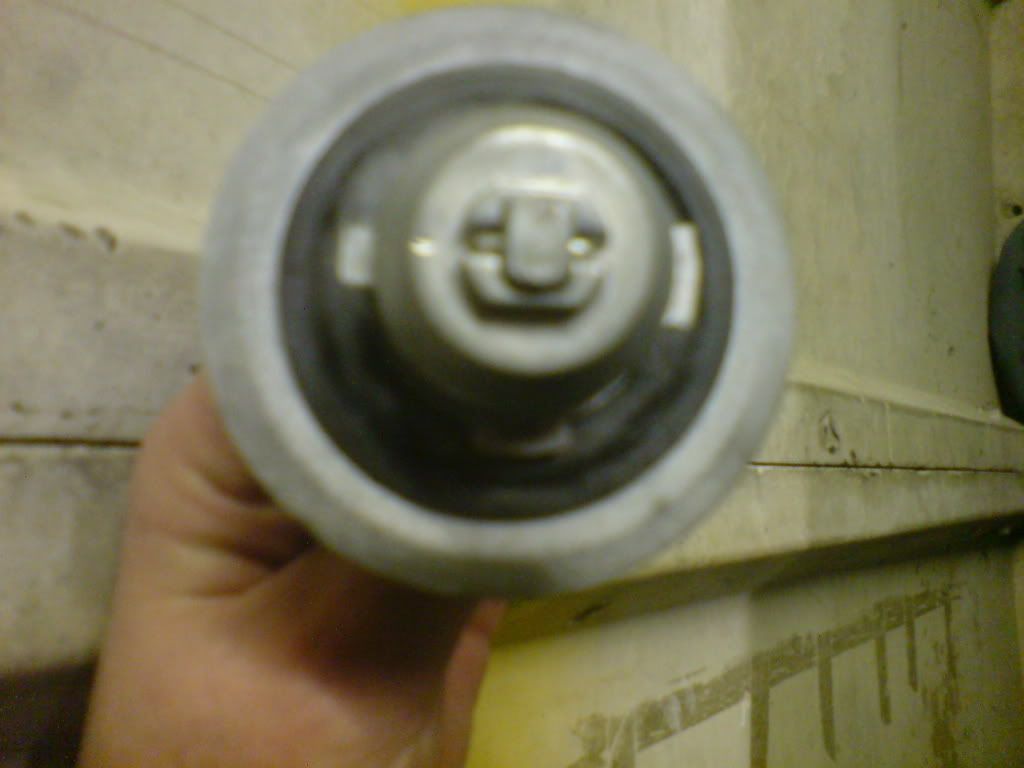 i think the old one was non original, so when the new cap is put in its well and truly out 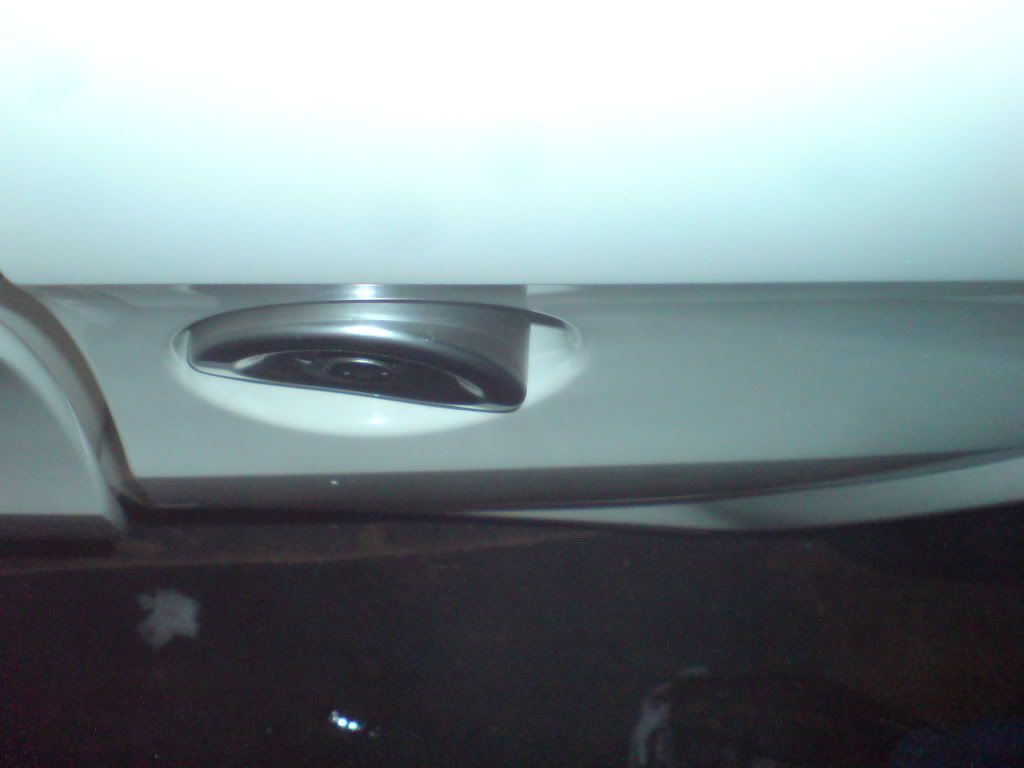 obviously the fiesta has a very different side profile to the Quantum 2+2, so i took a gamble (and a hammer and chisel ) and cut off the rivets holding on the stainless cover, with a quick spin it actually matches up quite well, only other thing i have noticed though is the filler hole is not concentric to the bodywork recess, more obvious now ive got a better fitting cap here is what I'm faced with 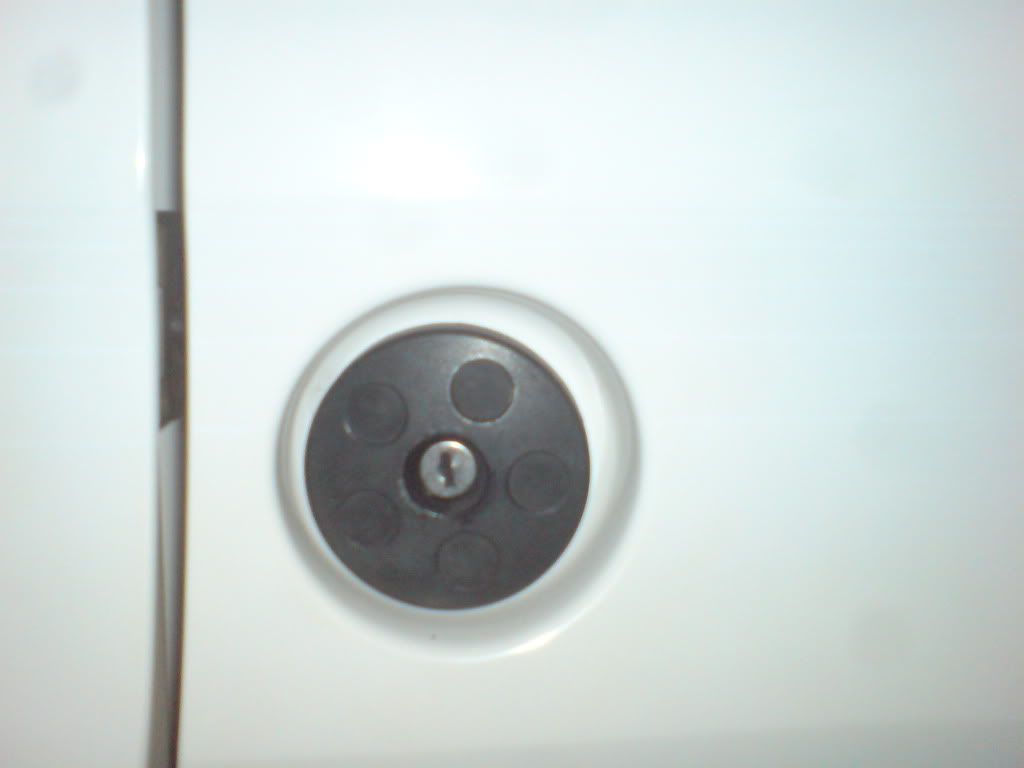 the cap is not concentric to the body so i worked out roughly where to cut the back to allow the stainless cover to slide over 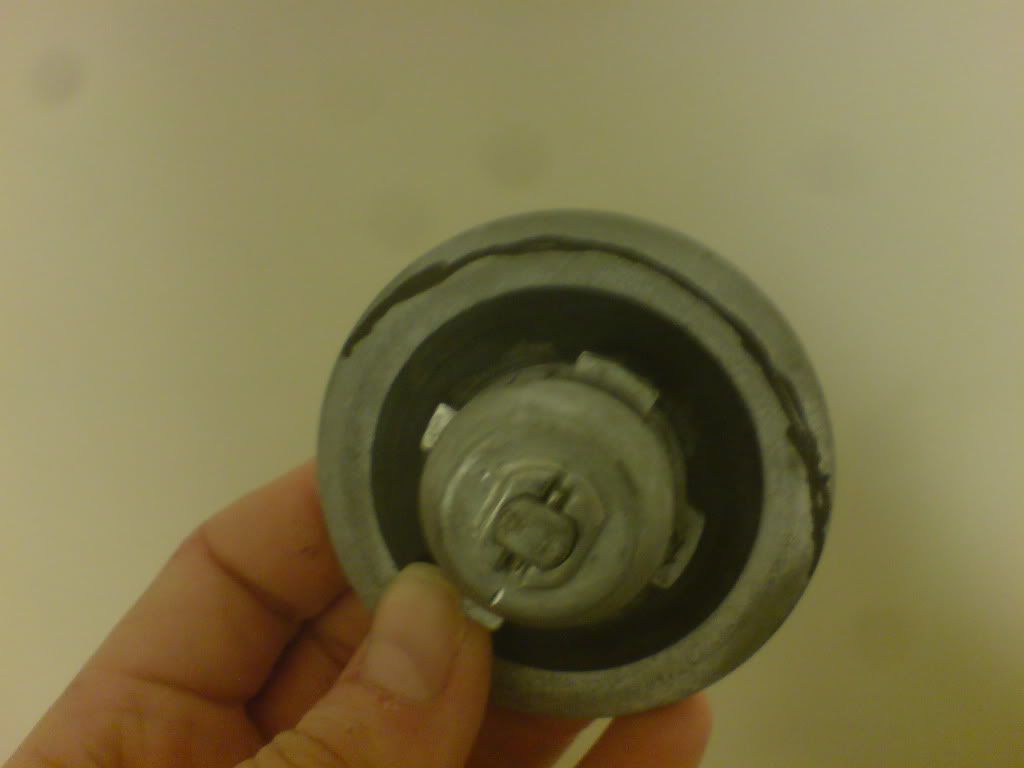 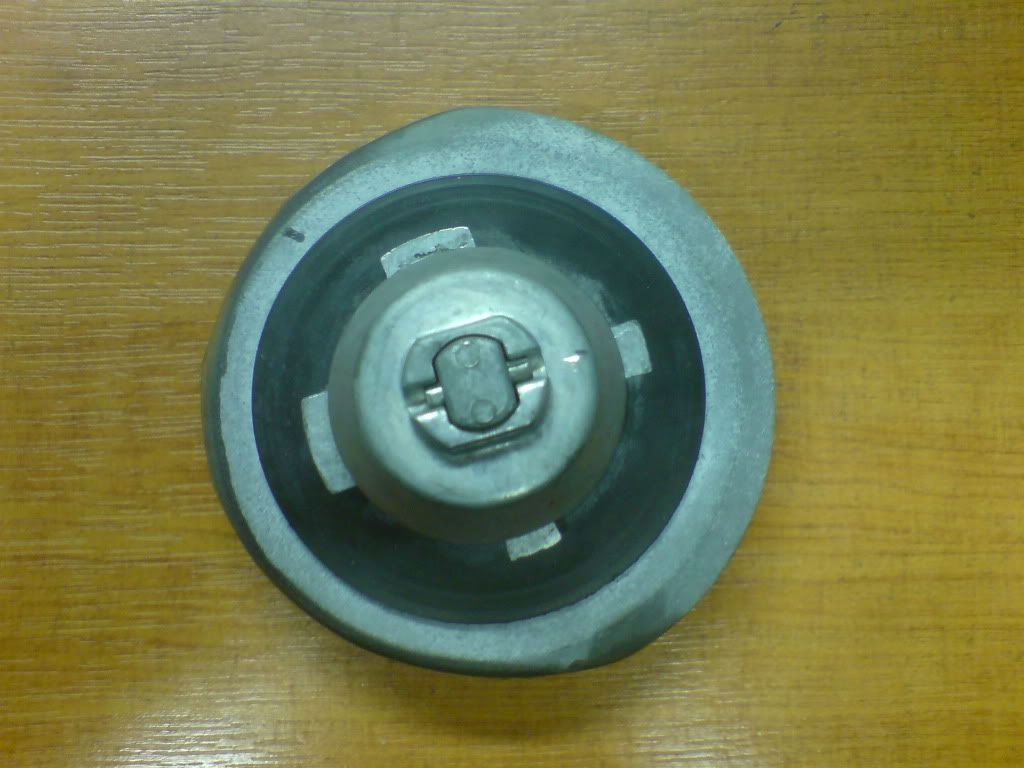 then trimmed the hole for the key to fit to suit 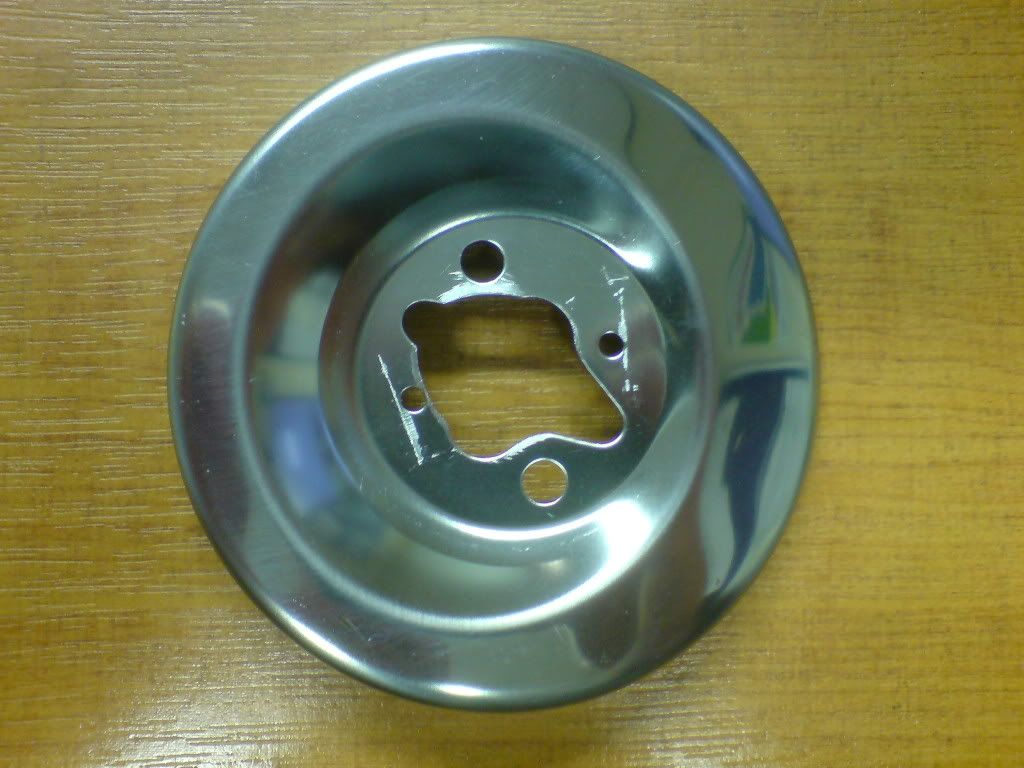 you can see the difference to the mounting from behind when the 2 halves are bonded together rotated and slid across 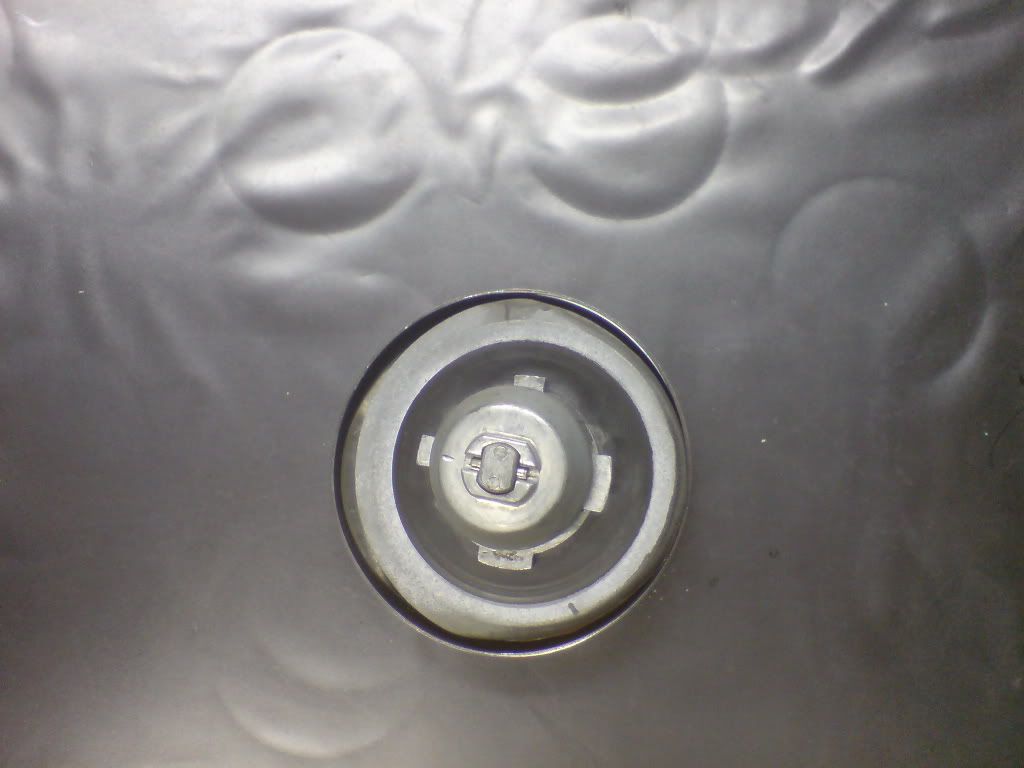 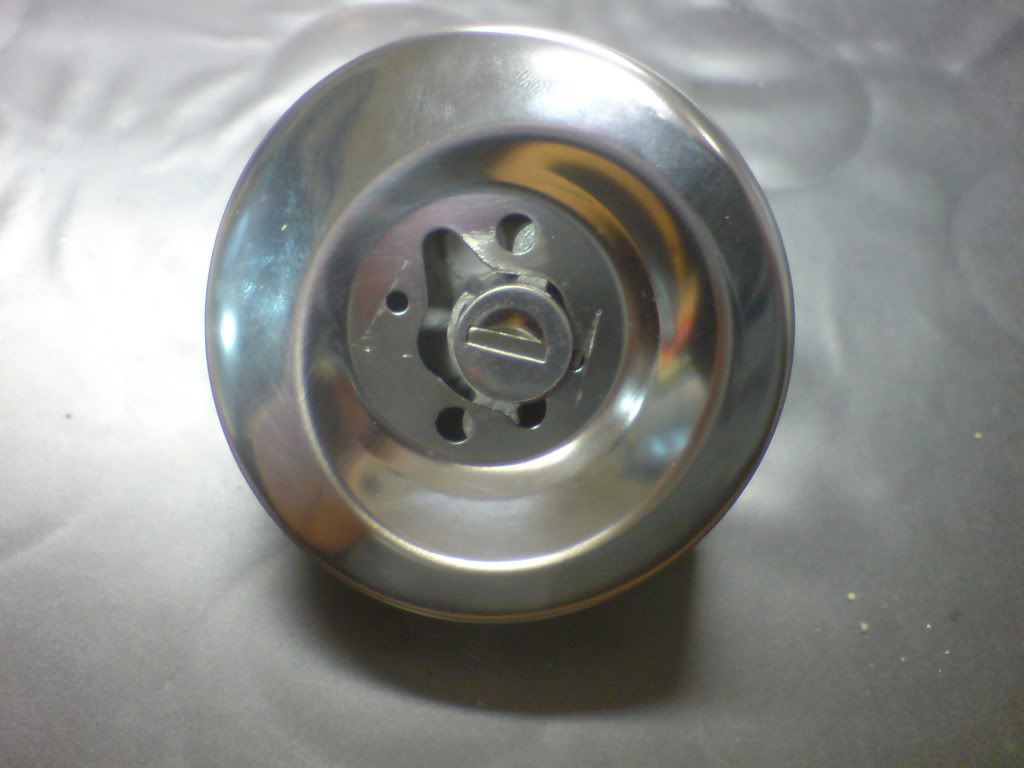 bearing in mind i was away from the car i think i guessed it rather well 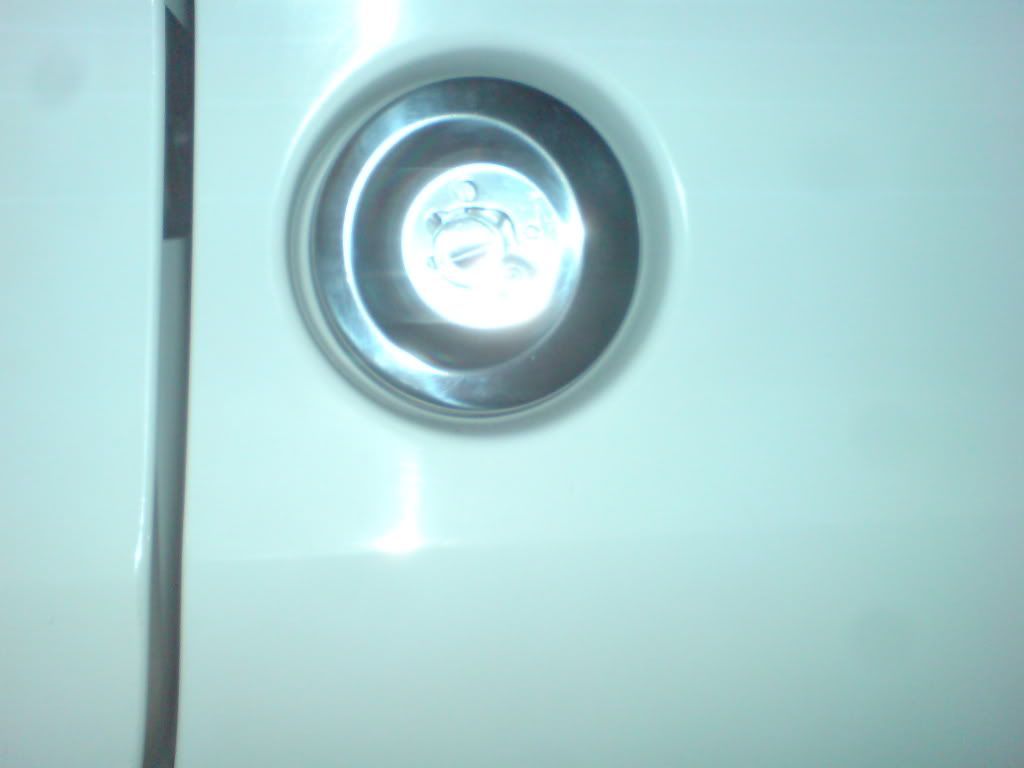 now i know its right ill bond the plastic insert in tomorrow, then job done ;D[/quote] |
| |
|
|
|
|
|
|
|
|
A nice piece of attention to detail.
I think ours was not quite flush too, but I don't remember it being quite as bad as that. I guess it's set by the angle the filler neck comes up from the tank.
Your old filler cap looks aftermarket. The Ford original had a more tiangular thing going on. I can't find a piccie ot the web, but it was a bit more Ford Cortina Mk1 ban-the-bomb tail-lights.
|
| |
|
|
jin
Part of things
  http://quantumforum.proboards.com
Posts: 69
|
|
|
|
, but it was a bit more Ford Cortina Mk1 ban-the-bomb tail-lights. those have to be one of the most sexiest tail lights ever to be fitted to a car    |
| |
|
|
jin
Part of things
  http://quantumforum.proboards.com
Posts: 69
|
|
|
|
today saw the finishing touches, i didn't fancy the black plastic center cap anymore as it looked a bit cheap and the hole was now in the wrong place due to the body being moved 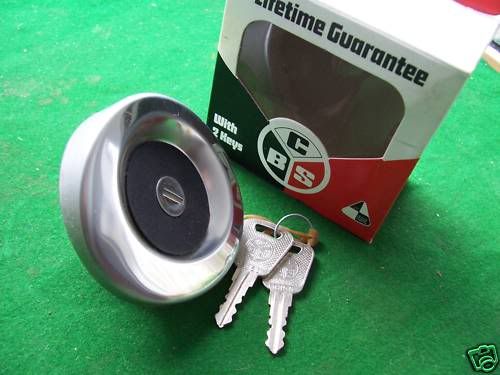 so what to do? ......... well, here's what 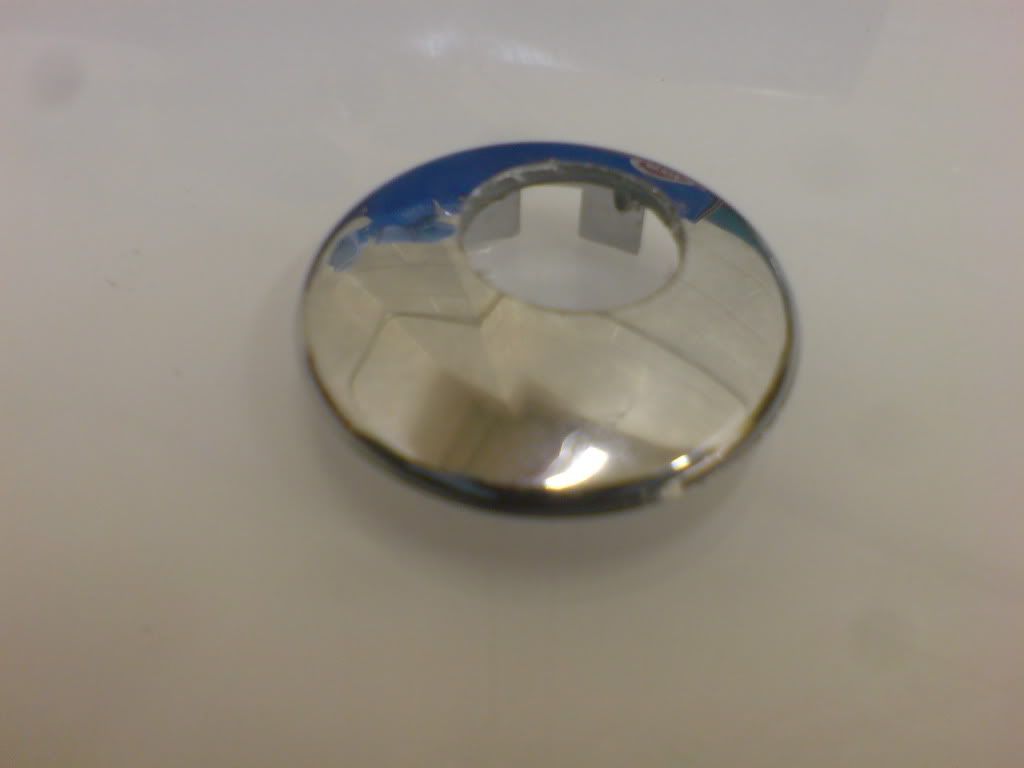 yes the top off a basin tap with a 16mm hole reamed into it 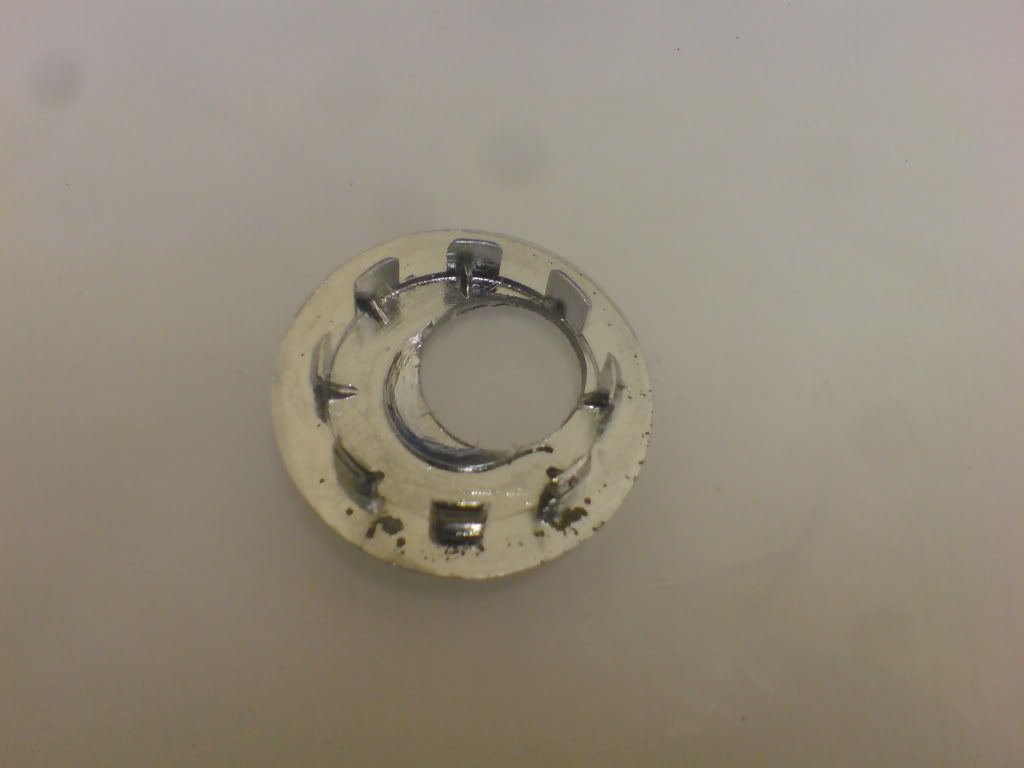 with the legs filed off it was ready to fit 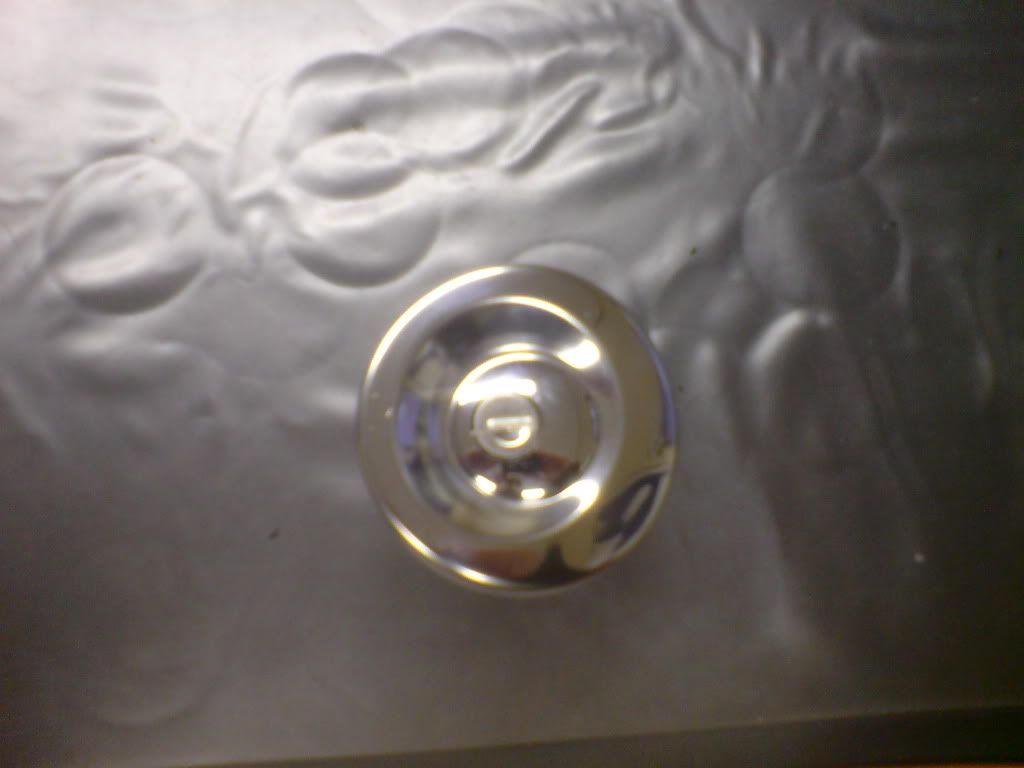 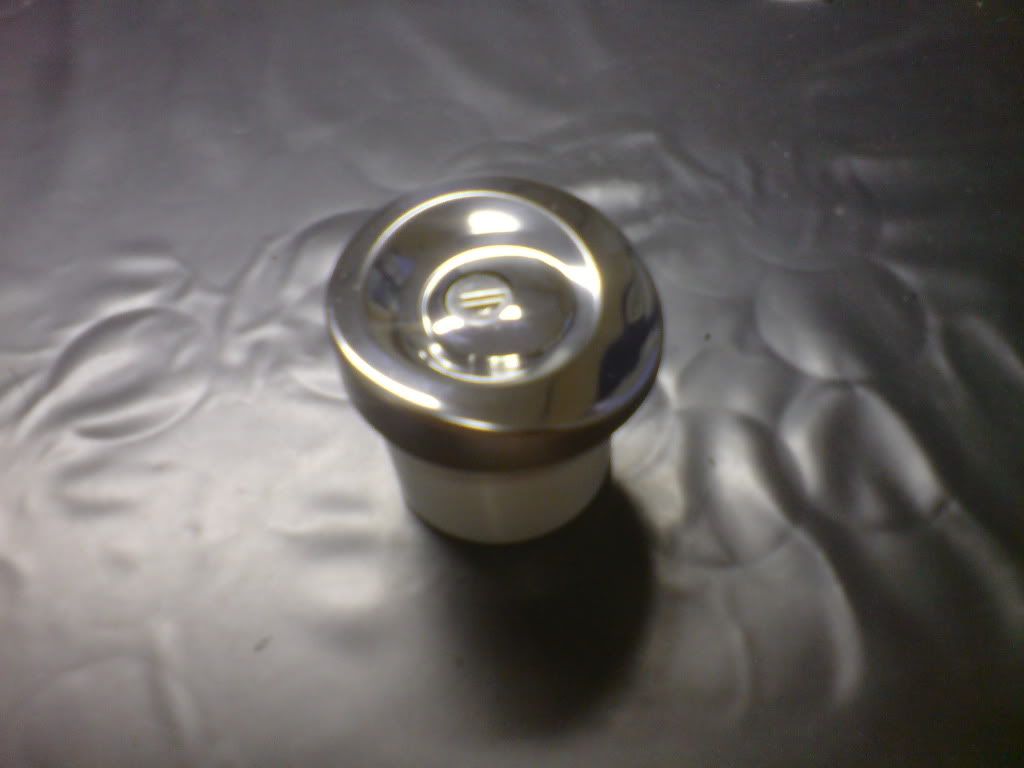 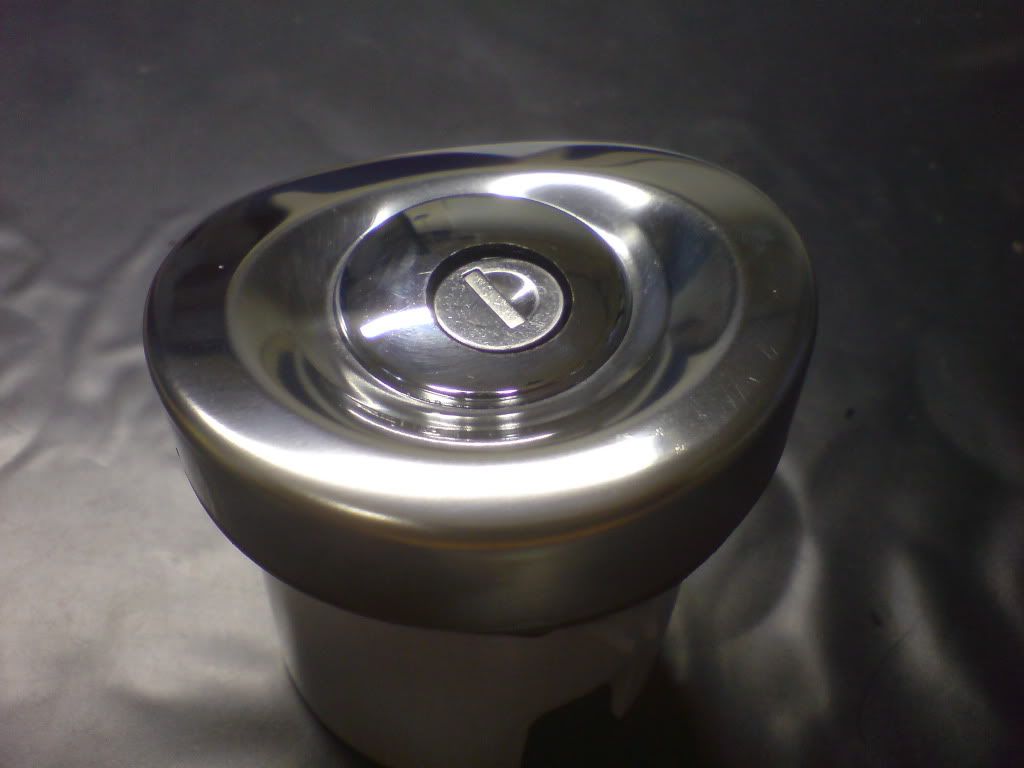 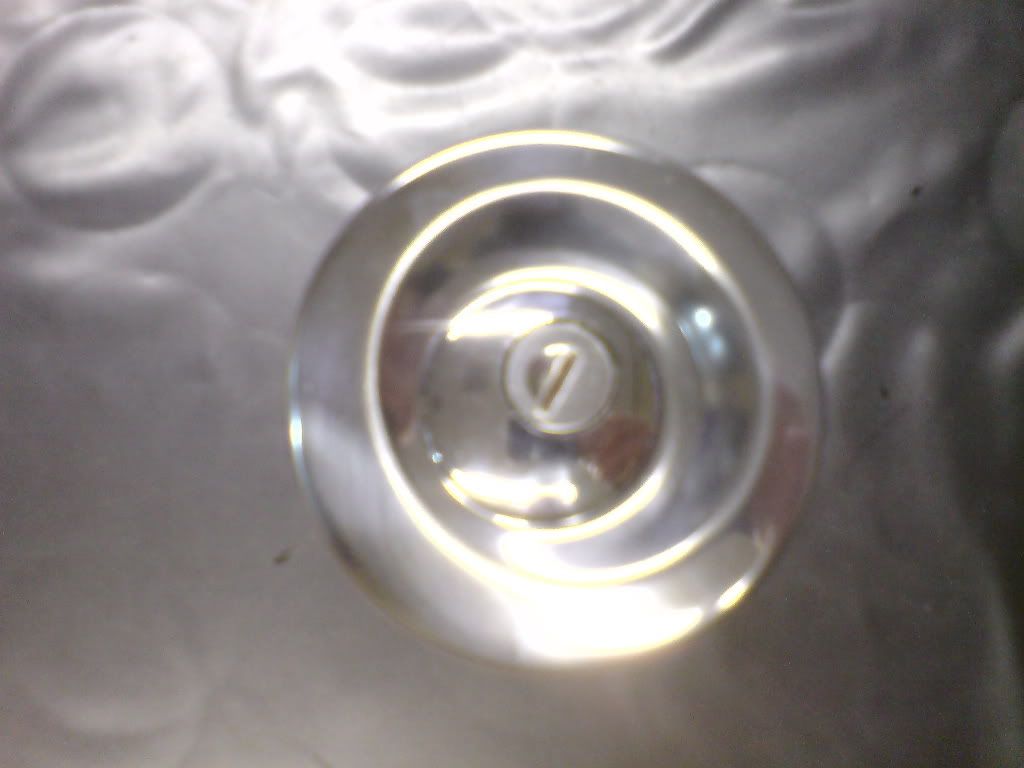 all done, so I've gone from this 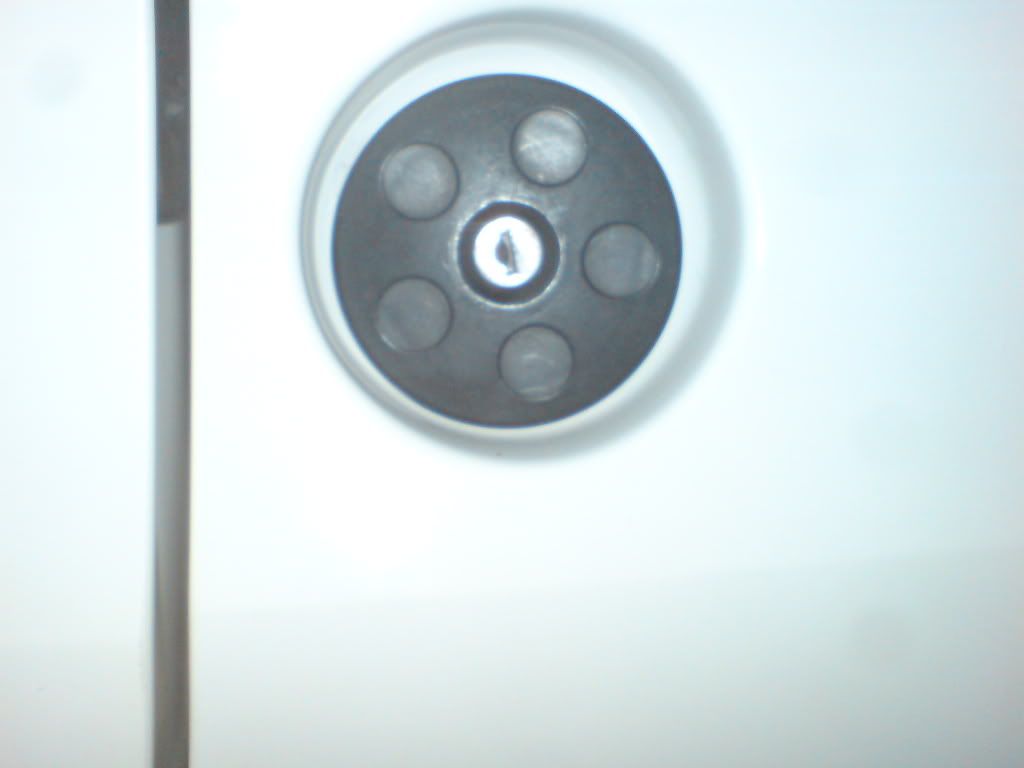 to this 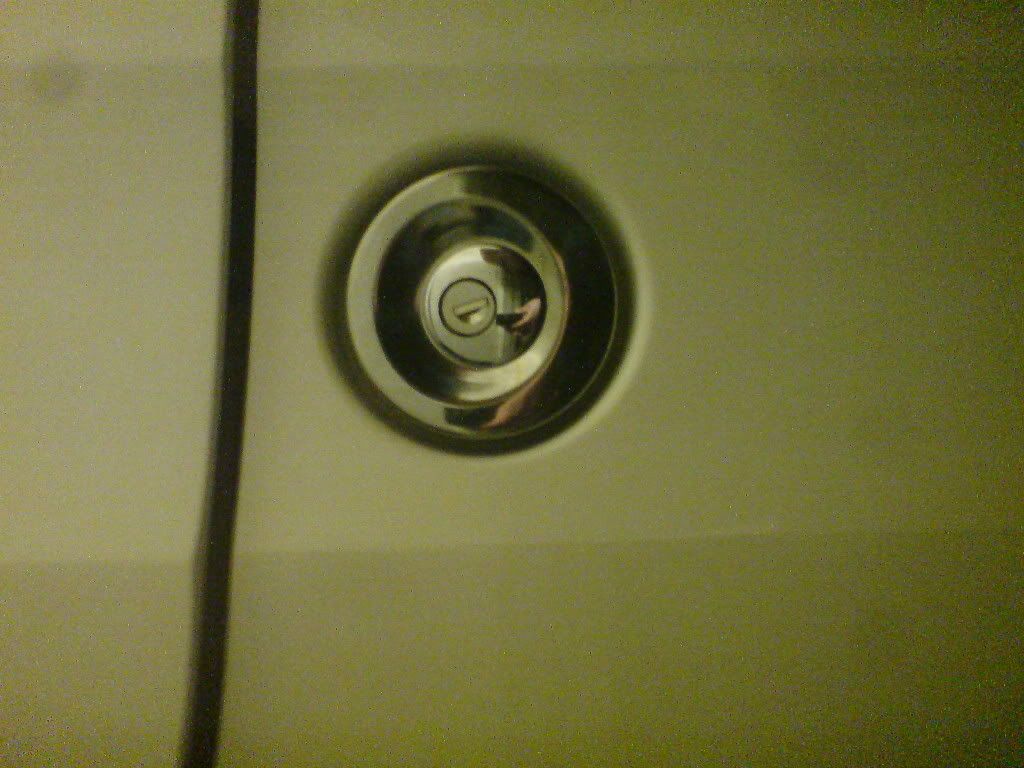 * no actual basins were harmed during this project  |
| |
|
|
jin
Part of things
  http://quantumforum.proboards.com
Posts: 69
|
|
|
|
bled my brakes today, took a while as space was tight in the garage and it was damn cold, but its done now non the less i used my super home made brake bleeder i made some years back 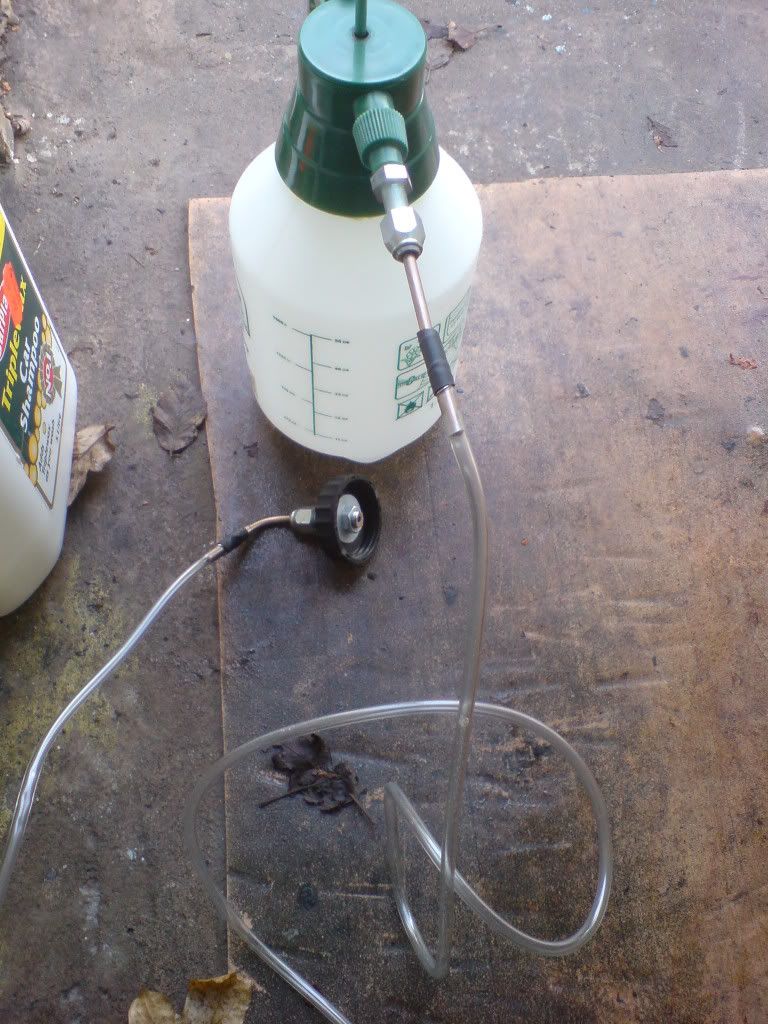 which consists of a pressure sprayer and a far length of screen wash hose, one end sealed to the bottle and the other to the cap 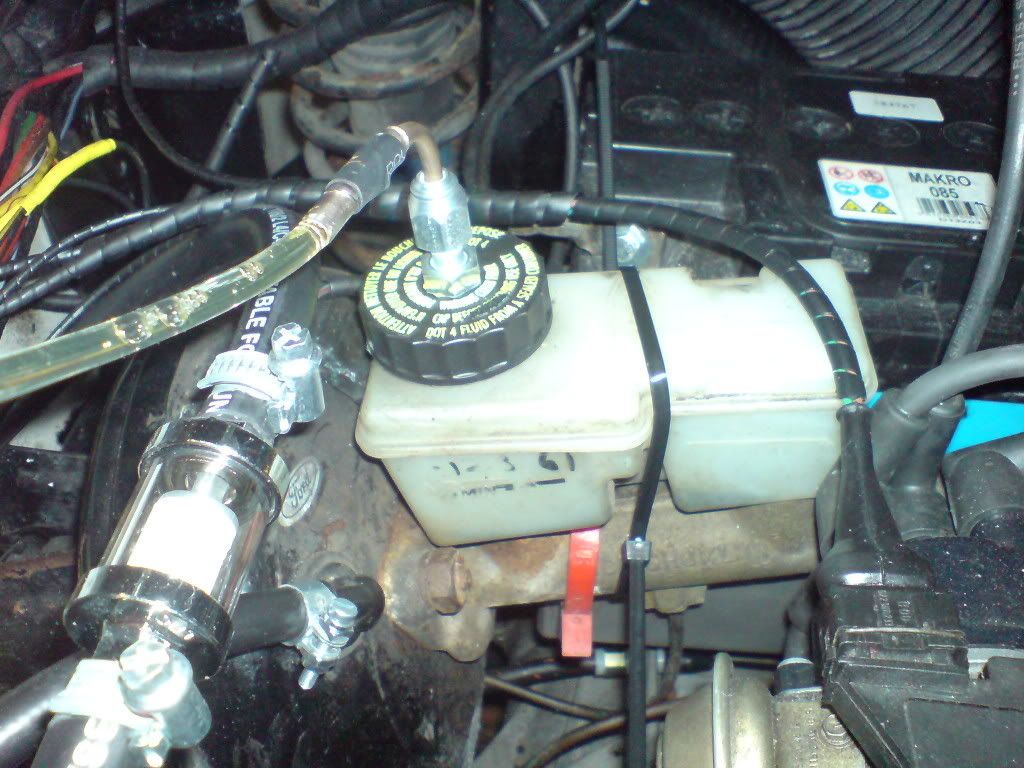 with the trigger locked to spray and the bottle filled with fluid you can begin, one push on the plunger results in a controlled push of fluid from the nipple, with the nipple open no pressure gets built up in the reservoir just a controllable flow of fluid from the bleed hose, one its running its just a case of working from one corner to the other, the hose to the reservoir is long enough to reach round the car ;D i also finished the engine bay wiring 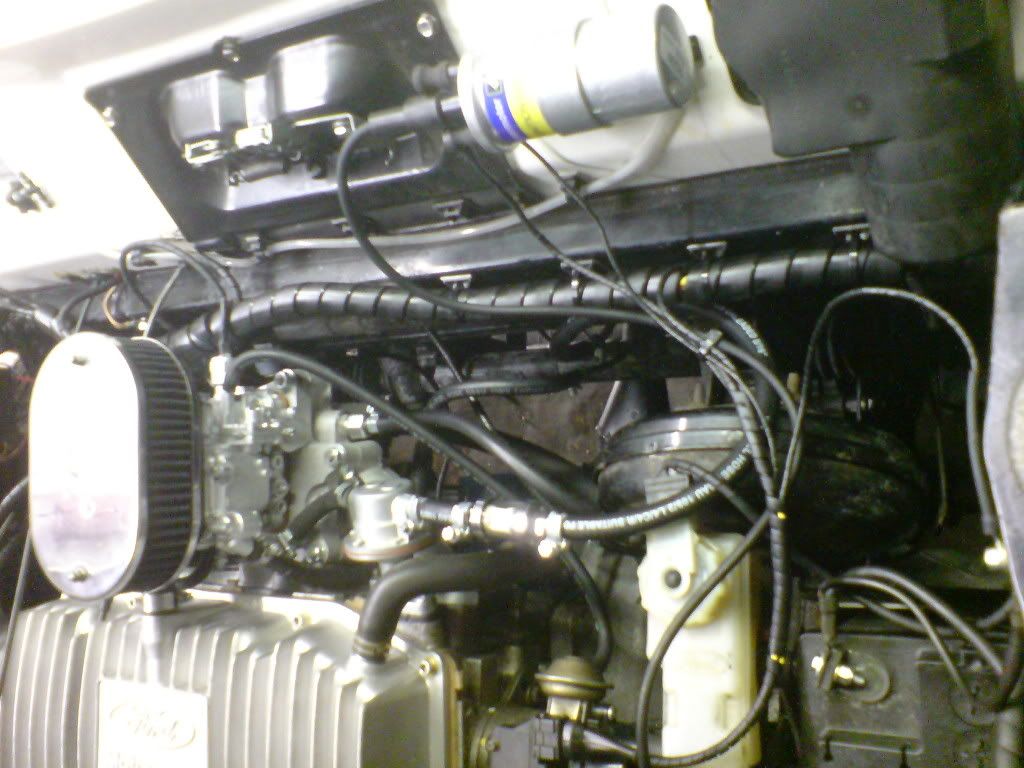 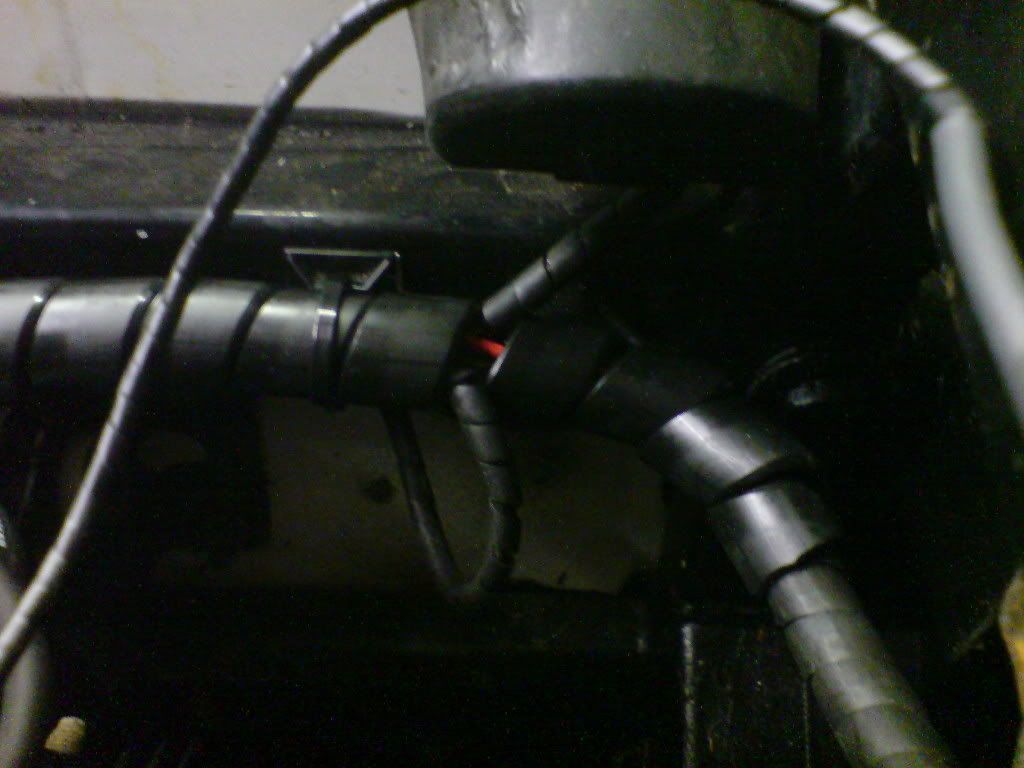 for a quite simple car theres a bewildering amount of wires going here there and everywhere, but its now all wrapped up and tied together, i just dread trying to find a fault in the wiring now cos theres miles of spiral wrap ;D ;D |
| |
|
|
|
|
jin
Part of things
  http://quantumforum.proboards.com
Posts: 69
|
|
Dec 29, 2010 17:29:19 GMT
|
i did manage to address the tailpipe as this will dictate where the rest of the system bolts on so best to do this before making more holes in the car, the standard Ashley system has a proper intergalactic melon launcher for a tail pipe which stood out too much as with most fiestas / Quantum 2+2s 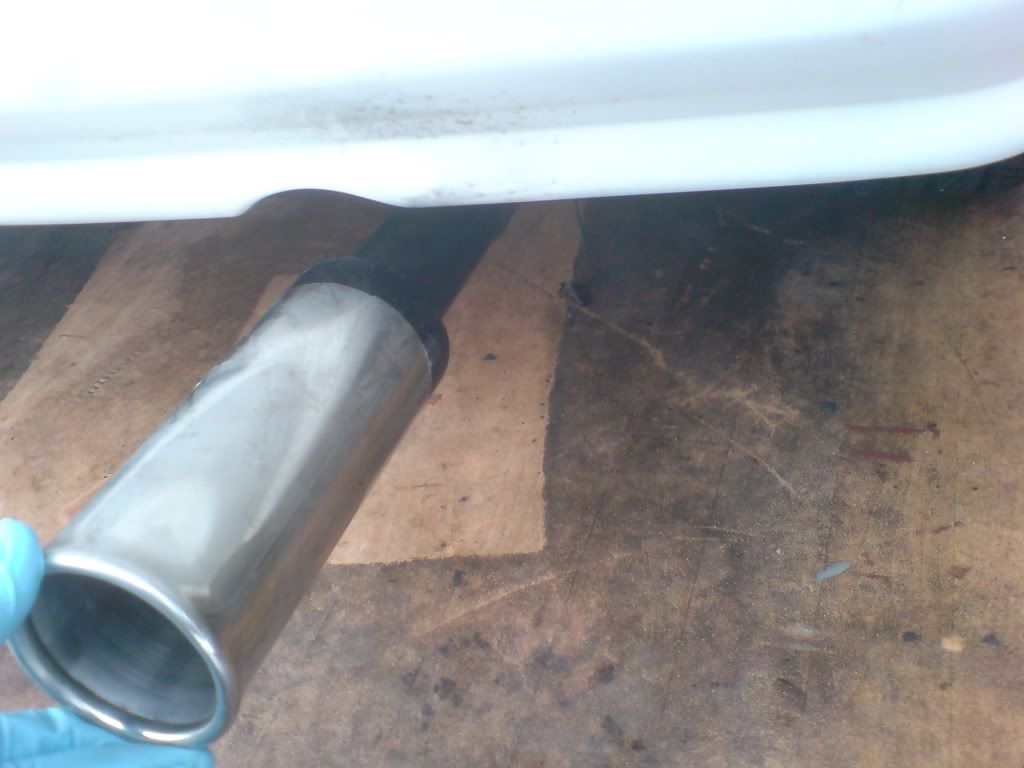 and without it it was too short 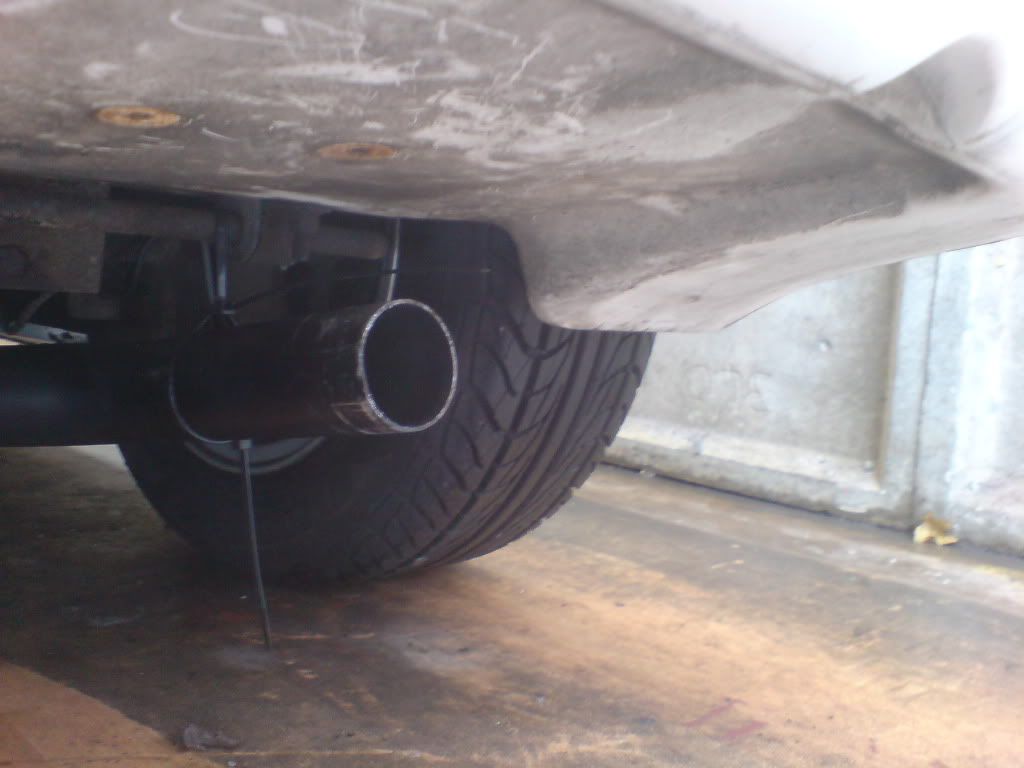 so i bought a trim off ebay but rather than nip it on with a single self tapper i drilled and pop riveted it in 3 places and bonded it also with polyurethane. 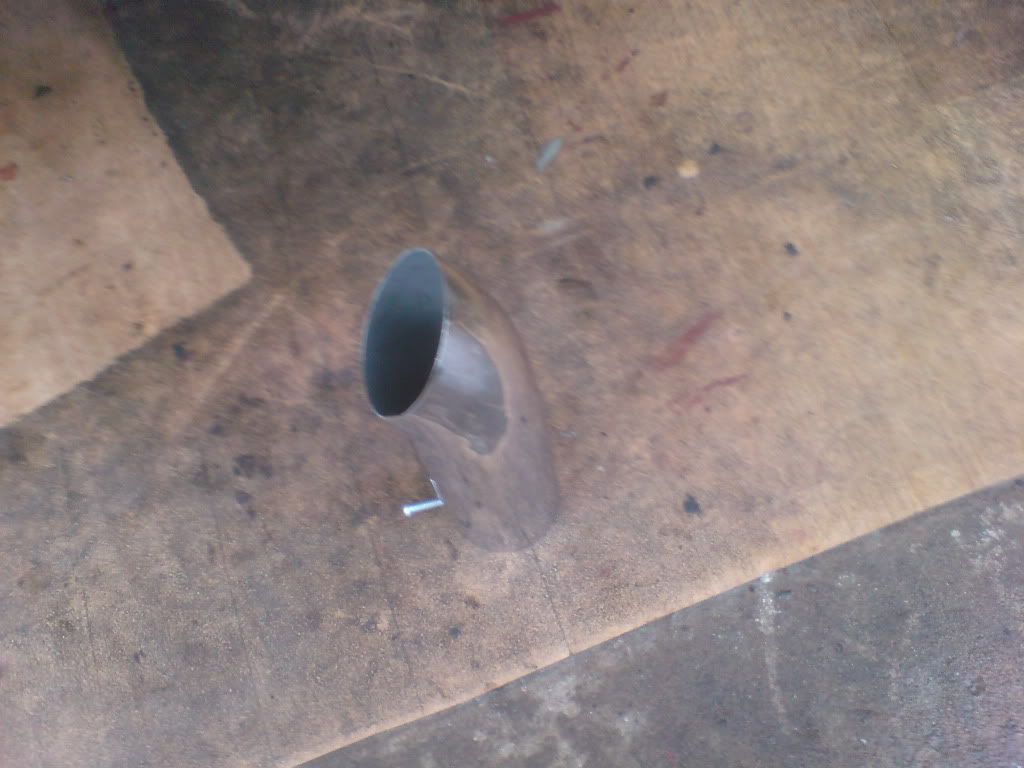 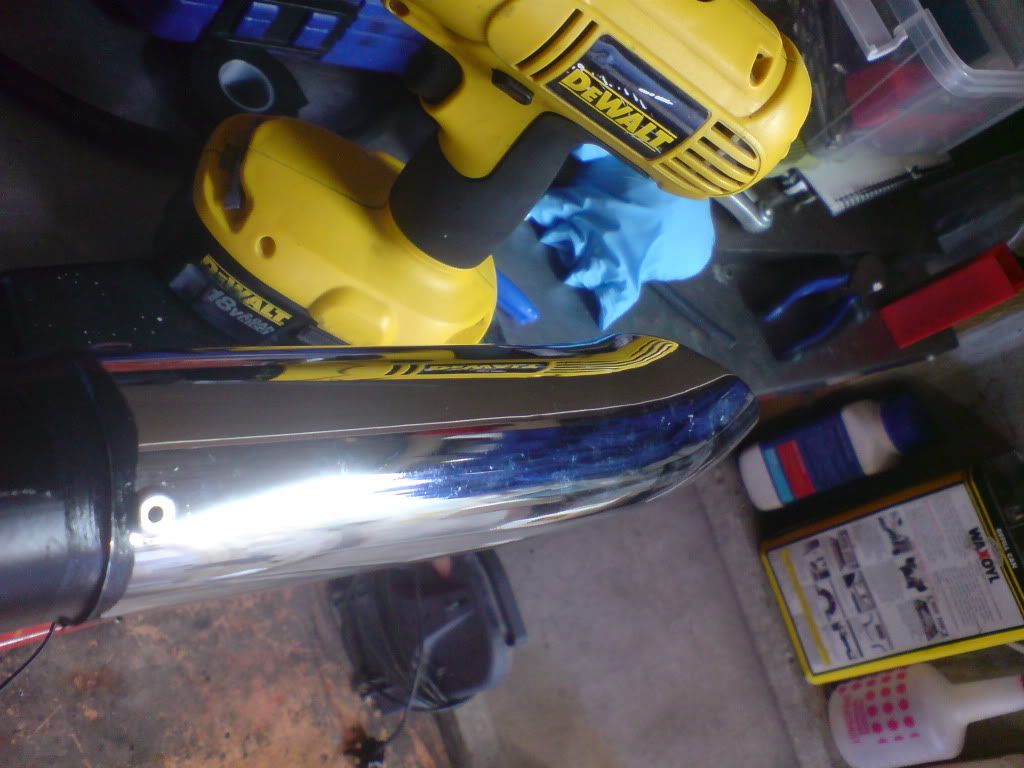 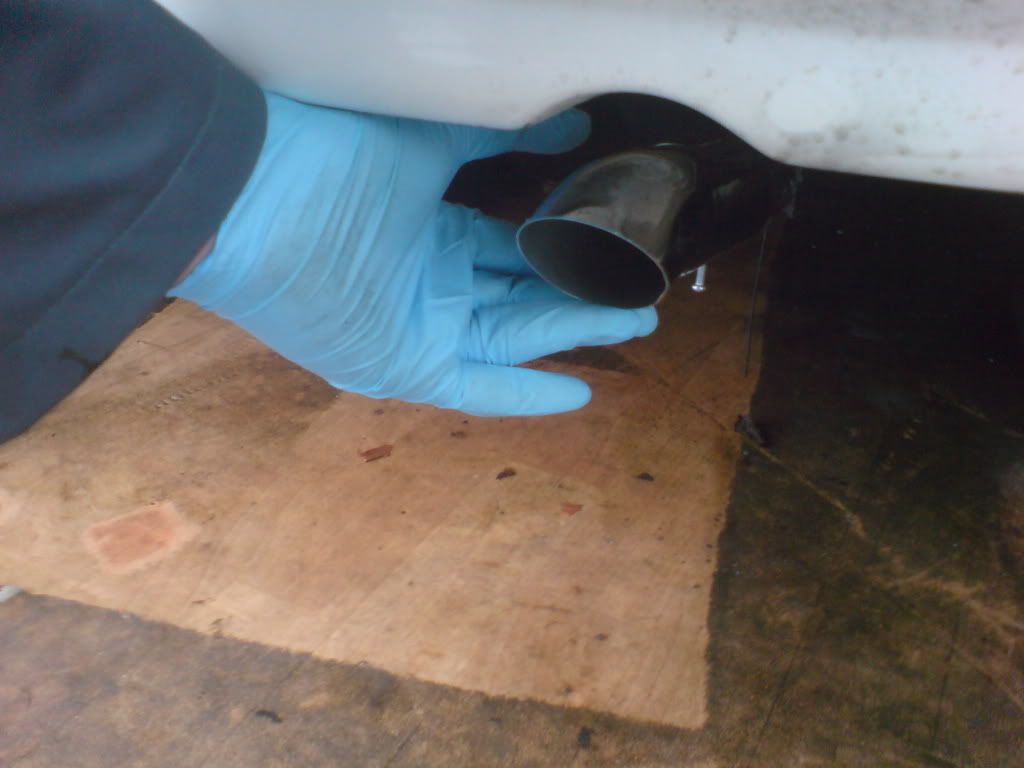 if all goes to plan ill actually fit it tomorrow and finally bolt the exhaust mounts to the car (ill have to do something with it because the wife is already moaning about it lying in the spare room and the polyurethane making a smell, i quickly counteracted this impending strop by fitting the new curtain pole she wanted but i don't think a curtain pole alone will hole her off) |
| |
|
|
jin
Part of things
  http://quantumforum.proboards.com
Posts: 69
|
|
Dec 29, 2010 17:29:45 GMT
|
at long last ive got a well hung exhaust (oooh errr) using my brackets i made ive mounted it at the rear most end with the rubber strap 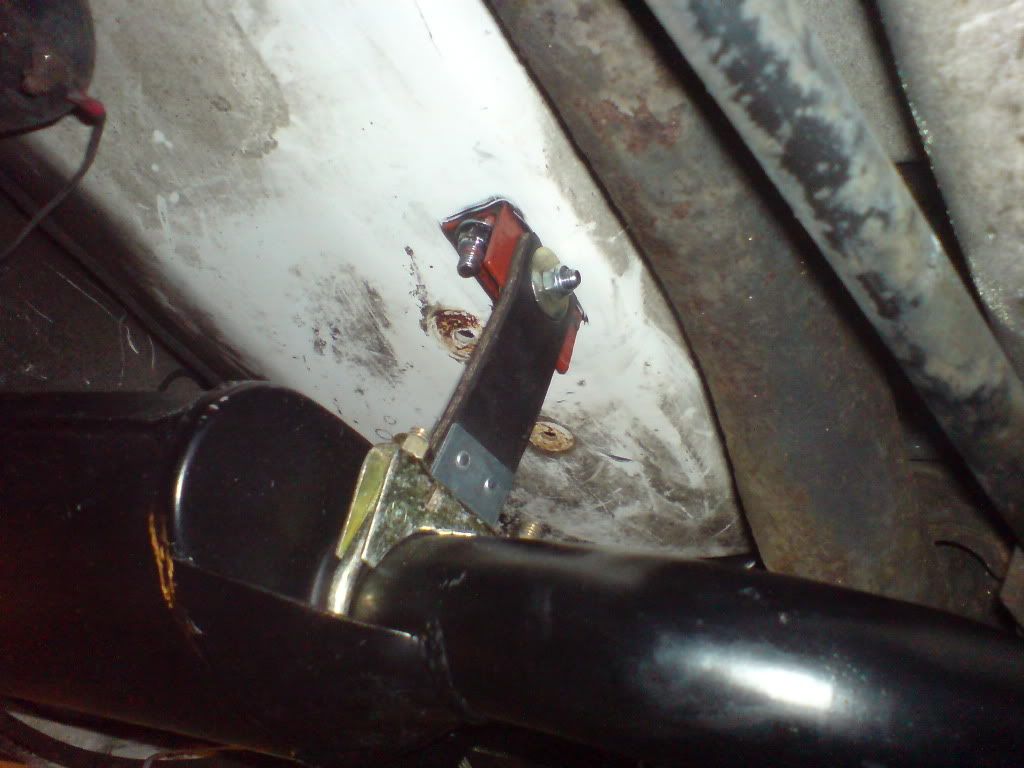 and the backing plate within the rear bulkhead 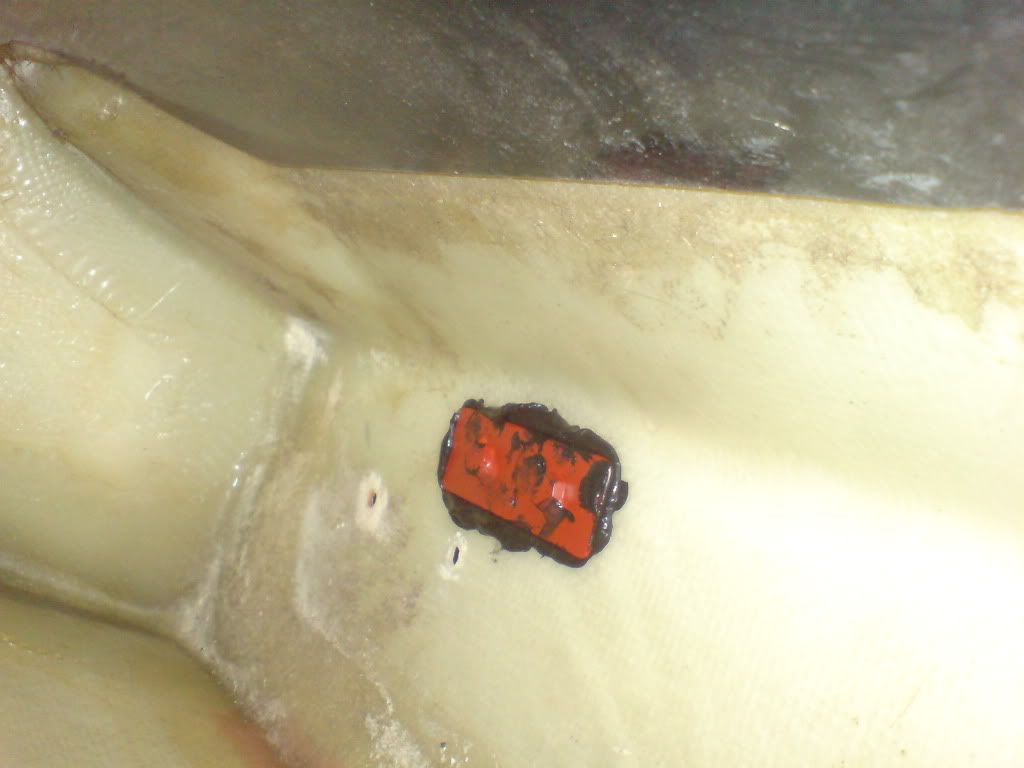 after a bit of head scratching i figured i could drill the handbrake mount from inside the car (space too tight from underneath) 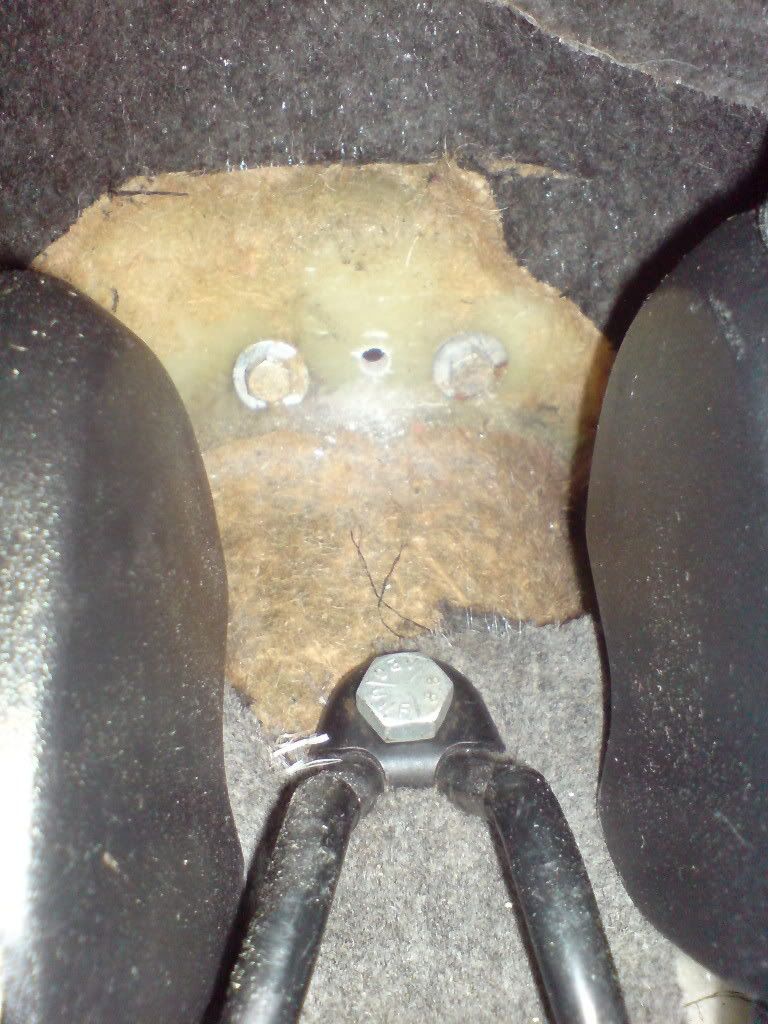 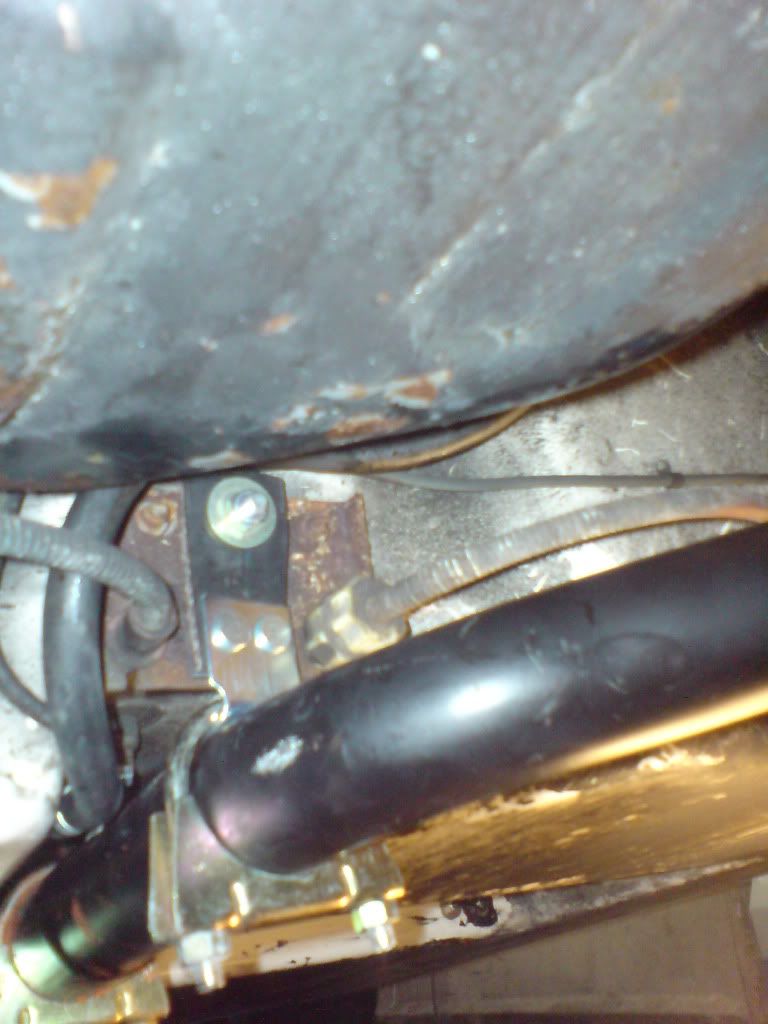 i even took the opportunity to blank some of the old unused holes under the car 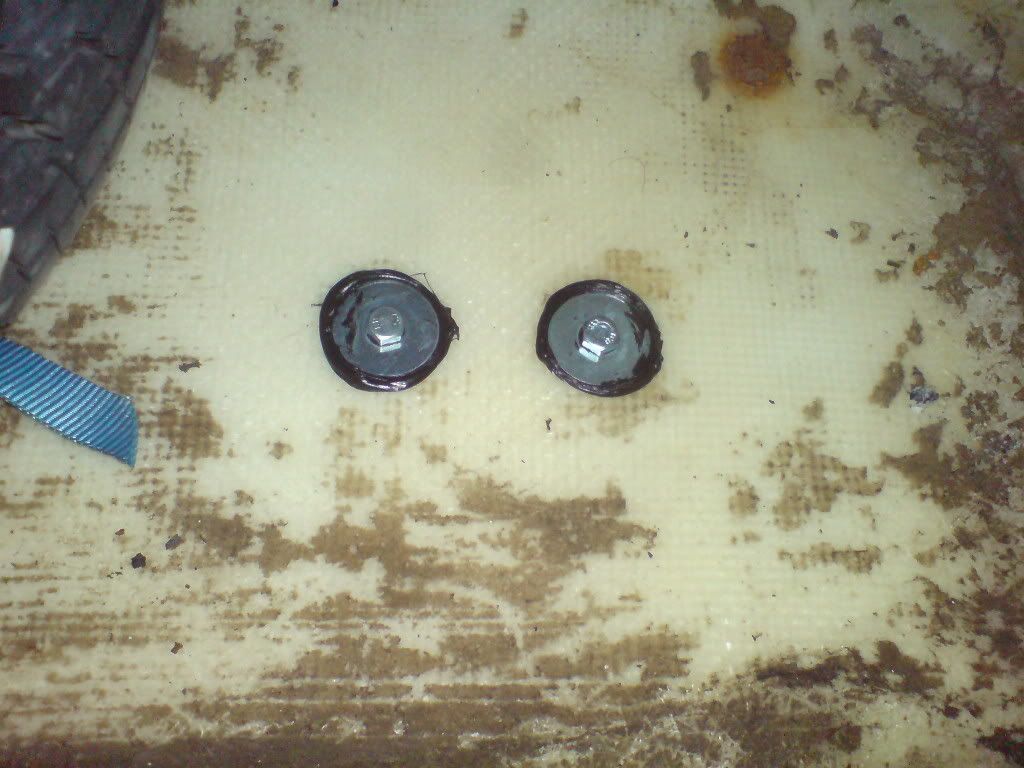 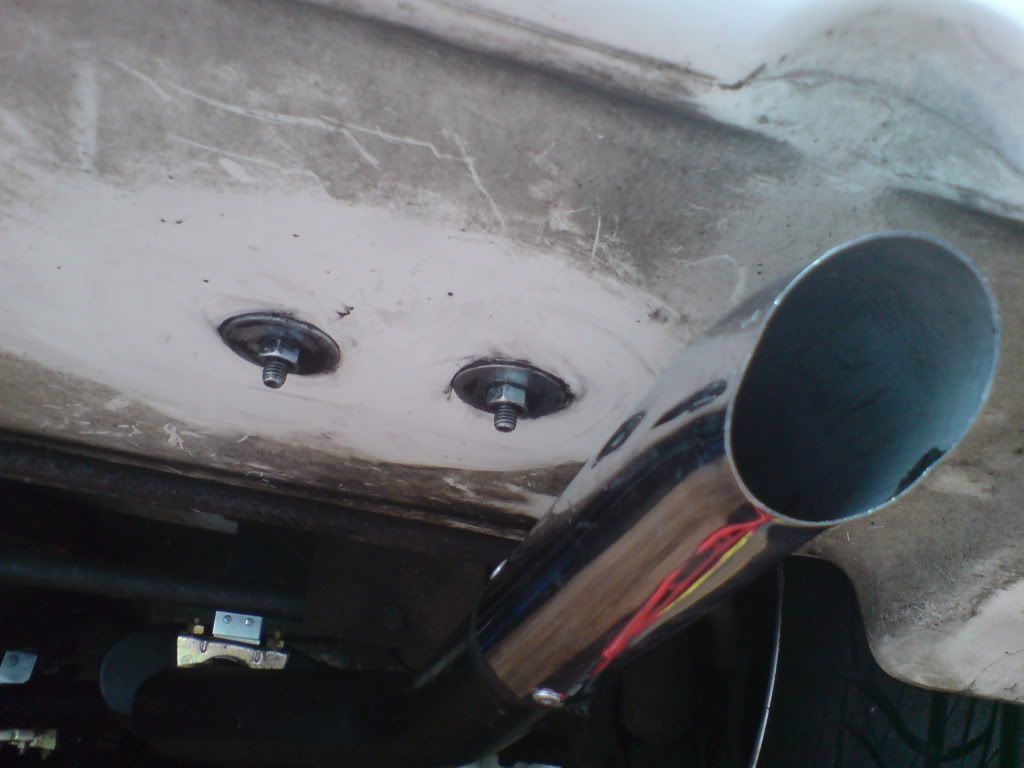 sealed with polyurethane so now the exhaust sits nicely with no sideways movement at all and looks like it wont catch anything in use (except maybe the odd speed hump but time will tell) 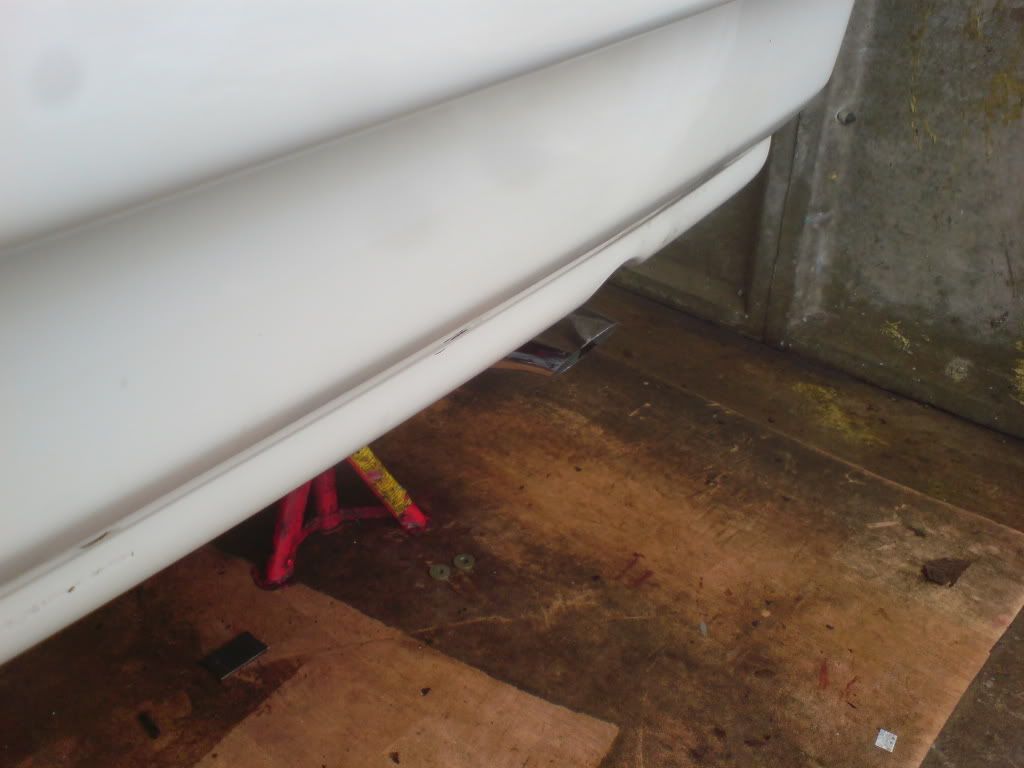 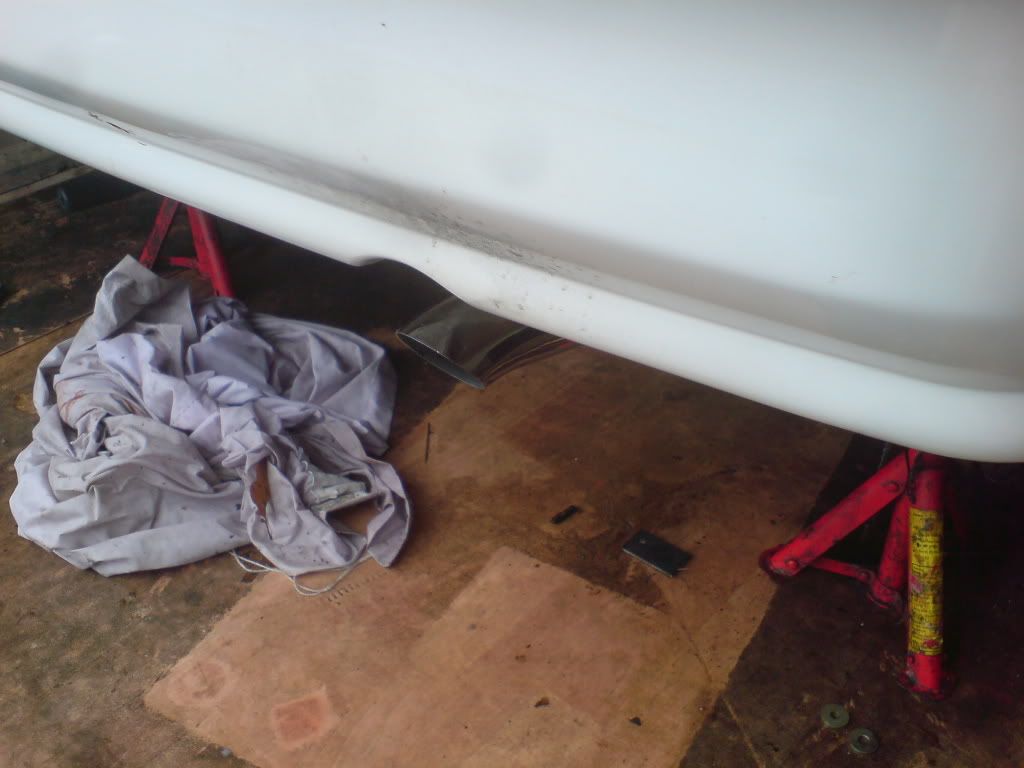 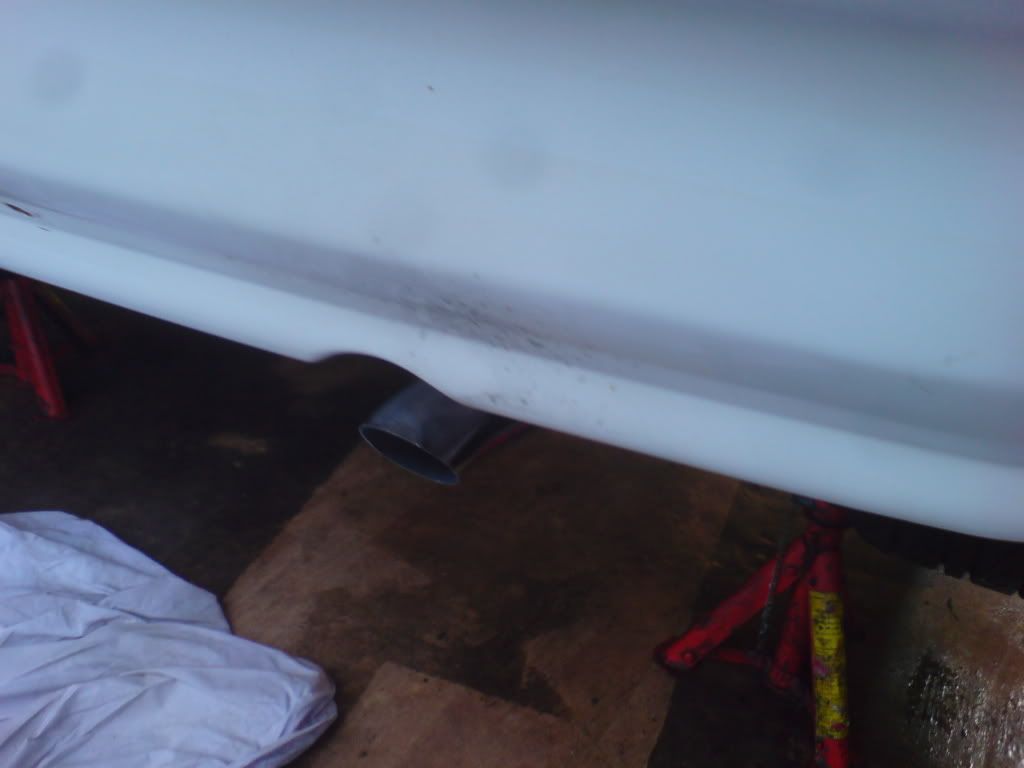 stupidly i did drop the rear section once out the garage door as i opened it since it was leaning against the inside, worryingly id only put it there about 5 mins beforehand but luckily it didn't hit the car. i feel the exhaust is mounted securely but feel an extra mount wouldn't go amiss, anyone got any suggestions? i did think bout drilling the rear edge of the front sub frame at the bulkhead and putting a strap there but not sure if the exhaust heat will burn it? either way I'm happy as ive been trying to get this done for ages, I'm pretty much back to square one now before i blew up the old engine... happy days ;D |
| |
|
|
|
|
|
Dec 29, 2010 19:36:28 GMT
|
|
Nice job on the exhaust trim, and as for the filler cap : I thought I was fussy :-), but looks the business.
That looks like about the ideal Q2+2 exhaust arrangement.
To me, the problem area seems to be where it cranks around the gear linkage box, and can be too tight to the tunnel. If anything, I'd look to see if the gear linkage could be moved to one side on elongated holes to give more clearance. But that's only if you still find it rattling up front.
Darryl
|
| |
|
|
jin
Part of things
  http://quantumforum.proboards.com
Posts: 69
|
|
Dec 29, 2010 20:16:13 GMT
|
If anything, I'd look to see if the gear linkage could be moved to one side on elongated holes to give more clearance. But that's only if you still find it rattling up front. Darryl hmm, thats a good idea nice one mate, if i tuck the exhaust up into the tunnel it does just catch the linkage, for now ive got it positioned slightly downward - as much as i can without being too low, only time will tell if it is too low but if it is i may well elongate the holes like you say cheers mate  |
| |
|
|
jin
Part of things
  http://quantumforum.proboards.com
Posts: 69
|
|
|
|
been busy tonight after thinking it over i thought the rearmost part of the back section could do with a bit of extra support so i got another hanger 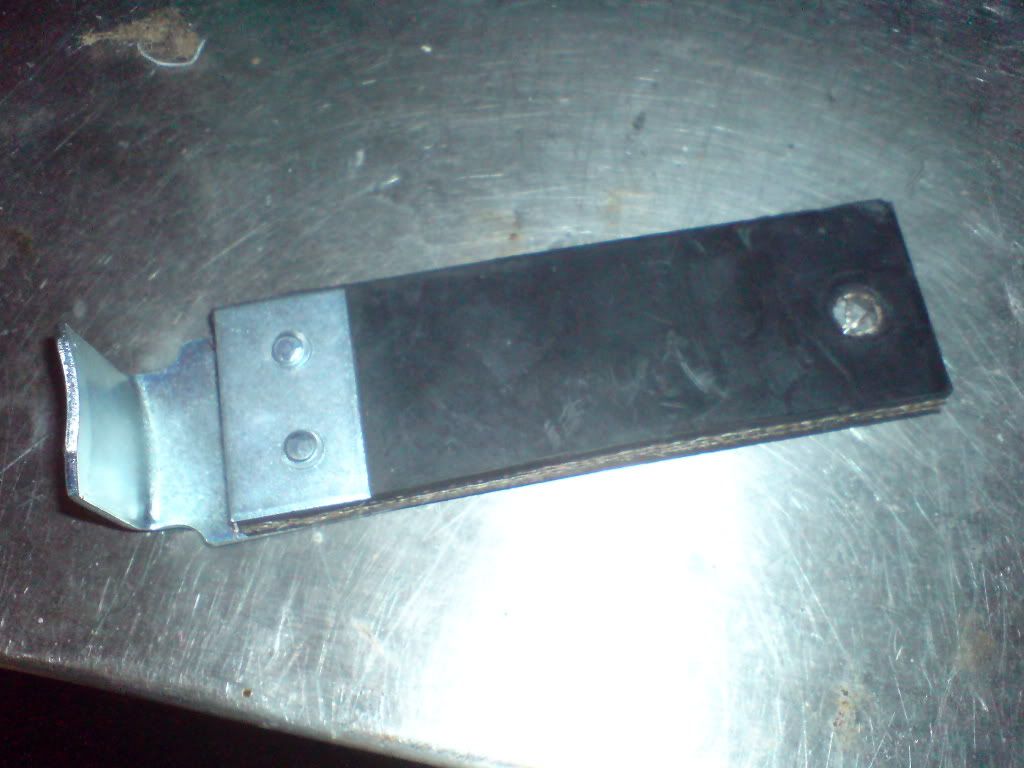 chiseled off the rivets 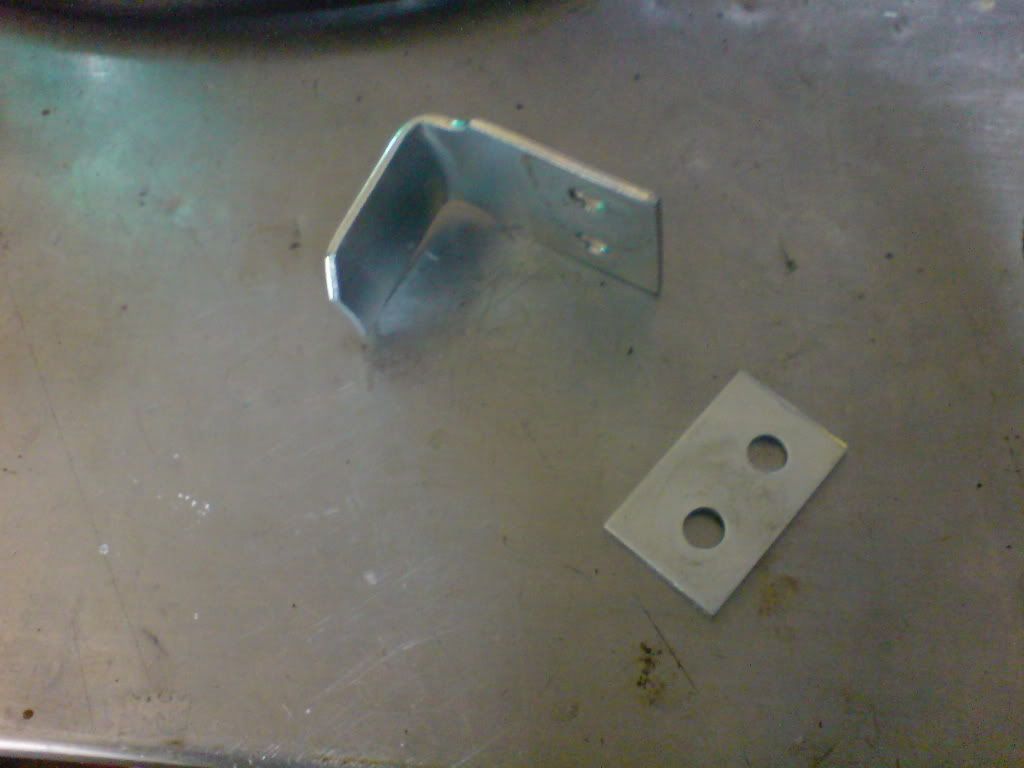 and mounted it side on since there was not enough clearance above as with the other 2 mounts 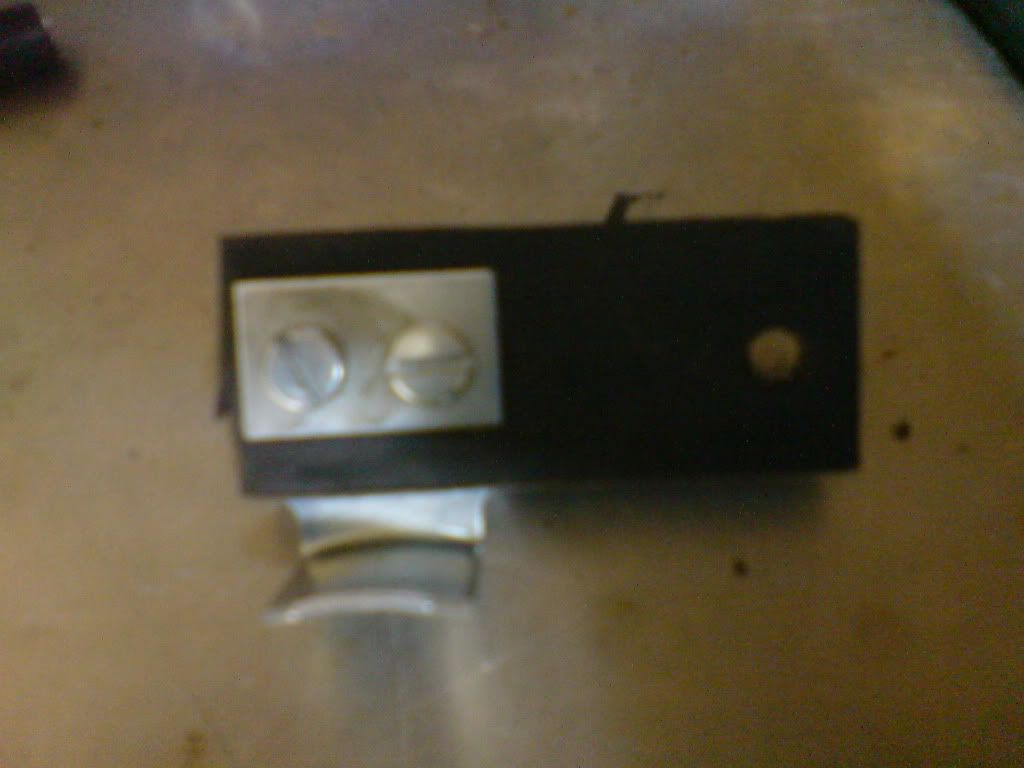 and here we have the final mount 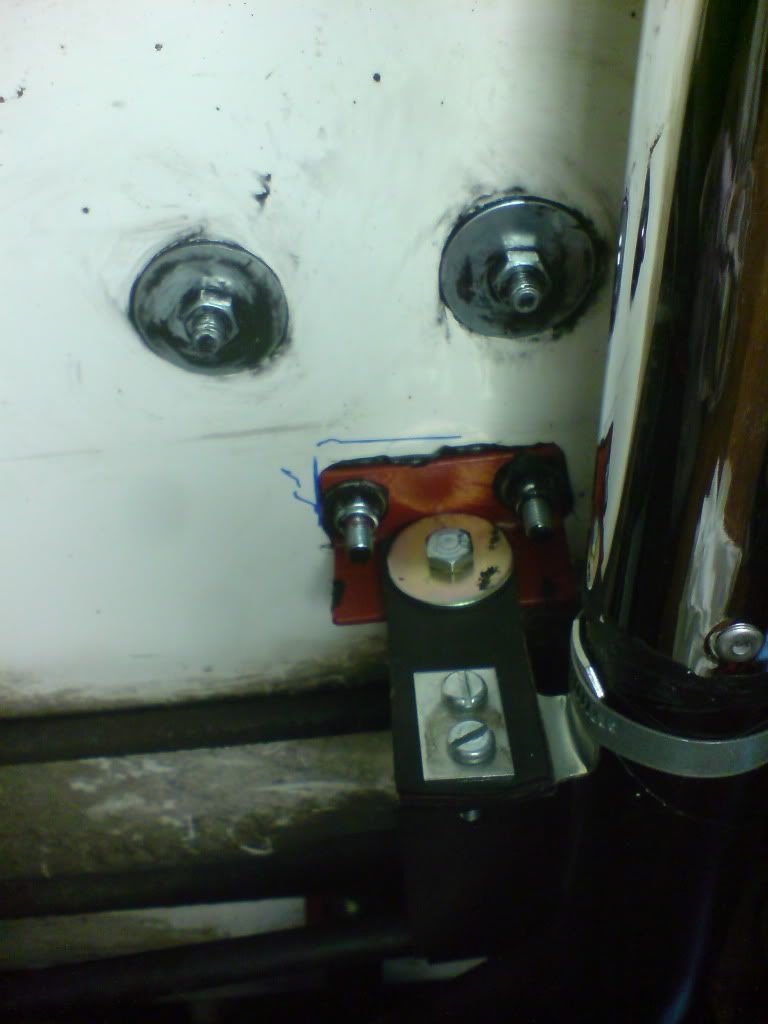 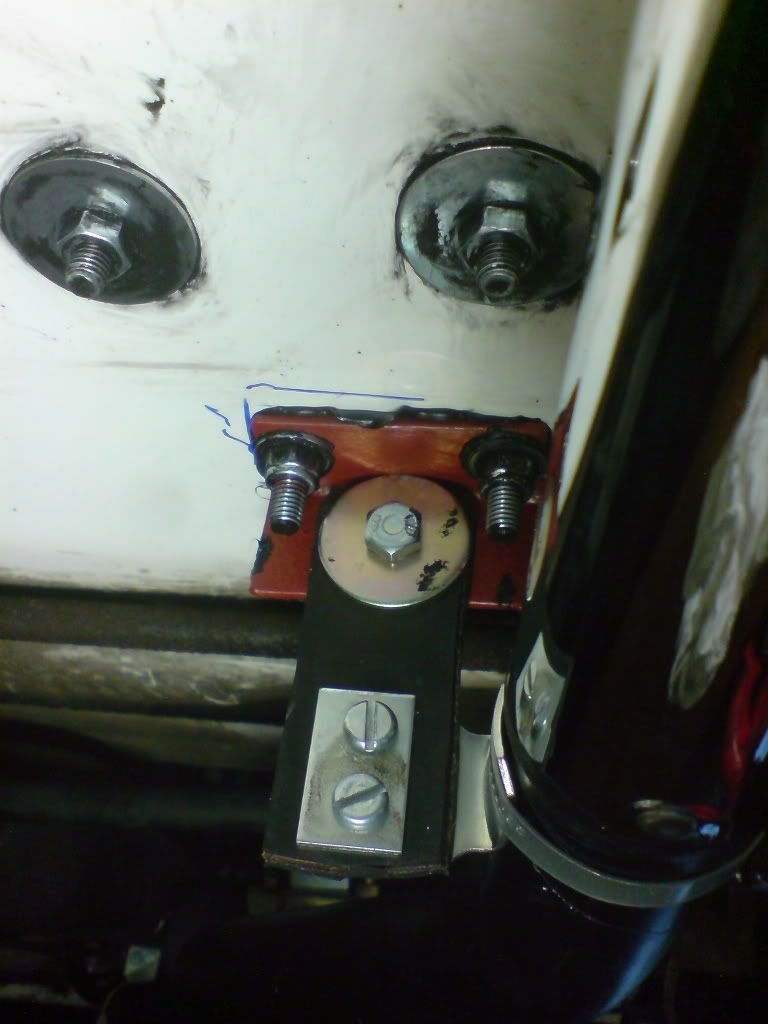 it is now totally flex free side to side, no amount of wiggling the tail pipe will knock any part under the car, which was one of my main issues wit the old system. ive also tidied up some of the heater hoses and connections and fitted the speedo cable, as far as i can tell i have finished the car- by which i mean its now in the same usable state is was in before the old engine went pop ok so theres still loads to do, ill be starting the rear trailing arms and mounts very soon but at least now it is technically back together ;D |
| |
|
|
|
|
|
|
|
Lots of impressive work there  I've had to modify every XR2 exhaust system I've ever fitted to either a 2+2 or a Saloon. I'm still not happy with the Zetec Saloon exhaust as the mounts I used are so solid I'm getting vibration through the whole car past 5000rpm. I've tried using a version of that rubber strap you're using in the past. Although it worked well at first I found it deteriorated and eventially snapped after about 6 months so I'd keep an eye on it's condition. Perhaps I just give my car a hard time though.  None of the Quantums I've had have had so much of an angle on the filler neck. I wonder if yours is cut correctly or has been replaced with something off a different car? On the Saloon I have now the standard XR2 cap sits perfectly in the bodywork with no modification to the cap and I'm sure our old 2+2 was the same. |
| |
Last Edit: Jan 2, 2011 19:44:18 GMT by Skip_Rat
1989 Saab 900i Convertible
1993 Rover 416 GSi
|
|
jin
Part of things
  http://quantumforum.proboards.com
Posts: 69
|
|
|
|
cheers mate, ive had to modify this one, i cut a slot and welded it and put a flexi section in it, more joins than id hope for but thats life cheers for the heads up on the straps, ill keep me eye on em  |
| |
|
|
jin
Part of things
  http://quantumforum.proboards.com
Posts: 69
|
|
|
|
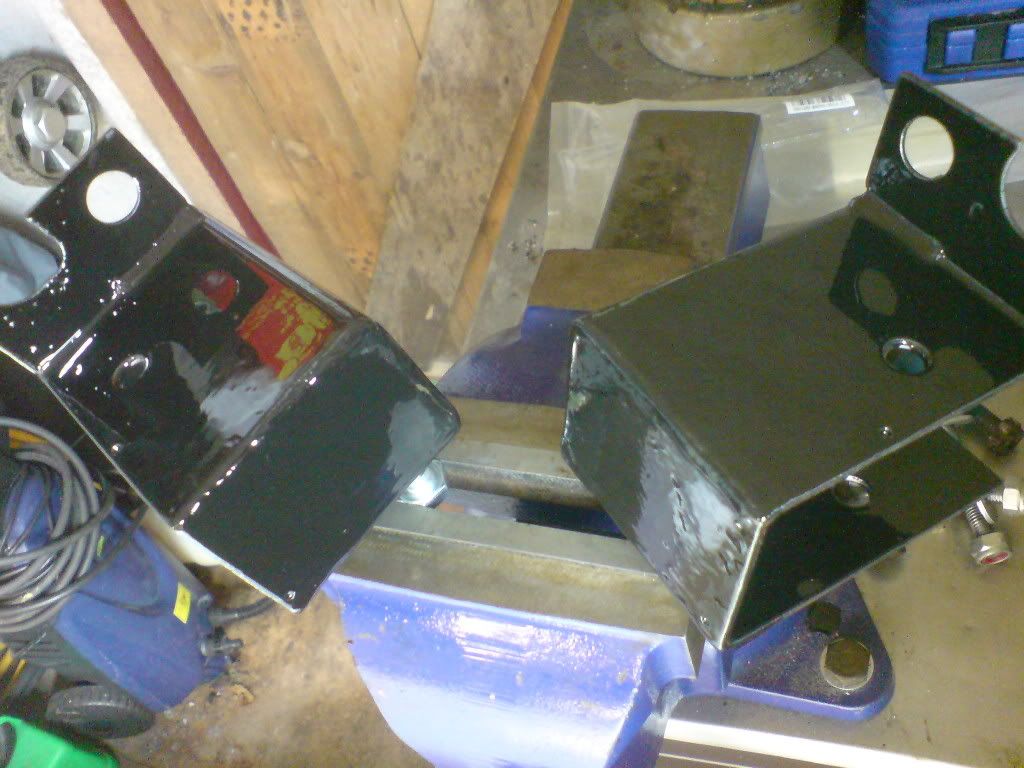
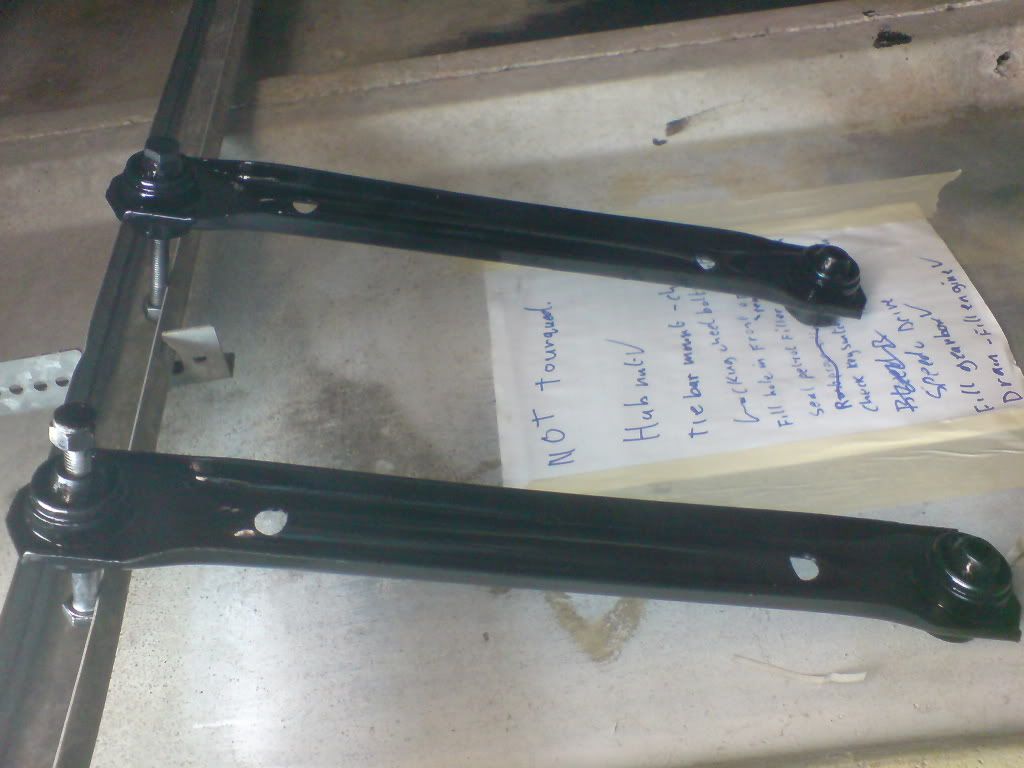
and they re off........ the trailing arms that is my funky spanner did a great job 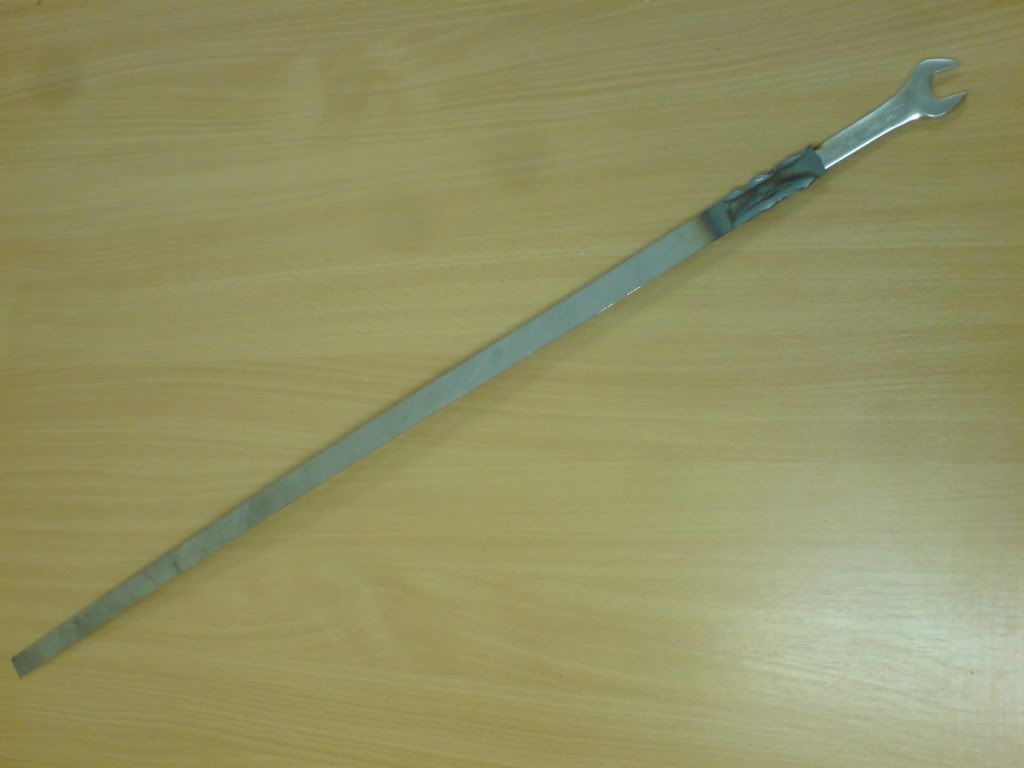 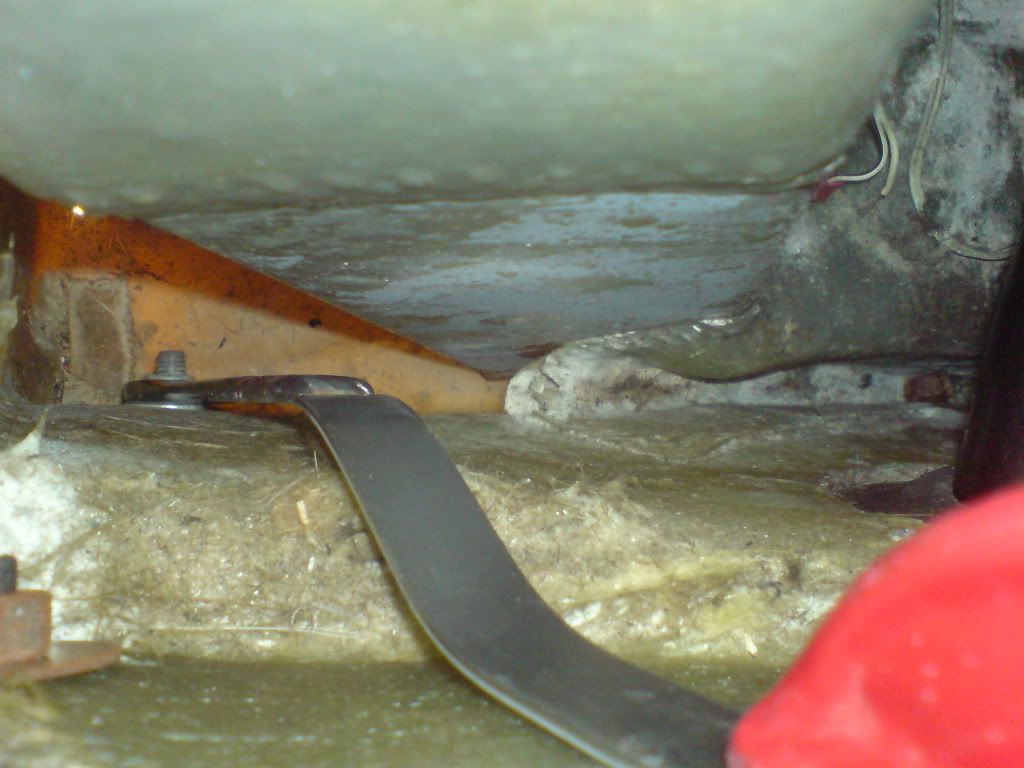 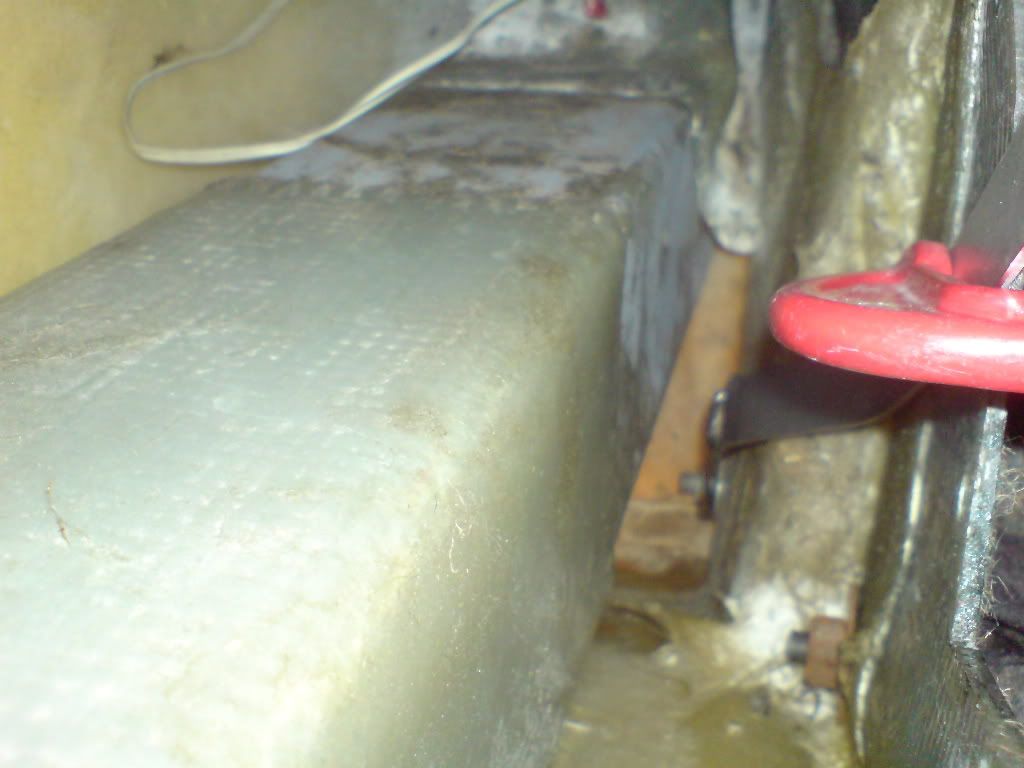 passed down inside and clamped to the inner panel with a G clamp, allowing hands free operation from this side, bit tricky trying to fish the nuts out from the sill with a magnet once they buggered off inside but with a long mirror and the sort of skill last seen on the grabbing machines at the fairground i got them out. trailing arms and brackets removed 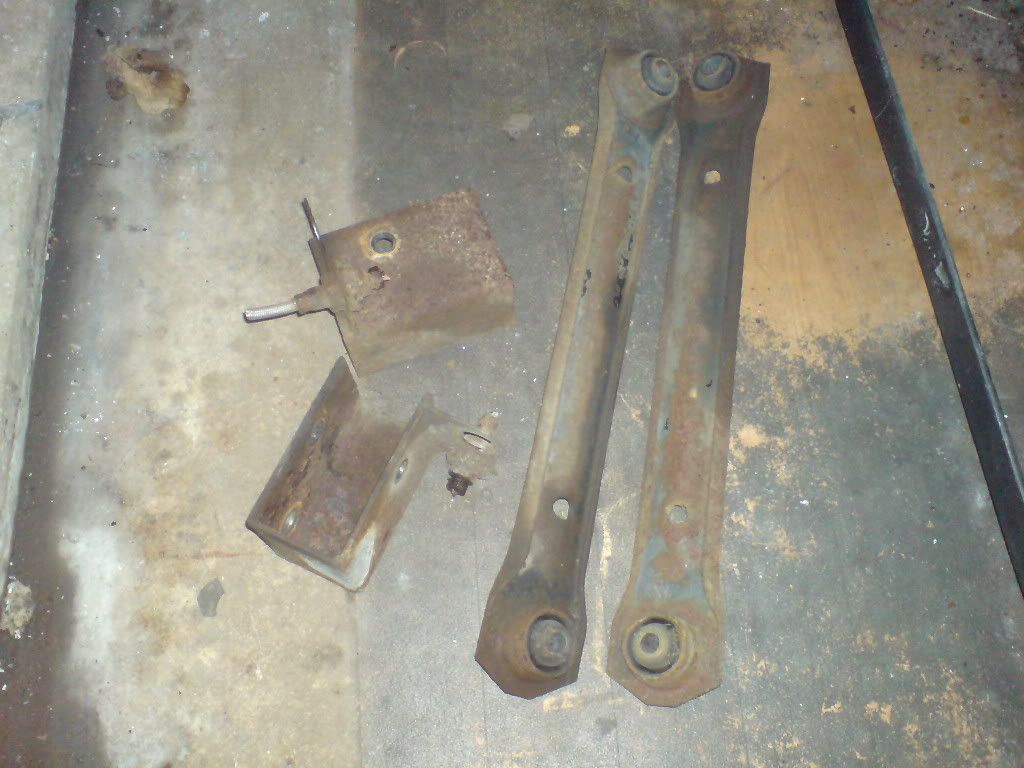 the resulting mess left behind 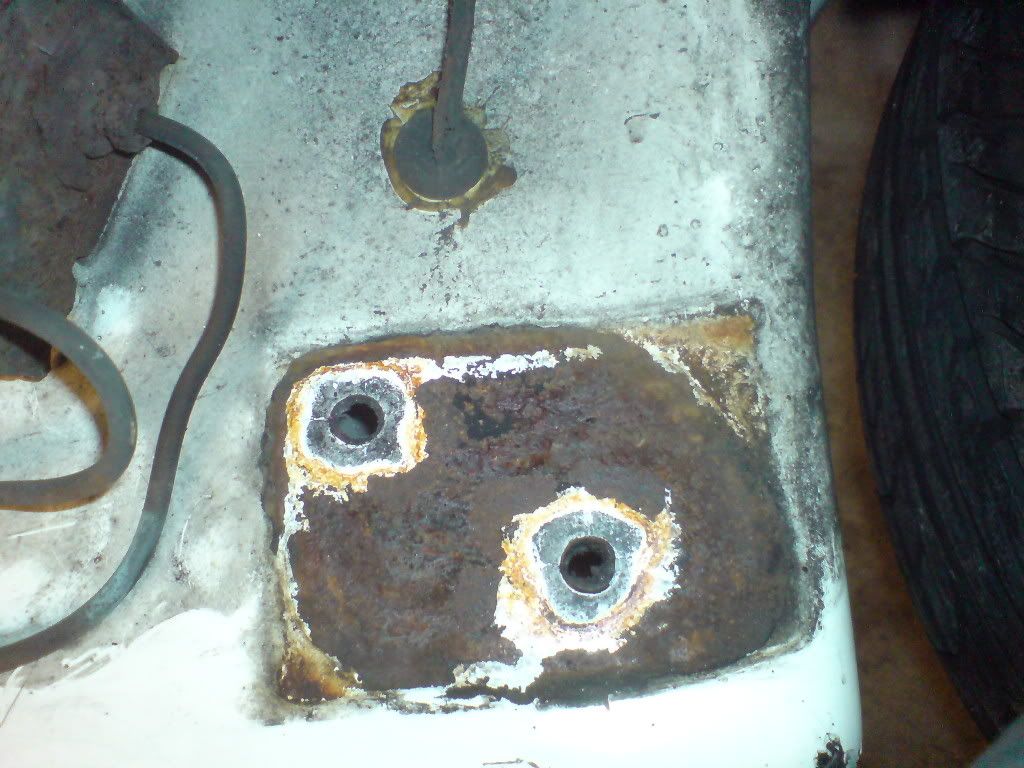 i think Quantum could have been a tad more generous with the sealant but no worries..... i will. all cleaned up 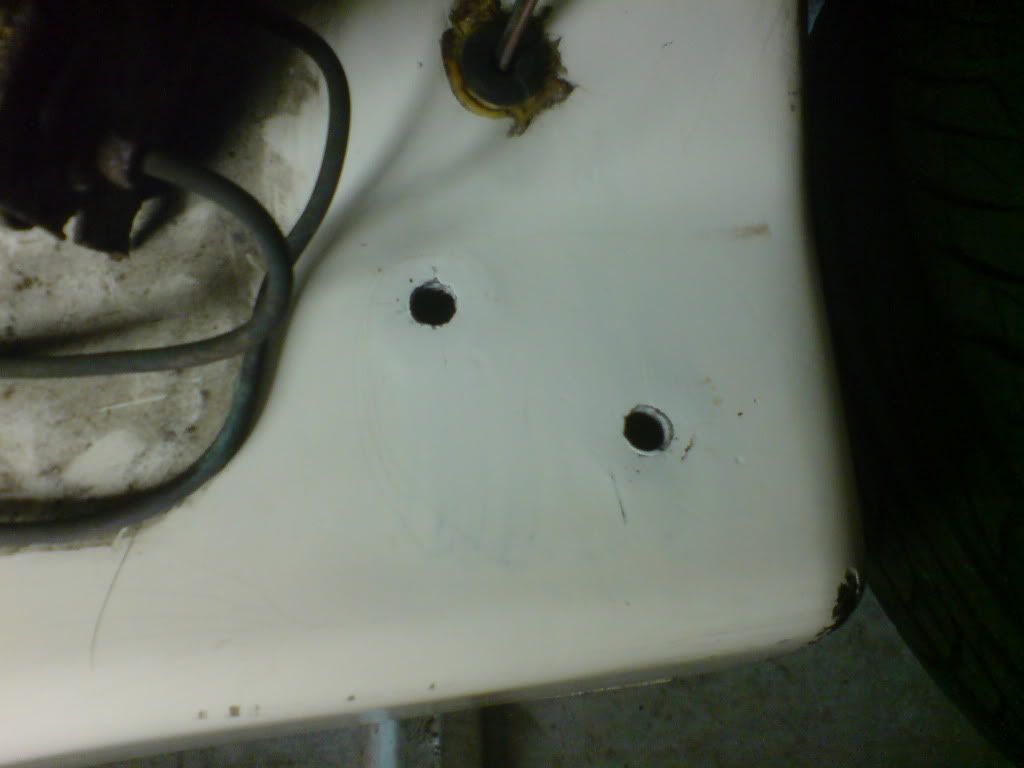 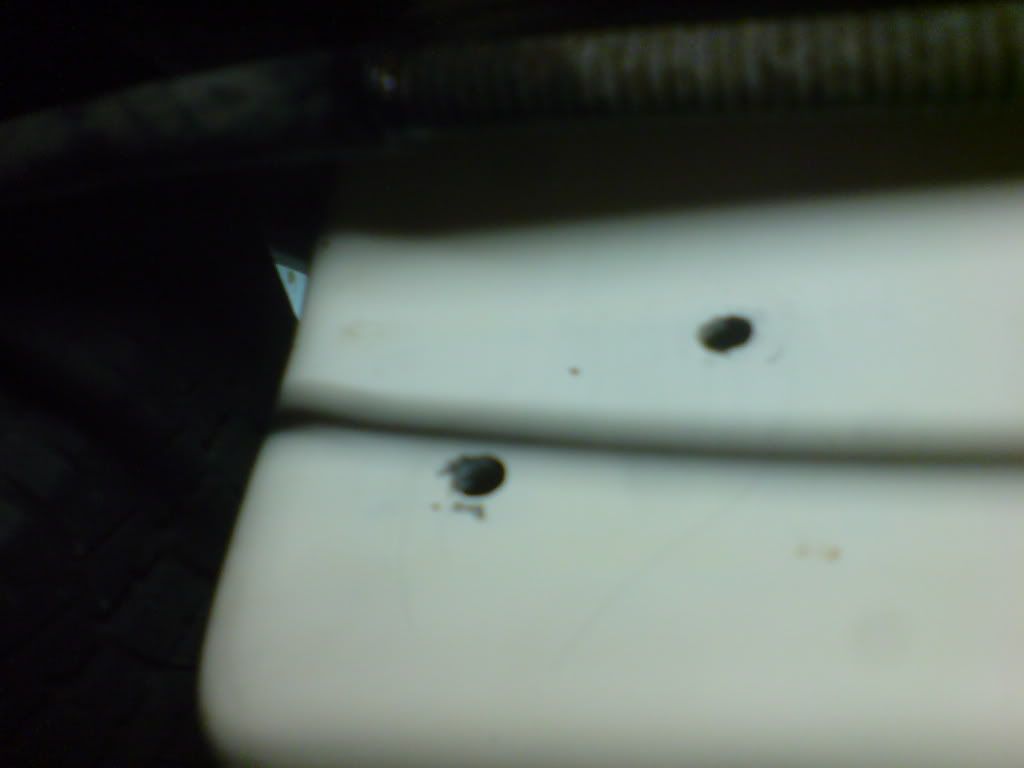 and ready for re-fit once I've shotblasted the brackets and hopefully galvanized them. only snag was i had to undo the break lines to get the brackets off so ill need to bleed the brakes again  i even started to remove some of the old carpet and spend a fair while cleaning off all the old god awful sound deadening stuff that seems to be made from recycled donkey fur 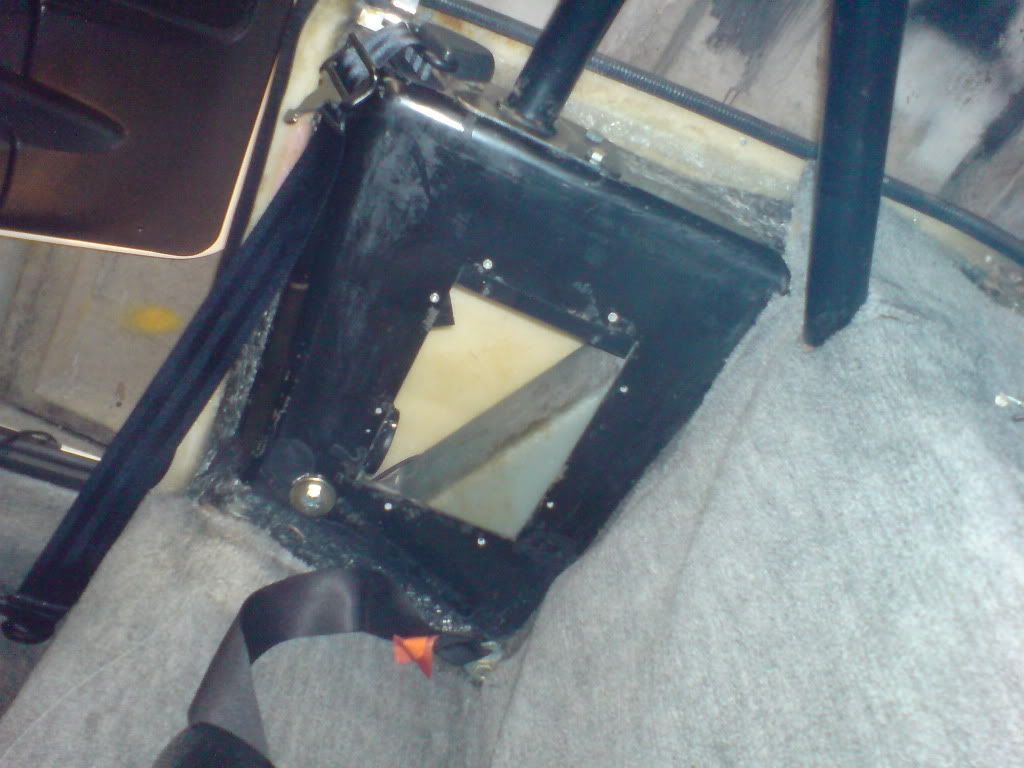 it wont be being put back on not bad for a few hours at it ;D |
| |
|
|
jin
Part of things
  http://quantumforum.proboards.com
Posts: 69
|
|
Jan 12, 2011 19:02:22 GMT
|
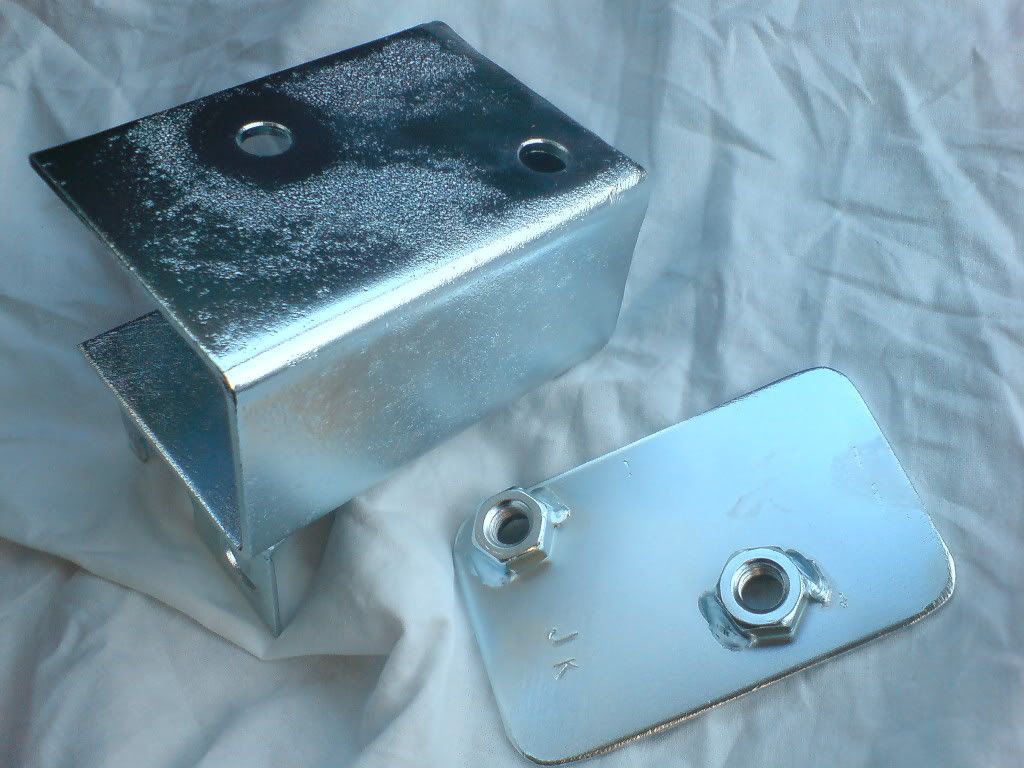
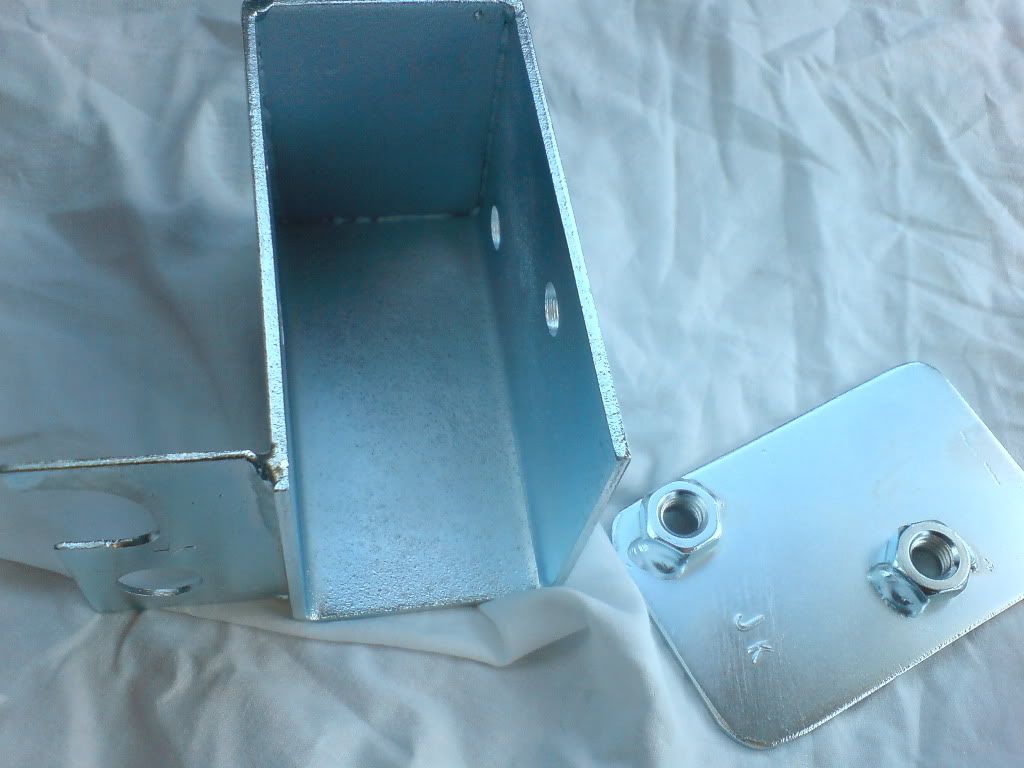
touch more progress made the backing plates today using matching material to the mount itself (3mm) drilled and welded the nut on 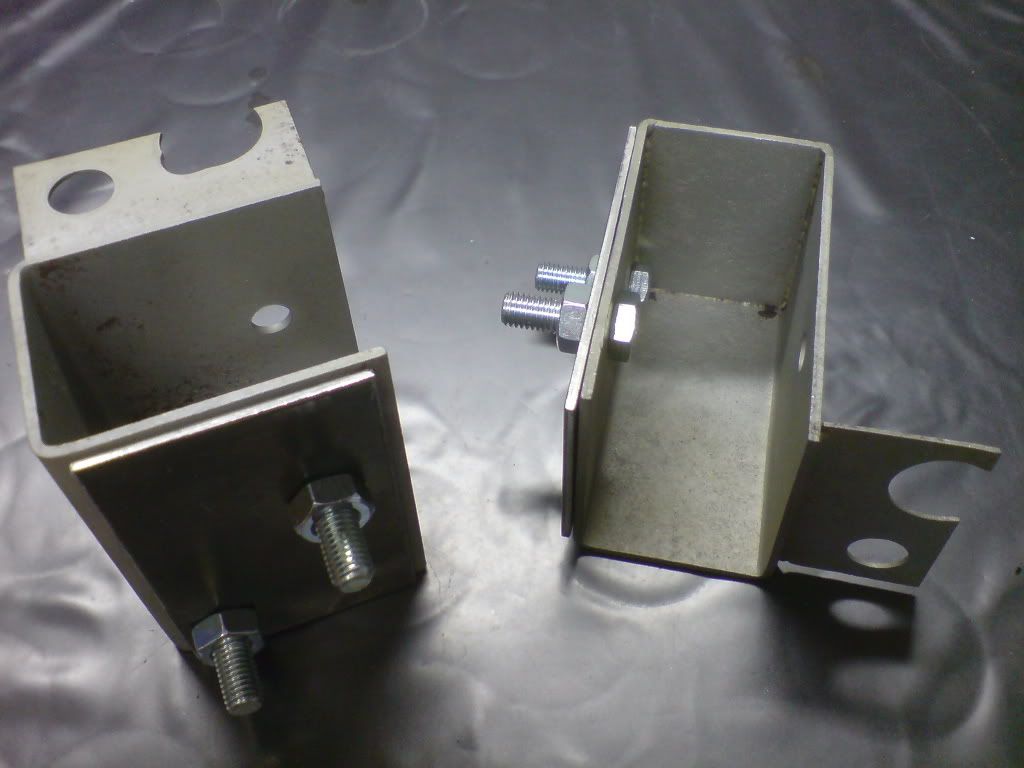 filed the edges to reduce the risk of stressing the fiberglass from behind i totally de-rusted them today using a combination of acid and blast cleaning 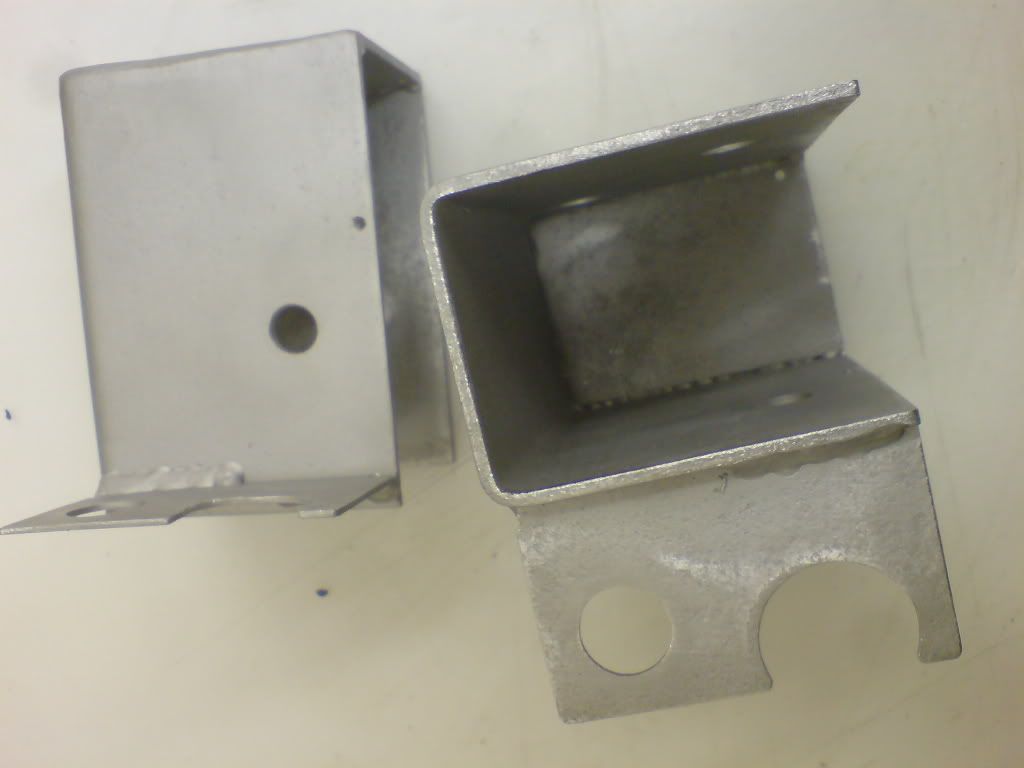 and spent a fair while deburring them as they were quite rough 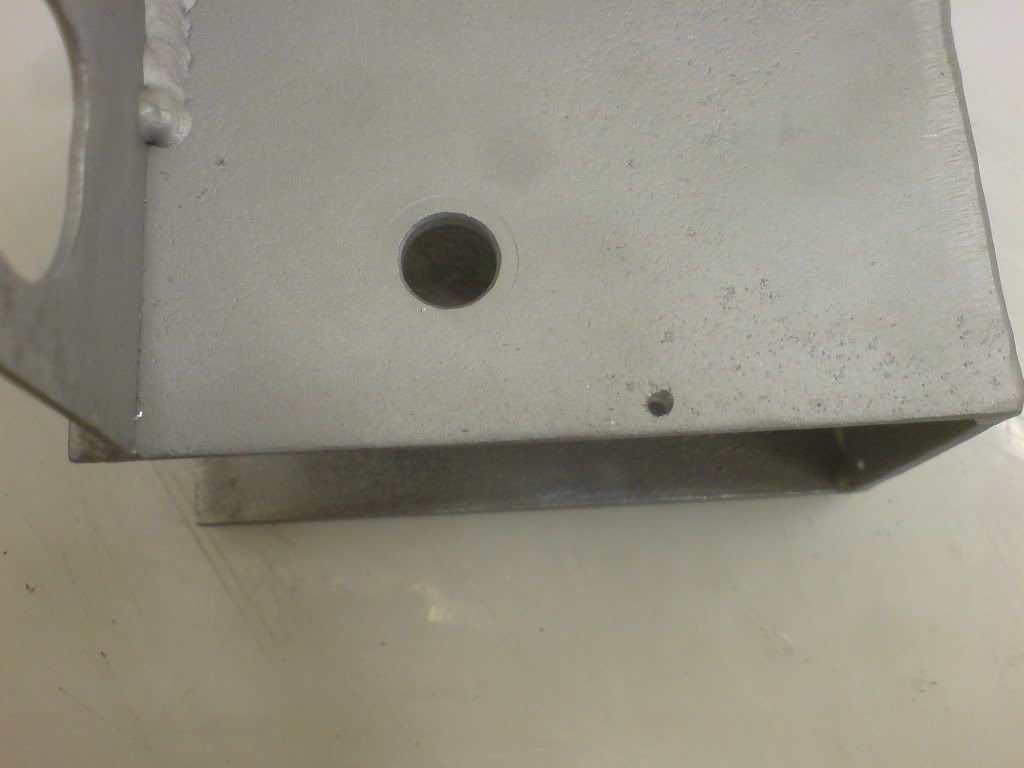 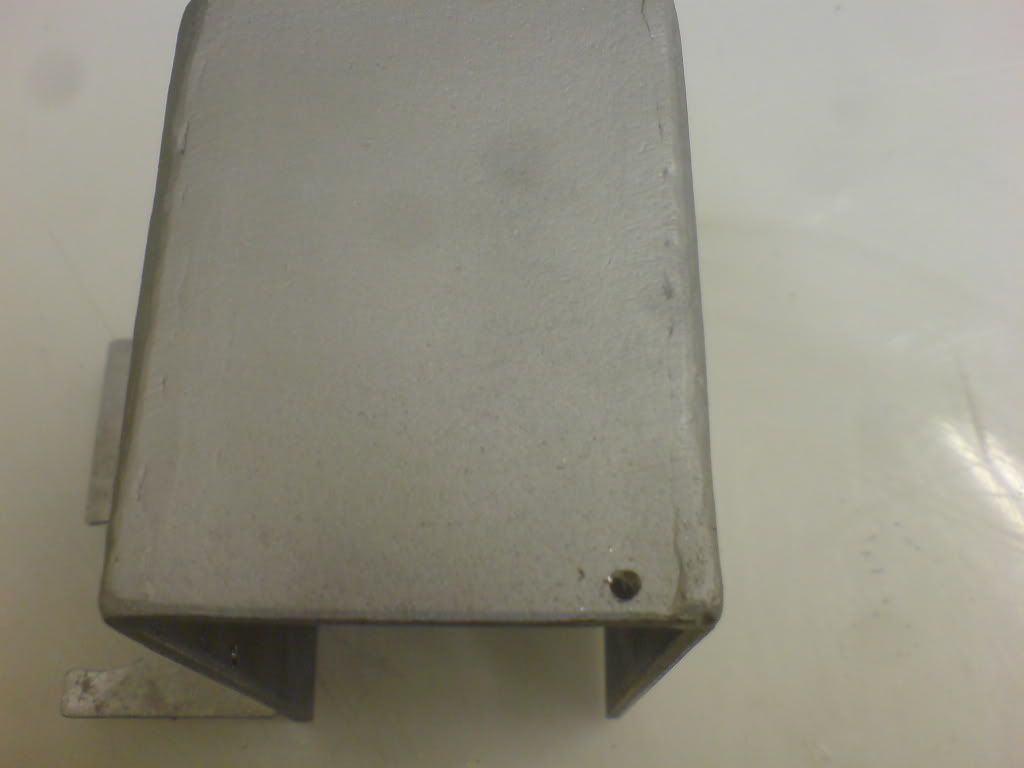 also drilled the small holes in them as above bet you cant guess what for...... should get them back from the plater by the weekend ;D |
| |
|
|
jin
Part of things
  http://quantumforum.proboards.com
Posts: 69
|
|
Jan 14, 2011 19:41:25 GMT
|
|
|
| |
|
|
|
|


 missing my eye by a fraction (i know i know, should have been wearing goggles, ive got some too) so i had to cut the remainder off by holding a 12" hacksaw blade in my hand as the saw frame wouldn't fit in, hands are now a bit sore to say the least.


 missing my eye by a fraction (i know i know, should have been wearing goggles, ive got some too) so i had to cut the remainder off by holding a 12" hacksaw blade in my hand as the saw frame wouldn't fit in, hands are now a bit sore to say the least.


