Morning folks -
Thought it was about time I said something about what I've been up to, since I've read loads from everyone else.
At the moment it's pretty much a copy / paste of the blog I try to keep updated over on Scimitarweb (so apologies if some have seen it before)..
I bought the car over 2 years ago, and a house purchase shortly after meant litlte time to play with it.
However I got a few jobs done, and I'm back now working on it with a renewed enthusiasm. It's probably fair to say that I'm not aiming for a concourse winning car here, but something which is reliable, and tastefully modified where appropriate.
I'm trying to recall this all from memory, so the timeline is probably a little screwed up, and probably missing some detail, but hopefully it'll become like a restoration blog thing
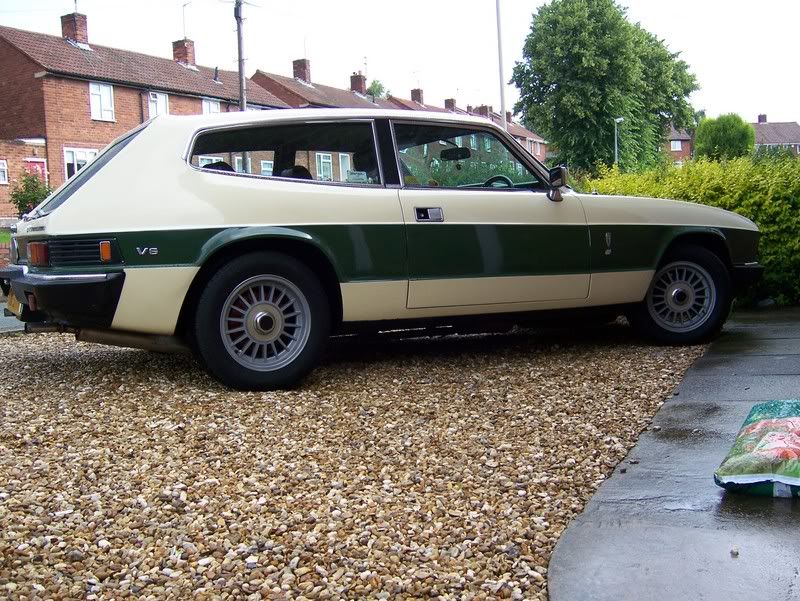
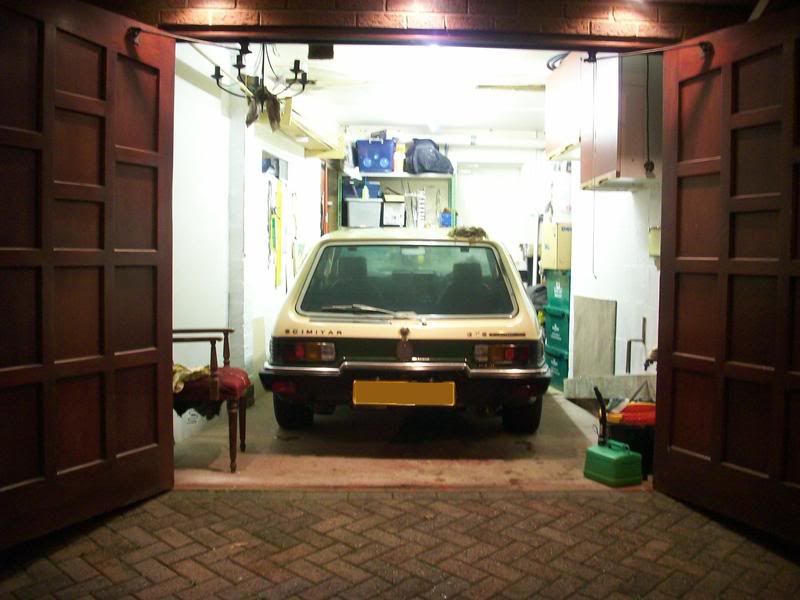
Anyway, - quick pic of it when I bought it -
The first job was to cure the leaky rear screen, which was caused by the drain holes in the channel at the bottom of the screen having rotted away. Quality repair this, courtesy of half a Bic biro barrel, and some p38. Unfortunately I don't have a pic of the biro in place, but I also repaired the drain holes like so -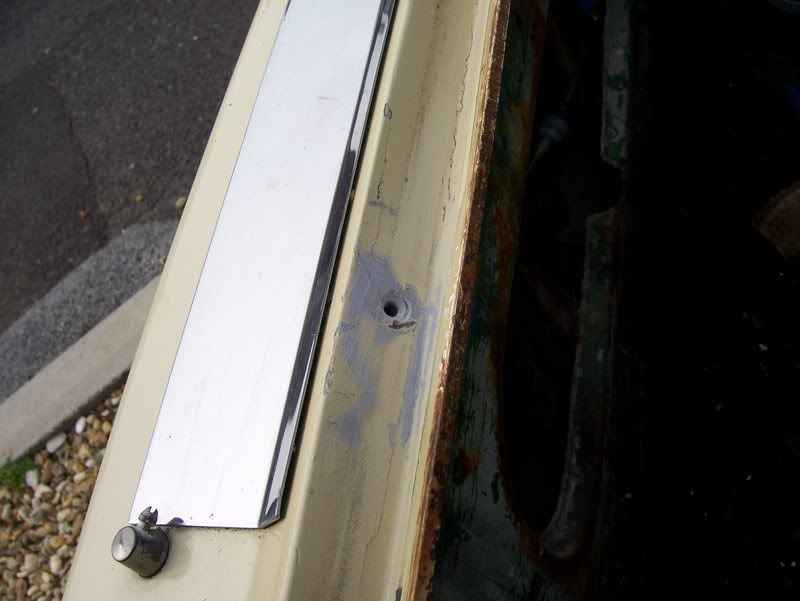
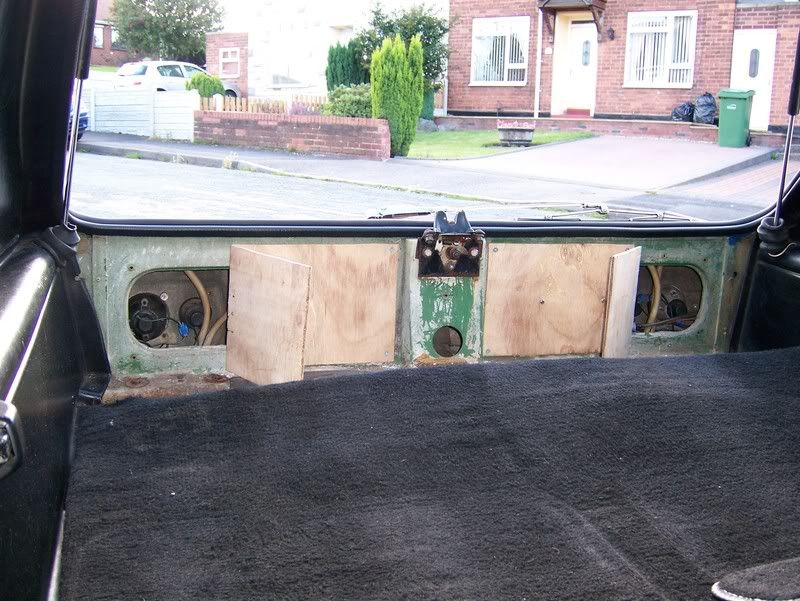
I also knocked up a couple of internal covers for the rear lights, although i think they look curse word now in these pics, so I'll redo them at some point. (The main reason for doing it was because the wiper motor was hanging off!
So I didn't do anything else for a while now, and we bought the new house which took 6 months to complete renovations - so the car took a back seat for a while. However, to reward it for being patient, this is where it lives now -
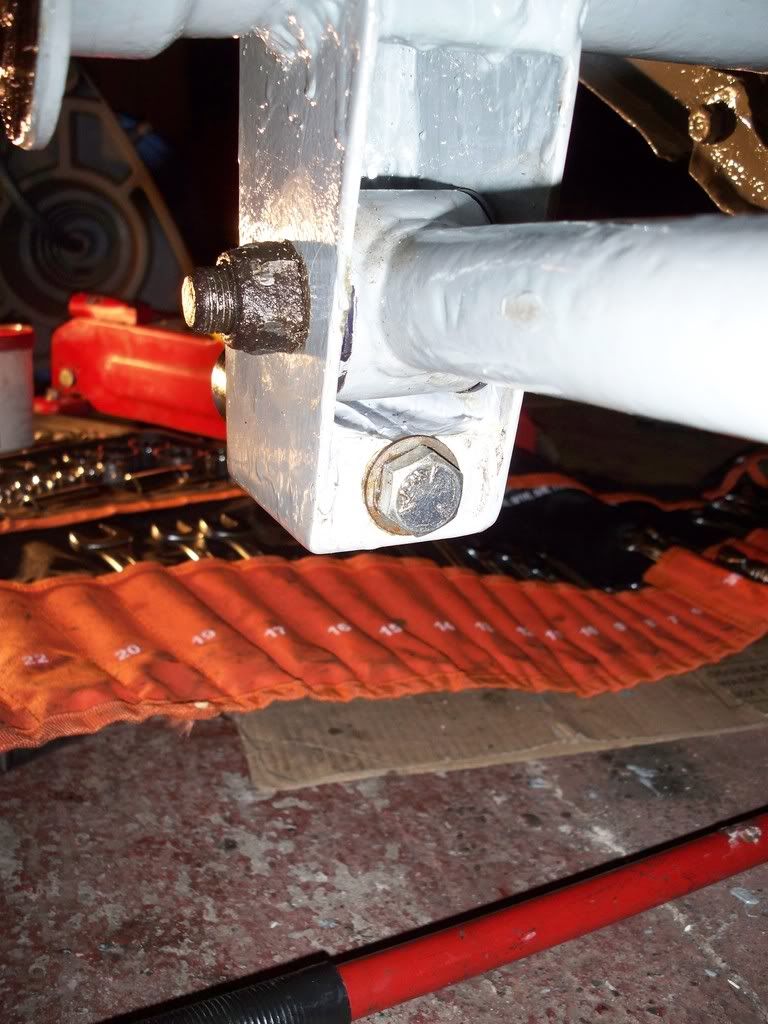
Earlier in the year I started to get it ready for MOT, so had a good crawl round it, and painted the front suspension and chassis. Heres a pic half way through -
I also decided to service the cooling system, so a new water pump was fitted which you can just see in the pic above, the old metal pipes were servicable, and I had the rad re-cored. I also fitted a fan from a Rover Coupe turbo which just fits in without removing the original mounting bar for the original fans, as below with a couple of diy brackets
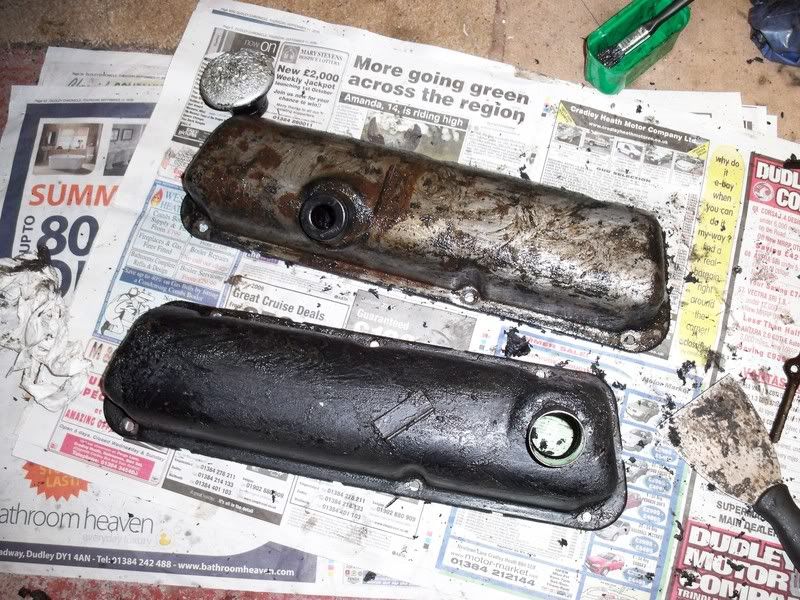
I also removed the rocker covers to replace the gaskets to cure an oil leak. While they were off I thought a coat of paint wouldnt go a miss - before and after :-
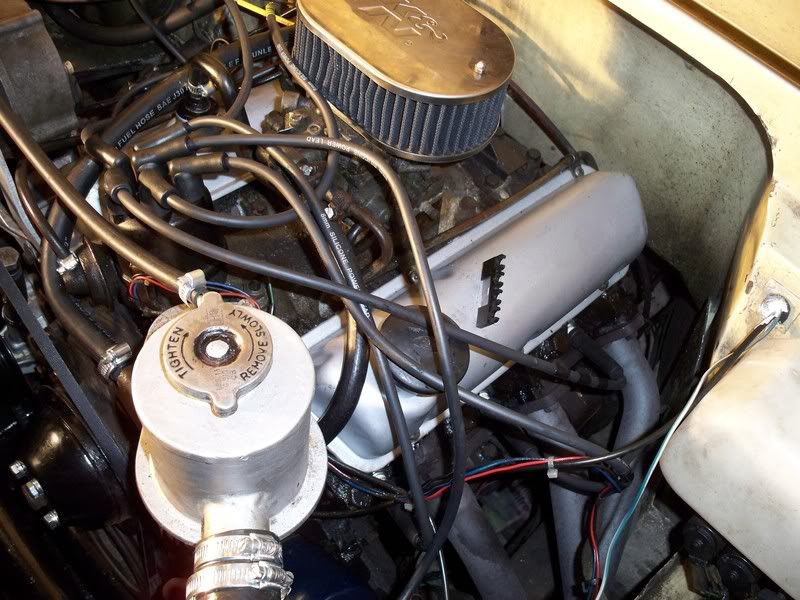
(excuse the messy wiring, I was trying to get it running after what turned out to be me unknowingly clouting the dizzy with the spare wheel!)
I also chucked on a set of plugs, leads, rotor arm, dizzy cap and cleaned the air filter at this point
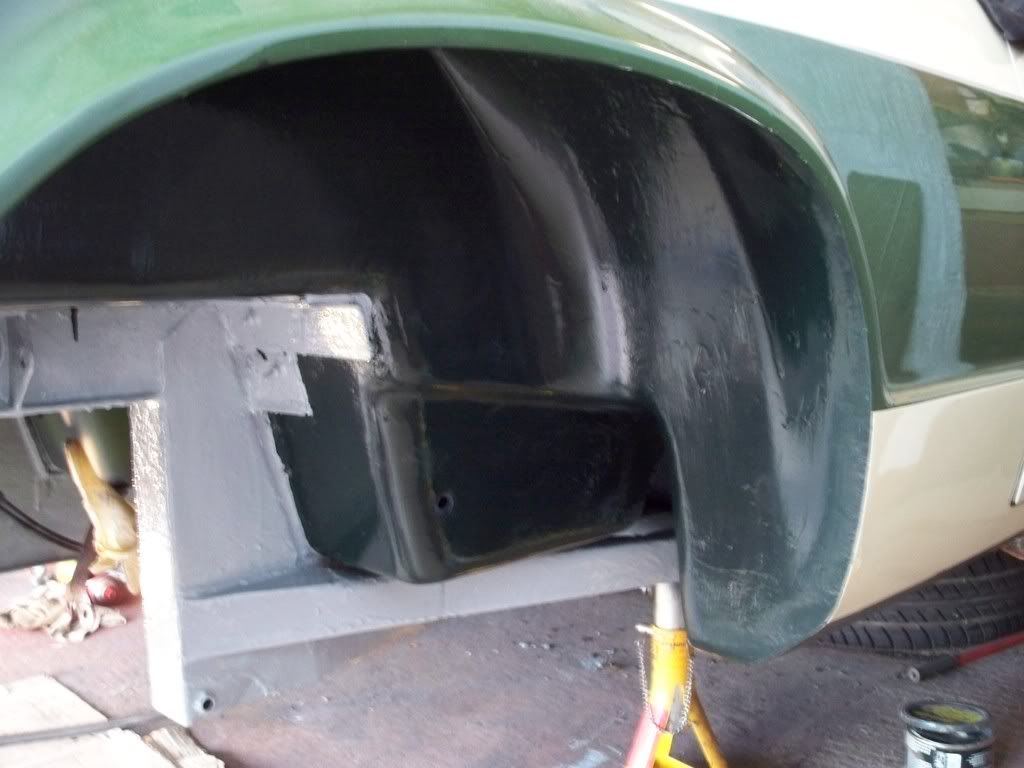
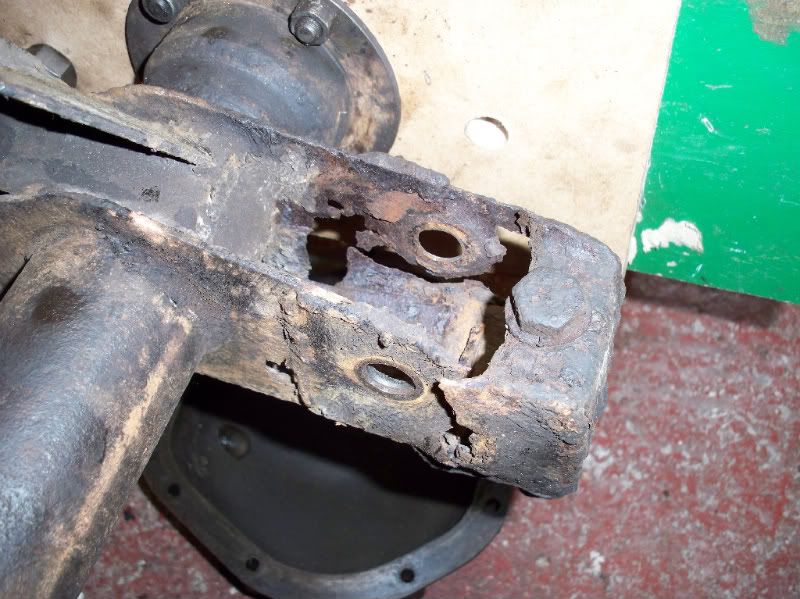
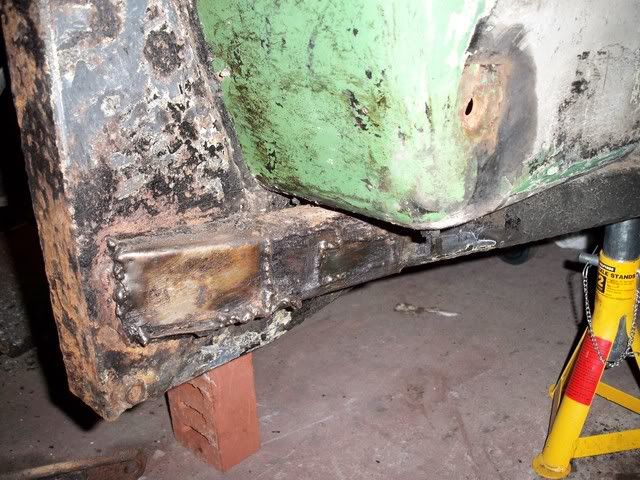
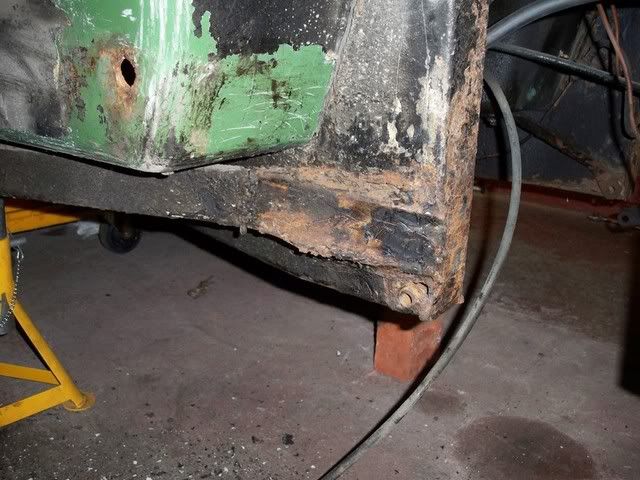
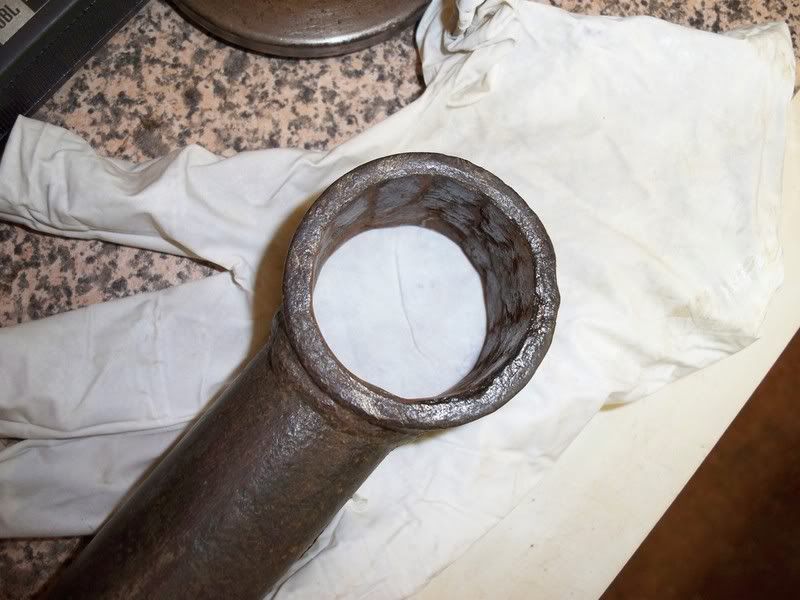
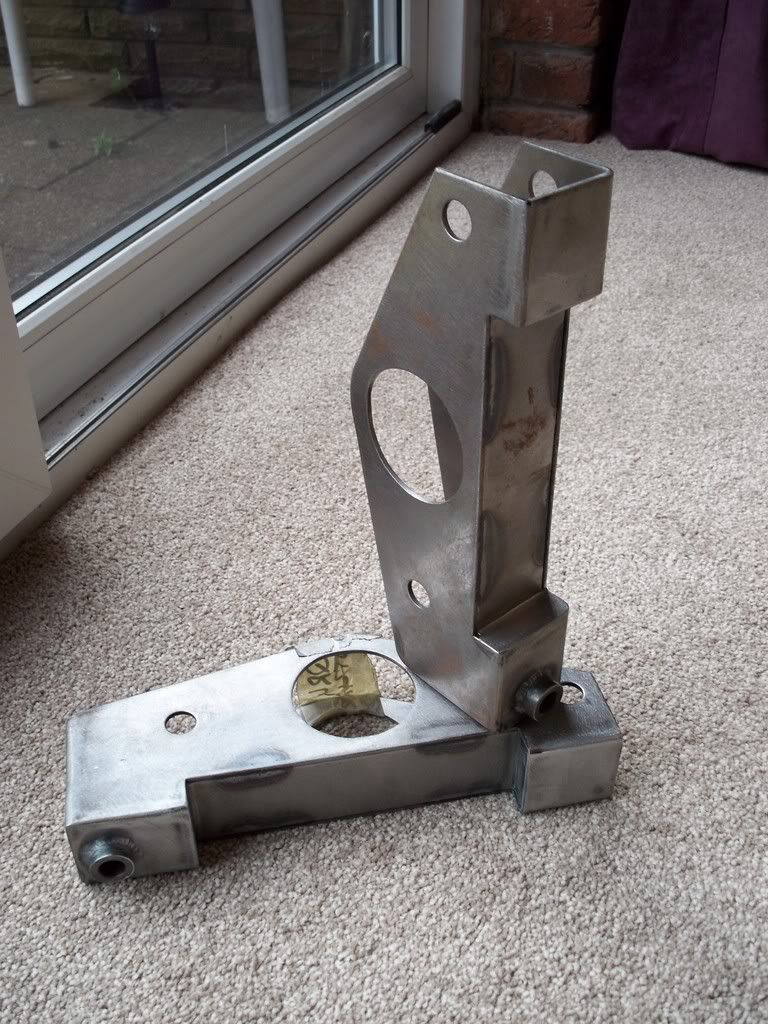
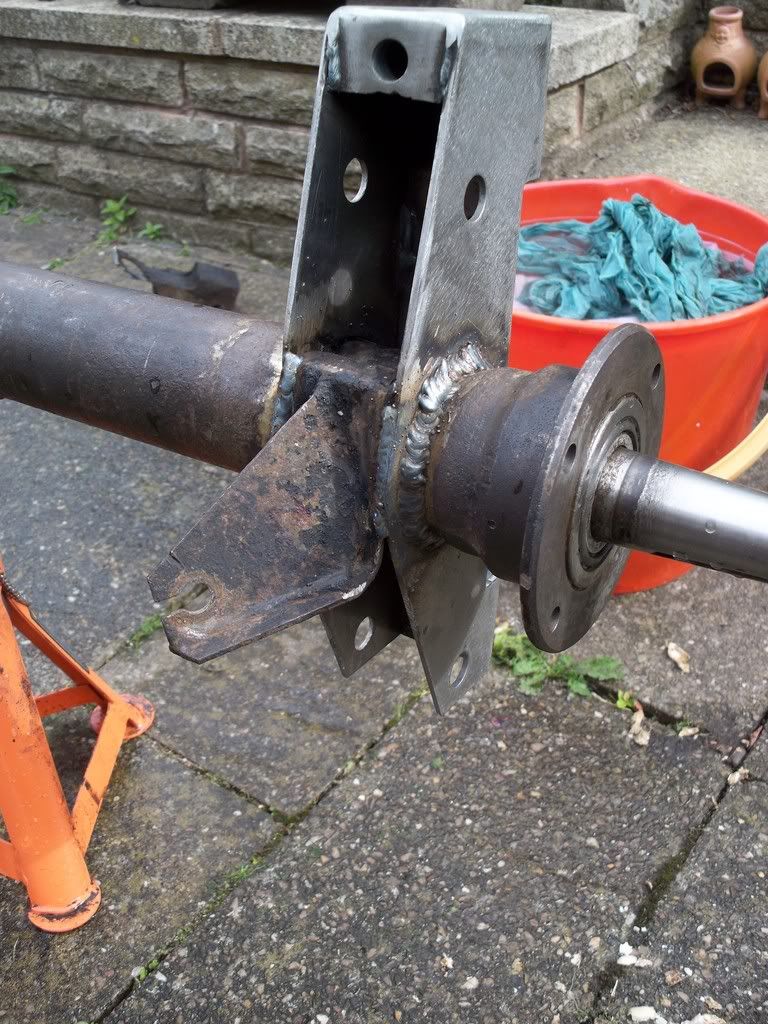
It was at this point that a mate pointed out a slight leak on the master cylinder, so I removed it, rebuilt it (or so I thought) and bled the brakes. While bleeding the brakes I noticed a bit of rot on the training arm / axle brackets. This has turned into a mamoth job (well, it is by my standards).
Heres a pic of the worst of the rot -
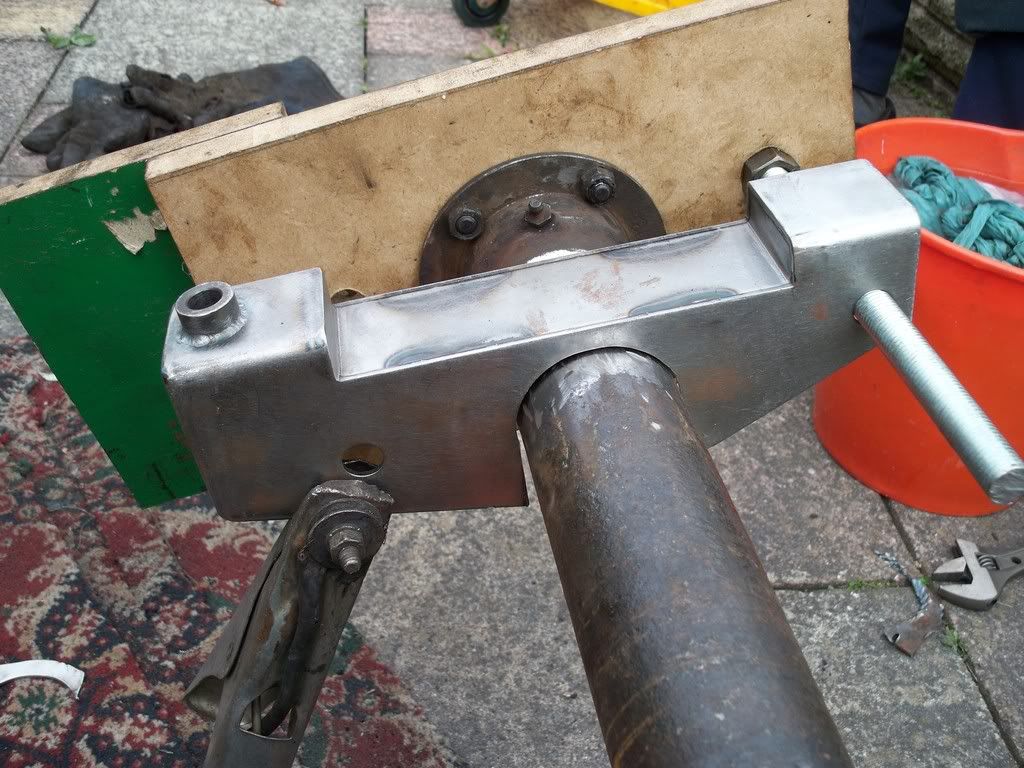
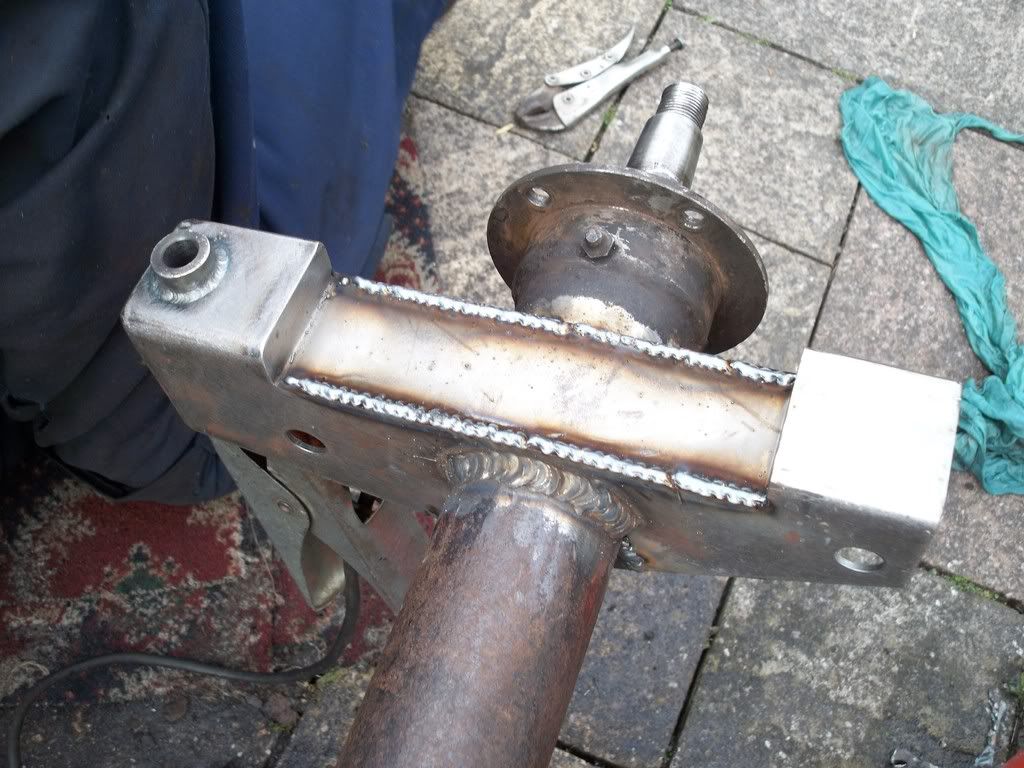
And here's the jig I've made up to ensure the new bracket is at the right angle and the right distance from the end of the axle
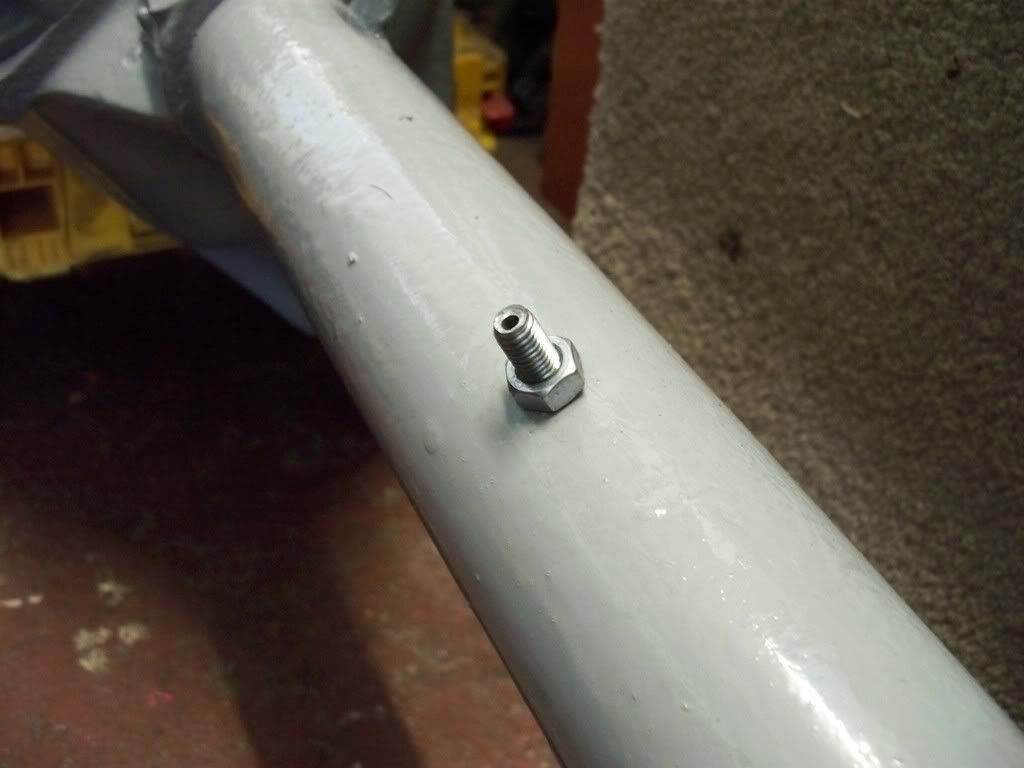
And thats where I'm up to now. I'm currently replacing all the trailing arm bushes for poly ones (the old ones were totally wrecked!). I'e also got to change the pinion oil seal - got knows why that nut is so tight! And I suspect I may end up having to change the oil seal at the hubs once the welder has done his thing
Oh, I also made an electrolysis tank for getting rusty parts freshened up - like so -
Still to do -
- Weld, Paint, Refit axle, paint and waxoil the underside everywhere
- Refit diff casing with new gasket
- sort out a new master cylinder, and rebuild brakes
- replace handbrake cable with one I picked up from Curbs
- Clean stainless petrol tank, as its 'grubby' at the mo
- Change the otter switch as I'm not completely confident that it will stay put in the rad once pressure has built up
.....
I've now refurbed the wheels - well, rubbed down and a coat of aluminium silver. Also the centres had a sort of plastic sticker on which I removed to reveal a nice shiny chromed finish, so they should all look a bit fresher when they're back on. Heres a pic before looking a little grotty -
and heres one after -
.....
Heres a pic of the trailing arm pre rust treatment - note the knackered bush, this was actually one of the better ones!
And heres one after its been in the tank and 5 mins with the wire brush - I'll probably give them another dunk beofer painting, as theres still a bit of surface rust - but it's perfectly paintable as is tbh.
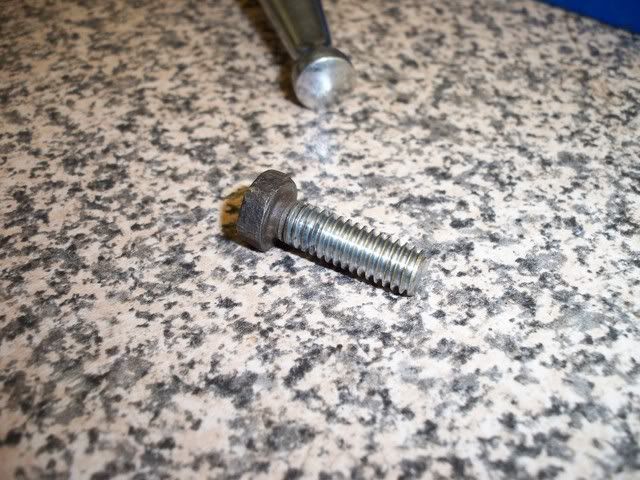
I also cameup with a way of cleaning up grotty bolts - pinch them between 2 peices of wood in a vice like so -
Wind the bolt in and out a couple of times, and it turns from this -
To this -
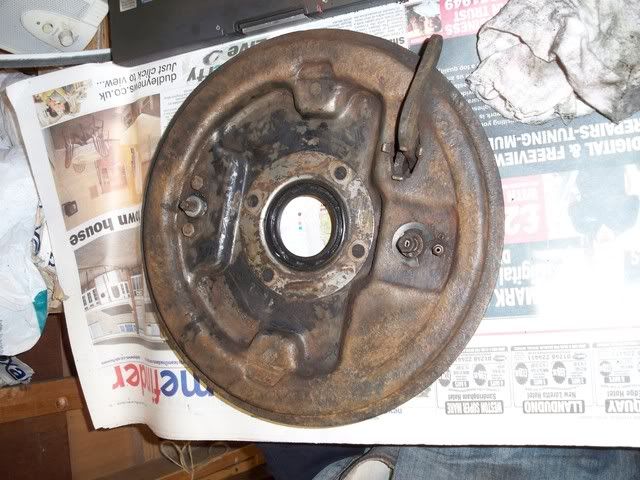
I then had a quick look at the rear brake drums, and went from this -
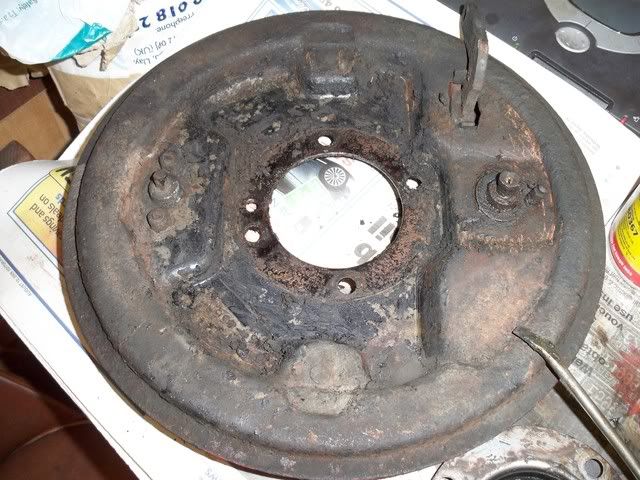
To this, ready for further dismantling and painting
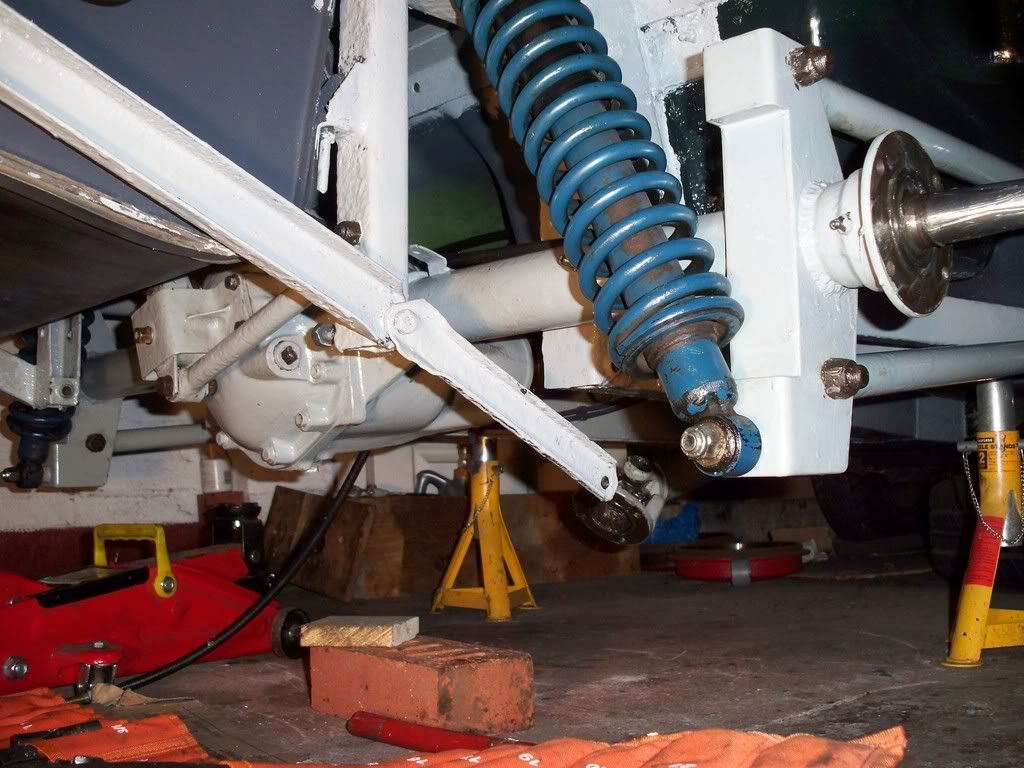
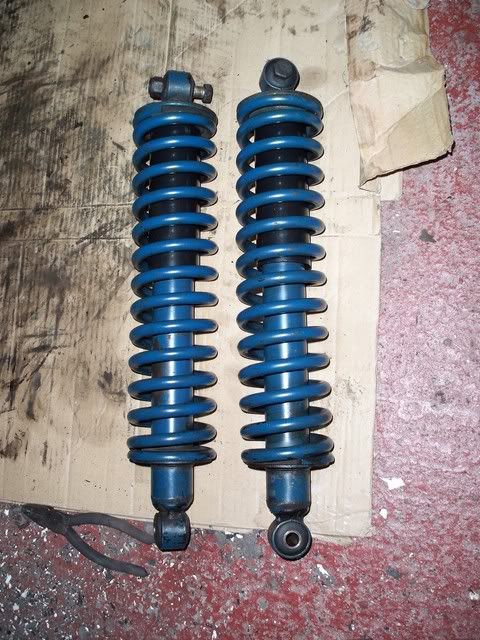
Rear shocks have come up quite nice too -
A couple of pics of some shonky welding i'm having put right next week -
New wheel cylinders required here after I had to use the heatgun on the axle. (ok, I could've remove them firt, but I'd struggled all morning and patience was wearing thin :oops: )
I refitted the axle back cover too, but only temporarily so I don't get muck in it with welding. I've bought a new gasket for it so as to cure that leak - do I need some blue hylomar or anything on it, or just the gasket on its own? (the pics are pretty poor of the axle for some reason - but theres not mch to see there, honest
.....
Anyway, onto what I've been up to...
I'm waiting for a mobile welder chap to come round and weld the axle brackets up, so while I'm waiting I've done some other bits - first the pinion oil seal.
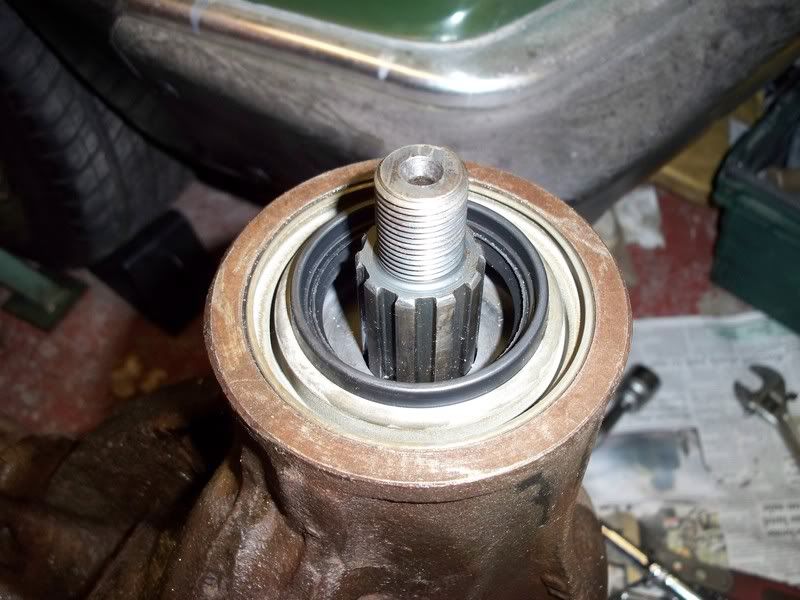
I can't beleive how tight the nut was to get off - a lenth on angle iron bolted to the flange and a 2 foot breaker bar and another 2 foot steel tube was reqired! The old oil seal was pulled out with a hub puller, and the new one knocked in. The flange was then polished a bit with wet n dry where it contacts the seal - as below:-
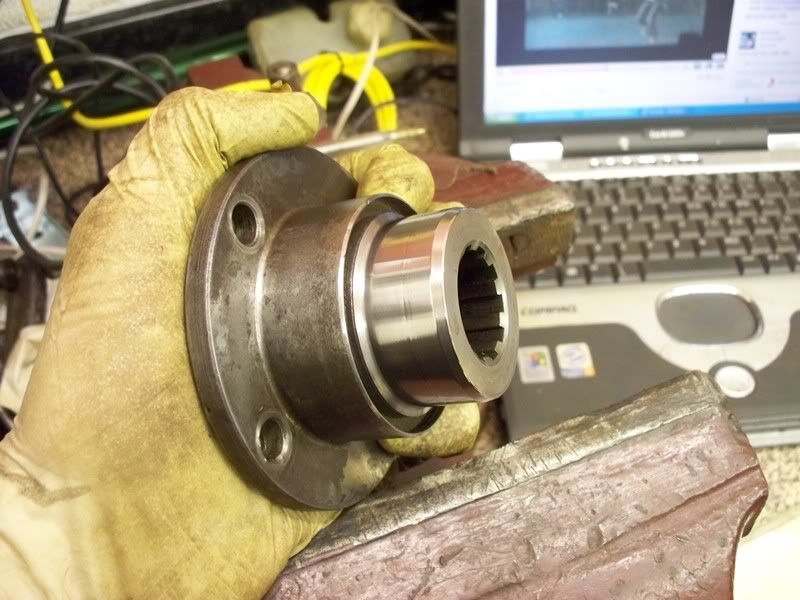
new oil seal fitted:-
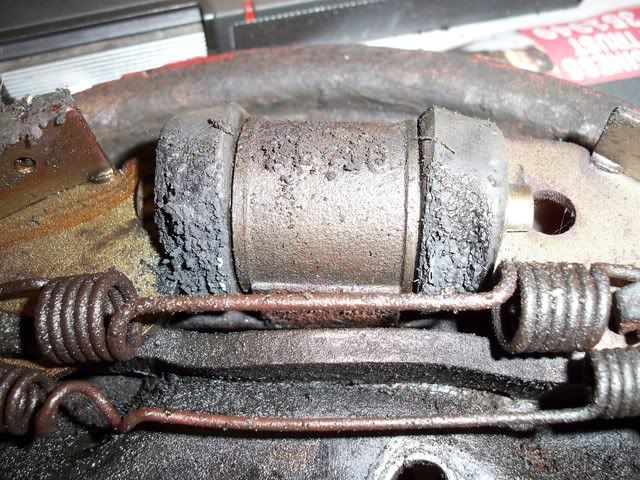
I then turned attentions to the trailing arms. Having moved the rubber bushes previously I looked at the size of the new ones (45mm) which were not going to fit into the trailing arms (39mm). However a bit of research revealed that metalistic bushes were originally fitted, which had an outer metal sleeve. This is what is left of the old metalastic outer bush -
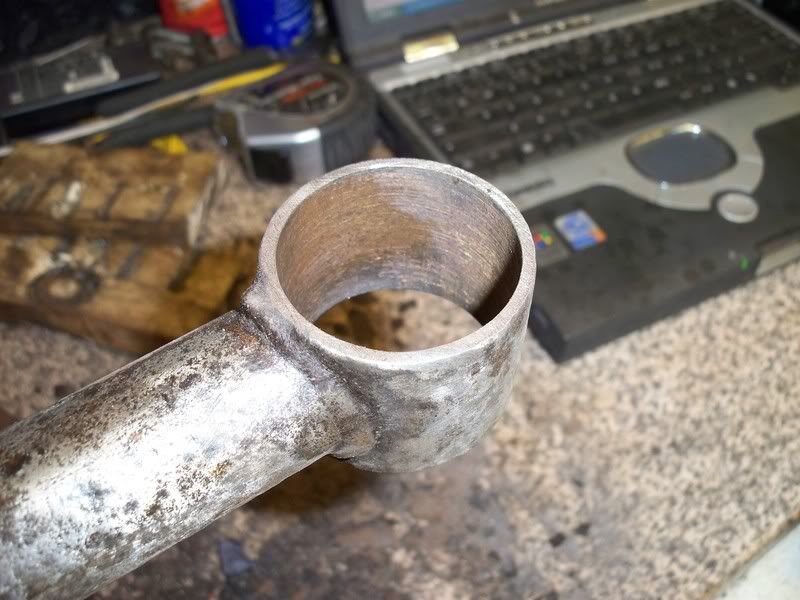
I then removed them with a hacksaw, centrepunch, old screwdriver combo, like so -
which left me with a nice smooth trailing arm like this -
This meant that I could press the new bushes in, so I now have 4 of these -
In the background you can see the remains of the outer metalastic bushes.
Tomorrow will see me painting all the bits I think, and cleaning old paint / surface rust from underneath.
.....
Small update here, I've been painting bits ready to go back on the car. A couple of the local Halfords have been selling off the obscure colours of Hammerite - so I've stockpiled 4 tins of grey smoothrite. This should be enough to do the whole underside.
Anyway, onto the pics...
Here's the trailing arms (one's in my other car as I took it to show me dad what I'd been up to), the supports which go underneath the axle (one's still held by a seized bolt and is still on the car), the seatbelt bracings, and everthing to do with the Watts linkage.
Heres a closeup of the bushes fitted in the trailing arms -
And heres one of the brake drums now I've stripped it all down, wirebrushed everything, and awaitng painting. I covered the shoe material with masking tape so as not to contaminate them with grease.
I need to get the rubber gaitors where the handbrake levers enter the drum, and the spings and caps which hold the shoes to the backplate have seen better days. I hope someone does an overhaul kit for the rear drums. Hopefully I'll get them painted up and reassembled this weekend, but we'll see.
Does anyone know what the items are in the last pic in the middle of the shoes? - are these the axle oil seals, or just seals to top curse word entering the drum? Either way, they're pretty simple to replace at this stage. I can't look at the ends of the axle at the moment, since it's all jigged up waiting fir mr. welder man to come do his stuff.
.....
Anyway, I've done a bit of spending today. 23 quid got me these bits for refurbing the drums -

It's worth noting that the 2 horizontal springs in the pic are left and right handed.
I'm replacing all the springs, the little plates that go on the retaining springs were knackered, and I thought I may as well replace the retaining pins - although I forgot to inclde them in the pic. One of the handbrake gaiters was missing and the other was pretty curse word so i replaced them too. I've also bought a couple of wheel cylinders a couple of weeks back, so i think thats pretty much everything.
I bought them from David Manners near Oldbury, since they're only a few miles away - and based on the fact that they're the same as MGB drums they had all the bits in stock.
Hopefully I can give them a lick of paint tomorrow ready for reassembly next week. Fingers crossed eh?
.....
Bit of an update, Friday was welding day. It turned out to be a long day - from 9am till 5:30, with a 10 minute lunch break.
Anyway, it was well worth it, as all the welding is now complete so on with the pics...
We started the day with a couple of these which I bought from qrg (about 67 quid each):-
We cut the fronts out of them so they slid over the axle like so...
I'm pleased so say the jigs worked out perfectly too.
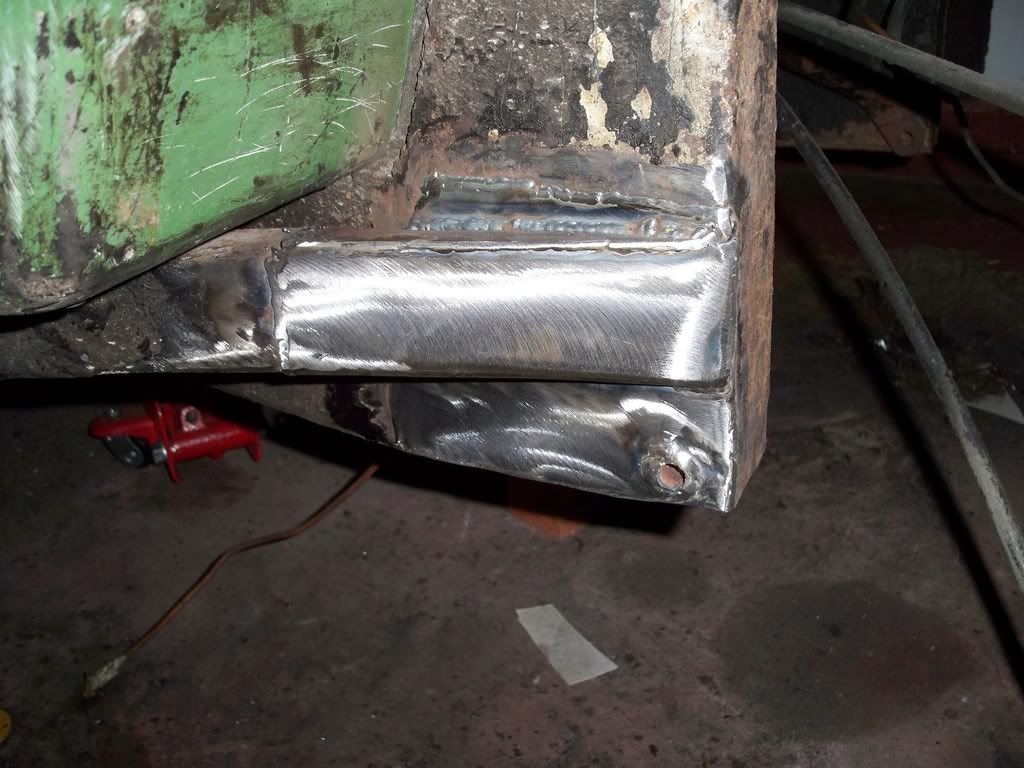
Heres a pic of one end all welded up -
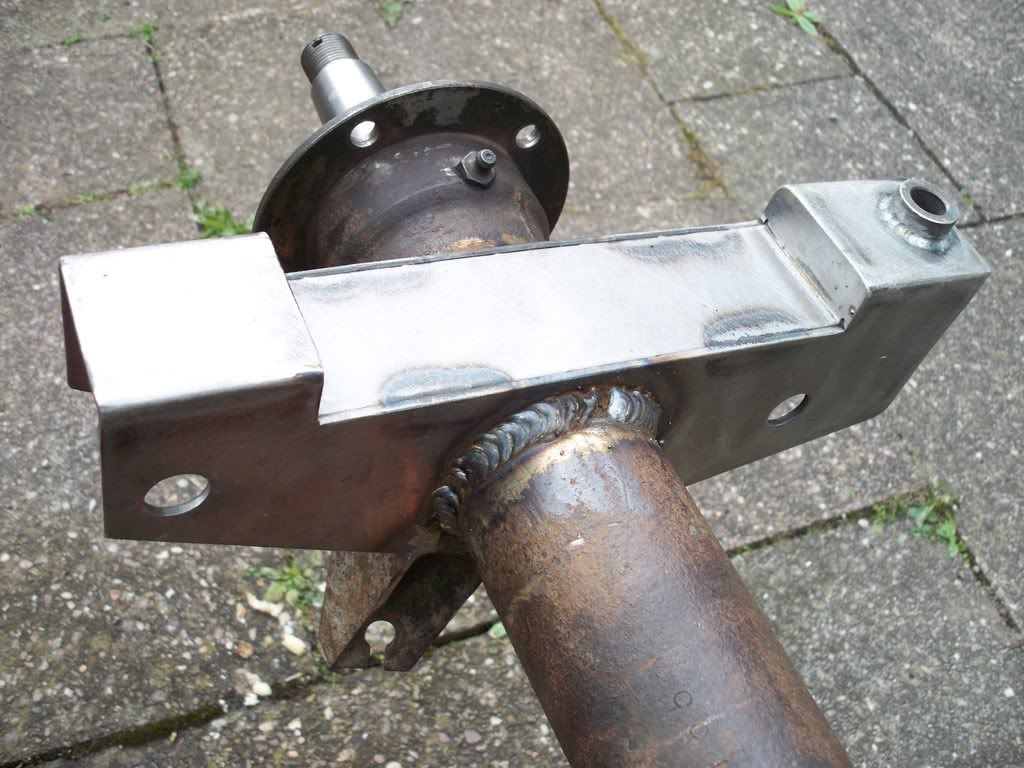
And another
You can see we also ran a weld down the backs of the brackets, as they were only part welded. They would've held but it might have been a bit of a rust trap.
The handbrake brackets were reused, as the new brackets don't come with them. Not a problem though, as they were in good condition anyway. Here's a pic...
Then we moved onto the diagonals under the car.
Quick remninder of before
Nearside
Offside
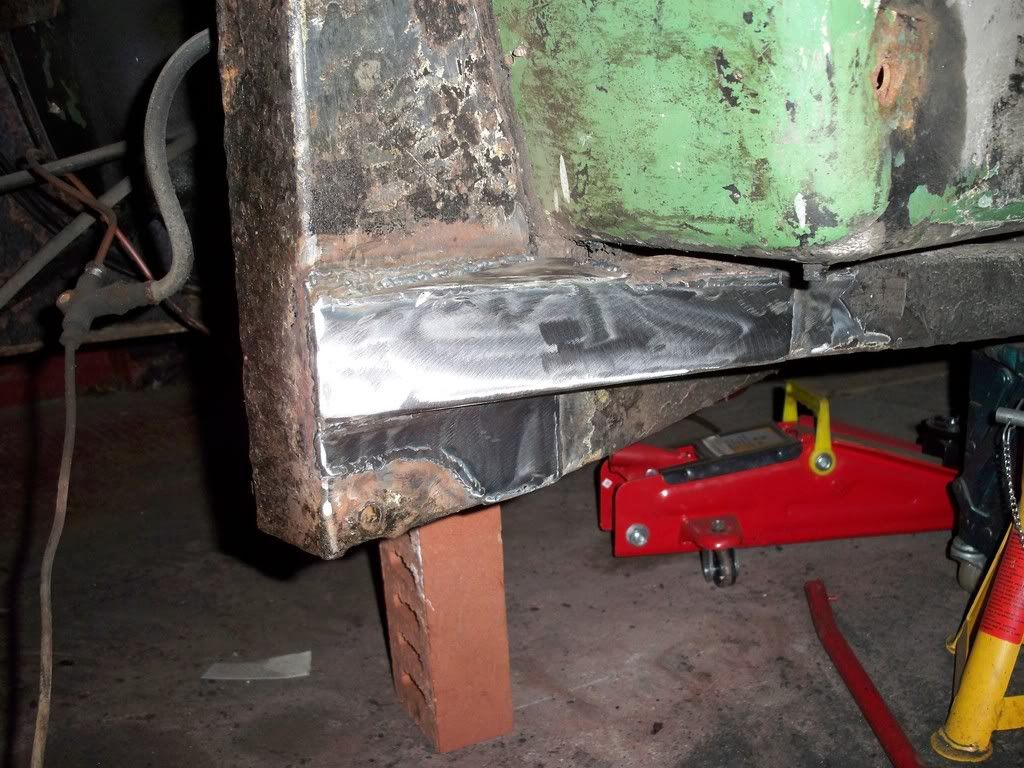
And heres the fresh stuff -
Nearside
Offside
Both chassis uprights needed repairing before the diagonals were repaired, as the nature of the diagonals create a mud trap which had rusted through.
Hopefully tonight I'll be able to crack on prepping the rest of the chassis and ready for painting later in the week.
Lastly, Les - If you're reading this, thanks very much mate, I'm well happy with the work
.....
Only a small update really - we had a week away the other week, which has kind of took the momentum out of things, and I've got a few diy jobs looming on the horizon too, but I'm still plodding on. Only a small update really - I've started painting now. Hopefully i've finished rubbing down now, I can't handle any more brown dust on everthing.
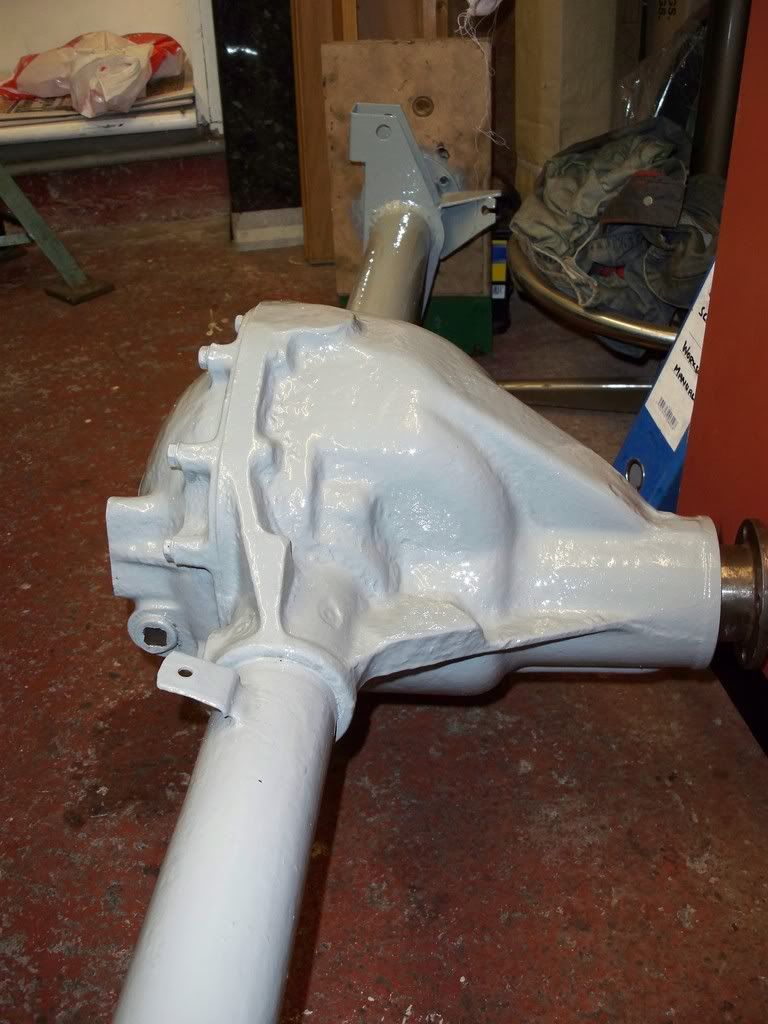
So here's pics of the axle painted - I bolted the jigs back onto the end of the tubes so i wasn't hindered by axle stands.

I did take some of the chassis, but its only in first coat stage, so it looks a bit curse word tbh - I'll post pics of that when it looks a bit smarter (hopfully I'll get a couple of hours in the garage tonight.
.....
Anyways, I had a few hours on it yesterday, and here's where I'm up to now.
The underside is now painted in grey hammerite and I sprayed it in Grey Stoneshield (by Hammerite) paint. I might do another coat of grey hammerite over the top, hopefully it won't react. Here's a pic, shame about the runs
Now, onto the brakes. I've started reassembling things, but I can't get the handbrake to work in a 'nice' manner. Here's a pic of where I think it's worn, it's not atually contacting the shoe which means the handbrake has to travel miles before doing anything.
What do you think - does it need replacing?
Here's the other one actually mounted -
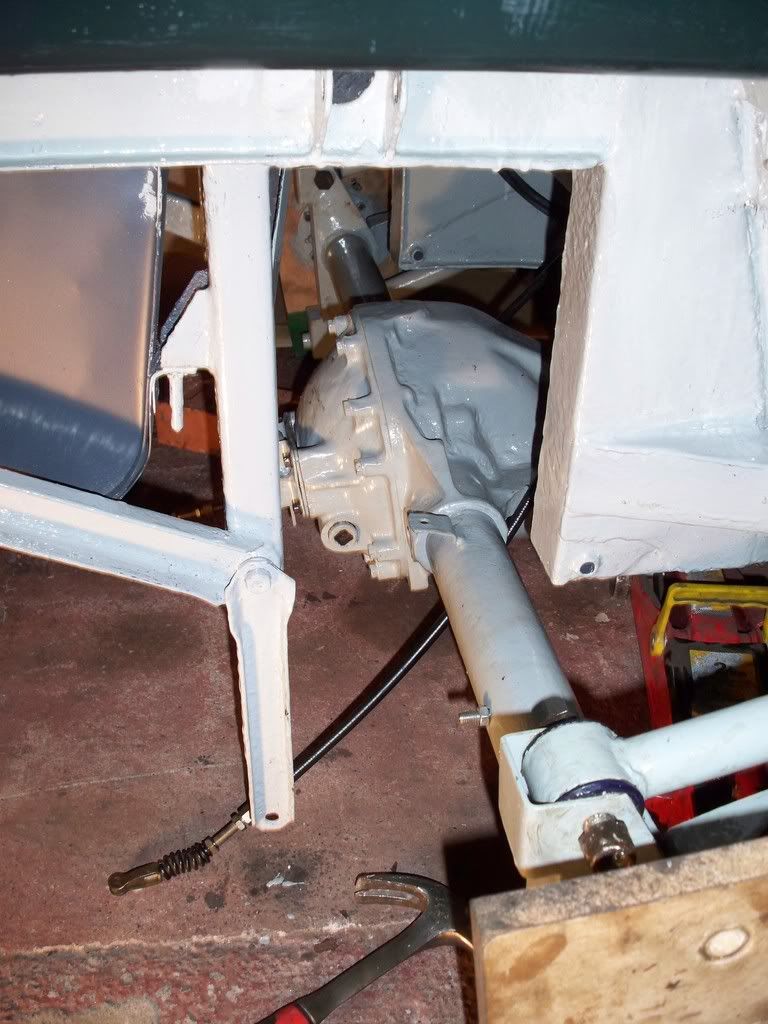
and finally I've cleaned up and painted the prop -
Thats it for now, hopefully I'll keep the momentm up on it a bit now
....
And that's really where I'm up to.
I'll keep this one up to date as well, hopefully it might gee me up a bit to get out there and do some work instead of sitting at the computer reading about work
Cheers,
Mike.
Thought it was about time I said something about what I've been up to, since I've read loads from everyone else.
At the moment it's pretty much a copy / paste of the blog I try to keep updated over on Scimitarweb (so apologies if some have seen it before)..
I bought the car over 2 years ago, and a house purchase shortly after meant litlte time to play with it.
However I got a few jobs done, and I'm back now working on it with a renewed enthusiasm. It's probably fair to say that I'm not aiming for a concourse winning car here, but something which is reliable, and tastefully modified where appropriate.
I'm trying to recall this all from memory, so the timeline is probably a little screwed up, and probably missing some detail, but hopefully it'll become like a restoration blog thing

Anyway, - quick pic of it when I bought it -
The first job was to cure the leaky rear screen, which was caused by the drain holes in the channel at the bottom of the screen having rotted away. Quality repair this, courtesy of half a Bic biro barrel, and some p38
. Unfortunately I don't have a pic of the biro in place, but I also repaired the drain holes like so -I also knocked up a couple of internal covers for the rear lights, although i think they look curse word now in these pics, so I'll redo them at some point. (The main reason for doing it was because the wiper motor was hanging off!
So I didn't do anything else for a while now, and we bought the new house which took 6 months to complete renovations - so the car took a back seat for a while. However, to reward it for being patient, this is where it lives now -
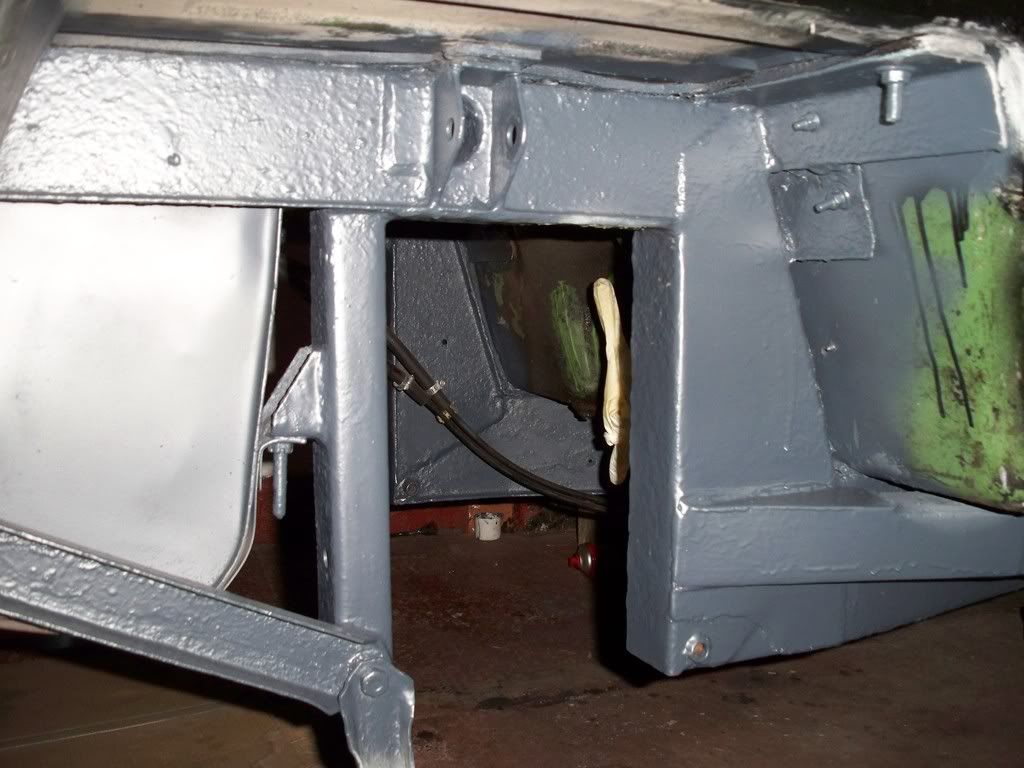
Earlier in the year I started to get it ready for MOT, so had a good crawl round it, and painted the front suspension and chassis. Heres a pic half way through -
I also decided to service the cooling system, so a new water pump was fitted which you can just see in the pic above, the old metal pipes were servicable, and I had the rad re-cored. I also fitted a fan from a Rover Coupe turbo which just fits in without removing the original mounting bar for the original fans, as below with a couple of diy brackets
I also removed the rocker covers to replace the gaskets to cure an oil leak. While they were off I thought a coat of paint wouldnt go a miss - before and after :-
(excuse the messy wiring, I was trying to get it running after what turned out to be me unknowingly clouting the dizzy with the spare wheel!)
I also chucked on a set of plugs, leads, rotor arm, dizzy cap and cleaned the air filter at this point
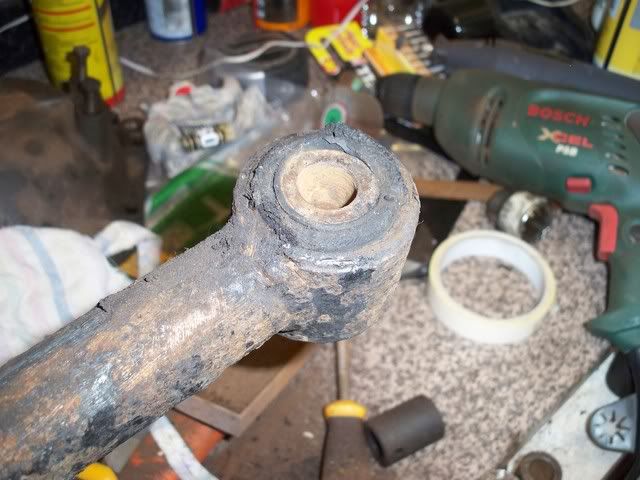
It was at this point that a mate pointed out a slight leak on the master cylinder, so I removed it, rebuilt it (or so I thought) and bled the brakes. While bleeding the brakes I noticed a bit of rot on the training arm / axle brackets. This has turned into a mamoth job (well, it is by my standards).
Heres a pic of the worst of the rot -
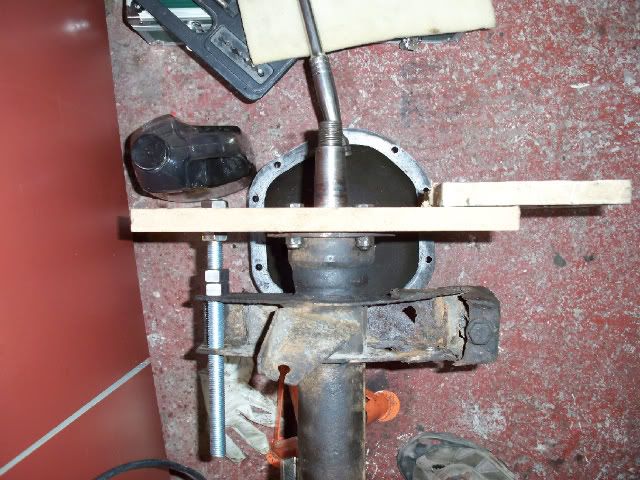
And here's the jig I've made up to ensure the new bracket is at the right angle and the right distance from the end of the axle
And thats where I'm up to now. I'm currently replacing all the trailing arm bushes for poly ones (the old ones were totally wrecked!). I'e also got to change the pinion oil seal - got knows why that nut is so tight! And I suspect I may end up having to change the oil seal at the hubs once the welder has done his thing
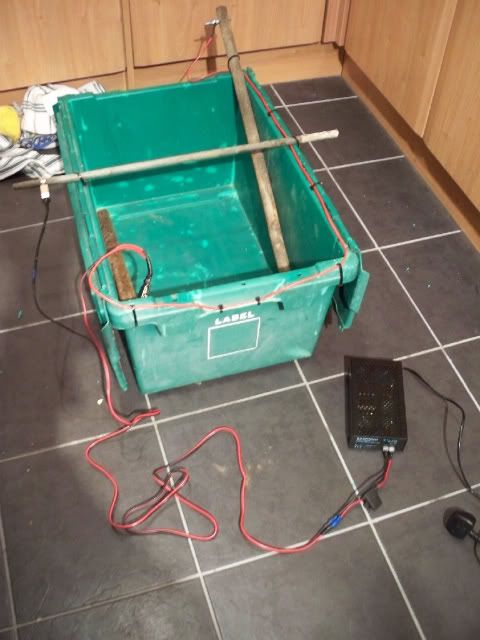
Oh, I also made an electrolysis tank for getting rusty parts freshened up - like so -
Still to do -
- Weld, Paint, Refit axle, paint and waxoil the underside everywhere
- Refit diff casing with new gasket
- sort out a new master cylinder, and rebuild brakes
- replace handbrake cable with one I picked up from Curbs
- Clean stainless petrol tank, as its 'grubby' at the mo
- Change the otter switch as I'm not completely confident that it will stay put in the rad once pressure has built up
.....
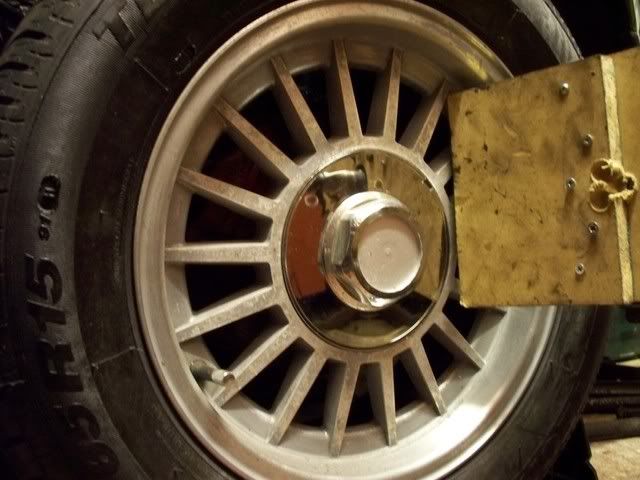
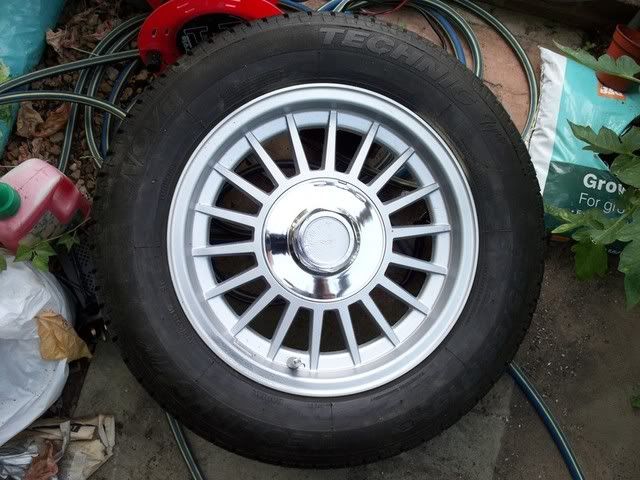
I've now refurbed the wheels - well, rubbed down and a coat of aluminium silver. Also the centres had a sort of plastic sticker on which I removed to reveal a nice shiny chromed finish, so they should all look a bit fresher when they're back on. Heres a pic before looking a little grotty -
and heres one after -
.....
Heres a pic of the trailing arm pre rust treatment - note the knackered bush, this was actually one of the better ones!
And heres one after its been in the tank and 5 mins with the wire brush - I'll probably give them another dunk beofer painting, as theres still a bit of surface rust - but it's perfectly paintable as is tbh.
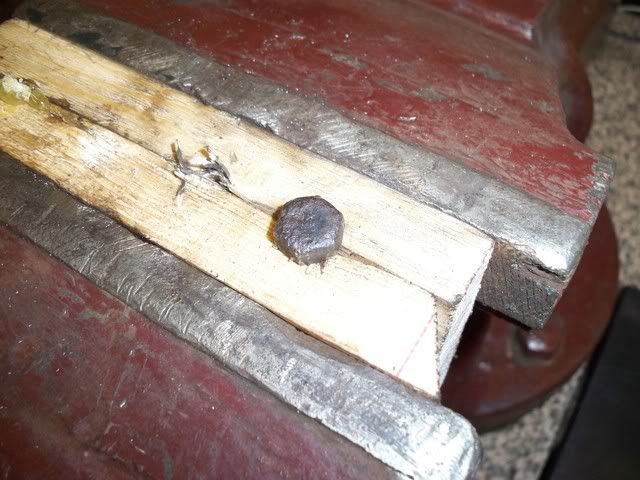
I also cameup with a way of cleaning up grotty bolts - pinch them between 2 peices of wood in a vice like so -
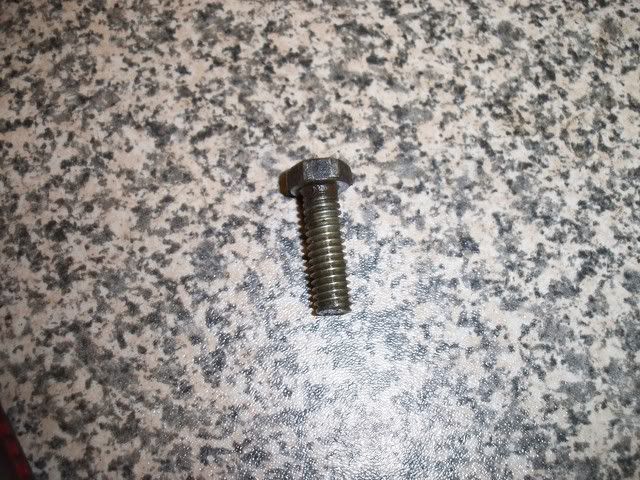
Wind the bolt in and out a couple of times, and it turns from this -
To this -
I then had a quick look at the rear brake drums, and went from this -
To this, ready for further dismantling and painting
Rear shocks have come up quite nice too -
A couple of pics of some shonky welding i'm having put right next week -
New wheel cylinders required here after I had to use the heatgun on the axle. (ok, I could've remove them firt, but I'd struggled all morning and patience was wearing thin :oops: )
I refitted the axle back cover too, but only temporarily so I don't get muck in it with welding. I've bought a new gasket for it so as to cure that leak - do I need some blue hylomar or anything on it, or just the gasket on its own? (the pics are pretty poor of the axle for some reason - but theres not mch to see there, honest
.....
Anyway, onto what I've been up to...
I'm waiting for a mobile welder chap to come round and weld the axle brackets up, so while I'm waiting I've done some other bits - first the pinion oil seal.
I can't beleive how tight the nut was to get off - a lenth on angle iron bolted to the flange and a 2 foot breaker bar and another 2 foot steel tube was reqired! The old oil seal was pulled out with a hub puller, and the new one knocked in. The flange was then polished a bit with wet n dry where it contacts the seal - as below:-
new oil seal fitted:-
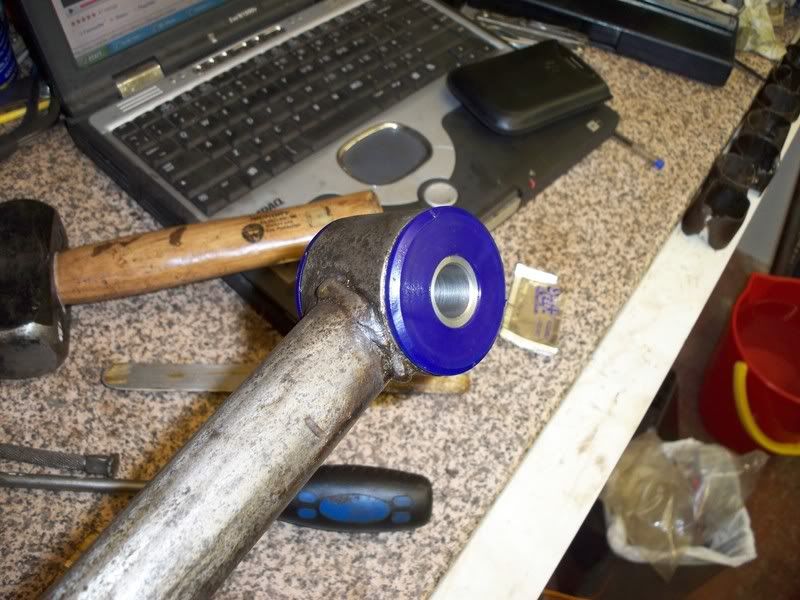
I then turned attentions to the trailing arms. Having moved the rubber bushes previously I looked at the size of the new ones (45mm) which were not going to fit into the trailing arms (39mm). However a bit of research revealed that metalistic bushes were originally fitted, which had an outer metal sleeve. This is what is left of the old metalastic outer bush -
I then removed them with a hacksaw, centrepunch, old screwdriver combo, like so -
which left me with a nice smooth trailing arm like this -
This meant that I could press the new bushes in, so I now have 4 of these -

In the background you can see the remains of the outer metalastic bushes.
Tomorrow will see me painting all the bits I think, and cleaning old paint / surface rust from underneath.
.....
Small update here, I've been painting bits ready to go back on the car. A couple of the local Halfords have been selling off the obscure colours of Hammerite - so I've stockpiled 4 tins of grey smoothrite. This should be enough to do the whole underside.
Anyway, onto the pics...
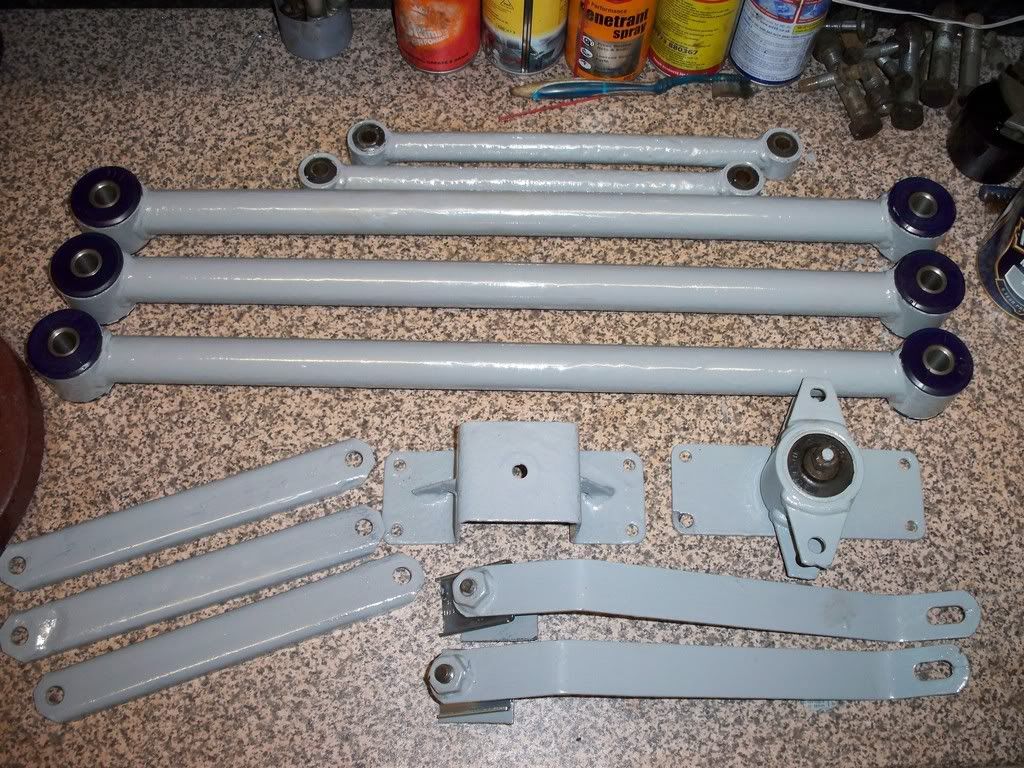
Here's the trailing arms (one's in my other car as I took it to show me dad what I'd been up to), the supports which go underneath the axle (one's still held by a seized bolt and is still on the car), the seatbelt bracings, and everthing to do with the Watts linkage.
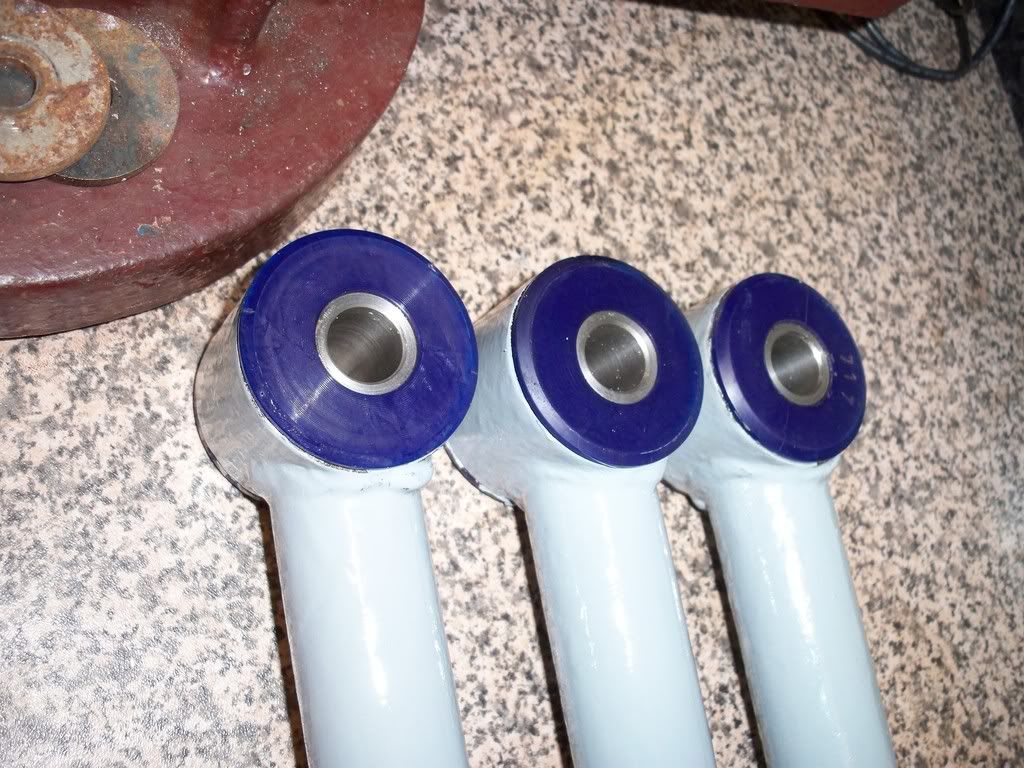
Heres a closeup of the bushes fitted in the trailing arms -
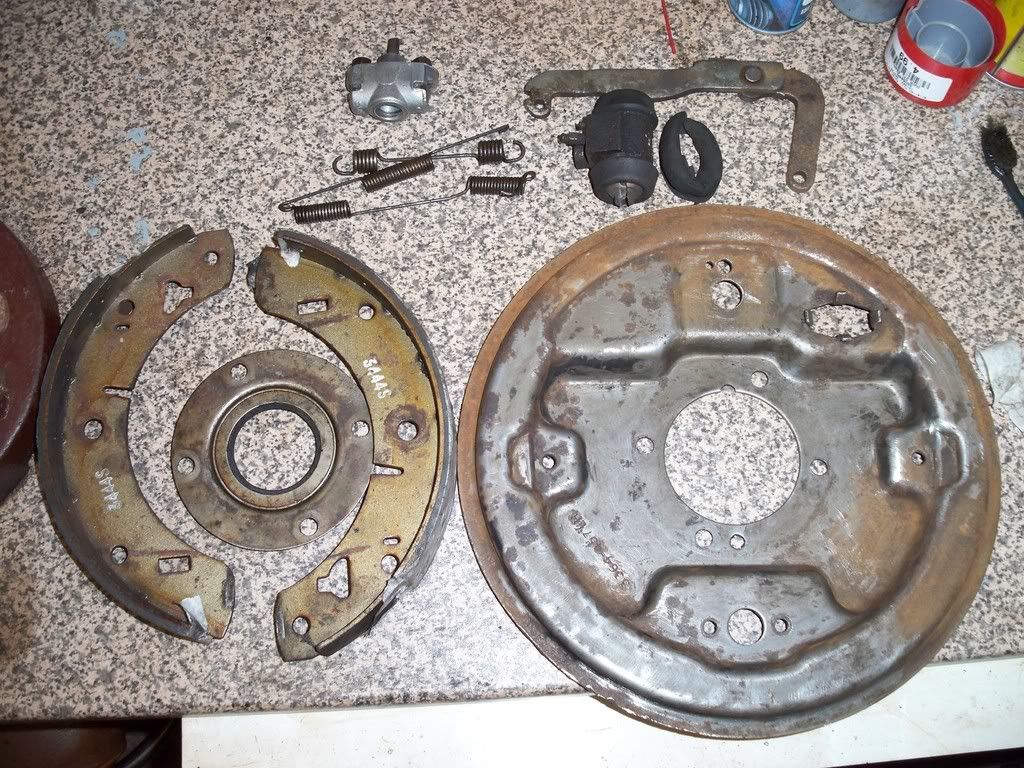
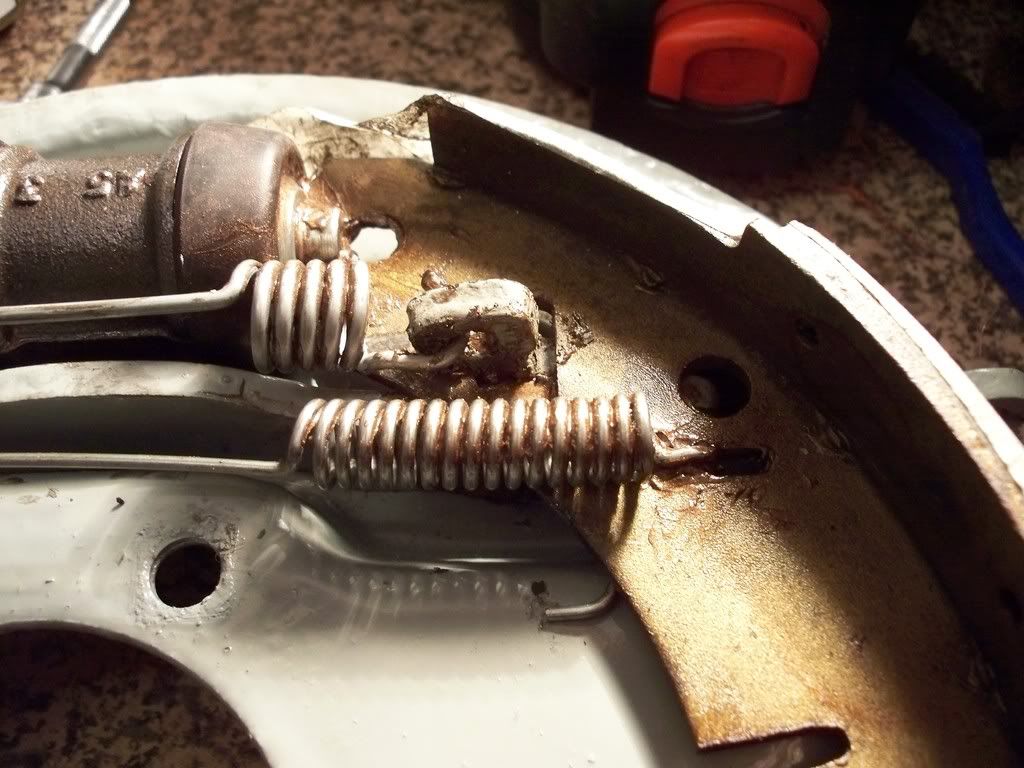
And heres one of the brake drums now I've stripped it all down, wirebrushed everything, and awaitng painting. I covered the shoe material with masking tape so as not to contaminate them with grease.
I need to get the rubber gaitors where the handbrake levers enter the drum, and the spings and caps which hold the shoes to the backplate have seen better days. I hope someone does an overhaul kit for the rear drums. Hopefully I'll get them painted up and reassembled this weekend, but we'll see.
Does anyone know what the items are in the last pic in the middle of the shoes? - are these the axle oil seals, or just seals to top curse word entering the drum? Either way, they're pretty simple to replace at this stage. I can't look at the ends of the axle at the moment, since it's all jigged up waiting fir mr. welder man to come do his stuff.
.....
Anyway, I've done a bit of spending today. 23 quid got me these bits for refurbing the drums -
It's worth noting that the 2 horizontal springs in the pic are left and right handed.
I'm replacing all the springs, the little plates that go on the retaining springs were knackered, and I thought I may as well replace the retaining pins - although I forgot to inclde them in the pic. One of the handbrake gaiters was missing and the other was pretty curse word so i replaced them too. I've also bought a couple of wheel cylinders a couple of weeks back, so i think thats pretty much everything.
I bought them from David Manners near Oldbury, since they're only a few miles away - and based on the fact that they're the same as MGB drums they had all the bits in stock.
Hopefully I can give them a lick of paint tomorrow ready for reassembly next week. Fingers crossed eh?
.....
Bit of an update, Friday was welding day. It turned out to be a long day - from 9am till 5:30, with a 10 minute lunch break.
Anyway, it was well worth it, as all the welding is now complete so on with the pics...
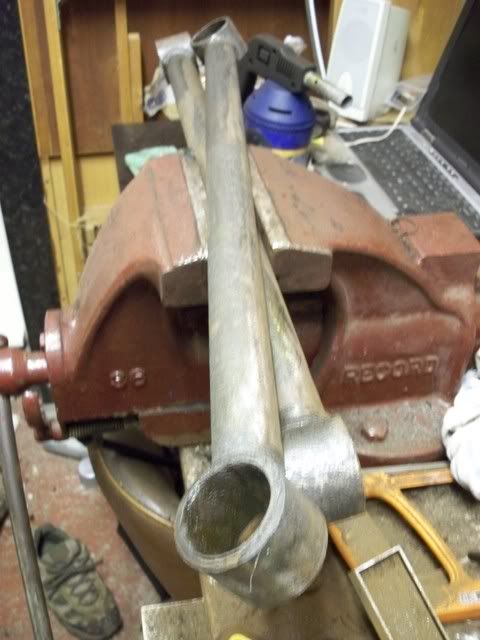
We started the day with a couple of these which I bought from qrg (about 67 quid each):-
We cut the fronts out of them so they slid over the axle like so...
I'm pleased so say the jigs worked out perfectly too.
Heres a pic of one end all welded up -
And another
You can see we also ran a weld down the backs of the brackets, as they were only part welded. They would've held but it might have been a bit of a rust trap.
The handbrake brackets were reused, as the new brackets don't come with them. Not a problem though, as they were in good condition anyway. Here's a pic...
Then we moved onto the diagonals under the car.
Quick remninder of before
Nearside
Offside
And heres the fresh stuff -
Nearside
Offside
Both chassis uprights needed repairing before the diagonals were repaired, as the nature of the diagonals create a mud trap which had rusted through.
Hopefully tonight I'll be able to crack on prepping the rest of the chassis and ready for painting later in the week.
Lastly, Les - If you're reading this, thanks very much mate, I'm well happy with the work
.....
Only a small update really - we had a week away the other week, which has kind of took the momentum out of things, and I've got a few diy jobs looming on the horizon too, but I'm still plodding on. Only a small update really - I've started painting now. Hopefully i've finished rubbing down now, I can't handle any more brown dust on everthing.
So here's pics of the axle painted - I bolted the jigs back onto the end of the tubes so i wasn't hindered by axle stands.
I did take some of the chassis, but its only in first coat stage, so it looks a bit curse word tbh - I'll post pics of that when it looks a bit smarter (hopfully I'll get a couple of hours in the garage tonight.
.....
Anyways, I had a few hours on it yesterday, and here's where I'm up to now.
The underside is now painted in grey hammerite and I sprayed it in Grey Stoneshield (by Hammerite) paint. I might do another coat of grey hammerite over the top, hopefully it won't react. Here's a pic, shame about the runs

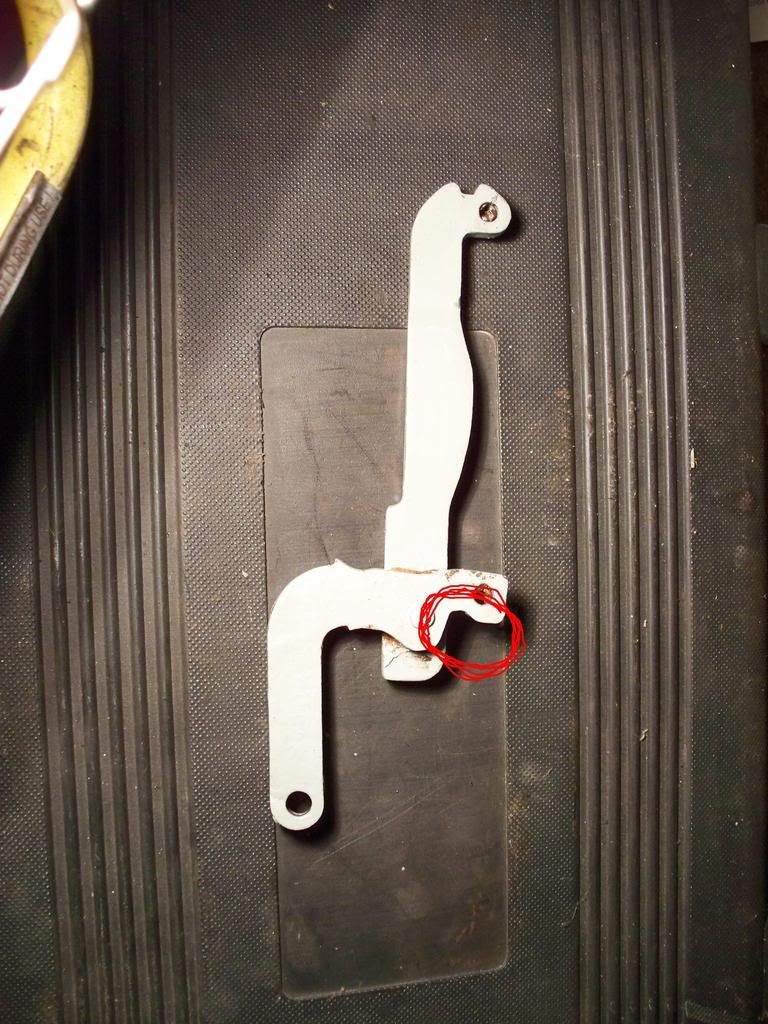
Now, onto the brakes. I've started reassembling things, but I can't get the handbrake to work in a 'nice' manner. Here's a pic of where I think it's worn, it's not atually contacting the shoe which means the handbrake has to travel miles before doing anything.
What do you think - does it need replacing?
Here's the other one actually mounted -
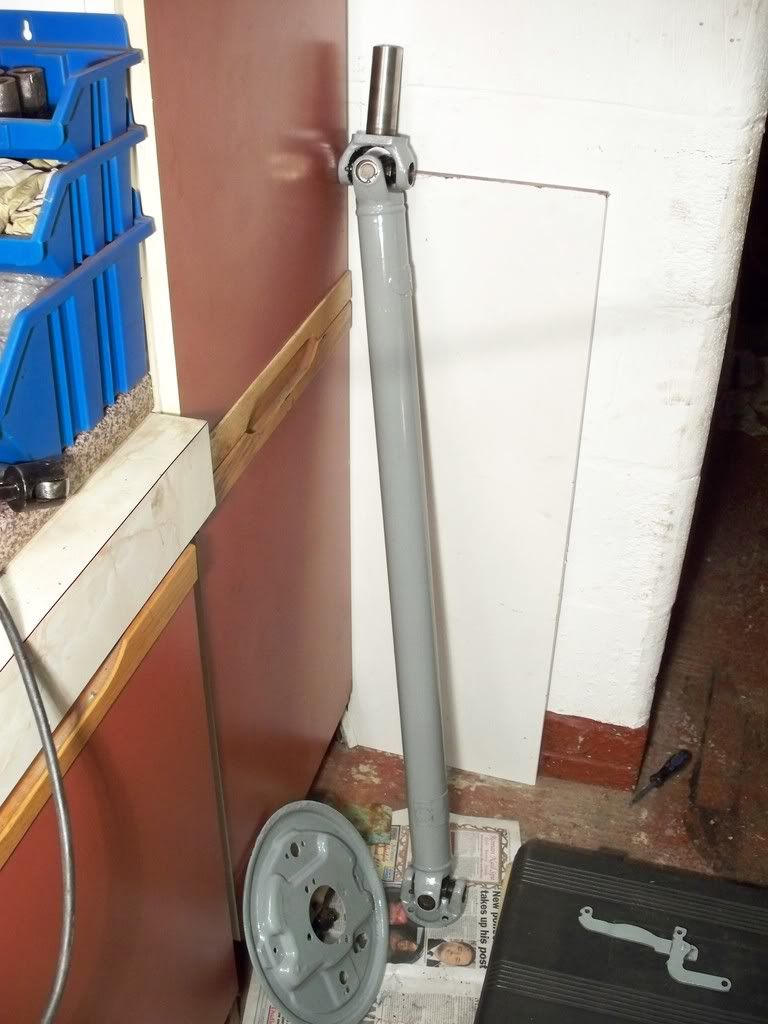
and finally I've cleaned up and painted the prop -
Thats it for now, hopefully I'll keep the momentm up on it a bit now
....
And that's really where I'm up to.
I'll keep this one up to date as well, hopefully it might gee me up a bit to get out there and do some work instead of sitting at the computer reading about work
Cheers,
Mike.


 aint seized, but it's all a bit of a sloppy fit to be honest - it seemed a shame to put it back together like that really. The lever mechanism has to move an inch or so before it has any effect, so i'm getting it filled with weld and I'll grind it back like new.