MrSpeedy
East Midlands
www.vintagediesels.co.uk
Posts: 4,789 
|
|
|
|
So, having established (in my mind anyways) that the fuel mixture was leaning out above 4K I aquired a few NOS needles and set about trying to sort the problem. I stuck a couple of needles in the lathe and trimmed them down by 0.008" at the thin end, blending into standard diameter half way. Original 2AQ at top and my reprofiled below  This resulted in a complete turn around and now she won't go over 3800 as it turns stupidly rich and just chokes up! Still at least this proves that it was weak. I also trimmed another pair down by 0.004" as a halfway measure. When I got the needles I just assumed they would be no good, however, having found a needles comparison chart it appears that the ones I have bought (1EL as opposed to 2AQ) that they should give a slightly richer mixture right about where I need it, so next step is to try a pair of those in standard trim and see what happens. I've also dug out some Aluminium sheet and started crafting some interior trim panels in place of the original shoddy cardboard that went soggy and collapsed   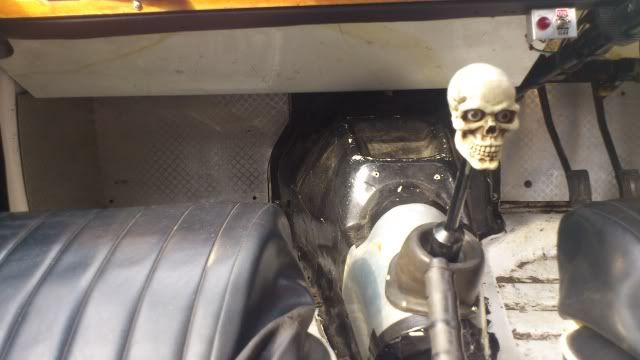 |
| |
|
|
|
|
MrSpeedy
East Midlands
www.vintagediesels.co.uk
Posts: 4,789
|
|
|
|
So, I'm still plugging away experimenting with needles in the carbs and it is getting better. I needed a distraction tho (ran out of fuel  ) so i started on the interior trim panels Following on from the kick panels I fitted last week I've order some 1mm Aluminium sheet to make new door cards. All being well these will have a bead rolled into them to give a little detail and rigidity. I also made this 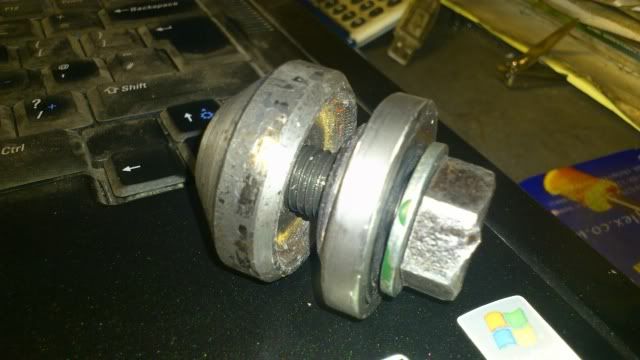 1" flare punch to enable me to do this   Not a huge weight saving granted, but there's 0.2KG gone already I've done it more for the look tho tbh, as I think the punched holes where the wood capping used to be will look rather nice against the new Aluminium door cards |
| |
|
|
|
|
|
|
|
|
Is your boot floor covered in some sorta bitumen gunk? That's gotta be a couple of kg, at least!
Have you heard of the ali heads that one of the specialists was developing?
|
| |
Last Edit: May 9, 2012 20:09:20 GMT by mdh
Koos
|
|
ChasR
RR Helper
motivation
Posts: 10,269
Club RR Member Number: 170
|
|
|
|
Chris Witor does supply a load of ally bits to bolt onto the engine so as to reduce the weight by quite a bit. Saying that, you've probably succeeded well there by going as light as you have on the front with the FG front, ally rad etc. Looks great as always  . |
| |
|
|
MrSpeedy
East Midlands
www.vintagediesels.co.uk
Posts: 4,789
|
|
|
|
@ mdh; yeah, there is a fair bit of underseal, but that'll wait till another day when I can strip it all off and give it a couple of thin coats of shutz. I have heard of Ali heads but can't seem to find them atm. Tho, I know they'll be large amounts of wedge, and this is not a cheque book build  @ ChasR; I've seen the front and rear Aluminium plates and couldn't justify the cost. Tho I don't kow why I didn't just get a piece of Ali and make my own tbh. Maybe a job for a rainy day, but it's fairly major swapping them over with the engine in |
| |
|
|
|
|
|
May 11, 2012 11:18:13 GMT
|
|
Pop down the breakers, grab a couple of wrecked heads, melt them down and mould your own!
Oh and one for me too! :-)
I read somewhere that the 'Rumph 6 pot weighs the same as a small block Ford....
|
| |
Koos
|
|
MrSpeedy
East Midlands
www.vintagediesels.co.uk
Posts: 4,789
|
|
May 11, 2012 16:28:07 GMT
|
Pop down the breakers, grab a couple of wrecked heads, melt them down and mould your own! Oh and one for me too! :-) I read somewhere that the 'Rumph 6 pot weighs the same as a small block Ford.... It probably does. They're a stupidly heavy engine. Must account for at least 1/4 of the total cars' weight, if not more! I think I'll pass on the challenge of making my own Aluminium cylinder head at the moment. (But never say never, eh?! ;D) Anyways, Today Mr. postman brought me what he called "a new wobble board" It wasn't tho, it was some Aluminium sheet I traced around the old trim panels and cut out some new ones. Then had a play with the bead roller These are the result   The old trim panels had a combined weight of approx 7Kgs and these Ali ones have a combined weight of approx 4Kgs, so a 'massive' 3Kgs gained there However, I like the look of these shiny shiny things over the tatty old trim  |
| |
|
|
|
|
|
May 11, 2012 17:44:28 GMT
|
That's a great finish. Looks really purposeful. This is one of my favourite build threads to follow |
| |
...proper medallion man chest wig motoring. |
|
|
|
|
May 11, 2012 19:26:33 GMT
|
|
Looks like a proper 60s racer!
Just remember those panels will get well hot in the summer, so mind your love handles don't get singed!
|
| |
Koos
|
|
Em
Part of things
 Fuel Injected? Carb Infested!
Posts: 601
|
|
May 14, 2012 16:51:23 GMT
|
|
Looking good dude!
Love the holes, very racy!
|
| |
|
|
|
|
|
|
|
|
|
Like it Speedy ;D got to change those side windows for perspex next My parents Vitesse took a long time to get running properly things improved when they found dad had forgotten to add the linkage between the carbs |
| |
|
|
MrSpeedy
East Midlands
www.vintagediesels.co.uk
Posts: 4,789
|
|
|
|
Thanks fellas Those new Aluminium panels have really lightened the interior. The engine is running a little better now with some more 'tweaked' needles, and continues to get better as it loosens up. An oil and filter change is planned for tonight. rob, I do have plans to remove the side windows and replace with perspex. The front door glass was concerning me because there's no runner to keep the rather flexible perspex in place, but I think I have a solution for that |
| |
|
|
Dez
Club Retro Rides Member
And I won't sit down. And I won't shut up. And most of all I will not grow up.
Posts: 11,786
Club RR Member Number: 34
|
|
|
|
green perspex FTW. interior looks pretty smart now, says 'racecar' even though theres still a back seat. |
| |
|
|
MrSpeedy
East Midlands
www.vintagediesels.co.uk
Posts: 4,789
|
|
|
|
green perspex FTW. interior looks pretty smart now, says 'racecar' even though theres still a back seat. Thanks Dez. That's kinda the style I've been veering towards. Currently debating a rollcage Oh, and Shhhh with the green perspex, I don't need encouraging when it comes to silly ideas! Sooooo, what's been happening lately? Not a huge amount tbh. After many needle swaps and tweaks to the carbs, she's now running very nicely. I think there's still more to be had, but until I get more needles I'll be leaving it as is. I have no idea what the needle profiles are that's now fitted, as I've been tweaking them myself in the lathe, removing 0.001" at a time until it pulls clean through the rev range. It now pulls through to 6k and I'm sure it would go further, but I feel it's still leaning out a little at top end. I've also been spending many hours hunched over the laptop (No, not doing that!!) putting together plans for a brake upgrade. Now I can't et anything bigger diameter under the 13" wheels than standard (246mm) BUT, I can just squeeze in a conversion to vented discs, using spaced out 16P calipers, 2.8i Capri discs, remachined hubs and spacers. Well, I can in theory, but that'll be tested next week. I've also just ordered some Goodridge brake hoses to ensure that the system is as good as can be. In other news, I aquired a set of 4 3.5" Herald wheels, and would you believe it, 2 of them 'fell' onto the lathe  Then a 6.5" (  ) strip of steel got somehow caught between the two halves  Ooooh, Dishy. (sorry )  Now, I'm not actually seriously contemplating using these new wheels on a regular basis (well, I'm trying to convince myself not to) but just doing it as something to do. Mostly because I aquired a pair of these from a Formula 3 car  Could be a bubble! lol |
| |
|
|
|
|
|
|
|
|
Holy offset batman!!
How you gonna squeeze them beuts ander the arches?
|
| |
Koos
|
|
MrSpeedy
East Midlands
www.vintagediesels.co.uk
Posts: 4,789
|
|
|
|
Holy offset batman!! How you gonna squeeze them beuts ander the arches? Ahhhh, yes. The offset! That's going to need some 'adjustment' I'm hoping to shove the centres out by around 3/4" to bring the inner rim inboard as much as possible to reduce the poke. However, they're never going to fit under the arches properly, hence why I'm not looking to use these on a regular basis and just doing it for a giggle ;D |
| |
|
|
MrSpeedy
East Midlands
www.vintagediesels.co.uk
Posts: 4,789
|
|
Jun 12, 2012 16:12:41 GMT
|
Soooooo, she currently looks like this  But why? Well, it's at least by choice rather than forced upon me. Having concentrated so far on making the thing go faster, it's about time I did something to help slow it back down. Now, whilst the brakes performed ammicably on the brake rollers for the MOT, I feel they could be improved upon, and they haven't had any attention for the last 4 1/2 years So, the plan is this; This standard set up will almost remain  The calipers have been removed, stripped, cleaned and fitted with a spacer kit 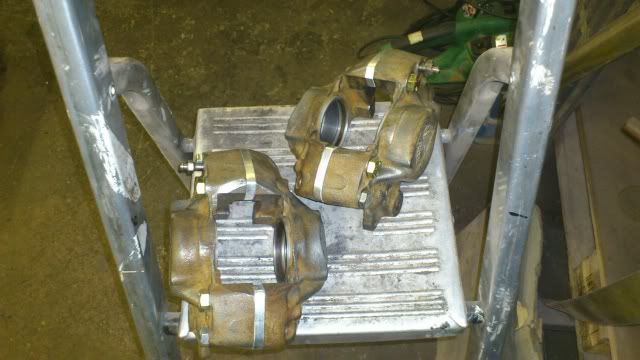 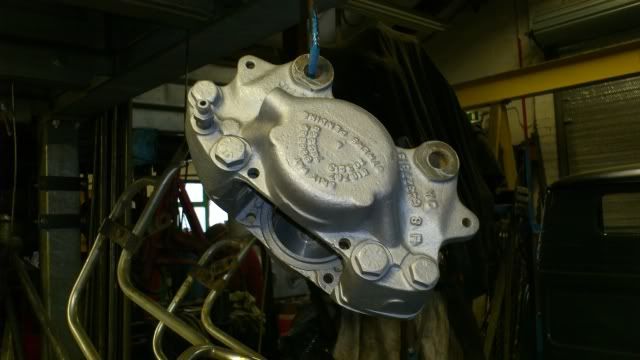 This is to allow fitment of a set of vented discs. Now, an obvious upgrade would be to fit bigger discs, but I can't get anything bigger under the 13" wheels, and I'm not changing them!! So, the plan is to freshen up the calipers with a new seal kit (they were a little stickiy tbh) and fit some vented discs off of a Capri 2.8i. This will need some machining tho. The original Triumph disc is 10mm thick and the Cappa one is 18mm, hence the 8mm spacer kit in the calipers. However, there is precious little room to fit wider discs as can be seen;  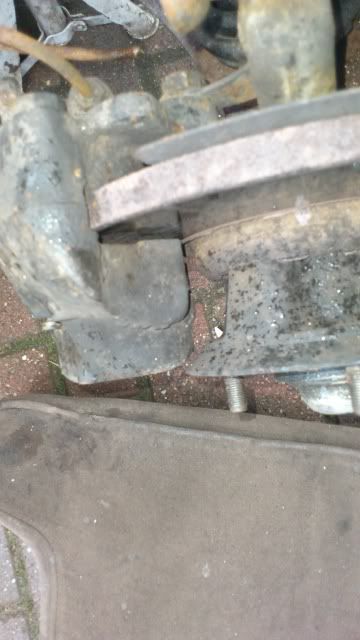 With some careful measurement and machining tho, I'm aiming to machine the hub to bring the outermost face of the new disc 4mm further out and skim the back of the hub to give clearance. There will then be a 4mm spacer added between the caliper and carrier bracket, which should restore the caliper on the centre line of the new disc. This may neccesitate a small spacer between the steering arm and vertical link tho, so that the track rod end will clear the disc. Now, whilst I know that all this won't give me any mechanical advantage over the original set up, I believe it will give me the best available brakes given the size of wheels I have. Time will tell! |
| |
|
|
|
|
|
Jun 12, 2012 19:38:42 GMT
|
|
I assumed it had broken down lol!
You didnt fancy finding some big heavy Princess four pots?
FWIW I found that black diamond discs gave more stop for the size.
|
| |
Koos
|
|
MrSpeedy
East Midlands
www.vintagediesels.co.uk
Posts: 4,789
|
|
Jun 12, 2012 19:57:10 GMT
|
Princess ones carry a serious Ford scene tax these days, plus I'd still be struggling to get them under the 13's Anyhooo, these evenings work has gone something like this; A little bit of turning 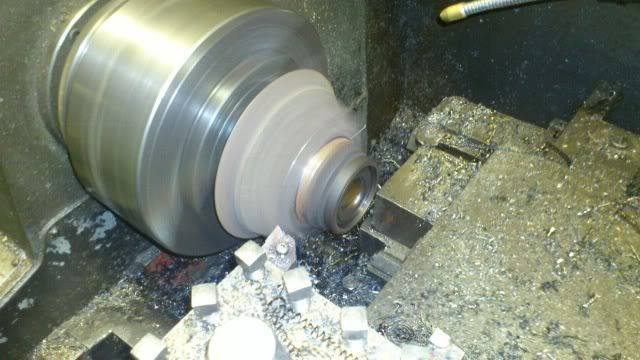 This allows the Capri discs to fit to the hubs concentrically, and to also move the disc centre somewhere near the original That was followed by a little drilling 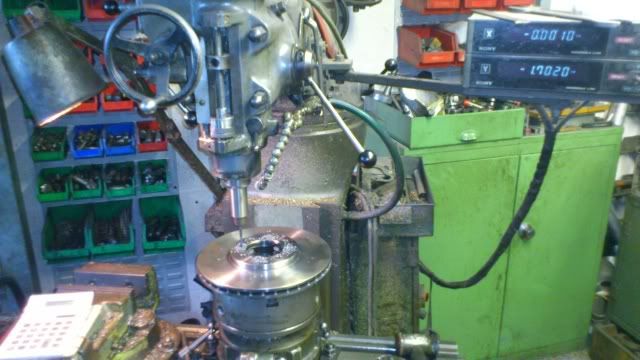 Unfortunately the Ford bolt pattern didn't quite match the Triumph one and rather than slot the holes I redrilled them and reamed them to size to ensure there is absolutely no chance of either 'run out' or sloppy bolts Whilst I had the dividing head on the Bridgeport, I figured I may as well add a few grooves to the discs  A quick coat of paint and the hubs/discs are ready to fit back to the car tomorrow 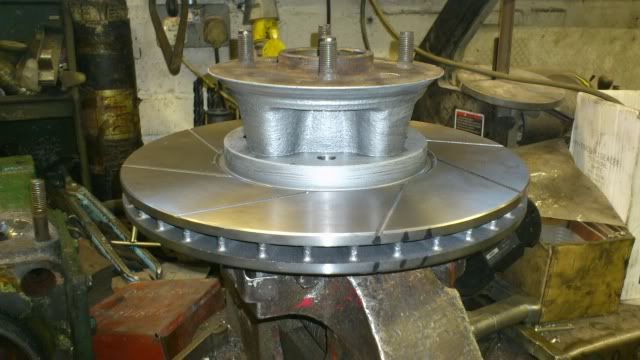 Hopefully my new seal kit and braided flex hoses will turn up tomorrow too |
| |
|
|
bstardchild
Club Retro Rides Member
Posts: 14,941
Club RR Member Number: 71
|
|
|
|
|
This just gets better everytime I check in for the updates
|
| |
|
|
|
|


 ) so i started on the interior trim panels


 .
.


 ) strip of steel got somehow caught between the two halves