|
|
|
|
|
i haven't updated this for a few days, yet things are still moving forward. Heres what ive been up to recently. Firstly, that panel above ^ at the back of the battery tray/inside O/S rear corner has been removed. I ground back the welds to see what they were trying to cover. After i split it in half it started to peel away  and then after a few more minutes it finally came away. Its not as bad as i feared to be honest, yet its another repair that I'm going to have to do 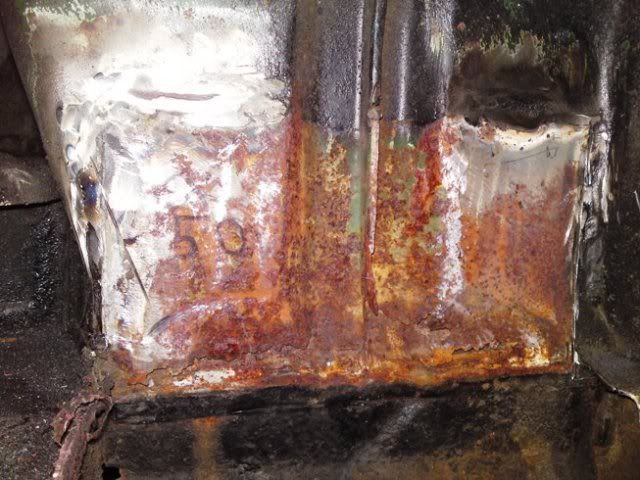 I then turned my attention to the engine bay panels on this side too. I could see repairs were going to be needed 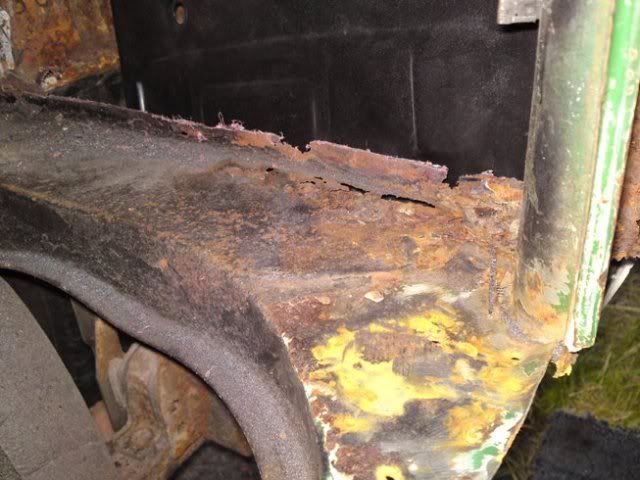 So i worked out where i wanted to chop, and taped it up. 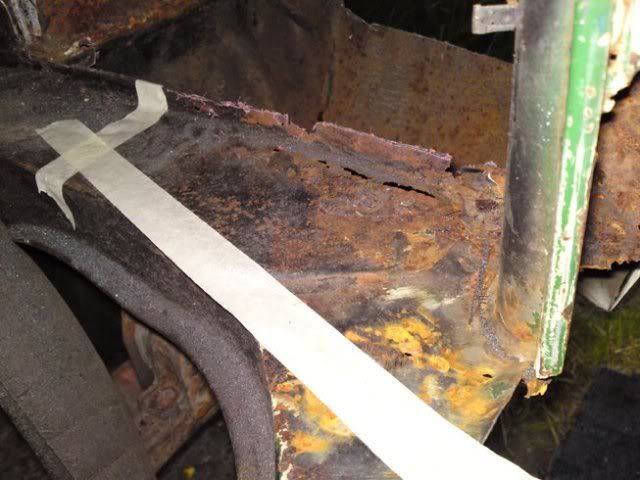 then out came the grinder again, and i chopped that section out. 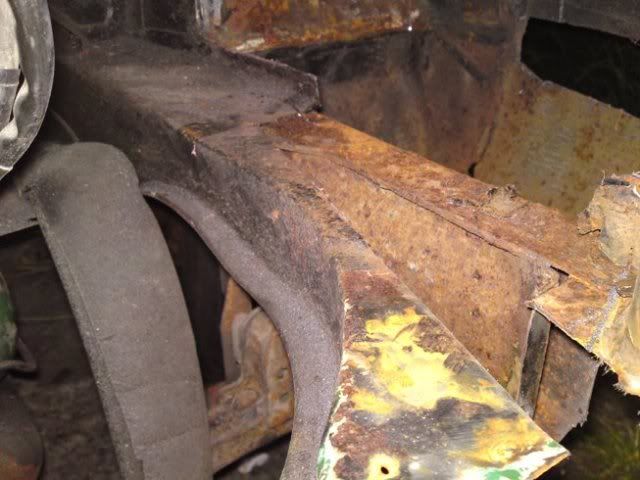 This also gives me greater access to the remainder of the inner rear valance. It is my intention to remove all remaining parts of the inner rear valance this week, so that the new inner rear valance can go in this weekend. Once i have the inner in, then i can mock up the other panels around it. Heres how the RHS battery tray/engine bay/inner rear corner now looks. 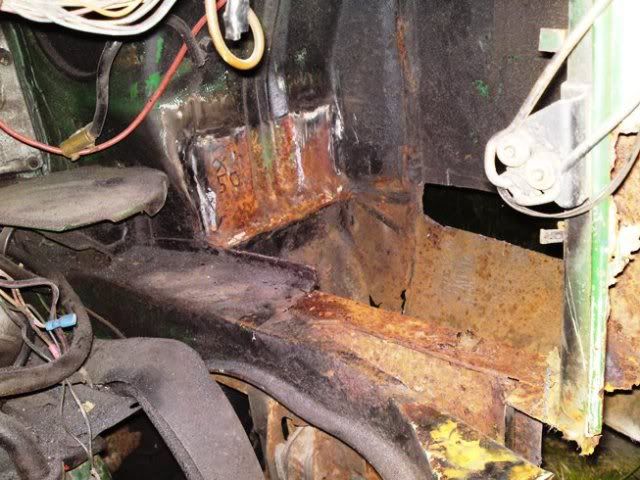 I'm trying to get as much prepared as possible before i get the welder out. Ideally i would like to be able to do as much welding in one hit as i can manage, and that means i want to have panels sorted and ready to go in. With that in mind i turned my attention to making up a battery tray for the LHS. You may remember i had two RHS battery trays. If you look at a previous post you can see i intended to flip one of those, and then cut a section out and reverse that, to give me drain holes in the correct place. Heres the Panel as it started 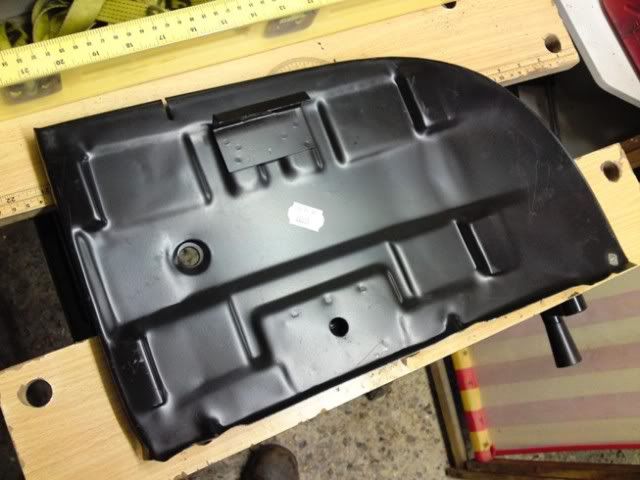 I marked out where i wanted to chop with masking tape 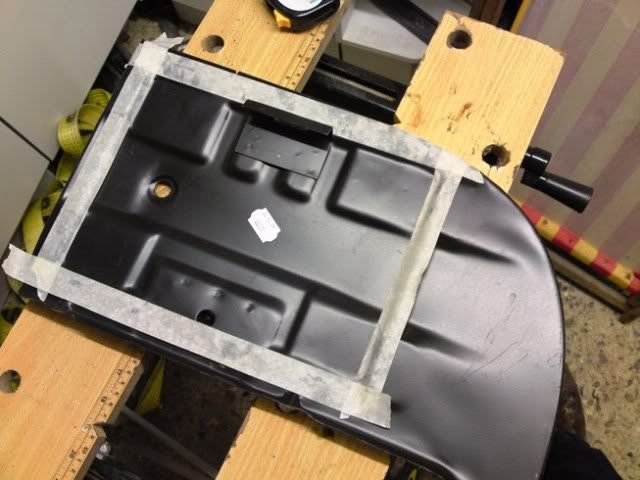 I then flipped the panel out with a view to remove the mounting for the battery. I have recently discovered that the axe head off Tashas grandads old axe makes a wonderful chisel! lol. The spot weld drill bit died on me so i was forced to drill out the spots and then a quick tap with the axe and off it came. At the point Tash walked in and expressed her .... dislike .... of me using her grandads axe as a chisel lol. 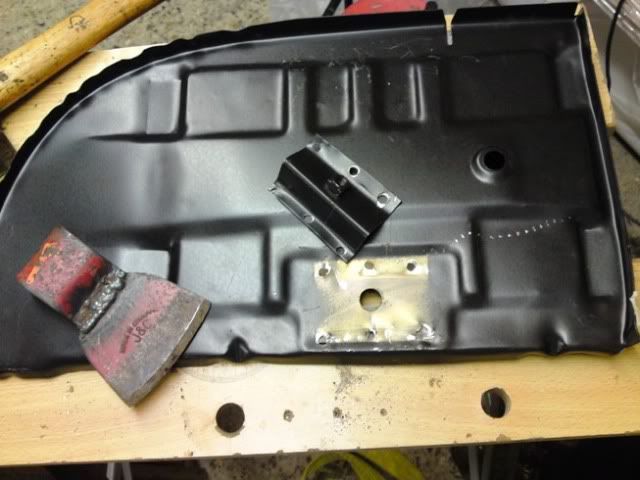 Then i flipped the panel back over and chopped out the section i had marked out. 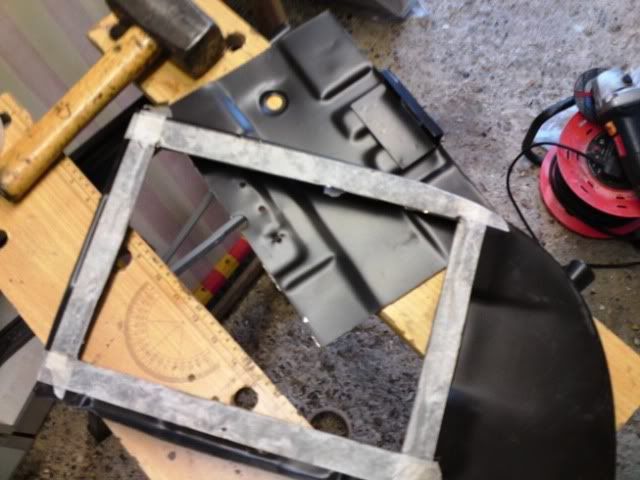 I now need to weld that section back in. I flipped it over to see how it will fit though, and this gives you an idea of how it will go together 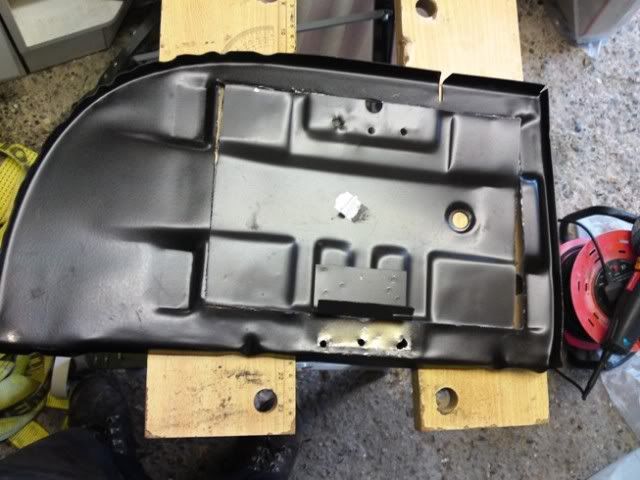 I'm getting very close to being ready to weld now. I may end up doing the closing panel on both rear arches, i need to look at those next. One evening should see the rest of the inner rear valance out, and then i can make some panels, do A LOT of prep, and then get welding! |
| |
|
|
|
|
|
|
|
Jun 24, 2009 12:22:32 GMT
|
Yoinks, that ended up being loads of work hiding in there  |
| |
|
|
|
|
|
|
|
i havent updated this much recently, but things have been progressing well. I had a good weekend on it, but now it wont get touched for a fortnight or so, which is a shame. Anyways, the battery tray for the LHS has now been made. Its not fully welded in so i have some room for manipulation when it comes to getting it to fit with the new repro rear corner. 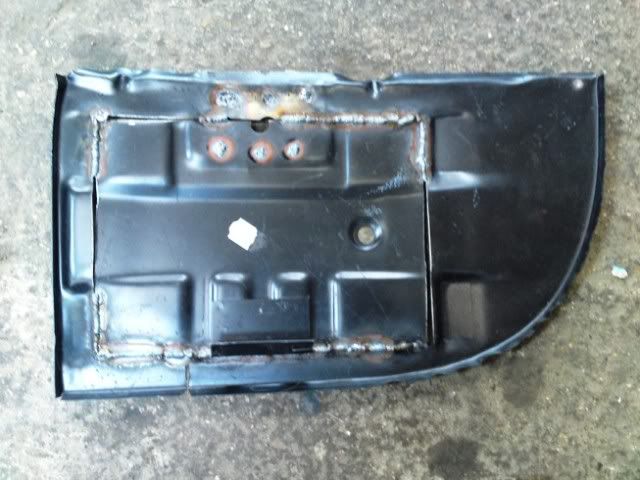 I then removed a little electrical box at the back of the rear LHS wheen tub (that had to be ground off) and also removed the old rear closing panel repairs. This meant i can loosely fit the new battery tray to see how close it is. I wont get it to fit exact until the new rear corner is in, but this gives me a good idea of how close its going to be against factory.  You remember the engine bay section i chopped out the other week on the RHS? Well i then made the template for that repair section. My goal was to have all the metal chopped out, and all templates made, so that when i get back on it i can just make some panels and get welding. 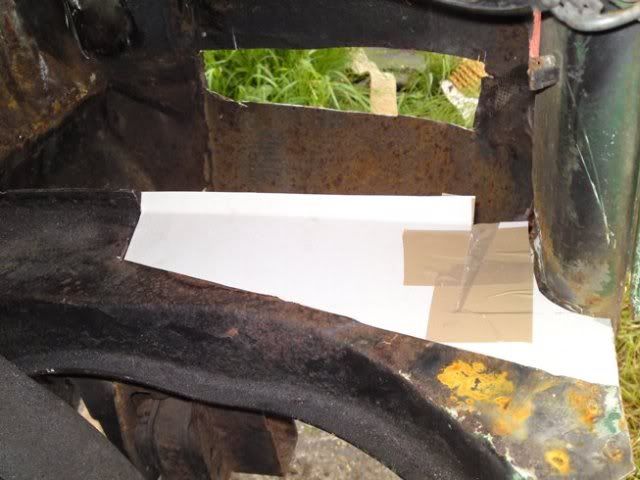 I then marked out the area that needed to be chopped out and replaced on the engine bay of the LHS. 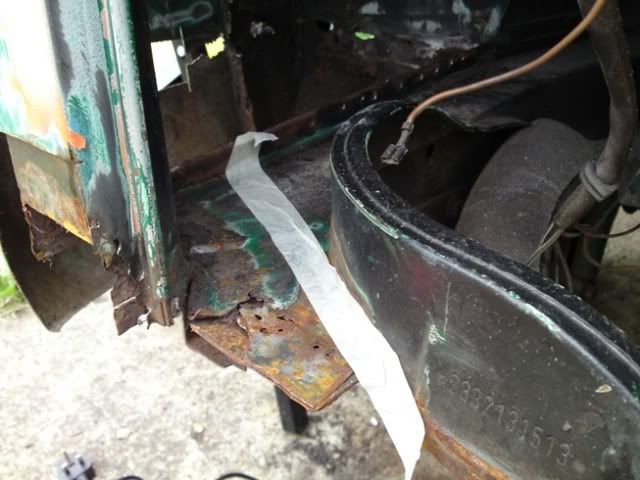 This was removed. Finally i removed the final sections of the original inner rear valance, which meant that the new inner rear valance can be tried fitted. 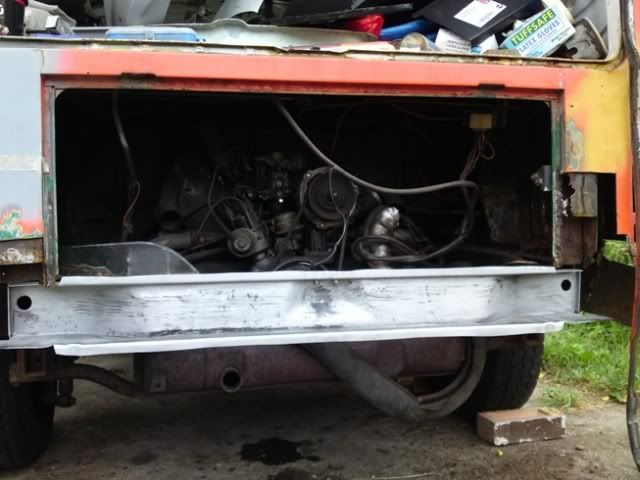 You can see here how it all fits together. Basically i need to make the tabs at the end of the chassis member to mount that new inner valance up against, and then you can see where the engine bay repair panel will mount on top of the inner rear valance. The other side fits exactly the same, and needs identical tabs/panels to be made to complete. 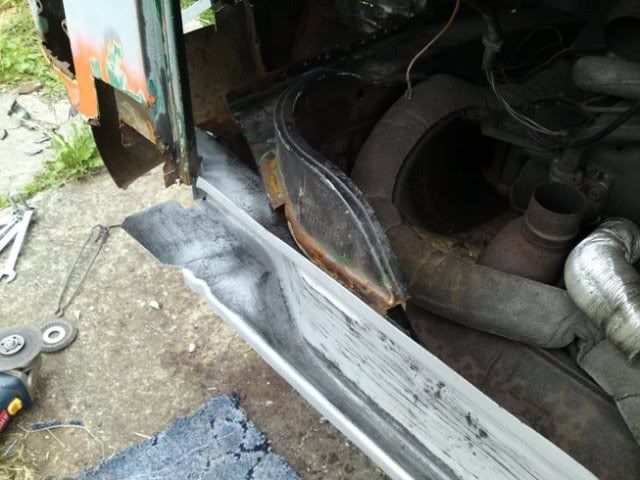 To finish off i made the remaining templates for the chassis member tabs and engine bay repair panels. 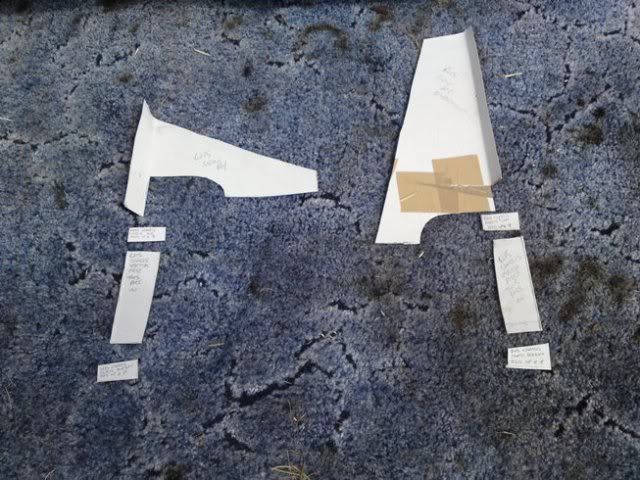 When i get back on it i now just need to make these panels and get them into place and the inner rear valance can go in. Then i tackle the rear corners. And finally the battery trays can go in. Considered all the above has been done during the month of June i don't think i've done too bad. If July will go as well then I'm hoping that all the metal work at the rear end will be in, and i'll be onto the next thing! |
| |
|
|
|
|
|
|
|
|
Mate! You've got your work cut out there (you see what I did there!). awesome work, a lesser man would give up at the original sight of it, and given the limited access.....
Gotta love a bay. How is they rest of the floorpan and the front end around the steps, behind the arches and the door runners ect? weldathon coming on or no?
|
| |
|
|
|
|
|
|
|
Vivaboy - yeah, theres a fair bit of work to do, but i've seen much much worse. The chassis is all good and strong, and its had new arch and sill on the passenger side. The sill on the drivers side is ok but not great, i think i will end up doing it to be honest. It will be a weldathon though, no two ways about it lol. Just the roof is a mission in itself! I have been away recently so nothing much has progressed over the past week or so. However, Tash brought along some material that we had acquired, borrowed a mates sewing machine, and we now have curtains for the bus!!!! We have a basset/beagle cross, so you can imagine how much we love these!!  I think she's done an amazing job! Hopefully we'll trial fit the interior and curtains this weekend so we can make sure its all going to go together ok. 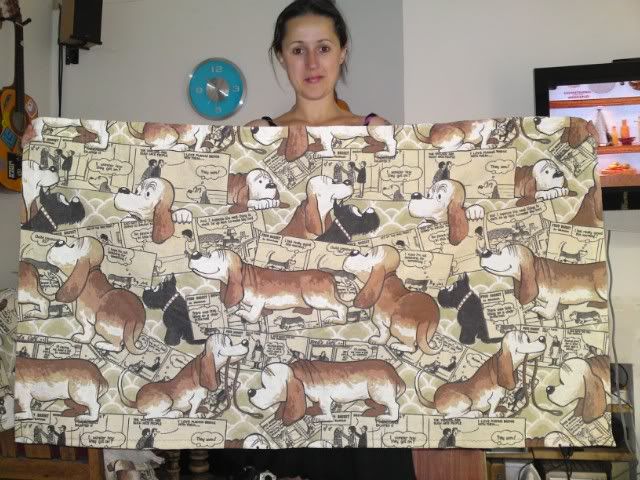 |
| |
|
|
|
|
|
Jul 11, 2009 21:22:26 GMT
|
more progress today! Its been a bit slow this month, so I kinda feel like I'm playing catchup a little. Firstly I got the tabs made for the rear chassis members. I need these to mount the inner rear valance against.  From the template id previously made, I then made the panels for the engine bay. 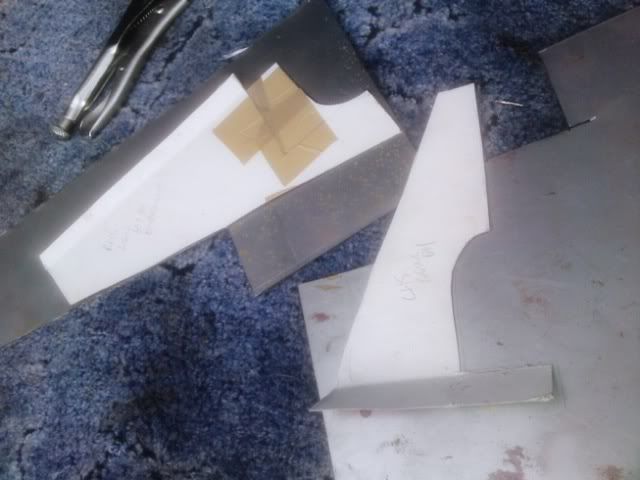 Having a poke around the rear corner I realised there were going to be further repairs needed. Another one that can wait for another day lol 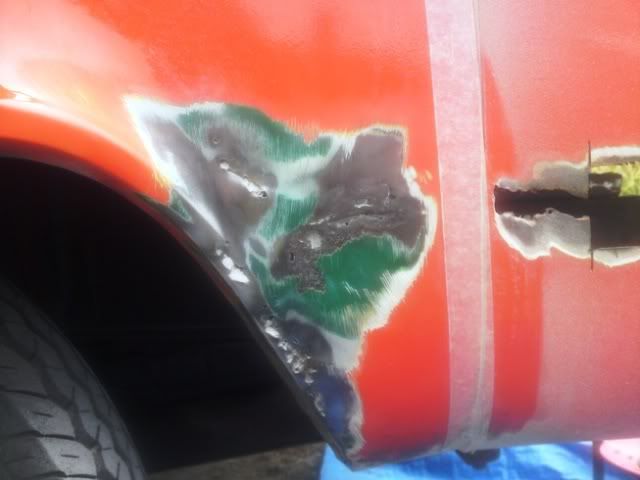 We then had a small stoke of luck. We had to run out and sort some carpet for a room. As we were leaving we saw something ideal for flooring, and grabbing it for the bargain price of a tenner! When we got back, with the clouds looking suspiciously grey, I decided it would be better to mock up the interior rather than risk electricution from impending rain shower. Heres how it looks 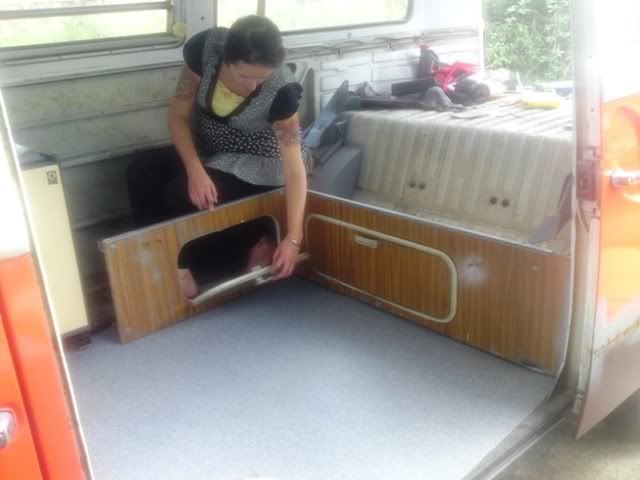 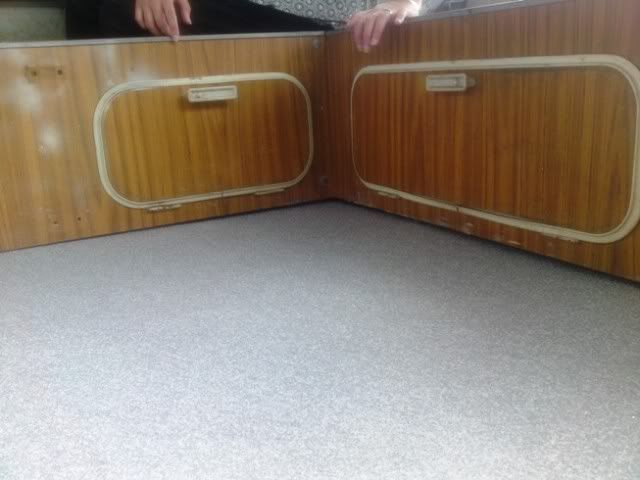 Its ideal because its very hard wearing and has a super grippy surface ... ideal for two dogs! Heres a close up 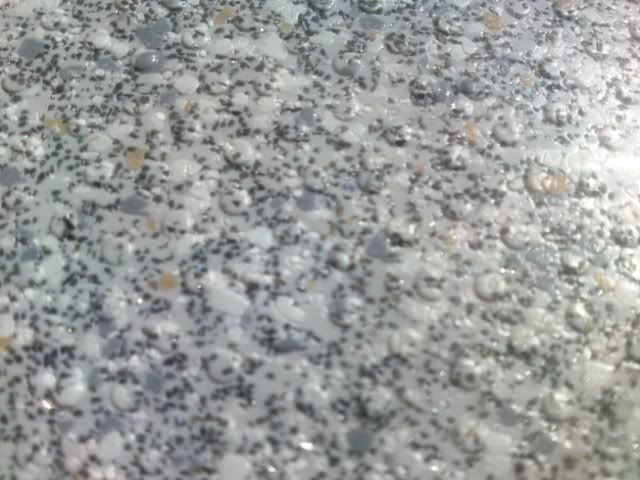 Anyway, the rain didnt come so I decided to carry on. With the tabs for the chassis made, it means I am very close to welding in the inner rear valance. Ive long wanted to POR15 the inside of this so it is properly treated and isnt going to rot from the inside out. When we moved in there was a punch bag in the barn. That soon went, but the mount it hung from remains and its ideal to hang things from that need to be painted. I also happened to go fishing last week which reminded me I had shockleader, ideal for suspending panels! 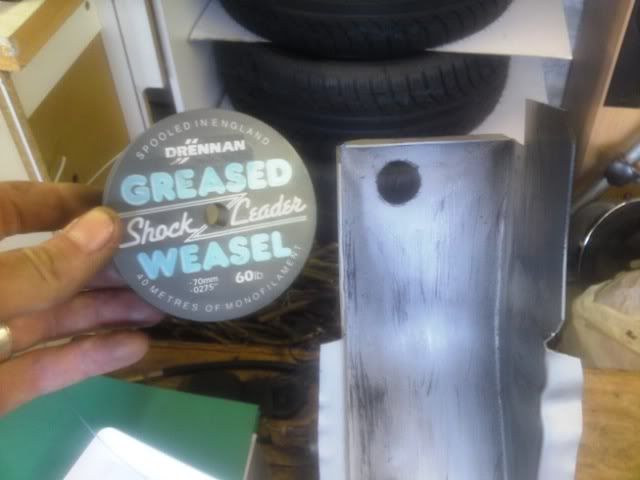  I'd already cleaned back the tabs and given them a quote of weld through primer, so it was only the parts that wont get hit with a welder that I wanted to paint. Sh*t picture, but you get the idea.  I had decanted much more than I needed, and so was wondering what else I might need to use it on. The N/S sill has previously been repaired, but was only painted in primer and there were signs of rust coming through 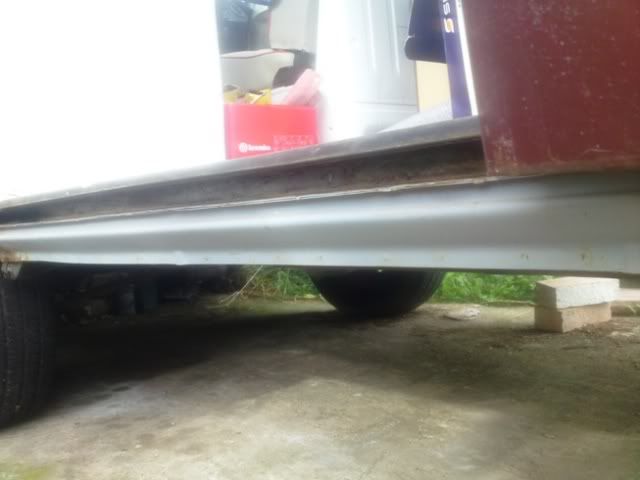 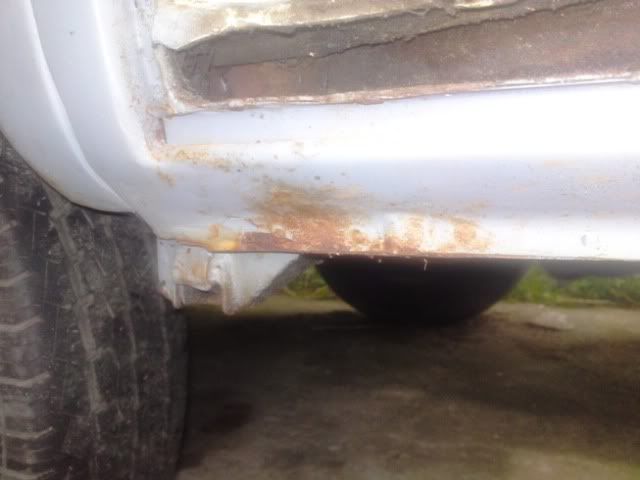 my long term plan has always been to clean these up, give them a coat of POR15, underseal, and then body colour paint over the top. Once cleaned up, they came up great after a coat of POR15. 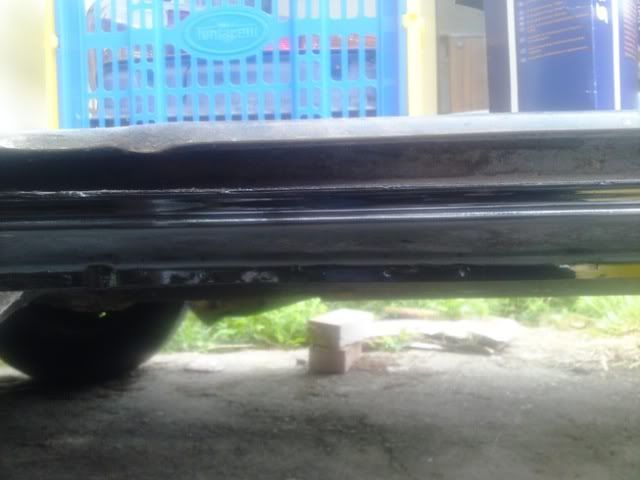 POR15 is evil stuff. Once on, it never comes off. I wore latex gloves. Somehow, I still got covered lol. Gonna have to make like a reptile and hope I shed soon lol. Oh, I also found out the B pillar has had a god aweful repair done in the past which i'll need to sort out 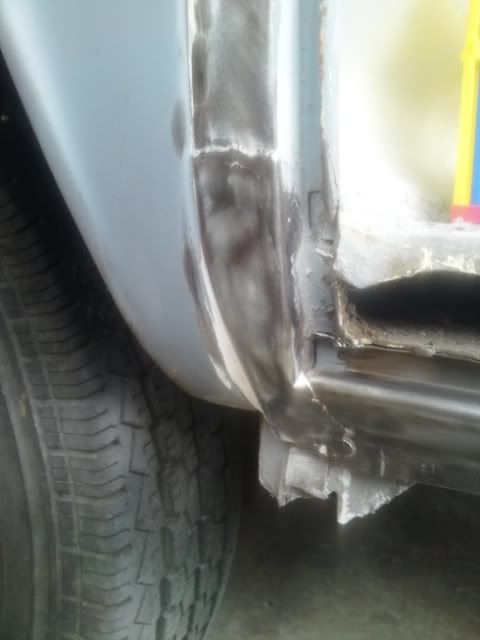 I'm now at a point where I can start welding. My only problem is that first up is the chassis tabs, and then the inner rear valance. Once the inner valance is on it will mean I cant get access to the sheared off bumper mount bolt. And MAN THIS WONT MOVE! Ive now destroyed 3 drill bits trying to drill this out! SO, in my next installment .... i'll be drilling! And if i'm welding, then the drilling went well!! |
| |
Last Edit: Jul 11, 2009 22:56:51 GMT by Keefy
|
|
|
|
|
Jul 11, 2009 23:18:57 GMT
|
|
i sit here eatin ice cream looking at yo log
i drop my ice cream with mouth agog!
wish i had talent and patience for that ;D
wanna be like you, dave, plums,mrj, polardego................(endless list....)
|
| |
2001 HONDA CT110 (NOT RCV)
|
|
|
|
|
|
|
i'm really enjoying it at the moment, so to keep it moving forward is all good. I just hope the weather holds for the next few months! I had a quick look at my current problem before we ran out yestreday. Inside the rear LHS chassis member you can see a large block of rust? Thats the old captive and bolt for the rear bumper mount. 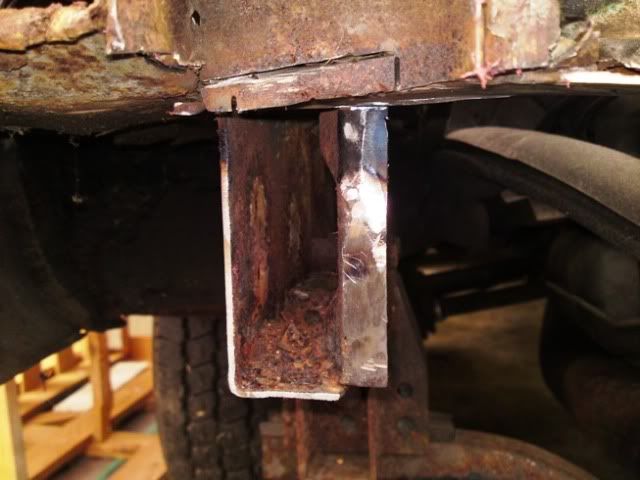 The tabs i have made will go to on the top, bottom and LHS of that chassis member, and the inner valance mounts up to it. Therefore, as soon as i put the inner valance on, i wont be able to have access to the captive anymore. Upon inspection yesterday, it looks a little crunchy around there so instead of wasting hours trying to drill it out I'm going to chop the lower section out, make a new section, and weld in a new captive. Then i can weld that in place, treat the chassis member so i know it wont rot from the inside out, weld on the tabs, and then the new inner valance can go on. Guess what i'm doing tonight?? ..... |
| |
|
|
|
|
|
Jul 20, 2009 17:52:52 GMT
|
Epic work sir.... |
| |
|
|
|
|
|
|
|
There has been progress recently, and I have got pics, but I'm so busy at the workshop I just cant find 5 minutes to sort thru them and resize them. Same goes for getting anything else done on the bus! My panels arrived for the NS rear of rear arch, and i've chopped out the rotten section there or the new piece to go in. You can see here how rotten the old panel was. I also received the closing panel thats the rear tub of the rear arch. You can see it here at the top middle of the picture. You can see daylight thru the old bodged repair lol. The new panel needs trimming down, and I need to do a small amount of panel whacking to the panel that sits inside the arch. After that, I should be ready to crack on with the welding. Once i've chopped out that damn siezed bolt! Oh - I also grabbed my spotlights from Edd (bodieanddoyle) at the Ace last Saturday, so thats another box ticked and ready to go. Theres a nice box of bits being put together now. Once I get the next week out of the way I'm hoping to find some time to make it all progress a lot faster. July has been slower than I would ideally have liked, buts its not been too bad. Hopefully another update will follow before the end of next week .... |
| |
Last Edit: Jul 23, 2009 6:20:19 GMT by Keefy
|
|
|
|
|
|
|
|
|
Ok, so its been a little slow with progress recently. What with the P1G Bus at the workshop, and then all the prep for the Gathering pretty much everything else got pushed to one side. I had felt a little annoyed that progress had slowed so much with the bus, and am determined to get it ticking along again. So, in preparation of a good days work, yesterday i grabbed the welder from the workshop nice and early. Whilst up there i finished off the engine bay side panels that i had previously made. They now look like so, and look like they should fit a dream! 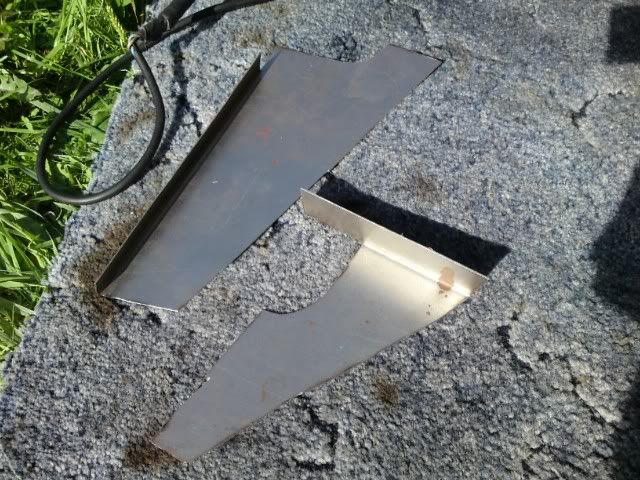 Feeling good about myself i attacked the sheared bumper bolt that has been consuming me recently! I ground away the welds, and chopped it out. 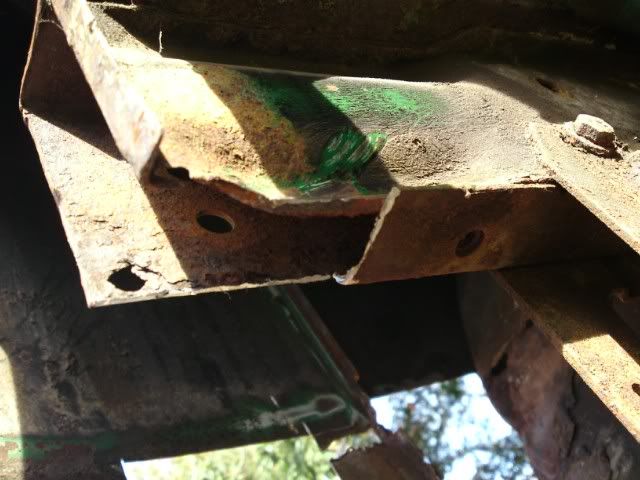 I then also removed to square sections from the end of the chassis where the metal was thin and holed in a few places. I welded in these small repair section, and mocked up the new chassis bottom. 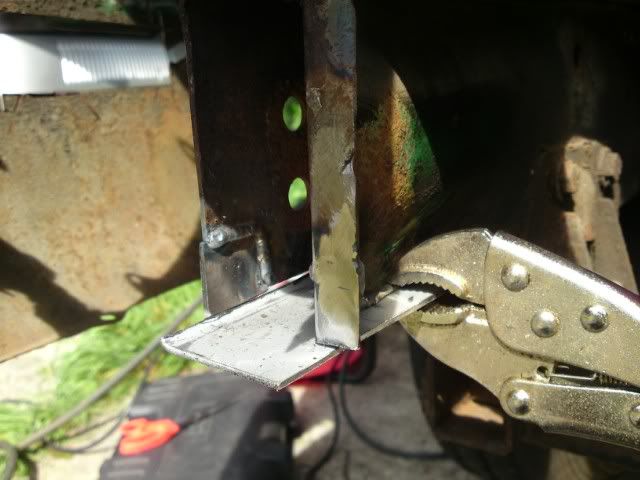 I then checked the second captive to make sure a bolt would do up into it OK. Turns out that it wont, nor on the other side. This renders that lower panel i've made pretty useless, and means i need to make bottom plates with 2 captives for both sides. Frustrated at this (largely cos i didn't have any chassis grade metal to hand) i decided to weld on the side tabs to the chassis ends 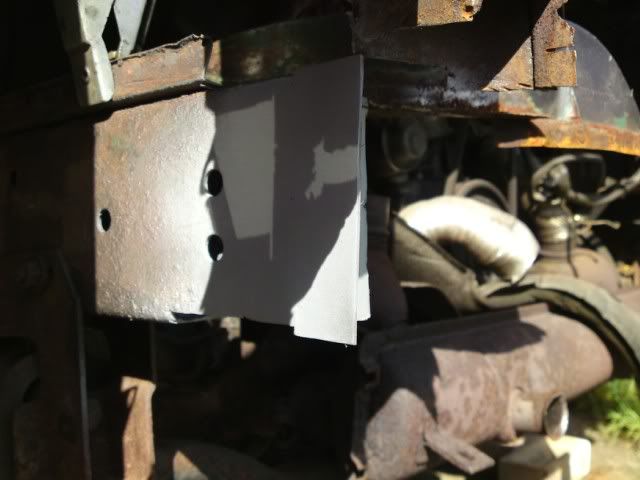 which meant i can mock up the inner rear valance and make sure everythings OK 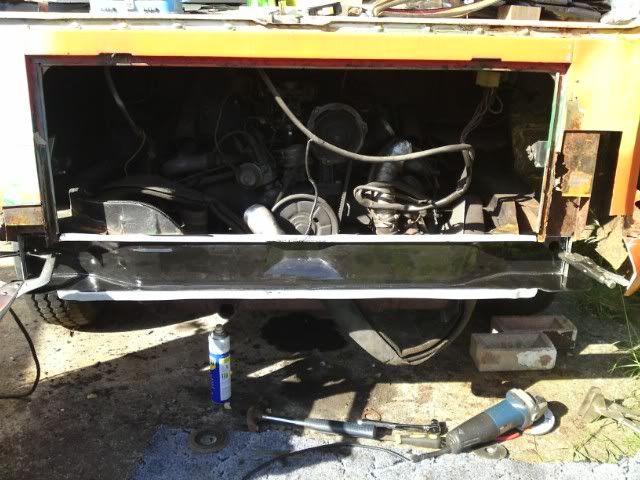 and there i left it. Not a bad days work (considering breaks for F1 etc), but my mojo sky dived after i realised all the problems with the captives for the bumper bolts. If i can find time i will get them cut out and made up this week. Then things can really get rolling! |
| |
|
|
Seth
South East
MorrisOxford TriumphMirald HillmanMinx BorgwardIsabellaCombi
Posts: 15,515
|
|
|
|
So is the deadline one or two months away then  Couldn't you have run a tap through the captive nuts to clean out the threads and make them servicable?  |
| |

Follow your dreams or you might as well be a vegetable. |
|
|
|
|
Aug 24, 2009 16:47:53 GMT
|
|
yeah, tell me about it. I pretty much just lost a month. My main focus now is sorted the rear of the house so i can keep the bus undercover and keep working through winter. At least we'll have it next summer then. No-one ever really sticks to a deadline do they? lol
There is a chance i can use the captives, but they seem an odd pitch. I need to check, its probably just where the thread it crusty. However, if i'm replacing one already ive got a good mind to do both for piece of mind. If one of the others cracks off 6 months down the line i would be a very angry boy! lol
|
| |
|
|
luckygti
Posted a lot
 I need to try harder!
Posts: 4,912
|
|
Aug 24, 2009 21:46:32 GMT
|
|
Looking good and the plans/colour scheme sound like they'll really work well. Plenty of rust indeed, but getting rid of it all is definitely the only way to go!!
|
| |
|
|
|
|
|
Sept 3, 2010 21:58:53 GMT
|
Crikey, i didnt realise it had been so long since i posted an update! Progress had been pretty slow on the bus till recently. Just a few little odd jobs getting done, never really being able to find the time to get stuck into it. However i want to get the back end all done by the end of the year, and so last weekend when my mate Bill was up (and Tash and Alfie were away) i managed to make some noticable progress. In between drinking beer, the Spa GP, and rain showers we managed to get the rear arch closing panel fabbed up, rear corner chopped out, and everything pretty much fettled so it will all go together nicely. There is still some more work to do to the closing panel, and to the battery tray, before they get welded in place but they sure arent far off. this is what we were faced with at the start of the day 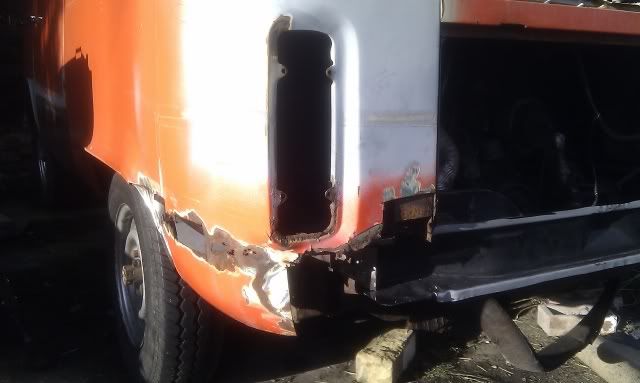 this shows how the rear of the rear arch and battery tray sections will go in 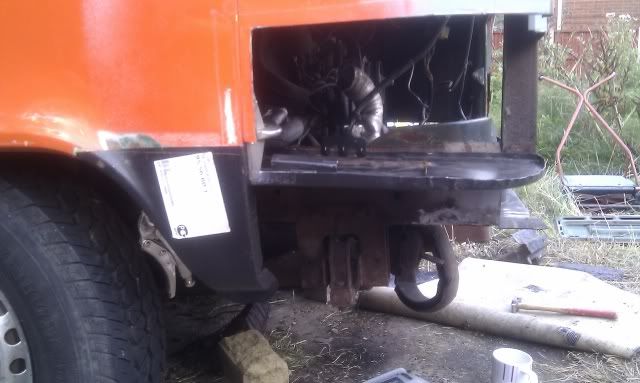 a slightly different angle and you can see the closing panel mocked up too 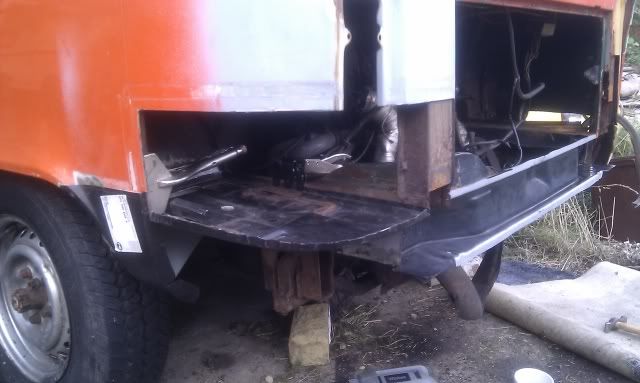 this shows in clearer detail how the closing panel will sit 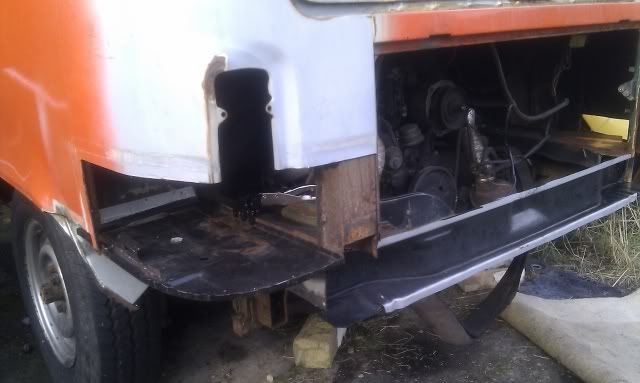 its slow progress because everything needs to be checked so many times before anything gets chopped out/welded in, and with 6 panels going in i cant afford to get any of them wrong! I was hoping to get more done this weekend, but getting the benz mot prep done might take over ... |
| |
|
|
|
|
|
Sept 5, 2010 11:48:29 GMT
|
|
Yo!!! Some lovely work of impressive 'depth' getting done here, I love a good weldfest.
|
| |
1974 Lancia Beta Saloon
1975 Mazda 929 Coupé
1986 Mazda 929 Wagon
1979 Mazda 929 Hardtop
1982 Fiat Argenta 2.0 iniezione elettronica
1977 Toyota Carina TA14
1989 Subaru 1800 Wagon
1982 Hyundai Pony 1200TL 2-dr
1985 Hyundai Pony 1200 GL
1986 Maserati 425 Biturbo
1992 Rover 214 SEi 5-dr
2000 Rover 45 V6 Club
1994 Peugeot 205 'Junior' Diesel
1988 Volvo 760 Turbodiesel Saloon
1992 Talbot Express Autosleeper Rambler
2003 Renault Laguna SPEARS OR REAPERS
|
|
|
|
|
Jan 18, 2011 21:58:01 GMT
|
With Linz away snowboarding, and Bill playing taxi to and from Luton airport, we fixed a date in the diary to get onto the bus again and that date was Saturday. Having battered GT5 till 2:30am we somehow managed to be up and at it by 10:30am Saturday morning. Its amazing what coffee and poached eggs & bacon on toast can do! Its been a while since I touched the bus, but I was soon reminded where we had got to before. 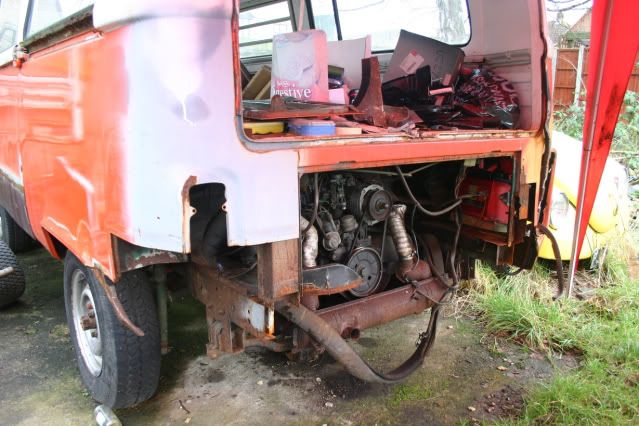 The forecast for the day was appalling, and it was clear we were going to be battered by a strong gusting wind throughout. We decided to get a gazebo up, strengthen it, and tie it down as best we could. If nothing else it gave us a starting point to try and keep the gas out of the torch heading rougly towards the weld! 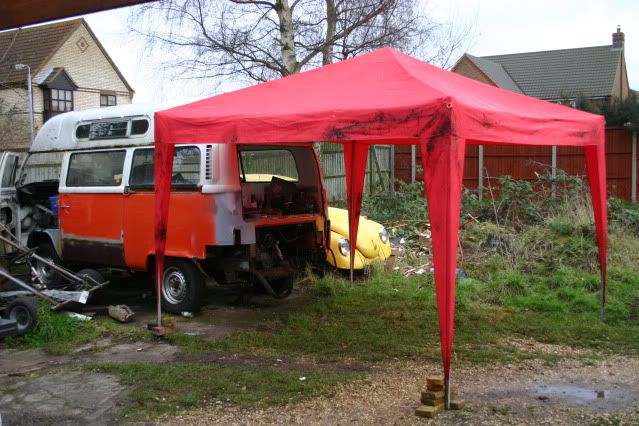 We got cracking with sorting the closing panel for the n/s rear arch. It all cleaned up a treat, and we mocked everything up with a definite sense of deja vu! 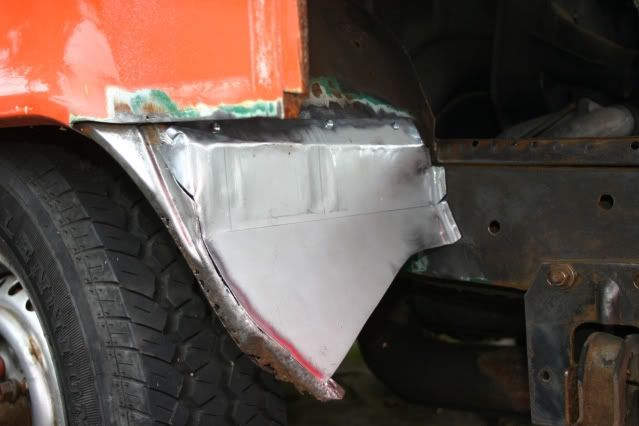 It was clear that further repairs were going to be needed though! 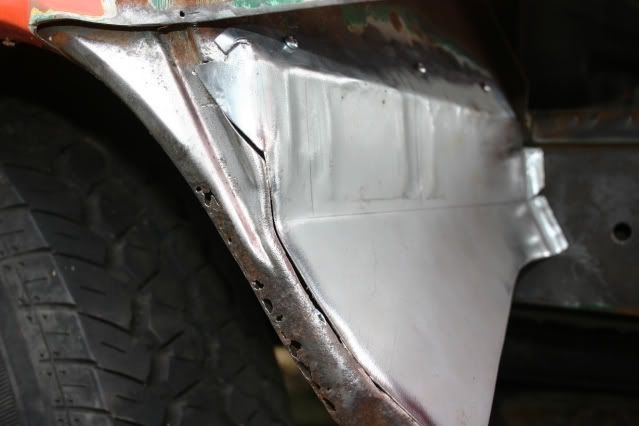 Everything went fairly smoothly, with the odd exception of diving across the grass to grab a gazebo leg! It was the usual case of small things taking ages, and sorting the lip took 3 or 4 times longer than we would have liked. But in the end it all went together nicely, and we got everything done tidied and packed up before darkness decended. 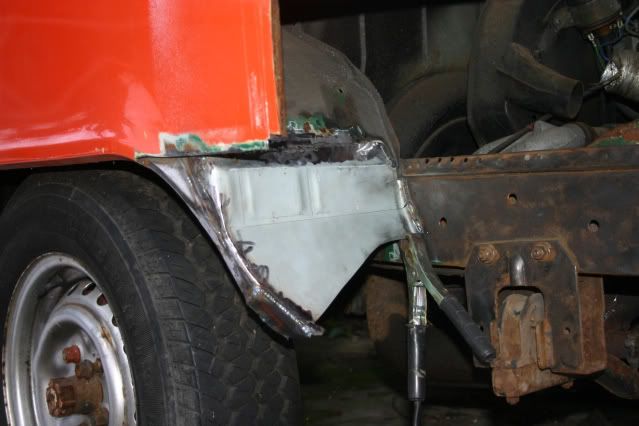 We've spent a lot of time mocking up the adjacent panels, so next I can move onto the rear arch repair and know it will slot in nicely. Then onto the rear corner when things will really start to take shape! I've bags of enthusiasm for this now, and I'm desperately hoping to get back onto it very shortly. |
| |
|
|
|
|
|
Jan 18, 2011 22:24:27 GMT
|
|
Looking great, the rear corners always go, and they are so damn complicated to repair properly. Good luck when it comes to the gutters, I hope for your sake the inners are ok..
|
| |
1989 Mini MG 1275 ~ 1987 VW Polo ~ 1989 Citroen 2CV ~ 1998 VW T4 ~ 2006 Volvo XC70
|
|
|
|
|
|
|
rear corners always go, and they are so damn complicated to repair properly. Good luck when it comes to the gutters, I hope for your sake the inners are ok.. Yeah I know mate, its the same old story with the battery trays collecting water and rotting around those adjacent panels. To be expected, but it'll get sorted No need to worry about the gutters, i have a new roof to drop on! |
| |
|
|
DutyFreeSaviour
Europe
Back For More heartbreak and disappointment.....
Posts: 2,944
|
|
Jan 19, 2011 11:02:52 GMT
|
|
Keefy - excellent info on the work going into this - and pointers for anyone thinking of looking at one!
the replica/homage to the POrsche 'support' bus sounds a great plan...
I have to admit to really diggin' the hi-top tho'.. can't you keep it?
John
|
| |
Back from the dead..... kind of
|
|
|
|


