|
|
|
|
|
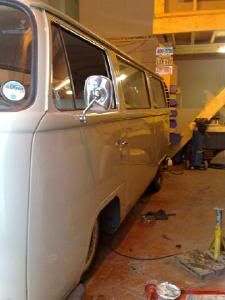
Last November Tash and I acquired this gorgeous  example of a bay bus. With two dogs to cart around, and me dealing with these beasts day in day out we had had our eyes open for a while. Thankfully this fell into our laps when someone contacted me and offered it to me. He didnt want a lot with it, has already had sills and front arch done on the n/s and has the interior freshly retrimmed and never fitted! It also came with a pair of rust free cali doors. Its nice and solid underneath, the front will need doing sooner rather than later, and the roof needs replacing sooner than the front panel ;D To say it has no gutters is an understatement. Its also a great excuse to get shot of the high top, although that is kinda growing on me now! Anyway, this is the beast when we first saw her at the barn .... 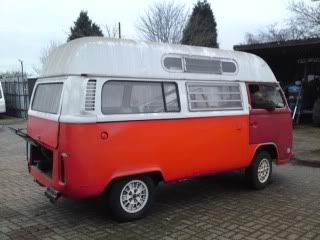 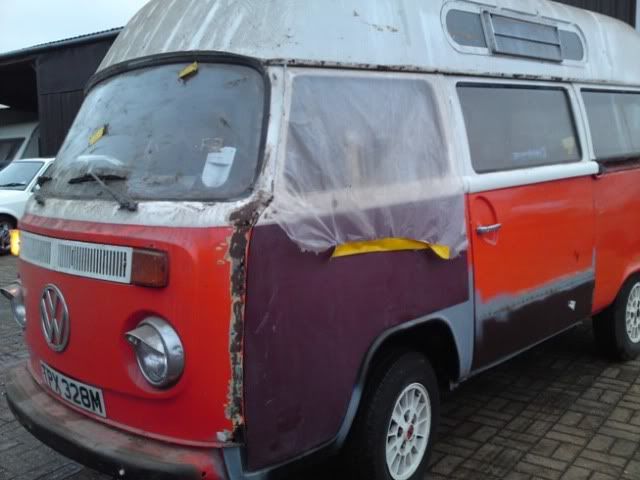 we rescued it back to the house around December, and sourced a new tin top roof for it. This has been delivered to my workshop, and i'll get the beast up there for that job! 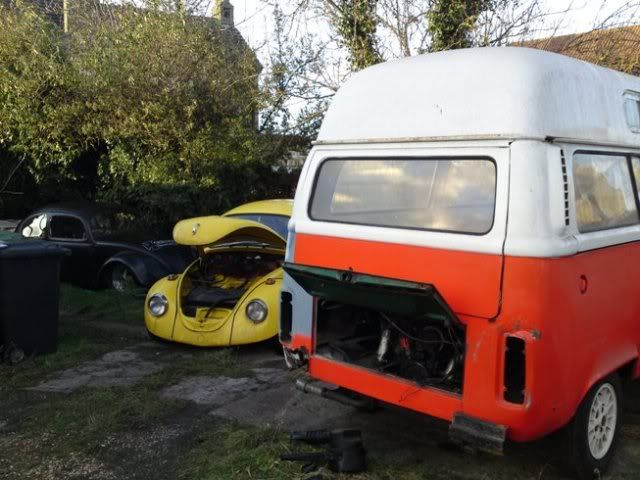 In the meantime i've tried to spend some time each week on it just to see it progressing. I've sorted all the exhaust and engine problems, and given it a service and it now runs sweet. The front solid brake pipes have been replaced and the callipers rebuilt. Similarly the rear solid pipes have been replaced, and new shoes and drums have been fitted. I've also got all the electrics working correctly. We also found out Tash is pregnant, which makes a bus even more practical! Being a Westfalia it had provision for the bunk up front. I fitted one of the front seats, and we tested the hammock in place. Perfect for a little'un I reckon!   So it came to looking around the underneath last week to see what it might NEED for an MoT. The front looked much better than I remembered, but I need to sort out the front of the arch where it comes to the inner front valance. Also the outer panel is home made and HORRIBLE. Check the aweful door gap! 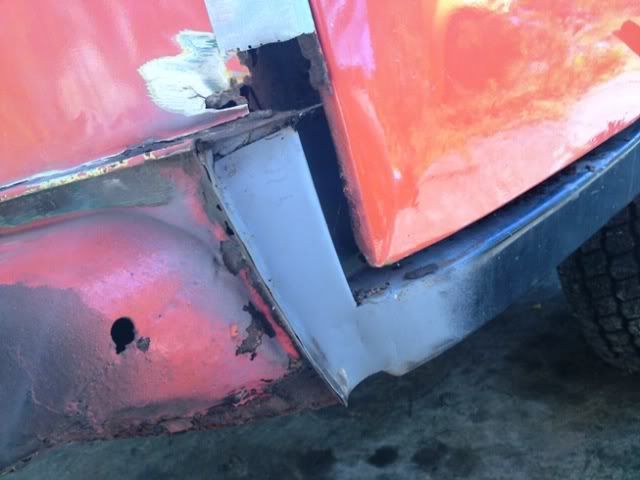 Anyway, the front wasnt half as horrific as I thought, and so I moved to the back so see how that looks ... and I was greeted with this .... 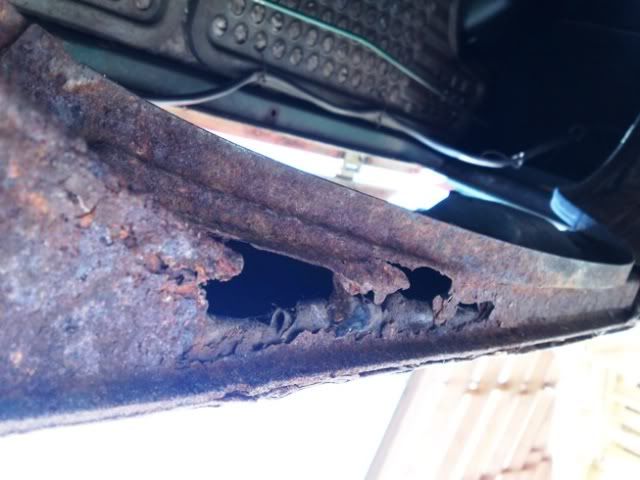 ^ thats looking up at the inner rear valance Now from the outside it didnt look too bad, so I sat back for a second and wondered about what to do. this is the view of each rear corner. 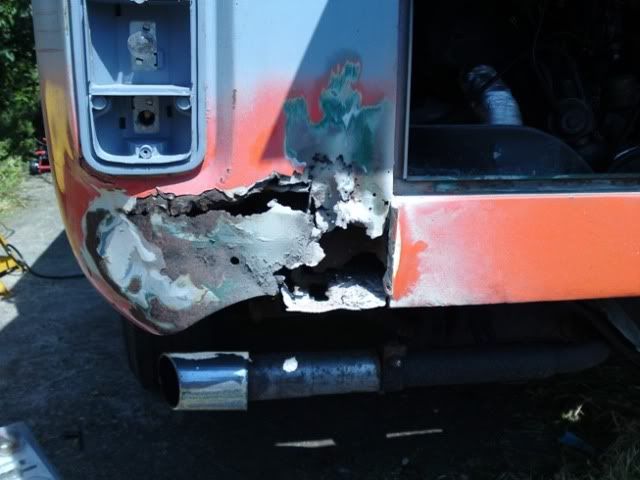 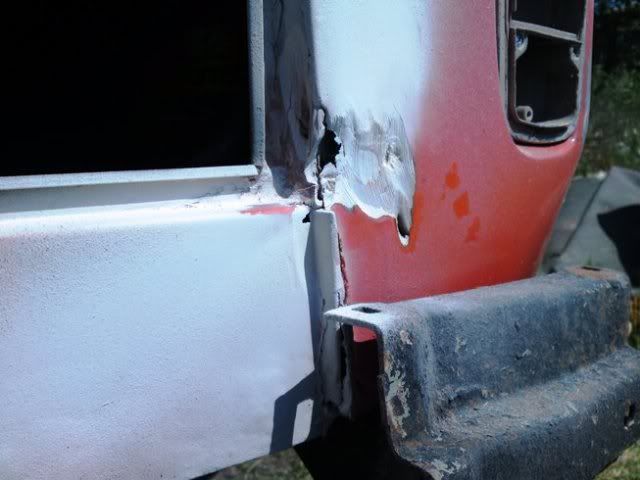 I am off fishing in about 4 weeks and the plan was to take this bus. In the end I said f*ck it, do it once and do it right. I got straight into it and got my trust friend the spot weld drill bit out and got shot of the outer valance. This pic shows the inner valance thats left, once the outer is drilled out  Seeing whats ahead I ordered in the 2 rear corners and the inner rear valance. The rear corners will need some fettling to get right, and heres the new inner 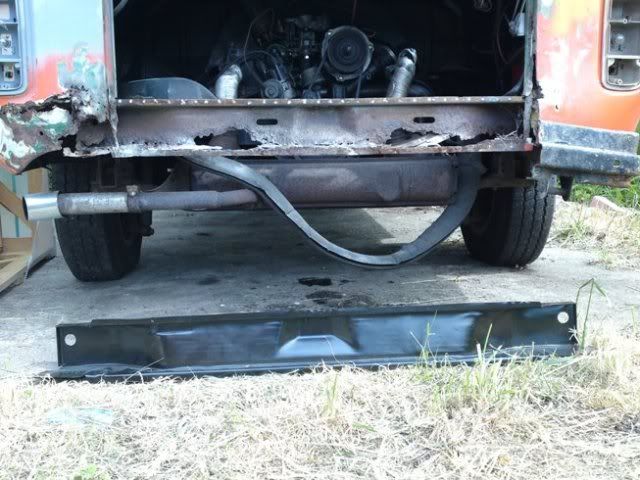 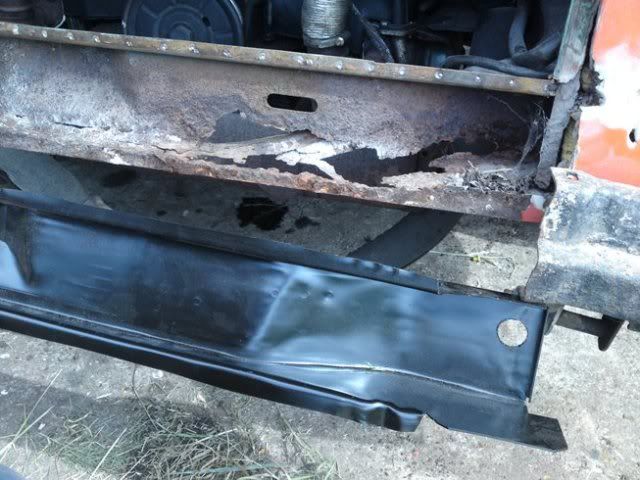 So onto this weekend! I have been out tonight and removed the rear light housings so I can attack the corners tomorrow. There is a bumper hanger on the RHS that someone has sheared a bolt on. I need to remove that, then remove the inner rear valance, and then start on the corners. I'm guessing it will need battery trays as well, but ive enough to keep me busy for now! I've certainly got my hands full if I'm gonna take the beast fishing lol. And really I just wanna SLAM IT! |
| |
Last Edit: Feb 13, 2011 19:46:13 GMT by Keefy
|
|
|
|
dubscum
Part of things
 thats what i do
Posts: 531
|
|
|
|
|
look like you've got your hands full there mate, slammed hightop will look cool as
|
| |
whip it, into shape ........ go forward
|
|
chaz
Part of things
Posts: 403
|
|
|
|
|
Always loved VW buses, looks like a good project mate.
|
| |
|
|
|
|
|
|
|
so - yesterdays update ... we were supposed to be visiting Tashas parents yesterday, but on Friday I caught a weather forecast and hastily request that plans be rearranged. Its no good me having my car day on Sunday when a) its going to p!ss down and b) theres a grand prix to watch! That combination would have equalled ZERO progress, and I was way to full of motivation to let that happen! So I wake up yesterday morning and look outside to be greeted with .... rain! However, I was determined not to be stopped. I got the dogs walked, dug out a tarp from the barn, and got my electricals out and all covered up and protected. Now the way I tell this tale is not strictly in chronological order. I never work in a completely logical way. I often flit from one thing to another, although keeping within the 'grand scheme'. I will however make it appear that I work completely logically, and don't start the next part until i've finished the previous! With deception like this, I could be a magician! Anyway, heres things yesterday about 9am 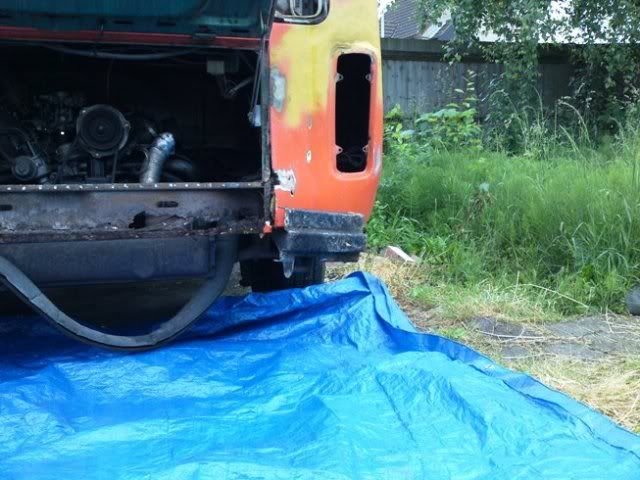 I really wanted to remove the inner valance in one hit, but I could see that would be impossible unless I had the bus at the workshop. I therefore decided to unpick it piece by piece. Where the inner valance meets on each end to the chassis is quite complex, and there are three panels that come together. The inner valance usually being the middle one! Unpicking it piece by piece means I should be able to keep the other panels intact, and not make myself a load of work in the future. Looking from above on the LHS engine bay you can see what I mean, as illustrated by my immense Paint skillz! 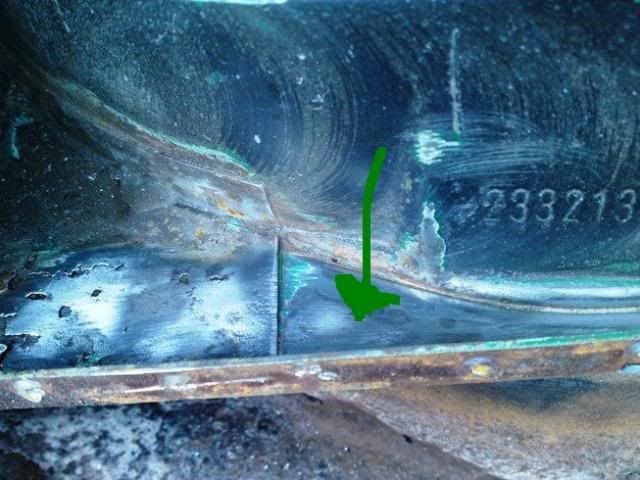 Unpicking each end, still meant the main section in the middle could come out, and so out came the grinder. I left more than I needed to so that when I offer up the new panel I can trim the old one down to meet perfectly. 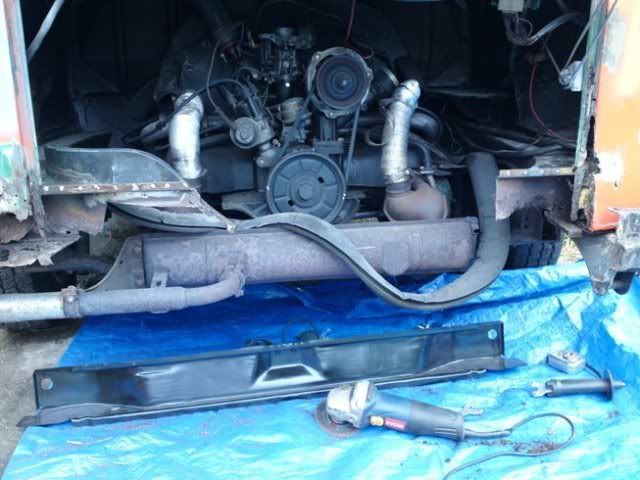 Now lets start with the LHS. Cos I did START there  . Once the centre section of the inner valance was gone, this is what I was left with. The inner valance is that small section (as arrowed previously), the vertical lip, and the small bit that folds down below. (Btw, by now the rain had stopped and the day was becoming much more pleasant. I felt smug ) 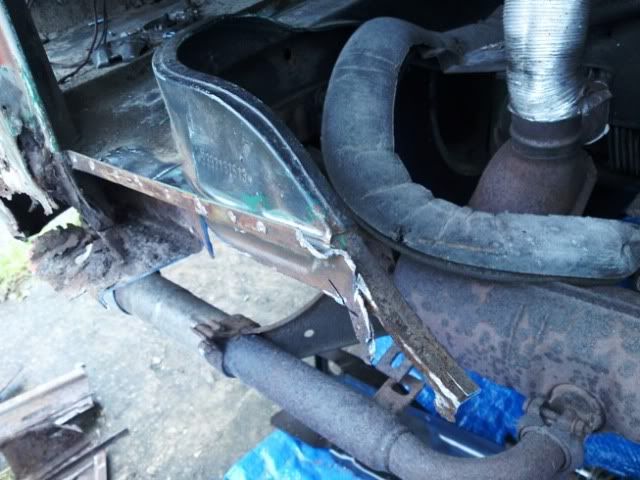 I decided to start with the section that folds below. I could see the panel join from the inside, so a quick buzz with the wheel of wire showed up the spot welds. 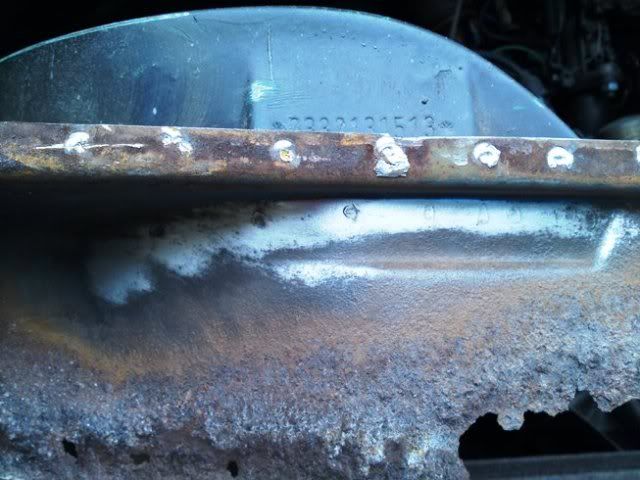 I was fed up with drilling out spot welds after last week, plus spot weld drill bits are much more effective in an air drill than an electric drill ...... so I got the grinder out. Seeing as I had good access it made sense to. One rule here though - NEVER EVER use a grinding disc. They are way too harsh for 99% of jobs on a car. A quick going over with a flap disc had the lower section coming away nicely. 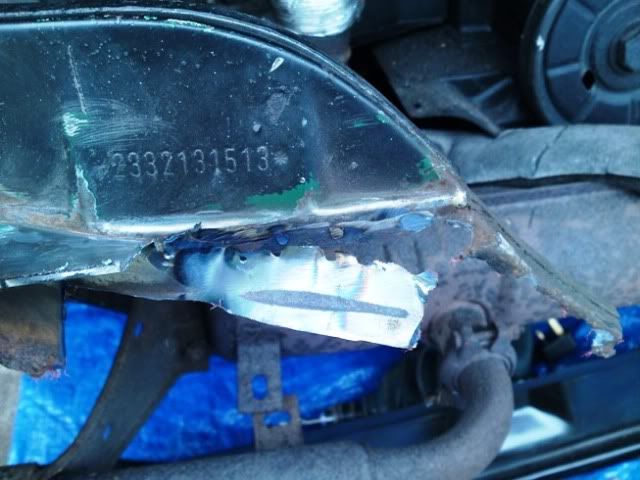 I trimmed this back until it met where those 3 panels join (see arrowed pic above lol). I wanted to tackle where the inner valance meets the rear chassis member first, and then deal with how it attaches to the inner edge of the engine bay last. I was lacking some space, so whipped off the exhaust and then chopped away a section of the rear corner so I could see what was going on. I knew repairs around here would be necessary. 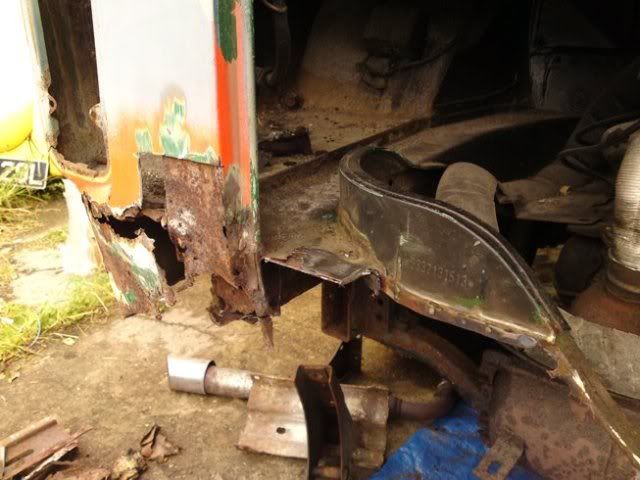 The inner valance meets at the chassis rail, and this vertical box comes down into it (which as ar as I was concerned now was infront of it!). The vertical box is made out of two sections, that meet together on the RH edge. Clearly the outer of this vertical is shagged and will need repair. It was also in my way. There was no way it was staying! To illustrate, my orsums arrow skills come into play again! 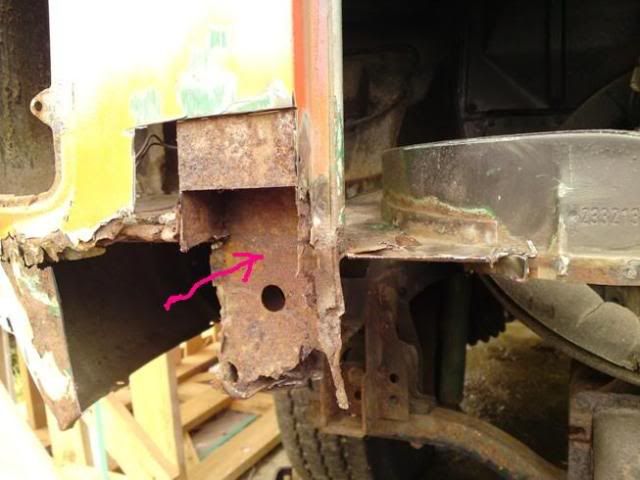 This finally exposed the inner valance. 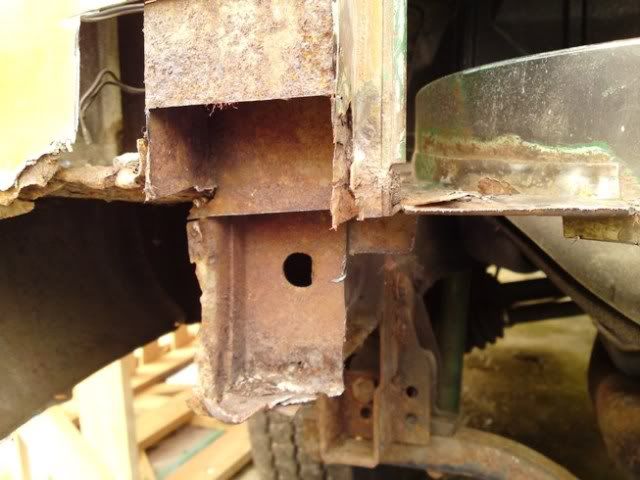 I couldn't decide whether to drill out the spots, but this became unrealistic due to it being welded at the bottom and I had no access. So out came the flap disc once more to grind it back and remove it. From the pic you can see one lip. The back of the inner valance sits against this. There should also be a LHS and lower lip on that chassis member that the inner valance sits it. Seeing as I have just ground them away I will need to replace them before the new inner valance goes in. 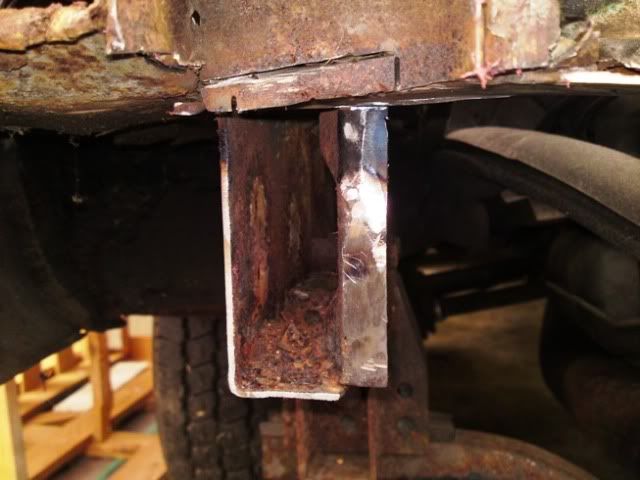 That meant it was time to replicate that work on the RHS. It started like this once the centre section was removed ... 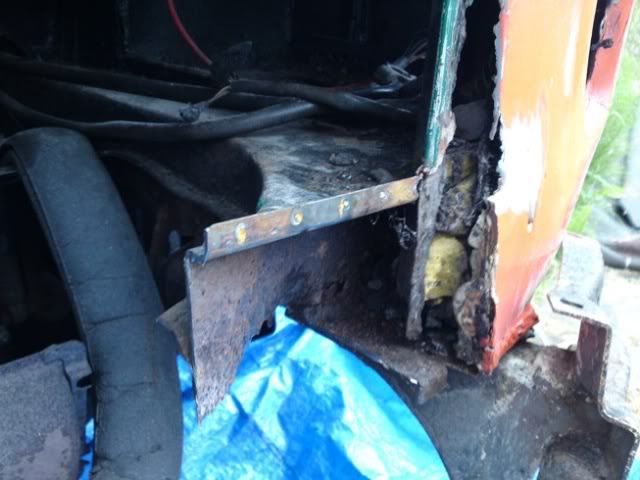 Chopped myself some space, and removed all the paper and sh!te from some previous god aweful repair. This also meant I could get to the sheared captive and remove the other bumper hanger.  Then I made the hole bigger. This was a) to see how much of a repair I was going to have to do to the vertical section, and also to see quite how far the filler goes on that rear corner! 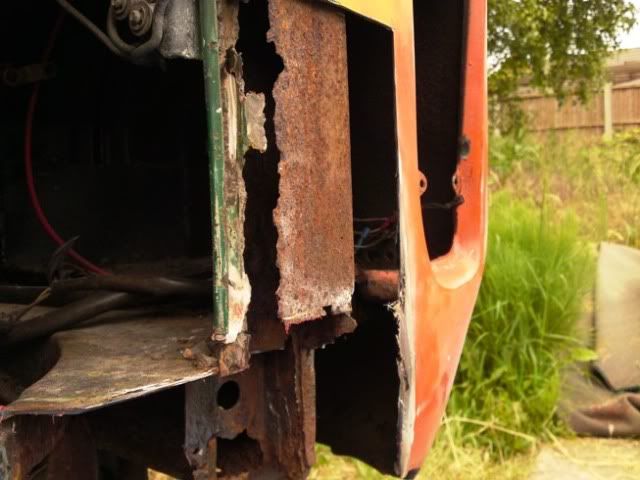 And MY there is plenty of filler in that corner! 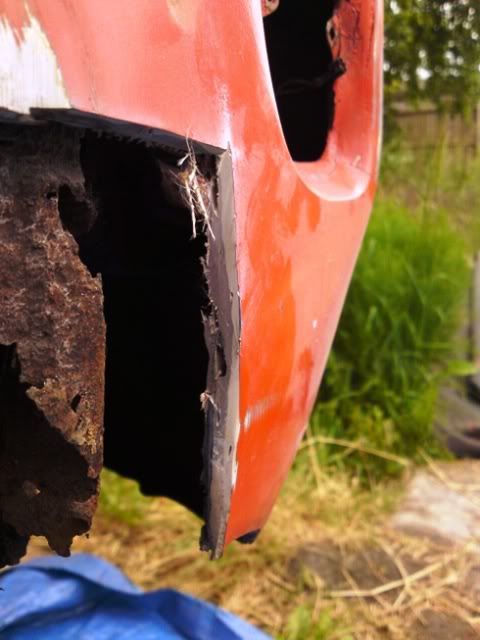 This left the chassis end nice and visable 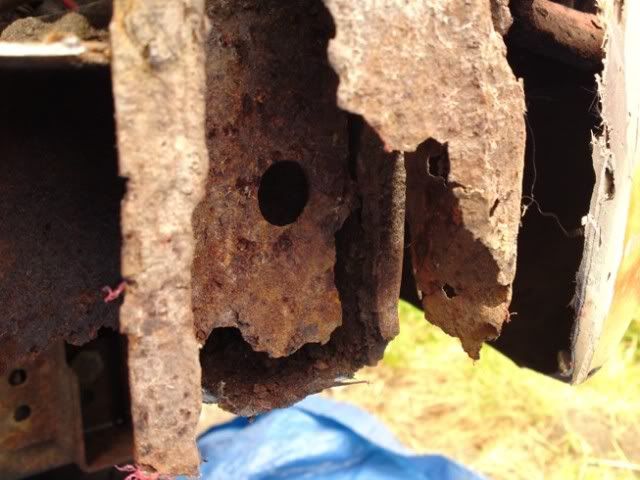 So, just like with the LHS, I chopped away the outer section to reveal 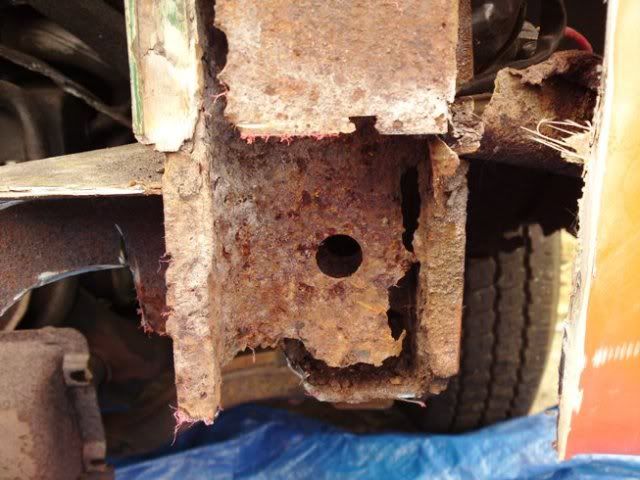 And then I removed the outer to reveal the inner valance 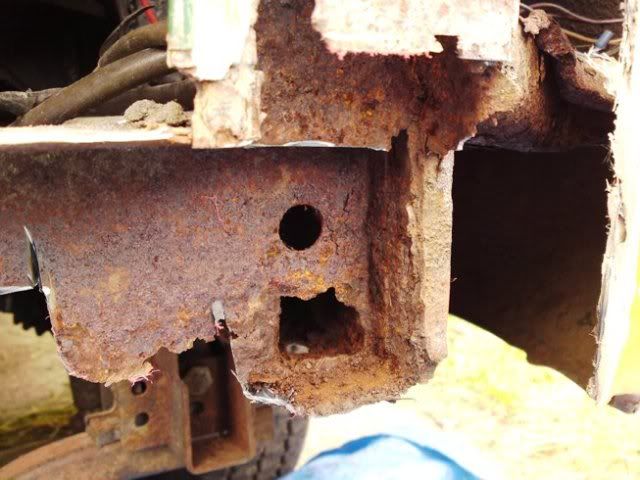 So out came the flap disc on the grinder, which soon had this side replicating the other. The only thing left to do is deal with the piece of inner valance that goes under the engine bay. You can see it (and where the inner valance has been removed back to the chassis member) here 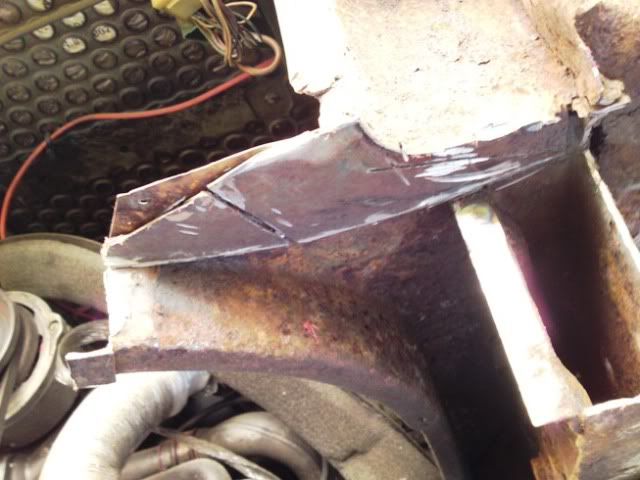 The original metal used for the inner valance is nice thick stuff (and it should be considering its structural). The only way to remove this remaining piece of the panel was to grind it .... and considering its so thick I whacked the grinding disc on the grinder!  SORTED! This meant that I was left with a nice pile of rust, filler and foreign newspaper ... 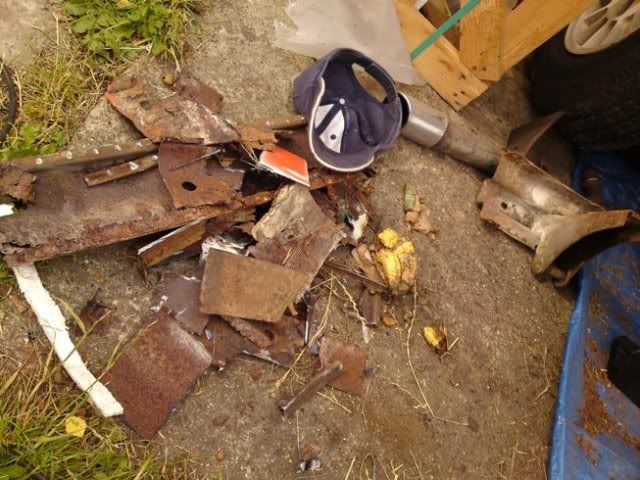 And the rear valance could be mocked up as so!  Not bad for about 4:30 hours work! 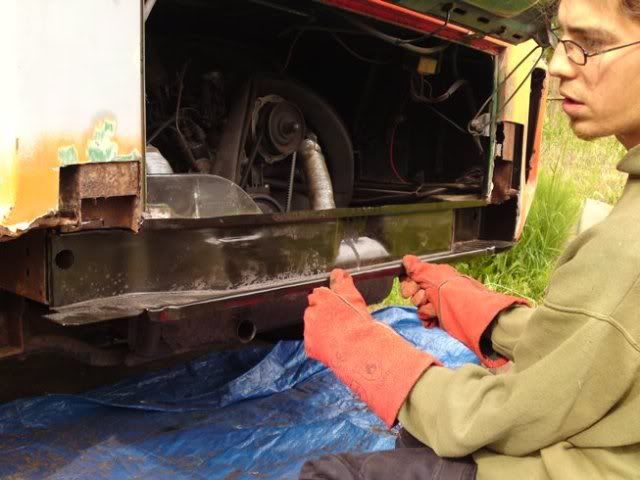 next up I need to cut away the rear corners and make the one repair panels it, and make the repair sections for the rear chassis members. I will probably also be doing the battery trays while I'm here, so it could be a while before that new inner valance actually goes in! And as I look outside now I see its p!ssing down, so i'm VERY glad I swapped my weekend around! |
| |
Last Edit: Jun 7, 2009 21:49:23 GMT by Keefy
|
|
|
|
|
|
|
|
Neat neat neat! Must get one of these spot weld drills, I have never used one.
|
| |
1974 Lancia Beta Saloon
1975 Mazda 929 Coupé
1986 Mazda 929 Wagon
1979 Mazda 929 Hardtop
1982 Fiat Argenta 2.0 iniezione elettronica
1977 Toyota Carina TA14
1989 Subaru 1800 Wagon
1982 Hyundai Pony 1200TL 2-dr
1985 Hyundai Pony 1200 GL
1986 Maserati 425 Biturbo
1992 Rover 214 SEi 5-dr
2000 Rover 45 V6 Club
1994 Peugeot 205 'Junior' Diesel
1988 Volvo 760 Turbodiesel Saloon
1992 Talbot Express Autosleeper Rambler
2003 Renault Laguna SPEARS OR REAPERS
|
|
|
|
|
|
|
|
Brave work there.
Good luck with it and the pregnancy.
|
| |
|
|
|
|
|
|
|
thanks for the feedback guys. Mr B - buy a spot weld drill bit. You will wonder how you ever managed without one! Grizz - thanks for the kind wishes This resto is being done on a budget, and i'm counting the pennies. I'm also now wanting to prove that you can own a bus and not have to spend a fortune. Tash and i had spoken about wheels before, and agreed we would keep an eye out for some nice steelies. The plan then being to sell the alloys currently on it, which would add some £££ for the bus fund. These babies were won on ebay last night for a bargain £31.01. Collection is easy, Tash virtually goes past the location on her way home each day! 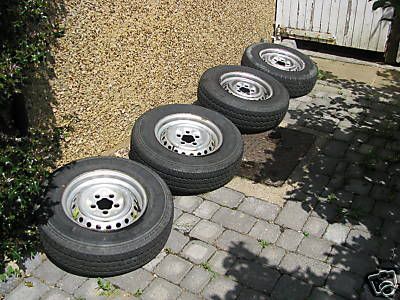 The plan now is to get these home and see how they look. The bus will be run on these tyres to start with cos they have good tread. Once the tread is dead, new lower profile rubber will be bought and at the same time the bus will be slammed |
| |
|
|
|
|
|
|
|
Nice to see another old bus getting the love it deserves. You´ll have the rest sorted in no time if you keep going at that pace! |
| |
|
|
Seth
South East
MorrisOxford TriumphMirald HillmanMinx BorgwardIsabellaCombi
Posts: 15,515
|
|
|
|
Good work Keefy. Its amazing how long it seems to take to neatly chop off bits of metal. |
| |

Follow your dreams or you might as well be a vegetable. |
|
|
|
|
|
|
Good luck with it mate & keep motivated,I've been working on & off on my 76 bay for 3 1/2 years  |
| |
|
|
|
|
|
|
|
|
|
cheers guys got out onto the bus again last night, really want to keep it moving now. It was damp, and the sky looked like it wanted to throw it down so once again I dragged the tarp out and got my electricals all covered up. I wasn't sure where I was going to start, but seeing this pretty much made my mind up... 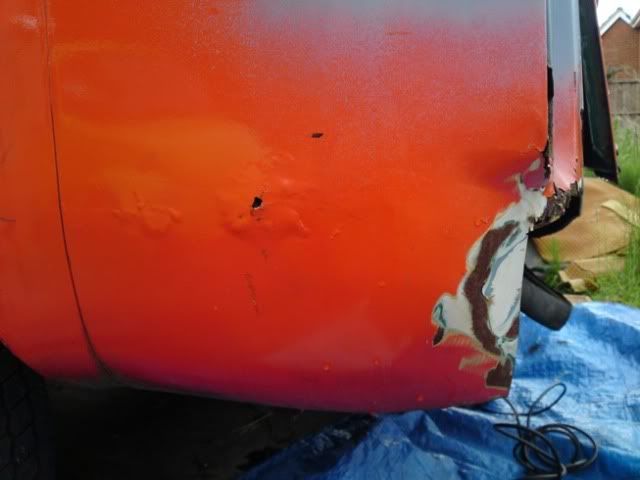 Views like that always mean the battery tray has gone, and I knew there were some nasties hidden away. I got the knot wheel onto the grinder, which revealed this .... 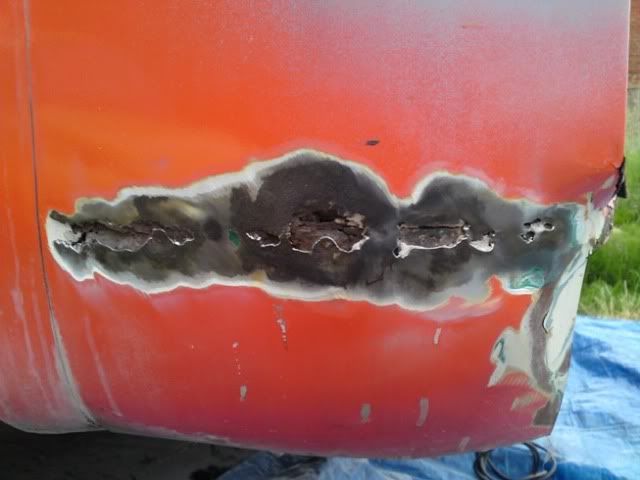 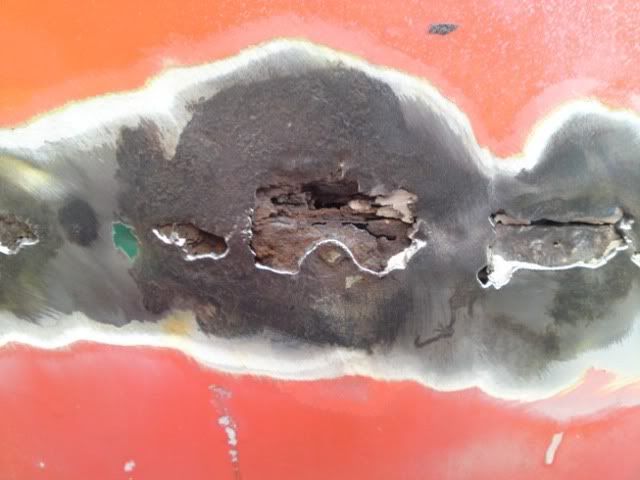 Seeing as i'd gone that far I figured i'd better sort this corner tonight .... So out came the goo!!!! No, not THAT goo .... THIS Gu!  To store all the nuts and bolts that had been thrown in the battery tray area! 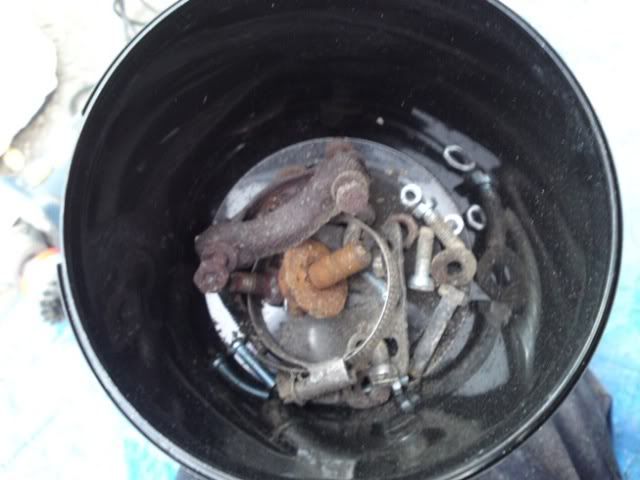 The battery tray was covered in dirt and filth, and I suppose some people might think it looks solid enough ... but I knew it wasn't as I wanted 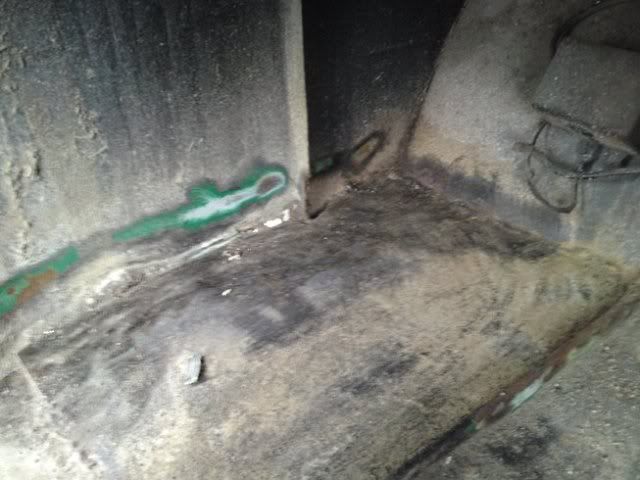 I gave it a buzz with a wire wheel to reveal where the previous repair attached. 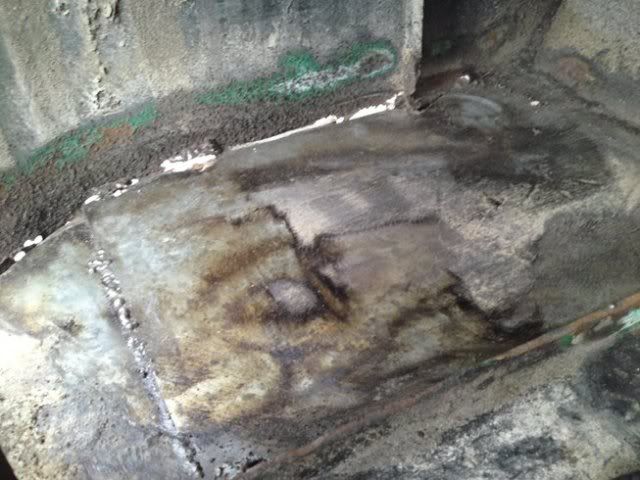 Access was massively restricted. I knew I was going to do some of the chopping with one hand going through the hole for the tail light, and one coming around inside the engine bay. With this in mind I decided to cut a small hole, which would give me better access and also something to grab and get some leverage from. You can see on the LHS some of the remains from the old original panel. 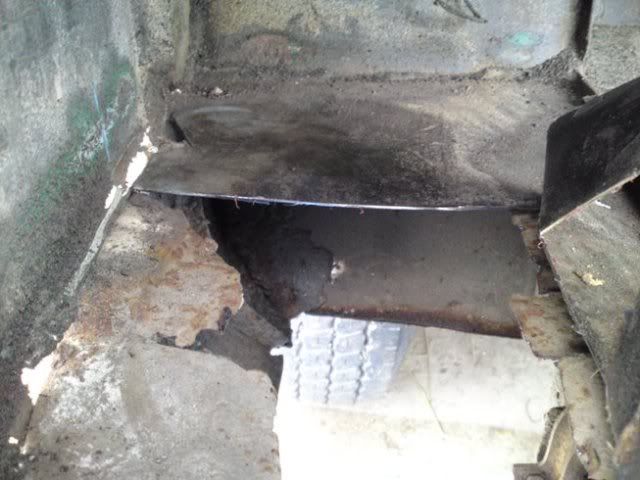 I could see this repair panel attached to the wheel tub, so got the wire wheel out to reveal the welds.  I then ground these back, and the rest of that nasty repair panel came out. 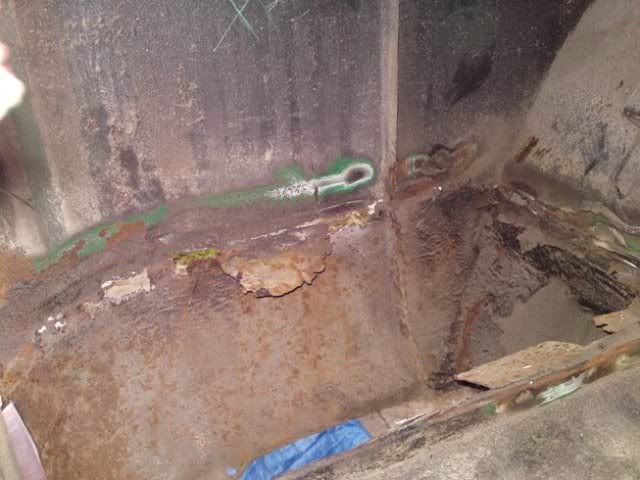 This leaves some of the old original panel still attached to the rear corner (LHS) and the engine tray lip (RHS). The LHS will be easy, I can grind that off but I'm not going to bother because i'll be cutting that whole corner our shortly. You can see what is left on the RHS lip here. There are sections of repair panel here, and the original battery tray is spot welded to that lip. 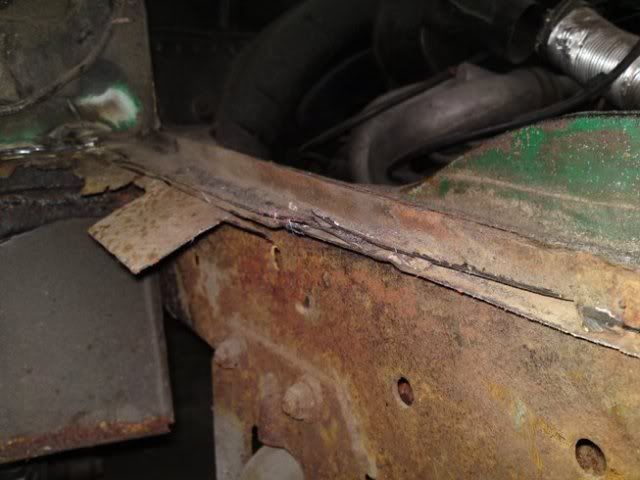 The new battery tray that goes in will have a solid lip, so I have decided to drill out the original battery tray lip from the back side, and the holes that are left can be plug filled against the new battery tray. I am doing this largely because I cant get good access to drill the holes out with a spot weld drill bit from inside the battery tray. I have much more access inside the engine bay. Knowing I will attack this part next time, I decided to clean up the lip to see what I would be facing, you can easily see where the spot welds are! 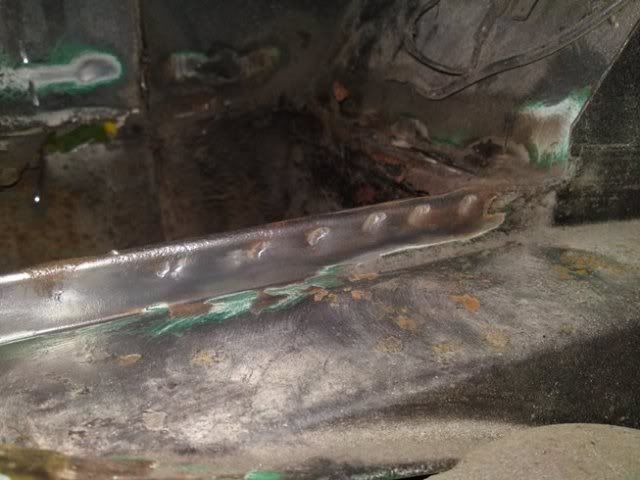 At least I know where I will be starting next time, and it will mean the previous bodge and original panel have been removed without trace Heres my pile of metal at the end of the day;  And heres how shes currently looking; 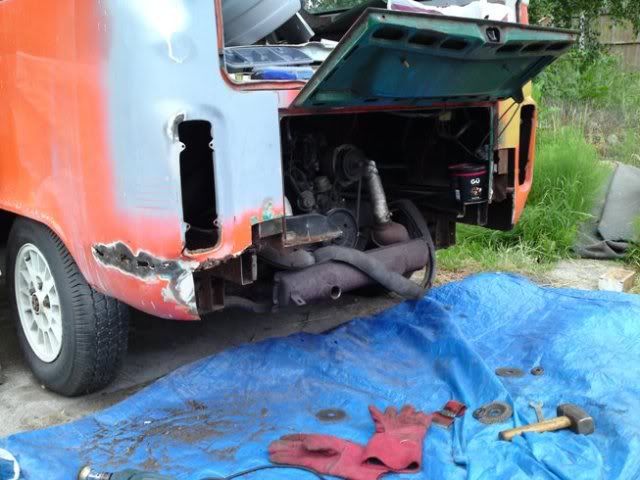 All this done in under 1:30hr, and I was back inside and cleaned up in time for 9pm to watch the IOM TT |
| |
Last Edit: Jun 9, 2009 6:28:52 GMT by Keefy
|
|
|
|
|
|
|
Another day, and another step forward. Only small progress this time, but it all helps, and by keeping it moving is keeping me motivated. first step this time was to drill out the old spot welds holding the battery tray against the engine bay. 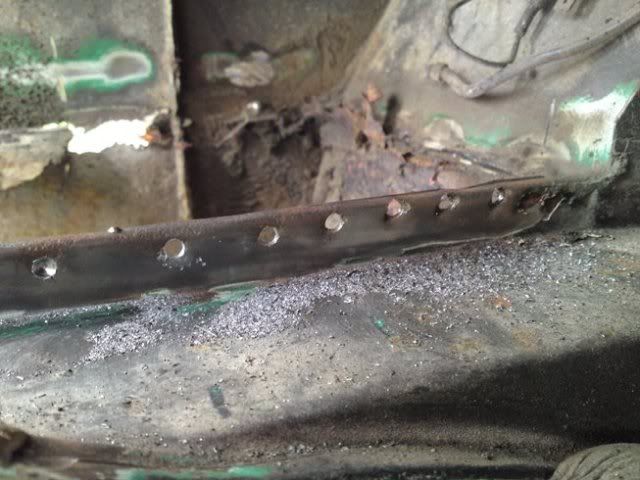 You can see here how the old repair and the original battery tray lip now come away from the engine bay 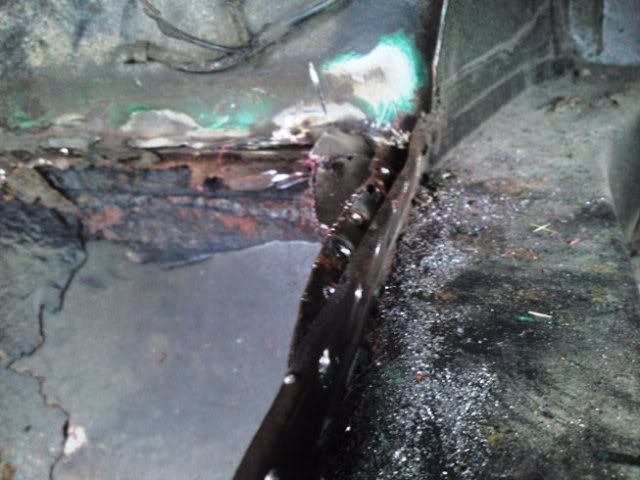 Access was very poor, and i was forced to grind away the spots towards the very rear of the battery tray. The old came away lovely though, and it gives a lovely surface to mount the new battery tray up to 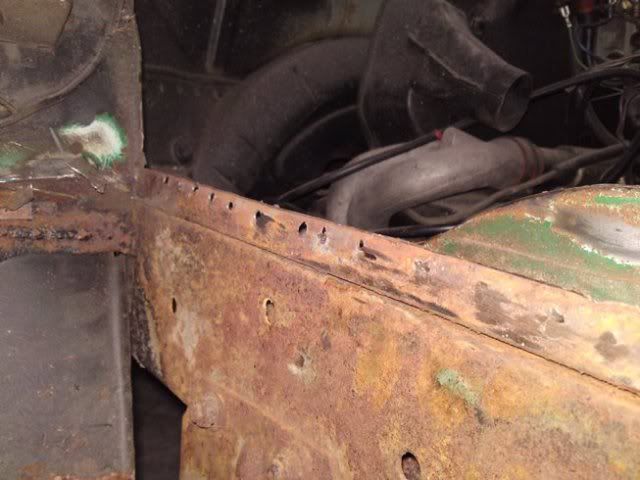 The light was very poor though, and it came to about 9pm and i decided to call it a day. I had hoped to remove the lip of the battery tray that mounts against the wheel tub, but that will have to wait. You can see it here, which is where i will start next time .... 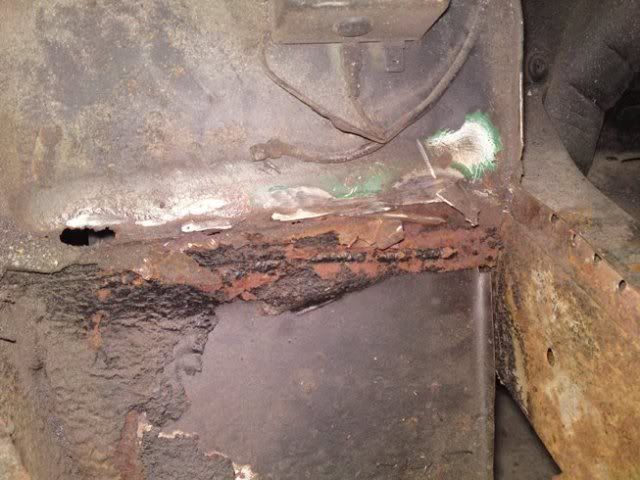 With the way things are going i'm hoping to have the battery tray out, rear corner out, and repair panels made up by the weekend. Then hopefully i can start welding this side early next week |
| |
|
|
|
|
|
|
|
Well done mate! Coming along great guns! Do you think i'll fit on the hammock?  J |
| |
|
|
|
|
|
|
|
Blown_Imp - i'm sure you can fit in the hammock ..... but i don't think it will take your weight tho, fat boy! lol Just a small update this morning. Made the trip out last night in the pouring rain to collect the wheels won on ebay last weekend. It ended up being a nightmare journey, and it killed Tashas evening .... so big thanks and hugs to my wonderful wife! We got them back and unloaded. I need to have a good look at them to decide what to do. I suspect i will take the tyres off, have them blasted and then powdercoated. I cant decide on white or black at the moment. I suspect i'll need to try them on tonight and get a photoshop knocked up! 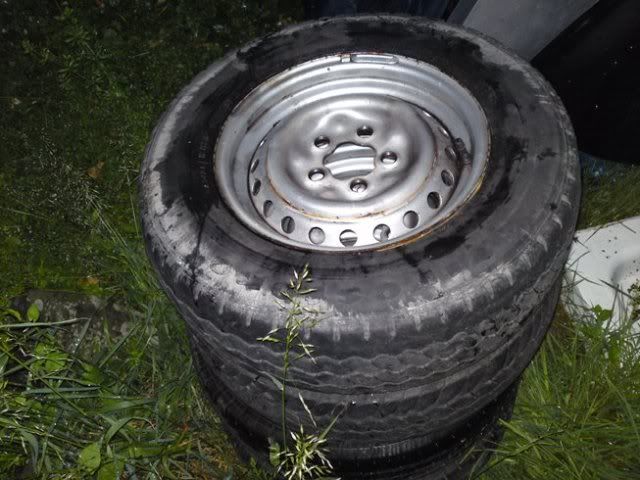 |
| |
|
|
|
|
|
|
|
I'm massively enthusiastic about this at the moment, and i can see me getting carried away with it! lol. I've already decided that its going to get all the metalwork done, and fully sorted before it hits the road. Its looking like that will involve the rear end which i'm doing (both battery trays, rear corners, inner valance and rear valance) plus also sills on the RHS, front panel, front valance (inner and outer) and the new roof. No small challenge, but i want it done before the summer ends! I've been looking for a direction to take this. You may remember i stuck a poll up on the main board about camo paint. Ive now had my inspiration! The bus was always going to be orange because the newly trimmed interior that came with the bus is orange. Ive decided on Porsche Blood Orange. Obviously, with the paint and the obvious porsche/vw connection it got me thinking. I love motorsport of old - when men were men and all that. The Targa Florio is one of the most famous, and back in the day was one of the most testing for cars and drivers alike. The bus is a 1973 ... coincidently thats also that last year the Targo Florio was raced as a world championship competitive race. Porsche won, and also finished up as the most victorious manufacturer with 11 wins. Therefore, the bus is going to become something of a homage to Porsche @ Targo Florio. It will basically be blood orange with black detailing. Bumpers and wheels will be black too. The bus will then be signwritten as a support bus for porsche in 73. Drivers names on the doors. The history and a map of the circuit on the tailgate. Possibly some sponsors logos down the sides (Martini, but all in black). With that in mind, work continued .... The RHS Battery tray needs to come out.... heres what i started with 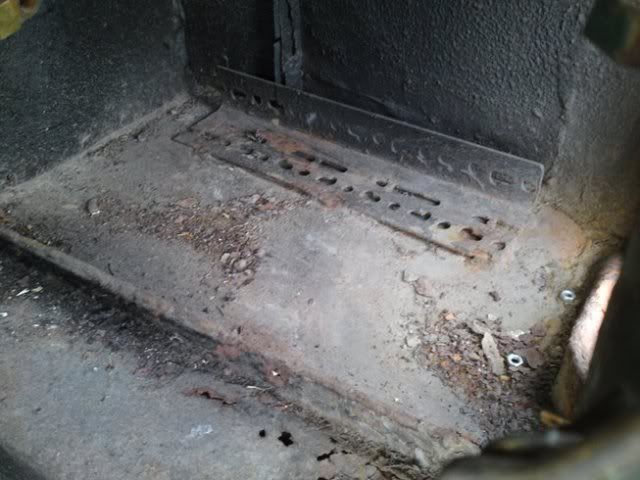 As i did with the other side, i cut a hole in the middle to get things moving and to give greater access. This also means i can get some leverage on the poor repair, and rusty original panel.  I was left with the panel attached by the original spots to the engine bay and to the rear corner. I managed to chop enough access inside for it to come away from the engine bay. I had very little access against the rear corner (largely cos my cutting disc was wearing down and i didnt have a new one! lol) so i decided to chop the spots out from the rear corner. The rear corner is going anyway, so it didn't matter. 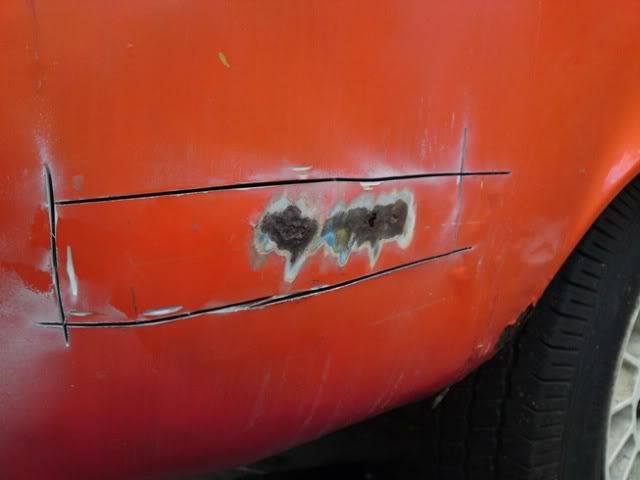 Then with a little whacking, bending and cutting ... out came the battery tray! 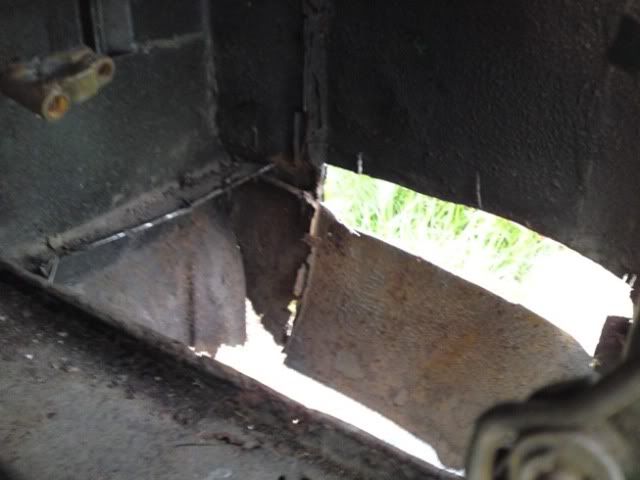 I need to remove the section of the panel where it meets inside the engine bay. I will clear the area up to reveal the spots and either grind or drill them out. It moving along nicely now. Next i want to get the areas inside the engine bay sorted so i can get the inner valance in. My new battery trays have been ordered, and so should be here this week, which should mean i can start to rebuild the RHS soon! |
| |
|
|
|
|
|
|
|
Nearly time to start melting it all back together I think the porsche support bus is a great idea, bit of innovation never hurt the VW scene! |
| |
|
|
|
|
|
Jun 17, 2009 19:57:13 GMT
|
yes indeed - i'm hoping to be able to crack the welder out very soon. I will be happy once the rear corners and rear valance are in, and the sooner i can start the better. Had a little progress tonight. I decided against getting the grinder out because i was SURE it was going to rain. Of course, it didn't! Anyway - the steelies we collected earlier in the week were beggin to be put in place, and so i spent a few minutes swapping rims over. It means the old alloys can go on the bay to raise some funds too. Before she hits the road the steelies will come off to be blasted and powdercoated at the same time i have the tinware etc done. Heres how it started 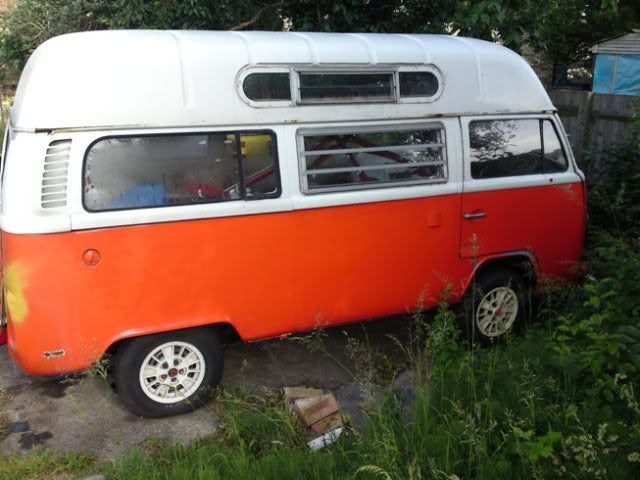 And then with steelies ... 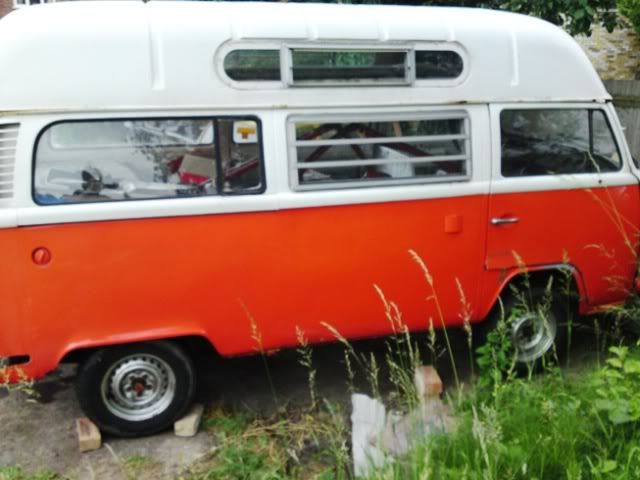 at the front 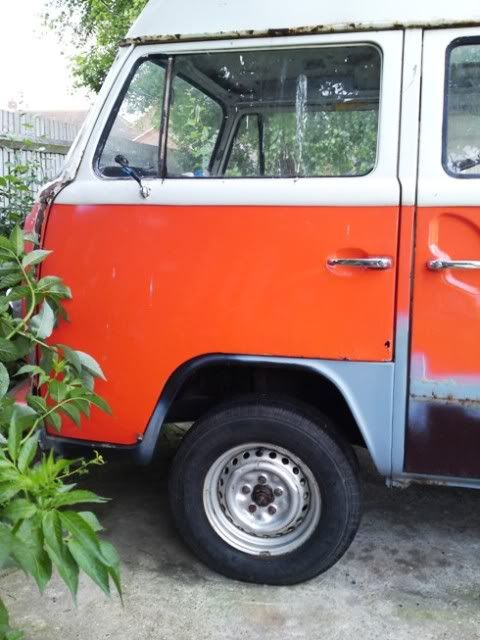 side on 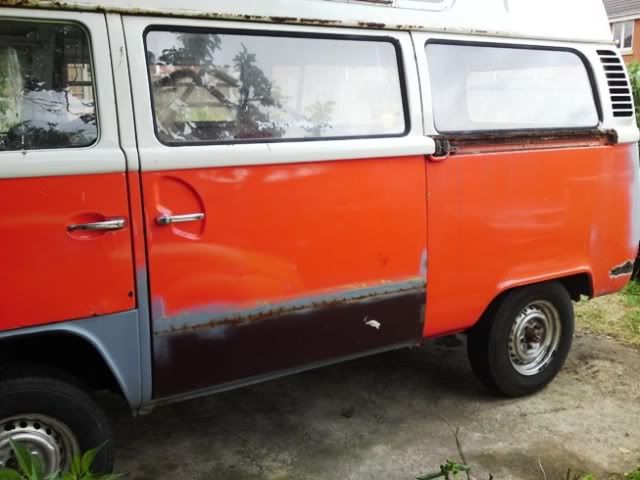 rear end 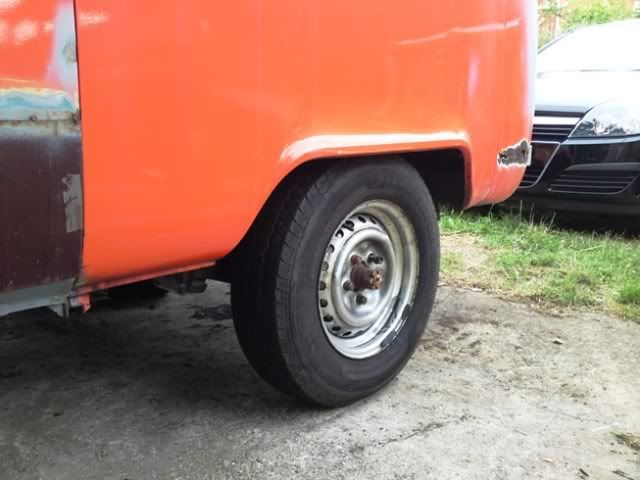 Tash's first words to me once she saw the picture was "that needs slamming!" Awesome! And to be fair, she is SO right! Hopefully the sun will shine and i can get the remains of the rhs battery tray tomorrow night. |
| |
|
|
|
|
|
Jun 17, 2009 21:22:05 GMT
|
|
i know you seem to like the steelys but if you slam that bus on the alloys it'll be superb!
they arecool wheels, i'd have them if they're 5x112! PM what ya after, or if you want to swap for anther set of steelz with 7-8mm tread branded tyres i don't mind a trip to bedford-sh in my bus
thats a cool bay, i love the top of it, very differant!
|
| |
Mini 998cc grp bonnet & boot, lightend shell, 6-point cage, soon to have a turbo on the 998 engine (t2 frm a r5gt) rs turbo intercooler, hoping to get 120ish bhp?
father is building a Mini Van 1330, 45 weber, 100bhp@wheels
'RIP' 1.8 Metro GTi, 15.23 1/4mile
|
|
|
|
|
|
|
the alloys do nothing for me. Longer term aim would be to run fuchs, but in the short term steelies fit in perfectly with where I'm going. Trust me! I you want the alloys check the for sale forum - they are also on ebay mate |
| |
|
|
|
|
|
|
|
Still keeping things rolling along. I'm getting about 1 hour - 1 1/2 hours each evening that i manage to get out. Its not a huge amount, but if i can manage it for 3 or 4 days a week thats getting up to 6 hours. Its amazing how effieciently you can work when you are pushed for time too. Its also keeping my enthusaiasm high! My two new battery trays arrived today. Bonus i thought ... that means i can mock up everything on the LHS and get that all ready to go in. 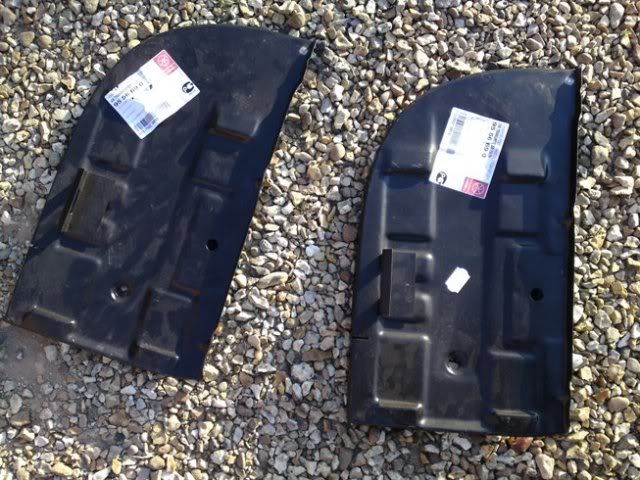 But oh no, nothing can be that easy. GSF send me two RHS panels. I call them up, and apparently thats all they supply. I'm told you need to remove the mount for the battery and just flip the panel. However, when you look at the panel you can see all the pressing are designed to flow the water down to the drainage hole. If i just flip the panel, then the drain hole become the highest point. So, i'm now going to chop out a large section of the panel, flip that, reweld it back in, and then fold the tabs over on themselves so they sit in the correct position. Seeing as the battery trays collect all the water that comes in through the vents for the engine, i want to make sure they drain correctly otherwise they will just rot out again in days! Heres roughly where i'm going to chop 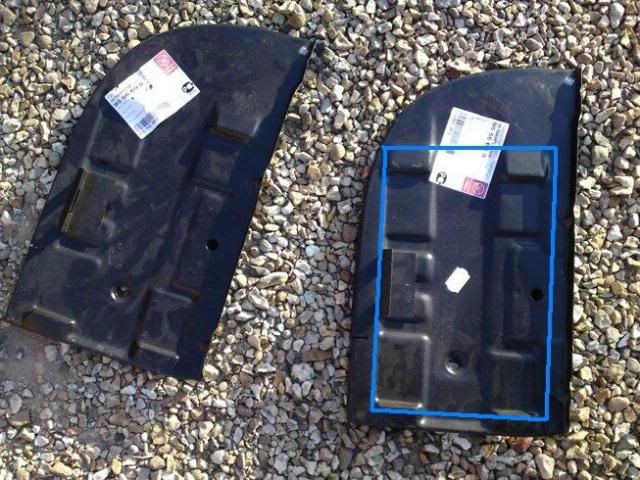 So, that meant i only really had a RHS battery tray so i continued with that side. I knew i had some remnants of the old repairs to remove, so i decided to crack on with that. This is how things were left the other day. This is the bodged repair, where it meets against the lip inside the engine bay. 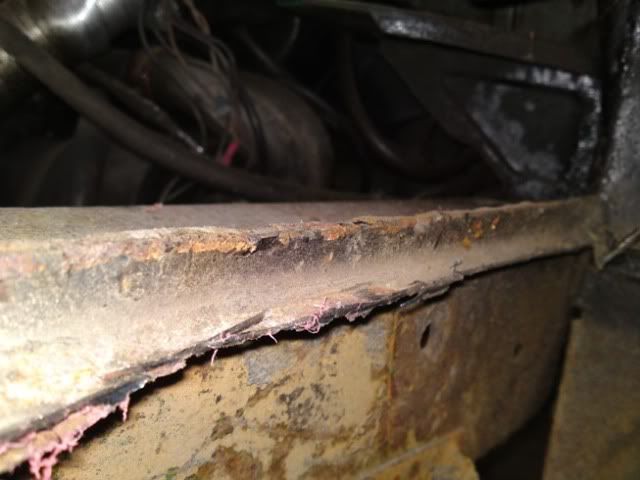 This was seam welded along the top. I know i am going to have to make some serious repairs around here, especially to the engine bay panel, and so i just jumped on in with the grinder to seperate the bodge panel. Here you can see the bodge panel split away. 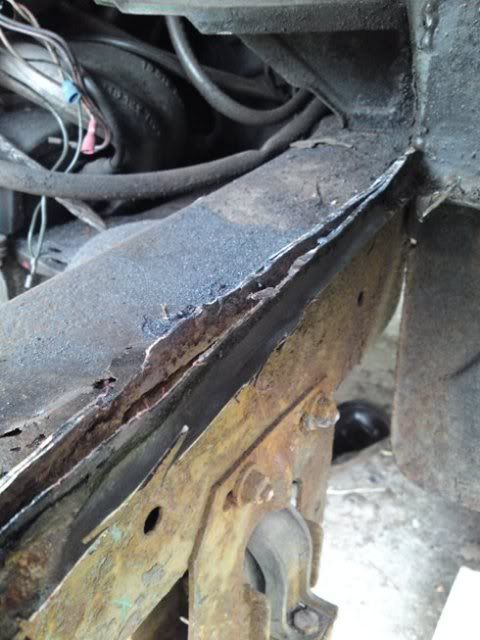 I then removed that, removed any remaineder of the original panel, and tidied the lip against the engine bay. all that left was a bodged panel against the back of the battery tray/lower wheel tub. You can clearly see it here. 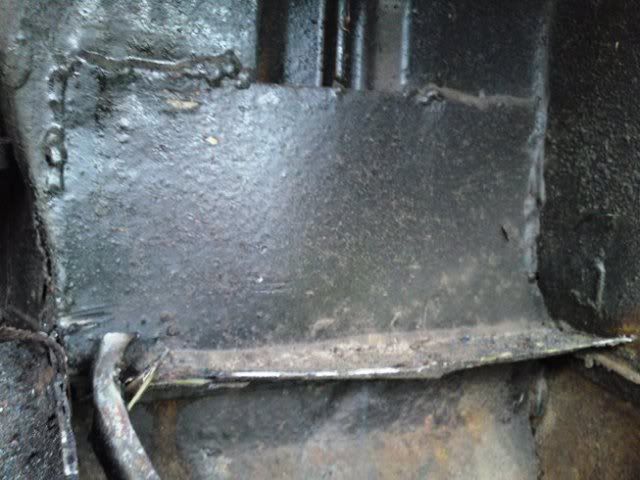 Access is pretty poor, so i decided to chop that out and then finish for the evening. I was about halfway through when HoTWire rang me to chat about RRG09 .... so i didnt get it finished. Plenty to do tonight though! |
| |
|
|
|
|


 example of a bay bus. With two dogs to cart around, and me dealing with these beasts day in day out we had had our eyes open for a while.

 . Once the centre section of the inner valance was gone, this is what I was left with. The inner valance is that small section (as arrowed previously), the vertical lip, and the small bit that folds down below.