|
|
|
Jan 27, 2011 23:21:48 GMT
|
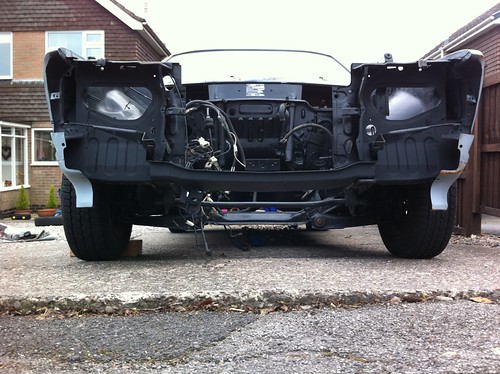
Awesome work Dude. Looking fantastic! I might have some ideas for more lows at the back (and I think you might approve of them) so will call you when I get back tomorrow.... Loving the way this car is progressing and keep enjoying the updates. This shot:  It's amazing! |
| |
|
|
|
|
|
|
|
Jan 27, 2011 23:43:07 GMT
|
Thanks bud! I'm really excited about the look, and that pic makes it look viscious haha!   Extra pic Talk tomorrow bud. Dibs |
| |
|
|
roundozo
Part of things
  Retroless but not for long!
Posts: 332
|
|
|
|
|
Hi There,
I've got a 2.8 V6 on the way to replace my current one (serious oil leak) and before I put it in I want to give it a clean like you have. What steps did you take to make sure water didn’t get into the engine and electronics etc? I would be interested to know how you did it as I would like to do the same before I put it in the car.
Cheers.
|
| |
|
|
Speedle
Posted a lot
   Need a Country Rock band in the Hampshire Area? https://www.facebook.com/DirtRoadDiaryUK
Posts: 2,221
|
|
|
|
Awesome stuff dude! The car already looks ace, and solid too! You must be very proud  |
| |
|
|
|
|
|
Jan 28, 2011 12:54:56 GMT
|
Hi There, I've got a 2.8 V6 on the way to replace my current one (serious oil leak) and before I put it in I want to give it a clean like you have. What steps did you take to make sure water didn’t get into the engine and electronics etc? I would be interested to know how you did it as I would like to do the same before I put it in the car. Cheers. Thanks. I got some freezer bags and bagged up every electrical link I could find, then zip tied or laggy banded for a seal. All the oil points I stuffed with kitchen paper covered in oil and bagged those too. After the wash I blew as much of the water off with a blow gun and then wiped it dry with kitchen paper again. I'm going to POR15 the engine block and gearbox I think, mainly as I'm pee'd off with hammerite as all the axle, leaf springs, front suspension arms etc that I brushed, treated and painted are now covered in little rust spots. I'm going to slowly rub down those again and POR15 them as and when. Awesome stuff dude! The car already looks ace, and solid too! You must be very proud  Thanks! I'm over the moon! Very pleased and impressed with myself. Chris! |
| |
|
|
|
|
|
Jan 28, 2011 16:04:49 GMT
|
Couple of hours between lessons today, so popped home for a few bits and bobs I didn't have time for yesterday. Measured the eye to eye length of the leaf springs for Mike incase using his decambered Celeste springs is an option, so hopefully it'll be cool to see if they fit and how they change the stance. Fitted and checked the drop links for size...  Too long, the ARB is point up to the wishbone, so took a quick measurement and dropped another 6mm off the spacer in the centre and...  Better angle I think. I'm no Lotus engineer but that looks better to me geometrically. Then tackled the steering wheel I've been meaning to remove for months! EASILY the best oem steering wheel out there!  Drilled a couple of holes in a plate, and found two bolts that would screw into the hole either side of the spline.    A few socket turns later and....!!!!  It's just the hottest wheel out there! Love it! Dropped the horn buttons out (I'll put a button on the dash for that!) and flapped the brackets flat.  Leaving....!!!        Check out the dish!  Plans for this are to weld up the horn holes in the centre and simply polish it up and find a company to leather retrim it! Back coaching now! So see you all again soon  |
| |
|
|
|
|
|
Jan 28, 2011 16:26:11 GMT
|
|
On the subject of the steering wheel, if I strip the vinyl covering a) what am I likely to find and would it be safe to do so, and b) what will I need to keep if anything for a leather retrimmer to successfully retrim?
I want to throw a polishing disc over it before it's retrimmed
|
| |
Last Edit: Jan 28, 2011 16:28:16 GMT by Diabolu
|
|
|
|
|
|
|
Not much of an update today I'm afraid. It's a little grotty outside, so wrapped up and welded the holes in the steering wheel after doing some research on DSLR's! See if you can see which I'm leaning towards?  haha Anyway, pic of the now 'ready for retrim and polish' steering wheel. May yet weld up the slots too, I'm not sure.  And the car I'm driving around in until this evening... 500or so bhp AMG SLK haha! The V8 does sound amazing but it's not really my kinda car.  |
| |
|
|
|
|
|
Feb 12, 2011 11:18:07 GMT
|
Great looking' steering wheel! Don't know if it is a look that suits you, but I would maybe consider to strip the covering on the rim and recover it with wood.  |
| |
194? Willys Jeep MB 1965 Volvo 544 Special 1968 Opel Rekord 1975 Opel Kadett Estate 1985 Mercedes-Benz 230E 1985 Datsun 720 King Cab 4x4 diesel 1997 Volvo S70 2.5SE (ex. "Volvo544special65" - changed to more reader friendly username.  ) |
|
sowen
Club Retro Rides Member
Posts: 2,245
Club RR Member Number: 24
|
|
Feb 12, 2011 15:09:58 GMT
|
Wowzers  this has come on a bit  On one of my steering wheels, I peeled the old rubber rim off leaving the plain metal rim, wrapped it in rubber hose slitted lengthways so it slid on, glued it in place and fitted a lace up vinyl steering wheel cover over the top, very 70's  |
| |
|
|
|
|
|
|
|
Feb 12, 2011 21:19:47 GMT
|
Haha! Thanks Sowen! It's really gathering a head of steam now! I'm trying to get my head around front brake discs and calipers now! As for the steering wheel, here's a sneak peak of where it's at right now  Had a re-covering thanks to a trimmers recommended by Bruce.  |
| |
|
|
|
|
|
Feb 13, 2011 11:51:05 GMT
|
|
Yum!
|
| |
194? Willys Jeep MB 1965 Volvo 544 Special 1968 Opel Rekord 1975 Opel Kadett Estate 1985 Mercedes-Benz 230E 1985 Datsun 720 King Cab 4x4 diesel 1997 Volvo S70 2.5SE (ex. "Volvo544special65" - changed to more reader friendly username.  ) |
|
|
|
|
Feb 13, 2011 12:02:50 GMT
|
Fitted and checked the drop links for size...  if the steering arm is attached to the bottom joint like the Datsun then you can make and fit a spacer between the lower ball joint and the strut. this improves the lower arm angle  as on the Datsun if the steering arm is attached to the strut though it'll increase bump steer |
| |
|
|
|
|
|
Feb 13, 2011 12:38:35 GMT
|
Good plan!! I might whip a strut off and see if I can fabricate a block while at Area52 one day  Thanks! Makes the geometry look much better!! |
| |
|
|
|
|
|
Feb 14, 2011 20:42:59 GMT
|
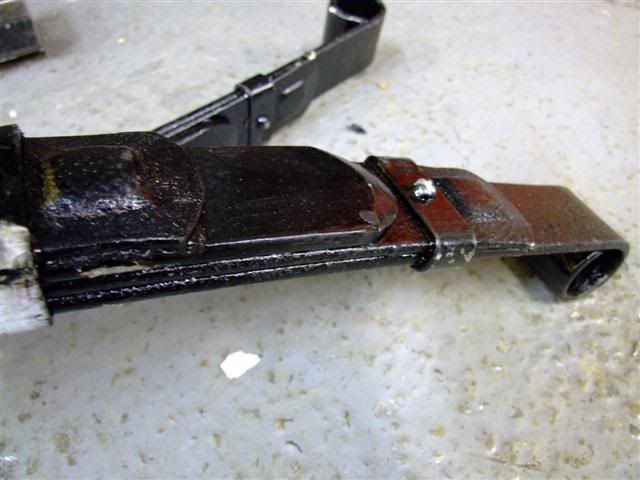
Plan for today before work was.... RAKE ADDRESSING! Thanks to a very kind Mike D (see earlier in the thread) these came a couple of days ago!   Decambered and de-leafed leaf springs from his Mitsi Celeste, which are as near as makes no difference the same length as mine! A few bolts later and we were at...   Going down!!....  Reckon the rake issue has been addressed?  Before... Before... After... After... :-D  And there's a bad photo of how they lie with the arch flares on. The 2 leafed springs are obviously not as taught as the original, so its a good job that these...  ...came a few days ago too! Adjustable shocks from Pro-tech!  I hope they add enough stability to the rear. The proof will be in the pudding  See some of you at Area52 at the weekend  CHRIS!!!!!!     |
| |
|
|
|
|
|
Feb 14, 2011 21:22:02 GMT
|
|
|
| |
|
|
|
|
|
Feb 14, 2011 21:24:49 GMT
|
you do know leaf springs can be bent or straightened in a press? just do a few inches at a time to straighten them along the length. add some leaves from one set of springs to the other to stiffen the rear end then tune with the shocks. soft springs and stiff shocks will be horrible. soft springs will give easily and because they are soft the stiff rebound on the shocks will make the ride height slow to return. iv'e got an extra thick leaf added to each side on the back of the Datsun with quite stiff shocks and they still move around a bit. handles great on the track. with such a low ride height you need the suspension to move as little as possible. very stiff front springs will be needed as well. iv'e got 250lbs springs on the front. with the tyre pressures at 25psi the ride is very pleasent and feels very solid. my Datsun isn't that low but if I lowered it more I feel I would need to stiffen it more. another thing you can do is to make the leafspring bushes from solid nylon. this acts as an antiroll bar for the rear as it keeps the eyelets level with the car and the twist of the springs tries to keep the car level these are my springs and my car is probably lighter than yours   |
| |
Last Edit: Feb 14, 2011 21:31:27 GMT by bozwell
|
|
|
|
|
Feb 14, 2011 21:28:10 GMT
|
Boz, awesome, thanks!  I'll rip my current ones up and straighten/stiffen those out! Could u pop some pics up of yours please? Would love to see them. Chris  |
| |
|
|
|
|
|
Feb 14, 2011 21:35:53 GMT
|
 these are the bushes i made. i only made them for the front eyelet the rear ones are still rubber. |
| |
|
|
|
|
|
Feb 14, 2011 21:42:42 GMT
|
oh and when you modify the springs draw an outline of how they started on a piece of cardboard then you'll know how far you've gone. i forgot to say if i leave the tyre pressures at 32 psi the ride is extremly harsh and quite unpleasent on the road so mine is quite stiff for road use. down to 25psi makes all the difference in the world to how the car feels. such light cars don't need much presure in the tyres. i just go up a bit on the track and if i forget to lower them again i soon remember the first bump i hit  |
| |
|
|
|
|


 [*]
[*] [*]
[*]


 haha
haha


 )
) this has come on a bit


