remmoc
Part of things
 
Posts: 931
|
|
Apr 15, 2017 14:06:34 GMT
|
Not done much as per the norm but i did get my grubbies on a rare passenger sun visor with a built in vanity mirror ( my beloved likes to check her face now and again ) It was only ever fitted to early Hillman Imp Californians and is very rare so I was lucky to find one even if it was minging . Pics tell the story  As received - rather grotty with a knackered mirror  Cleaned up well , i replaced the dust that was the foam interior with some thin sheets used when laying laminate flooring , rear foam already in  front foam in , tricky to fit through the mirror hole but got there in the end , foam now surrounds the metal frame  New mirror cut and fitted  And finally its in the car , my beloved can now preen herself without moving my interior mirror   |
| |
Last Edit: May 5, 2017 17:23:34 GMT by remmoc
|
|
|
|
remmoc
Part of things
 
Posts: 931
|
|
Apr 15, 2017 14:13:50 GMT
|
Oh and i cleaned the engine at last   |
| |
|
|
remmoc
Part of things
 
Posts: 931
|
|
|
|
Ive actually done something worth while on this at long last . Namely the gear control rod thingy . This is basically a 1 inch diameter bit of pipe with a cast end for the gearlever ball brazed in one end and an adaptor brazed into the other end , In this adaptor a strange spring like flexi linkage connects the shaft to the box . Shaft runs through two strange nylon bushes with finger like protuberances poking out each side . All this gets covered in crud which rusts up the control bar which in turn wears the fingers away which in turn gives a naffo gearchange. Anyway i managed to get my grubbies on some 1" stainless tube which was once part of a milking parlour . Using another spare shaft i removed the ends and brazed these into the stainless tube , fitted new finger bushes and a new flexi which i covered in grease and then heat shrink to keep the aforementioned crud off . Gearchange now feels much better   old control bar thingy  Crud covered springy linky thing  Shiny newness stainless with the lever end cub brazed in  old and new side by side  New one in  Flexi doofer with protective condom  |
| |
Last Edit: May 5, 2017 17:07:11 GMT by remmoc
|
|
remmoc
Part of things
 
Posts: 931
|
|
Jun 12, 2017 19:37:05 GMT
|
Back again , more modding of stuff as if ive not done enough already. The original washer bottle on these was a bag effort that looked like a colostomy bag for want of a better description . Held very little water and was a pain to fit , not only that there was no electric pump just a rubber hand pump effort - quite frankly it was hopeless . 2o odd years ago i fitted a proper plastic bottle and an electric pump and also moved the jets from the scuttle to the bonnet . Bottle ended up on the NSF inner arch but it did swallow up some valuable boot space . Also 25 years ago i moved the combined brake and clutch fluid reservoir off the front panel and fitted two separate period girling ones ones onto the OSF inner arch - even more boot space gone. Anyway this left a hole in the front valance and i just fitted a blank and that was that. Fast forward a few decades and a plan was hatched to use the old brake and clutch mount hole for the washers thus getting a small bit of boot back. In the end i butchered an old brake reservoir by removing its divider and bottom and got this to fit into the top of the washer bottle , i had to "trim " a bit off the headlight mount , fit the bracket upside down , mount the pump on what was the brackets proper mount and butcher the brake reservoir lid so it wouldnt be confused with its former use . Pics tell the tail much better so here goes . As it was , blank in front the now moved brake and clutch reservoirs and washer bottle on the NSF inner arch  Trial fit of the new bottle and pump position - bottle is the later larger lid type as the real early lid was way to small  Bracket now painted and loction finalised  I then changed the bottles lid for a more secure one and added a one way valve   Old reservoir lid  I machined out the middle and added the middle of a modern lid fror the correct colour and logo  Set up looks like this now - ive added period Girling labels just to make doubly sure theres no confusion   |
| |
Last Edit: Jun 12, 2017 19:45:02 GMT by remmoc
|
|
remmoc
Part of things
 
Posts: 931
|
|
Jul 16, 2017 17:22:49 GMT
|
It would seem from the return drive home from a show yesterday that the transaxle in this is not very happy with itself as selecting any gear whatsover is tricky . Its become very notchy and stiff and its almost undriveable , once a gear has been successfully selected it does stay in which i guess is a bonus , Not good as i don't have a known working spare or the pennies to get get one. Tis a bad day  |
| |
|
|
|
|
|
Jul 16, 2017 17:49:41 GMT
|
|
Check there is oil in the gearbox
|
| |
|
|
remmoc
Part of things
 
Posts: 931
|
|
Jul 16, 2017 17:54:18 GMT
|
Check there is oil in the gearbox its full - first thing i checked  |
| |
|
|
|
|
|
Jul 16, 2017 18:12:03 GMT
|
|
🙁
|
| |
|
|
trimtechniques
Part of things
  Porsche 928 4.7 ltrs of German grunt. Mazda MX-5 MK1 Dakar. VW T4 camper
Posts: 158
|
|
Jul 16, 2017 20:09:15 GMT
|
|
Superb little car! I had one of these as my first car. Unfortunatly it didnt last long. The dreaded rust bug got it in the end.
|
| |
|
|
remmoc
Part of things
 
Posts: 931
|
|
Jul 20, 2017 21:40:52 GMT
|
Another transaxle has been fully rebuilt ready for fitting over the winter - or sooner if i can  |
| |
|
|
|
|
remmoc
Part of things
 
Posts: 931
|
|
Aug 18, 2017 17:19:21 GMT
|
Well finally progress but not in the way i was initially thinking . I had a good look / poke about under the car at the old transaxle and had the idea that maybe the selector shaft which connects to the lever might of been binding in the alloy case it pokes through . I cleaned up the selector shaft as best i could ( it was a bit rusty ) , pumped a load of oil / grease / slippy stuff on it , operated the gears from under the car a few dozen times and VOILA . The gears are back . Ive done about 100 miles since and its been fine . Also gave the engine a once over - a bit of fine tuning - changed the needles for some very slightly richer ones ( MME instead of number 7s ) which gave a small an improvement on hills and acceleration - plug colour remains almost the same , just a tiny bit darker. So all in all it lives again Couple of recent pics of it out and about  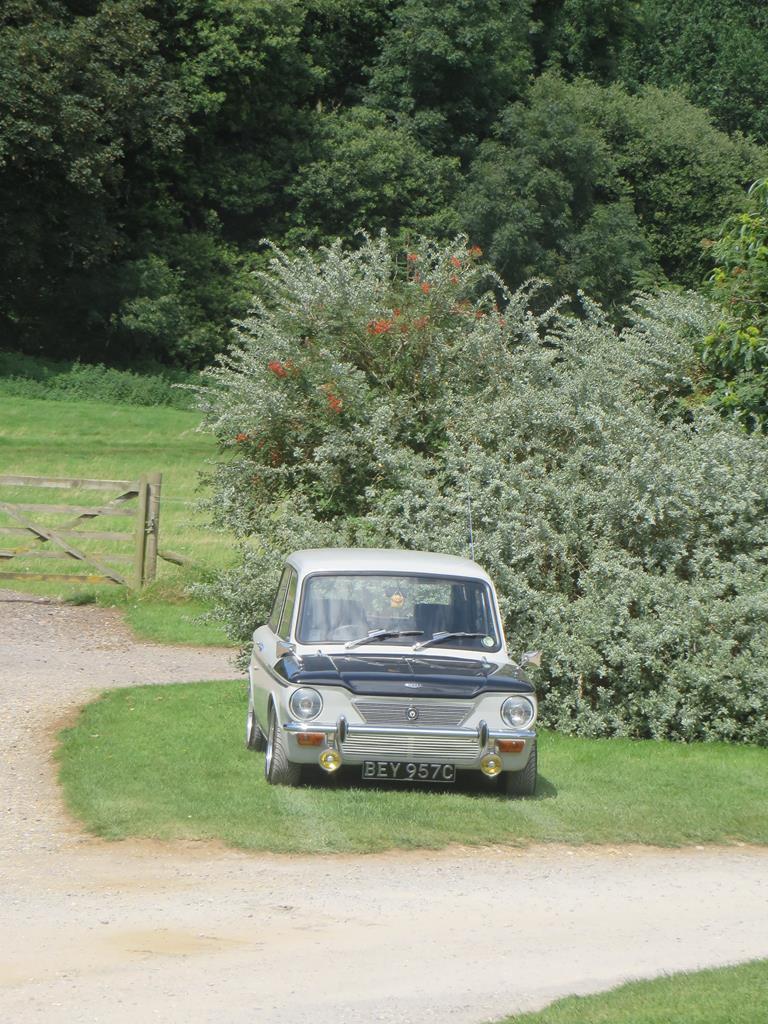 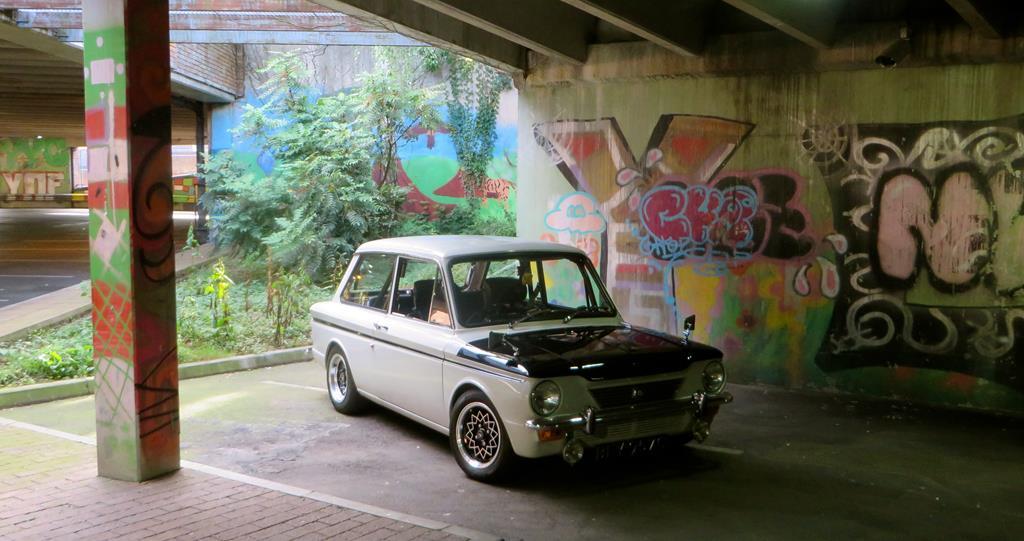 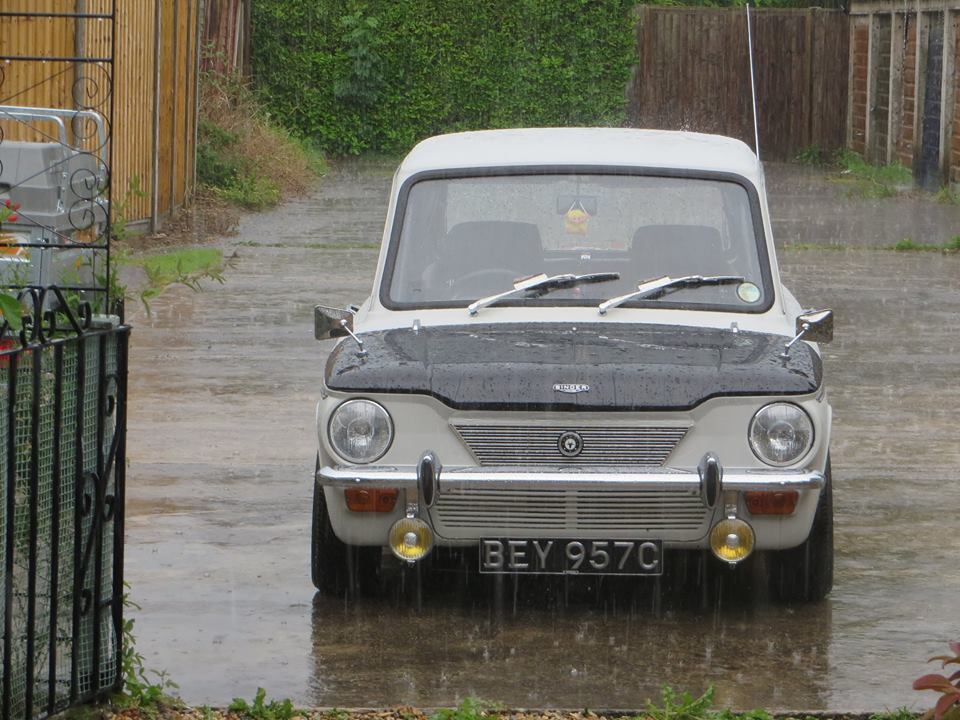 |
| |
Last Edit: Aug 18, 2017 17:23:21 GMT by remmoc
|
|
bazzateer
Posted a lot
   Imping along sans Vogue
Posts: 3,653
|
|
Aug 18, 2017 20:09:42 GMT
|
|
Damn! So I guess that means I can't take it off your hands for the price of a packet of custard creams?
|
| |
1968 Singer Chamois Sport
1972 Sunbeam Imp Sport
1976 Datsun 260Z 2+2
1998 Peugeot Boxer Pilote motorhome
2003 Rover 75 1.8 Club SE (daily)
2006 MG ZT 190+ (another daily)
2007 BMW 530d Touring M Sport (tow car)
|
|
remmoc
Part of things
 
Posts: 931
|
|
Sept 2, 2017 14:23:53 GMT
|
As some of you might remember I'm running twin 1 1/4 SUs on this , Imps never had these as standard but had either a single Solex or twin 125CD Strombergs . Anyway ive had it running rather well on number 7 needles but did find some very slightly richer ones i thought id try . These new ones are MME needles and since fitting there has been a slight improvement and as we all know every little helps . Ive also adjusted the throttle response so its a bit quicker which has also helped a bit 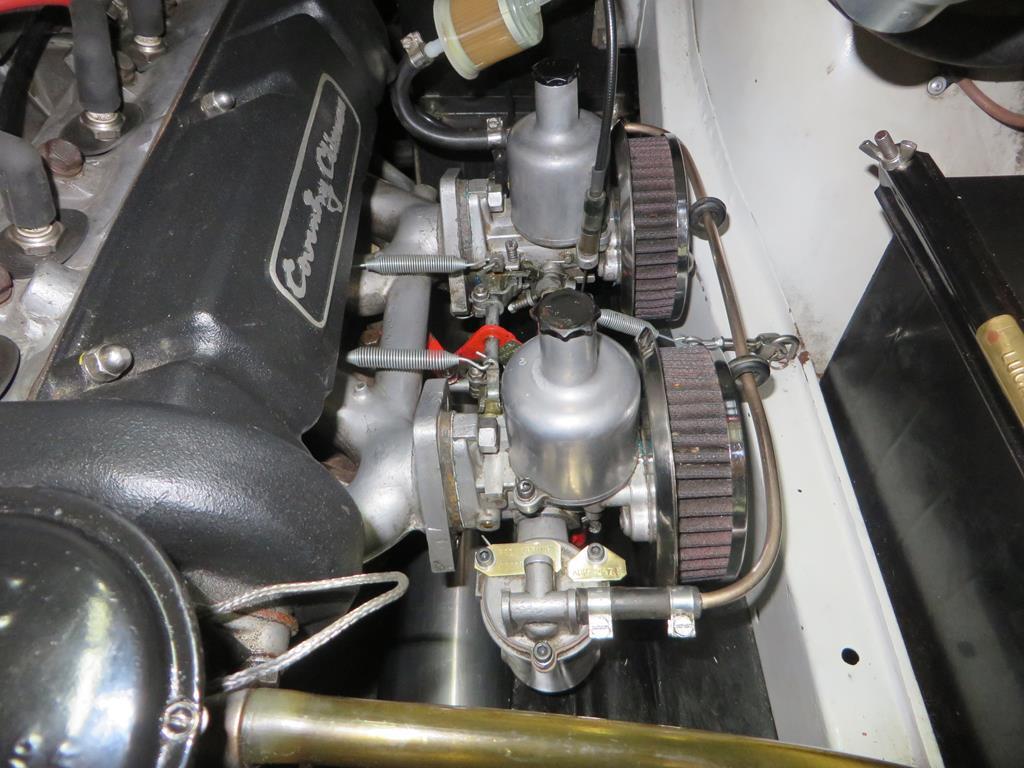 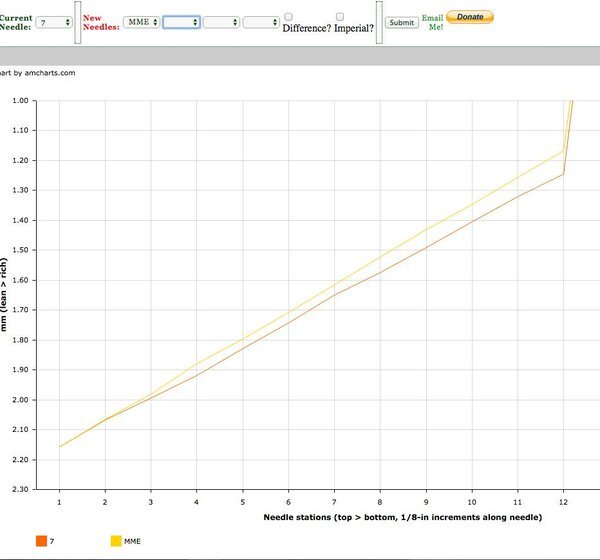 |
| |
Last Edit: Sept 2, 2017 14:25:16 GMT by remmoc
|
|
remmoc
Part of things
 
Posts: 931
|
|
Sept 9, 2017 10:19:39 GMT
|
Made some new fog lamp brackets out of stainless yesterday , the old ones were ally but i have a thing for stainless so felt compelled to do this even though it wasnt really necessary . Such is the world of old cars I guess . Fitted 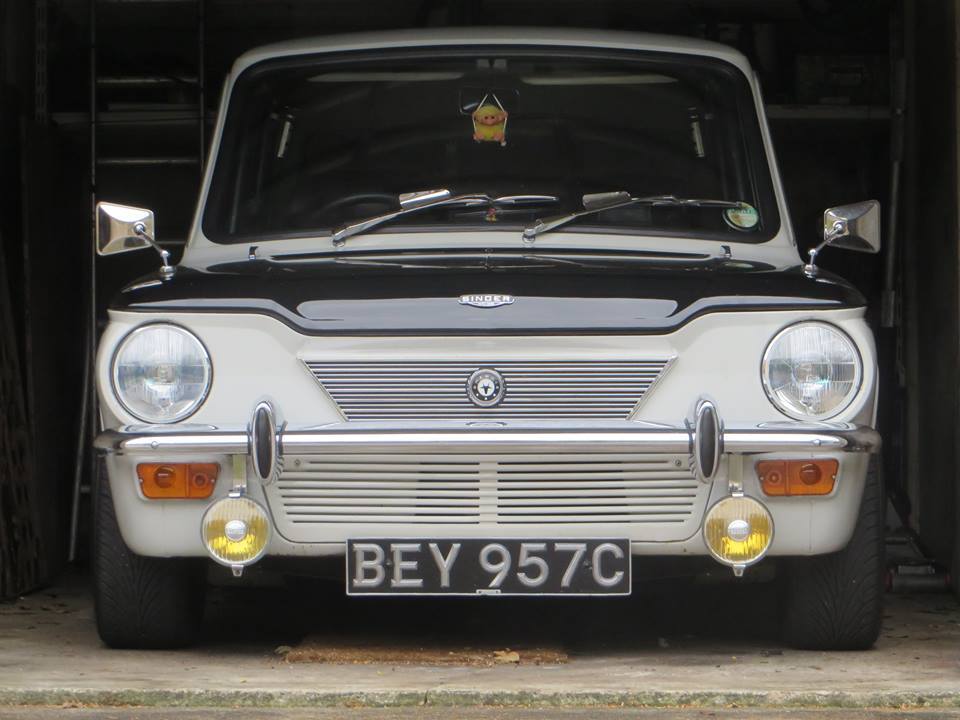 They actually work 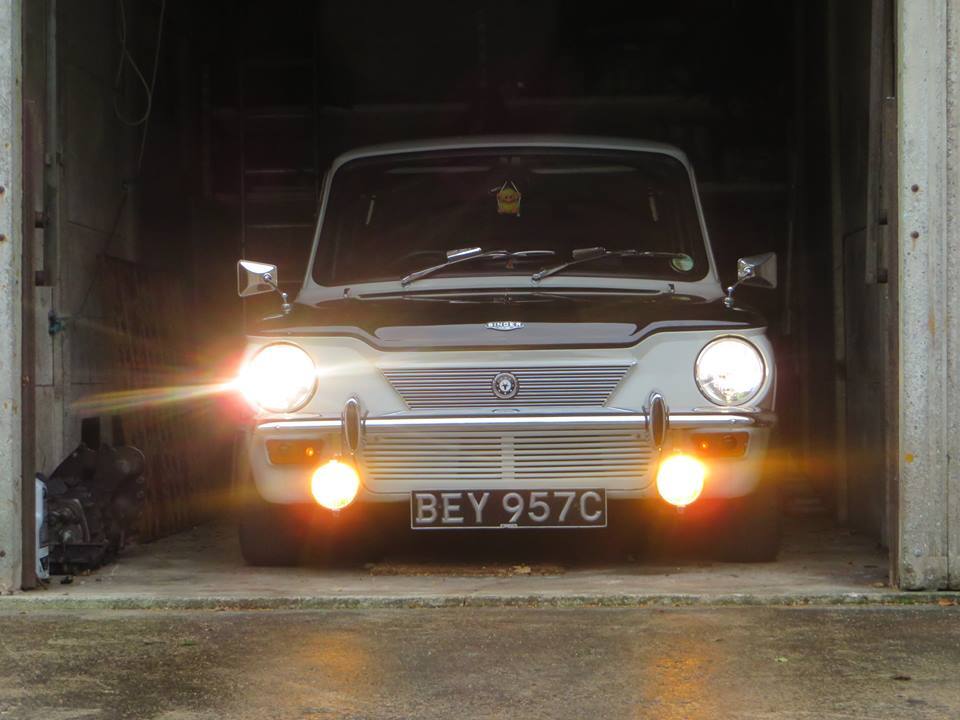 A large plank of wood really helped getting the lights perfectly straight 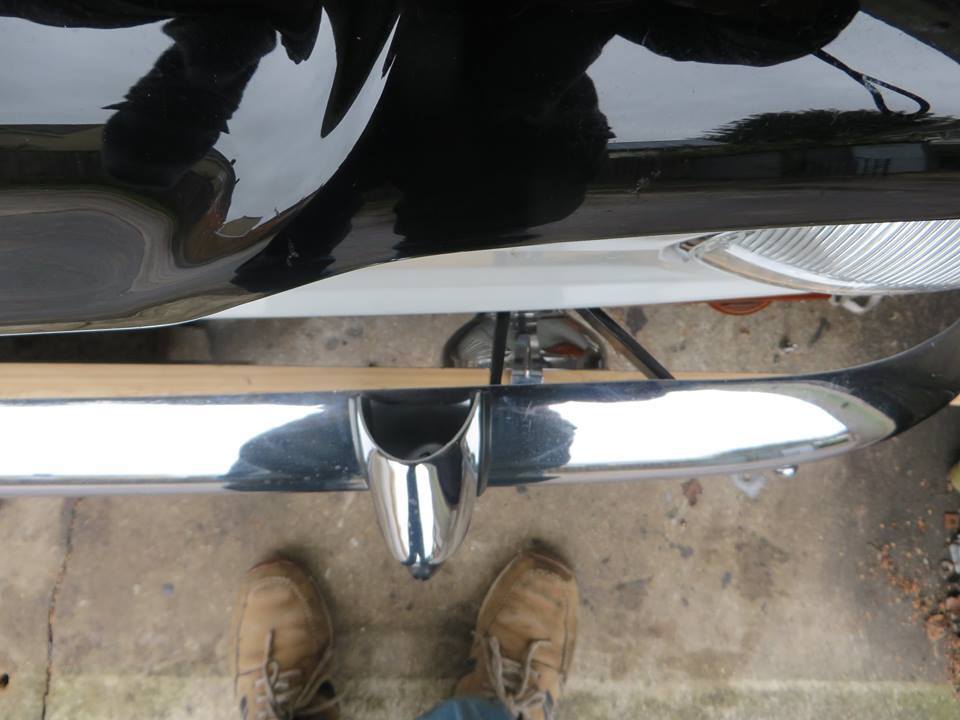 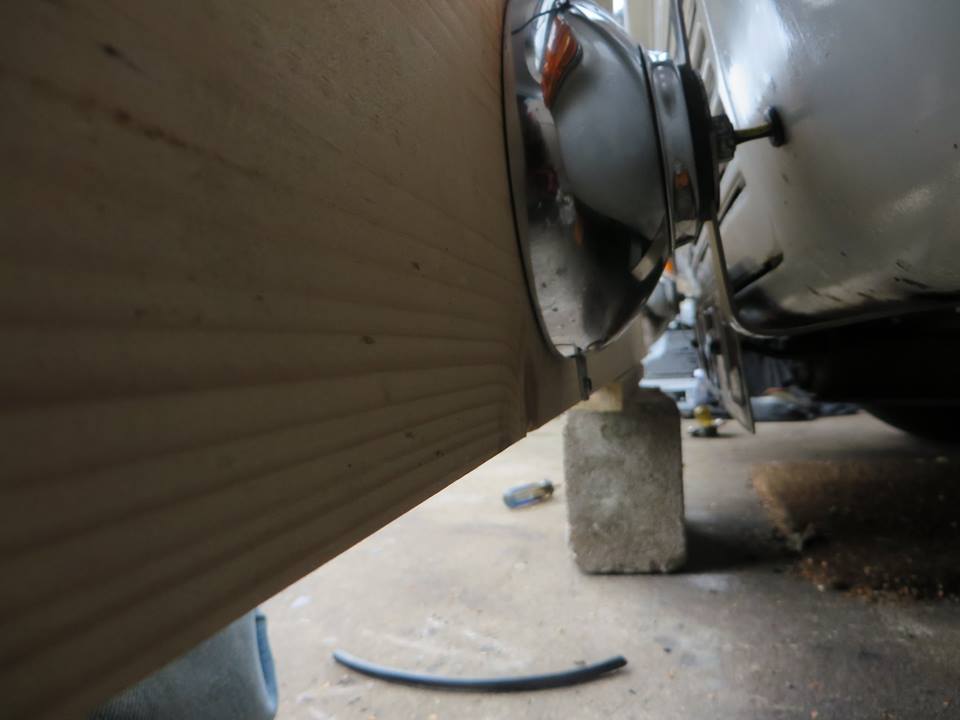 |
| |
|
|
remmoc
Part of things
 
Posts: 931
|
|
Sept 23, 2017 7:36:15 GMT
|
So ive been pratting about again. Theres not much i like on modern cars but tother week i noticed my mates Jag had a footwell light that came on when you opened the door . I can do that .  So I eventually found a small light that had its own separate earth tag ie. not one that earths to the mount . Earth wire goes to the earth wire on the door switch , live came from my interior light fused supply - simples . You open either door and it comes on and if you operate the interior light switch it also comes on . Mounted behind my switch panel out of sight on a screw already there so no extra holes . Took an hour or so to do . Perfect  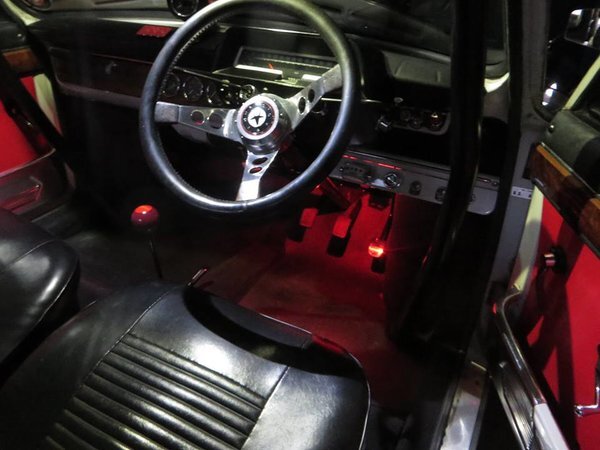 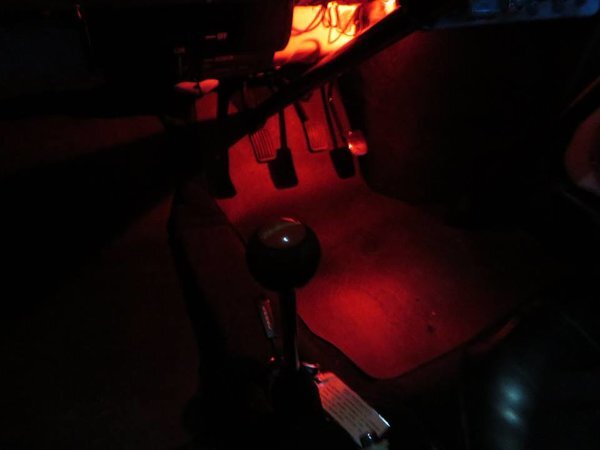 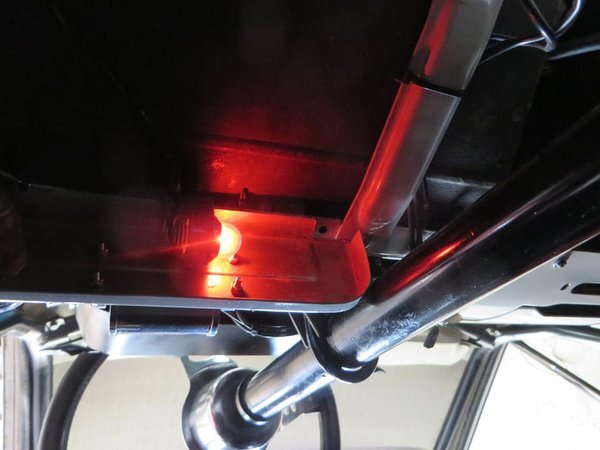 |
| |
Last Edit: Sept 23, 2017 7:37:23 GMT by remmoc
|
|
|
|
|
Sept 23, 2017 8:51:55 GMT
|
|
Nice car! I also fitted an additional interior light for the switches on the center console and used a LED strip for that with a cover to make it less bright. It works well and spreads the light. You can cut these trips every 4 cm to get the length you need
|
| |
|
|
ovimor
North East
...It'll be ME!
Posts: 938
|
|
Sept 23, 2017 9:22:08 GMT
|
|
IIRC someone on here has custom machined a 'bobbin/throttle wheel', the throttle cable wraps around, with a spiral profile = giving non linear pedal/butterfly opening rate?
Wonder if it might suit other applications/installs...
OVIMOR
|
| |
Knowledge is to know a Tomato is a 'fruit' - Wisdom, on the other hand, is knowing not to put it in a 'fruit salad'!
|
|
remmoc
Part of things
 
Posts: 931
|
|
Sept 23, 2017 9:43:43 GMT
|
IIRC someone on here has custom machined a 'bobbin/throttle wheel', the throttle cable wraps around, with a spiral profile = giving non linear pedal/butterfly opening rate? Wonder if it might suit other applications/installs... OVIMORYes ive seen that - very clever i must say - its always good to know other options are available  |
| |
|
|
remmoc
Part of things
 
Posts: 931
|
|
Sept 23, 2017 9:48:21 GMT
|
Nearly forgot - I remade the soundproofing frame for the engine lid from some copper bar as it kept trying to fall out the ends of the old one The old one 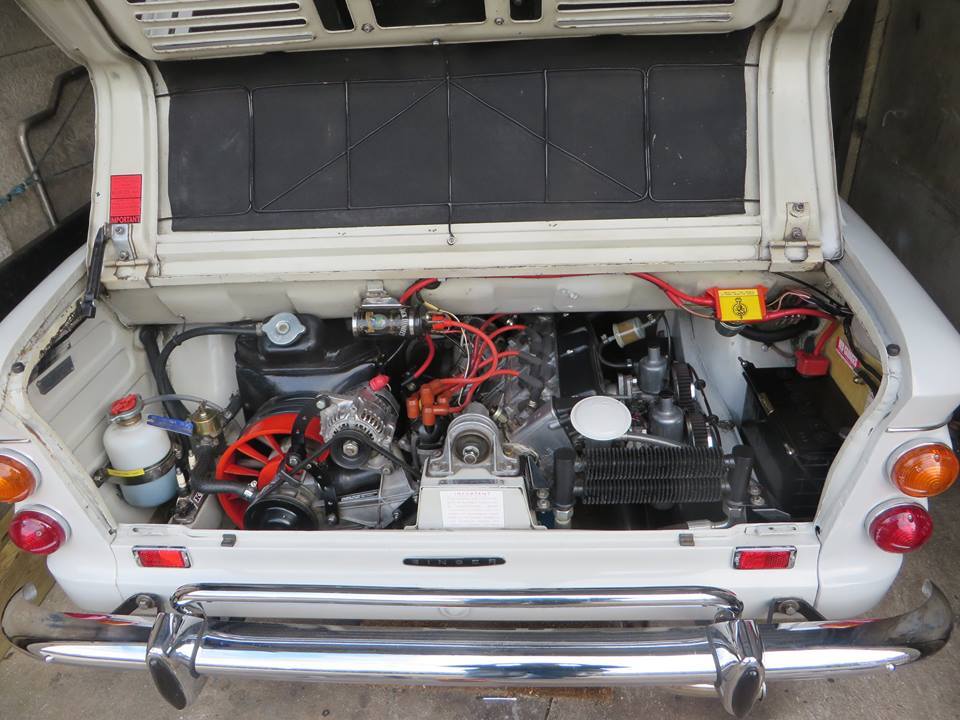 New one coming together , i used copper rivets to hold it all together 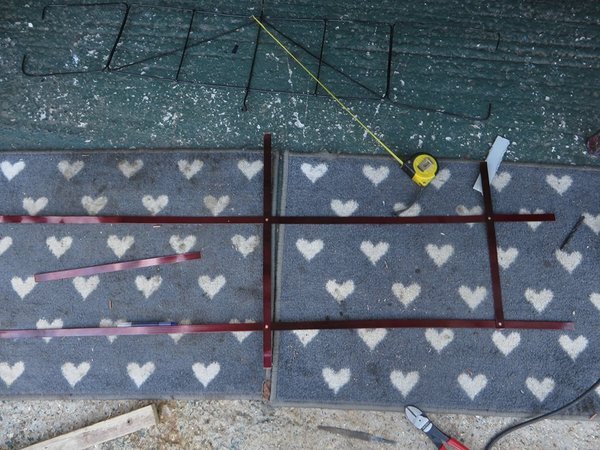 Fitted and sprayed satin black - much better i think 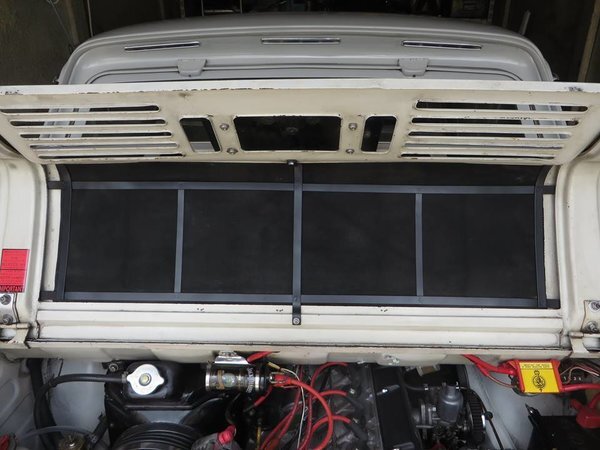 |
| |
|
|
remmoc
Part of things
 
Posts: 931
|
|
Sept 23, 2017 15:44:14 GMT
|
One more thing id completely forgot to post on here - ive redone the fuse box cover yet again - this final time i went mega OTT and added stamped copper labels Heres the three incarnations of one insignificant home made fuse box cover . Prototype number one - a slab of old number plate 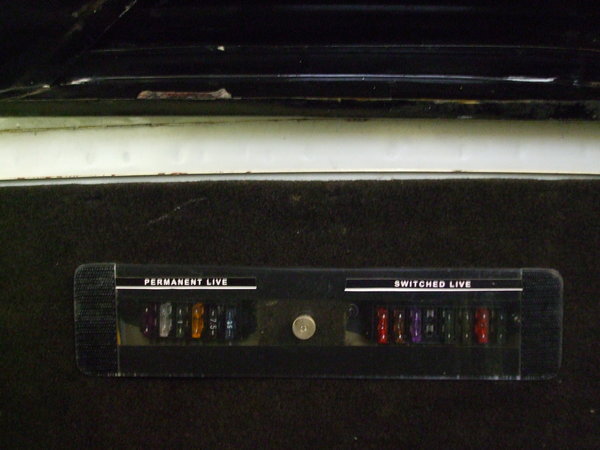 Now labeled with letraset 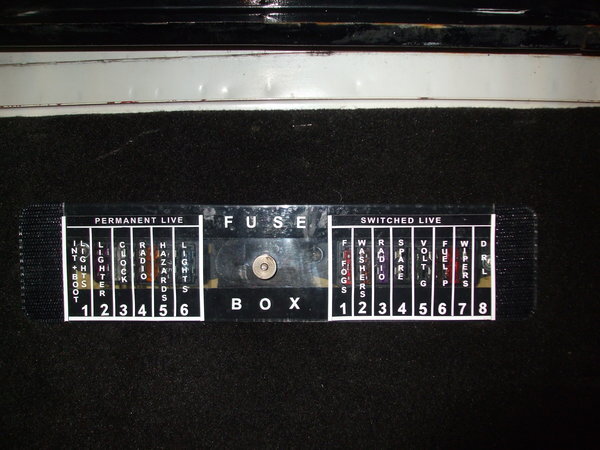 And finally copper labels , brass rivets and a beefed up centre part using an odd bit of black perspex and more copper rivets 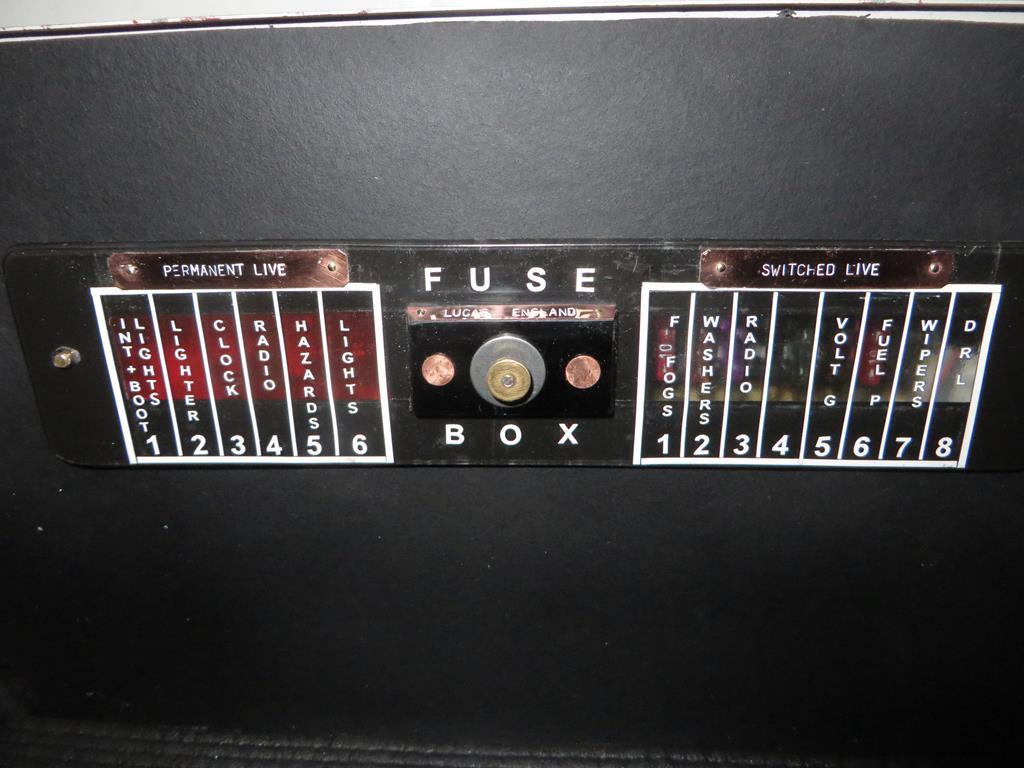 |
| |
Last Edit: Sept 23, 2017 15:46:23 GMT by remmoc
|
|
|
|


