***Jump to the end of page 3 for the 3rd installment - 1986 Peugeot 309.***
**Jump to the end of page 2 for the 2nd installment - 1996 Ford Escort.**
*Starting below the 1st installment (from March 2009) - 1995 Ford Fiesta*
After Scaryoldscortinas very useful welding day (retrorides.proboards86.com/index.cgi?board=general&action=display&thread=56755), here I am home alone having a go myself. Firstly I would never have even got as far as stepping outside to have ago without last weekend, seeing what to do and being shown the basics is the biggest help anyone could give me.
Soooo.......Here we go........ I'm reluctant because I don't like sharing with the world stuff I cant do very well, but one must learn, and hopefully inspire some others to have ago too. Now just to be clear PLEASE CRITICIZE, I wont take offense and need the pointers.
Equipment is a Clarke 160T with a small disposable CO2/Argon Mix bottle and a Fixed shade flip up lens mask.
1st lets introduce the victim, my house mates recently MOT failed fiesta. It's destined to the scrappers anyway (I'm surprised it hadn't already gone) so if I screw it up theres no loss and if I fix it enough to MOT for another year then thats a bonus. Meet 'Hank' the fiesta.
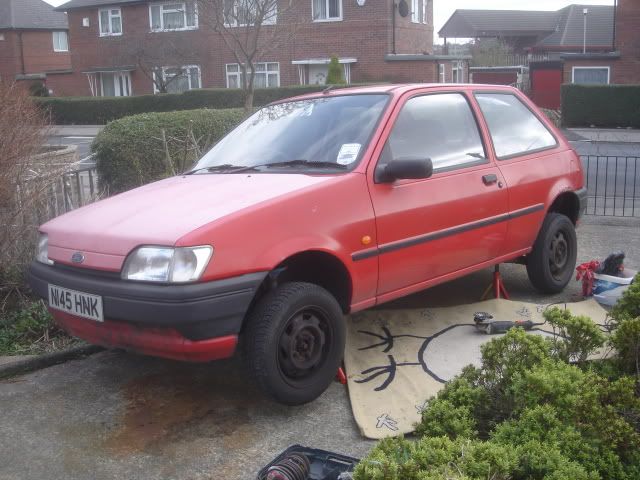
1) OK so I jacked it up onto stands and prodded one of the holes. Followed by a quick whiz over with my newly acquired knot wheel on the grinder.
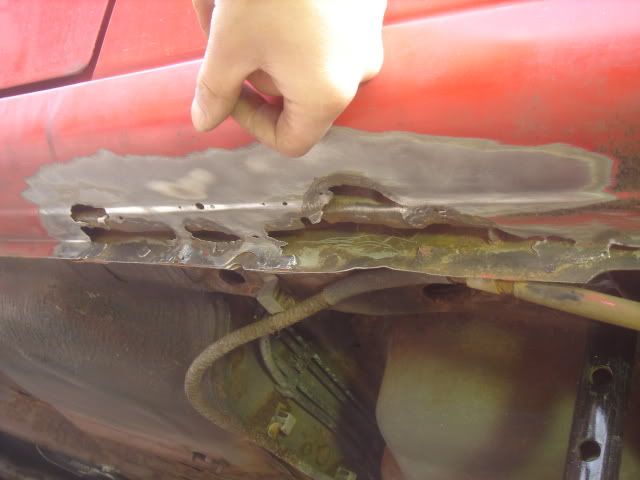
2) I drew a square covering the rust and cut it with a thin metal cutting disc in the grinder. The arrows are pointing at the spot welds which I focused a metal grinding disc on until they could be prised free with a screwdriver.
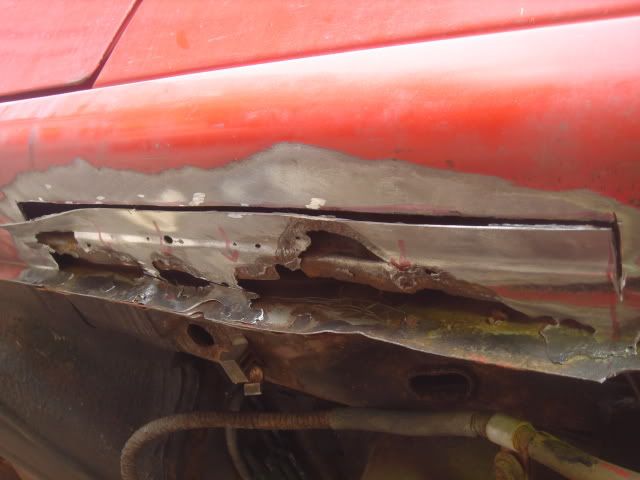
3) I went over it all again with the knot wheel and ground back the remains of the spot-welds with the grinding disc. Couldn't work out how to get right in to the corners by the lip but figured that would be OK left raggy (least of my worries you might say) so I just wiggled the metal off as close as I could.
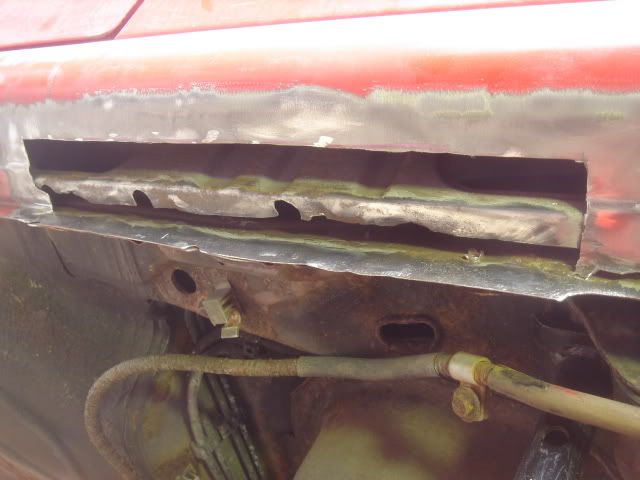
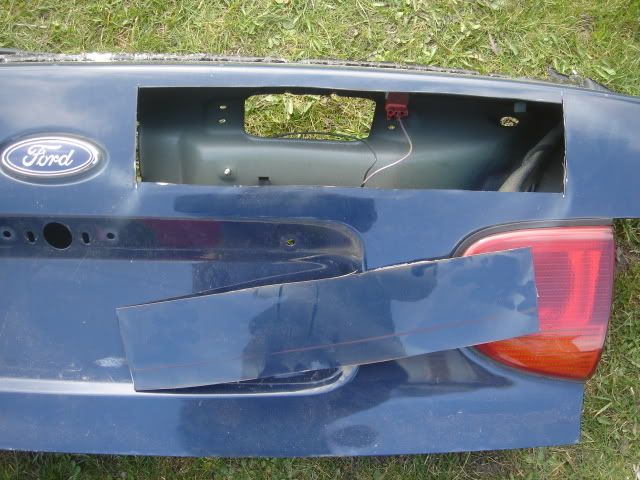
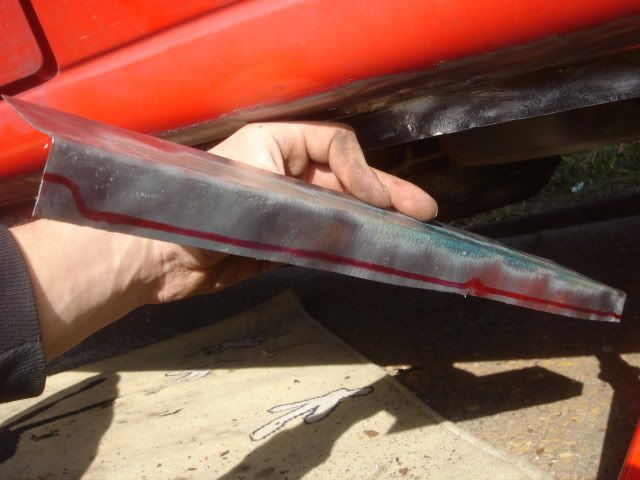
4) Made a cardboard template and then cut it out of an old boot lid. I stripped the paint off with the knot wheel.
5) Hammered it over in the jaws of a workmate.
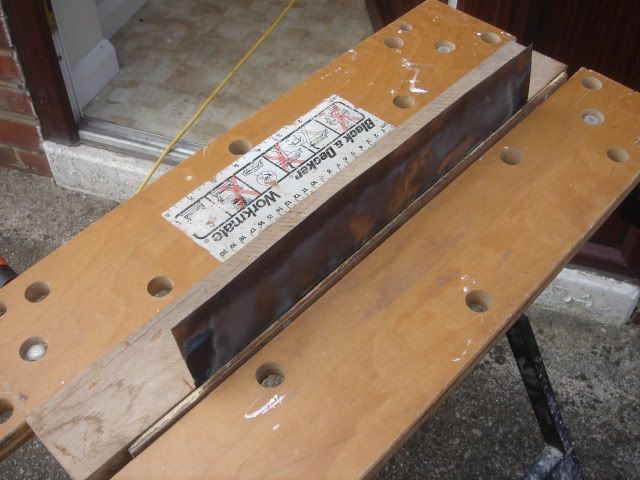
6) I cut it to overlap about 1/2 inch, maybe a bit more.
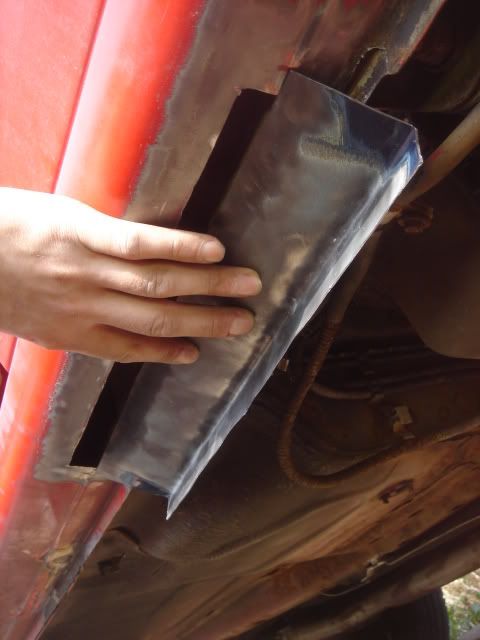
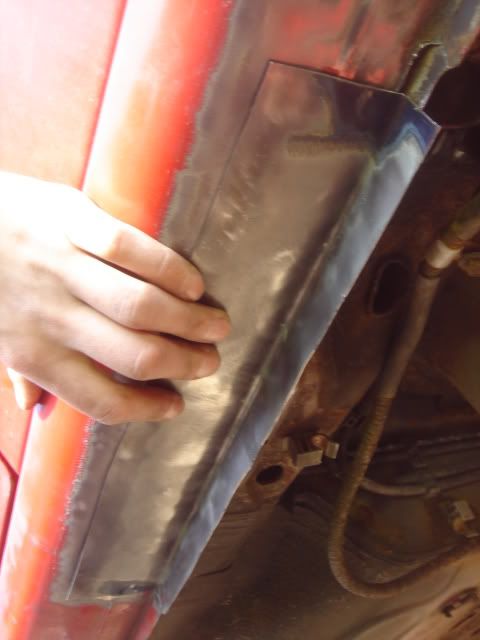
7) Drew along the back edge of the lip and cut it down. (this might have been a mistake to cut it flush>? as welding on the edge of the lip was lets say challenging.)
8) Put on a few tack welds (I think the success of these was somewhat beginners luck as it got messier quickly)
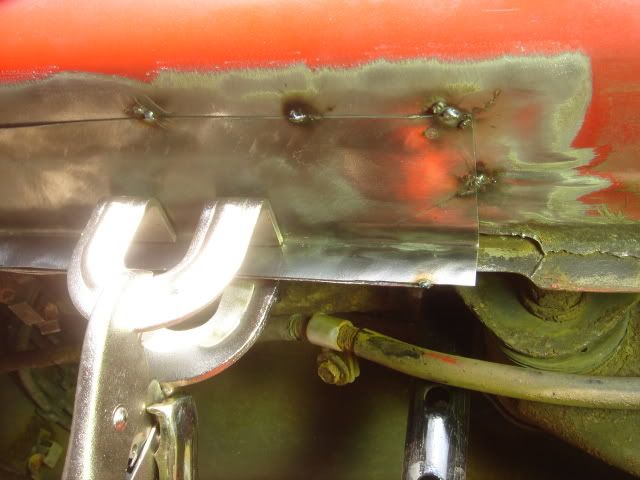
9) As you can see I completely missed the aim on the right of this pic and view some splatteryness to the left.
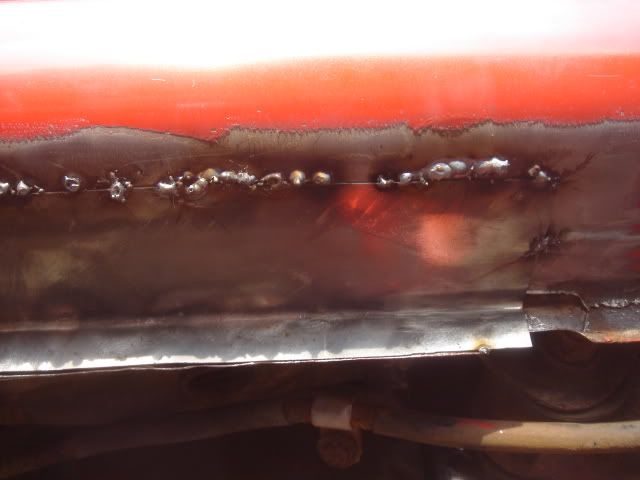
10) So I kept going anyway. Here you will see such joys as over melting in the middle of the pic, and uneven blobs where I tried to weld the lip. The bits of MIG wire hanging of the lip are where I have lost aim and wire has just shot out before I have brought it back.
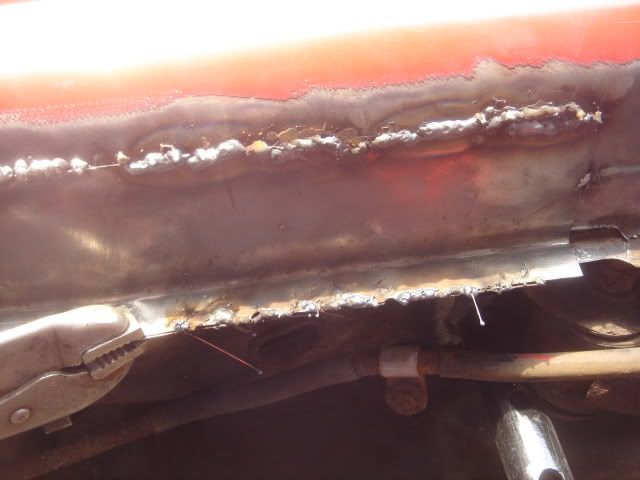
11) I think the big blob at the top is where I blew a hole through and tried to 'bridge' over it.
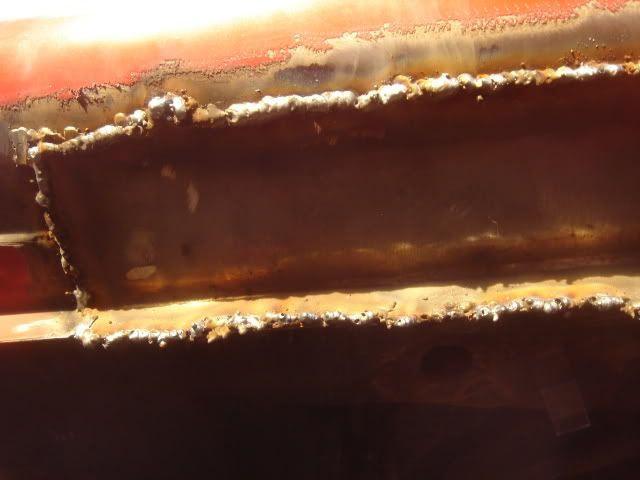
12) Close up of the weld on the lip, what happened here? Are the bubbles my gas shield blowing away or something more fundamentally wrong?
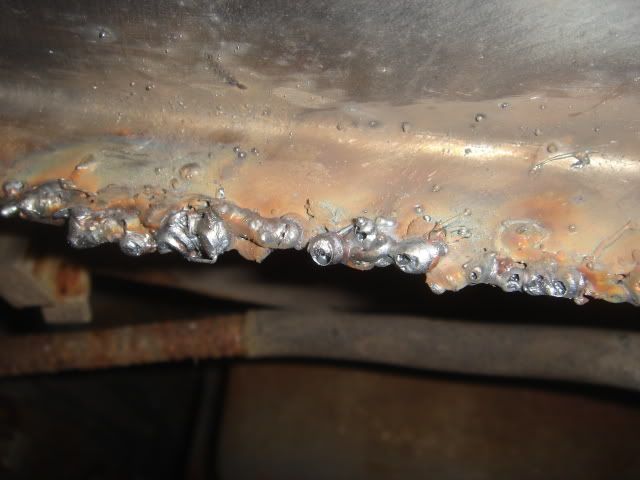
13) Am I right in thinking this is one of my more successful bits? Well apart from the aim wiggling all over the place.
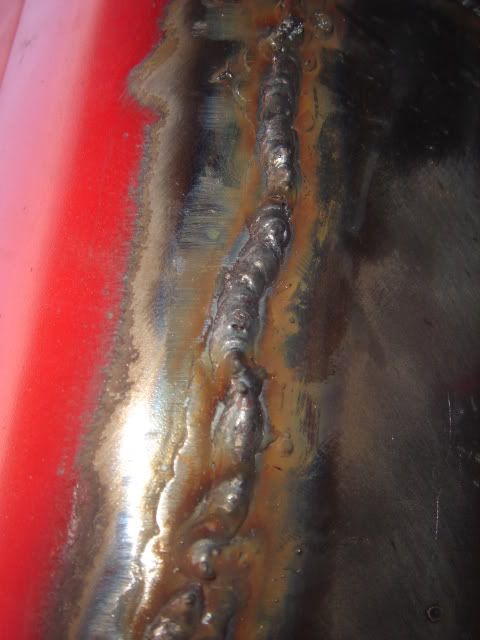
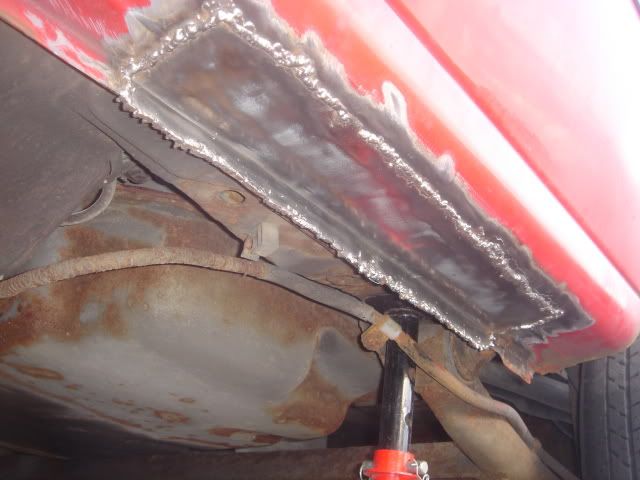
14) Now a few overviews of after I went over it with the wire knot wheel. I did grind back some of the worst of it and then pass over it again in an attempt to make sure its attached all along.
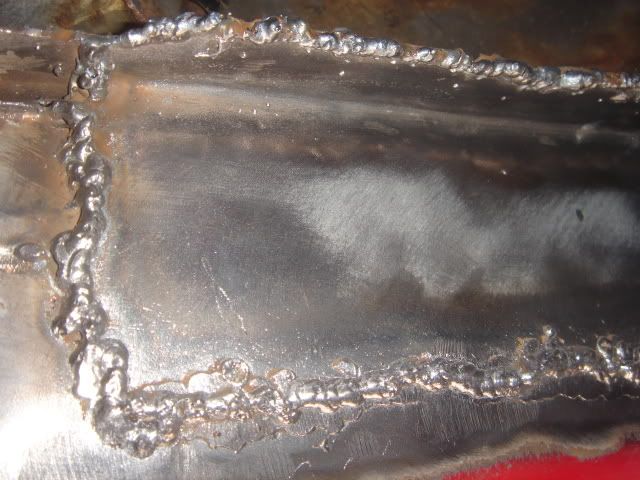
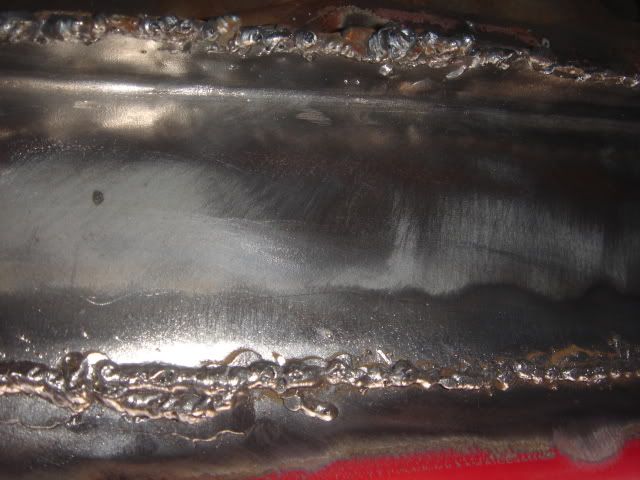
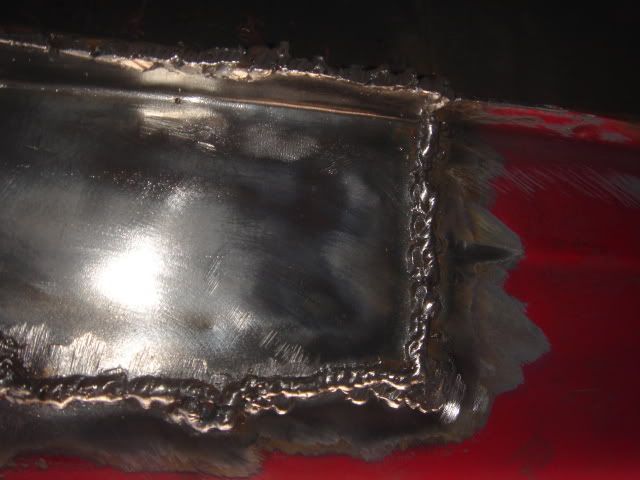
15) So for better or worse this is what I was left with.
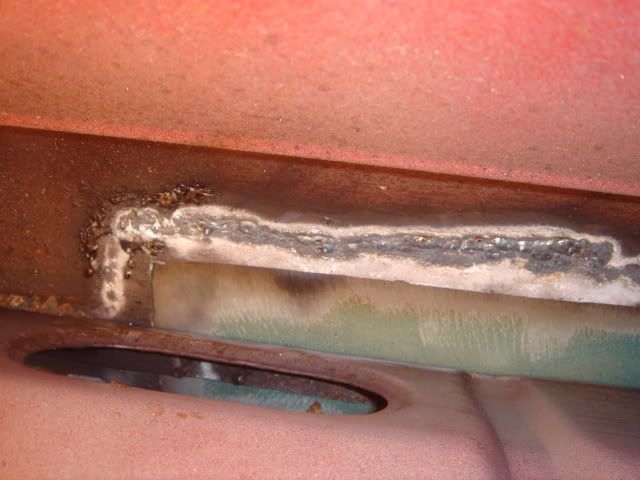
16) Two pics pointing the camera down from inside the car to show the reverse of the welds. I know this is called penetration but I don't know what its supposed to look like! Is this OK?
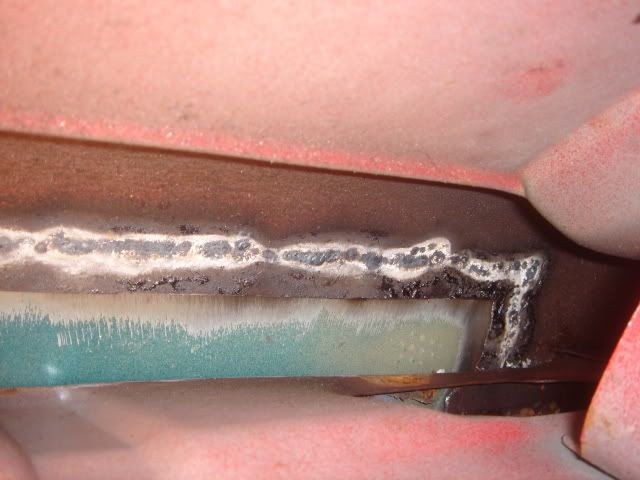
....and breath, I didn't realize that was gonna end up so long! If you need bigger resolution pics please ask. Could this MOT, or would I be laughed out of the station?
Cant wait to hear what you have to say, Thanks for reading.
-Steve-
**Jump to the end of page 2 for the 2nd installment - 1996 Ford Escort.**
*Starting below the 1st installment (from March 2009) - 1995 Ford Fiesta*
After Scaryoldscortinas very useful welding day (retrorides.proboards86.com/index.cgi?board=general&action=display&thread=56755), here I am home alone having a go myself. Firstly I would never have even got as far as stepping outside to have ago without last weekend, seeing what to do and being shown the basics is the biggest help anyone could give me.
Soooo.......Here we go........ I'm reluctant because I don't like sharing with the world stuff I cant do very well, but one must learn, and hopefully inspire some others to have ago too. Now just to be clear PLEASE CRITICIZE, I wont take offense and need the pointers.
Equipment is a Clarke 160T with a small disposable CO2/Argon Mix bottle and a Fixed shade flip up lens mask.
1st lets introduce the victim, my house mates recently MOT failed fiesta. It's destined to the scrappers anyway (I'm surprised it hadn't already gone) so if I screw it up theres no loss and if I fix it enough to MOT for another year then thats a bonus. Meet 'Hank' the fiesta.

1) OK so I jacked it up onto stands and prodded one of the holes. Followed by a quick whiz over with my newly acquired knot wheel on the grinder.

2) I drew a square covering the rust and cut it with a thin metal cutting disc in the grinder. The arrows are pointing at the spot welds which I focused a metal grinding disc on until they could be prised free with a screwdriver.

3) I went over it all again with the knot wheel and ground back the remains of the spot-welds with the grinding disc. Couldn't work out how to get right in to the corners by the lip but figured that would be OK left raggy (least of my worries you might say) so I just wiggled the metal off as close as I could.

4) Made a cardboard template and then cut it out of an old boot lid. I stripped the paint off with the knot wheel.

5) Hammered it over in the jaws of a workmate.

6) I cut it to overlap about 1/2 inch, maybe a bit more.


7) Drew along the back edge of the lip and cut it down. (this might have been a mistake to cut it flush>? as welding on the edge of the lip was lets say challenging.)

8) Put on a few tack welds (I think the success of these was somewhat beginners luck as it got messier quickly)

9) As you can see I completely missed the aim on the right of this pic and view some splatteryness to the left.

10) So I kept going anyway. Here you will see such joys as over melting in the middle of the pic, and uneven blobs where I tried to weld the lip. The bits of MIG wire hanging of the lip are where I have lost aim and wire has just shot out before I have brought it back.

11) I think the big blob at the top is where I blew a hole through and tried to 'bridge' over it.

12) Close up of the weld on the lip, what happened here? Are the bubbles my gas shield blowing away or something more fundamentally wrong?

13) Am I right in thinking this is one of my more successful bits? Well apart from the aim wiggling all over the place.

14) Now a few overviews of after I went over it with the wire knot wheel. I did grind back some of the worst of it and then pass over it again in an attempt to make sure its attached all along.


15) So for better or worse this is what I was left with.

16) Two pics pointing the camera down from inside the car to show the reverse of the welds. I know this is called penetration but I don't know what its supposed to look like! Is this OK?


....and breath, I didn't realize that was gonna end up so long! If you need bigger resolution pics please ask. Could this MOT, or would I be laughed out of the station?
Cant wait to hear what you have to say, Thanks for reading.
-Steve-


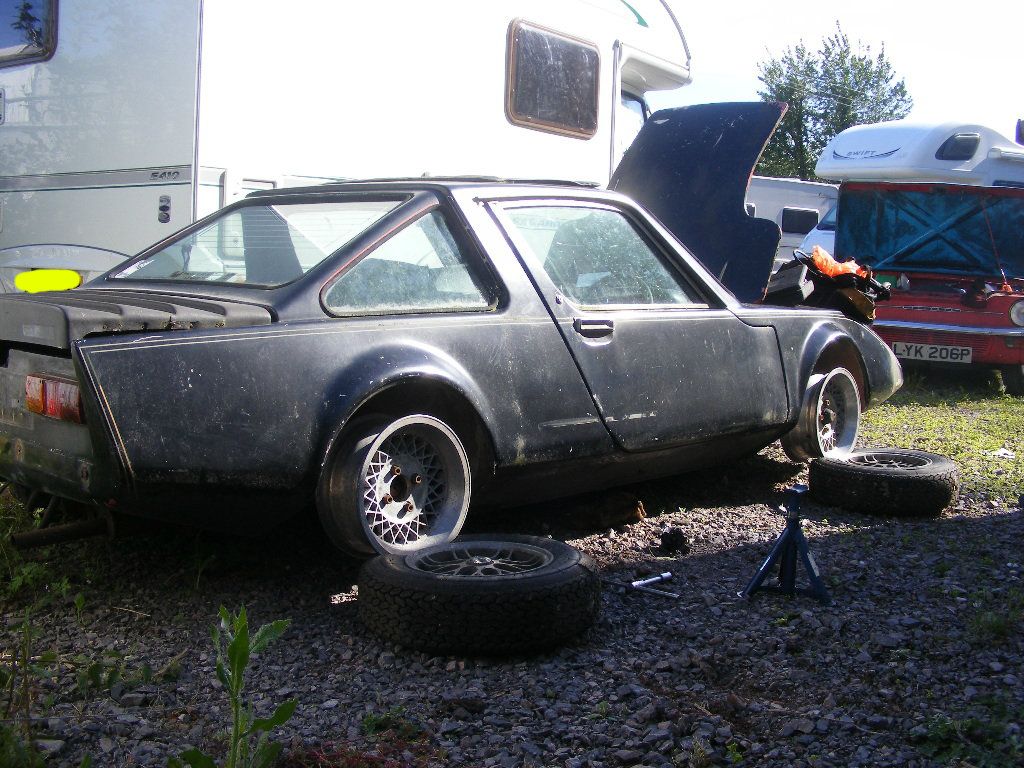


 the bubbling is just the gas flow situation, you have managed a good consistant weld with good penetration anyway!


 [*]
[*] [*]
[*]




 of it sometimes, so don't let any future failures put you off, the first bits of welding I did years ago were bloody awful, and as SOC said, I've seen MoT garages turn out stuff far worse than yours!