dafs
Part of things
 
Posts: 23
|
|
|
|
Ahoy-hoy! Well, I've been browsing this site for ages, and I finally decided to sign up and i though i'd post up some pics of my current project - my GTI These first few posts will be just recap what i've already done, and then I'll try and post where I'm at. The car was an e-bay special, that came with boge suspension and some dymag alloys. I gave a good clean and a full service and it became my daily driver. Here's how it looked after an intense T-cut session and after i refurbed the alloys: 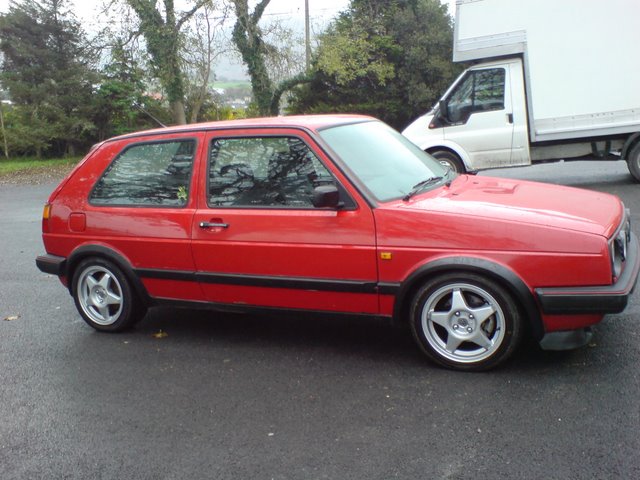 Since I was using it daily, some issues become obvious inluding: Water ingress behind dash Minor Oil Leak Noisy front bearings I had been tempted to do some quick fixes to sort the problem, but when someone broke into it at work, i decide that it was now or never! I knew that the arches were a bit rusty, but i was shocked when i removed the wings!  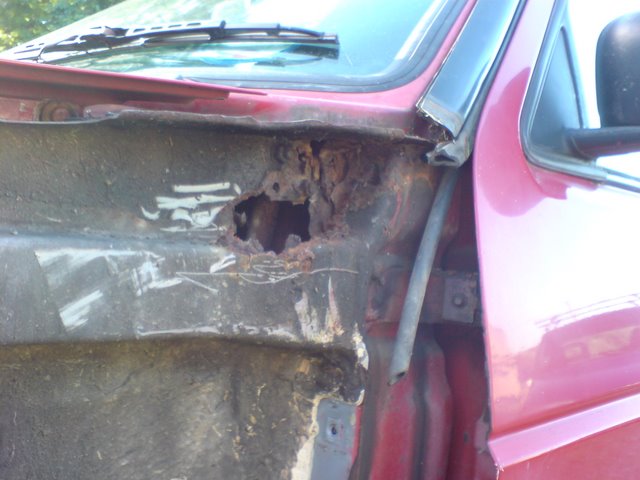 The windscreen surround are prone to rust aswell, and mine was no exception  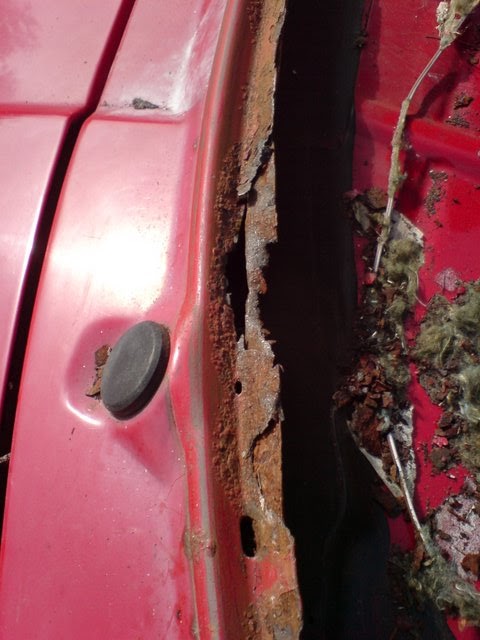 The pics above don't really show the full extent of the rust, since i took these before i started poking things with a screwdriver! Guess I'll have to bust out the welder...and learn to weld...then try and fix things! Undaunted, and armed with all the proper equipment - old skateboard, pallet, rusty welding gas trolley and various lengths of wood i managed to literally drag the enigne into the shed! 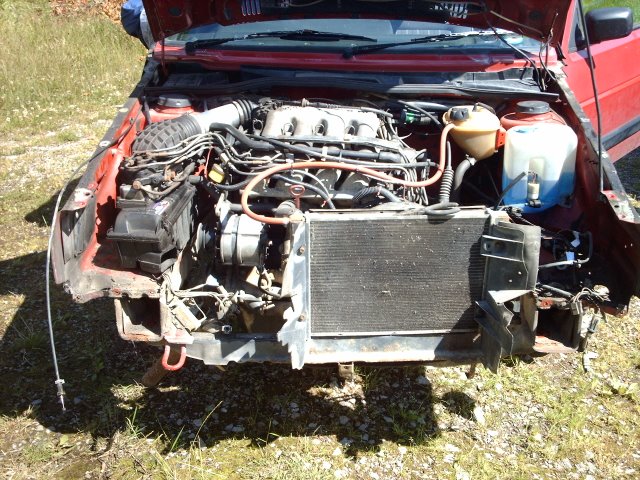 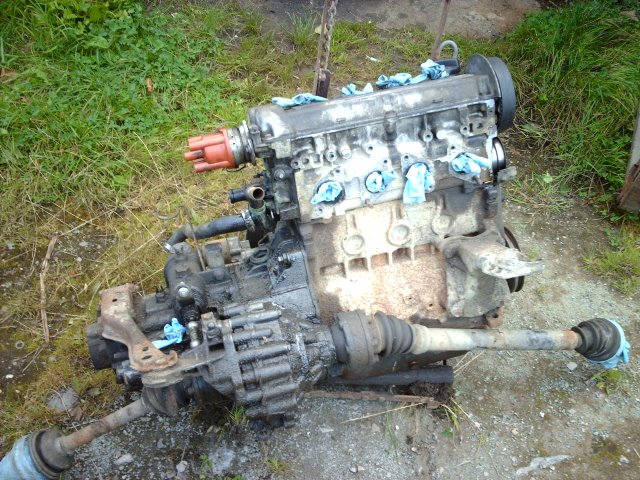 This left me with a big engine sized void under the bonnet, and a terrible feeling that i'll never remember how to put things back again!   To Be Continued...  |
| |
Out of the flames!
|
|
|
|
razer
Part of things
  Getaway Driver
Posts: 79
|
|
|
|
Oh lord  All my prayers go your way now, don't give up! Welding is simple as curse word, just do some reading on why this works and that doesn't and so on. I hope you'll keep working, it will be inspirational:P |
| |
It's not what you drive, it's what drives you.
|
|
dafs
Part of things
 
Posts: 23
|
|
|
|
Oh lord  All my prayers go your way now, don't give up! Welding is simple as curse word, just do some reading on why this works and that doesn't and so on. I hope you'll keep working, it will be inspirational:P Thanks razer - all prayers are greatly received ;D I've got the Haynes welding guide, and i've been reading up on a few sites, i just need to practice on a few things before i dive! |
| |
Out of the flames!
|
|
|
|
|
|
|
|
Go team! Hope it goes well, I'm sure there loads of people on here could give you some advice if you're stuck anyway so don't be worrying. Dive straight in and weld the feck out of it!
|
| |
Club Retro Rides Member
|
|
Torquesport
Part of things
  Astras all the way!
Posts: 453
|
|
|
|
This left me with a big engine sized void under the bonnet, and a terrible feeling that i'll never remember how to put things back again!   Mate, you're already halfway there aren't you. Don't fret it'll go back fine and if not, there's always help available here. Welcome by the way! |
| |
|
|
|
|
|
|
|
|
welcome dafs from another noob dub fan... ...looks like you've got some work ahead of you there mate, but if thats the only rust, then you are not too badly fixed...
Whats the battery tray, floors and sills like; don't know much about the mk2 golf having never owned one, but have done a bit of rust repair to mates Mk2's; the early ones seem to rot a bit more from what Ive seen...
Get some time in with that welder and it all be second nature after awhile, replacing the rusty bits...
|
| |
|
|
dafs
Part of things
 
Posts: 23
|
|
|
|
|
Cheers for the welcome and the encouraging words.
TBH, the rest of the body is in pretty good condition, with only a few rust blisters and small holes. Certainly, this is easy compared to some of the amazing restorations on this site!!
I'll post some more pics when i finally get around to sorting them.
|
| |
Out of the flames!
|
|
dafs
Part of things
 
Posts: 23
|
|
|
|
Ok, here are some more pics for those who are interested! The subframe/steering rack has been stripped down, cleaned and painted. I've upgraded to polybushes where possible to improve the ride. The bushes are a Prothene Kit i got off e-bay. They seem pretty good value, however, the ARB bushes that were included are to big, so I'm just going to replace them with new OEM rubbers. (That's why the ARB isn't fitted in the pic!   (PS, what looks like rust on the subframe is actually just some copper slip that i managed to get everywhere!!) As i was finishing the subframe, i managed to find a cheap engine stand on 'tinternet, so i mounted the gearbox on it for a degrease and paint.  I used some special "aluminium" paint, but I'm not convinced that it won't peel off. If i can be bothered, I'll strip it off, etch prime and respray it with proper paint. Either way, the box will get some new seals then it will ready to go! The engine is still looking pretty unloved on the trolley. The plan is to do a strip down and rebuild to standard spec, I'm not going for anything lairy at present.  I want to try and get the shell finished before i work on the engine, so i can rebuild it and have it back in the car without leaving it stored for a long period of time (How long can an engine "survive" withou being turned over/used?) Finally, last weekend, I spent a hours labeling and removing the wiring loom. It was a tedious job, but it will hopefully pay off when it comes time to refit everything. To remove the loom, the brake servo had to come out, so the braking system was also removed. This left me with a nice empty engine bay: 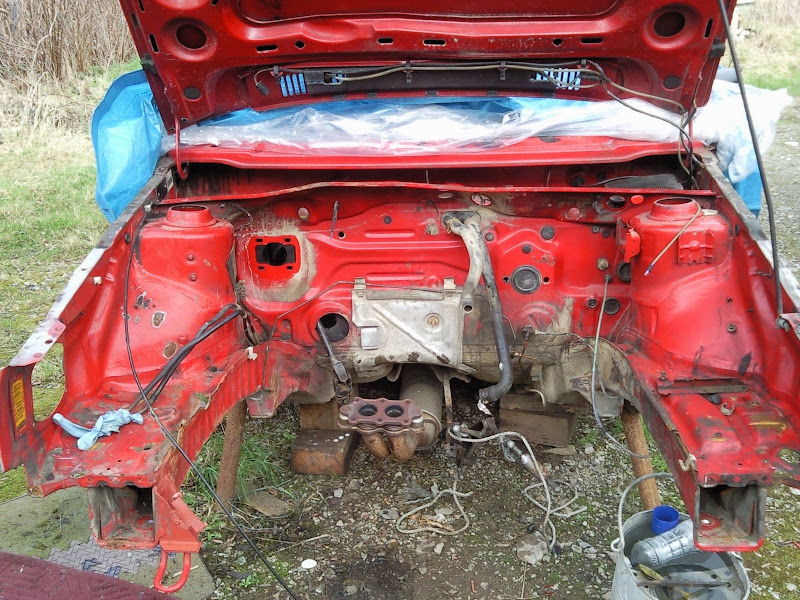 I've got a few days holidays coming up, so hopefully, i can get a bit more done! Stay tuned ;D |
| |
Out of the flames!
|
|
LAndy
Posted a lot
  
Posts: 1,061
|
|
|
|
|
good luck with the project mate, your not messin about are you lol
|
| |
Previous retros: 92 AX GTi 92 Scirocco Scala 94 80 sport 87 Golf Cab GTi Current retro: 1965 Clark Cortez YouTube Website Instagram |
|
|
|
|
|
|
Looks like its coming on well  Don't worry about leaving an engine stood, aslong as its oily you'll be fine. If you get really worried stick some oil down the plug holes occasionally (not wd40, something thick, engine oil is ideal) I've known engines that have been stood in gardens under tarps for a decade run fine for thousands of miles. We put a Saxo VTR engine in a mates 106 that was found in a container at some premises that a firm had moved into 10 years prior, meaning the engine had been stood for at least ten years, perhaps more We dropped it in with a new cambelt and tensioner and it was fine  |
| |
|
|
|
|
Speedle
Posted a lot
   Need a Country Rock band in the Hampshire Area? https://www.facebook.com/DirtRoadDiaryUK
Posts: 2,221
|
|
Mar 13, 2009 10:13:13 GMT
|
top work mate! loks like your certainly getting stuck in! big fan of the mk2's so glad to see one getting the full treatment  |
| |
|
|
dafs
Part of things
 
Posts: 23
|
|
Mar 13, 2009 13:20:09 GMT
|
Looks like its coming on well  Don't worry about leaving an engine stood, aslong as its oily you'll be fine. If you get really worried stick some oil down the plug holes occasionally (not wd40, something thick, engine oil is ideal) Thanks for the info cobblers - i might pour some fresh oil down this weekend, just so i know that it's got some protection!  |
| |
Out of the flames!
|
|
dafs
Part of things
 
Posts: 23
|
|
Jan 19, 2010 22:29:49 GMT
|
Hello again!! Shamefaced, i notice the other day that i haven't updated this thread in ages. Even more depressingly, i realised that i hadn't really done much in the intervening time!!  So, as a new years resolution to my self, i decided to get at least one proper job done every week. So, here's a bit of an update on what's been happening. The old Griling calipers were doing a good job of stopping the car, so whilst they were off, i decide to strip down and refurb them. Here's how they looked initially: 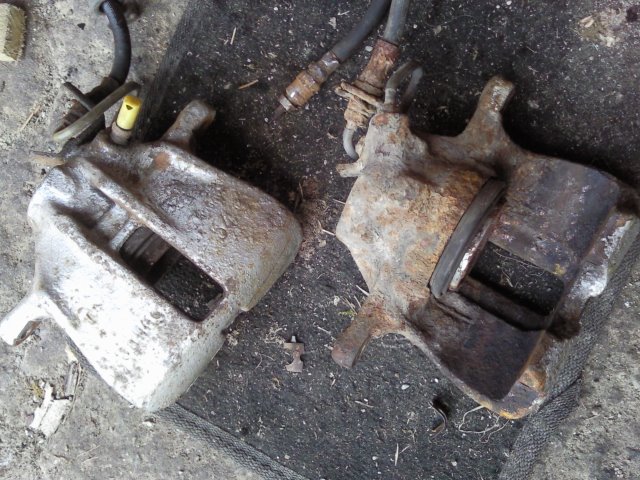  I was really worried about snapping off the bleed screw or a union, so i soaked them in Rust Buster and Plus Gas for a few days. After stripping of the paint with some nitromorse and popping out the pistons with compressed air, i left everything to soak in some DeoxC for a few days to eat away the rust. Here's the new seal kit from BiggRed  Before fitting it, i tarted up the brakes with some anti-rust primer and some red hammerite (handily, an aerosol can lid fitted perfectly in the brake piston hole, to keep overspray out!) 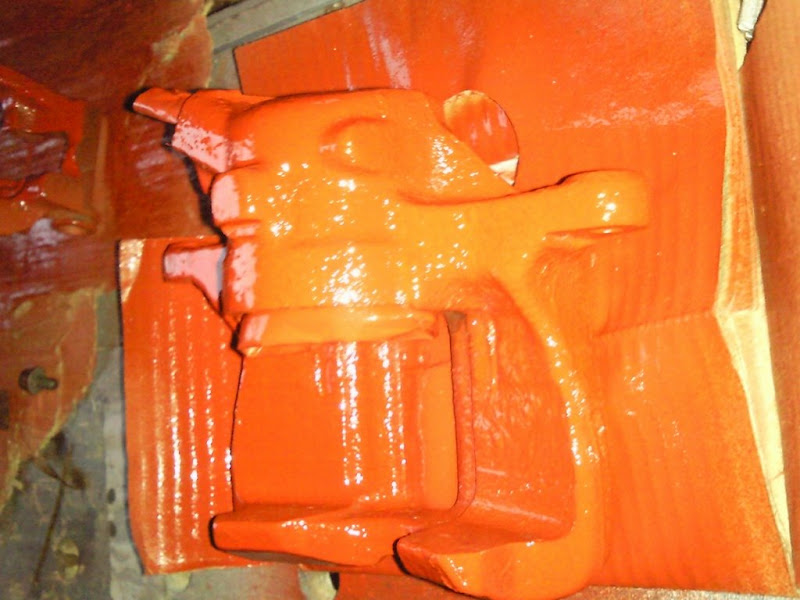 I know that red may be a bit chavvy, but i think i can get away with it on a red car!!  After a very frustrating time refitting the seals, here's one caliper rebuilt:  Still need to do the same to the rear calipers, and then fit some braided lines. After that, i stripped sown the driveshaft to regrease and fit new boots. Unfortunatly, one inner and one outer CV were pitted, and so i had to replace them. The only other major work that i did was to respray the engine bay. I basically got bored with messing around with CV grease and sorting out wiring looms, so i decided to bust out the spray gun. Degreasing the bay took ages, since it was covered in a mix of engine oil, mud/clay, rusty bits and the waxy stuff VW use as a seam sealer. There were a few dings and small holes, that i patched with some fibreglass. Primed and ready 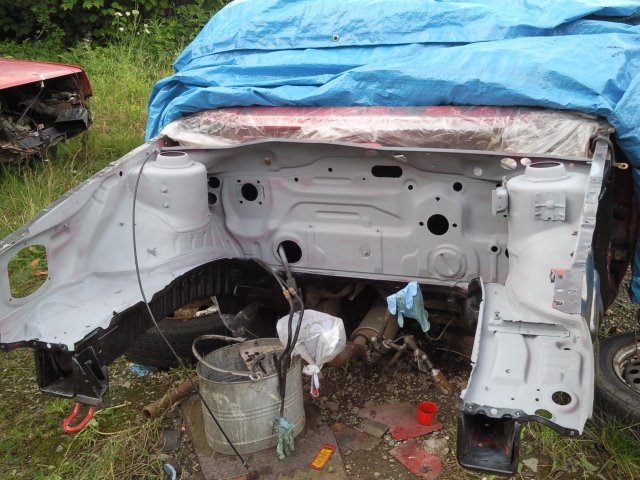 I had already painted the lower section and under the arches with some hammerite.  I was quite chuffed with the results.  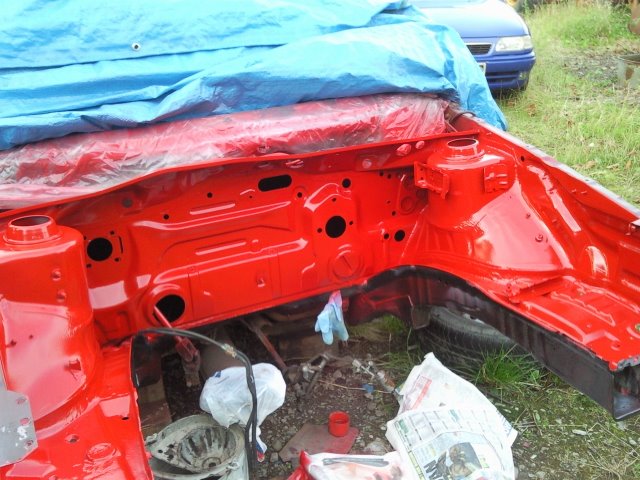 Once that was done, i refitted the subframe/suspensio so i could get the car back on 4 wheels just so i could move it around etc.  Fitted old CV joints in the hub to stop the bearings breaking apart. Current jobs under way are refurbing the distributor and stripping down the engine.  |
| |
Out of the flames!
|
|
Speedle
Posted a lot
   Need a Country Rock band in the Hampshire Area? https://www.facebook.com/DirtRoadDiaryUK
Posts: 2,221
|
|
Jan 20, 2010 12:22:07 GMT
|
top work chap! some nice attension to detail  that bay looks lovely! |
| |
|
|
dafs
Part of things
 
Posts: 23
|
|
Jan 20, 2010 23:51:58 GMT
|
Decided to post a few more pics of what i've been up to! Found some pics i took during the wiring loom and interior stripdown: 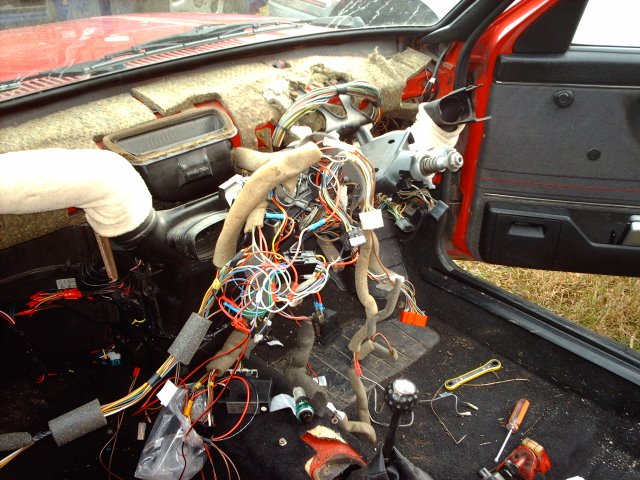 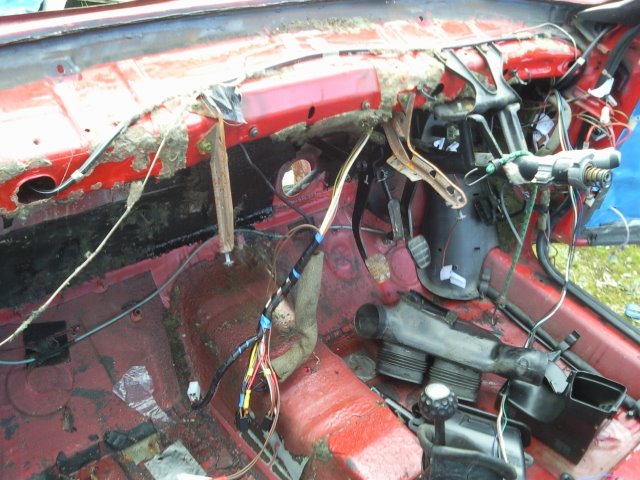 I also removed the heater system and all the thick sound deadening, since water had soaked into it via the rusty windscreen surround. Luckily, the firewall itself was ok, so i'll just give it a quick coat of paint. The heaters inners were a bit "unhygenic"!  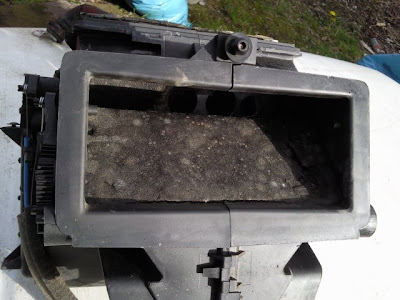  With the interior stripped, i tackled the windscreen surround. As mentioned, i bough a replacement panel from here www.vwheritage.com/bbt/Body/Standard/Front-Body-Section/?templateID=bbt#mk2Roughly checked the fit:  To remove the old one, i decide to try and retain as much of the interior lip as i could. The plan is to use the lip as a datum when welding the replacement panel in, then, when that's done, cut the interior lip and replace it!! Used a dremmel and hundreds of thin cutting discs to slice the panel off! 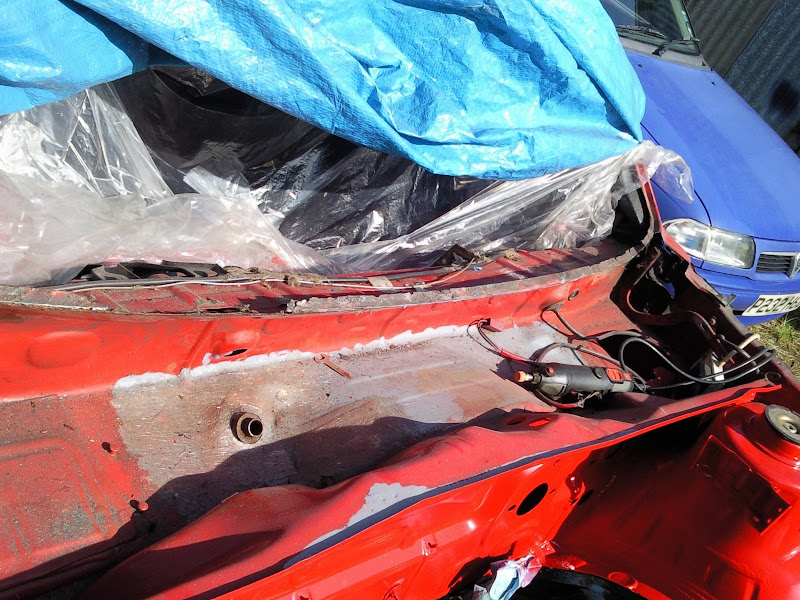 With that off, i found some rust underneath, so traeted it and painted it with anti rust primer. There were a few pinholes in it, so i used some fibreglass sheeting just to seal everything in. With the panel removed, i have better access to the other rust problem  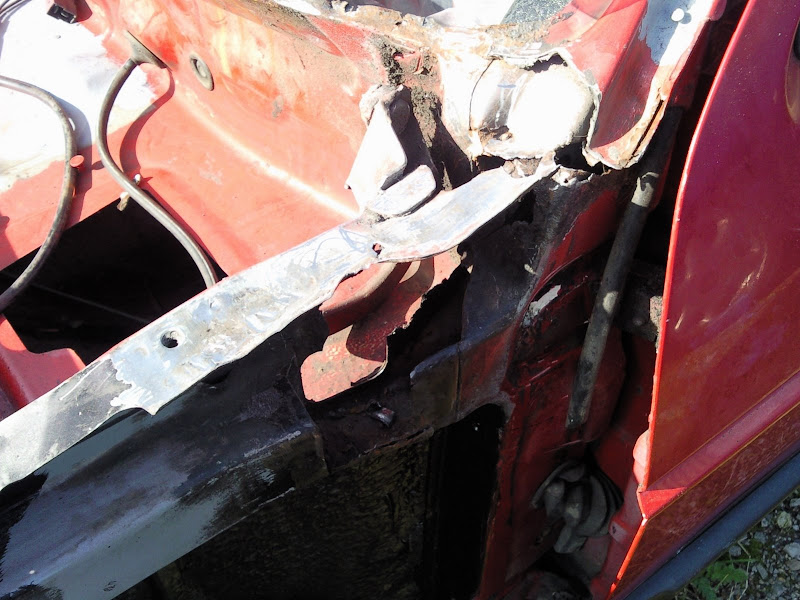 I think that updates the thread pretty much. To be continued!....  |
| |
Out of the flames!
|
|
Drizz
Part of things
 
Posts: 337
|
|
|
|
|
Intense work chap!
|
| |
MGF VVC 160
MG Midget
Metro Turbo
200 BRM
Range Rover Classic TD5
Discovery Premium 300TDi
Defender 90
Rover 420 GSi Sport Turbo
Discovery Extreme 300TDi
Range Rover P38
|
|
|
|
|
Jan 22, 2010 22:40:52 GMT
|
|
|
| |
|
|
dafs
Part of things
 
Posts: 23
|
|
Jan 23, 2010 18:53:44 GMT
|
|
Thanks Guy's
theboymike - Just read your thread - car looks great, a nice clean example.
Plans for mine are just to restore it and enjoy it! No big bumpers, promise! ;D
|
| |
Out of the flames!
|
|
|
|
|
Jan 25, 2010 19:06:46 GMT
|
Cheers - mine's not as minty as it looks when you get close, but it's solid and honest  Glad you're keeping yours stock - there are so few unmolested examples about now. Made any more progress? I commend your determination - it usually takes me months to sort out the smallest of jobs  |
| |
|
|
sumpcracker
Posted a lot
   Yes, I’m still here.
Posts: 1,751
|
|
Jan 25, 2010 21:36:48 GMT
|
|
Hardcore.
|
| |
|
|
|
|


