|
|
|
Feb 13, 2011 18:54:31 GMT
|
your right, the column change usually extends through the bulkhead, so ive got to shorten it to just above the lower column support, about 2/3 the original length, where the tape is easy !!  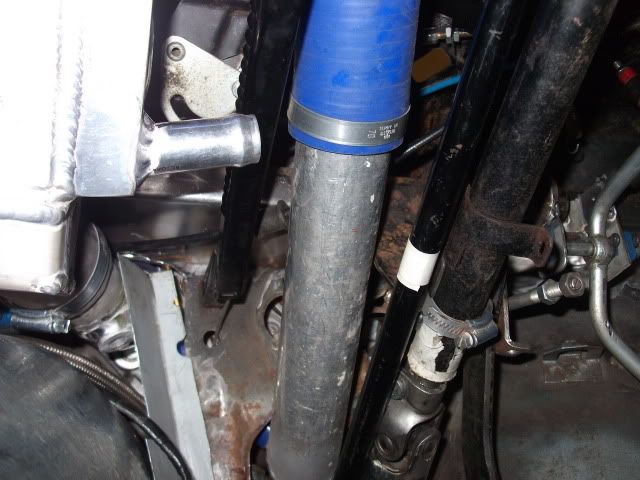 the bottom arm has to swing through about 45 degrees to push and pull the selector cable the right distance. I need this selector arm to point upwards, as hanging down would obstruct the brake pedal but the column is to the right and there is a 50mm ali turbo pipe above and to the left that cant be relocated.  So i will have to shape the arm to miss both obstacles and still give enough travel There is also an issue at the gearbox end as the usual route for the cable is front to back, and my cable is coming over the tunnel and straight down to the gearbox selector arm, 90 deg from usual!! 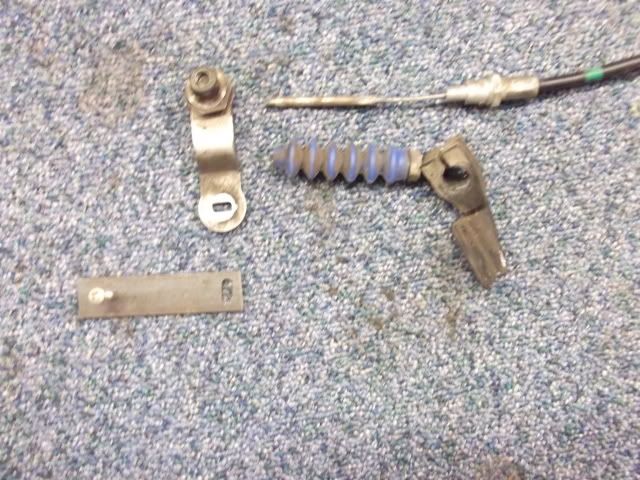 cable is from a BMW but there is nowhere to bolt the outer cable to  Also the gearbox has 1,2,3, D N R- P (7 positions and a long gap between R and P) but the selector arm on the column has L,D,N,R,P so i have got to remake the gate on the column selector to suite   |
| |
|
|
|
|
Chops
Club Retro Rides Member
Don't touch me I've been somewhere
Posts: 461
Club RR Member Number: 36
|
|
Feb 15, 2011 16:57:45 GMT
|
Could you use a short bottom arm just above the tape, connected by a linkage to remote column shift bar mounted vertically on the front of the steering column. Then weld a longer top arm (in front of the column where there seems to be a bit more space) to your remote bar which will multiply the travel at the cable. Dunno if that makes any sense to you or if it's any help at all  |
| |
|
|
|
|
|
Feb 15, 2011 19:12:55 GMT
|
hi chops, i sort of get your idea. here is a pic of the cut down shifter, with the arm scribed around the turbo pipe and column. ( the cable is just laying there ) 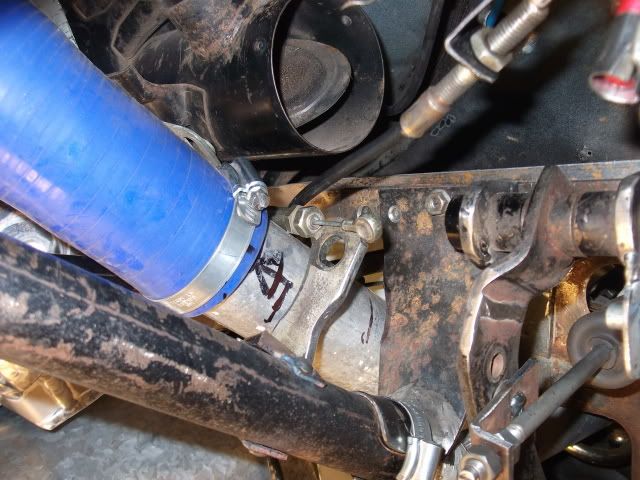 at half pull the cable and arm should be at right angles, same as the arm on the gearbox I think i have to get the top end connected first to establish the max travel, then make the gearbox arm the right length to achieve the same travel. I think  making the outer cable support is going to be an ass! |
| |
|
|
Chops
Club Retro Rides Member
Don't touch me I've been somewhere
Posts: 461
Club RR Member Number: 36
|
|
Feb 15, 2011 22:27:48 GMT
|
I see what you mean about the cable support, guessing the distances from the pics it looks like it needs to be welded to the park brake lever! I'd agree that your best bet is to mount one end and see what you've got, I've made the mistake in the past of over engineering a solution to a problem that wasn't really there in the end.  |
| |
|
|
|
|
|
Feb 15, 2011 22:49:34 GMT
|
yea! sometimes i'm thinking about things too long and too far ahead, but it does frustrate me when i have to remake something. Like the top of the trans tunnel, went in nice, then i eventually get a seat and it doesnt clear the top of the tunnel.  still it all keeps the brain cells working  |
| |
|
|
|
|
|
Feb 16, 2011 22:51:36 GMT
|
a whole evenings work This wil be the gear shift outer cable support to be welded to the lower column support. 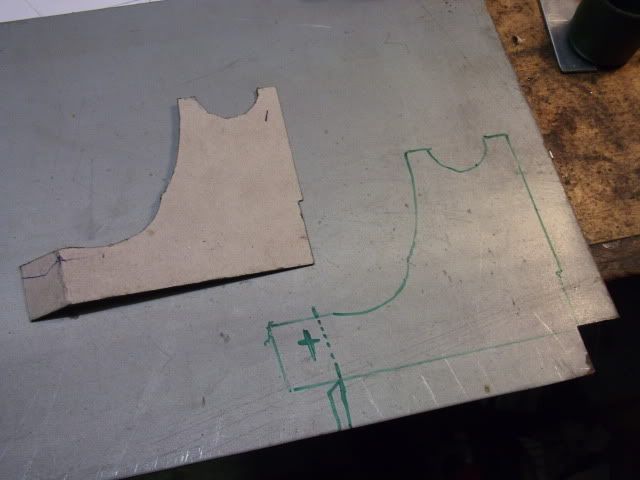 need to trim the tunnel opening larger to clear the pipes and cables , i will also turn up a 20mm lip so it seals to the underside of the chargecooler, Too late now to fire up the grinder  |
| |
|
|
|
|
|
Feb 20, 2011 23:35:18 GMT
|
shifter cable support bracket made, 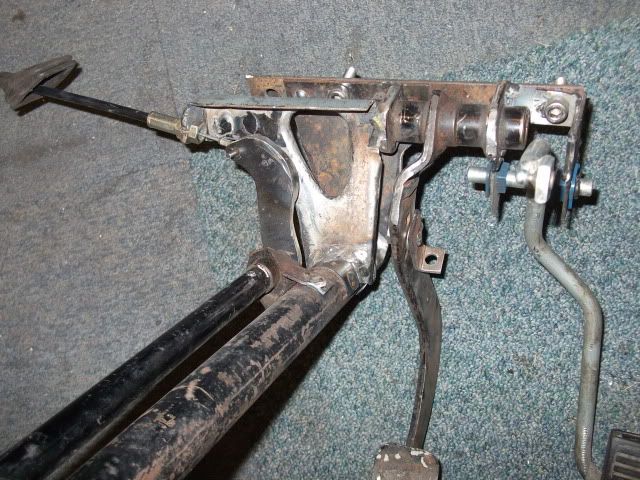 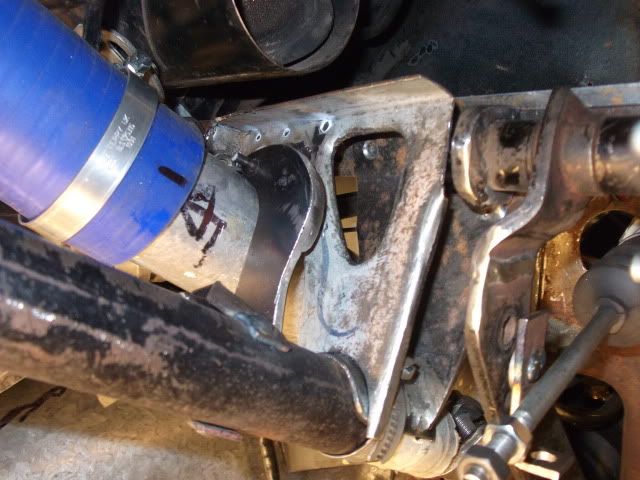 Got to alter the gearbox bracket, its the wrong angle and needs to be longer to engage all gears then make a bracket to hold the bottom of the outer cable 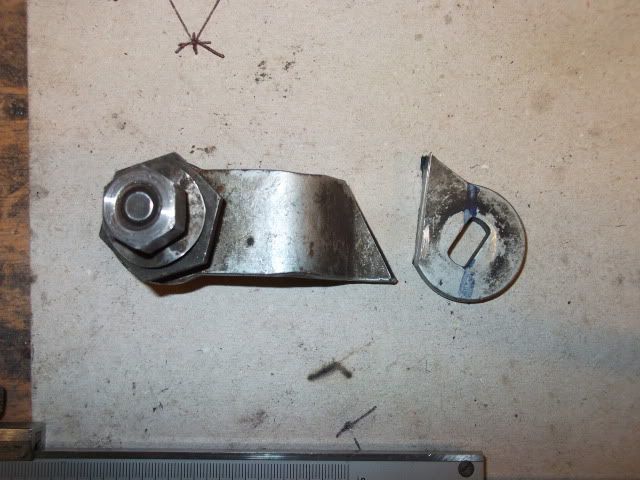 Ive been strugling to see through my welding mask that ive had for a couple of years. Tonight i noticed there was a plastic protective film on the lens. Peeled it off and now i can see where i am welding  Two frickin years strugling!!  |
| |
|
|
Chops
Club Retro Rides Member
Don't touch me I've been somewhere
Posts: 461
Club RR Member Number: 36
|
|
|
|
Ive been strugling to see through my welding mask that ive had for a couple of years. Tonight I noticed there was a plastic protective film on the lens. Peeled it off and now I can see where I am welding  Two frickin years strugling!!  Hahaha............ I did exactly the same, it took me about 6 months of cursing "this new-fangle auto darkening helmet" for being wibblepoo before I noticed the film starting to peel off in the corner  . Shifter bracket looks ace mate  |
| |
|
|
|
|
|
|
|
new roof section trimmed and the edges of the old joggled  Time to fire up the welder. 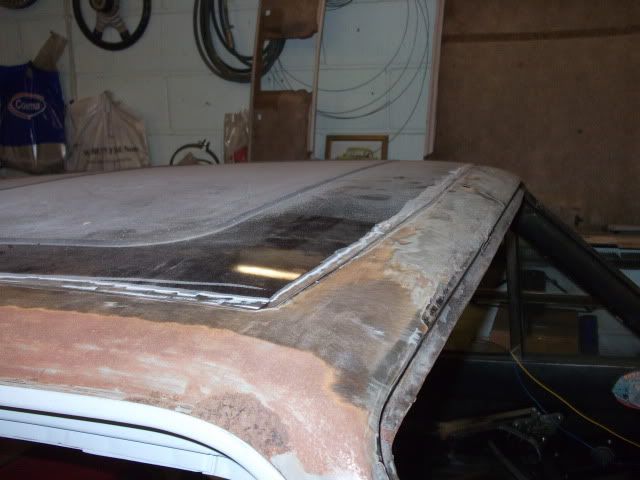 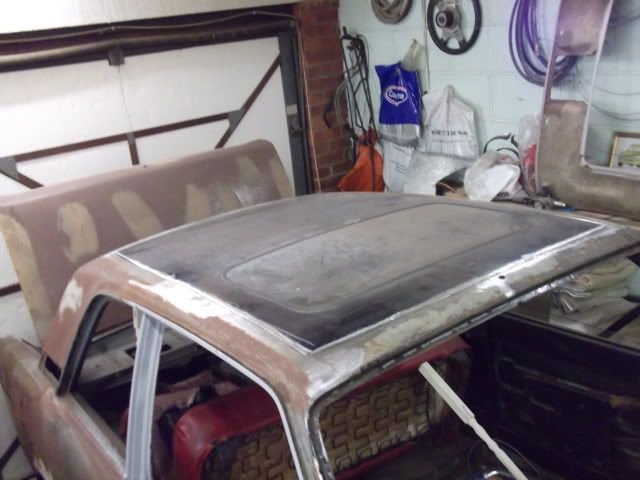 Going to take my time to minimise distortion |
| |
|
|
|
|
|
|
|
well i thought i took it slowly but still distorted, but i tapped it back into shape, 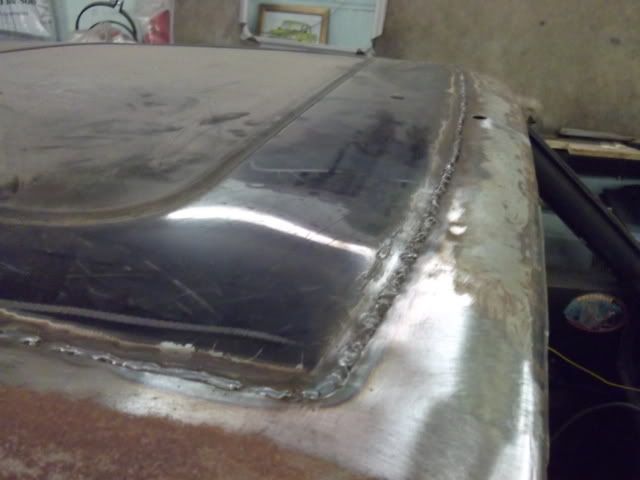 |
| |
|
|
|
|
Chops
Club Retro Rides Member
Don't touch me I've been somewhere
Posts: 461
Club RR Member Number: 36
|
|
|
|
well I thought I took it slowly but still distorted, but I tapped it back into shape, Looking good  It's almost impossible to avoid distortion when welding a pannel that big, I had exactly the same trouble when I did the rear window frame on my Chrysler. The rear skuttle looked like I'd been jumping up and down on it  |
| |
Last Edit: Mar 8, 2011 7:18:41 GMT by Chops
|
|
|
|
|
|
|
The panel didnt so much distort but sunk a bit, but as i said it tapped back up and its had a skim of filler. 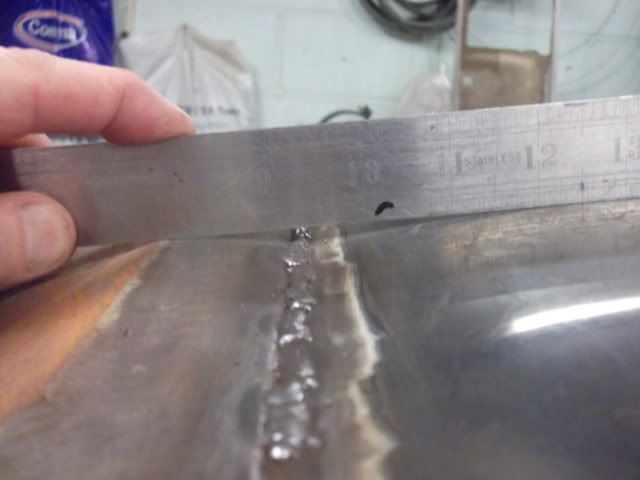 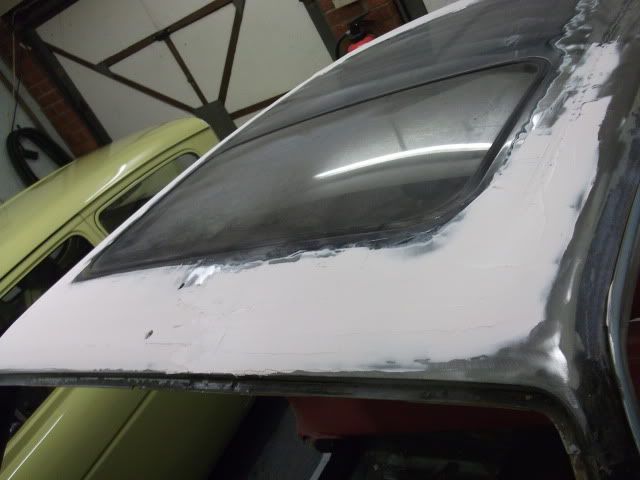 Going to start on the body rust next |
| |
|
|
|
|
|
Mar 18, 2011 22:18:27 GMT
|
bottom of the o/s screen pillar, rusty cut off gutter and face of pillar.  Inner strenghthener was rusty too so cut that out. 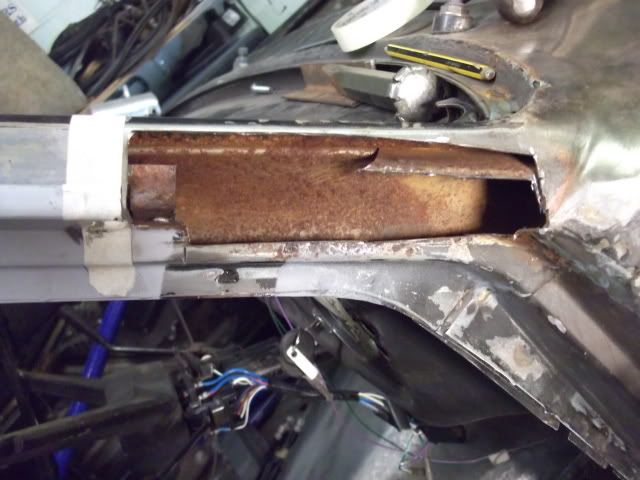 make new strenghtener section  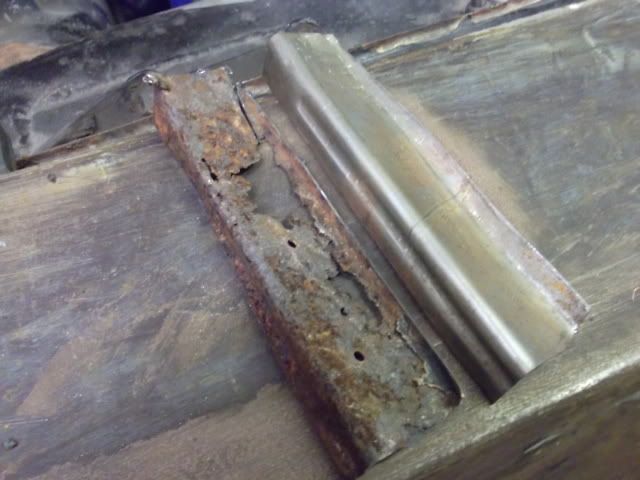 |
| |
|
|
|
|
|
Mar 20, 2011 11:26:41 GMT
|
welded the three new sections in  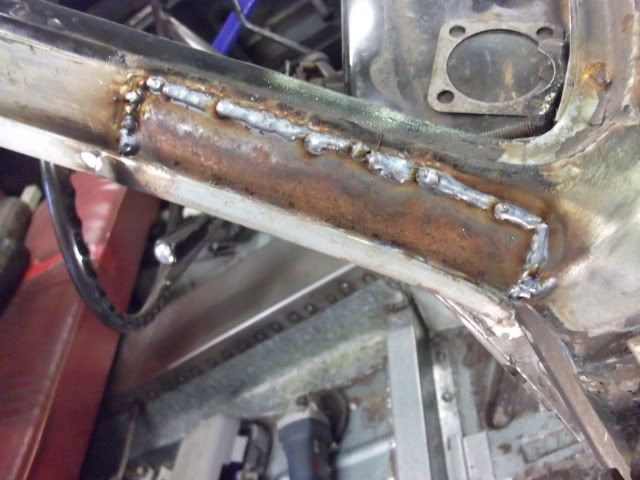 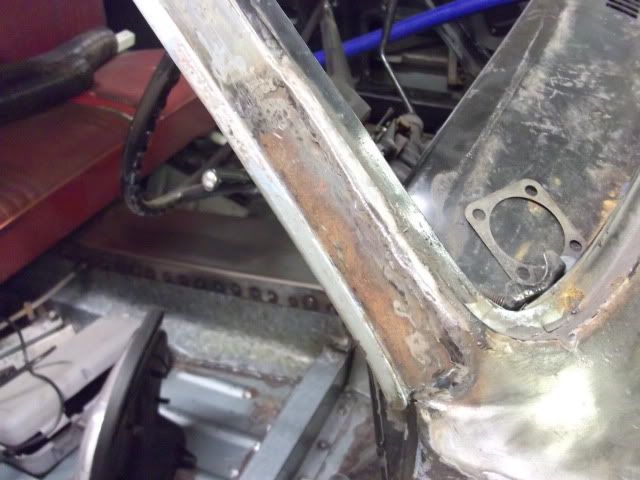 quite pleased with the effort lots more to do though whats the best tool for cutting out sections and grinding back welds in tight spaces, i don't have much joy with a dremmel  |
| |
|
|
|
|
|
Mar 20, 2011 20:51:21 GMT
|
|
A powerfile is my tool of choice for grinding in tight spots
|
| |
|
|
|
|
|
Mar 20, 2011 21:03:18 GMT
|
|
This has to be one of the most interesting car projects I've ever seen! Can't wait to see further updates!
|
| |
|
|
Chops
Club Retro Rides Member
Don't touch me I've been somewhere
Posts: 461
Club RR Member Number: 36
|
|
Mar 20, 2011 23:38:57 GMT
|
|
10mm air powerfile for me too. I find the dremmel a bit lame for grinding welds but it's handy for shaping lead or filler in tight spots.
|
| |
|
|
|
|
|
Mar 22, 2011 20:26:56 GMT
|
I know where i can borrow a powerfile, but my little compressor runs out of puff a bit quick, i will have to be patient  The car had a vinyl roof previously and thats made it rust around the edges. On the rear pillar, there were a dozen small (3-4mm holes and indents where the metal had gone thin but not gone into a hole yet. I have treated the areas with Bilt Hamber rust remover then welded over the holes and thin bits. 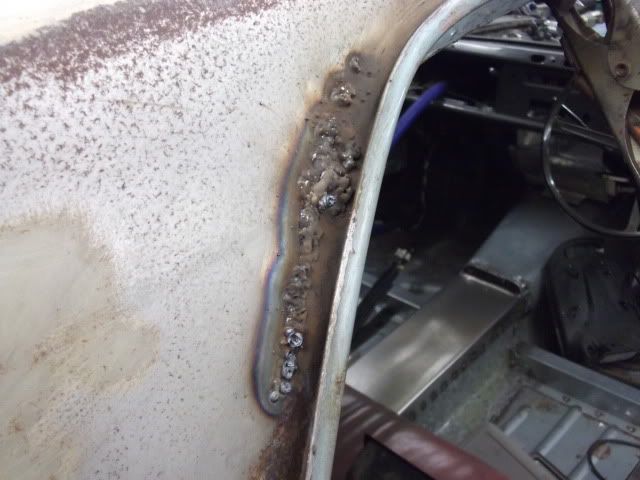 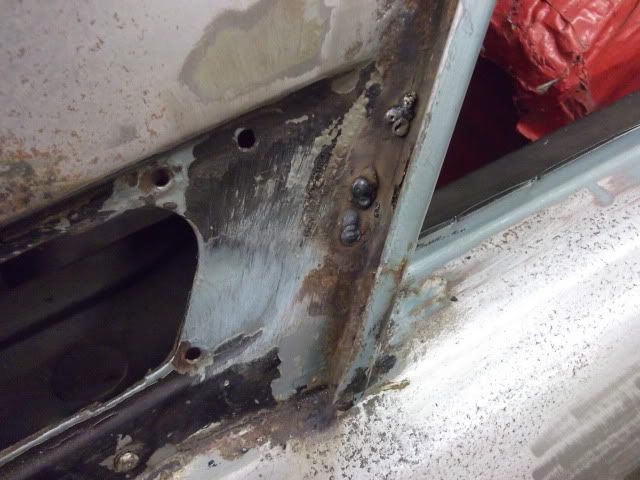 Not as good as replacing but will it last like new metal, or has it got to come right out  |
| |
|
|
|
|
|
Mar 22, 2011 20:33:04 GMT
|
|
Should be okay like that
I use an electric powerfile, even just one of the black and Decker ones from B+Q or the like still give excellent results
|
| |
|
|
|
|
|
Mar 27, 2011 21:26:08 GMT
|
ordered a file and belts. Belts turned up, no power file  More repairs to A post this time 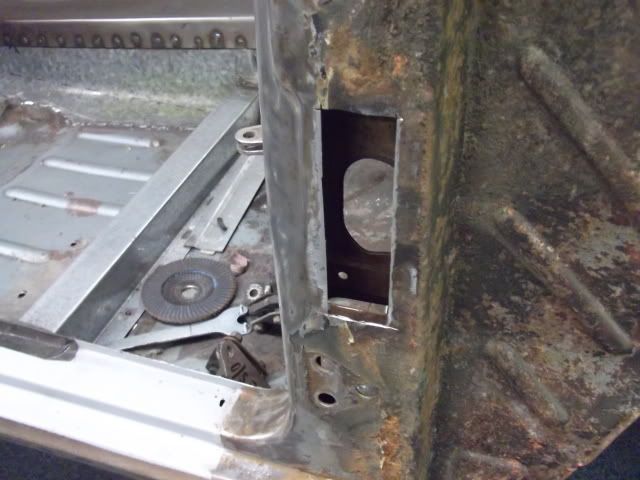 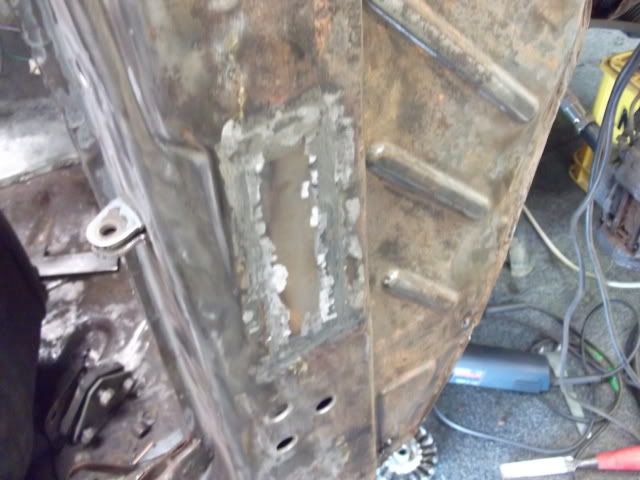 and window frame 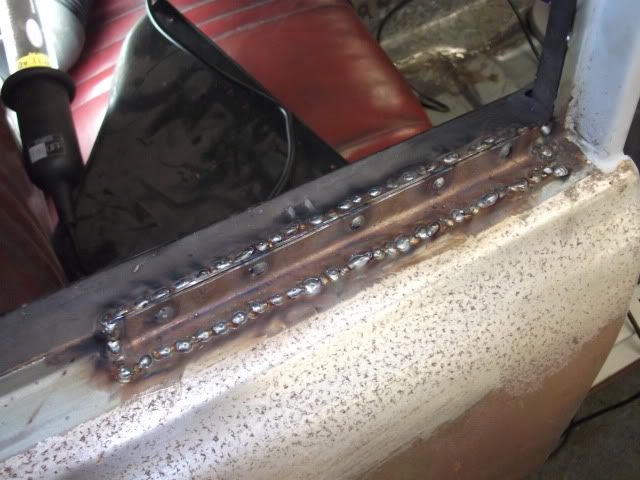 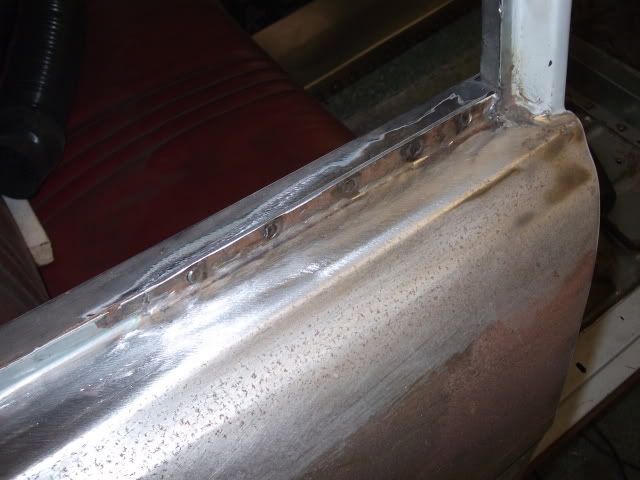 don't want to pay over £100 for one of these headlight panels, so going to try a repair 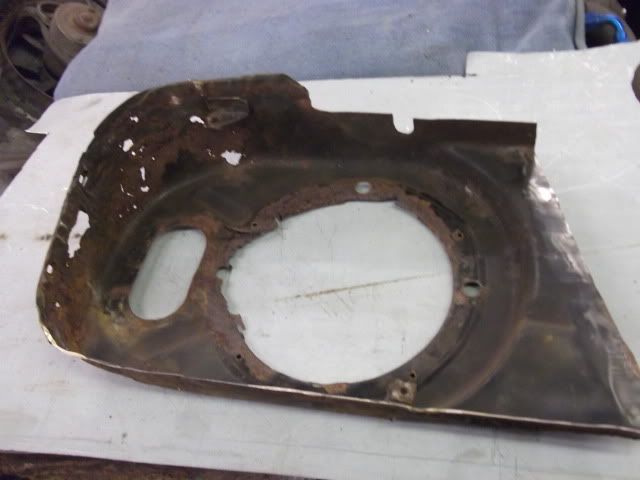 |
| |
|
|
|
|


