ChrisT
Club Retro Rides Member
Posts: 1,670
Club RR Member Number: 225
Member is Online
|
|
Jul 12, 2010 21:35:42 GMT
|
that would make sense fitting it at the bottom, but the top's where I'd already put it so that's where it's staying - sure there must have been a reason originally  the fan is only really needed when the car's stationary so the rad's not going to cool much then, so if it's hot exiting the engine won't be much cooler going back in - if that makes sense (know what I mean but can't put it into words) |
| |
Last Edit: Jul 12, 2010 21:38:05 GMT by ChrisT
|
|
|
|
ChrisT
Club Retro Rides Member
Posts: 1,670
Club RR Member Number: 225
Member is Online
|
|
|
|
Not a huge amount to report, just been using and abusing it over summer...... ooops 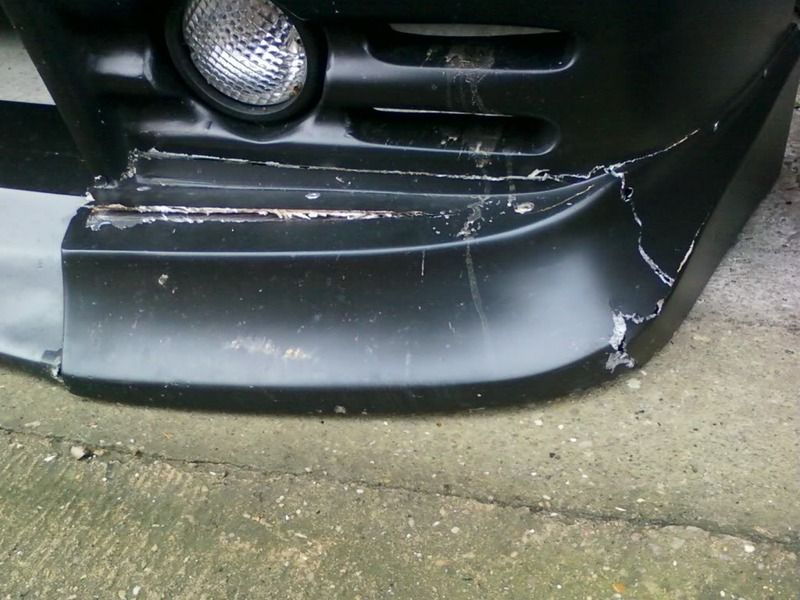 Mended, with a little help from a drill and some cable ties 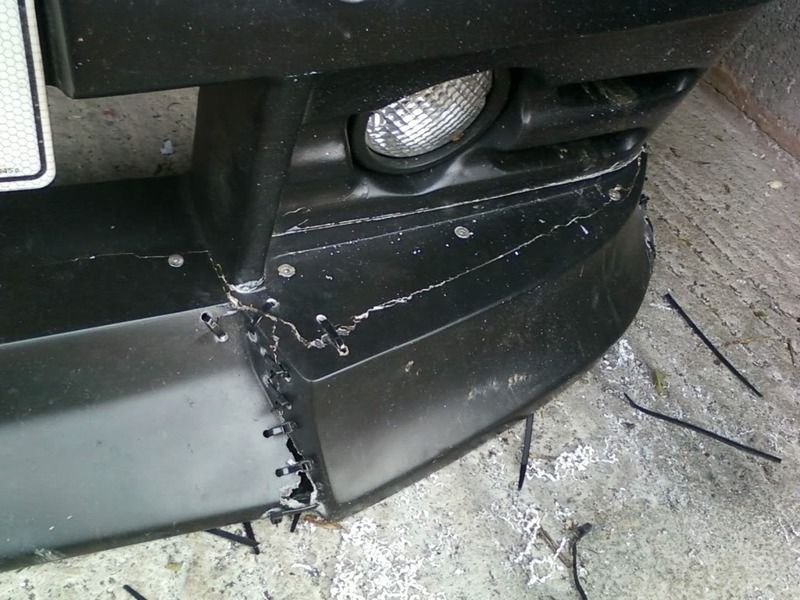 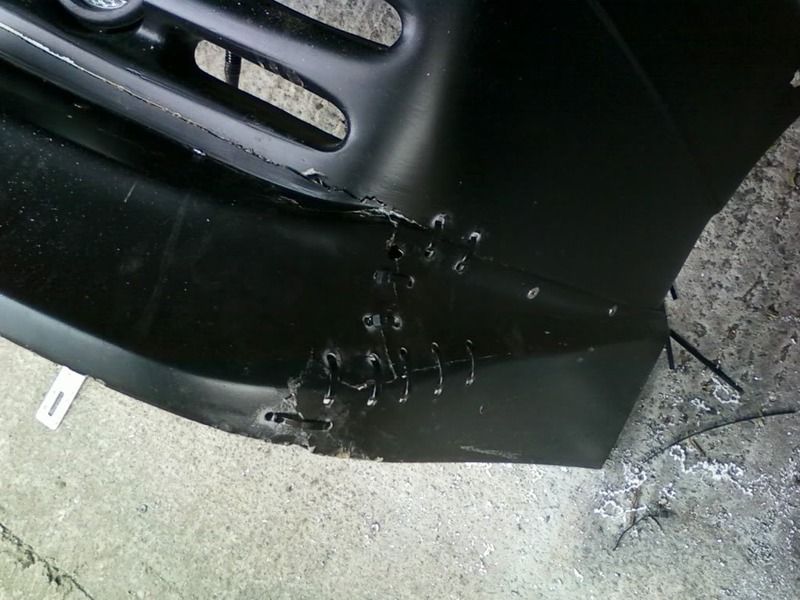 Bought some hydraulic boot hinges for my other project but they were no good so decided to fit them to the Manta as it's been lacking any kind of boot lid support. They're from a Volvo S40 (I think) 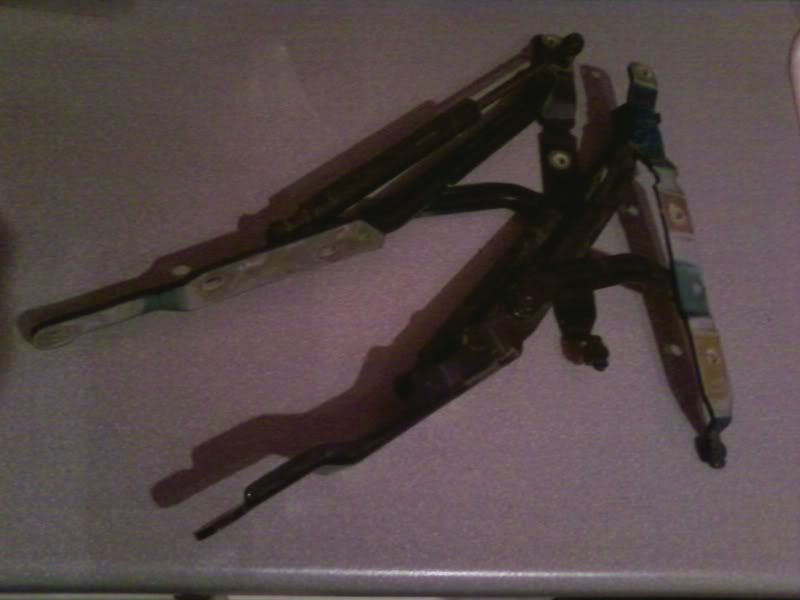 Nice little compact units - the original manta set up is twisted metal springs between the hinges, across the back of the boot, I removed them years ago when the boot was full of stereo equipment Used a bit of dexion to mount them at the side of the boot and chopped excess material off 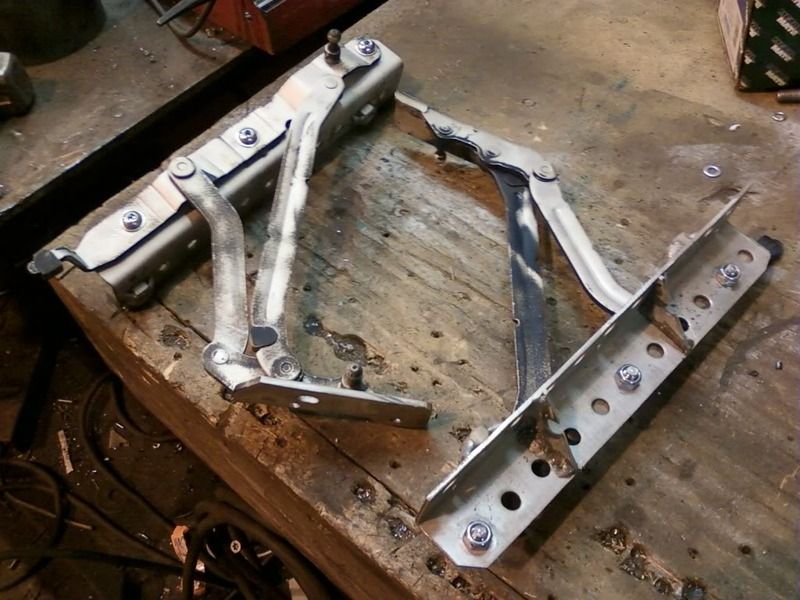 Sprayed black and fitted in place... 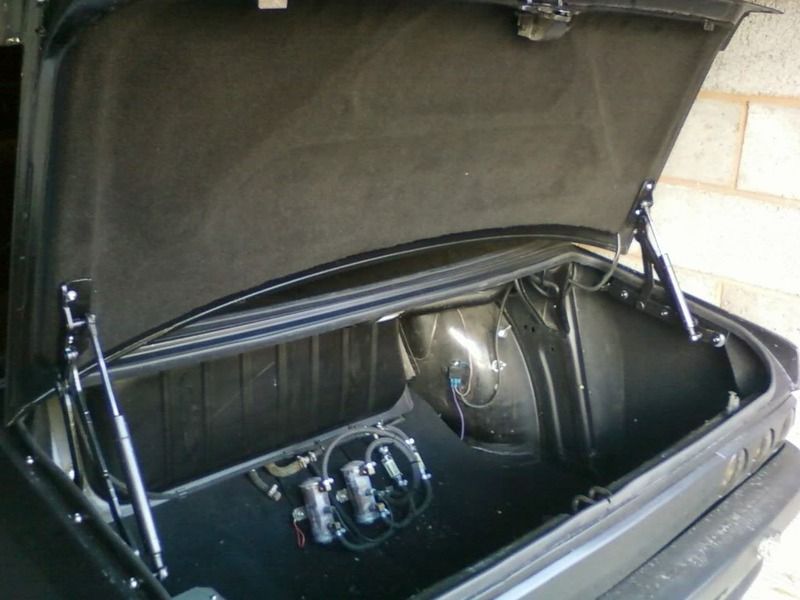 Work quite well, was hoping that the boot lid would rise up without a helping hand but the lifters are not quite up to the job, although one of them has just given up so I need replacements, might be able to find some beefier ones. Edit - with BMW coupe lifters installed..... With winter approaching it's time to think about taking the engine to pieces and sorting a few problems and add a few goodies, so did a compression test today, not sure what to make of the results... No.1 - 250Psi No.2 - 286Psi no.3 - 260Psi No.4 - 282Psi nos. 1 and 3 were down on the others so added oil and got... No.1 - 275Psi No.3 - 300+Psi - off the gauge  My gauge doesn't sit at zero, more like 20-30Psi but even accounting for that the results seem a little on the high side, don't know what CR I'm running at. I'm thinking rings on 1 and 3 because of the oil result but as has been pointed out to me all the readings are within 10% so acceptable - may have to go with a leak down test now to get a better idea of what's happening. |
| |
Last Edit: Feb 6, 2011 15:57:02 GMT by ChrisT
|
|
ChrisT
Club Retro Rides Member
Posts: 1,670
Club RR Member Number: 225
Member is Online
|
|
|
|
Following on from my compression test I bought a leak down tester  After a lot of messing around trying to figure out how to use it properly and breaking one of the gauges in the process, I've ruled out valves and going with rings on No.1 piston might do them on No.3 while I'm at it. Will start stripping the engine next week. Ordered some lightweight pulleys and looking at a lightened flywheel as well - going to see how heavy mine is first..... Bought a new battery box last week to replace the home made ally one I built a few years ago - functional but not very nice to look at. Out with the old.... 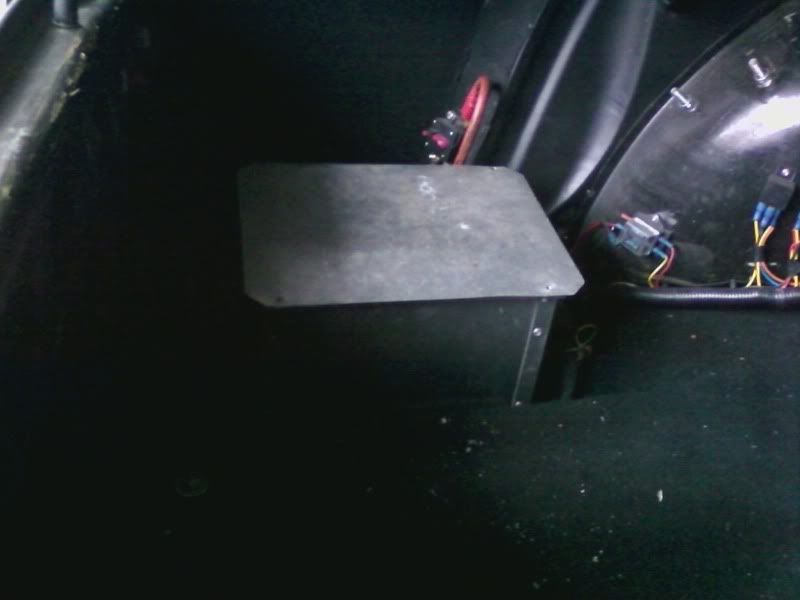 In with the new.... 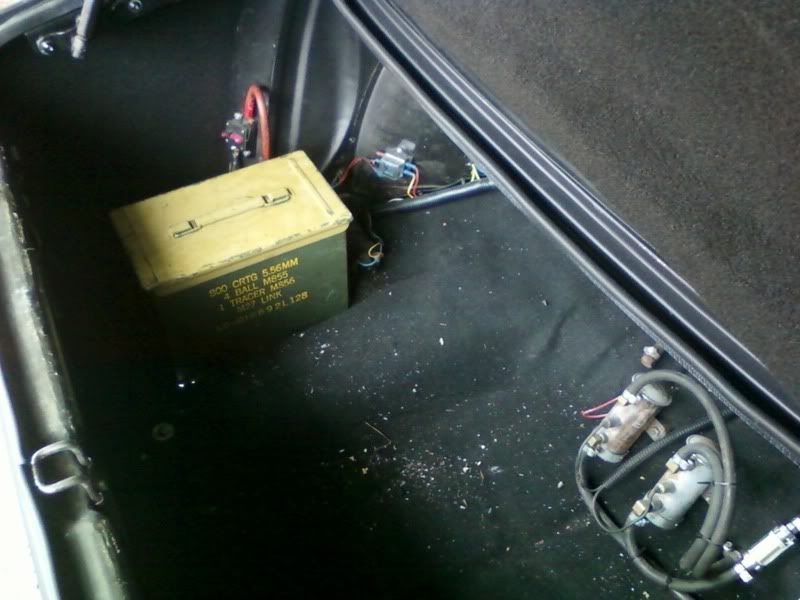 Remounted the circuit breaker on the box, connected the wires and bolted it all down  It's a large 50 cal ammo box, battery fits in there perfectly. Not so keen on the lid colour, the paint that's on it looks like it might come off leaving the original behind. But I might just paint it all black and re-do the lettering in grey... Also found a larger box in the workshop which will make a decent accompanying toolbox. |
| |
|
|
ChrisT
Club Retro Rides Member
Posts: 1,670
Club RR Member Number: 225
Member is Online
|
|
|
|
pulleys arrived yesterday.... 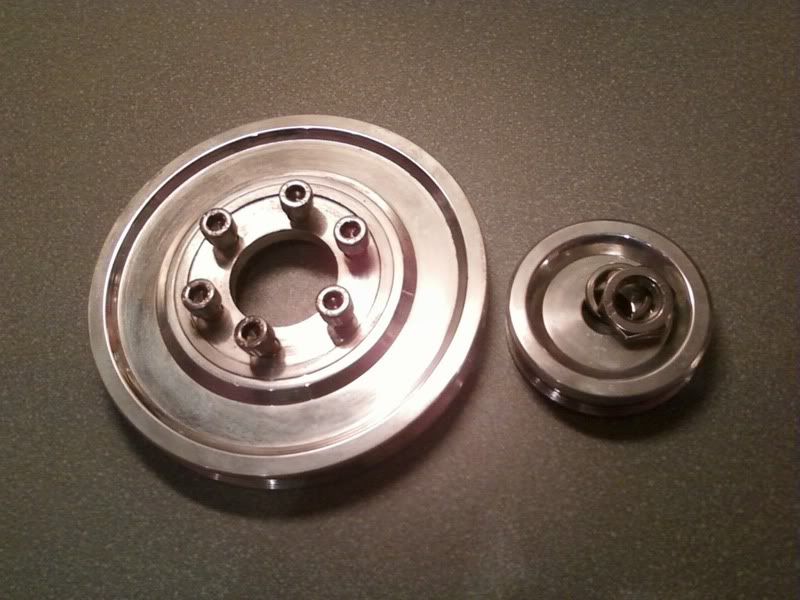 Crank pulley, and bolts, weighs in at 665g compared with the std one at 1.584Kg Battery box lid after 15minutes in the workshop blast cabinet.. 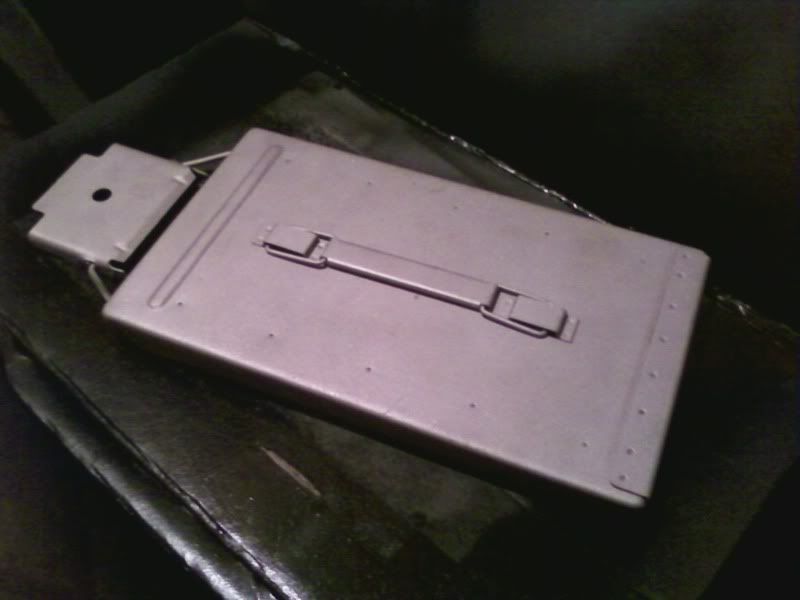 it's all going to be matt black now |
| |
|
|
ChrisT
Club Retro Rides Member
Posts: 1,670
Club RR Member Number: 225
Member is Online
|
|
Feb 10, 2011 21:24:46 GMT
|
Old back box.... 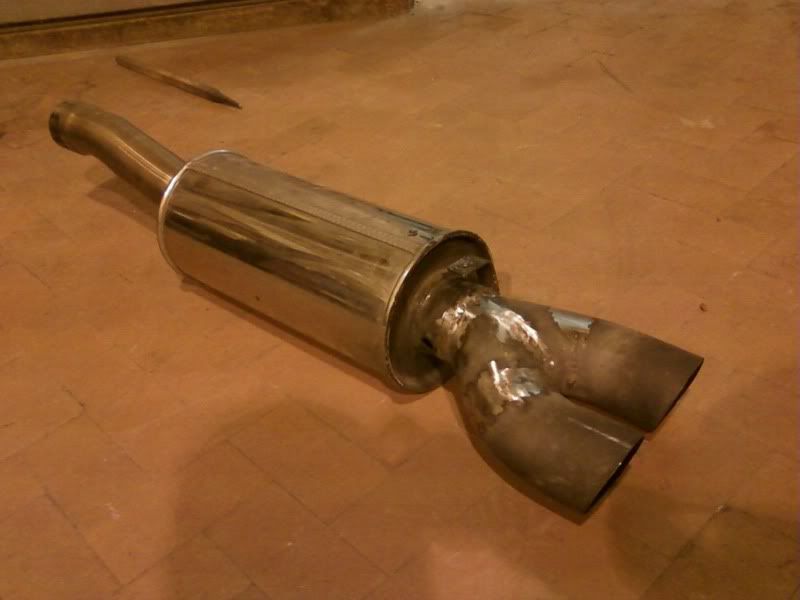 Take half a meter of 3" stainless pipe and cut in two......  Slice a section off one end, turn it around, weld back on along with a slightly smaller diameter piece....  Insert in old tailpipes.....  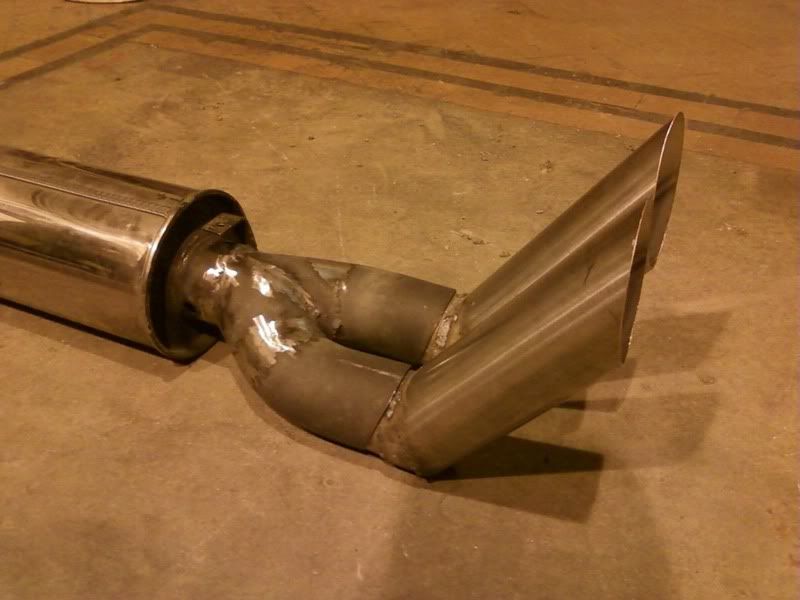 Ignore the rough welding, it's only mocked up and still needs a little finishing off here and there |
| |
|
|
|
|
|
Feb 10, 2011 21:30:10 GMT
|
|
Have you bought a bandsaw and blast cabinet?
|
| |
|
|
ChrisT
Club Retro Rides Member
Posts: 1,670
Club RR Member Number: 225
Member is Online
|
|
Feb 10, 2011 21:32:51 GMT
|
|
haha, and where exactly would I fit them?
blast cabinet at work, pipes cut by hand with grinder
|
| |
|
|
|
|
|
Feb 10, 2011 21:59:37 GMT
|
|
Nice cut.....i can never get mine anywhere near that straight!
|
| |
|
|
bstardchild
Club Retro Rides Member
Posts: 14,971
Club RR Member Number: 71
|
|
Feb 10, 2011 23:46:36 GMT
|
Nice cut.....i can never get mine anywhere near that straight! Same here - must be a trick we are missing  |
| |
|
|
ChrisT
Club Retro Rides Member
Posts: 1,670
Club RR Member Number: 225
Member is Online
|
|
Feb 13, 2011 10:38:35 GMT
|
Think I just got lucky on that cut Yesterday morning made a start on removing the engine - without the aid of an engine hoist 10.30am  A little later... 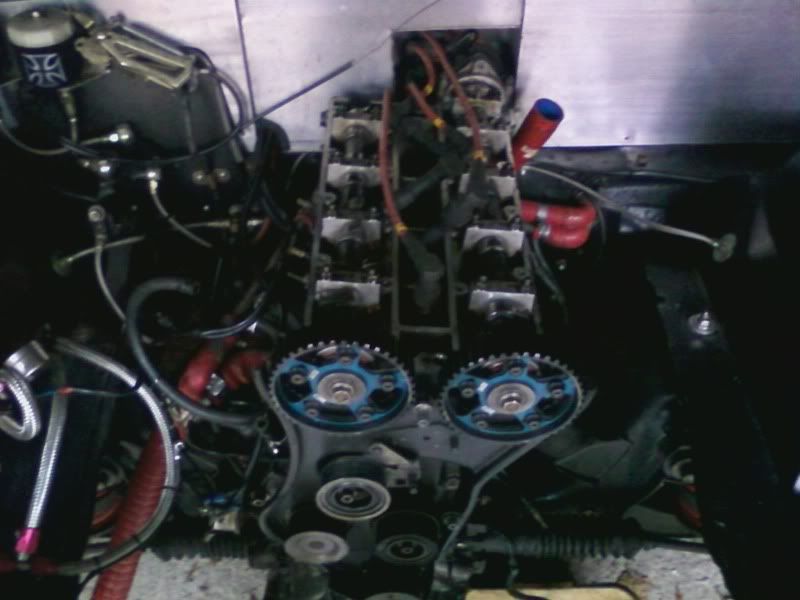 Not long after that....  Disconnected from 'box and ready to be pulled.... 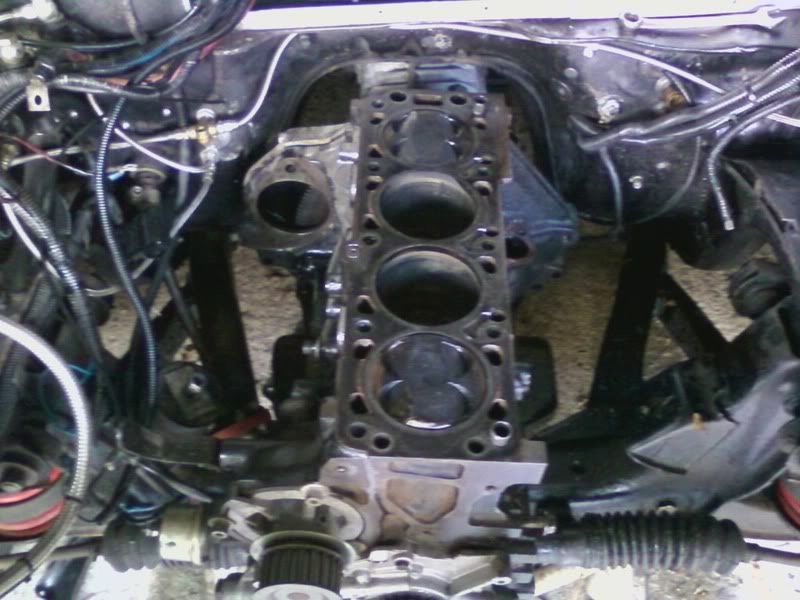 It was at this point my back said no more lifting  Cylinders 1 and 3 show slight scoring, but barely noticeable with finger nail, should hone out.... 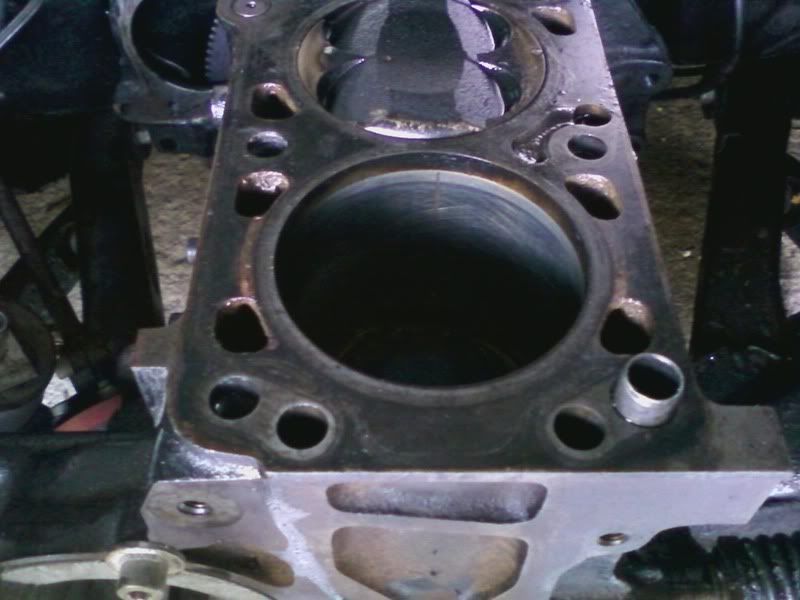 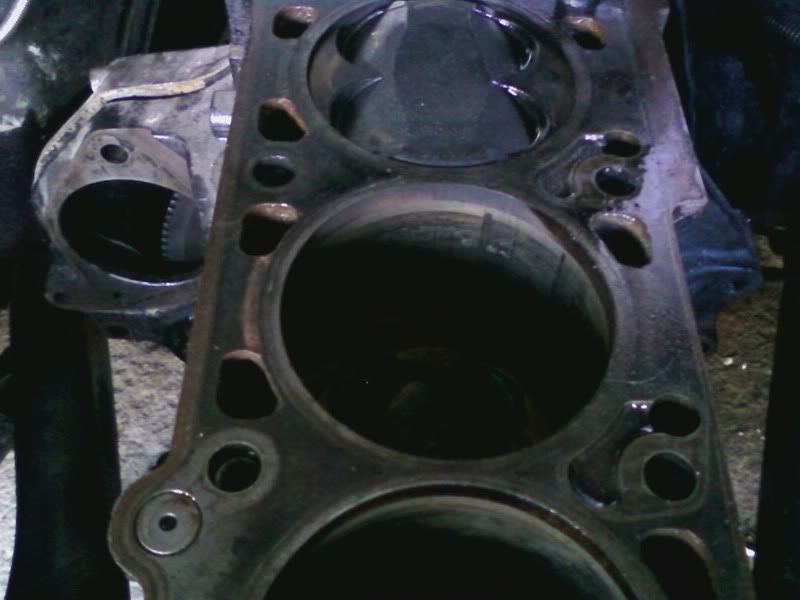 Early start this morning, with a rested back and a pair of welding gloves (block's a bit oily) things went smoothly. Pulled block from 'box, removed clutch and hauled it out the engine bay. 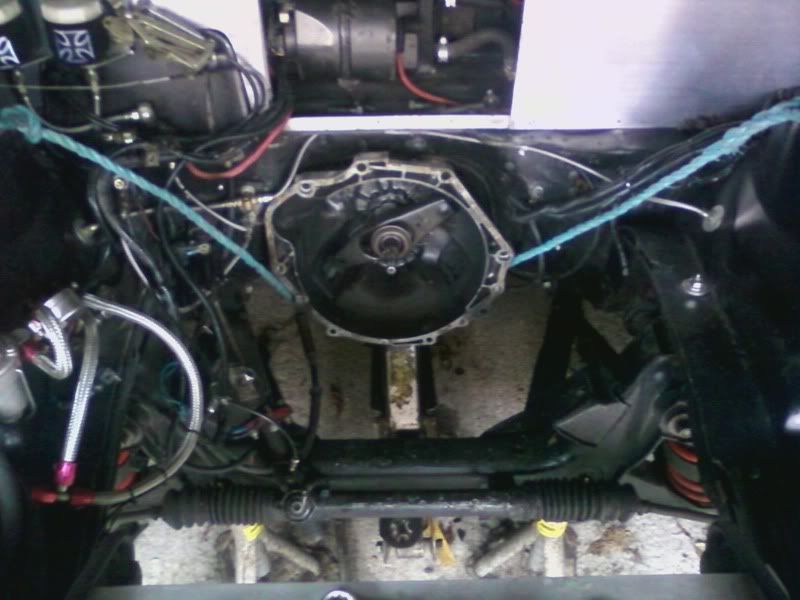 Clutch has some meat left on it so why it's slipping I don't know - will get some part numbers off it and contact Helix to see what sort of power it should take. Cover's got some hot spots on though.... 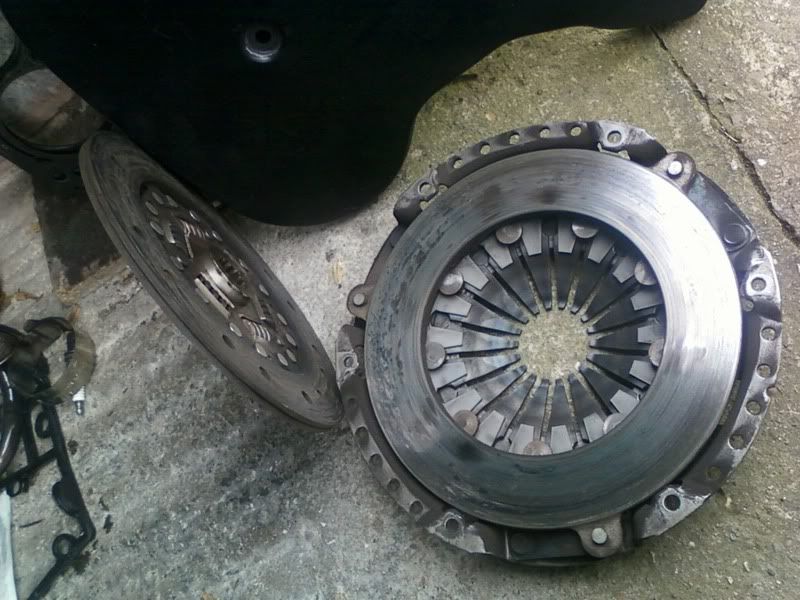 How to stop crank rotating when removing flywheel bolts, stick a hammer in there... 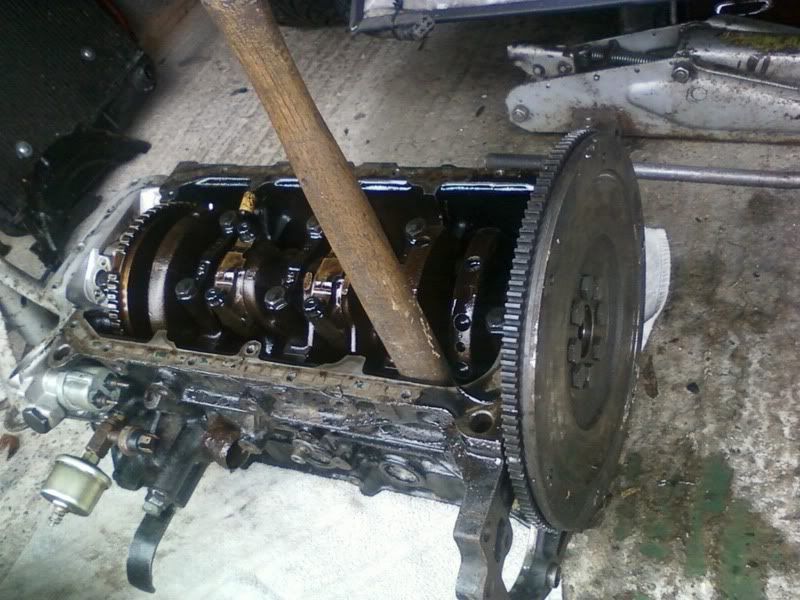 Flywheel weighs in at 7.3Kg so I think a TurboSports 3.1Kg one will be replacing it. 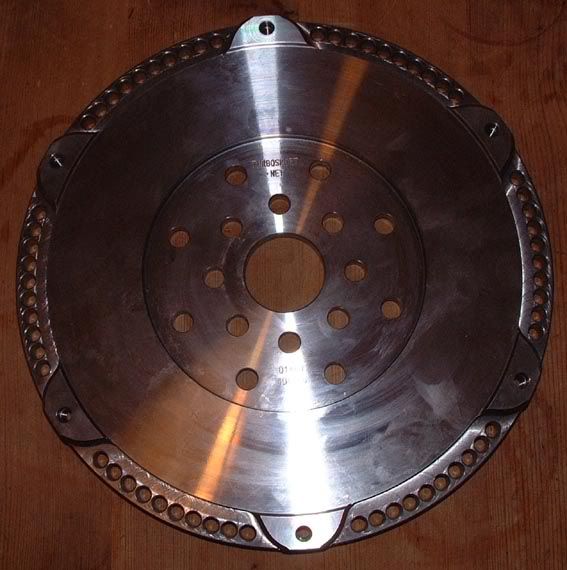 |
| |
|
|
|
|
|
|
|
Feb 13, 2011 17:58:39 GMT
|
That'll be a curse word before you get used to it ;D Maybe the clutch is slipping early beacuse your flywheel isn't thick enough. Otherwise clutches tend to not look too bad if they haven't gone with a bang, or are 100% gone. You could go with a sinter clutch, but you might not want to drive the car anymore if you mate it to a 3.1kg flywheel  Still one of my favourite cars on here, always a pleasure to see progress, any pics of the back box in place? |
| |
|
|
ChrisT
Club Retro Rides Member
Posts: 1,670
Club RR Member Number: 225
Member is Online
|
|
Feb 14, 2011 22:44:15 GMT
|
That'll be a female dog before you get used to it ;D shouldn't be that bad, have to keep the revs up because of the lumpy cams anyway. no pics of the exhaust fitted yet, just debating whether to keep them removable or weld them on..... |
| |
|
|
ChrisT
Club Retro Rides Member
Posts: 1,670
Club RR Member Number: 225
Member is Online
|
|
Feb 15, 2011 19:08:15 GMT
|
Repainted battery box... 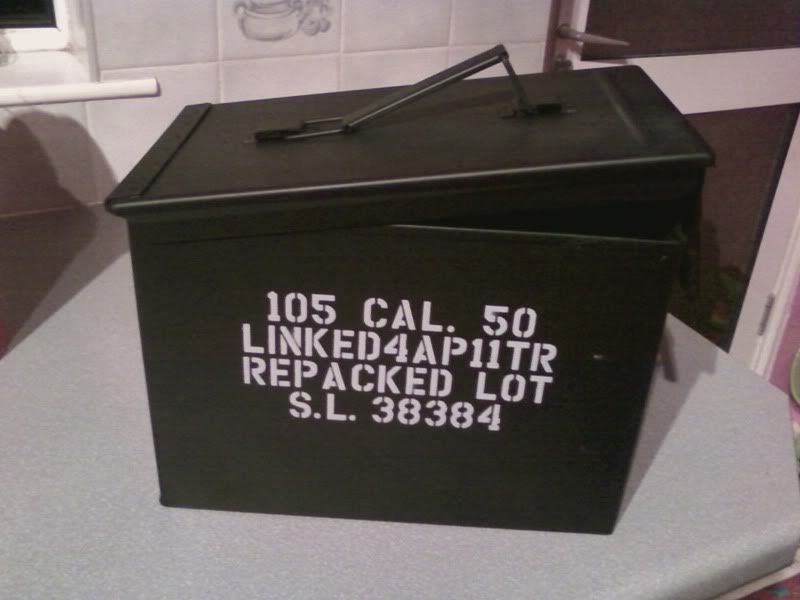 Much more in keeping with the rest of the car now |
| |
|
|
ChrisT
Club Retro Rides Member
Posts: 1,670
Club RR Member Number: 225
Member is Online
|
|
Feb 19, 2011 12:43:34 GMT
|
Tailpipe extensions welded in place - was going to make them removable but thought I'd take a chance as they're not that excessive and make them permanent. 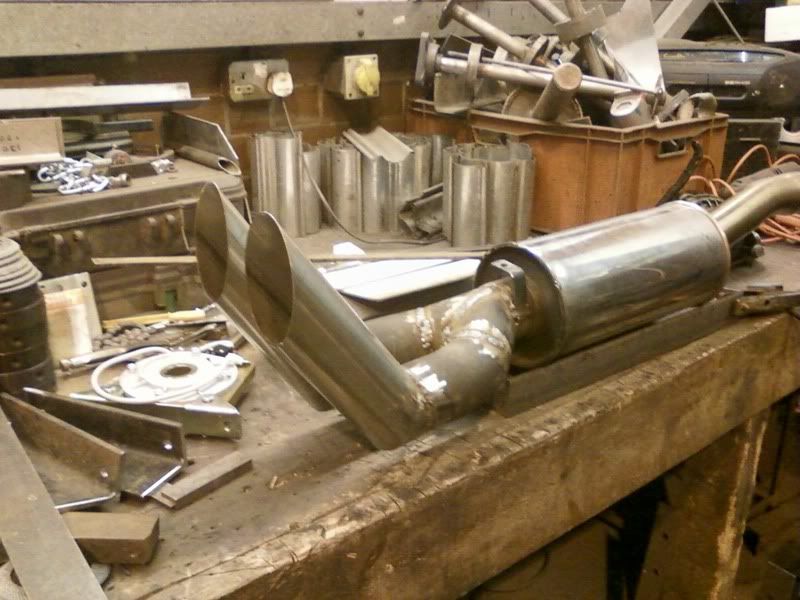 Nitrous jets need refitting at a better angle, as they are it's good for access to fit the lines but not ideal for spray as it's directed at the manifold wall....  Cleaned up in the blast cabinet 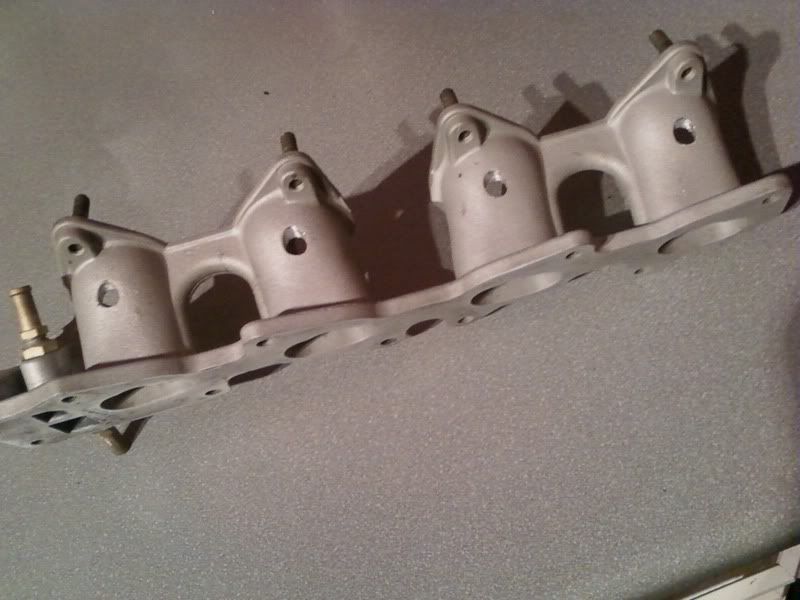 The other year I bought some Durafix aluminium rods which worked well repairing the AC pipes in the SX so thought I'd try filling the injector holes (something similar is done in the instruction video) but I can't get it to work - thinking I need a better heat source as I can't get the whole area up to temp. When fitting the engine I moved the alternator to the other side to give a bit more clearance and quickly made an adjuster bracket for it, basic but it's done the job. 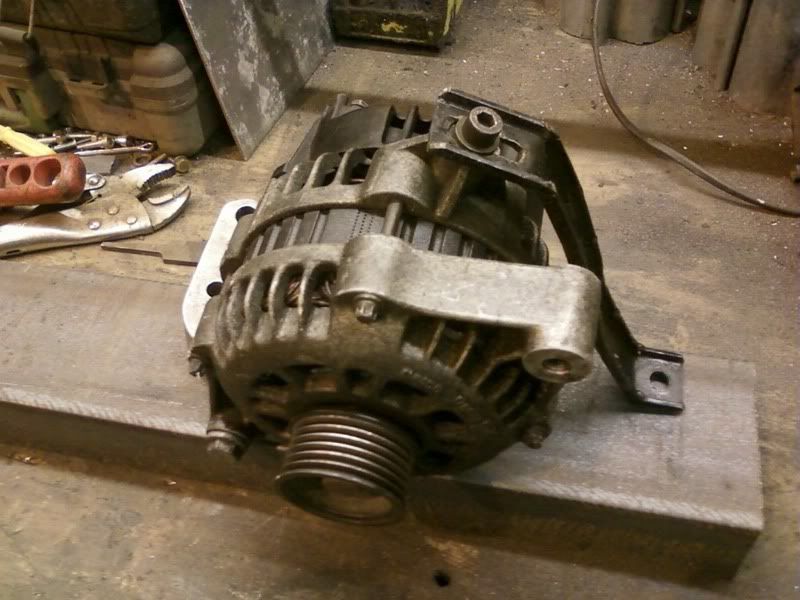 Decided it was time to replace it with something better so ordered a couple of M10 rod ends and sleeves, RH and LH thread, welded together with a nut between them for adjustment.... 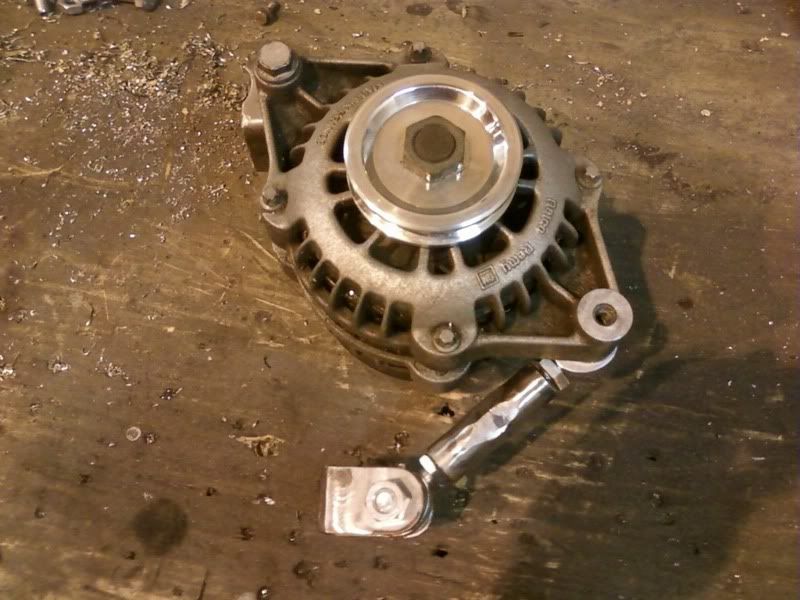 Looks better...... |
| |
|
|
ChrisT
Club Retro Rides Member
Posts: 1,670
Club RR Member Number: 225
Member is Online
|
|
|
|
Remade the backet which supports the top alternator bracket (previous version was, like the other bracket, just a bend bit of metal to the nearest unused bolt hole).... 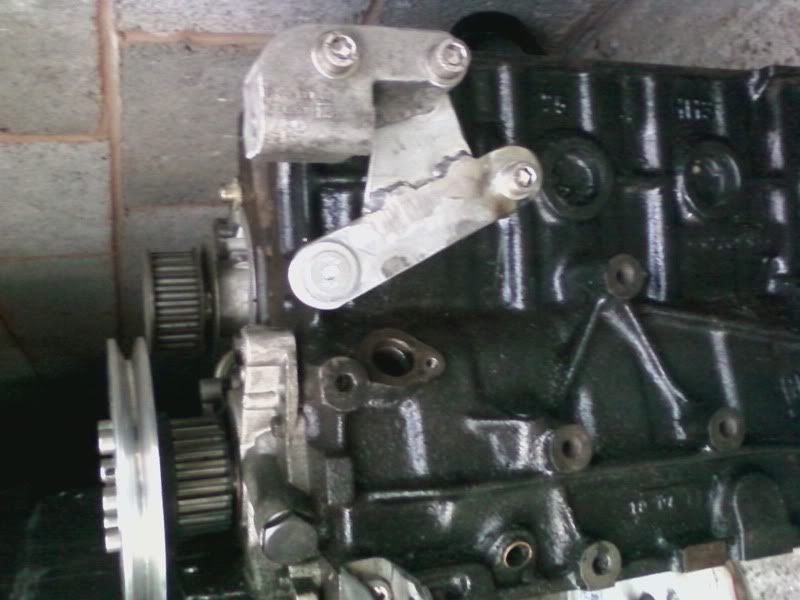 This one picks up two bolt holes so should be better, although the old one has worked fine for years. Alternator adjuster seems to work.... 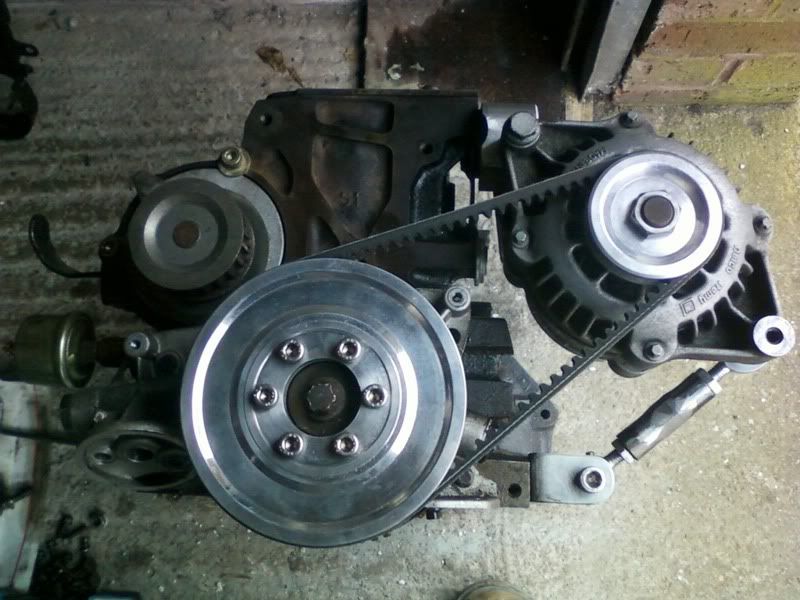 Didn't go for the Turbosport flywheel as it doesn't come with ring gear, but found LMF Vauxhall do a nice one with integral ring gear at only 4.035Kg, which has got to be better....  Very similar to the std one from the front, but from the back it's obvious where the weight's gone from... 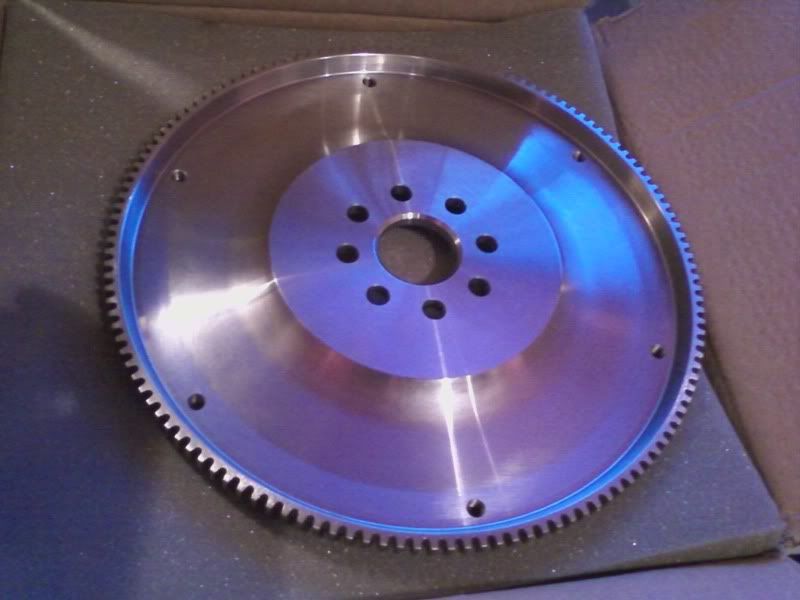 Got some ARP bolts to hold it in place too. Did some CR measurement/calculation today.... 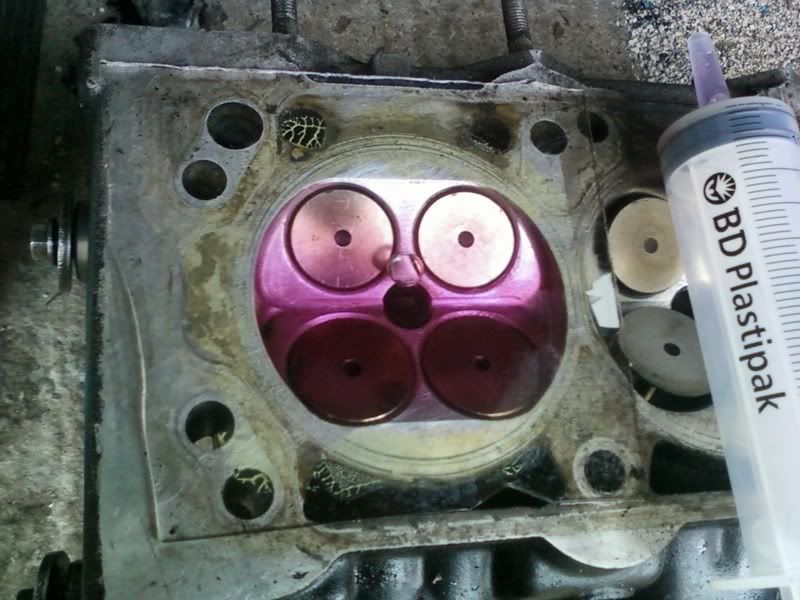 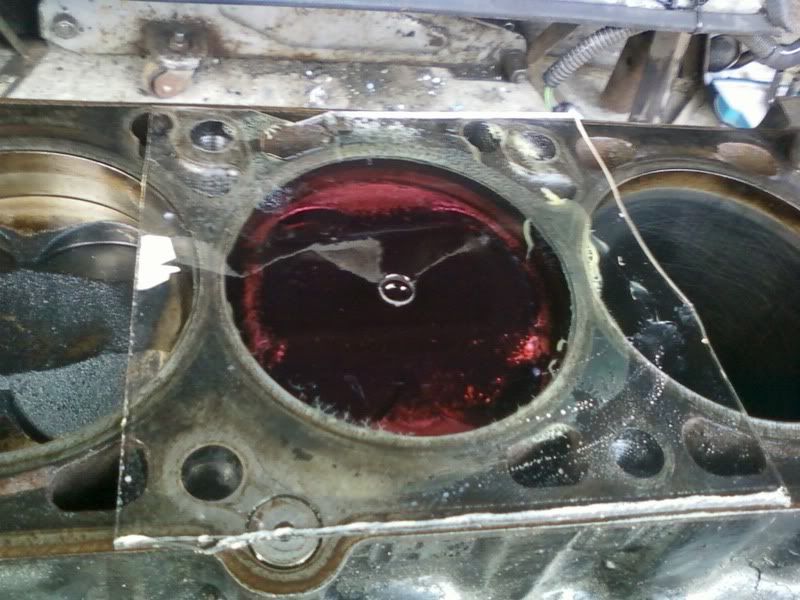 After a lot of number crunching I've some up with the figure of 9.8:1 which can't be right, the accralite pistons should give 11.6:1  May have to remeasure again tomorrow |
| |
|
|
ChrisT
Club Retro Rides Member
Posts: 1,670
Club RR Member Number: 225
Member is Online
|
|
|
|
aah, that'll be your problem then.... 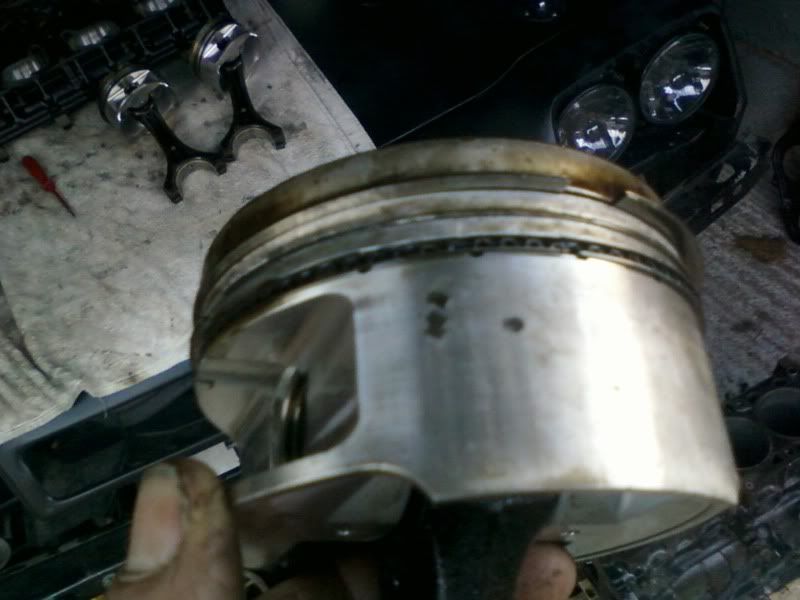 Apart from having a phone that doesn't do closeups well, the bits on the side are pieces of oil rings and the second compression ring is seized in the groove  At least that explains the low comp on that cylinder and the smoking |
| |
Last Edit: Mar 27, 2011 19:12:11 GMT by ChrisT
|
|
ChrisT
Club Retro Rides Member
Posts: 1,670
Club RR Member Number: 225
Member is Online
|
|
Mar 19, 2011 19:40:44 GMT
|
Seized ring eventually removed, new rings fitted and all pistons cleaned up...... 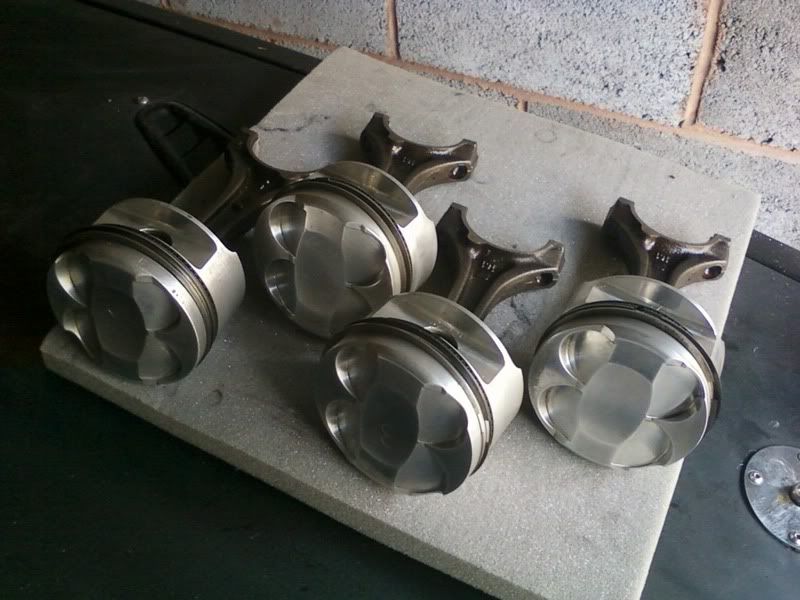 Scratches removed by a good honing of the bores (despite what it looks like in the picture)..... 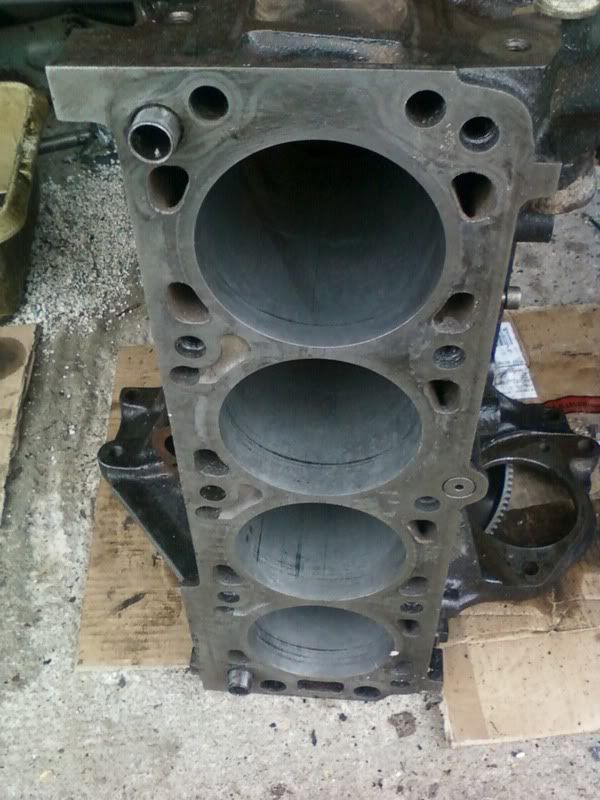 Techniclutch Calibra turbo clutch and new big end bearings.... 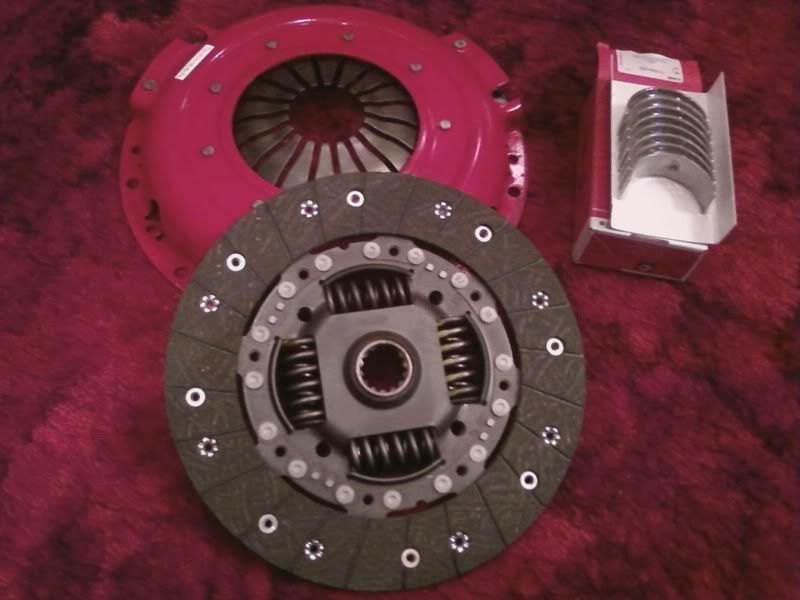 Two std Z20LET MLS headgaskets combined, minus two layers, to make one 1.9mm gasket ......  Pistons, bearings, flywheel etc fitted.... 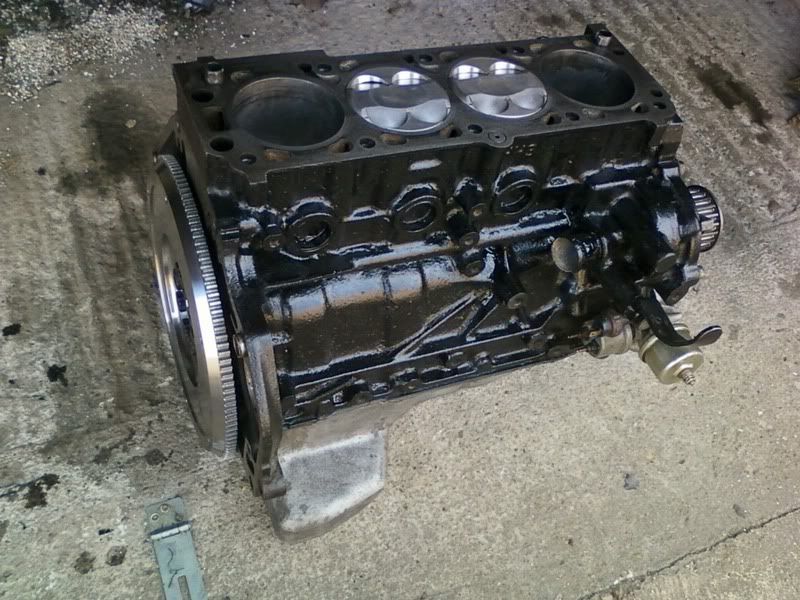 Would have got further but found the new flywheel takes larger threaded clutch cover bolts than std  Have bolts that will fit but feel I should use ones bought for the job in this application. |
| |
Last Edit: Mar 19, 2011 19:45:09 GMT by ChrisT
|
|
ChrisT
Club Retro Rides Member
Posts: 1,670
Club RR Member Number: 225
Member is Online
|
|
Mar 27, 2011 15:38:13 GMT
|
Bought some 12.9 grade caphead bolts for the clutch cover..... 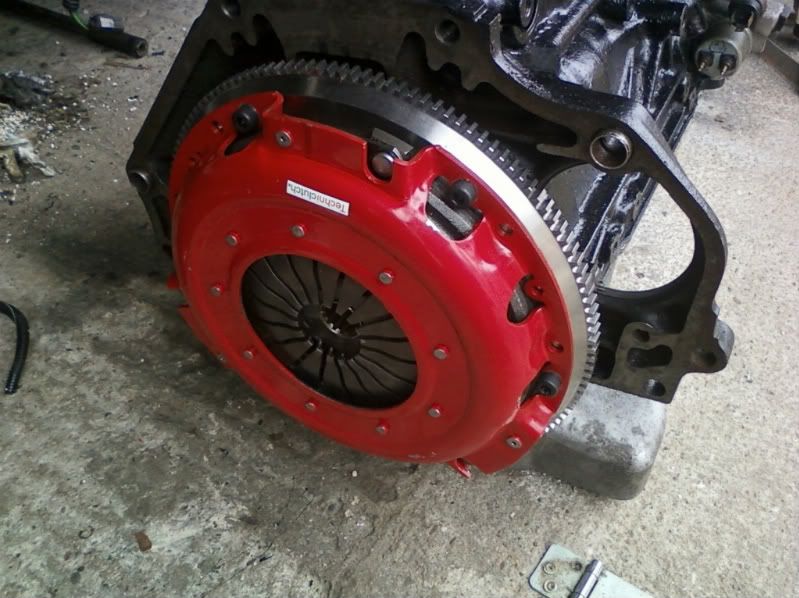 Fitted the block back to the gearbox but found I had no clutch pedal, so out it came again, adjusted the clutch arm pivot bolt and refitted the block. Got some pedal this time, should be able to get more adjusting the threaded end of the cable..... Block back in place.... 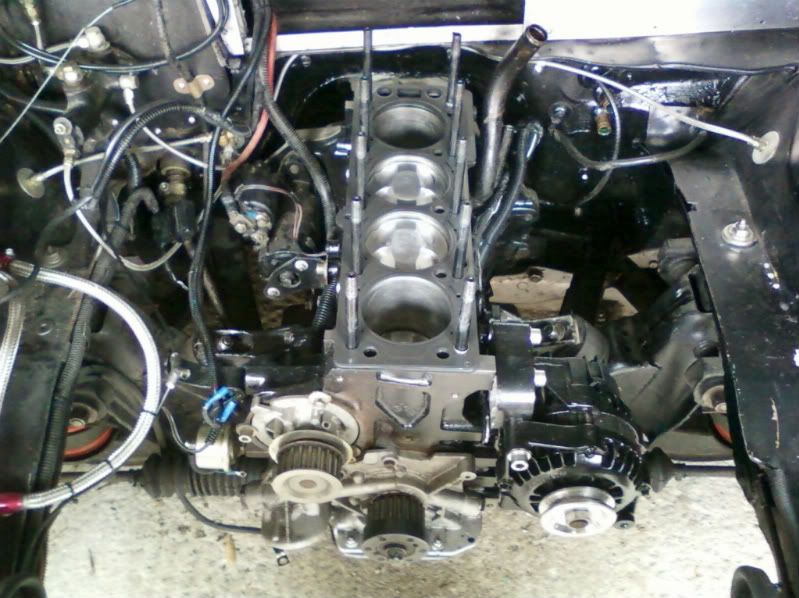 About as far as I got yesterday.... 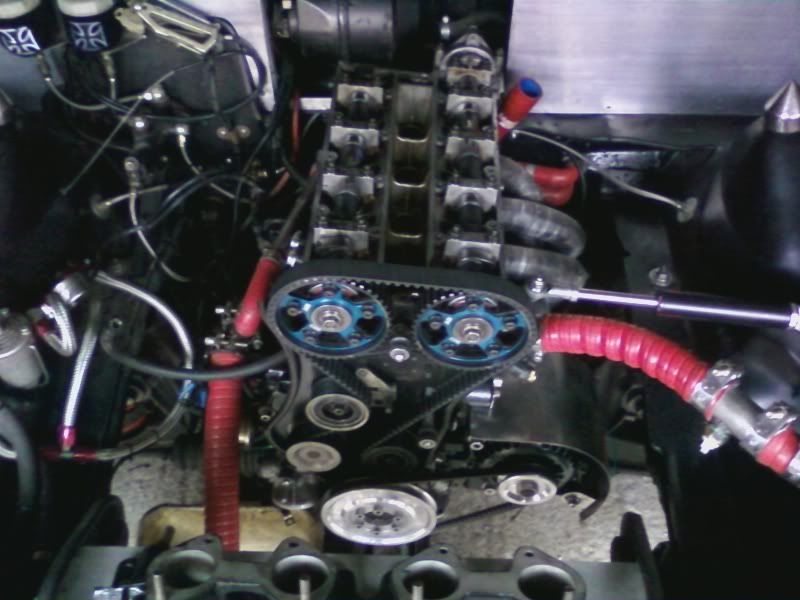 Been having some problems fitting the nitrous injectors to the manifold, my original plan of using Durafix rods didn't work so ended up using plastic fittings originally supplied with the kit for fitting to rubber hoses, except for I broke one, managed to get a replacement but broke that as well yesterday  Found I'd got an M14x1.25 tap in a tool box so I now have a cunning plan, whether I do it to all of them or just the one that's not fixed I don't know yet........ Could only spend a couple of hours on it today but got the carbs back on along with the coolant hoses, clutch pedal adjustment and a few other bits.... 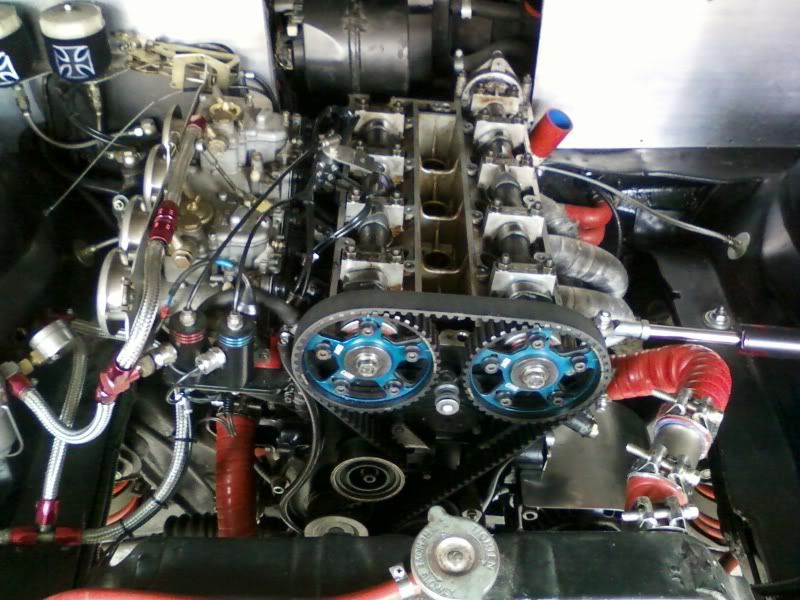 Just need to buy a set of thackeray washers (for the carbs) as most of mine seem to have broke  |
| |
|
|
ChrisT
Club Retro Rides Member
Posts: 1,670
Club RR Member Number: 225
Member is Online
|
|
|
|
Feels a bit like I'm talking to myself here but anyway...... Been having some trouble reinstalling the nitrous injectors in the manifold - took them out as they were not at the best angle, hoping to fill the hole with a durafix rod. That didn't work so drilled the hole out to fit bits of 12mm ally rod in there hoping the durafix might work filling a smaller gap - didn't work. Found some fittings supplied with the kit designed to be used when fitting to rubber hose and they seem to have done the trick apart from I broke one, got a replacement and broke that one so had to figure something else out...... Found I had an M14x1.25 tap so tapped the manifold with that, got an old spark plug, cut it down and ran an M10x1 tap through it to fit the injector in. Injector, cut down plug and tap.... 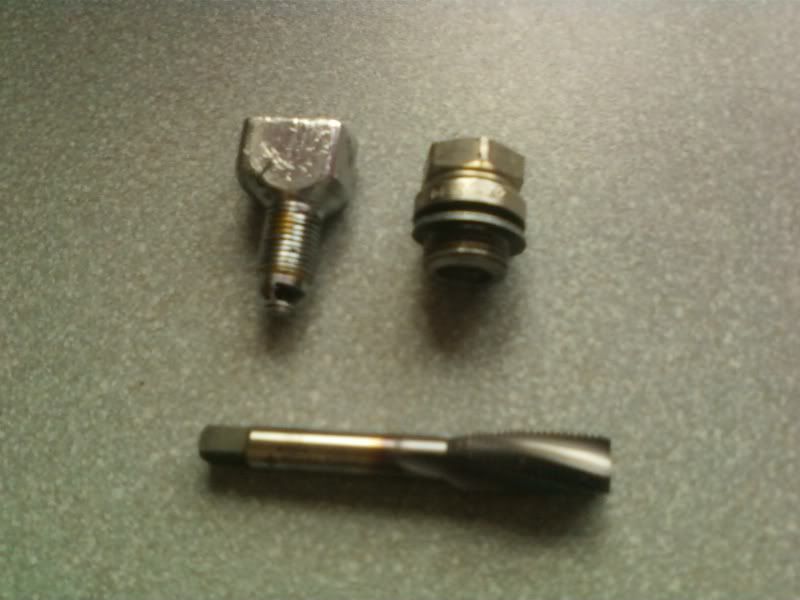 Injector in plug.... 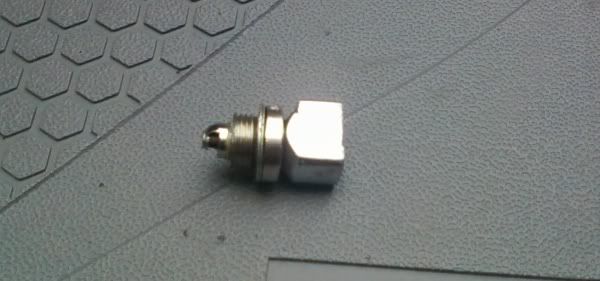 Seems to have done the trick  Engine's back together and running..... 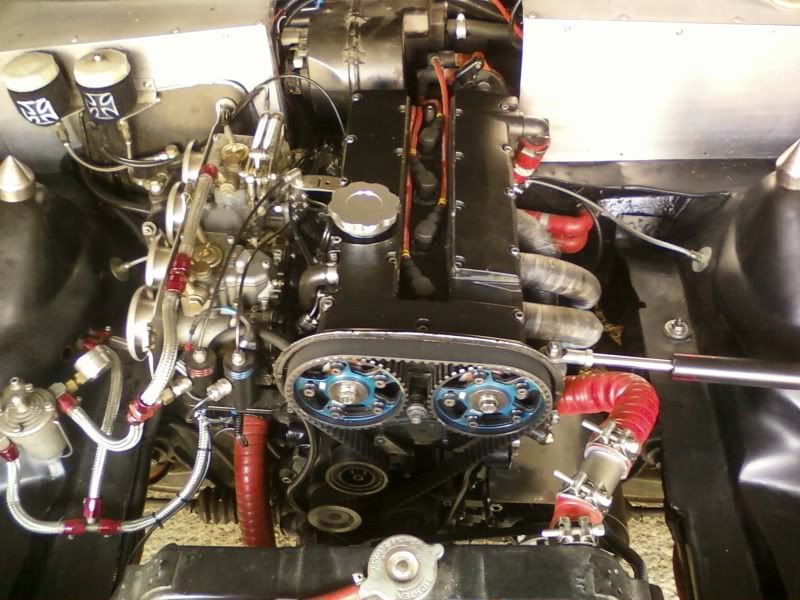 Had a bit of a problem with the alternator light coming on soon as the battery was connected, despite the keys not even being in  For some reason there's constant 12V at the light terminal, thinking I've caused some damage by degreasing it  Voltmeter shows over 14V with the engine running so that's something at least. Been out for a bit of a shakedown to check for leaks and bed the rings in, apart from the carbs needing balancing all seems good. Comedy exhaust is too comedic, needs a couple of inches removing to bring them closer to the bumper....  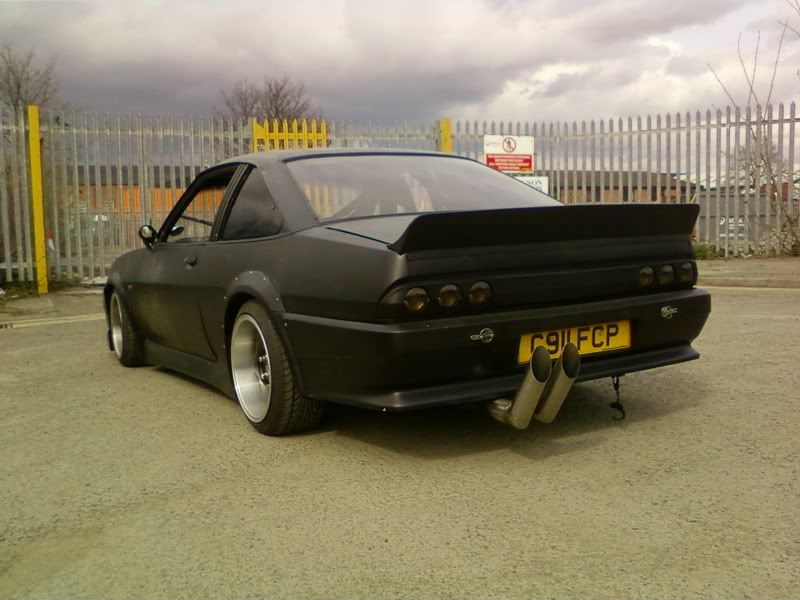 Battery box looks good though.... 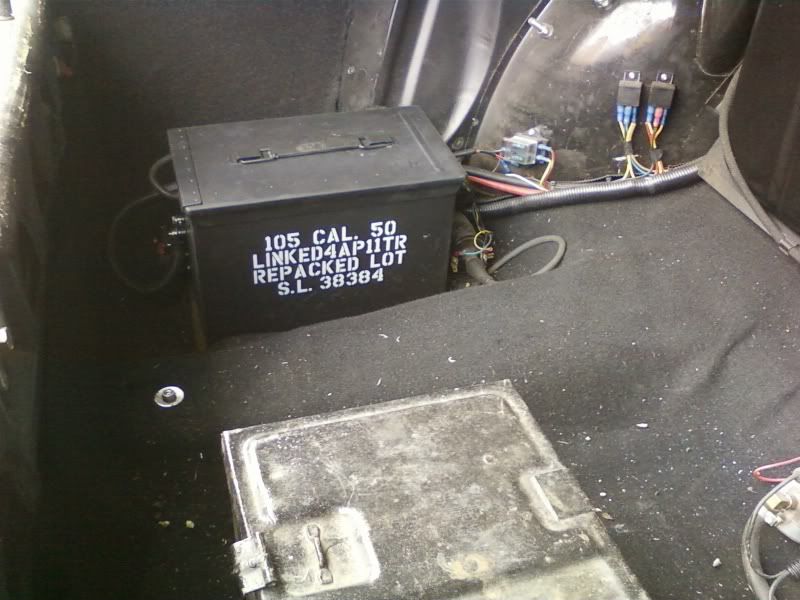 |
| |
Last Edit: Apr 3, 2011 17:02:54 GMT by ChrisT
|
|
Chris™
Part of things
  This is clearly filler material.
Posts: 519
|
|
|
|
|
Don't worry - we're all still reading ;D Great to see it's up and running again, you did a great job with the engine rebuild there, all in a short space of time too!
|
| |
1989 Volvo 340
1986 Suzuki SJ413
2000 BMW 318ti
2006 Lexus IS250
|
|
|
|


