|
|
|
Dec 21, 2021 21:25:46 GMT
|
Quick update - I have done a bit more re-assembly. The warm(er) weather last weekend allowed me to re-paint the front boot (or Frunk as the americans call it (front trunk)). I also re-furbished the pedal box and various other bits and bobs. I had previously refurbed headlight pods and radiator so those got re-fitted. Got the rear brake main line and clutch line to fit first, and then I can re-install the front subframe (I did a bit more work on that over the last few days like re-greasing the bearings with the correct grease (I used Moly grease before which I later found out was not ideal for bearings), and fitted new front disks to go with the new pads already in the calipers. 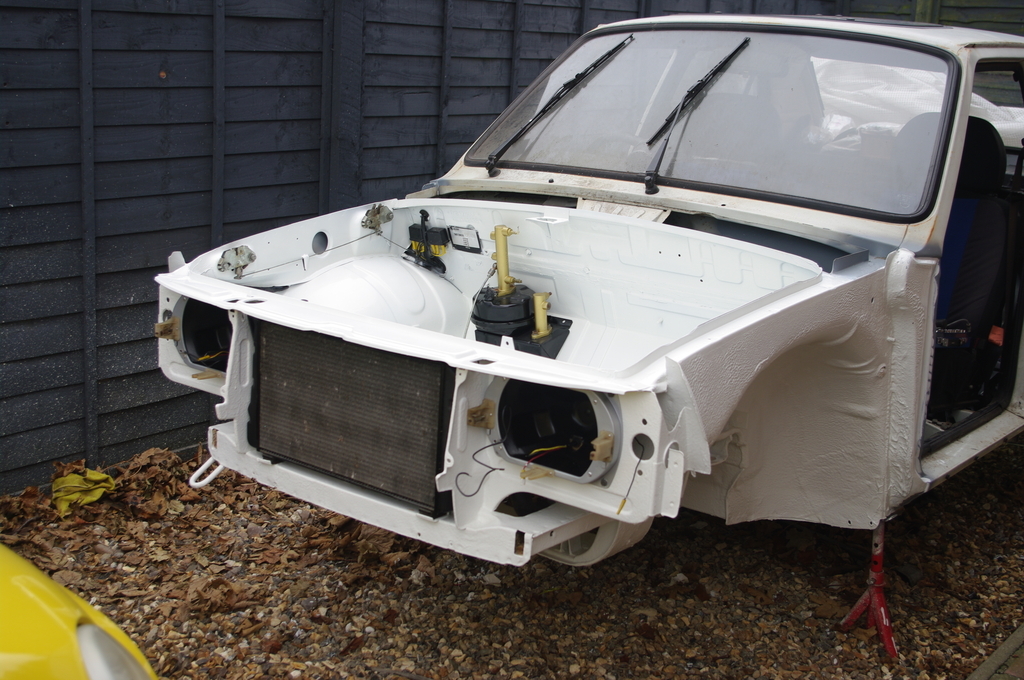 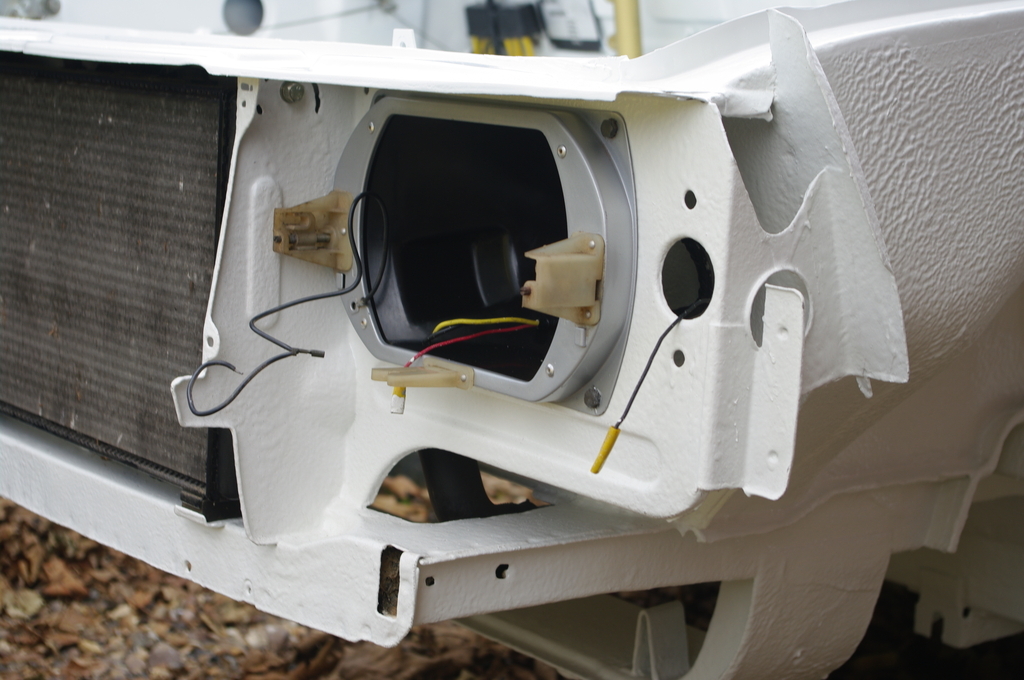 |
| |
Last Edit: Dec 21, 2021 22:45:48 GMT by lewist123
|
|
|
|
|
|
|
|
|
Quick update - I have done a bit more re-assembly. The warm(er) weather last weekend allowed me to re-paint the front boot (or Frunk as the americans call it (front trunk)). I also re-furbished the pedal box and various other bits and bobs. I had previously refurbed headlight pods and radiator so those got re-fitted. Got the rear brake main line and clutch line to fit first, and then I can re-install the front subframe (I did a bit more work on that over the last few days like re-greasing the bearings with the correct grease (I used Moly grease before which I later found out was not ideal for bearings), and fitted new front disks to go with the new pads already in the calipers.   Looking very good Sir! What do you use for underbody protection, underseal? |
| |
|
|
|
|
|
|
|
Sorry, lazy me, I looked closely and found what you use for underseal. Nice job. What kind of air compressor do you use for this job?  |
| |
|
|
|
|
|
Dec 22, 2021 20:16:13 GMT
|
|
Cheers for the feedback. The car originally had the rubbery stone chip factory applied, so I just went with that as it was easier to stick like for like. Plus, the waxoil type underbody sealers are normally black and I wanted to keep the underside white so didn't have much choice.
I chose that brand as it was what was cost effective on ebay - I bought it 6 at a time - I think I used a total of 10 cans - some areas of the car just had a very thin blow over, whilst other bits needed a bit more. Much of the gloopyness in the finish was there in the factory coating.
Air compressor wise, I have a 1.5hp 25ltr draper jobby. I step the pressure down to about 40-50psi and use a water trap. I also warmed the cans up in boiling water for about half and hour before applying it to make it flow better out of the can.
Edited to add - I wouldn't suggest my compressor is ideal for the job, but it can just about keep up.
|
| |
Last Edit: Dec 22, 2021 20:17:59 GMT by lewist123
|
|
|
|
|
Dec 31, 2021 22:40:48 GMT
|
Hi all - bit more of an update. I have done a bit more reassembly. Brake hard lines, clutch hard line, front subframe, rear suspension etc. 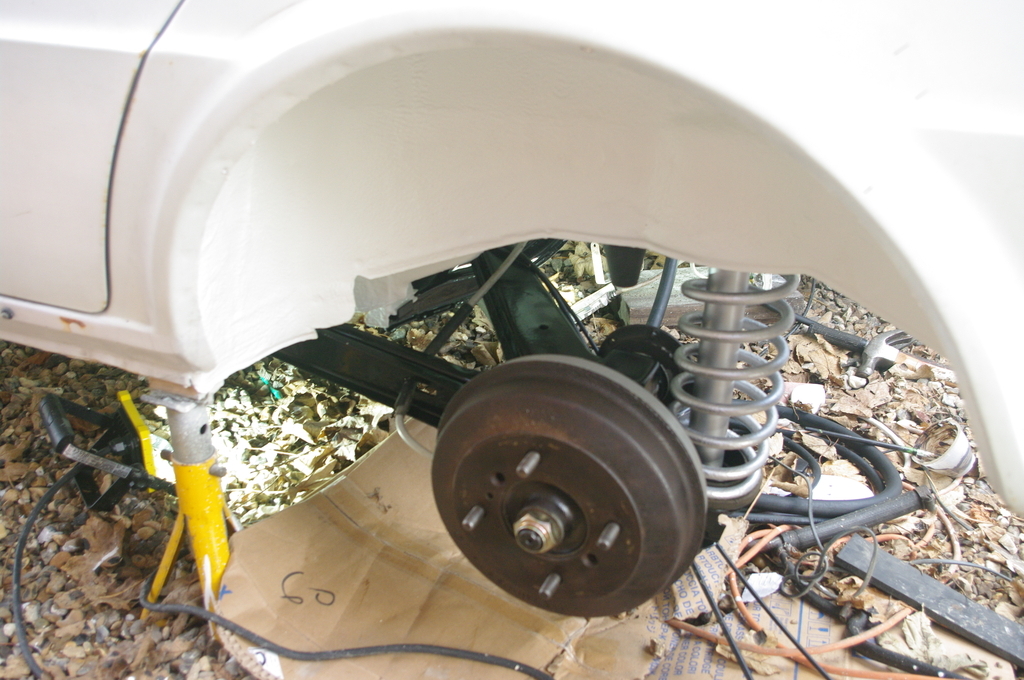 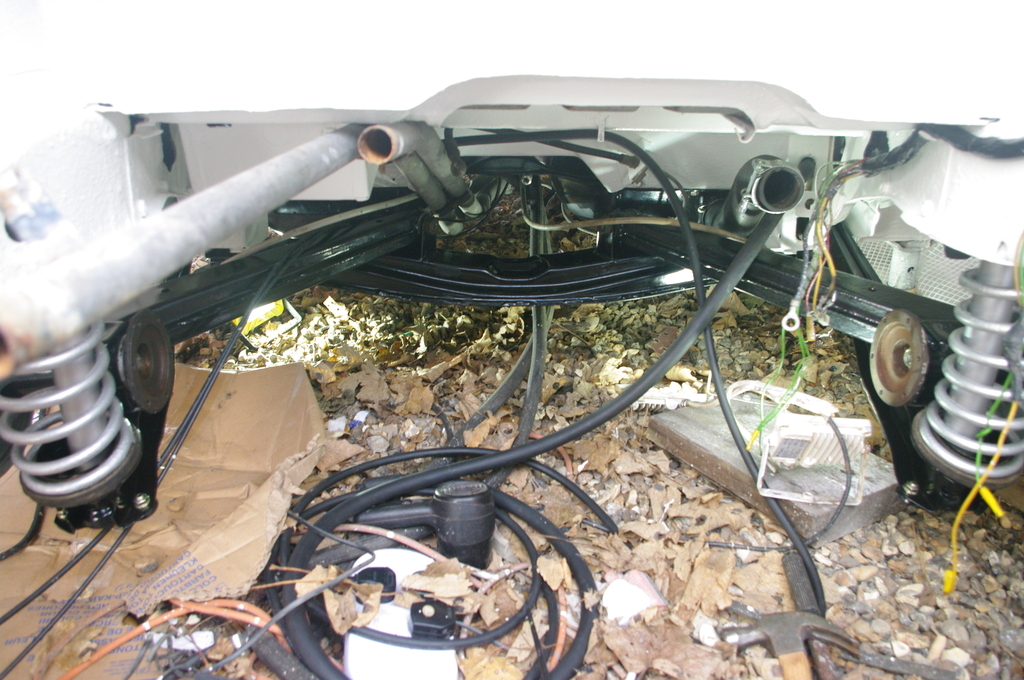 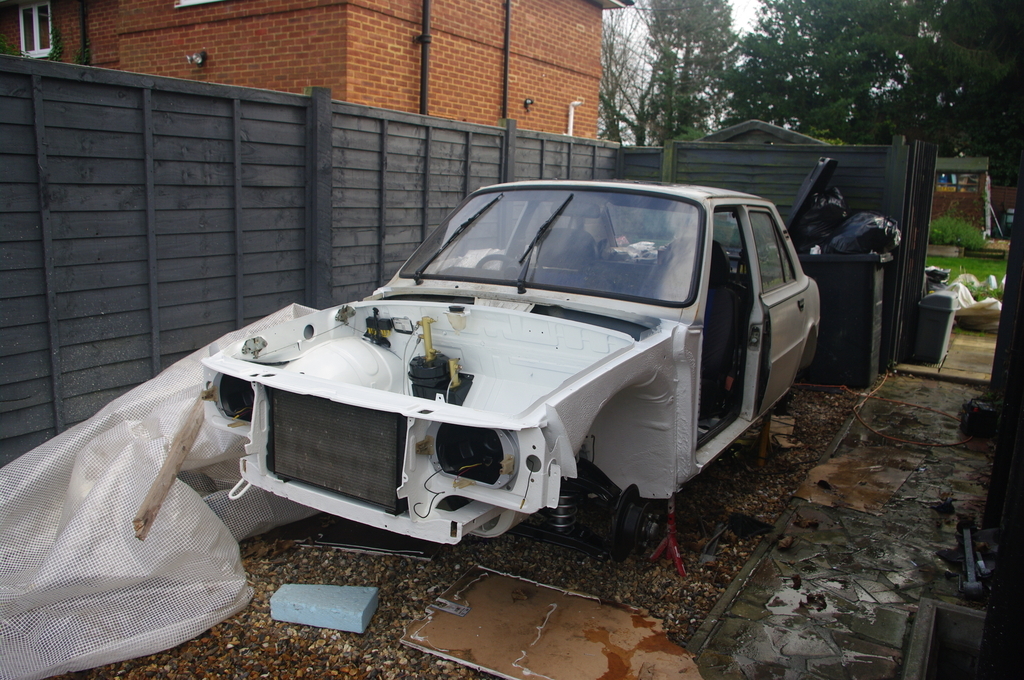 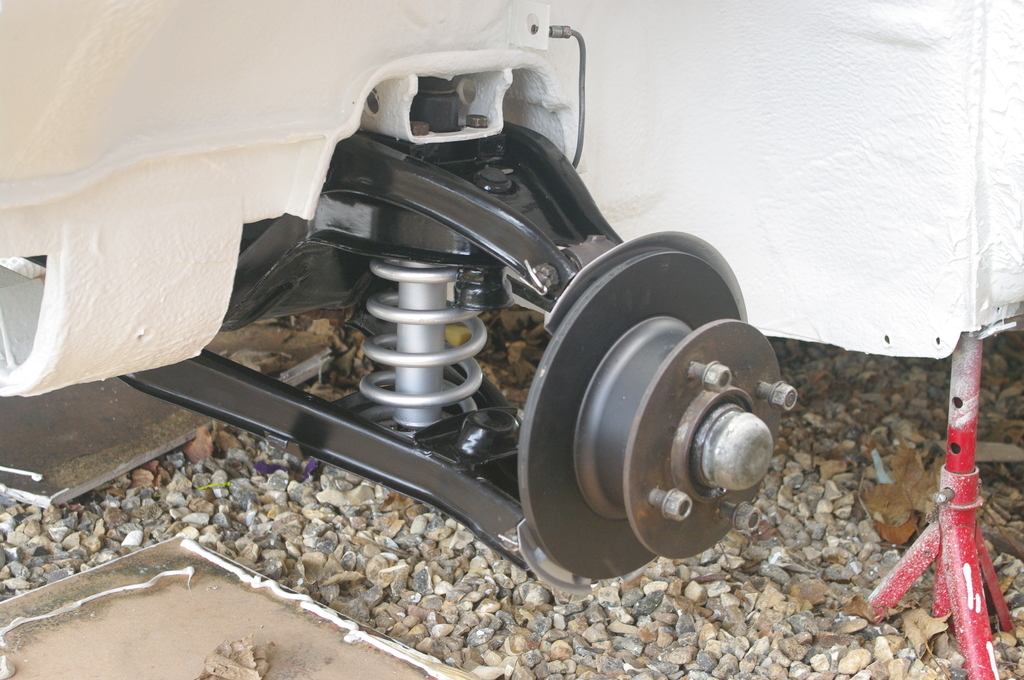 Currently waiting on new rear flexi brake lines before going much further - they are quite tricky to get to once the gearbox is installed. Got a few other odds and ends to do first. Not yet fitted the front callipers - I got a new seal kit to re-furb the calipers, but upon taking them apart, there was some corrosion on the sealing faces of some of the brake pistons. I can get new ones from the czech republic, but the 46mmx29mm pistons are not available in the UK (the 34mm ones are for the 4 pot calipers, but not the larger ones for the single pot calipers). Looking on ebay, I found that Subaru Imprezzas with the brembo calipers use 46x29mm pistons, so took a punt and ordered a set of hard anodised aluminium ones off ebay (for less than importing some standard steel ones). I have a set of 4 pot calipers which I would like to fit at some point, but they are not direct bolt-one replacements. There are different caliper brackets (which I have), but the disks are smaller (to clear the original 13 inch wheels) and the brakes are dual circuit which requires modifications to the hard lines and brake splitters. All do-able, but a pain. I might made custom brakets so I can use the 4 pot calipers with the larger 2 pot disks and make some custom distribution blocks to make fitting the dual circuit calipers easier. Anyway, a project for another time. Got the gearbox in the shed to try and sort an annoying niggle with the gear selector. It was always tricky moving across the H-patern. It always felt a bit graunchey and would sometimes get stuck in 3-4 and not move across to 1-2. I was a bit worried that it was terminal/serious, so went digging. 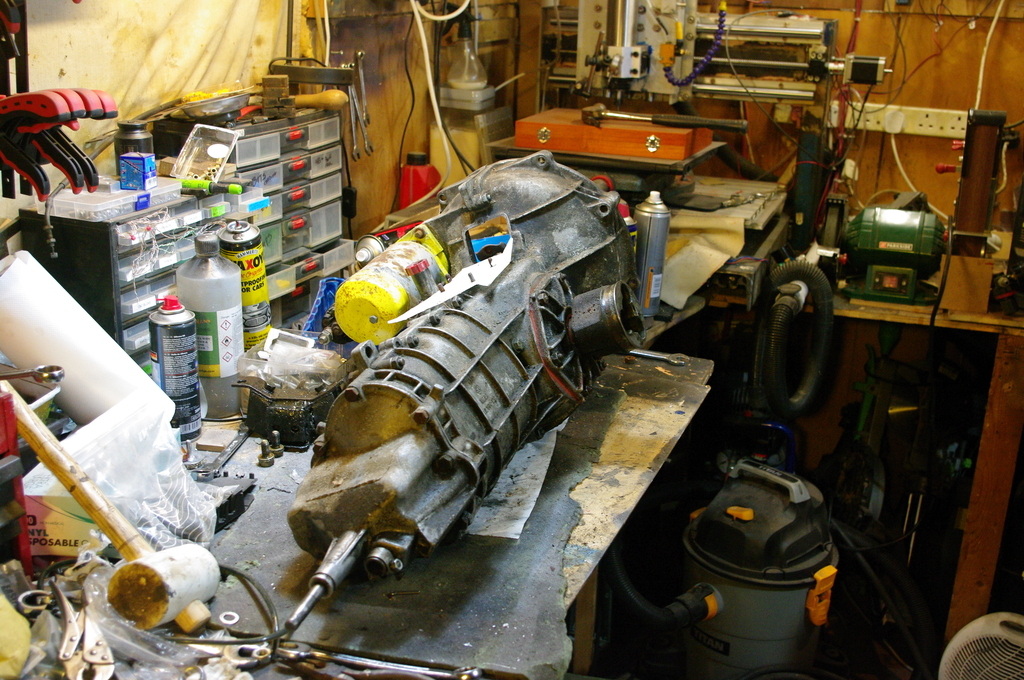 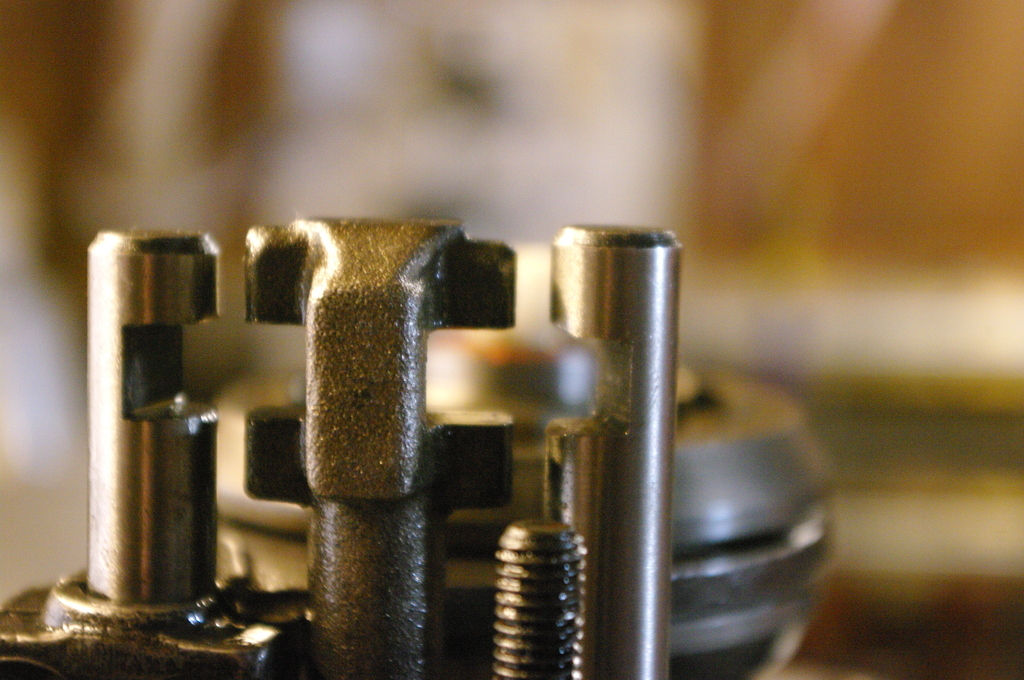 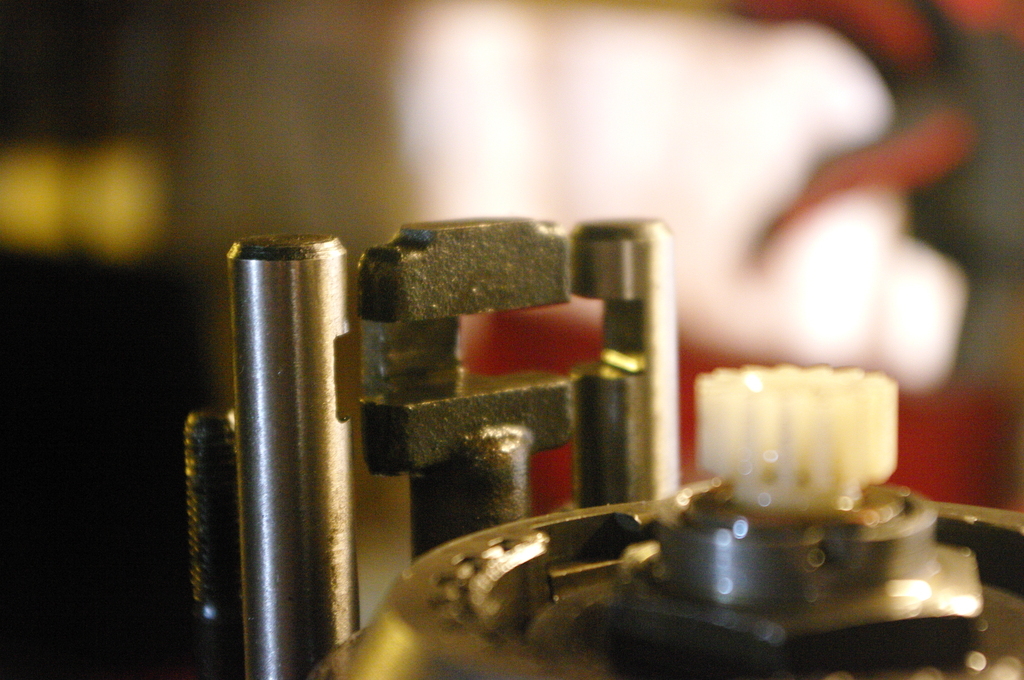 The selector fork moves between the two rods and the cast bit in the middle. It appears that they are at slightly different heights - only a fraction of a mm, but enough to cause the selector fork to catch. I couldn't see any reason why they were at different heights so instead cleaned up the end of the fork (a slight burr where it was catching) and put a small chamfer on the edges of the fork to help lead in out out a bit better (one of the rod already had a lead-in worn into it). Now reassembled with a new gasket and it appears to work better now. |
| |
Last Edit: Dec 31, 2021 22:49:49 GMT by lewist123
|
|
|
|
|
|
|
Great progress dude - looking forward to seeing this out & about  |
| |
|
|
Chris™
Part of things
  This is clearly filler material.
Posts: 519
|
|
|
|
Better than brand new! Very nice work  |
| |
1989 Volvo 340
1986 Suzuki SJ413
2000 BMW 318ti
2006 Lexus IS250
|
|
|
|
|
|
|
Thanks for the comments guys - Looking forward to finally seeing on the road too! Fingers crossed nothing too major gets in the way! The new brake pistons arrived today - looks like the risk paid off... These are ones I ordered www.ebay.co.uk/itm/274077821055and in future if the listing ends, this was what they were listed as 'for Subaru IMPREZA & LANCER EVO FRONT Brake Caliper Pistons 46mm Dia P462902' As mentioned, 46mm pistons are not avaiable in the UK - 34mm ones are, but not the single pot brake pistons. I could have imported some, but these were cheaper and available more quickly. They fitted perfectly! Hard annodised aluminium rather than steel. This is what the old pistons looked like - pitting on the sealing face probably would have resulted in leaking. 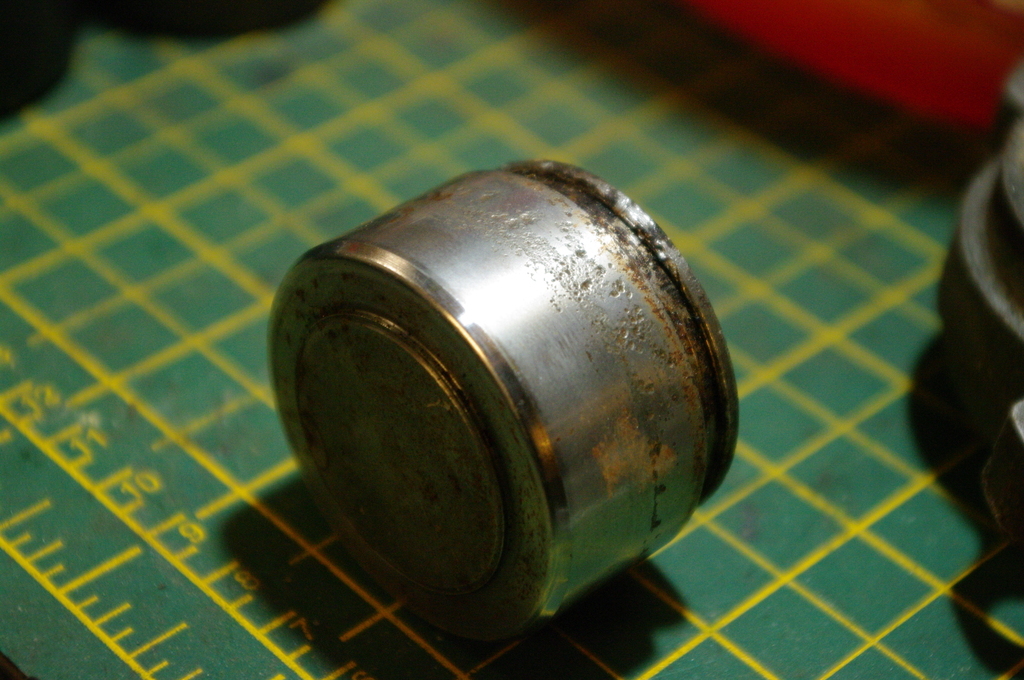 Here is an old one compared to the new ones. Some minor differnces (very slight) but the diameter and height are spot on and they fitted perfectly. 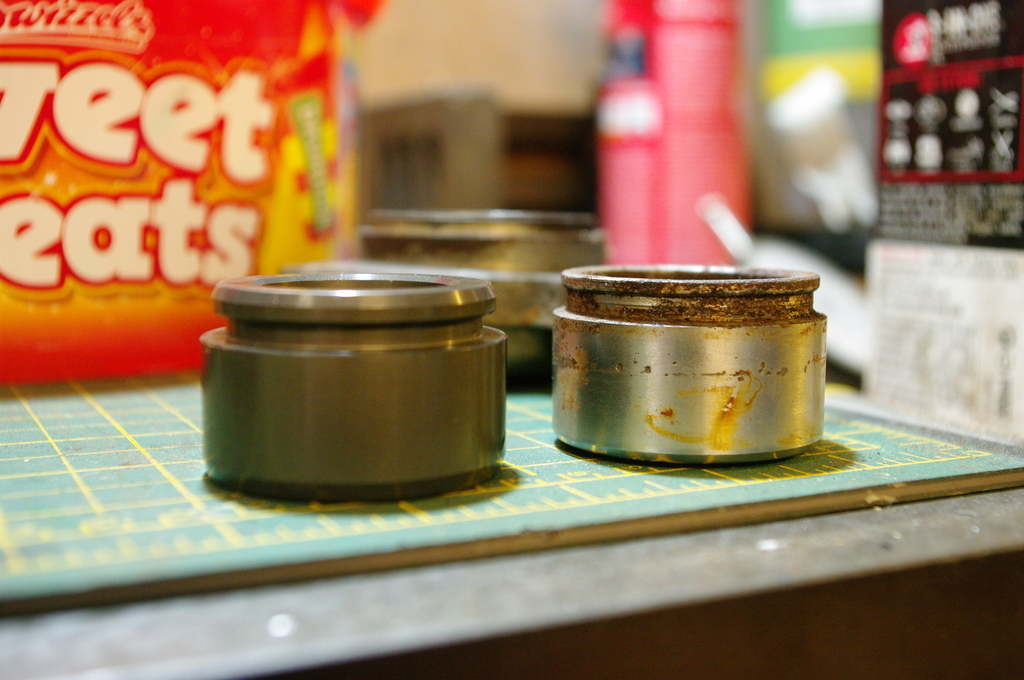 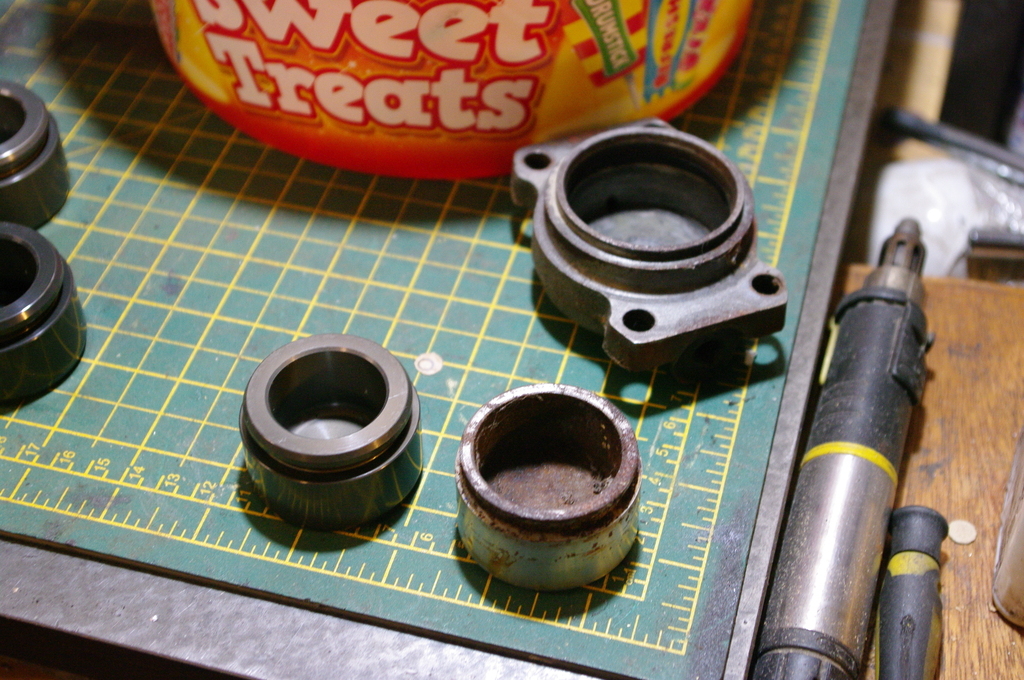 Calipers now re-built with new seals and dust covers 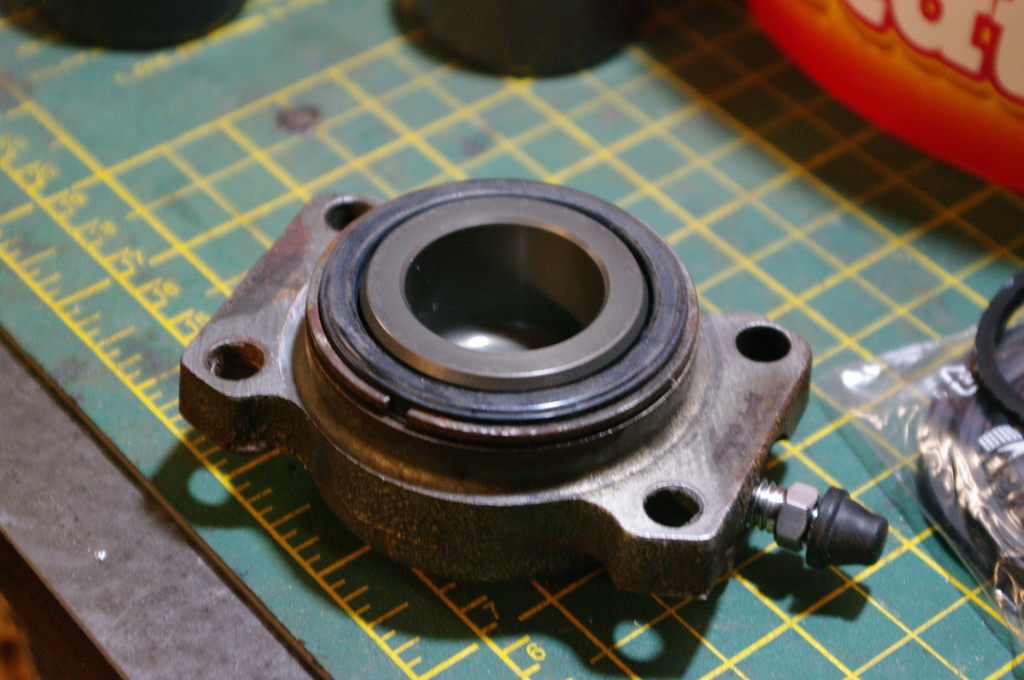 Rear brake flexis arrived as well, although a bit cold this evening to go and refit them so will save that for anther day. Gearbox all back together with a new clutch release bearing and the starter motor lubed and painted (ran out of silver and black so went with gold for some of it - only me and the MOT man will ever see it as it is burried under the back seats). New gear selector boot too. I did find that the reverse switch appears to be broken, so a new one on order (ebay). Once that arrives the gearbox can go back in; then on to the engine. 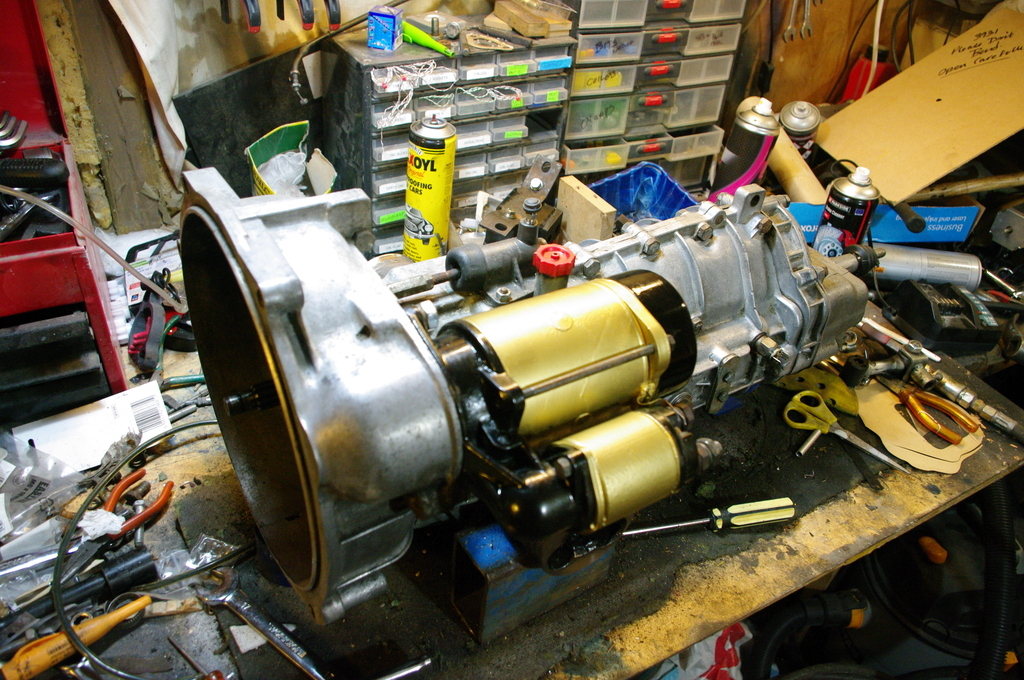 Onward! I am tempted to get it in for an MOT before trying to paint it, just in case there is a major engine setback which needs time and money to fix. Plus if I can drive it, it opens up more options for painting. |
| |
|
|
|
|
|
Jan 19, 2022 23:11:18 GMT
|
Hi all, Not much of an update - been doing a few little jobs like making sure all the various hoses, pipes, clips, cables etc are all sorted out before fitting the gearbox. Took me longer than I care to admit to get the brake pipe bracket retaining clips snapped back into place. Re-fitted the front calipers with new flexi pipes, torqued up some of the front suspension components and fitted new split pins in the castellated nuts. I still need to get final torque on the front wheel bearings, but I want to get it one its wheels and let it roll a bit first before finally nipping them up. I did manage to re-fit the gearbox and re-assemble one of the drive shaft UJs - I lost all the pins out of the needle bearings when pulling them apart before christmas. Brakes and front end... 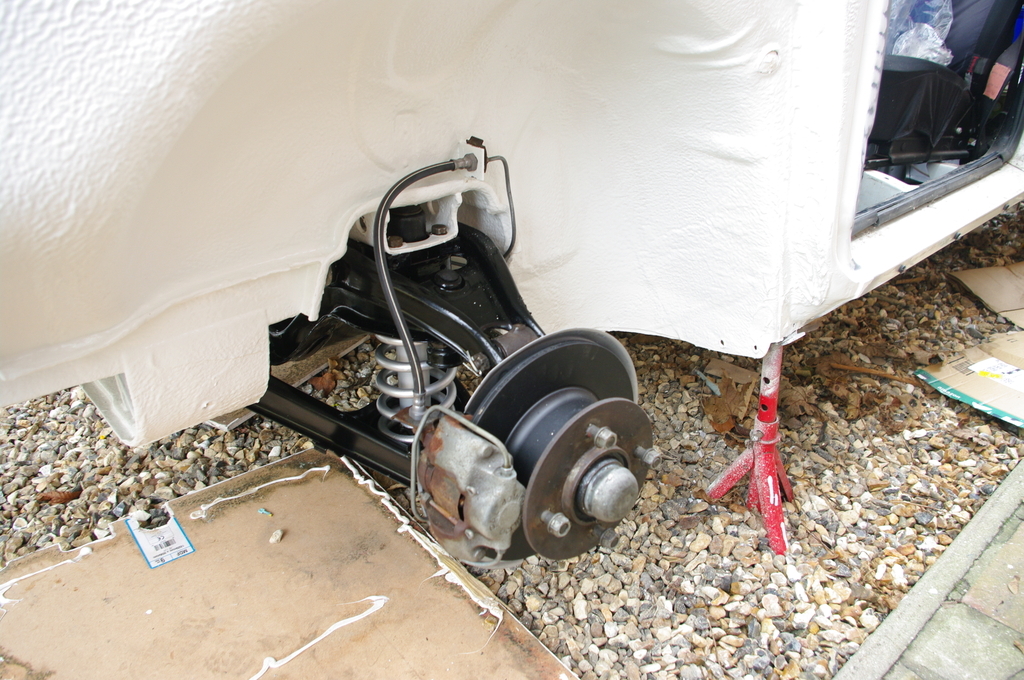 Gearbox going back in... 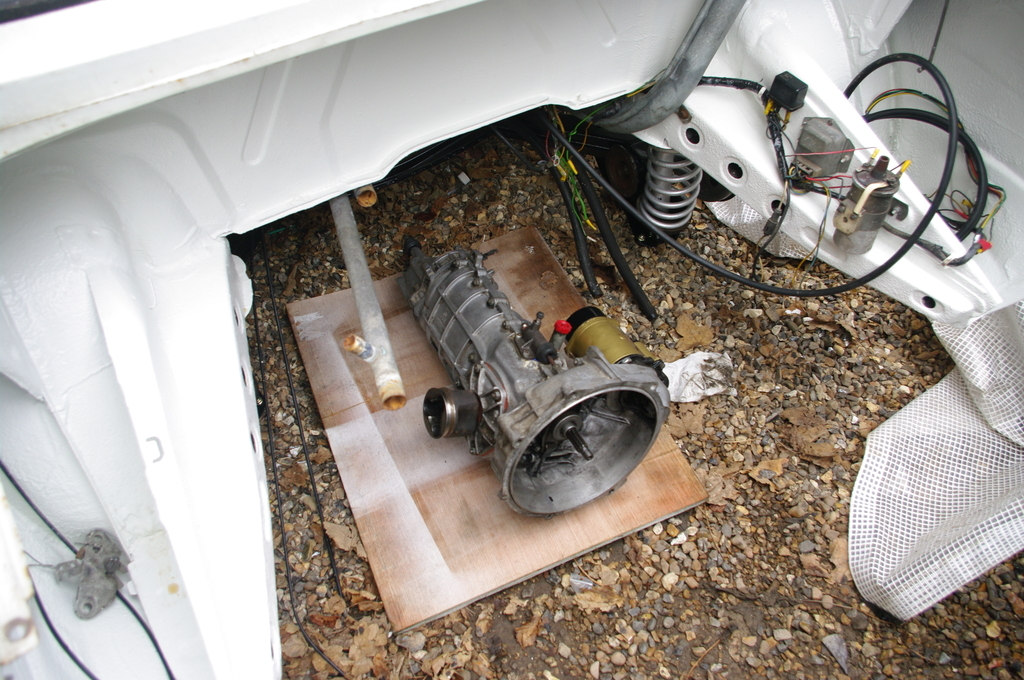 Took me WAY too long (like an hour) to get the two gearbox mount bolts re-fitted - you can't get a socket on them due to the rear subframe, and the little space between the two halfs of the fuel tank gets mega tight with lots of cables, pipes and other stuff passing through it. Due to the tight space you can't really get a spanner on or even really get my fingers in there to start the bolts. I guess the gearbox and suspension cross member should be fitted to the gearbox before installation, but that would have prevented me fitting the rear suspension until after the gearbox was installed. I forgot to take pictures, but I also made a few modifications to the gear selector linkage - like most old cars the gear selector is like stiring poridge - much of the slack is INTENTIONAL slack designed into the linkage - I guess to allow for assembly tolerances. I ended up drilling out the pressed in pivot rods, drilling out the various brackets and installing M10 sholder bolts instead with a load of o-rings and rubber shims to remove a significant portion of the slack. Gear selector feels much tighter and snappier now. I purchased the rear suspension and gearbox from someone braking an old 130 (different rear suspension) and never really paid much attention to it. However it appears that I have 2 different vintage drive shafts. One use bushes on the UJ spider bearing things, whilst the other uses needle bearings with loose pins. When I took the driveshafts out I forgot this and managed to let the bearings come apart and drop all the pins on my gravel drive. I ended up having to order 100 pins off ebay and rebuilt them. UJ with bushes on one drive shaft 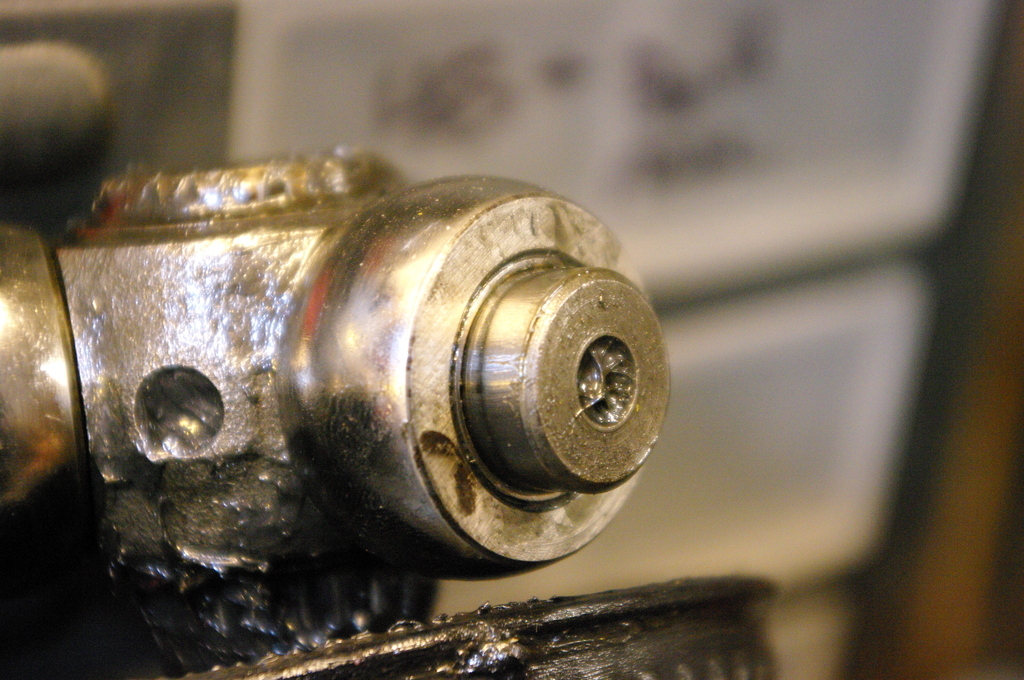 Roller/needle bearings on the other one 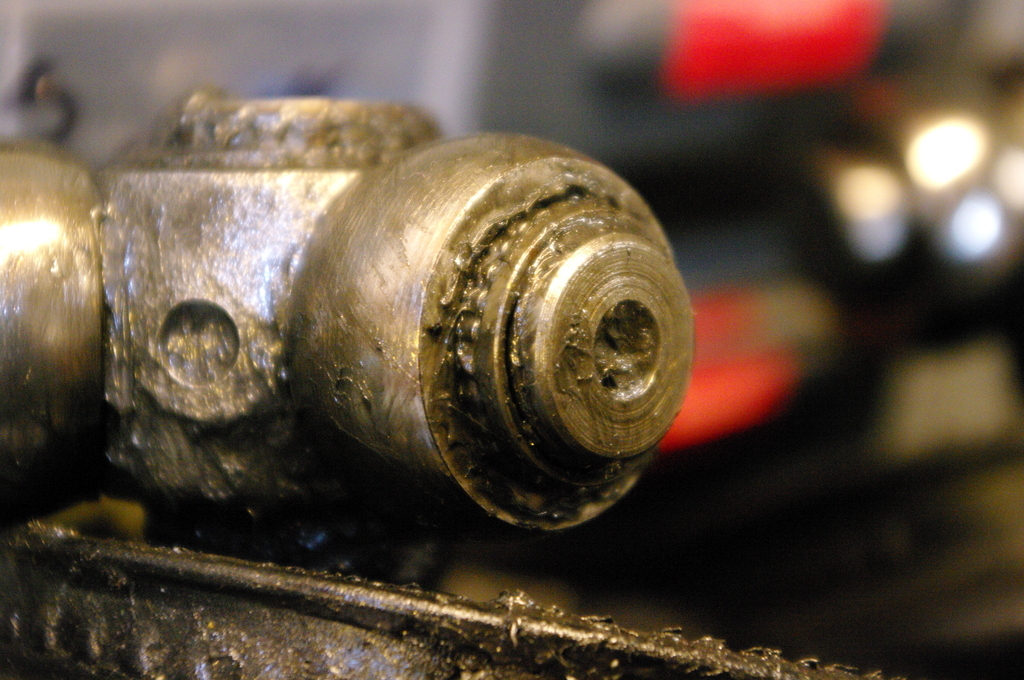 Anyway, weather has been pretty wet over the last week, but I hope to get the engine out of the storage shed this weekend, change the friction and pressure plate (already fitted a new clutch release bearing to the gearbox) and get the engine re-fitted at the weekend. Cheers Lewis |
| |
|
|
jamesd1972
Club Retro Rides Member
Posts: 2,921  Club RR Member Number: 40
|
|
|
|
|
Nice progress, especially in the cold weather.
Always thought that the rear would take more brakes and did look at a disk conversion but getting handbrake to work stopped me.
I always used to keep the engine and gearbox in one as I found it easier to put them together on the floor and then put them in as one. Not too heavy even together ! Bought a 136 rapid engine and box from a scrappy for something stupid like £100 from a crashed low miles car and it came home sitting where the passenger seat used to be and I tootled home.
Keep up the good work and updates
James
|
| |
|
|
|
|
|
|
|
Jan 20, 2022 10:05:14 GMT
|
Engine in will be another HUGE milestone, great progress dude  |
| |
|
|
thebaron
Europe
Over the river, heading out of town
Posts: 1,659 
|
|
Jan 20, 2022 14:51:05 GMT
|
Fantastic attention to the details and fair play for getting back to it with such force after the time away. You have cleared the 2 major hurdles, keeping hold of the car and starting to work on it. With your skills it's an easy run in from here  |
| |
|
|
|
|
|
Jan 20, 2022 23:57:43 GMT
|
|
Thanks for the kind comments everyone.
James - agreed, the engine and box are not very heavy but together they are too much for me to manage on my own. I can do them separately by myself but not together. I don't have an engine crane, so it is brute force and a trolly jack only!
Once the engine it, it is fingers crossed that the last little while being sat idle has not caused any major problems. I did consider taking the head off now, but figured I would get it in the car and see - I can always take it out again if needs be. If there are problems with the engine, I can see perhaps rusty bores or valve stems, so a hone, new rings and new valve stem seals. I do have a spare set of valvues in good condition if needs be, or I can still get them from Czech. I hope not and she just springs to life, but best to be prepared for the worst!
Fingers crossed for nice weather this weekend (well just not raining, cold is fine but rain is a show stopper).
|
| |
|
|
|
|
|
|
|
|
This is a great project, great to see it moving again. I'm really into weird old cars with rear engines, plus bike carbs makes the whole thing so cool. Can't wait to see it back on the road!
|
| |
|
|
|
|
|
Jan 22, 2022 20:57:42 GMT
|
Nice weather today, so managed to get the engine re-installed into the car. Here is gearbox re-fitted the other day 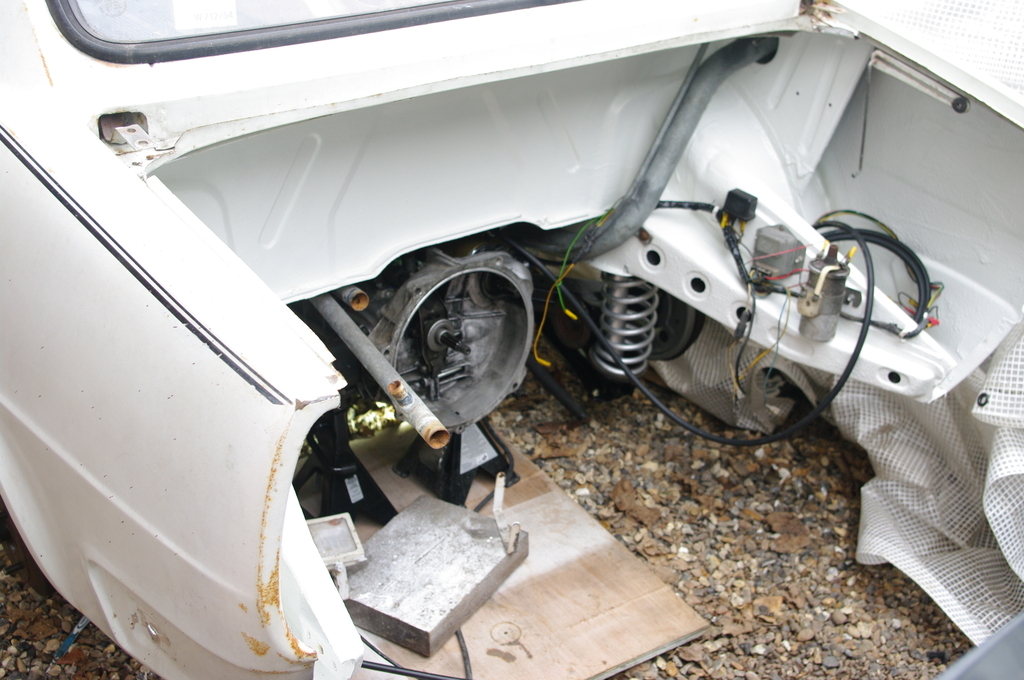 Engine out of the shed ready for a few new parts before being re-fitted. 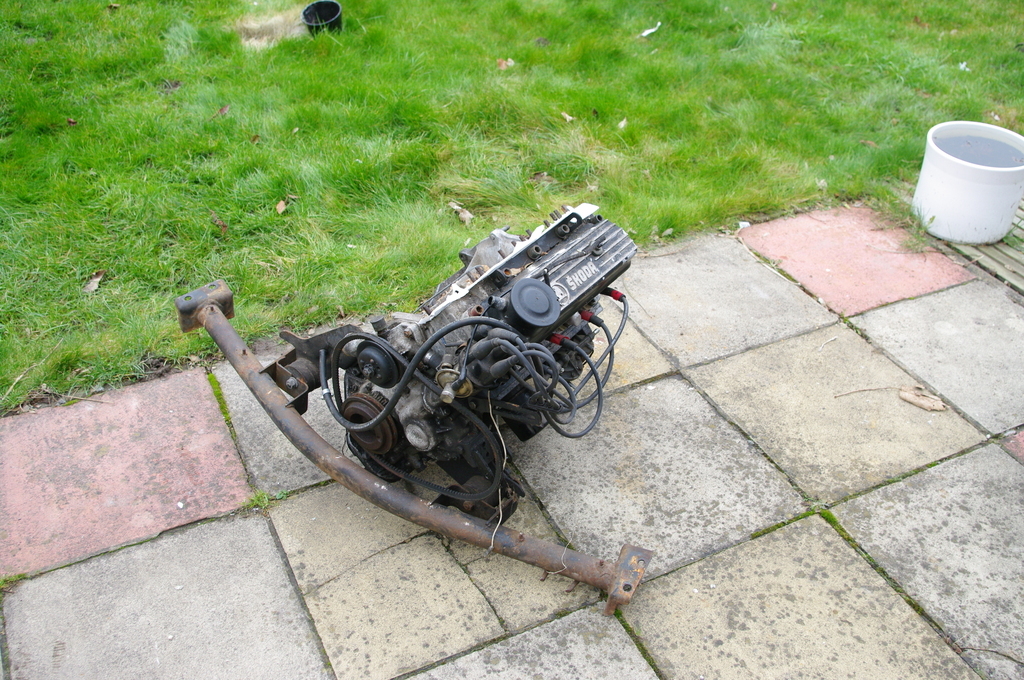 I got a clutch kit on ebay for not much money - I didn't think it needed it but seemed sensible to change it while the engine was out. 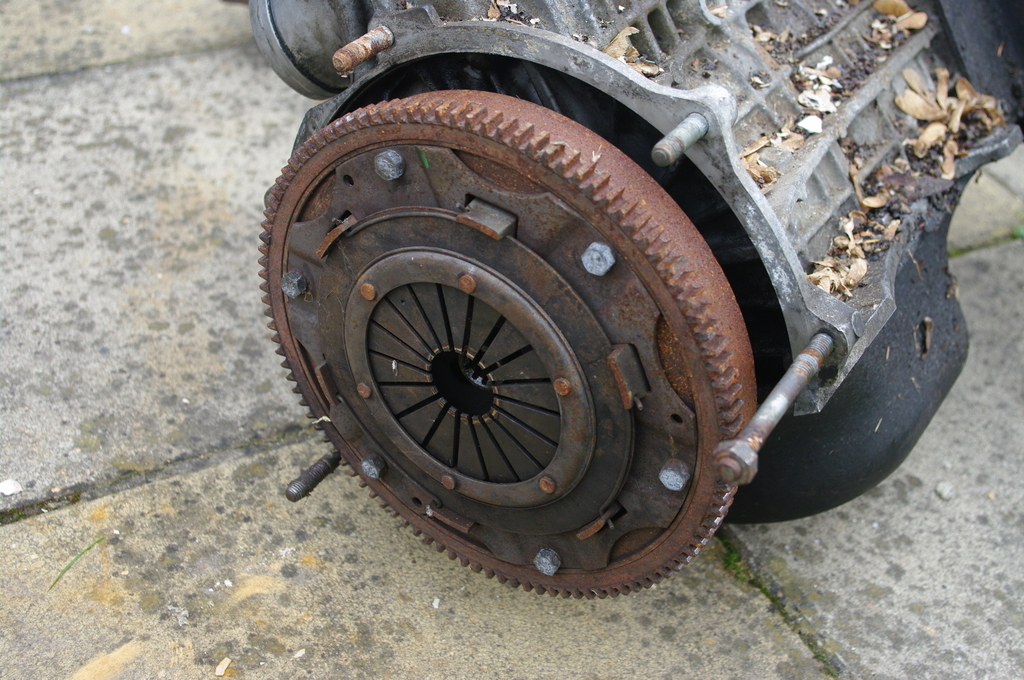 Flywheel mating surface still looks in good knick - gave it all a wipe down with brake and clutch cleaner 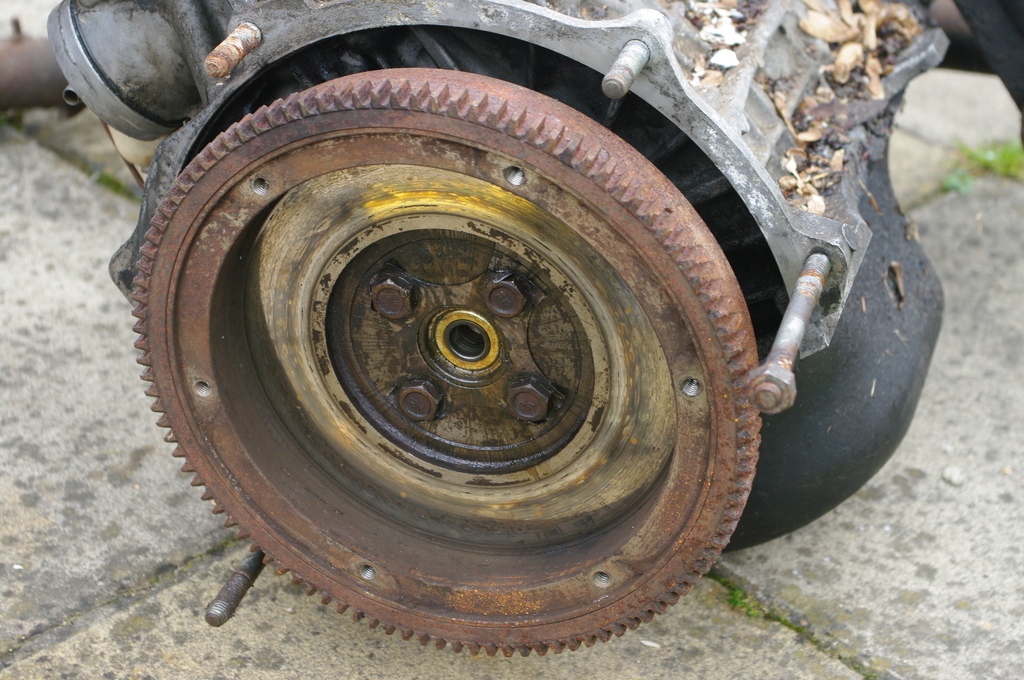 Looking at the friction plate, it did actually look quite worn - this is the original clutch from the car when it had the 120 engine so had done less than 30k. Also new clutch is a spring loaded one rather than the original solid plate so that is an upgrade I guess! 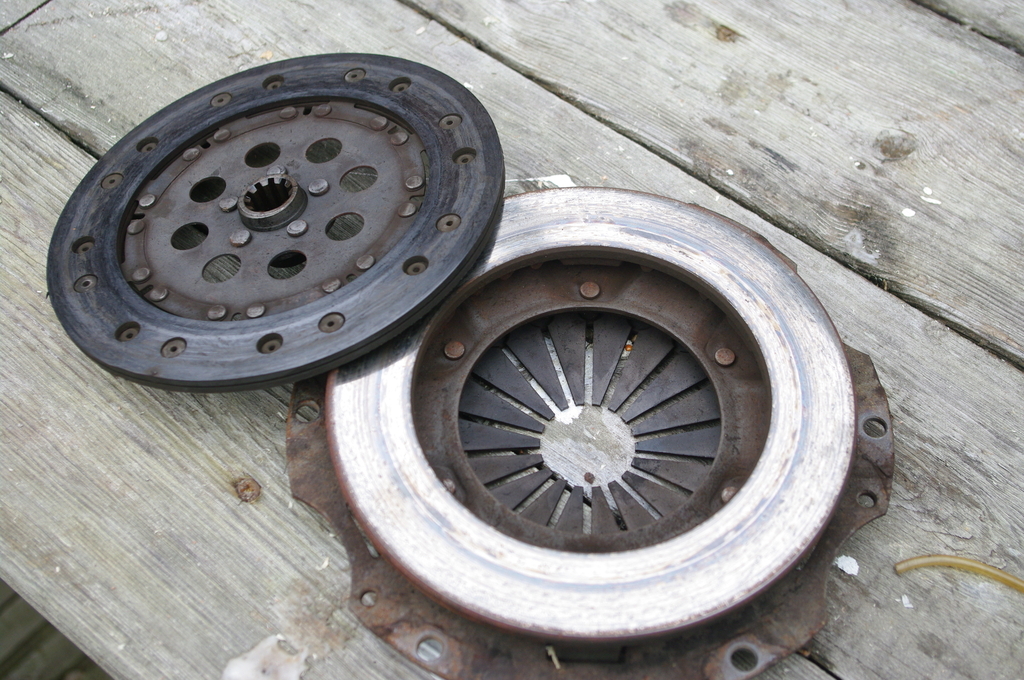 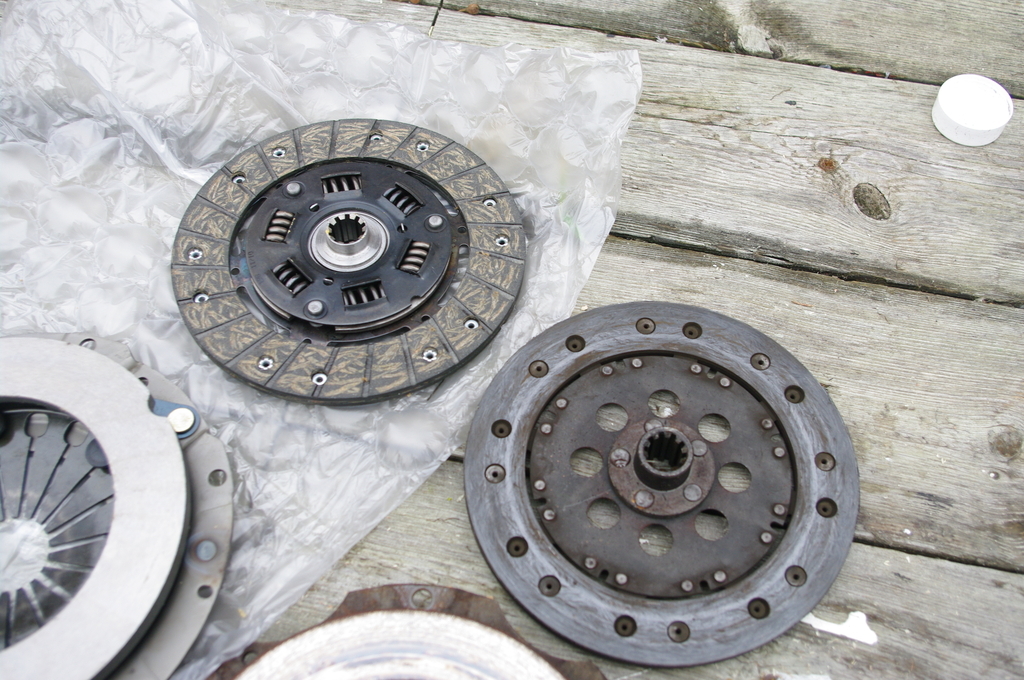 Fitted and torqued 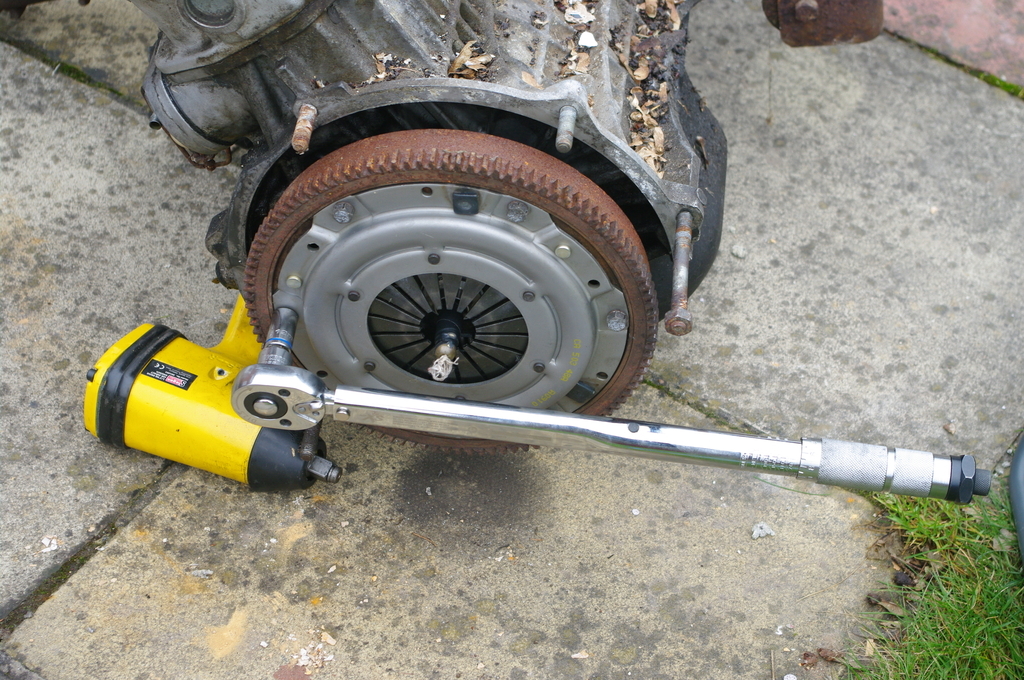 I got some new engine mounts in my parts order from Germany. Stupid me only bought 2 rather than the required 4. So fitted 2 of them and will order 2 more at some point. The old mounts had sagged over time, so when I reinstalled the new 'sport' mounts (one on each side), I turned the re-used old mount upside down so it is now sagged 'up'. Should help a bit I guess! 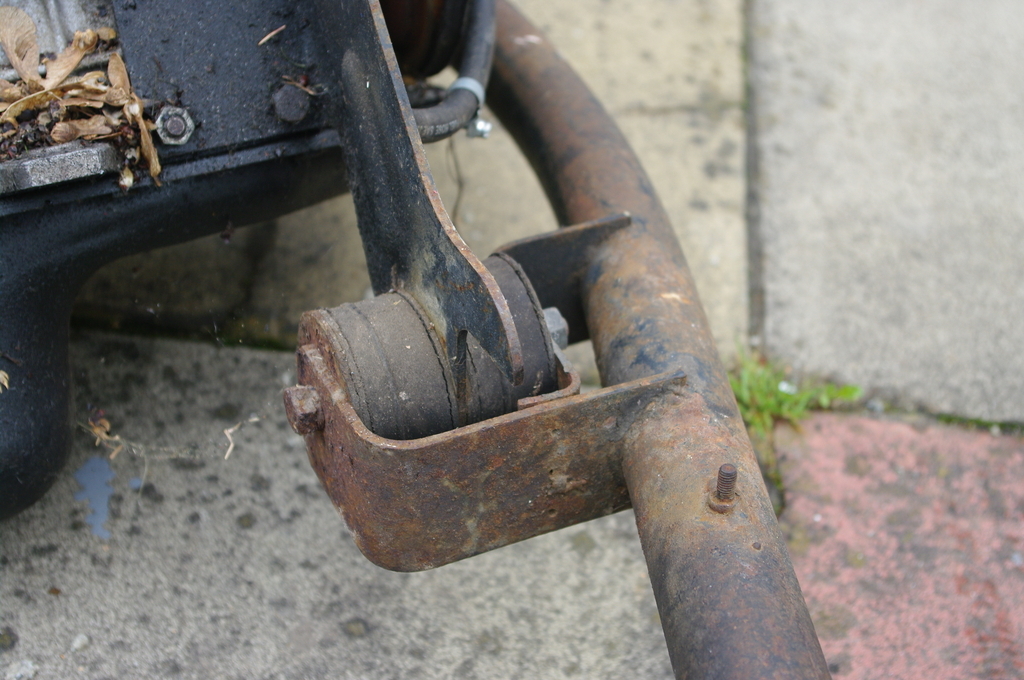 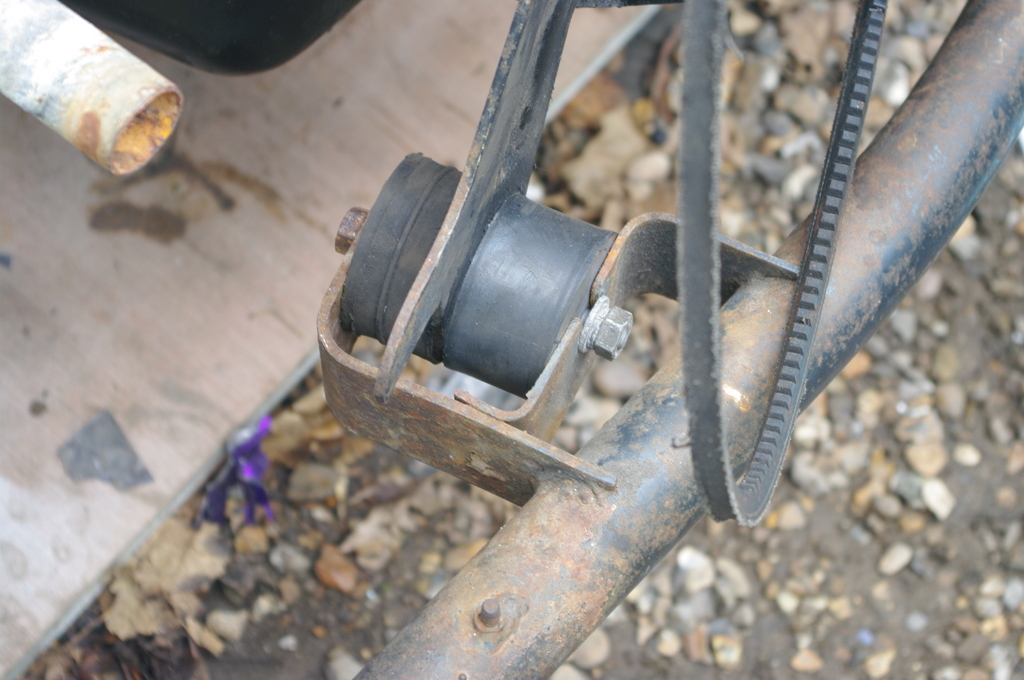 And then re-fitted the engine. 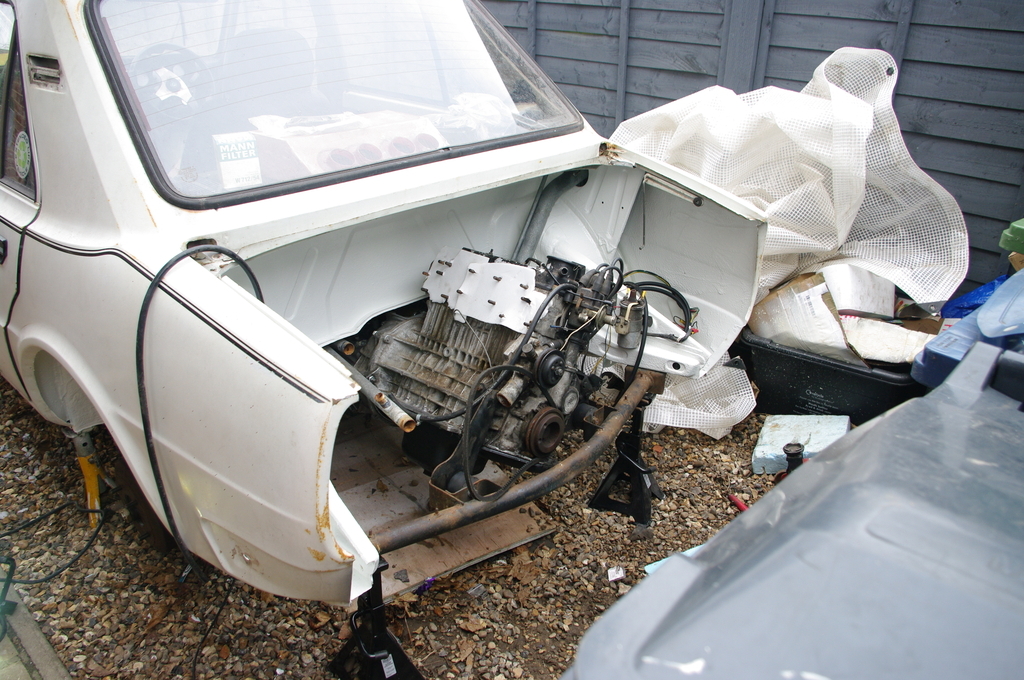 Got lots of little jobs to do over the next few days like hooking up wires, pipes etc. I can then re-fit the intake manifold, carbs and then look at skimming the exhaust manifold flanges. Will also de-grease the engine block too - spruce it up a bit. I gently cranked the engine over with a breaker bar and it was still nice and free and turned easily. At first there wasn't much compression, but after a few revolutions compression started to come back. So rings were probably a bit stuck and a gentle spin and I guess a bit of oil flowing has started to get them to re-seat. Shone a torch down the intakes and all the valve stems look good with no rust or anything, so fingers crossed it has survived my neglect without too much damage being done. |
| |
|
|
|
|
|
Jan 22, 2022 21:24:51 GMT
|
|
Wow, this car is so cool! Never seen on in person. ass-engined cars that aren't German are very rare in the States. Keep posting your efforts!
|
| |
|
|
|
|
|
Jan 30, 2022 19:14:20 GMT
|
Yeah, there are a few rear engined cars out there other than VW and Porcshe, but not that many. Not many of these left on the road either in the UK. How many left lists just a handful of each of the models. Odds and ends update... Spent the last week re-fitting various bits and bobs, ordering parts and getting a few more coats of paint on the inner wings before I bolt the wings back on soon. I couldn't fit the exhaust manifold on the CNC - not enough Z clearance, so carefully hand filed the exhaust flanges using my surface plate and straight edges as a reference. 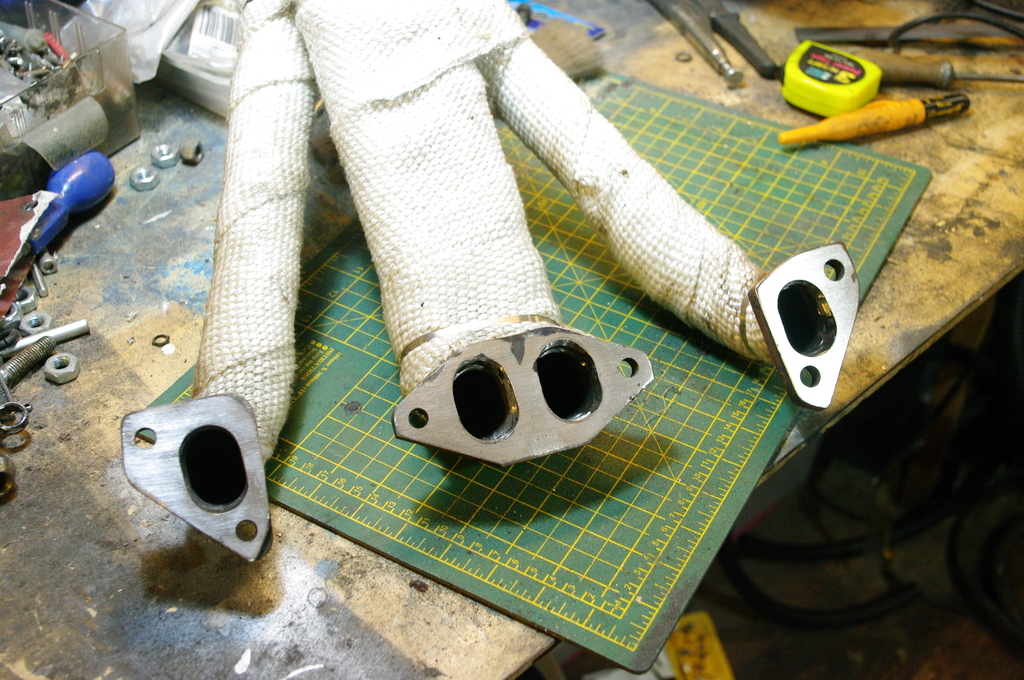 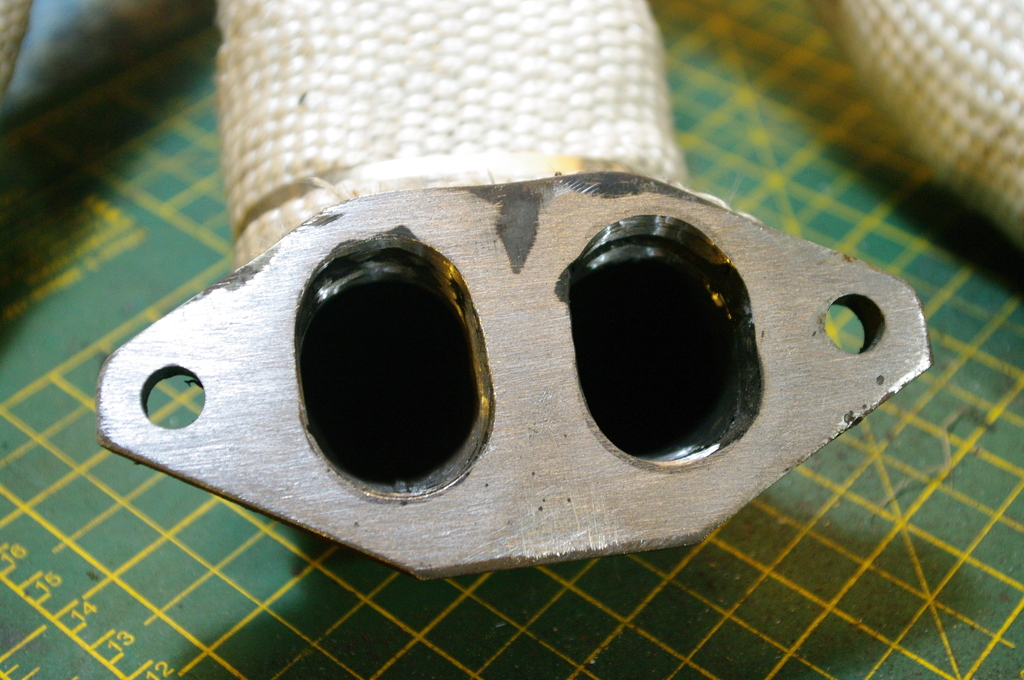 I decided I fancied 'titanium' exhaust wrap instead of white, and also wanted to wrap the back box and rest of the exhaust so ordered a load and installed it. I kept the white already on the manifold in place and wrapped over it, so the 4 branch as 2 layers and the rest of the exhaust a single layer. 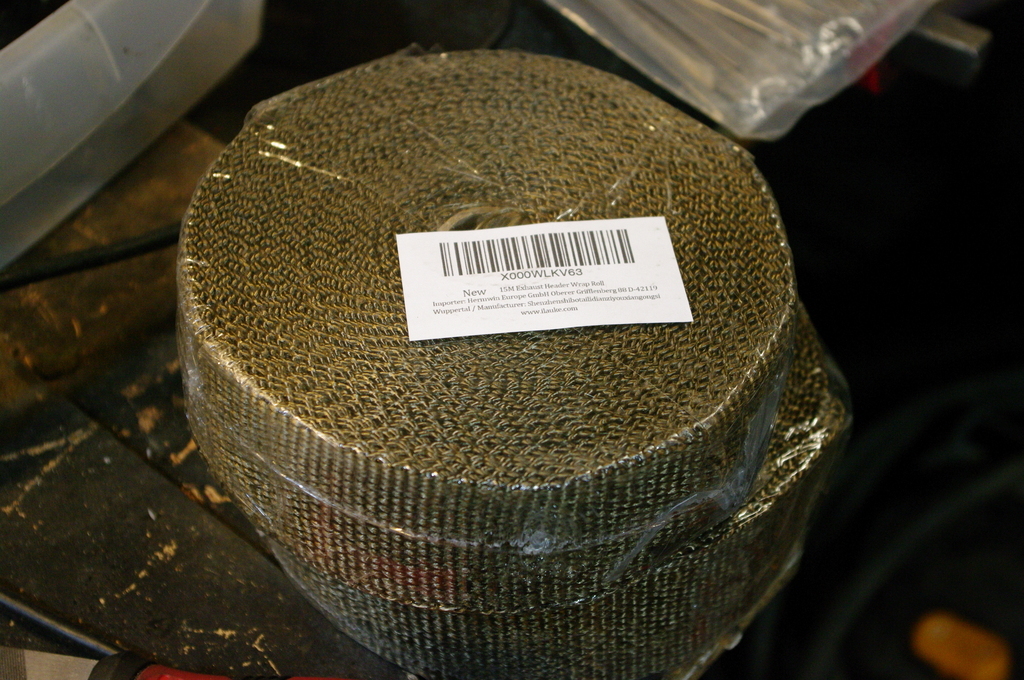 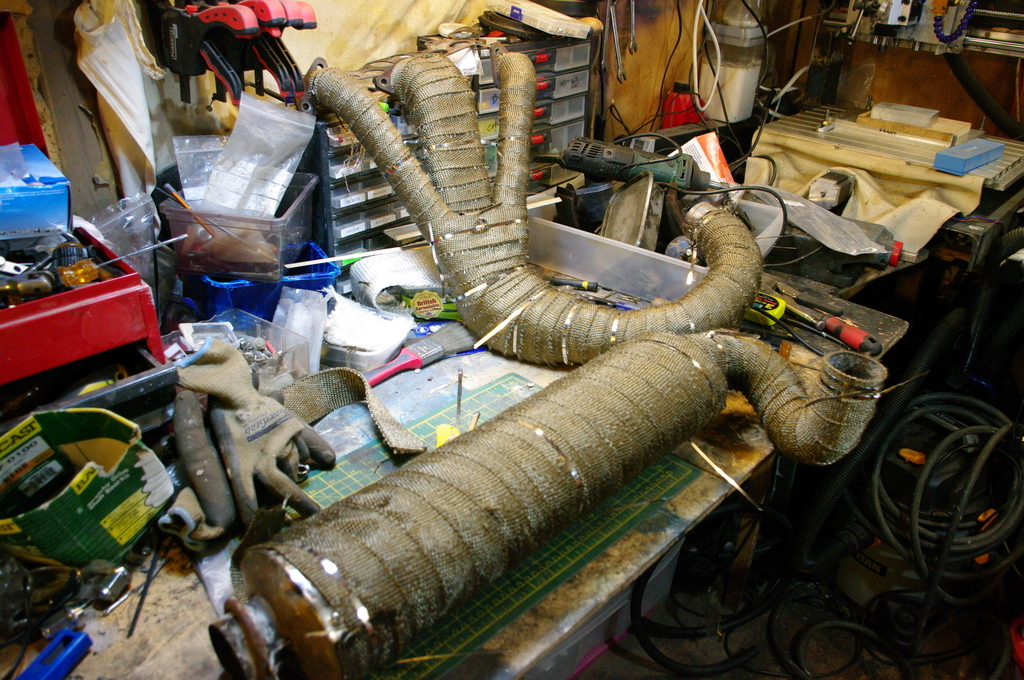 Then refitted the intake and exhaust. I also got a super cheap air filter off Amazon to see if it would fit - there is not a lot of clearance between the carbs and the boot lid, due to the angle these carbs have to sit at. I might change the carbs in the future to ones that sit more horizontal, but I am going to stick with these for the time being. 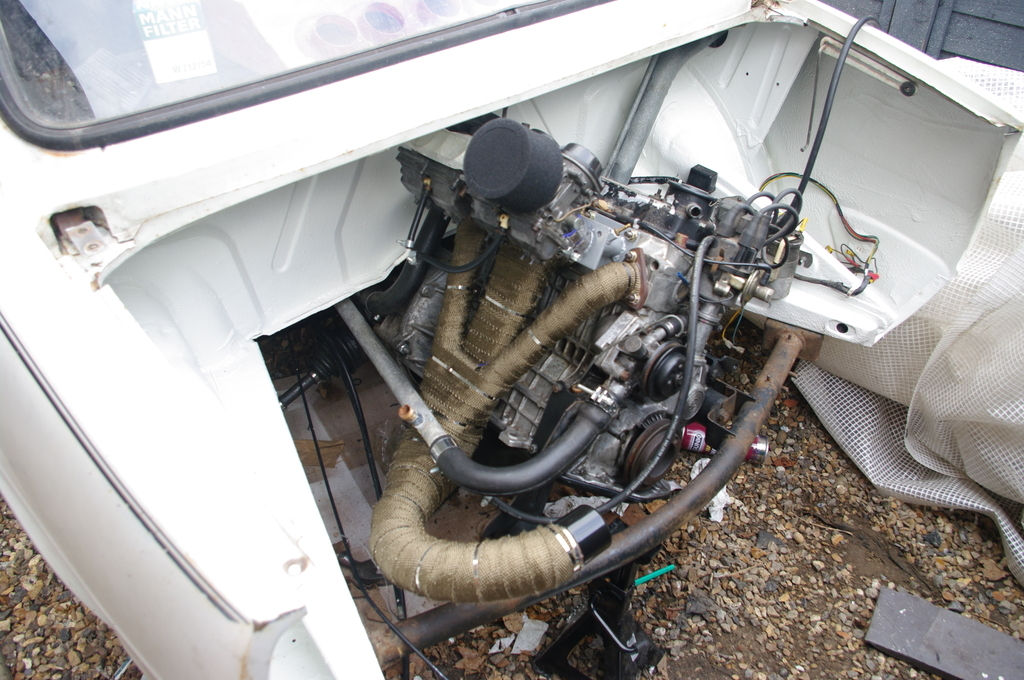 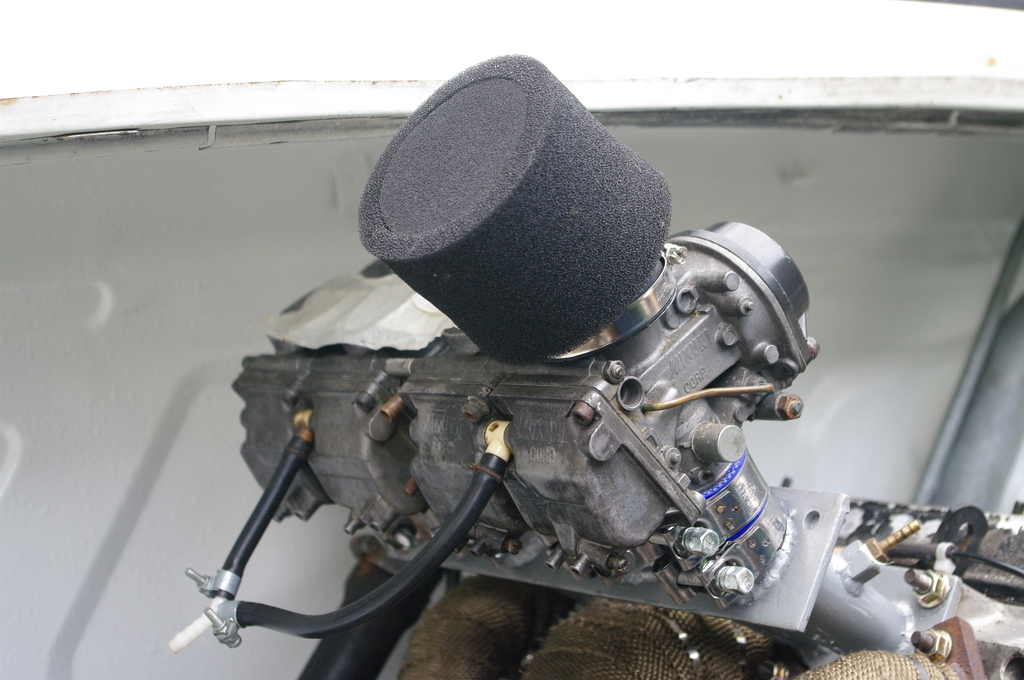 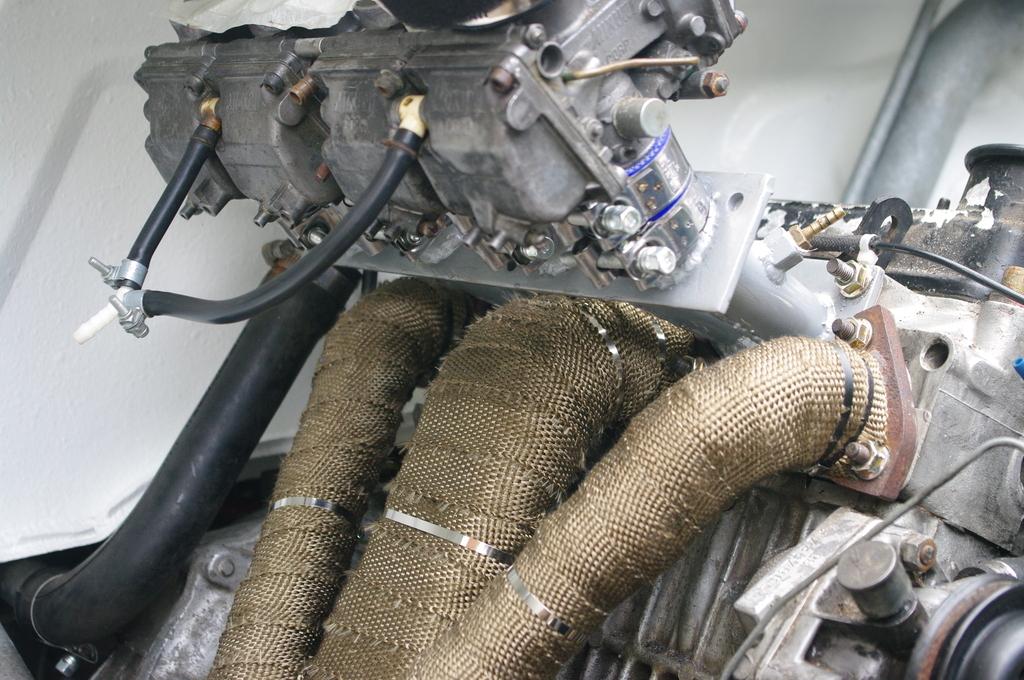 I have gearbox oil, brake fluid and some other stuff coming tomorrow. So in the next few days my plans are to finish off installing new brake hoses from the res to the master cylinders and then bleed the brakes and clutch. At that point I can probs drop it off the stands back on to its wheels. |
| |
|
|
|
|
|
|
|
Bit of an update - no pictures at the moment. Plagued by leaks! Got all the various lines, hoses etc all connected and bled the brakes and clutch. Total pain bleeding the clutch but I think I finally have it sorted. Brakes were no problem, except I noticed two leaks. One was on a front caliper had line to flexi - I have done that up a bit tigher and will need to keep an eye on it. The other leak was on one of rear hard lines and rear splitter. This is a replacement line (done before I owned the car) in copper - the rest are steel. When I stripped the hard lines off before Christmas, I noticed that the flare had failed so re-did it before refitting the hard lines. Well this flare failed again and was weeping so had to cut it off and re-flare it in place which was a total pain. Got it back on and re-bled the brakes, but I think the new flare might be leaking as well! ARGH. Had 3 fuel leaks - one on the output of the fuel pump, one on the fuel inlet connector to the carb (the seal in the carbs) and one of the float bowls was leaking. So re-did the fuel pump connection (cut off the old end and renewed the clip. I had to strip the carbs and fit spare seals (from my spare carbs) to the inlet and check, clean and re-seated the float bowl seal with a tiny smear of gasket jizz. Got the car started and warming up to bleed the coolant system. One of the new transfer pipes I fitted (amazon coolant hose) popped off. Re-tightened that and then the entire hose burst! ARGH! so off to halfords for some better hose - refitted and now sorted. What a total pain! Engine ran pretty well considering - I changed the oil and fitted a new filter as well as cranking with no plugs until I was happy I had good oil pressure. However, I have had recurring problems with it only idling on 3 cylinders. Previously it was No.2 which was cutting out, this time it was No.4. Balanced the carbs by ear but 4 is still not contributing to the idle. Appears to come to life when revving, but not at low throttle or tickover. Def a fuel problem as squirting some carb cleaner down No.4 intake at tickover brings it to life. Happy with the progress but frustrated at the brake leak issue and carb tuning. Will get there in the end, but I really don't want to have to take off the rear hard line as I will end up getting brake fluid everywhere and it is total pain to get to with the gearbox in place.  |
| |
Last Edit: Feb 6, 2022 19:00:06 GMT by lewist123
|
|
jamesd1972
Club Retro Rides Member
Posts: 2,921  Club RR Member Number: 40
|
|
|
|
|
Some frustrating progress, but still progress. Have you got a matched recess and flare and or any damage inside of the splitter ? Just remember having about 5 different options on the flaring tool we borrowed ? If not sounds like a new length of cupro nickel is in your future, but having the tools to hand its not too bad.
Onwards.
James
|
| |
|
|
|
|
|
|
|
|
Thanks for the comment James. I have a propper flaring tool and made a nice looking double flare. Perhaps last time it was too small. I tried to have more pipe sticking out when making this flare. It was definately leaking when I re-made it again this time, but nipped the fitting up a bit more earlier today and it now doesn't appear to be leaking. I hope I have now sorted the leaks in the brake pipes.
I am never quite sure how tight to do the nuts up - clearly you don't want to really lean on them, but went round and put another quarter turn on all the connectors and I think all is now good. I cleaned all the unions with brake cleaner, so will stomp on the brake pedal a few times tomorrow and go and have a look at each connector and see if they are wet. Fingers crossed.
Had another play around with the carbs and I am really confused as to what is going on. Swaped spark plugs around as well as HT leads and the problem stays with No.4 Got good spark on the plug. I checked the compression on No.4 and got about 130-135 PSI. I didn't bother checking the rest, but from my recollection 135+ PSI is about right for this engine. Checked the valve clearances when hot and there was still plenty of play (can probs close them up a bit actually).
Spark plug is wet, so clearly fuel is getting into the cylinder, but it is just not running. I take back what I said in my earlier post, and I don't actually think No.4 is working when reving the engine either.
I re-balanced the carbs and got them pretty close by ear and re-set the idle mixture. If I smother No.4 intake, fuel gushes into the carb, so it appears like the carb float bowl is full (although this was the one which was leaking the other day).
I also retract my previous comment about squirting carb cleaner down No.4 causing it to fire. I was doing this today, and saw no change to the idle (I think last time it was also getting sucked into No.3 causing the revs to rise).
So I know I have compression and spark. Fuel appears to be in the carb, but adding carb cleaner does nothing, so perhaps it is running too rich? The exhaust does smell like it is running rich - perhaps this is the unburnt fuel from No.4 getting dumped down the exhaust - bit if there is fuel getting into the cylinder, why is it not running?
I really don't want to, but I suspect I will need to take the carbs back off again and do another strip down and inspect. Bummer.
Inerstingly I had similar problems before with it only running on 3, but last time it was No.2 which was not working properly.
|
| |
|
|
|
|


