|
|
|
|
|
Hey there beetlecharles! Just browsing through google and came across this thread for the first time. It's an amazing car you have there. Your modification goals and style is almost exactly the same as my car except that I started with a 1970 1500 single-port! Remarkable, it seems that we both got the cars at roughly the same time as well, however my budget has been even tighter than yours and so less work has taken place. I still love competing in it though! Hopefully you are still on this forum and will check back here eventually. Any chance of an update? Keep up the good work! Hello! I do check over here on Retro Rides quite often although I should probably log in and actually post occasionally too.  Love the look of the wide steel wheels on your car, i'm hankering after a set myself but can't quite afford them at the moment. Updates wise... Well since I last posted I've had an extensive lightening session to increase my power to weight ratio. I've managed to source a nice period Reece Fish carburettor: 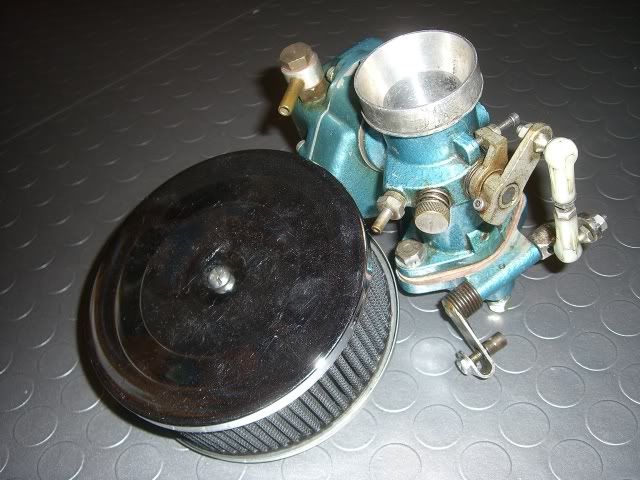 Some more stickers have found their way onto the increasingly rubbish paintwork and I've added a Kamei rear spoiler too. 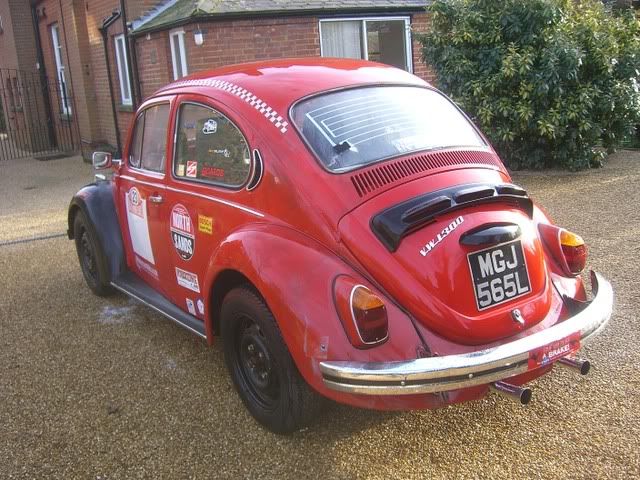  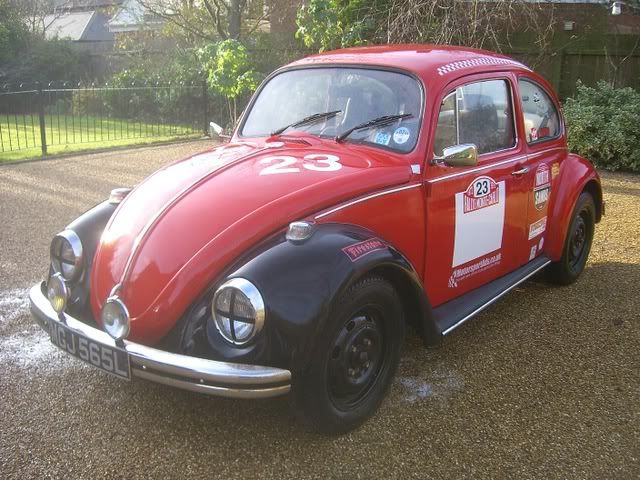 Thats all... For now.  |
| |
Last Edit: Feb 9, 2009 13:09:08 GMT by oldspeed
|
|
|
|
|
|
|
|
|
|
The Reece Fish looks very nice, although I haven't heard of it. The only period aftermarket beetle carby I've heard of is the Holley BugSpray. I'm keen for Webers on decent manifolds when I can afford it.
Where did you route the wires for your tacho, do they run down the left side near the heater channel with all the other wires? I want to put a tacho in mine but for some reason have been too scared to drill holes and cut the dash up. Will have to bite the bullet at some stage and rip into it!
|
| |
|
|
|
|
|
|
|
|
Quite apart from the great work youre doing on your Bug, especially with your limited budget, what a nice change for a young person to be so articulate and write using proper words and punctuation!!! Well done - keep it up - and the sterling work on your car!
|
| |
|
|
|
|
|
|
|
The Reece Fish looks very nice, although I haven't heard of it. The only period aftermarket beetle carby I've heard of is the Holley BugSpray. I'm keen for Webers on decent manifolds when I can afford it. Where did you route the wires for your tacho, do they run down the left side near the heater channel with all the other wires? I want to put a tacho in mine but for some reason have been too scared to drill holes and cut the dash up. Will have to bite the bullet at some stage and rip into it! The 'Fish was a UK made carburettor produced by both Minnow and Reece but only in small volumes so I'm not suprised you haven't heard of it. Twin Webers are a good solution but not cheap! And yeah my tachometer wires run alongside the main wiring loom down the side of the car to the engine. Luckily there was already holes all over my dash so I didn't have to worry about chopping it up! Quite apart from the great work youre doing on your Bug, especially with your limited budget, what a nice change for a young person to be so articulate and write using proper words and punctuation!!! Well done - keep it up - and the sterling work on your car! Thanks for the compliments. ;D Anyway so not much has happened with the bug recently as I've only been doing boring jobs like renewing the brake master cylinder lines etc. But this weekend I finally got myself a long overdue set of new (second hand) wide steel wheels and nice Goodyear tyres. 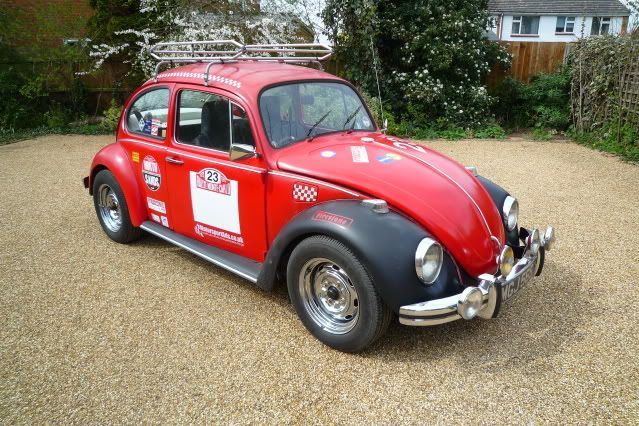 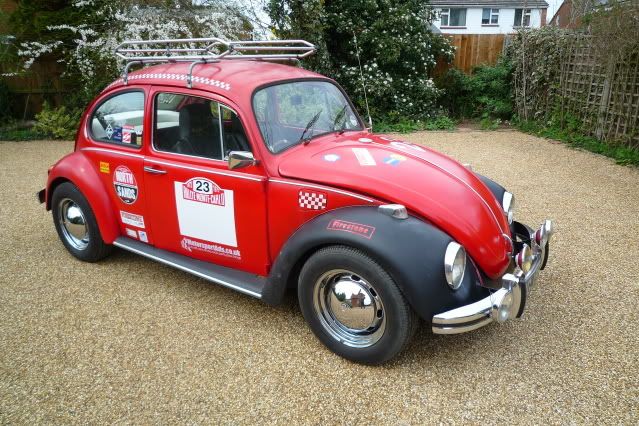 The question is... hub caps or no hub caps? |
| |
|
|
LAndy
Posted a lot

Posts: 1,061
|
|
|
|
|
no hub caps!
great looking beetle!
|
| |
Previous retros: 92 AX GTi 92 Scirocco Scala 94 80 sport 87 Golf Cab GTi Current retro: 1965 Clark Cortez YouTube Website Instagram |
|
|
|
|
|
|
|
Hubcaps off, I think. It'll be a waste of good chrome, but I reckon you should paint these new ones black like the old ones - they really suited the style of the car.
|
| |
|
|
|
|
|
|
|
no hub caps! great looking beetle! Cheers and yeah I'm leaning towards no hub caps. Hubcaps off, I think. It'll be a waste of good chrome, but I reckon you should paint these new ones black like the old ones - they really suited the style of the car. Yeah I agree the black worked well with the rest of the car. Shame these rims are chrome really as it makes them a pain to paint over. I think I'll just wait until all the curse word Brazilian chrome turns to rust and then paint them when theres a key for the paint to stick to. Chrome with no caps can look alright though:   |
| |
|
|
|
|
|
|
|
Hub caps off it is! 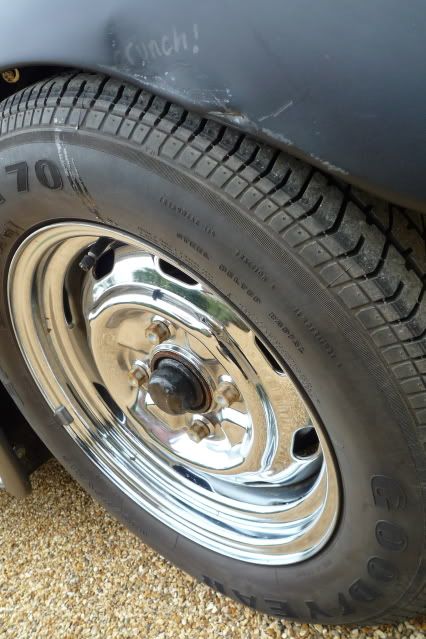  ;D |
| |
|
|
|
|
|
Apr 21, 2009 20:30:02 GMT
|
nice stuff what sort of go are you expecting from the turbo? |
| |
Lets clear up car terms:
"Understeer" is when you hit the fence with the front of the car.
"Oversteer" is when you hit the fence with the rear of the car.
"Horsepower" is how fast you hit the fence.
"Torque" is how far you take the fence with you.
|
|
|
|
|
May 30, 2009 21:16:23 GMT
|
nice stuff what sort of go are you expecting from the turbo? Lots.... eventually. Turbo / EFI plans have had to be shelved due me being a bit overambitious on the insurance front.  BUT the parts are still there for future use and I'm now in the process of putting together a new and more importantly more powerful engine: 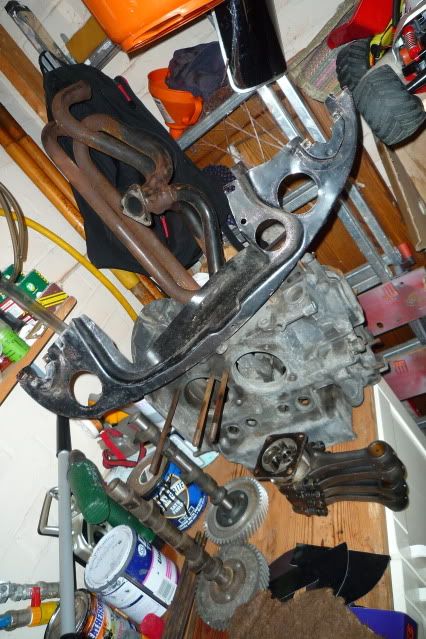 I have also set the steering alignment myself recently and adjusted the front suspension for maximum negative camber which improves handling and tucks the top of the tyres under the wing edge. The other day my mate David came round and I showed him how to service his car and saved him a packet on what garages were quoting. Boring old Astra actually proved to be quite easy to work on. 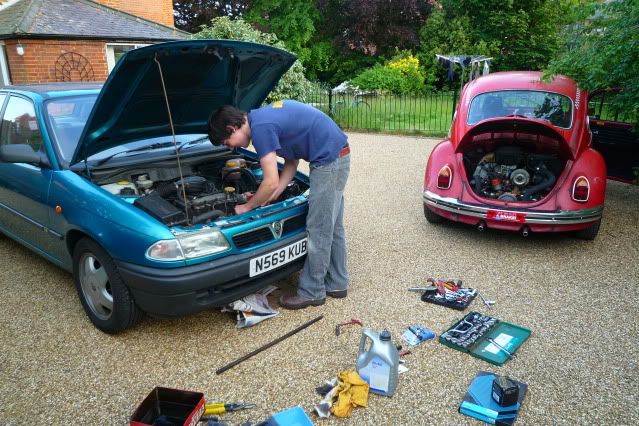 Then a mysterious package arrived containing two brand new Hella 1303 / Mk1 Golf H4 headlamps. Al Kaholik from Volkszone had seen my moaning about my knackered old lamps and kindly sent me these: 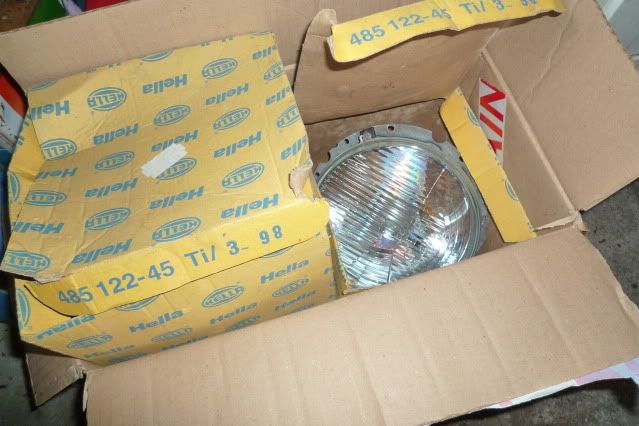 With a bit of messing around I soon had them adapted to work with the earlier beetle headlamp rims etc and now I have BRIGHT lights for the first time evar... 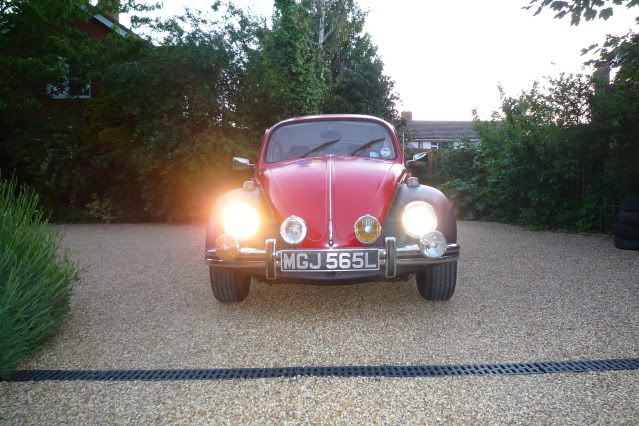 ;D Having replaced all the electronic fuel gauge components at least once and it still being utterly curse word I bit the bullet and converted to the cable operated system earlier bugs had as standard and it works a treat. 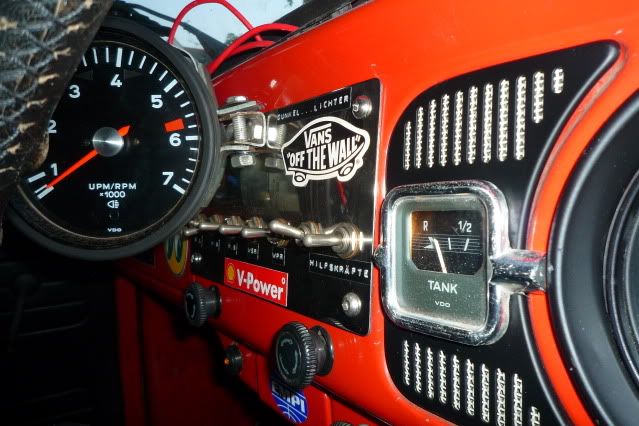 I hate using incorrect year parts but this was a case of function over form as was the black paint on the dash grills with early chrome strip... 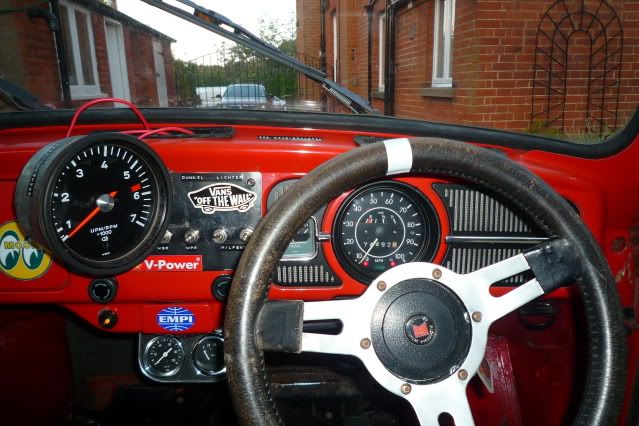 Finally I am in the process of adding oil pressure and temperature gauges under the dash and have just rebuilt the Porsche 914 tachometer as the needle was sticking against the dial face. |
| |
Last Edit: May 30, 2009 21:17:47 GMT by oldspeed
|
|
|
|
|
|
|
May 30, 2009 21:23:09 GMT
|
Since my previous update I have also done a few other bits and bobs. Stripped sound deadening from rear boot floor ready for painting etc: 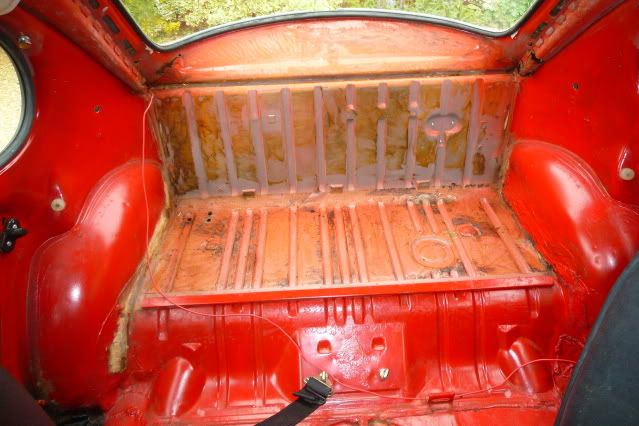 Luckily its mostly rust free. Pulled several kilos of water trapping expanding foam and sound deadening out of here there and everywhere: 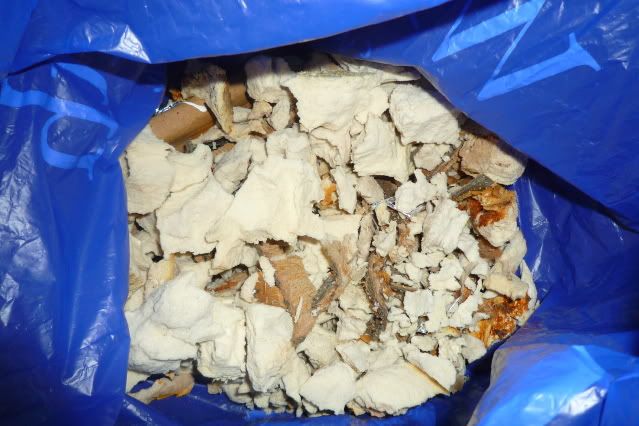 Did some extensive lightening: 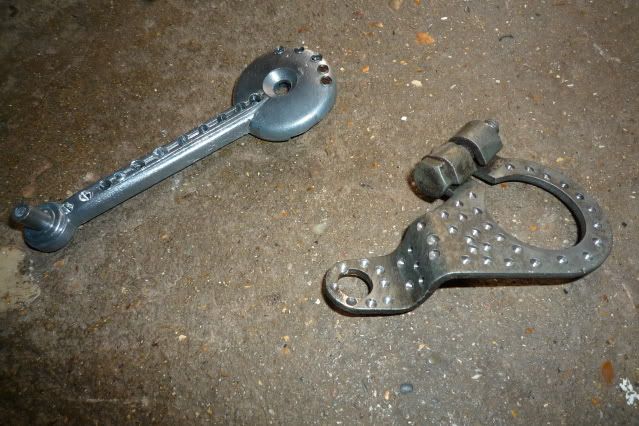 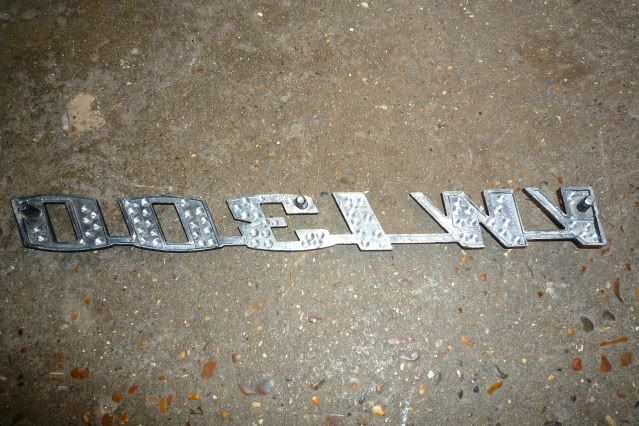 Set tracking: 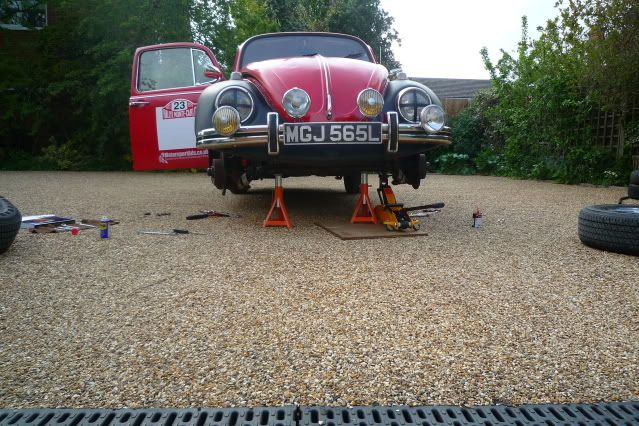 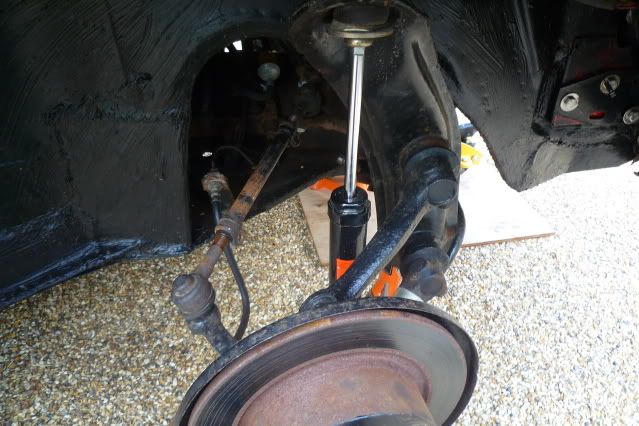 Blacked out the rear badge: 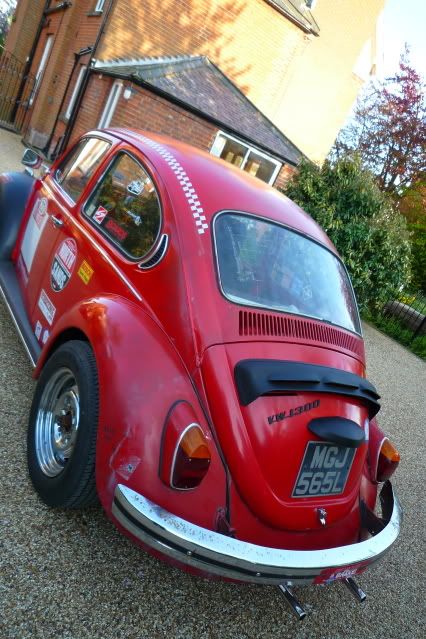 And thats pretty much it for now folks. 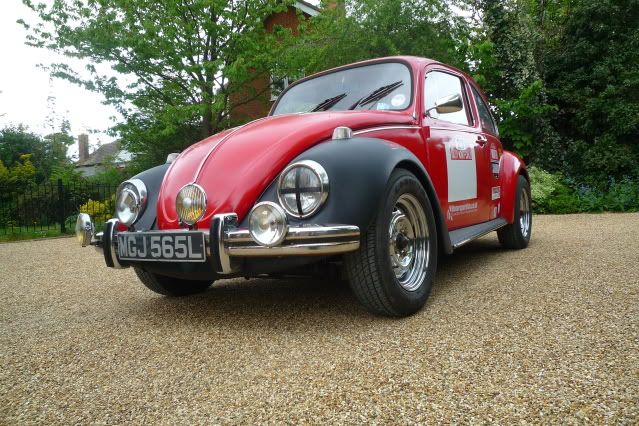 Got to get back to revising for my impending A level exam death.  |
| |
|
|
|
|
|
|
|
|
Looks good, and glad to see that nasty foam out of there. I had to laugh at the badge-lightening though, hilarious! Not only would that only save about 3 grams but if you were really going to be that hard-core you would take the badge off and save 50 grams! ;D
|
| |
|
|
|
|
|
|
|
Looks good, and glad to see that nasty foam out of there. I had to laugh at the badge-lightening though, hilarious! Not only would that only save about 3 grams but if you were really going to be that hard-core you would take the badge off and save 50 grams! ;D Cheers, glad you picked up on the badge joke! ;D Next job on the weight saving (redistribution really) front is to replace all the windows bar the windscreen with lexan. Another job on the list is to construct a subtle front air dam to help high speed stability with provisions for an external oil cooler and brake cooling ducts. A splitter will run from this under the front of the floor pan to smooth airflow in the front suspension area and act as a skid plate. |
| |
|
|
|
|
|
Aug 22, 2009 21:53:37 GMT
|
Since the last post I've done a fair bit to the Beetle. Firstly I tidied up the dash and ditched some of the stickers for a more original look: 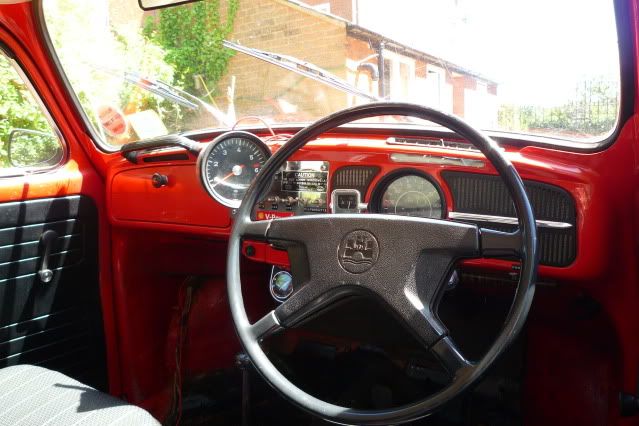 Then I got my £75 bargain Gold so I was a bit busy fixing that up. It was MOT time when I turned my attention back towards the Beetle and sadly after doing a few of the usual checks I found this: 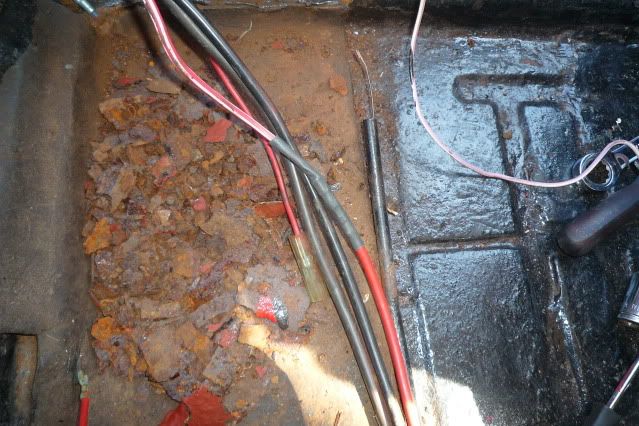 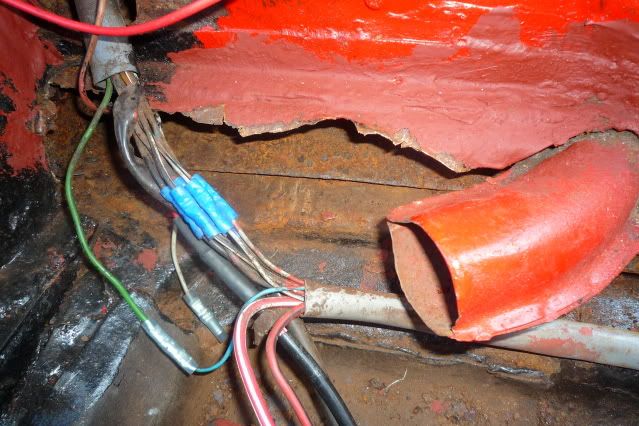 WTF! My heater channels do not have closing plates! So I've been driving round in a car thats barely secured to its floor pan... 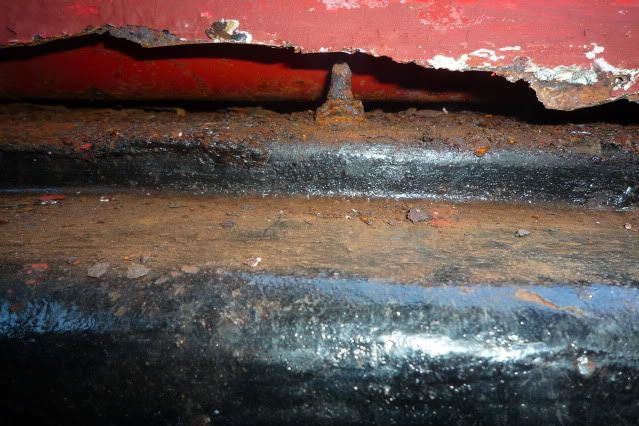 Looks pretty solid but its all welded together and bodged: 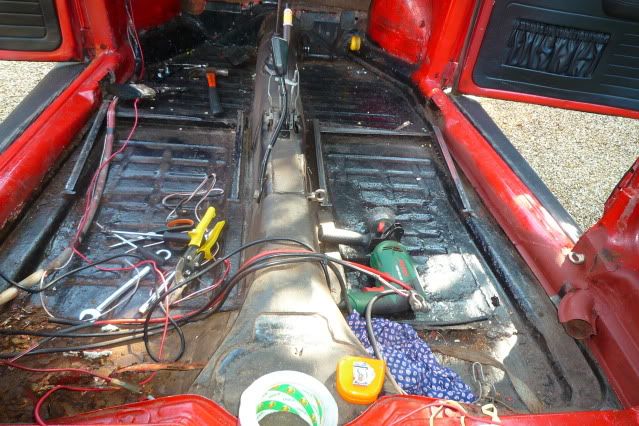 Both heater channels are welded to the floor pans at the front, the drivers side front quarter has accident damage and is very out of shape, the passenger side front quarter has already got an inner arch repair on it and its very out of shape. Both door posts have been badly remade out of thick sheet metal and covered in filler. One of the B posts has turned out to be non existent under filler and the other is plated over. Finally the rear cross member corners are already a patchwork and the front bulkhead is bodged where it joins the heater channels. Problems: 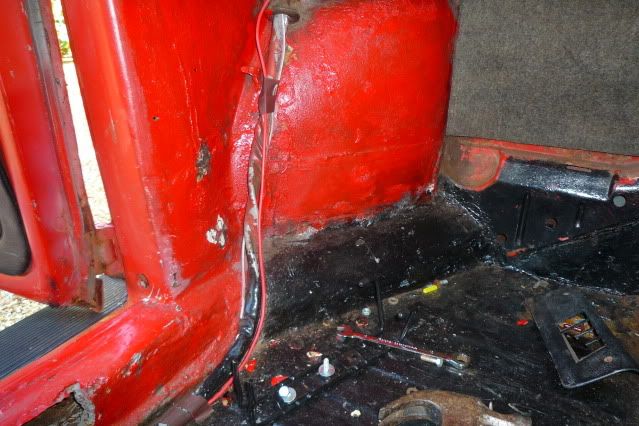 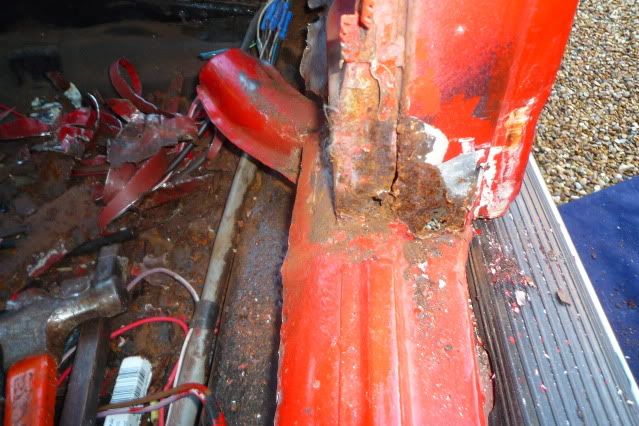 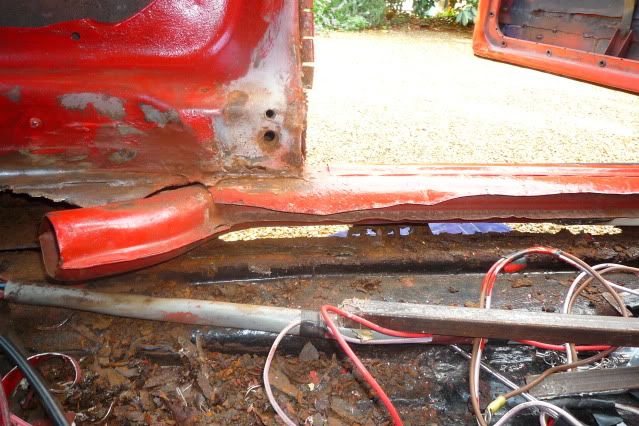 Poke poke poke:  So basically I've got nothing good to weld to... And I haven't used a welder in 5 years... I don't have any of the necessary tools and I have almost no money. This is going to be fun... |
| |
|
|
|
|
|
Aug 22, 2009 21:58:24 GMT
|
So I started stripping the car down: 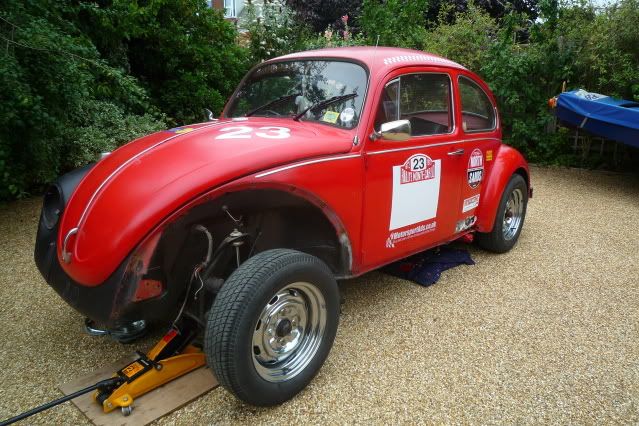 Rear quarter has been badly repaired in the past, it seems the lower panel is mostly held on with 1/2" thick filler... 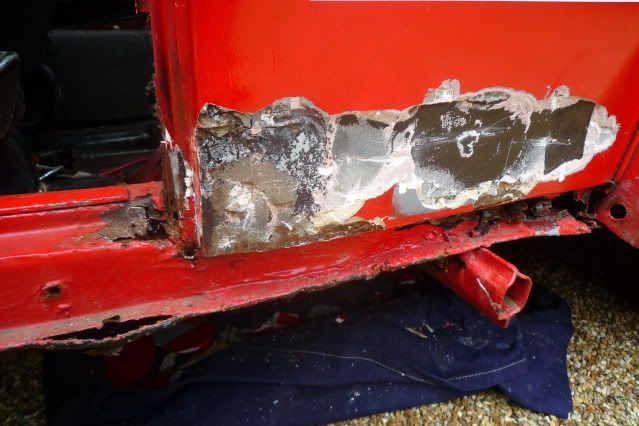 Inner arch looked ok. The front bumper mounting and captive nuts are pretty good. 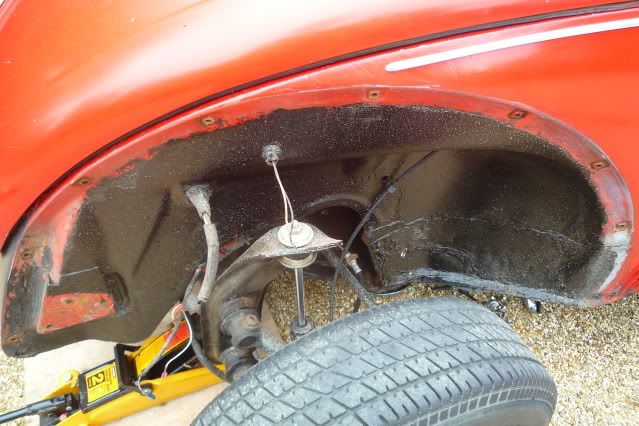 ... BUT. After further investigation...(Bear in mind I'm yet to use any power tools on this car, just a cold chisel, screw driver and hammer!) I found this... 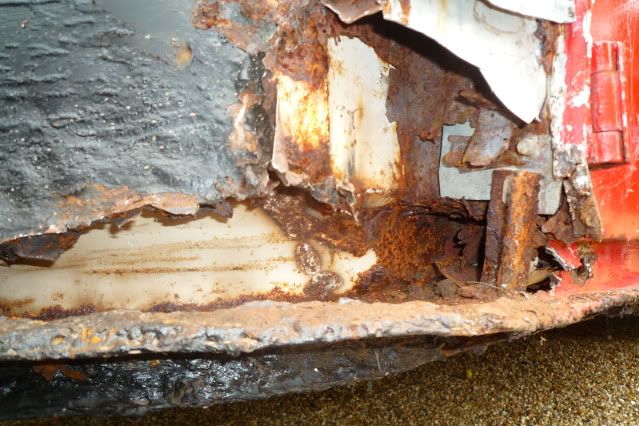 It seems my beetle doesn't really have heater channels at the front, or an A pillar. Just sheets of metal welded (in places, attatched with filler in others) to the inner wings and then to the floor pans. Ooops... 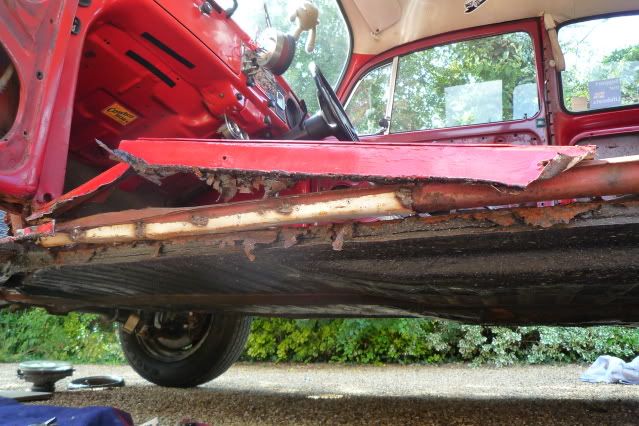 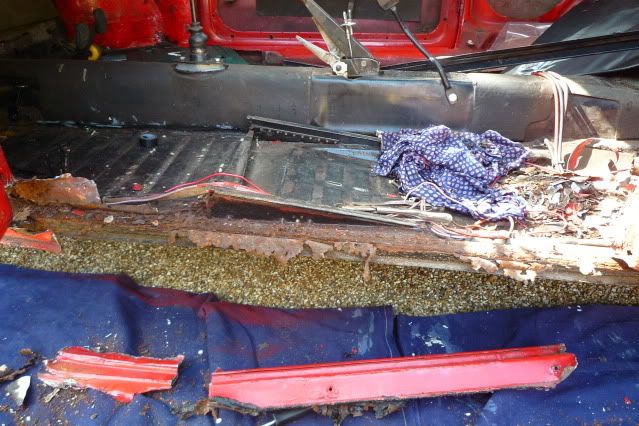 Front bulkhead needs replacing as its welded to the frame head. I'm going to have to replace the complete driver's side front quarter rather than doing it in a couple years. And this is why... 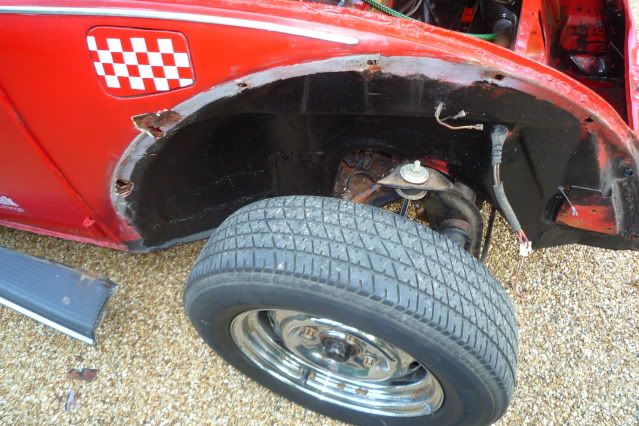 Wing bolts ripped out as I removed them. Poked it with a screw driver a bit: 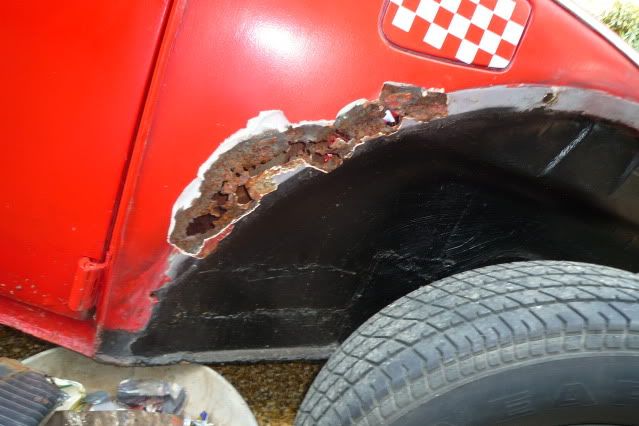 That was certainly well hidden. Wasn't bad enough to spot when I originally replaced the wings. |
| |
|
|
|
|
|
Aug 22, 2009 22:04:55 GMT
|
So now I've gone and jumped in at the deep end. I've spent ALL my spare money on things to repair the Beetle including the following: * Clarke 135TE MIG Welder * Auto darkening Helmet * Floor pan gasket * Chassis bolts * Both door pillars * Left front quarter lower repair section * Left rear quarter lower repair section * Heater channel RHS * Heater channel LHS * Front bulkhead * Cutting discs * Welding gas * Welding clamps * 3.5L Body filler * Leather welding apron * Grinding goggles * Heater channel end plate LHS * Rust preventative paint Going to probably need a couple more panels too. On the positive side, it seems that the driver's side floor pan has not been welded to, just covered in mastic so I can save it and the passenger side is probably repairable for now. That saves a bit of cash for now. Let the games begin. ;D Starting to build a Beetle out of panels already and there are more on their way: 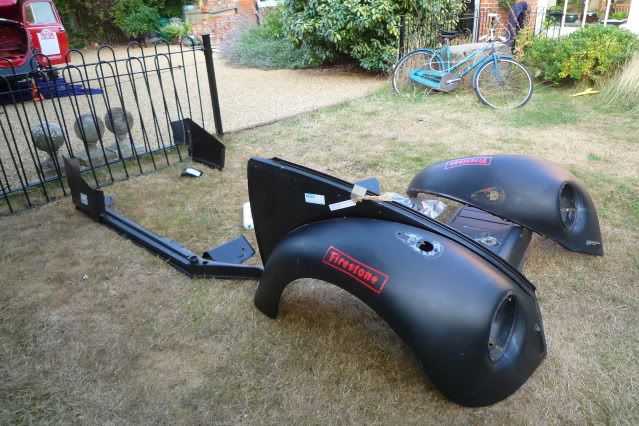 So I've spent ages over the last couple of days prepping the new panels ready to fit to the car. First up was the front bulkhead which needed completely reworking due to a random bracket welded onto the front, the fact its for a LHD car, the way that it uses the design of an earlier Beetle than mine and the pressings are completely different... oh and the way in which its just awful. So I drilled out the spot welds on the upper inner skin and peeled it back, drilled out the spot welds on the extra front bracket, and drilled out the upper spot welds on the lower inner skin. Correct late model bulkhead: 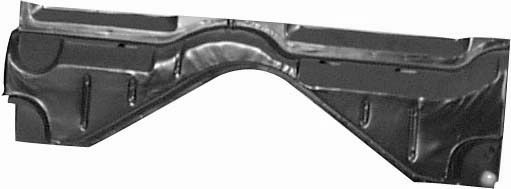 Early type reproduction (after tinkering): 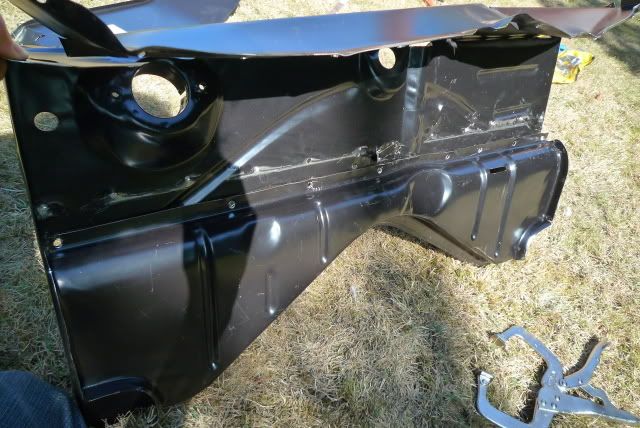 Completely different pressings. So what I'm going to do is cut the new outer skin half way up the inner skin and spot weld the rest of the new inner skin onto the original upper outer skin in the car. When you see it, it will make sense. Mocked up new panels, this shows how poor the fit of the bulkhead is (before modification): 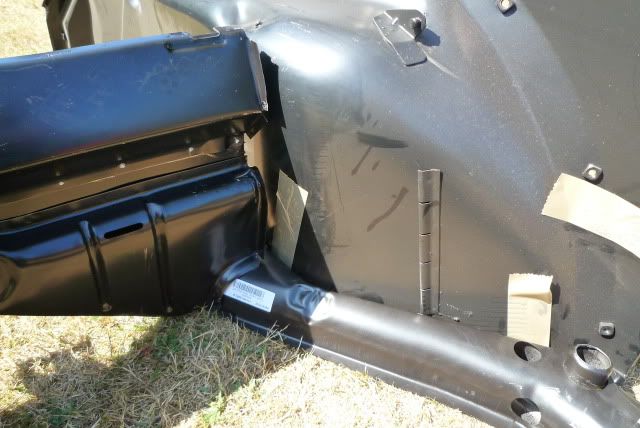 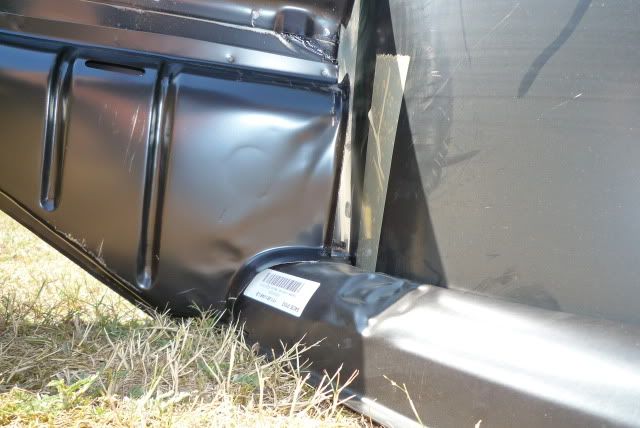 I've also been preparing the heater channels for fitting. Firstly I flap wheeled the closing panels and then sprayed them in stone chip ready for Rustoleum top coat next week. Then I sprayed primer inside the channels, followed by filler primer and finally stone chip. The final step will be to fill them with cavity wax before fitting. 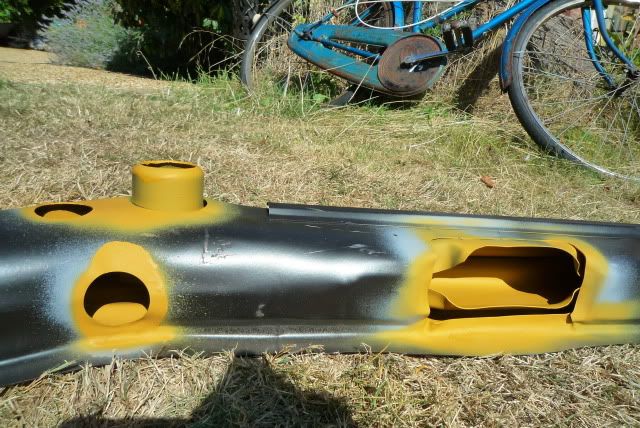 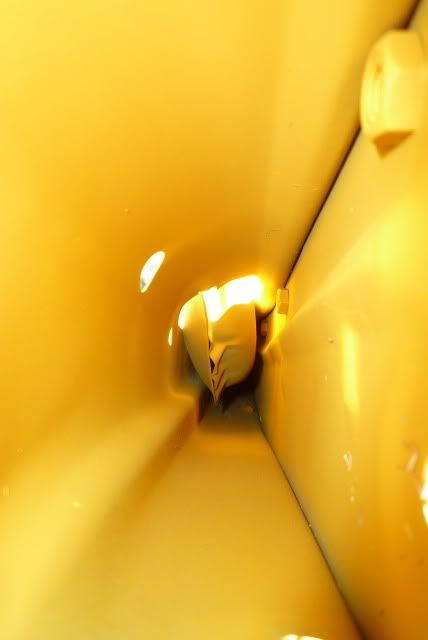 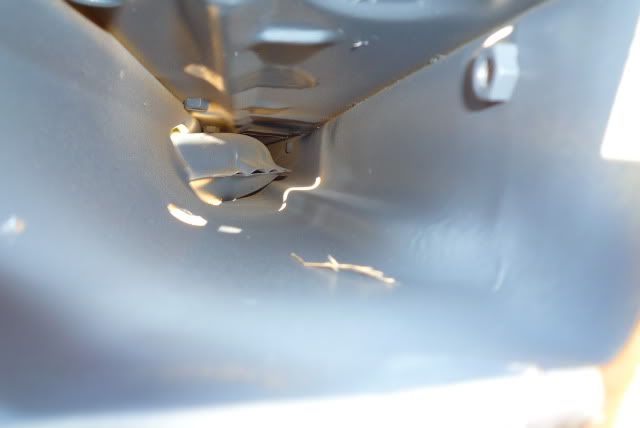 Using a hole saw I'm going to drill some holes in the interior skin of each channel through which extra paint can be added and wax can be reapplied annually. The holes will be filled with rubberised plastic bungs. Cavity wax:  Access hole plugs:  I started teaching myself to weld... 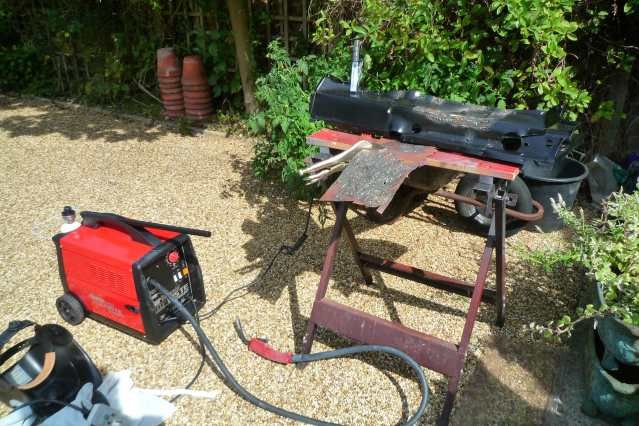 Started off making lots of pigeon poo: 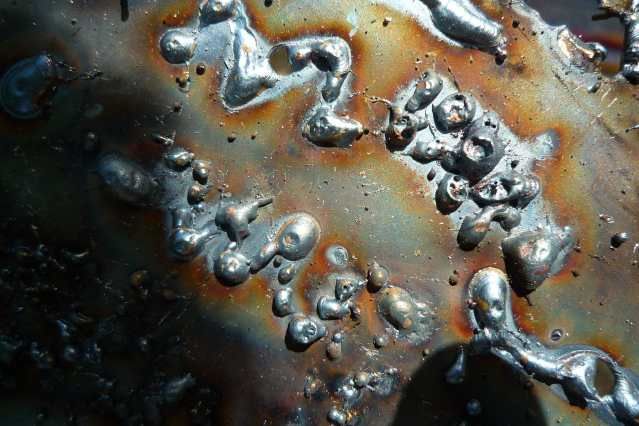 Now after an hours practice its getting a little better with good penetration and I have successfully run a few butt welds too: 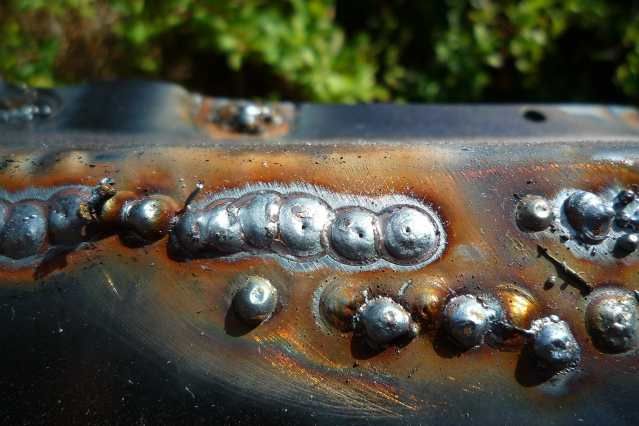 So I've been busy cutting out all the junk holding the car together. The left front quarter panels had three skins of metal with one of these also forming the inner front heater channel and the whole lot was comprehensively welded to the floor. Now I have a rather big hole: 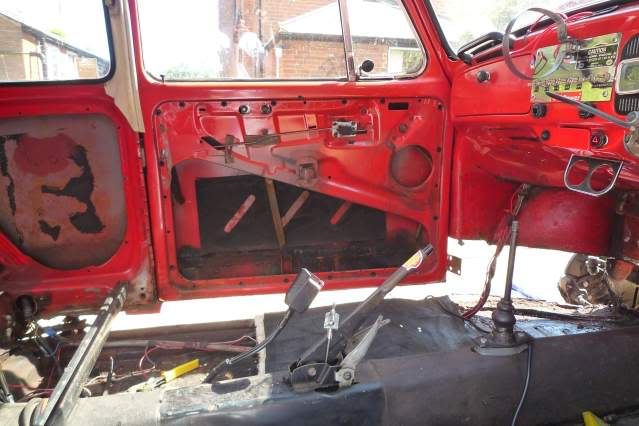 Took hours to get that far as the car is so incredibly bodged. Just need to finish cutting out the front bulkhead this afternoon, nearly done: 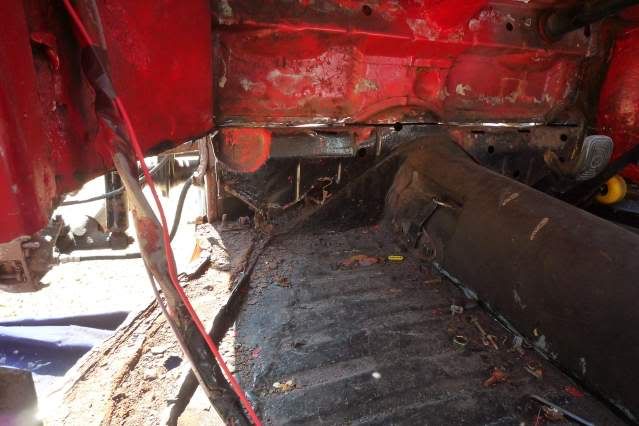 Then I'll chop the lower rear quarter and it will be time to start mocking up the new panels for the passenger side. |
| |
|
|
|
|
|
Aug 22, 2009 22:06:57 GMT
|
So I managed to get the front bulkhead out this afternoon: 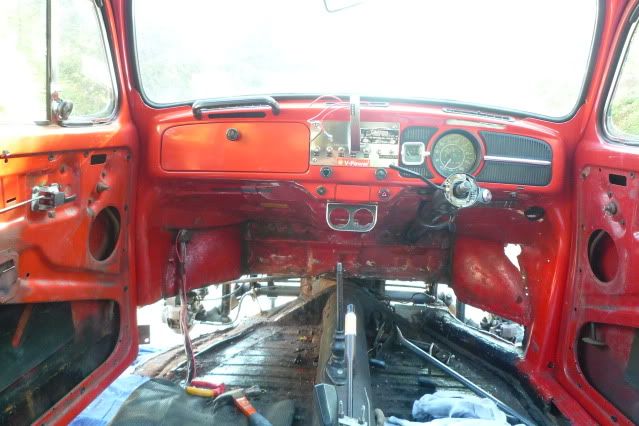 I think the car had previously been repaired with tank metal as some of the patches were up to 4mm thick.  I've now got 4 weeks to complete all the necessary welding and get the car back in one piece as I'm off to university on the 21st of September. This should be interesting!  |
| |
|
|
|
|
|
Oct 28, 2009 17:07:55 GMT
|
So I did manage to get a few more bits done before I left for university... Firstly I made some more holes: 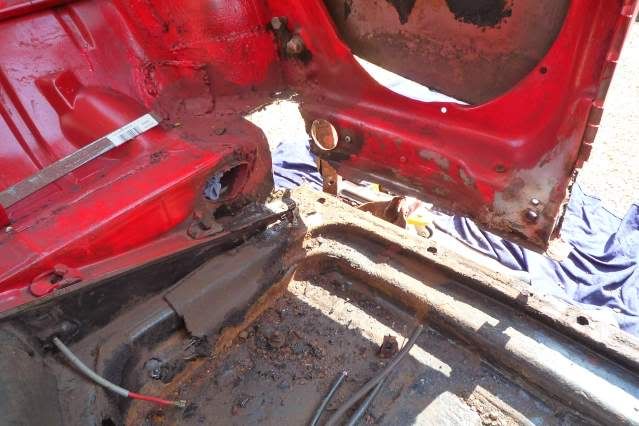 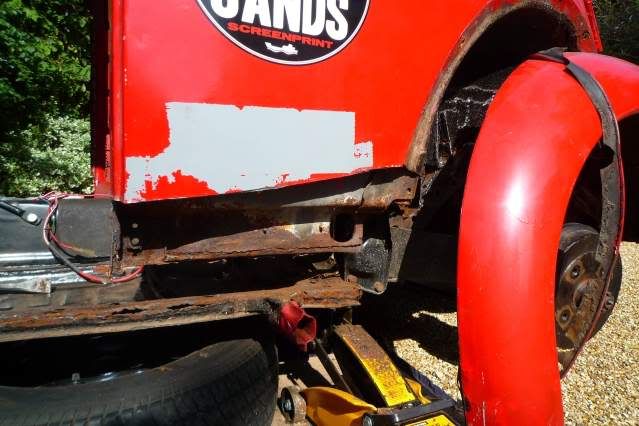 Cut some access / weight saving holes in the inner rear C pillars so I could pull out all the soggy expanding foam that was rotting them from the inside out. I also removed the engine wiring loom at the same time. 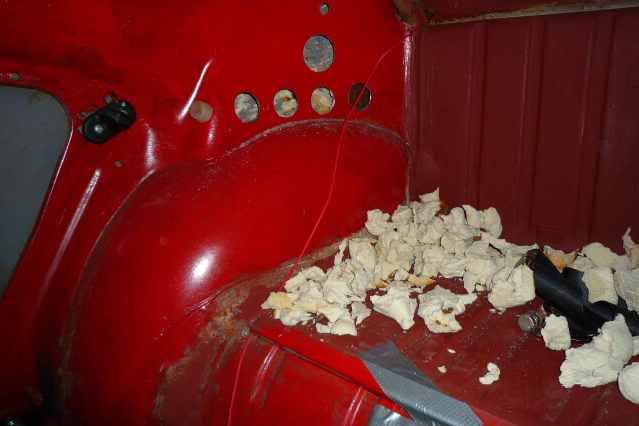 After hours and hours of messing round I managed to get the new heater channel into place: 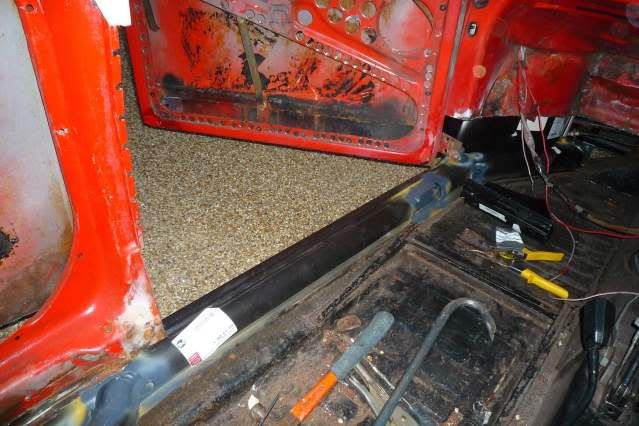 Then after another two days I had nearly all the panels mocked into place. They all needed slight adjustments before welding though so I never got as far as gluing it all together. Still, a major milestone:  New front and rear quarter panel repair sections were also cut to fit: 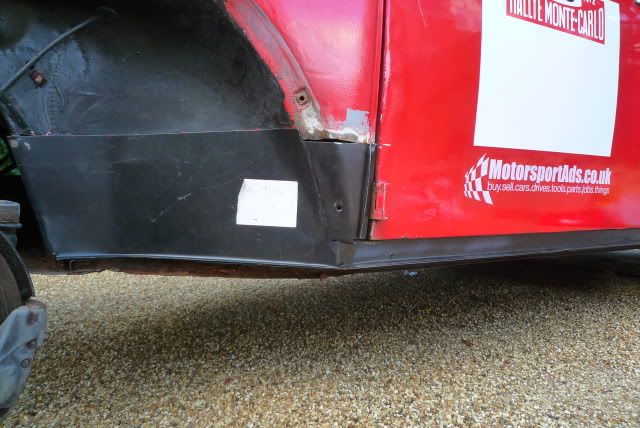 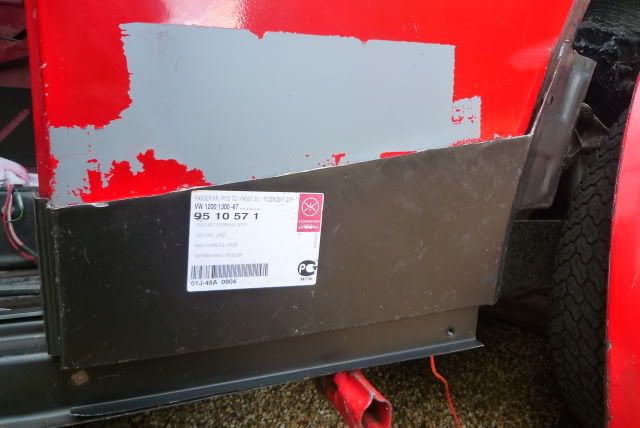 So now I'm away in Surrey at university. No more cars for a while... Thankfully I've found a dry barn to store the Beetle in for the winter whilst I'm away. Work will resume in the spring hopefully. By the end of next summer, all necessary welding should be complete including chassis work. I've also managed to source lots more bits including a battery cut off switch and mount, A NOS rear valance, new rear body mounts, a Kamei front bonnet scoop, Kamei front spoiler and lots of shiny engine bits! |
| |
|
|
|
|
|
Oct 28, 2009 18:07:10 GMT
|
|
Man you are fearless! Can't wait to see it finished, great work
|
| |
1967 Morris Traveller 1971 Series IIA Land Rover 1991 Golf GL 4+e 1992 Corrado G60 1986 E28 BMW 528i |
|
|
|
|
|
|
|
Holy ferrous oxides, Batman! That's an outrageous amount of fairly well-hidden corrosion. Good luck with this, you're certainly brave but it all seems to be going well.
|
| |
|
|
|
|