|
|
|
Jan 28, 2022 10:11:04 GMT
|
Moving on tonight, I flatted off the primer on the bulkhead and front chassis rails and laid on the first 2 coats of gloss from the chassis crossmember under the A posts to the front of the chassis. Quite tricky to do all of that at once without touching the chassis rails so I might split the front chassis rails as a separate job and just do the bulkhead and under the floor for the next coats. It looks good in the photos so I wont mention the 2 fairly large runs in it.....dammit, I just mentioned them  But I only said it once and I don't think anyone noticed  The before shots for reference from last March; 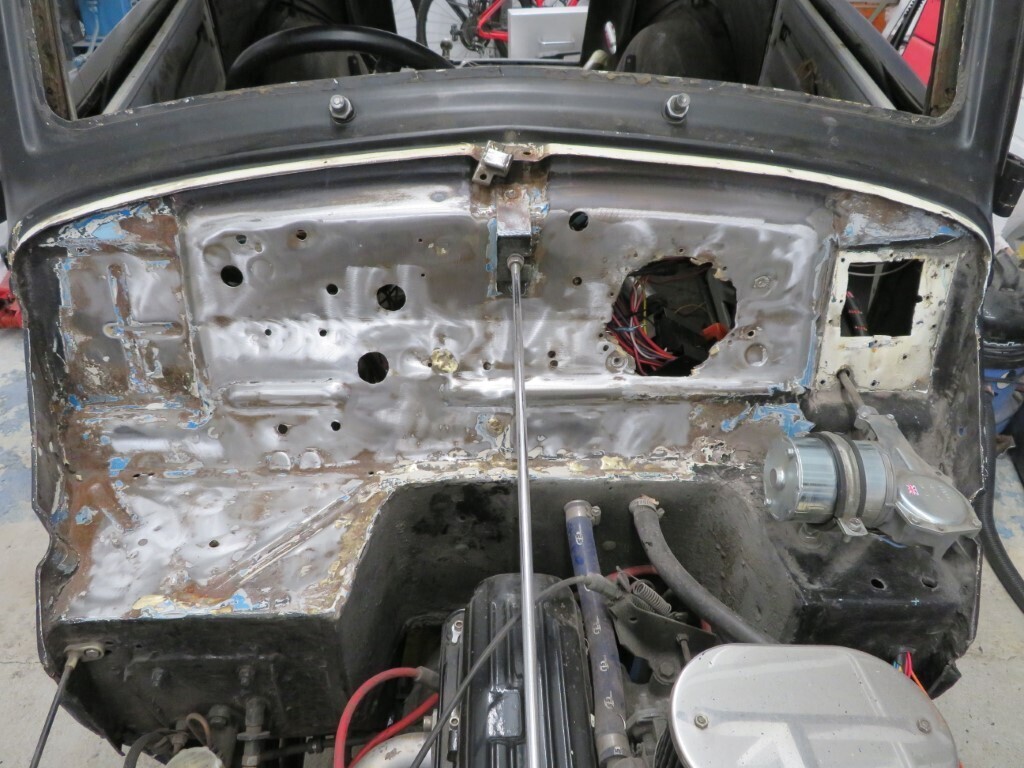 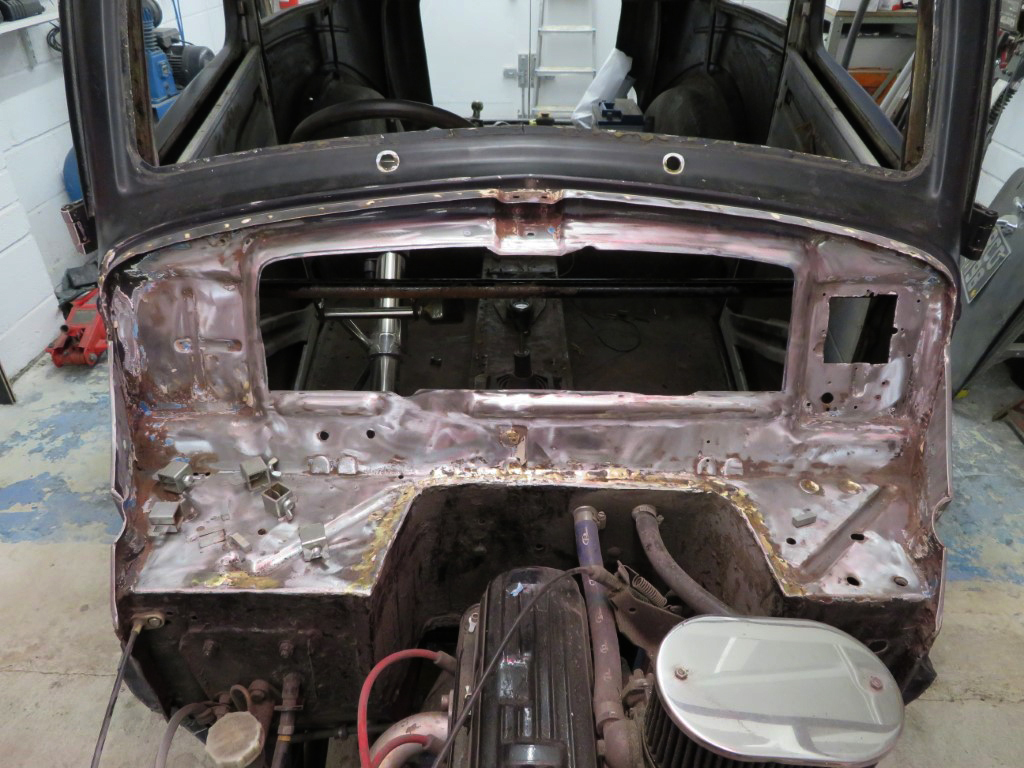 And after tonight; 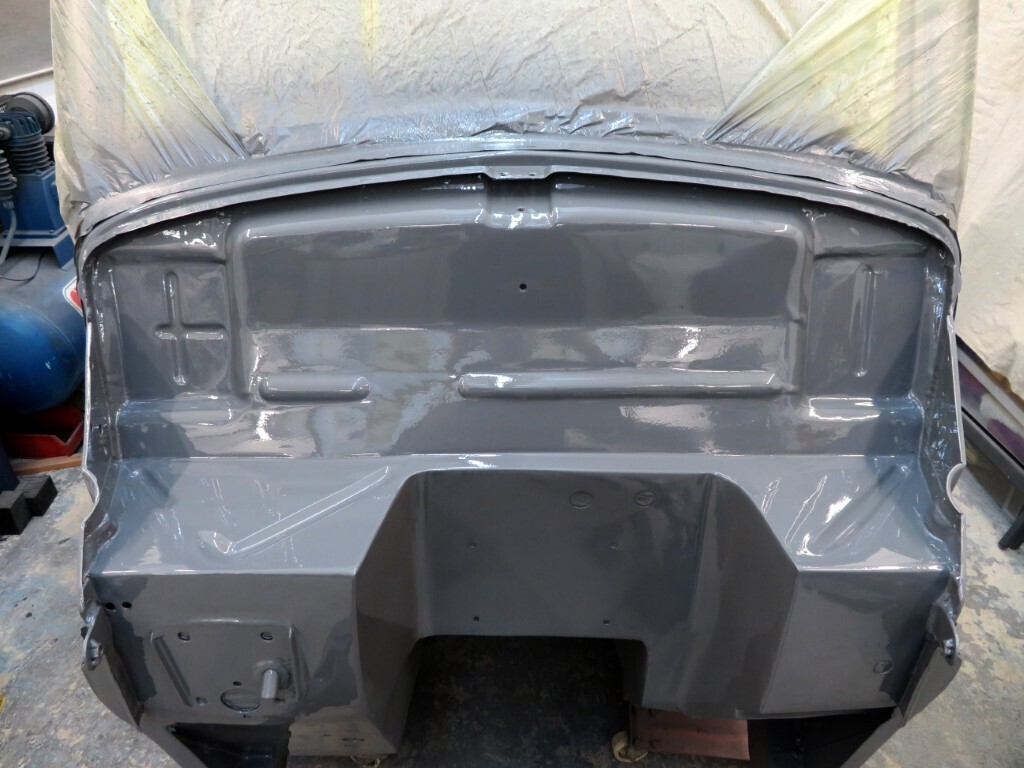 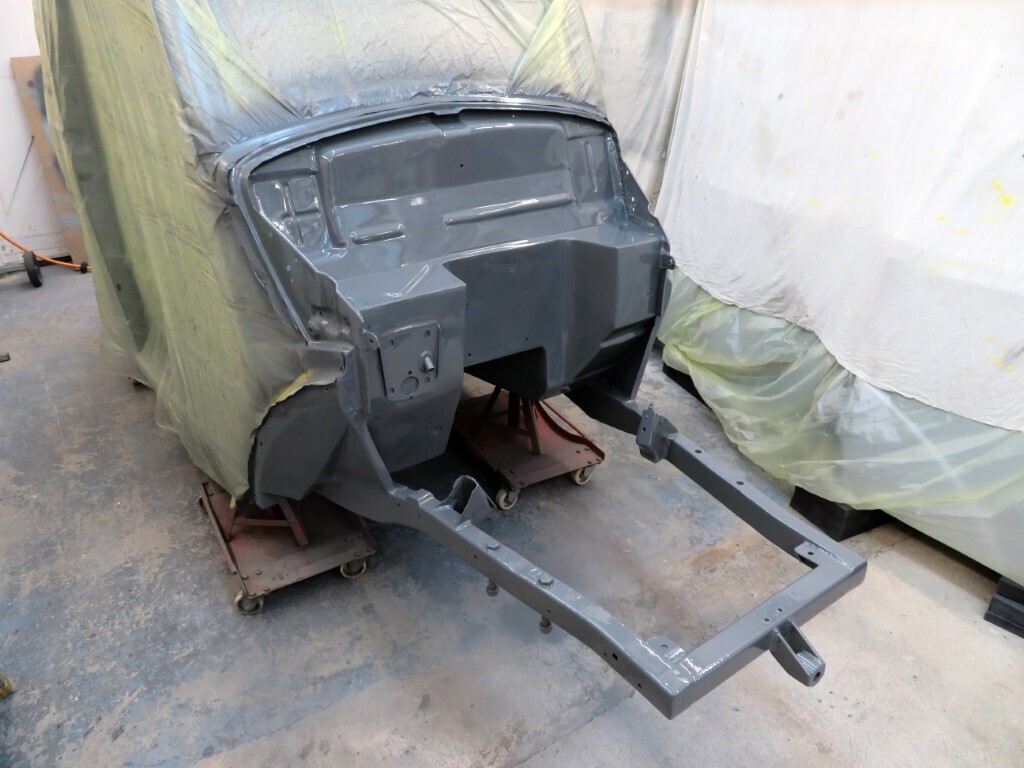 652.5 hours. Amazing transformation. Excellent work, Mark. |
| |
|
|
|
|
Norman
Part of things
 
Posts: 449 
|
|
Jan 28, 2022 10:42:37 GMT
|
|
Hi Mark, You had me worried with that first picture of the bulkhead, I thought wtf has happened. It’s looking good, you don’t have room for a Vogue do you? Is that deadline you have a serious thing or are you having a laugh. All the best and looking forward to the next instalment, Norman
|
| |
|
|
|
|
|
Jan 28, 2022 13:36:19 GMT
|
|
Thanks chaps.
Norman, that was all tongue in cheek for fun.
|
| |
|
|
Darkspeed
Club Retro Rides Member
Posts: 4,873
Club RR Member Number: 39
|
|
Jan 28, 2022 18:17:50 GMT
|
The only thing missed from the false jeopardy was a last minute decision to change the colour back to the original "Diversity edition" scheme  Hard work and effort is really paying off - knocking on 700 hours not including anything Phil has done/is/will be doing once handed over just brings into focus the time it takes to do something well. |
| |
|
|
|
|
|
Jan 28, 2022 22:59:23 GMT
|
Certainly does Andrew. Think it will easily exceed 800 hours before its done. I came home from work a bit early today so snuck another 2 hours in the garage before a nice curry out with the neighbours and flying out in the morning. I carefully rubbed down the runs and flatted off the rest of the paint, then got another 2 coats of gloss on the lot again. No photos as it looks the same as yesterday except it's a lot shinier  654.5 hours. |
| |
|
|
|
|
|
Jan 29, 2022 18:44:16 GMT
|
|
Ive been lurking in the background for a while , ive finally signed up , to allow me to compliment you on the great work your doing on this pop , had the chance to look over yours at hot rod drags
|
| |
|
|
|
|
|
|
|
Thanks scunnynige. I'm now back from Switzerland where I was busy seeing how fast I could slide down mountains with planks strapped to my feet. Turns out this year it was 59.1 mph which was only 0.9 mph off my target of 60 mph. I used to chase 70 mph but I'm now getting a bit older and not quite as brave (foolhardy?) so my top speed will remain at 67 mph as I will never beat that again. Back to Phils car. I stripped off all of the masking and Phil brought the front suspension back over that he had cleaned & painted up. While Phil was stripping off the old paint on the holes in his alloys I was brush painting the roof guttering around the big hole in the roof and cleaning up the bolts for the front crossmember. We then fitted the front suspension back on the car and put it back on it's front wheels. A significant moment as it's the first part of the reassembly. 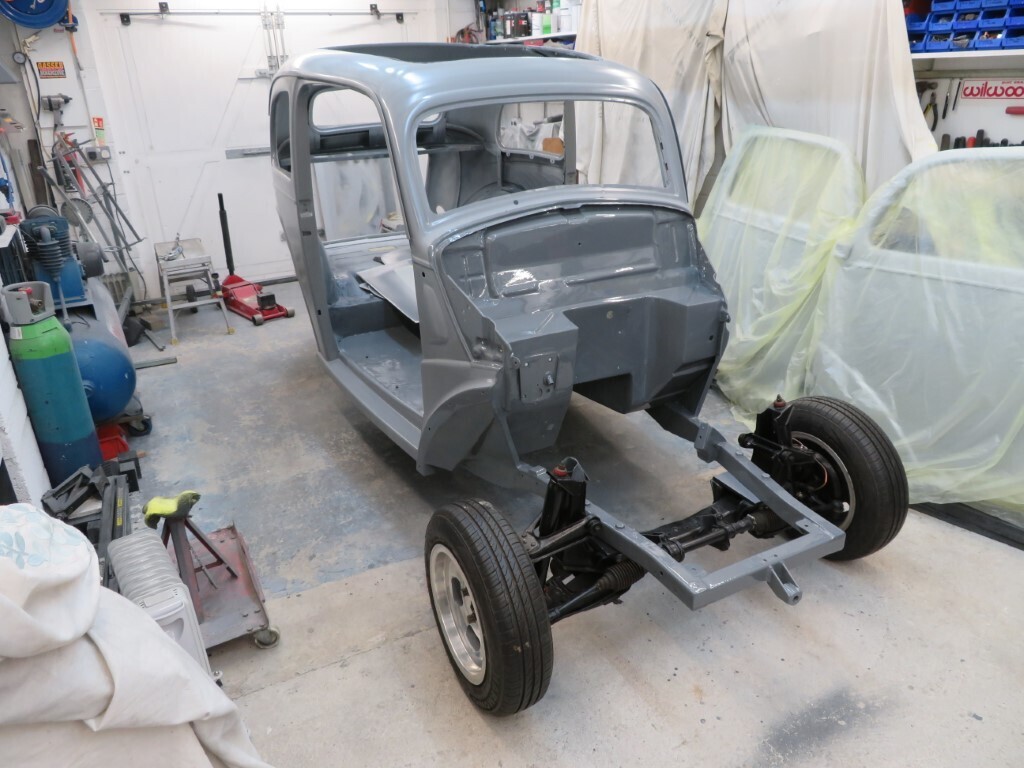 Bulkhead with all of the masking removed; 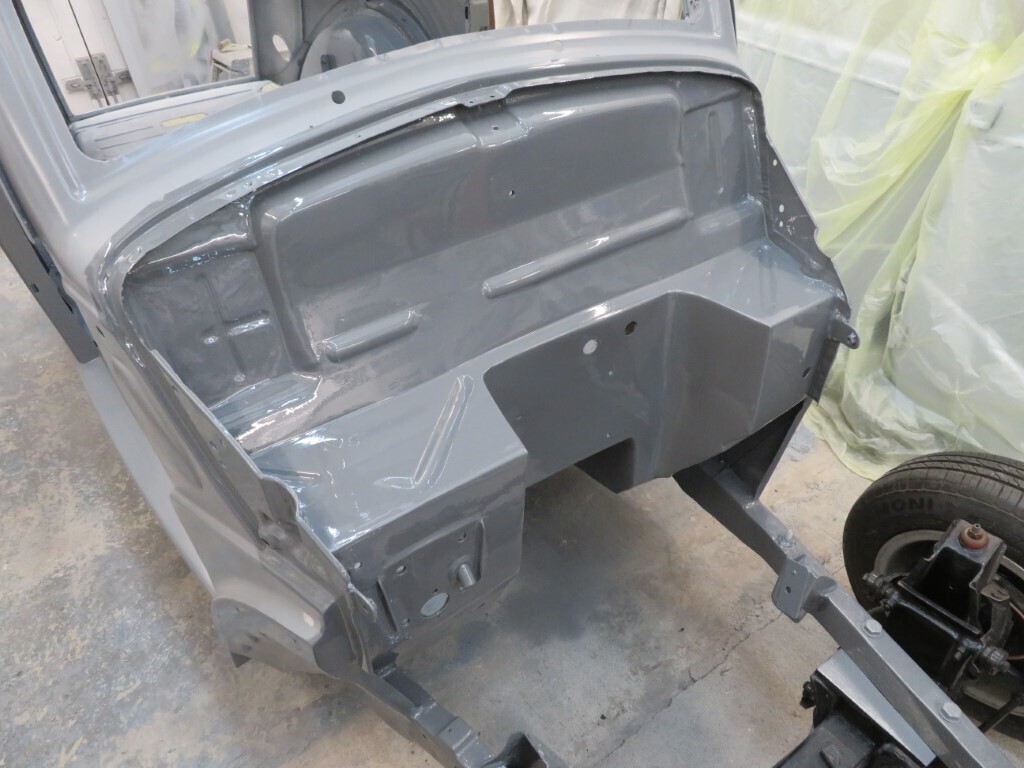 Car now back to approx ride height. 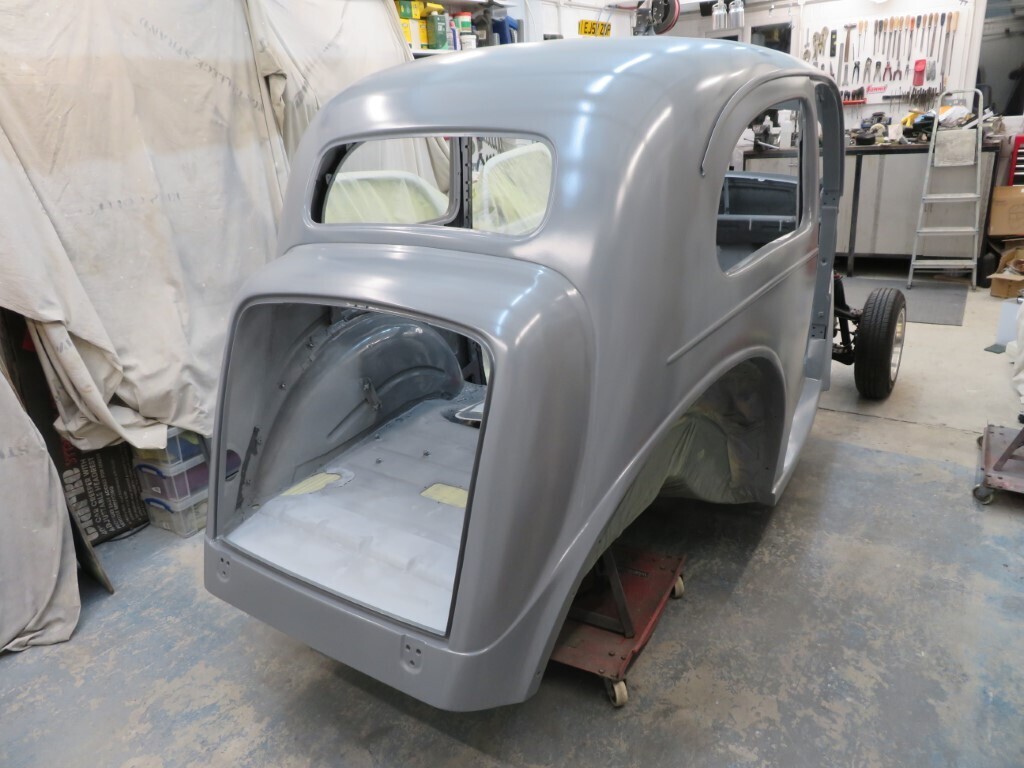 658.5 hours. |
| |
|
|
|
|
|
|
|
Nothing very exciting to show for tonights work, we found a very small crack on the front crossmember when we refitted it (shame we did not spot it before fitting  ) so that got cleaned up and a plate welded over it. Not a pretty repair, but nice and solid. 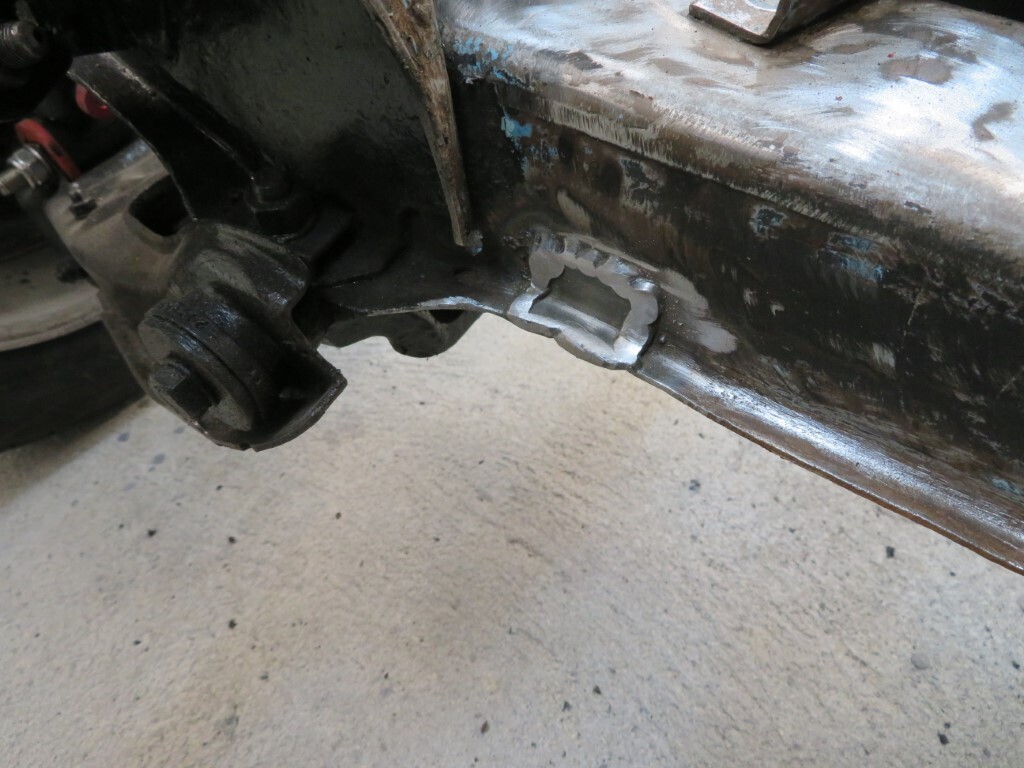 Phil had cleaned up the crossmember & painted it - his prep work was not the best (sorry Phil!) so the paint has not adhered very well - I've cleaned up what I can easily do so will treat that properly in the coming days. 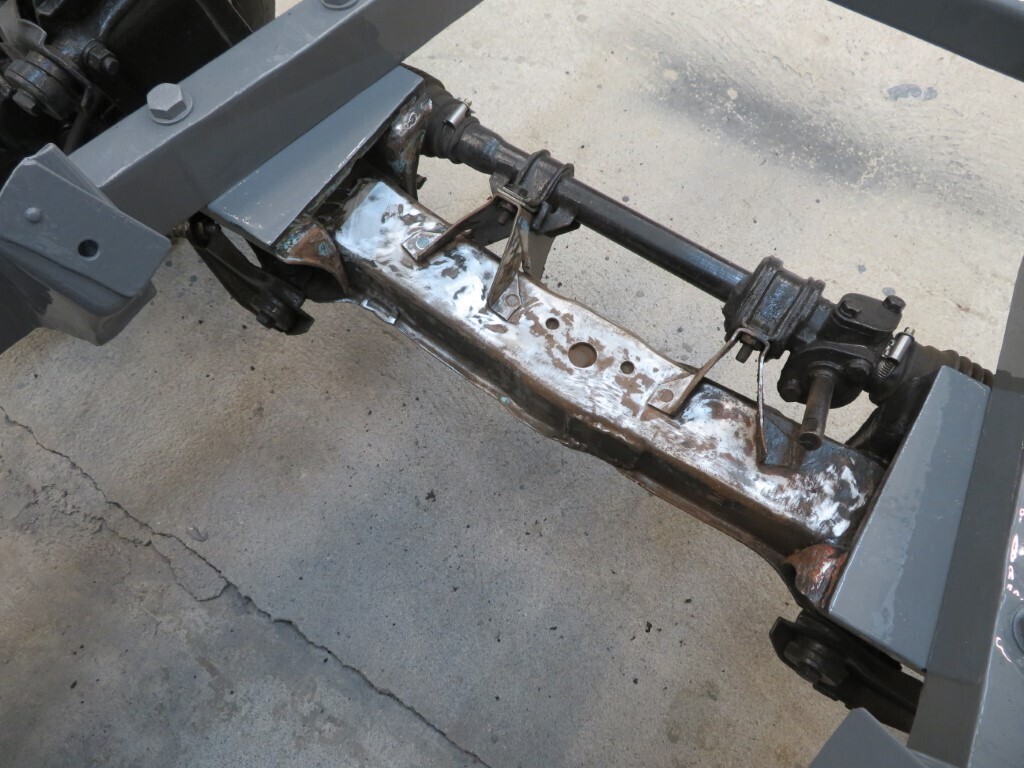 After that I gloss painted the top roof channel by brush, and I mixed up an extra amount so I could also brush all the awkward areas inside the car that the spraygun won't reach easily. Lastly a request for help - we need new wheel studs as the ones on the car are well past their best, HA Viva ones that are 7/16" UNF and the splined end seems to be 1/2" with a 1 3/8" length of stud. Any ideas where these can be sourced? 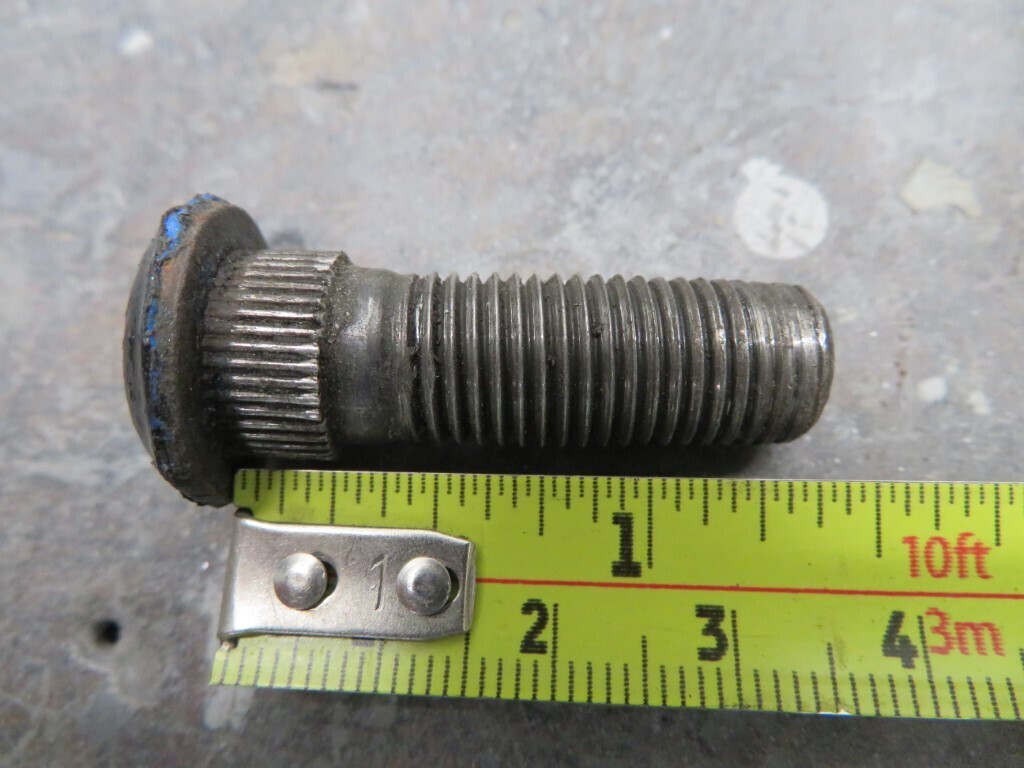 661.25 hours. |
| |
|
|
75swb
Beta Tester
Posts: 1,052
Club RR Member Number: 181
|
|
|
|
This guy was recommended on here previously and a mate got some wheel nuts off him with no complaints. www.mistertee.co.uk/products/wheel-studs/(Lovely work btw, shame about the crossmember prep and crack!) |
| |
|
|
|
|
|
|
|
|
^ I got all my Anglia ones from Maurice too, but that was 15-odd years ago now so no idea if he’s still doing them.
|
| |
|
|
|
|
|
|
|
|
70s Ford eg Escort wheel studs are the same thread and available in different lengths, pretty sure a few of the Vauxhall guys have used them, if you get really stuck I might have some spare Viva hubs I can knock the studs out
|
| |
|
|
|
|
|
|
|
Thanks chaps - Ford ones are 13.1mm spline and the Vauxhall ones appear to be 1/2" (12.7mm) so if I can get confirmation gtviva they will pull in ok then the Ford ones will work. |
| |
|
|
Darkspeed
Club Retro Rides Member
Posts: 4,873
Club RR Member Number: 39
|
|
|
|
Speedshack are pretty good for those sorts of things www.speedshack.co.uk/Wheelnuts.htmETA Just had a look into the bucket of studs and nuts that I have - the 7/16 ford ones I have would probably need a 1/2"/ 12.5mm hole in the hub to pull into as that what the shoulder before the spline is - What's the min ID of the Viva stud hole? 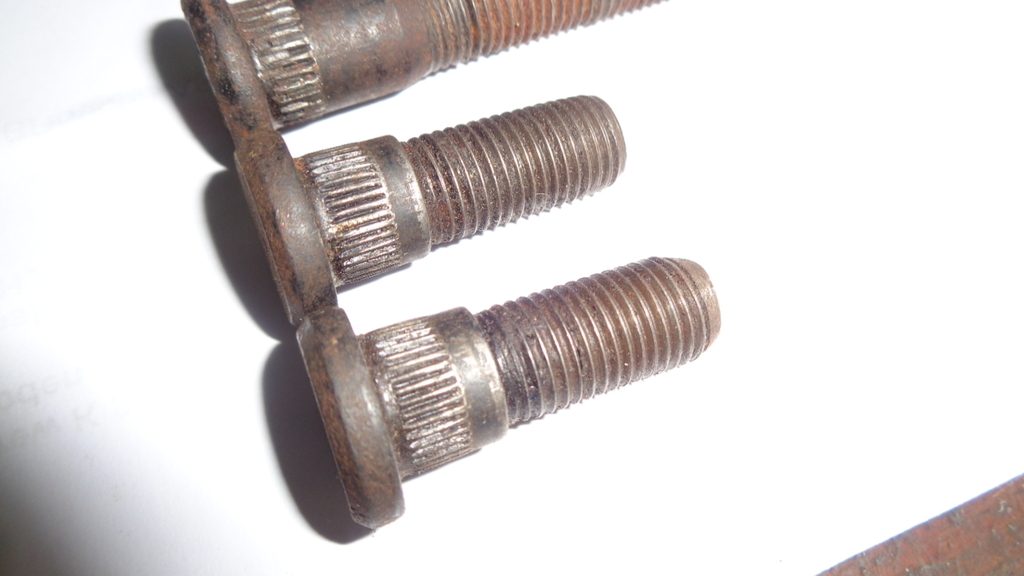 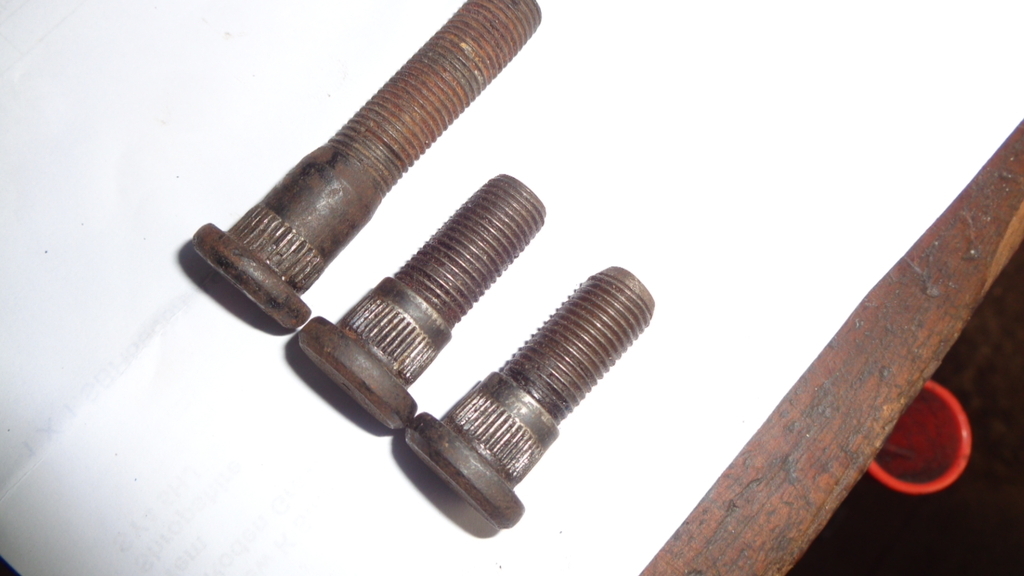 Short ones are the standard for steels - 1-1/4" - longer for alloys but have to look out for sleeve nuts bottoming on the extended shank. If these are of any use and you are not in a rush I can send them in a week or so. |
| |
Last Edit: Feb 8, 2022 12:43:27 GMT by Darkspeed
|
|
|
|
|
|
|
|
The Vauxhall studs will be 13.2mm on the outer spline, they also did 2 versions, a fine spline and coarse spline, pretty sure the early ones were fine spline and they had problems with them spinning out so changed the design to a coarse spline, ive probably got the dealer bulletin from the 70s somewhere...
|
| |
|
|
|
|
|
|
|
|
Thanks Chaps, Andrew - I'll check the hub hole tonight. I'll need a set of 8 though.
I think these are so shagged (you can almost pull the nut off!!!) because they are not long enough for the alloy sleeve bolts so longer studs would be the correct replacements.
gtviva, the stud is the one in the photo above - looks like a coarse spline to me? I measured it at 1/2" - I'll recheck in metric tonight. Could be undersize as the splines look a little worn.
As Ford studs are 13.1mm and easy to get would they be a good/safe replacement?
|
| |
|
|
Darkspeed
Club Retro Rides Member
Posts: 4,873
Club RR Member Number: 39
|
|
|
|
|
Check the nuts as well, the thread in those may also be shagged - If they are also well past their best it may be worth upgrading to M12 with new studs and nuts.
I can probably assist with 8 x M12 x 1.5 x 48mm - M12 x 63mm I only have 6 - Longer 7/16 just a couple of those here as I normally upgrade to M12 - Hence the short 7/16 being in the bucket.
Course and fine is an interpretation - Fine I would see as more splines on the diameter - see my picture above short studs (Ford OEM)I would say fine - and long stud (aftermarket) course. Or you could describe as same amount of splines but different overall diameter fine being a smaller diameter of the spline.
|
| |
Last Edit: Feb 8, 2022 13:56:05 GMT by Darkspeed
|
|
|
|
|
|
|
|
Nuts are definitely shagged as well, They were due for replacement anyway as they were rusty (chromed originally).
If we upgrade to the metric stud what size hole will be required in the hub?
|
| |
|
|
Darkspeed
Club Retro Rides Member
Posts: 4,873
Club RR Member Number: 39
|
|
|
|
Nuts are definitely shagged as well, They were due for replacement anyway as they were rusty (chromed originally). If we upgrade to the metric stud what size hole will be required in the hub? Shoulder on the M12's is the same as the 7/16 - 1/2" / 12.5mm - They may well just pull into the existing Viva hub hole if its 12mm or so. |
| |
|
|
|
|
|
|
|
Andrew, Checked hole size in hub tonight, on my imperial vernier its a fraction over 1/2" hole. On the digital if I get it into the splines its approx 12.6 - 12.8mm. If you think that's ok to use the M12's in directly then I would appreciate your help in sorting a set please. In more exciting news I have been wrappping Phils car up  No, it's not getting posted anywhere  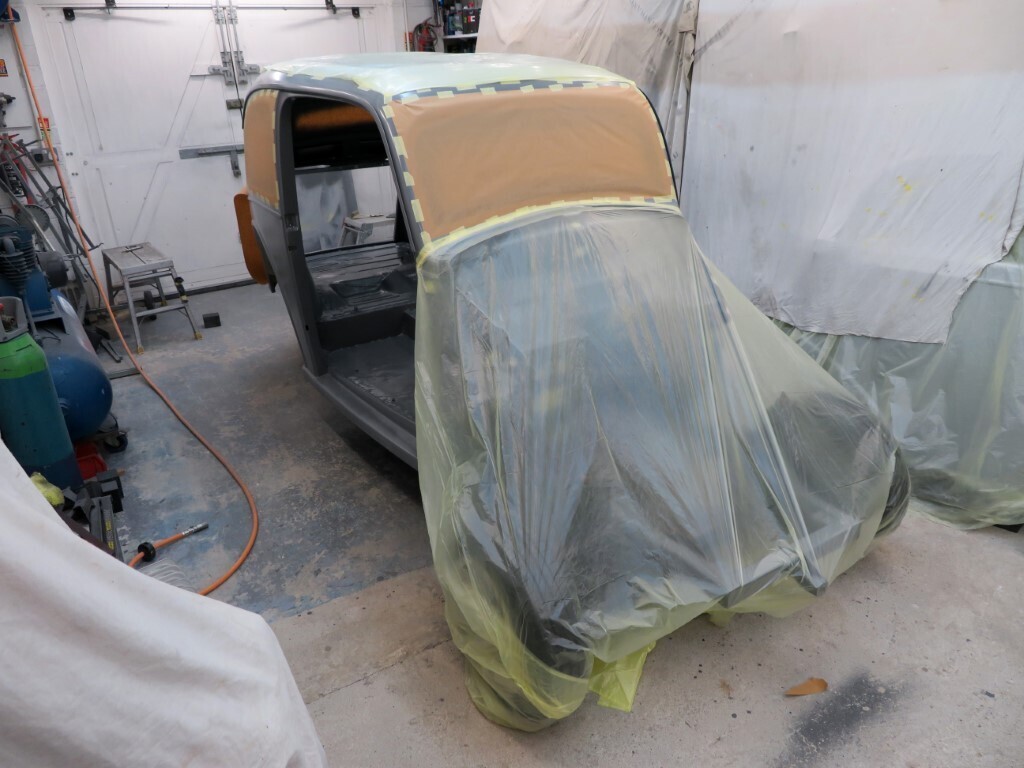 And then I have been painting the inside of it. It's mainly for getting a decent amount of paint on the inside edges of the window frames and door shuts so when the outside gets done it won't be thin in those areas. 2 coats went on around the window frames. 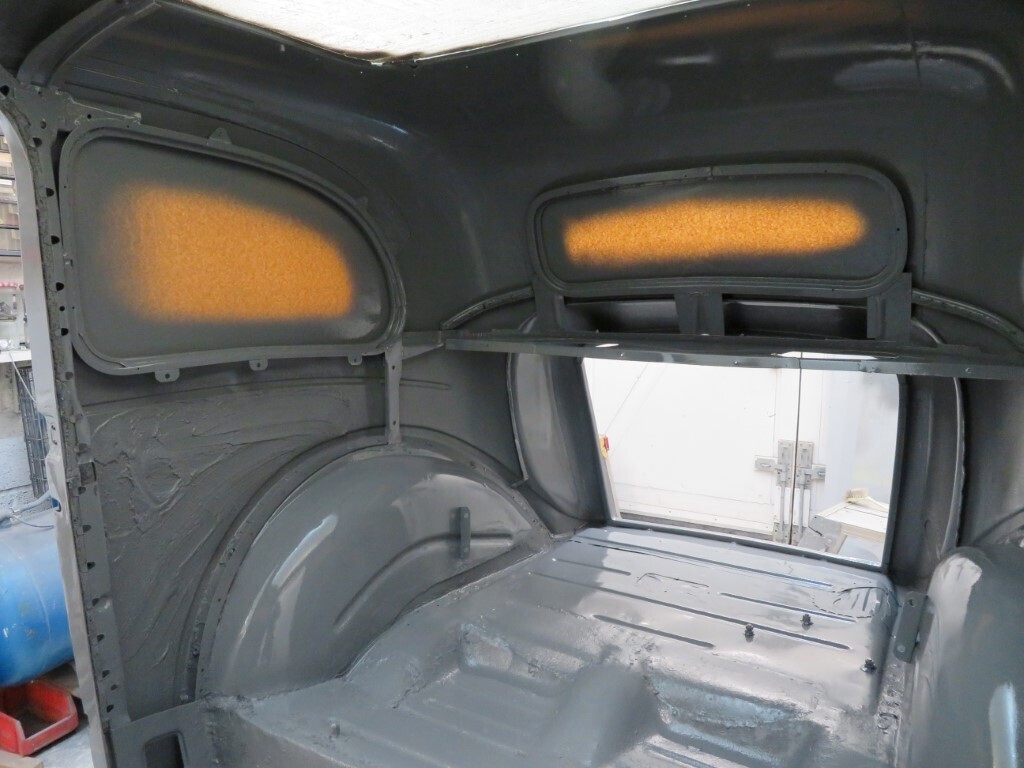 But I also got a single coat on all of the inside surfaces for general protection. Awkward areas will be finished off by brushing. 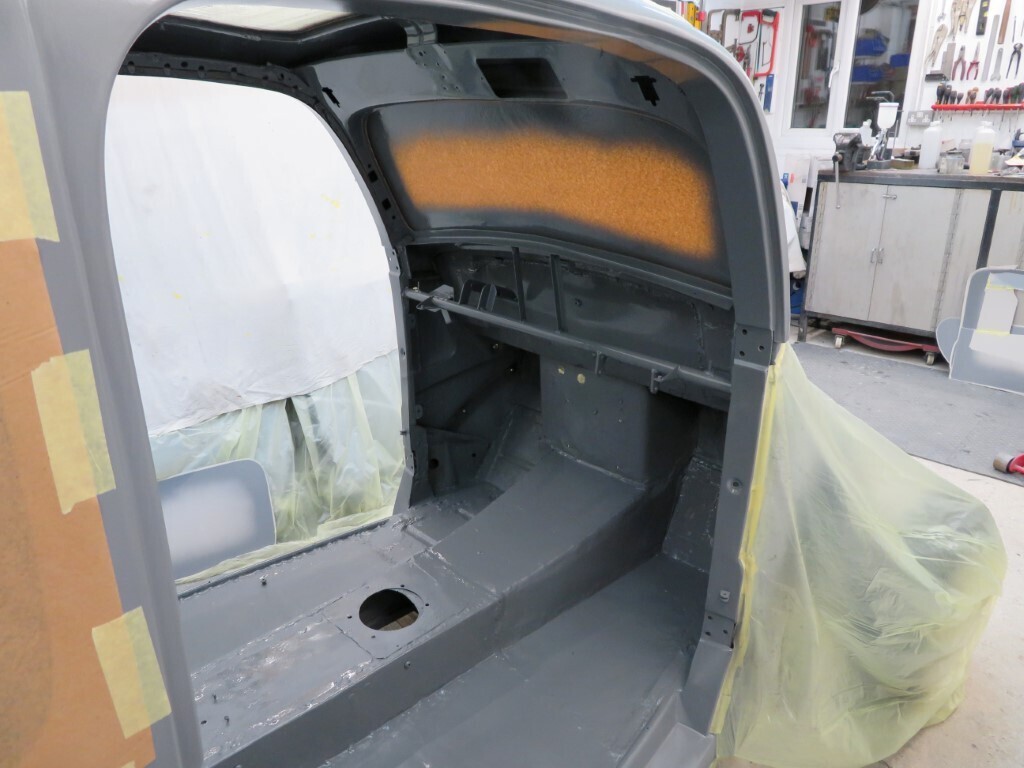 Boot floor got 2 coats;
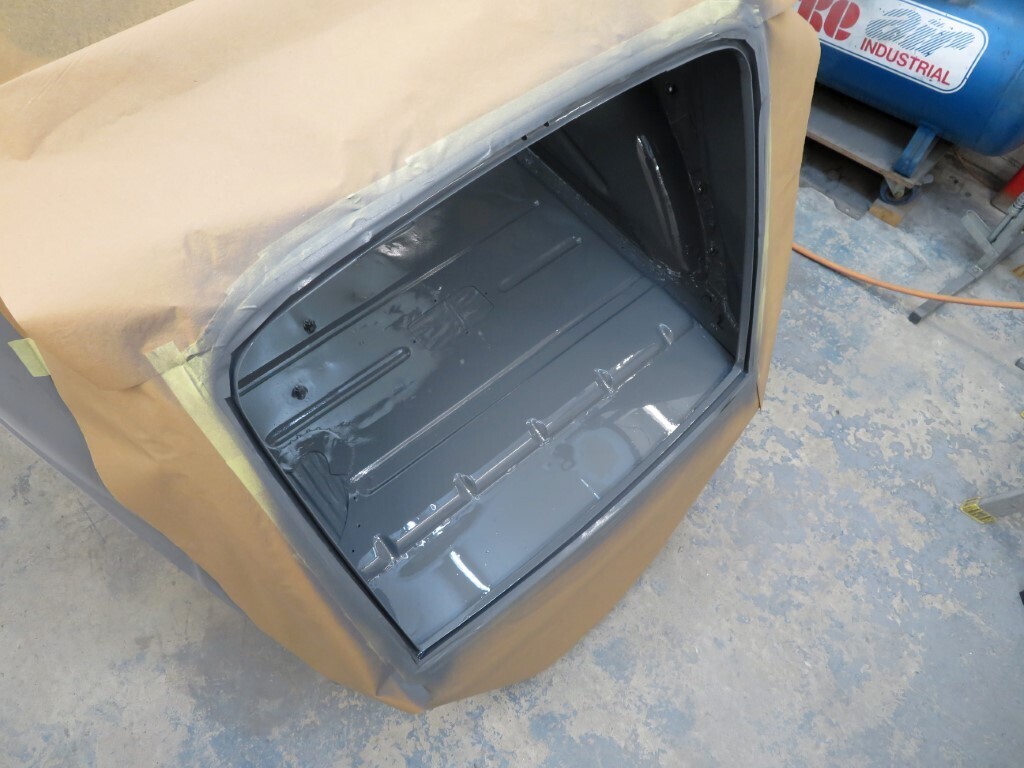 The boot gutter edge also got a good coat - masking is deliberately hanging over the body edge all round - this will give a soft edge that will be easily sanded later on for when the outside gets painted.
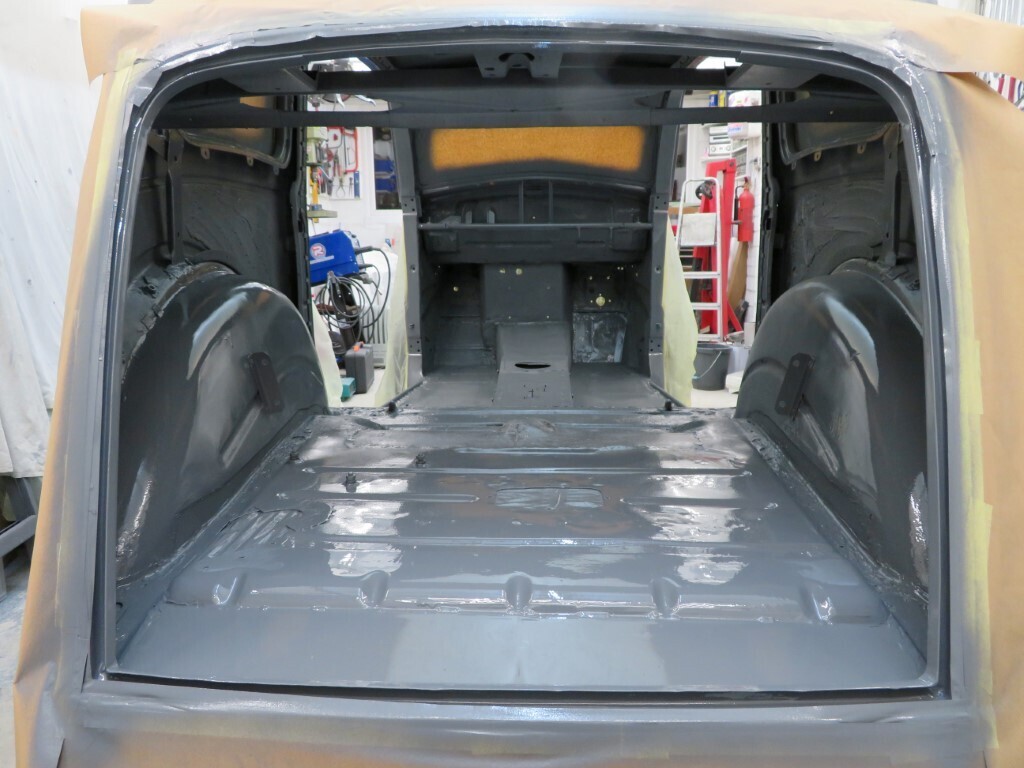
I'll repeat this tomorrow night as well, then the inside will be done apart from the aforementioned brushed in areas.
663.5 hours.
|
| |
|
|
Darkspeed
Club Retro Rides Member
Posts: 4,873
Club RR Member Number: 39
|
|
|
|
|
Drop me a PM with an address to send them to and I will box up the 8 that I have and ship then down - Will take a week but looks like you have enough to keep you busy till they arrive.
|
| |
|
|
 But I only said it once and I don't think anyone noticed


 ) so that got cleaned up and a plate welded over it. Not a pretty repair, but nice and solid.


 No, it's not getting posted anywhere


