|
|
|
Apr 24, 2020 17:47:02 GMT
|
The paint did flow out a bit overnight so I left it to bake in the sun for most of the day to harden off. A bit of colour sanding got it glassy smooth, so happy with that. I was less happy with the painted hinges - opening the doors scraped the paint off them so they looked tatty. Some masking up and very careful use of a new stanley blade cut most of the paint off, then more careful sanding saw the rest of the paint gone and the aluminium hinge smoothed off. 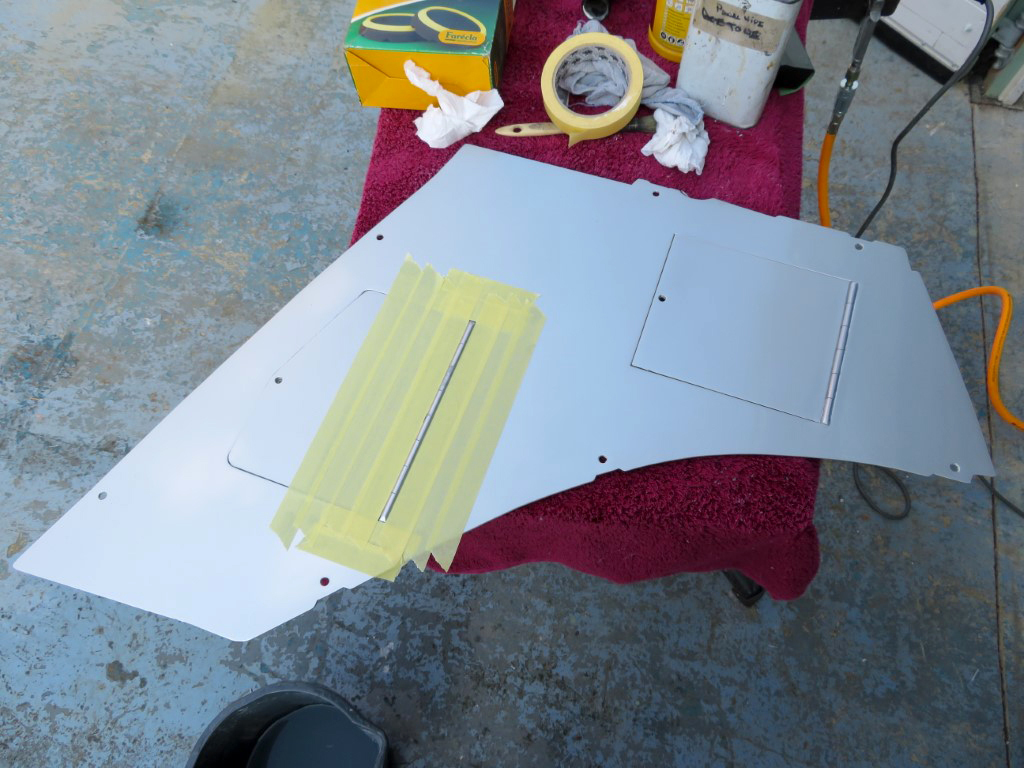 And with it fully polished and machine glazed it's now back where it belongs. 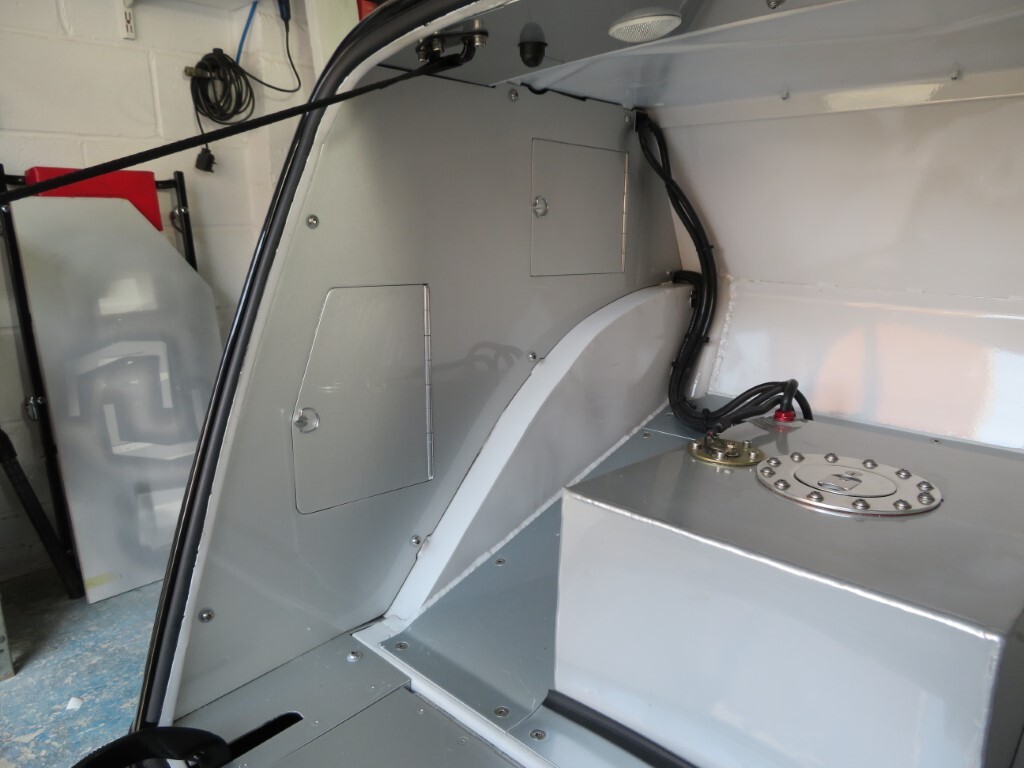 I really must sort out the boot trim now! |
| |
|
|
|
|
|
|
|
Apr 25, 2020 14:22:35 GMT
|
A little ride out just before lockdown kicked in fully on very essential business  And no, I was not paying enough attention at the roundabout!! (was watching what I thought was a copper on a bike on other side - so not paying attention to cars on roundabout - naughty me!) |
| |
|
|
|
|
|
Apr 25, 2020 15:28:57 GMT
|
outrageous !  |
| |
|
|
|
|
|
Apr 25, 2020 15:46:03 GMT
|
|
I don't normally watch the videos on posts but I did that one, I enjoyed that thanks! no sound on my PC though so I had to use my imagination!
|
| |
Last Edit: Apr 25, 2020 15:47:08 GMT by gtviva
|
|
glenanderson
Club Retro Rides Member
Posts: 4,345
Club RR Member Number: 64
|
|
Apr 25, 2020 15:53:56 GMT
|
|
At least you know that the brakes are working. 😃
|
| |
My worst worry about dying is my wife selling my stuff for what I told her it cost...
|
|
|
|
|
Apr 25, 2020 16:24:02 GMT
|
|
that's a slippy convetter mark ...2800 rpm ?
|
| |
|
|
|
|
|
Apr 25, 2020 17:26:31 GMT
|
I don't normally watch the videos on posts but I did that one, I enjoyed that thanks! no sound on my PC though so I had to use my imagination! You REALLY need speakers - you are in for a treat. |
| |
|
|
|
|
|
Apr 25, 2020 17:27:32 GMT
|
that's a slippy convetter mark ...2800 rpm ? 3000 Robert, though with the weight of the car it's probably around 2600. |
| |
|
|
|
|
|
Apr 25, 2020 17:54:23 GMT
|
At least you know that the brakes are working. 😃 Yep  it has excellent brakes - the skinny tyres are the weak point as you heard! |
| |
|
|
|
|
|
Apr 25, 2020 18:36:21 GMT
|
|
Whats making the ticking (transmission) noise at normal road speeds?
Good video nice day why not.
|
| |
|
|
|
|
|
Apr 25, 2020 19:39:49 GMT
|
|
The Go Pro picks up all sorts of sounds you don't really hear in real life - the tappety sound is the exhaust - no balance pipe and it has a 90 degree bend out of the collectors which has a hammer effect on the exhaust pulses sound waves - I've got used to it now but it worried me at first.
|
| |
|
|
|
|
|
|
|
I don't normally watch the videos on posts but I did that one, I enjoyed that thanks! no sound on my PC though so I had to use my imagination! You REALLY need speakers - you are in for a treat. I am looking at a new desk top pc with sound and everything at the moment! As usual too much choice and conflicting information! |
| |
|
|
|
|
|
|
|
Thought I'd sort out the indicator switch again today. You might remember I had replaced this recently, but it was worse than the original. So....it had to come out and I had to check out my spares; 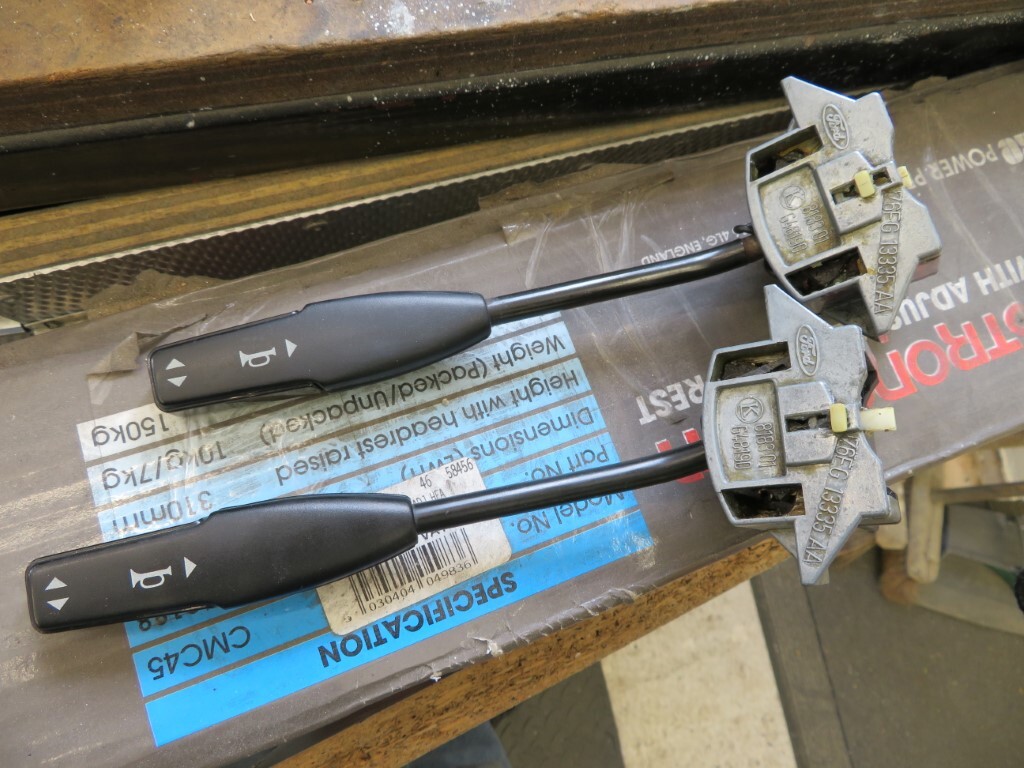 Then it was a case of dismantling the column to swap one over. 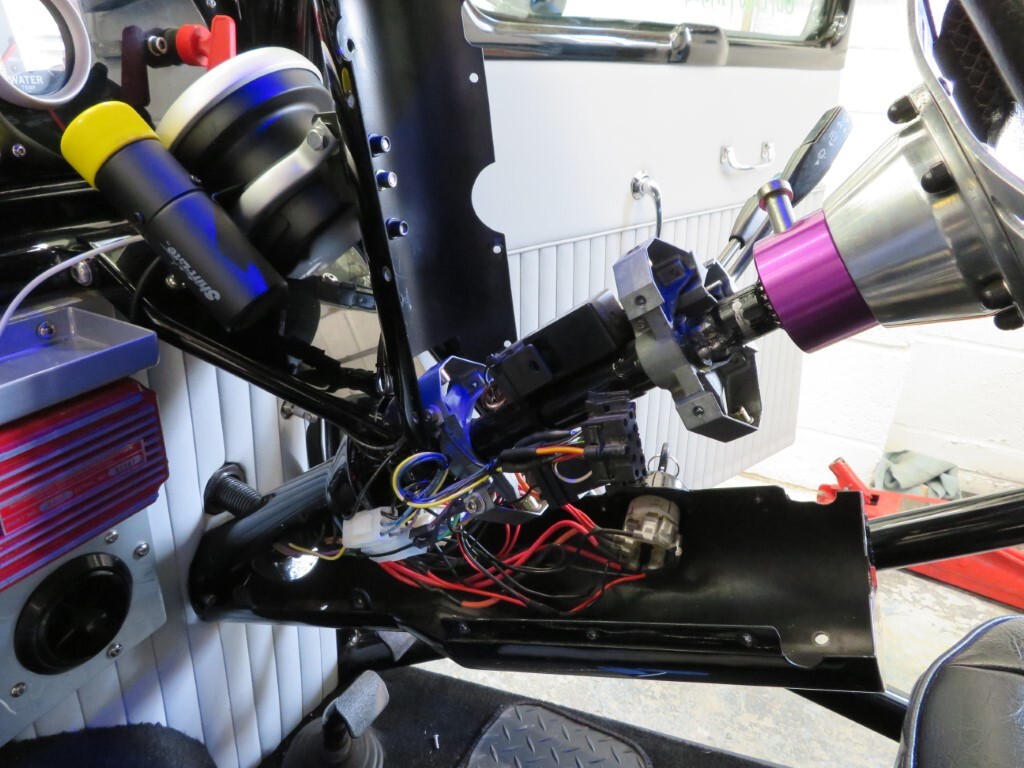 It was only then that I discovered why the original switch was not self cancelling when turning left........the rod fixed to the column shaft that triggers the cancelling tab was not sitting at 9 O'clock when the wheels were pointing straight ahead. Doh! it was sitting around 6 O'clock, it must have got moved around during the final build and when doing the tracking. As such it was never in the right place to trigger the left turn cancel. Not too difficult to sort then......hmmmm.......all I had to do is disconnect the UJ from the rack, turn the column to the right place and then reconnect it back to the rack. Access is a little tight from the top but I could not be bothered to jack it up. 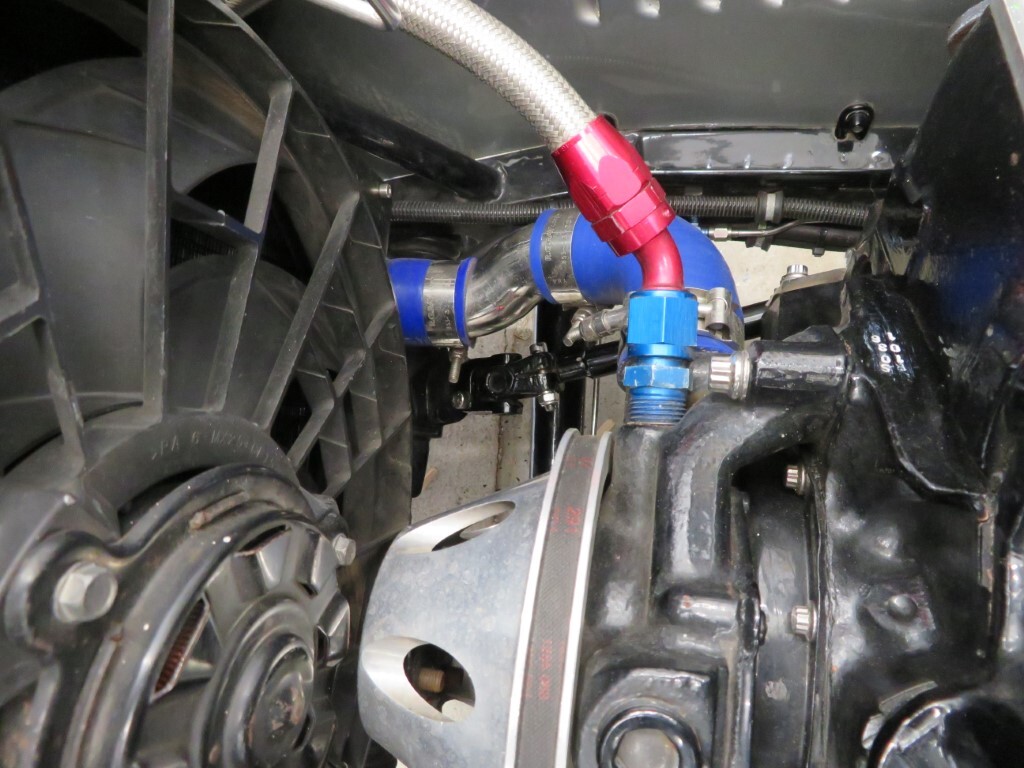 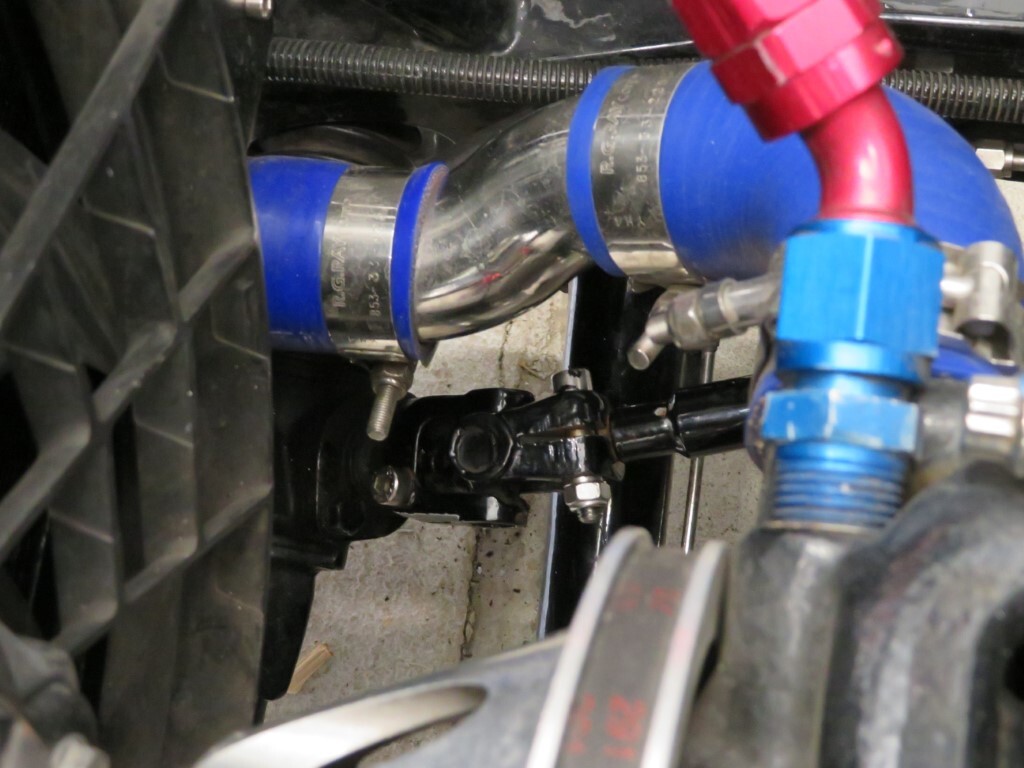 Lots of swearing as I dropped spanners many times and the splines were a little tight to get back on, but it's all done now and finally it cancels properly for the first time  Last job was to paint a new arrow on the top of the column which shows me where the steering wheel needs to go back on. Arrow tells me to put the top of the steering wheel in line with the point of the arrow. 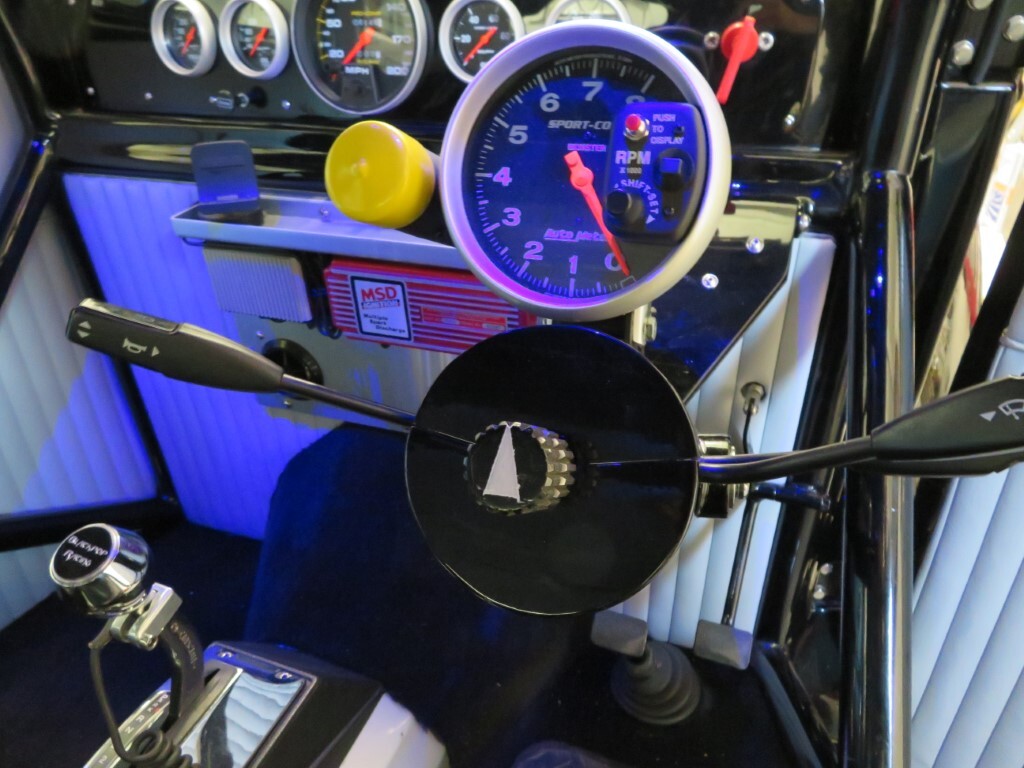 |
| |
|
|
|
|
|
|
|
Another job on the 'to do' list is being tackled today. I currently have a pressure switch for the brake lights in the brake lines - it works perfectly well except I feel it only makes the lights come on under actual braking rather than when you have your foot resting on the pedal gently. I'd prefer it the lights came on under light pedal pressure - not actual braking, as I think this is a bit safer. As such I want to convert to using one of these, it's (I believe) a Land Rover brake switch. 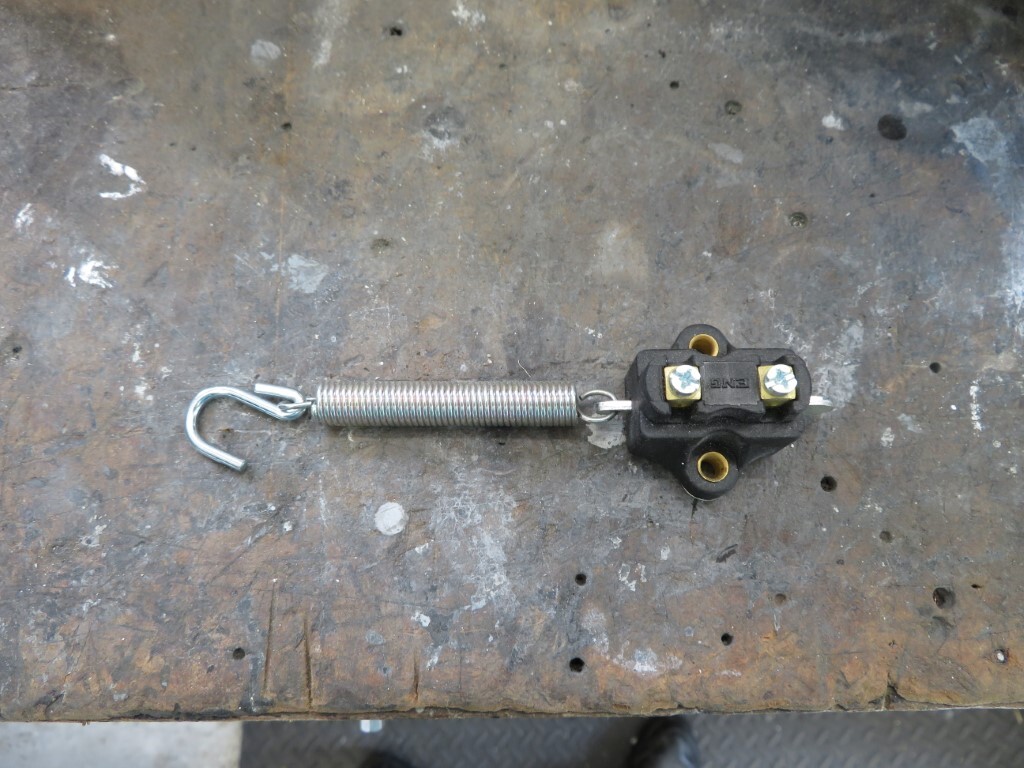 So, seats and gearbox tunnel needed removing; 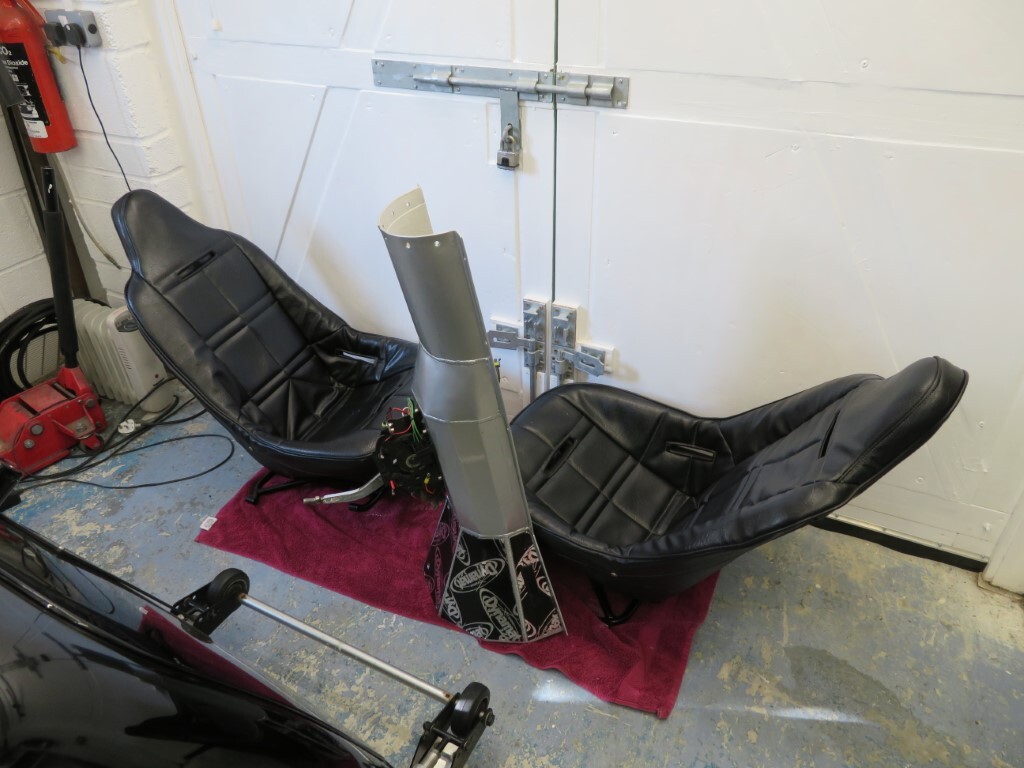 Which exposes the gearbox - which is remarkably clean considering it's done over 6,000 miles now. 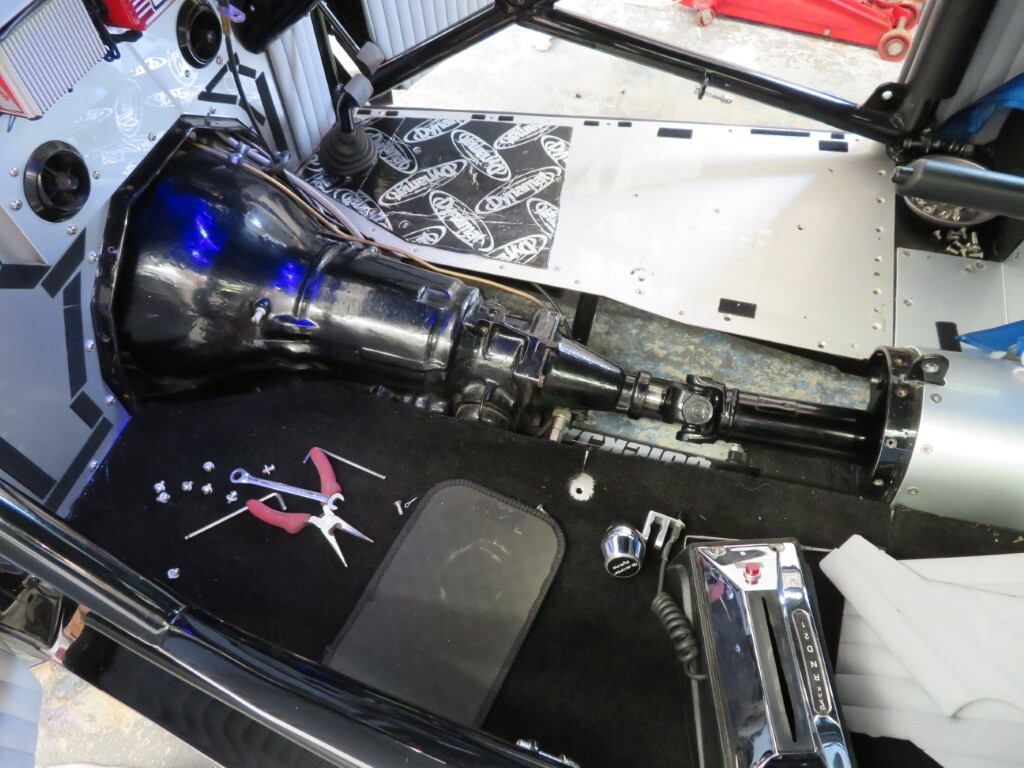 next is to remove the drivers side floor panel; 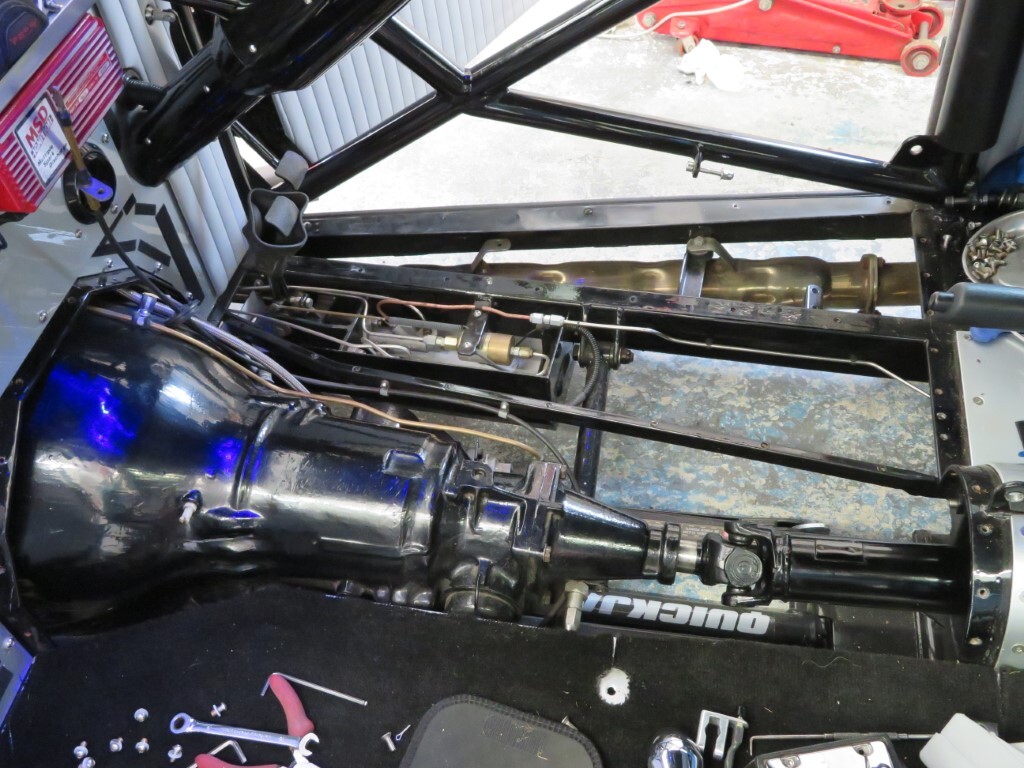 I want to mount the switch roughly here - it's wire tied on here just to see how it will fit. 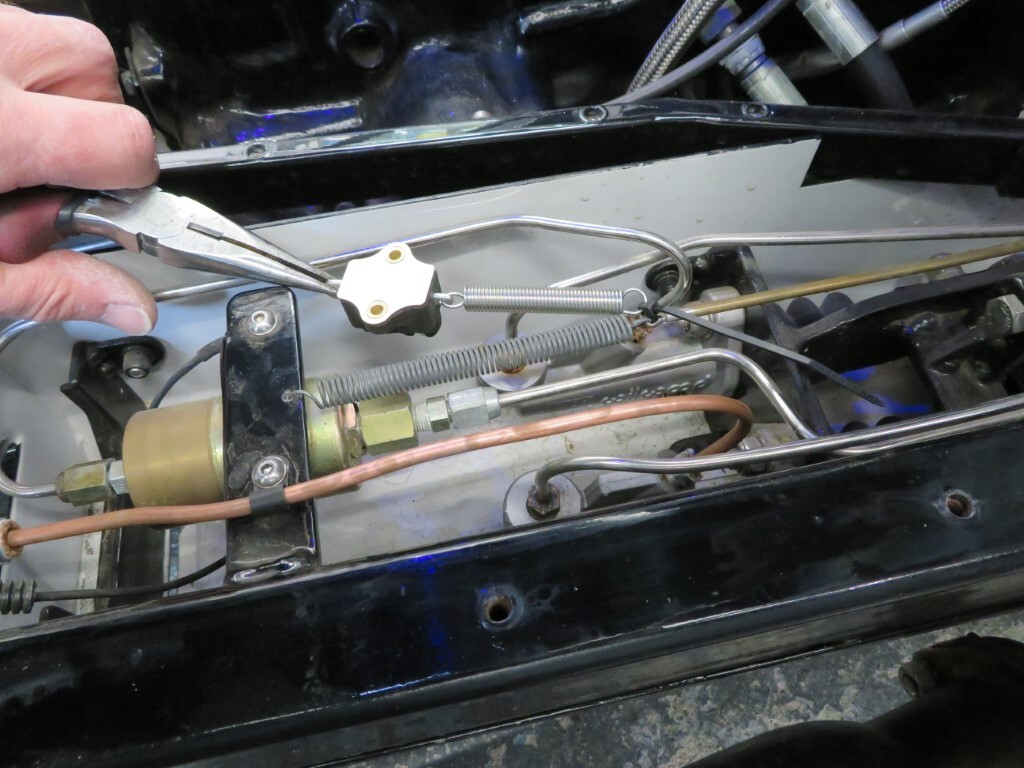 A bit of pondering as to how it would be attached to the pedal return rod, had a few different ideas that I tried but ended up adding a second bit of brass tube with another split pin soldered into the end with the brass tubes soldered together. 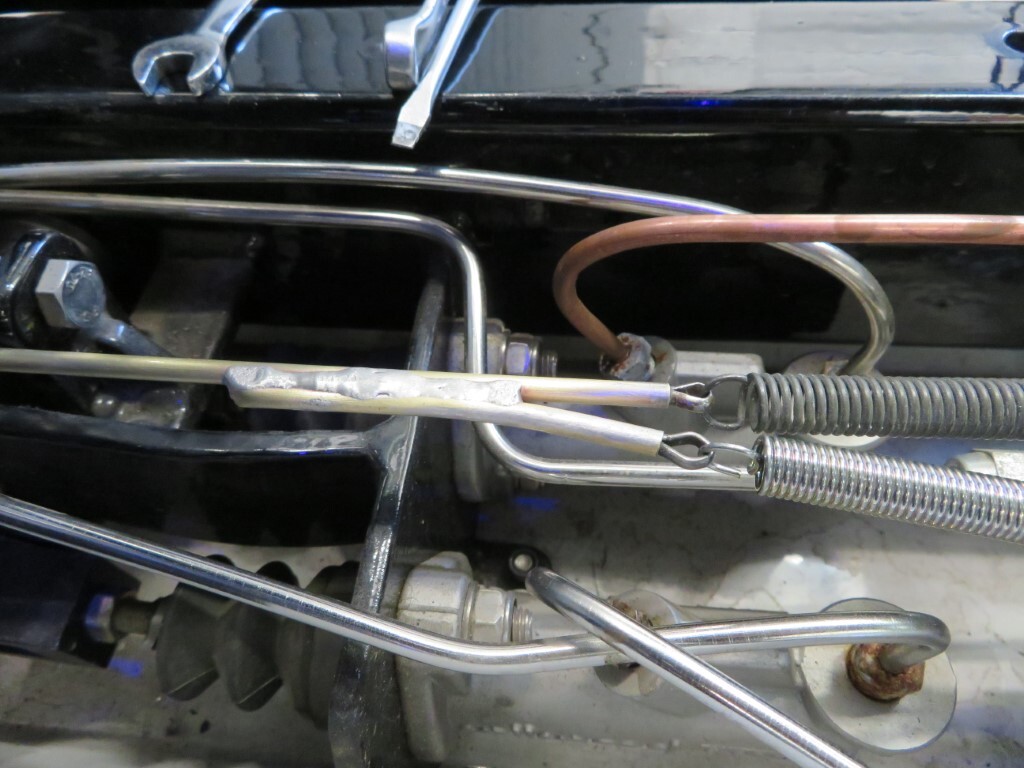 Then it was the prototype bit of aluminium plate to mount the switch on and to fix to the bracket that the line lock is mounted on. Slots were cut to find the best place to get the switch fixed at. 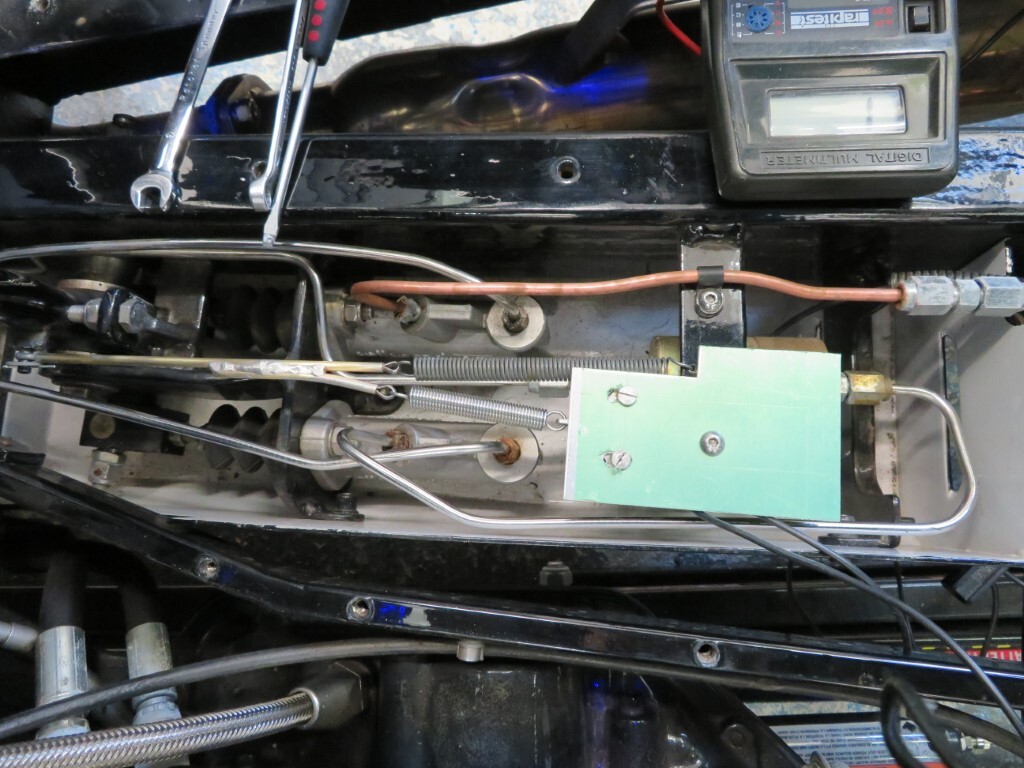 Once I had found the sweet spot I made a second plate without slots, its in rough form here as dinner stopped play, I'll finish shaping it tomorrow. I'll also give the brakes cover a good clean as it's a bit grotty here! 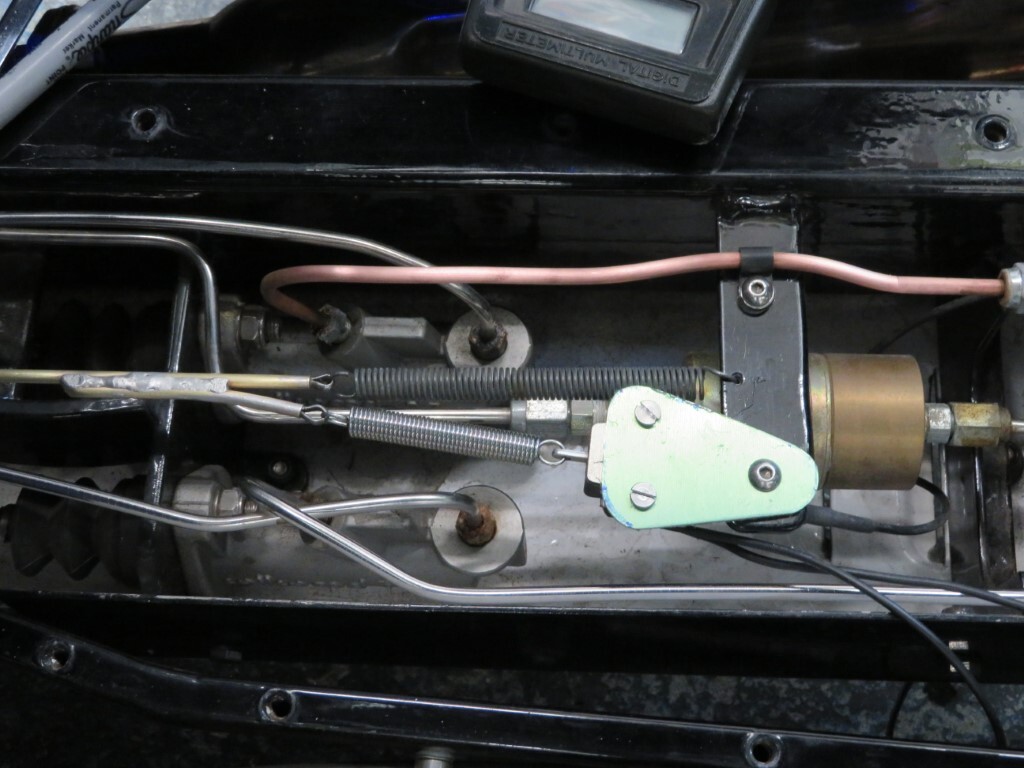 Testing with the multi meter shows that the switch triggers about 1/2" of pedal travel sooner than the hydraulic switch does, so I'm pretty happy with that. Tomorrow will see the plate tidied up and polished and I'll then have to get under the car to extend the wiring loom forward to the switch from the hydraulic switch that is fitted over the rear axle. |
| |
|
|
|
|
|
|
|
Almost completed the job today - but not quite as the garage faeries have struck. One of the spreader washers for the seats has been taken by them and hidden somewhere, I'm sure they were having a good laugh as I searched the garage for it, but they had hidden it far too well. I'm sure they will put it back if I leave it for a day or so  In the meantime I had made up a new loom extension; 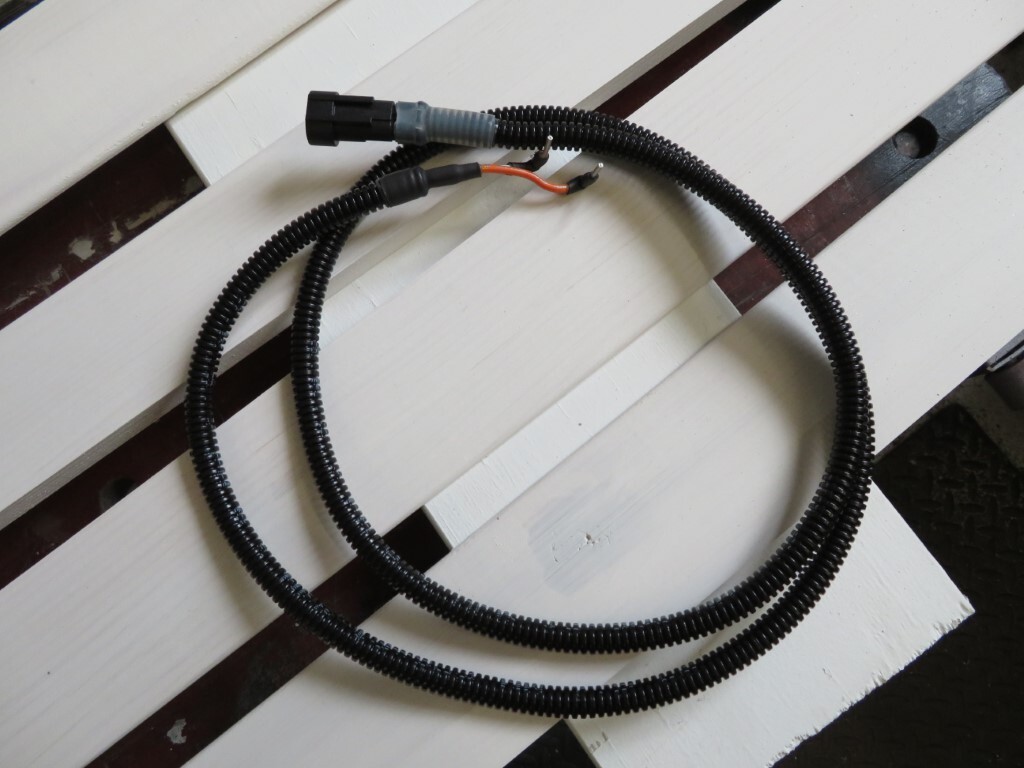 I did manage to catch my leg walking around the back of the car on the shifter arm, tripped me up and tangled my legs in it so I went down hard, I thought it had hit the back of the car but luckily it had not, so no damage done there. My legs however did not fare so well so a bit scraped & sore now. Bracket now finished , I gave it a quick polish on the mop, not sure why as no-one will ever see it! Brake cover has now been given a good clean as well; 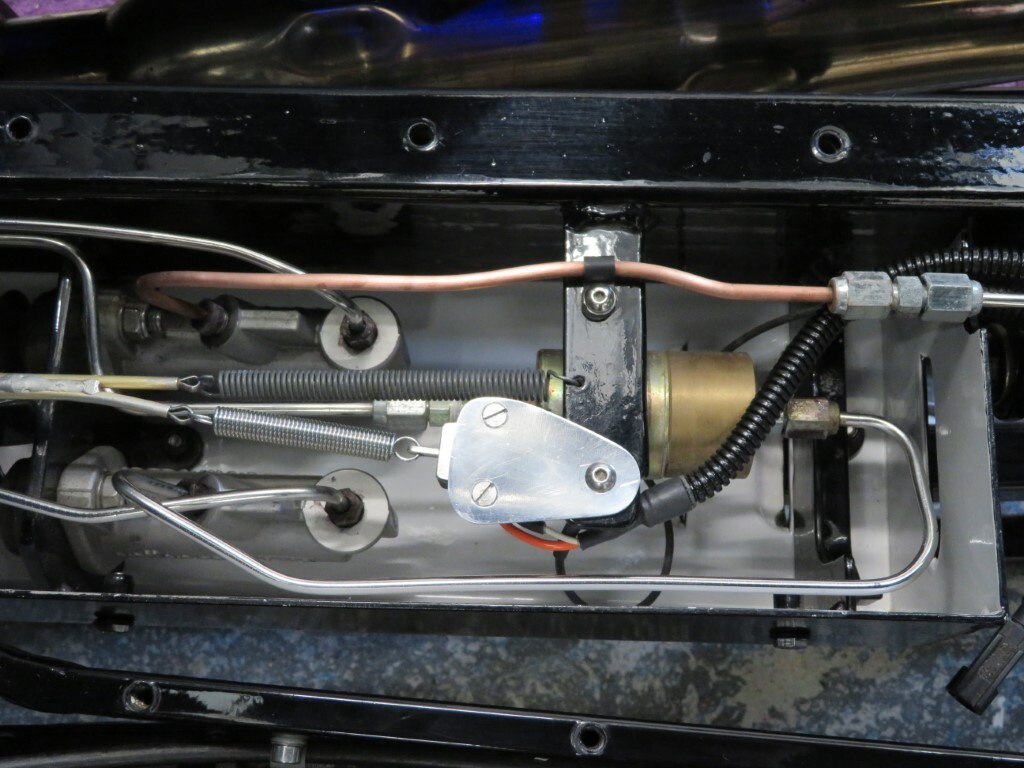 And where it replaces the pressure switch under the car, I only had the male part of the weatherpack connector in stock, so the female sides are just pushed on the pins here, I'll get the female casing tomorrow, luckily the casings are the last parts to be fitted so it will just slide over the pins with a bit of adhesive heat shrink to seal it. 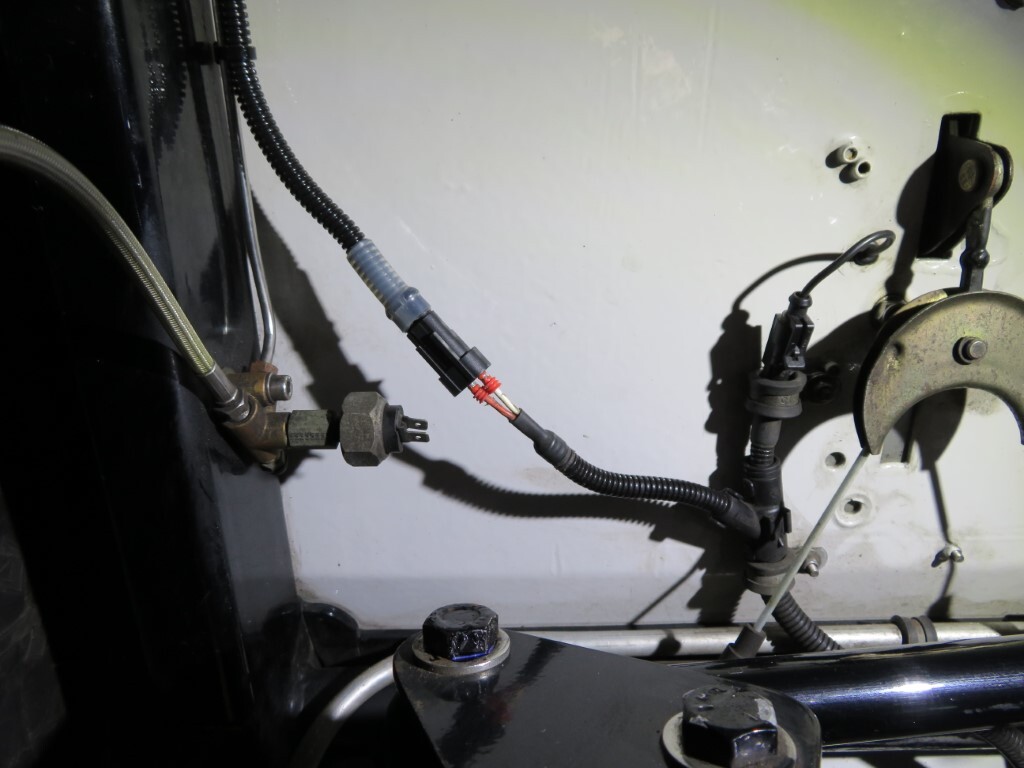 Maybe I will find the seat washer when I fit the cover tomorrow  |
| |
|
|
stealthstylz
Club Retro Rides Member
Posts: 14,956
Club RR Member Number: 174
|
|
|
|
|
Or maybe you'll find it when you're wondering what that annoying rattle is under the floor lol.
Video was cool,
|
| |
|
|
|
|
|
|
|
|
Ha-Ha!
The annoying thing is I had put all the bolts in a tin in the car so none would get lost.
|
| |
|
|
stealthstylz
Club Retro Rides Member
Posts: 14,956
Club RR Member Number: 174
|
|
|
|
|
I do that with engines. All the bolts go straight into a tin, tin goes into degreaser for 5 minutes then into TFR for several hours. Tin comes out, quick rinse off then dried and any exterior ones/silicone join ones wire brushed.
Pour the tin out ready to build the engine and there's always a couple missing. If it didn't happen when the other lads were on holiday I'd swear somebody was taking them out on purpose.
|
| |
|
|
glenanderson
Club Retro Rides Member
Posts: 4,345
Club RR Member Number: 64
|
|
|
|
|
I would have liked your post for its progress, but then couldn’t because of your tumble, but could again because you only damaged yourself not the car, then couldn’t again because of damn garage imps.
Can we please have all the good news in one post and the bad in a separate one?
Thanks.
🤪
|
| |
My worst worry about dying is my wife selling my stuff for what I told her it cost...
|
|
|
|
|
|
|
|
It’ll be under the fridge.... I suffer from really strong fridge suck, there must be half a dozen 10mm sockets under mine!!
As above, it was a rollercoaster of highs and lows, so I decided not to like it either.
GWS but at least you didn’t scratch the car
|
| |
|
|


 And no, I was not paying enough attention at the roundabout!! (was watching what I thought was a copper on a bike on other side - so not paying attention to cars on roundabout - naughty me!)


