super66
Part of things
 Singer Chamois Coupe 1969
Posts: 396
|
|
|
|
|
Really starting to come along now mate!
I think like we said that you could bolt your coil onto the inspection plate, saves more drilling, or could it be classed as weight loss lol.
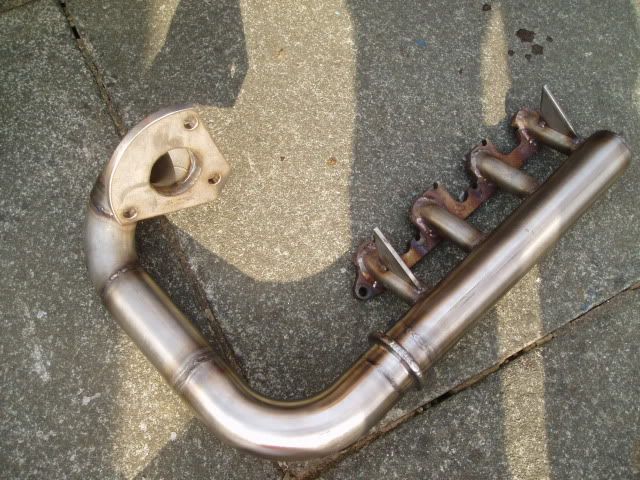
You were sayin that you scratched the intercooler pipes pretty bad, can you not spin them round or they scratched all over? surely a bit of polish can sort!
|
| |
|
|
|
|
bazzateer
Posted a lot
Imping along sans Vogue
Posts: 3,653
|
|
|
|
Looking good Chris  Keep The Imp Club updated as well! |
| |
1968 Singer Chamois Sport
1972 Sunbeam Imp Sport
1976 Datsun 260Z 2+2
1998 Peugeot Boxer Pilote motorhome
2003 Rover 75 1.8 Club SE (daily)
2006 MG ZT 190+ (another daily)
2007 BMW 530d Touring M Sport (tow car)
|
|
|
|
|
|
|
|
Great work, videos needed !
|
| |
|
|
|
|
|
|
|
|
|
|
Love this car and loving the work! I always seem to end up rewiring sections of my cars. One day I'll say sod it and do the whole car, they you know exactly what everything is and that there are no dodgy connections hidden behind the dash etc.
|
| |
|
|
|
|
|
|
|
lol yer I thought about redoing the whole lot but when I put the harness back in I checked over every single wire and was happy enough this time around, cheers for the comments! |
| |
|
|
|
|
|
Apr 10, 2009 16:50:50 GMT
|
|
|
| |
|
|
super66
Part of things
Singer Chamois Coupe 1969
Posts: 396
|
|
Apr 10, 2009 18:18:59 GMT
|
Good effort that mate! yeah that starter wire will be a lot better. Good to hear that the doors weren't too bad to sort out, like you say 1 hole you can fill and paint can't ya! be good once the ball cup thing wotsit thing comes then can get it done properley  That gauge shelf looks neat don't it! not bad for a template  lol |
| |
|
|
|
|
|
|
|
Apr 15, 2009 23:13:24 GMT
|
LITTLE UPDATE TIME AGAIN! I finished off making the dial plate then made some mods to the switch plate then mounted them both up temporary to see how it all looks! decided to drill a hole in the bottom plate too. will round the edges off to I think!    bit to much flash on this pic! gear knob fitted  then after drawing up and measuring the plate holes needed to mount the seats on the frames I drilled the holes, then tried to fit. I couldn't believe how far off I managed to get it all wrong very un characteristic of me! (must have been the sun and bear :    then cut the studs down (and then filled them level/smooth as they would hit the seat, need to make some 10mm spacers still for the seat to sit on the plate, tomorrows job!  until tomorrow, today whatever lol chris |
| |
Last Edit: Apr 15, 2009 23:22:25 GMT by deadlikeme
|
|
|
|
|
|
|
Apr 16, 2009 23:26:44 GMT
|
Test fitted the seat, wired the fans up, stuck the boost gauge down, ran the hose to the engine bay and mounted the battery box. little spacers  fitted in place  then tested in the imp, happy with it and tried to get in, happy to report its easy enough!  took me awhile to figure out what wire was what one on the fans as I couldn't remember which way they where meant to blow after checking its the black for positive and blue negative (why not just red and black!!) so the fans flow into the car aiding flow not pushing into it (right yer?)  ran the wires up to the inside  then I wanted to mount my battery box in the middle of the back seat so had to make a little shelf for it to sit on flat  bolted through the box into the car so nice and sturdy  sorted  is this ok as a earthing point?  stuck gauge in place and fed the boost tube down the vent  along the wire harness  by the fuel lines  up the arch and can just see inside the big hole the wire coming through the grommet in the bay   till next time where some big bits get put back on, one being a new bit! |
| |
|
|
|
|
|
|
|
|
looking good. as long as that earth is clean of paint it will be fine.
|
| |
|
|
|
|
|
|
|
|
thought so, good to hear confirmation as the hole was already there It works well.
thanks
|
| |
|
|
|
|
|
Apr 17, 2009 22:12:14 GMT
|
|
|
| |
|
|
|
|
|
Apr 17, 2009 23:33:45 GMT
|
|
great build thread
|
| |
|
|
Bioshock
Posted a lot
It aint hip to be square.
Posts: 1,861
|
|
|
|
Great work fella  looking forwards to the finished car,its going to be the nuts. |
| |
Almera GTI = ugly bird who turns out to be great in the sack = Win
|
|
PhoenixCapri
West Midlands
Posts: 2,684
Club RR Member Number: 91
|
|
|
|
Looking good, but I'd run an earth cable to the engine block. Your asking a lot of the current to get through the body for starting from there, and when you do that nasty things can happen, I had an engine fire start once due to underspec'd earth system, now I always run a few earths since it costs next to nothing |
| |
|
|
|
|
|
Apr 19, 2009 20:50:50 GMT
|
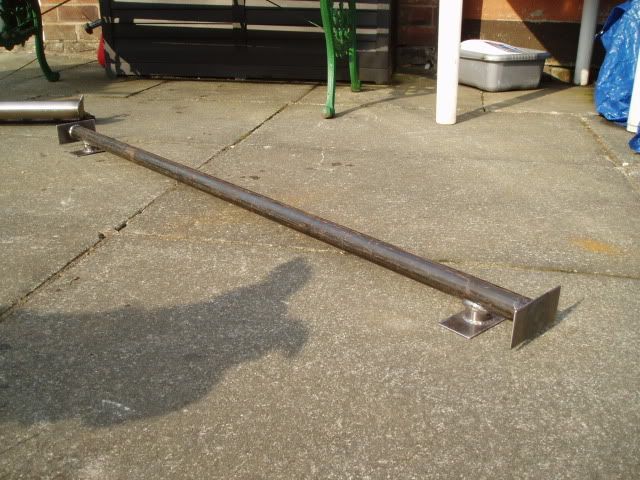
Started off by spotting the exhaust in the position I wanted, Ill stop right now and explain what your going to see next lol I'm not good at welding I know that just Id rather try and get it solid and do it myself than have to wait get it done elsewhere then fit and see if right so please don't be mean lol. I took it off and went all the way around it filed down a little in this shot.  but its all good as its covered by this ;D ;D  in position just need to get a strap and hanger now.    intercooler pipes ect in place   and intercooler all tightened up (then I realised I needed to do the water pump still d'ho! took me ages to get the jubilee clips in place too)  water pump mounted "quickly"  need more clips everywhere on this car at the moment!   also connected up the turbo water/oil pipes, wires, other hoses ect ect but the pics are more boring than above lol. air filter from window to turbo   its one of those dynatwist things, it was fitted to my cupra leon before i sold it. think ill be starting the engine next weekend! YEEEEEEEEEEEEY!! |
| |
|
|
|
|
|
Apr 25, 2009 23:24:40 GMT
|
this weekends work so far, i spent Friday till 1.30am working on it and a good 6 hours on it today! got all my lights working 8) never had a four light front before i likes it, I likes it a lot!  new pipes on the cooler with heat wrap on them  found a strap for the exhaust in the garage which will fit like this but with a long stud bar ect ect!  decided to see why my dip stick was getting bent like this  I noticed this after I put new oil in :roll: so out it came, and sump off.  On the baffle plate! the hole wasn't in the right place - don't know what numpty made this one!!   you can see where its been hitting and dragging! sorted now   fuel pipes all on  spent a lot of time on the wiring this weekend! very boring pics so cut short! drawing done on cad by me  spent hours, connected basically everything using solder so its all neat and solid! fuse box  relay box  all working and happy with it except the bloody water pump, looks like its buggered running really rough so have to think what to do with it now. Ready to start it up tomorrow after f1!! so last little job tonight   chris |
| |
|
|
mk14dr
Yorkshire and The Humber
Posts: 4,472
Club RR Member Number: 85
|
|
|
|
WOW - what a beast. Smashing colour, and some cool details - however, if it was me, I'd lose the 'turbo' badge from the back, no need to advertise it afterall |
| |
Last Edit: Apr 26, 2009 1:46:25 GMT by mk14dr
|
|
|
|


 Keep The Imp Club updated as well!


 took the dizzy apart to look the base plates out and lock the bottom out so the timing was locked at static so when I come on boost itll stay the same.


 then Ill do the other side when this is good.


 lol
lol