Seth
South East
MorrisOxford TriumphMirald HillmanMinx BorgwardIsabellaCombi
Posts: 15,543
|
|
Mar 26, 2015 10:00:26 GMT
|
Thanks everybody peeps. Amazo, there's no way I'm painting this all white (and maintaining it that way) underneath!  Plug leads then. When I did the Herald engine swap I had a whole load of HT lead cotton braided in the old yellow/black style. This is modern carbon cored lead, not copper lead which you can buy this way off the shelf. Anyhow, with the various ends ordered from AES I got on with the job. With the lead cut I soaked superglue into the end part of the braid so that it wouldn't unravel while pushing through the boot. Its pretty tight so I applied some Vaseline to the entry point to aid insertion. 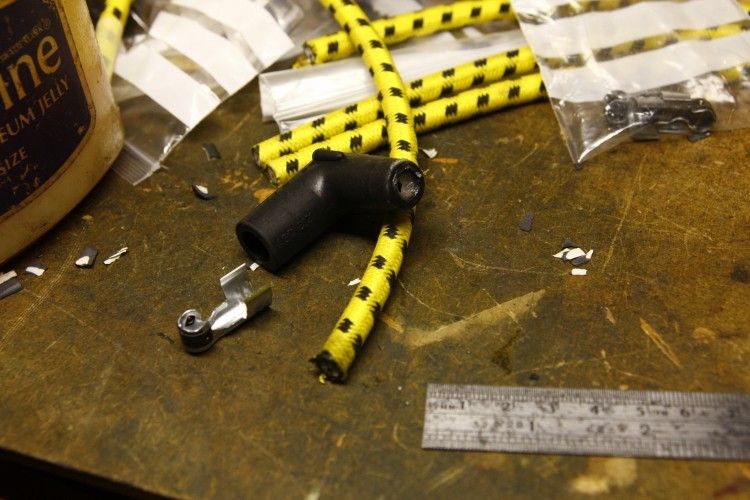 Once it is poked right through, very carefully trimmed the insulation away as the carbon core is also very easily cut. 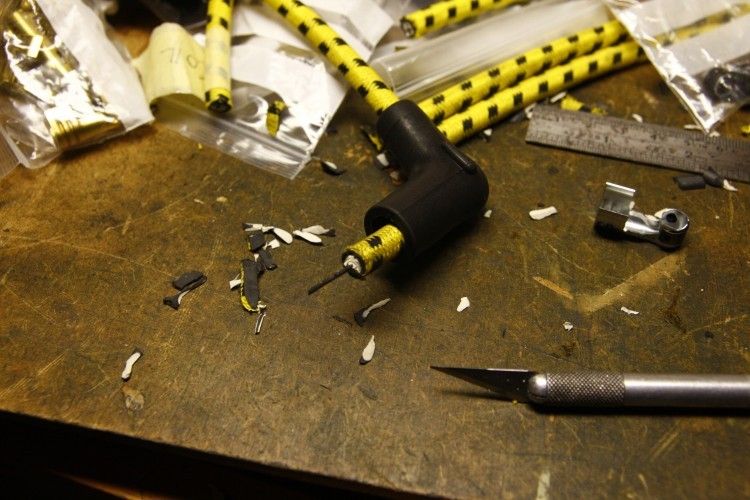 Core wrapped under the lead and then crimped into place. Then pull the lead back out until the terminal is in the right place in the boot. 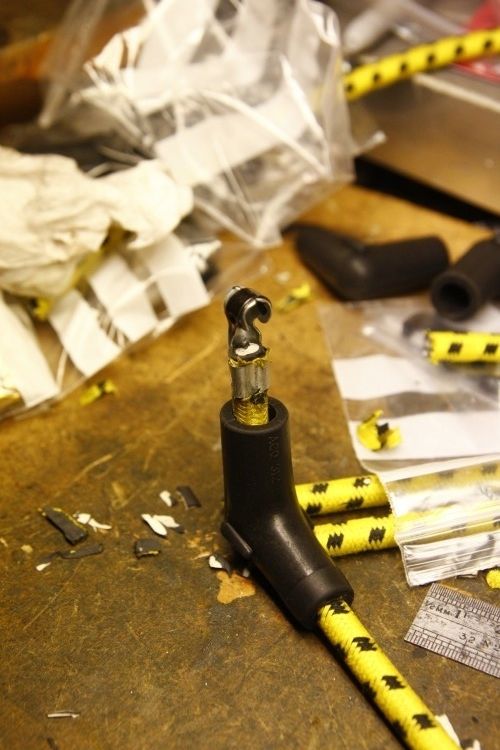 And repeat nine more times. 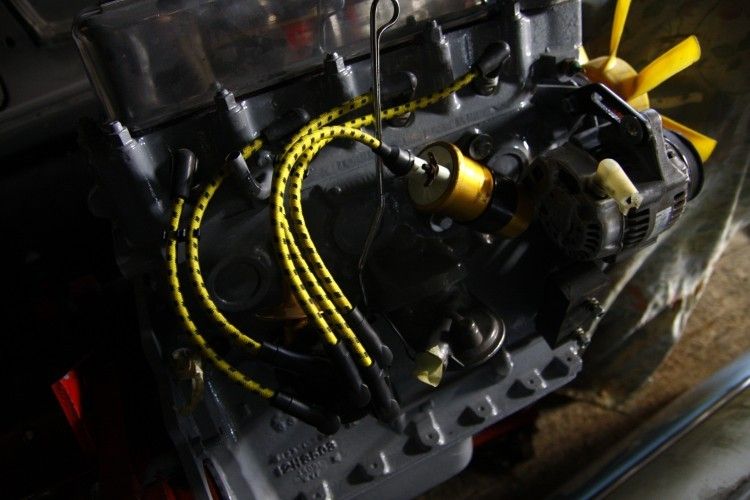 When I said previously I wouldn't be bothered about some dust in the engine bay paint I was actually a bit dissapointed with it when I first went back and knew if I didn't deal with it I'd always feel that way. So it was rubbed down lightly with some 1200 and then got two more coats which I applied by leaning over from the front (with added shin pain thanks to the front metalwork) rather than standing in the middle. Much better finish in general. The compressor died as I was 99% done and I was rather glad it didn't do that half way through. Not terminal though - I have the compressor in bits at home at the moment to re-build and it should be good to go again soon. Finally happy with the paint I've started putting things back for hopefully the last time and finding that I don't quite have all the fixings I might need.... Anti-roll bar with its new bushes out of the boot... 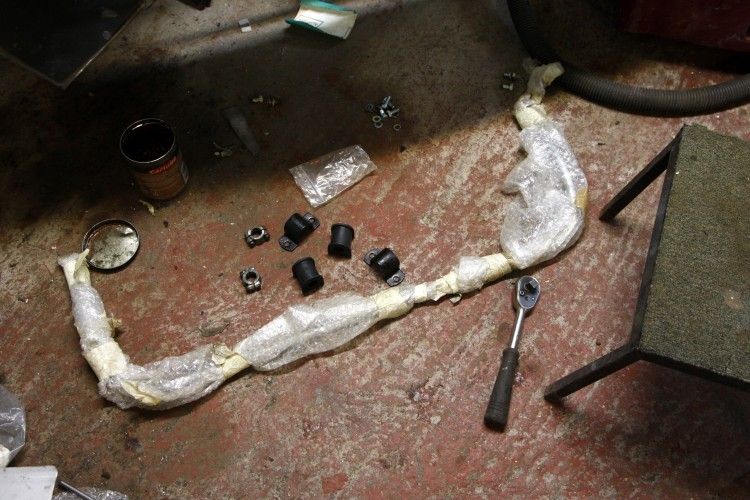 and on to the car. 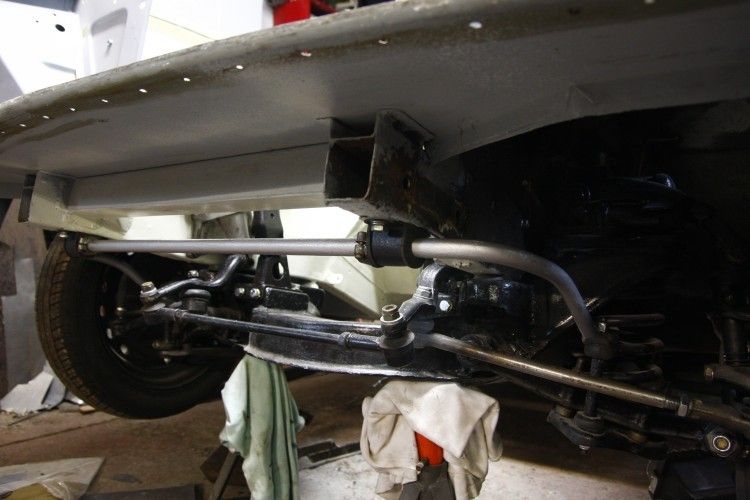 Steering box and column with its support bracket. 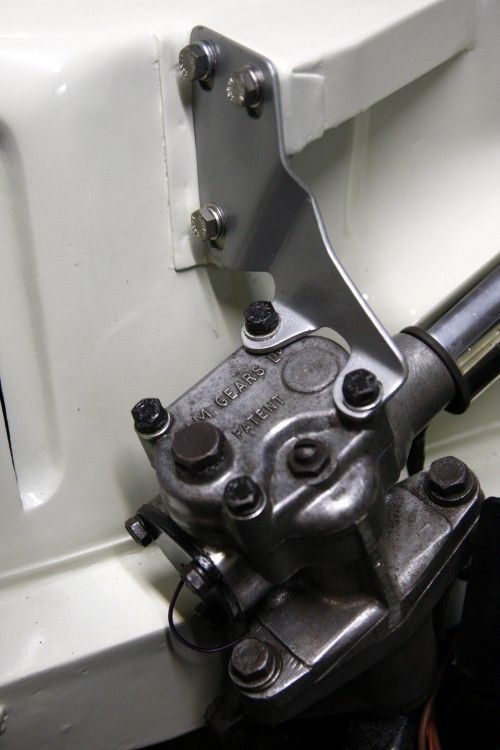 Stainless column tube slipped over the top and wiring loom passed through. 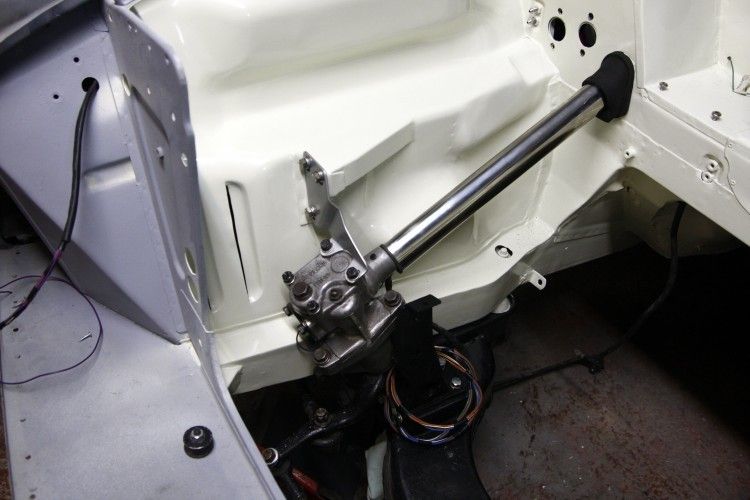 Heater box, for which I had to make foam 'gaskets' it sits on top of. 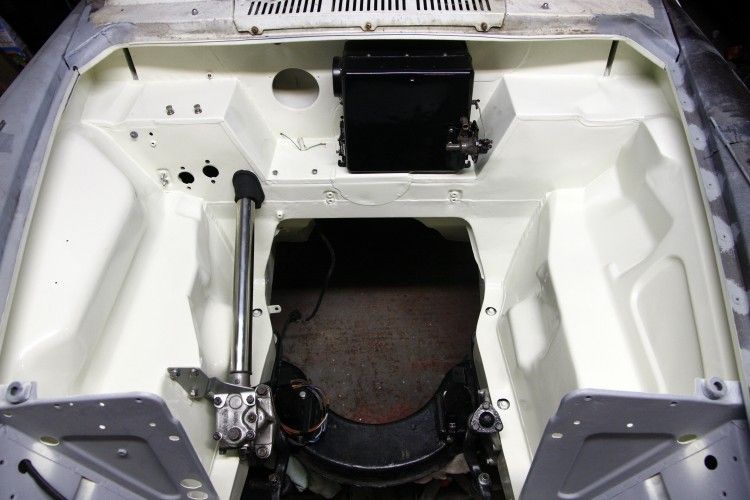 Dash is also back in, brake lines underneath etc. |
| |

Follow your dreams or you might as well be a vegetable. |
|
|
|
vulgalour
Club Retro Rides Member
Posts: 7,285
Club RR Member Number: 146
|
1970 Morris Oxford - 20/9/24 - vulgalour
@vulgalour
Club Retro Rides Member 146
|
Mar 26, 2015 10:43:33 GMT
|
|
Wow, that's dedication with the spark leads. Going all out on this with details like that.
|
| |
|
|
|
|
|
Mar 26, 2015 11:20:35 GMT
|
What are you planning for the heater hoses? I use the braided tap connectors with compression fittings they work great look tidy and are quick to undo for the frequent engine outings.  |
| |
|
|
VIP
South East
Posts: 8,302
|
|
Mar 26, 2015 14:01:26 GMT
|
Its pretty tight so I applied some Vaseline to the entry point to aid insertion.  |
| |
|
|
brc76
RR Helper
Posts: 1,108 
|
|
Mar 26, 2015 14:37:48 GMT
|
Its pretty tight so I applied some Vaseline to the entry point to aid insertion.  |
| |
|
|
|
|
|
|
|
|
Long time since I've popped into this thread, you have really made some progress Seth - look forward to seeing this out again.
|
| |
|
|
bazzateer
Posted a lot
   Imping along sans Vogue
Posts: 3,653
|
|
Mar 29, 2015 18:25:49 GMT
|
|
This has progressed really quick since I visited. It's going to be a bit of a stunner!
|
| |
1968 Singer Chamois Sport
1972 Sunbeam Imp Sport
1976 Datsun 260Z 2+2
1998 Peugeot Boxer Pilote motorhome
2003 Rover 75 1.8 Club SE (daily)
2006 MG ZT 190+ (another daily)
2007 BMW 530d Touring M Sport (tow car)
|
|
|
|
|
Mar 30, 2015 12:04:34 GMT
|
|
What a great job you are doing with this, that engine bay is looking really good. Much likely!
|
| |
1992 Range Rover vogue tdi
1991 Westfield
1970 MG B GT
To infirmity and behond.
|
|
Seth
South East
MorrisOxford TriumphMirald HillmanMinx BorgwardIsabellaCombi
Posts: 15,543
|
|
|
|
Thank you guys. It is quite daunting to think I might actually have a working car in a matter of weeks and that all these things are not coming out again in the short term. What are you planning for the heater hoses? I use the braided tap connectors with compression fittings they work great look tidy and are quick to undo for the frequent engine outings.  Heater hoses will just be normal rubber hose, with a stainless pipe running from front of the engine to back. Jubilee clips are also quick to undo...  but I don't intend frequent engine outings! |
| |

Follow your dreams or you might as well be a vegetable. |
|
Em
Part of things
  Fuel Injected? Carb Infested!
Posts: 601 
|
|
|
|
|
Beautiful work as always Seth and fabulous attention to detail.
Think I've said it before, but it REALLY is starting to come together now!
Lovely, lovely stuff.
|
| |
|
|
|
|
|
|
|
Mar 31, 2015 14:41:26 GMT
|
|
the real problem with amazing posts like this epic one, is that I get drawn in and then have to view the whole thing from the very beginning right through the end. Now I really have to get back to work if you don't mind!
What I am very impressed with is the skills you have picked up along the way and how much better your welds have become (borrowing that other welder a few years back seemed to change everything!) and your skills on the lathe, with shaping metal, ect.....have all been very inspiring to me...(maybe there is hope for the front corners of my BMW trailer yet!)
superb job...amazing commitment to this car!
JP
|
| |
I know its spelled Norman Luxury Yacht, but its pronounced Throat Wobbler Mangrove!
|
|
Seth
South East
MorrisOxford TriumphMirald HillmanMinx BorgwardIsabellaCombi
Posts: 15,543
|
|
Apr 22, 2015 22:35:20 GMT
|
Thank you Em, JP. Bit of a bits an pieces update from the last few weeks. Master cylinders both now bolted in which means the pedal box is also now fitted securely. 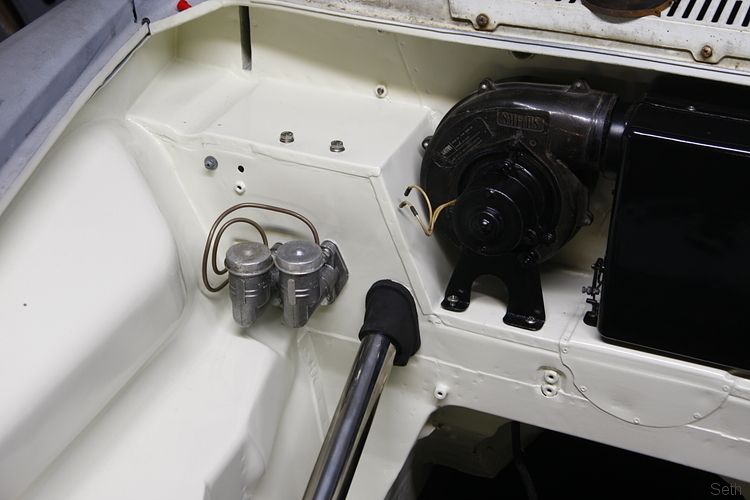 Having faffed about mocking the engine all up and taking some posh photos of it, it was finally time to drop it off the engine stand. Was quite nice to see it from this perspective, at the height it'll roughly be when in the car. 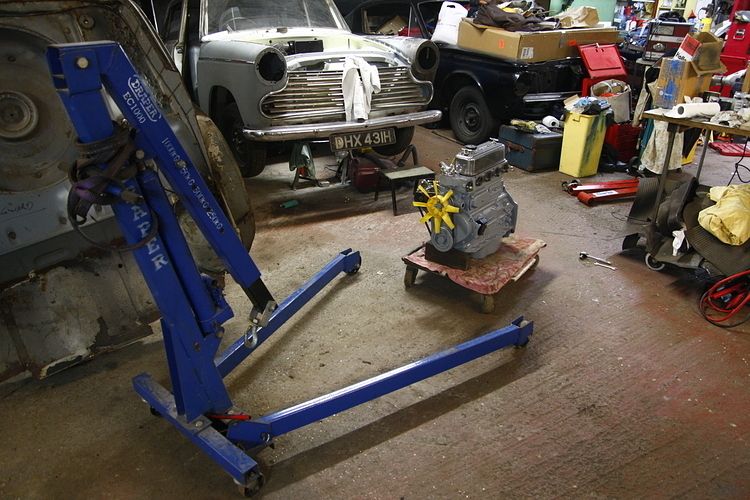 The main reason for this, and a job I have regretted forgetting before it went on the stand, was to get the spigot bush out of the end of the crank. 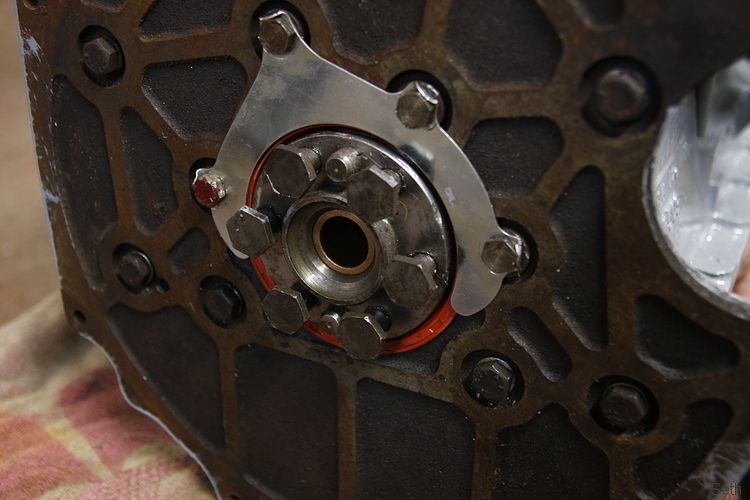 The way I have done this before is to 'hydraulic' it out using a punch and grease. I turned a piece of steel at home that was just slightly oversize to go in the bush so improvised a 'lathe' in the dungeon and used a file while spinning it in the drill to reduce the OD a tad. 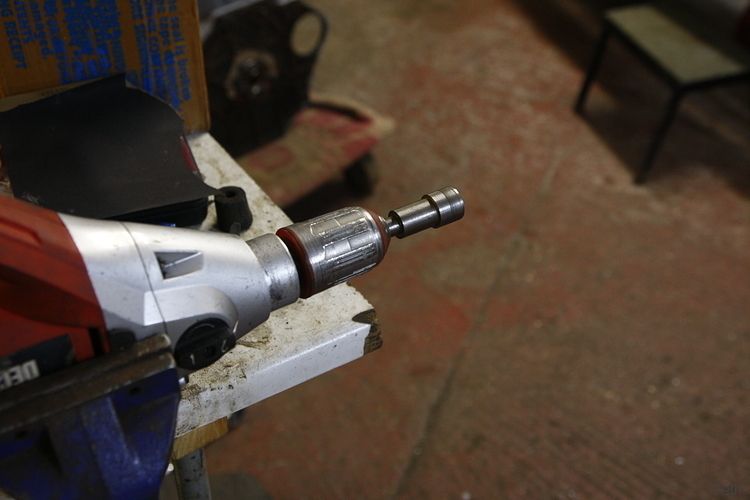 Then, fill the cavity with grease, insert the punch, whack it and the hydraulic pressure pushes the bush out. 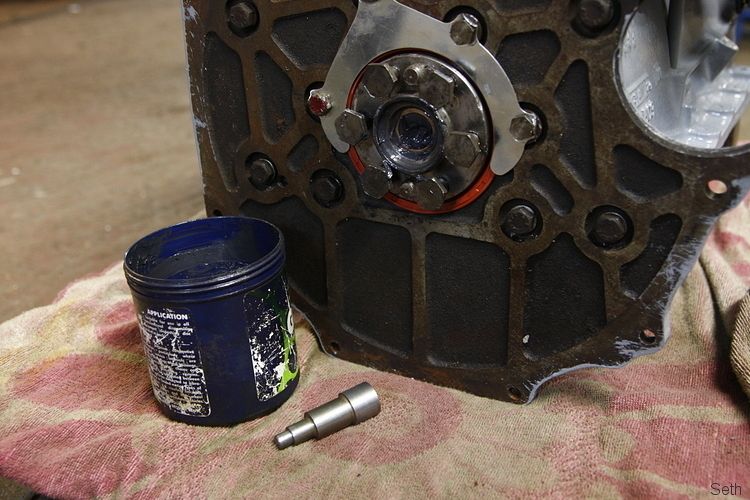 This is where I show you a nice messy photo of the extracted bush and grease everywhere, except I don't because it didn't work. I can only put that down to the crank and bush both being 'new' so haven't suffered any wearing in because it has worked before on older parts. I want to get the bush out intact so I can accurately measure its OD and make a new one with the much smaller bore necessary for my gearbox shaft. Plan B required but annoyingly delayed progress by a week. The ID of that bush is not dissimilar tot eh tapping drill size for a 5/8"BSP thread. I didn't have a 5/8BSP tap so I bought one. Its a common thread for oil cooler plumbing etc so maybe I'll use it more than just this once. Today I got to have a go at the plan. Tap twisted into the bush to cut its thread. 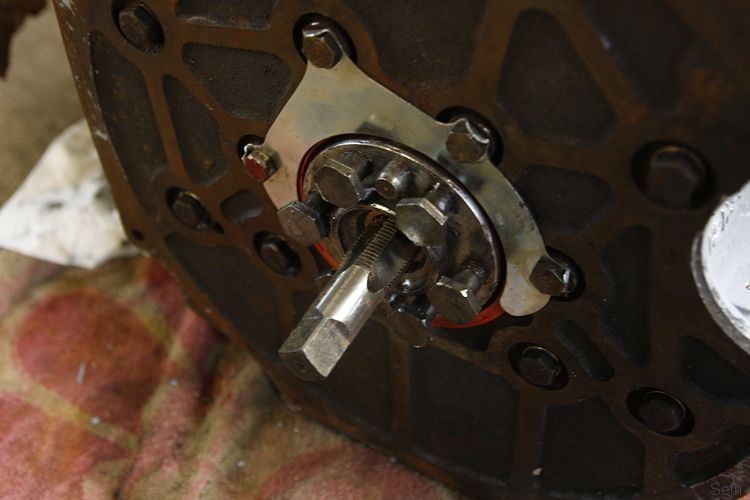 Once it was pretty much through I took it out again and put a couple of scrap smaller nuts in the bore for the tap to press against. Once the tap reached those, continuing to turn it started forcing the bush backwards. Hurrah! The tap shank is smaller than the thread so I was able to wind the bush right the way out. 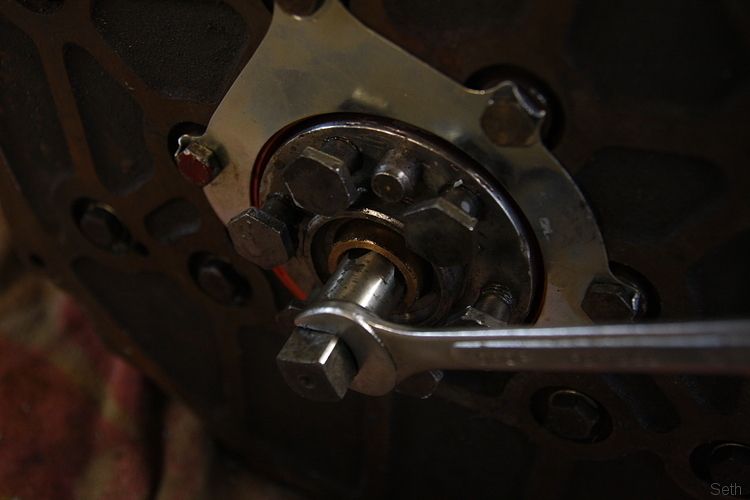 Having done that in 5 minutes today I decided to tackle mounting the fuel pump which meant getting the car back off the stands and roll it forwards so I could crawl in the boot. 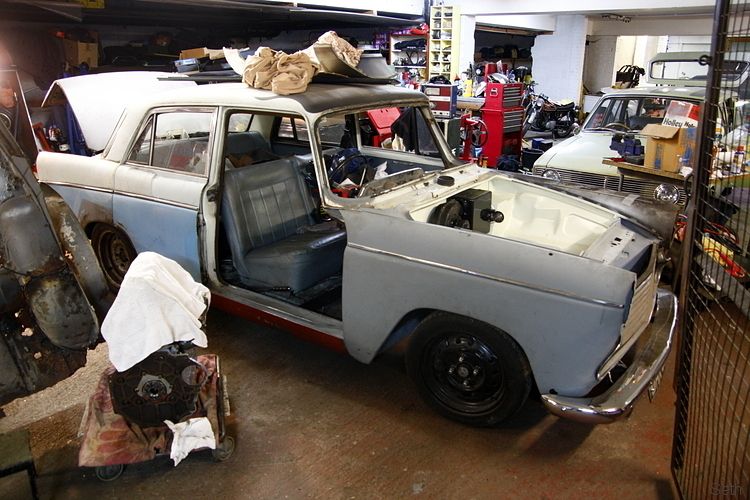 Mounting the pump was a bit of a squeeze in the original location as it is the larger higher flow SU type but I eventually found it a comfortable position and was able to get hoses to/from it. 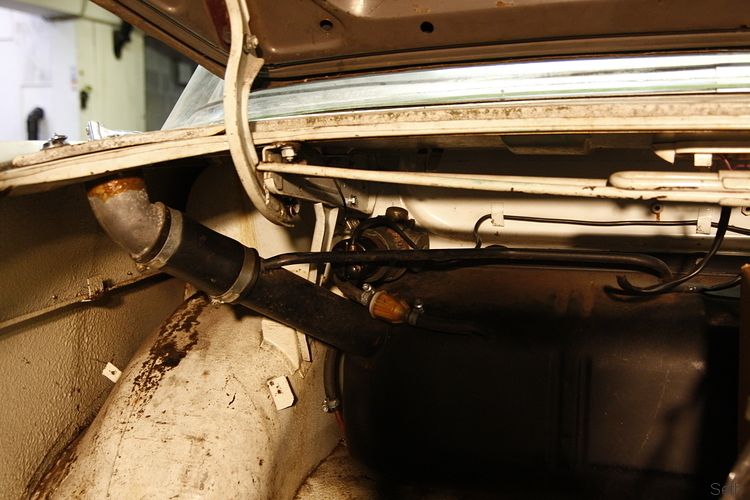 So that's all the progress on the car but at home I have been carb fiddling. The pair of HS8s I'm using were both the same and I need to make a mirrored pair. This means one needs a different, opposite hand jet. I decided to order a pair of jets from Burlen as I also wanted to get a different size (to match the 'MGB Competition' spec shown in the references). Only problem is they didn't have both in stock, nor the parts to make the one I needed. It then struck me that the only difference is the direction the pipe points when it is assembled to the jet body. I wondered if you could actually convert a RH jet to a LH etc. so decided to attack one of the exisitng, too small jets. With the crimped brass collar removed it was possible to pull out the pipe and reverse the direction. 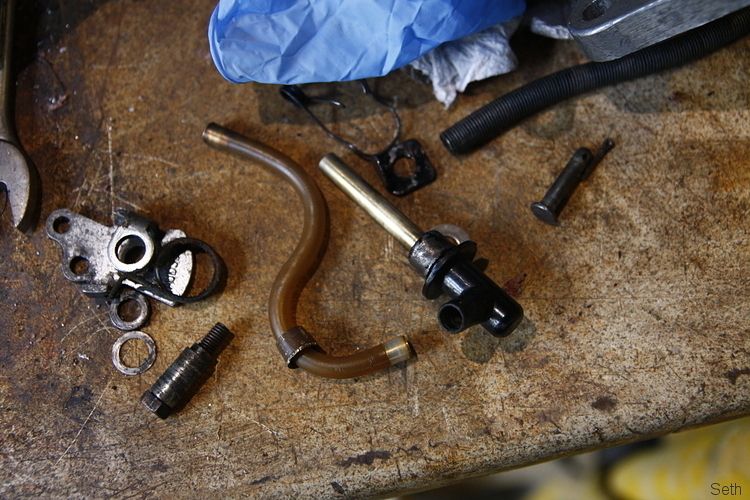 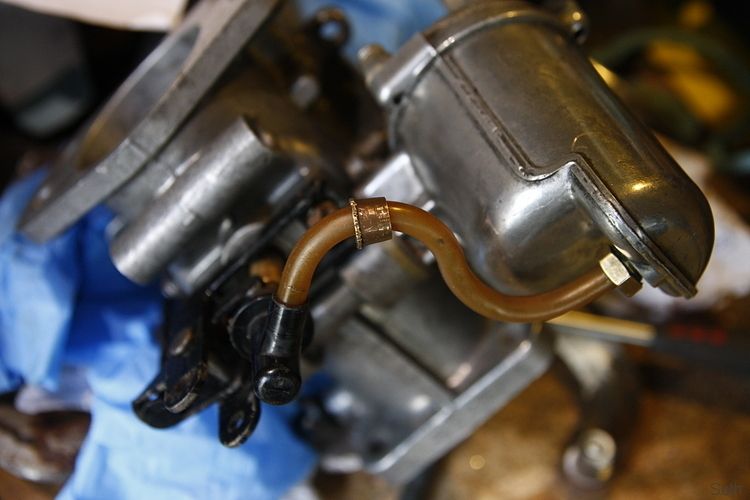 Only risk would be sealing that join again afterwards but I'm sure it'd be possible. Anyway it is all academic now as I then thought it worthwhile to phone around carb parts suppliers to see if anyone had what I needed in stock and the Carburettor Hospital came up trumps. SO they got the order for the jets and other parts came from Burlen. 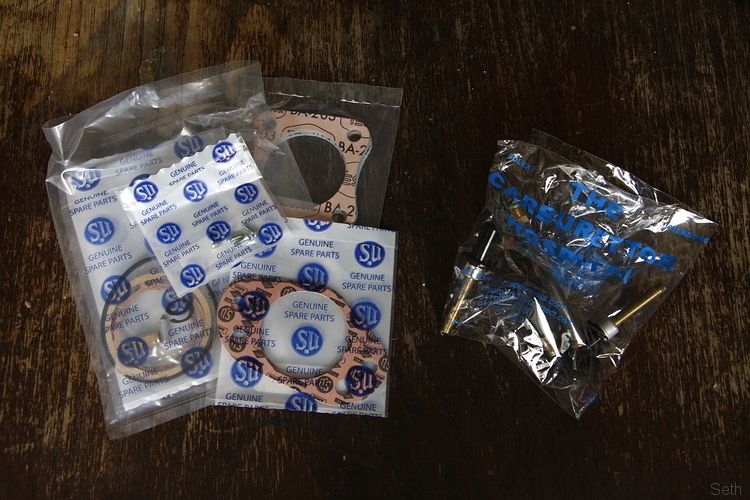 Gotta put that lot together but also still need to sort out the choke levers that need making... |
| |

Follow your dreams or you might as well be a vegetable. |
|
|
|
|
|
|
Apr 24, 2015 14:38:32 GMT
|
|
Seth, your builds always leave me feeling both inspired and happy.
|
| |
|
|
Seth
South East
MorrisOxford TriumphMirald HillmanMinx BorgwardIsabellaCombi
Posts: 15,543
|
|
Apr 26, 2015 19:59:43 GMT
|
Thankyou Vulga, Grizz. Just to finish the spigot bush story, here's one I made earlier. On Friday actually. 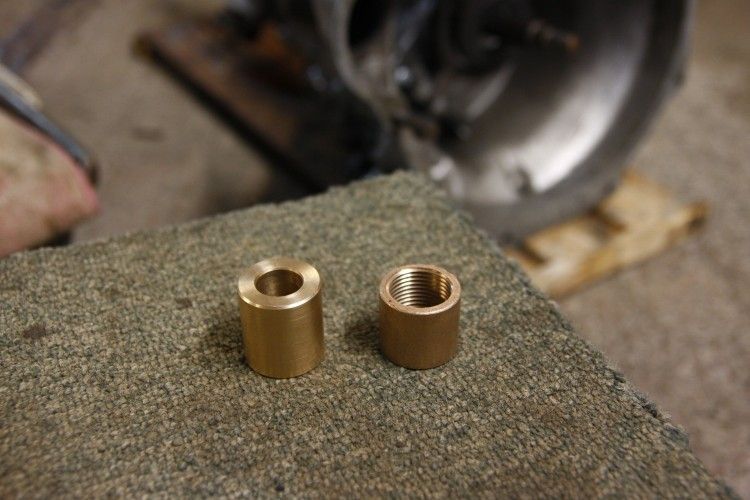 I made the new one longer than the original as I was under the impression that the previously shortened input shaft on the gearbox would benefit from more bush. There followed some furious measuring, sketching and calculations which determined that the new bush was actually too long and I needed to shorten it. 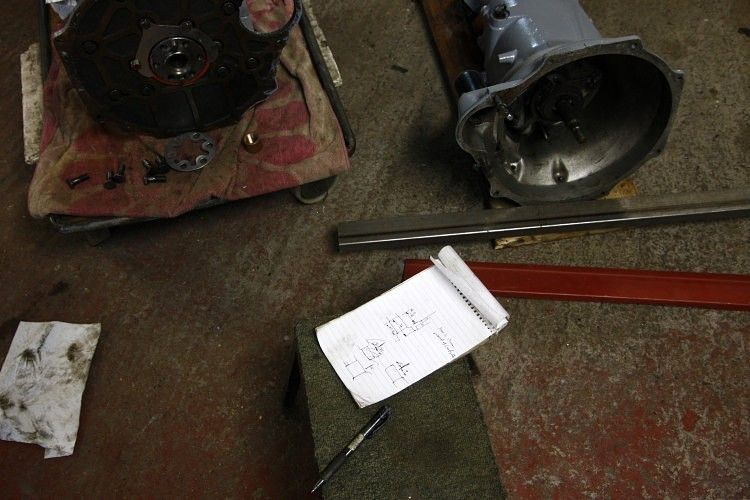 That would have been easy enough to do in the lathe at home but I was on the other side of London so the improvised drilll-lathe came in to play again. 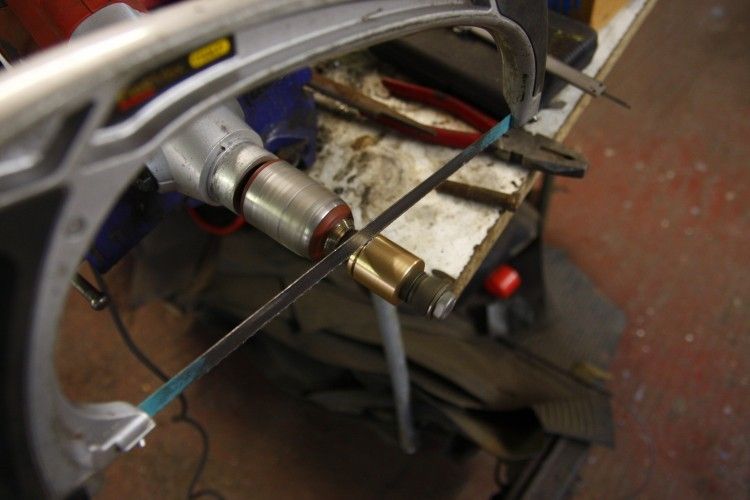 To hold it I used a long 3/8UNF bolt with a (probably Triumph) wheel nut to help centre it all. Worked out OK. 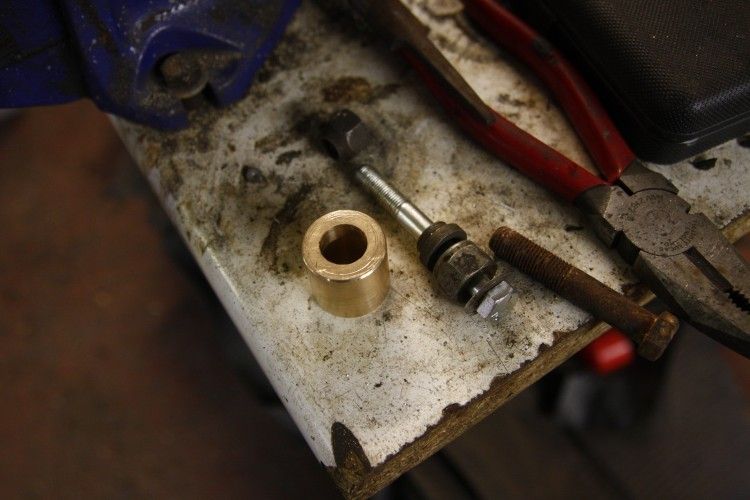 With that done I was able to tap it in to place and subsequently fitted the flywheel. 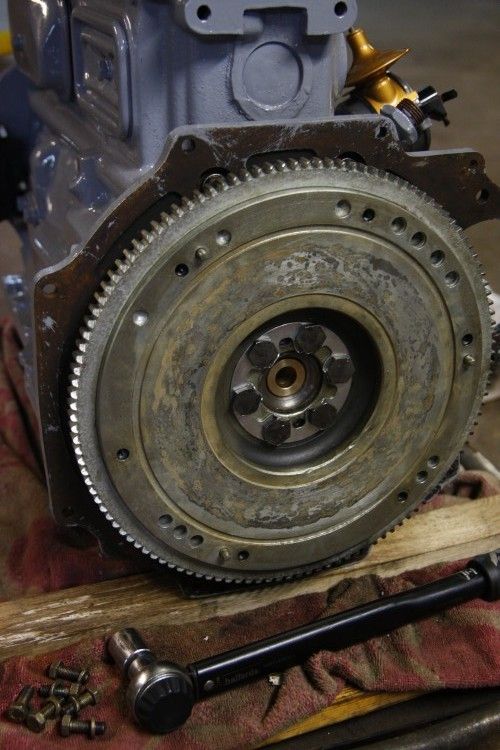 CLutch also went on and new release bearing on the lever. I even remembered to do up the nut on the lever pivot bolt. 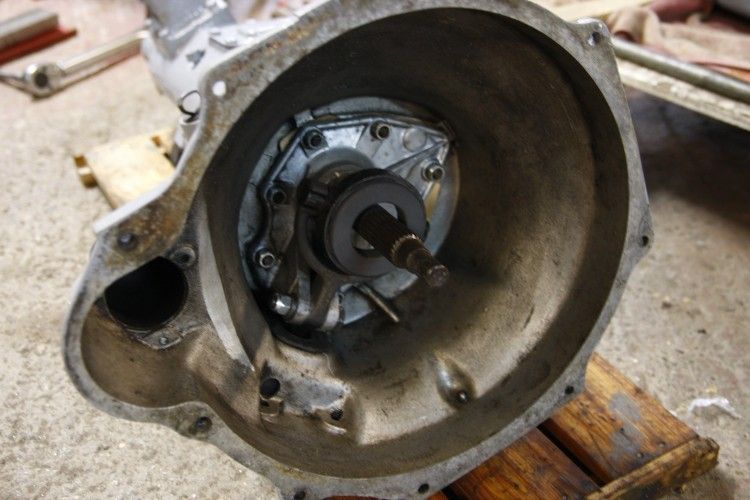 And then with a bit of effort, engine and gearbox were bolted together. As I was on my own that was as far as I got. Hopefully enlisting some help for the next visit and I can get the engine bolted in the car. |
| |

Follow your dreams or you might as well be a vegetable. |
|
|
|
|
Apr 26, 2015 20:25:51 GMT
|
Clutch also went on and new release bearing on the lever. I even remembered to do up the nut on the lever pivot bolt. Great work as always. Just curious - will the pivot bolt only go in from the bottom? I always try to fit bolts from the top so they won't drop out if the nut works loose  |
| |
|
|
Seth
South East
MorrisOxford TriumphMirald HillmanMinx BorgwardIsabellaCombi
Posts: 15,543
|
|
Apr 26, 2015 20:59:07 GMT
|
Just curious - will the pivot bolt only go in from the bottom? Yes.  |
| |
Last Edit: Apr 26, 2015 20:59:25 GMT by Seth

Follow your dreams or you might as well be a vegetable. |
|
Seth
South East
MorrisOxford TriumphMirald HillmanMinx BorgwardIsabellaCombi
Posts: 15,543
|
|
|
|
The day today! Here's pretty much how things were left. 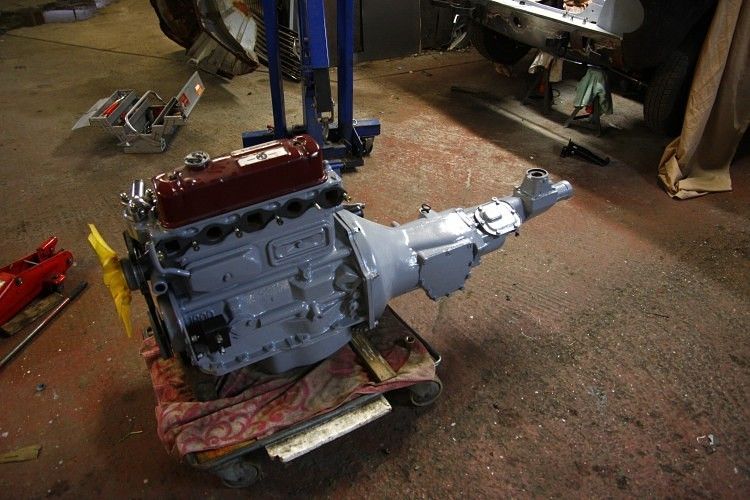 I had enlisted help from paulw and Amazosan lent a hand too. Up we go.. 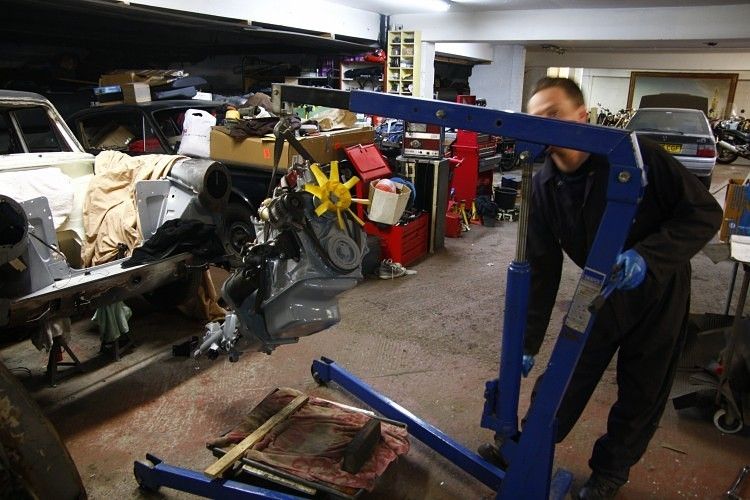 and into the hole 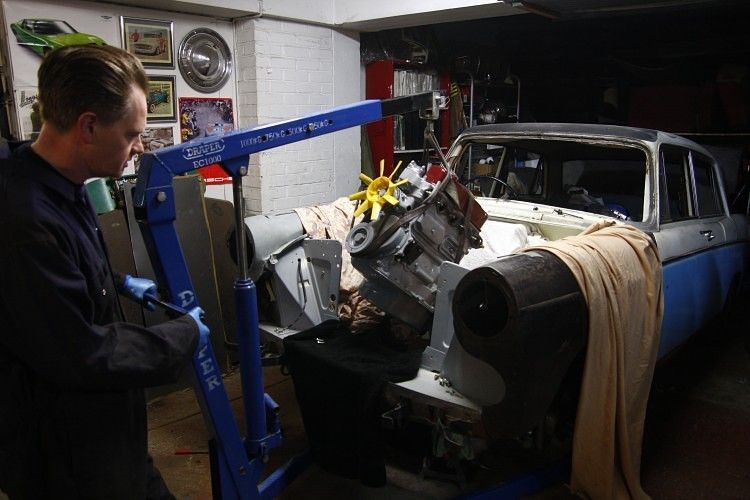 There was a lot of careful jigging, jacking and pumping but we made it in the end. It is really tight getting the sump over the crossmember and the back of the cylinder head to the bulkhead, trying to level it all off as it drops in. I've never taken so much care - even all the sheets/blankets around. 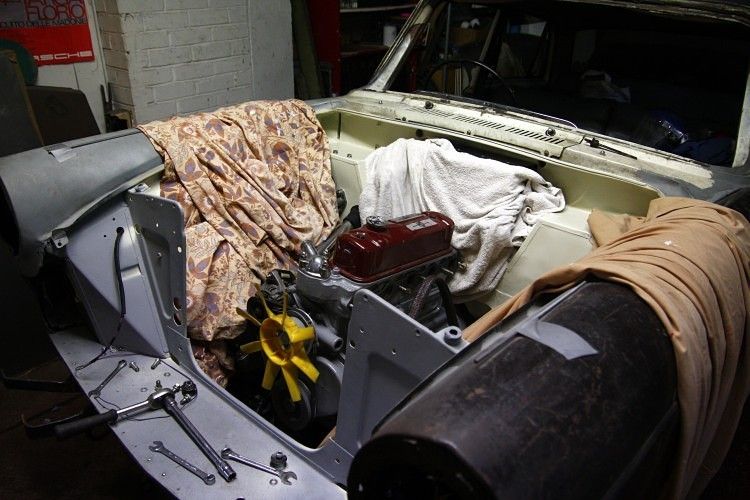 I had to get it back of the axle stands and see where laden ride height was going to be. 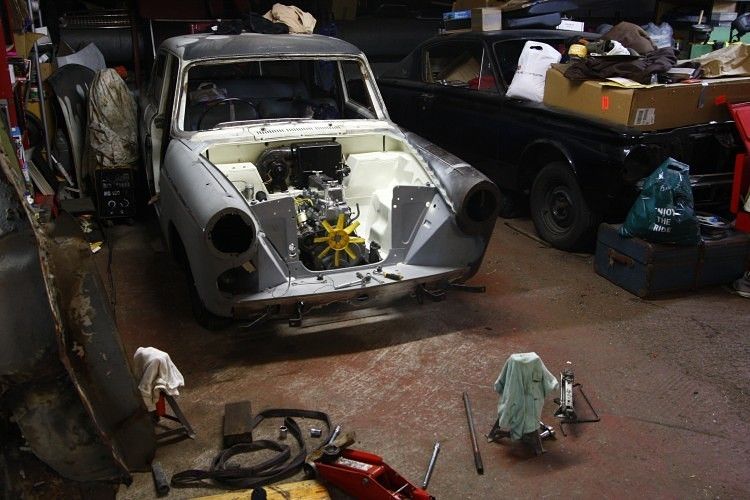 That's sitting about 1/2" lower than it used to, probably due to the 'dropped spnidle' effect of the MGB uprights. But I am pretty freaking happy with the way this is looking now and there was only one tiny dink in the bulkhead paint. 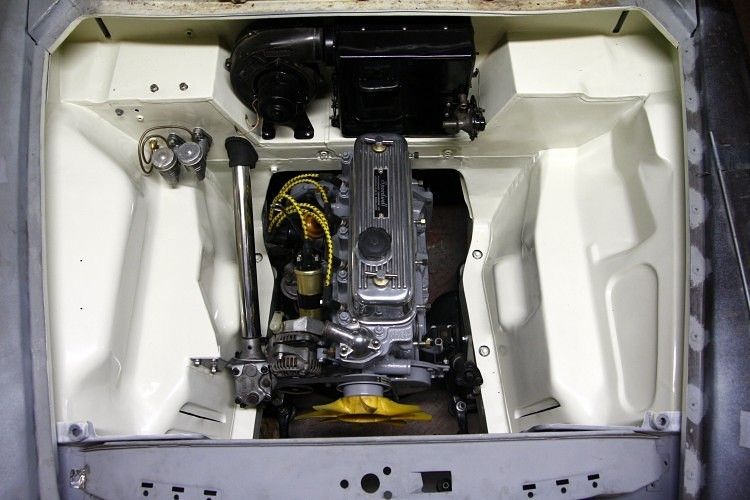 Time for a celebratory beer tonight me thinks. 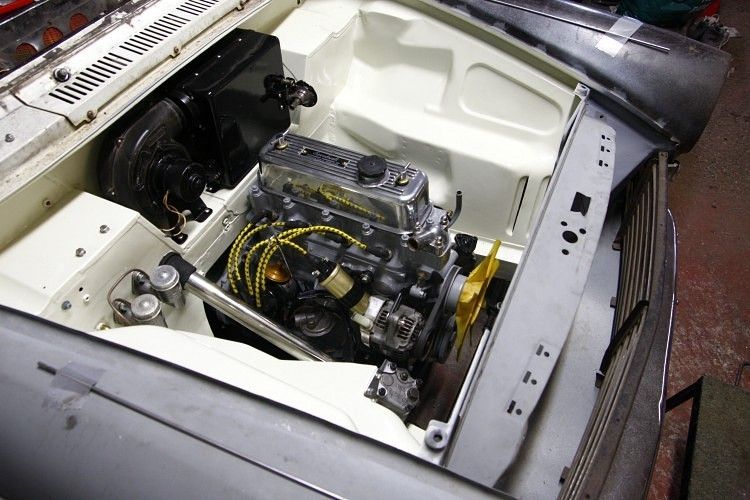 |
| |

Follow your dreams or you might as well be a vegetable. |
|
fogey
Posted a lot
  
Posts: 1,623
|
|
|
|
|
That looks totally fab - enjoy your beer!!!
|
| |
|
|
|
|
|
|


 but I don't intend frequent engine outings!