kilroy
Part of things
  Suit you sir...
Posts: 251
|
|
Feb 20, 2014 10:45:41 GMT
|
Hey Seth - thanks for the thoughts.. I have been doing a bit of swappage down here - now that I am down to my last 7 (or 8..) Marinas. My ever faithful blue estate has come to the end of its useful life - about 350,000K on. It used to be the everyday hauler for work and play..  I had a saloon with broken rings in one hole - so it seemed logical to swap the whole engine/transmission over..  However - this is moving from O series to B series - so there are quite a few other bits that have to be changed also. Like "anti run-on" solenoids, starter relays because the inhibitor switch is shagged, etc etc - you know the drill. Swapping entire exhaust systems requires dropping one rear spring, swaybar, blah blah woof woof, then it snags the towbar so you hacksaw the end off it anyway. That end held the second "cooper" muffler - so it is going to be loud.. Until then - they slumber in the garden..  A trio of "sandglows" - lol.  Anyway - to the end result. I had forgotten how much poke the 1903 B series thing had - with its 11.something/1 CR - impossible to move it on gravel without spitting crusty stuff all about. Hours of fun for the whole family. The lighter body of the saloon seems to have liberated a tad more excitement - so currently Sue and I both try to grab "JZ" first of a morning. Despite my best intentions I have acquired another white Mk3 saloon - with dreadful big-end rattle, so am trying to decide what obscenities I can commit on it. The shell is rust-free, which makes it something of an enigma as far as whether to move it on or keep it. No doubt I shall have some fun while deciding... Off to ride motorcycles around America in a month or so - will cogitate on the future of the Marinas while in that contemplative state. All the best with your endeavours - you are obviously up to the task..  Cheers. |
| |
|
|
|
|
Amazosan
Part of things
  The Stylin', profilin', limousine riding, jet flying, kiss-stealing, wheelin' dealin' son of a gun!
Posts: 188 
|
|
Feb 22, 2014 20:12:05 GMT
|
'You fiend! What have you done with my eyes!'
|
| |
|
|
Seth
South East
MorrisOxford TriumphMirald HillmanMinx BorgwardIsabellaCombi
Posts: 15,543
|
|
Feb 27, 2014 10:01:17 GMT
|
Nice to see some news Kilroy! All looks fine and dandy from where I'm sitting. Amazo, that joke copyright IKBrunel 2014  Not seen you in the dungeon for a while, hope all is good. With the car currently having to be moved to and fro a little at the moment I opted not to pull the doors back off yesterday to start trying to get the outer sill on. Instead I went for what was going to be the next task anyway, inner arch, under back seat floor. 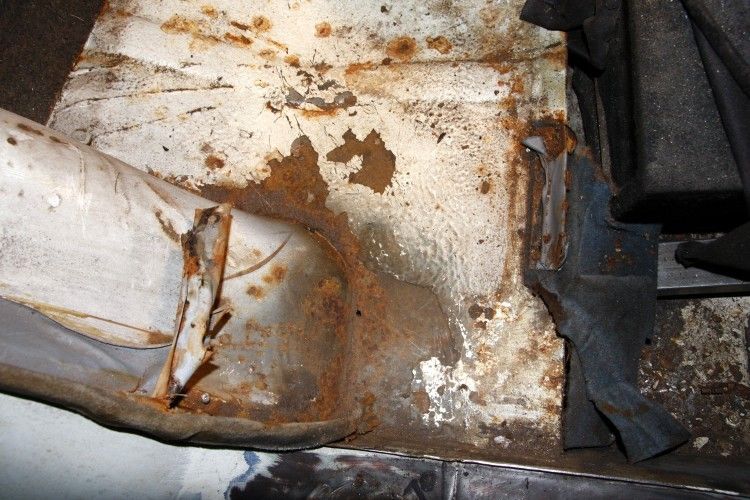 From other side you can see the ugly patches I had previously put on with holes in them and the original metalwork too. 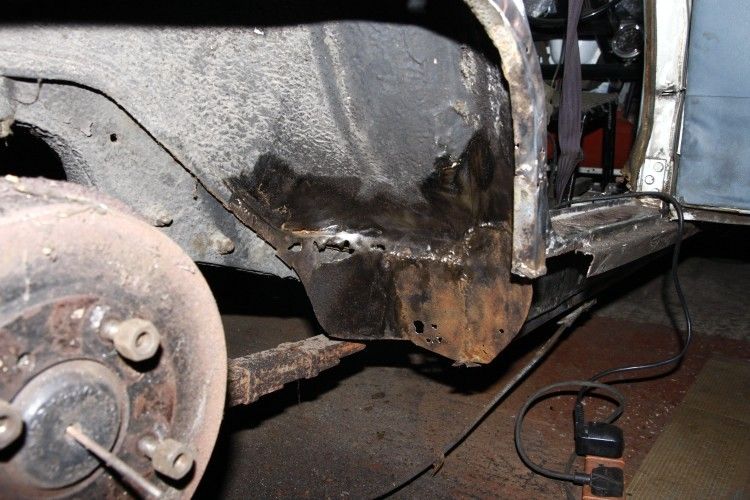 Holes in the floor got bigger once attacked with the twisted knot too. New patch has been mostly made. 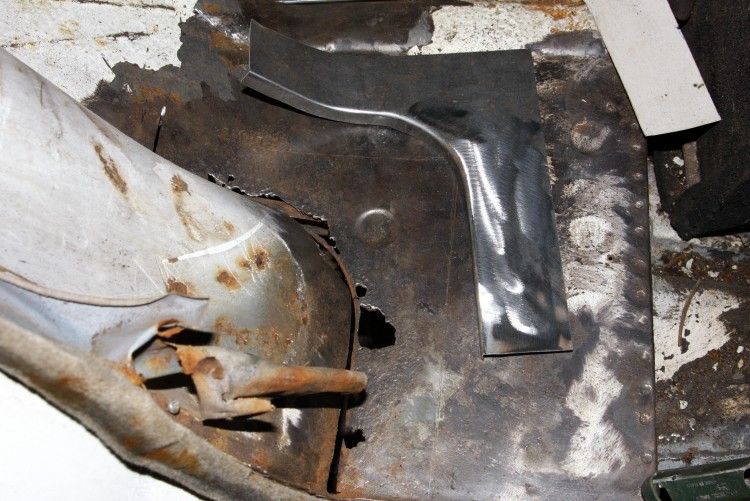 Tacked in. I used a piece of exhaust pipe as a die to hammer out that round dimple. 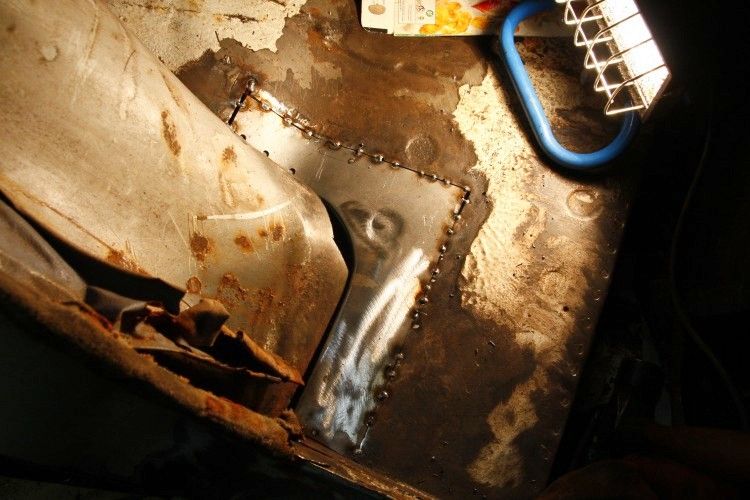 All done. Took my time with this job and am happy with the result. 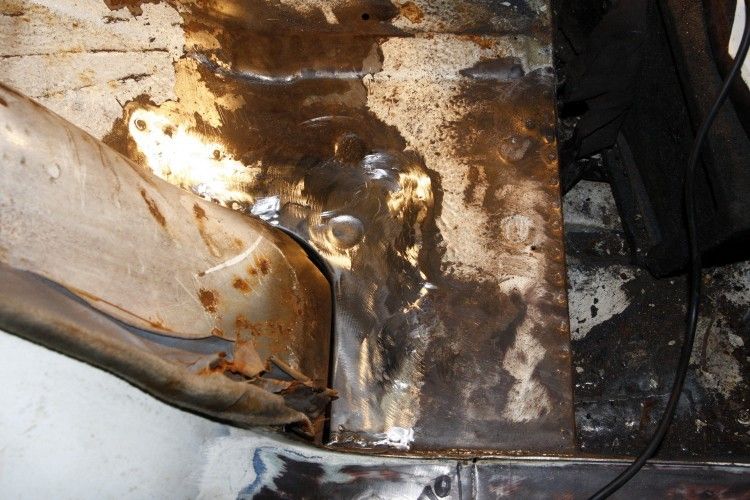 Just got to add the metal back on this side, which I'd started shaping but ran out of time. You can see where I had to put a little piece in the 'chassis rail' too. The rest was sound. 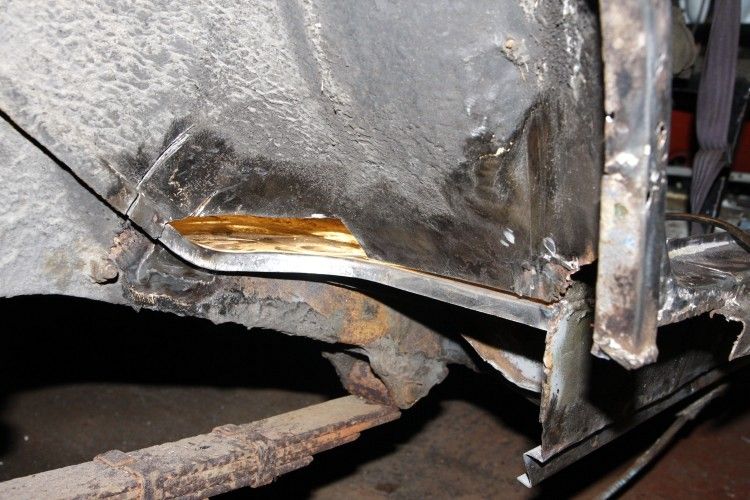 |
| |

Follow your dreams or you might as well be a vegetable. |
|
Amazosan
Part of things
  The Stylin', profilin', limousine riding, jet flying, kiss-stealing, wheelin' dealin' son of a gun!
Posts: 188 
|
|
|
|
Not seen you in the dungeon for a while, hope all is good. Yeah, alls good; been decluttering, sorting through approx 3,000 comics and still stripping that damn Rover. Oh, and keep those TR6 rims on the rear of the Farina. Phwoar. |
| |
|
|
|
|
|
Mar 17, 2014 18:39:36 GMT
|
|
Hello. Much impressed with all of your hard work! A trip to the antipodes would have saved you a lot of time and mig wire though! We still have a reasonable amount of these cars around without the rust! I have 5 Oxfords as spare parts machines....if you require spares! Question please, would you have a copy of the Classics magazine article that your Flame Farina featured in? I am working on a Riley 4/72 and need motivation and ideas! It is not available on back order etc. A scan or photocopy perhaps? Cheers
|
| |
|
|
Seth
South East
MorrisOxford TriumphMirald HillmanMinx BorgwardIsabellaCombi
Posts: 15,543
|
|
|
|
Hello Richie! With the money I have spent on garage rent in the years I've been doing this car I could have bought a really nice example over here without having to drag one half way round the world! But I've owned this car for half my life, it dragged me to and from university, my wife accepted my proposal while we were sat in it, it took us away from our wedding ceremony, my daughter came home from hospital in it.....etc. If you PM me your email address I can email that article.Would love to see what you're getting up to with yours  |
| |

Follow your dreams or you might as well be a vegetable. |
|
|
|
|
Mar 19, 2014 21:56:35 GMT
|
|
Hi, I think I have sent you a message (PM)! Along with my email address. Please let me know if you have it.
I look forward to reading the article
Cheers
|
| |
|
|
Seth
South East
MorrisOxford TriumphMirald HillmanMinx BorgwardIsabellaCombi
Posts: 15,543
|
|
May 11, 2014 18:52:25 GMT
|
Progress on this has been rather hit and miss over the last couple of months. MOT work on the other cars took up muck of my 'car-time' plus life happenings somewhat reduced what time was available. Hopefully things have settled down a bit now so I'm trying to get stuck back in. Within a day or two of chopping that bit of inner wing out something appeared on Ebay that I had to have. A NOS inner wing. Never seen one for sale before and the timing couldn't have been more perfect as I was even able to pick it up myself from Walsall on a drive back home from Manchester. The BL sticker is dated 1973 so presumably a post end of production panel for crash repair purposes. 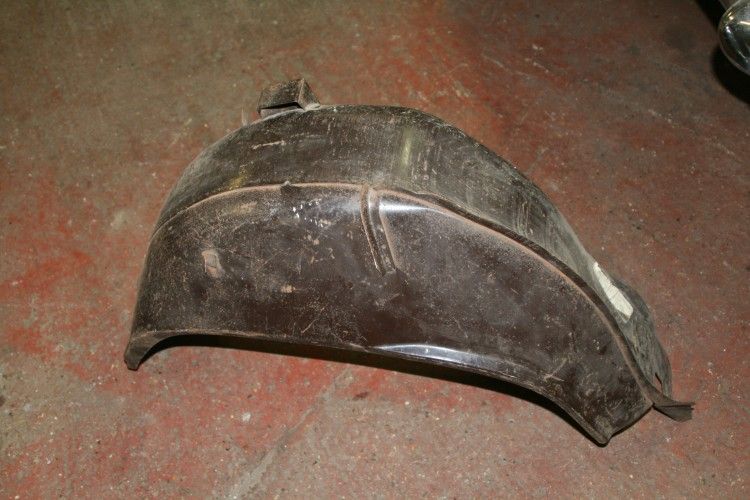 I was not really wiling to try and fit it as a whole unit as that would have required dismantling that corner of the car to a rather extreme level. But it is providing ready made, perfectly matching repair sections. Before getting in to that I repaired this small part of the door shut area to try and keep a good solid datum for the end of the wheel arch/door area. 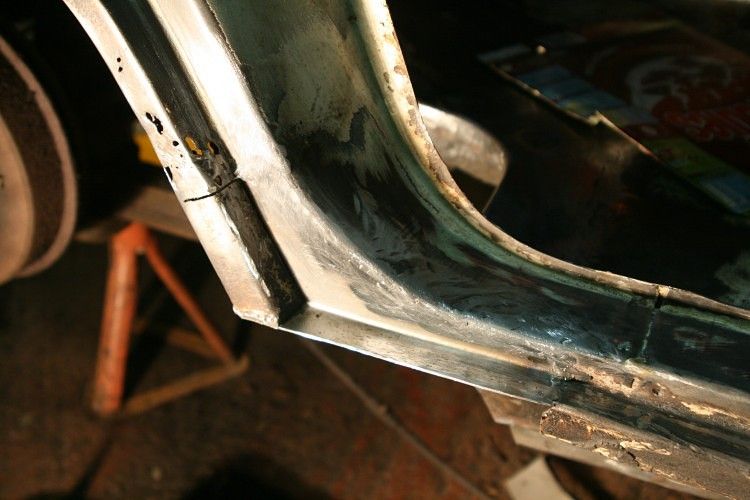 With the donor sections ready made I chopped out a bit more of the old inner wing to hopefully make fitting a bit easier. 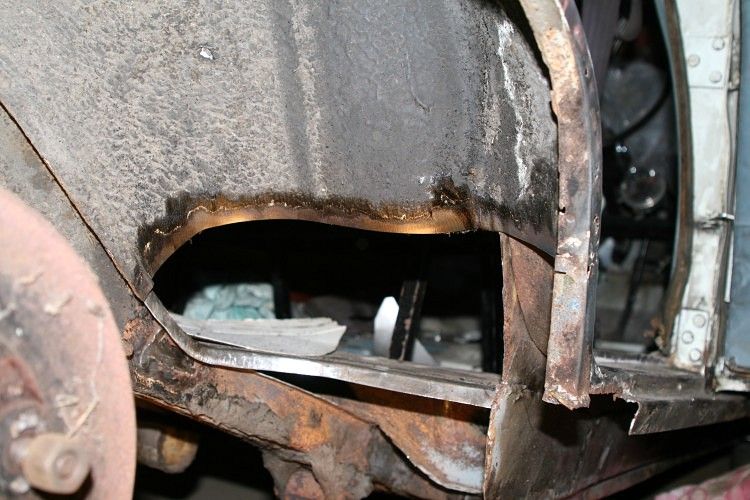 The chopped out bit made a useful guide for where to chop my virgin panel. I like the fact that my repair section has the rippling as a result of the stresses from the original press tooling. 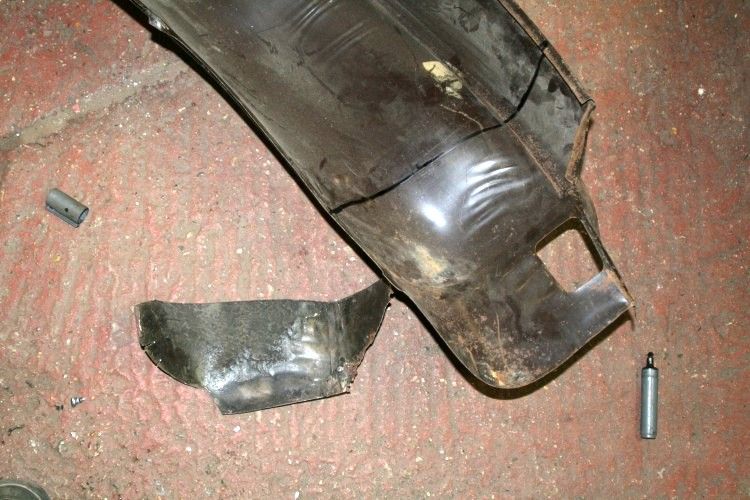 Taking care not to cut too much off and with the plan to use the rest of the inner arch lip off the new panel as well, this is where I got to earlier today. 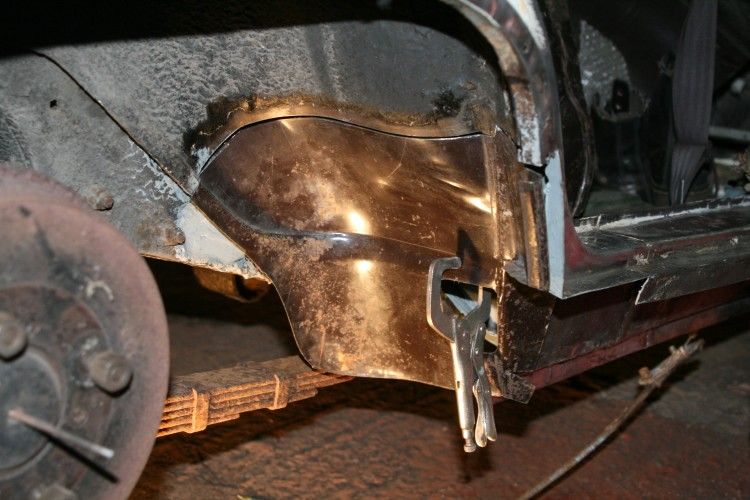 I think my current plan is to get this fitted, then do the outer sill and then hang up the welder for a while and do something more interesting.  |
| |

Follow your dreams or you might as well be a vegetable. |
|
Seth
South East
MorrisOxford TriumphMirald HillmanMinx BorgwardIsabellaCombi
Posts: 15,543
|
|
|
|
I've got that bit welded in now. Pretty pleased with how its come out. I might drive around without the back seat in the car just so I can point out those factory wobbles and creases in the replaced inner wing metalwork. 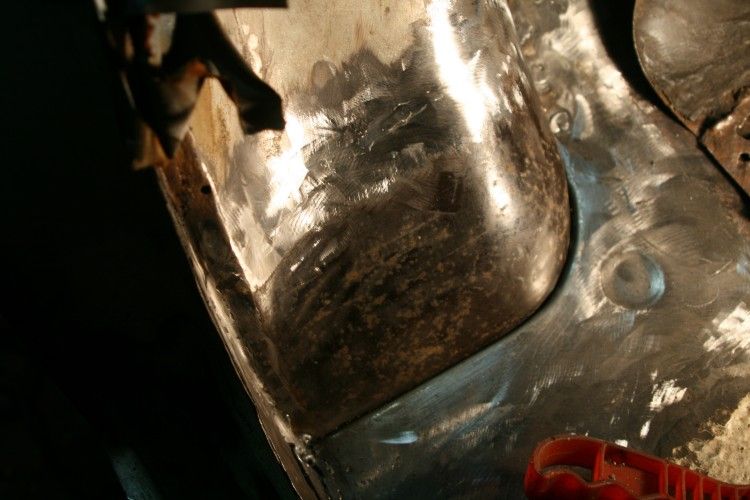 and with some paint. 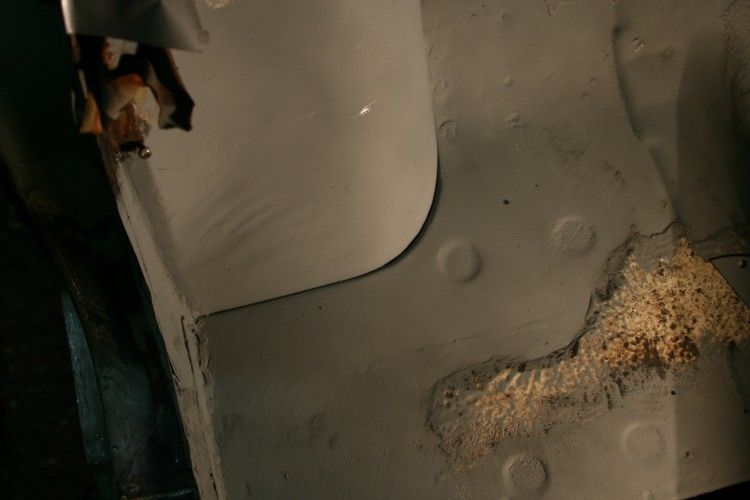 Underside looks like this. 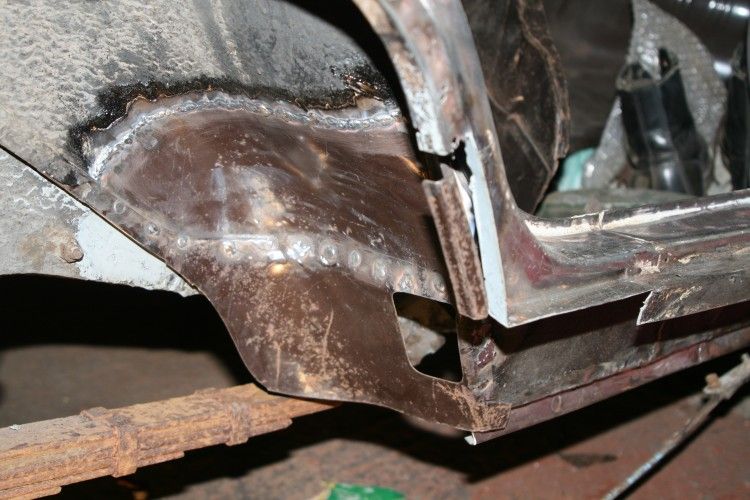 So I've moved on to getting the sill step cut to suit the new sill and the sill itself prepped to go on. Quite a lot of trial fitting etc. Next time I head down to the car I'll be attacking it with the sparky weldy machine. 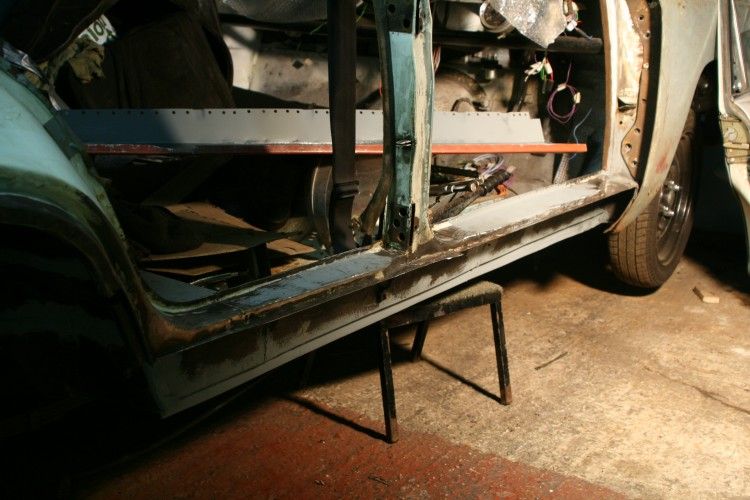 |
| |

Follow your dreams or you might as well be a vegetable. |
|
Seth
South East
MorrisOxford TriumphMirald HillmanMinx BorgwardIsabellaCombi
Posts: 15,543
|
|
|
|
Last week the outer sill finally went on and then on Sunday I sorted out the front closing area. 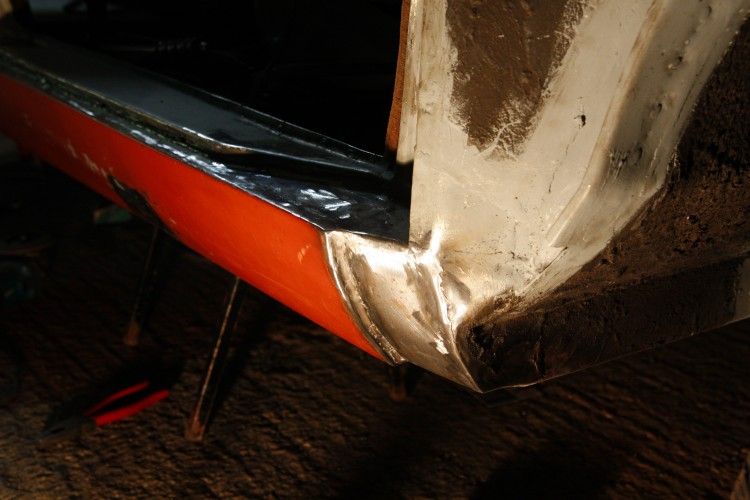 Yesterday I spent a rather horrible amount of time on my back under the car getting rid of any loose old underseal, wire brushing all over the place and then painting any bare sections. I am of the view that the original gooey gunk is very good where it is still stuck and the car is never going to be a concours weapon so I'm not about to strip everything bare and try and get it all shiny under there. Copious Dinitrol will get applied at a later date. 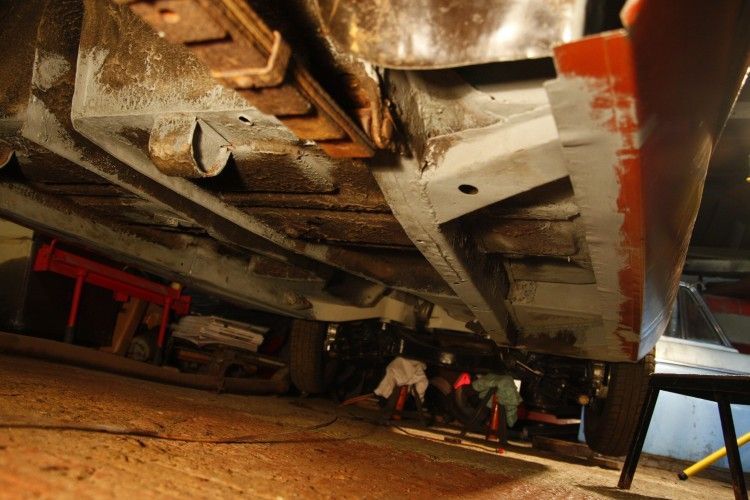 It felt a bit odd to be working on the car with no intention of cutting/welding steel. I wasn't sure what to do and have so many things buzzing round my head about wiring/plumbing etc. So I decided to empty the boot and get all the trim panels out. I was pleasantly surprised to find a proper SU fuel pump under there as I have no recollection of buying that one. I've got a larger MGB type one to go on though. The floor is in mostly very good order too. It never really suffered from water ingress when the car was on the road and its all quite oily/greasy too. 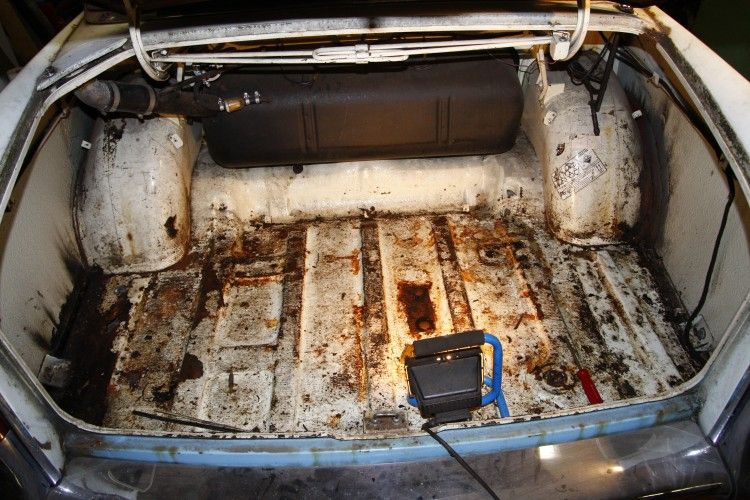 A battery was borrowed to consider probable locations. 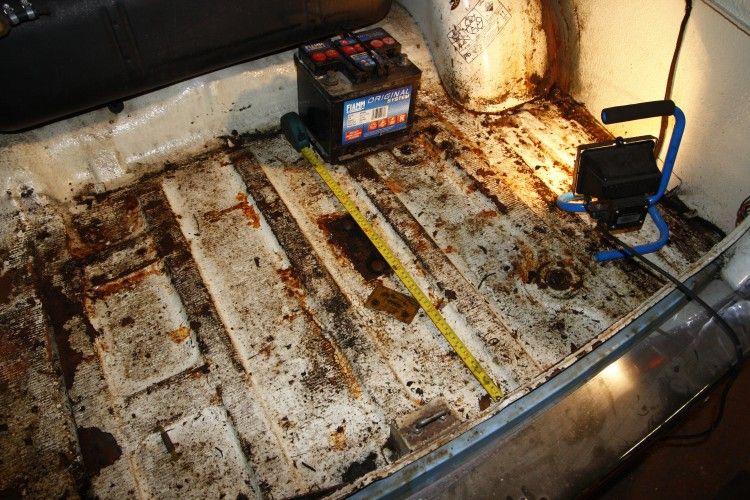 I also made a start on the long planned hidden brake plumbing by positioning the original 5 way block. Need to make a spacer for it to move it away from the bulkhead a little so there is room for the light switch. 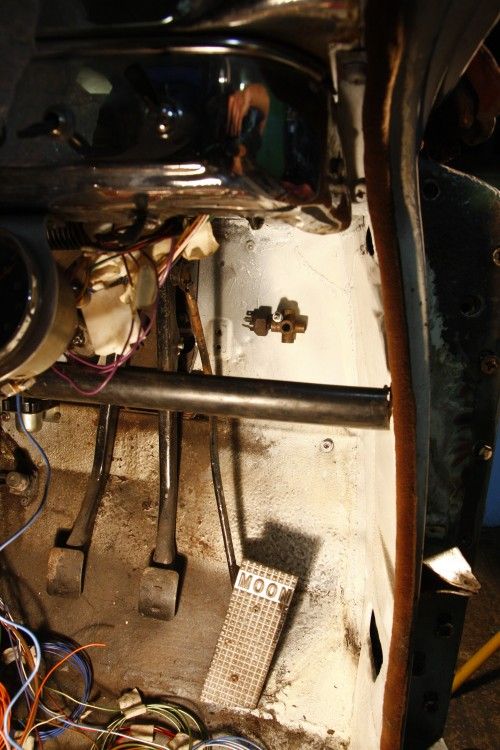 Next time more brake plumbing I think. |
| |

Follow your dreams or you might as well be a vegetable. |
|
|
|
|
|
|
Jun 19, 2014 10:18:47 GMT
|
|
This is just such a great project to peek at every now and again... This is quite clearly much more than just a car and I love that!
Superb stuff...
|
| |
***GARAGE CURRENTLY EMPTY***
|
|
CaptainSlog
Part of things
 
Posts: 510
Club RR Member Number: 180
|
1970 Morris Oxford - 20/9/24 - CaptainSlog
@captainslog
Club Retro Rides Member 180
|
|
|
|
Seth
This car is the reason I am on RR. I have been following it's progress from the beginning. Glad to see that it is getting more love and is going to last forever.
Good luck with it and thanks.
|
| |
|
|
Seth
South East
MorrisOxford TriumphMirald HillmanMinx BorgwardIsabellaCombi
Posts: 15,543
|
|
Jun 20, 2014 15:07:03 GMT
|
Now there's an appropriate user name for this thread.... Thanks chaps. I dropped my second hand drivers side front wing and the bonnet slam panel off at the blasters today as I wouldn't be able to get in to all the nooks and corners with a wire wheel and I'd like to know they're properly sound. Trying to get around to various things all at once at the moment while the weather makes it a reasonably pleasant activity. |
| |

Follow your dreams or you might as well be a vegetable. |
|
|
|
|
Jun 26, 2014 12:02:31 GMT
|
|
Love this thread. I have just restored a Riley 4/68 for a friend. No two panels are the same so its a constant fight to get the correct gaps. Keep up the great work.
|
| |
|
|
Seth
South East
MorrisOxford TriumphMirald HillmanMinx BorgwardIsabellaCombi
Posts: 15,543
|
|
|
|
Thanks aseriesandy. Look! There's some seats falling out of the Hillman! These have spent about 6 1/2 years in my mum's loft. 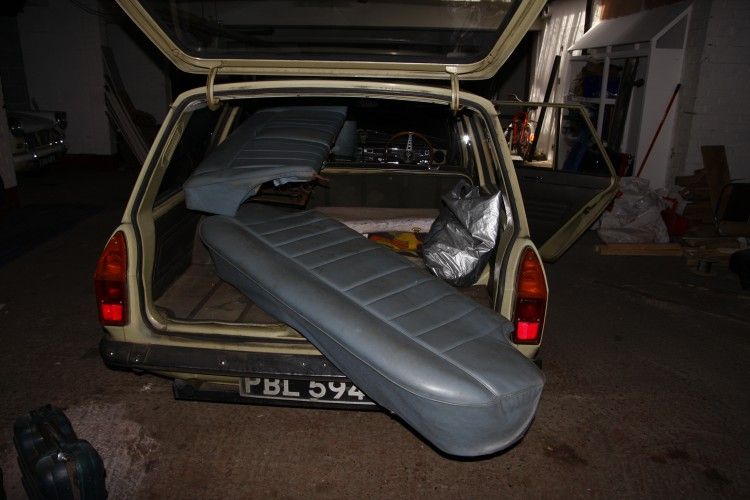 They're not in permanently yet but I wanted them in place partly because they're no longer in the way of any welding and also to work out some wiring possibilities. 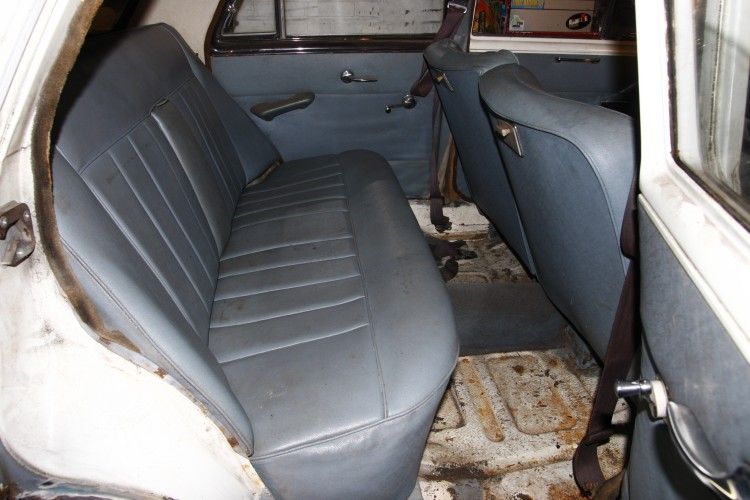 Obviously after such a long time it was rather special to be able to sit here again. 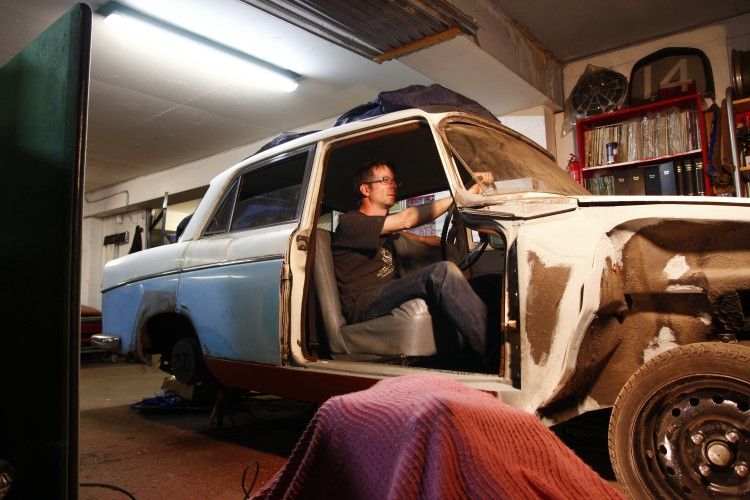 I just sat there, listening to the workshop radio for about 1/4 hour and could have spent longer. But it's not going to hit the road through daydreaming. I'd made a threaded spacer/mount for the brake pipe splitter so welded that in place allowing me to bolt the 4 way + switch block properly in place. 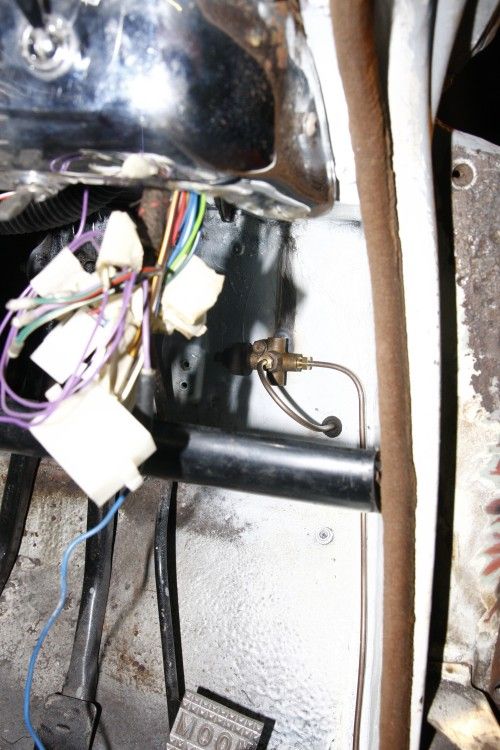 Having seen recommendations on here I bought one of these pipe flaring tools. It is brilliant, very nicely engineered. You cannot go wrong with it. 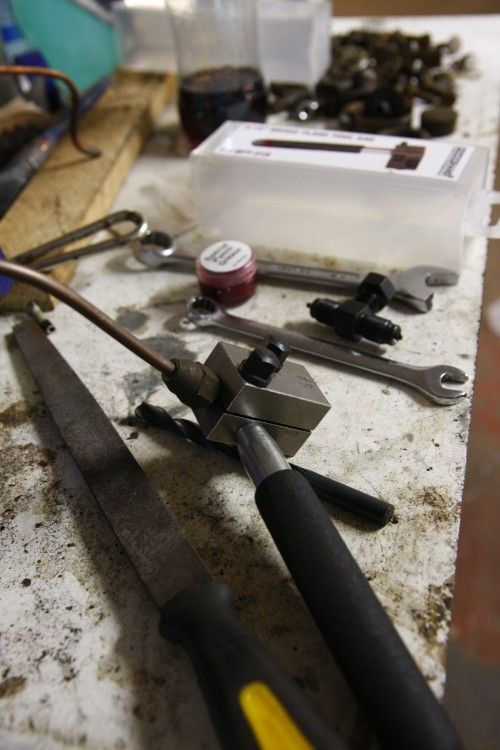 Pipe to the front right is done, as are the ones to the rear (which just need a couple of fittings added) Front left to do, and the feed in from the master cylinder. 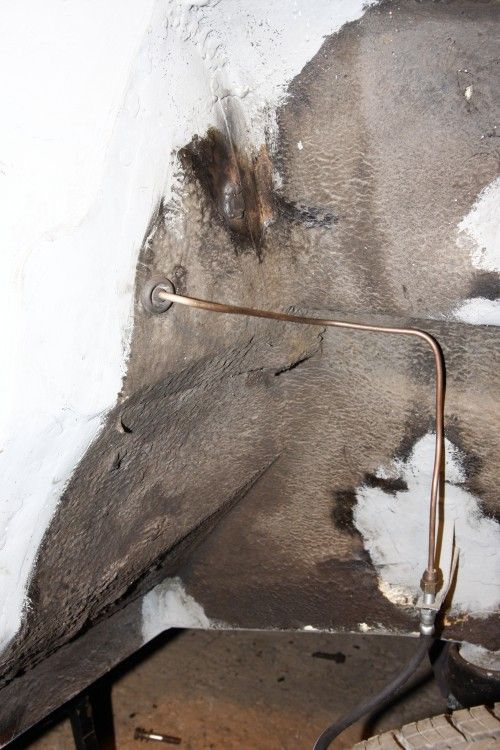 |
| |

Follow your dreams or you might as well be a vegetable. |
|
Seth
South East
MorrisOxford TriumphMirald HillmanMinx BorgwardIsabellaCombi
Posts: 15,543
|
|
Sept 11, 2014 20:16:45 GMT
|
Still trudging along with this, in between life, having a holiday etc. Brake plumbing is now pretty much finished though nothing tightened up as it'll probably all be coming off again for undersealing etc. Here's the four way block under the dash with the bulkhead fittings (lower one is for the clutch pipe which is yet to be done.) Also visible here is the bracket for the throttle pedal which is now welded to the pedal box rather than being bolted in using a couple of bent pieces of steel from the lower pedal box bolts.  Master cylinders were put in place to allow forming the feeds to those bulkhead fittings. All quite tight for space but there is just enough room to turn a spanner where needed.  There's been more wiring progress too and that is now pretty much all complete as far as the dash/bulkhead is concerned. Engine loom and front lights loom need connectors fitting but that has to wait until I know the steering column is fitted for the last time. Which means the engine bay needs finishing/painting. So next on the list is arranging the front wings to bolt in and making sure absolutely all welding/metalwork is done in that area. When I repaired the edges of the scuttle they ended up low at the front pointed section which has become more apparent now the wings are being fitted. So I sliced along the top edges and lifted the front up a bit.  Then welded it all back up in that position. Some filler will still be needed here but not 1/4" of it...  With the wing in place I marked evenly spaced positions and drilled through the wing and the top inner wing rail.  The some hi-tech equipment was utilised... 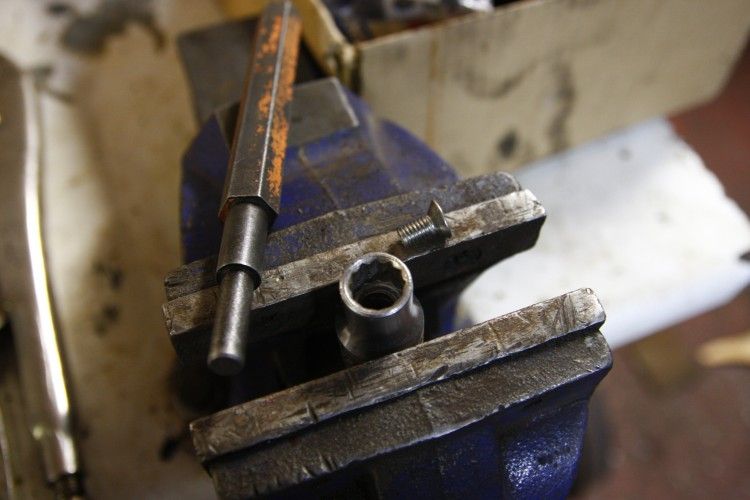 ... to dimple the holes in the wing. 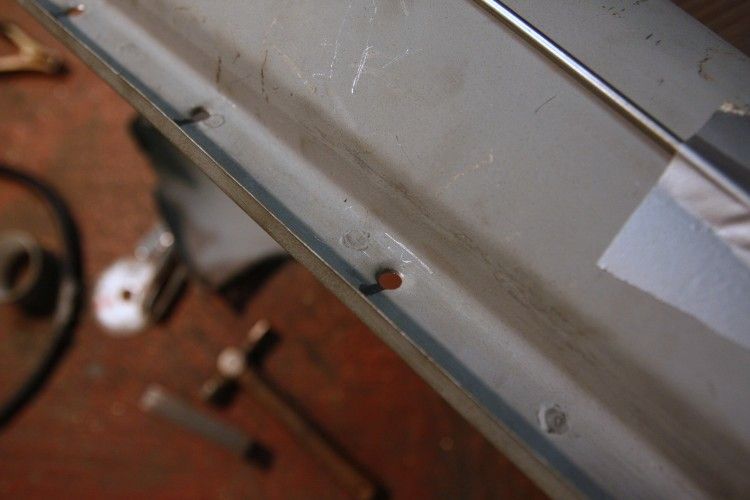 Stainless csk screws then welded in to place in the dimple. I also replaced about a 6" long section of the channel where it had been damaged when removed - this is the second hand wing that is still very good but not perfect.  With the screws fully welded and the welds ground back in the channel I am left with a row of studs in the wing. So the finished item will be bolt on with pretty much no visible fixings. 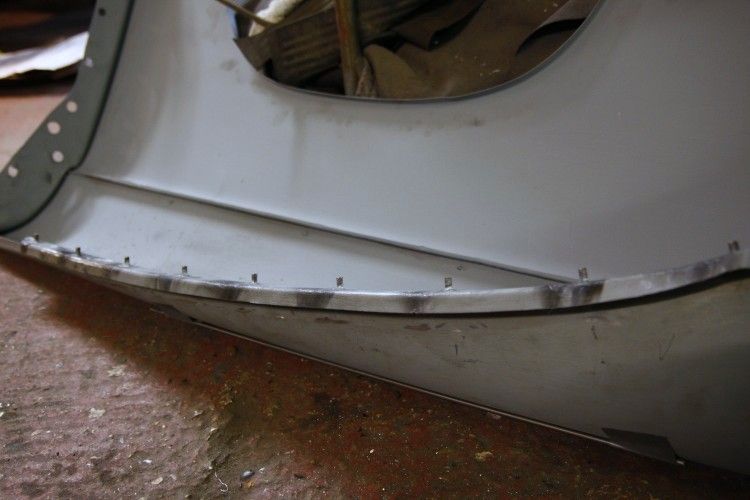 At the back corner, where the wing was originally brazed or welded to the scuttle I have made sure to have a little overlap. When the wings are finally fitted there'll be a bead of sealant here to stop water from dripping in to the engine bay side of the inner wing but I have also filed a notch in the outer wing channel, and shaped the metal underneath to allow it do drain underneath down the A pillar. 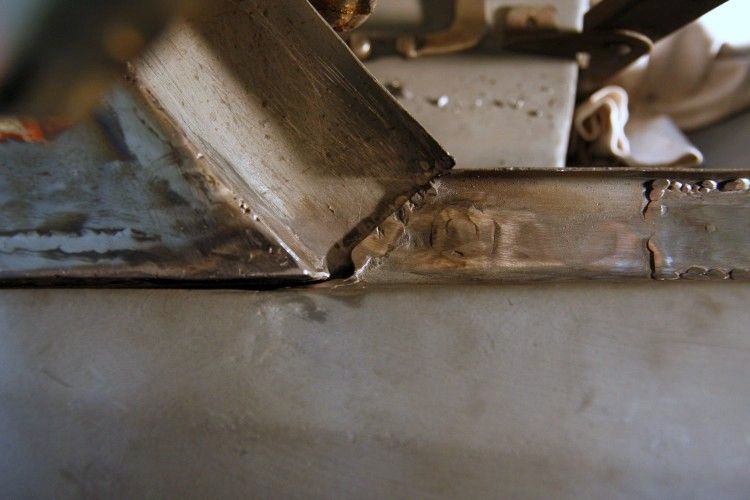 |
| |

Follow your dreams or you might as well be a vegetable. |
|
tigran
Club Retro Rides Member
In rust we trust. Amen.
Posts: 6,444
Club RR Member Number: 142
|
1970 Morris Oxford - 20/9/24 - tigran
@tigran
Club Retro Rides Member 142
|
Sept 13, 2014 20:07:40 GMT
|
|
Nice to catch up with this once in a while buddy. Looking forward to seeing it in the flesh some time.
|
| |
1964 Rover P5 i6
1987 BMW 525e - The Rusty Streak
1992 Micra K10
2001 BMW E46 316i
2002 BMW E46 330Ci
2013 BMW F31 320d
2018 BMW G31 530d
|
|
|
|
|
Sept 14, 2014 9:34:48 GMT
|
Must admit, I get excited when I see an update on this. Such a cool car.  |
| |
|
|
Seth
South East
MorrisOxford TriumphMirald HillmanMinx BorgwardIsabellaCombi
Posts: 15,543
|
|
Sept 15, 2014 8:17:58 GMT
|
|
Thanks Tigs, varelse. I'm in one of those phases where my mind is continually buzzing with ideas/things to do on it to keep progress going. Just wish I could have a garage at home and work on it more often than the once or occasionally twice a week!
|
| |

Follow your dreams or you might as well be a vegetable. |
|
|
|
|
Sept 15, 2014 8:25:20 GMT
|
|
There's so much quality tin bashing on the blue forum nowadays. If this site attracts a random selection of tinkerers from across the world I would conclude that global mig welding skills have improved by 125% over the last 10 years. Lovely job!!
|
| |
1974 Lancia Beta Saloon
1975 Mazda 929 Coupé
1986 Mazda 929 Wagon
1979 Mazda 929 Hardtop
1982 Fiat Argenta 2.0 iniezione elettronica
1977 Toyota Carina TA14
1989 Subaru 1800 Wagon
1982 Hyundai Pony 1200TL 2-dr
1985 Hyundai Pony 1200 GL
1986 Maserati 425 Biturbo
1992 Rover 214 SEi 5-dr
2000 Rover 45 V6 Club
1994 Peugeot 205 'Junior' Diesel
1988 Volvo 760 Turbodiesel Saloon
1992 Talbot Express Autosleeper Rambler
2003 Renault Laguna SPEARS OR REAPERS
|
|
|
|




 Not seen you in the dungeon for a while, hope all is good.


