|
|
|
|
|
This is where the tape comes in, brown parcel tape is one of the best release agents know to man  So when it is all sorted carbon wise, I can melt most of the foam out and then just peel the tape off, pulling the filler with it This is the plan, what actually happens could be a long way from it! Cheers J top thinking there! looking forward to seeing the outcome |
| |
Remade In Australia
thereimaginarium.com.au
|
|
|
|
|
|
|
|
|
Hi guys, tonight was just more fitting things! The relay board for the megasquirt went in, as did the EDIS controller - 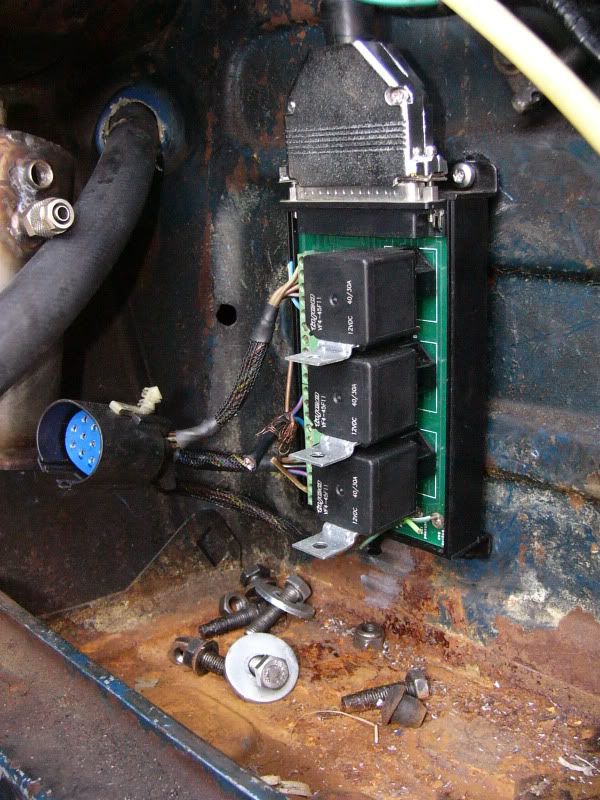 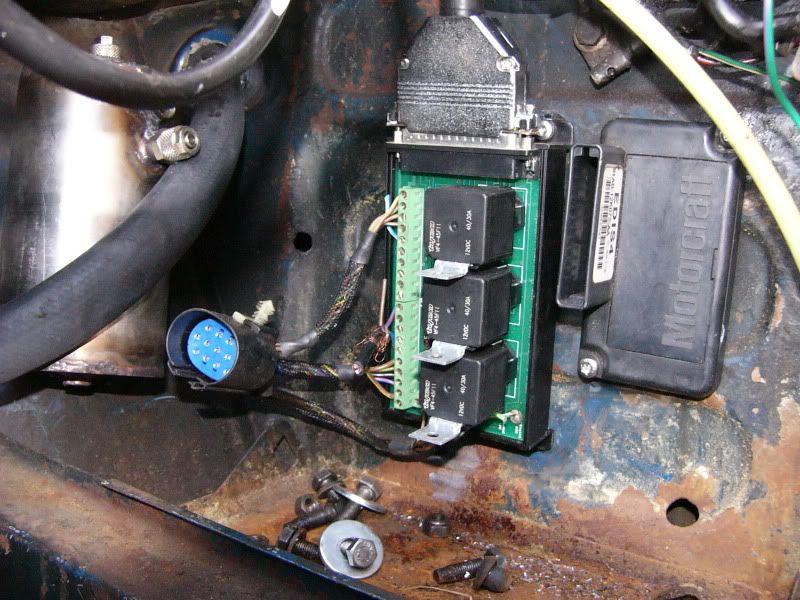 I also found a 90 degree bend that was just the right size for the connection between the header tank and the water pump, this was cut to length and fitted. It worked perfectly as the hose no longer kinks! The water pump mount was sorted out too, so that is now all fixed in! 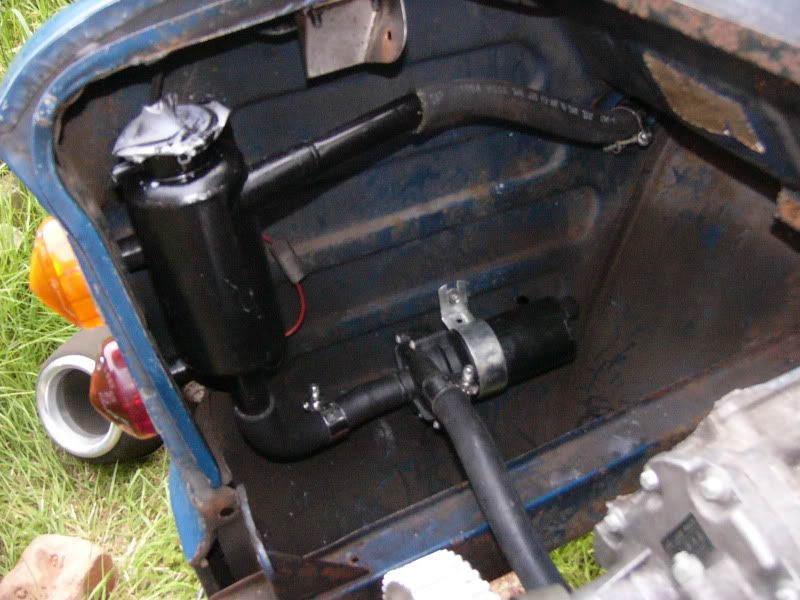 All looking good! Tomorrow I promise I will continue with the plenum, it's an indoor job and I want to make the most of the sunshine Cheers J |
| |
Last Edit: Jun 2, 2009 21:25:47 GMT by Blown_Imp
|
|
Seth
South East
MorrisOxford TriumphMirald HillmanMinx BorgwardIsabellaCombi
Posts: 15,521
|
|
|
|
Top stuff. Glad to be able to read regular updates again  |
| |

Follow your dreams or you might as well be a vegetable. |
|
|
|
|
|
|
|
nice work dude, keep at it! Riv-nuts are FECKING handy, aren't they!
|
| |
|
|
|
|
|
Jun 10, 2009 18:08:45 GMT
|
Good afternoon, I have been busy trying to get allsorts done, the plenum has been getting much attention as I can give it! I started by putting the packing tape onto the foam, this was in part to protect it from the resin that would melt it, and also because brown tape is a brilliant release agent! 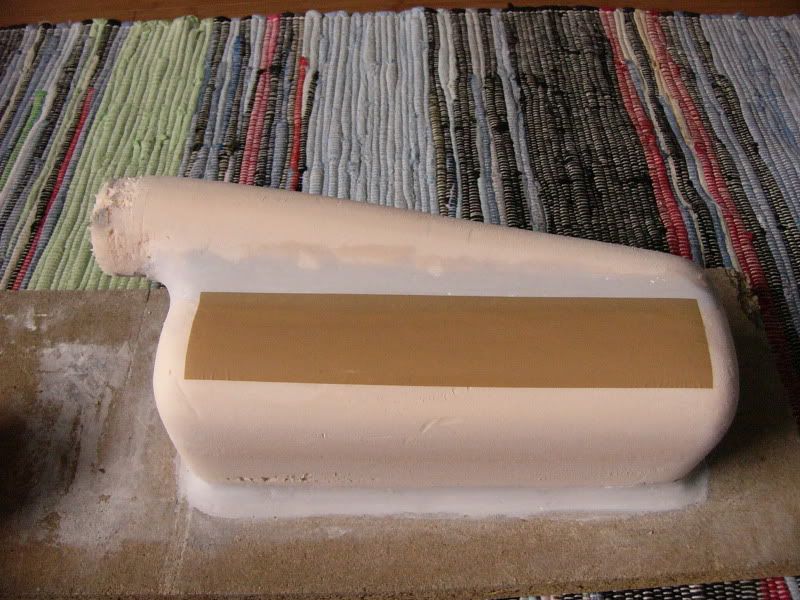 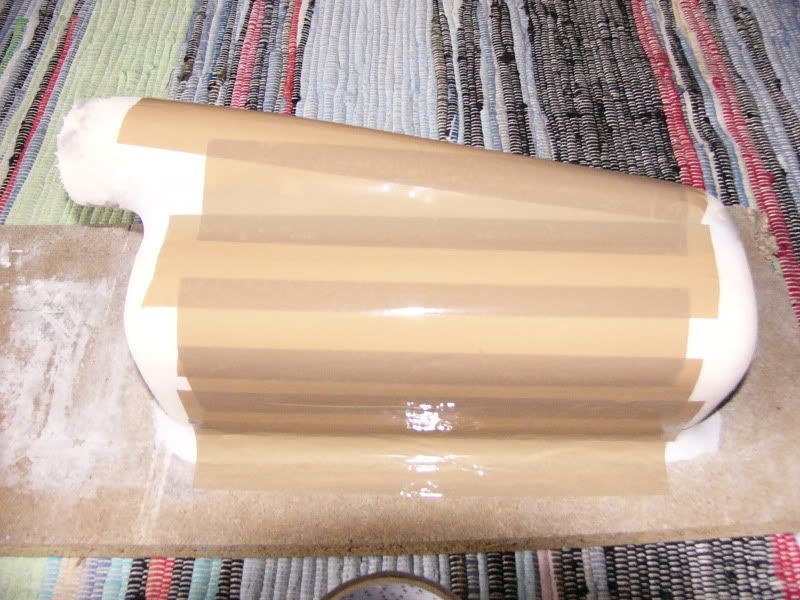 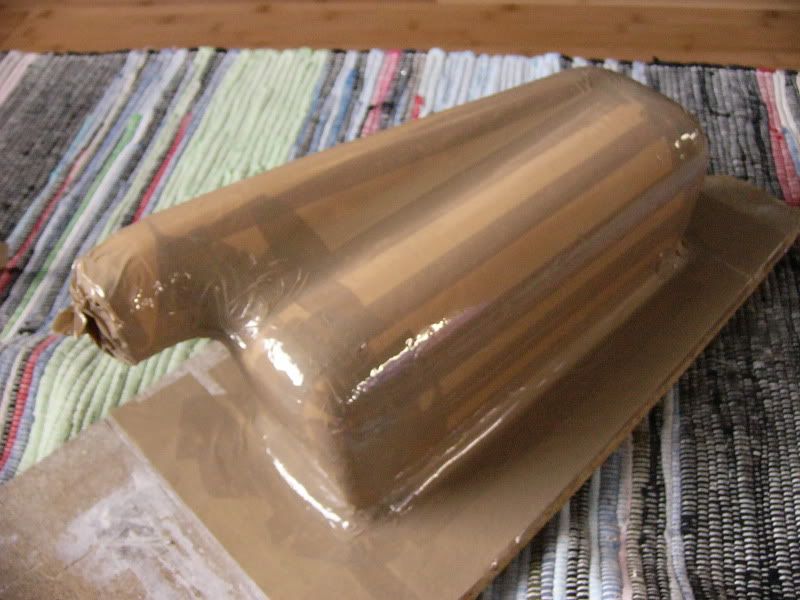 That took an evening to get it to a point where I was happy with it, next I waxed the mould - 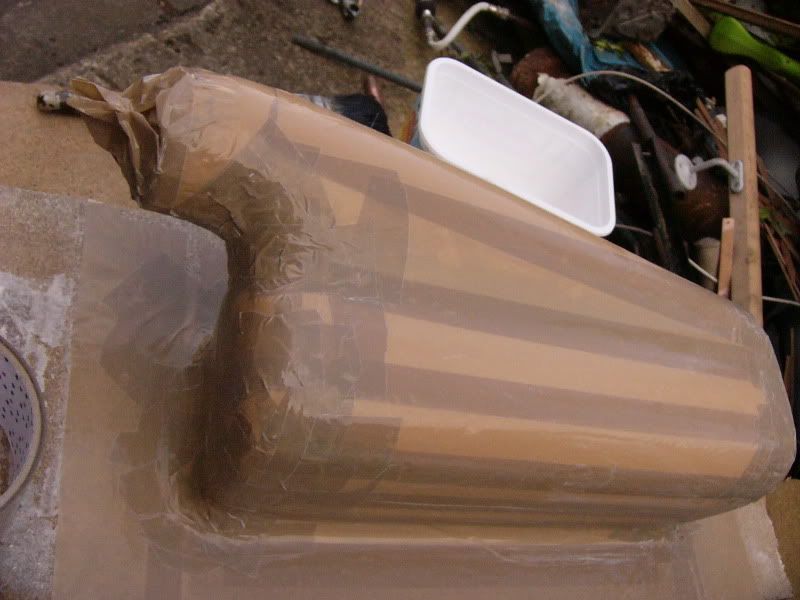 I prepared an area outside to do the initial glass and carbon layers, I was going for a total of 3 each, with the last carbon layer as a cosmetic one. I sharpened my scissors in anticipation -  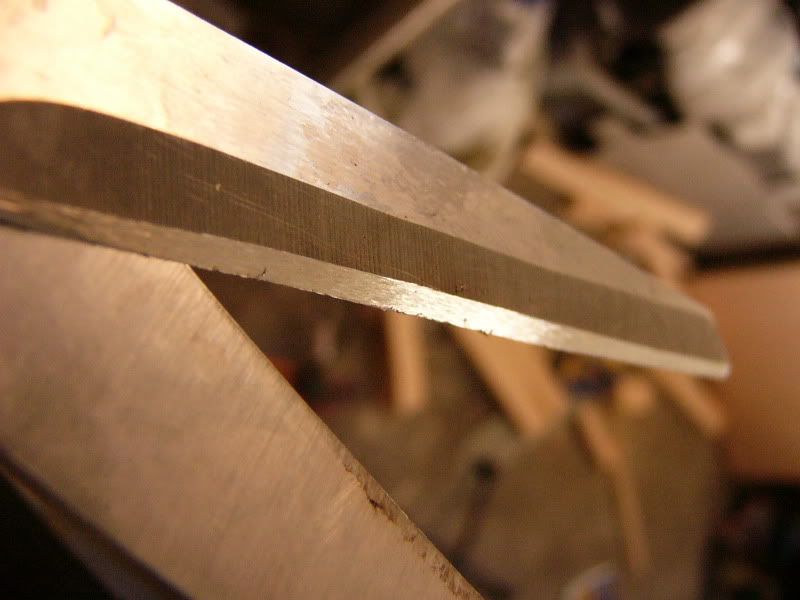 Razor! The glass all cut and ready - 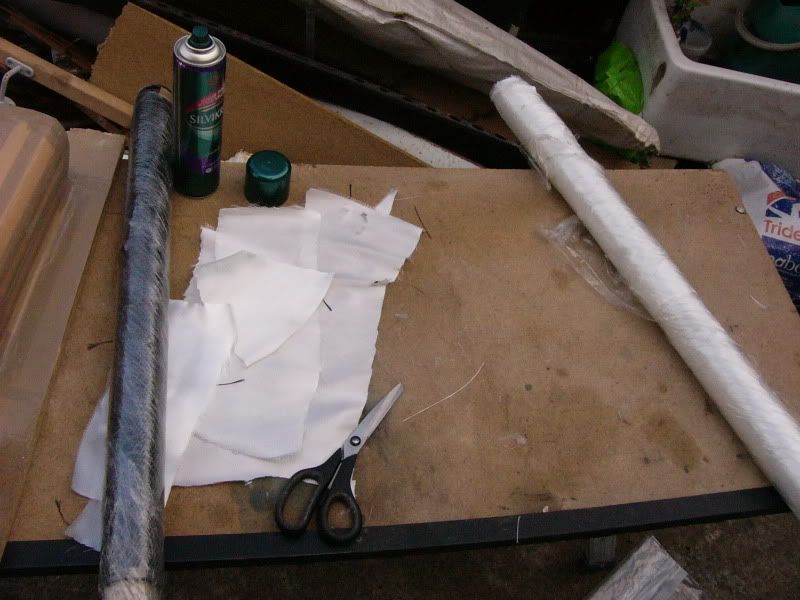 MMMMmmm carbon ;D  No action shots as I am on my own here, I was covered in resin! The maigolds were perfect for this task, bought one size too small so that they are tight. Here is the end of the first glassing session - 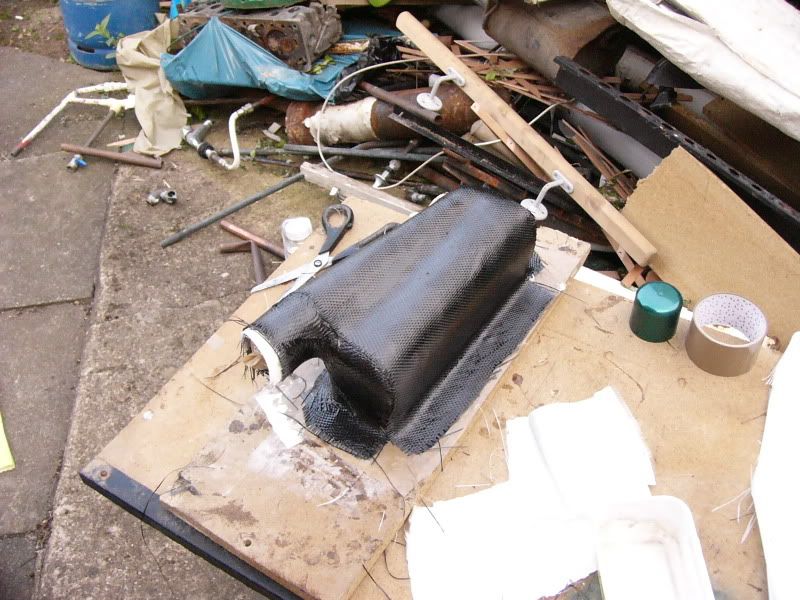 The edges were not perfect, but they will do for this point - 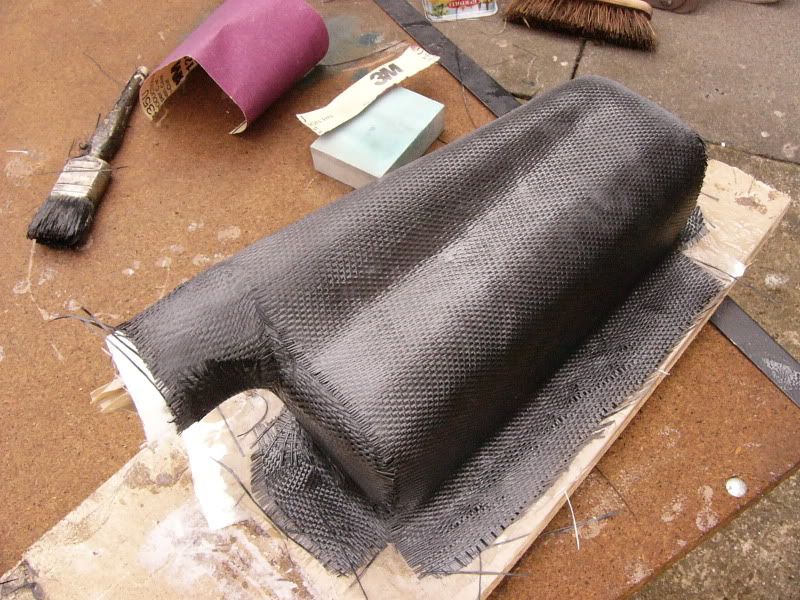 Once all this had set properly, I rubbed it down to key for the final layer, this showed what it might look like in the end - 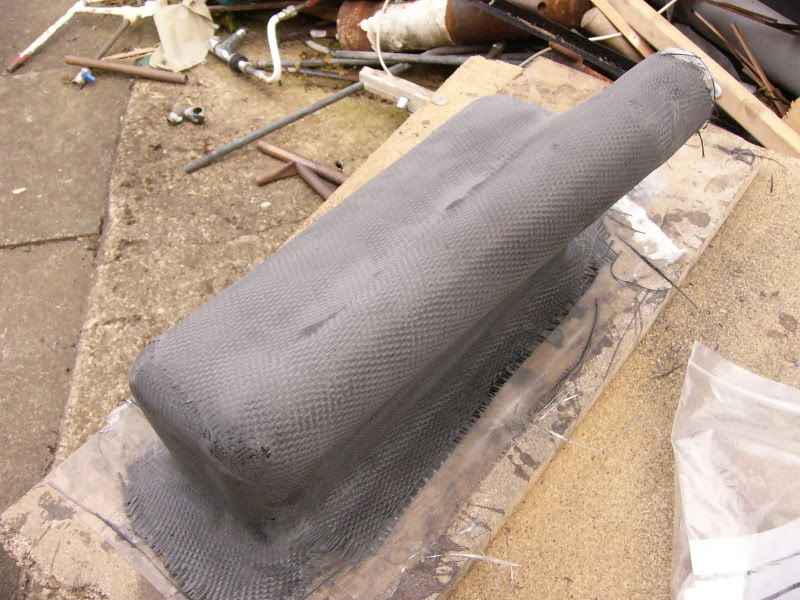 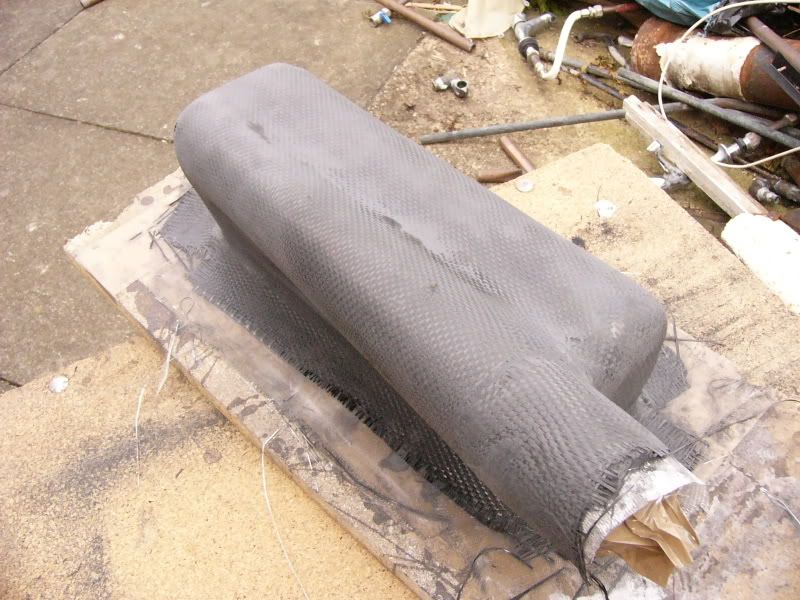 I very carefully cut and prepared the final layer, so that the edges would be neat, no fraying etc. This was layed up using a little more resin than usual to get it nice and smooth. I then decided to wrap it in clingfilm to hold the corners nice and neat, anything that sticks can be rubbed back once it has all set. This is how it looked once it had set and most of the cling flim was removed - 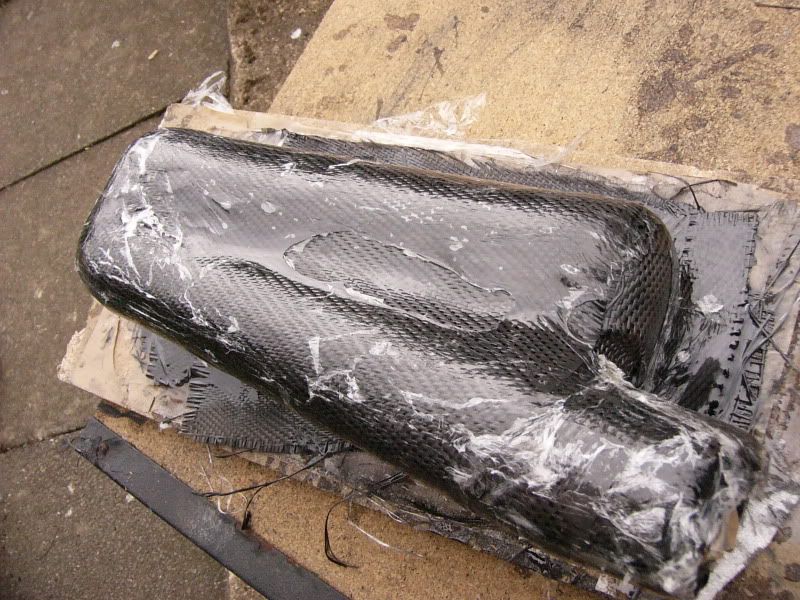 I'm not so sure its as smooth as I would like it, but I think it will work better than the last one! It's defo stronger  I pulled it off of the base plate - 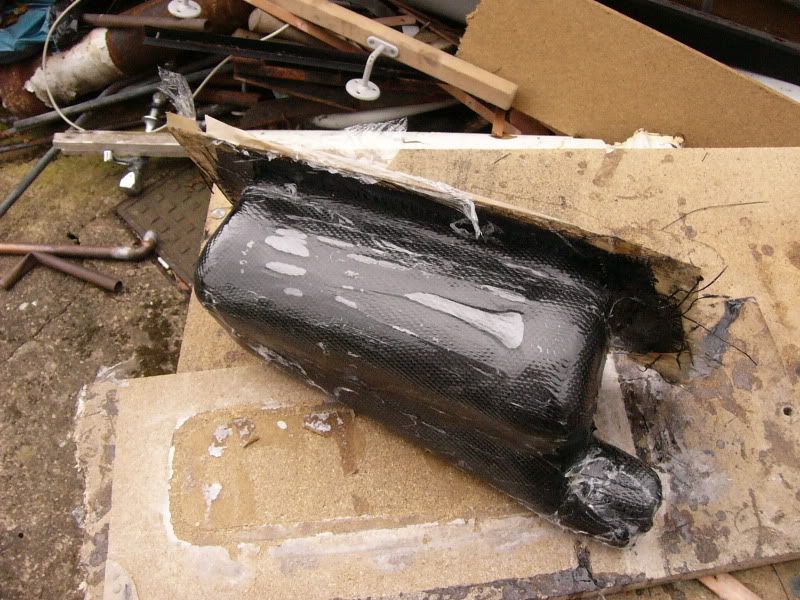 And started to hack out the foam - 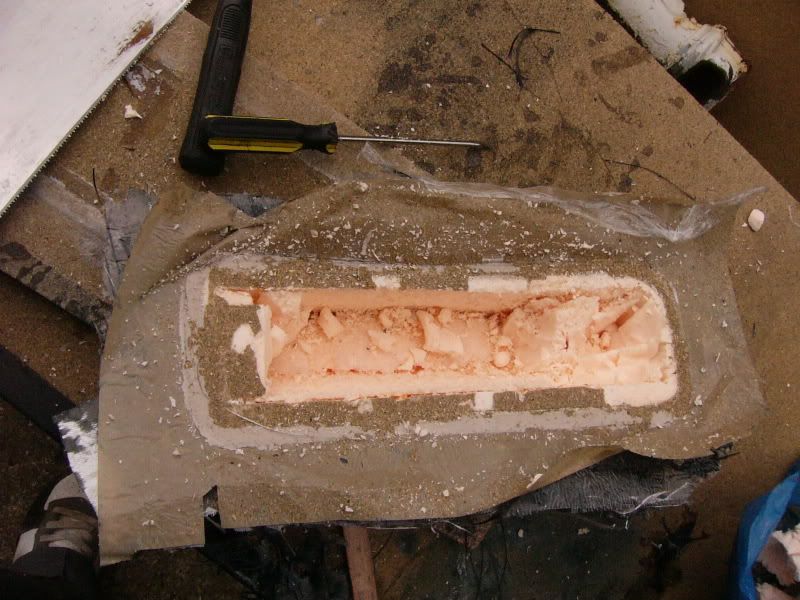 This took all of 10 mins to complete and the tape worked a treat! 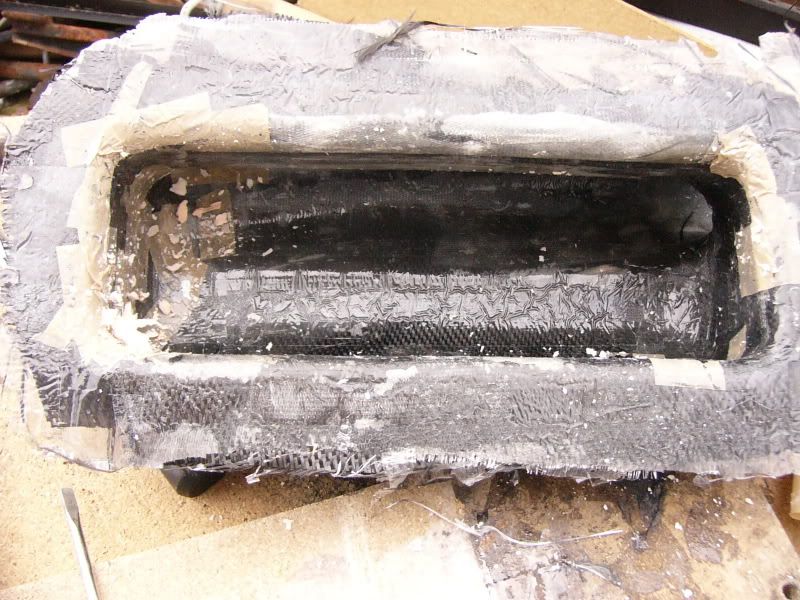 Obviously the resin had got to the foam, but only after the resin was set beyond deformation! This is the tapered tube for the inlet, it sure didn't look like that when I put it in!!! 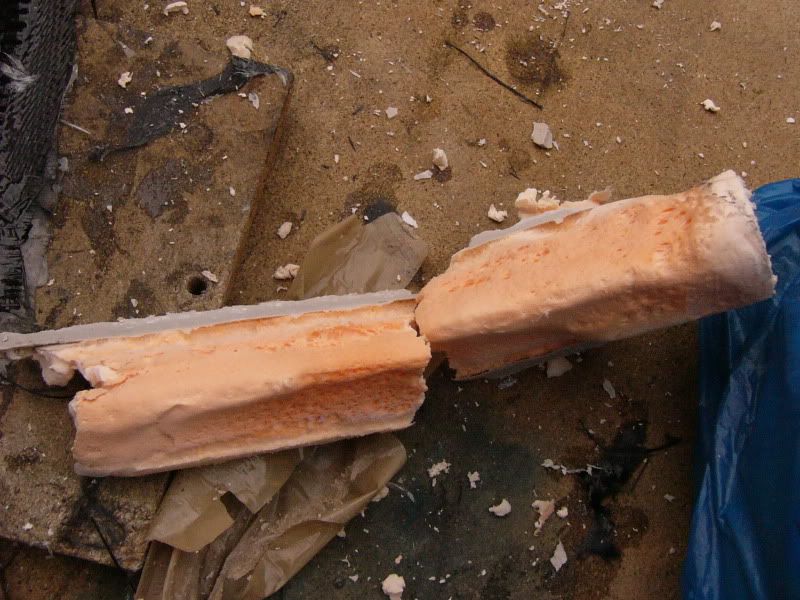 I could not help my self rubbing down one corner to see how it was looking under the surface - 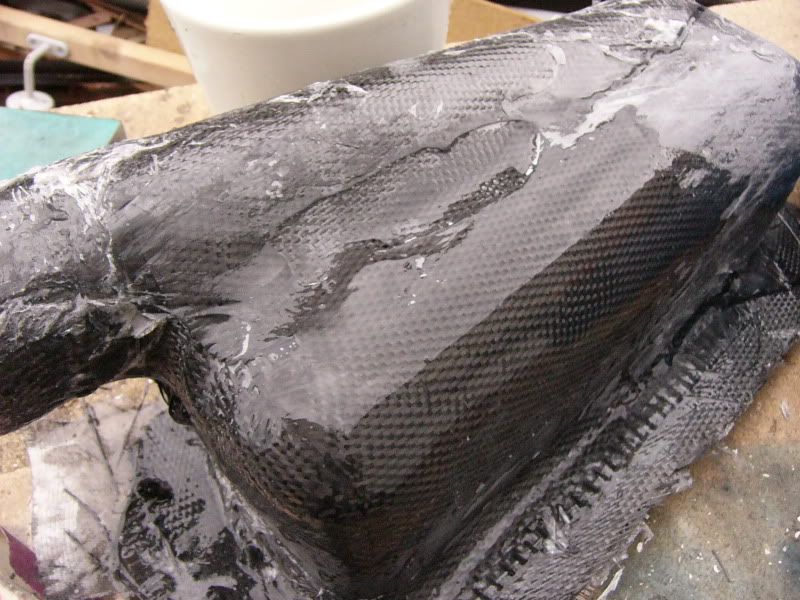 Not so bad, I just hope that the fabric has not bubbled above pockets of resin. Have to wait until I get on to rubbing it down properly?  Ahh well, it's damn strong, fits the trumpets perfectly, and the inside is nice and smooth, just need to tidy the outside! Hope your all well, J |
| |
Last Edit: Jun 10, 2009 18:12:05 GMT by Blown_Imp
|
|
|
|
|
|
|
looking good dude, can't wait to see it all finished and cleaned up!  |
| |
|
|
Seth
South East
MorrisOxford TriumphMirald HillmanMinx BorgwardIsabellaCombi
Posts: 15,521
|
|
|
|
Inspirational as ever |
| |
Follow your dreams or you might as well be a vegetable.
|
|
|
|
|
|
|
|
Wow, that's going to look really trick!
|
| |
1967 Morris Traveller 1971 Series IIA Land Rover 1991 Golf GL 4+e 1992 Corrado G60 1986 E28 BMW 528i |
|
|
|
|
Jun 11, 2009 12:14:10 GMT
|
Thanks for all the kind words, I'm going to hit it with the wet and ry later, see what we can do with the surface finish! I am also brewing a cunning plan for compression and rebound adjustable dampers for pittance Laters J |
| |
|
|
|
|
|
Jun 11, 2009 12:28:29 GMT
|
|
One of my favourate threads
Is the S/c off a merc c180?
|
| |
|
|
|
|
|
|
|
Jun 11, 2009 17:53:44 GMT
|
|
I think it may well be you know!
|
| |
|
|
|
|
|
Jun 13, 2009 19:44:38 GMT
|
Good afternoon, I've been busy busy today, finally got the cojones to do some proper fab and make mounts for the new alternator and it's position. I have also removed the radiator ready to have the outlet modified, I need a 90 degree fitting added so that the pipes fit better. Here is the radiator, pace racing aluminium unit has a second core too! 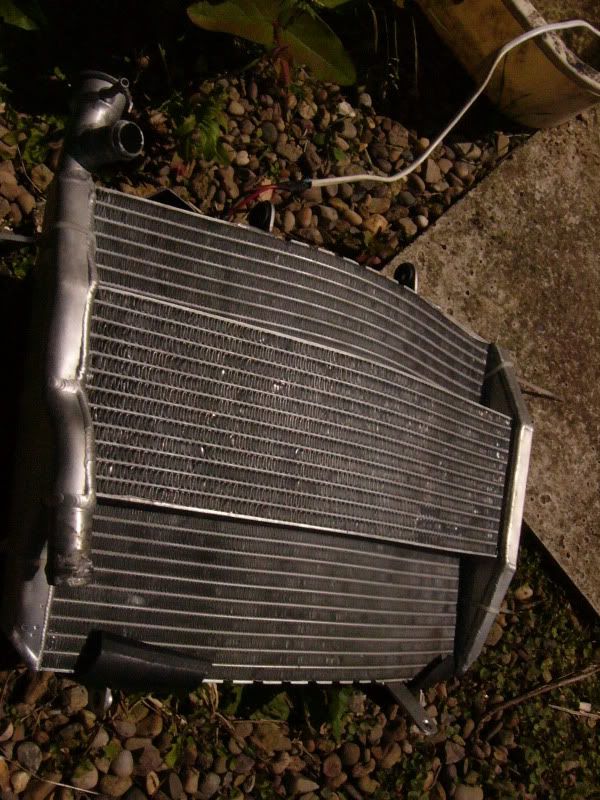 I have fitted a rather large fan to the other side too  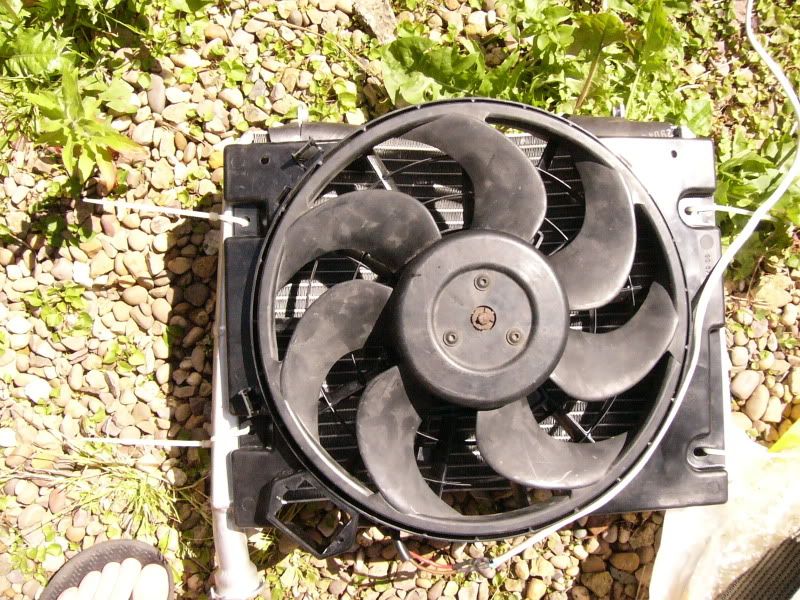 Yes the rad is under that fan! I decided to attack the alternator, previously I have been struggling to find space and fitting it was a nightmare. I was going to use a kawasaki alternator, but I decided that it was not up to the task of running all the electrics on the car. I then realised that the daihatsu alternator off my GTti was pretty small, infact shorter than the kwaka unit! I placed it into the only space left that had access to the drive belts, this is under the inlet manifold, behind the exhaust manifold and just to the right of the oil filter!! Toight loike a toiger ;D I measure up the bolts available and their spacing - 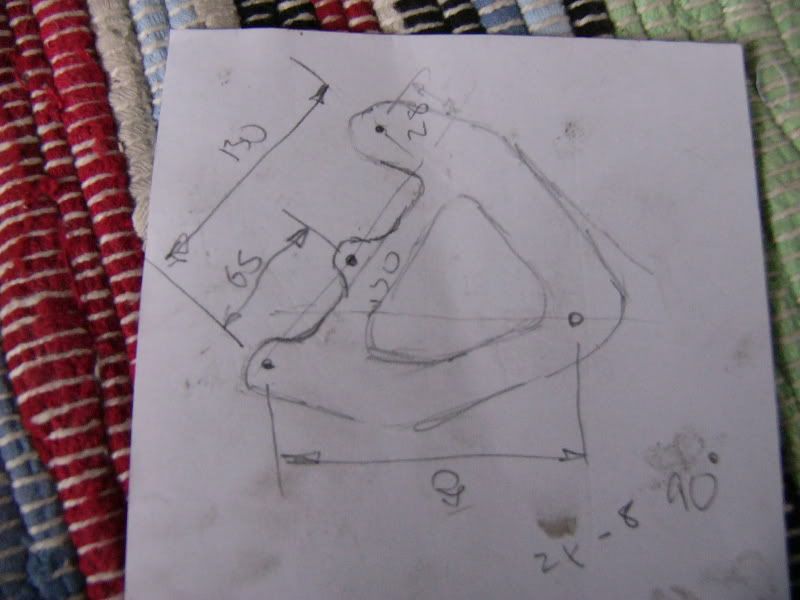 This was then transferred on to the back of a wheetabix box ;D 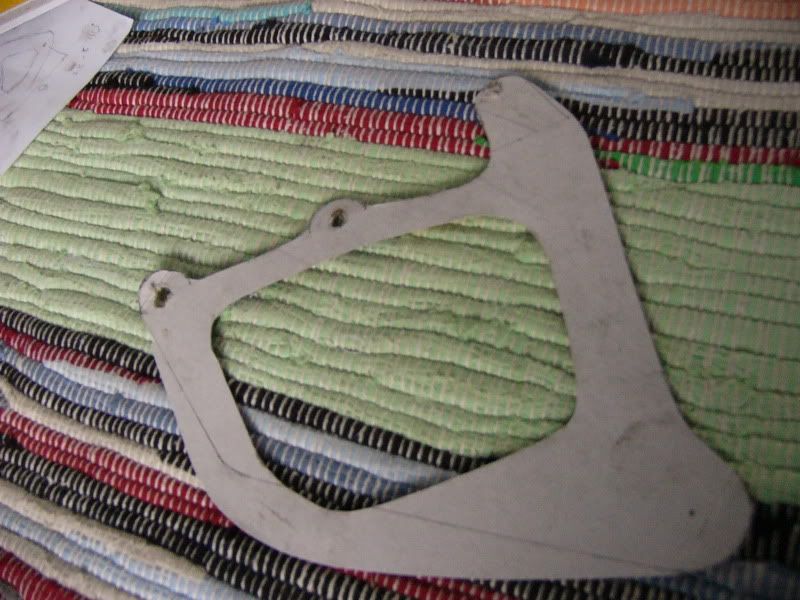 I trial fitted this to the engine and it was tight, but appeared to work, so I got some 5mm ally plate - 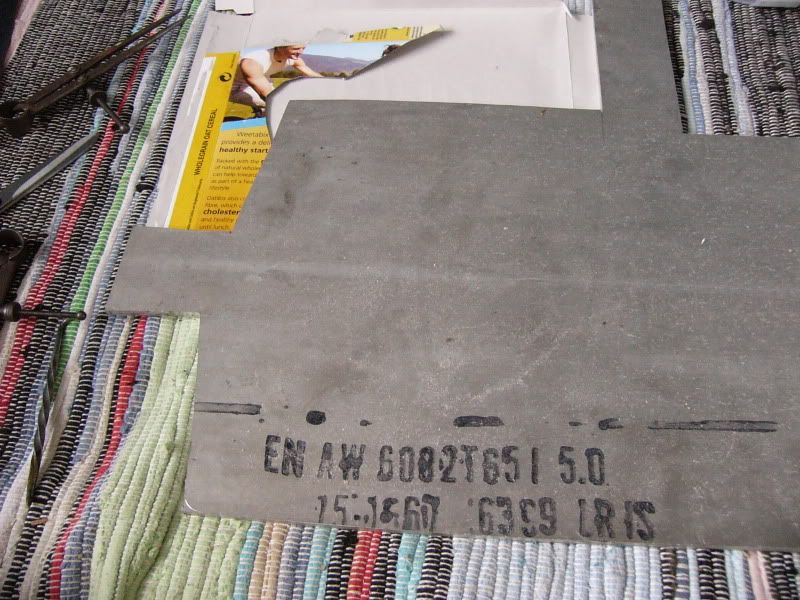 Marked out the shape required - 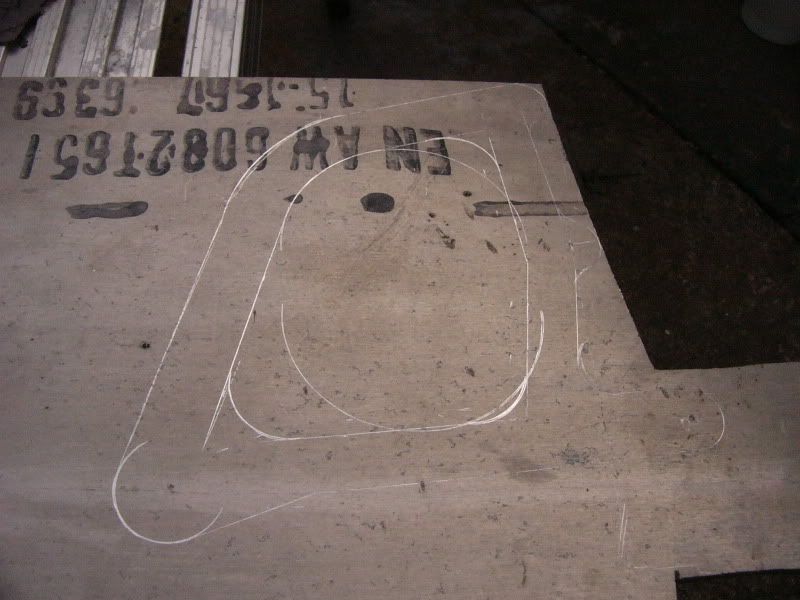 Then got at it with a hacksaw and drill hand tools all the way! 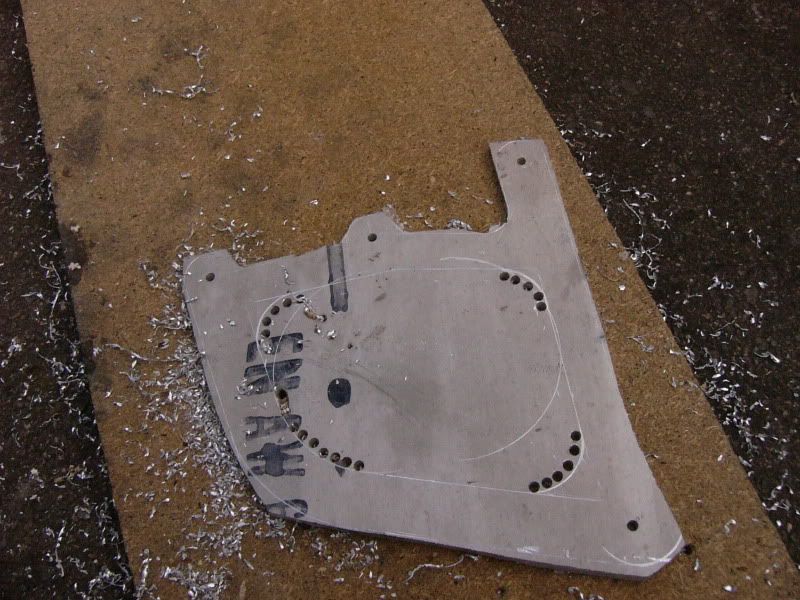 I then proceeded to trial fit and shape it, this took about 20 visits to the car and back to the work shop, but it is now snug! 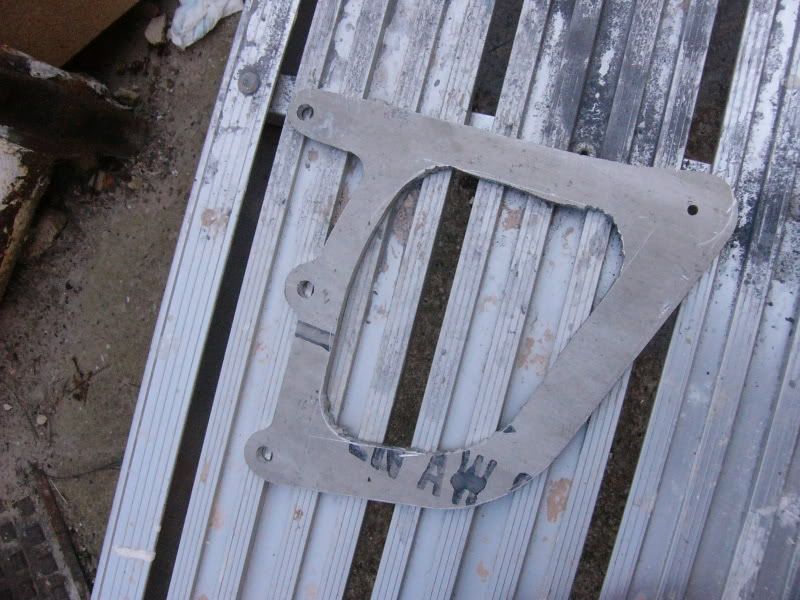 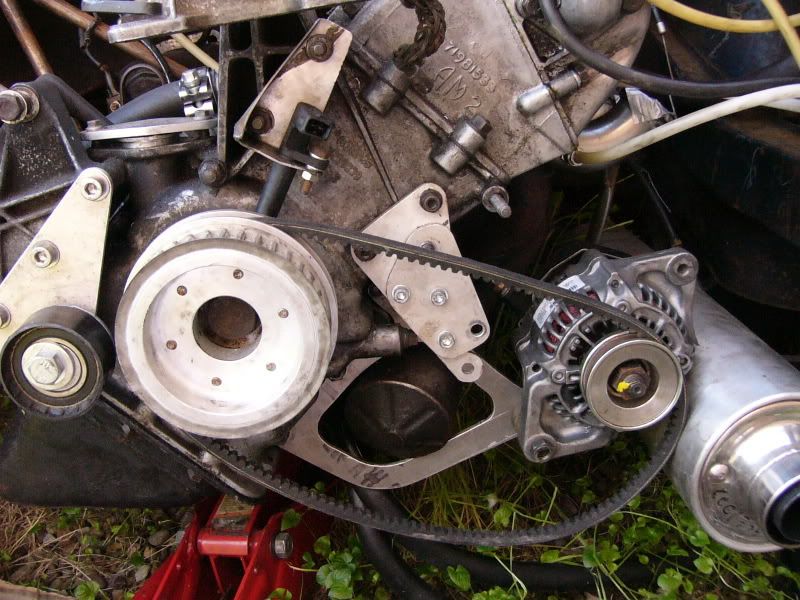 You can see here how tight it is, not a lot of room left to play with! 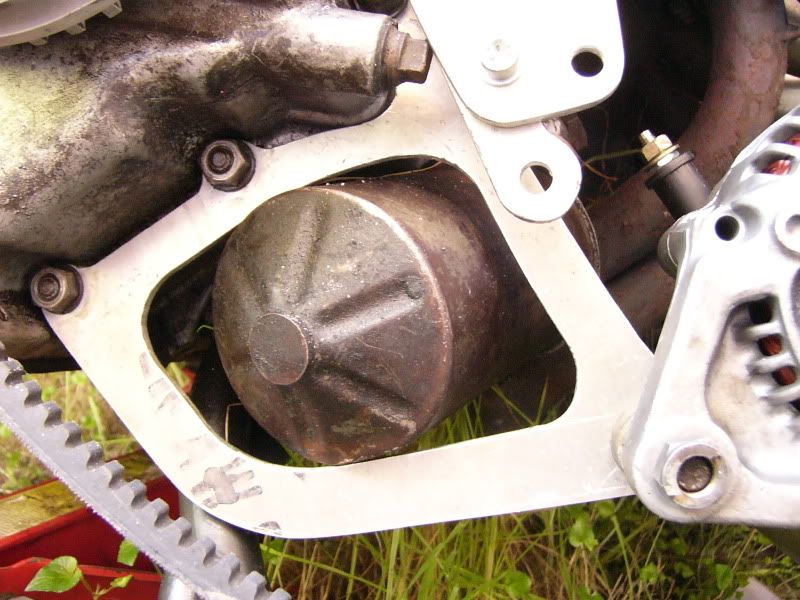 The alternator now has a home, because of the position of the mounting points I have to make up a 25mm spacer to make the pulleys line up, but thats no bother. As the alternator is mounted so far the the bolting points, I wanted to triangulate it and also put the mounting bolt into double shear. To do this I made up a reinforcement bar, it mounts to two of the sump studs and comes across at and angle to the alternator mounting point. I slapped up a couple of brackets out of 5mm steel plate - 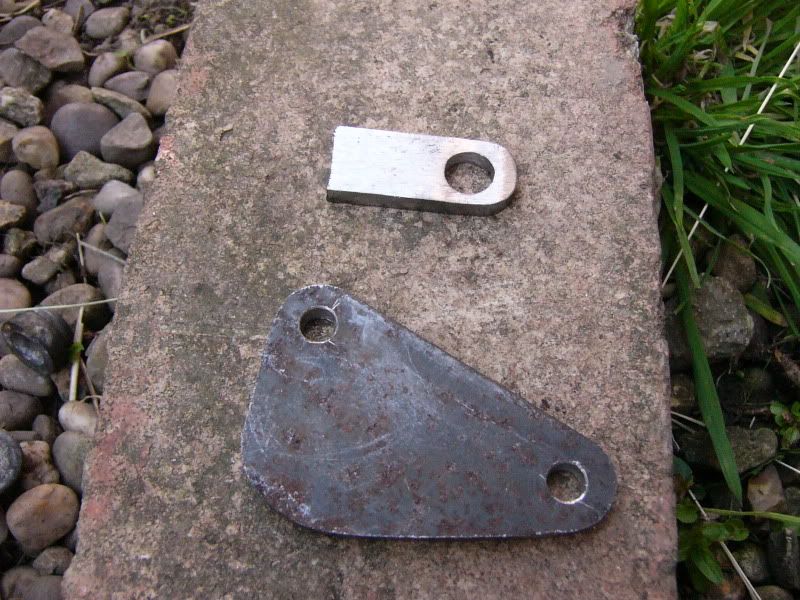 Sized up the pipe between the two points and cut it to size, I then slotted one end, this would carry the alternator bracket, I put the bracket into the slot and then welded around the edges. This was then put onto the alt and the other end of the pipe filed to fit the sump bracket location. Again this was then welded in position, then the whole thing was fitted up - 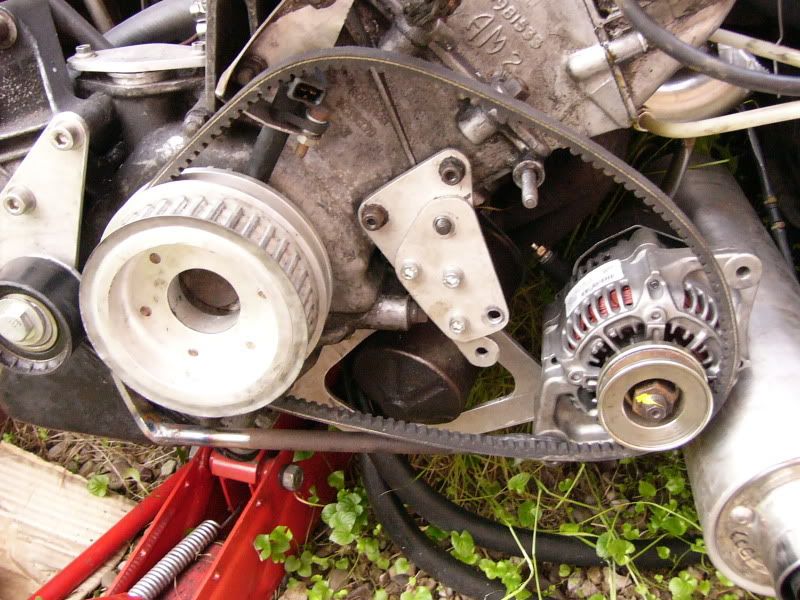 Sump end - 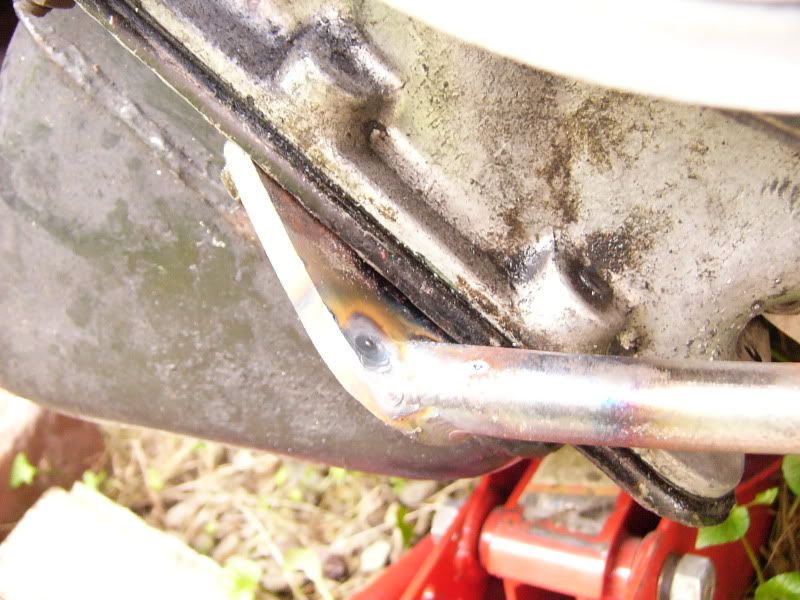 Alt end - 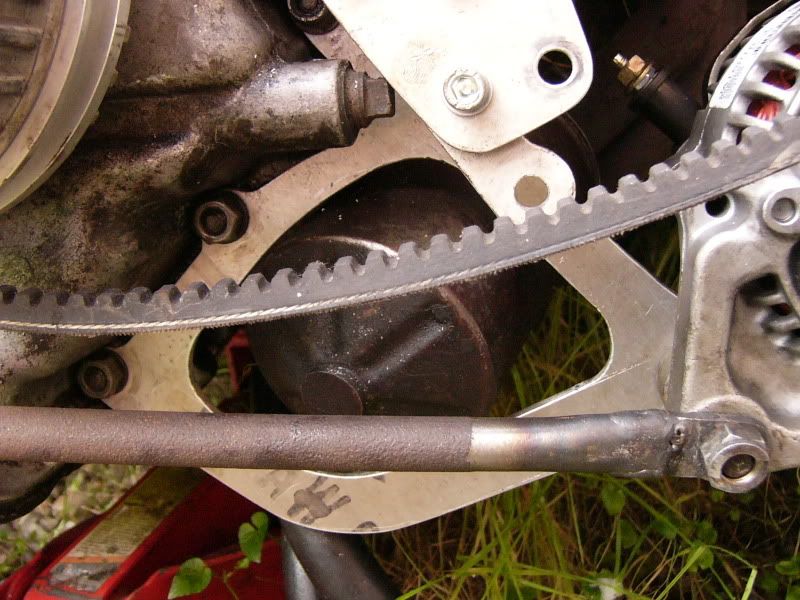 The whole thing - 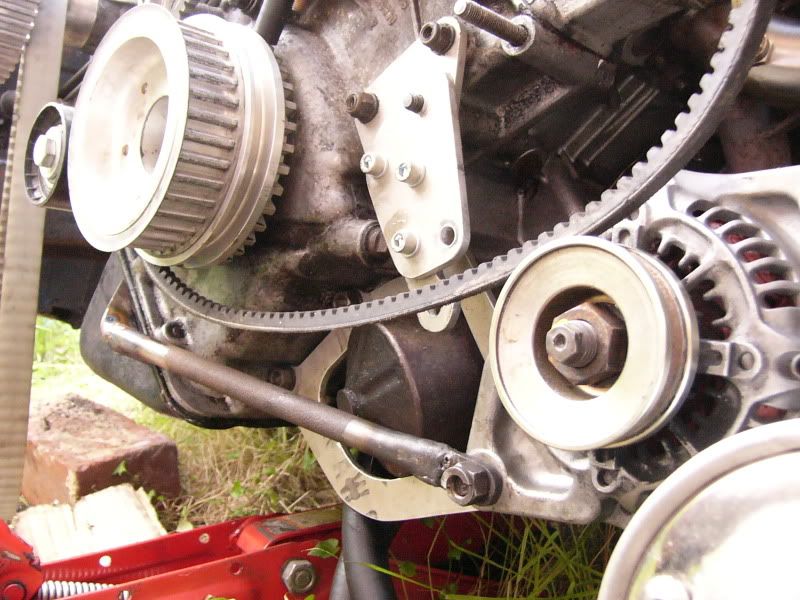 It has gone really well today, really raised my spirits (my girlfriend departed to work on a cruise ship for 9 months yesterday, not great for the mojo!), going drag racing tomorrow, so no work on impy, but next week it will continue in ernest ;D ;D Thanks J |
| |
Last Edit: Jun 13, 2009 20:14:34 GMT by Blown_Imp
|
|
|
|
|
Jun 13, 2009 20:51:30 GMT
|
|
that's a stroke of genious, and all with hand tools, respect to you.
|
| |
|
|
|
|
|
|
|
nice one dude! and all that being done tomorrow, yet its still only today! |
| |
|
|
street
Posted a lot
 6.2 ft/lbs of talk
Posts: 4,662
|
|
|
|
That's some nice fabricating! Great seeing problems bieng worked out and resolved in such a neat way. Keep it up  |
| |
|
|
|
|
|
Jun 15, 2009 13:36:45 GMT
|
|
Excellent Progress! Keep at it.
|
| |
|
|
|
|
|
Jun 15, 2009 16:59:44 GMT
|
Cheers guy's Yes it would appear that my time keeping has gone a little wayward I'm only just getting my brain back into the proper problem solving required for this build, it's a good feeling, and I need as much of that as I can get right now! Ive just popped a spacer in and a proper bolt, it's nice and stiff and all lines up! The adjuster mount is next, I might make it structural too just to stiffen it up a little more, stiffer never hurt anyone I'll take some pics once it stops raining! Cheers J |
| |
|
|
|
|
|
Jun 16, 2009 20:17:18 GMT
|
Right, I'm back from the future and doing today again Last time I had mounted the alternator, today I fitted a proper spacer and bolted it up tight - 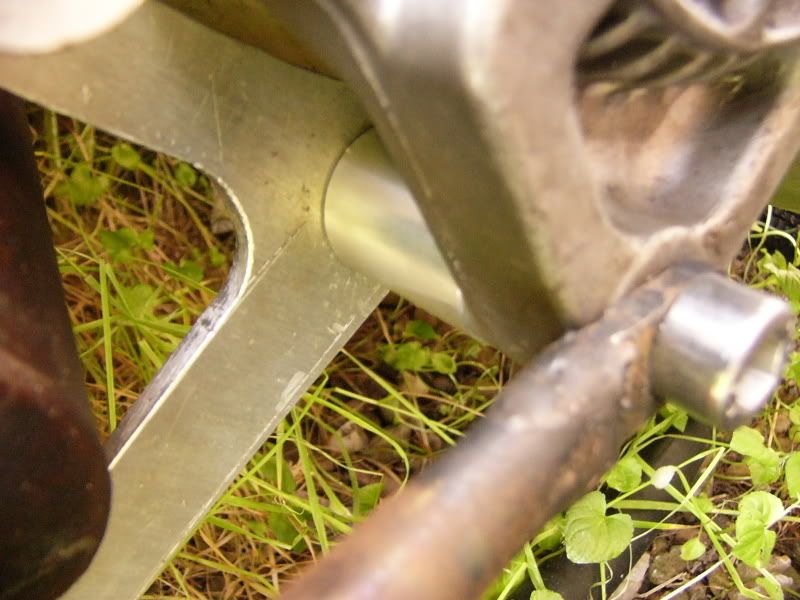 It's solid now! The adjustment at the top of the alternator needed a slotted bracket, I used part of the original imp one, and a bit off of an F3000 car, EGOR, HE'S ALIVE!!! 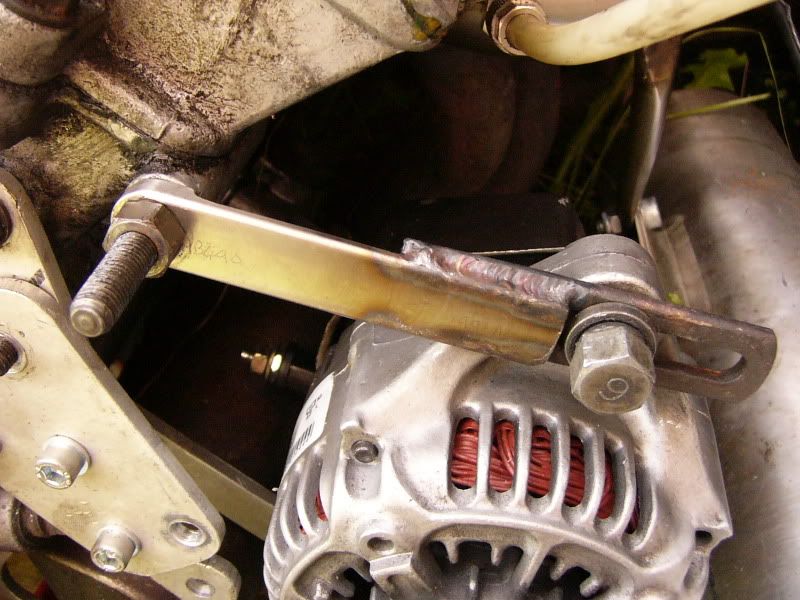 I just TIG'ed them together, and the offset is perfect! Next I decided to mount up the swirl pot I organised a while ago, this was to mount on the rear inner wing, perfect position for the feed and returns. It's the silver thing at the back of this picture -  It will have about 6" of pipe between it and the high pressure pump, nice and easy! I was umming and arring about how to make up the brackets, I was going to use stainless plate, but that would have been a ball ache with all the cutting shaping and bending, I had a look in the F1 draw of fun - 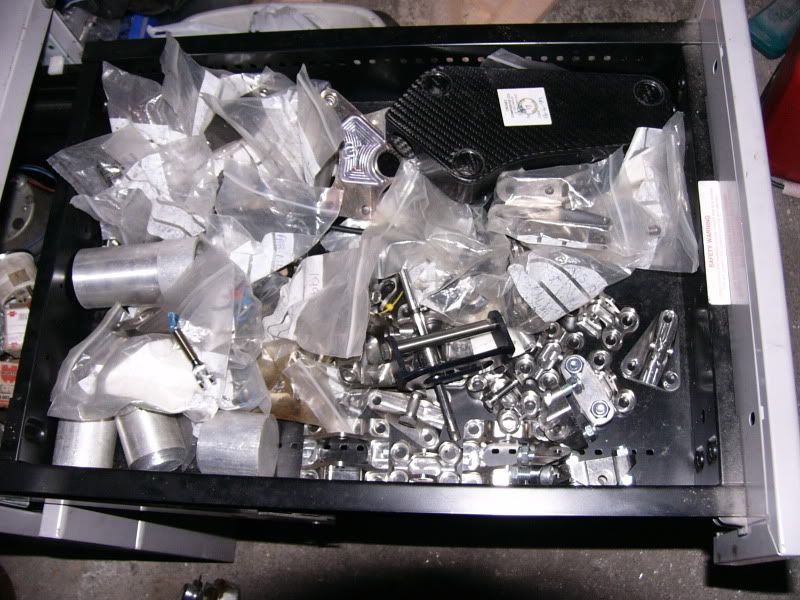 And found two of these - 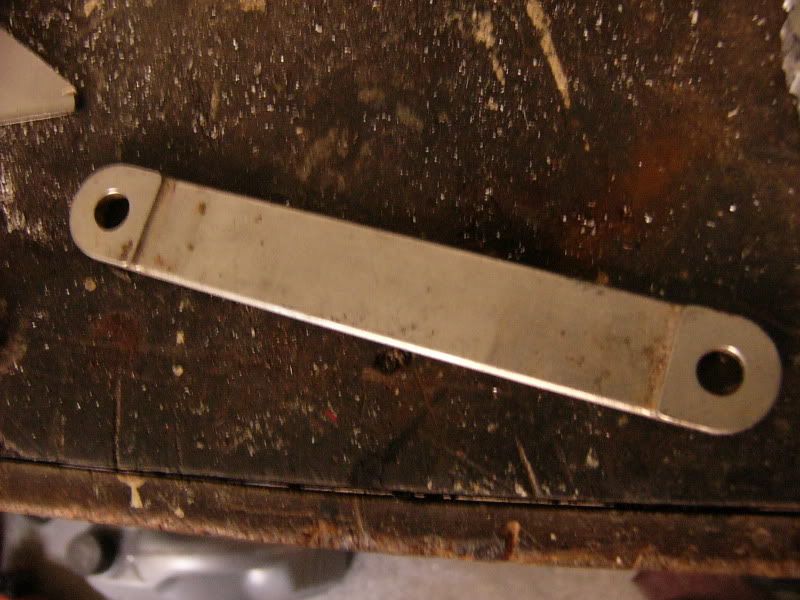 I think they were again off of an F3000 car, although I cannot be sure, they were in a BAR bag, so mabe F1? Anyway thats by the by, they were perfect when cut in half and bent - 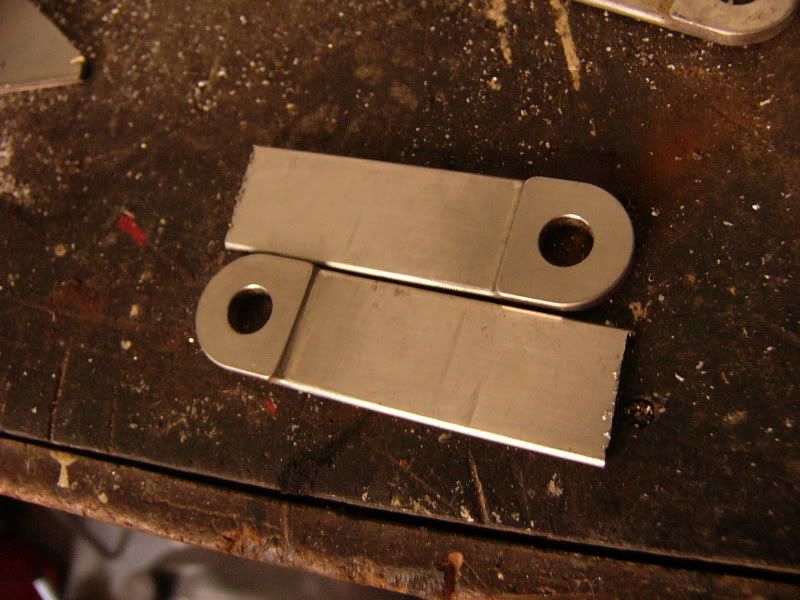 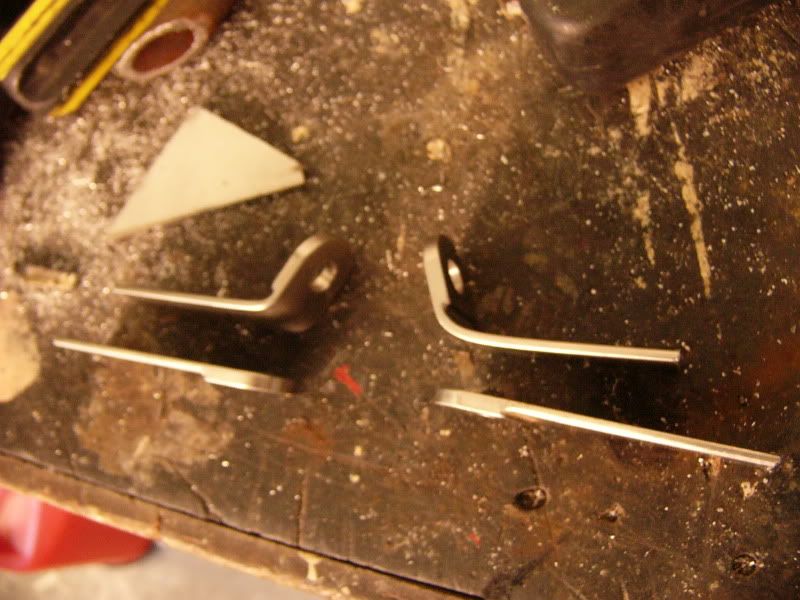 I scoped it all out on the car and got a basic idea of where they wanted to be and at what angle, then got the TIGindraw out, cleaned it all up and melted it all together - 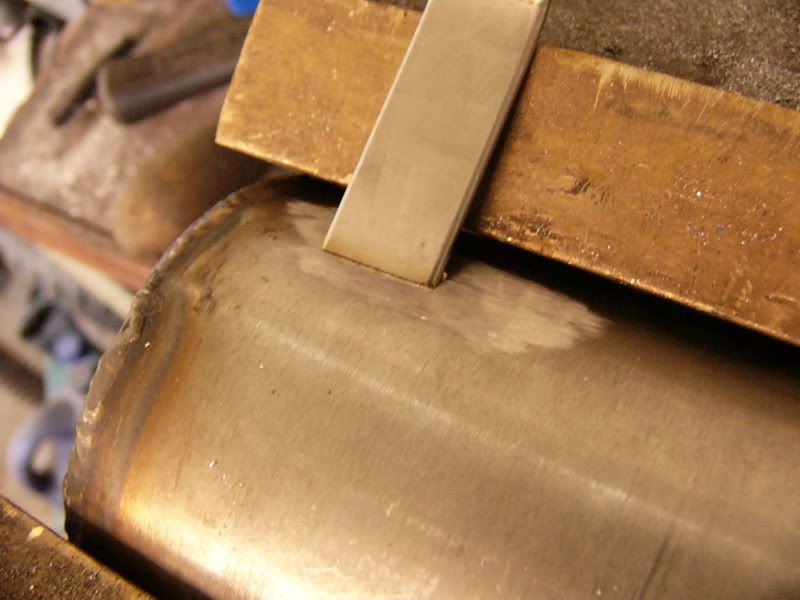 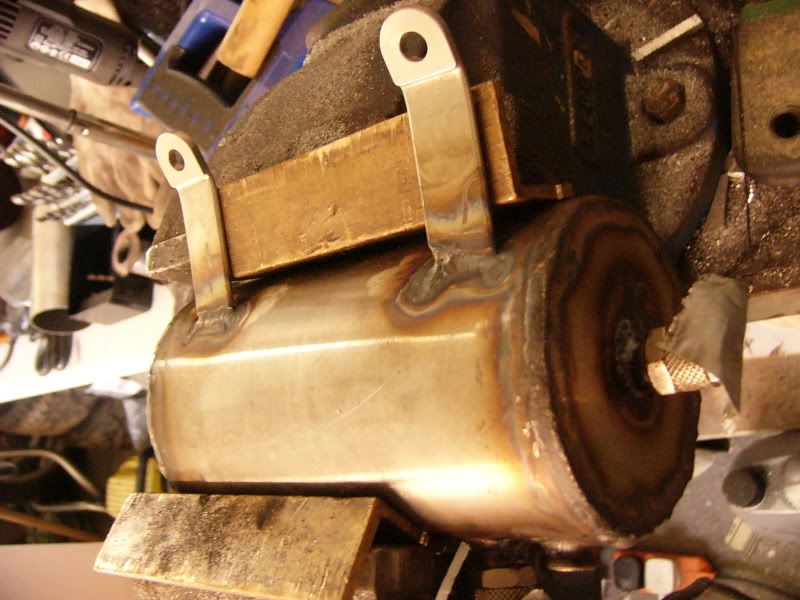 Bit of a shoddy picture, but I have tried to be all fancy and put weld tales on to improve joint strength - 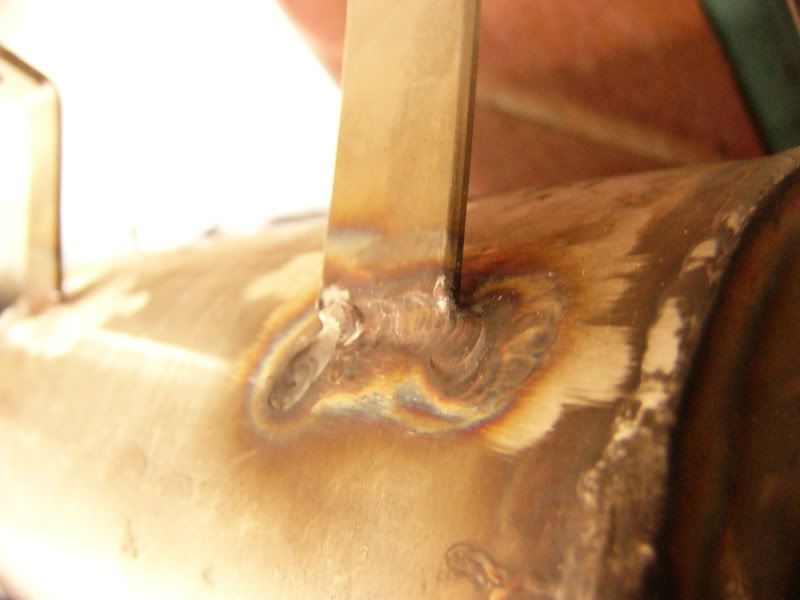 This ws then marked up on the car and the Riv-nut gun brought out again (if it's worn out by the time I give it back Ed, I'll buy you a new one ;D ) You guys have seen all that before, so heres the results -  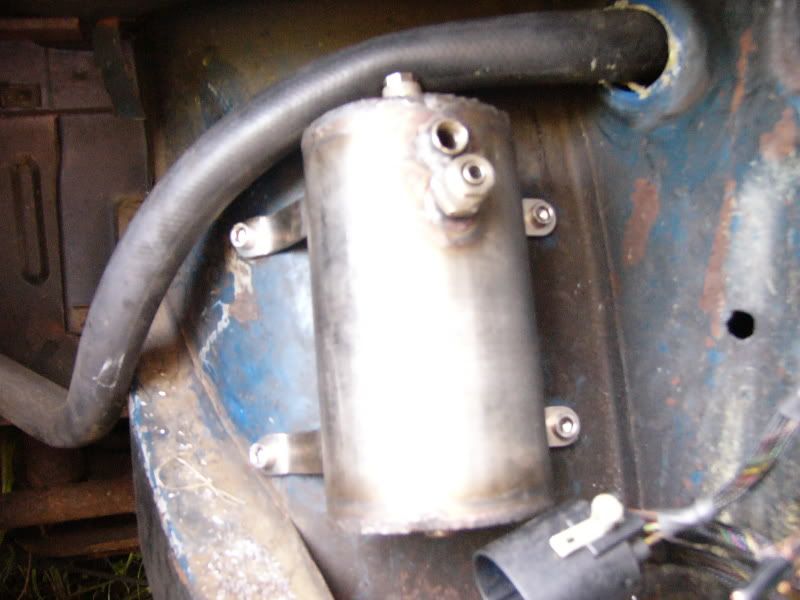 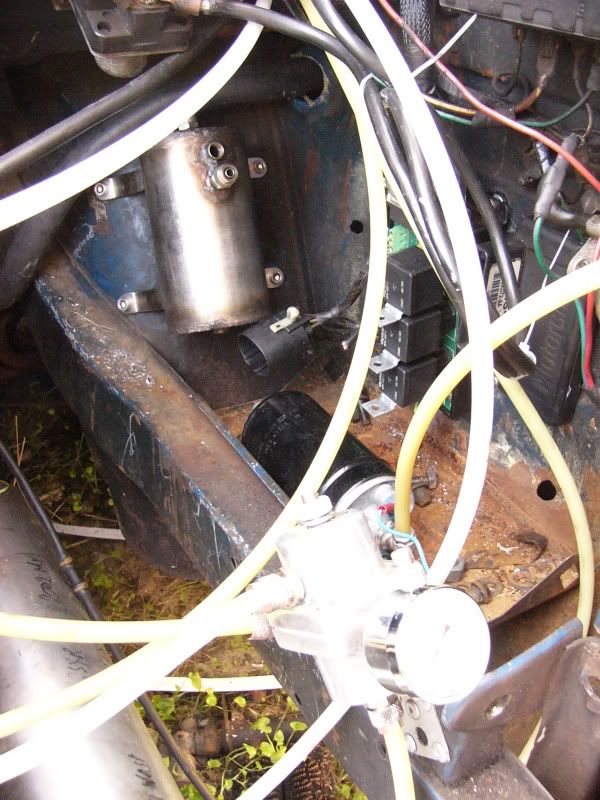 I'm not too sure what i'm going to do tomorrow, probably some more rubbing down on the plenum, it's a horrible job so I keep putting it off! I think it will be worth it once it's done. I have bought some clips for the fuel pump and filter too, so they will soon be mounted. Oh and a small injury today, not bad but it will be annoying, my finger got sucked into the belt sander and I've flat spotted my nail, it's so thin now that it hurts when I touch things. Oh well at least I wont go blind Peace out J |
| |
Last Edit: Jun 16, 2009 20:19:07 GMT by Blown_Imp
|
|
|
|
|
|
|
|
nice one dude, its all ticking along rather well!
|
| |
|
|
fatlad
Part of things
Posts: 65
|
|
|
|
|
loving the work! i have been watching this for a while now and find myself checking the site just to see if youve updated your thread! amazing car. how you getting on?
|
| |
|
|
|
|


 [*]
[*] [*]
[*]


