Mr K
Posted a lot

Posts: 2,993
|
|
Mar 20, 2008 13:43:00 GMT
|
dash is in, had to finish off a few little jobs then slotted it in.  fitted the column multi switch too. next up is gauges and switches. i had a bit of trouble with the bolt on the passenger side which secures the dash to the pilar, as it has been pulled through the bodywork sometime in the past (very neatly! looks like it was drilled!) but i managed to get a washer in there to spread the load. i also need to adjust my hole in the dash at that end as its a few mm out, so the bolt wont sit in strait. but i can do that once its on the road. the improtant thing is its secure and solid, unlike the old one! |
| |
|
|
|
|
|
|
|
Mar 20, 2008 18:57:21 GMT
|
|
As for getting camber on live rear axle cars goes all you have to do is heat the top of the axle with a oxy/acetylene torch till its nice and warm then as it cools it contracts and bends a little. it doesnt give much camber but in racing every little helps. it may wear your bearings quicker too as the half shafts will be under a little more load. its a trick i have seen used on racing astons from the 60's.
|
| |
|
|
|
|
|
Mar 20, 2008 21:56:08 GMT
|
and this fitting finally turned up for my brakes:  rally design wanted £5.50 for the fitting and £8.50 for the postage! its a little 90degree elbow... I waited until I had a bit enough order to warrant the postage and bit the bullet with the part as no where else seemed to stock it in this country. dash in tonight hopefully! FYI Think Automotive sell all that kind of stuff, and cheaper too. www.thinkauto.com/acatalog/intro.html |
| |
|
|
Mr K
Posted a lot
Posts: 2,993
|
|
Mar 25, 2008 13:50:19 GMT
|
Blackpop, cheers for the info, i didnt think of looking on there! DOH! well, i got a fair bit done this bankholiday weekend! first up i finished the wiring inside and fitted the gauges!:  i then started fitting all the ancileries, and hooked up a temory braether pipe, bypassed the heater matrix, and put a tempory wire from the battery to the solenoid on. i also found a few cracks in the exhaust manifold where i had ground the welds back too hard when i made it, so that got welded up. the 4 into 1 collector is actually 4 peices of steel, there where cracks down one of these seams, and across the top.   I'm currently at work and appear to have uploaded half of the wrong photos from home. oops. i then put a battery on it, checked all the electrics worked, which they did. it was very satisfying to see it all lit up after being appart, a great releif! i then spun it over with the HT lead off the coil to get some oil circulating, before trying to start it! first attempt there was thud as it tried to fire way to early, so we moved the disi a bit and tried again, a breif cough, 3rd time lucky and it was running! got good oil pressure then i let it stall as there wasnt much point in keeping it going. will need some setting up before i run it again! but heres a breif video:  that was with random timing, no choke, a carb jetted for a 2.25 landy, and the idle screw set to 'wind all the way in, and back off 2.5turns'! I'm supprised it ran at all! there was a small fuel leak but otherwise it all seems ok, hopefulyl get that sorted tonight, and maybe do some setting up! hell, i might even take a better video! |
| |
|
|
|
|
|
Mar 25, 2008 14:39:06 GMT
|
|
Wehey! Once I get an alternator and bracket in the post that's my next job too!
|
| |
|
|
moomin
Part of things
Posts: 772
|
|
Mar 25, 2008 19:31:41 GMT
|
|
Good work that man!
|
| |
@toxicknobs
|
|
DutyFreeSaviour
Europe
Back For More heartbreak and disappointment.....
Posts: 2,944
|
|
|
|
Fantastic stuff! - Glad it's all flying along now........ it'll free up time to get the SS1 sorted  Looks fantastic - when's it gonna be moved out and a full side shot taken for our lower viewing pleasure? Looks to have dropped a fair bit ;D |
| |
Back from the dead..... kind of
|
|
Mr K
Posted a lot
Posts: 2,993
|
|
Mar 27, 2008 13:45:55 GMT
|
made a start at working down my to do list, first up was fixing the fuel leak at the carb. the problem was that weber only pressed the fuel supply fitting into a lot of their carbs, and mine was coming out! this was the reason that a lot of scimitars went up in flames so, i set to and decided to put a pin through and peen the ends over, i found a pin, and a suitable drill, however, i somehow ended up with a hole in my work that was too big! i was not happy! so i put a nut n bolt in there for now which was a good fit and a good smearing of hermatite. this weaped a tiny bit, and i was not happy with it, (i have also since read the box for hermatite and its not suitable for use with petrol!). so off it came.  that large collection of fittings looks like it should contain a filter, it is infact the fitting on the carb, screwed into a female to female adapter, with a reducing peice screwed in the end and then a barbed push fitting in the end of that! utter cack. so i took it all out, consolted the dzeus book, and opened out the whole and tapped it 1/8" NPT. would my new fitting in (which also points in the right direction!) and put some cold weld in the holes i had drilled.  A lot better and now fuel tight! it started it up, and have had it idleing OK. but i cant get a clean pick up and a decent idle, it seems to be one or the other! the fuel pump also seems to be racing constantly; only slightly slowing when the pressure builts, it originally used to slow right down to a slow ticking once it had pressurised the system. to me this sudgests that i have a leak! no puddle and dry joints on the pressurised side of the pump sudgests that it might be sucking air on the vacuume side of the pump, or leaking within the carb. so tonight i will be looking into this. if this doesnt solve my problems ill be looking for an air leak between the carb and the manifold or manifold to head. hopefully it will be idling and reving OK tonight. bearing in mind its still jetted for a landy - although, when it was running ok at the top end it seemed clean and smelt right. we will see. will report back tonight/tomo! |
| |
|
|
DutyFreeSaviour
Europe
Back For More heartbreak and disappointment.....
Posts: 2,944
|
|
Mar 27, 2008 17:01:17 GMT
|
|
Good hunting! - I heard a quick check for leaks like that is a spray of WD40 as it temp seals the leak if there is one and you'll hear the difference....... never had to use it so not sure if that'll help or if you have a better routine. I'd be interested to know.
John
|
| |
Back from the dead..... kind of
|
|
Mr K
Posted a lot
Posts: 2,993
|
|
Mar 28, 2008 14:06:16 GMT
|
|
well, i checked and the fuel flow was plentyful and bubble free, so i decided that although the pump was running a bit fast, it wasnt the cause of my running problem. next i re-sealed the carb to the manifold, and the manifold to the head. no improvement, although I'm pretty sure the carb - manifold gasket was leaking.
i took the top off the carb, blew through all the fuel ways, unblocked the main jet and sealed the top on better, its better but still not the same as it was when we first fired it up.
if you start it at idle it ticks over (idle is too slow, but that can be sorted) but as soon as the butterfly moves it dies! you can however pump the injector pump with your hand and the revs rise, so its not a fueling issue, more an issue going from the idle circuit to the main circuit. this is confirmed because if you start it with some throttle, and keep it reving above idle its OK (although, you can see the fuel coming of the venturi and the flow is not constant and starts to slow down / drop off until you rev it again and the the flow carries on) but if you let it drop to idle, guess what, it stops! i think there must be bits blocking the emulsion tube / venturi, but i cant get the emulsion tube out; that will be my next port of call seeing as i have already found rubbish in my main jet.
gtvsaviour - i have heard the WD40 trick before, and tried it several times to find problems to no avail, i did it again last night but it made no difference, i then remvoed the manifold and red did the seal, that also made no difference. lol.
|
| |
|
|
|
|
Mr K
Posted a lot
Posts: 2,993
|
|
|
|
got the emulsion tube out, and cleaned all the way through the carb, it now runs OK. not setup at all, so not running brilliantly but it is running pretty well and you can now rev it from idle and it returns back to idle. with it running OK my attentions have turned to other things; i will come back to seting it up. i welded a patch over a hole in my old exhaust to make it MOTable:  made a bracket and i mounted the catch tank which i got from Dom off here:  and i have started to run in the new power lead from the battery to the solenoid. my brother got it for me; he asked in the shop for black battery lead and pointed it out in the catalogue; the guy returned with this really heavy duty browny bronzy coloured cable! Perfect!  i have also fitted the heater matix once i had painted it and flushed it out, and done numerous other little jobs. i have been working down my list, but seem to have not actually finished any of the jobs on it yet! also got the engine back in my brothers SS1 1800Ti:  |
| |
|
|
Mr K
Posted a lot
Posts: 2,993
|
|
|
|
last night i did up the last bolts on the heater matrix, and then set to fitting the centre console, i had all sorts of greif fitting the choke cable outer, as it clashed with the heater matrix if i tried to fit it to the centre console first, then slot the whole lot in. all in now, and its long enough to work with the weber so thats all good (its not an original reliant one, its a cheapy aftermarket one - but still OK) so with that in i finished fitting the gauges properly:  yea baby! interiors almost complete, just got to find some of the plastic peices to blank the un-used switch holes off, fit the steering wheel (wait until the wheels are pointing in the right direction) and sort some better sun visors. i also did a bit in the engine bay around the the battery cables:  |
| |
|
|
DutyFreeSaviour
Europe
Back For More heartbreak and disappointment.....
Posts: 2,944
|
|
|
|
|
Flying into the home straight ( although RatLook is now WAY off! ).
Looking as if it's all coming together superbly. Hope my Triumph looks half this good in the engine bay!
Any mre info, or potential thread on the SS1 - I'm sure I'm not the only one on here wouldn't mind seeing one........
|
| |
Back from the dead..... kind of
|
|
J.P
Posted a lot
I like to eat ice cream and I really enjoy a nice pair of slacks.
Posts: 1,175
|
|
|
|
|
Is the steering column from a Mini? That steering wheel is very cool, love the dish of it! Are they hard to come by?
You're close to the finish now!
|
| |
|
|
Mr K
Posted a lot
Posts: 2,993
|
|
|
|
Is the steering column from a Mini? That steering wheel is very cool, love the dish of it! Are they hard to come by? You're close to the finish now! the steering column is reliants own; as is most of the car, although a few bits of mini do creep in, namely the brake back plates, shoes, slave cylinders and modified drums, and the oil pump is also the same as some A-series. oh, and 10" rims... its the same as the following: ![]() i7.photobucket.com/albums/y290/shytorque/IMG_0159.jpg[/img] i7.photobucket.com/albums/y290/shytorque/IMG_0159.jpg[/img]they are dead cheap and common, being in almost every single kitten, robin, rialto and fox! but no, unfortunatly it wont fit a mini. i am indeed getting close! cant wait to drive it! so excited to see what it goes like! |
| |
|
|
Mr K
Posted a lot
Posts: 2,993
|
|
|
|
Flying into the home straight ( although RatLook is now WAY off! ). Looking as if it's all coming together superbly. Hope my Triumph looks half this good in the engine bay! Any mre info, or potential thread on the SS1 - I'm sure I'm not the only one on here wouldn't mind seeing one........ yea, i still cant think of a good name. lol. looking forward to seeing your triumph progress! i have always wanted a 2000. the thread for his other SS1 might be un-earthed soon and updated. i will stick some pics of the pair of them up on it at the weekend. |
| |
|
|
Mr K
Posted a lot
Posts: 2,993
|
|
Apr 22, 2008 12:54:03 GMT
|
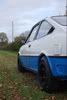
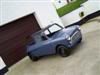
well, its definatly update time! i havent done a great deal really due to coursework etc. i have finished hooking up the battery switch:  bled the brakes through and got a solid pedal but theres definatly still a fair bit of air in the system. i fitted the battery mounts and the battery properly, and i have started to hook up the catch tank, 1 out of the two hoses done.  braided hoses on the front; still got to do the front suspension, but this will wait until its on the road as i have some things i want to try:  i then took it for a drive up and down the driveway, seems very easy to drive, i expected it to be a bit of a pain at slow speeds but its suprisingly good! (i don't know why, but the stance looks all weird in these photos!):   it is running considerably too rich, and i had the clutch adjusted wrong, but thats all easily sorted. and a parting photo:  |
| |
|
|
Tim
Posted a lot
Posts: 3,340
|
|
Apr 22, 2008 13:22:46 GMT
|
|
woo, it lives!
Looks quite brown in the latest photos, i thought it was yellow :-)
|
| |
|
|
DutyFreeSaviour
Europe
Back For More heartbreak and disappointment.....
Posts: 2,944
|
|
Apr 22, 2008 14:13:21 GMT
|
it's aliiivveeeeeee........ nice one  - good to see it's en route. Not long now! ;D |
| |
Back from the dead..... kind of
|
|
Mr K
Posted a lot
Posts: 2,993
|
|
Jul 25, 2008 13:14:01 GMT
|
no updates for 3 months! jeeez! what have i been up to?! not much is the answer to that. i pretty much finished building the other rear wheel, just need to paint inside the backs satin black. and that was about it until a few nights ago this week when i was feeling rather motivated by a trip the the LeMans classic and deicded to stop messing with that pesky ss1 and get on with this! the ss1 is cool, and has character, but its still too new, and the trim and styling is too dreadful, i needed a propper injection of some real old skool cool in my life! so ive decided to crack on with the kitten for a while instead of working as much on the ss1 (mainly as the ss1 is progressing too slowly due to funds, but i have most of the bits for the kitten already!) so i have started by refurbing a headlamp, stripped and cleaned, new 60/55watt halogen bulbs (which turned out to be the same as previously fitted, but ah well) and brand new light units which look way better, and stainless fasteners where i can.   demonstrates the resto process nicely there, take a grubby old chunk of car, clean it, protect it, re-assemble it, all thats left is to spray some lithium grease onto the adjusters to stop them rusting any further and keep them moving nicely, and wire up the relays, oh, and do the other side! more soon maybe! |
| |
|
|
|
|


 - good to see it's en route. Not long now! ;D