slater
Club Retro Rides Member
Posts: 6,390
Club RR Member Number: 78
|
1976 Minislater
@slater
Club Retro Rides Member 78
|
|
|
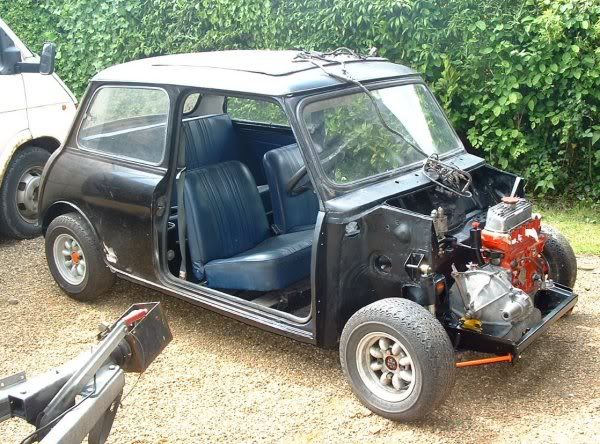 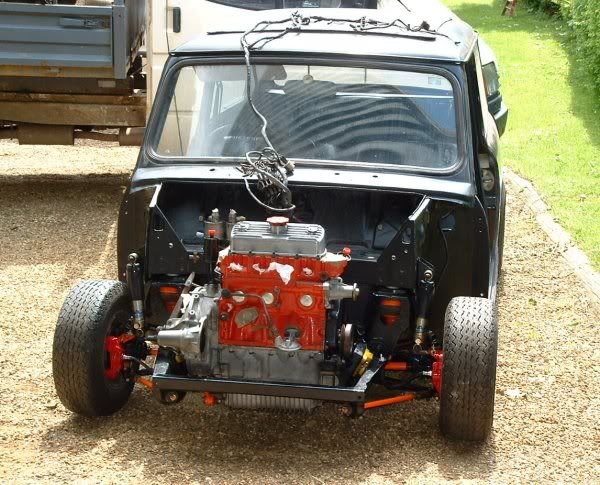 Heres my mini project  Theres a rather long story behind it but i should try not to bore you with that too much! started out when i was 13 (1998ish) got a mini to play with and ended up doing a proper resto job on it. Lots of custom bits like deseaming, frenched lights and debumpering. Only problem was i think i went a bit OTT on it so when a guy down the road was selling a pretty good 1000 for only £180 i snapped it up and diecided to use the bodyshell with the mechanical parts i had allredy built for the orignal car. ATM I'm aiming for Euro style. Rough spec goes - Modified 1100 engine along the same lines as my escort - Adustible suspension (ride hight,camber,castor) that i made myself - GAZ dampers - Will be bright Fiat Yellow - 1100 special alloys with splitrim conversion to make them 10x7 (still working on these) Am in the process of replacing the roof atm (some idiot put a curse word sunroof in it) its prooving to be... er.. fun  will keep you posted slater.. |
| |
Last Edit: Mar 1, 2005 21:50:57 GMT by slater
|
|
|
|
slater
Club Retro Rides Member
Posts: 6,390
Club RR Member Number: 78
|
1976 Minislater
@slater
Club Retro Rides Member 78
|
|
|
More pics 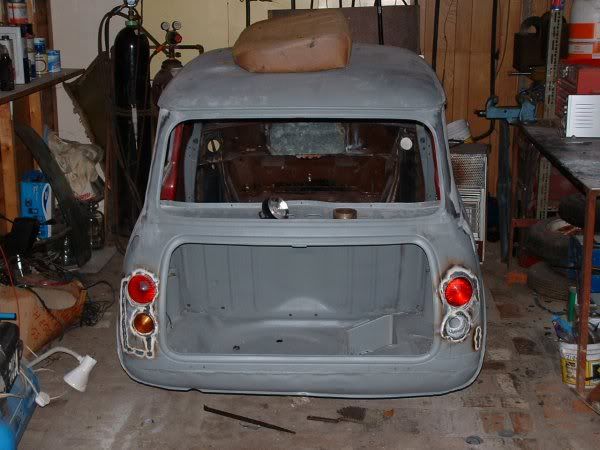 Original shell (getting in the way atm!)  2nd shell as i got it 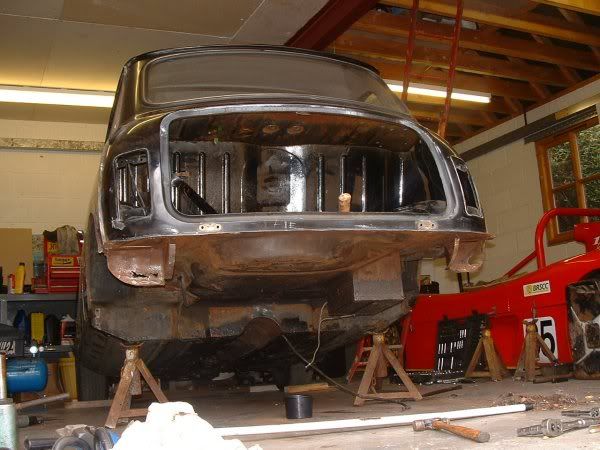 Minor rust at the back, nothing a rear valace panel couldent solve 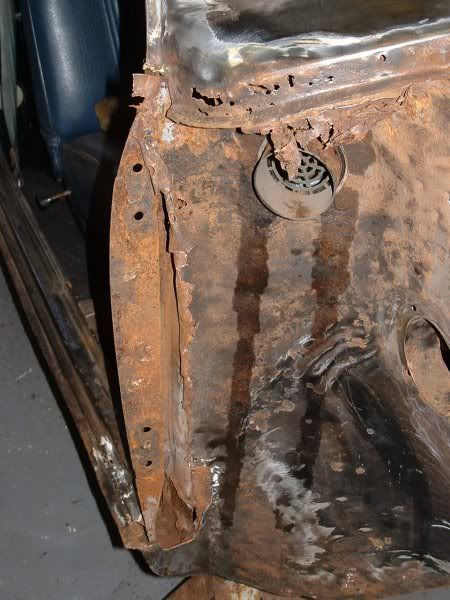 A bit more at the front tho 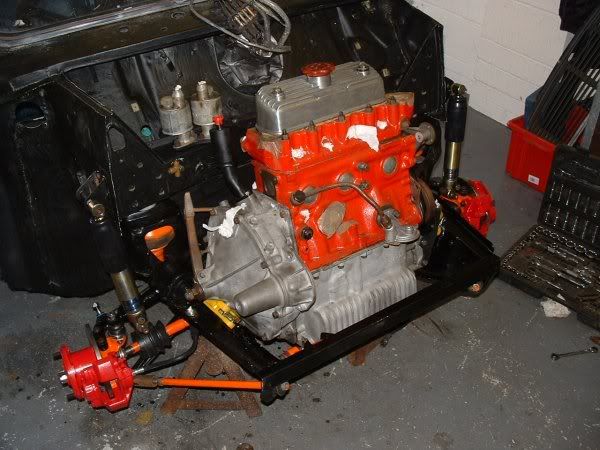 All solved Sorry i don't have many pics, i get carryed away when workign and forget to take many! |
| |
|
|
|
|
|
|
|
|
|
Thats gonna be really nice when its done    I presume from the cut down inner wings, your fitting a flip-front. |
| |
|
|
slater
Club Retro Rides Member
Posts: 6,390
Club RR Member Number: 78
|
1976 Minislater
@slater
Club Retro Rides Member 78
|
|
|
Yeh going for a flip front, Not sure if it will be steel or glass yet tho. I have the original panels which i could tart up and put back together but they are cruddy non-genuine ones so i reckon i will end up buying a new front for it. The orignal panels had a 1/2" gap between them when originaly fitted!  That reminds me, i must make some brace bars to keep the MOT man happy  |
| |
|
|
Kris
Posted a lot
  
Posts: 1,631
|
|
|
|
Nice work, that front end looks very tidy  |
| |
|
|
|
|
|
|
|
|
looking` good - I take it the split rims are the Force ones ?
Post some pics when you get them, they are soooo nice ;D
|
| |
|
|
slater
Club Retro Rides Member
Posts: 6,390
Club RR Member Number: 78
|
1976 Minislater
@slater
Club Retro Rides Member 78
|
|
|
|
Simlar idea but I'm going to do the conversion myself. I'm an engineer and my dad runs a engine building shop so ive got all the equipment ;D
|
| |
|
|
slater
Club Retro Rides Member
Posts: 6,390
Club RR Member Number: 78
|
1976 Minislater
@slater
Club Retro Rides Member 78
|
|
|
Well ive attualy done some more work at last so heres an update. Many parts aquired such as ignition, indicators, front panels and air filter but my fav are these 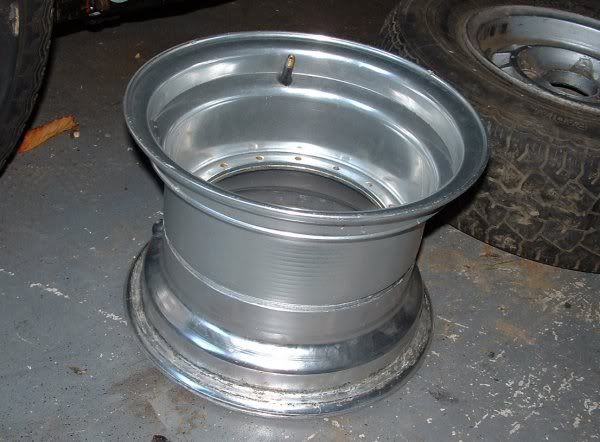 7ins of shiney rim  unfortunatly i had to abandon my split rim conversion on the exacton alloys as bloody Image have stopped making the 10" rims i needed! Fortunatly i got hold of these spectrum rims off a guy racing miglias for a very resanble price (under £150 for 4 10x4in and 5 10x3ins ;D) all i need to do is make centers for them which shouldent be too hard.  Also as some of you may know i had a problem with a slight hole in the roof  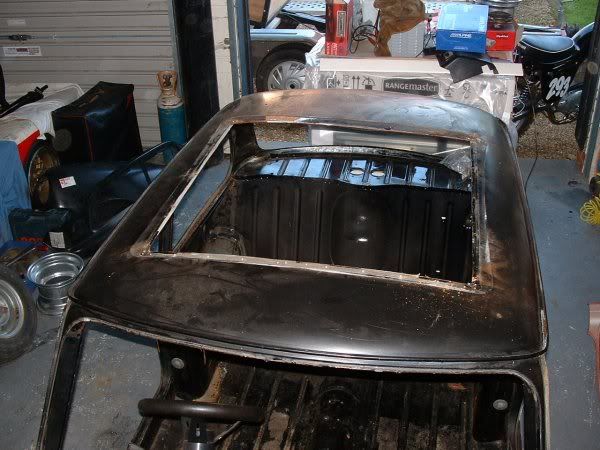 so my only solution was to make it bigger (obviously) 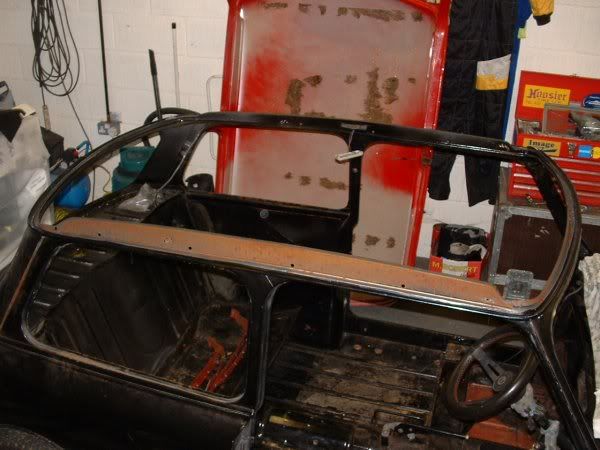 more on that later 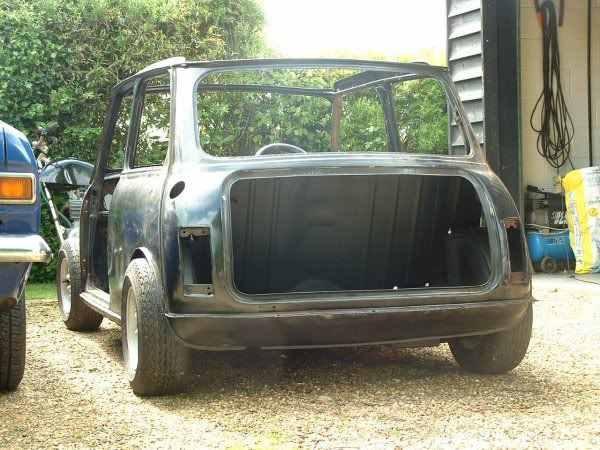 Slammed the back another few mill What do you think to red primer and black white checked stripe ? |
| |
|
|
Kris
Posted a lot
  
Posts: 1,631
|
|
|
|
That's serious  Did you drill out all the spot welds? Are you keeping the car at that height? If you do can I make a suggestion, that you fit the lower damper mountings as it keeps the damper at a more efficeint angle. |
| |
Last Edit: May 8, 2005 22:12:54 GMT by Kris
|
|
slater
Club Retro Rides Member
Posts: 6,390
Club RR Member Number: 78
|
1976 Minislater
@slater
Club Retro Rides Member 78
|
|
|
Nah there were to many welds to bother with that, i just cut around the edge with a nibbler and ground the seam back, plan to do the same on the replacement and spot it back on. Hopefully it will stay that low. i know the mounts you mean and i shall be fitting them some time before it get serious use  |
| |
|
|


