|
|
|
Jan 13, 2023 22:20:19 GMT
|
It's about which direction the pinion moves the rack when you turn it. Say for a rack-in-front setup and you want to turn right. You spin the steering wheel clockwise, and because it's located in front of the wheel it needs to push the rack to the right (as you're sitting in the car), pushing the front of the wheel out and steering right. Now, pop that same rack behind the wheel. You spin the steering wheel clockwise and the rack moves to the right of the car as before. However, because it's attached to the back of the wheel it pushes the back of the wheel out, turning left instead. Could you change your driving technique to suit?   I expect you'd have a crash course in it quite quickly?  I would have a check of the Ackerman as well, likely to be very wrong without steering arm surgery. Good point about the Ackerman. To sort it you need the balljoints to sit on a line drawn from the kingpin axis to the centre of the rear wheels. Should be doable heating and rebending the steering arms, although I must caveat that by saying I've not done that before and there might be more approved methods.  There's bump steer to sort as well, which I think is to do with the relative length of the steering rod from joint to joint and the suspension arm (if the steering rod is shorter, it describes a tighter arc and thus turns the wheel as the suspension compresses or droops causing bump steer). Options are find a shorter rack (preferably a rear steer one), or if you want to avoid all that maybe see whether there's scope to get someone to weld a channel into the engine sump so you can keep the front steer rack geometry. |
| |
Last Edit: Jan 13, 2023 22:21:07 GMT by biturbo228
|
|
|
|
|
|
|
Jan 14, 2023 16:40:19 GMT
|
Regarding the rack on the back, check out Frank Kelly’s you tube Chanel where he documented his Millington powered mk2 Escort during Covid lock down. He moved the rack to the rear of the cross member using a LHD rack. Crockpot is right about the Ackerman issues so some work will be required. Brilliant, thank you for that, that is exactly what I will do, it's nice to see it done as I am exactly in the same position, my brackets are now off the back of the subframe and it just shows the LHD rack theory works. |
| |
|
|
|
|
|
Jan 14, 2023 16:44:53 GMT
|
Could you change your driving technique to suit?   I expect you'd have a crash course in it quite quickly?  I would have a check of the Ackerman as well, likely to be very wrong without steering arm surgery. Good point about the Ackerman. To sort it you need the balljoints to sit on a line drawn from the kingpin axis to the centre of the rear wheels. Should be doable heating and rebending the steering arms, although I must caveat that by saying I've not done that before and there might be more approved methods.  There's bump steer to sort as well, which I think is to do with the relative length of the steering rod from joint to joint and the suspension arm (if the steering rod is shorter, it describes a tighter arc and thus turns the wheel as the suspension compresses or droops causing bump steer). Options are find a shorter rack (preferably a rear steer one), or if you want to avoid all that maybe see whether there's scope to get someone to weld a channel into the engine sump so you can keep the front steer rack geometry. I think it can be done with a LHD rack, the mounting position is not far away from where it would have been on the front (if that makes sense), the hubs of the MGB can be changed so my calipers will sit at the front, it may take some fine tuning but I think it is a goer. Thanks for the help and input. |
| |
|
|
|
|
|
Jan 14, 2023 16:45:07 GMT
|
|
A morris minor rack goes behind the axle and the track is similar, could that be of any use?
|
| |
|
|
|
|
|
Jan 14, 2023 16:48:09 GMT
|
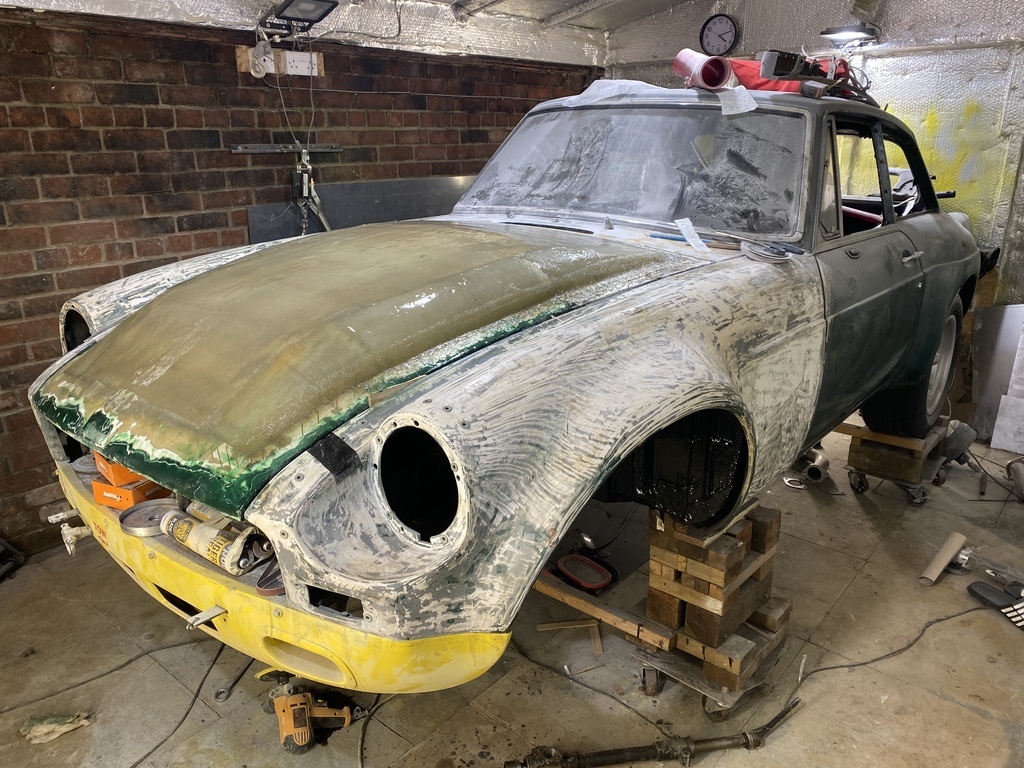
I did some more work on the bonnet, I think it looks better now it is complete, it still needs some lumps and bumps taking out and as it is a different colour it stands out more, if the front end was painted I think it would look alright -  |
| |
|
|
stealthstylz
Club Retro Rides Member
Posts: 14,960
Club RR Member Number: 174
|
|
Jan 14, 2023 19:04:53 GMT
|
|
Personally I'd concentrate on the rack situation before going any further. IMO it's the most important bit of any build, I've driven loads of stuff at work that has had the rack in completely the wrong place to clear bigger engines and it makes them impossible/dangerous to drive fast. The worst was a rack converted 55 Chevy that had so much bump steer and opposite/reverse ackerman if you pushed on round a corner the loaded wheel would be trying to straighten up and the other side would be steering more, which depending on where the undulations in the road were would make the car feel like it was zig-zagging on the road.
I'd do some basic mounts to get the RHD MGB rack in the position you want and hooked up to the hubs. Doesn't matter about the steering been backwards for now as if you jack the suspension up and down with a straight edge against the wheel you can see how much bump steer there is before wasting time/money on a LHD rack that might not work.
|
| |
|
|
|
|
|
Jan 14, 2023 19:18:40 GMT
|
|
I've seen some bad ones too...
The worst one was a mid '30s Chevy with a Corvair front clip ( suspension), combined with ( if I rember correctly ) a Pinto rack.
Bumpsteer on it was so bad you could read the letters off both front wheels when you jacked it up.
It was done by a coworker, a couple years earlier out of his garage ( we didnt let him live that one down...)
Correcting bumpsteer and Ackerman is possible, but it takes a lot of time ( mainly a lot of accurate measuring).
I think I'd rather modify the sump (even if it is a complicated casting and requires aluminum welding), or go dry sump.
|
| |
|
|
|
|
|
Jan 14, 2023 19:54:18 GMT
|
A morris minor rack goes behind the axle and the track is similar, could that be of any use? I did not know that, it looks like a really slender rack as well, and I am guessing simple and reliable. |
| |
|
|
|
|
|
Jan 14, 2023 19:58:07 GMT
|
|
Yep it's as simple as they come.
|
| |
|
|
|
|
|
Jan 14, 2023 20:06:43 GMT
|
Personally I'd concentrate on the rack situation before going any further. IMO it's the most important bit of any build, I've driven loads of stuff at work that has had the rack in completely the wrong place to clear bigger engines and it makes them impossible/dangerous to drive fast. The worst was a rack converted 55 Chevy that had so much bump steer and opposite/reverse ackerman if you pushed on round a corner the loaded wheel would be trying to straighten up and the other side would be steering more, which depending on where the undulations in the road were would make the car feel like it was zig-zagging on the road. I'd do some basic mounts to get the RHD MGB rack in the position you want and hooked up to the hubs. Doesn't matter about the steering been backwards for now as if you jack the suspension up and down with a straight edge against the wheel you can see how much bump steer there is before wasting time/money on a LHD rack that might not work. The RHD rack was in position on brackets (I had overlooked the reverse steering situation so much) and was ready to hook up the the hubs, the difference between it being at the front or rear of the subframe is the same distance, hence the engine sits were it does primarily. The rest oil filter, gear shifter, etc just fell okay. It is also at the height that it was at the front again hence the engine position. At this point I have little doubt the LHD rack would work other than I would have to remake the brackets as it is a different profile upside down, the youtube video on the escort is quite insightful. |
| |
|
|
|
|
|
|
|
Jan 14, 2023 20:09:19 GMT
|
I've seen some bad ones too... The worst one was a mid '30s Chevy with a Corvair front clip ( suspension), combined with ( if I rember correctly ) a Pinto rack. Bumpsteer on it was so bad you could read the letters off both front wheels when you jacked it up. It was done by a coworker, a couple years earlier out of his garage ( we didnt let him live that one down...) Correcting bumpsteer and Ackerman is possible, but it takes a lot of time ( mainly a lot of accurate measuring). I think I'd rather modify the sump (even if it is a complicated casting and requires aluminum welding), or go dry sump. It's worse than that at the front, it's not so much the sump but the block that would be in the way, also after that I then have the engine mounts and manifolds the steering shaft, this is the reason early doors that I went for rear of subframe. |
| |
|
|
|
|
|
Jan 14, 2023 20:23:21 GMT
|
|
For those that have helped and commented on the rack, if you jump back to page 1 you can see the rack in place on brackets and why the front is out of the question, cheers
|
| |
|
|
|
|
|
Jan 18, 2023 22:26:08 GMT
|
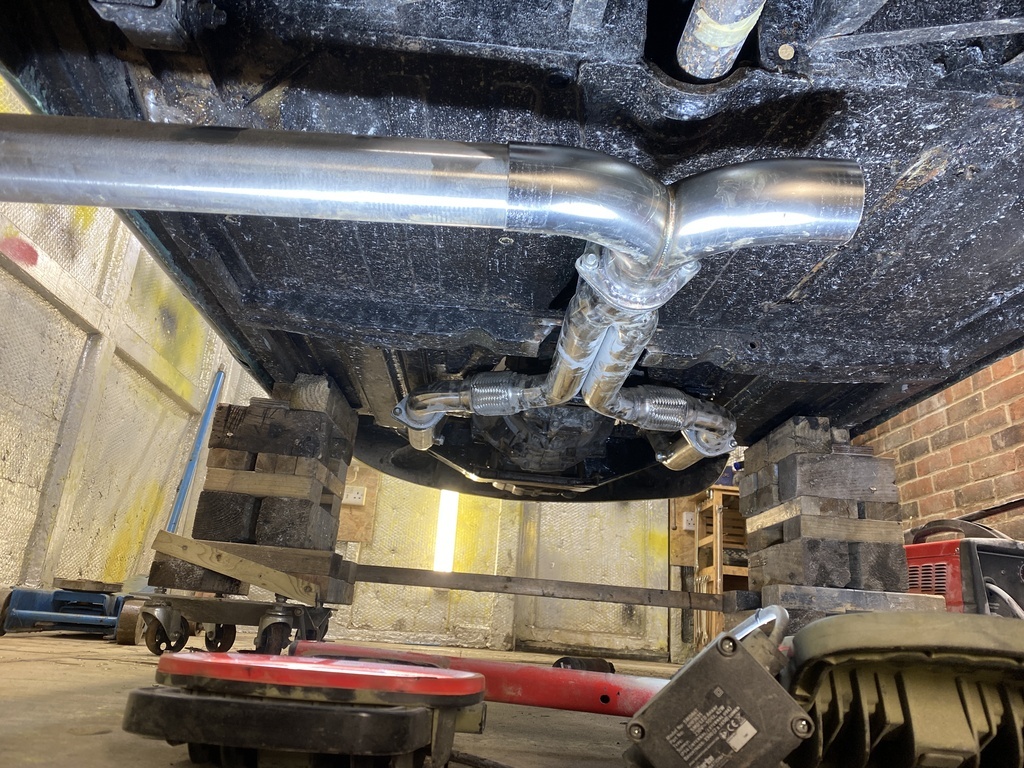
Nissan 350Z manifold, to decat downpipes, onto Y pipe and then to a T piece that will split to a side exit exhaust either side of the car, unfortunately no room for silencers, all Nissan stainless steel aftermarket exhaust right up until the T piece so I am not messing with the flow of exhaust gasses too much. It will still need a remap though as they are originally set up for cats and the removal in the first instance will lower the BHP until remapped, but hopefully it might get close to 300BHP once done -  The pipe off from the T was just to give me a view of the exit point on the car, it lands very nicely in front of the rear wheel. |
| |
|
|
|
|
|
|
|
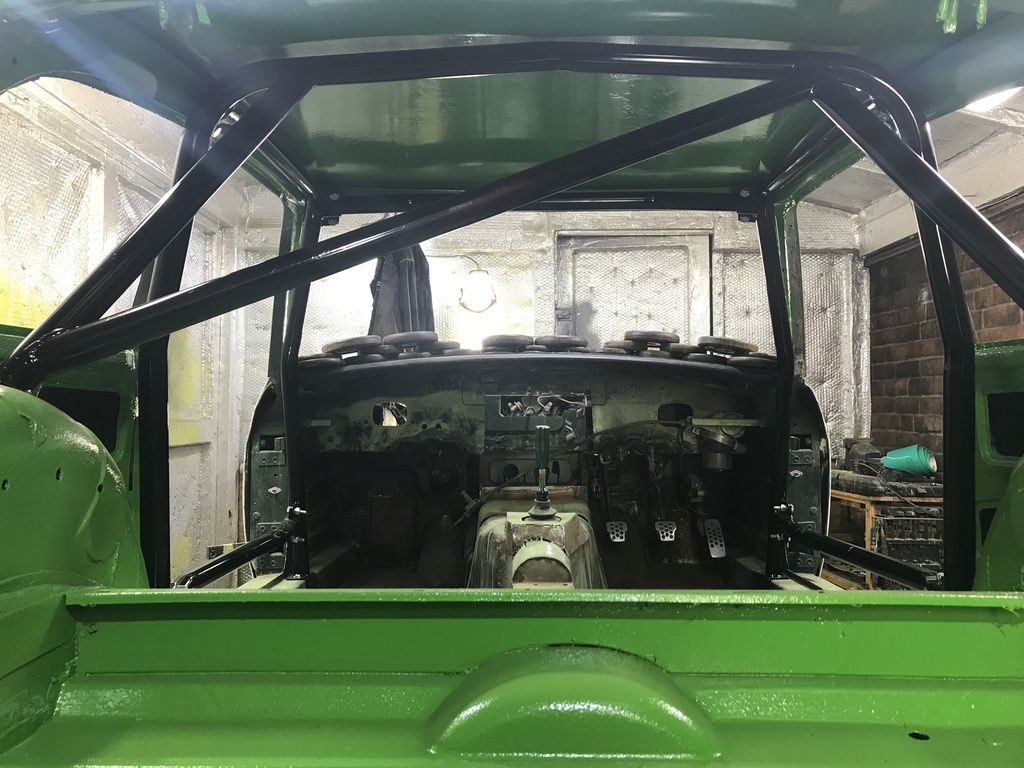
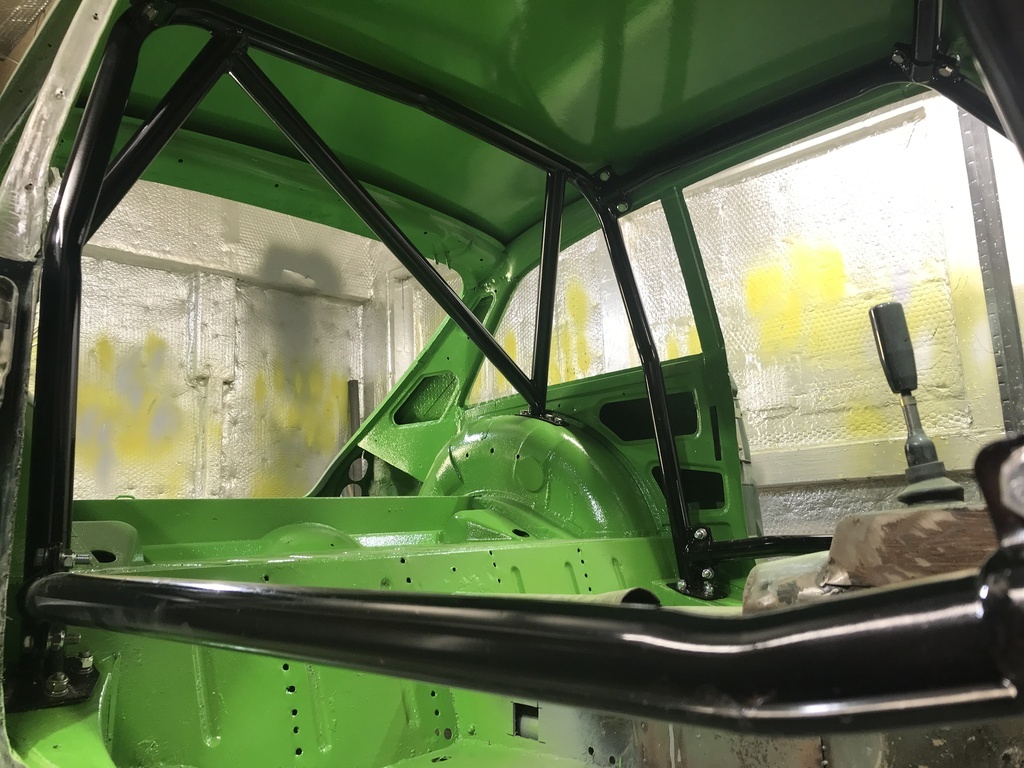
I previously had a full interior, door cards, carpets, etc. For the rebuild I am ditching all that and any excess weight to offset my roll cage, I had previously painted over any old paint with hammerite to protect it under the carpets and roof lining. So out with the heat gun and removed all old glue, paint and sound deadening, along with the battery cages under the car, the battery cover is now welded in place. Then primed the inside roof and rear so I could stick on the colour and get the now repainted in black cage back in, I cannot paint the front part of the interior floor as I have welding to do under the floor still, also no point welding old holes in the floor up as the car will be fully lexan which is never waterproof so any additional ventilation or drain holes will come in handy. Colour scheme change from British racing green with yellow front valance and red cage to Lime Green (aka Kawasaki Green) gloss black front valance, and black cage. Feels so much stronger with the cage back in -    I will also be getting rid of any chrome for black or just deleting altogether. |
| |
|
|


