gazzam
Part of things
 
Posts: 741 
|
|
|
|
Cheers Mark. Had a few days away. Went over to the coast to visit some friends. Also, my wife had an appointment over there. That was for Friday am and the Oxley Highway has been closed weekdays for months now, due to work repairing landslides. It reopens late afternoon, so we went over Thursday and spent the night. Sorry for the diary entry, back to car content. So Thursday morning I took the body out of the booth. Or rather I started to, and while watching the wheels of the rotisserie, the windscreen surround bumped the hoist. 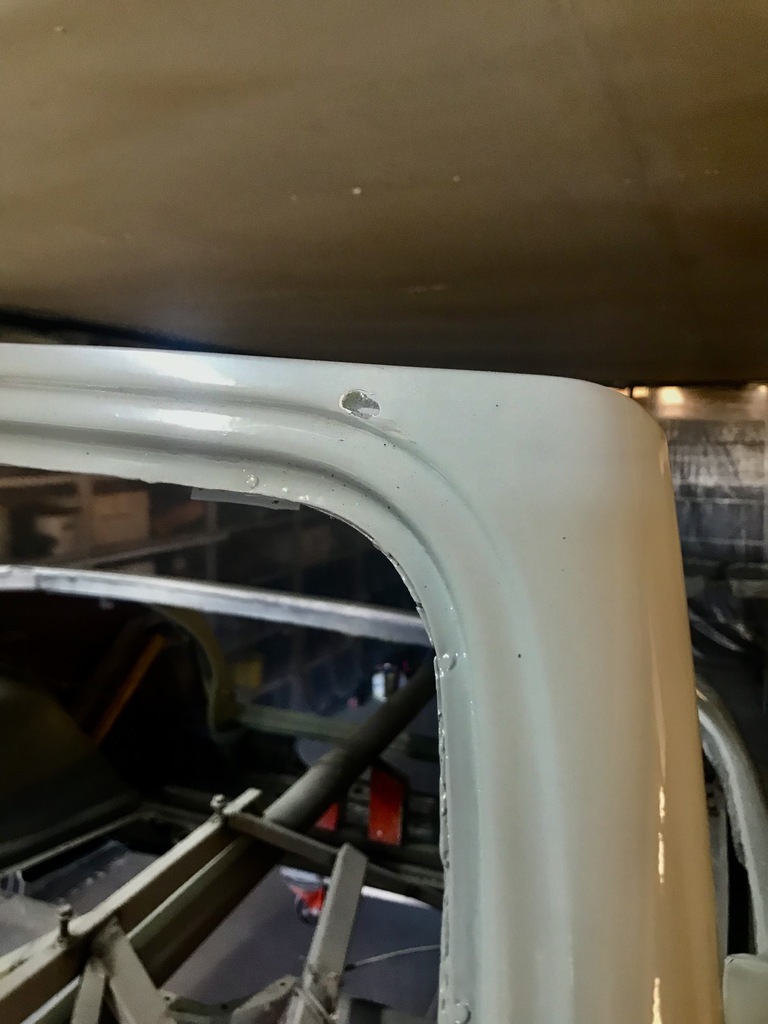 Not the end of the world I know, but I was annoyed enough to be able to walk away and not think about the damn thing for three days. Had the body been sitting 3/4 inch lower it would have missed. And the one thing I don’t like about 2k is that it isn’t really fixable. I’m going to try to blend it in, but it’s in a fairly obvious spot. First up I feathered the edges with 80# so I could fill the dented ally with bog. Then sanded the filler with 180# 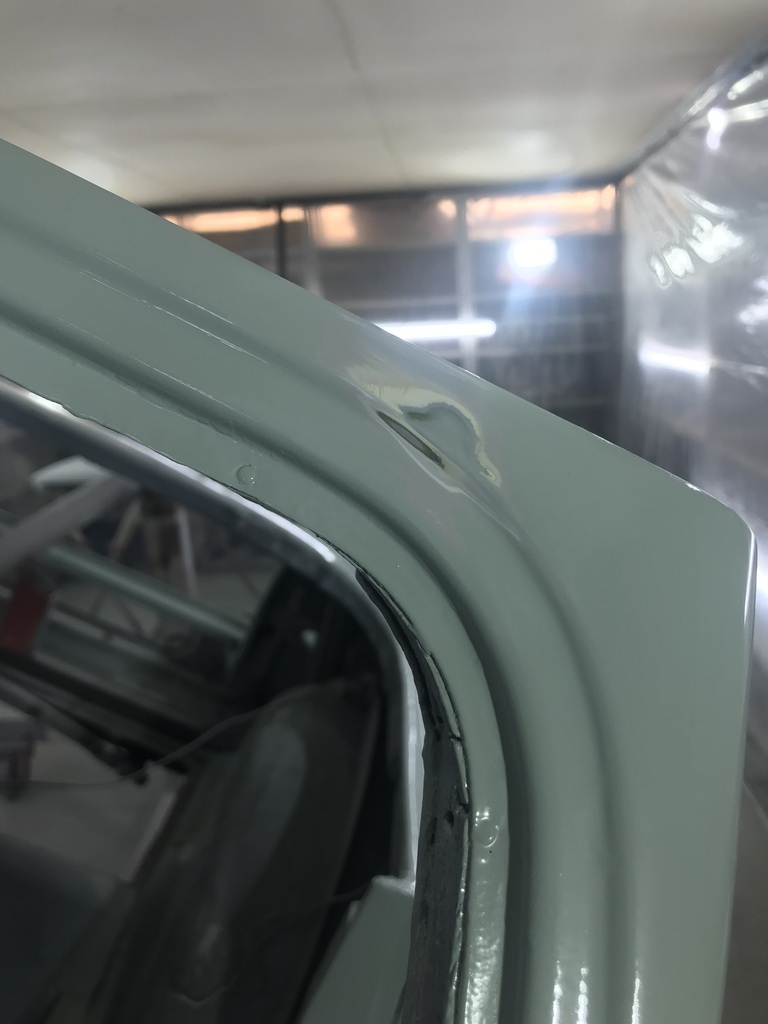 Then spot primed with Upol Spot 3. 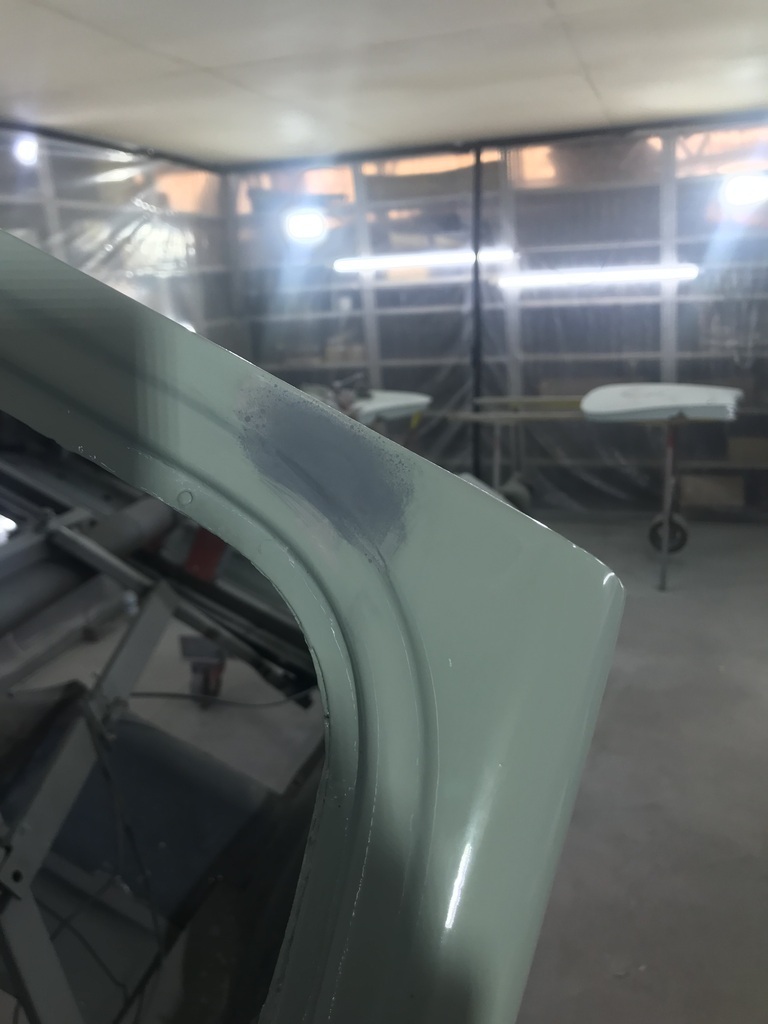 Next time I have some topcoat in the gun I’ll blow some on there, after a touch with 400 grit. When that’s hard I’ll attempt to polish the join, decide I can’t live with it and respray the panel and move the paint join to the lower sill… Started to prepare one of the front guards. Used the heat gun to remove 4mm of filler, most of it unnecessary. 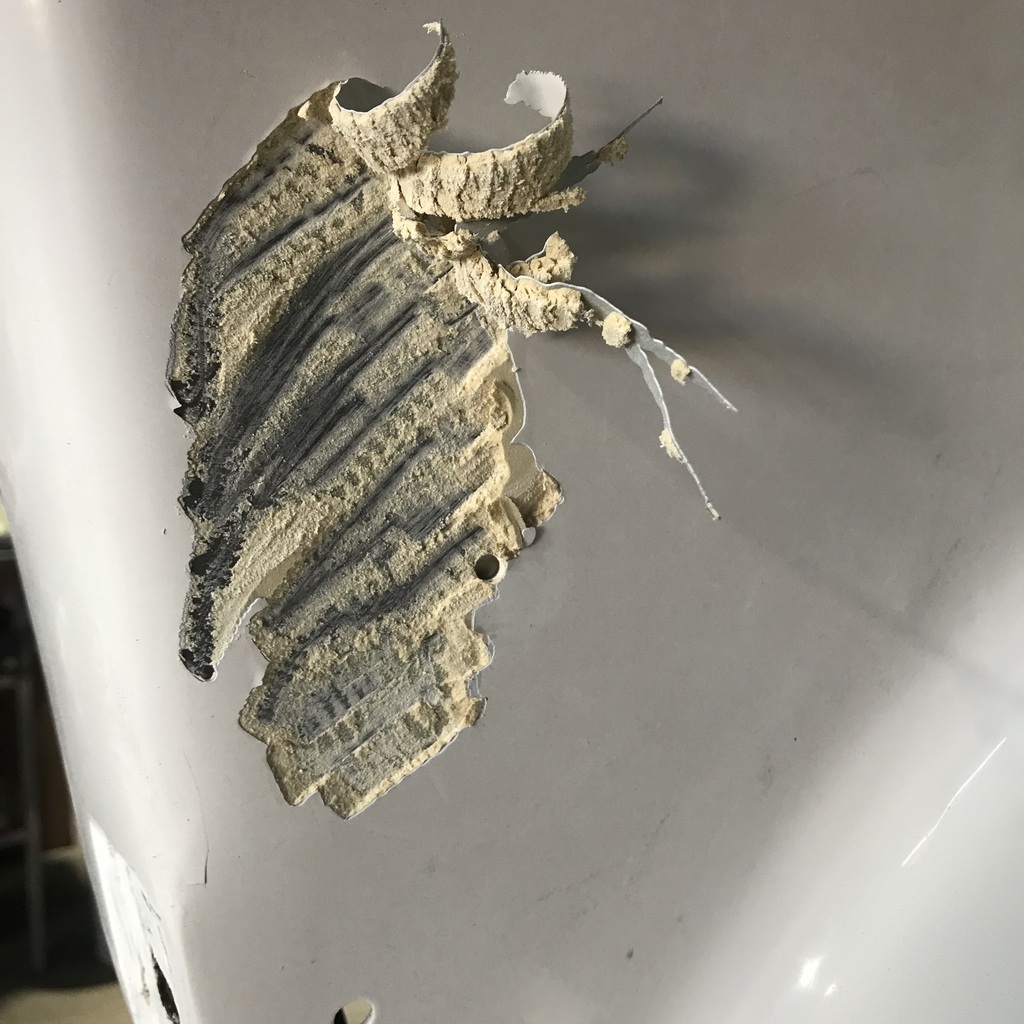 And then sanded it. 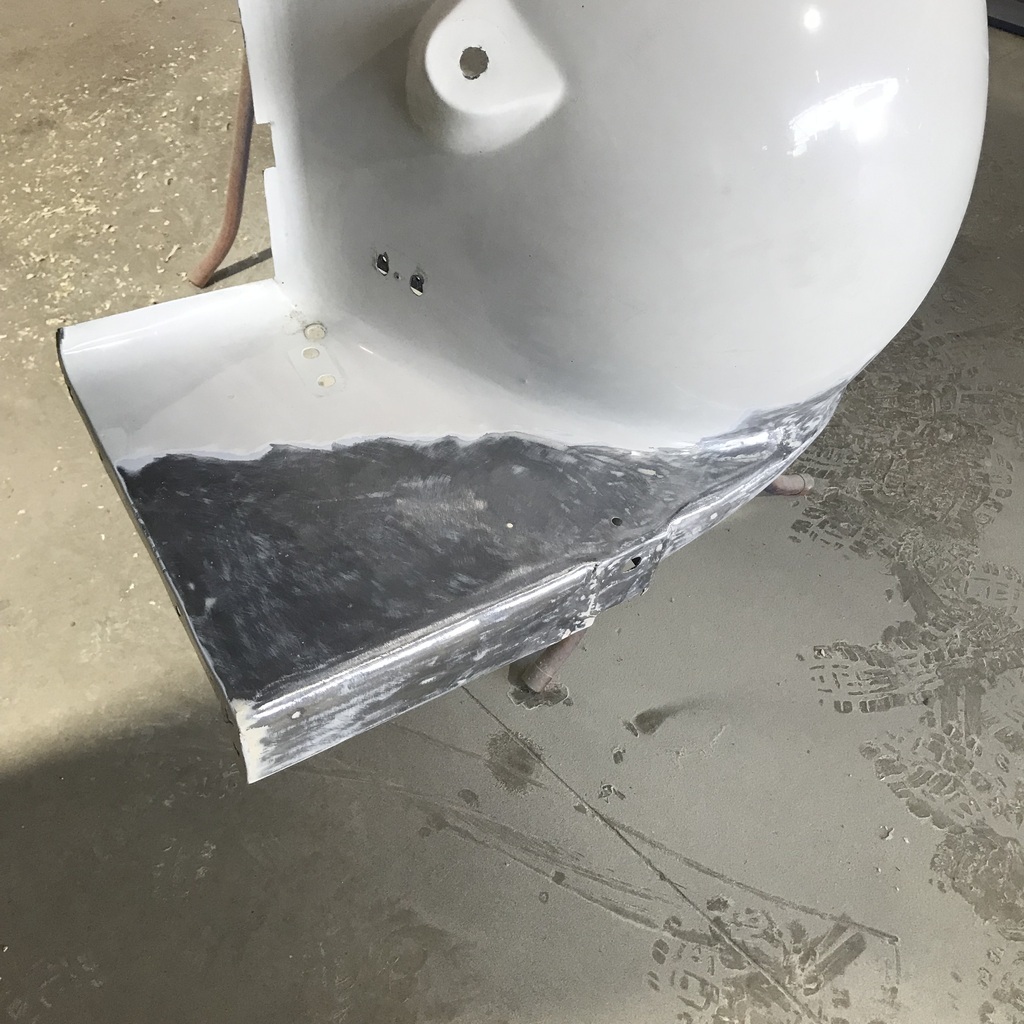 There are a couple of holes to weld up and with a bit of hammer and dolly work, should be able to finish it with far less filler. Thanks. |
| |
|
|
|
|
|
|
|
|
|
|
I'm gutted for you about the accidental damage and can relate to exactly how you must be feeling. I know how I and I'm sure many others on here have had exactly the same experience, painstakingly doing every job to the highest standard possible, being delighted with the result only to ding it right at the end. The hard thing is to accept it and move on but that is what has to be done. I can certainly understand that you had to take time out before getting back to it.
We are all in awe of the standard of your work and I'm sure that by the time you have finished the repair will be invisible to everyone except perhaps you because you know where to look. Keep up the good work and thank you for sharing the journey with us.
Best regards
John
|
| |
|
|
glenanderson
Club Retro Rides Member
Posts: 4,353
Club RR Member Number: 64
|
|
Mar 25, 2024 10:19:31 GMT
|
|
What John says ☝️
|
| |
My worst worry about dying is my wife selling my stuff for what I told her it cost...
|
|
|
|
|
Mar 25, 2024 13:18:56 GMT
|
|
2K isn't fixable?
Not sure what you mean there. But get yourself some 'fade out thinners' in a rattle can and carefully waft a squirt over the area after blowing it in. Keep can at least 300mm from the body and only a little waft is enough. This melts the new paint into the old and can leave an invisible repair.
I've touched in various parts of the front of my car from stonechips over the years and it's invisible. It can take a month or two for fresh paint to blend with old, (fresh paint always looks glossier than old) but as yours is fresh it should blend immediately.
|
| |
|
|
gazzam
Part of things
 
Posts: 741 
|
|
|
|
Thanks for the kind words John ( and Glen ). Much appreciated. This stuff, Mark? 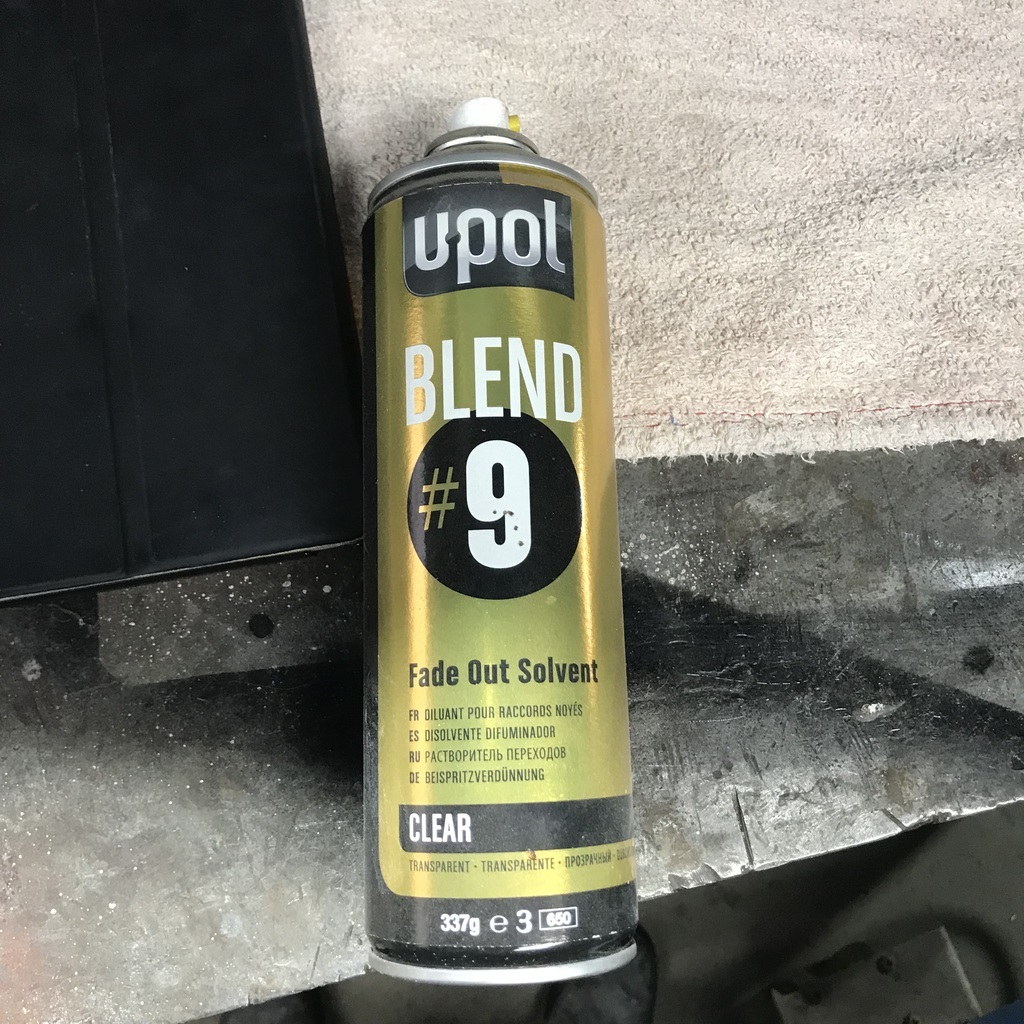 I tried it before on a repair of a rub through on the XK120. I wasn’t impressed at the time, tbh. Had a look after I saw your post, hoping to not be able to find it. But I’m sorry to report the repair is still visible. That was on paint that was only a week or so old at the time. But I gave this repair a very gentle spray with it ( after shaking the can for the full 2 minutes! ) so we’ll see how it goes. 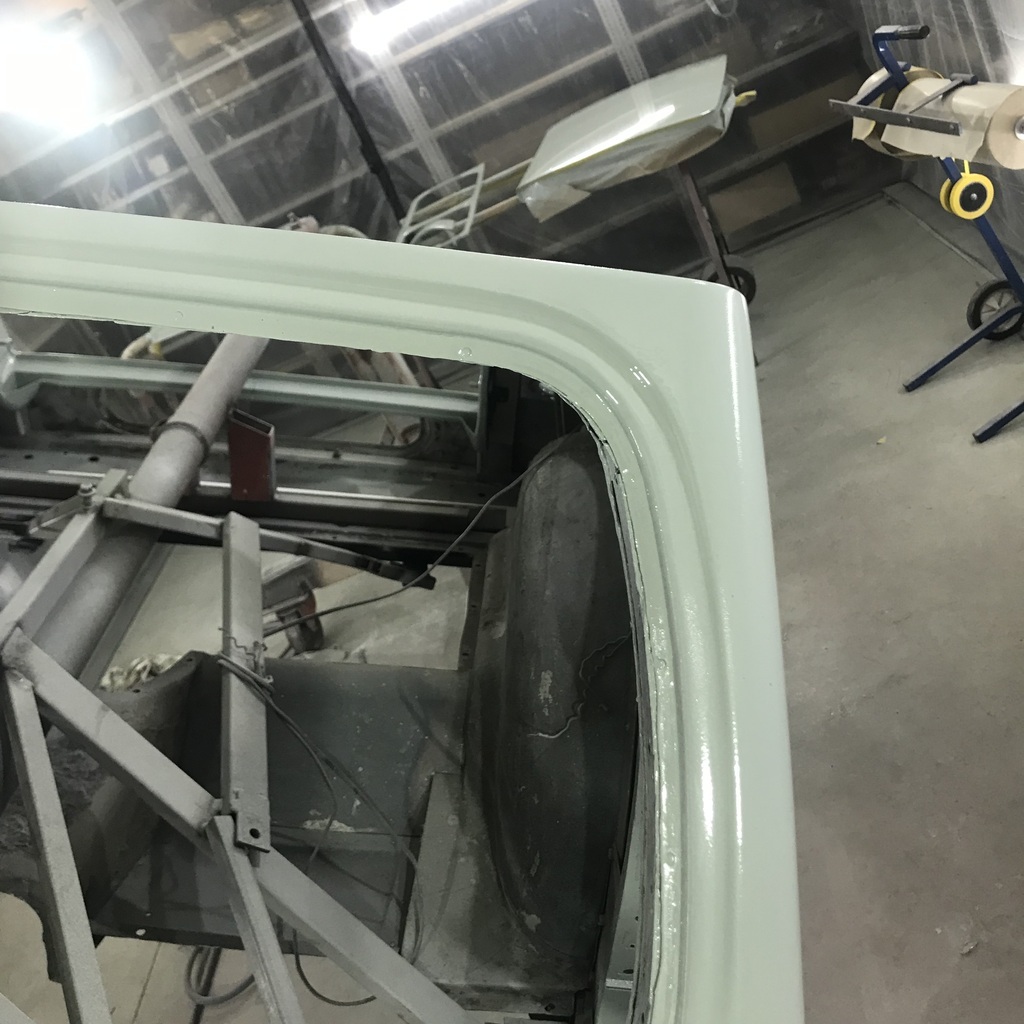 Finished sanding the doors yesterday, so I masked them ready for paint today. Should have taken them out of the booth and left them alone at that point, because they were full of dusty sh*t when painted. I think it could be the dust from the tiny windscreen repair come back to kick me, because I stupidly didn’t think to blow out the car body. The booth inlet fan is pretty strong and it’s probably blown that dust about. So I only gave the doors a single wet coat, and noticed the contamination. Didn’t waste any more paint as it will have to be sanded off… I love job creation. Anyway I did get some bits painted. The rear seat windscreen and the fuel lid. 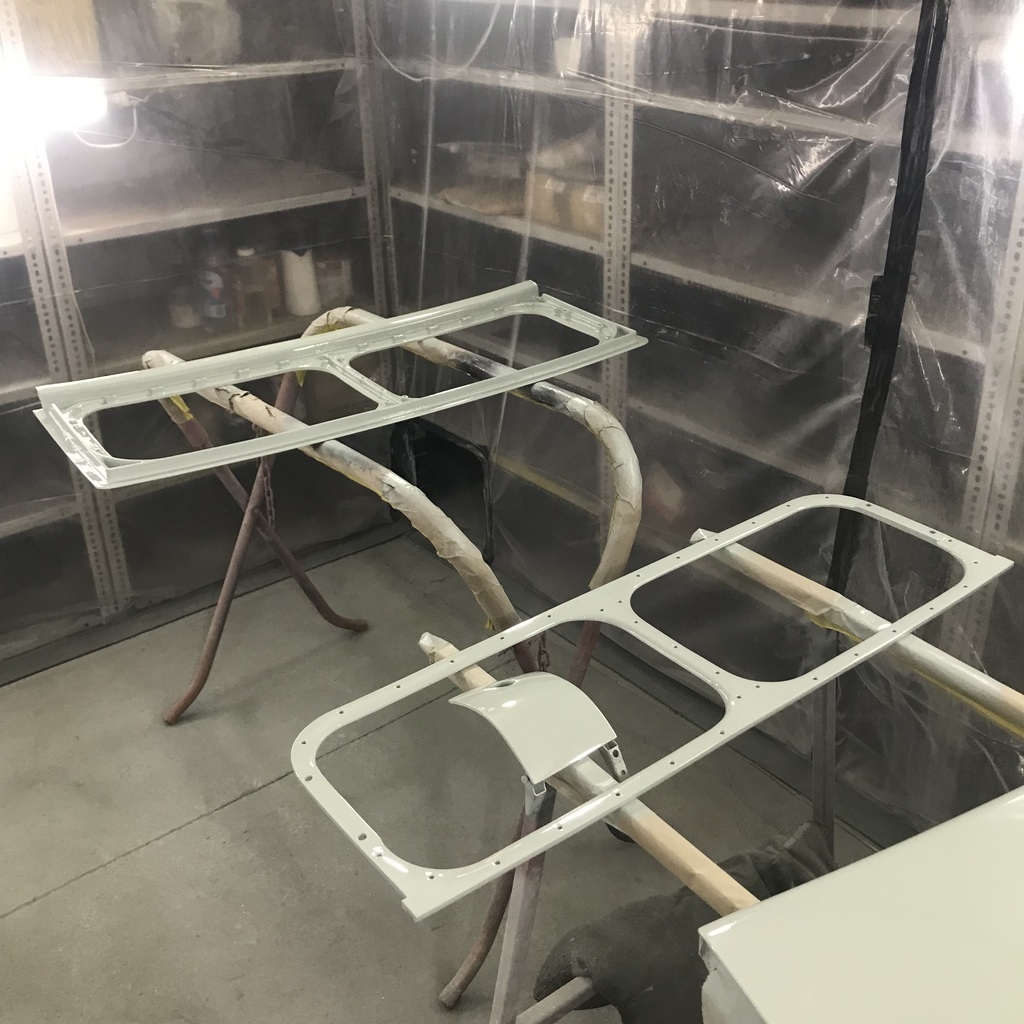 Also started preparing the bonnet. 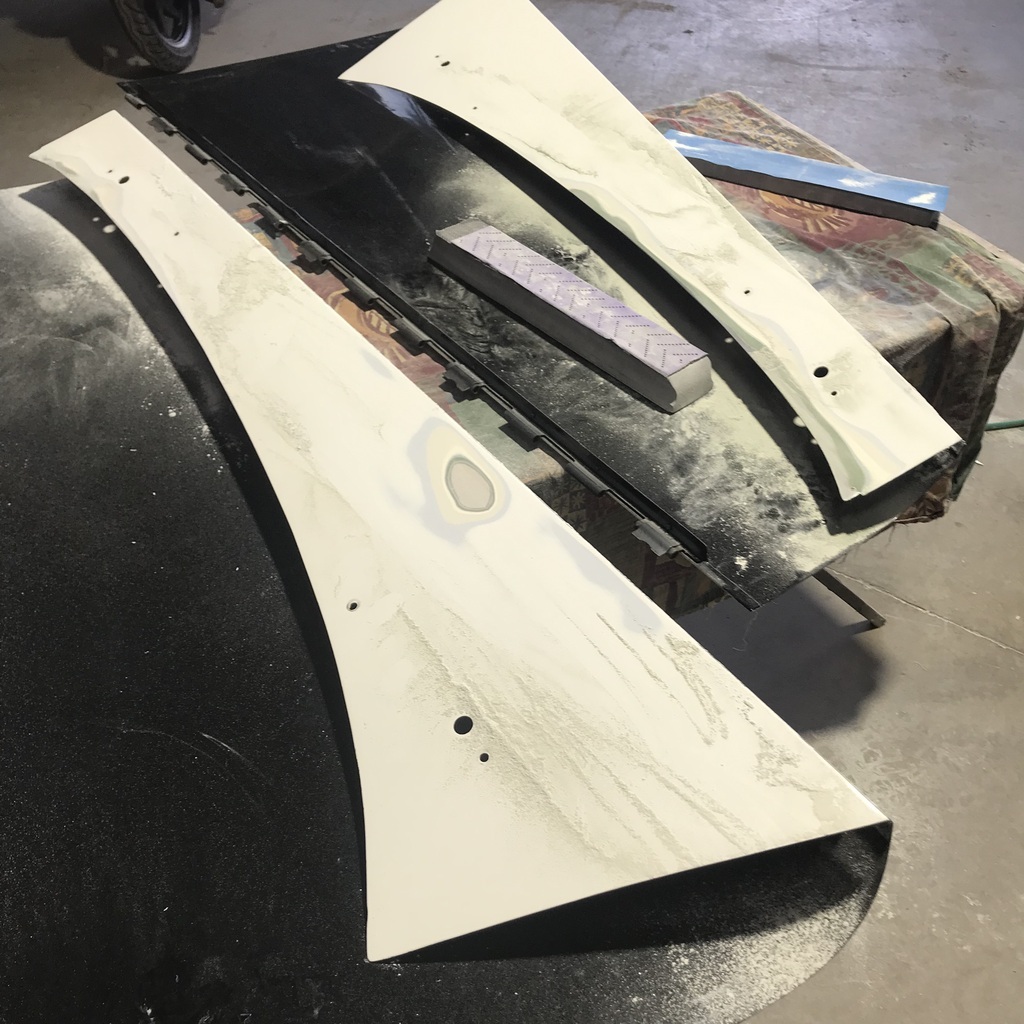 And reassembled the air cleaner. 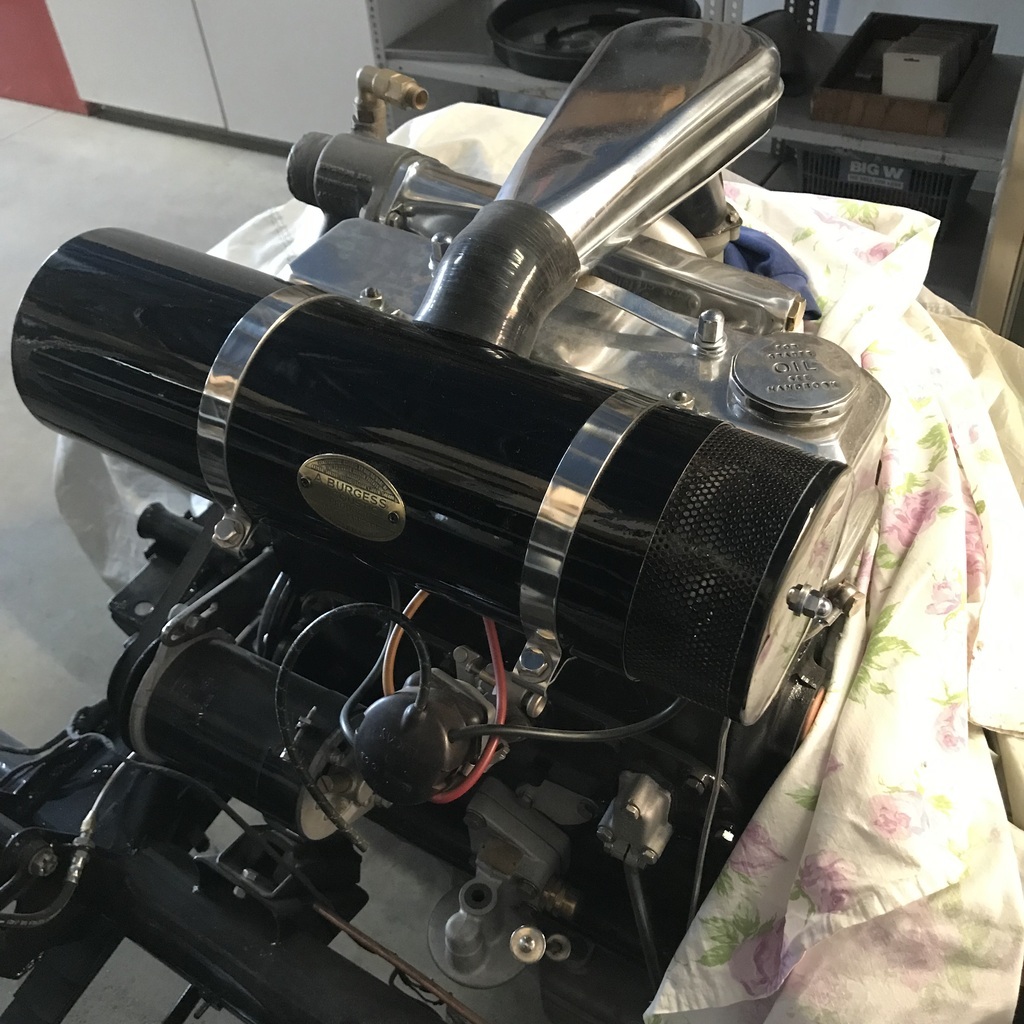 Thanks. |
| |
|
|
|
|
|
Mar 26, 2024 13:08:01 GMT
|
|
Hope the blend works ok this time - yes thats the stuff.
Engine is looking super smart!
|
| |
|
|
gazzam
Part of things
 
Posts: 741 
|
|
|
|
Thanks Mark, it sure looks better than it did! Took Rosie into the vets this morning to have a lump taken off. Hopefully a benign lump, but the vet thinks it needs to come off. Got home and resumed work on the LH front guard. Small rust repair, needs attention. Folded a piece of sheet around a bit of 3/8 rod in the vise. 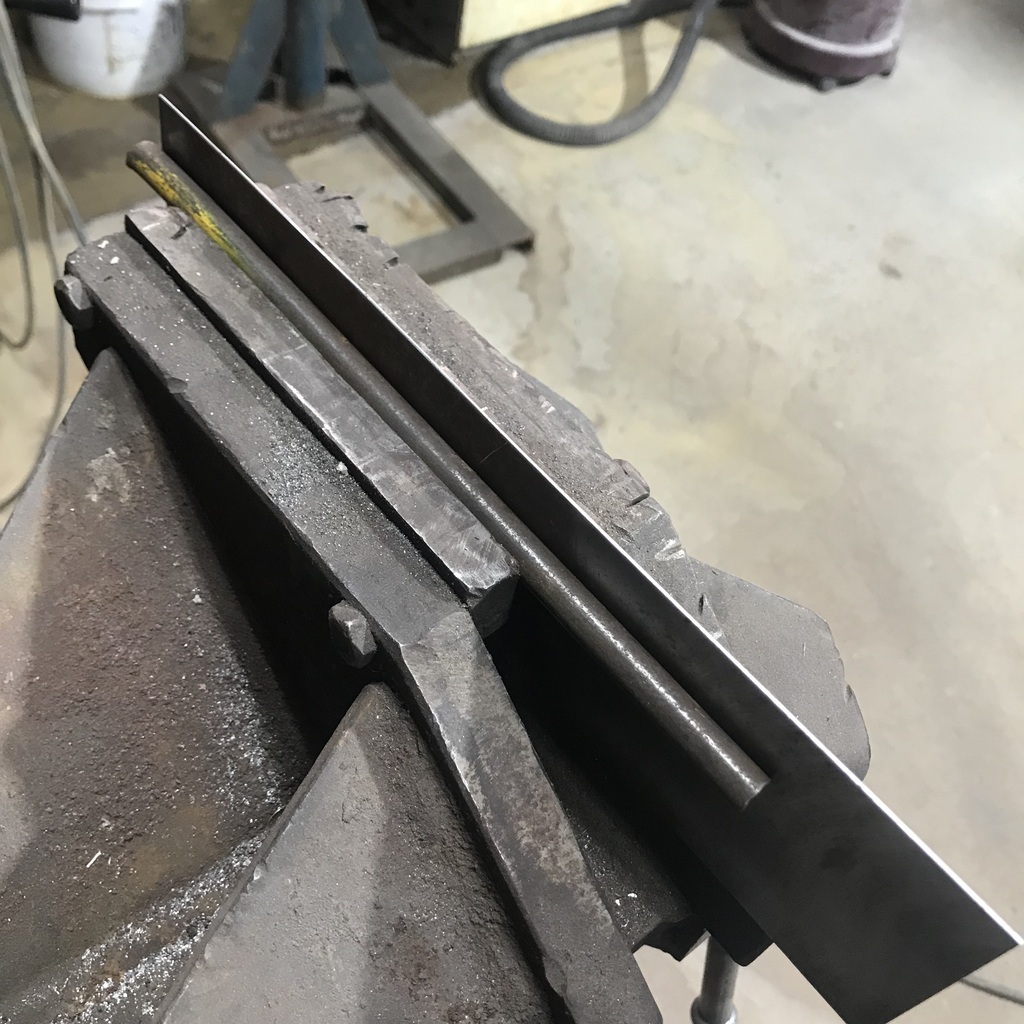 The folded piece and the area in question. 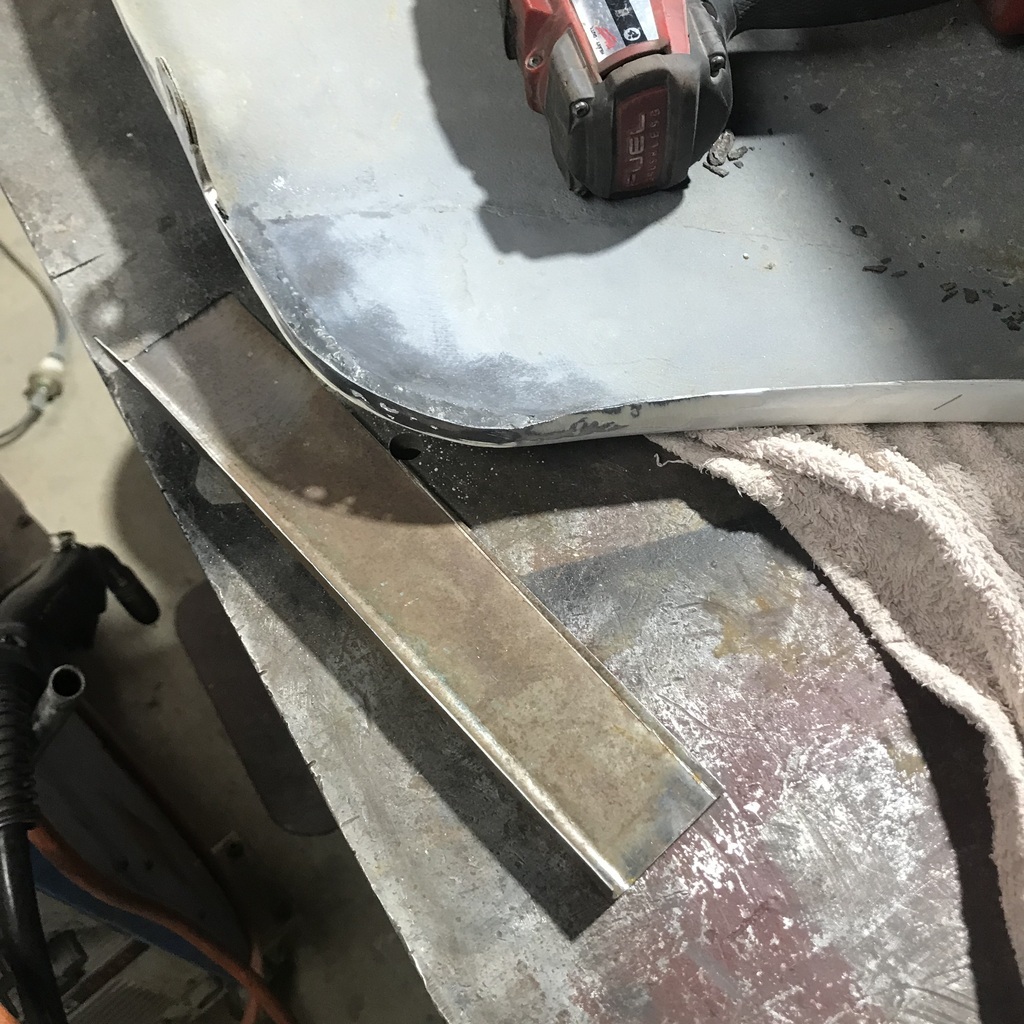 After quite a bit of shrinking, the curve matches the other guard. A bit nicer shape than this one, I think. 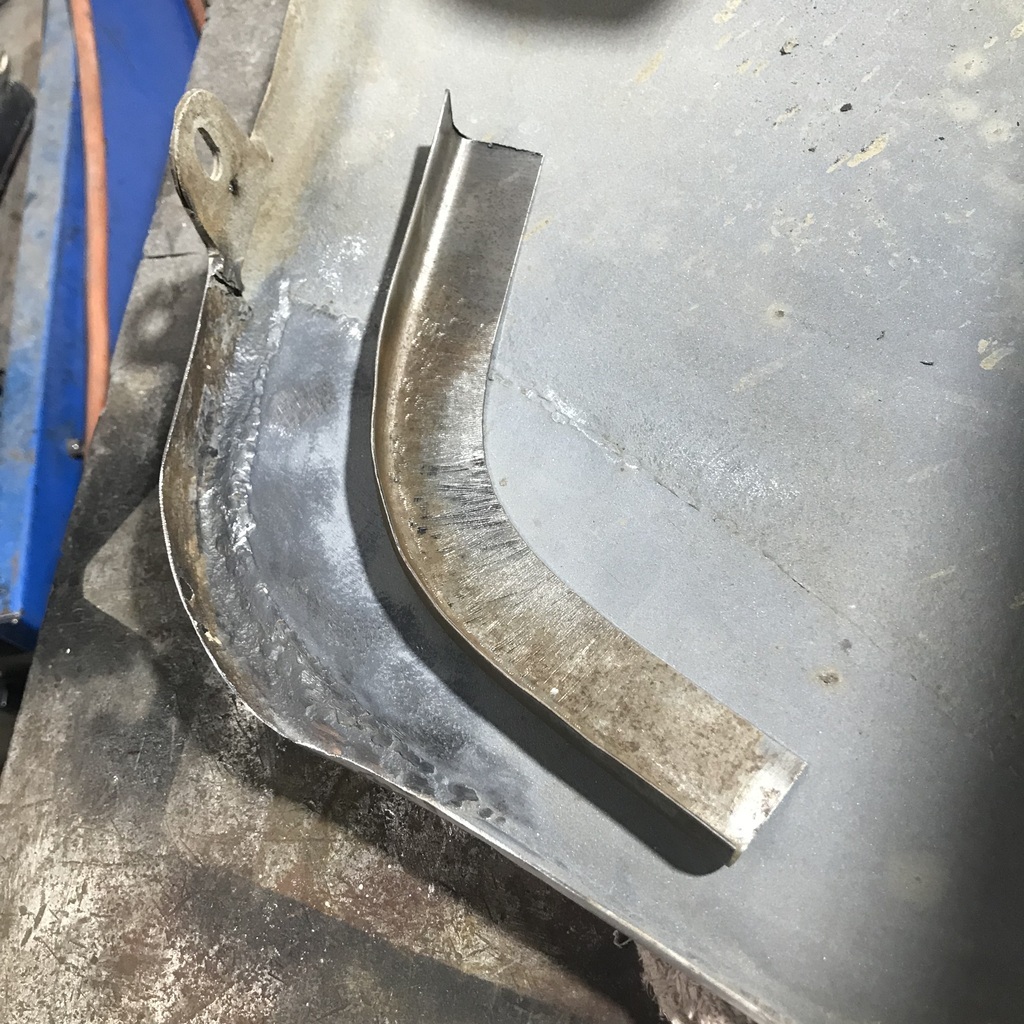 Cut the rusty edge back a bit in order to allow the repair piece to sit further toward where it needs to end up. 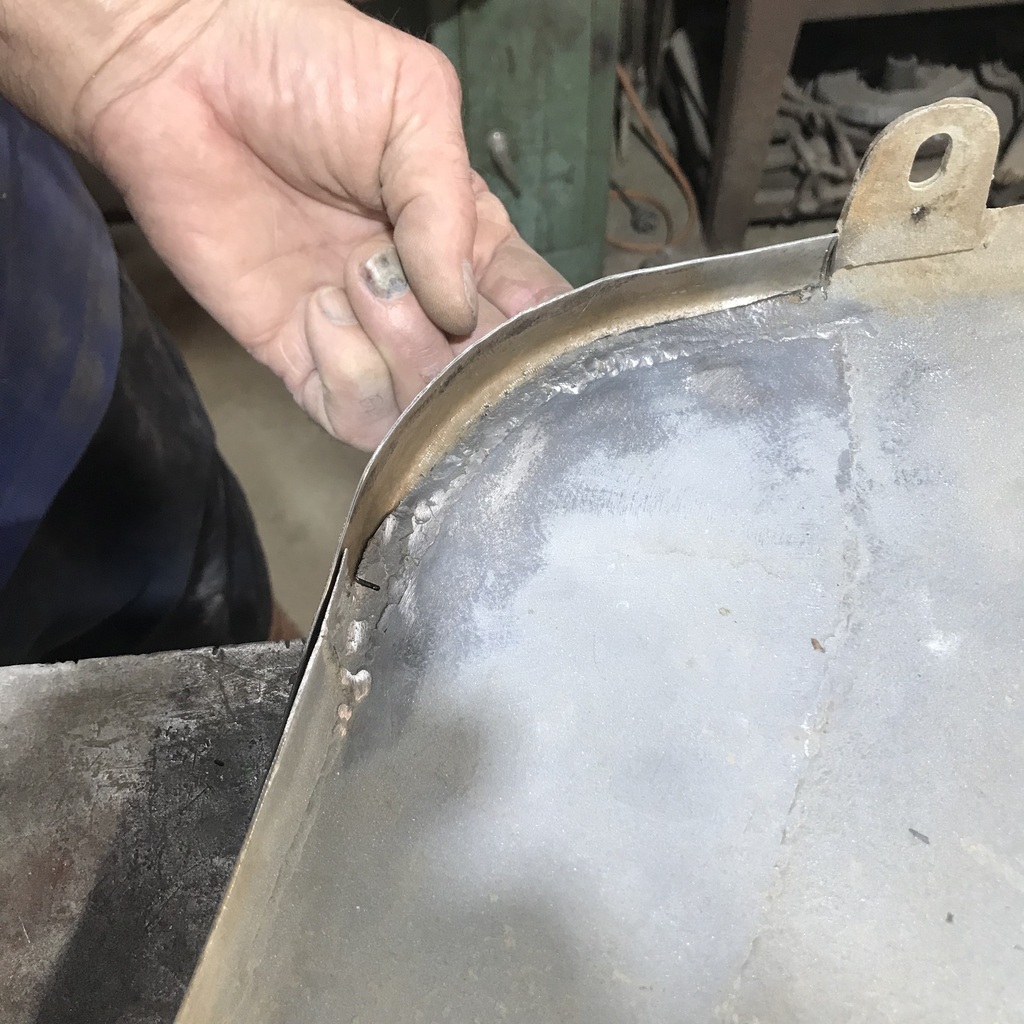 After trimming it to length, it’s clamped in place to scribe a line on the guard. 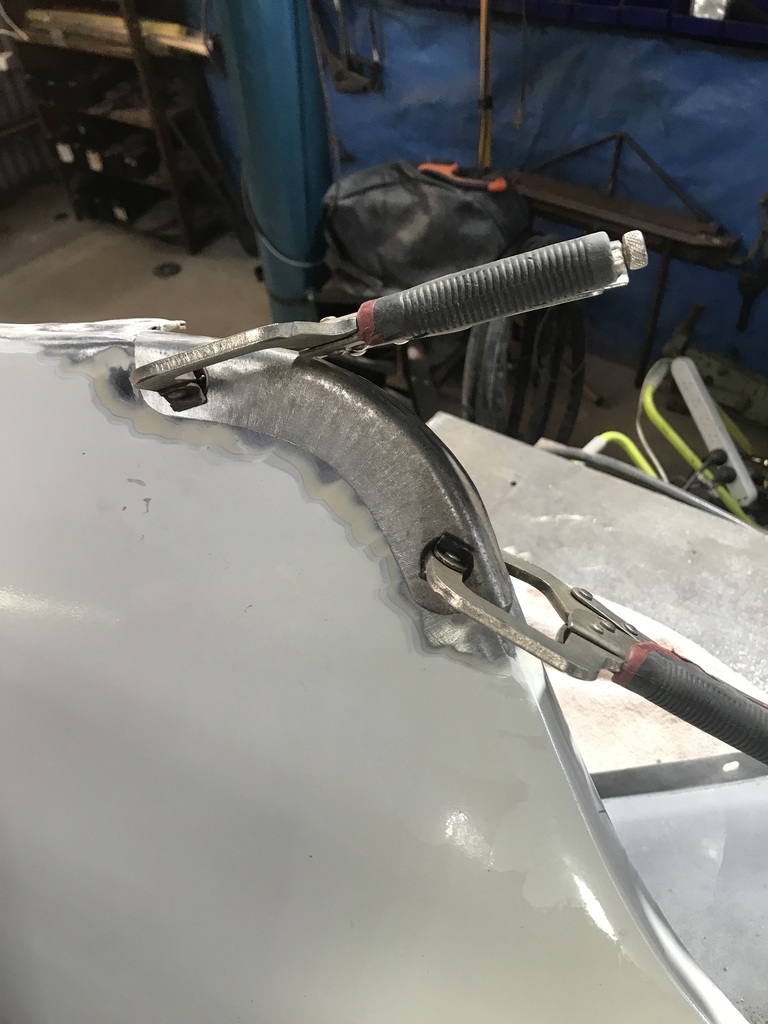 After cutting on the scribed line, then lots of little adjustments it fits in place. 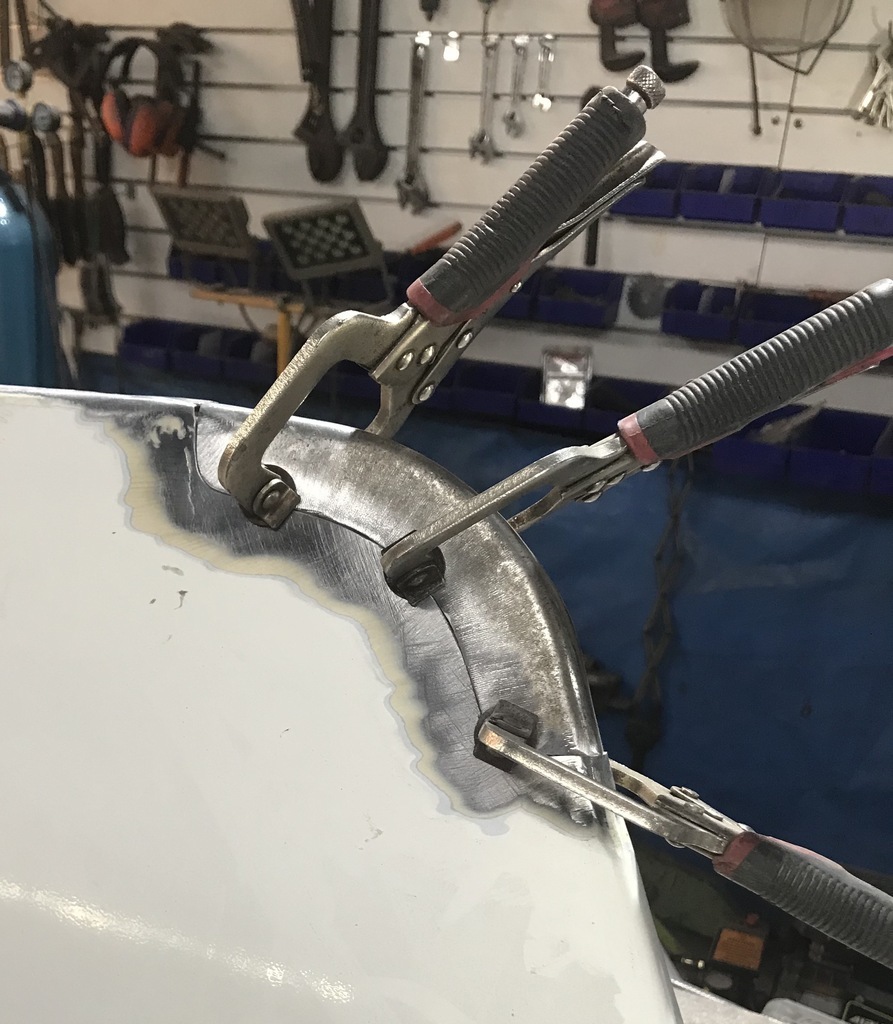 Tacked with the mig. 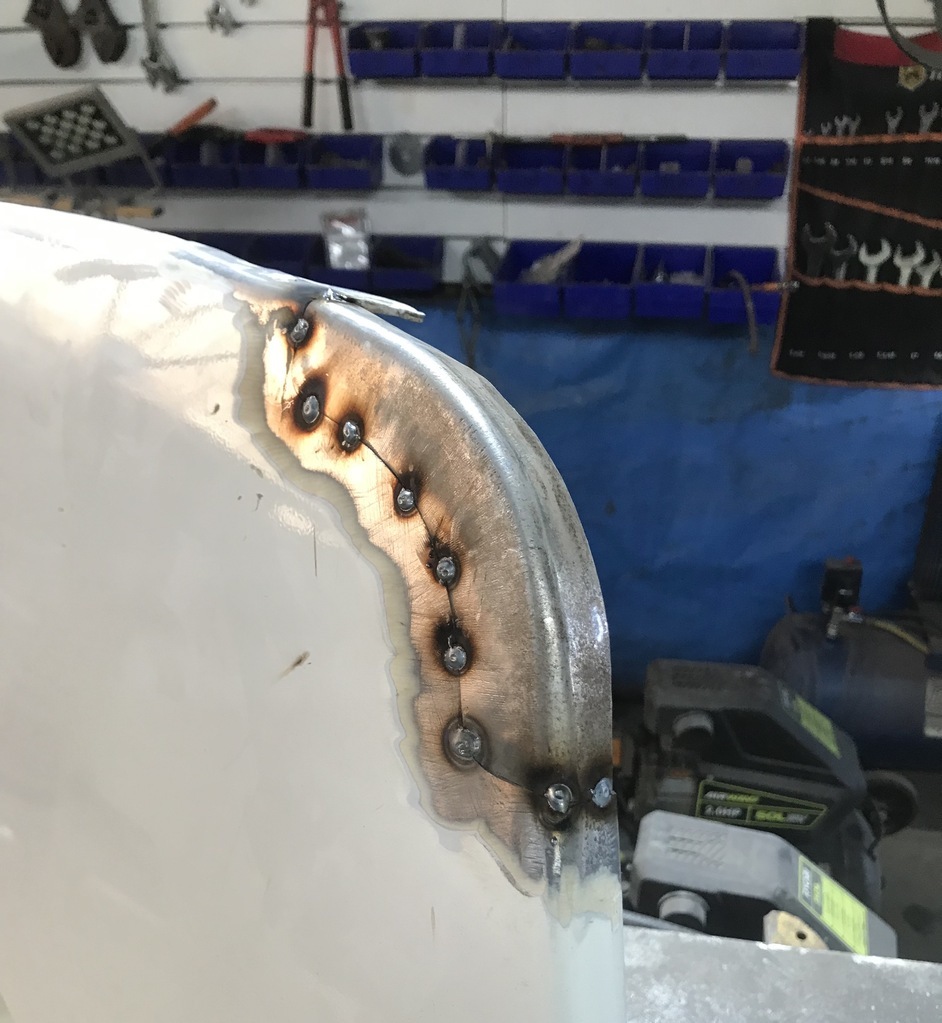 Then stuck together with the tig. No filler wire, except where I blew a hole at the end… 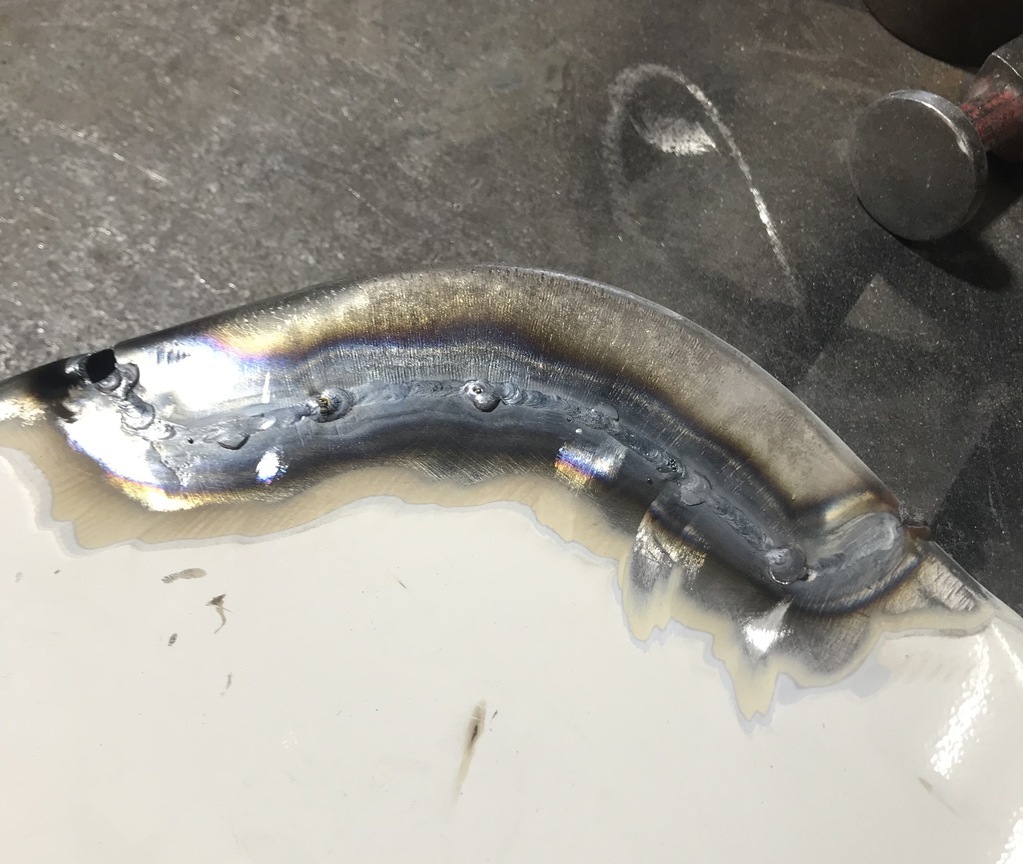 Filled the hole, using a copper backing. Planished the weld, and gave it a sand, it’s pretty close to ready for epoxy. 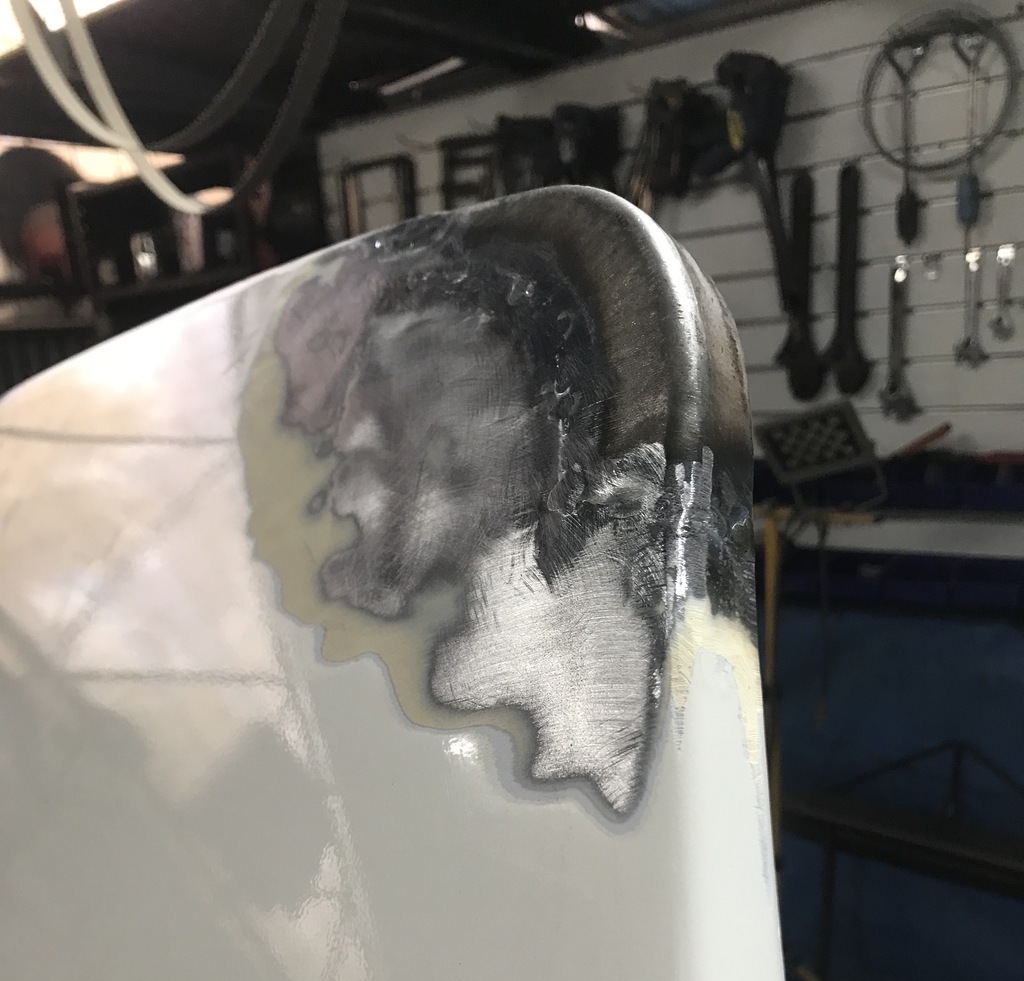 Also got the two halves of the bonnet ready for spot primer. This is one side. 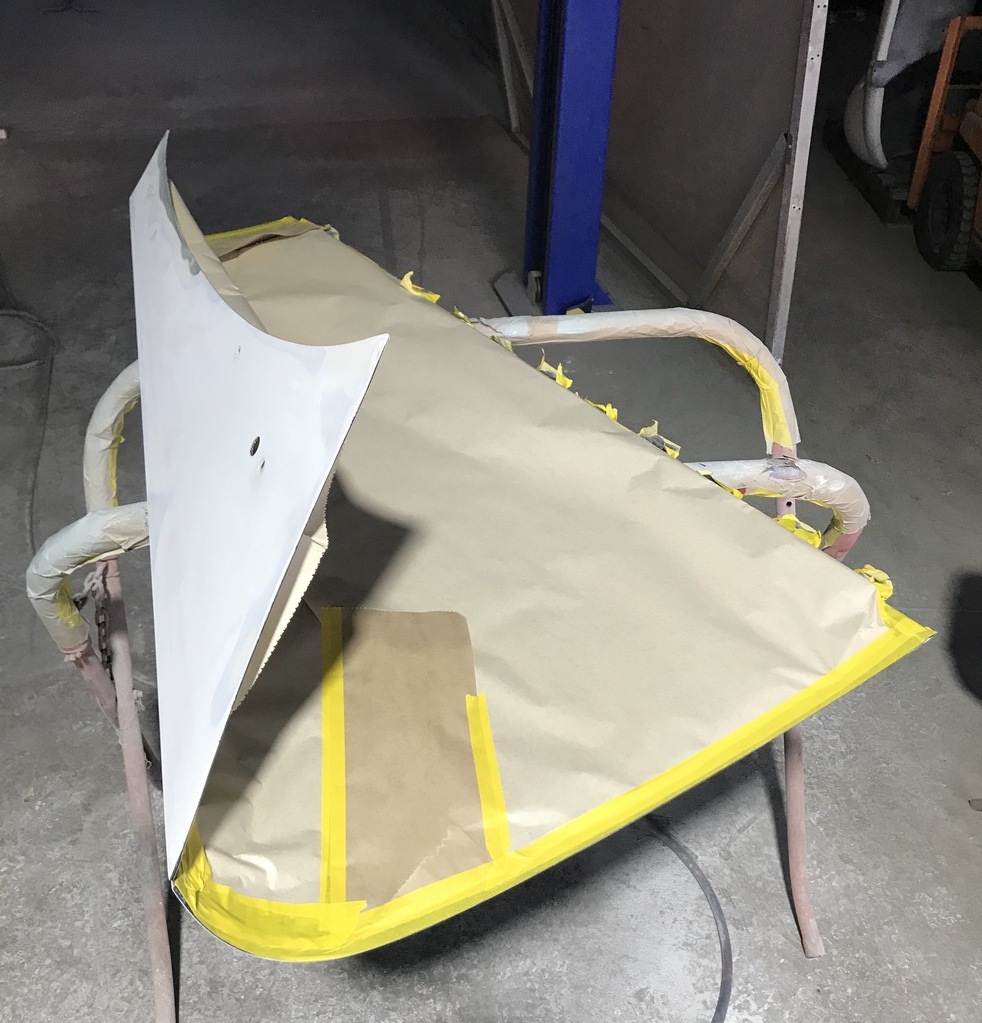 Thanks. |
| |
Last Edit: Mar 28, 2024 6:32:00 GMT by gazzam
|
|
gazzam
Part of things
 
Posts: 741 
|
|
|
|
Spent most of today mounting the front guards on a rotisserie. Just the engine stand one. Same as I used for the guards and doors of the XK. Doesn’t look like it should take the better part of a day, but it did. 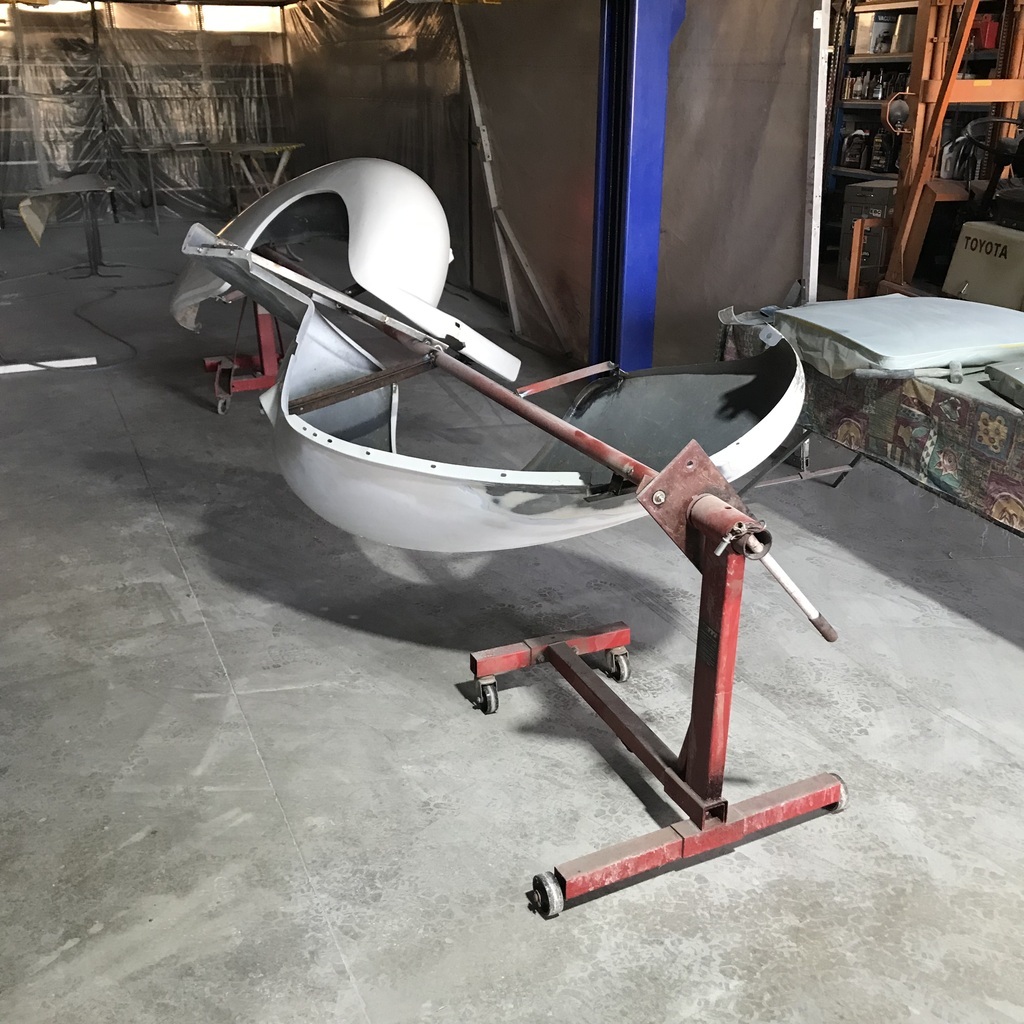 They will be much better to work on now that they’re held nice and firmly. And spot primed the two halves of the bonnet. 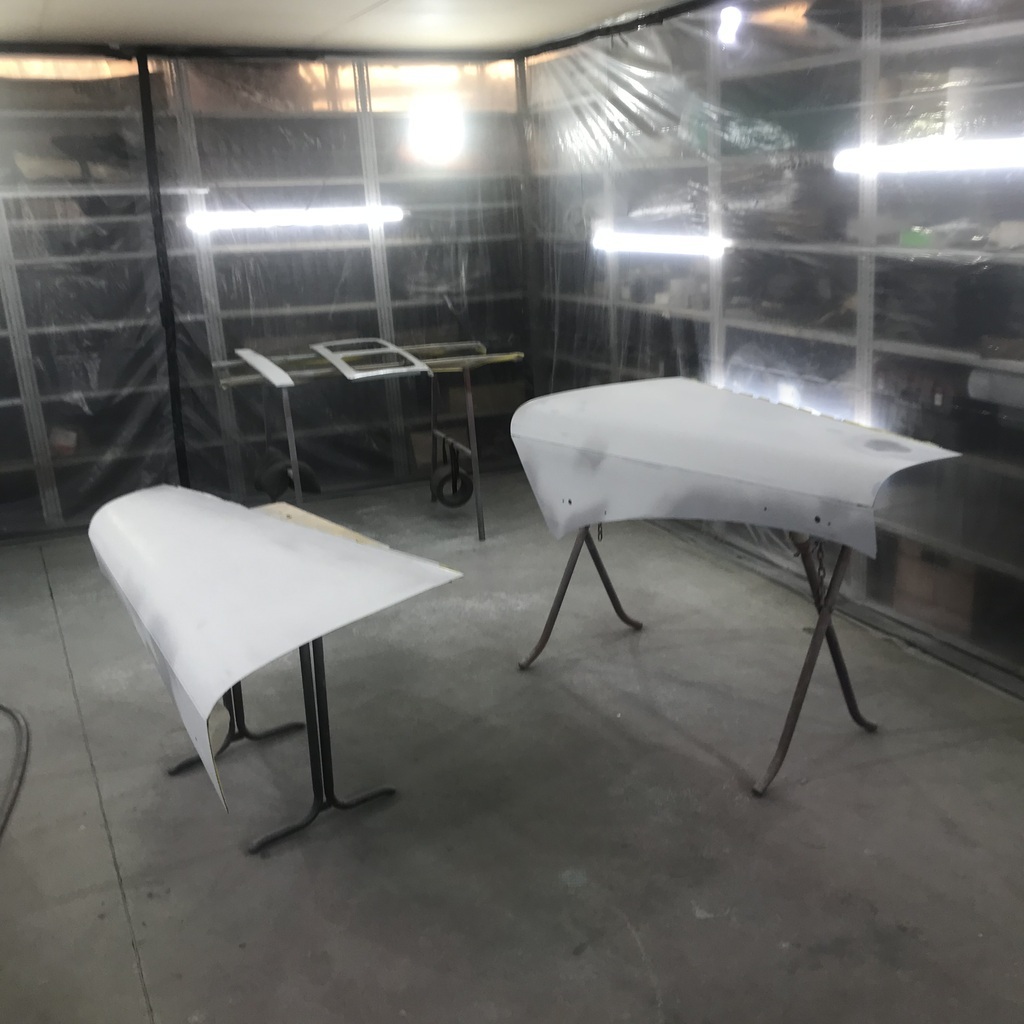 And since this post is a bit light on pics, here’s my little mate, complete with collar of shame! 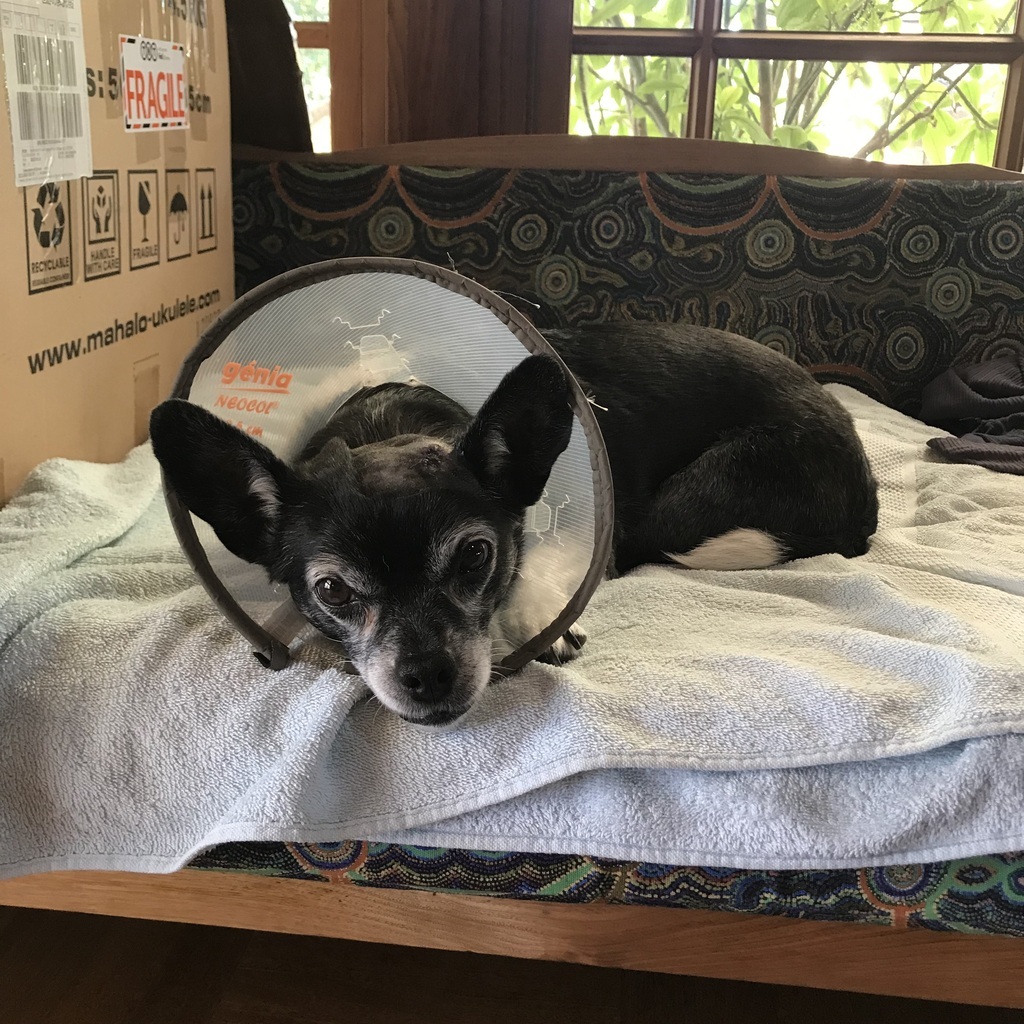 Thanks. |
| |
|
|
gazzam
Part of things
 
Posts: 741 
|
|
|
|
Emptied the booth and washed it out, including the ceiling. I’m hoping to only paint things once from now on… I did the final prep on the two doors, both halves of the bonnet, and two smaller bits. A few minutes after I'd tac ragged them I noticed something on the surface of all the pieces. So I blew them off and came back a few minutes later. Again I could feel stuff on them. I don’t know what it was, but I’m thinking it was coming in through the inlet filter. Maybe a mud wasp has built a nest in there. Or maybe the filter media is beyond it’s use by date. So I shut it off, just had the extraction fan going, not ideal as it’s pulling in unfiltered air. But the pieces turned out beautifully, virtually no contamination. 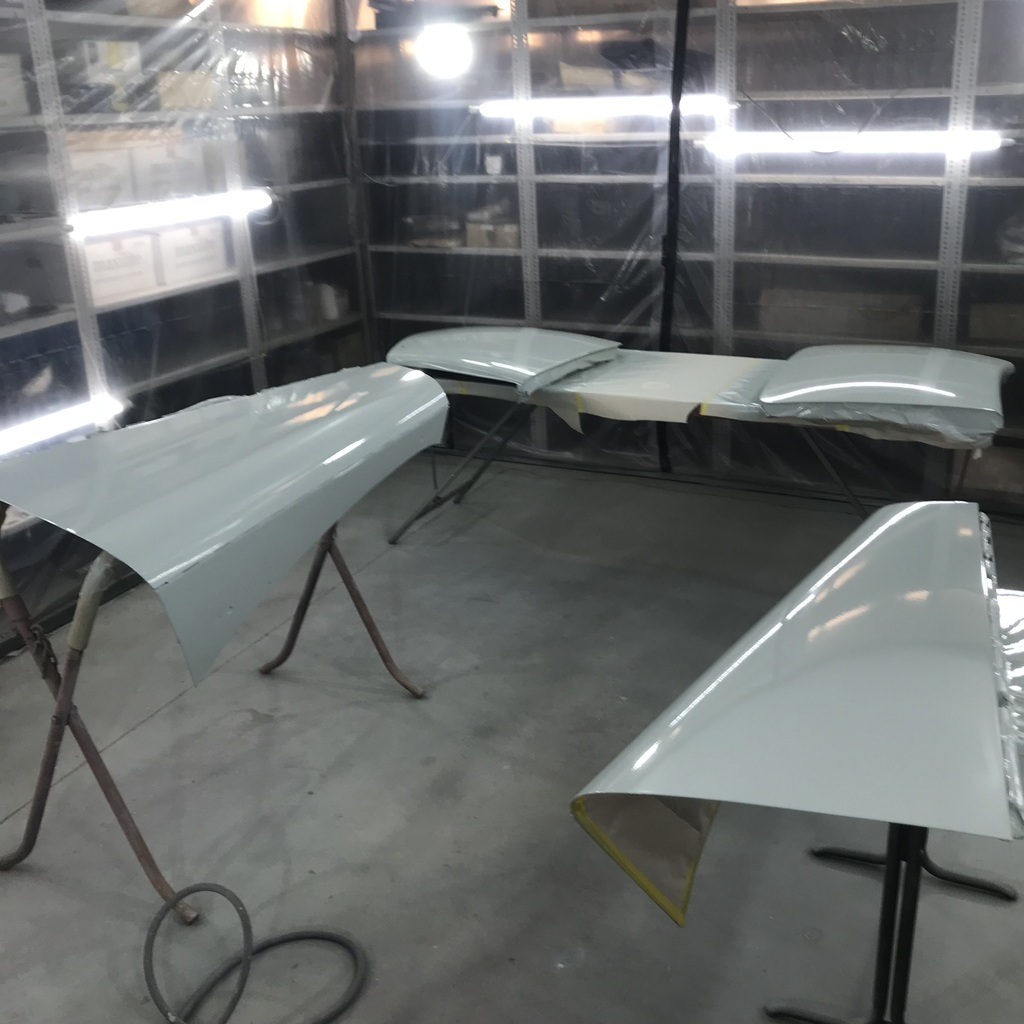 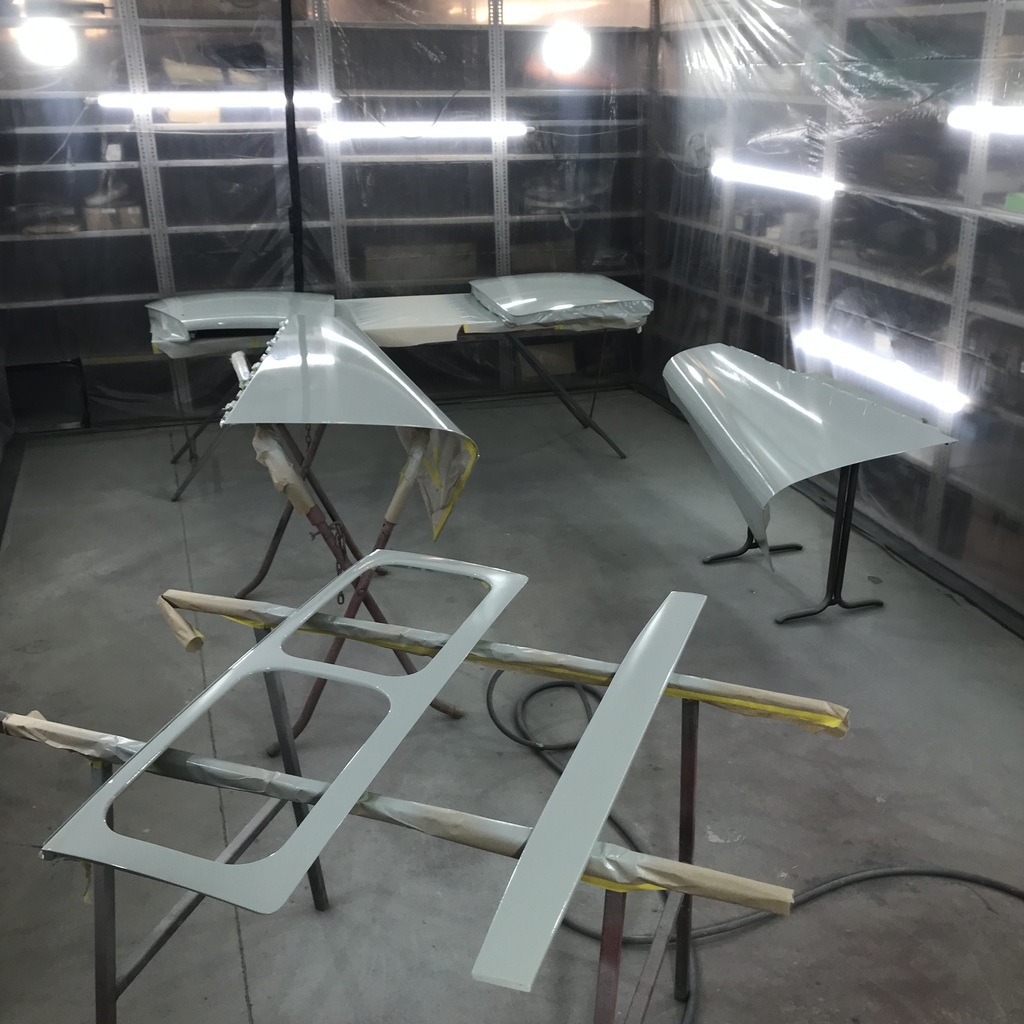 I’ll have to look in the inlet filter problem. Maybe the media needs replacing, it’s been on there probably 7 years and this is the fourth paint job. It might be starting to break down. Also started wet sanding and polishing the body. I’m doing it in small patches to keep the water to a minimum and avoid wetting any timber. 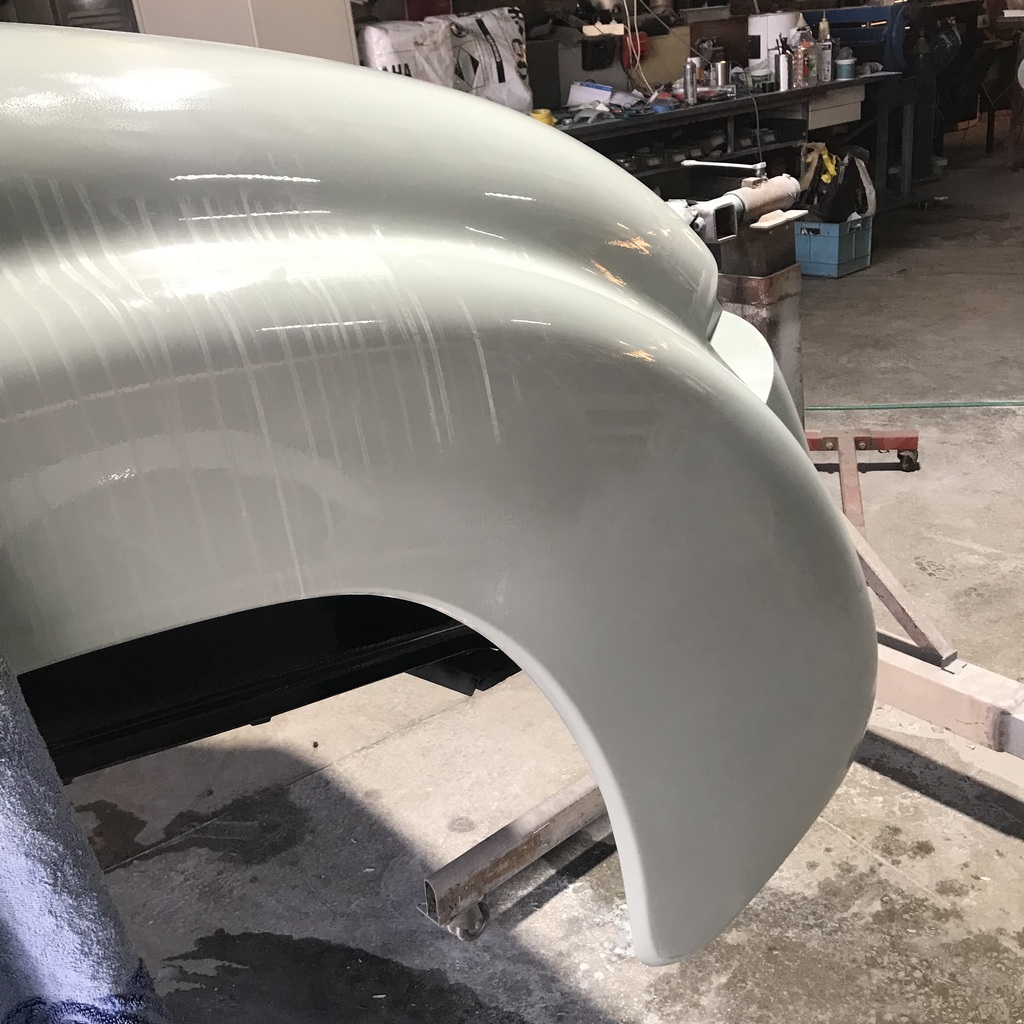 Thanks. |
| |
|
|
gazzam
Part of things
 
Posts: 741 
|
|
|
|
Spent the day alternating between this instrument of torture: 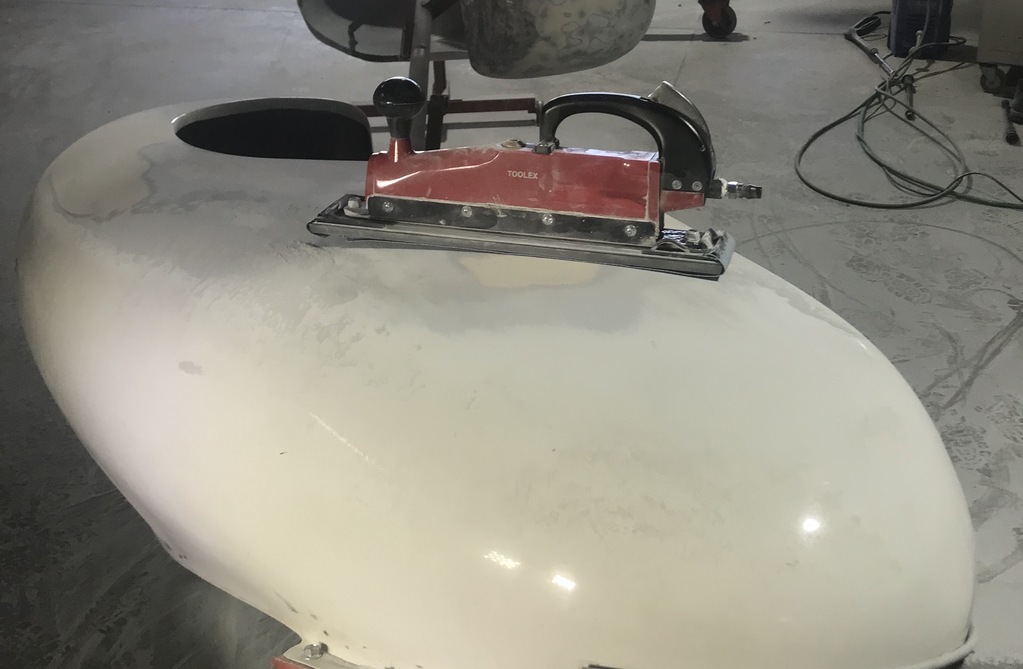 Taking off the topcoat and most of the filler beneath it. I’m using 40 grit to just go as far as the metal. Then I’ll give it a coat of epoxy and do my version of bodywork on top of that. Just trying to reduce the total thickness of the finish. There is so much filler on this thing, it’s hard to believe. And wet sanding/polishing the body. Which is now half done. To be honest, there isn’t really much area there. Very pleased with the progress though. I’m wet sanding with 1200, then 1500 and finally 2000 grits. Then polishing with a medium foam pad and 3M compound on the random orbital. And so far, I’ve not rubbed through. But I did put plenty of paint on it… And my little drama with the windscreen surround v hoist has become invisible. 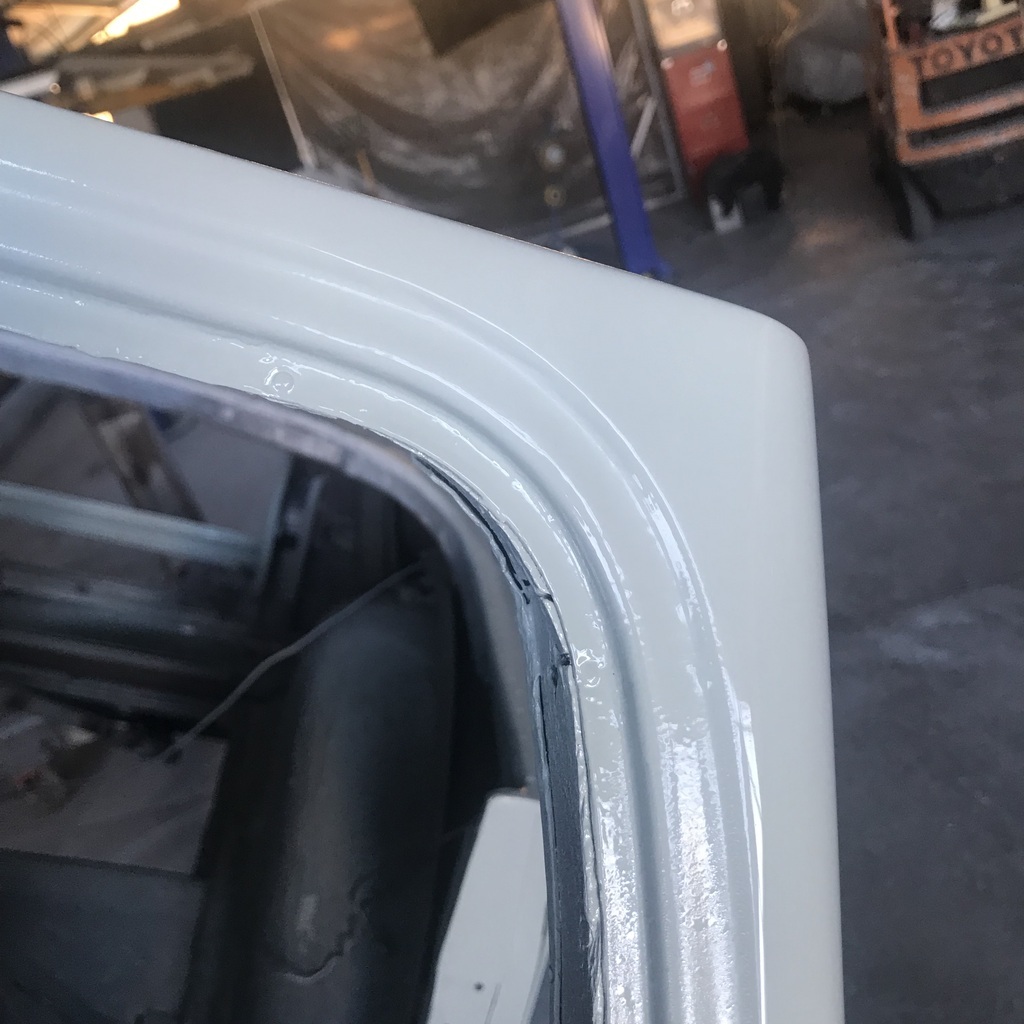 Maybe that blending stuff works, just not on red paint! Paint work is so much more enjoyable when it’s going to plan! One of the guards is pretty much done. The other is about a quarter of the way there. They are huge, a lot of area. 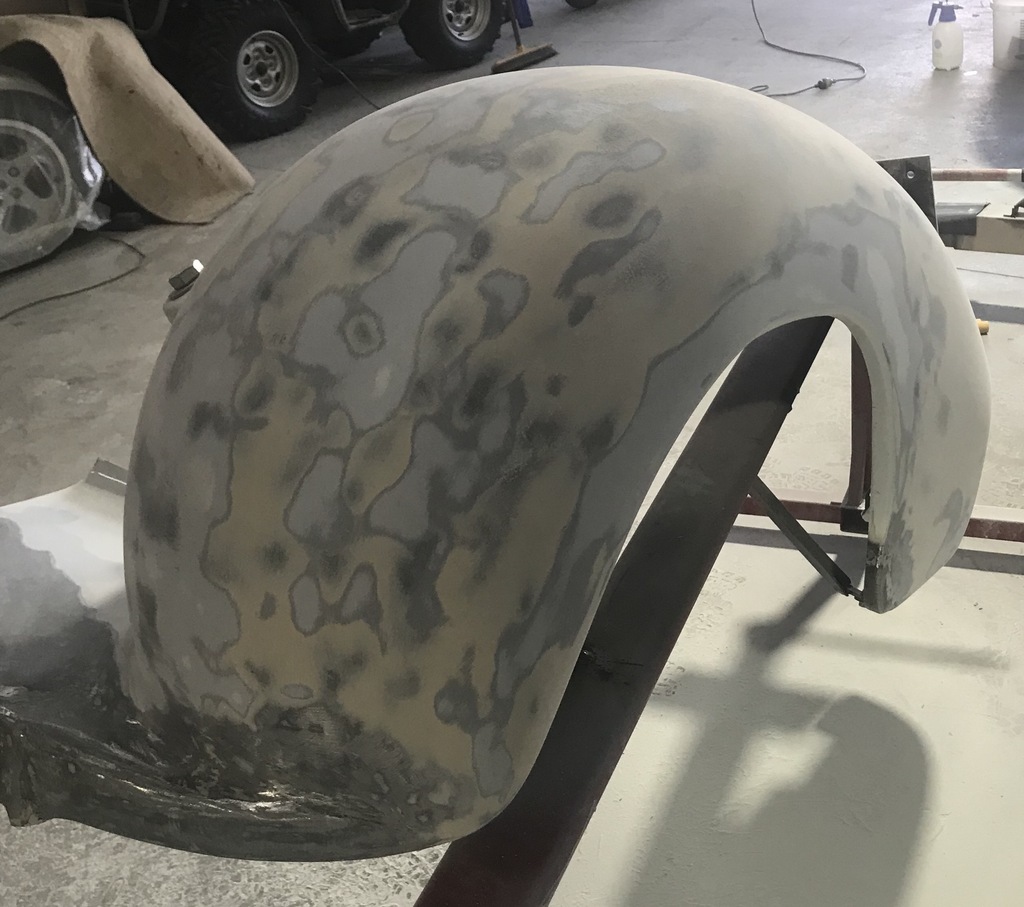 So, heaps of dust. Once I have them both ready to epoxy, I’ll have a clean up. The dust from that point on will be manageable. On the subject of unwanted dirt etc. I ran the fans on the inlet filter first thing this morning, as a test. Nice dry freshly painted panels in the booth, and after a few minutes of fans on, no nasties on the ( hard ) paint. So I don’t know what the cause of the contamination was. The panels are still in there, so I might run a longer test tomorrow. I really want to know. Thanks. Edited to add. Triumphs rule! 4 on the first page! |
| |
Last Edit: Mar 30, 2024 7:11:46 GMT by gazzam
|
|
|
|
|
|
|
Mar 30, 2024 21:35:01 GMT
|
|
Good to hear the repairs all worked out ok.
|
| |
|
|
gazzam
Part of things
 
Posts: 741 
|
|
|
|
Made some more dust this morning. Both guards now have the filler reduced to a reasonable thickness. I’m still gobsmacked by how much these 'pros' use. I welded up a couple of holes where 1980s sealed beam spotlights had been mounted. They were ugly lights and there’s enough going on at the front of this car to not need them. Go back to the pic at the start of the thread and you’ll see what I mean. Here’s where: 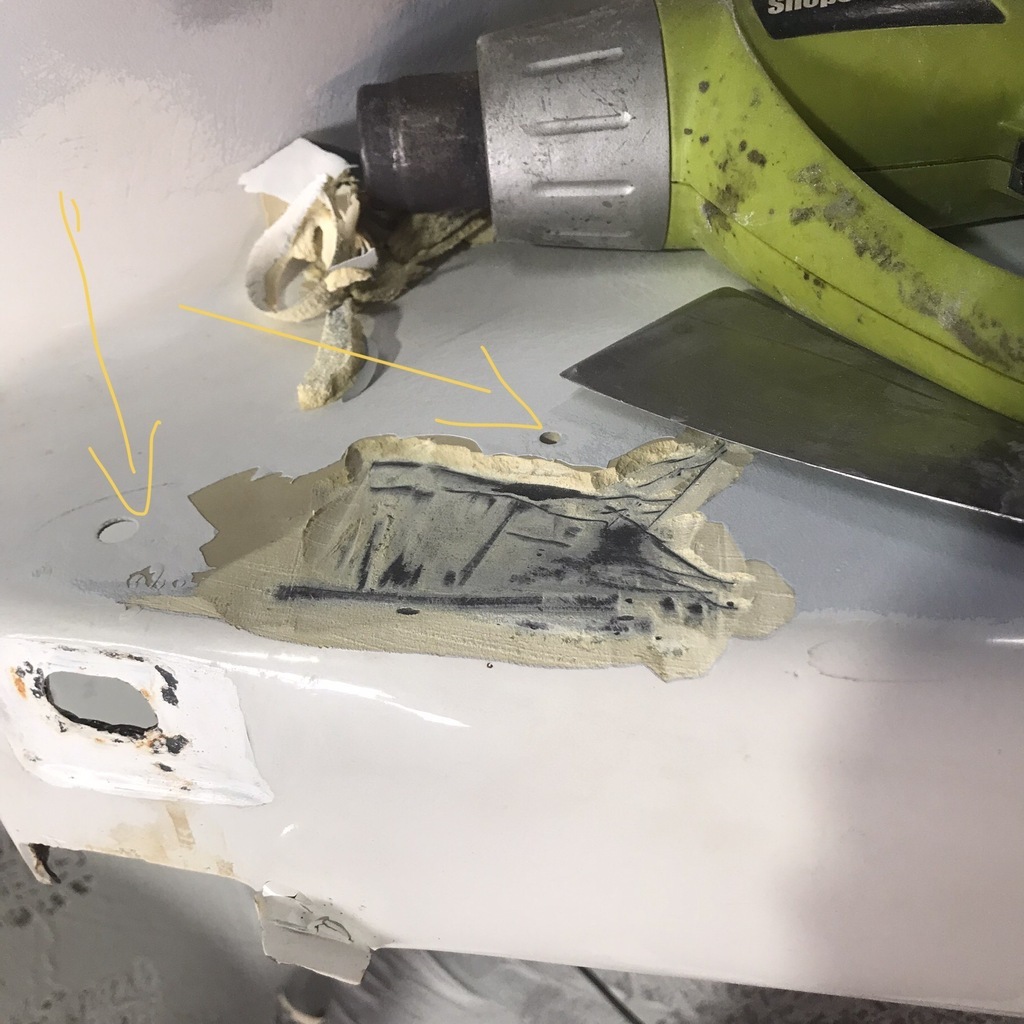 That’s 5mm of filler. Which obviously had to come off before I could weld up the hole. At least the heat gun saves on dust… So once I had finished making dust, I had a clean up. By that I mean I swept up the dust within 10 feet of the epicentre and then used a leaf blower to move most of the rest out the door. Once the place was inhabitable, I started on a couple of repairs. Welded a piece in here. 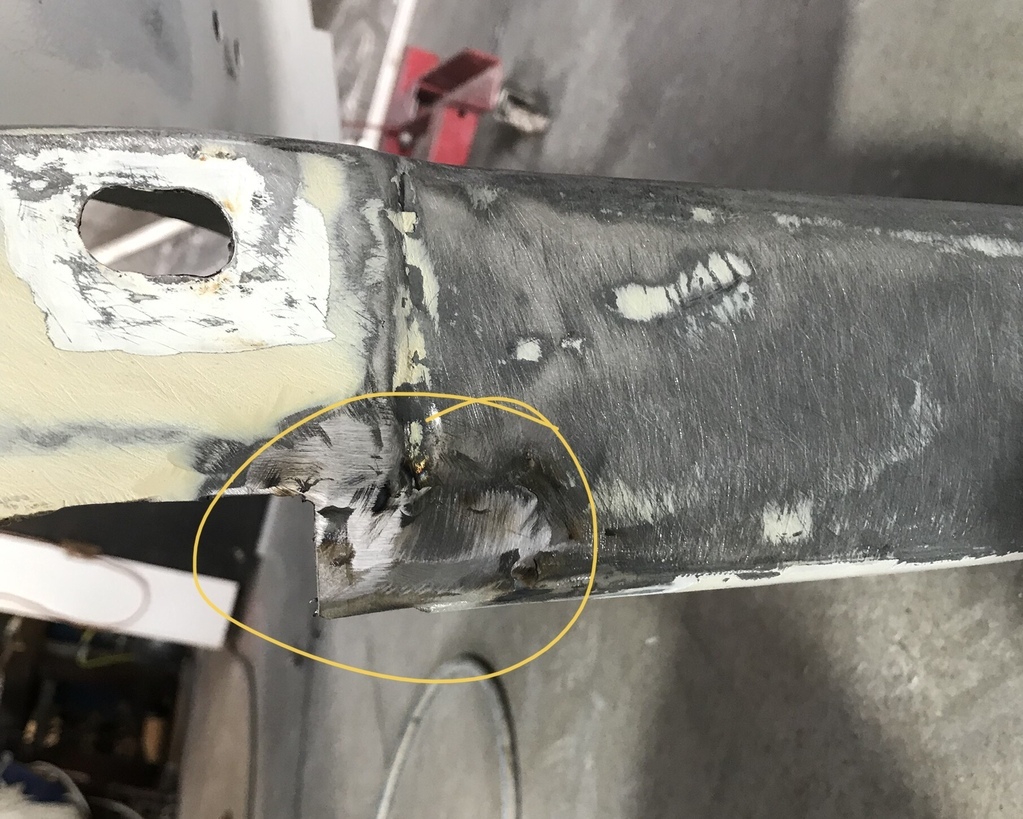 And I discovered some laciness. 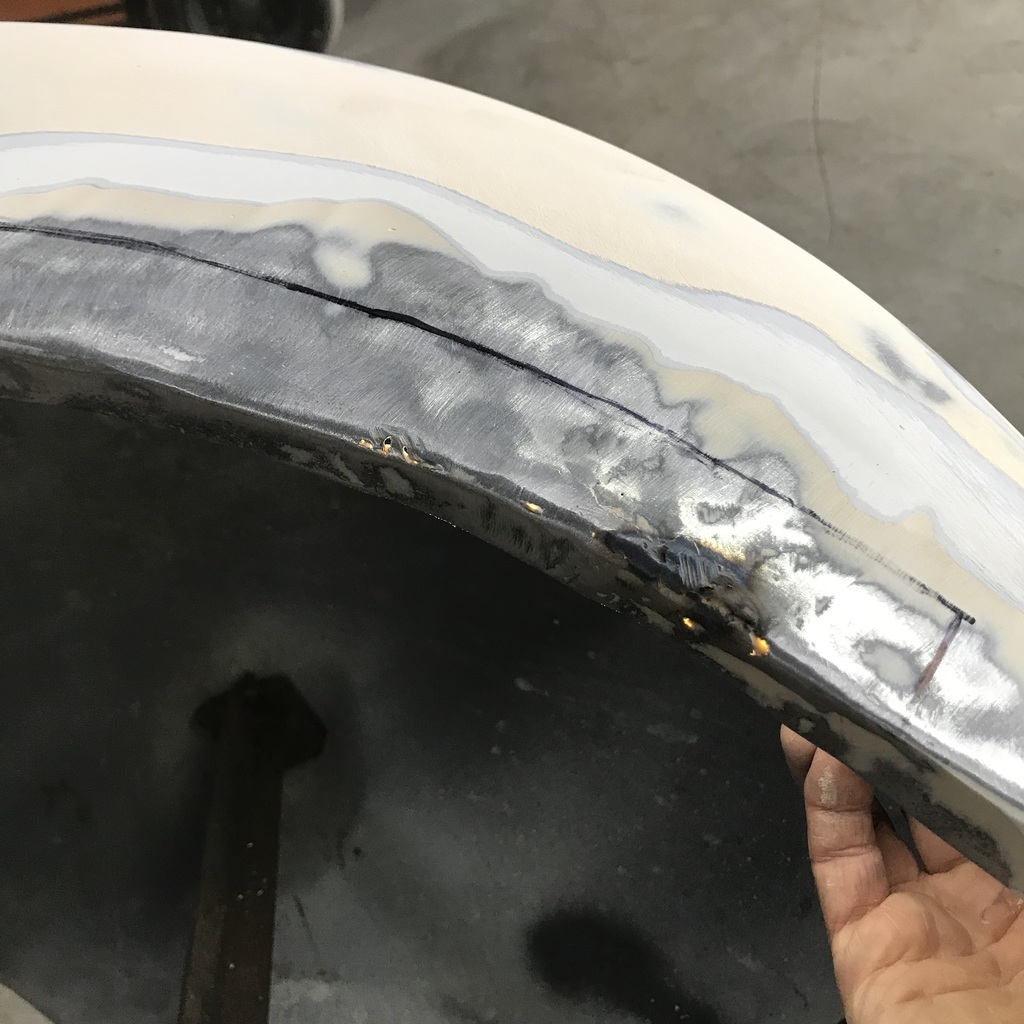 When I eventually found a marker that worked, I decided to replace this bit. Which had been covered by the filler. That’s being lit from behind in an attempt to make it show. The steps involved. Card template transferred to 20#. 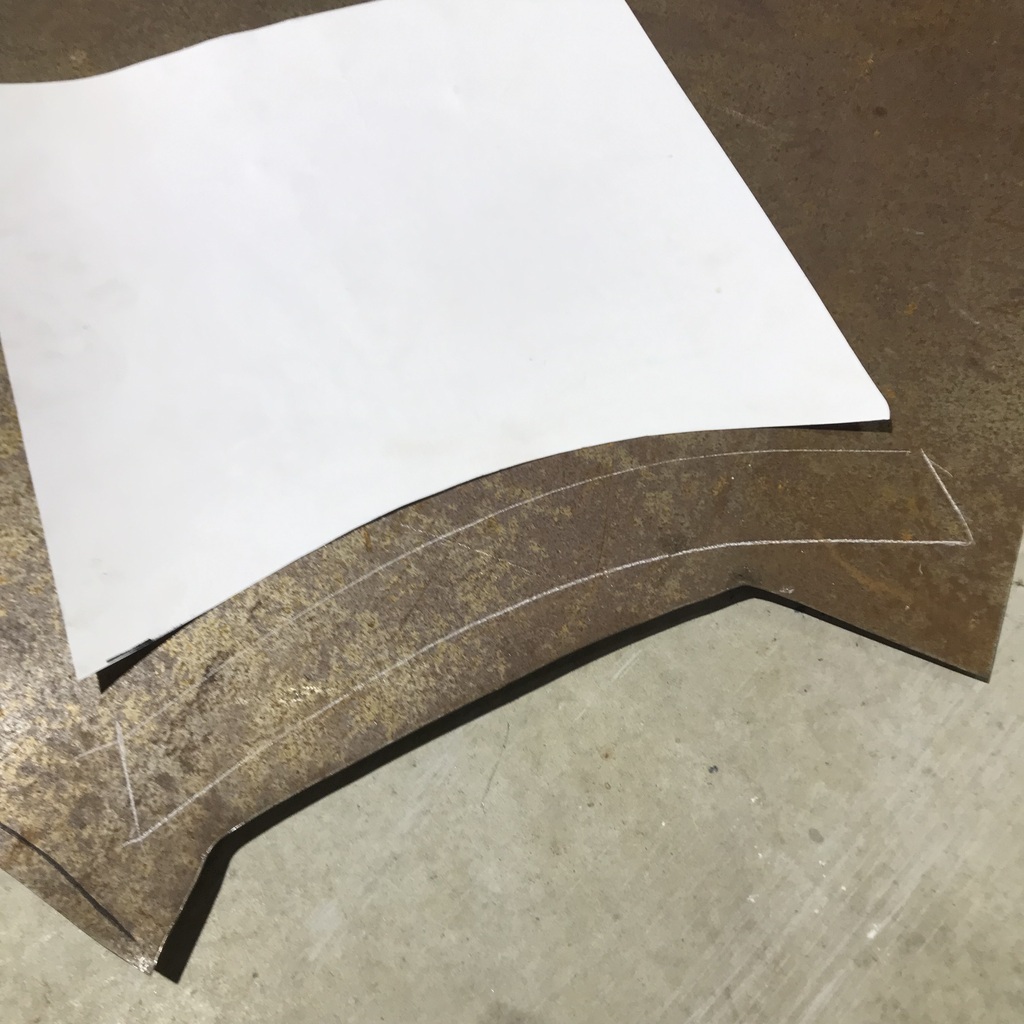 Roughly cut. I thought it might be better to stretch the return, rather than the larger side. 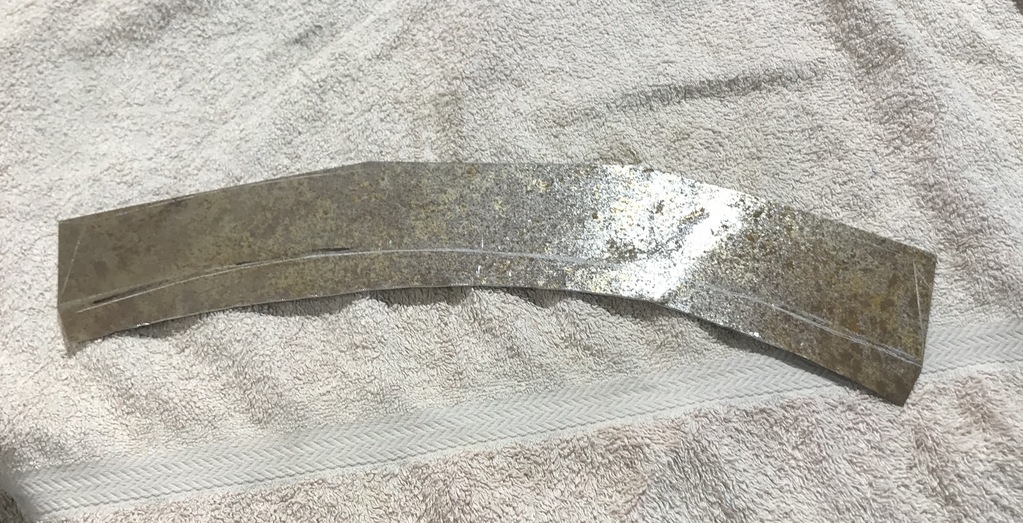 Then hammered the return over in the vise. Trial fit, shows promise… 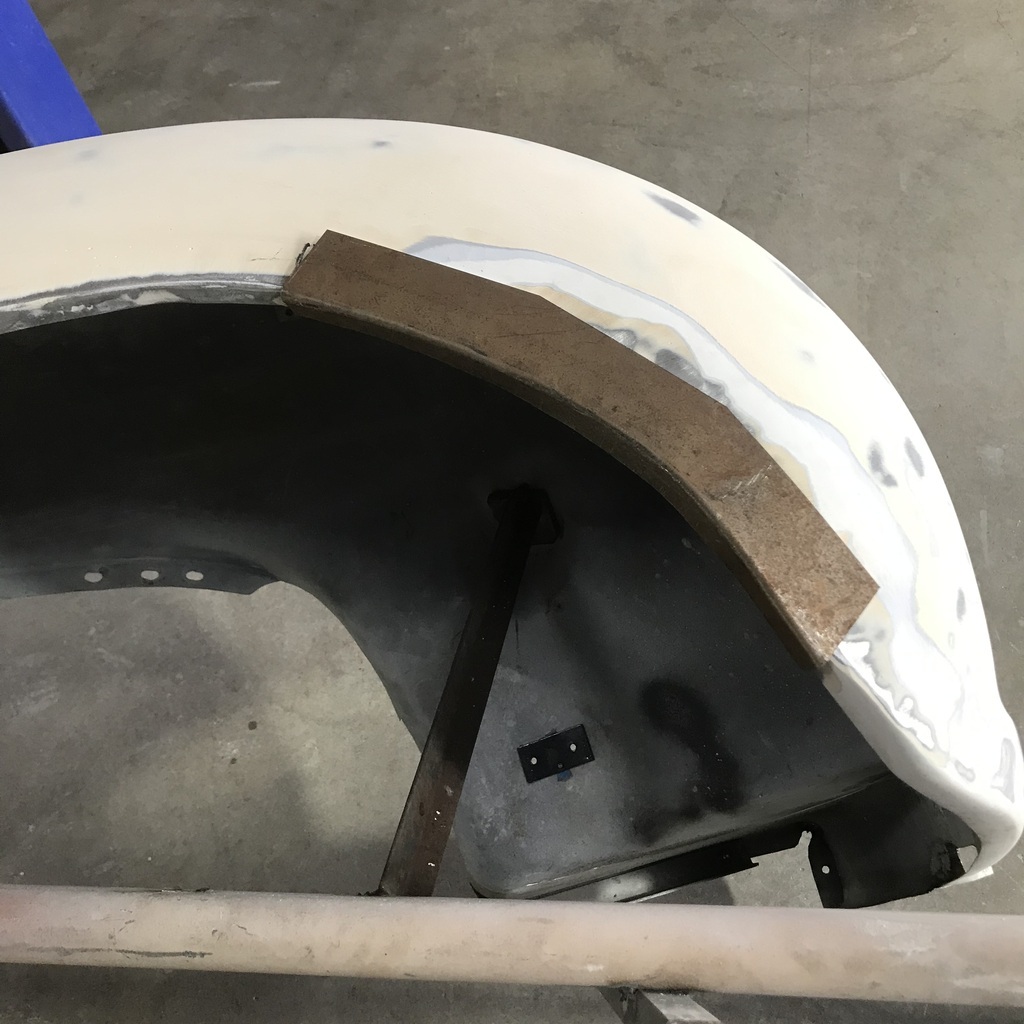 A bit of a fettle and it’s getting close. 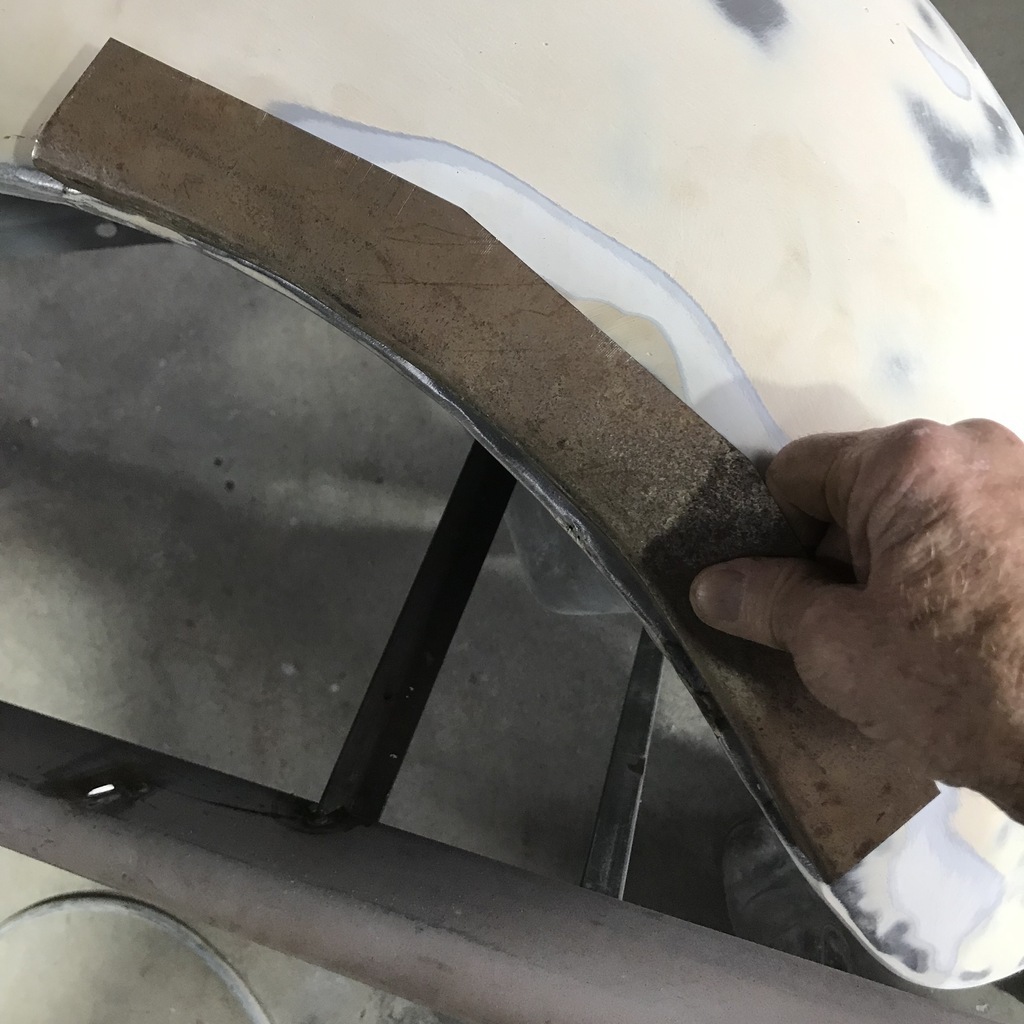 And the state of play atm. Nice clean shed. 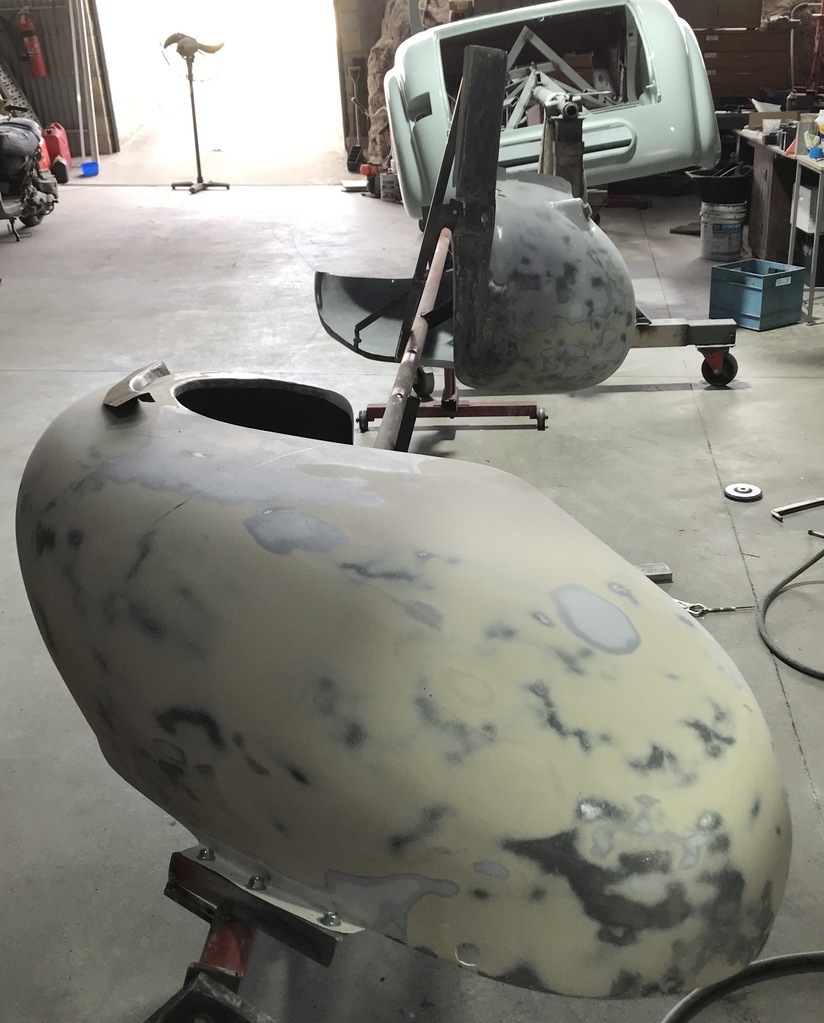 Easter Sunday, time for an ale! Cheers. |
| |
|
|
gazzam
Part of things
 
Posts: 741 
|
|
|
|
Back onto the repair I started yesterday. Cut the edge off. The blue tape is an attempt to record the curve of the arch, later abandoned when the tape wouldn’t stay stuck. 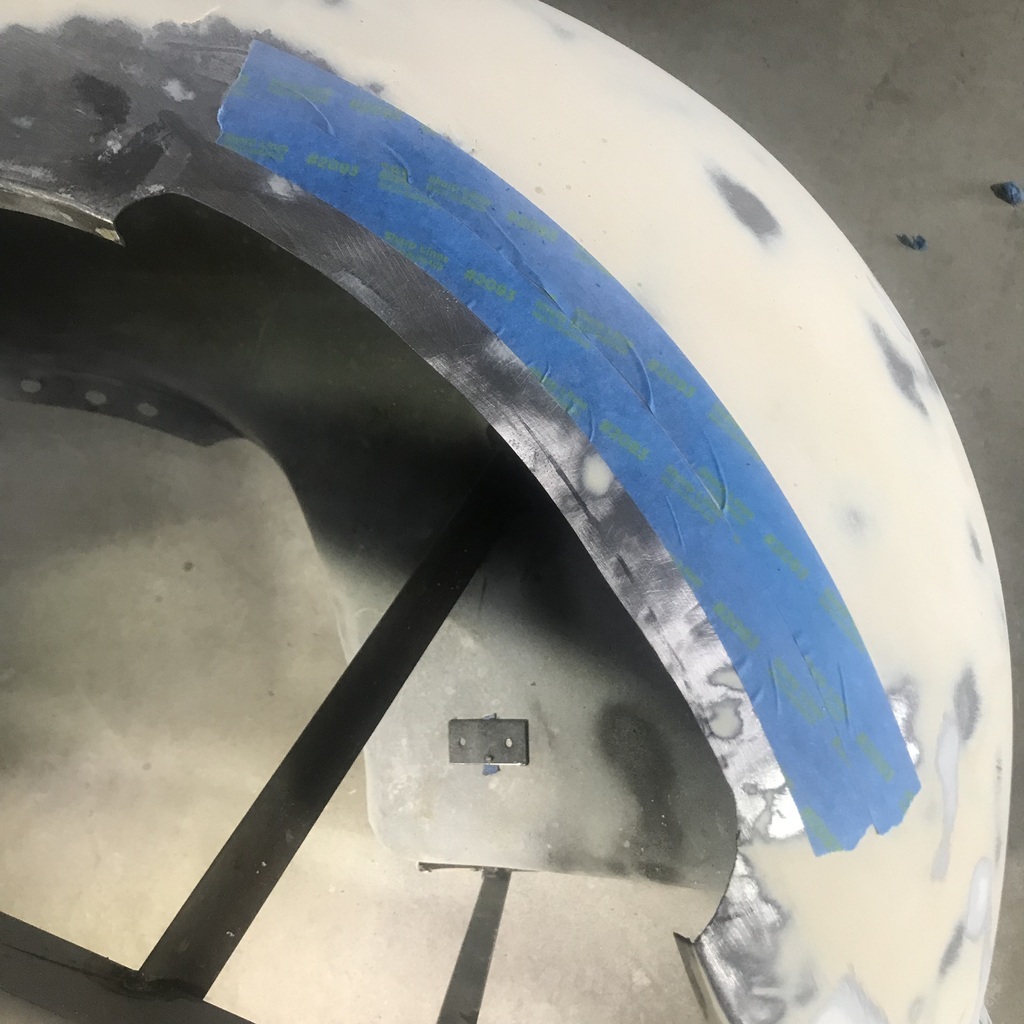 Trimmed the ends of the repair piece and then clamped it in place to scribe a cut line. Must be pretty close as it stays there without support! 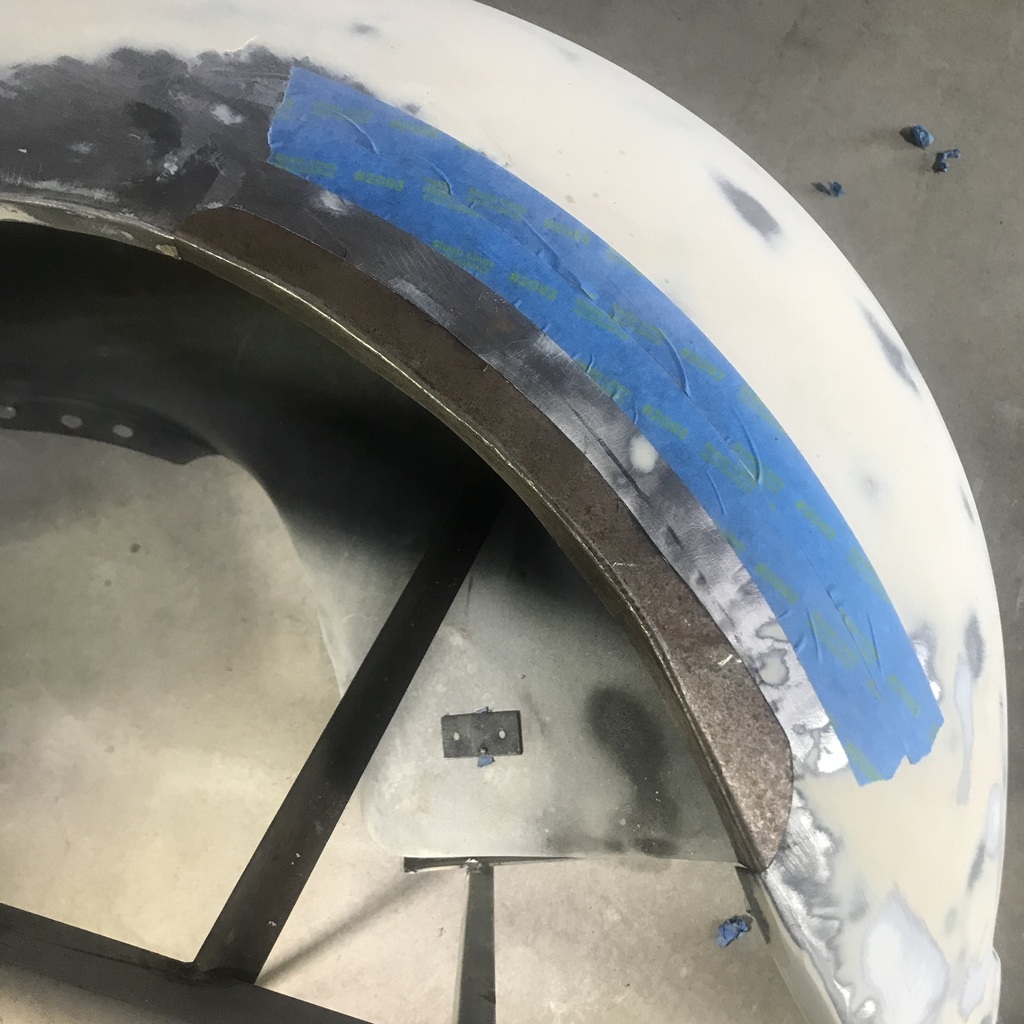 Clamped in place, ready to tack. Should stay there. 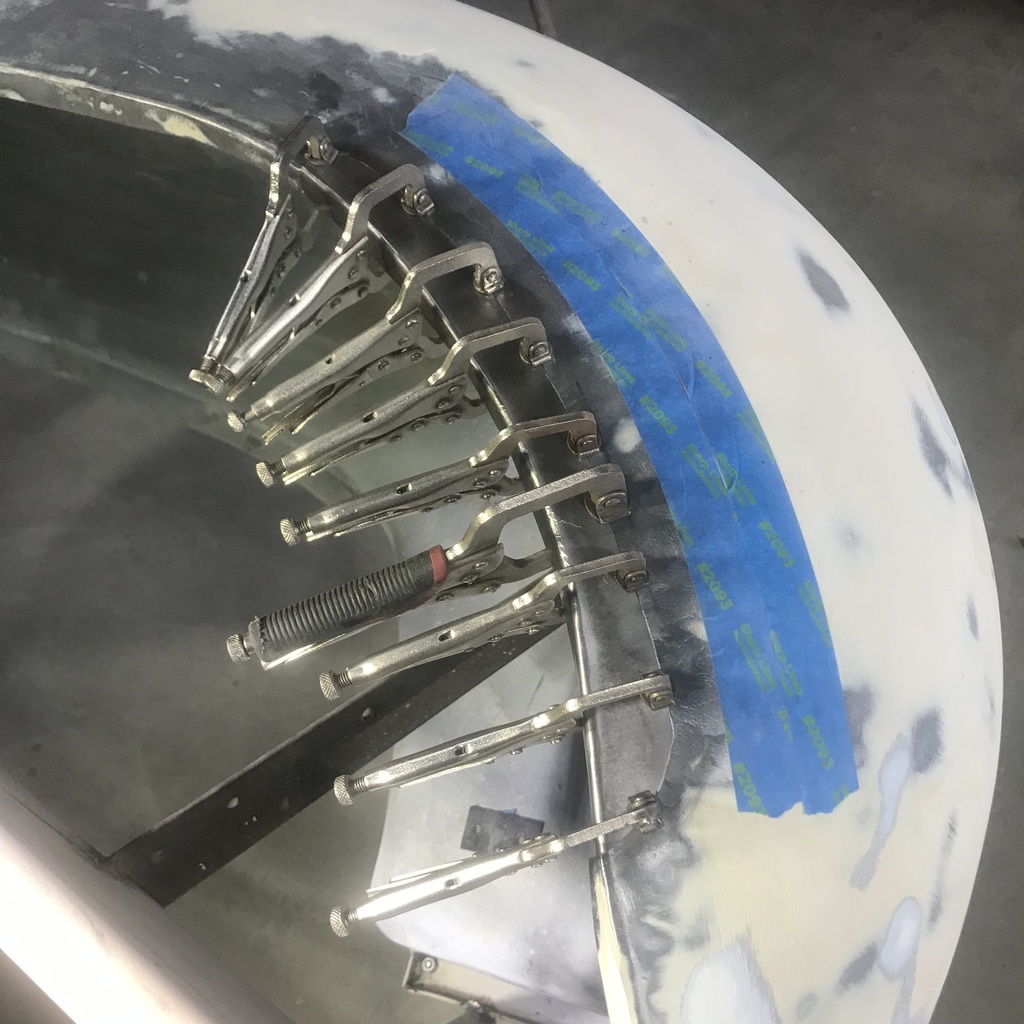 Tacked, cleaned up and tacks ground back. 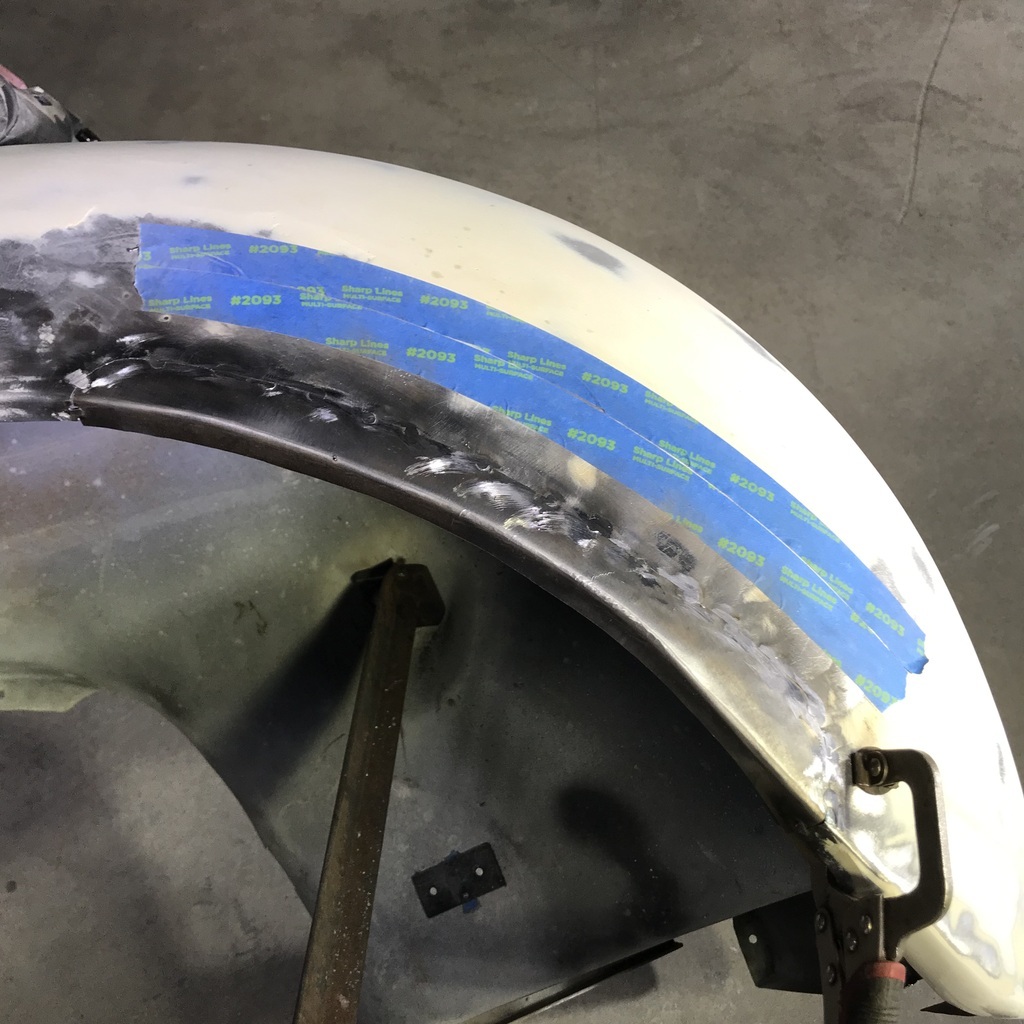 Fused together with tig, and ground back. The only grinding was where I filled a big blowout at each end. 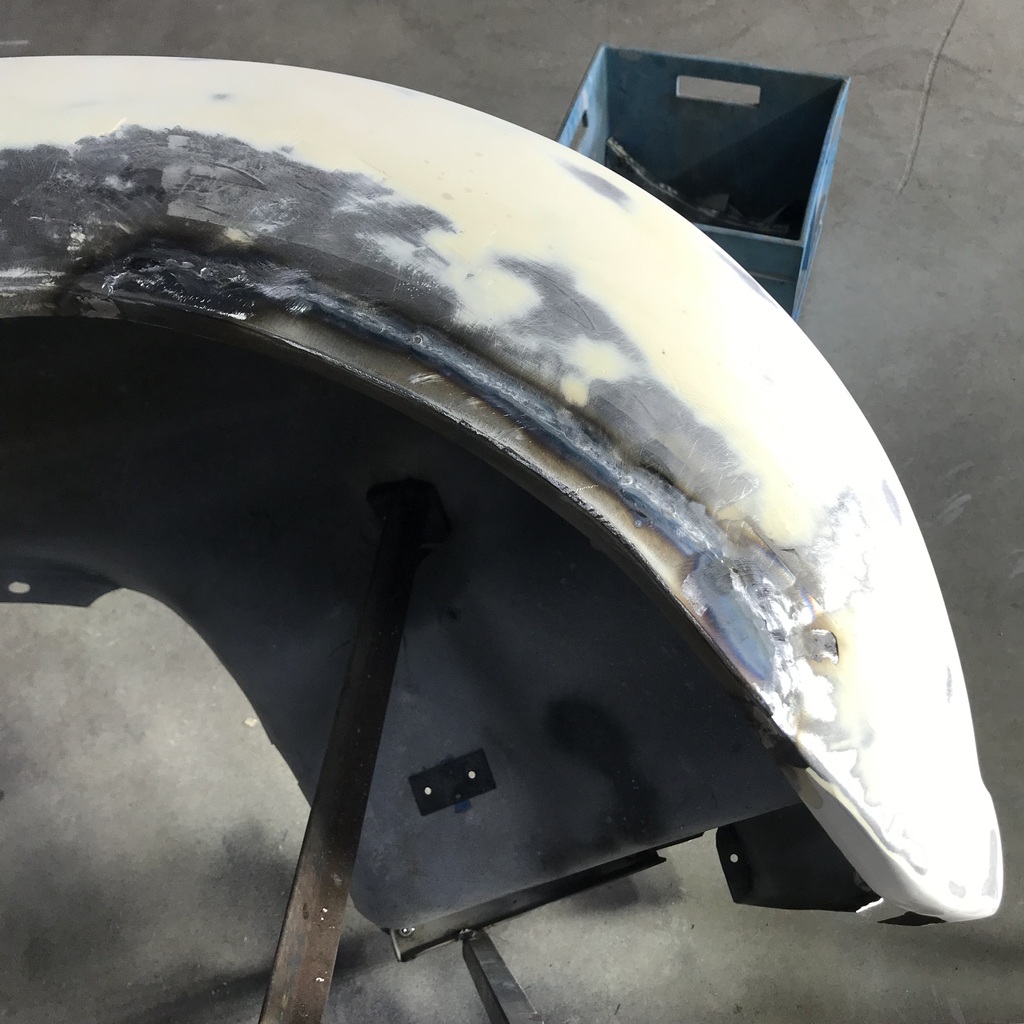 Taking out some more filler and found this hole. That’s the previously repaired return on the wheel arch. The previous repair is shown by the white pencil line. I have no explanation for the hole, other than 'pro' work. 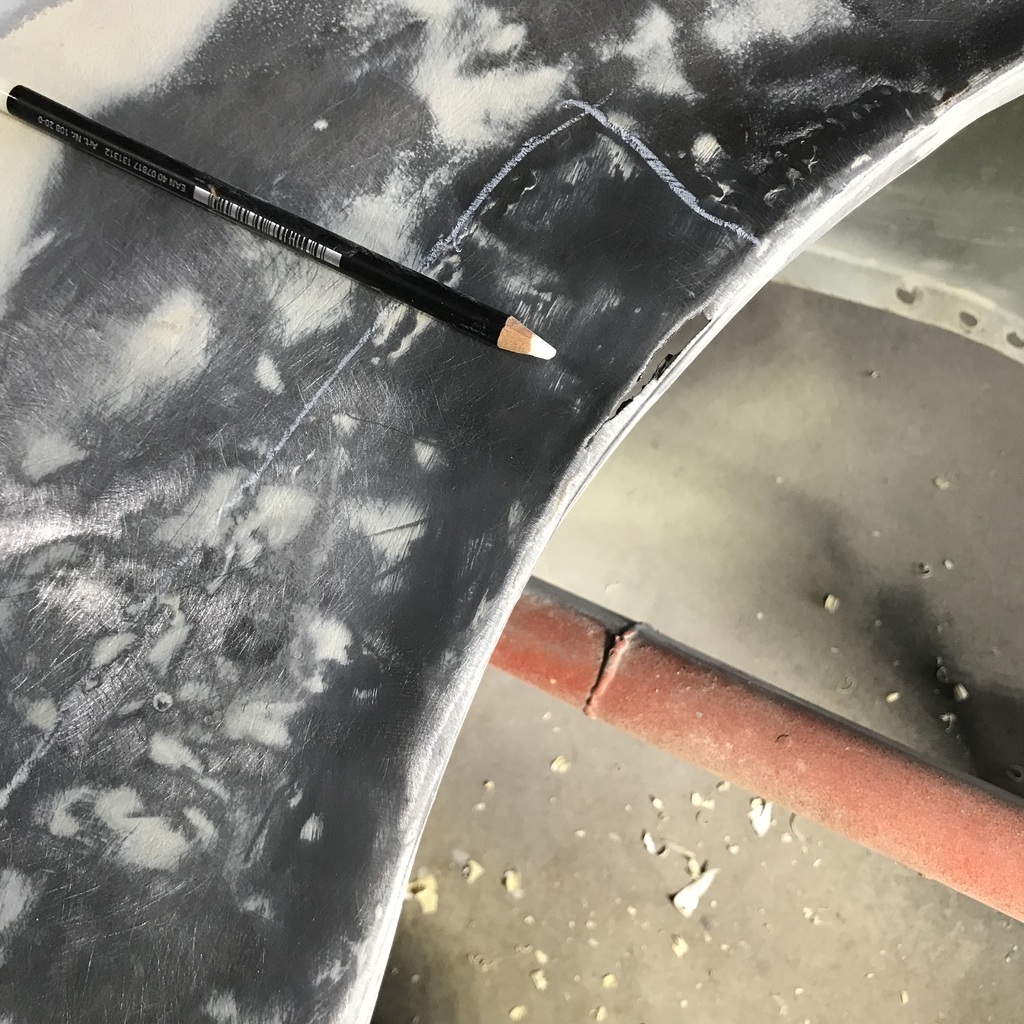 Clamped a piece of copper behind it. 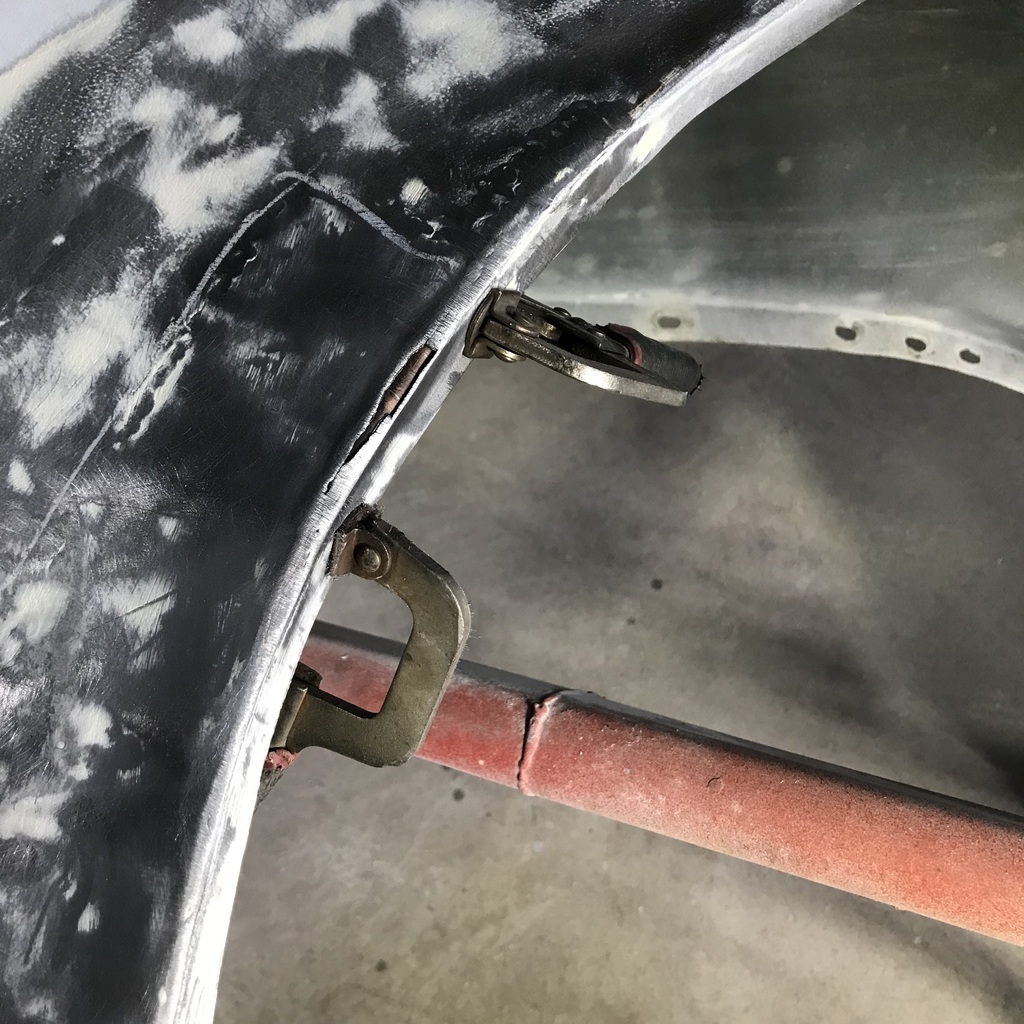 And filled it with tig. 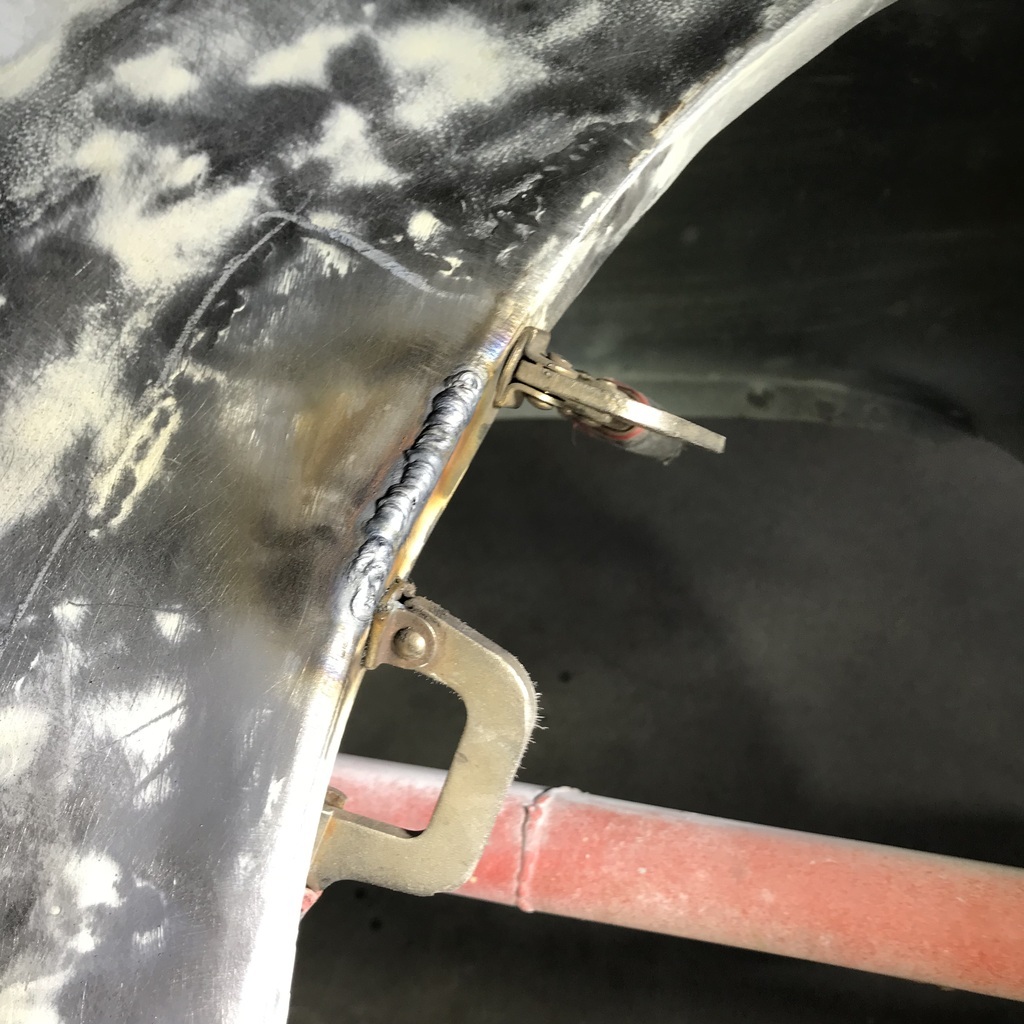 After grinding, while checking for holes using a light behind it, I saw these. 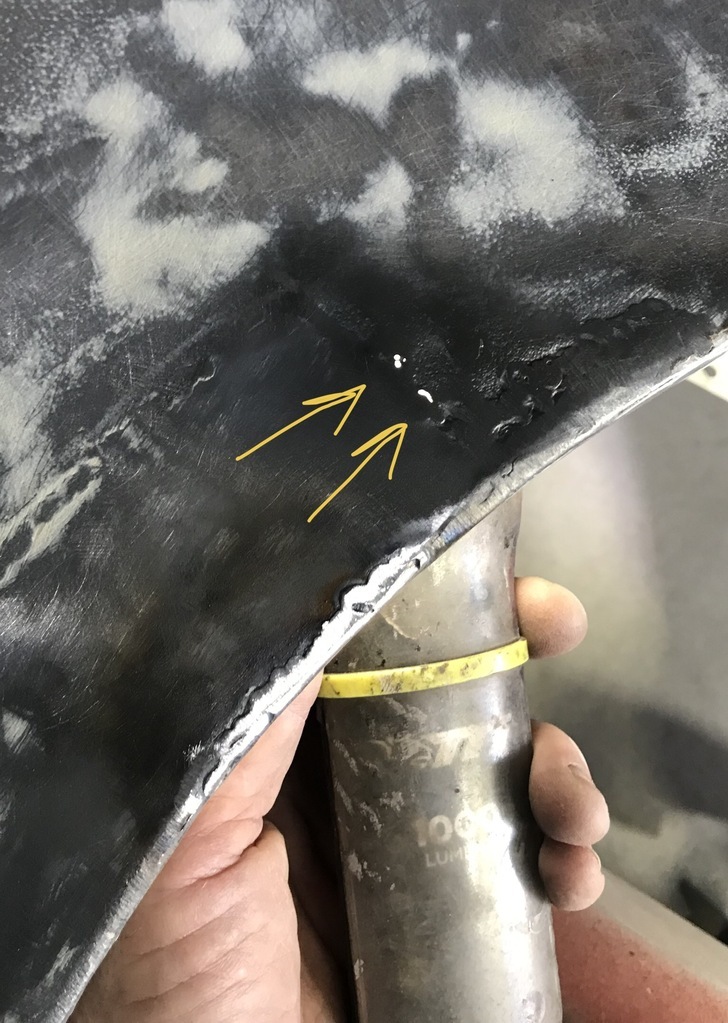 More 'pro' work! Filled them with the tig. And more of that structural filler on this corner. Mig sorted that. 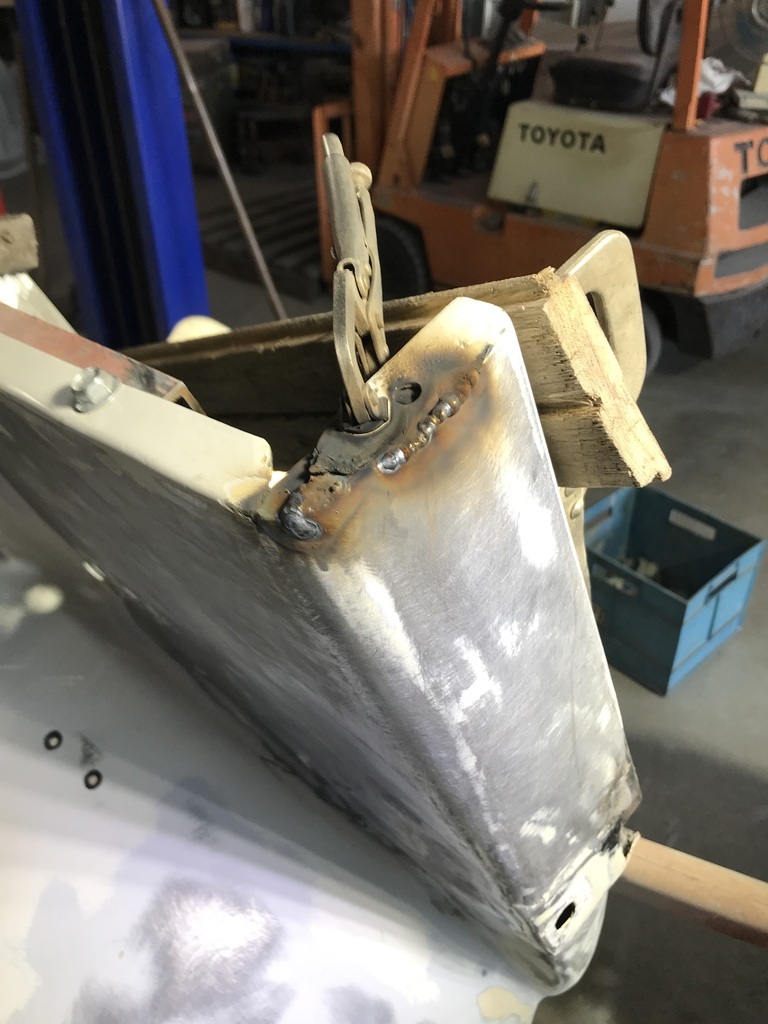 Ground back. 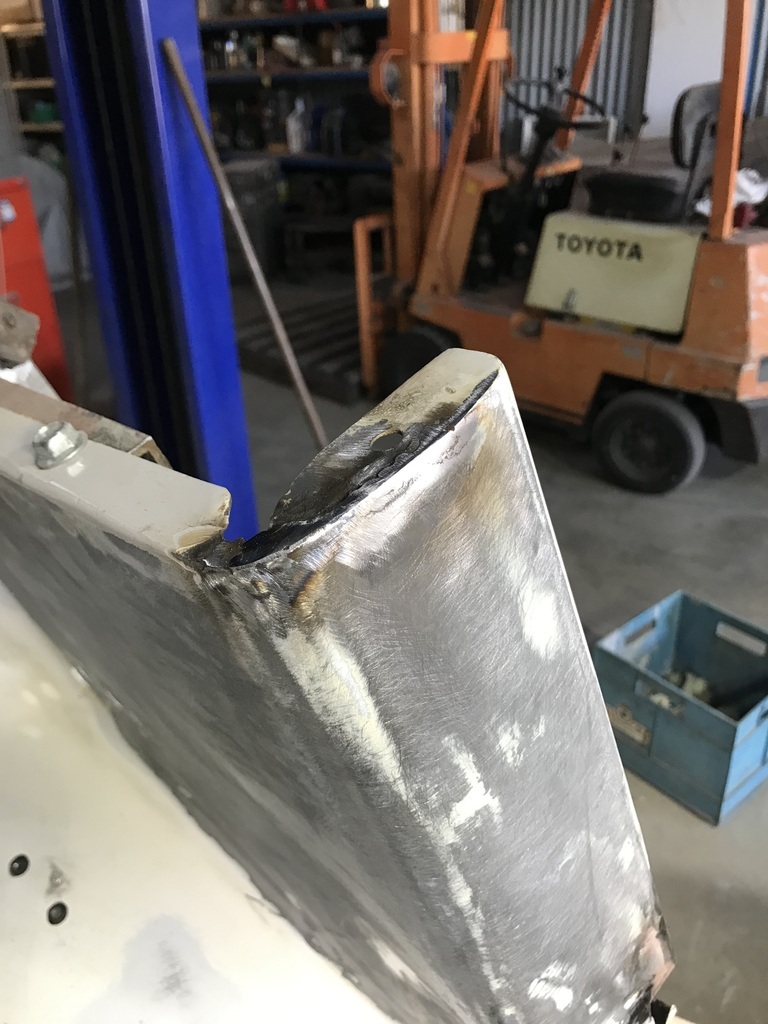 Spent most of the afternoon going over the two guards and welding up cracks, knocking out small dents etc. Just generally tidying up, so they’ll look as good as possible from underneath. Had some oil canning where I'd removed a thick coat of filler, and welded up some holes. A couple of heat shrinks cured that. 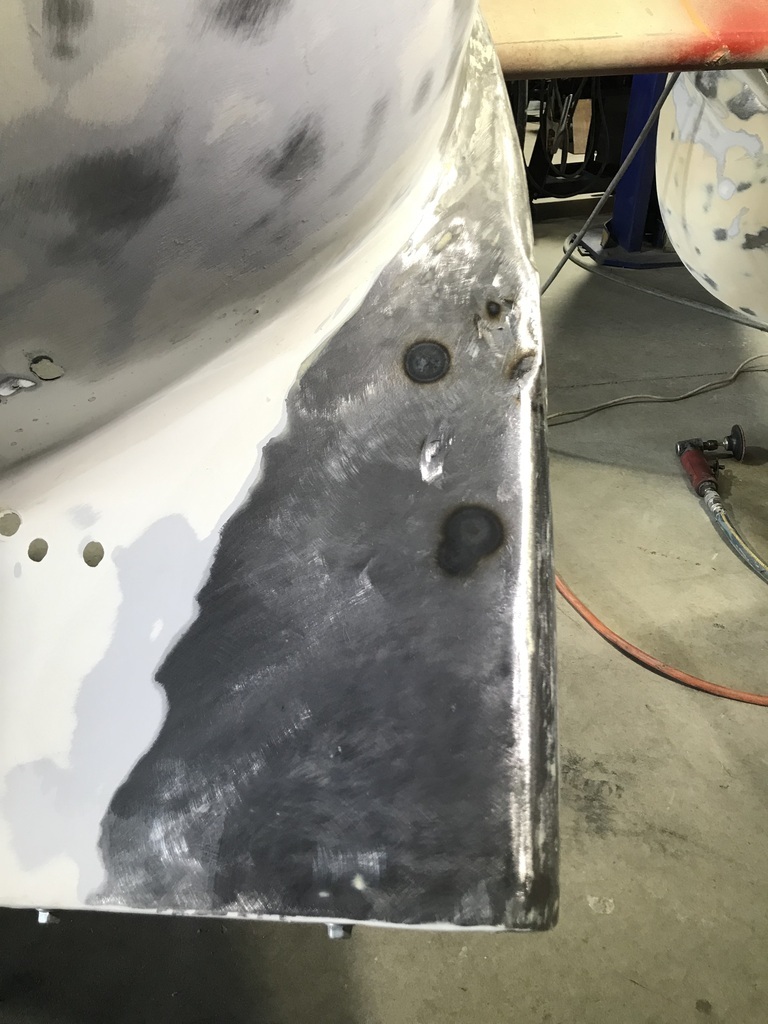 Thanks. |
| |
|
|
|
|
|
|
|
|
Nice work - as always. 🙂
I have seen similar “pro” work when restoring my GT6. Vast thicknesses of filler (sometimes even lead then filler) covering dents that could easily have been knocked out and finished with a skim of glaze. Also vast thicknesses of bog covering untreated rot and disguising misaligned panels.
“Panel beaters” who are actually bog sculptors with almost zero metal-working skills 😡
|
| |
1967 Triumph Vitesse convertible (old friend)
1996 Audi A6 2.5 TDI Avant (still durability testing)
1972 GT6 Mk3 (Restored after loong rest & getting the hang of being a car again)
|
|
|
|
|
|
|
|
Some of their sculpting skills are pretty impresive though!
|
| |
|
|
gazzam
Part of things
 
Posts: 741 
|
|
|
|
Yep, some of these 'pros' should be nicknamed Michelangelo. But they should not be called 'pros'. Not much to report today. Gave the guards a spray and wipe with wag remover. Then a quick sand with 180 grit and sprayed polyester filler over the topsides. This is really just to fill the sanding scratches from the 40 grit I used to remove the old topcoat and some of the bulk filler. Most of it will be sanded off. 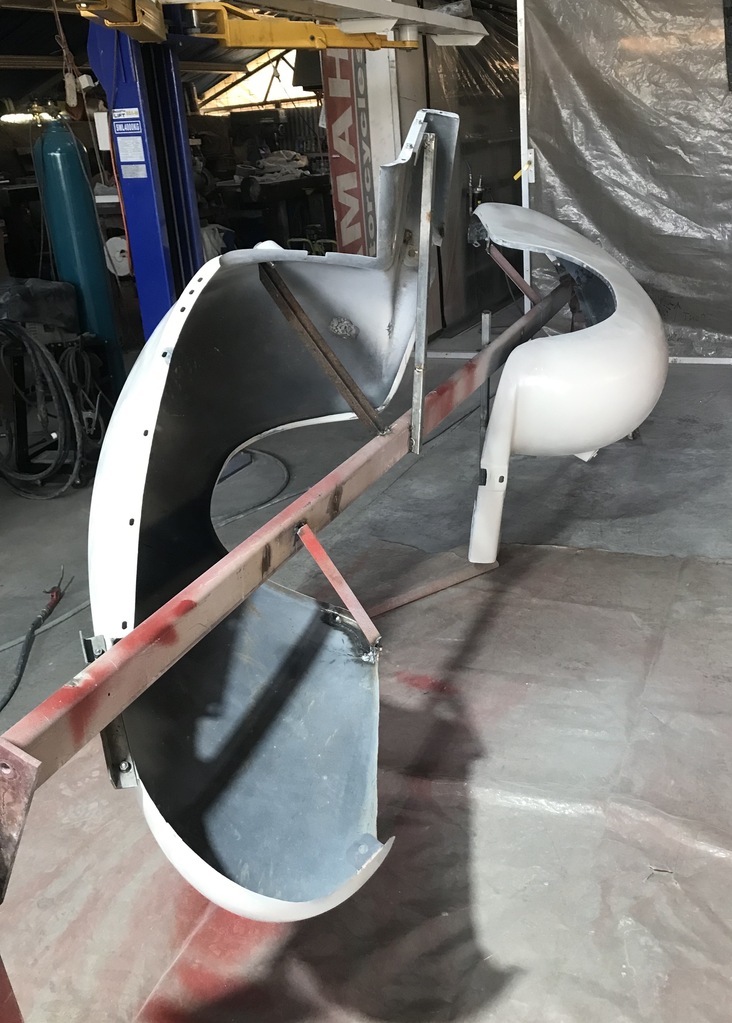 This revealed one small crack and a pair of tiny holes that I'd missed. Welded them up, but didn’t get any pics. Had planned to sand them and the get a coat of epoxy, but it didn’t happen. Did get them mostly sanded and skimmed some filler over my repairs. But I underestimated the size of these things. And had forgotten how hard Upol Reface is. They’re huge and it’s taking longer than expected. Such is life. More tomorrow. Thanks. |
| |
Last Edit: Apr 2, 2024 6:47:54 GMT by gazzam
|
|
gazzam
Part of things
 
Posts: 741 
|
|
|
|
Finally got the two front guards sanded and many small imperfections sorted. Had to heat shrink a couple of high spots. That of course means another area to be cleaned, scratched and given a skim of filler. And not a photo all day. They look pretty much the same as the last pic I posted, just a difference in primer hue. So in all I spent a day ( retiree day, not quite as long as when I was a taxpayer ) getting them 95% sorted and coated in epoxy. I say 95% because, even though I thought they were good, as soon as that fresh primer hits them, half a dozen or so problem areas appear. But anyway they’re all sealed up and can sit for a couple of days. We’re supposed to be getting some rain over the next few days, so I’ll get back to them after that. Also had some excellent news about our little mate. The last lump they took out was benign. And seeing I have no car pics, here’s one of her. Looks comfy!  Thanks. |
| |
|
|
gazzam
Part of things
 
Posts: 741 
|
|
|
|
Didn’t get much done on the Triumph yesterday. It was threatening rain, so I got the chainsaw out. Cut down one of three olive trees in the citrus orchard. They were planted by the previous owner and are just in the wrong place. So will become firewood. Seeing I had the saw going, there were some dead wattle trees around the house that needed to be removed. So cut them off at the ground, then loaded them on to a trailer behind the quad bike and carted them away to the spot down the paddock where vegetation waste goes. Then it started to rain enough that I could say ‘enough' and go to my shed… Made a good start on colour sanding and polishing the body. Which was finished by lunchtime today. 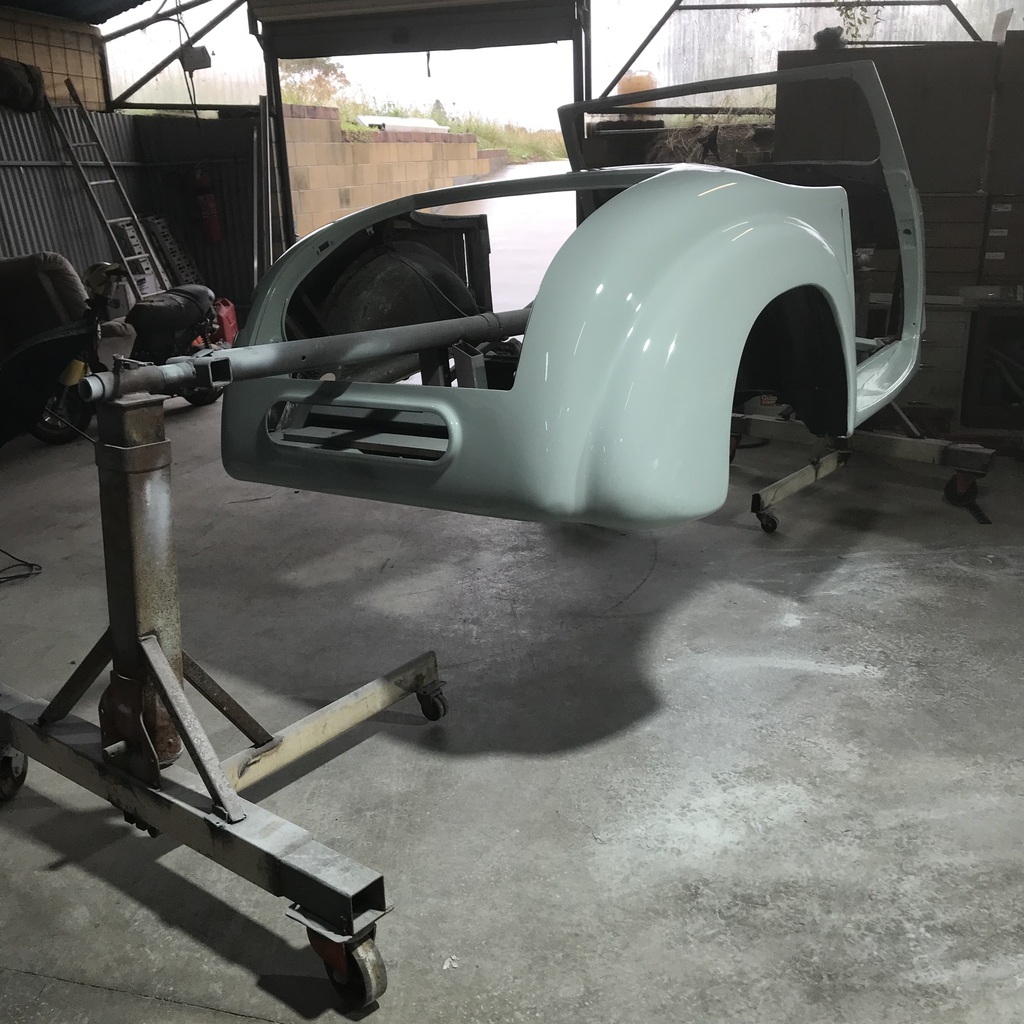 Very pleased with the outcome, glad to see that I’m not actually getting less good at this! Of course there are imperfections. But not many would spot them, because there are only a few, and thankfully they are tiny. So I think I’ll call it good enough, and get on with it. And my good wife helped remove the rotisserie, then we lowered it back onto the chassis, so now it’s like this. 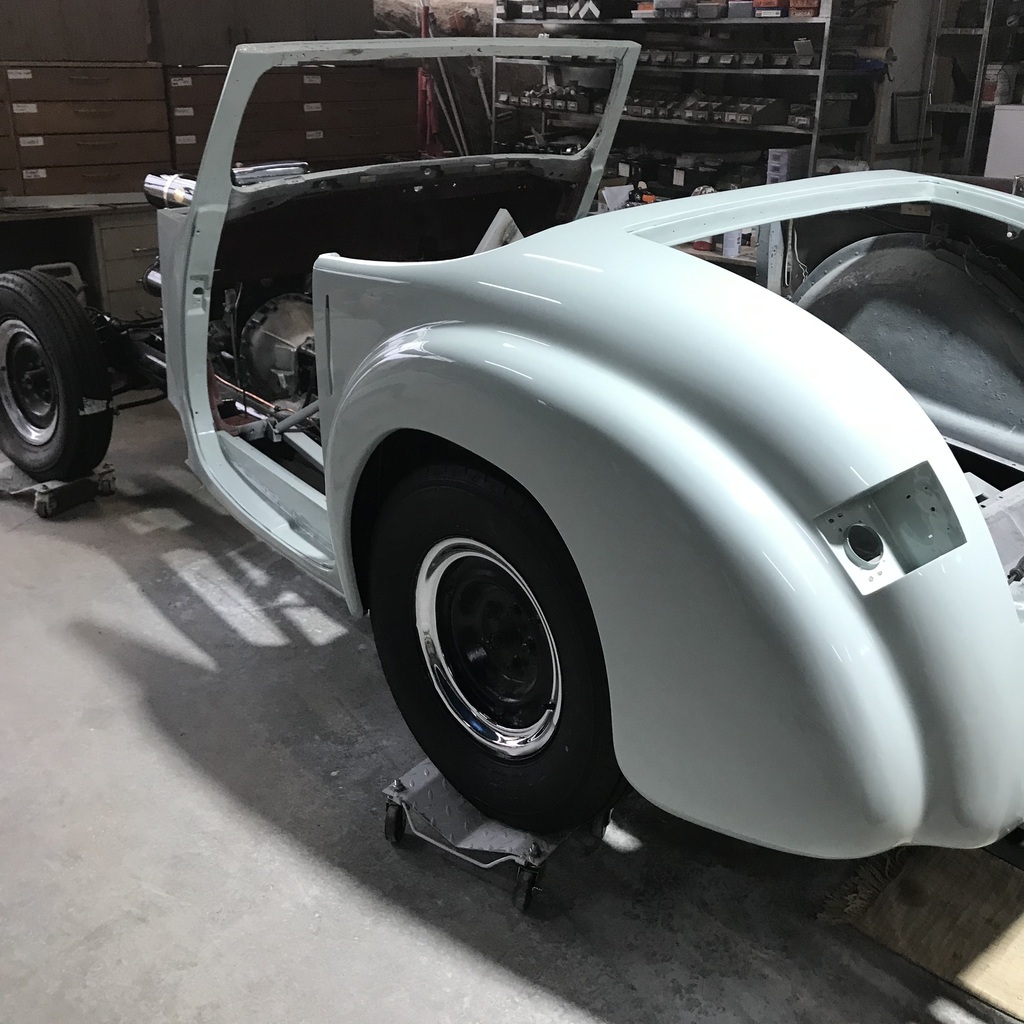 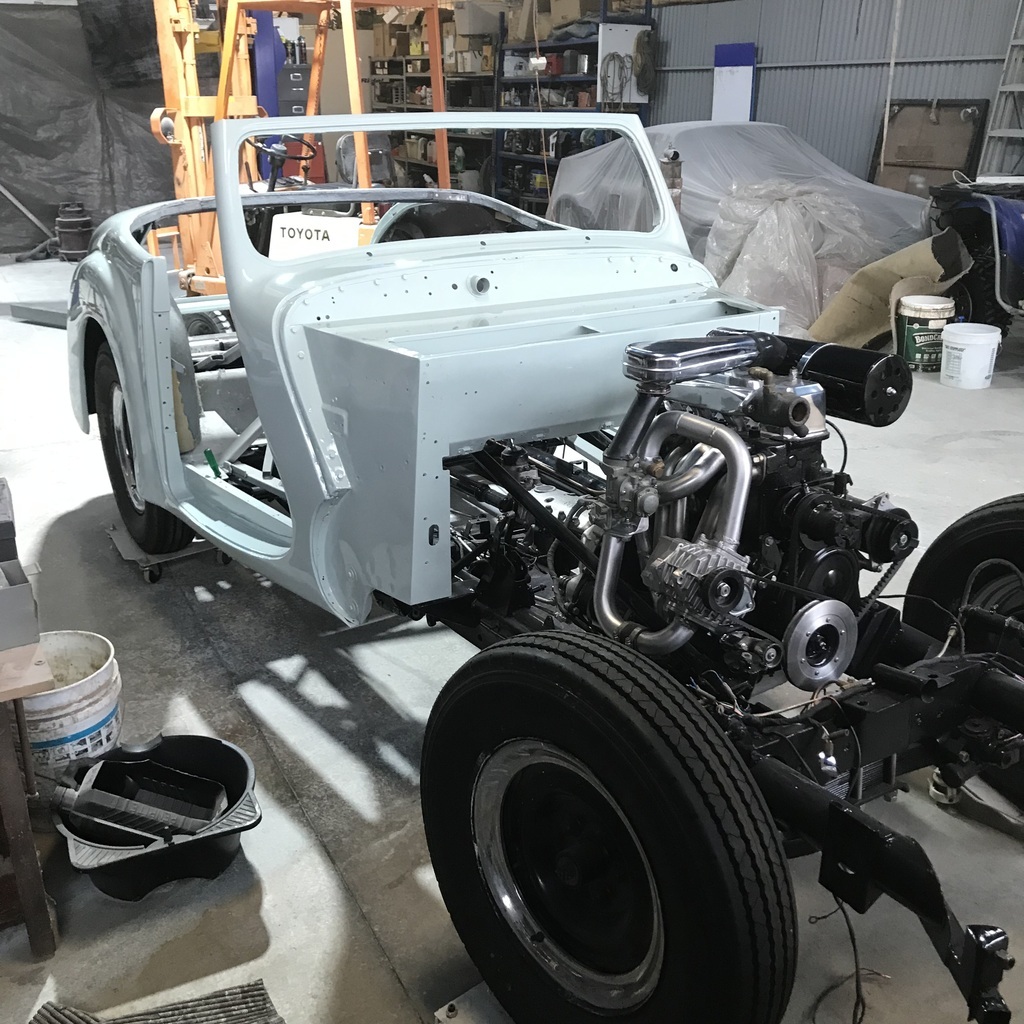 Was going to cut the support frame out this afternoon, but thought I might sleep on that. It’s a big job to put it back in place, should the body have to come back off. Thanks. |
| |
|
|
teaboy
Posted a lot
   Make tea, not war.
Posts: 2,125
|
|
|
|
|
That’s looking good, Gazza.
|
| |
|
|
Davey
Posted a lot
   Resident Tyre Nerd.
Posts: 2,348
|
|
|
|
|
Almost a car again.
|
| |
K11 Micra x3 - Mk3 astra - Seat Marbella - Mk6 Escort estate - B5 Passat - Alfa 156 estate - E36 compact
Mk2 MR2 T-bar - E46 328i - Skoda Superb - Fiat seicento - 6n2 Polo - 6n polo 1.6 - Mk1 GS300
EU8 civic type S - MG ZT cdti - R56 MINI Cooper S - Audi A3 8p - Jaguar XF (X250) - FN2 Civic Type R - Mk2 2.0i Ford Focus - Mercedes W212 E250
|
|
|
|


