|
|
|
|
|
|
I'll disagree about the etch primer.
Epoxy primer is designed to bond to ally (at least the stuff I use is) and has better adhesion than the etch nowadays.
|
| |
|
|
|
|
gazzam
Part of things
 
Posts: 741 
|
|
|
|
|
Thanks Truckdoctor and Mark.
I’m happy putting Baslac 25-30 epoxy on bare ally. Done that before on the Healey and XK.
I was more asking if Upol means not to use Reface on aluminium at all, no matter what primer or whatever.
I assume they just mean bare ally, so my plan remains the same.
Get all the topcoat off, then 80# and seal with epoxy.
Been caught by the weather though. It’s rained today and likely the next few days.
There’s lots of exposed filler all over it.
So I think I’ll put it out in the sun for half a day or so, once the the hot dry weather returns and then epoxy it.
That should be enough to remove any absorbed moisture.
Misteralz, it’s an '81 930 that I’ve had for 10+ years. It caught fire about 6 months after I bought it, lucky to save it.
After that I painted it (same colour, silver ) and changed the interior from cack brown to black.
|
| |
|
|
gazzam
Part of things
 
Posts: 741 
|
|
|
|
I’d previously taken the bulk of the topcoat off the rear of the body. 36# on the DA sander cuts through it fairly quickly. I tried not to go any further than the topcoat. In order to keep it flat, I’ll use a long board to take it down with 40# till I just see metal. I started to do this by hand and decided there’s just too much filler to bring it down manually. So I ordered some more sandpaper and will pick up an air sander next time I’m in town. Like this. 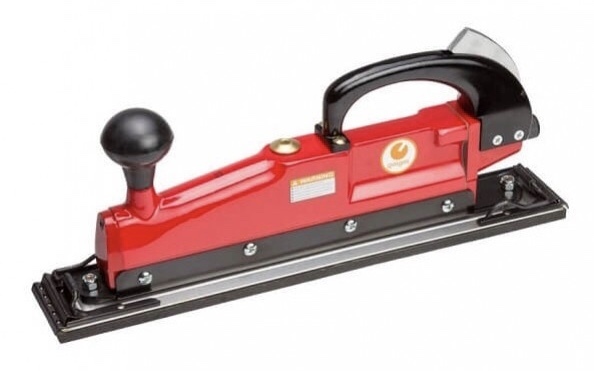 Hopefully it’ll do the job. Welded up the fuel thing. It wasn’t joined to the body along the outer edge and I couldn’t see why, so it got the tig treatment. 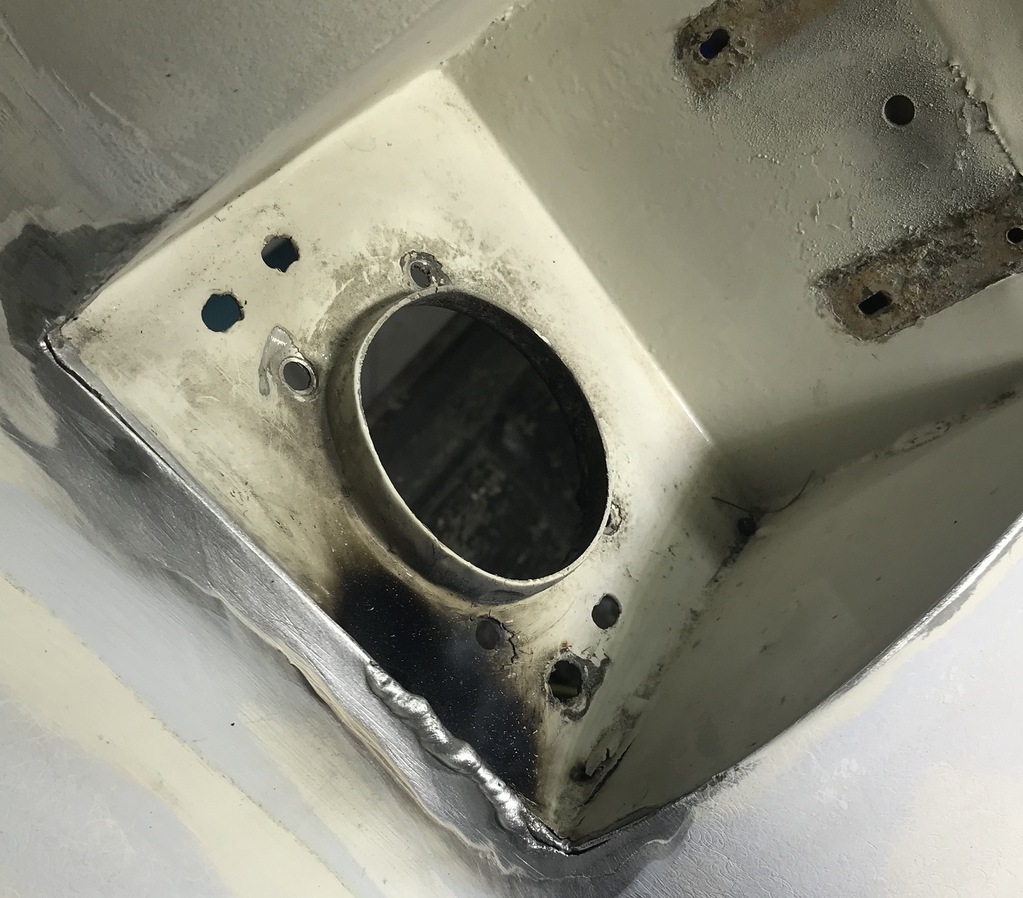 And cleaned up. 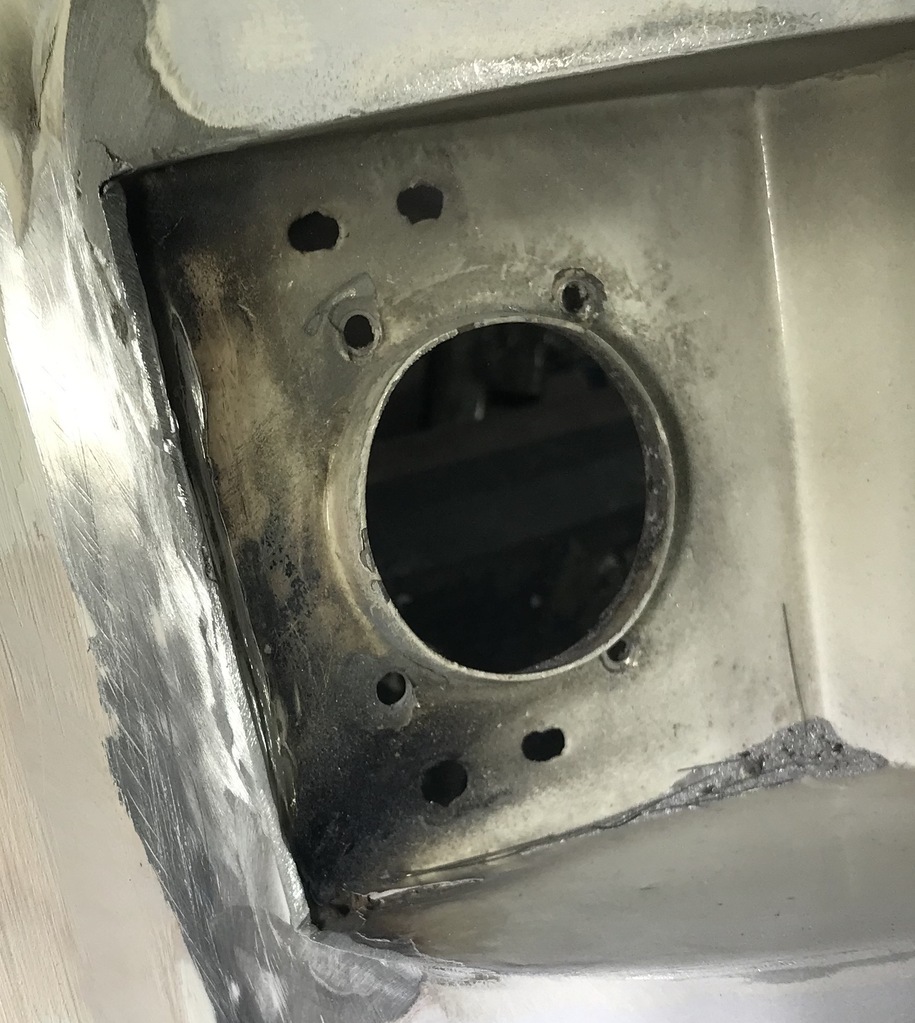 Also took the paint off, using stripper. I need to make up some spacers to get the cover to fit nicely. A little hammer and dolly work was needed to flatten the mounting face first. 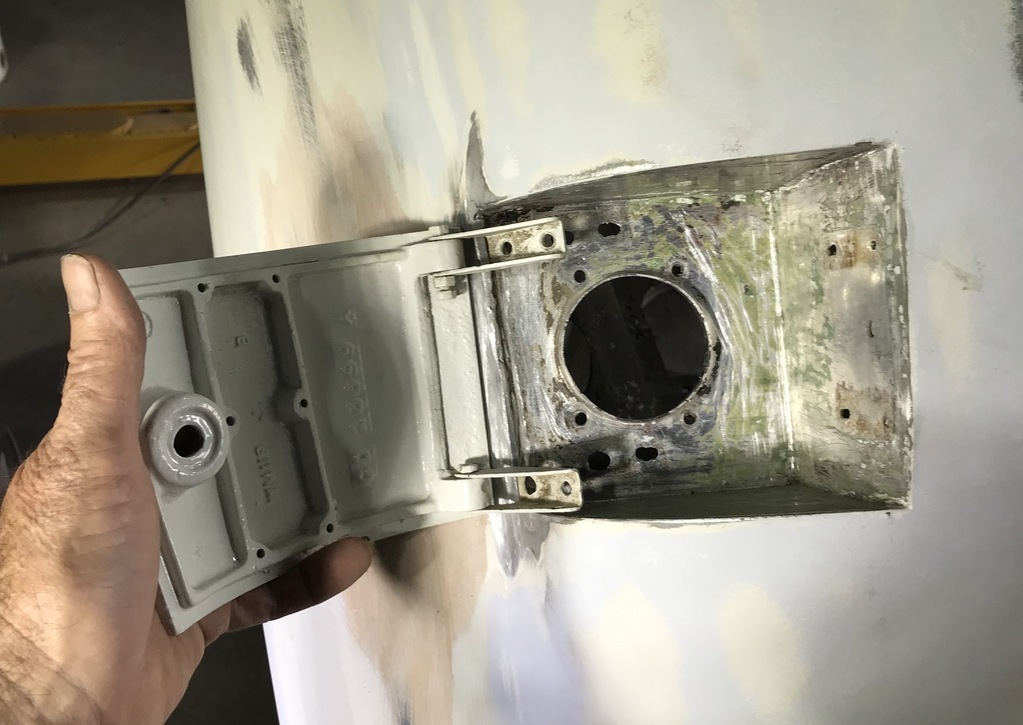 And did some plating, bits I’ve had sitting on the bench for ages. Some chassis, some body stuff. Three batches in this lot. 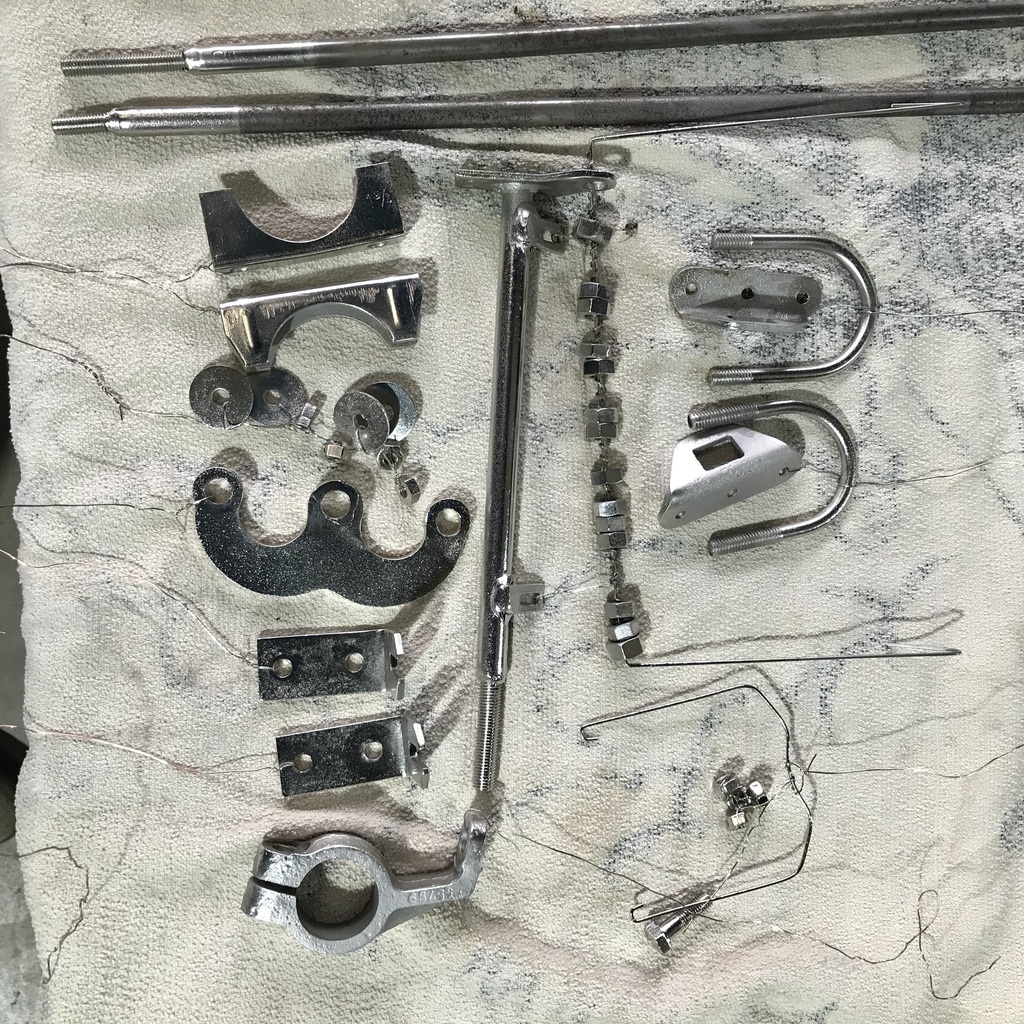 Thanks. |
| |
|
|
gazzam
Part of things
 
Posts: 741 
|
|
|
|
This is one of the receivers for the boot latches. 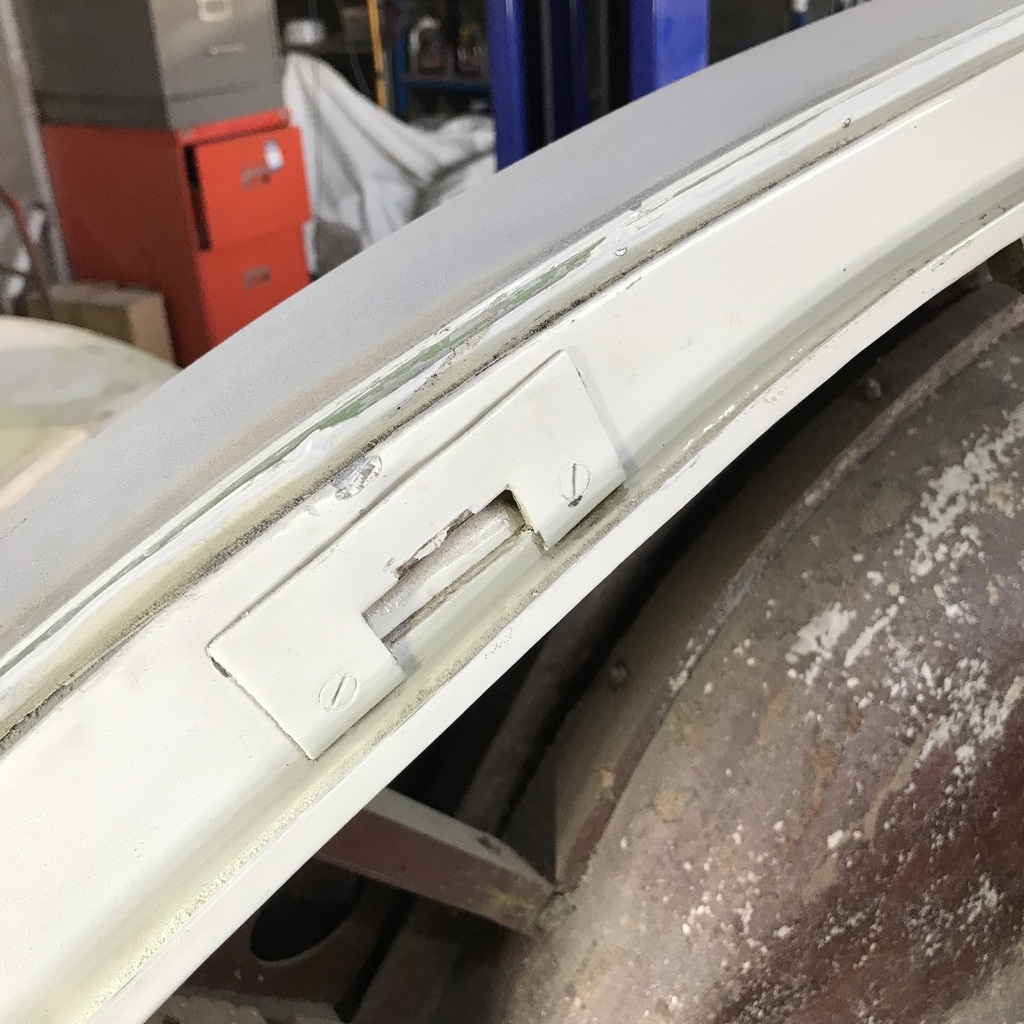 With the steel plate removed, damaged ally is cleaned up to be welded. 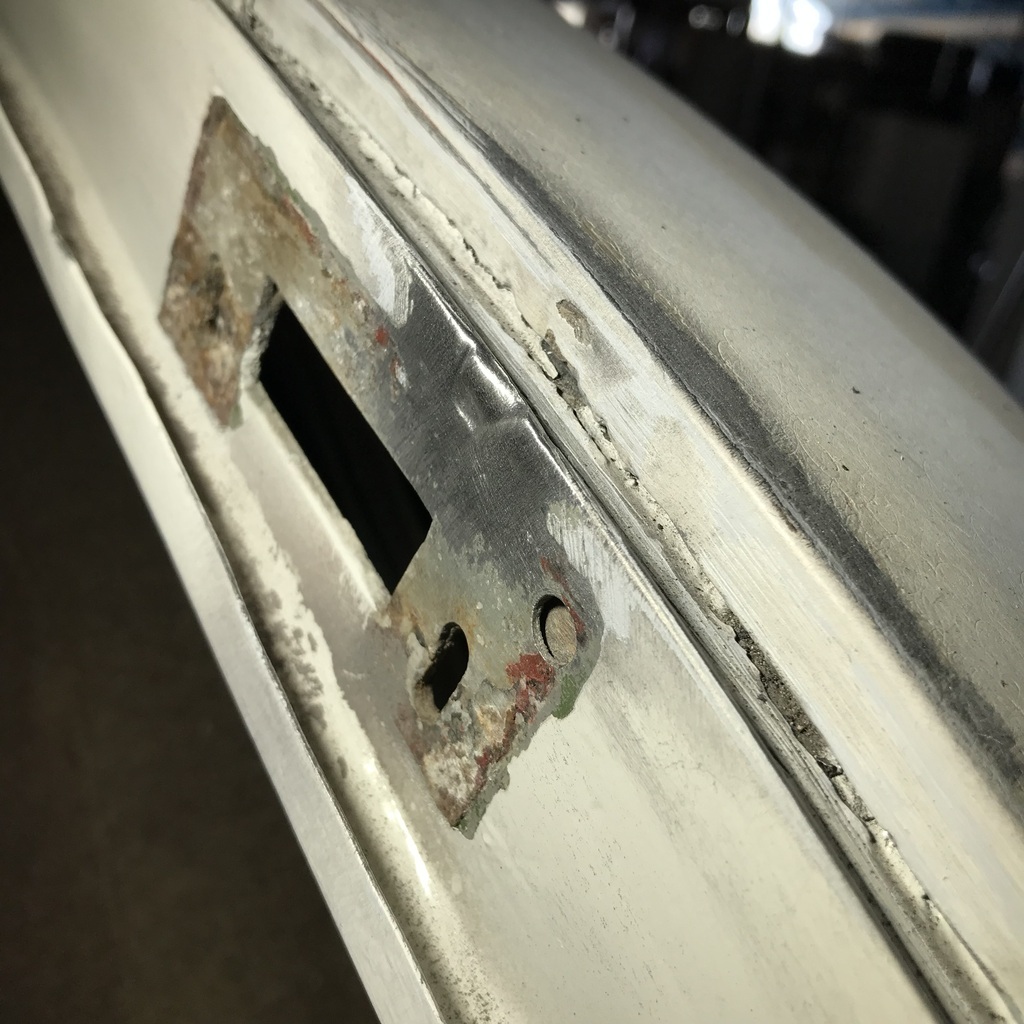 Ground back after welding. 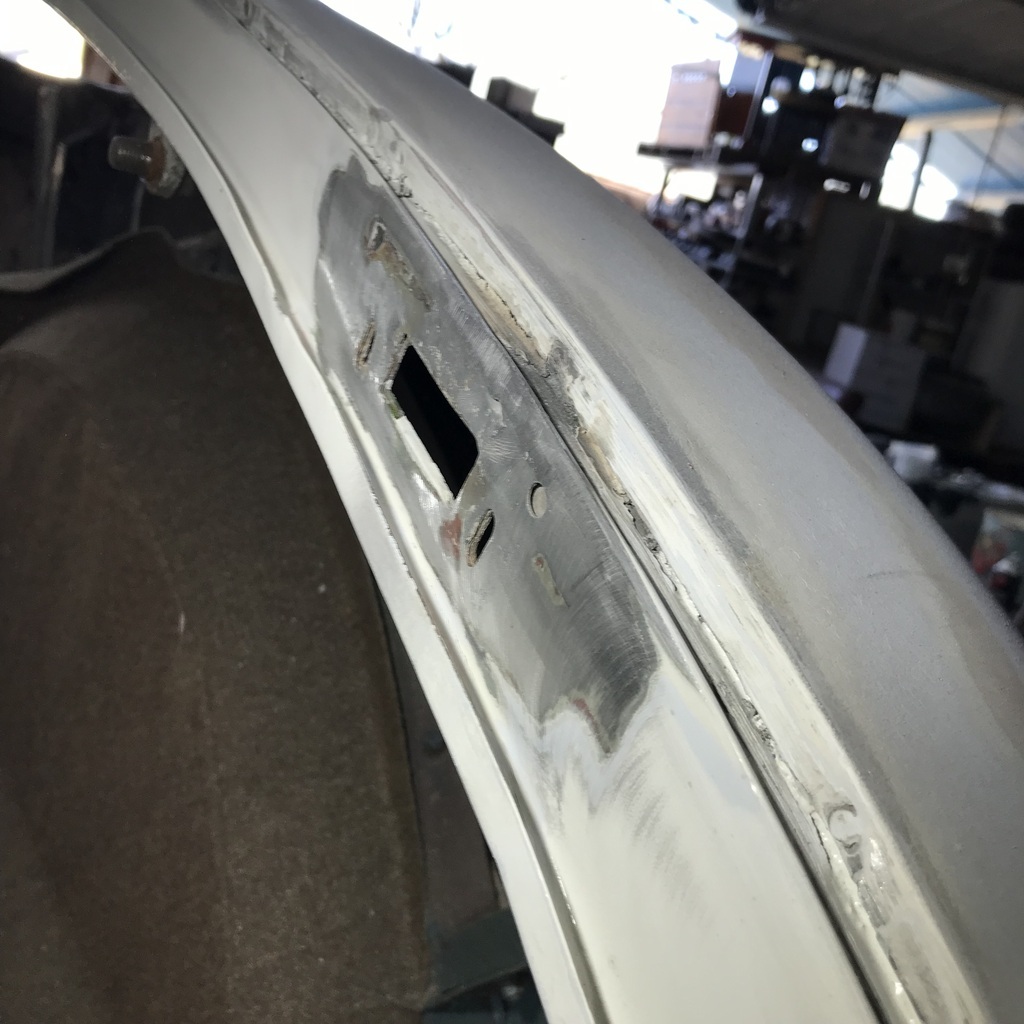 I thought the steel bits would look better plated rather than painted. Makes paint prep easier as well. Took them off and coated them with paint stripper. They’re a bit knocked around, so I decided to remake them in stainless, rather than plate them. Cut a piece of stainless and drilled some holes. 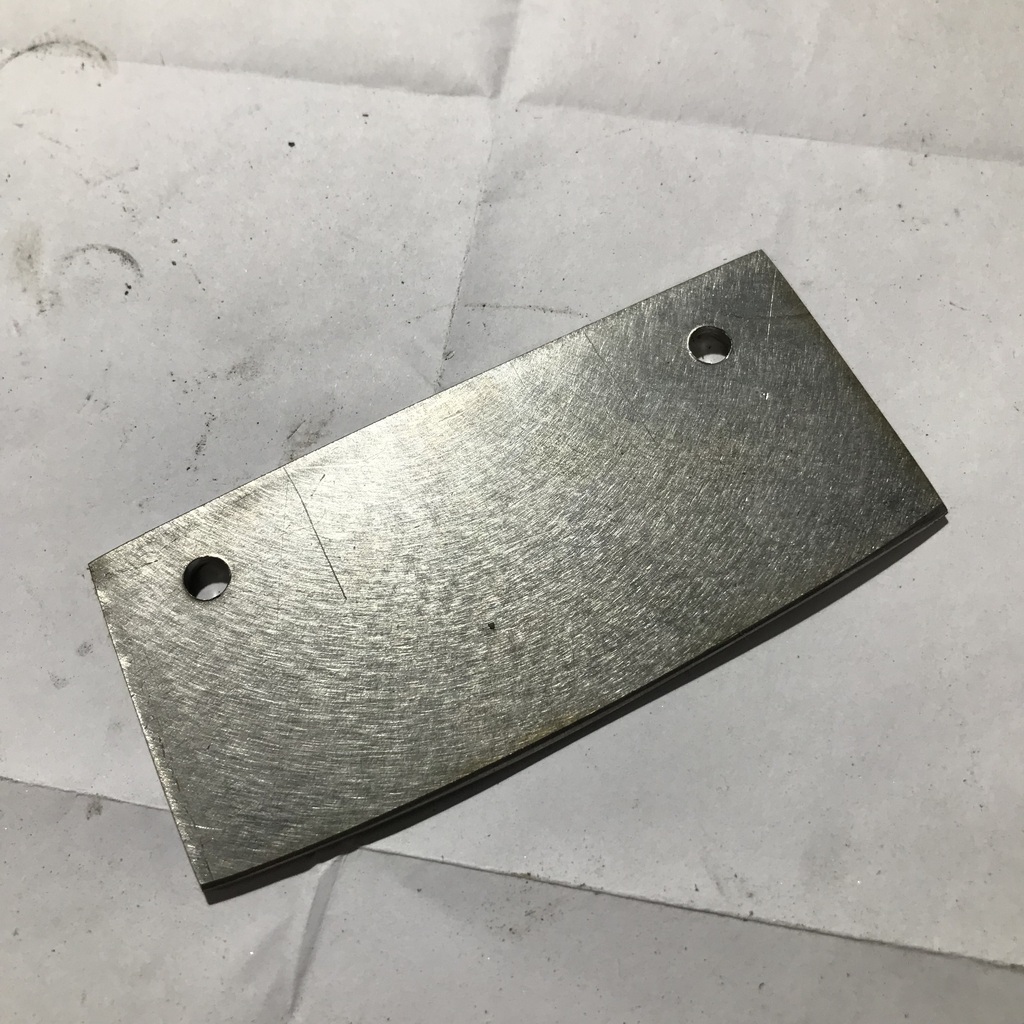 Cut 2 slots with the hacksaw and bent the tang. I made them about 5mm higher so they protect the ally a bit more. New and old. 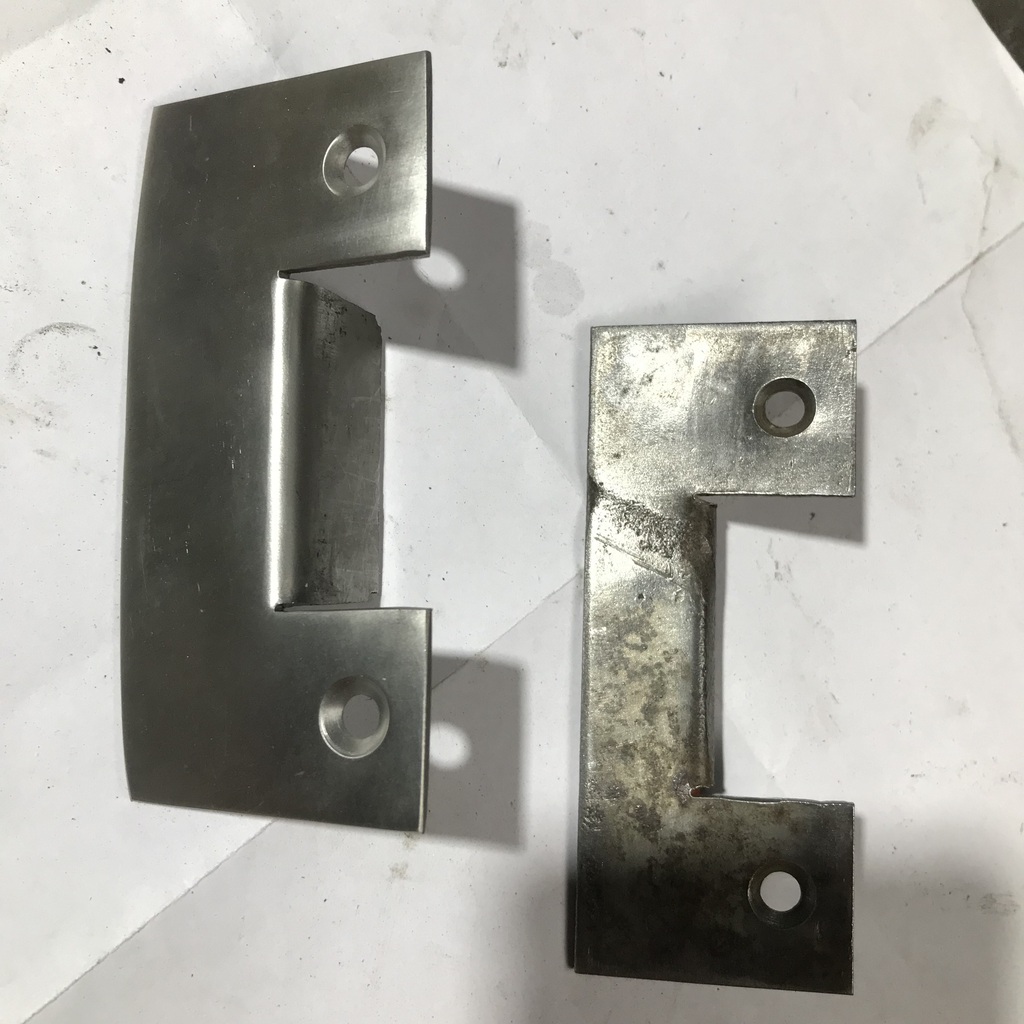 Waiting on sandpaper for the long sander. A bit weird that I can buy the sander locally but not the paper for it… So I’ve been preparing the boot and door jambs. Boot is done. Ready for epoxy. 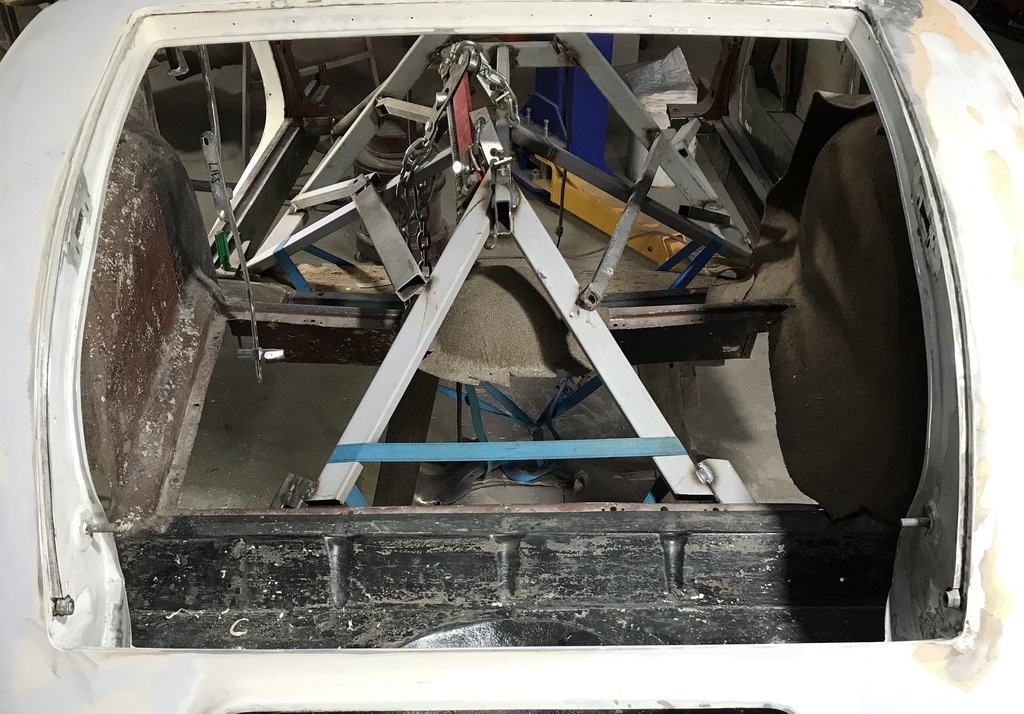 As is the passenger door, and fuel filler. 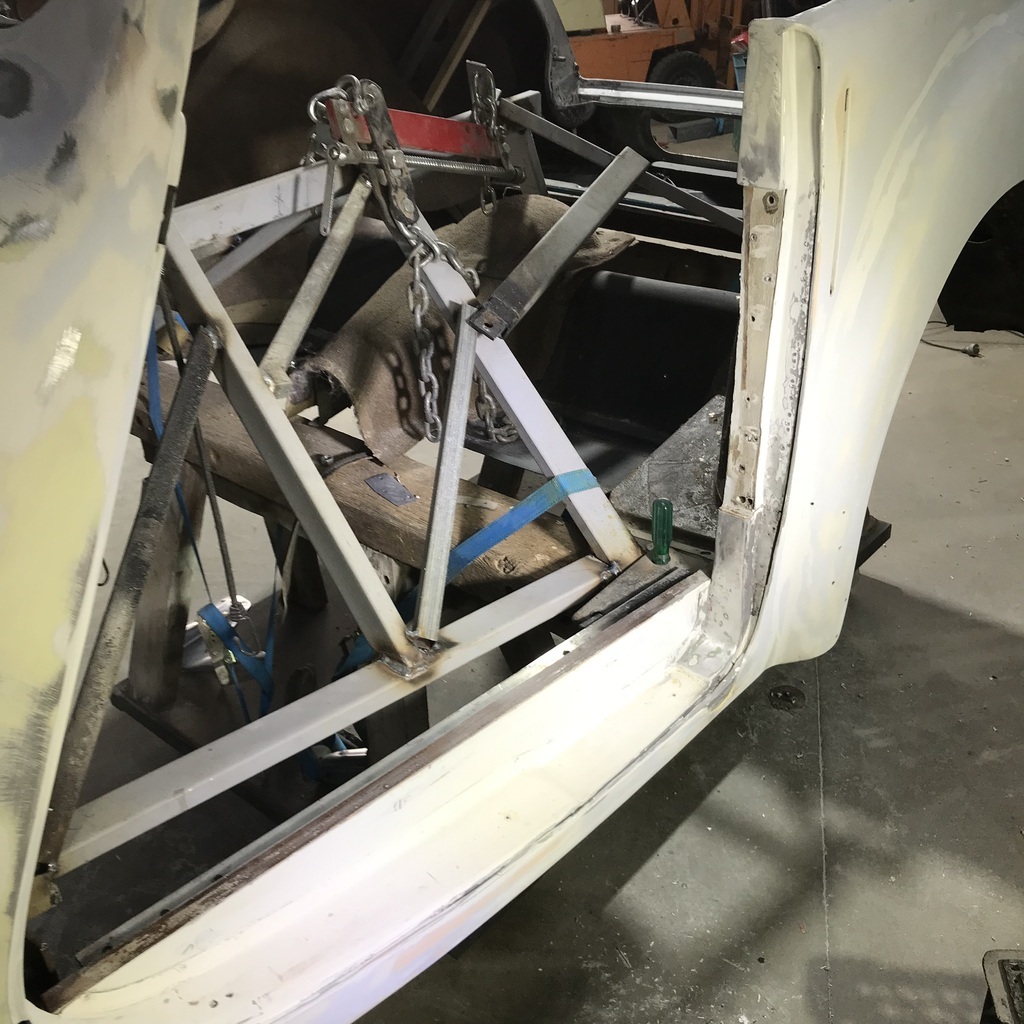 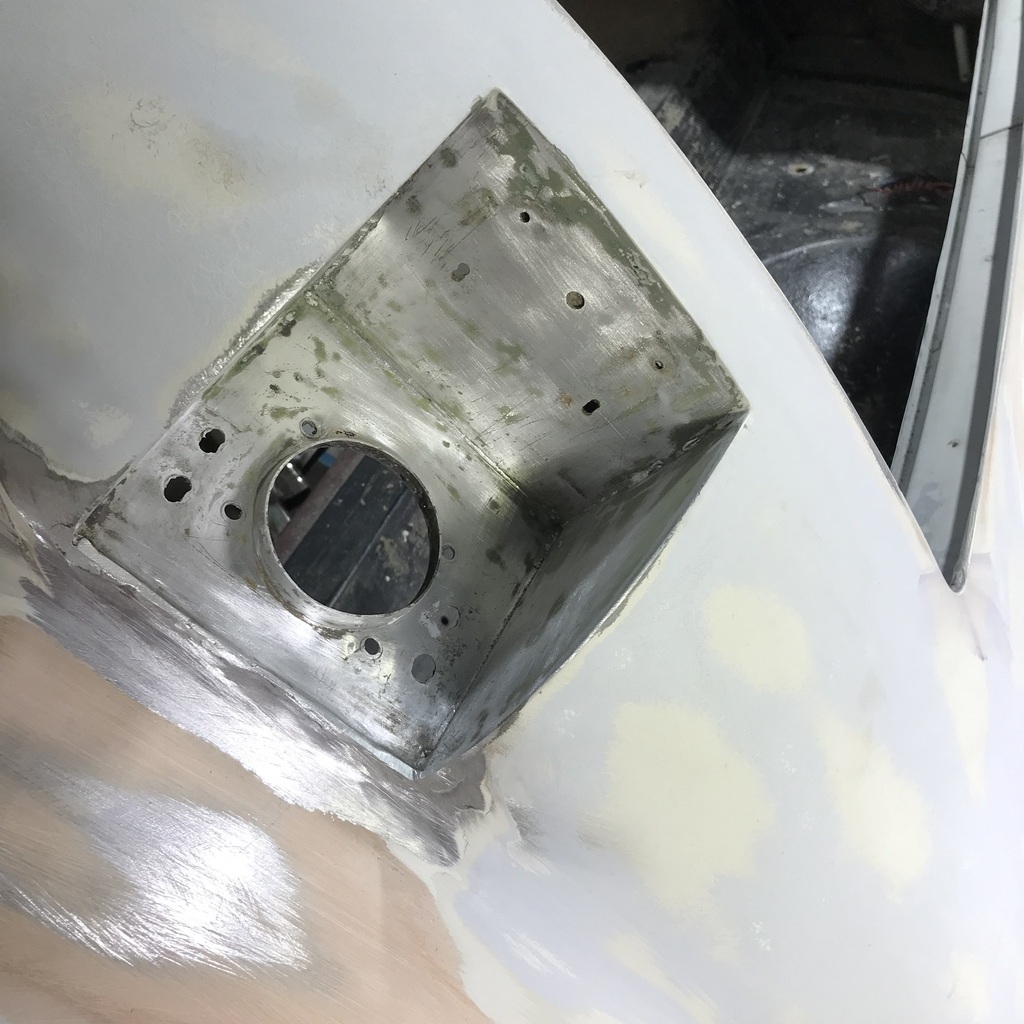 Thanks. |
| |
|
|
gazzam
Part of things
 
Posts: 741 
|
|
|
|
This is one of the boot latches in position. 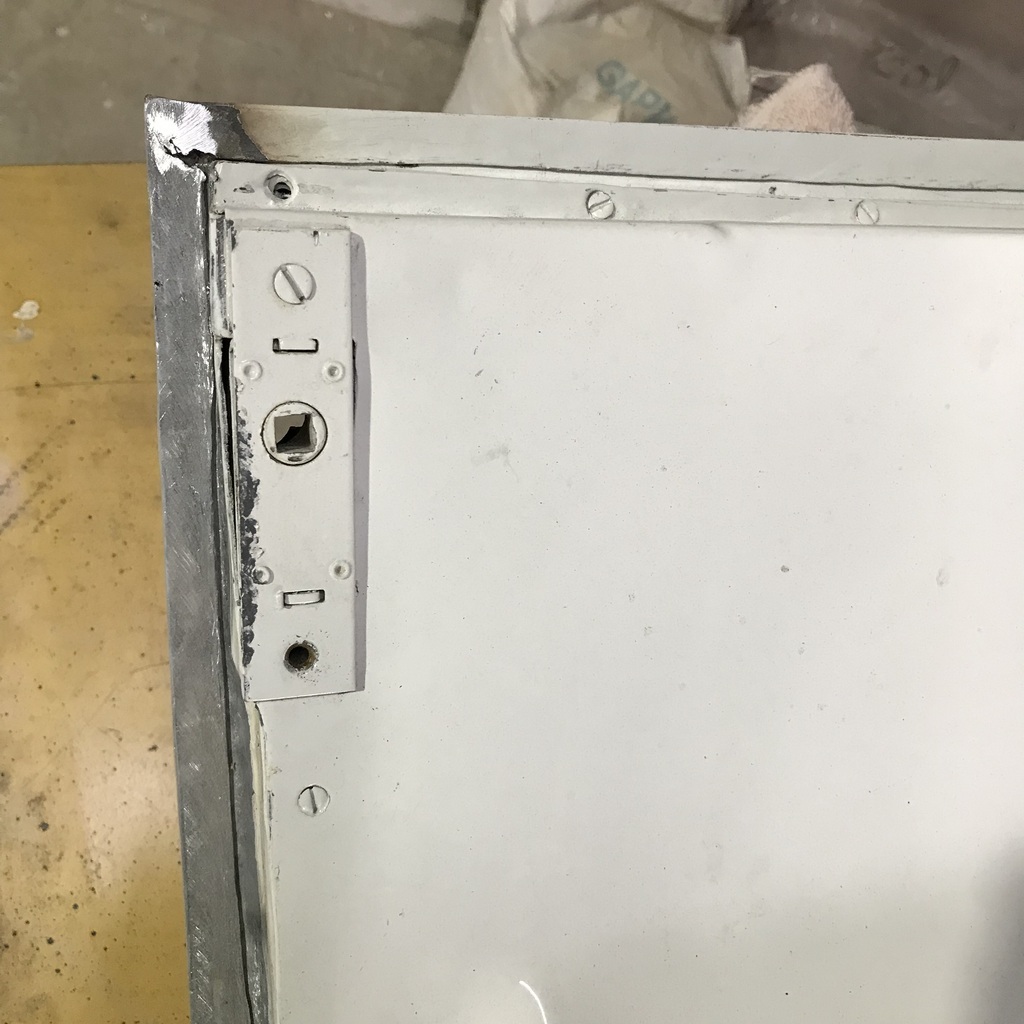 This is the pair. How does this come about? Another mystery. 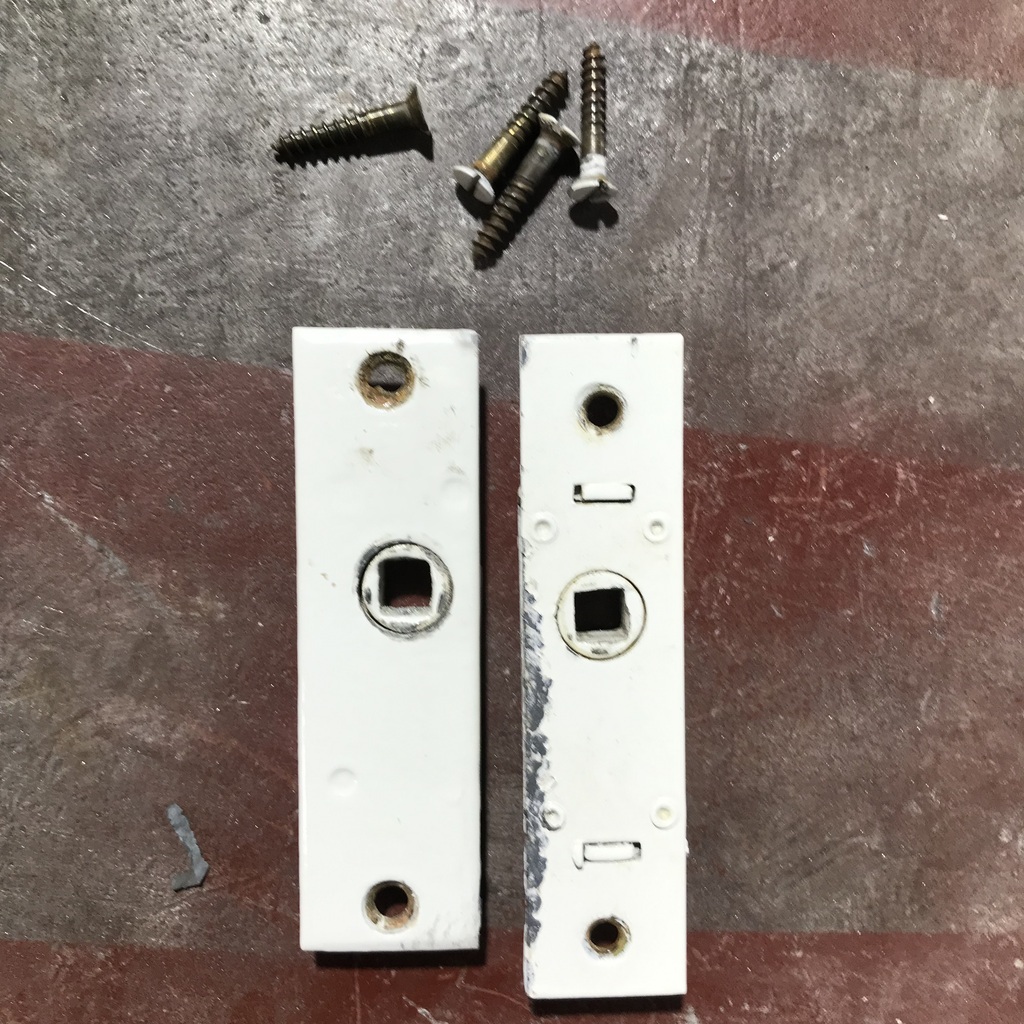 I remember the bloke who sold me the car saying that his restorer (?!) made one of the boot handles. Maybe he made a latch as well, and that was as close as he could get! I’ll get all the paint off and maybe there will be more clues. Planning on nickel plating them. Started getting the driver’s side door jamb ready for primer. First this crack on the sill needs sorting. 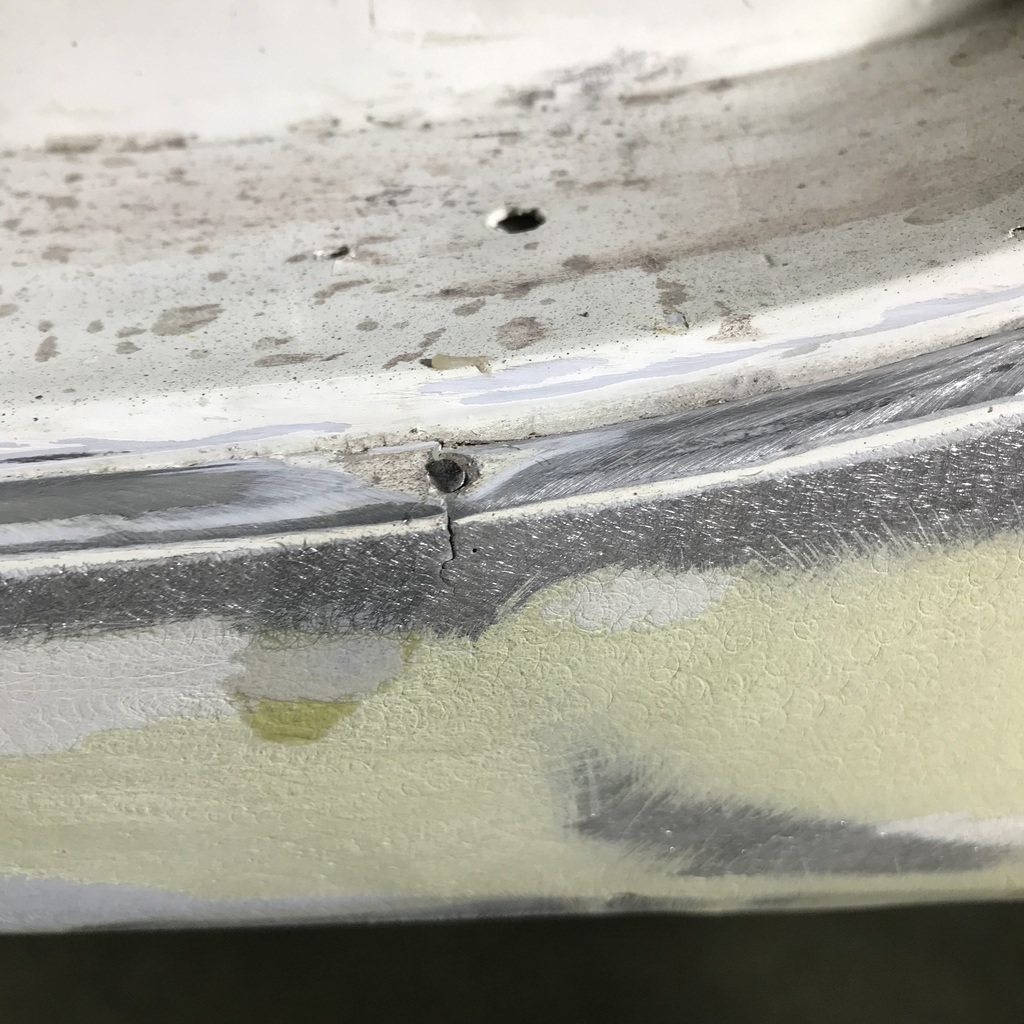 Nail removed, cleaned up as best I can and a piece of copper to try and get a decent edge. 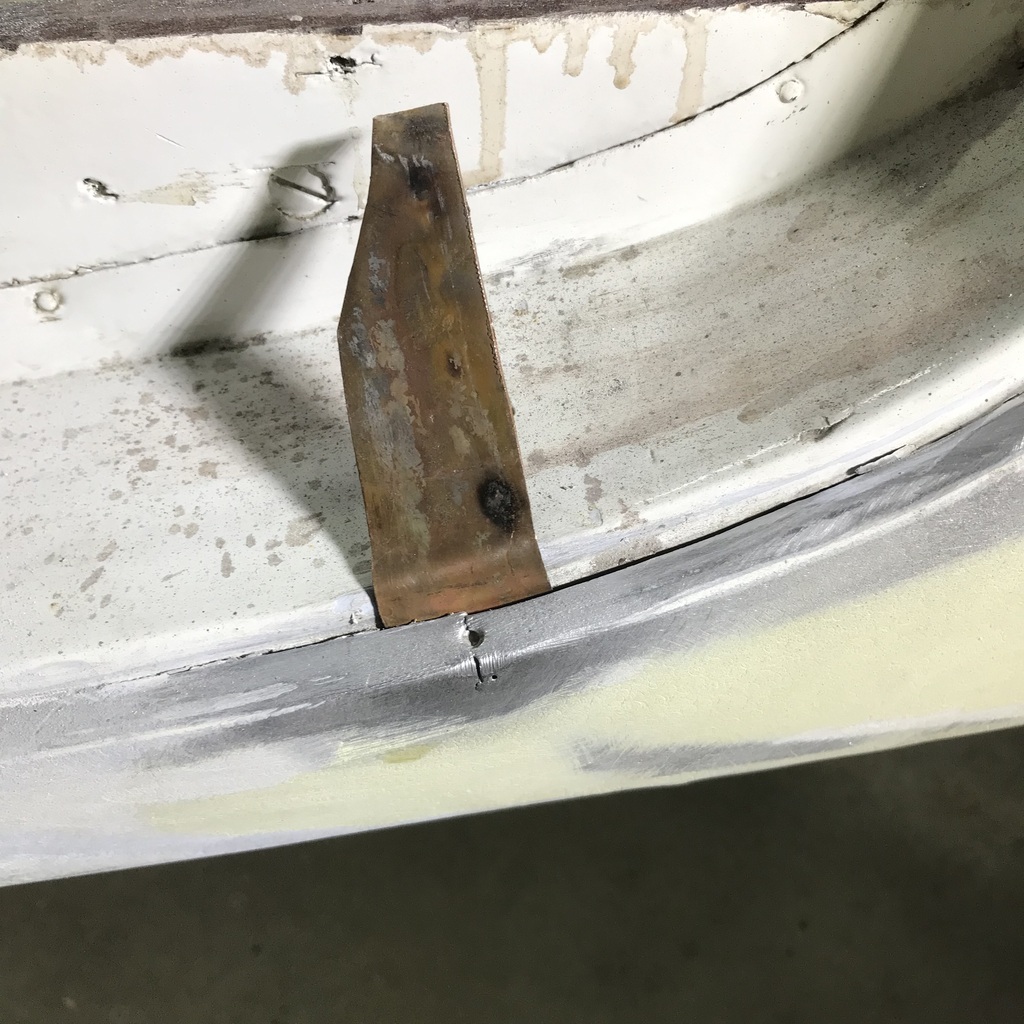 We have stickage! 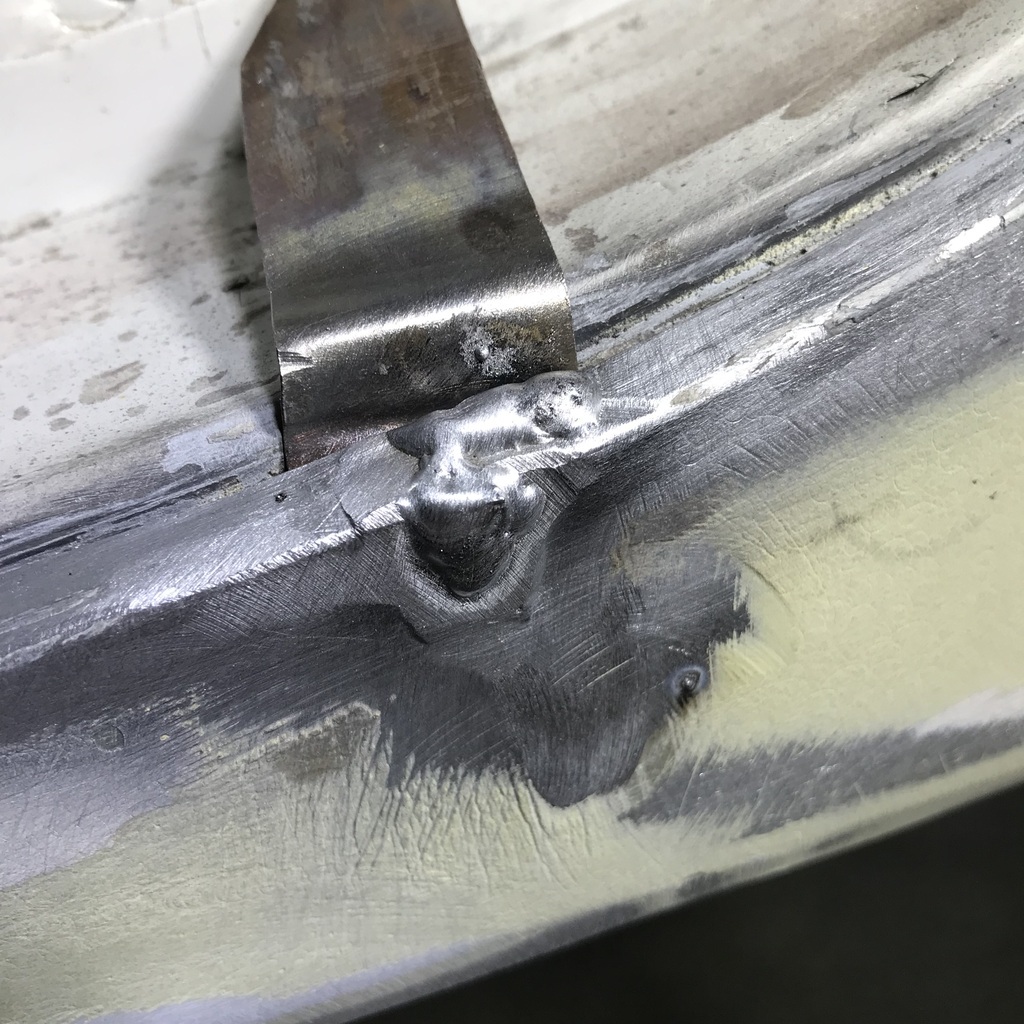 I think eventually the contamination burns away and it starts to weld ok. 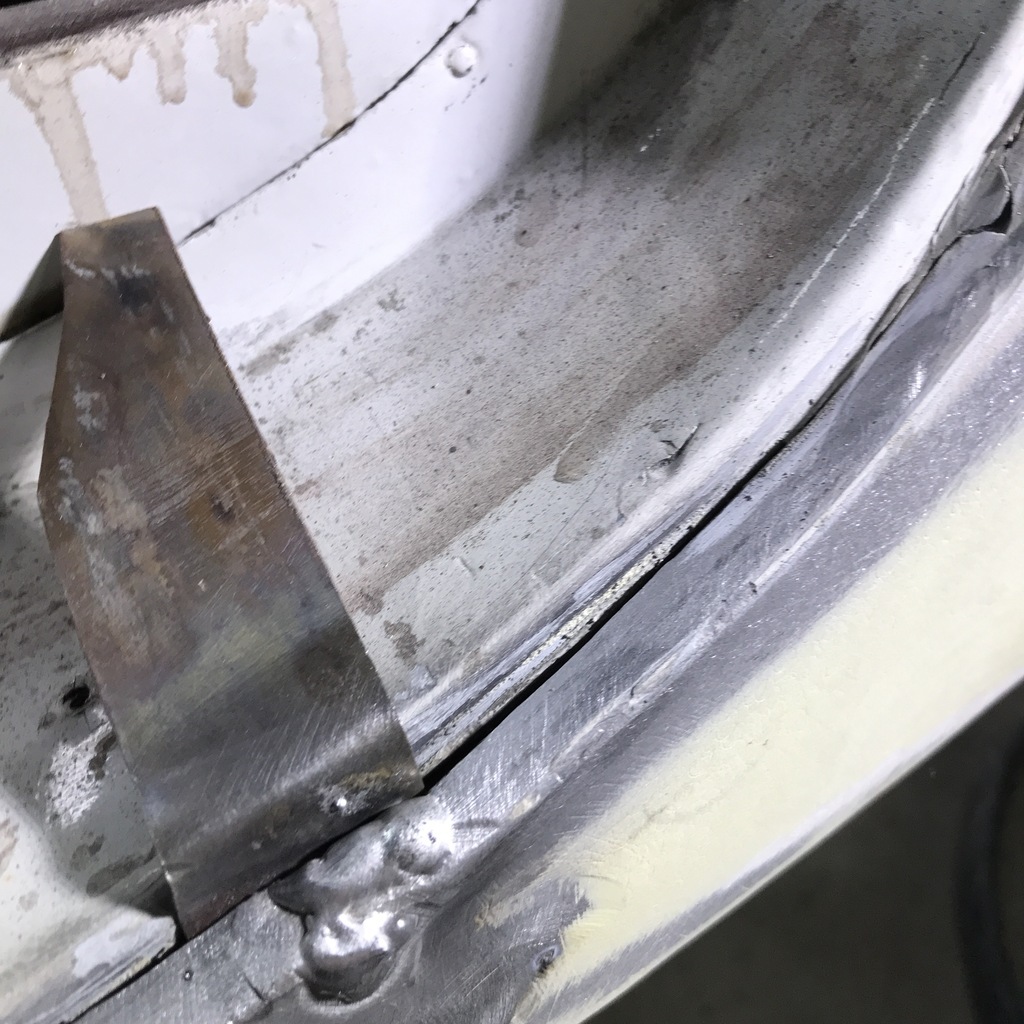 Ground back and ready for primer. 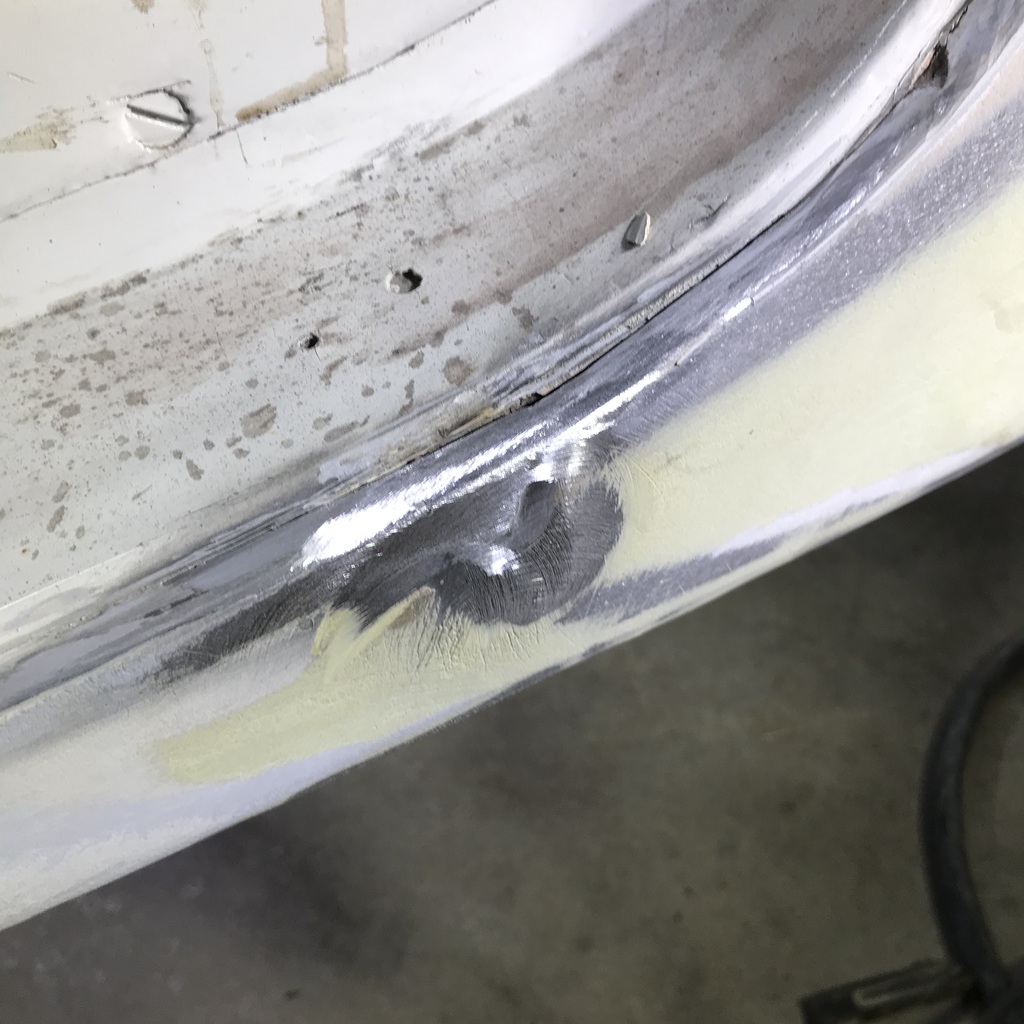 Was hoping the sandpaper would show up today and I could get stuck into reducing the filler thickness on the large areas of the rear guards. But Australia Post has it, so I might see it mid next week. Hopeless. I’ll have to find something else to play with for the weekend. |
| |
|
|
gazzam
Part of things
 
Posts: 741 
|
|
|
|
Finished sanding the drivers door jamb and the windscreen surround. Then injected wood preserver into any nail and screw holes that I’d missed previously. When that sets I'll inject some epoxy glue into them. Then I can be confident that any nail or screw that goes into there will actually hold. Also shaped a piece of oak to go here. 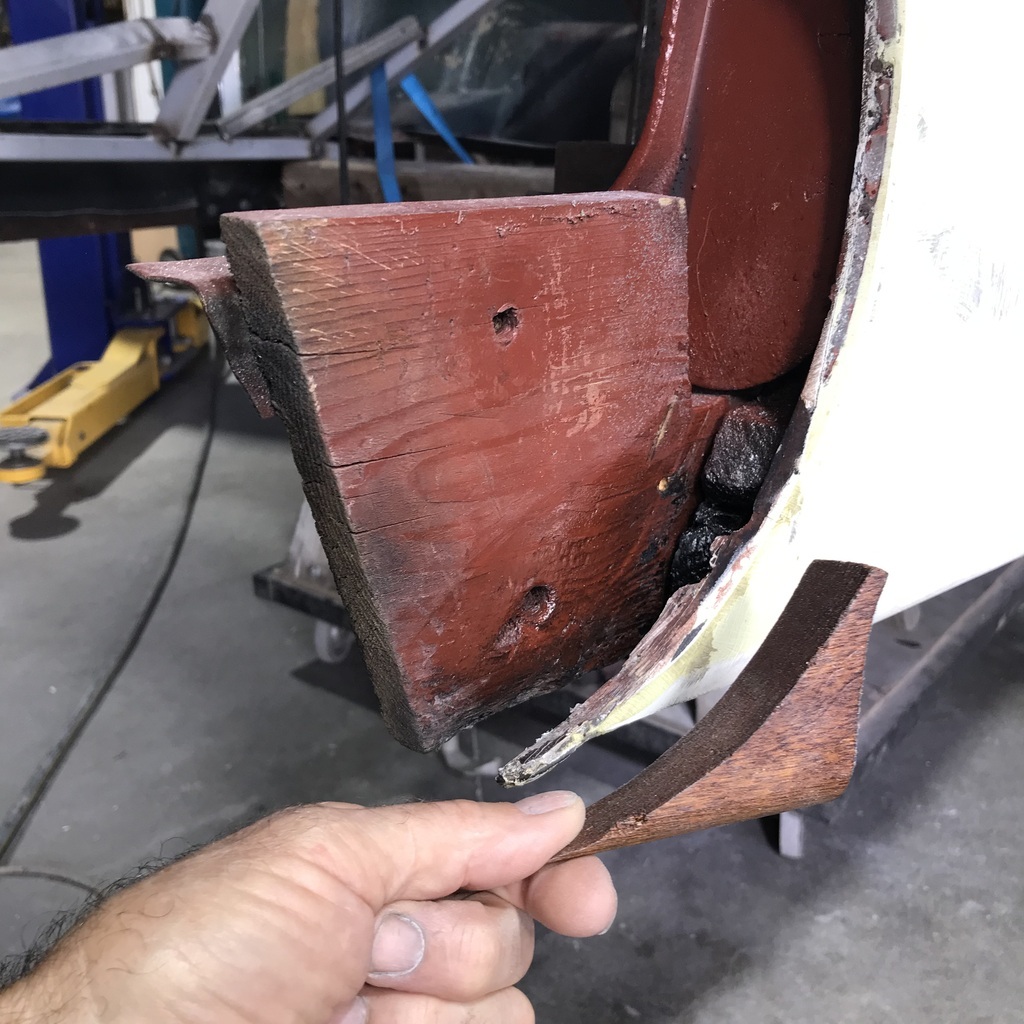 That’s the sill that I didn’t repair. The sill is ok but the piece to finish the front curve was mia. The replacement took a fair amount of adjustment to get it to fit. Glued in place. 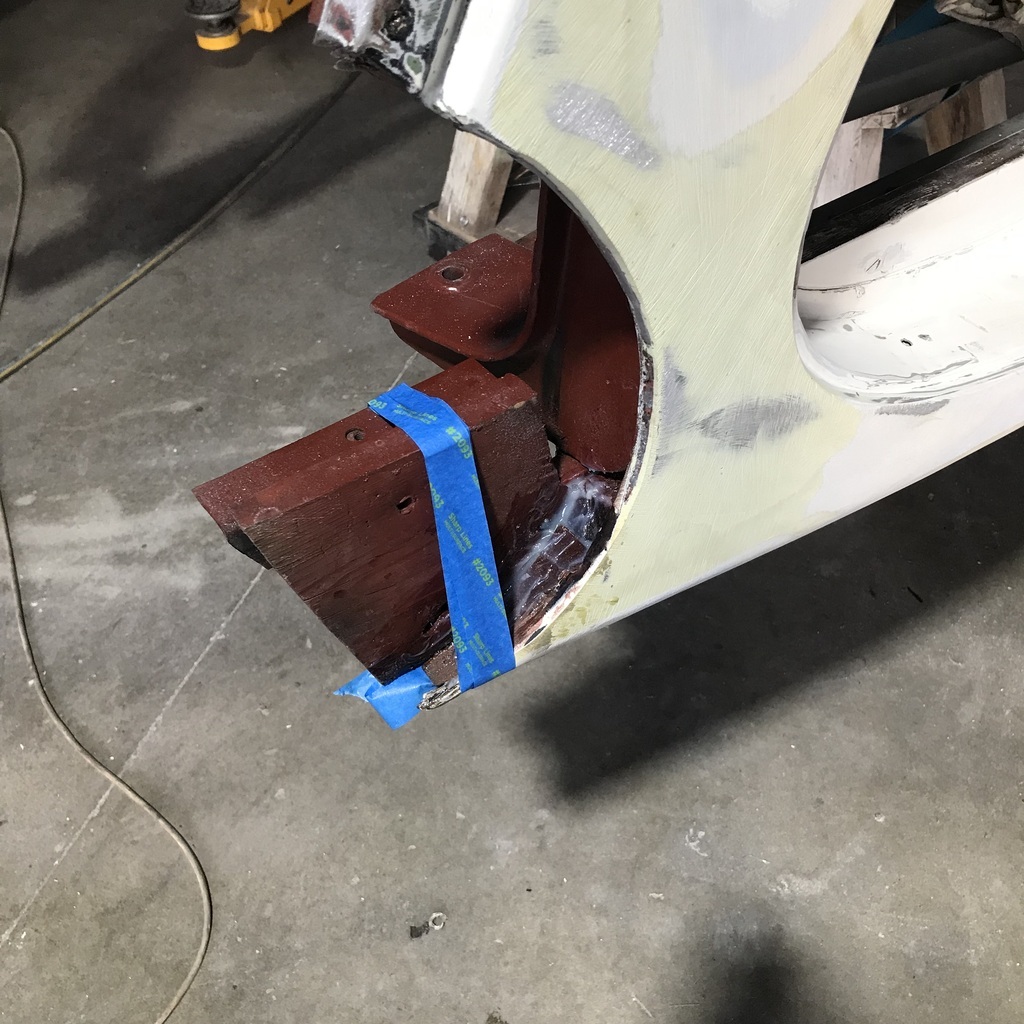 Thanks. |
| |
|
|
gazzam
Part of things
 
Posts: 741 
|
|
|
|
As I’m waiting on sandpaper and it’s 35C, it’s the perfect opportunity to bake any absorbed moisture out of the exposed filler. Lifted the body off the trolley and onto a little trailer, then towed it out to sit in the sun all day. 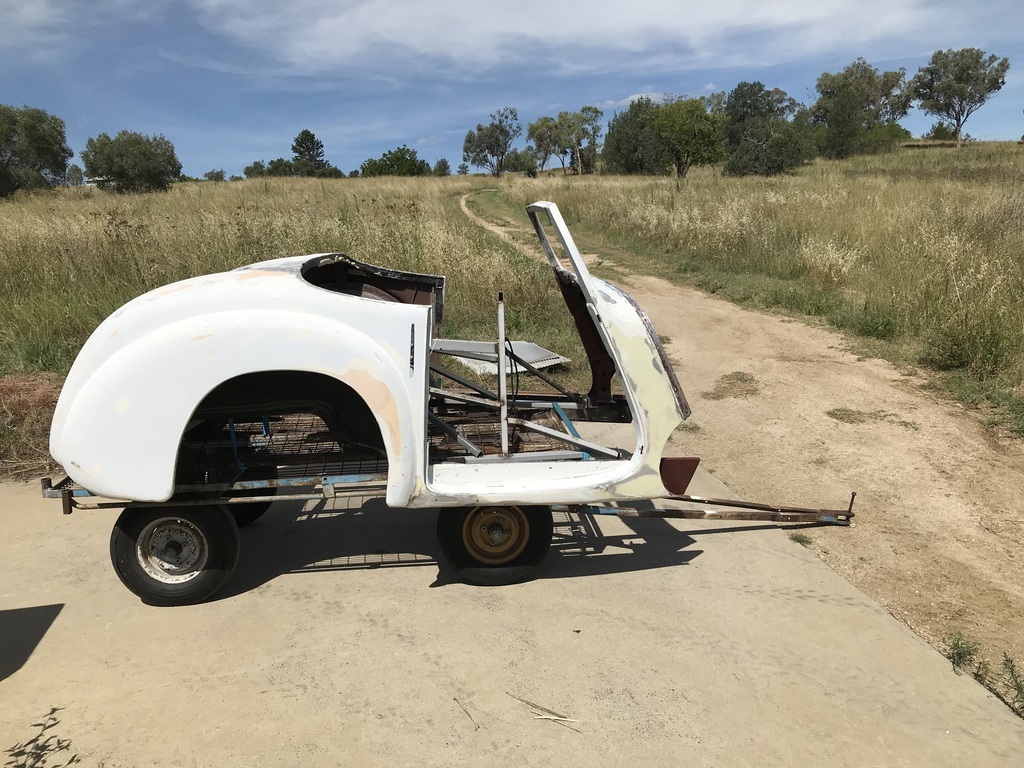 And did some sandblasting. These inner panels, that I repaired some time back have been sitting in the workshop ever since, getting in the way. I was trying to come up with some sort of container so I could soak them in molasses. But nothing popped up, so I bit the bullet and hooked up the 4 compressors. Just about ready for epoxy. Don’t know whether these will be body colour or black as they were. I’m leaning towards body colour as I don’t like engine bays that look like a black hole. 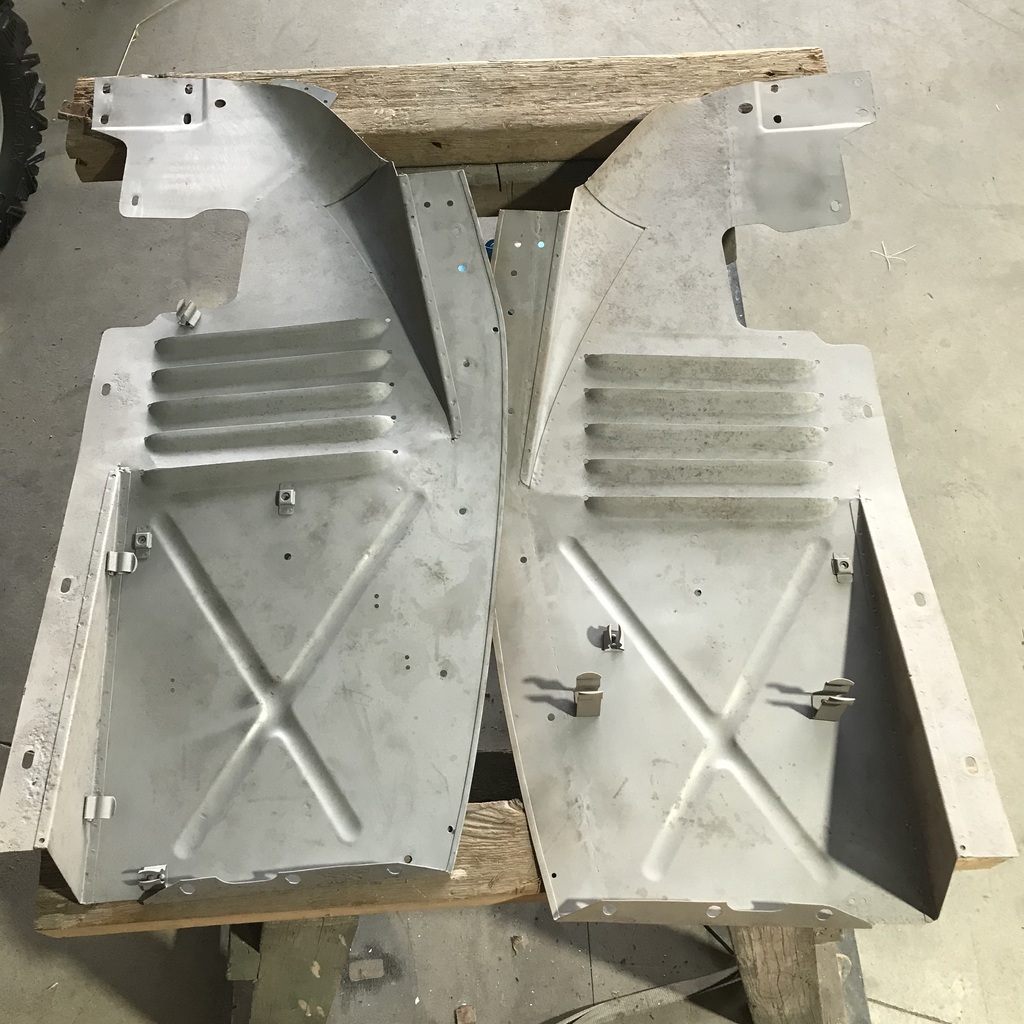 Also did a bit of plating. More shiny stuff. 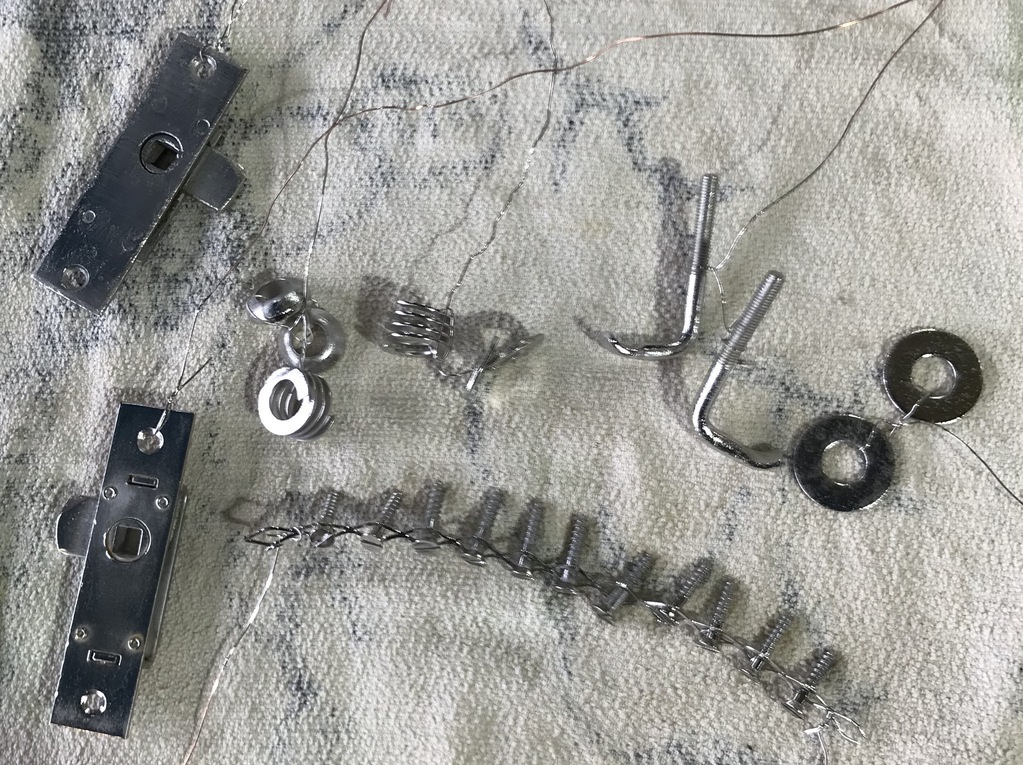 This is just a start on the zillions of woodscrews that need to be done. Thanks. |
| |
|
|
gazzam
Part of things
 
Posts: 741 
|
|
|
|
Drilled a 1.5mm hole in each of the old nail holes that I'd injected epoxy into. Then hammered in the modified head nails that I mentioned in a previous post. All around the firewall box retaining flange. 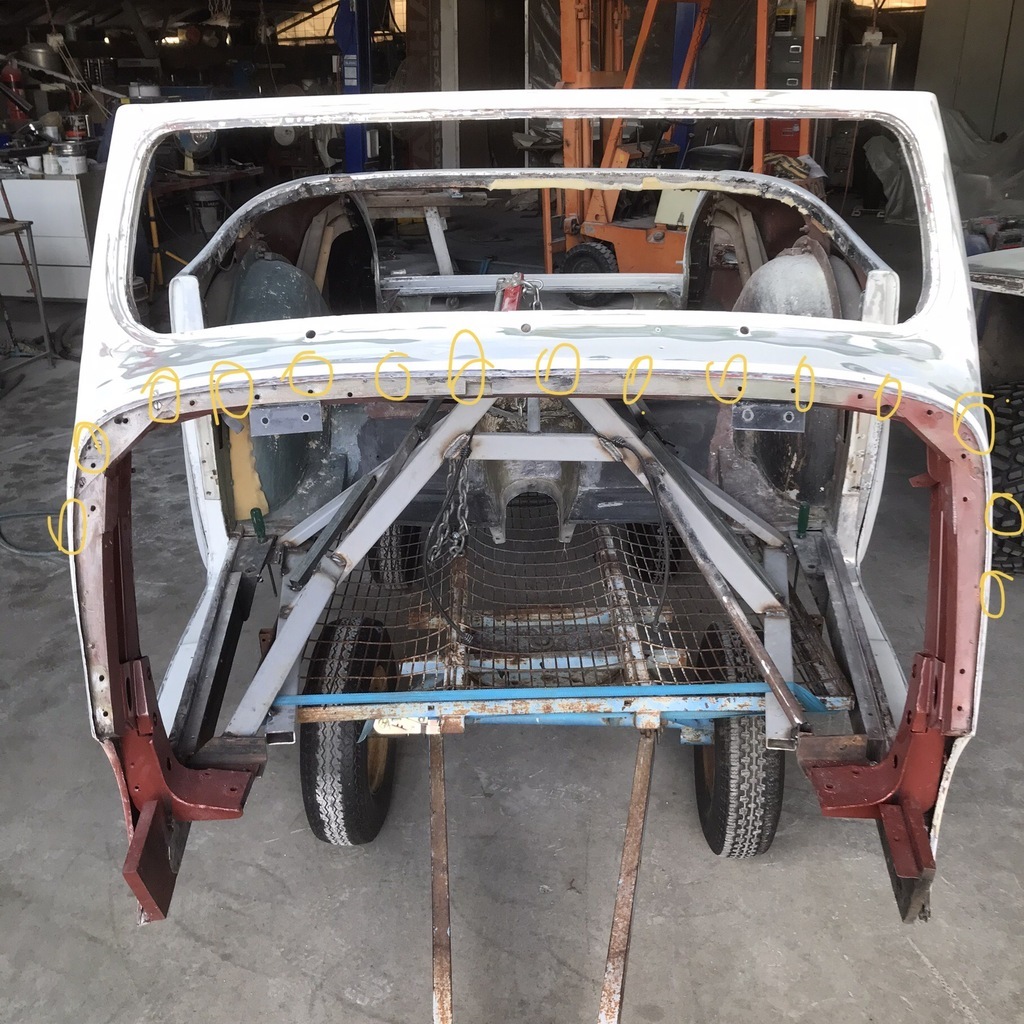 They went in with very satisfying firmness. Just like new wood! Then sanding, sanding and more sanding. The new sander isn’t all beer and skittles. It’s quite a task. Not as hard as the fully manual version though. Made even less fun when my hand slipped and a finger got whacked between the end of the sander and the the nut on the moving sanding plate. Ouch. I reckon I’ll lose this nail. These cars are out to get my digits. 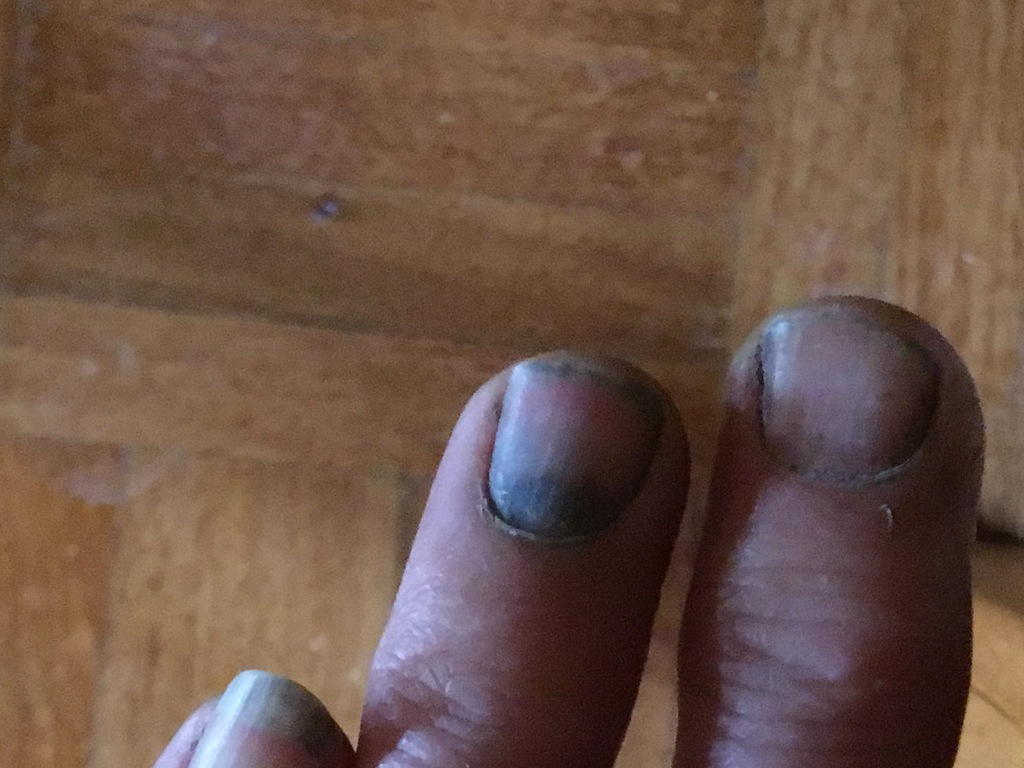 It’s throbbing like a barsteward even now, hours later. Anyway, the body is almost ready for epoxy primer. A couple of hours in the morning should see it right. 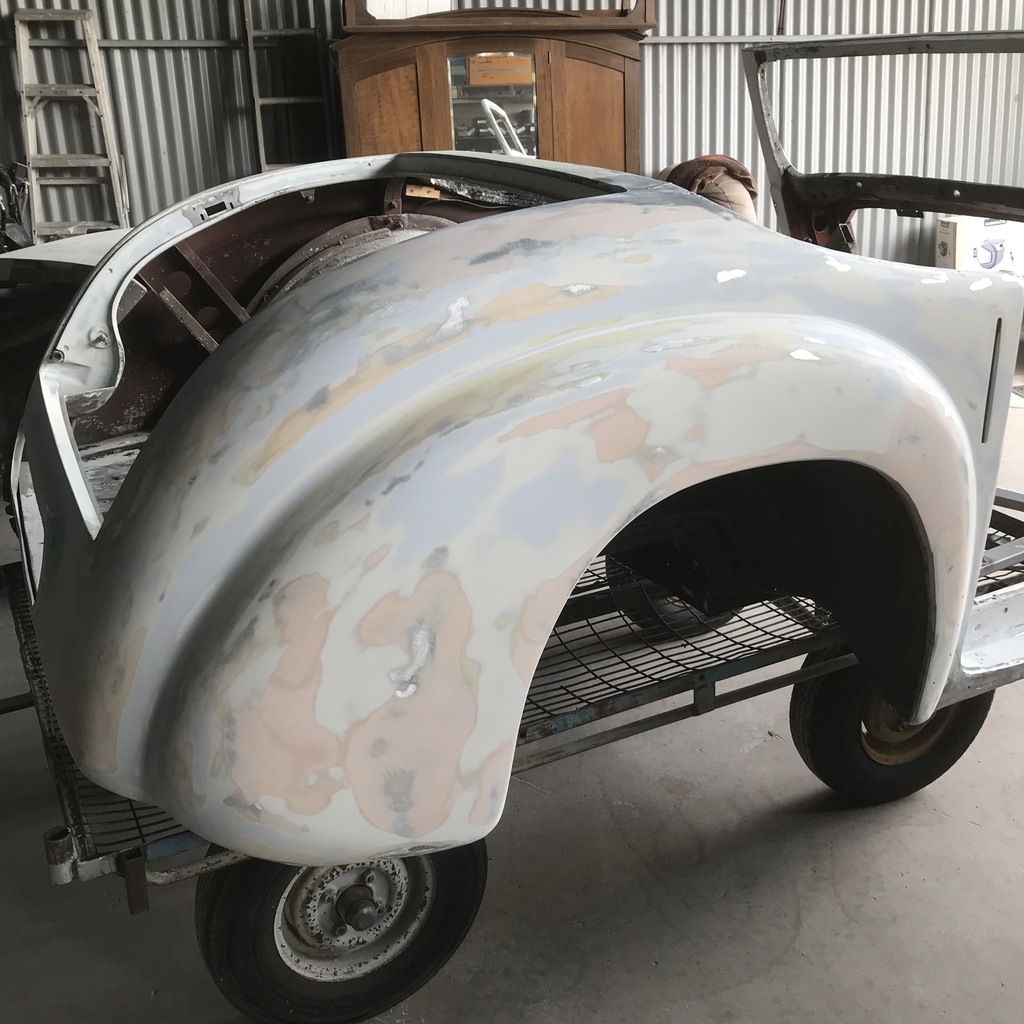 Thanks. |
| |
|
|
glenanderson
Club Retro Rides Member
Posts: 4,354
Club RR Member Number: 64
|
|
Jan 15, 2024 18:11:14 GMT
|
|
Use a 0.5mm drill bit in a pin vice to carefully pierce that nail above the burst. The relief will be instant. Then seal it with some clear nail varnish. You’ll probably still lose the nail, but again, use nail varnish to keep it together as it grows out.
Still jealous of your environment, albeit not of the stingy bitey critters you have to share it with. 🤣
|
| |
My worst worry about dying is my wife selling my stuff for what I told her it cost...
|
|
jamesd1972
Club Retro Rides Member
Posts: 2,921  Club RR Member Number: 40
|
|
Jan 15, 2024 19:55:47 GMT
|
Use a 0.5mm drill bit in a pin vice to carefully pierce that nail above the burst. The relief will be instant. Then seal it with some clear nail varnish. You’ll probably still lose the nail, but again, use nail varnish to keep it together as it grows out. Still jealous of your environment, albeit not of the stingy bitey critters you have to share it with. 🤣 Red hot needle does the same job with smoke ! James |
| |
|
|
|
|
gazzam
Part of things
 
Posts: 741 
|
|
|
|
Finger wasn’t really bothering me this morning, but I took your advice Glen, and drilled a hole in it. I used a 1mm for better flow, and boy did it flow. I disregarded your suggestion James, as I don’t like the smell of burning me. Didn’t get much done today. I have the body pretty much ready for a coat of epoxy to seal all the various layers. And I had it sitting in the sun at 35C on Sunday and yesterday was mostly dry. There were about a dozen spots of rain in the pm but mostly sunny. I found a humidity meter today and put some batteries in it. Today felt more humid than yesterday, the meter showed 50% @ 30C. Fairly cloudy but only a few spots of rain. Am I being silly worrying that the exposed filler will be absorbing moisture to come back and haunt me when the topcoats are done? Or should I wait till the predicted dry 35C day coming up ( tomorrow and Thurs are supposed to be wet ) and give it another day in the sun and then whack a coat of epoxy on? Or wait another couple of days till the predicted 39C? Another thing for me to over think is the actual epoxy. I have over 2 litres in stock, but it’s a year past its use by date. So I got some more from my paint supplier ( he’s mobile and was coming past this afternoon) and the hardener is out of date in a week! Apparently Aussie body shops don’t use epoxy primer, and it doesn’t move very quickly. Don’t start me on the standard of work by the 'pros'. All they seem to know is 'cave it and pave it'. I have to go to town in the morning, so I’ll go to a different paint supplier and see what they have. Why is it all so hard? Why would blOody paint have a use by date anyway? Rather than worry about paint I got the boot hinges ready to plate. They were powder coated before ( I hate that sh*t, it’s only for pool fences and not very good at that) and had of course rusted under it. But they cleaned up, with a lot of sanding, to a point that I think will be ok. 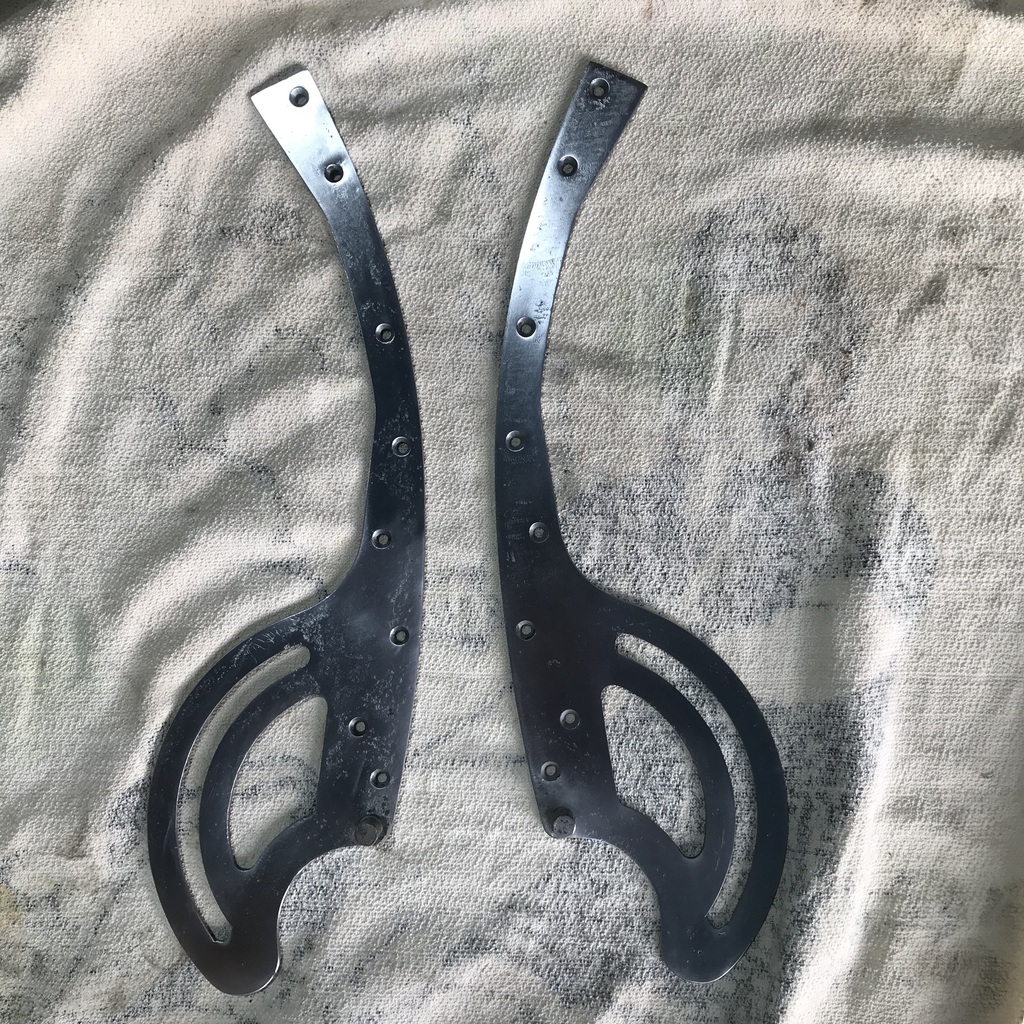 I have to work out a tub that’s big enough to hold them, but I’m sure that’s doable. And then I set about getting the body onto the rotisserie. This is end of play today. 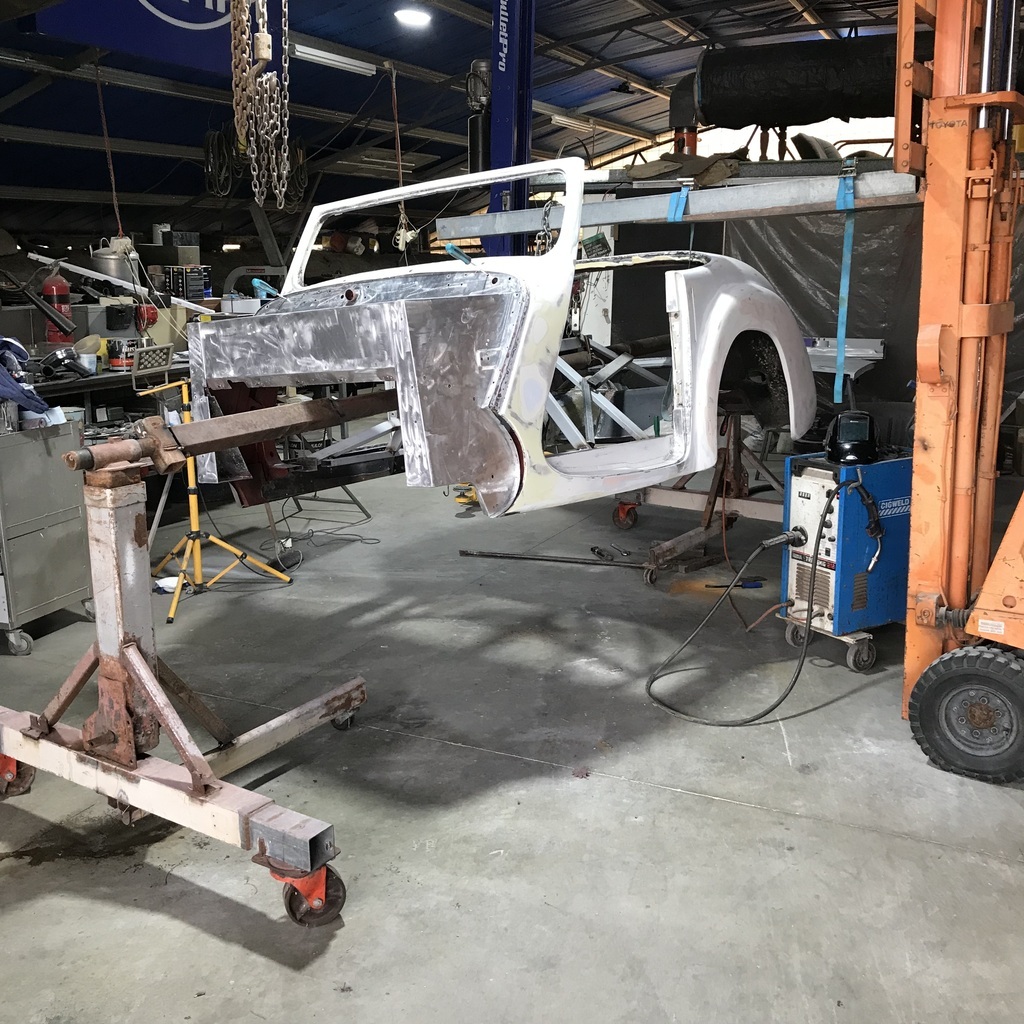 Thanks. |
| |
|
|
|
|
|
|
|
|
I've used out of date epoxy, gave it a good stir first and it worked fine.
I think you'll be alright, We are lucky to find a couple of dry days at 25 deg c to dry it out over here, I tend to have to rely on heat lamps.
|
| |
|
|
gazzam
Part of things
 
Posts: 741 
|
|
|
|
Spent most of the morning waiting at the eye doctor. I really hate how the medical profession has such contempt for the concept of appointments and their customers. Can they really not work to a schedule? Why must I spend an hour waiting at 9.30? Can they be that far behind by that time of the morning? I think a lot of it is just to reinforce their position in the scheme of things. “I’m so important I can keep you waiting and there’s not a damn thing you can do about it.” So it was nearly lunch time when I got to the Triumph. I had to add a bit of strength here and there on the rotisserie, it was really only tacked yesterday. And I had to bolt the body to the frame, it was only sitting on it previously, with old screwdrivers through the holes to locate it. Did that and was able to turn it this way, the first time ( I imagine ) it’s faced that way relatively since ii was in it’s country of manufacture. 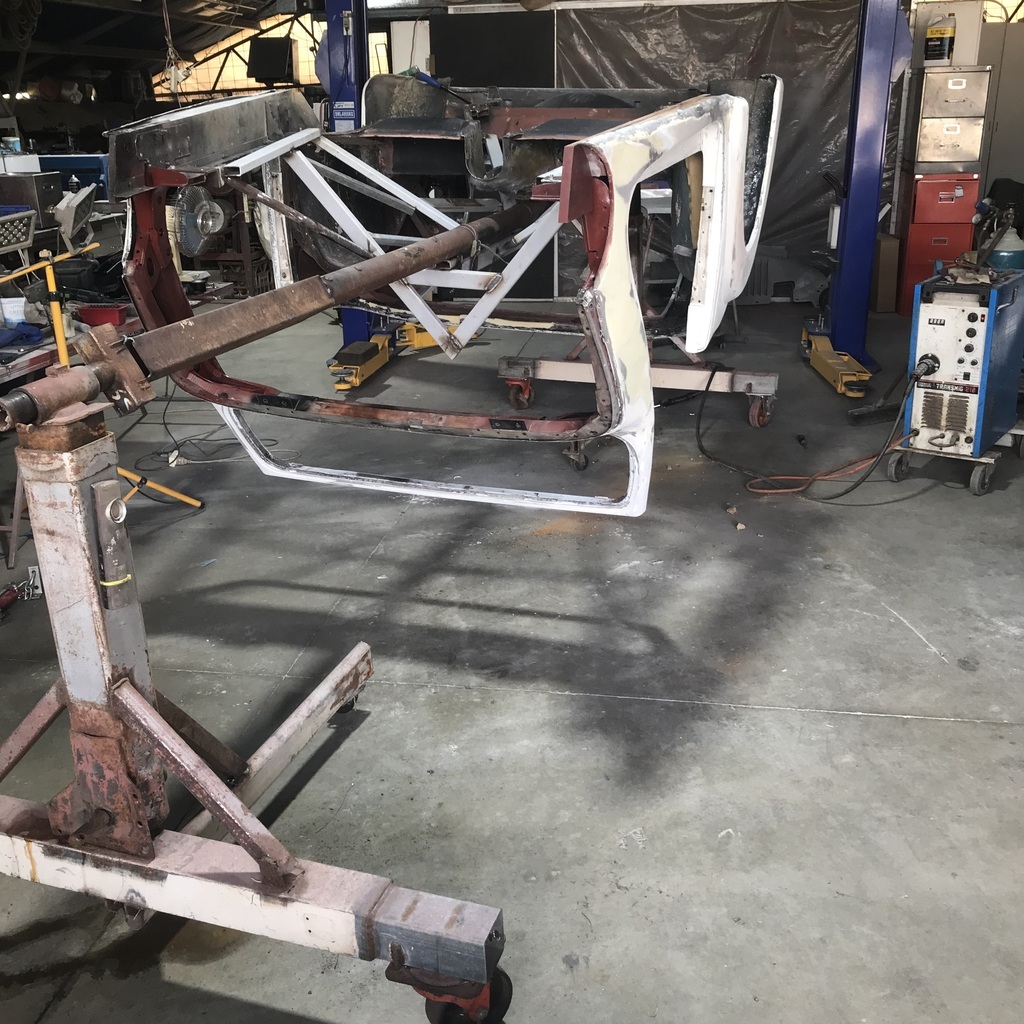 So I’ve decided to wait on some hardener that has a realistic use by date. We have some really hot dry days coming up, so I’ll wait til then, give it another baking and then epoxy it. There’s been too much work go into it to risk using out-of-date paint. I’m planning on using the out-of-date stuff on the doors, boot lid and inner guards. Possibly the front guards as well. Bits that I could redo reasonably easily if the epoxy failed. I bet it’ll be ok but I’m just not going to chance it on the body. Too hard to fix if it goes wrong. Started getting a bit of the underside stuff sorted. This, on the driver’s side rear guard. 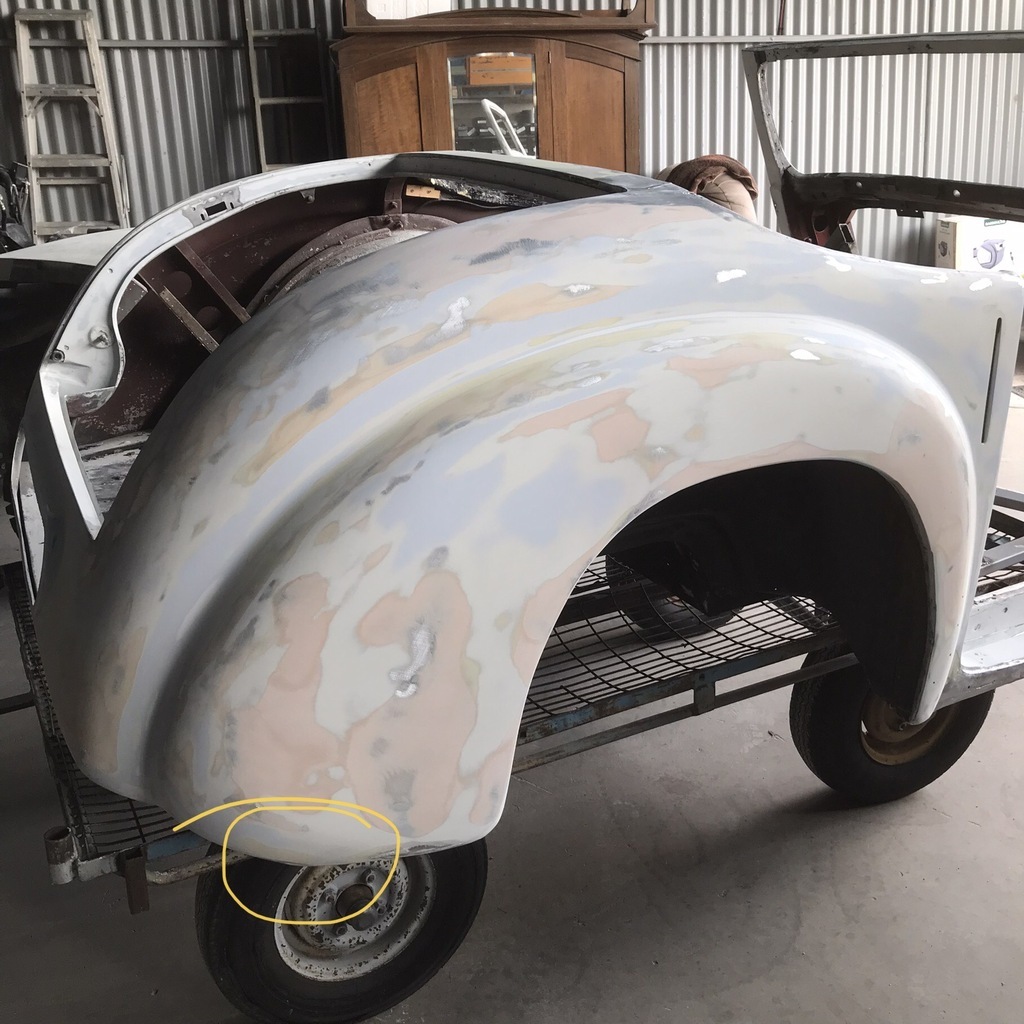 Doesn’t show much in that shot, but a nasty bulge that needed sorting. Very difficult to get at when right way up. When it’s upside down, it’s a lot easier. Starting to beat it into submission. 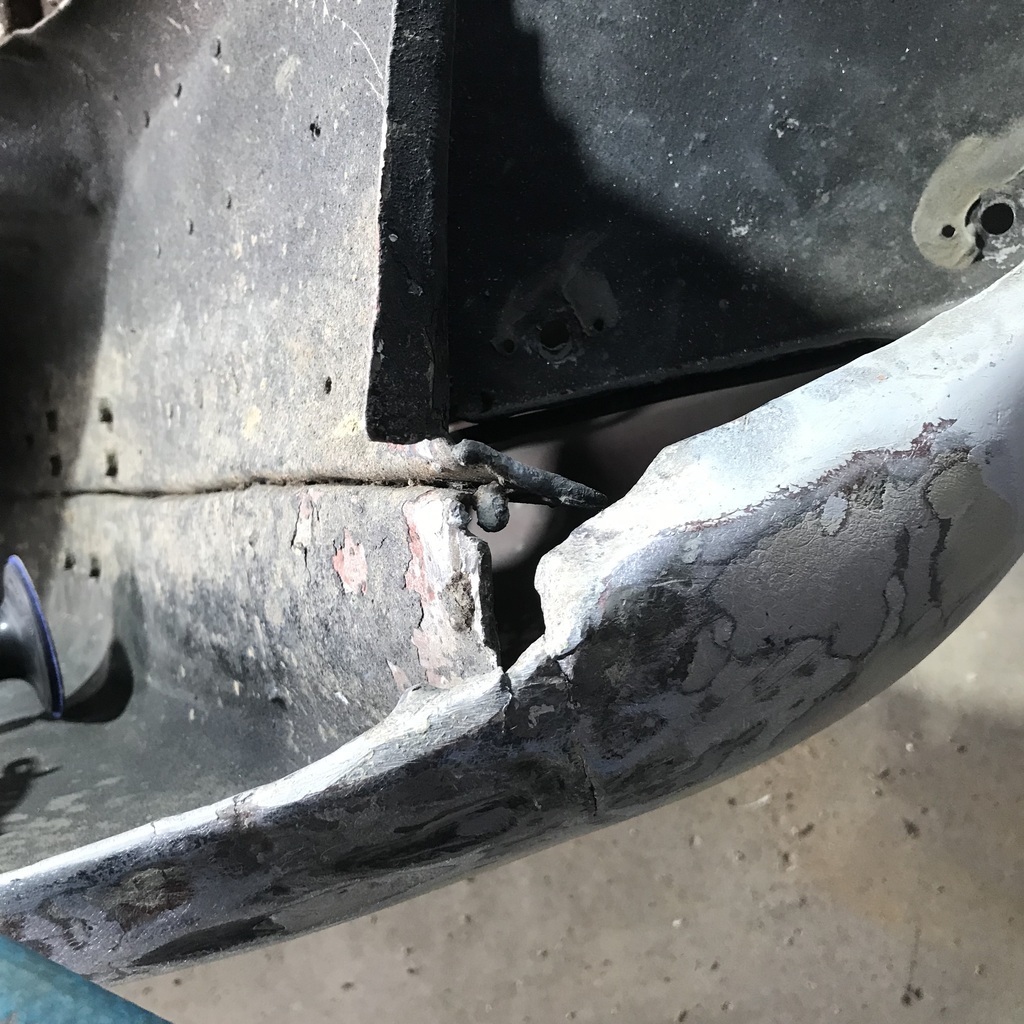 And on the other side, much the same place. Different damage, might even have been to clear the original exhaust. I’ve already bent it out in this pic. 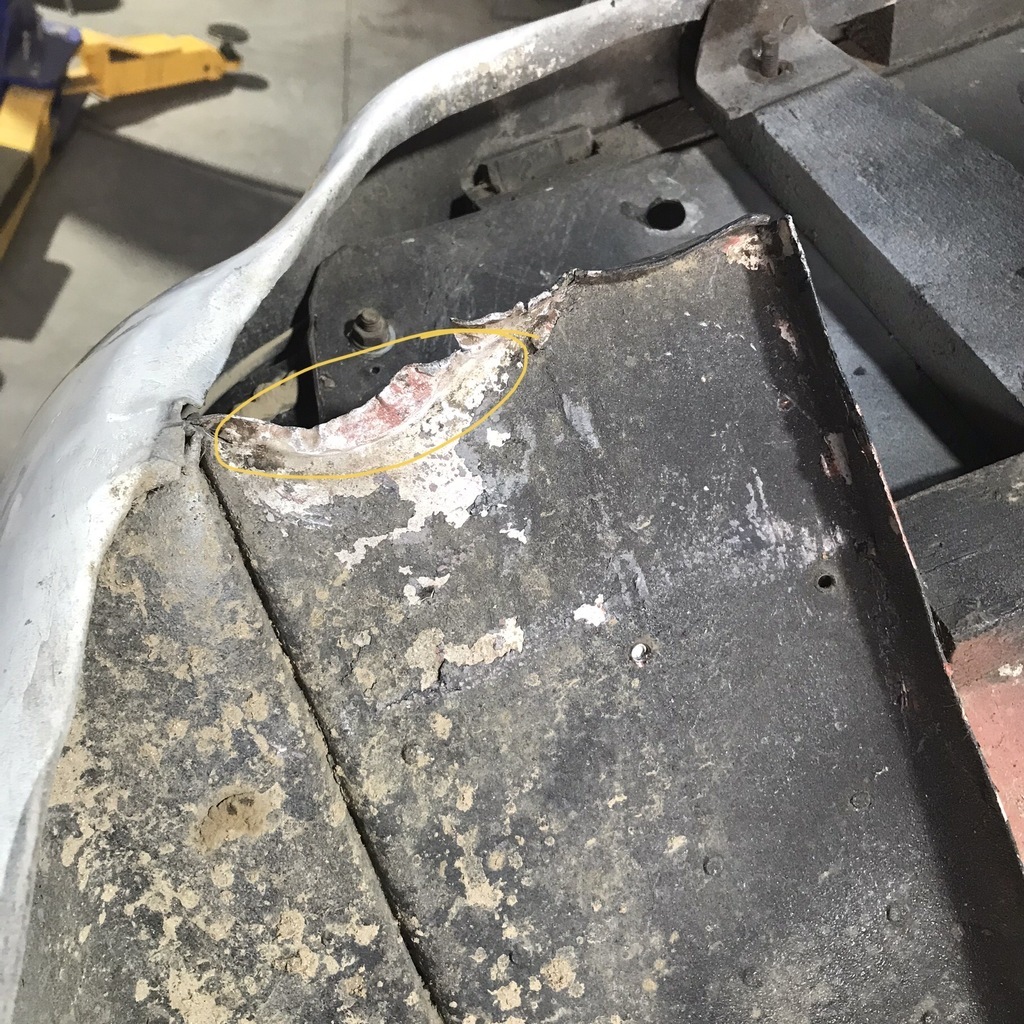 Cut out the affected area. 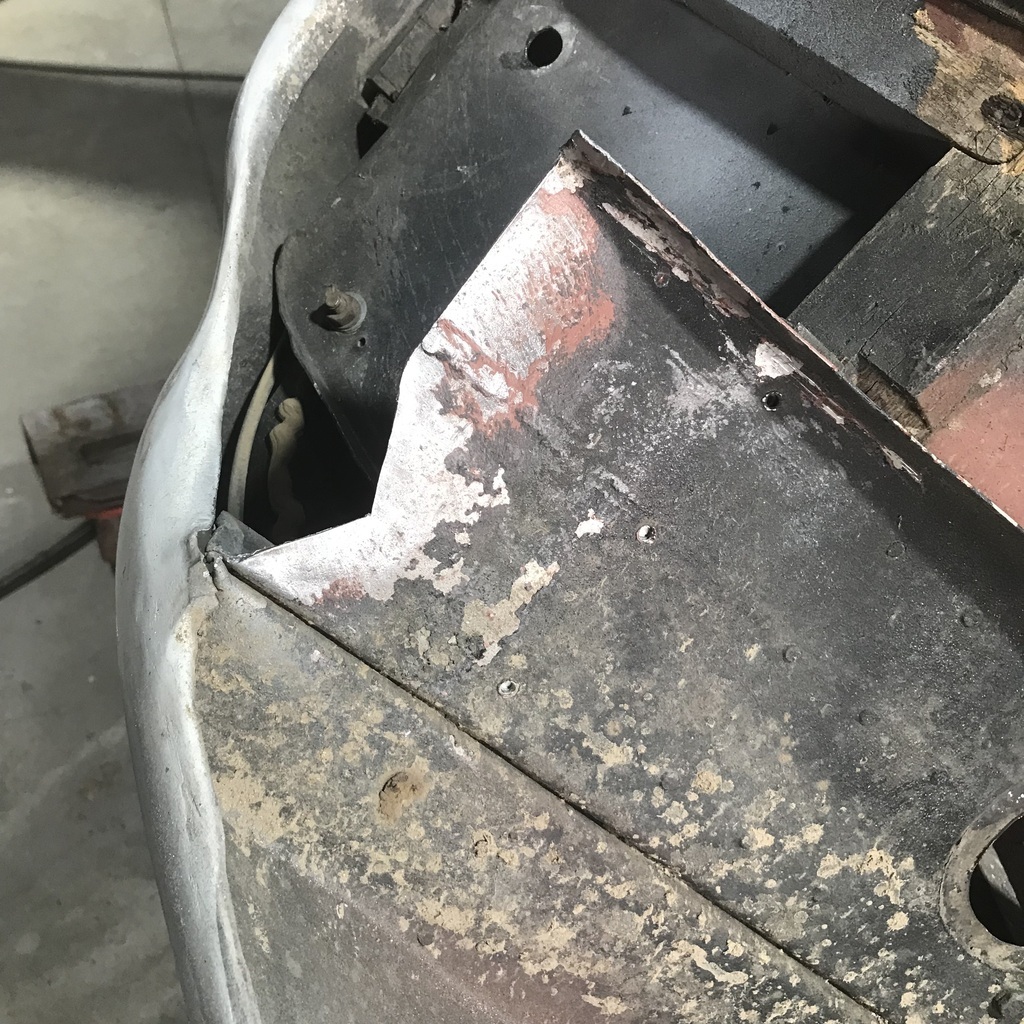 Cut and folded a repair piece. 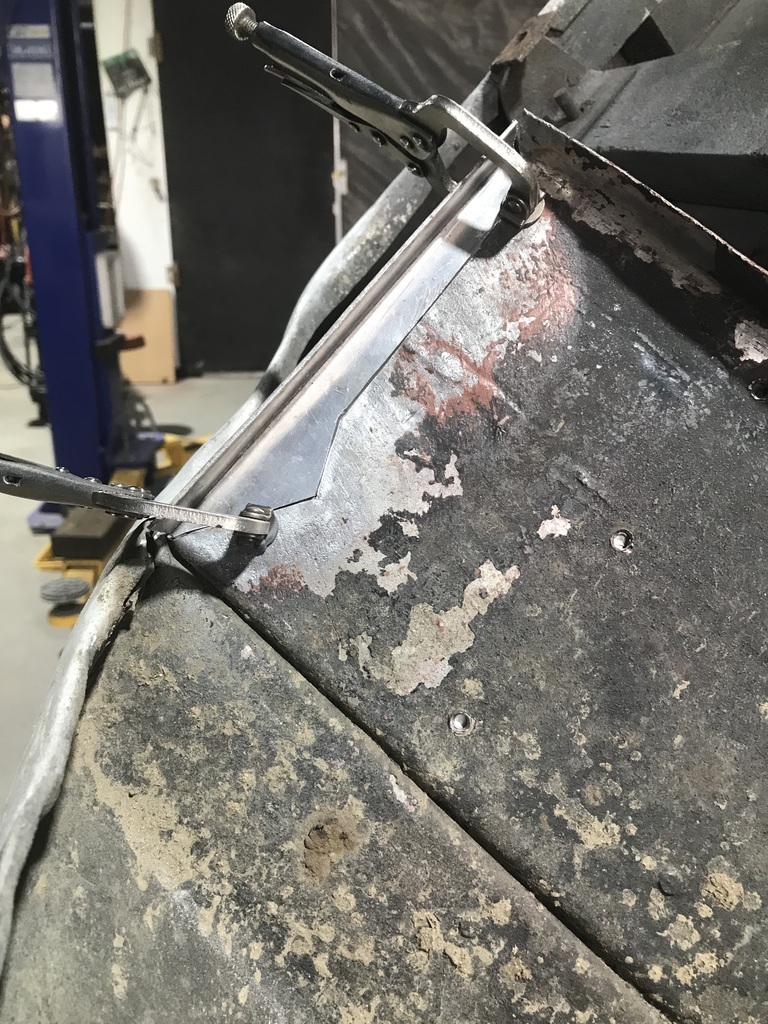 Just have to clean it up and weld it. At least I can get at both sides here. Thanks |
| |
|
|
|
|
|
Jan 17, 2024 13:07:15 GMT
|
|
I'd wait for dryer weather and cook it again. I've used epoxy that is 6 years old and hardener that has gone brown like toffee with no adverse effects.
|
| |
|
|
gazzam
Part of things
 
Posts: 741 
|
|
|
|
Welded the patch that I made yesterday. Partway there, not going as well as I hoped. Just not consistent, good in places and then heaps of contamination in others. 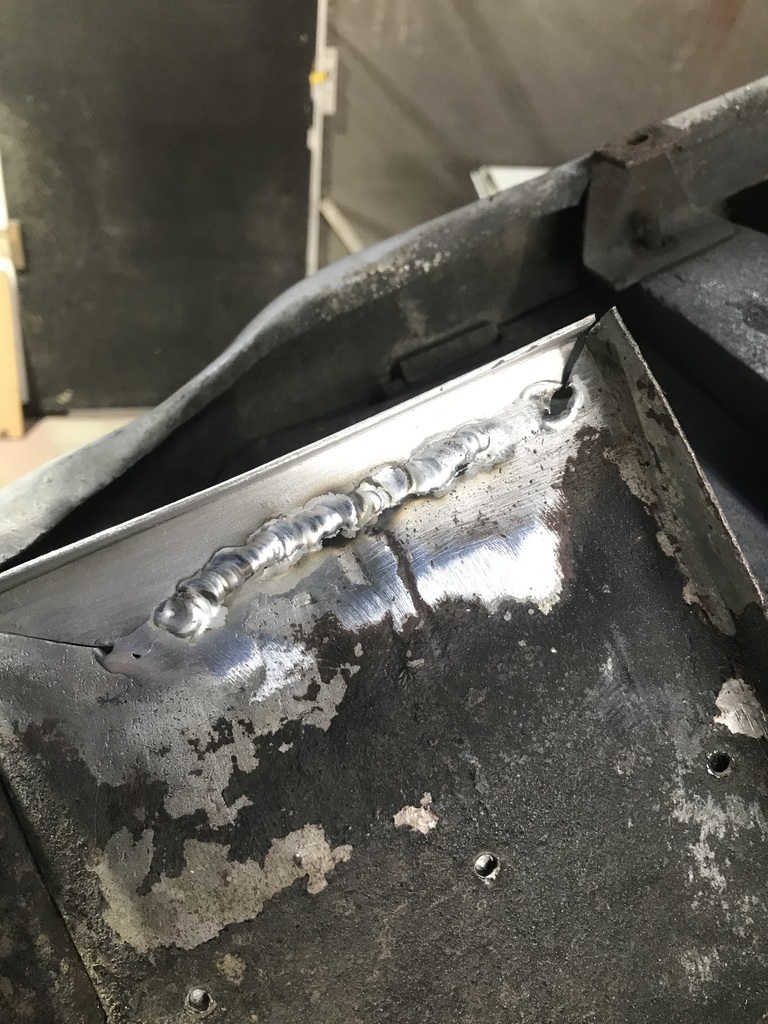 But it won’t fall off. And finally ground off. 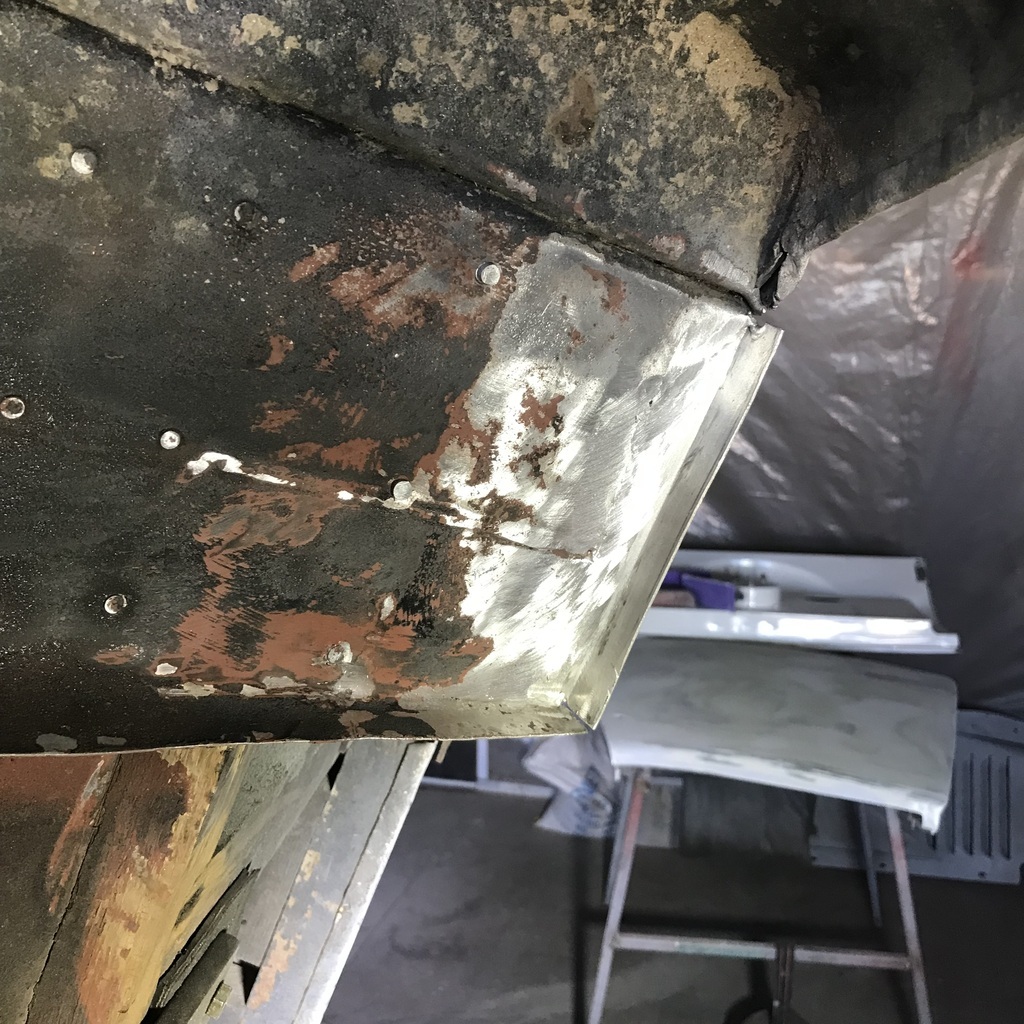 I haven’t decided what finish to use underneath the car. It’s going to be a real chore to prepare regardless. Open to suggestions as to what to use. There are lots of rivets holding the various bit together. The same as the ones holding the captive nut cages on that I showed quite a few posts back. They start as a piece of ally wire that fits neatly through an 11/64 jnch hole. 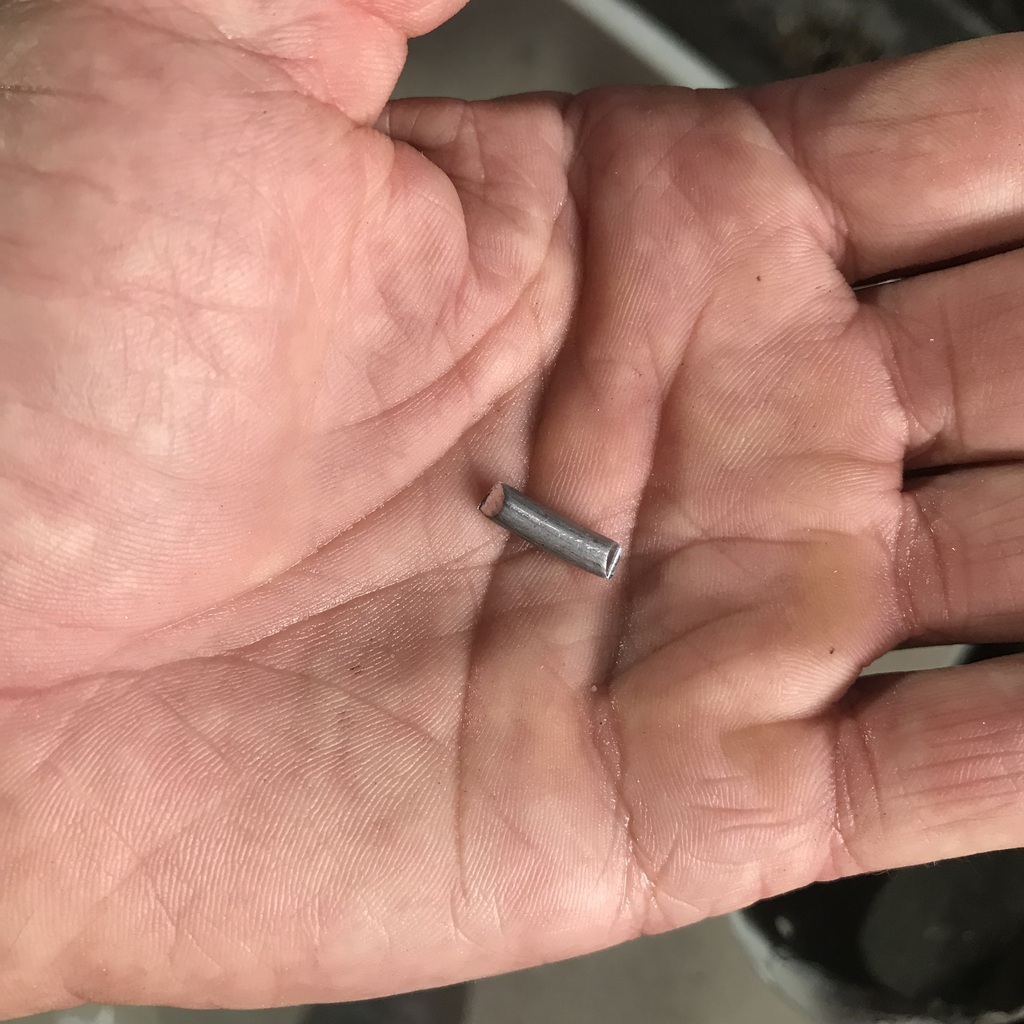 They’re peened over using a hammer and dolly, though I should make a proper tool, to get a consistent result. One that’s done. 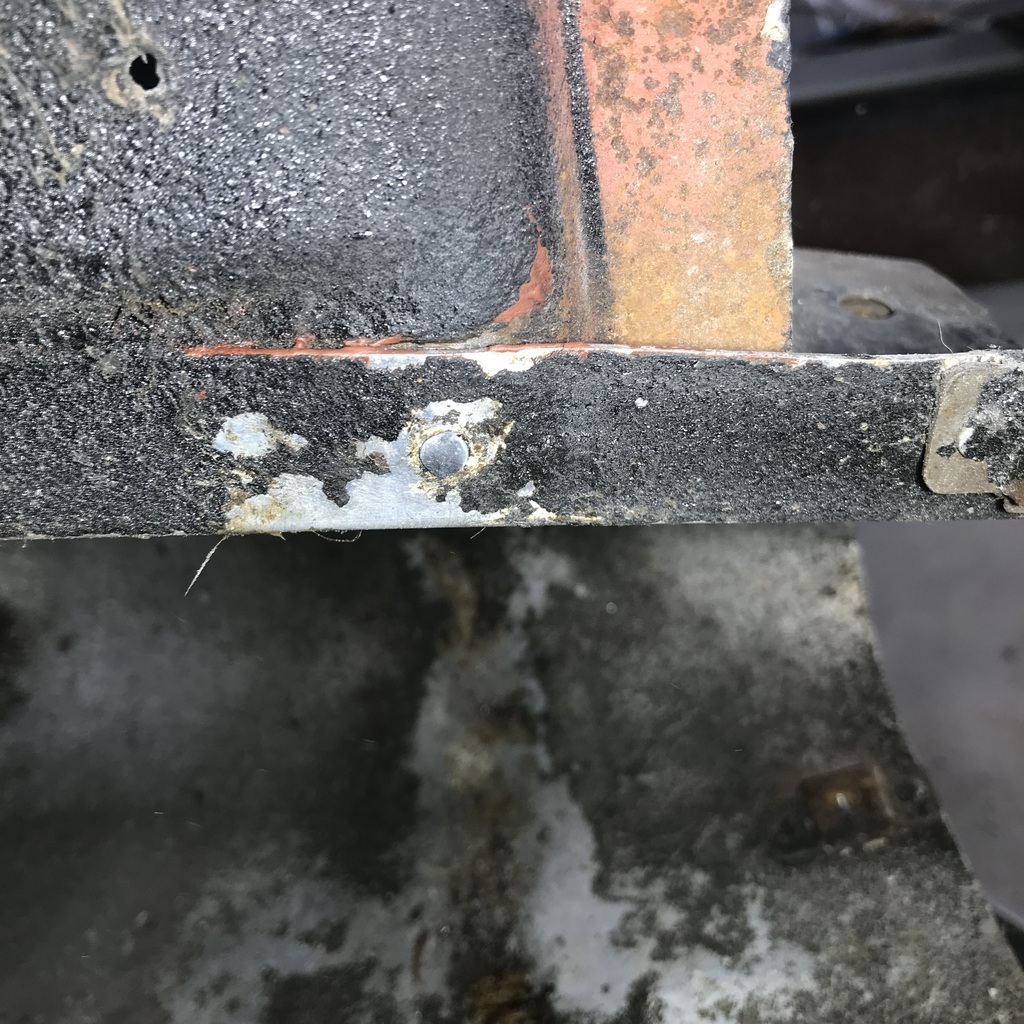 I’ve only done a couple in very hard to see spots, so I’ll sort something out tomorrow. Decided to cut out this piece on the bottom of the RHS rear guard. Shown upside down here. 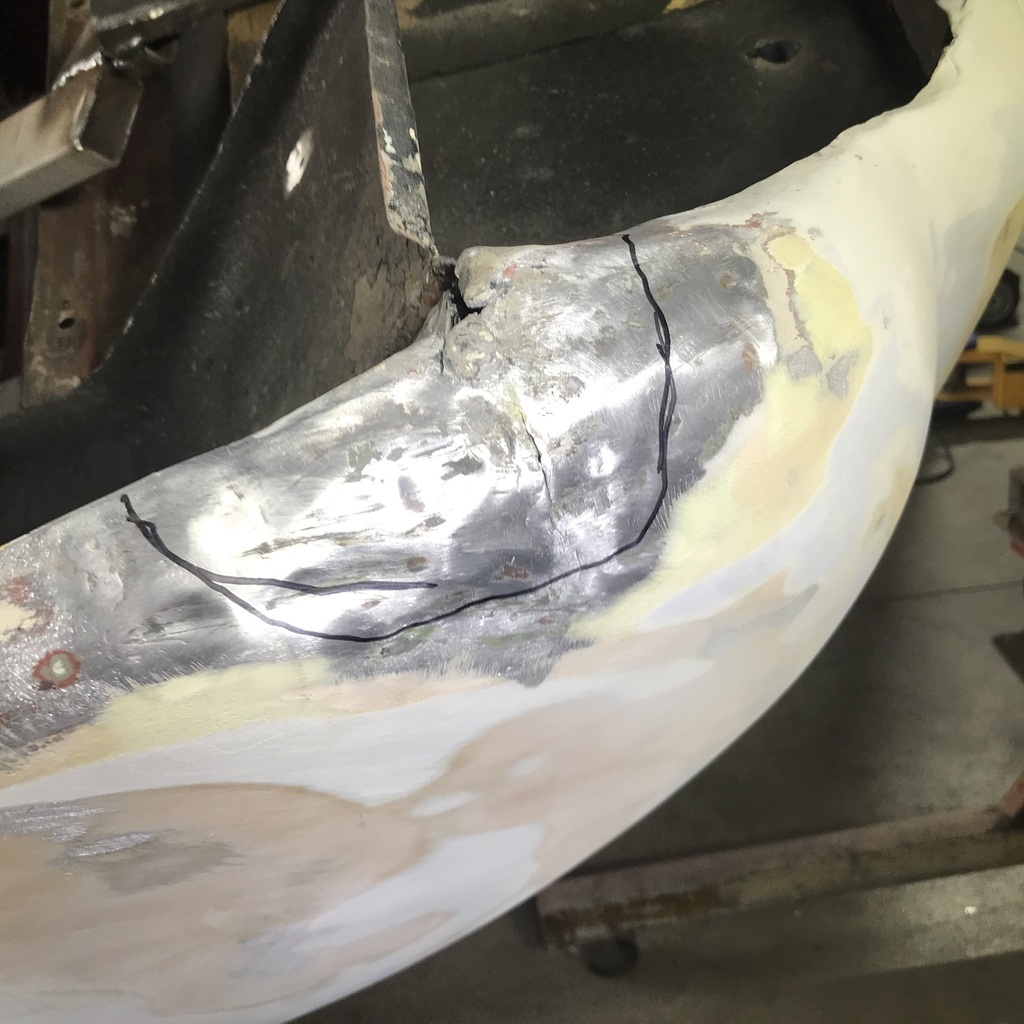 It has a couple of cracks and general nastiness that I can get rid of. I should be able to get at most of the other side to clean it. Started on a repair piece, first time I’ve used the English wheel for years. Nothing miraculous has happened in the interval! 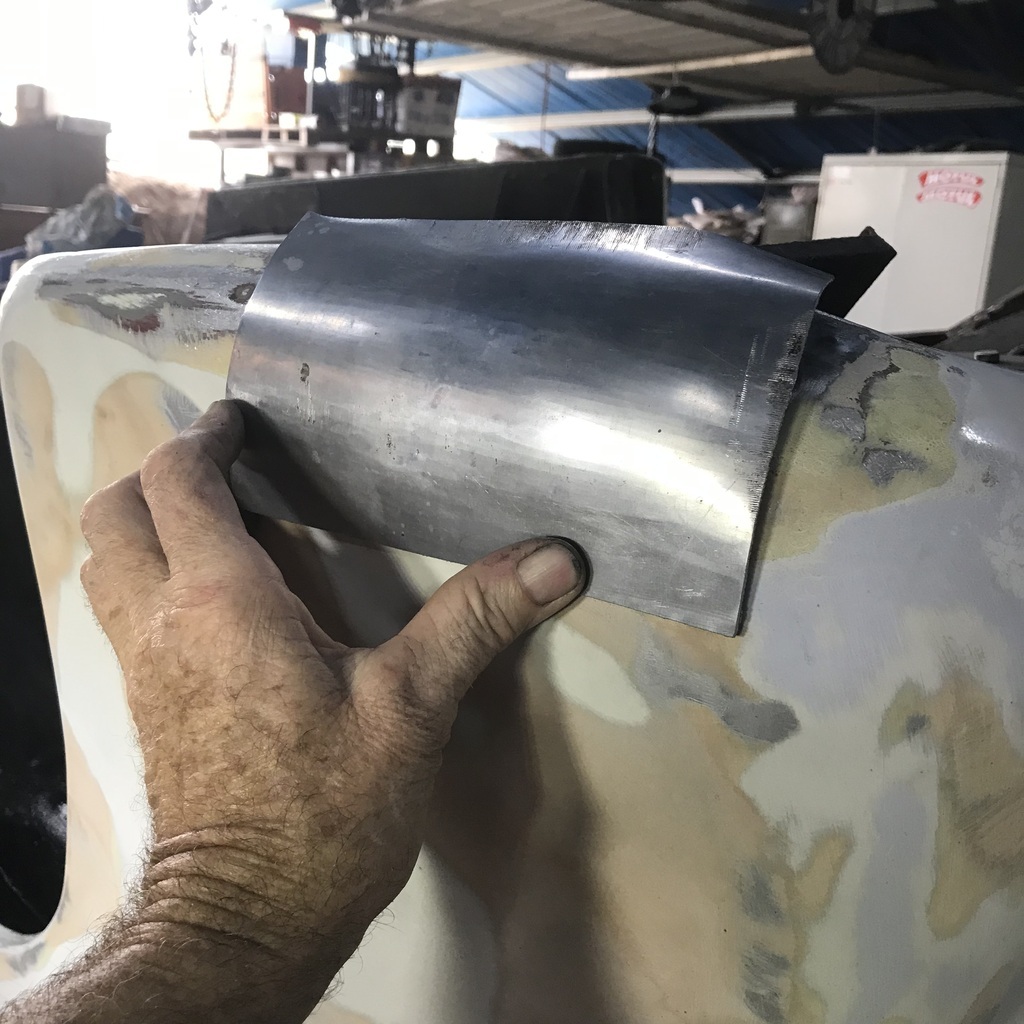 I ordered some different filler rods to see if it might help with the welding. They’re 4047and 5183, silicone was mentioned in the description, (as per your advice a while back, Mark, I couldn’t find the exact ones you mentioned, but I don’t think it was either of these?) So I might wait till they turn up to finish this repair. Thanks. |
| |
|
|
gazzam
Part of things
 
Posts: 741 
|
|
|
|
I started to make a punch to peen over the ally rivets ( really just wire, but it turns into a rivet ). It occurred to me that I’d need three hands to use it. One to hold the dolly, one for the punch and one for the hammer. Then I remembered when a mate came and riveted the rear shroud back onto the Healey. He used a (fancy) air hammer - borrowed from his work in aircraft maintenance. So I modified the bit of 3/8 rod that I'd drilled a hole in the end of. Welded a largish nut on it so it'd work in my (less fancy) air hammer 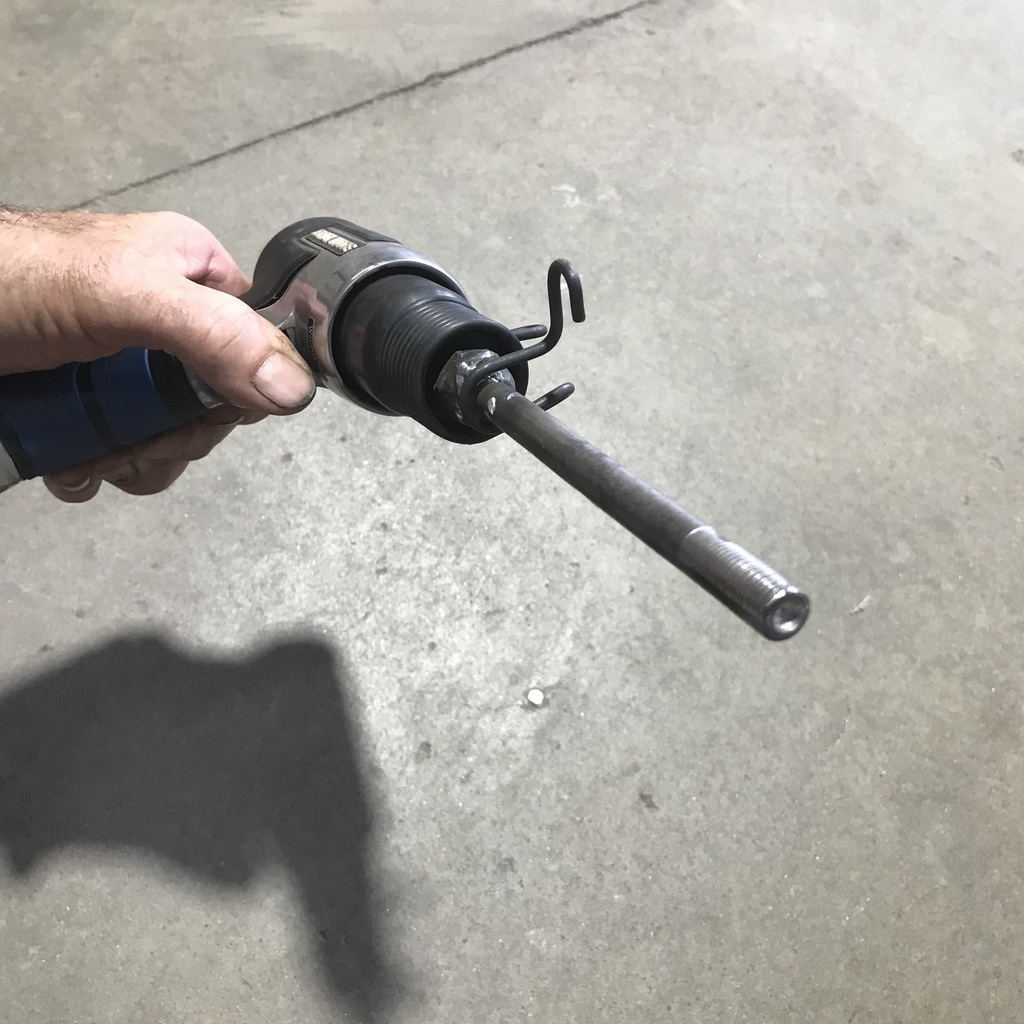 Worked a treat. Made a little template to pre drill the captivators. 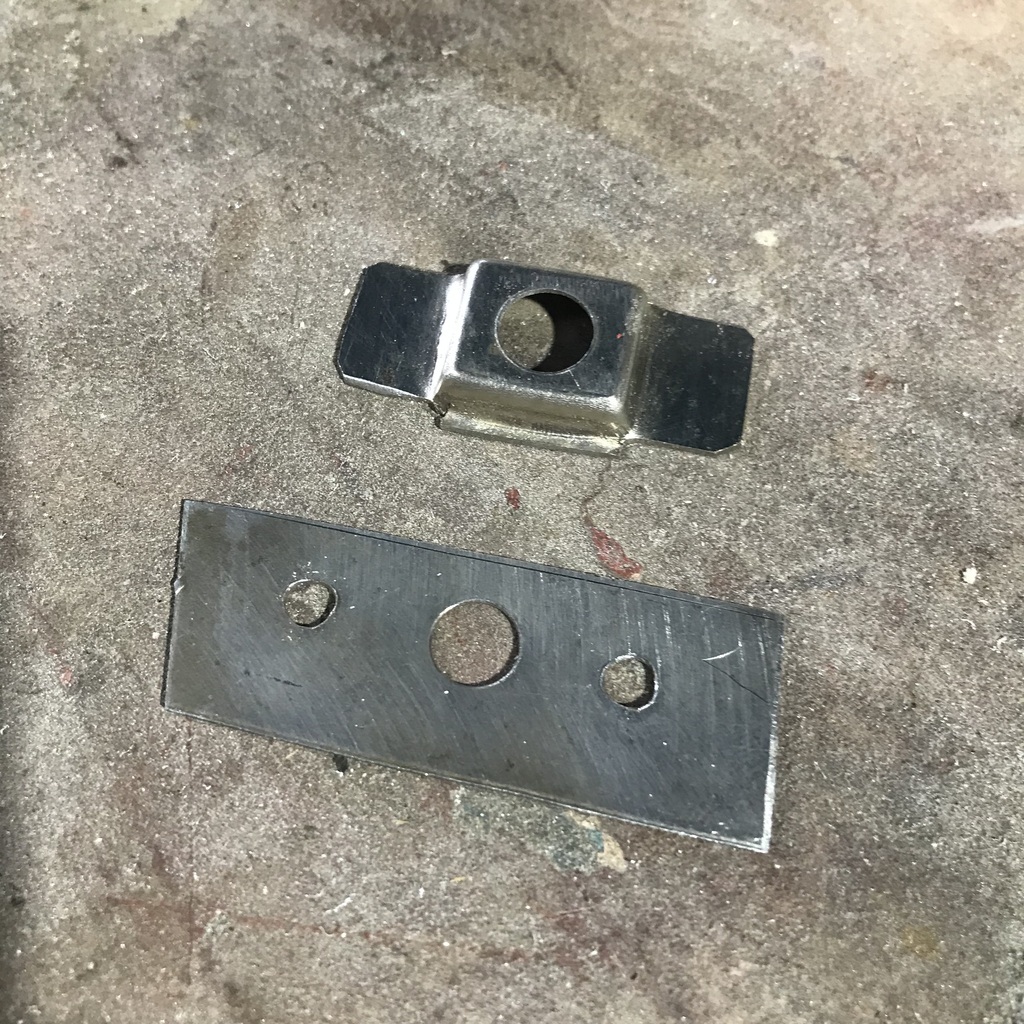 All this automation sped things up considerably. Finished this lot by smoko. 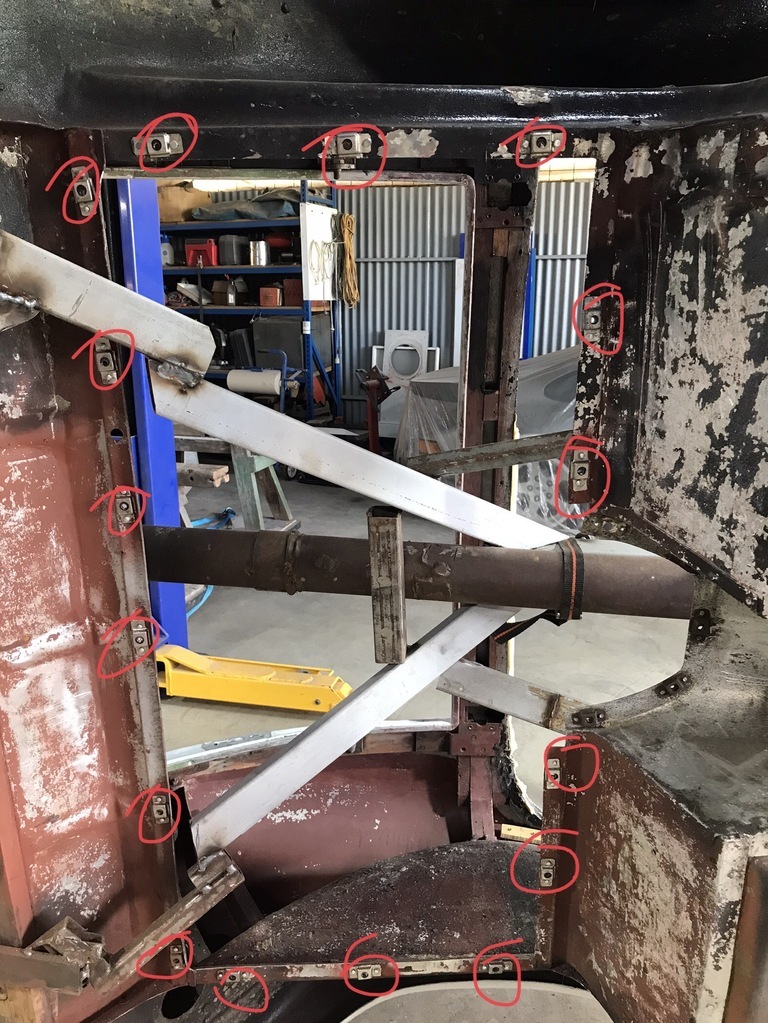 That’s the underside of the area above the fuel tank. All 16 of the captive nuts were either missing or damaged. A piece of ply is held in by bolts into those captive nuts. I think it must be structural. Here’s one half riveted. 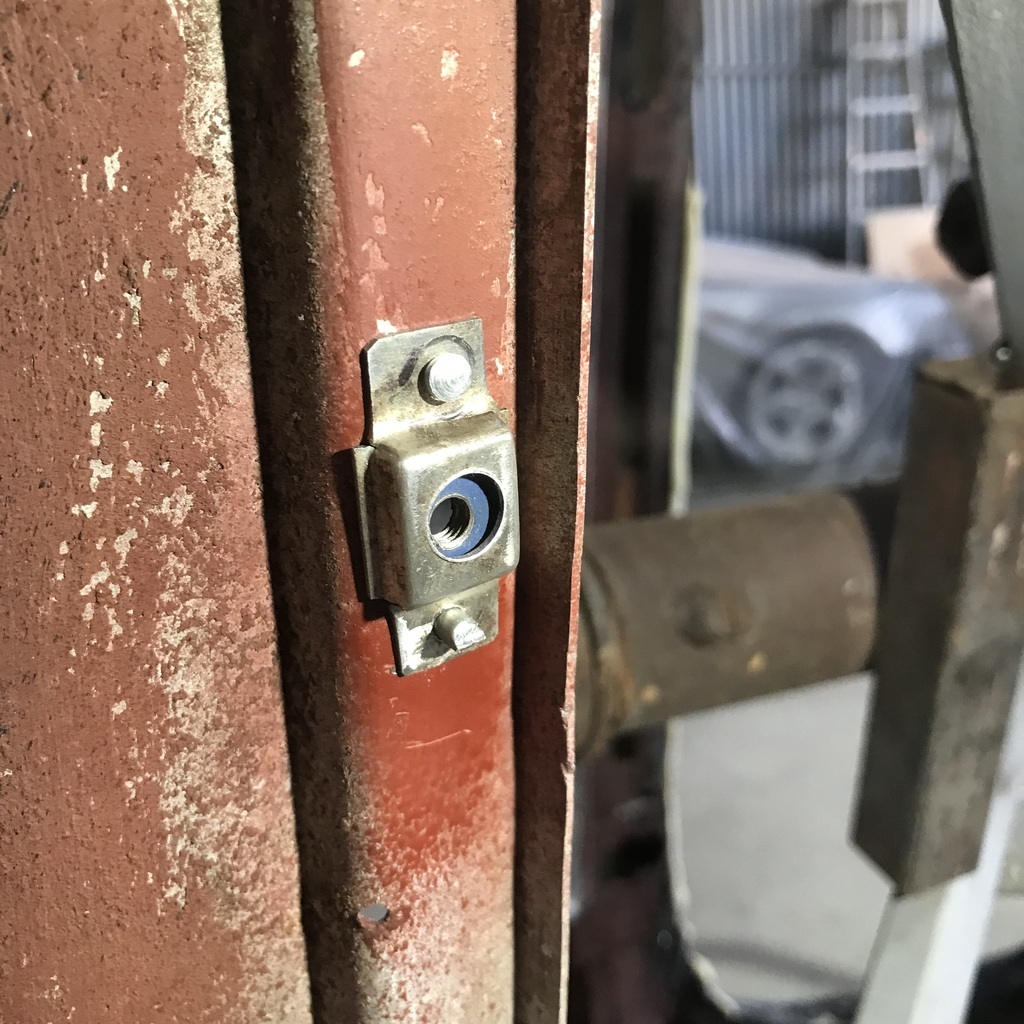 And the other side. 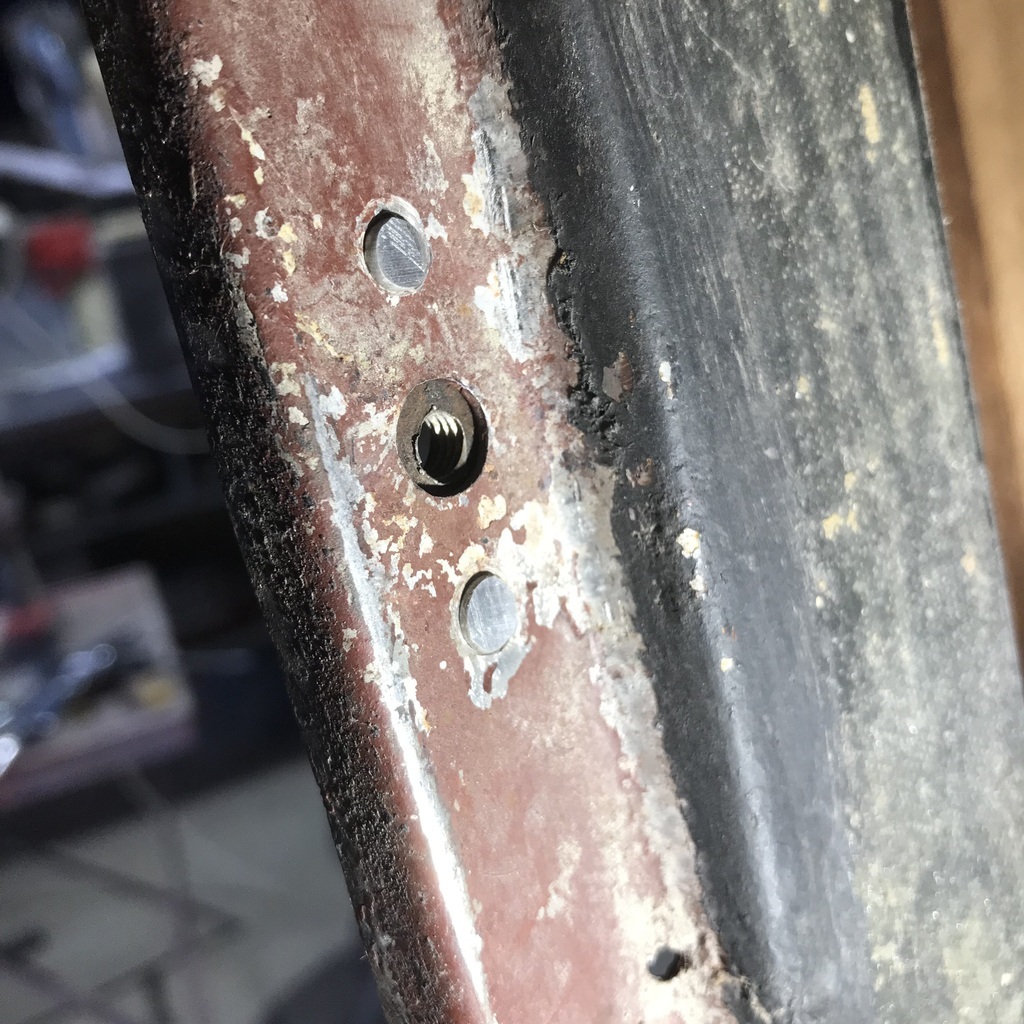 Then spent the rest of the day making some more. I keep finding places that have them missing. Or been replaced by regular bolts. The rivet holes on each side of the bolt hole are the giveaway. 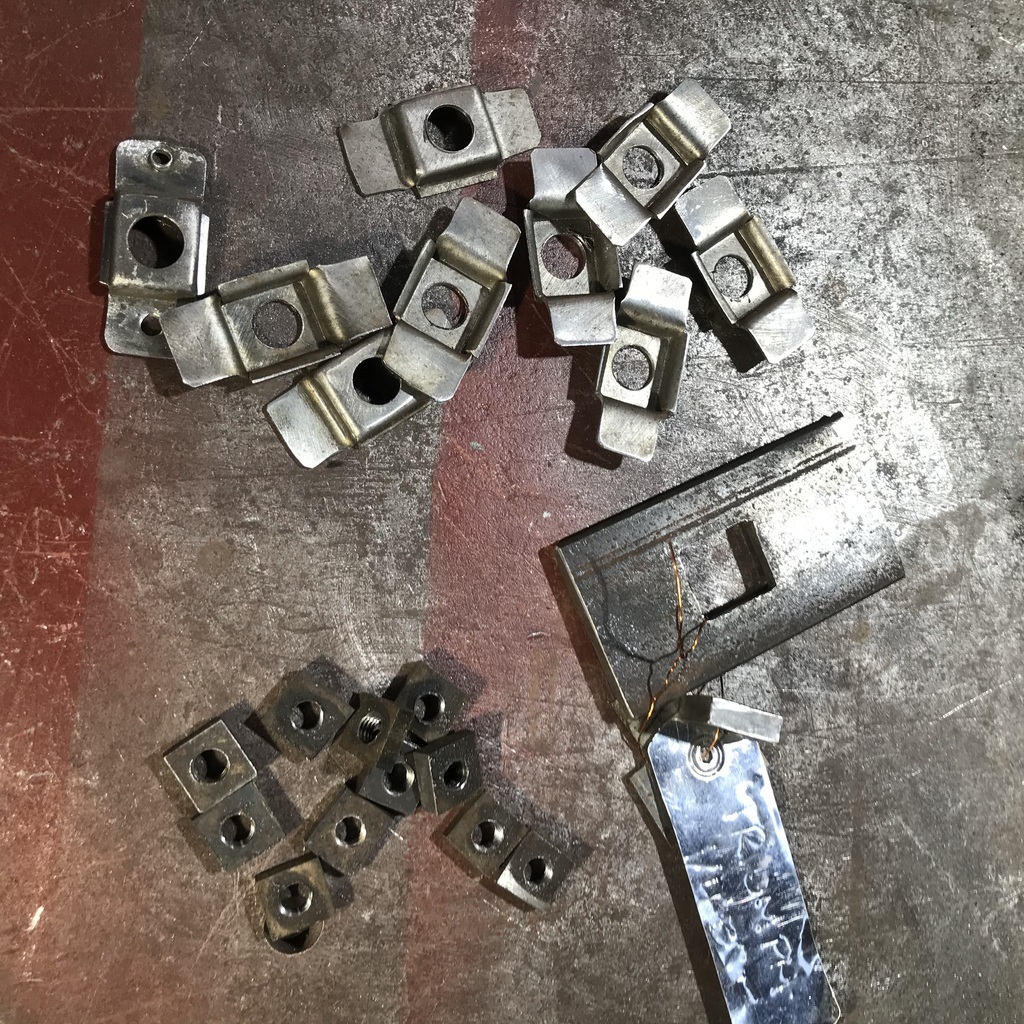 Thanks. |
| |
|
|
jamesd1972
Club Retro Rides Member
Posts: 2,921  Club RR Member Number: 40
|
|
|
|
|
Nice toolmaking and jig making sir. plywood the original composite material!
James
|
| |
|
|
gazzam
Part of things
 
Posts: 741 
|
|
|
|
Thanks James. Here’s an example of finding places where captive nuts are missing. 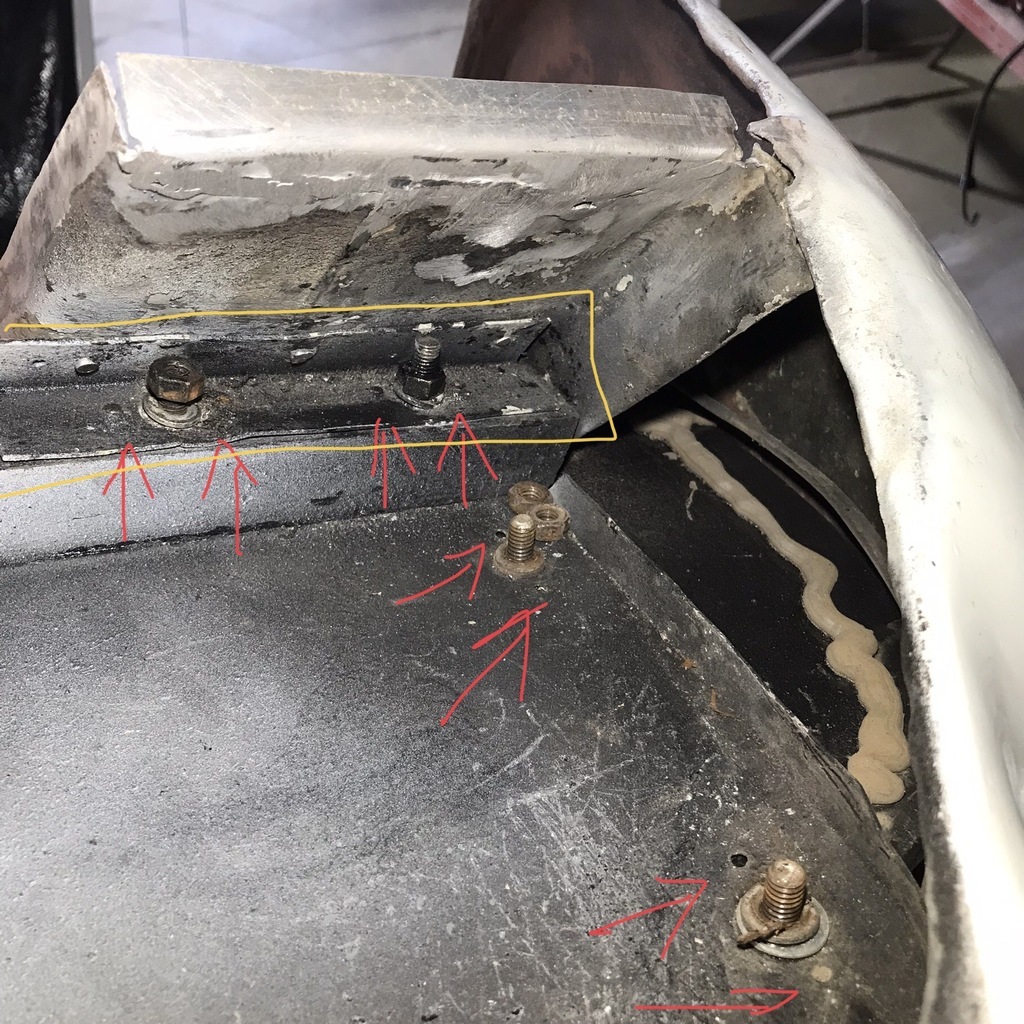 That’s a shot of behind the passenger rear wheel. Bottom of the boot floor. Upside down , on the rotisserie obvs. Four captive nuts have been replaced with cuphead bolts and nuts. Arrows point to the giveaway holes. The yellow line is a piece of ally that fixes the inner arch to the wooden crosspiece. It is pretty corroded where the nuts bear on it, probably galvanic. Don’t I sound clever? Or maybe the wood ate it? Here it’s with some new ally to make a replacement. 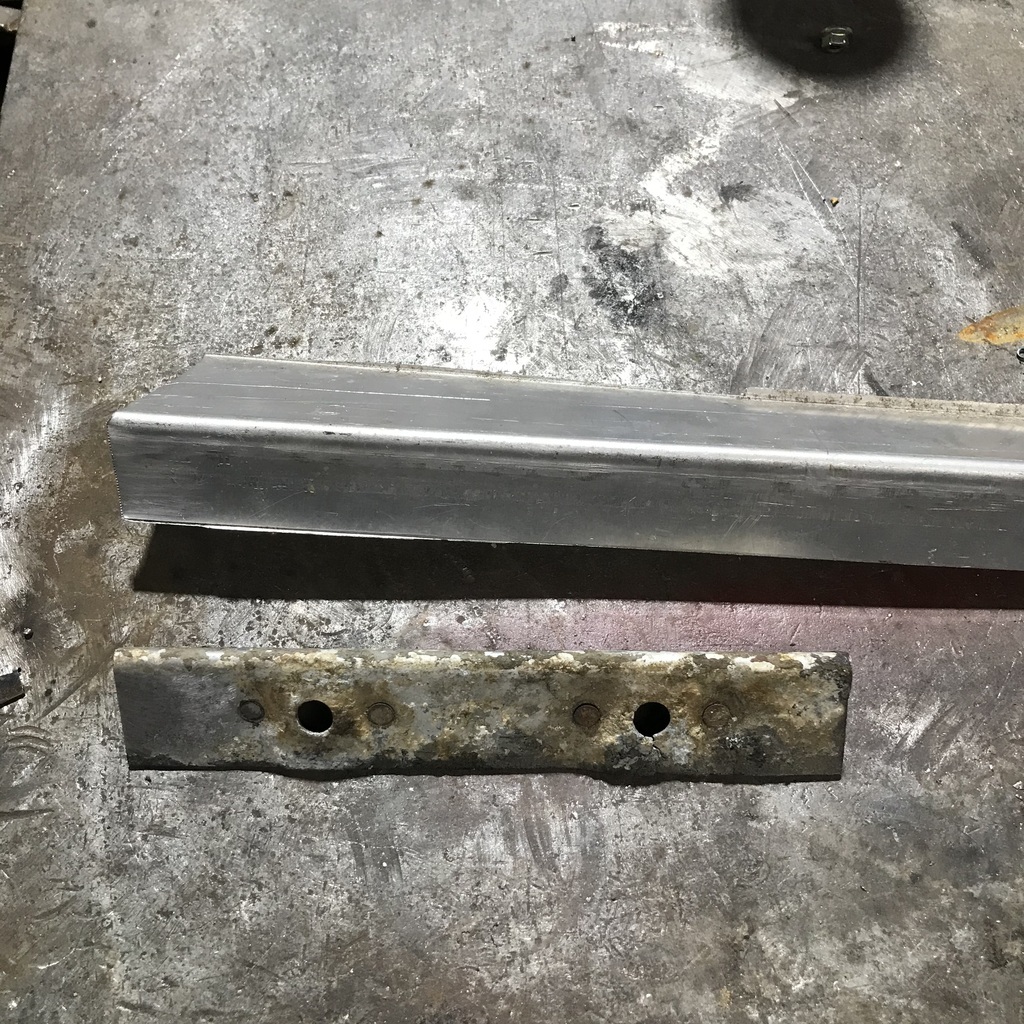 This is the new bit ready to have the captives riveted on. Note countersunk holes. To give the rites more to grab onto. Triumph's idea, not mine. 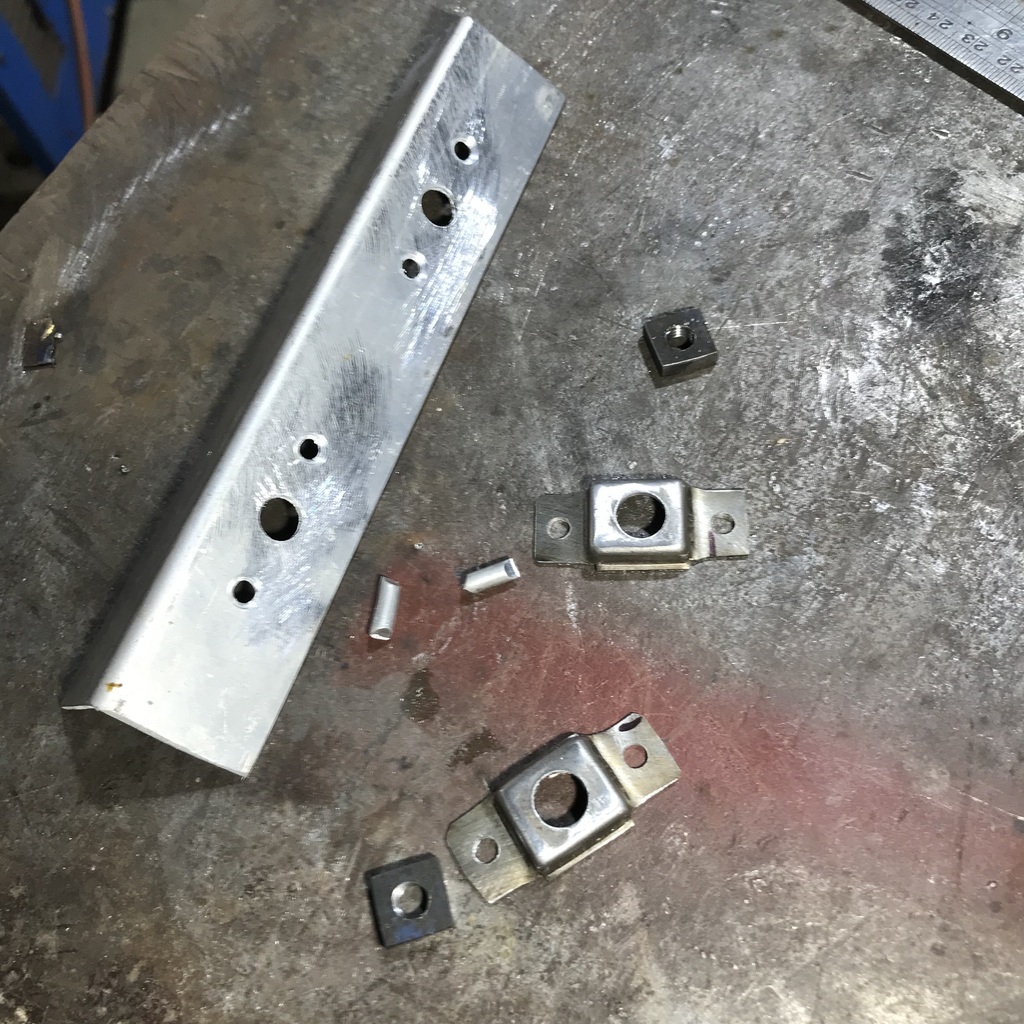 And done. Really easy with the steel table as a dolly. 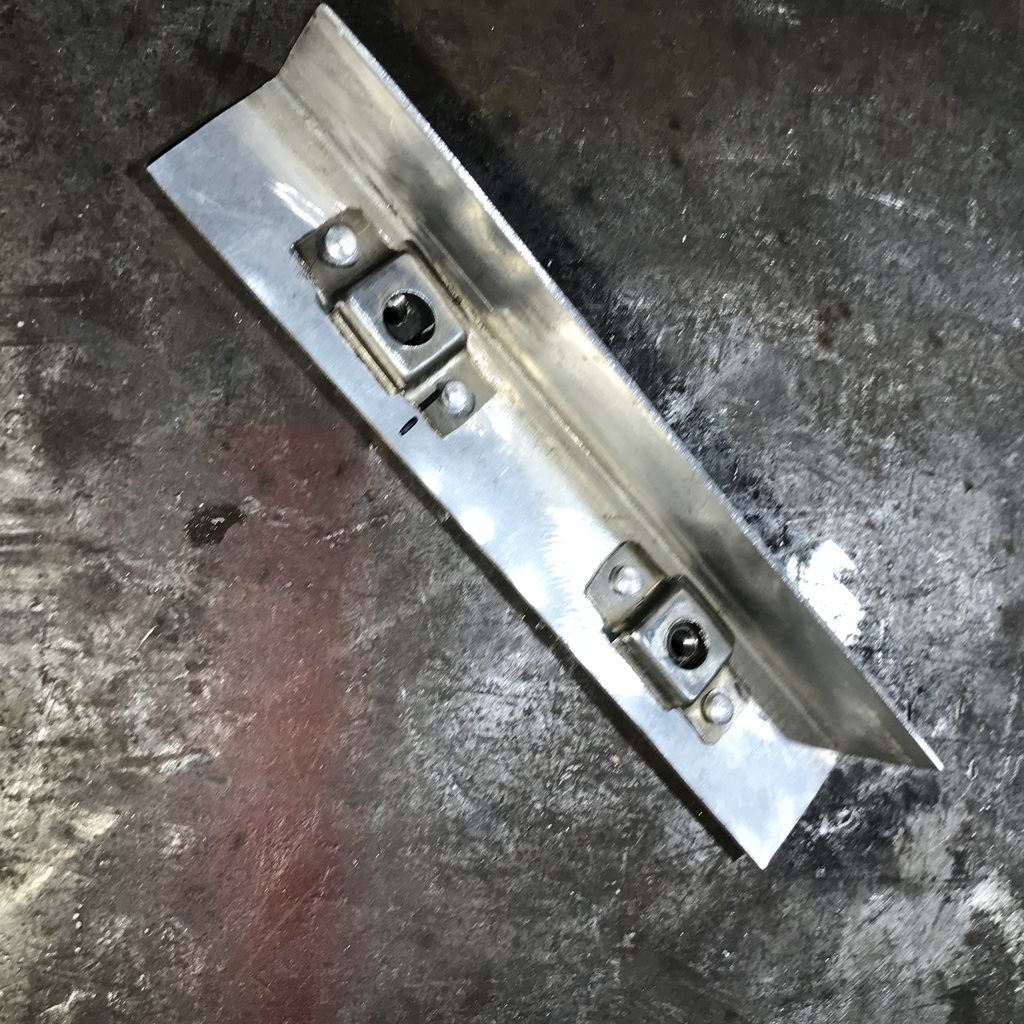 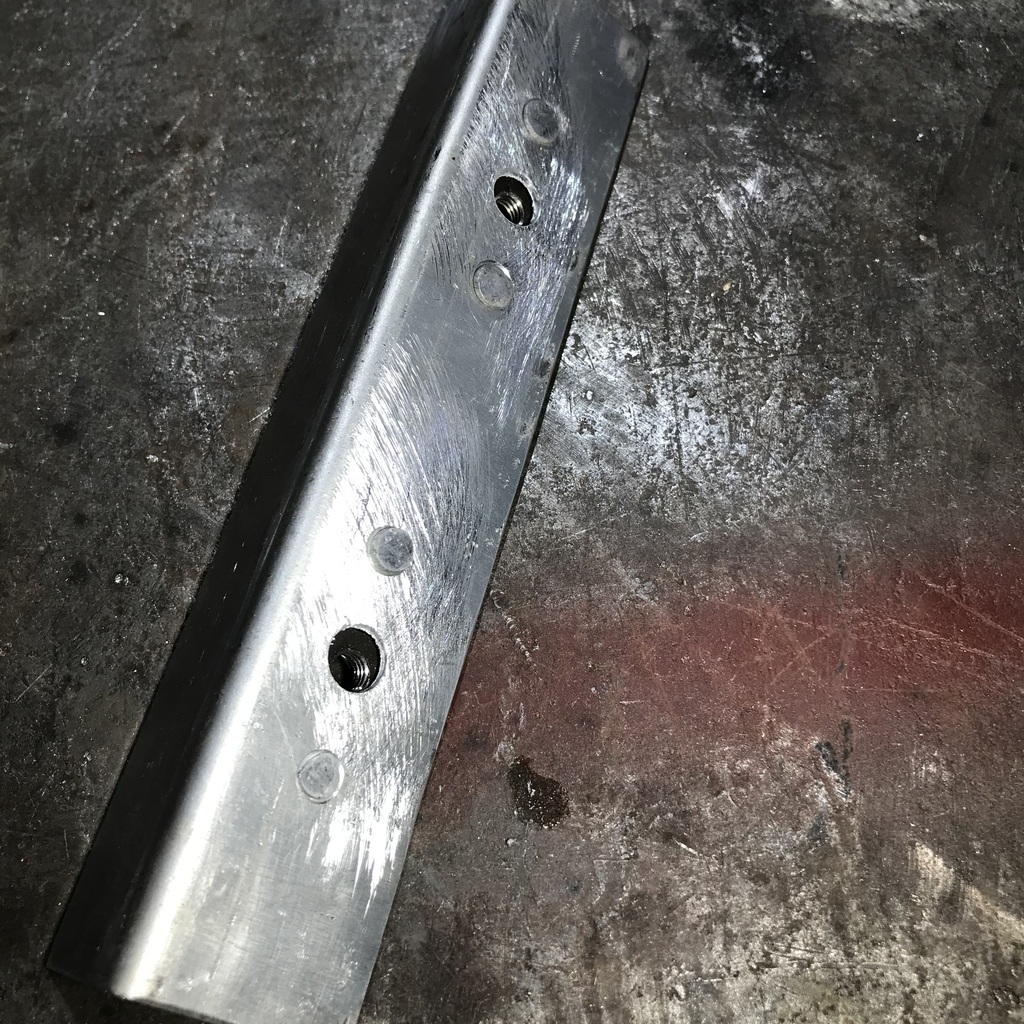 Found another task at the rear of sill/bottom of the B pillar/front of rear guard area. Don’t know how I missed this when I was fiddling with the sill before. It might have been because I was lying on the floor with grit getting in my eyes every time I touched something. This is hard to explain, but I found there were missing bolts on both sides. There were supposed to be two per side. One side had none, the other, one. And it wasn’t tight. I made a couple of backing plates, to help make up for the deterioration of the sill. This is ( upside down ) looking into the B pillar. Empty holes circled. And new backing plate in red oxide. 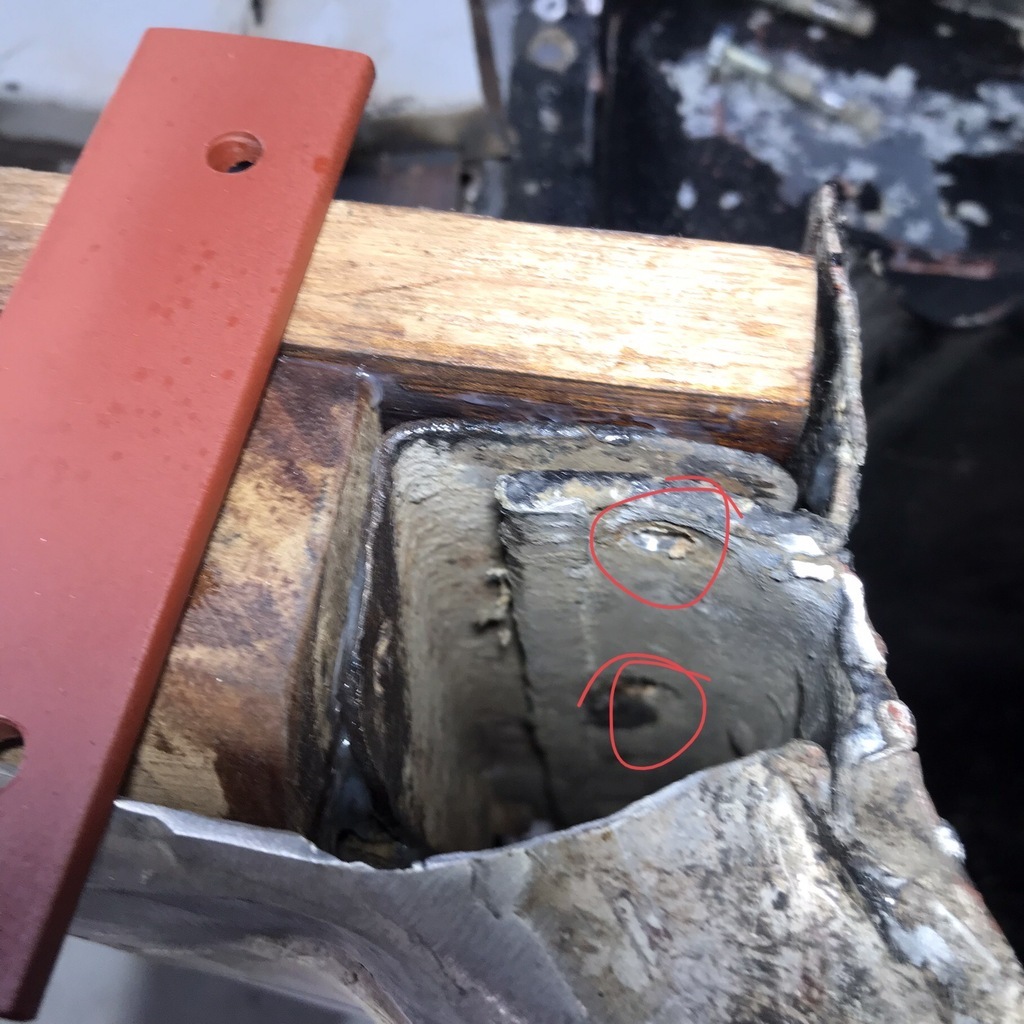 This is looking from the centre outward. Blue line is the bit of the sill that I replaced, red line is what was left of the original. 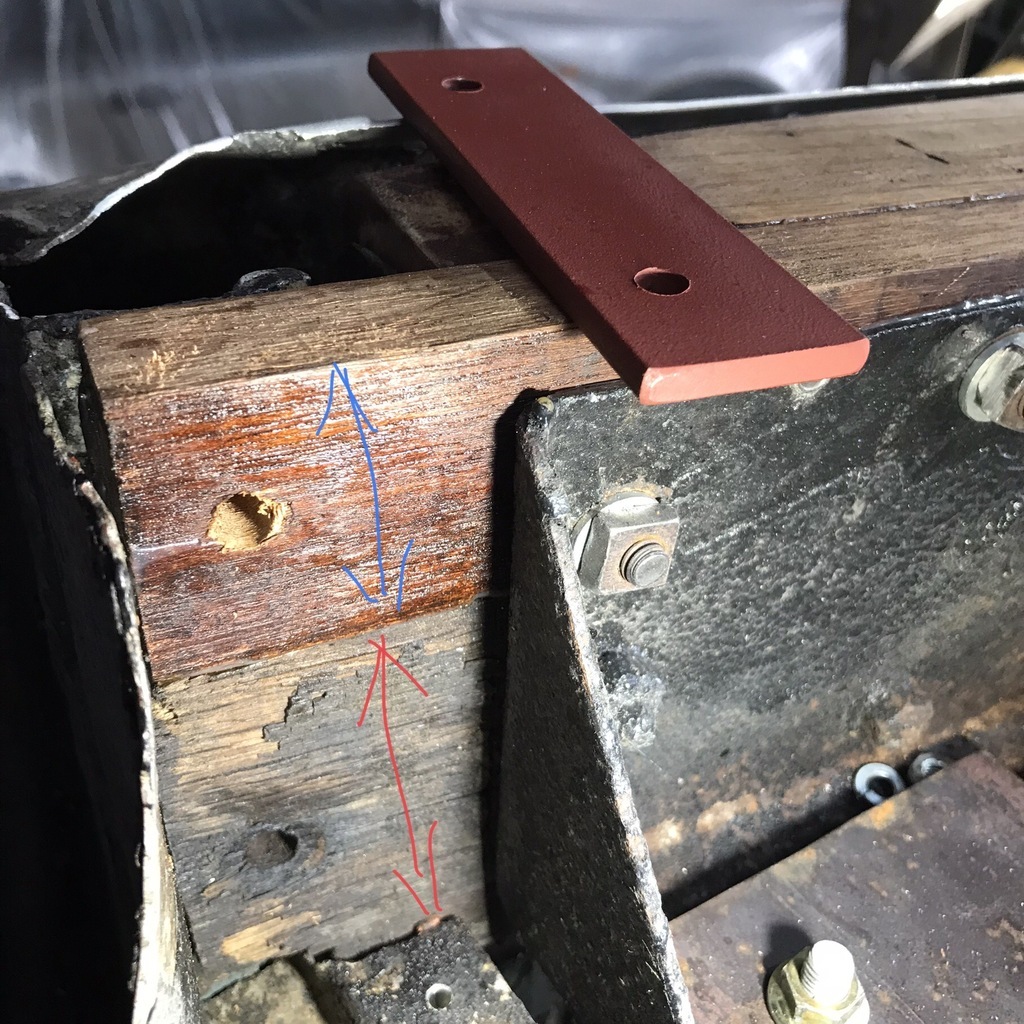 So this bolts the sill to the B pillar to the rear guard. And hopefully made the whole thing a bit stronger. 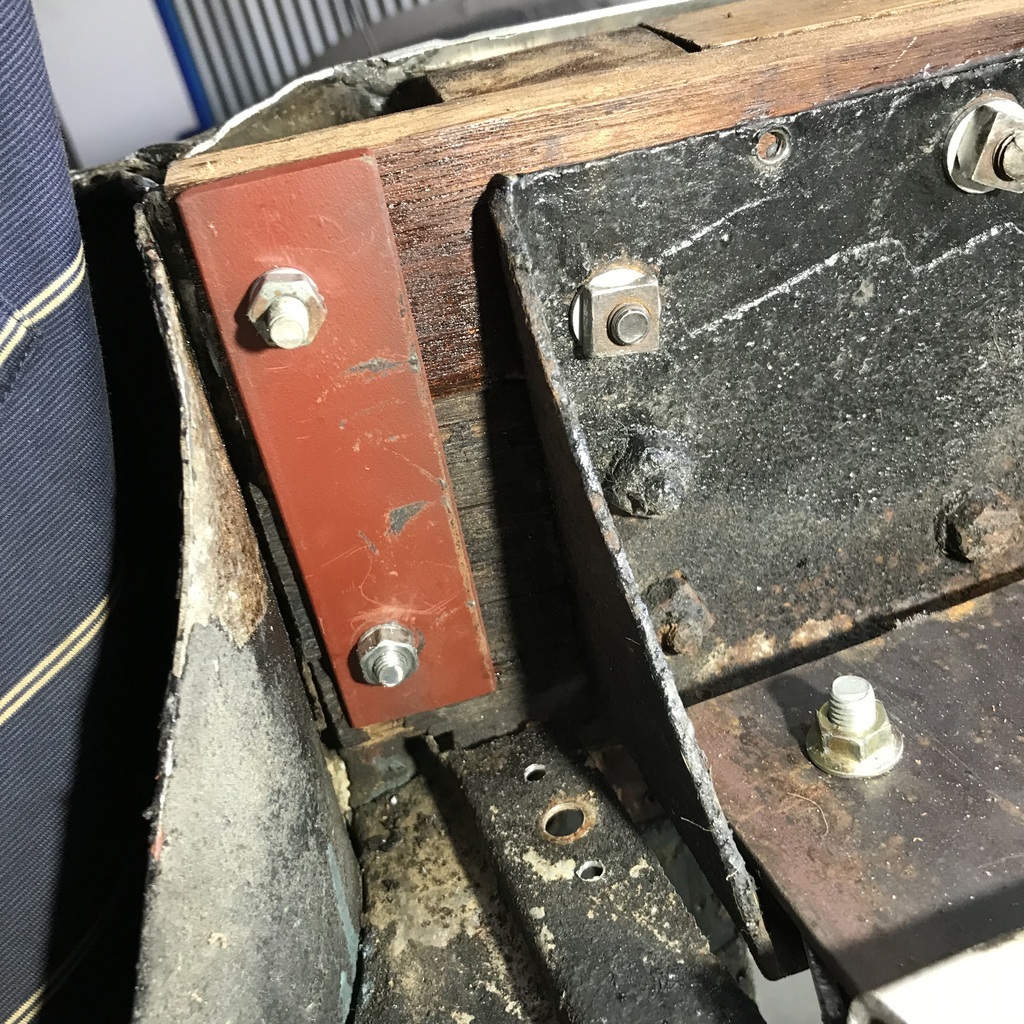 Thanks. |
| |
|
|
gazzam
Part of things
 
Posts: 741 
|
|
|
|
I’ve started stripping the underside. A rag soaked in GP thinner laid out, then covered with some plastic and a towel. Come back in 10 minutes or so, remove the rag and wire brush the surface. Move on to the next spot. Very effective. Wiped the shell with wax and grease remover. Then went over all the areas that I had missed with 80#. Then put the body, doors and boot-lid in the oven and set it to 37C. 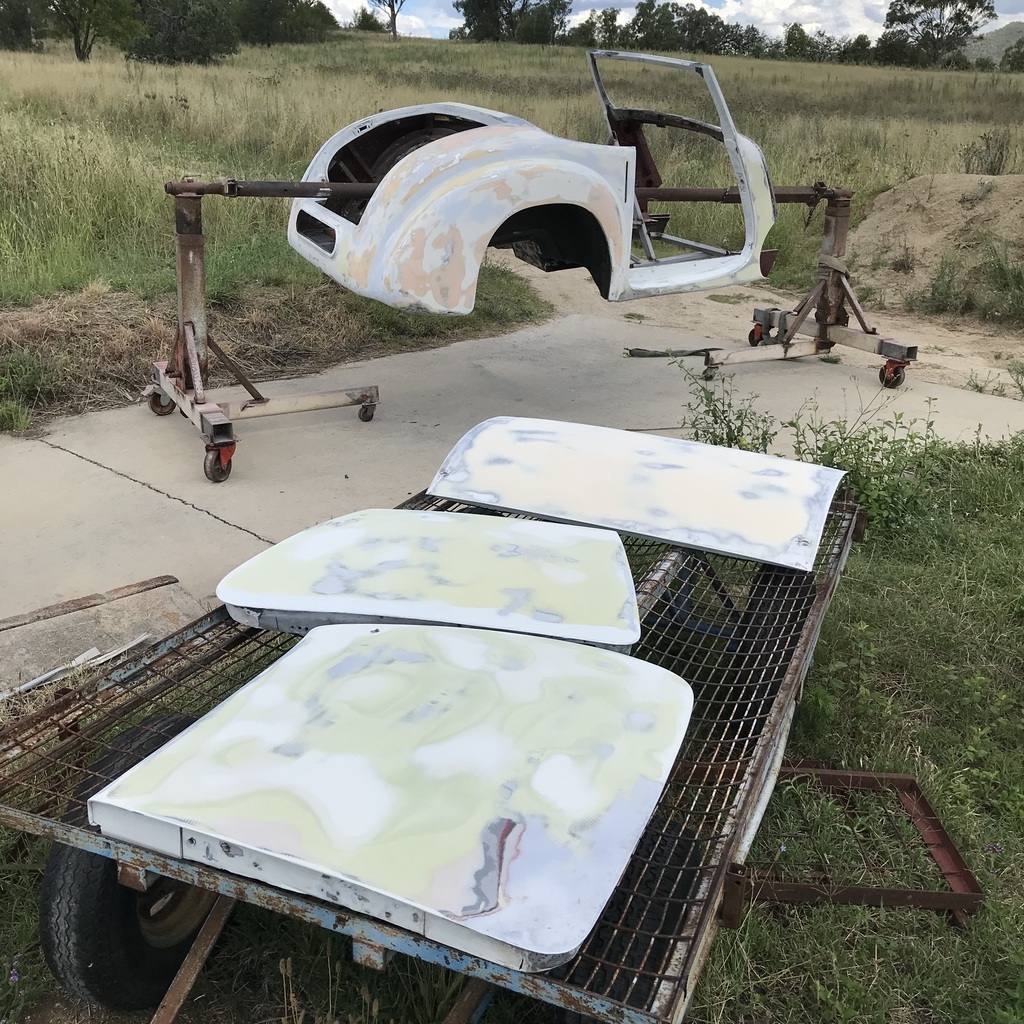 I’ll cover it tonight and my good wife will uncover it in the morning while my cataract is being seen to. It can sit in the sun all day tomorrow. 39C predicted. Back in the workshop in the evening, under my clearer watchful eye. All going well… Hopefully the replacement hardener that I’ve ordered will be here Tuesday and I’ll get a coat of epoxy on it then. Thanks. |
| |
|
|
logicaluk
Posted a lot
   Every days a school day round here
Posts: 1,373
|
|
|
|
|
All the best for the cataract removal.
Dan
|
| |
|
|
|
|


