gazzam
Part of things
 
Posts: 741 
|
|
|
|
Door gaps. Never going to be great on a 1948 car. That’s my excuse. But I’ll get them as good as I can. I knew the bottom gap was way too tight. It was pretty much non existent most of the way along. So I started by making sure there was no filler to confuse the issue. Would have been great just to be able to sand some of the excess off and have decent gaps. Never going to happen. The only way, that I know, is to open the lip of the skin, cut back the door frame and fold the skin over in a new bend. Fraught with danger. Been there, done that. The XK boot lid still haunts me. I really don’t want to attempt a door skin. This car was meant to be a quick resto. But it has to be done. So I marked the area that had to be opened up. This is the bottom edge of the door. 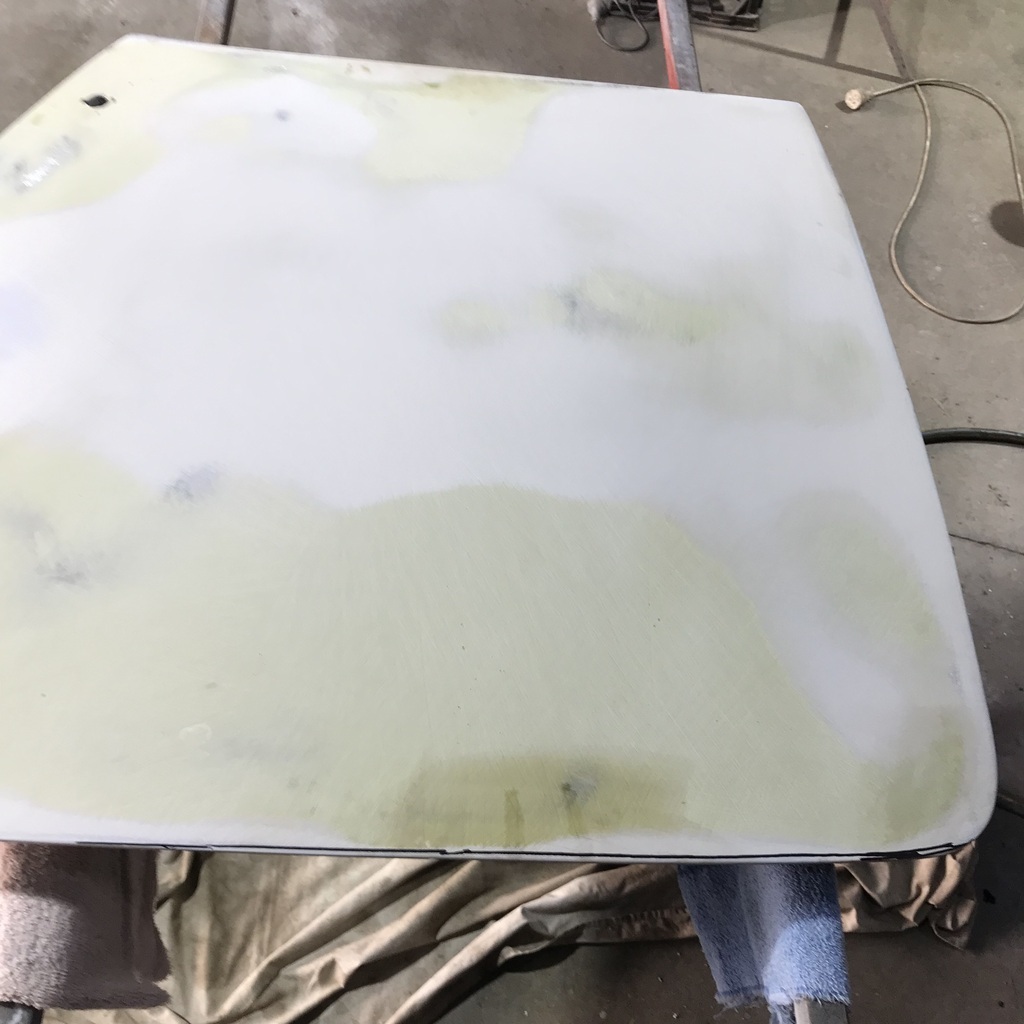 Then got rid of the filler in that area. 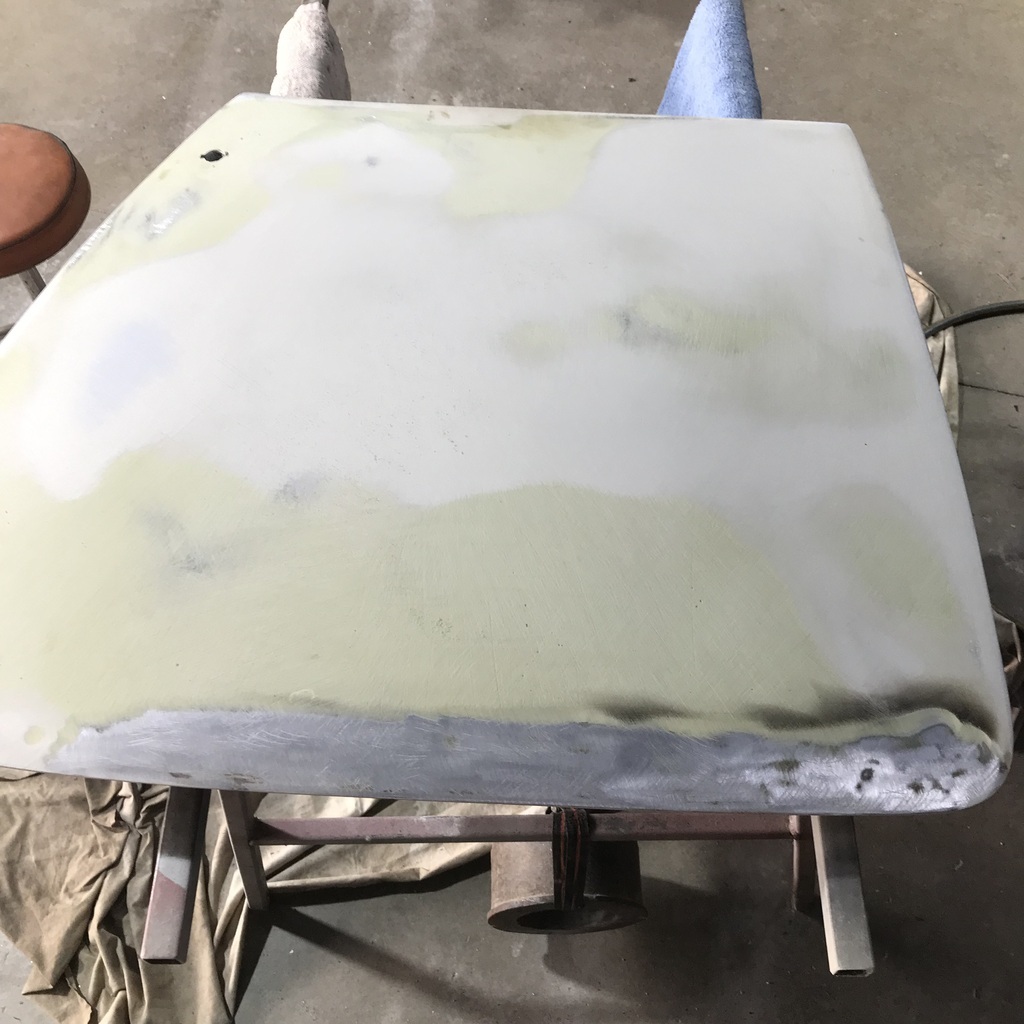 I annealed it and started to open the folded over edge of the skin, a couple of inches back from where it needed to be cut. And the edge of the skin cracked on the fold straight away. Great start. 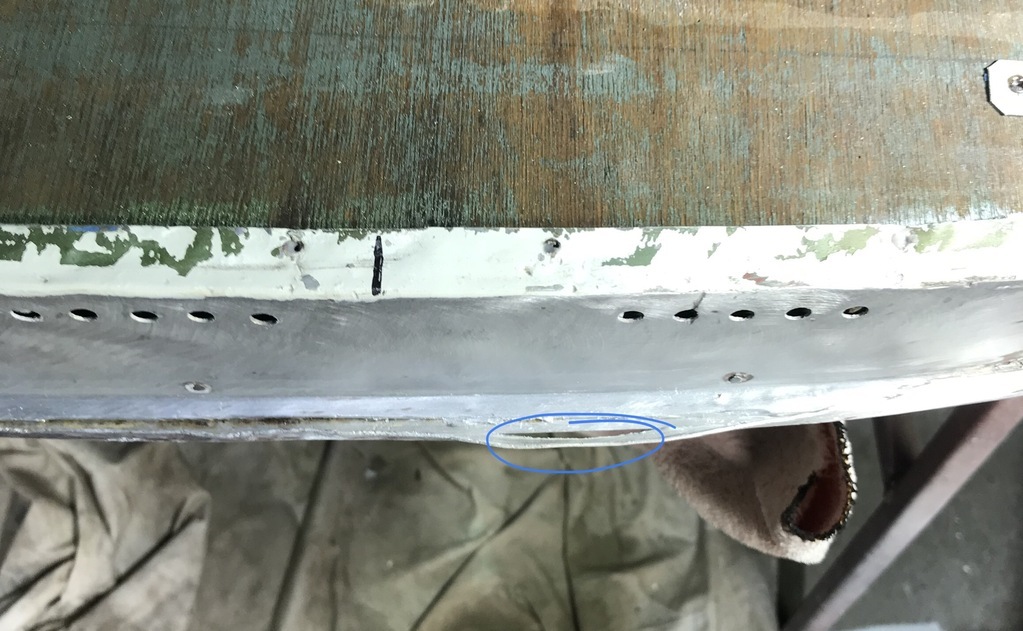 That pic is actually out of sequence, but it’s the only one that shows the break. Anyway I carried on, carefully opening up the fold. Annealed it a couple of times and eventually got it open enough that I had some chance of cutting back the frame. I only needed to take about 3 to 4 mm, but that had me worried, how to cut it without cutting the skin. Hopefully this pic will explain. 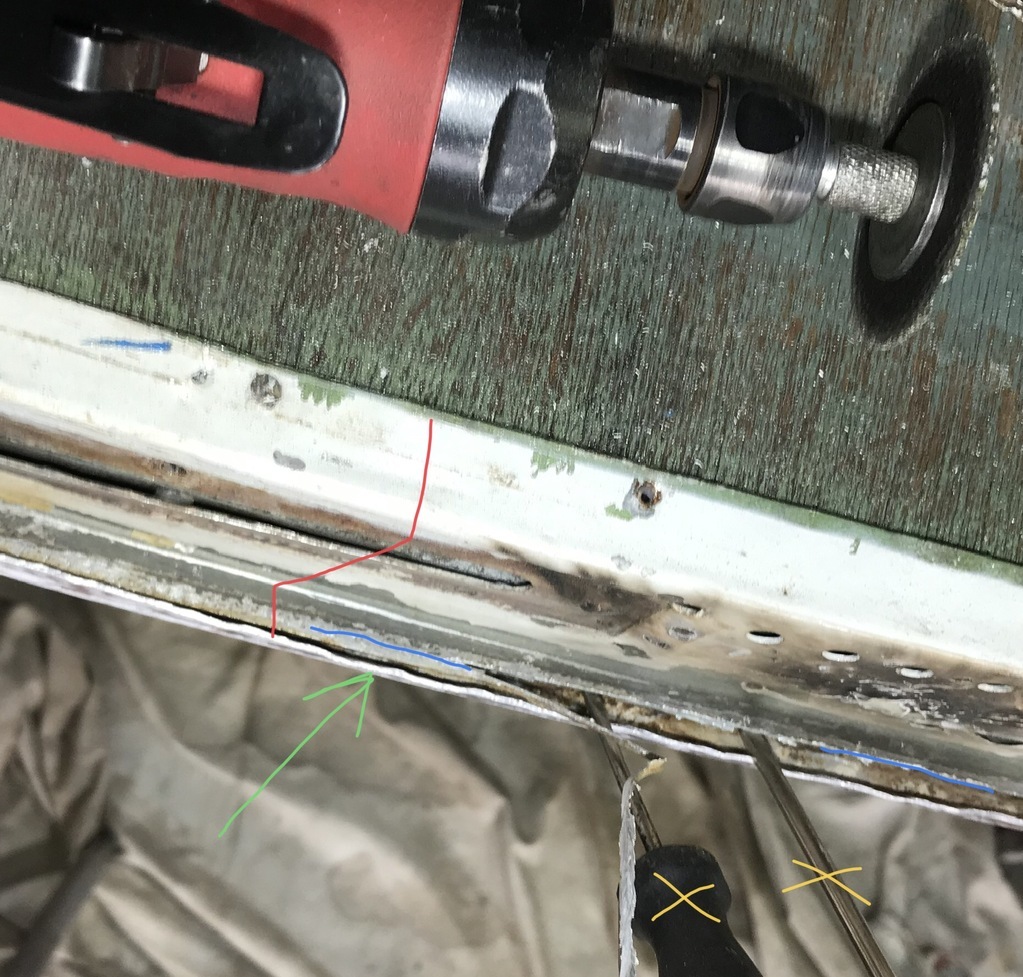 The red line just shows the profile of the door edge. The yellow crosses are small screwdrivers, prising the skin away from the frame. The green arrow points to the turned up edge of the skin and the blue line is the cut on the edge of the frame. Cut made with the die grinder shown. It was actually pretty easy. The frame is ally, I had expected steel, so that was easier. And prising the skin away with the screwdriver made it simple to avoid cutting the inside of the skin. Once the cut was made, I cleaned it all up and started the long process of getting the edge turned back over. Lots of hammer and dolly work. But it turned over ok. And just left me with the cracked area to try and sort. I wasn’t looking forward to trying to tig that. It’s very thin and I pictured it all just running away as soon as I got some heat into it. Cleaned it thoroughly with the dedicated stainless wire brush and acetone. Started at 25 amps ( I told you I was scared ) but soon took it to 40 and it went well. The copper pieces helped. Once that’s ground back it’ll be hard to pick I should point out how small this is. That strip being clamped is about 5mm wide and probably only 1.2 thick. The vice grips are my smallest. About 5 inches long. 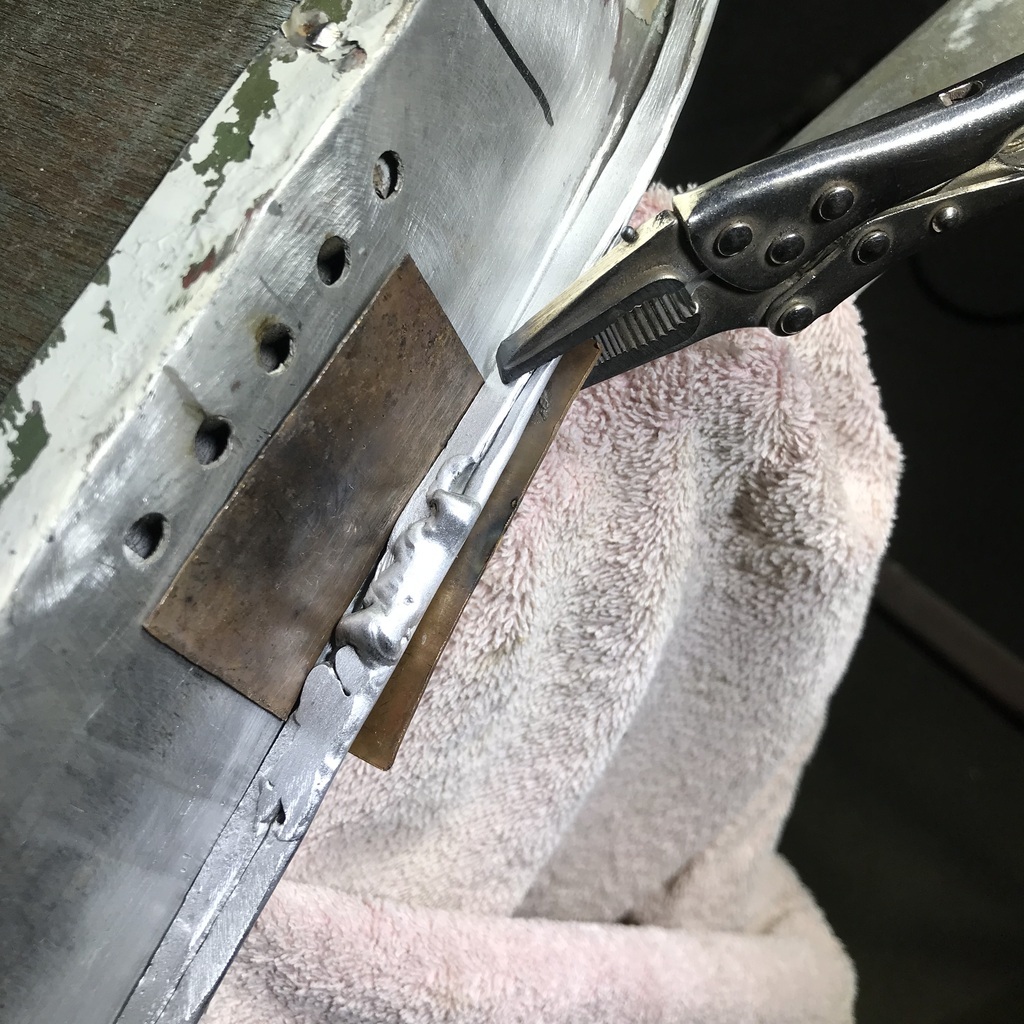 Onward! Thanks. |
| |
Last Edit: Dec 19, 2023 6:59:11 GMT by gazzam
|
|
|
|
gazzam
Part of things
 
Posts: 741 
|
|
|
|
Quick little job, as a break from putting the door on, taking the door off… This is the bracket that attaches the firewall box to the front of the sill. 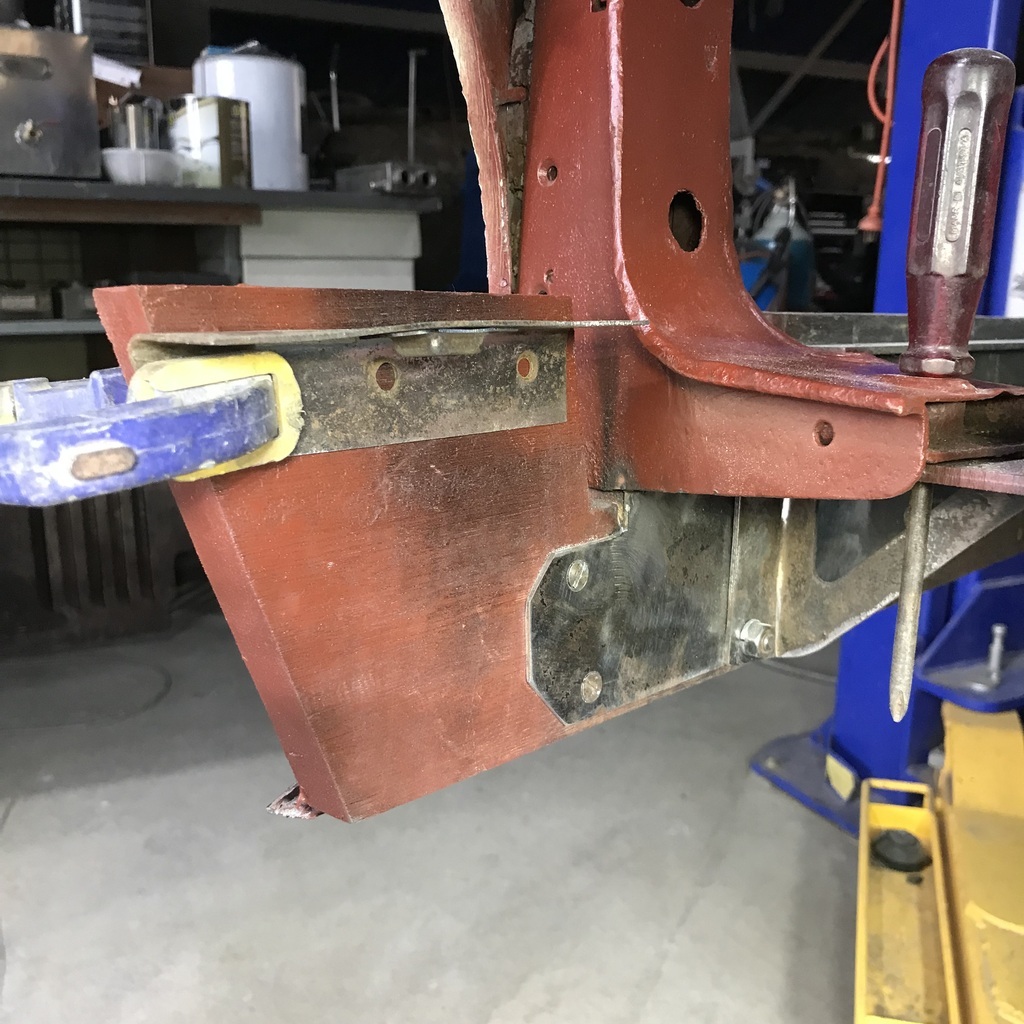 It’ll be screwed to the sill once the box is in place. But first the captive nut needs to be replaced. I made extra of these but I keep finding places to use them. Might have to make some more. Simple job for the spot welder. 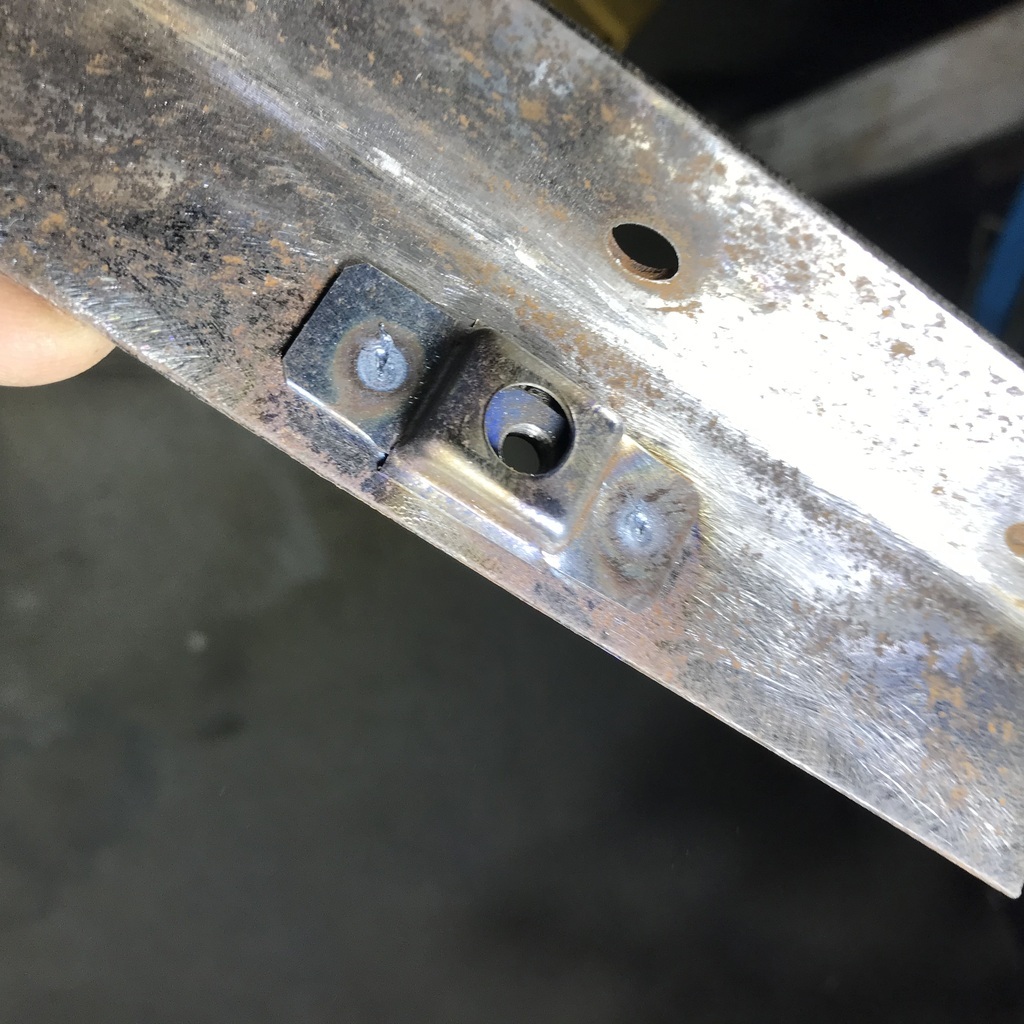 The door is pretty close to final. I know it looks too tight in the bottom front corner, but that’s just the angle of the photo. The door mustn’t be fully closed. 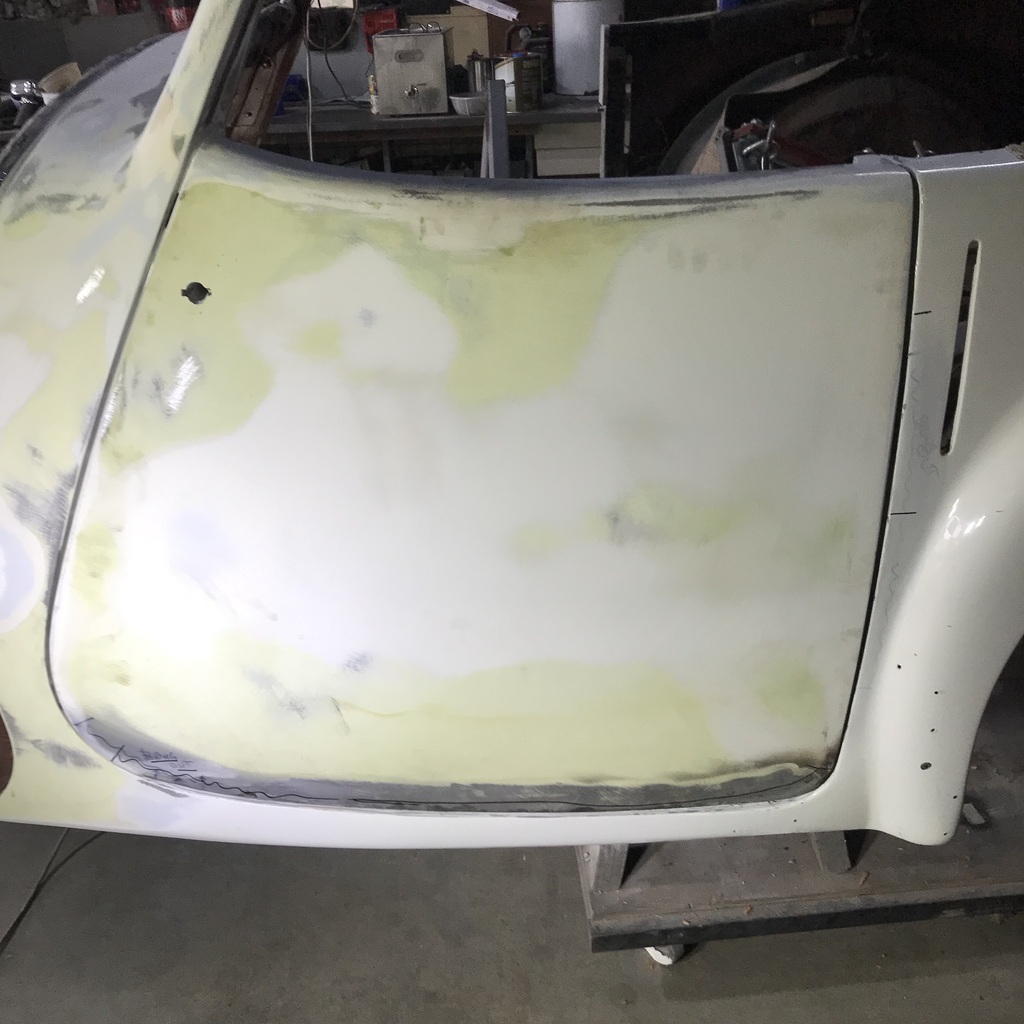 I had to massage this area. 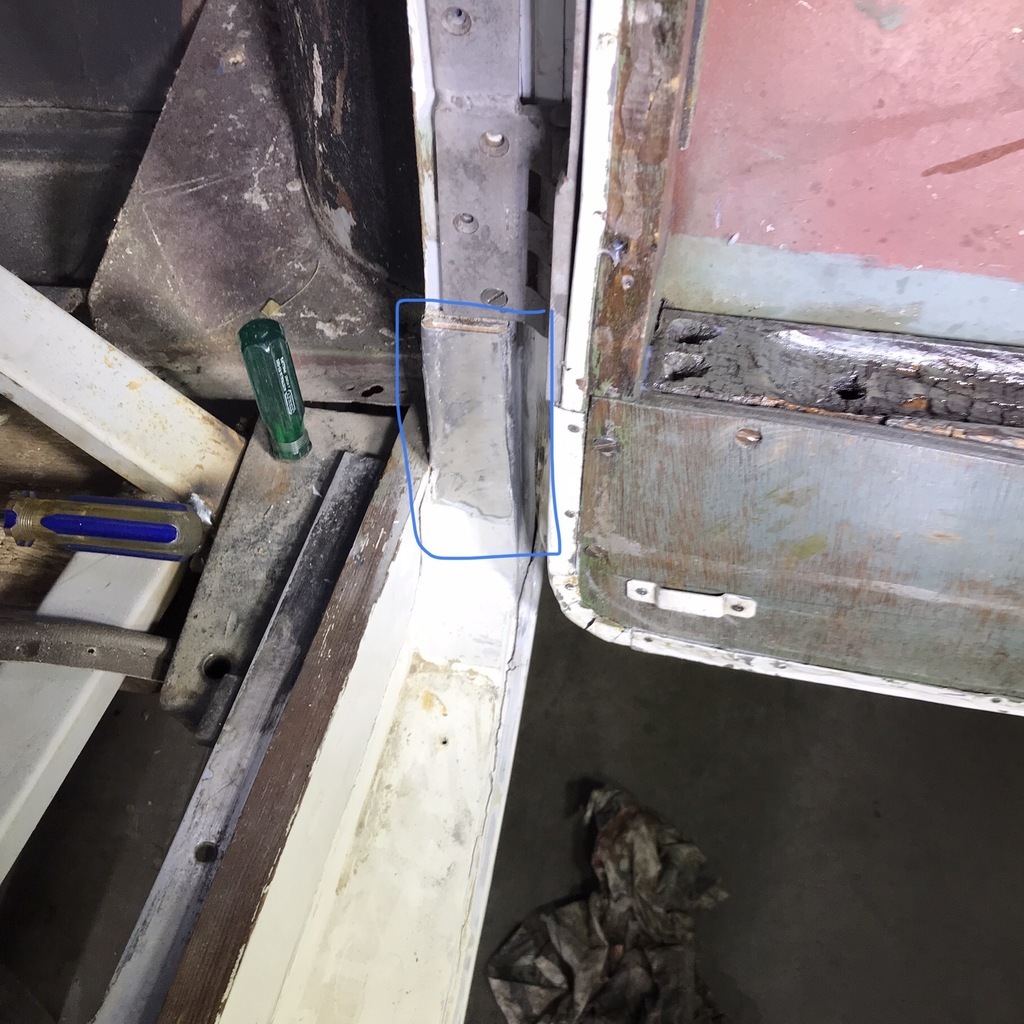 It was too tight when the door was closed. It’s just a piece of ally nailed over the wooden B pillar. The tacks came out easily and I was able to ease it apart enough to get a sharp chisel in there and take a couple of mm off the face of the wood. Then reshaped the ally with hammer and dolly and nailed it back into place. Turned out well and now has minimal clearance instead of putting pressure on the door. Thanks. |
| |
|
|
|
|
|
Dec 20, 2023 13:31:14 GMT
|
|
Door clearancing is always a PITA.
|
| |
|
|
gazzam
Part of things
 
Posts: 741 
|
|
|
|
|
Didn’t take any pictures today.
Injected some epoxy into the screw holes on the driver side body and door, so I can start the process on the that side.
The passenger side is done.
That is unless something has changed shape, again.
That happened the last time I fitted it ( the door ).
I had been using a 1.5mm spacer on the top part of the hinge. For probably the previous 5 or 6 times that I’d put the door on. All was good .
Then suddenly the bottom gap was tight at the front.
So I took the spacer out and it was good again.
I cannot explain that.
But I’m happy that the spacer is no longer needed. It was a ba$turd to get in place.
And I’m happy with the fit. It’s better than I was expecting, with less difficulty.
Thanks.
|
| |
|
|
gazzam
Part of things
 
Posts: 741 
|
|
|
|
Had family for xmas, so no shed time other than for a couple of small jobs on two of their cars. Front brake pads in a Skoda Yeti and regas the a/c in a 90s Corolla. They all left on Wednesday, so I was able to sand the driver’s door yesterday. That was after wife and I robbed the bee hive and then getting the grass under control, before it got too hot. Not worth a photo, just looks like the passenger side. About the same amount of unnecessary filler. So my arms are sore again and it’s hot again (was lovely late 20s over xmas ) so I’m having an easy day. First up I had to make some countersunk head screws for the driver side. 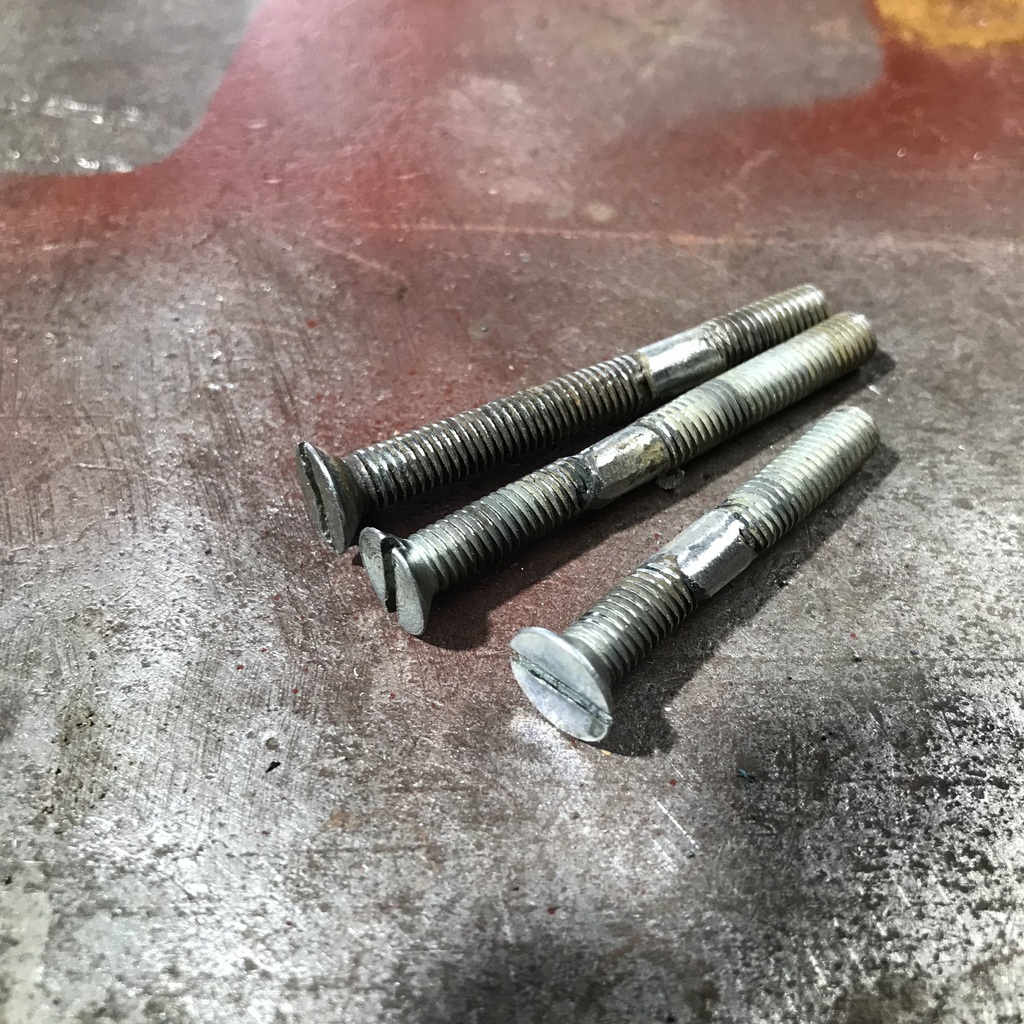 As you can see they’re just a BSF thread welded to a UNF ( I think ) screw. Then some yard work this morning and got the electric gate working ( bad battery ). Again before it got hot. Then back to the shed to mount the door and see what the gaps are like. Again, there’s work needed. This needs correction. That’s the upper rear of the driver door and I'd like to bring it down about 3mm. There’s no easy way, that I can see to do that. 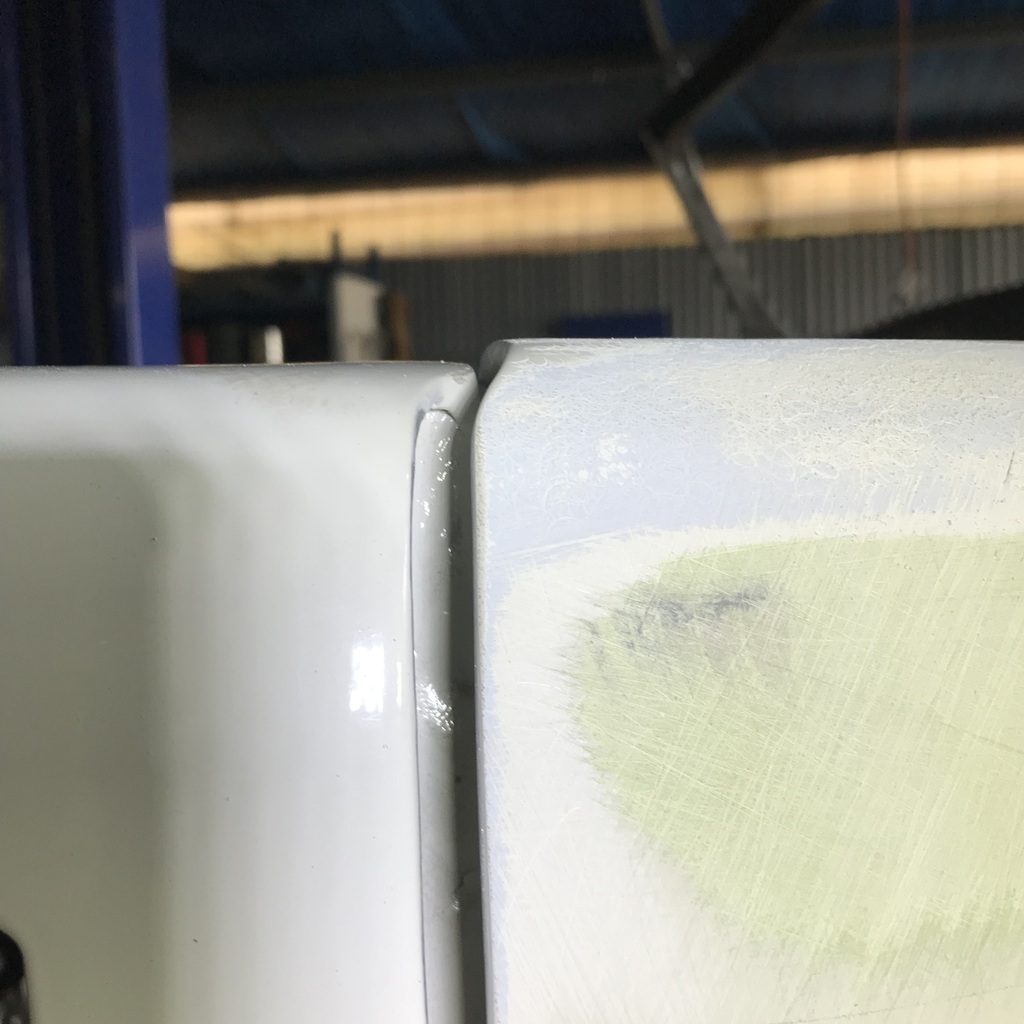 This is the hinge in place. The hinge is rebated into both the B pillar and the door. And there is one machine screw into the door and 3 into the pillar. I could weld up that hole in the hinge ( for the machine screw on the door side ) and redrill it down by 3mm. The other screws are all wood screws and the holes are filled with epoxy, so new holes for those are no problem. 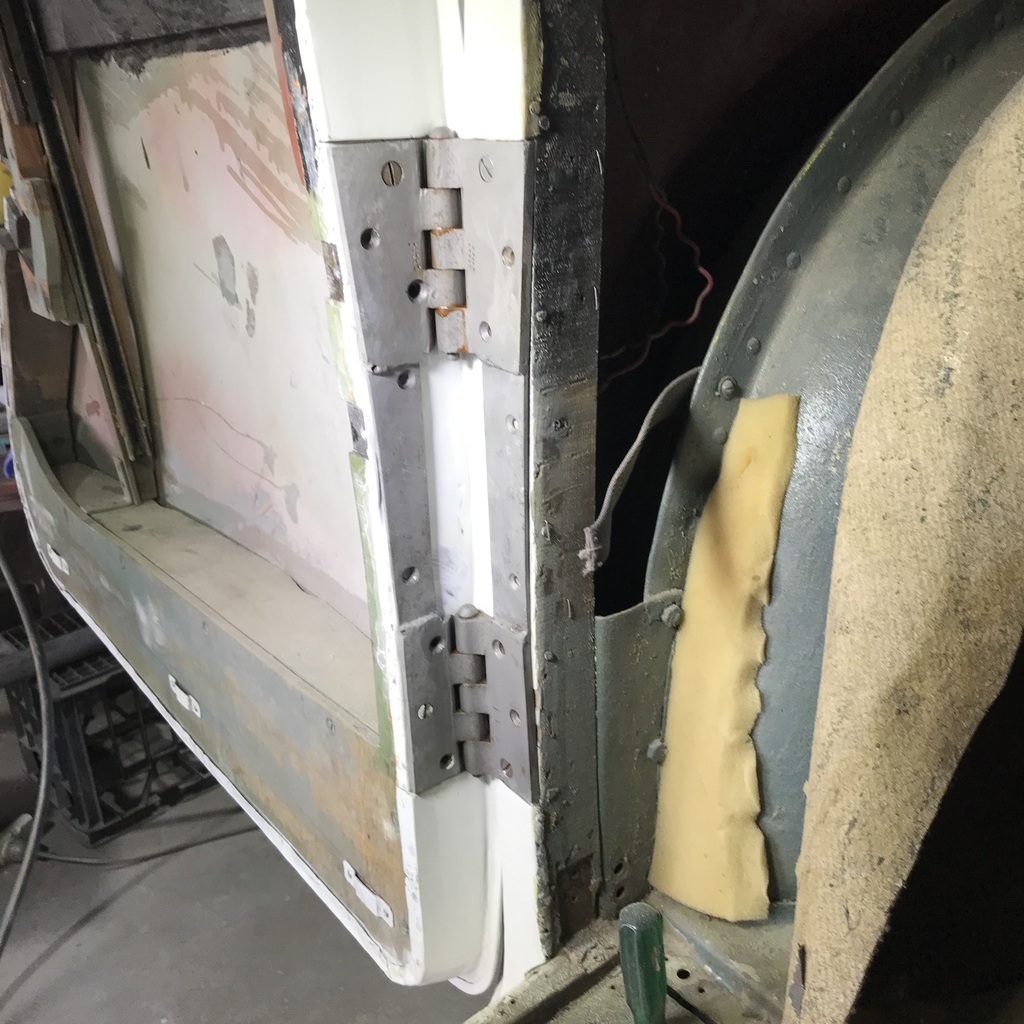 Then I could extend the upper door rebate up by 3mm. This will leave a gap at the bottom rebate but I think I can live with that. I did think of modding the pivots on the hinge, but I’m not keen. If you have a suggestion, let’s hear it. Of course, then this gap will tighten unacceptably, but it’s the same process as the other side to fix that. 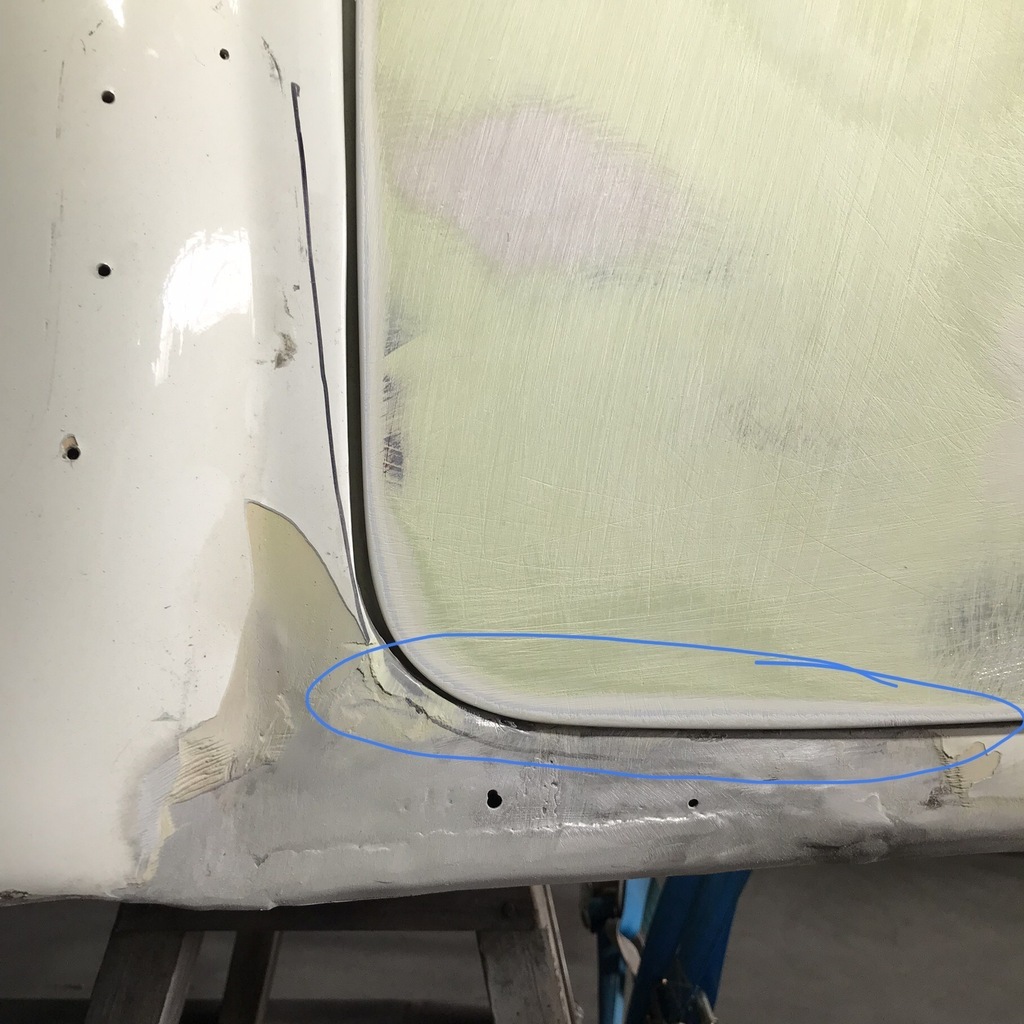 Thanks and have a happy New Year. |
| |
Last Edit: Dec 29, 2023 6:04:36 GMT by gazzam
|
|
glenanderson
Club Retro Rides Member
Posts: 4,354
Club RR Member Number: 64
|
|
Dec 29, 2023 13:13:35 GMT
|
|
Is it high at the hinge end of the door or the latch?
If it's the latch, a small shim behind the top part of the hinge? Wouldn't need to be very thick to drop the rear of the door down 3mm.
If it's the hinge end then physically dropping the door is the only way of doing it... Unless you could accept raising the body to meet it... and that's way more work (or filler).
Is there a rake of filler on the top of the door? Maybe it's worth looking at easing that down?
|
| |
My worst worry about dying is my wife selling my stuff for what I told her it cost...
|
|
gazzam
Part of things
 
Posts: 741 
|
|
|
|
Sorry Glen, I should have posted a better pic. This is where the door is high. 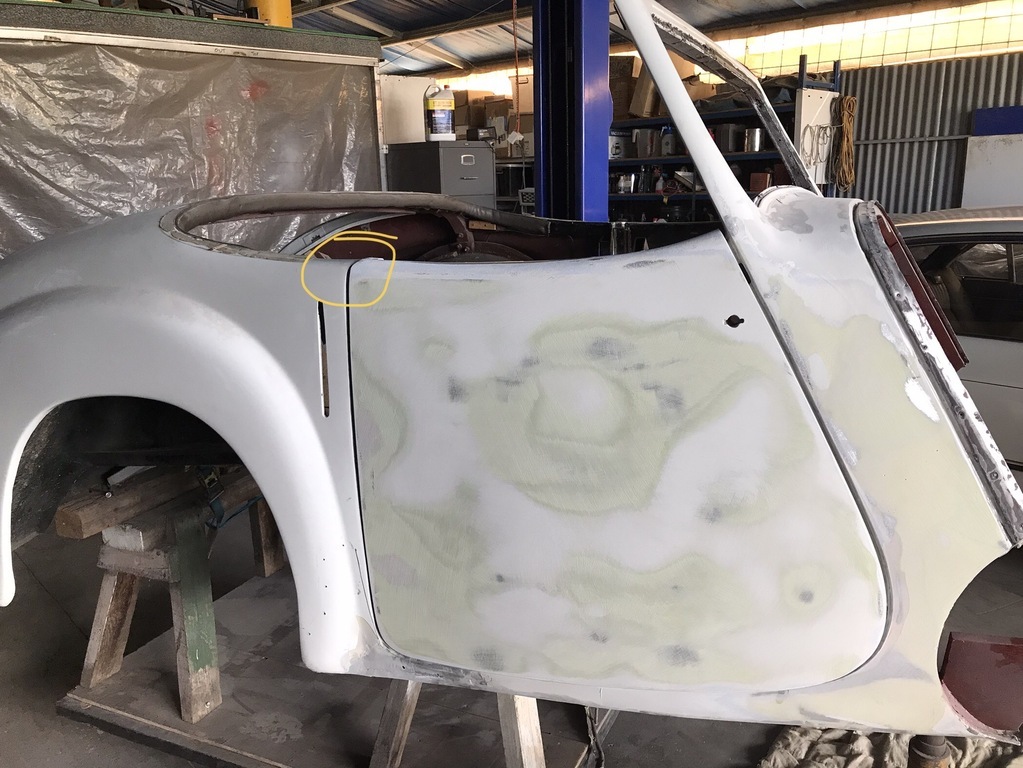 That’s the hinge end, as they are suicide doors. The hinge is attached with machine screws, 3 on the body and one on the door, and 12 woodscrews. The machine screws are what complicate moving the door relative to the body. This all makes sense in my head, but my ability to communicate it is lacking! |
| |
|
|
glenanderson
Club Retro Rides Member
Posts: 4,354
Club RR Member Number: 64
|
|
|
|
|
Ah, that’s clearer. 😃👍
I think I would look at the potential for reshaping the top of the door, or the body, rather than dropping it down on the hinges. If you start mucking around with where the hinge sits, you could well be into loads of potential aggro getting it to shut properly.
But, and it’s a big but, you’re the one sat looking at it. I’m on the other side of the world, guessing from the comfort of my armchair. 😃
|
| |
My worst worry about dying is my wife selling my stuff for what I told her it cost...
|
|
jamesd1972
Club Retro Rides Member
Posts: 2,921  Club RR Member Number: 40
|
|
|
|
|
Pretty sure some application of a brummie screwdriver would all it would have got when new!
Probably visually masked a fair bit once hood fitted anyway?
Watching with interest to see where you get too as always.
James
|
| |
|
|
gazzam
Part of things
 
Posts: 741 
|
|
|
|
Happy New Year to all! I got a little bit done yesterday morning before we had to go for a 3 hour drive to our friends for NYE. Then I had no time to post , so I’m catching up now that we’re home. I hope everyone had a nice time, we certainly did! I’ve decided to put the body on the rotisserie and for that, I need to change the front mounts on the frame. So I cut the old ones off and added some new ones that are simply a piece of 50mm heavy angle that picks up two different holes on the same mounts. I had noticed that there was a bit of flex in the 2x1 rhs that goes to that mount. So I added a bit of triangulation. 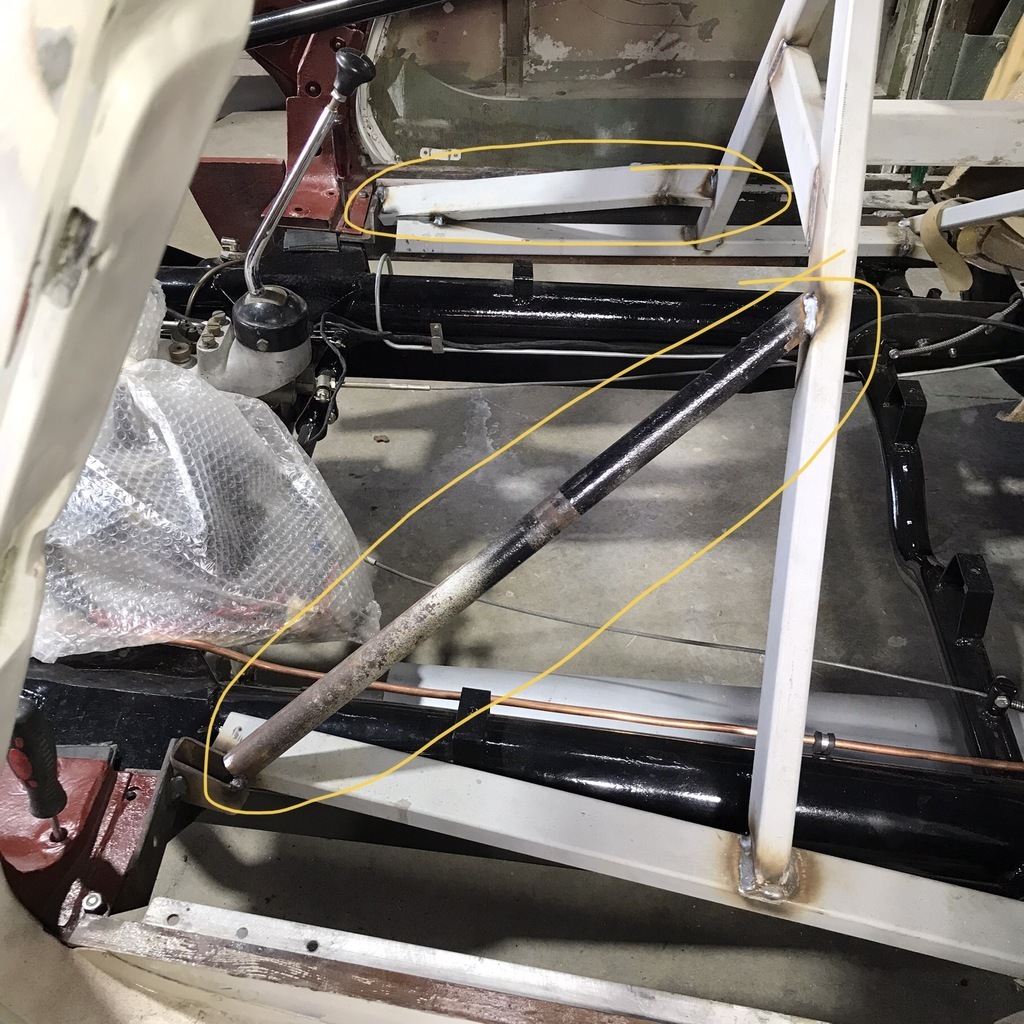 Also test fitted the firewall box. 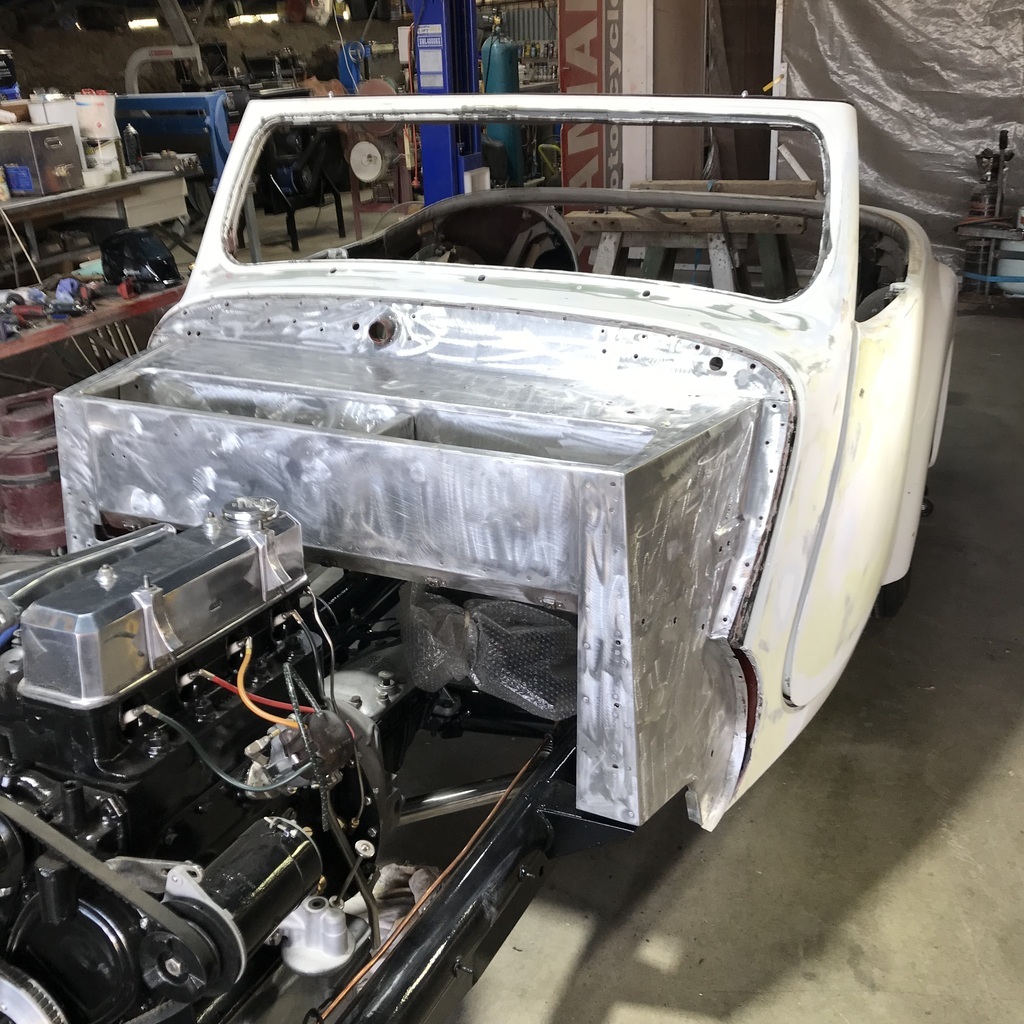 As you can see I sat it on the chassis for all this. Mainly to see what I need to do in the way of packing the mount points in order to get the best door fits. I took the body back off the chassis. After putting the chassis away, back under cover, I noticed that the passenger door gap had opened up at the bottom, so the frame is still not rigid enough. Tomorrow I’ll sit the body on the chases once more and add some more bracing after I’m happy with the gaps. Thanks. |
| |
|
|
|
|
|
|
gazzam
Part of things
 
Posts: 741 
|
|
|
|
First thing, I put the body on the chassis and welded in a couple of braces to stiffen up the frame. It was obvious that the whole thing was more rigid as soon as I lifted the body. So I put the chassis under cover and the body back on the trolley. Then started on the driver's door. Marked where it needed addressing. 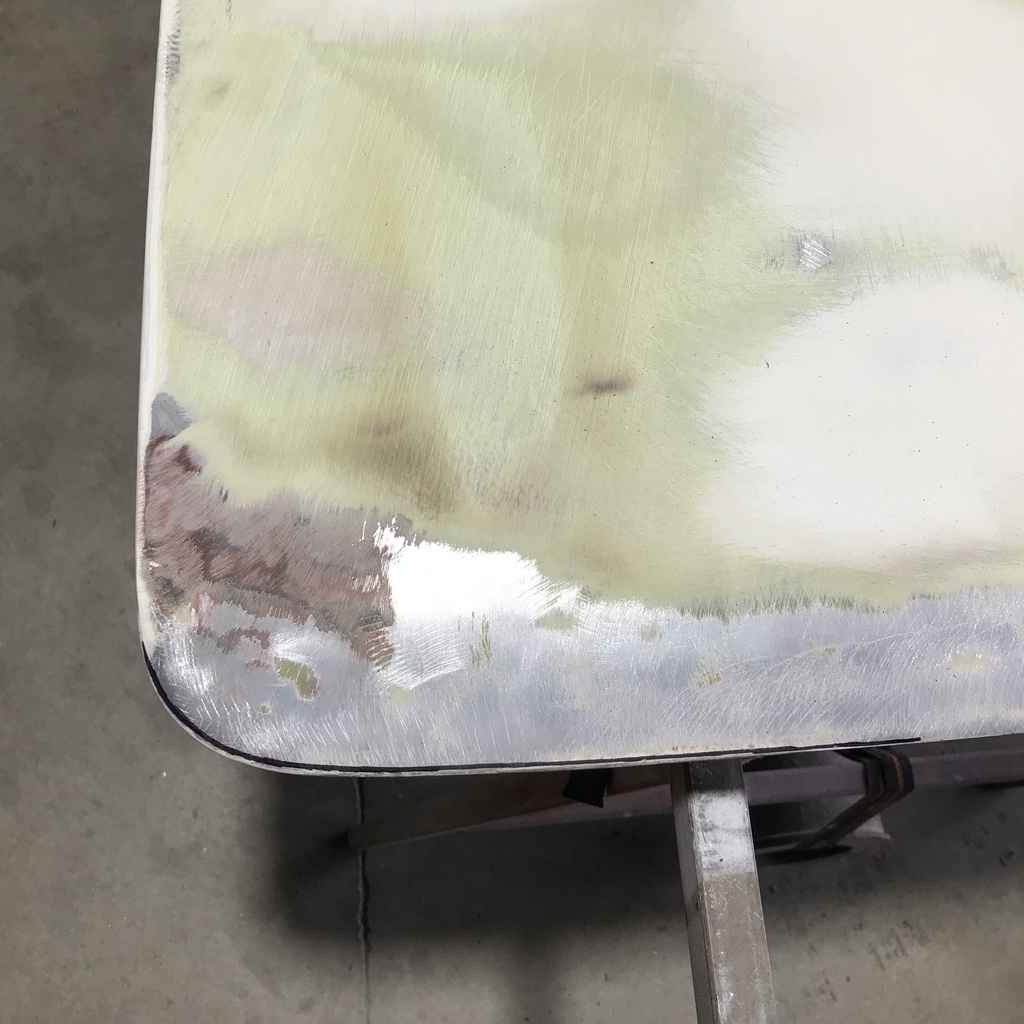 Same procedure as before, except I was lucky and the skin didn’t split this time. Skin opened up. 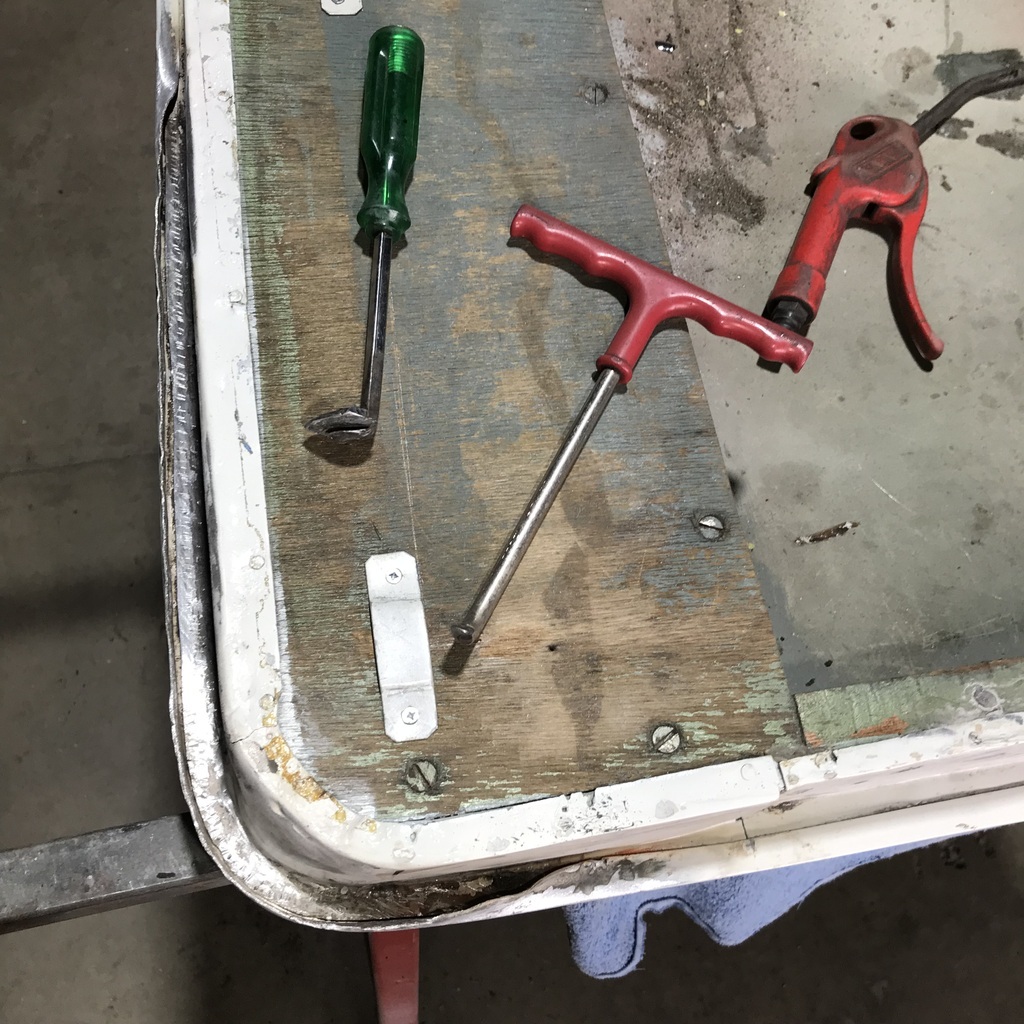 After cutting about 3mm from the frame it looks like this. 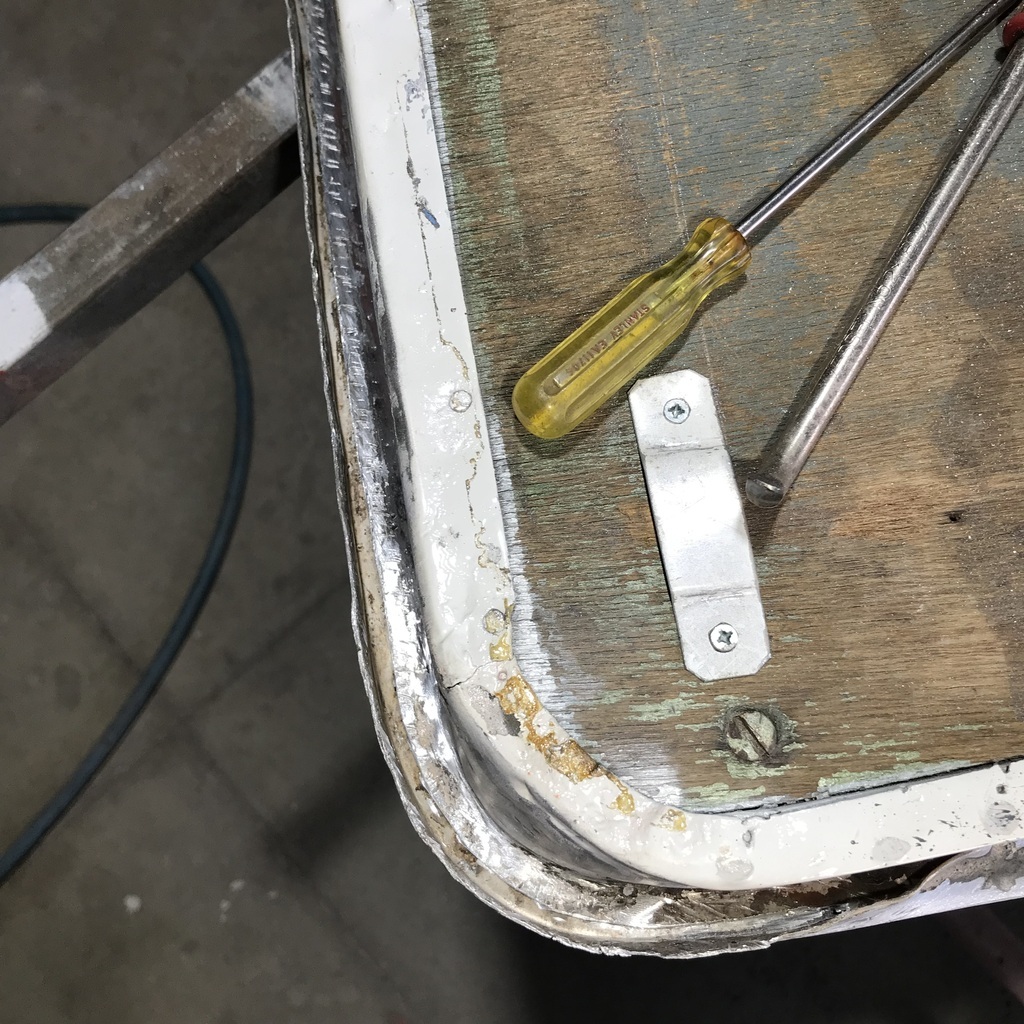 I must have annealed this half a dozen times, trying to avoid cracking the skin. I use a candle to put soot on the ally as a temperature guide. And oxy/propane to get that temperature. 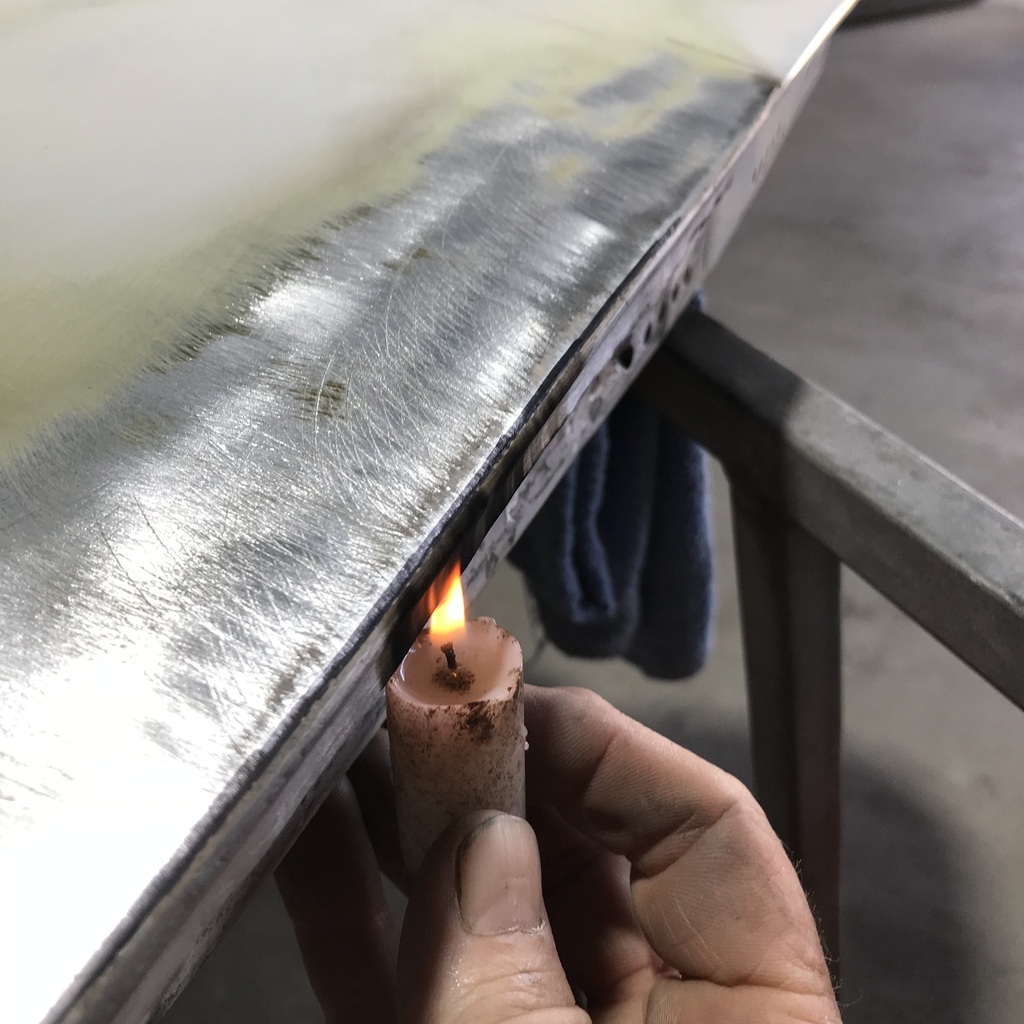 Then refold the skin with a hammer and dolly. After a fair bit of trial fitting, I have a gap I'm happy with. 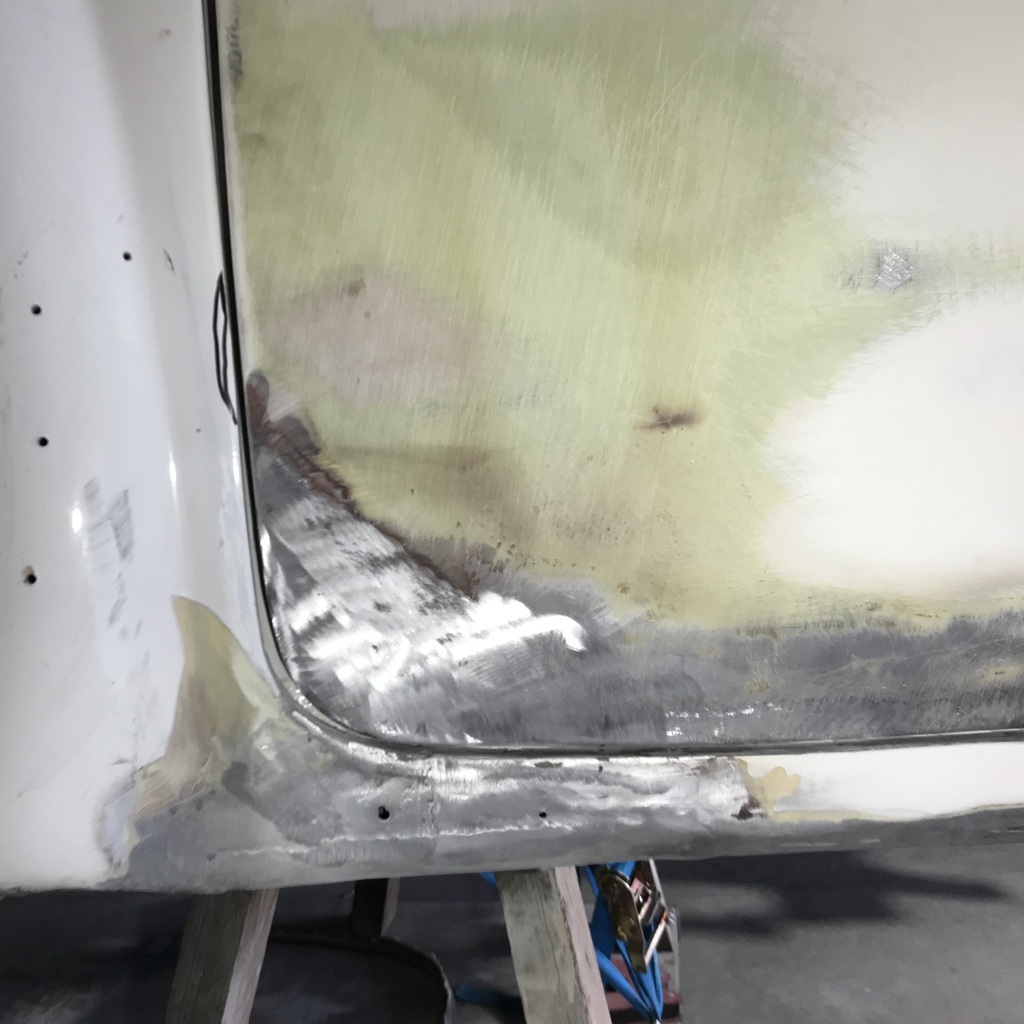 Thanks. |
| |
|
|
gazzam
Part of things
 
Posts: 741 
|
|
|
|
On to the boot lid. Took the topcoat off with 36# on the DA sander. Then reinstalled it. Gap on LHS. 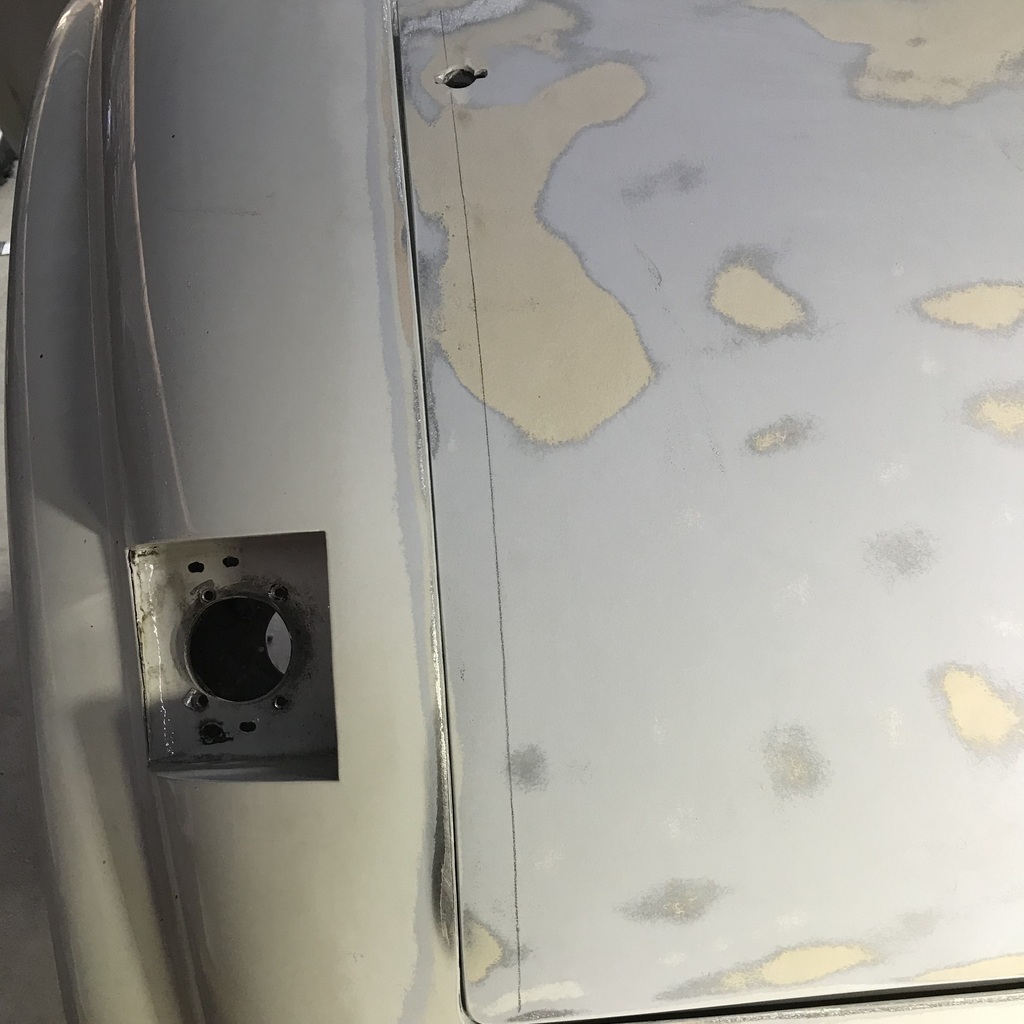 Needs opening up through most of the mid section. And the RHS. 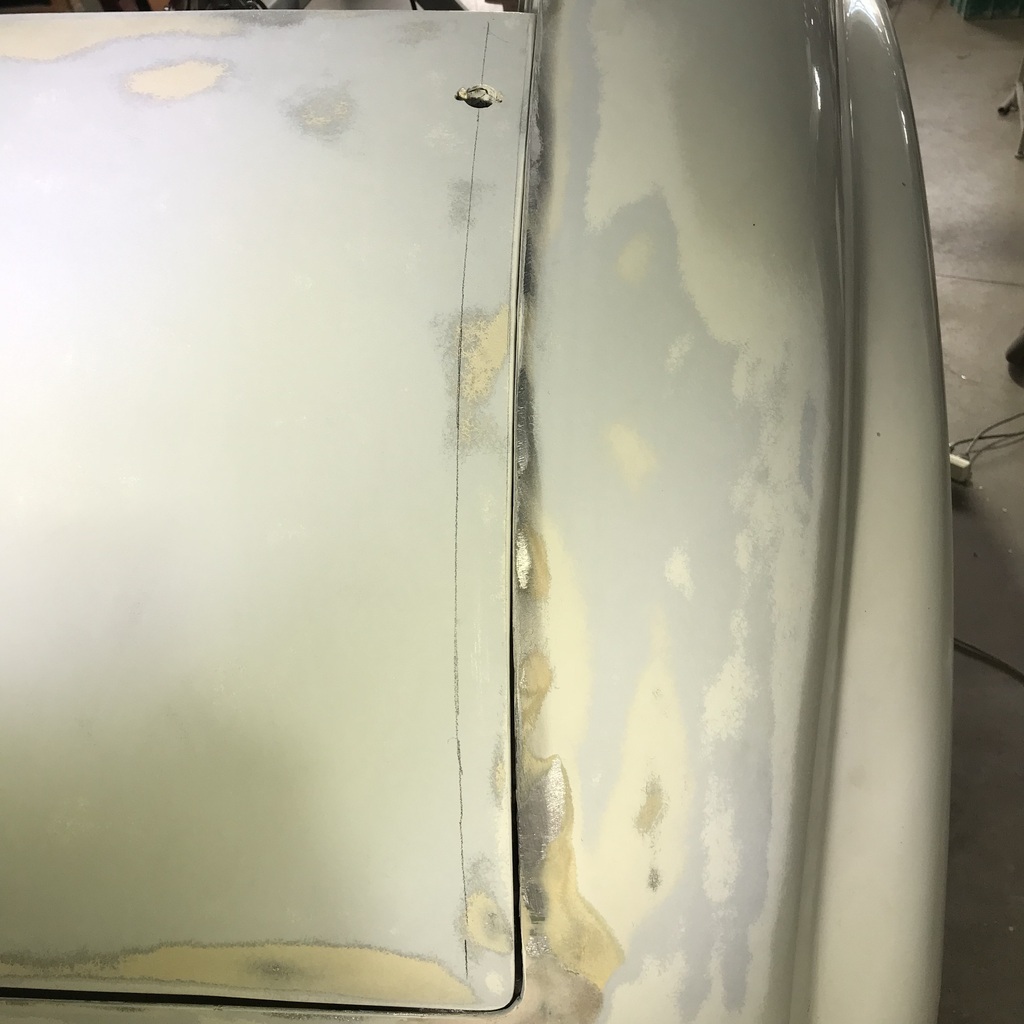 About the same except for the lower 1/3rd. You can’t see it in the photo but it’s low in the mid part of both sides and across the centre of the bottom. Seeing there’s so much needed, and it looks reasonably simple, the plan is to get the skin off. I annealed the edges and partly turned up the flanges. Once the sides were semi opened up, I punched in the 3 or 4 nails that held the bottom edge. Sprayed some penetrating oil into the top flange and I was able to slowly pry it off, without opening it up. And we have separation. 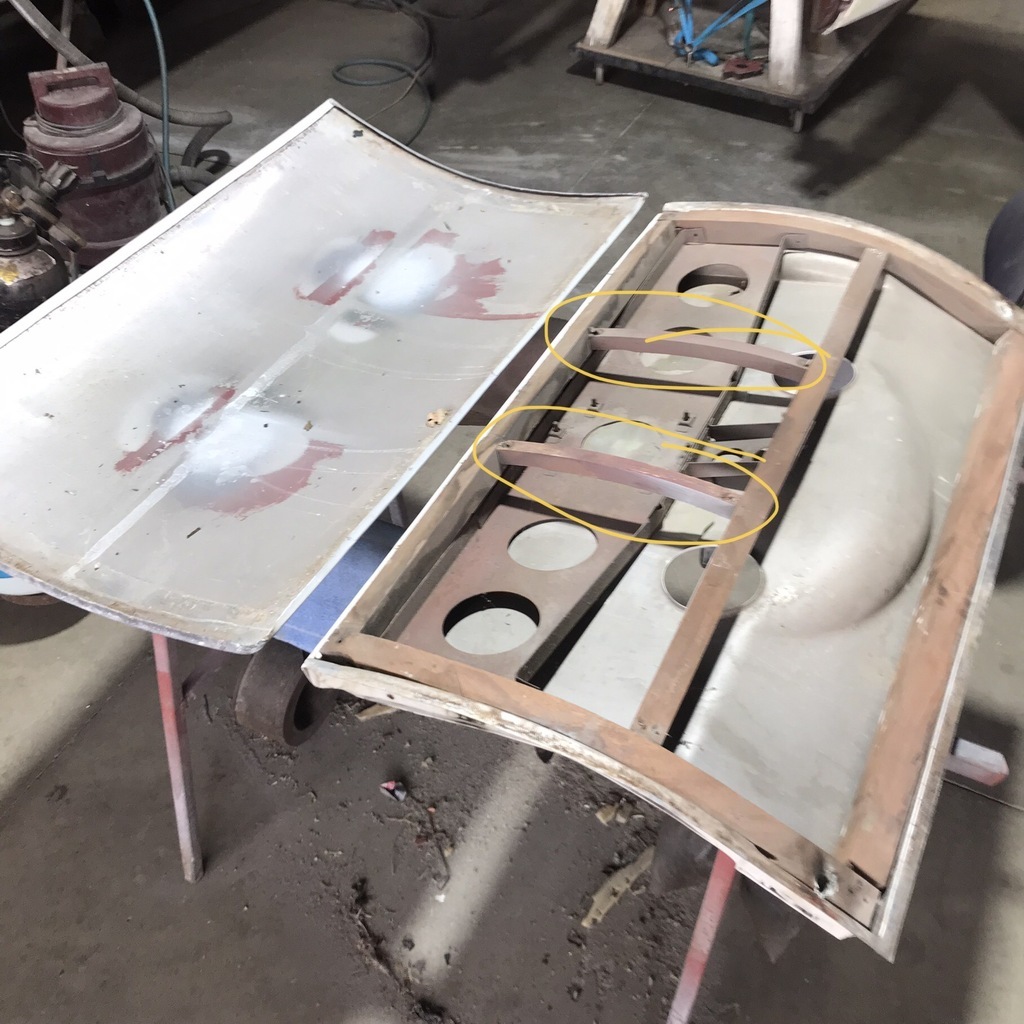 And I was quite surprised to see that someone has been in here before. That looks like Australian cedar to me. Also, I could be wrong, but I’d bet pozidrive screws weren’t a thing in 1948. The two pieces circled in that pic are original, I reckon. The rest are new. 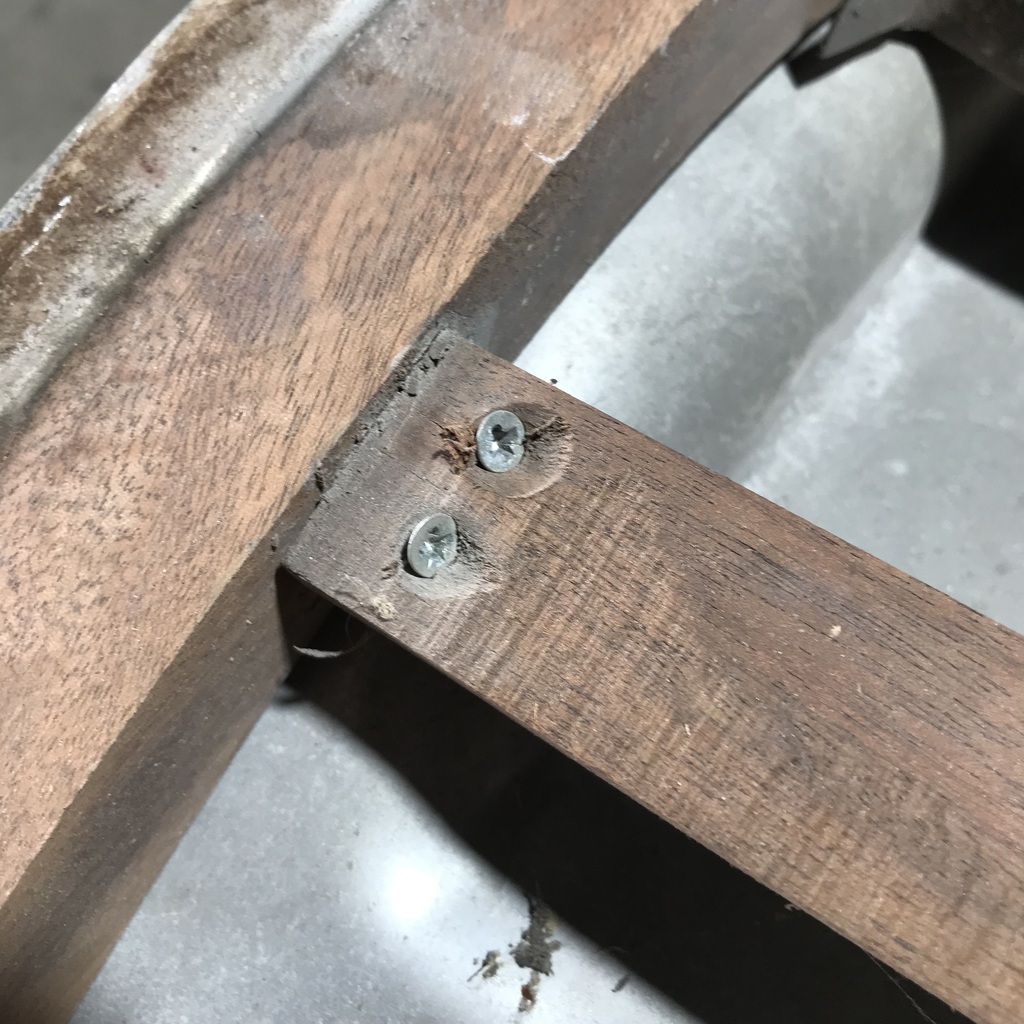 That said it’s a pretty good job. I suppose the original wood was rotten, though I can’t imagine why it would be. Although a lot can happen in 75 years… I really would love to know the history of this. The ally is in beautiful condition. And it begs the question, why wouldn’t you make it fit properly if you’re going to that amount of trouble? Budget maybe? Thanks. |
| |
|
|
|
|
|
|
|
|
its a convertible not sitting on its wheels watch the door gap change
when it goes on its wheels then you will be tearing your hair out
its a lovely old car something to be proud of
|
| |
|
|
gazzam
Part of things
 
Posts: 741 
|
|
|
|
With the skin removed, I put the frame back on the hinges. This made it easy to see what areas needed to be raised. This pic of the LHS shows where the frame needs to come up so that the skin is flush with the body. I put some black tape on the body to make it a bit easier to see. The marks on the frame are my indicators. 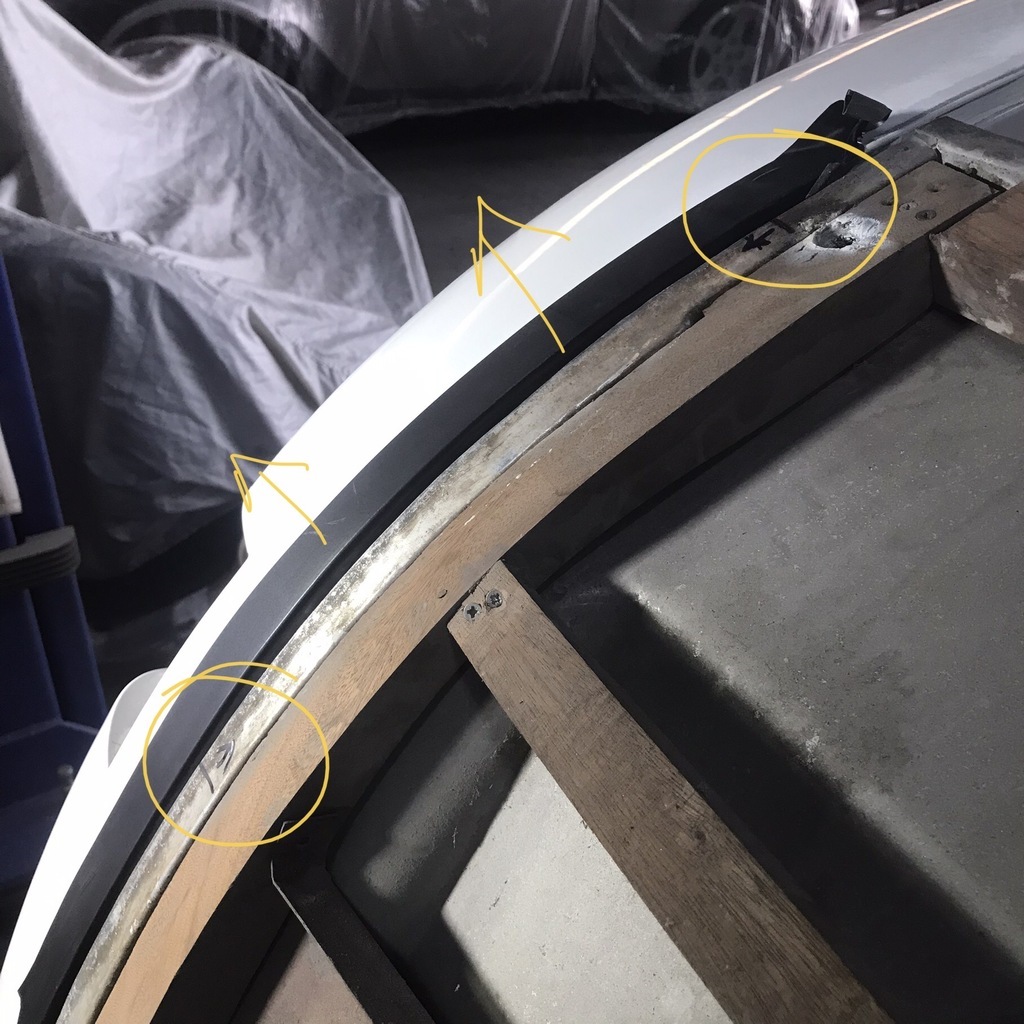 That’s a piece of aluminium folded and nailed to the wooden frame. The skin is folded over that. I was able to raise that area with some hammering using various dollies. It needed to come up about 3mm in places. Once both sides were sorted, the bottom needed some work. The skin is folded over the wood along the bottom and nailed to it. It was well inside the body, up to about 6mm in the middle. 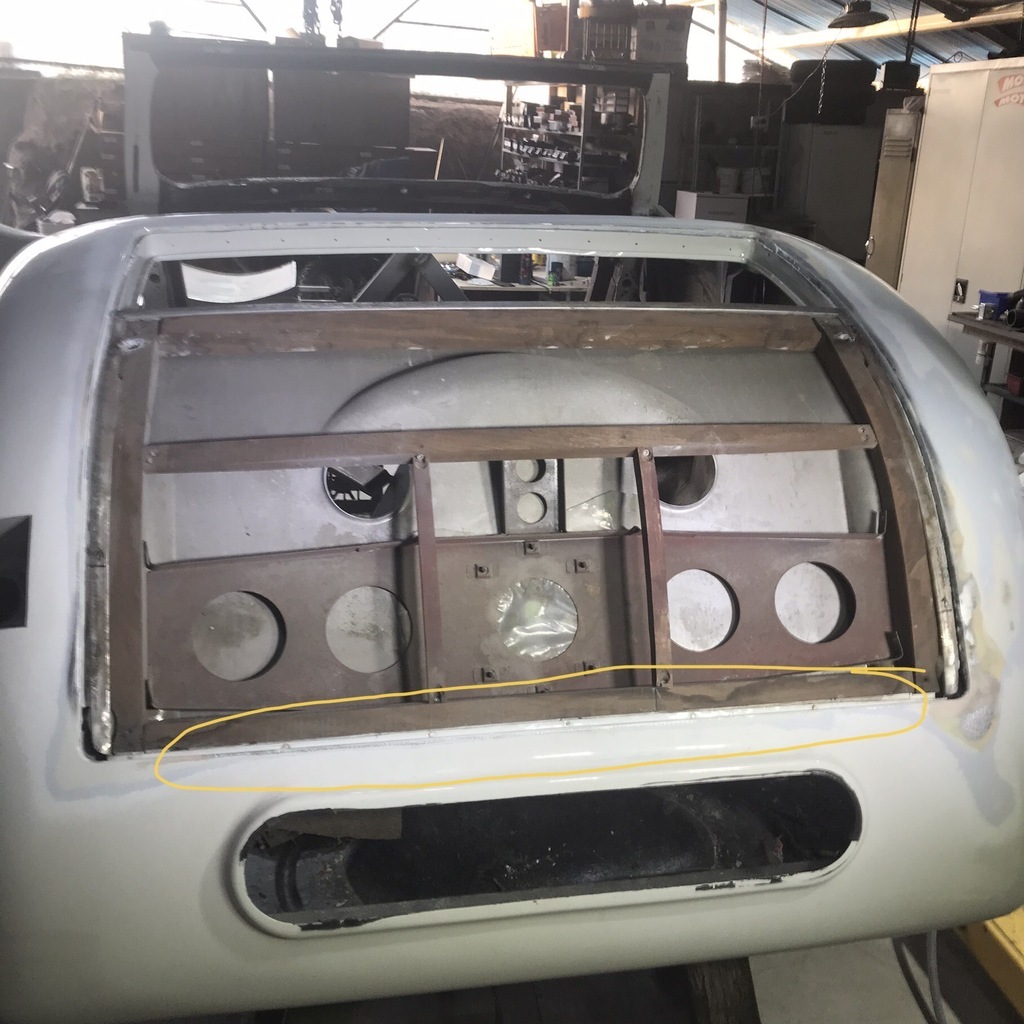 So I cut a strip of timber, I had some cedar as it happened, and shaped it prior to gluing it in place. That will bring the skin out the required amount. 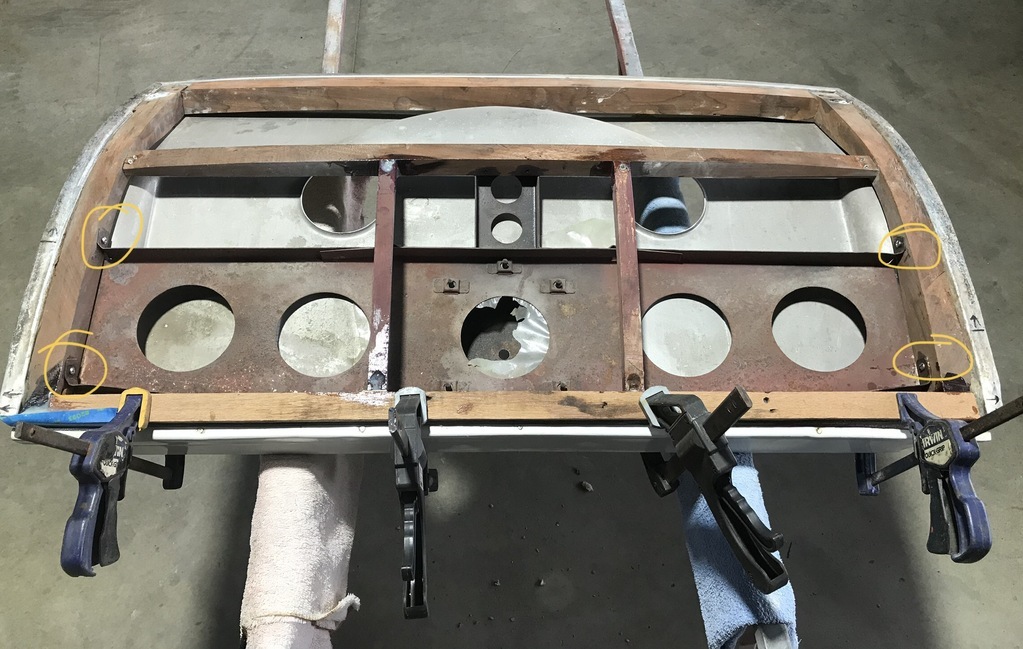 It’ll need a bit of fettling when I can get it back on the body. Also screwed that steel brace to the wood at the circled spots. This frame holds the spare tyre, so I can’t imagine why they wouldn’t have been replaced. Professional job, eh? Thanks |
| |
|
|
gazzam
Part of things
 
Posts: 741 
|
|
|
|
Once the glue had set on the boot lid frame, I was able to remount it and fine tune the shape of the lower edge to make it fit the body. I used the bead roller to put a crease for the new folds on each side of the skin. The positioning of these were really just an educated guess as I had no way of marking them. So I drew a line inboard of the old fold and winged it. There was room for adjustment as I hammer and dollied them over. I hope… The skin went on remarkably easily and even over the new wood with no bother. Then it could be put off no longer - I had to start to finish the folds. They turned out ok, except the left hand one had a bit too much gap for about 6 inches or so. So out came the tig. Went well. Surprisingly. 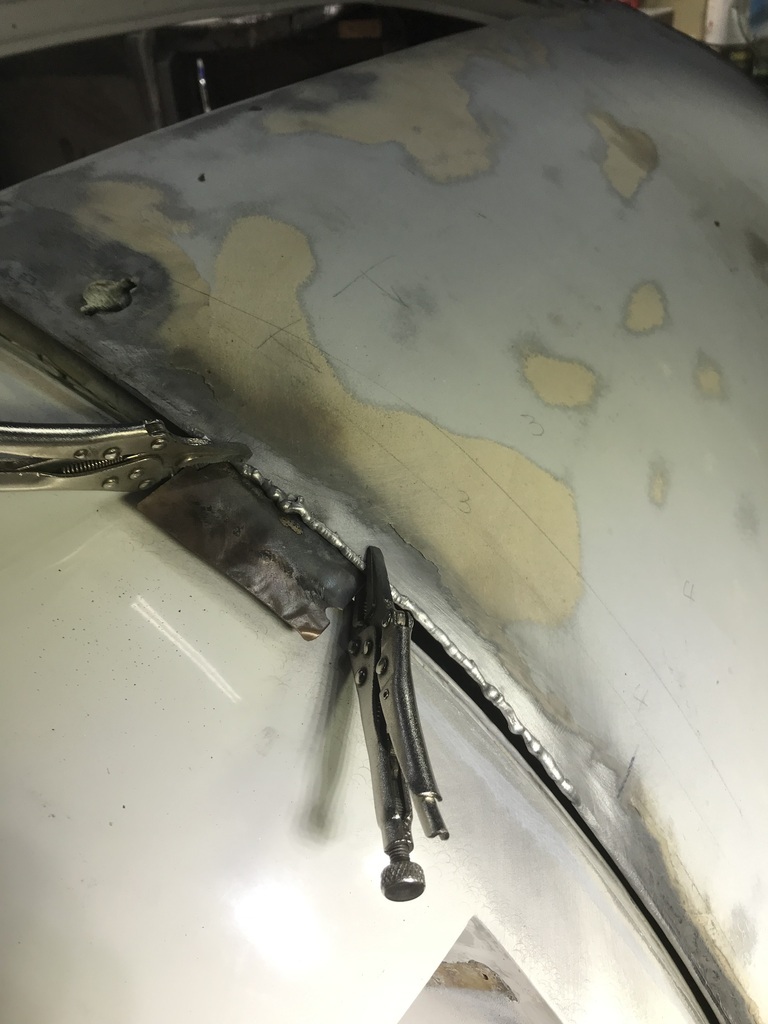 Seeing the welder was behaving ,I decided to run a weld up the inside on each side, I was worried that the old fold would crack. Easier to make sure now. I’m pleased how the boot lid has turned out. 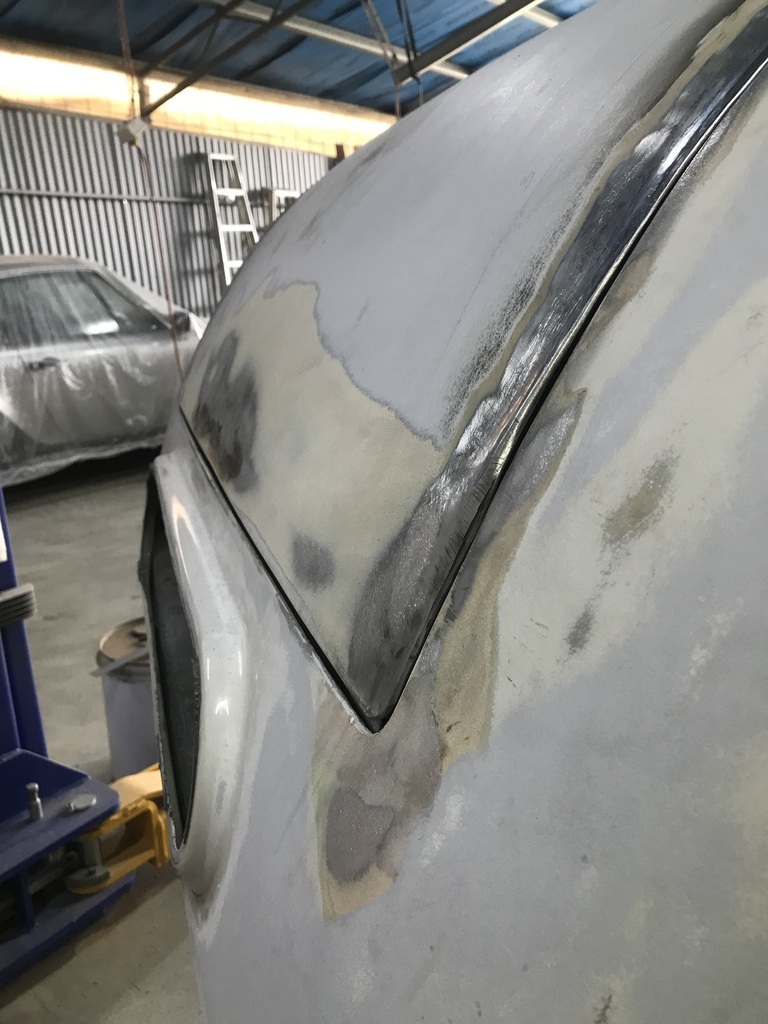 This crack is going to be a drama. 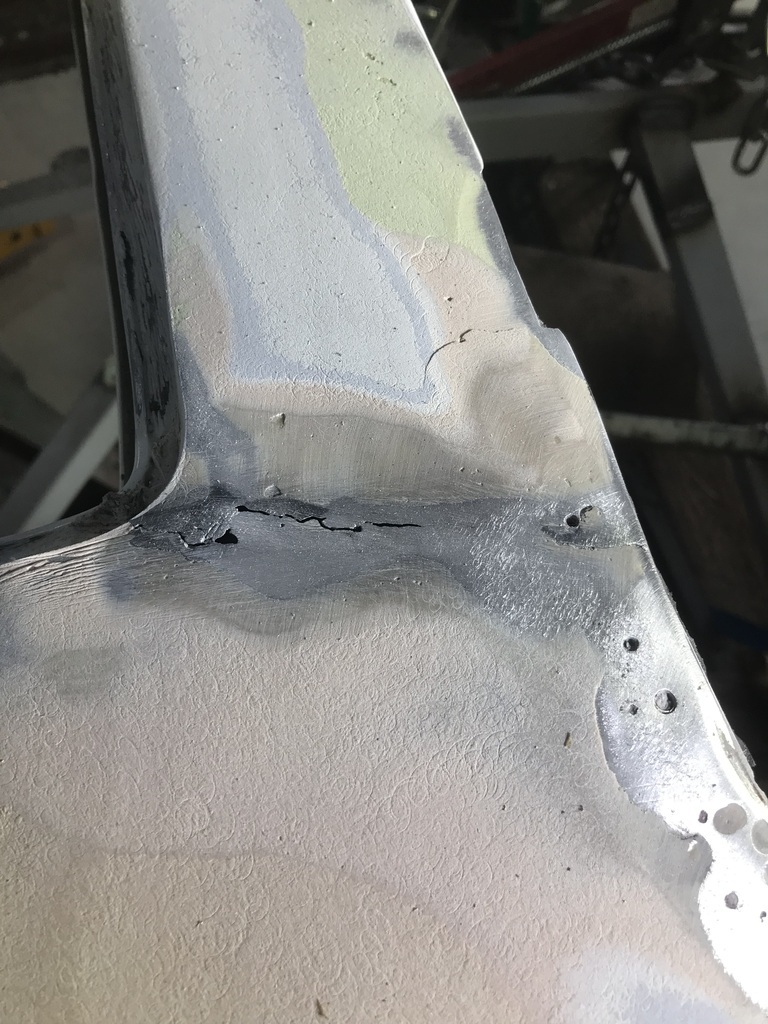 Thanks. |
| |
|
|
gazzam
Part of things
 
Posts: 741 
|
|
|
|
We finished play yesterday with this problem to sleep on. 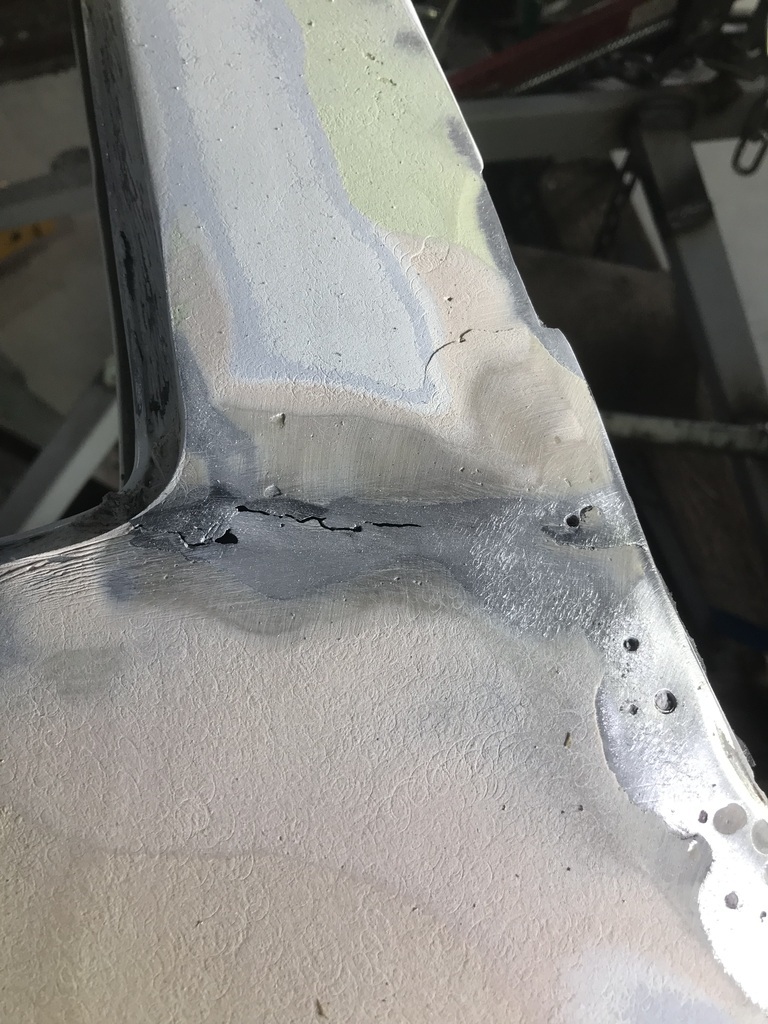 As I thought, it’s not going to be easy. I tried welding it, but it’s just too dirty and impossible to clean. This was the result. 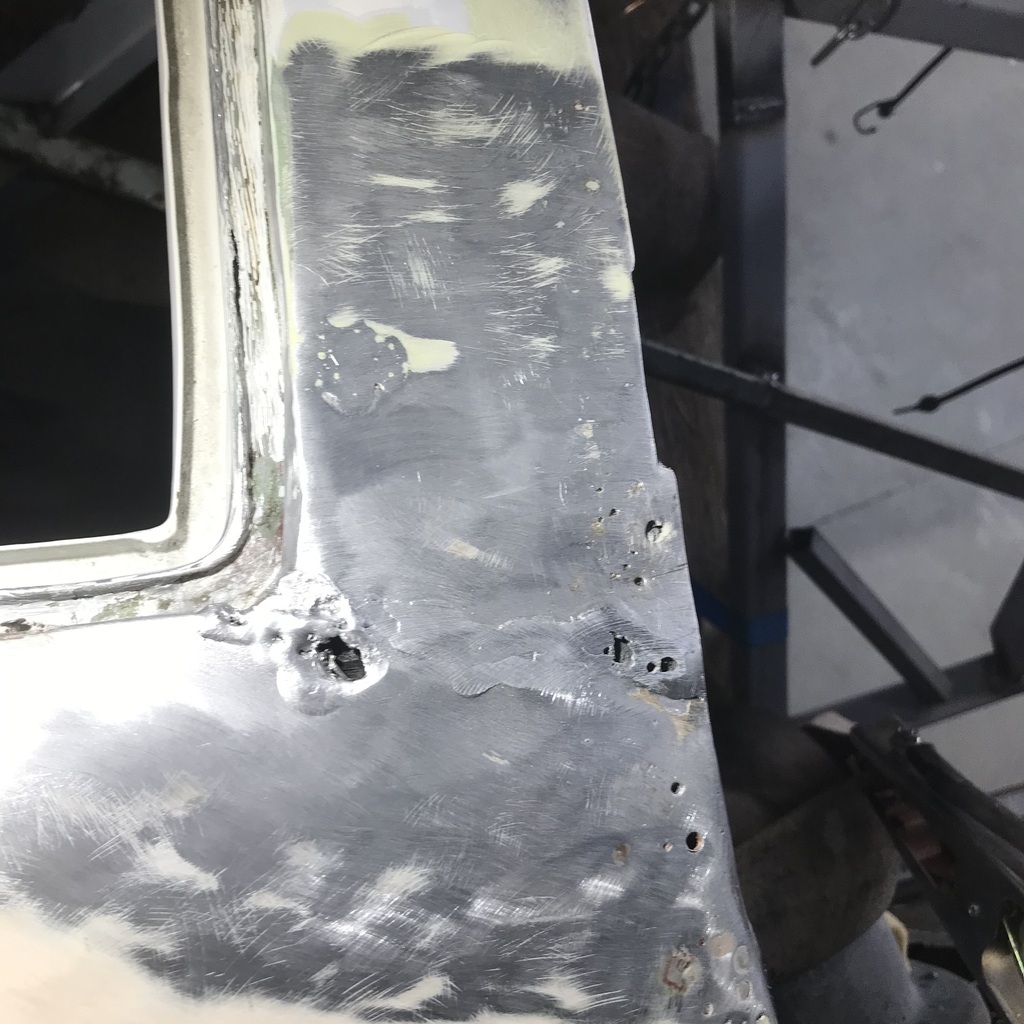 So drastic measures are called for… 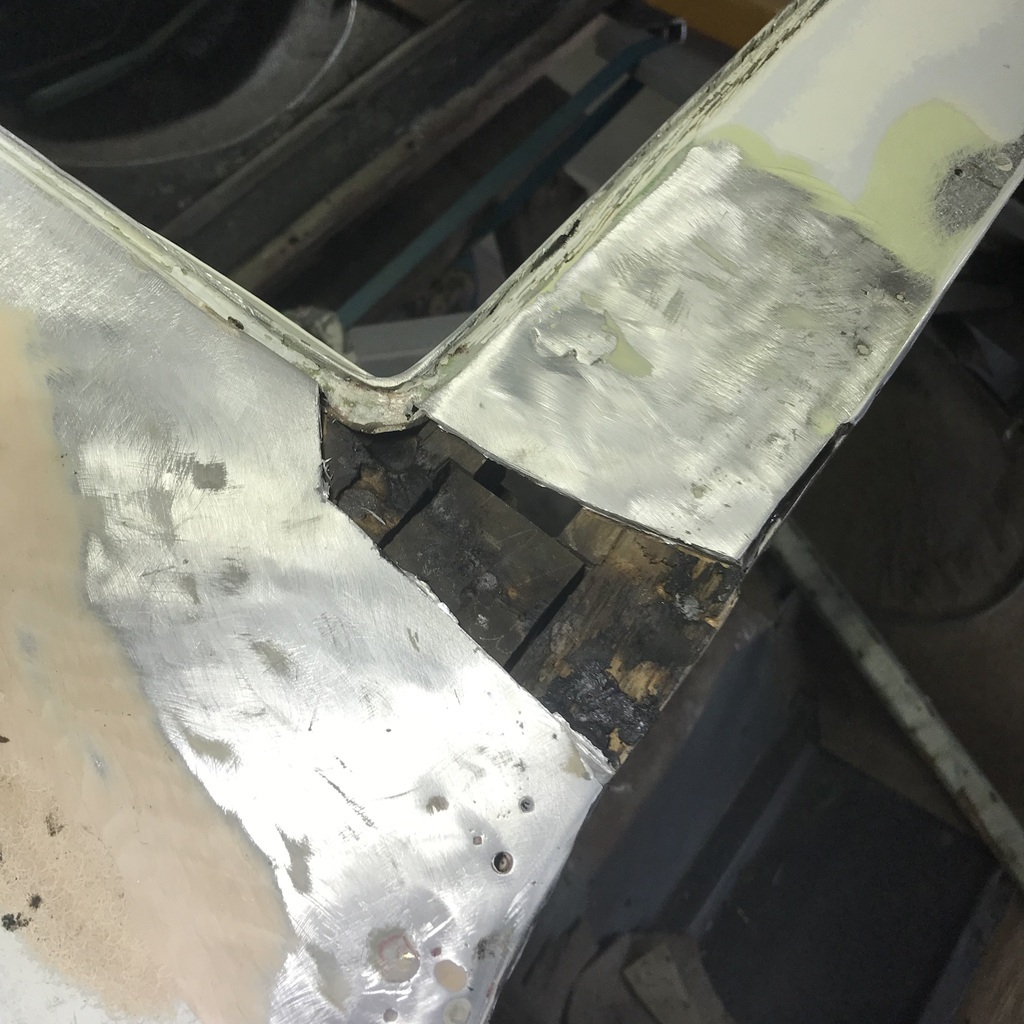 I soaked the wood with timber preserver. As I do everywhere I uncover wood that hopefully will remain covered for a very long time. While I waited for that to set I formed a replacement piece. Used thicker ally, I think 16#, to give me something with a bit more body to weld. 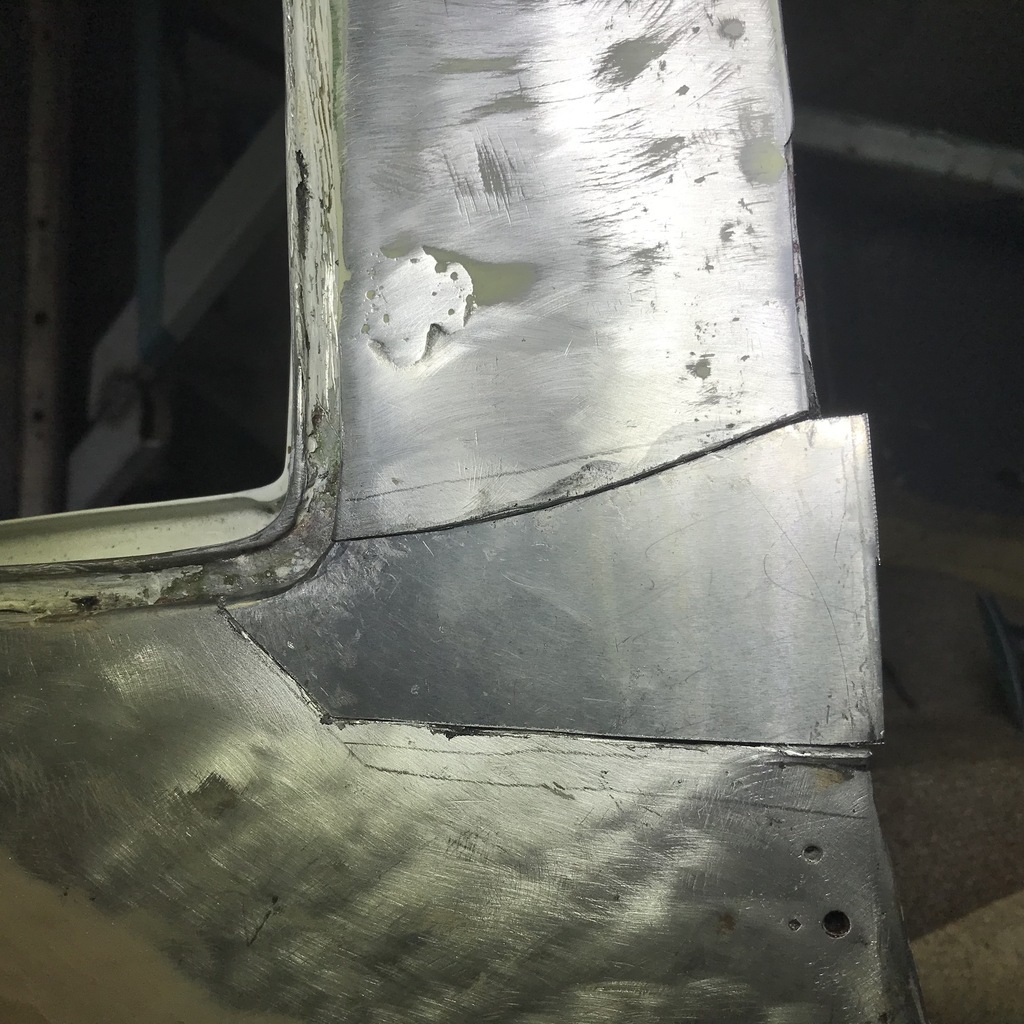 Once the preserver wasn’t tacky I injected epoxy everywhere I could. It’ll be set by the morning. 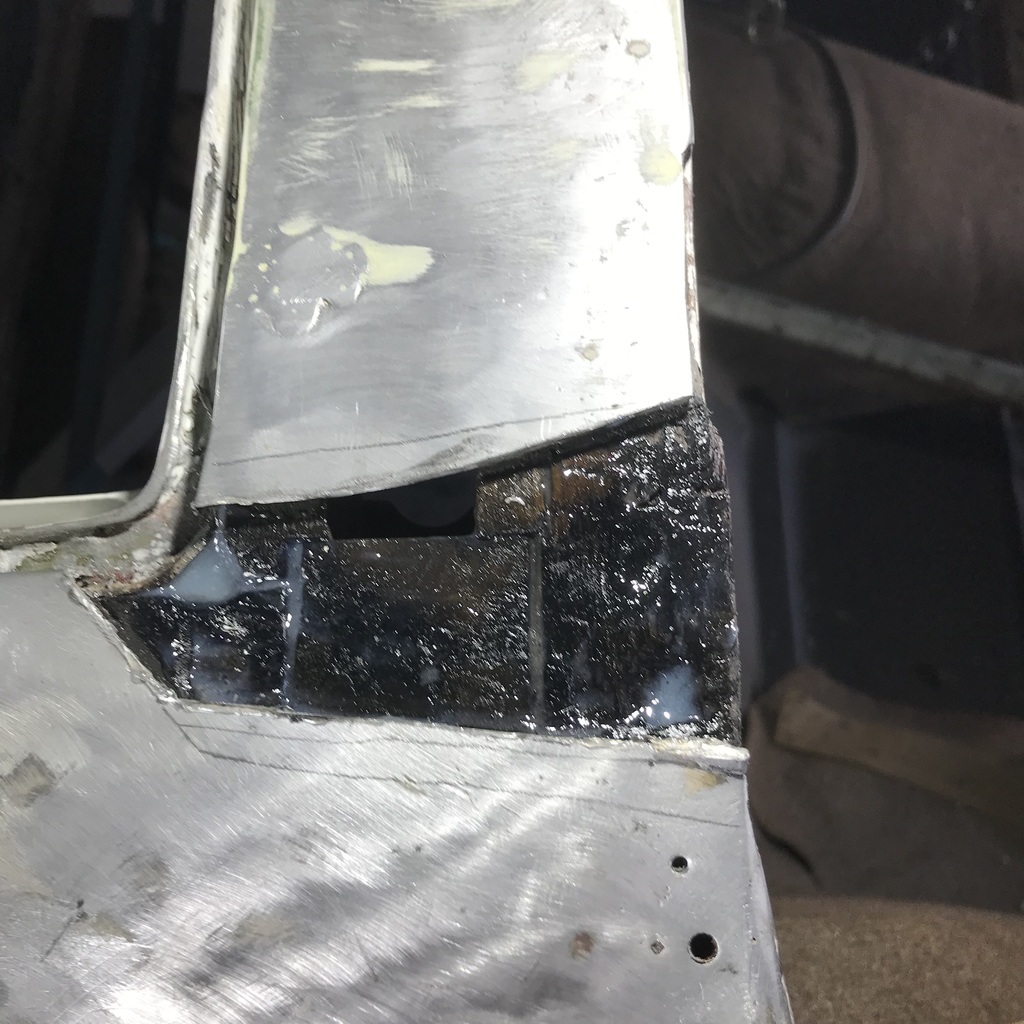 Also did some fiddling with the XJ12. I'd noticed the coolant fill points were a bit grungy, so I dosed it with radiator flush and took it for a drive. After it had cooled, I ran water through it till it was clear and dropped the bottom hose. Then refilled with coolant. Thanks. |
| |
|
|
gazzam
Part of things
 
Posts: 741 
|
|
|
|
Prepared the corner of doom as best I could. I cut some scrap copper sheet to lie under the welds. And I was able to prise up the body edges a few mm. This allowed the copper sheet to be positioned and then I cleaned the weld area with acetone. Then wire brushed it for an age, until I was reasonably confident it was clean underneath. The weld started poorly, but after fiddling with the setting on the tig, it went well. I thought to take a pic with the copper visible, after I'd started welding. 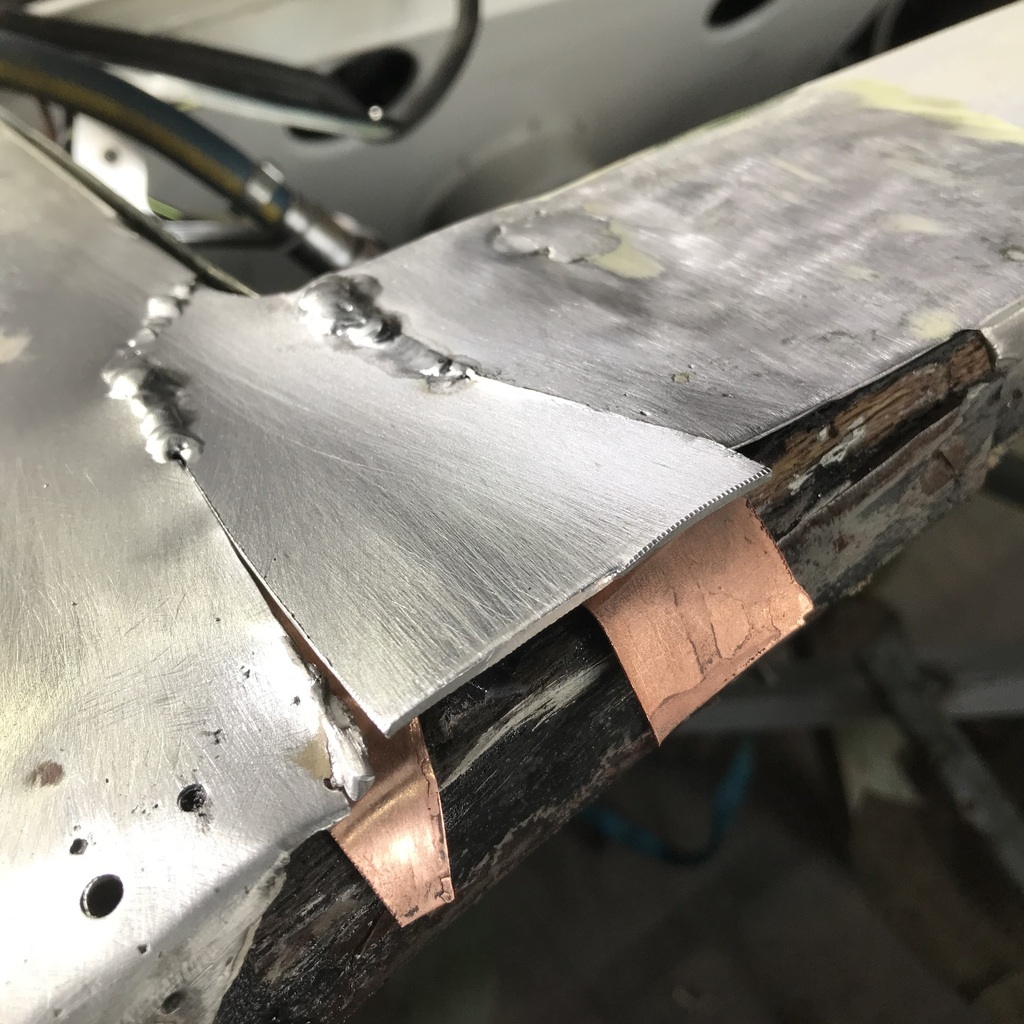 And fully welded. Won’t win any prizes, but I think it’s strong enough. 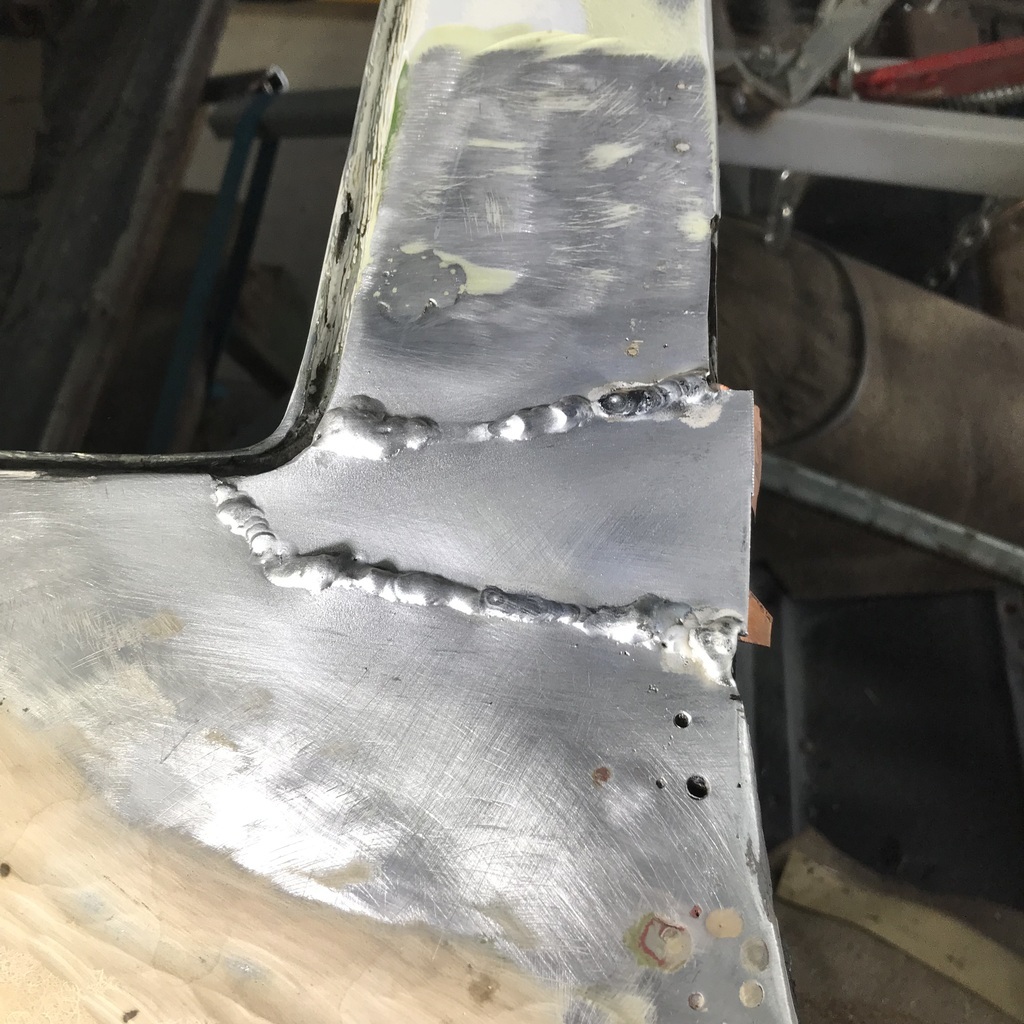 It cleaned up ok, and as they say, a skim of filler should see it sorted. 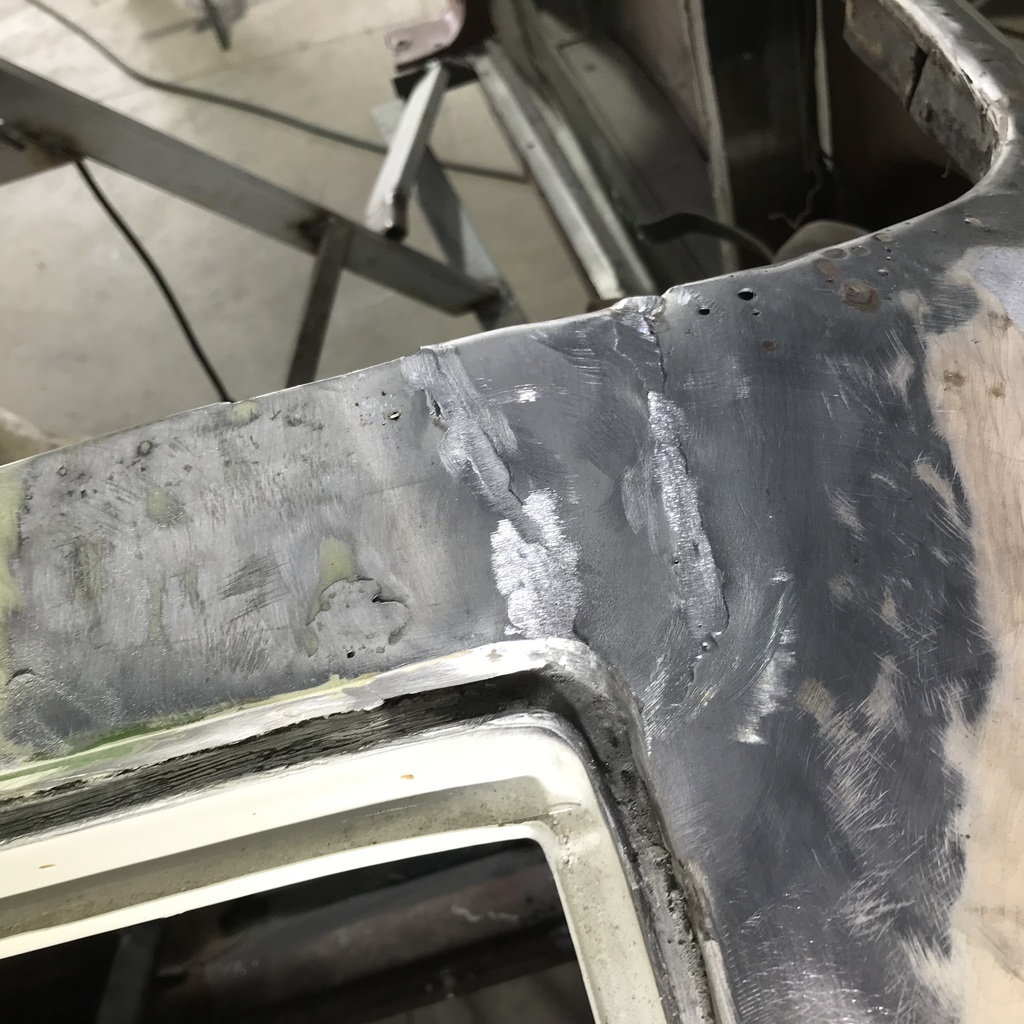 And in other news… The boot lid is finished! I hadn’t finished the bottom corners, as it needed to come off to get at them. And I’ve had it on and off about 50 times, I was just about over it! Of course I muffed up one side, and had to anneal the lower couple of inches and open it again. Just to get a few mm gap. (And a straighter edge.) Then I welded up the crease line, just in case… 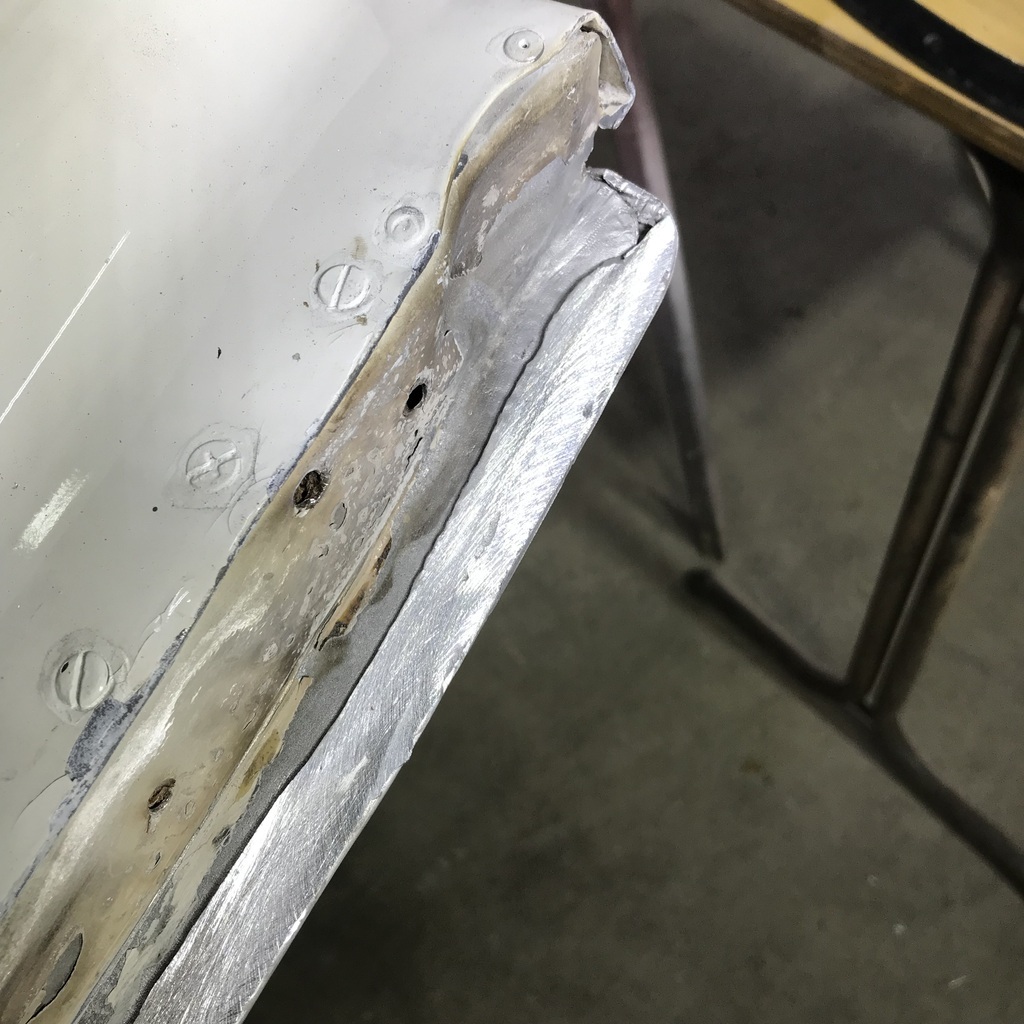 When I corrected the lower edge of the boot lid (brought it out to flush with the body) it was touching the body when fully open. I tried shrinking some of the bulge out of the skin, but it wasn’t enough. So I welded up the ends of the hinges, not allowing the lid to open quite as far. 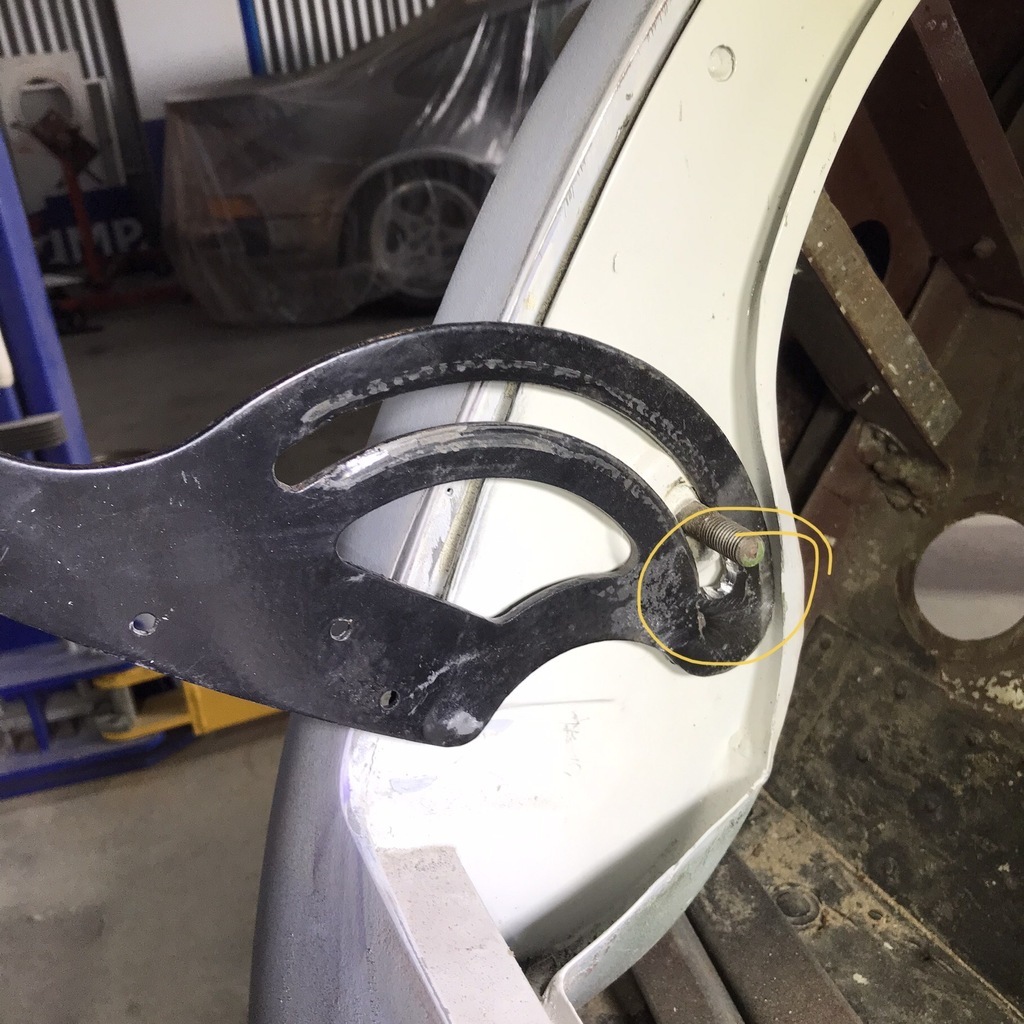 That’s given me a poofteenth of clearance, hopefully enough. That’s all the things that need fixing on the body, that I know of. So now its on to sanding and getting it ready for paint. I bought some Upol Reface sprayable polyester, the first time I’ll have used it. Looked at the data sheet, and it sticks to everything, but not aluminium. So I’ll put some epoxy primer over it first to seal everything ( and cover the ally ). If you know of a reason not to do it this way, or of a better way, please let me know. Thanks. |
| |
|
|
misteralz
Posted a lot
   I may drive a Volkswagen, but I'm scene tax exempt!
Posts: 2,495
|
|
|
|
|
Lovely work. Now, tell us about the RUF-wheeled G-Model please!
|
| |
|
|
|
|
|
|
|
|
Thoroughly enjoying your skilled workmanship.
Etch primer onto bare clean aluminium first for maximum adhesion, then epoxy primer to seal from the damp atmosphere.
You can use a bar of hand soap rubbed onto the area of bodywork that needs work to indicate the correct temperature when you apply heat. It turns black just like from the candle and then burns off.
|
| |
|
|
|
|


