|
|
|
|
|
Good Morning, and welcome to another day of cars I have wanted to own for ages, but have been too scared to, until now. It should come as no surprise to any of my regulars that I am somewhat a fan of Rovers. Generally unloved and kinda forgotten about (or remembered only as "the car grandad had), Rover has always been a bit all over the place as a company, but they could push out some great cars when they needed to. When you think about Rovers, you probably think leather, wood, big engines, soft ride and luxury... not Honda. Honda? What have they got to do with anything? Well, back in the late 70s BL teamed up with Honda to expand their range and help reduce platform development costs. A few years later, and a few "successful" platforms, the R8 was developed. The R8 was a platform that was jointly developed with Honda, who on their side, turned it into the Concerto. 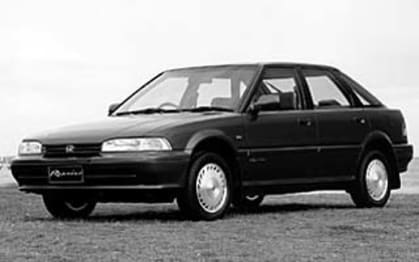 Rover took the platform and made the 200, and 400 series cars. Initially in liftback and sedan form, but the platform also spawned the coupe, convertible and touring too.  Of course, Rover couldn't leave well enough alone, and instead of the double-wishbone front suspension the JDM cars have, the European Concerto and Rover use McPherson strut in the front. Apparently this was at Rovers request, as it has longer suspension travel for a smoother ride, is cheaper to produce and easier to package. Honda obviously didn't agree with this, as for years all their JDM cars had double-wishbone up front, including the JDM version of the Concerto. The rear of course was pure Honda, with a multi-link independent rear. Among a bunch of other engines available in the 200 were the 1.6L SOHC and DOHC ZC/D-series Honda engines, the infamous K series (no BHG jokes pls), and the T series Turbo engine. The T series is the focus of my attention here. A coupe with a 200HP 2L twin-cam turbocharged engine, a manual gearbox and a super aggressive and agricultural torsen LSD (marketed as "traction control") sounds like a winning recipe to me. This was a genuine, tested and proven, record-breaking 150MPH (240KPH) car. The coupe was developed after a few years of the R8 platform being around. The name Tomcat comes from the codename used during that development, and is such a cool name. It was originally going to be marketed as a sporty MG, with even the concepts wearing MG badges, but somehow found its way into the ranks of the Rover lineup instead.   So that brings us to today, where after waiting a couple of weeks that felt like an eternity, the truck with my new car on it arrived. A 1994 Rover 220 Turbo in Tahiti Blue.  It arrived with a dead battery (Which was a surprise to me, I was told it had no battery), but swapping to the battery from the Marina and much to my surprise, it fired on the first turn of the key and settled into a smooth idle. No smoke, no hesitation, no roughness. A quick drive around the block, and it ran and drove smooth. The engine revved well, and made all the right noises, but seemed to have no urgency. I suspect there is a lack of boost. I was told when I purchased the car that it ran but ran badly and would hesitate, bog down and run like a bag of diddles. I'm yet to see that. It is low on fuel though, with a dicky battery, which won't help. I'd also doubt it's been run on 98 as it should. Being me, I did preemptively purchase a few service items, so will be going through the ignition system to refresh that, just in case it was a weak spark that had been causing issues. I will also get my old boost gauge temporarily hooked in and see what the turbo system is doing. I have everything needed to build a diagnostic cable for the car too. Since it doesn't use OBD1 or two, it has its own diagnostic terminal under the bonnet that taps into the MEMS ECU system, and although cables can be purchased, it's easy enough to make one. The car isn't perfect, it's far from it really. The paint is pretty good everywhere except the bonnet, which has peeling clearcoat, but overall the car has seen a lot of sun and various rubber and plastics have perished, peeled, cracked or shrunk. It will come up nice with a clean though, and looks nice from afar. 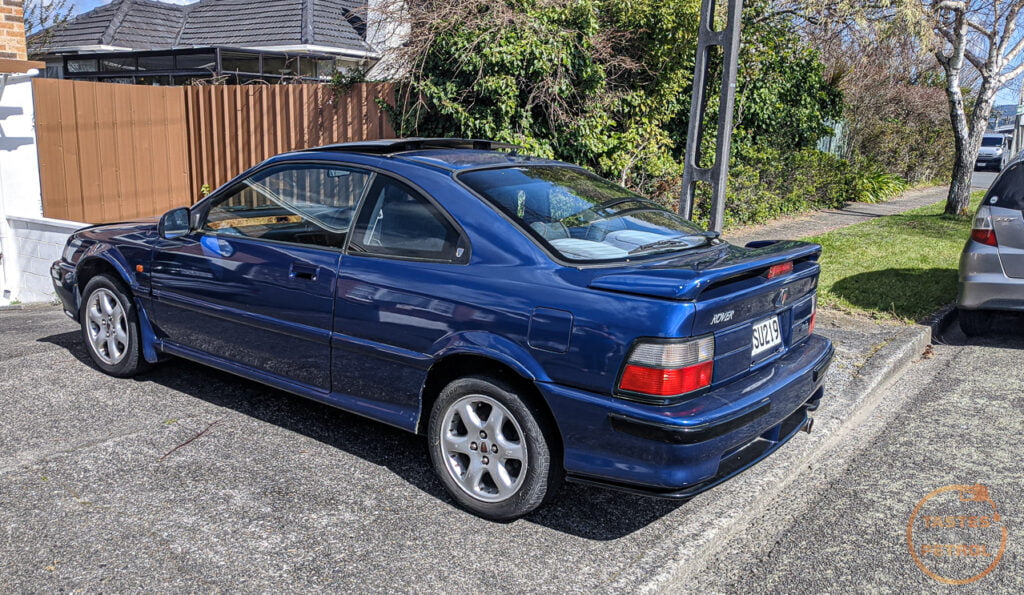 Of course the first thing I did was pop the T-Tops... The interior is the same. It's filthy and some of the seat stitching has blown out due to the leather shrinking, but it's all saveable. I'm looking forward to getting some conditioner into the leather. 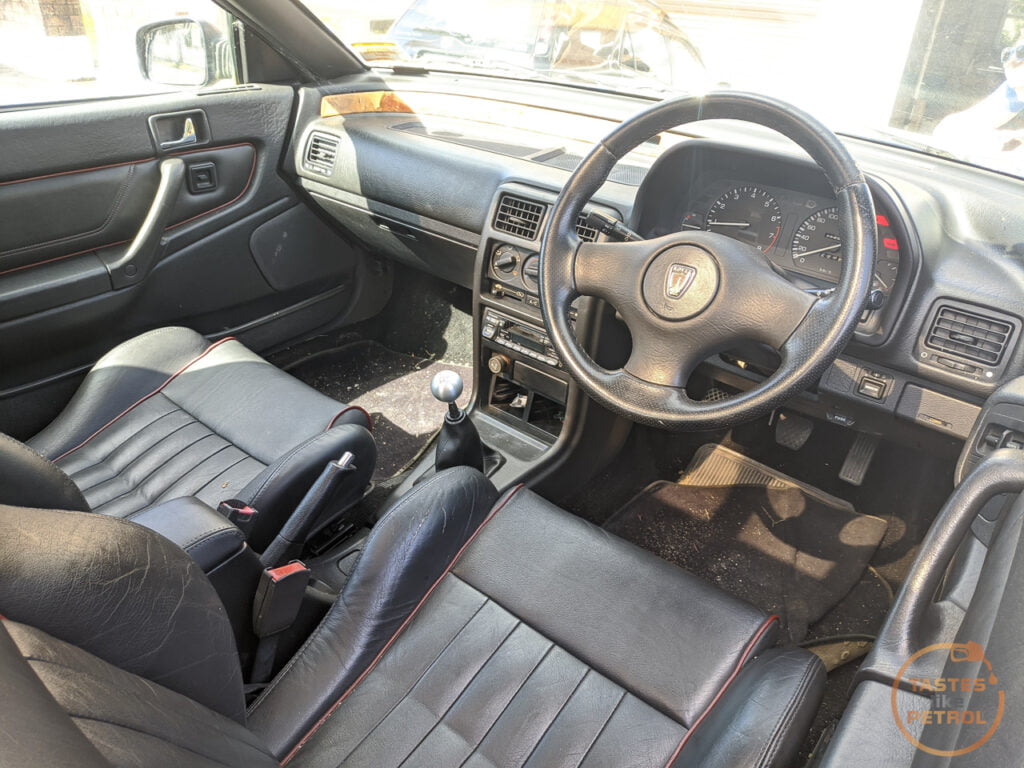 The AC has had the pipes removed, and unfortunately the compressor outlet has just been left open to the elements for who knows how long, so that is probably ruined. Apparently the engine has had the head gasket done, but with all the oil leaks and various scum everywhere, it's hard to tell what's been done and what was porkies. We will see in time what happens with the engine I guess. Hopefully it doesn't overheat, and I can get it boosting as it should.  It does make a hell of a noise though, with a straight-through exhaust to the stock rear muffler, plus the pod filter hanging off the nose of the turbo. It's all growls and whooshes. I'm looking forward to giving it a decent thrash. The other major issue is the boot, which is stuck shut. You can turn the key and pull the release all you want, but it doesn't move. On most cars this wouldn't be an issue, just fold the seats down and climb into the boot. Unfortuanately in Rovers wisdom, they put the only release for the seat backs inside the boot >_< I'll need to do some digging on that one. I don't need to use the boot, but I wouldn't sleep knowing it was broken. There is a lot to do on this car, and I feel it will be a source of pain for a while, but once it's going as it should it will be quite rewarding to drive. These are getting to be very rare cars in turbo form, even in the UK, so saving one is a good thing. Plus, it looks bloody good. |
| |
|
|
|
|
|
|
|
|
|
You'd think opening the boot would be a simple task, but no, not in this Rover. The seller did tell me the boot was jammed shut, so it wasn't a surprise, but it still bothered me. He told me some spare parts were in the boot too, so I wanted to know what they were (nothing interesting). It was stuck in such a way that you could turn the key in the lock, or pull the cable until the cows came home, and although you could hear the mechanism moving, nothing happened. I even tried the old trick of getting someone to push down on the boot as you try to open it, as that can take pressure off the catch if it's binding. It didn't help. The obvious way to get into the boot was to fold the folding seats down and clamber through. Nothing is ever easy though, the only way to fold the seats down is to pull a cable, which is on either side of the inside of the boot. Ah. After much googling, I found one person that had a similar issue, and he explained how he did it. It involved bending the pivot points on the bottom of the seat back, lifting it, and pulling the release. Sounds easy. I started by removing the seat bottom, which pulls up from the back of the base, to unhook the hooks at the front edge. This was the first of the water puddles. 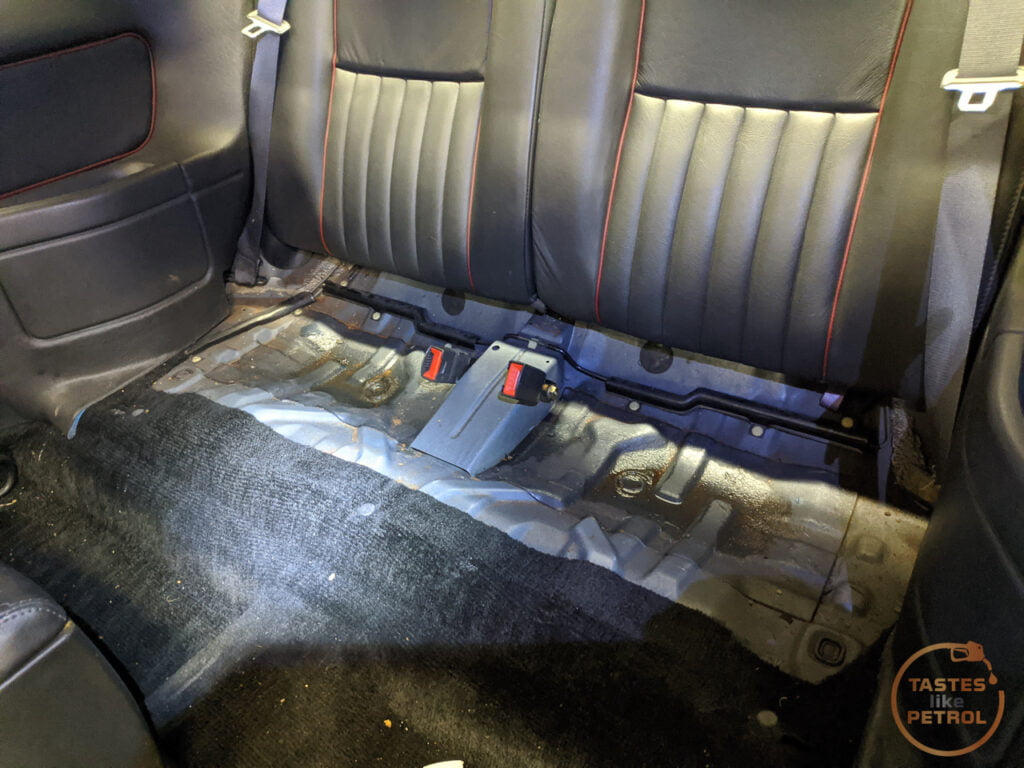 I then used a small pry bar to gently lever both of the pivot points so they bent off the pins mounted to the body. Once both were free the back of the seat could be moved around slightly, just enough to lift it up and see into the boot from under it. Using a torch and my longest prybar I managed to push on the back of the release cable for the seat I was working under, which released it and I could remove it. I then used the prybar to reach over and pop the other seatback too. I used an 8mm ratchet to undo the bracket and remove the seat base properly on this side. This left me with a wide, but not too tall opening into the boot.  Through which I could see both the boot latch, and the large spider guarding it. I killed the spider, and used my phone to record a video of me pulling the cable, just so I could see how it worked. It was doing as it should, but the lever that should release the catch just wasn't working. I ended up climbing through that gap, into the boot and undoing the three 8mm bolts that attach the latch to the boot lid, and eventually this released enough tension on the catch to unbind it and the boot could be opened. You wouldn't want to be much fatter than I am for this job, I barely squeezed through as it was.  By golly that boot lid is heavy though! I used a pair of vice grips and a rag on one of the gas struts just to ensure the boot lid didn't choose to brain me whilst working inside the boot. Might need new struts.  After removing the latch it was somewhat obvious why it didn't want to play the game.   I'm pretty sure that it shouldn't be twisted like that, and the Lh side should meet the orange line I drew. A quick trip the vice, a few smacks with the BFH, and twist be gone. Refitting and adjusting the latch means the boot now opens and closes, albeit it does need to be slammed to latch. That's fine, as long as it opens and works, I'm happy. Unfortuantely I did find the Tomcat swimming pool though. The spare wheel well was under a bit of water, and the weight on the soggy boot board meant that it has deformed and fallen into the water, thoroughly soaking it. 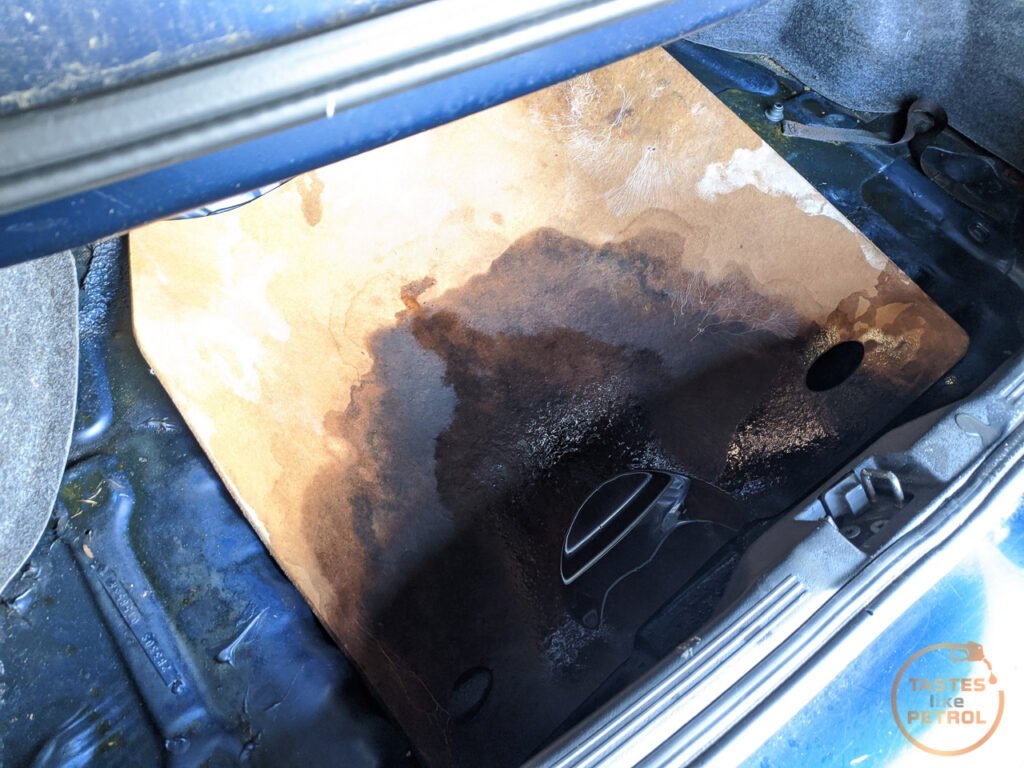 I removed that board, and the carpet on top, and I'm trying to dry them out. The board is probably a write-off, and a new MDF one will probably be on the cards, but the carpet should be saveable.  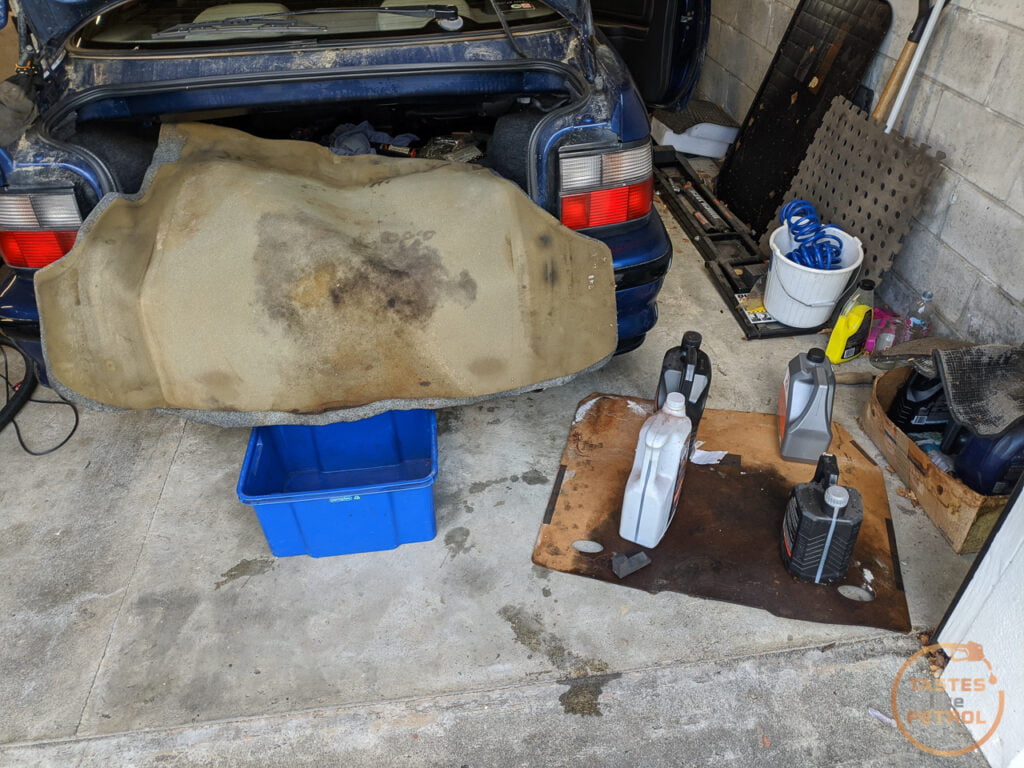 Waste oil containers coming in handy to flatten the board For some strange reason there are no drain plugs in the bottom of the boot, so I had to drill a small hole to drain it. There was a good litre or so sitting in there.  So, now that I can open and close the boot, I probably won't use it anyway. The opening is stupidly shallow. Can probably get some shopping bags in there, but anything bigger would be a battle. The parcel shelf also hangs really low (part of the coupe/convertible platform sharing I suspect).  It's a good first fix, and I'm glad that I can dry it out now too. |
| |
|
|
|
|
|
|
|
|
Now that is (potentially) a very nice looking car,
I've always thought the early 200 / 400 series were the nicest looking cars that Rover produced before their closure,
Really looking forward to seeing future updates on this thread,
Nigel
|
| |
BMW E39 525i Sport
BMW E46 320d Sport Touring (now sold on.)
BMW E30 325 Touring (now sold on.)
BMW E30 320 Cabriolet (Project car - currently for sale.)
|
|
|
|
|
Sept 4, 2021 10:17:44 GMT
|
|
As has been mentioned by a friend, it kinda looks like a British Honda Integra, which isn't a bad thing; I'm quite fond of a good DC2. I quite liked the 200 hatches, but the coupe is ultimate for me, such a slick design.
|
| |
|
|
stealthstylz
Club Retro Rides Member
Posts: 14,960
Club RR Member Number: 174
|
Kelvinators Rover 220 Tomcatstealthstylz
@stealthstylz
Club Retro Rides Member 174
|
Sept 4, 2021 10:23:57 GMT
|
|
Was nowhere near as good as the 620Ti handling wise but girls liked cruising round with the T bar off so the coupe was always my favourite. Is it like the UK FDH import spec ones?
|
| |
|
|
|
|
|
Sept 4, 2021 10:33:49 GMT
|
Was nowhere near as good as the 620Ti handling wise but girls liked cruising round with the T bar off so the coupe was always my favourite. Is it like the UK FDH import spec ones? I believe its almost identical to the original FDH spec. I guess if the FDHs were sent a bit earlier (before whatever change was made that they werent able to be sold in Japan anymore), this would have technically been one of them? The 620s had some upgrades over the Tomcat from what I hear, such as a better, less aggressive Torsen, and wasted spark ignition. Bigger platform probably helps the handling too, these 200s are quite small. |
| |
|
|
stealthstylz
Club Retro Rides Member
Posts: 14,960
Club RR Member Number: 174
|
Kelvinators Rover 220 Tomcatstealthstylz
@stealthstylz
Club Retro Rides Member 174
|
Sept 4, 2021 11:25:35 GMT
|
|
I always remember it seeming to be a bit flexible, probably cos of the T bar. They are properly fast though, mine had a few bits done to it, off the line wasn't all that but 50mph upwards it would reel stuff in like they were on the brakes.
|
| |
|
|
|
|
|
|
|
I just can't help myself, I needed to dig further into the Tomcat and see what was happening. So the issue I had was although the car was running OK on the one drive I took it on around the block, it ran really flat and there was no boost. I had read about the diagnostic tools available for the MEMS 1.6 ECU, and it was quite limited. I could either spend hundreds of dollars on a dedicated scan tool for it, or make a cable myself and use the free software available. The choice was obvious, DIY. Three parts are needed, Some crimping and soldering later, we had a proof-of-concept cable.  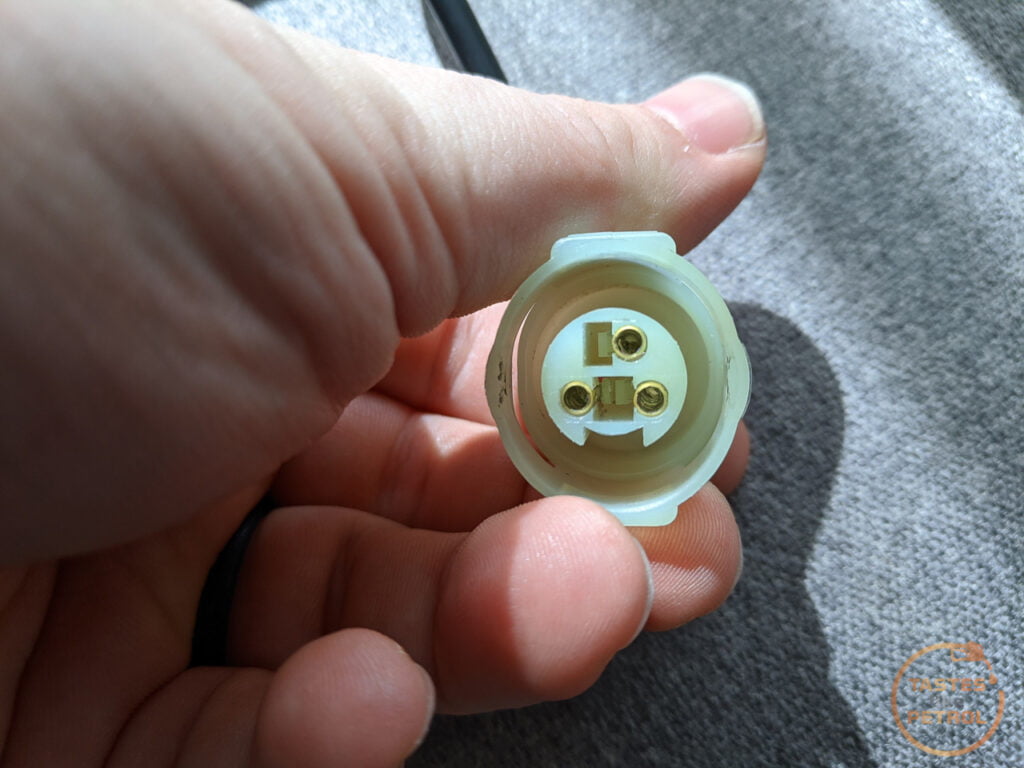 Once the cable was assembled, and the drivers are installed, it is just a matter of plugging into the car and opening the software. In this case in using the fantastic piece of free software, MEMSFCR. 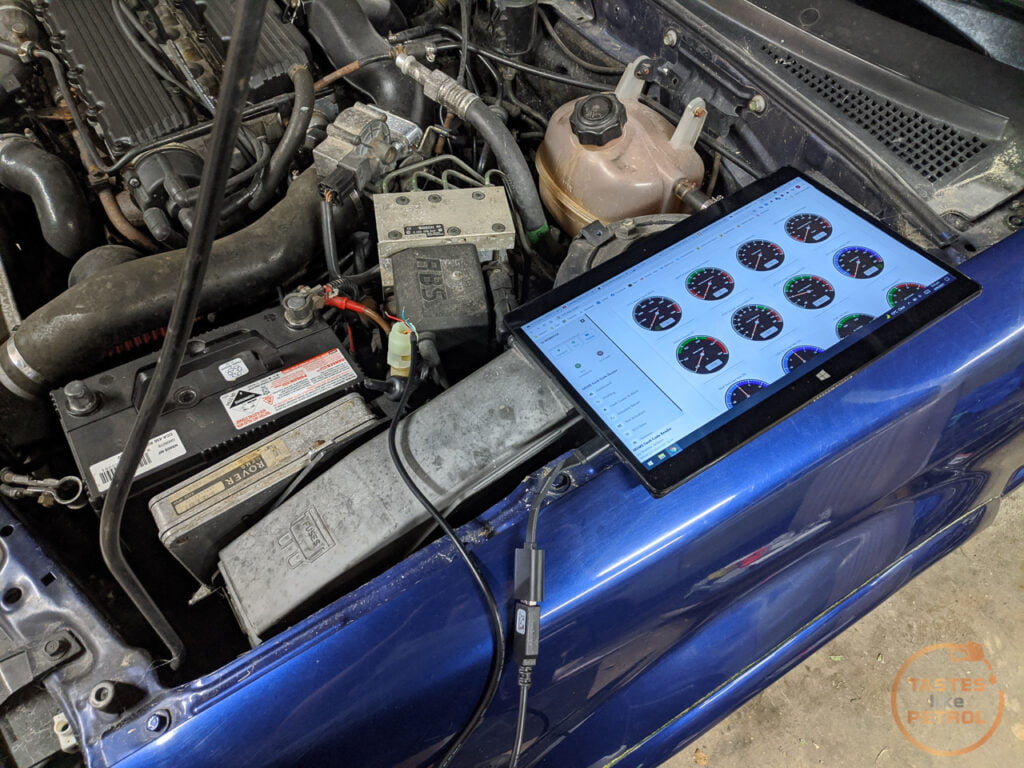 I reconnected the battery, set the COM port on the software, started the car and the software connected with no issues. A quick check of the error codes and showed that I had one, the O2 sensor was reading out of spec.  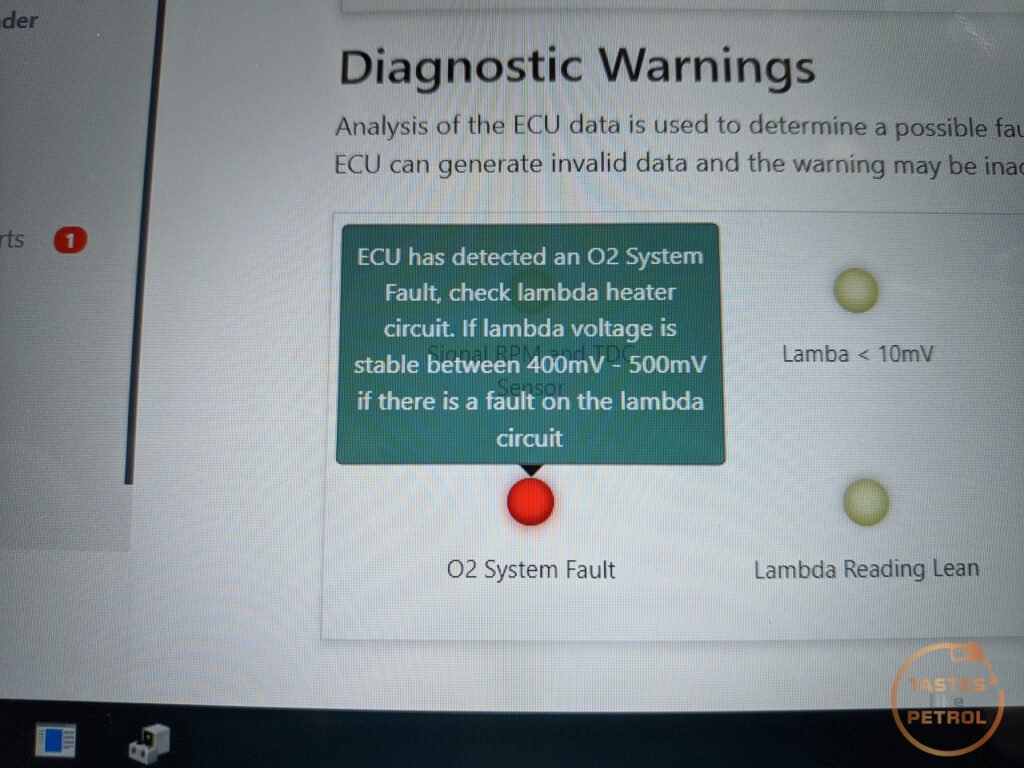 I changed over to the dials screen, and sure enough, the O2 sensor reading was off the scale  And the short term fuel trim was trying to pull a large amount of fuel out 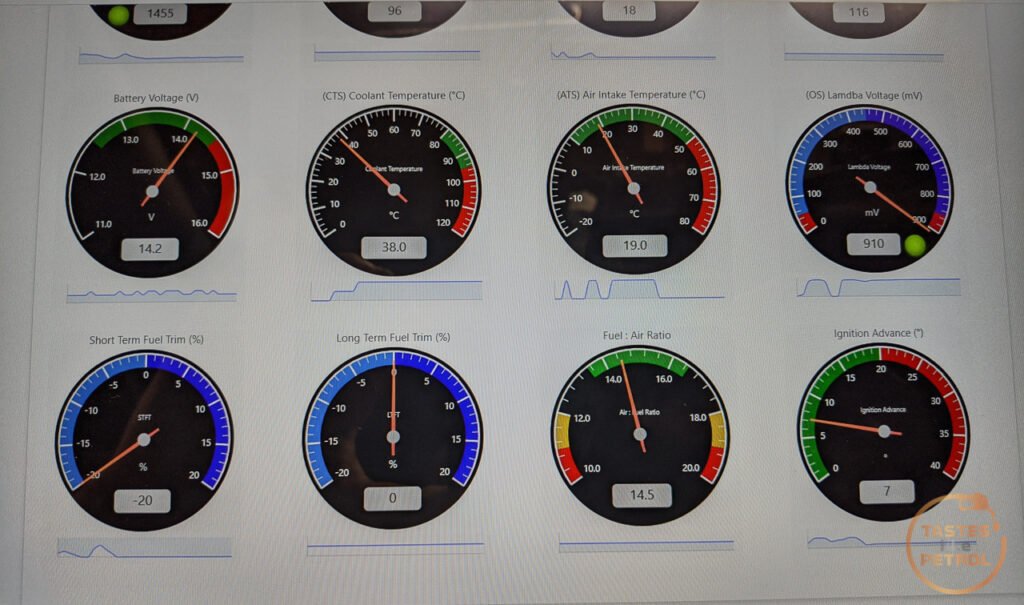 But what bothered me was the MAP sensor reading. I noticed the needle pegged at 96KPA and sat there, even if the engine was revved. That's not right.  This was also where I noticed the car was running like a bag of rubbish, popping and farting when giving it throttle. So I shut the car off and started hunting. Clearly there was an issue with the map sensor, so let's check that first. On the MEMS 1.6 units, the map sensor is inside the ECU and fed via a vacuum hose. Well, clearly I didn't get the memo, but it seems we have advanced to wireless map sensors now.  In that image, the hose (orange arrow) should be connected to the black hose nipple (green arrow), but instead, it's hanging free, causing a vacuum leak and not feeding any data to the sensor. I removed the unreliable wireless connection and reverted to good old plugging it in.  I fired the car back up, connected the diagnostics and instantly the car was already running better. Much smoother at idle and revved cleanly. The diagnostics were all suddenly back within range now too, with the O2 sensor, MAP sensor and Fuel Trim all perfectly within range. The MAP sensor was now changing with the throttle position as it should.  The amount of detail and information that can come through those three pins was quite astounding. It was a bit late at night to take the car for a test drive, so I waited until this morning. Before heading out though I needed to fix another minor issue. My Wife has noticed yesterday when I parked the car in the garage that the taillights appeared to be on when the car was running, but the headlights were off.  Turns out yes, there were lights lit, but they were actually the brake lights (although the high stop light wasn't working, as shown in the above photo). The switch on the brake pedal is adjustable, so a quick couple of turns of the switch, and the lights were back to working properly, but I still had no high stop light. Regardless, I embarked on a sneaky trip to the nearest petrol station with the sweet high octane fuel. 40 litres of 98 went into the tank, which in a tank that takes 55L from dry, means it was quite low. The pump certainly sounds a lot happier now. No idea what swill was in the tank, but I bet it wasn't 98. And the result? Well, we certainly have a lot of torque steer now, which also means we have boost again. I need to get a boost gauge on the car to see what we are actually getting, but I suspect it's not the full 12PSI and it does taper off quite quickly, so a smoke and boost leak test is on the cards. The main thing is that it runs really well, drives smoothly, and makes great noises. The temp stays steady, and the fans came on as they should. The brakes need a good looking over as they are spongy and have a bit of a wobble. One thing I knew I needed to fix before trying for a WOF check was the high stop light that wasn't working. They aren't the greatest designed light, and it was an afterthought slapped onto the boot lid of the JDM cars, as the UK cars never had one. It was made by L.E Perei, who appears to make lights for... trailers.  Two screws hold the lens on, and then the actual light unit slots into the housing. Inside the boot are the two wires, with bullet connectors attached. Disconnect them, and pull the light unit out through the boot lid. All bulb holders and bulbs were present, one was removed before the photo was taken.  The reflector was filthy, so that got a clean, but putting power to the wires resulted in no light from the bulbs. On the back of the unit is a basic circuit board that links all the bulbs in parallel. The bulbs work by just touching the contacts of the bulb holder onto the metal strips on the circuit. 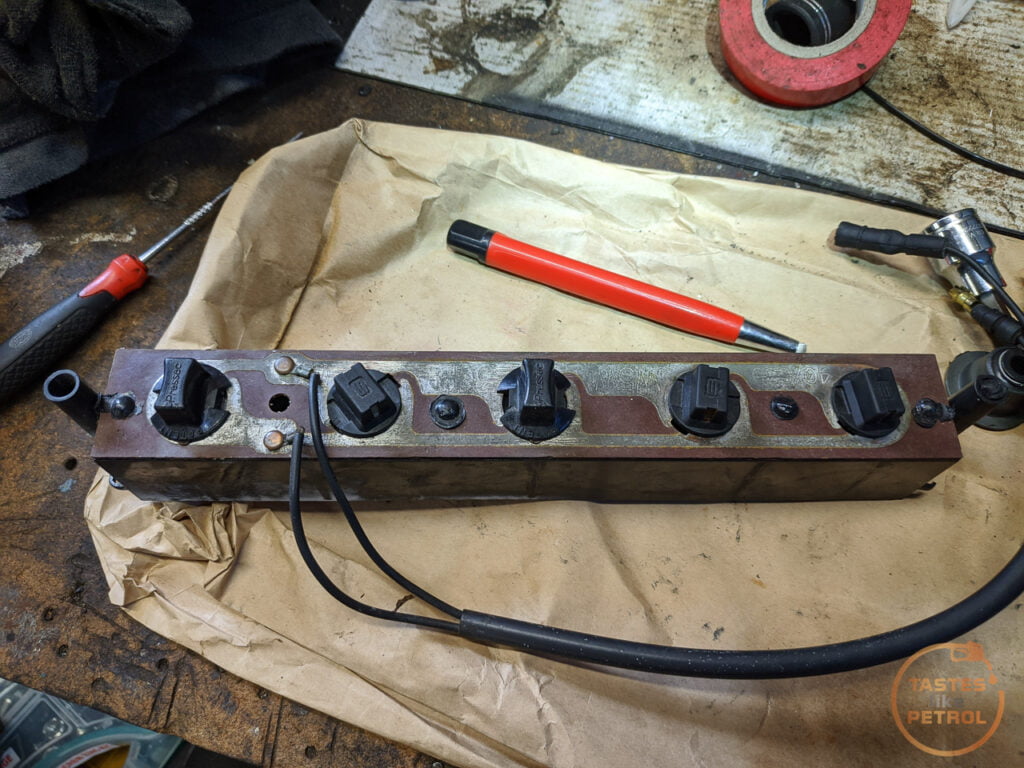 I tested all the bulbs one by one to make sure they worked, cleaned the contact areas up with the fibreglass brush, and fitted the bulbs back into the unit. A couple of bulbs only worked after some wiggling, but I got all of them working. The unit got refitted, and a bottle of oil was placed on the brake pedal to test.  Aww yeah, look at that vacuumed carpet  I reassembled the light, slammed the boot closed a couple of times to latch, and bam, suddenly only 4/5 bulbs worked. Oh well, good enough for a wof.   Thinking of the substandard design, I'm going to look for a nice surface mount LED board to fit into a 3D printed housing that works inside the existing light. Do away with that rubbish circuit board completely. Speaking of slamming the boot, this is why it needs to be. My catch looks like this 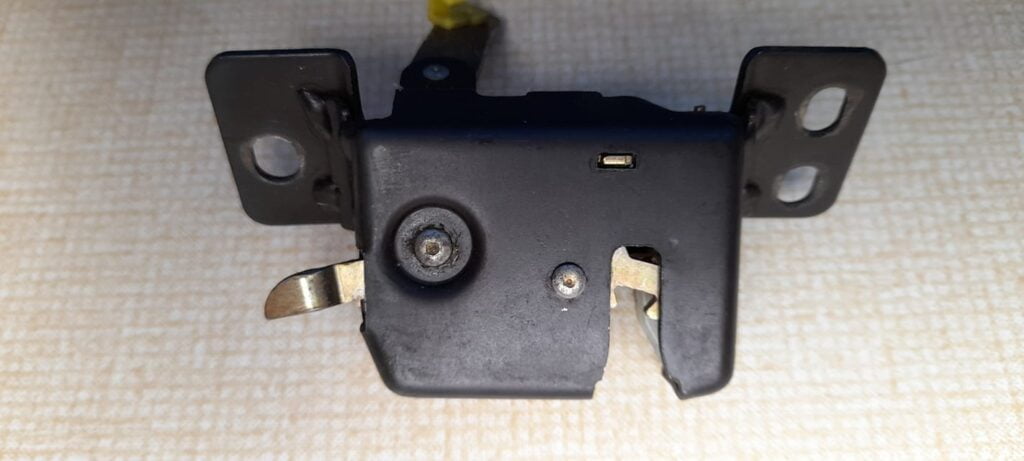 But it should look like this, with a plastic section on the catch, which would change how far the striker needs to go into the catch to latch it. The orange arrow shows what is missing. 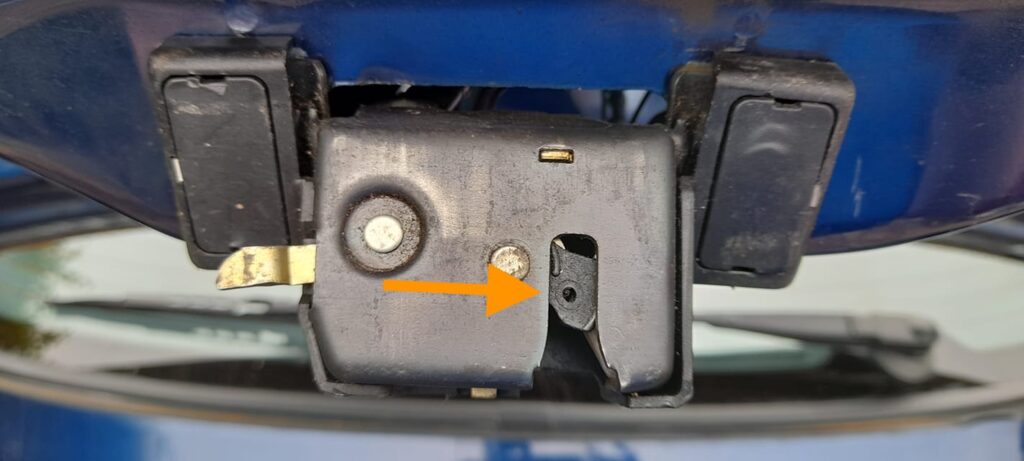 So I need a new boot catch. Yay. Until then, it's slammy slam time. That is where I'm at for now. I still need to reassemble the back seat, and then work on sealing everything that could leak so the car can live outside again.  |
| |
|
|
|
|
|
Sept 18, 2021 10:17:11 GMT
|
It was obvious from the moment the car was delivered that I had purchased yet another car with a deferred maintenance problem. There were leaks everywhere, and the coolant was anything but. Of course, this set me into the usual course of action. A full service. The first on the list was the coolant. When I first backed the car off the truck, before starting it, I checked to see if there was anything in the expansion tank. There was, but it was a mixture of clean water and brown sediment. Yay. Draining the cooling system is fairly simple, albeit a pain due to a lack of a drain tap, so you have to pull the lower radiator hose off and try not to make a huge mess. 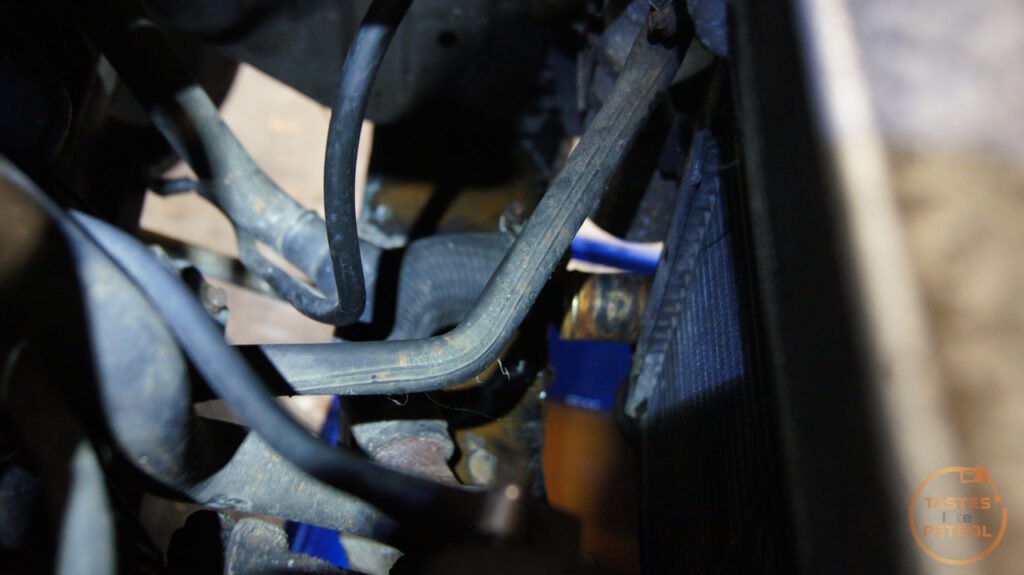 Thankfully I got a cheap fish bin a while back, and that was perfect for catching a large amount of liquid from various places. There was no coolant in the system, just brown murky water.  I drained it all out, removed the expansion tank for a quick clean (it's very stained, but holds pressure, so it will stay for now) and then flushed the radiator and engine through with fresh water until it ran clean.  With the expansion tank out it was the perfect time to remove the ugly AC pipe that was just hanging out in the engine bay. The AC system is a write-off since the previous owner left the inlet/outlet on the pump open to the elements for who knows how long, so the pump is probably stuffed. I'll just make do with popping the tops on a hot day (or using a different car).   To flush the engine I removed the top hose. This hose should house a thermostat (it's held in the top hose with a hose clamp, not in a housing). I suspected the thermostat was missing, and sure enough, nothing.  Filling and bleeding the T series system is also quite easy. Fill the expansion tank up whilst squeezing the top hose until coolant starts to flow from the top hose bleed screw (which was plugged solid with gunk, so I had to clear the bleed screw first. It should have a little hole in the side near the top so you don't have to remove the screw completely), and then run the car up to temp with the cap off the tank. I used my big coolant funnel to raise the head even higher which makes bleeding a bit easier, but not necessary. 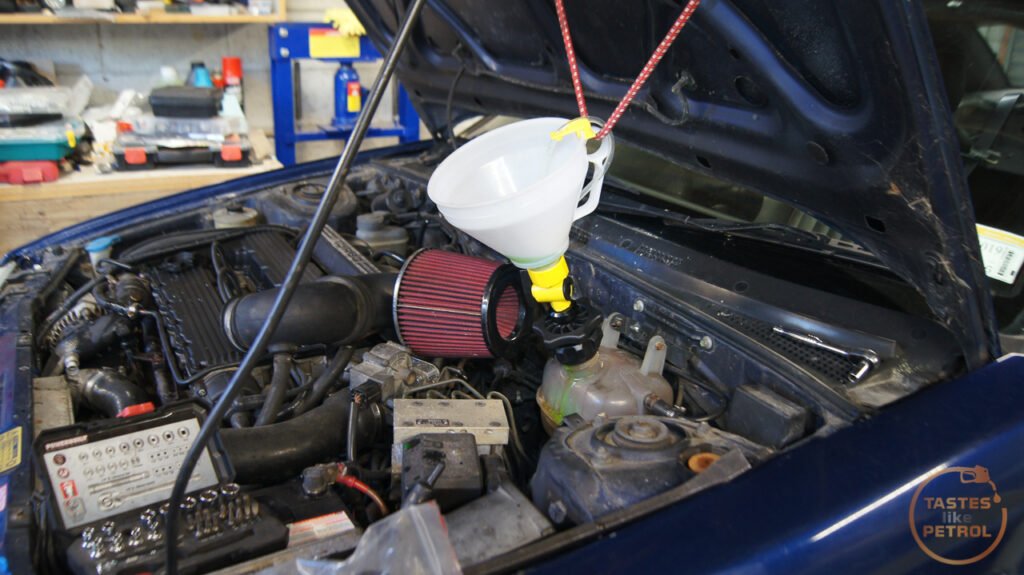 This is about how far the bleed screw needs to be opened if the internal channel in the screw is clear  The coolant bottle ain't great, but at least I can see the coolant level now. I removed some coolant once I was sure the cooling system was bled, and now it sits just on the Max line.  Next up, since the engine was warm now, was to drop and replace the engine oil and filter. This was really easy. 19mm bolt on the back of the sump to drain the oil, and the filter is just right there off to the side.   The smell of Bullshite was starting to get pretty strong now. In the listing for the car when I bought it, it clearly states "Full Service" as having recently been done. Well, clearly not the coolant, or as it turns out, the engine oil. The oil was black and smelt a bit fuelly. Not fresh, that's for sure. I poured in the required 4.5L of HPR10 10W50 full synthetic, started the car up, the oil light went straight out and the engine sounded happy. The gearbox was next. I know these PG1 gearboxes are VERY sensitive to being run with low fluid due to their plastic cage bearings, which will overheat and grenade themselves. There is some bearing noise at idle in this car, and I could see the gearbox was wet on the back, so hopes weren't high that the oil level was correct. As always, remember to crack and remove the fill plug first, and then the drain plug. The fill plug (green arrow) is a 17mm hex, whilst the drain plug (orange arrow) can be undone with a 3/8 ratchet with no socket. 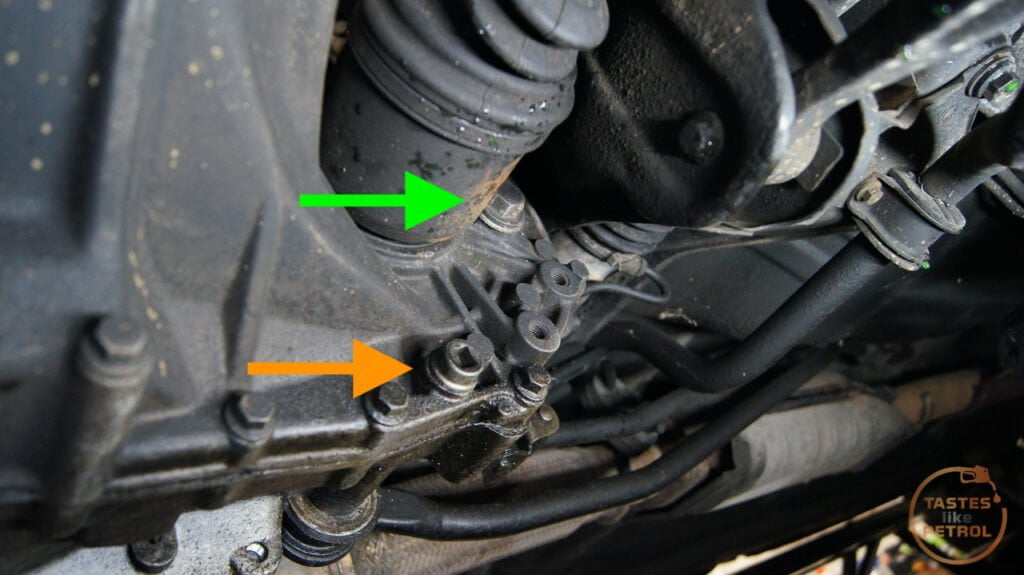 Because I was curious, I drained the fluid into a clean measuring jug. The colour wasn't good, and it smelt burnt.  Well, I'm glad I drained it. Less than 1.5L, which is over 1L down on the 2.5L it should have in it. No chunks thankfully, but those bearings must be a bit toasty.  I refilled the box with Honda MTF. I agonised (like usual) over this oil decision for ages, but the recommended oil is Landrover MTF94 (which supersedes engine oil in the box), which according to the interwebs is interchangeable with Honda MTF. Either way, it's got to be better than what was in there. Interestingly though, Honda MTF is very thin, which was a surprise. With the underside fluids done, I moved on to the sparky stuff. The leads didn't inspire confidence, as they were generic off the shelf Repco leads. Probably fine, probably do the job, but were wrong. Wrong is bad.  With the leads removed, I could remove the spark plugs. These did actually look quite new, and were the right model (NGK BKR6E), but they hadn't regapped them from the standard 1.1mm gap to the required 0.85mm gap. Sigh.  I fit a new set of BKR6E gapped to 0.85mm and then fit the new Lucas LUC7443 leads. 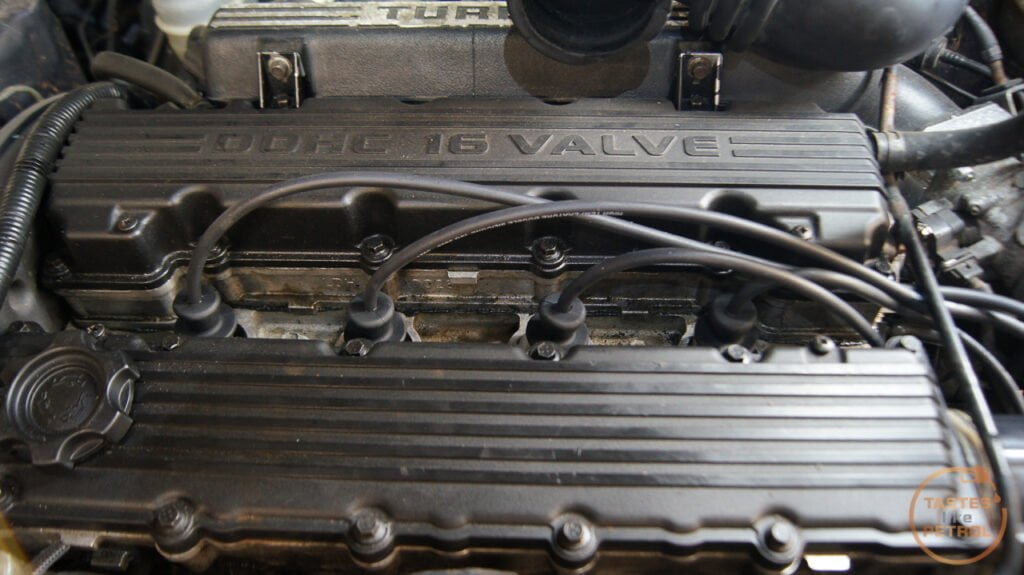 I also removed and replaced the cap and rotor. They were in decent shape, but had some minor wear. It's quite interesting that the T series doesn't have a distributor as such, the rotor mounts right onto the end of the camshaft, and the cap screws to the head. The shield under the cap was looking a bit worse for wear, but are expensive to replace.  New cap and rotor fitted, and new leads connected. I was interested to note that despite the listing saying "new coils" the coil (tucked behind the battery) was original. Maybe they meant spark plugs?  Next, since the intake pipes were out of the way, I wanted to check the wastegate and dump valve were working correctly. I connected my vacuum pump to the dump valve vacuum hose, but it wouldn't hold a vacuum. I could hear a whistling noise. Nuts. Turns out, the vacuum hose had a big gash in it, which had been badly covered with insulation tape. That tape had proceeded to fail in the heat and wasn't sealing anything.  The vacuum hose to the wastegate was actually a length of fuel hose and had gone rock hard in the engine bay heat. Unfortunately when trying to remove this pipe from the boost control valve, I broke the nipple off the valve. Ugh.  I did a quick fix, hopefully it holds. If it doesn't I will look into a manual boost control to replace it, and set it to standard boost. To try to fix this one I ran a 5mm drill bit down it, and epoxyed a short section of brake tube into the hole. It was a snug fit (had to be tapped into place), and the epoxy is meant to be super strength. 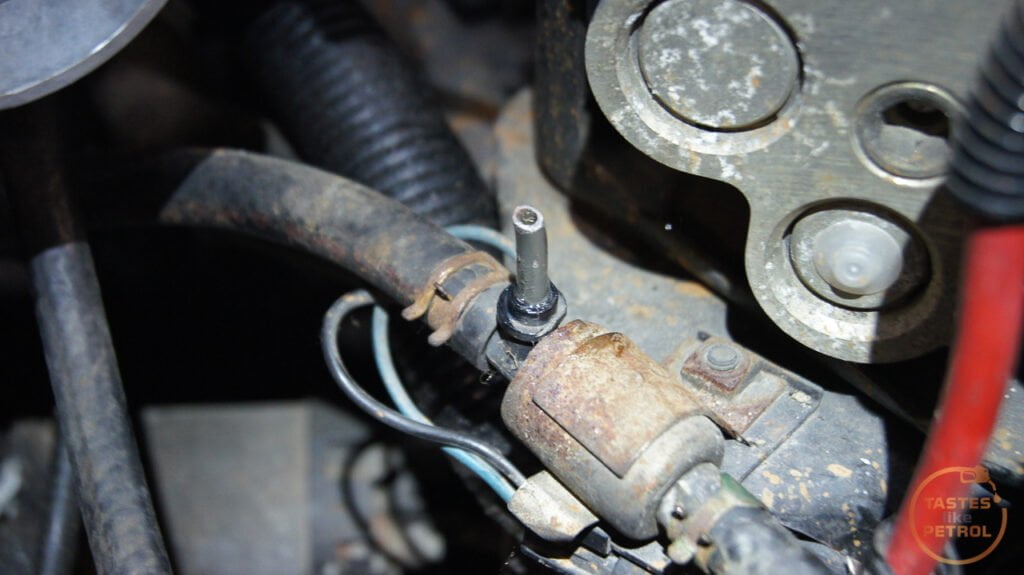 I used a length of old hose to test the dump valve and wastegate in the meantime, and thankfully both worked as expected.  After a couple of days for the epoxy to cure, I replaced the rubbish vacuum hoses with new black silicone vacuum hose.   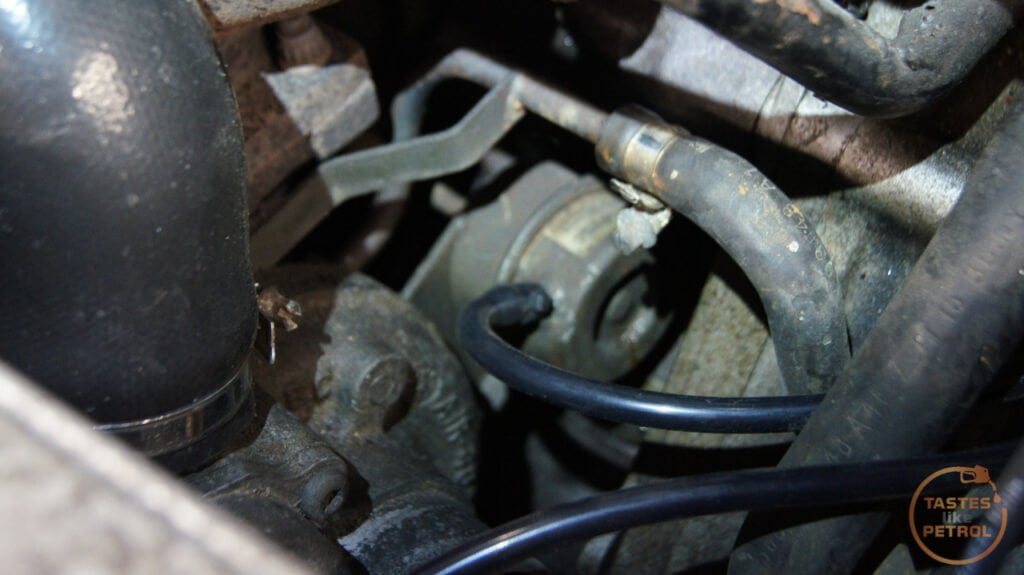 Since I was already there, I quickly removed the cambelt cover to check the timing and condition of the belt. I had been told the belt was replaced recently when the headgasket was done. Since the head is pouring oil from everywhere, I didn't have much faith in the cambelt having been done/done properly either. 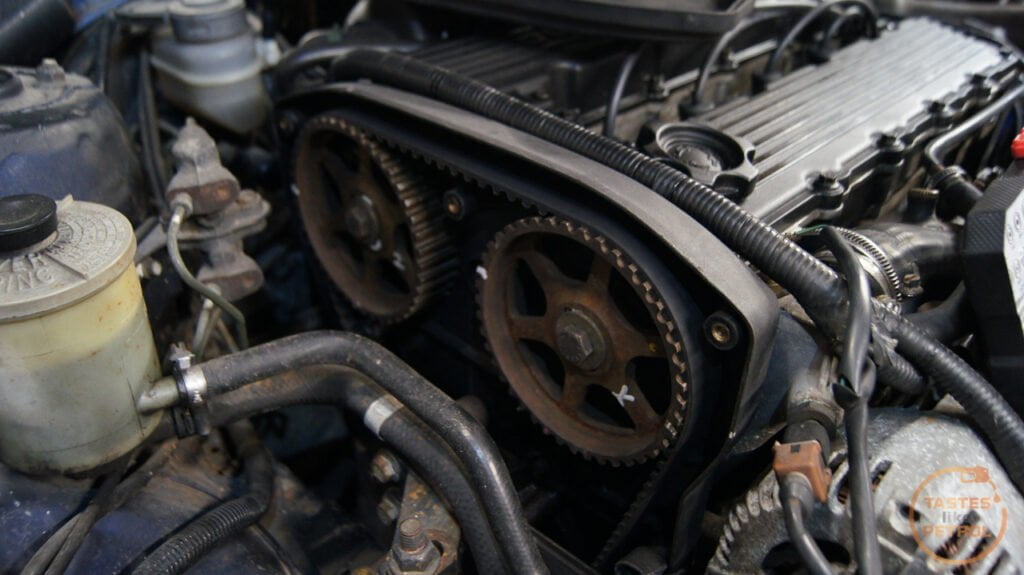 Thankfully, the belt looks very good, if it's not new new, it's not long been replaced. Even better, the timing marks all line up as they should. It appears the roll pins are in the correct locations too.  I buttoned the engine back up  The engine bay looks exactly the same, except for the missing AC pipe, and the green coolant in the tank. The main benefit was that the engine starts on the button every time, doesn't overheat when idling, runs quietly and idles smoothly. Annoyingly the brake light switch has failed (brake lights stuck on again), so since I'm waiting on a replacement to show up I haven't been able to take the car for a drive since I did all this work. Hopefully it isn't too far away, I'm dying to see if it boosts better now. Since the car was stuck in the garage I did a couple of other things. The boot latch was no good. As I mentioned in my previous post, I had to slam the boot lid hard to get it to catch. This was due to the catch having a missing plastic section inside it. I managed to source a replacement catch, with the correct plastic piece intact.   This is the old catch  And this is the new catch, with the required black plastic bit  The plastic part alters how far the striker needs to go into the catch before it shuts the latch. Interestingly the new catch was date stamped 97 (my original 94) and seems to have some running updates and is a higher quality.  The improvement is vast. Not only does the internal release work correctly now, but I don't have to slam the boot lid. I can close it like a normal person, gently letting it close, and it latches first time every time. Great success. Now to get some new gas struts so I don't have to worry as much about the 2 tons of boot lid taking my head off when I use the boot. |
| |
|
|
|
|
|
Sept 18, 2021 10:46:55 GMT
|
This car has some cosmetic challenges. I managed to knock a couple off and make things just a little nicer. Most of the cosmetic issues with this car stem from it being outside under the sun. There are some things that are hard to get (or hard to replace) but thankfully some parts are easy to replace, and since there is an R8 Rover 200 liftback at the local Pick A Part I went on a raid to get some bits. The major one was the dash wood. Mine was in really bad condition and was an eyesore to look at. Although the wood seemed good, the lacquer was falling off in chunks.  The wood on the dash of the car at PAP was perfect. Not a mark on it. 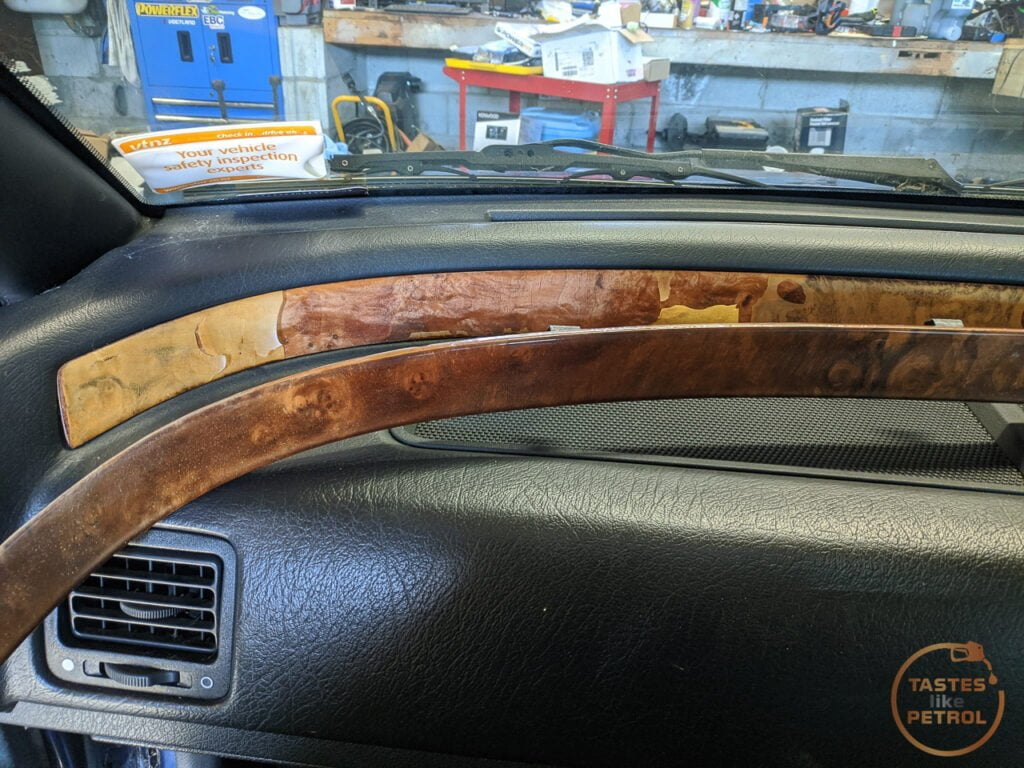 Removing the trim can be a bit nerve-wracking. There are a series of spring clips along it. 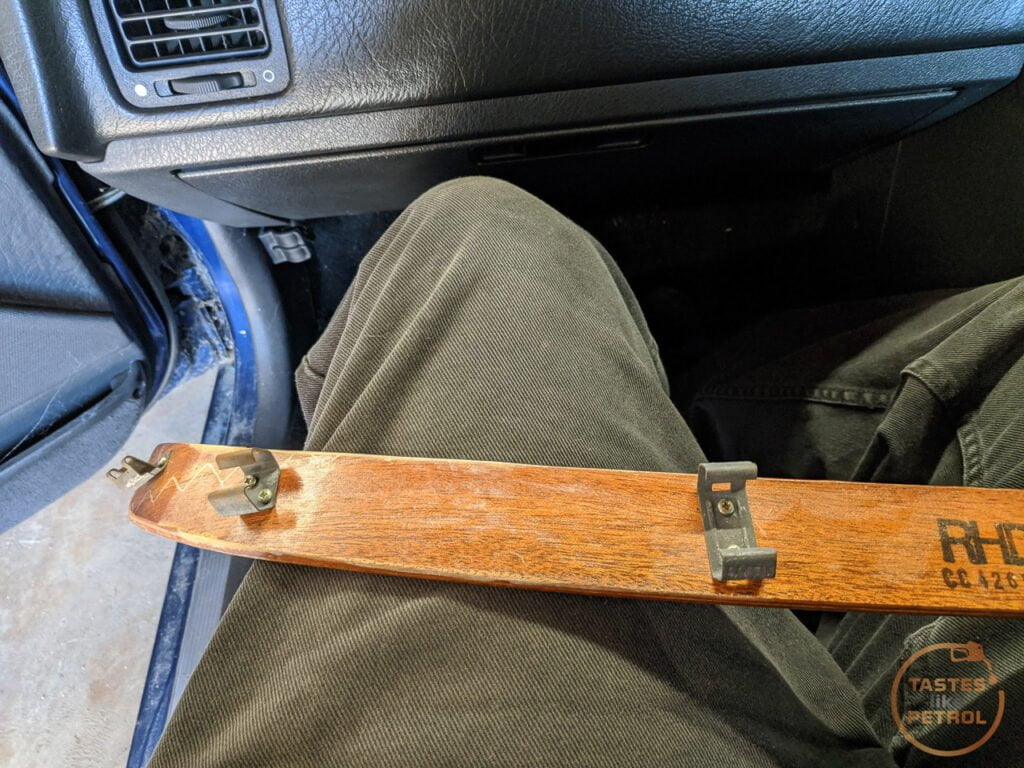 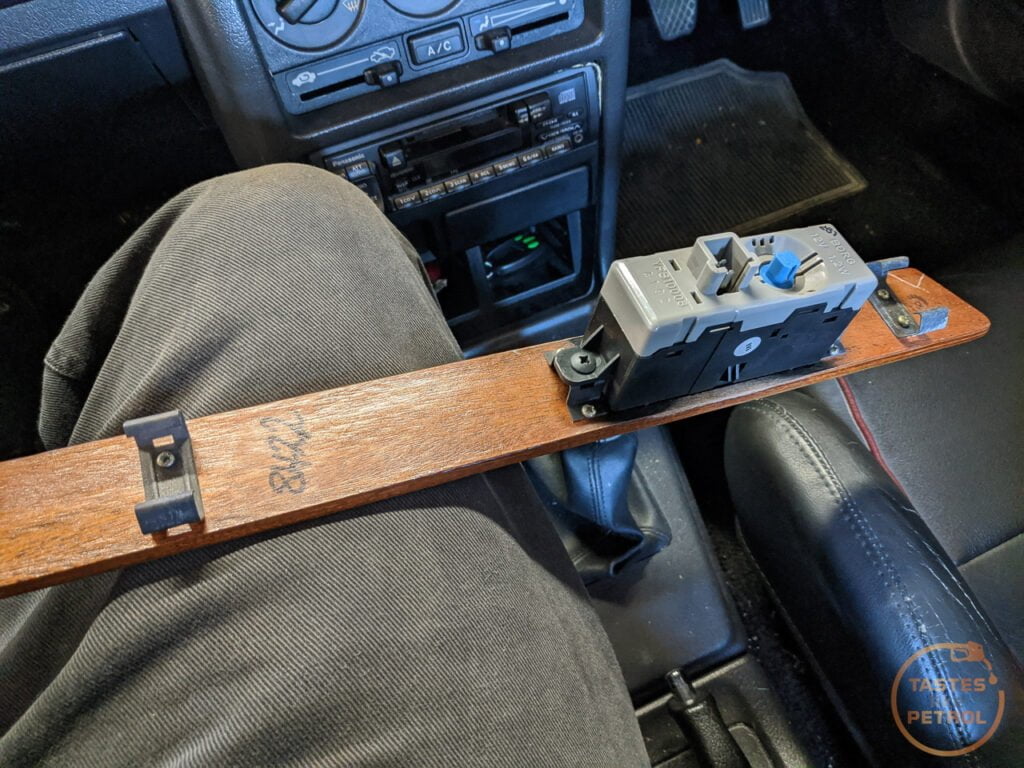 To release the clips, start with a pry tool on the far LH side, levering it outwards. Using another tool, work slightly further along. Eventually, with some force, the end clips will give in, and then you can just pull it free with your hands.  The other benefit of replacing the trim was that I could look into why the backlight on the clock was dead. The LCD was working as you could just make out the faint digits. It turns out that both the bulb was blown, and the clock needed to be disassembled and the solder joints reflowed. The replacement clock suffered the same issue. The replacement wood just pushes into place, starting at the RH end. 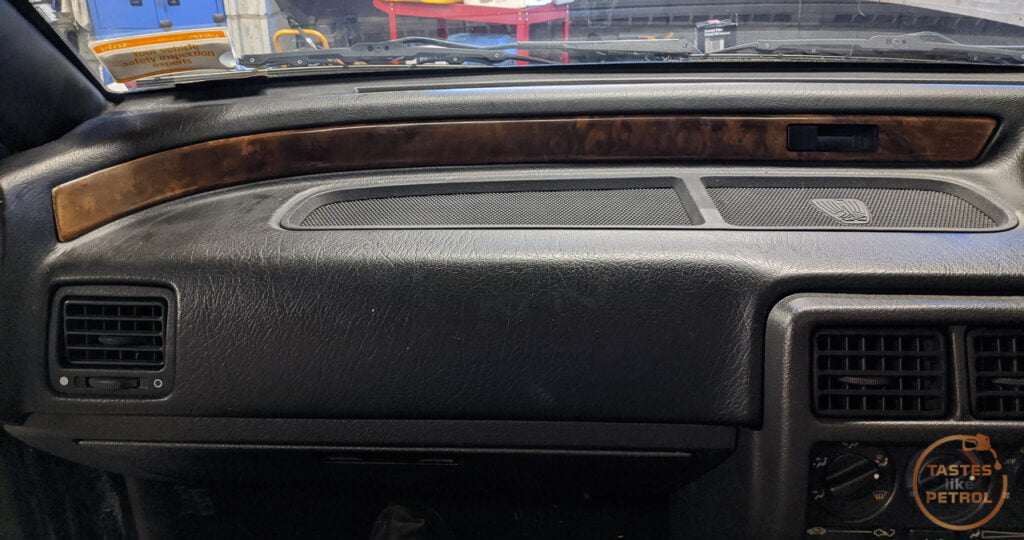 And the clock works too. Such a classic orange glow.  When I was at Pick A Part I decided to grab a couple of door switches, as I know they are known failure points. Turns out this was fortuitous as both of mine were broken, and the interior light didn't work. The slider lever had broken off both.  One screw holds it on, so remove that  Disconnect the cable, plug it into the replacement and screw it back in. Done. 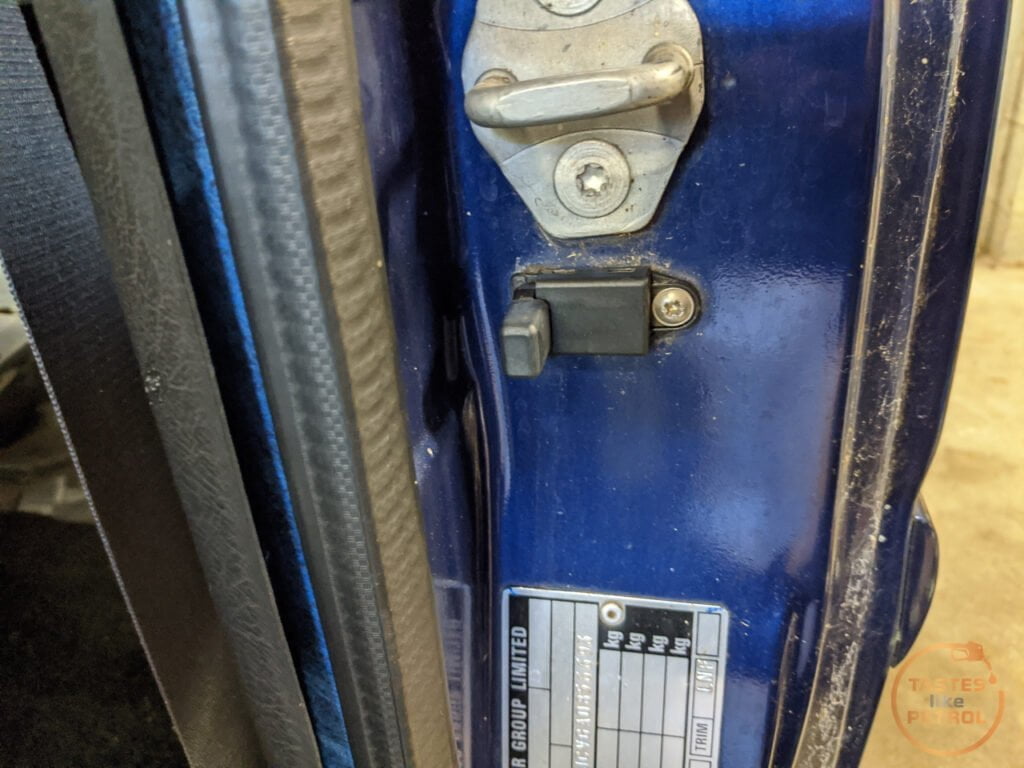 Rinse and repeat for the other side. Now the light works on the door setting. 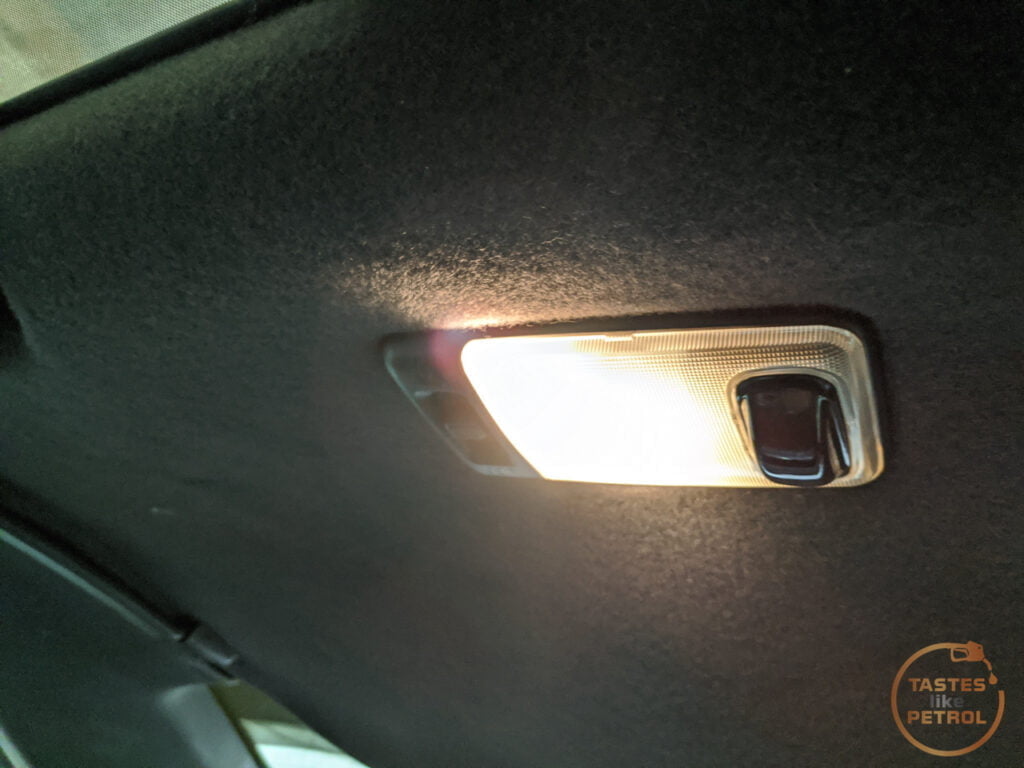 I changed it to an LED for more brightness and less consumption.  The LED doesn't fade quite as nice as a bulb (yes, the light fades out, how flash) but it's not really noticeable unless you're watching the light. Moving right along, the next part I scored was a good condition front grille. Mine was rusty and I was at risk of getting tetanus every time I lifted the bonnet (which is a lot). 5 nuts hold the grille on. I found this mess behind the grille.  A quick clean  And the replacement grille fitted. I had to swap my badge over because someone had screwdrivered the badge when it was at PAP.  This is why I replaced it 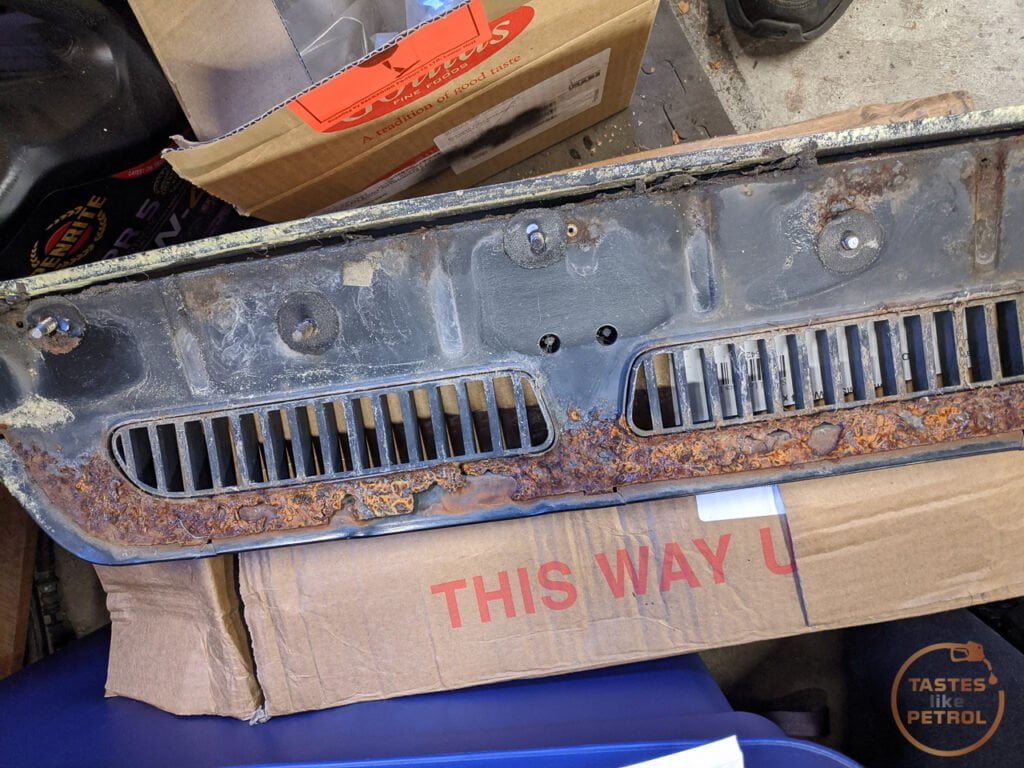 The replacement had some surface rust on it, but I wire brushed it and then used some rust converter to hopefully stop it getting too crispy. The grille is riveted together, So it wouldn't be a bad idea to split it and properly coat that steel backing inside and out. Still plenty more parts to tidy up on this car, but it looks nice from afar. |
| |
|
|
|
|
|
|
|
Sept 18, 2021 11:40:46 GMT
|
The last lot of work was to service the braking system as it wasn't quite right. In the test drives I have taken the car on the brakes have felt a bit off. The pedal is soft, with lots of travel and not much in the way of stopping. There is also quite a shudder when braking and the hand brake appears to only be working on one side. The plan was to replace the front pads and rotors and the rear pads, figuring the shudder is likely to be from the front, and the pads on the rear were looking old. The front rotors had some grooves in them, but no lip. I suspect the shudder was probably pad deposits from sitting, and may have gotten better with more use. The rotors were quite rusty through. 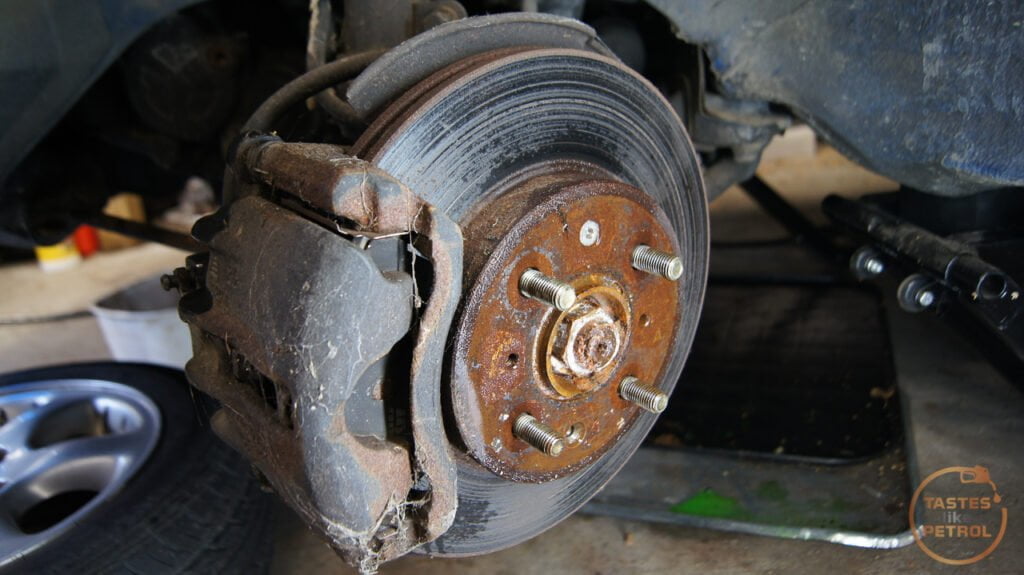 Two 12mm bolts hold the caliper to the slider pins. Removing these allows the caliper to swing up and over. 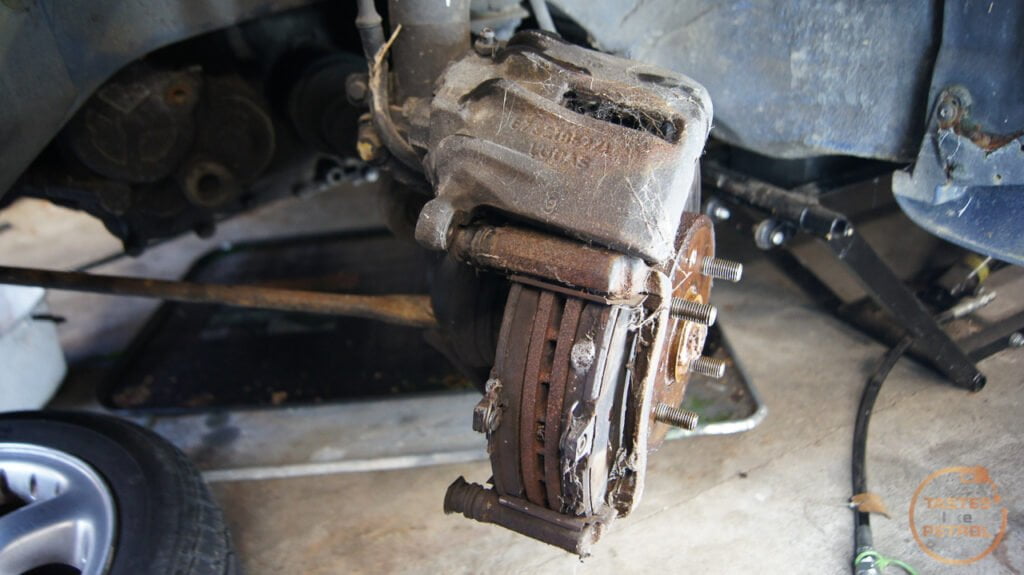 I was really worried about these rotor retaining screws as they all look quite chewed up, but they came out with no issue. I used a screwdriver bit in my impact wrench to undo them.  A quick clean of the hub face and on went the new rotor.  The old pads did look quite recent and had little wear. It's peace of mind to replace them though.  The slider pins were well greased and sliding freely. I cleaned and regreased them anyway.  These little plates that the pads ride on weren't in good shape though. Both were gunged up with old grease and brake dust. I've cleaned one half of this one with a wire brush. 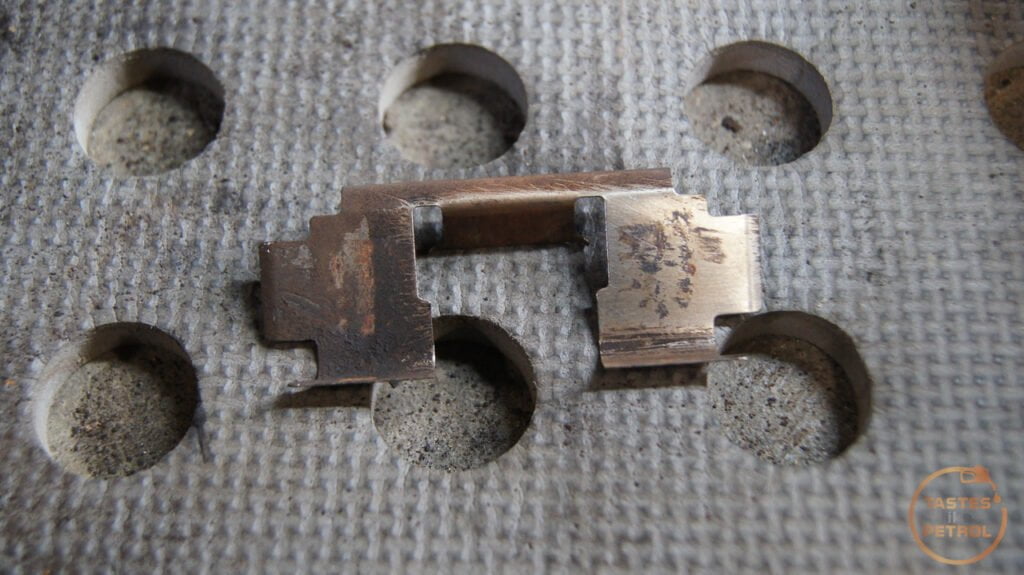 After cleaning all the plates up, giving them a coating of copper grease and refitting them to the bracket it was time to fit the pads. I would have liked some Mintex pads, but they aren't easy to get here and are really expensive. 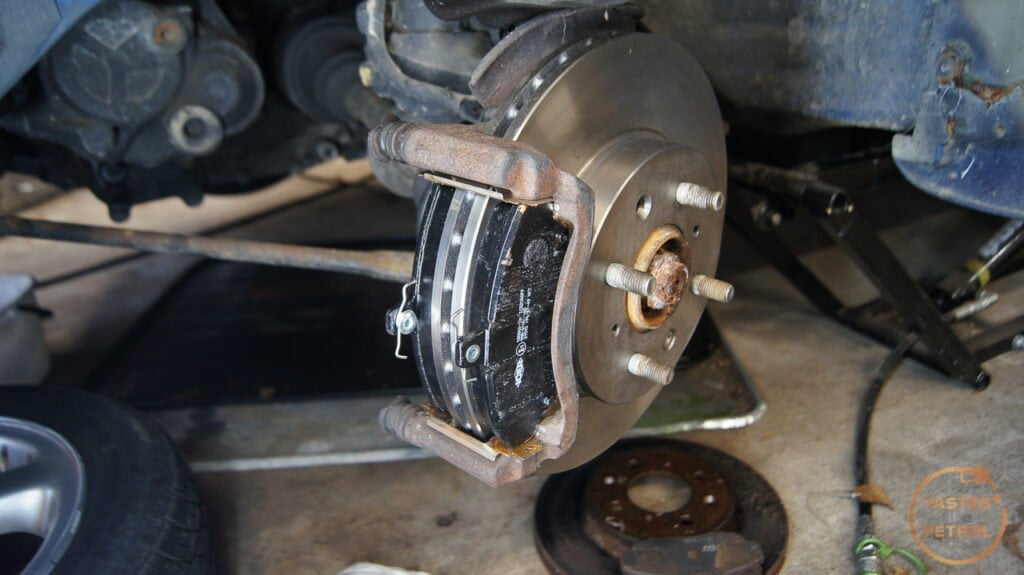 The piston in the caliper was pressed back with a clamp, and the caliper refitted. The bracket to hub bolts get torqued to 100NM, and the caliper slider bolts are 32NM.  Rinse and repeat for the other side. The rears are a little more of a pain due to the handbrake cable.  Mmm webs. This isn't even the worst, the other side was grosser. Lots of fly spray and vacuuming made it safe to work.  The pads had plenty of meat but were old Lucas pads, maybe original to the car?  I removed the handbrake cable pins because they are known for rusting up, and sure enough, mine was very stiff and rusty. I cleaned it with a wire brush and refitted it with plenty of copper grease.  The slider pins on each side were stiff and covered in dry old grease. They weren't seized but didn't move freely. These were thoroughly cleaned and greased before refitting.  The other side was much of the same.  One of the boots on the slider pins hadn't been fitted correctly but thankfully still kept dirt out. The grease was still hard as a rock though. 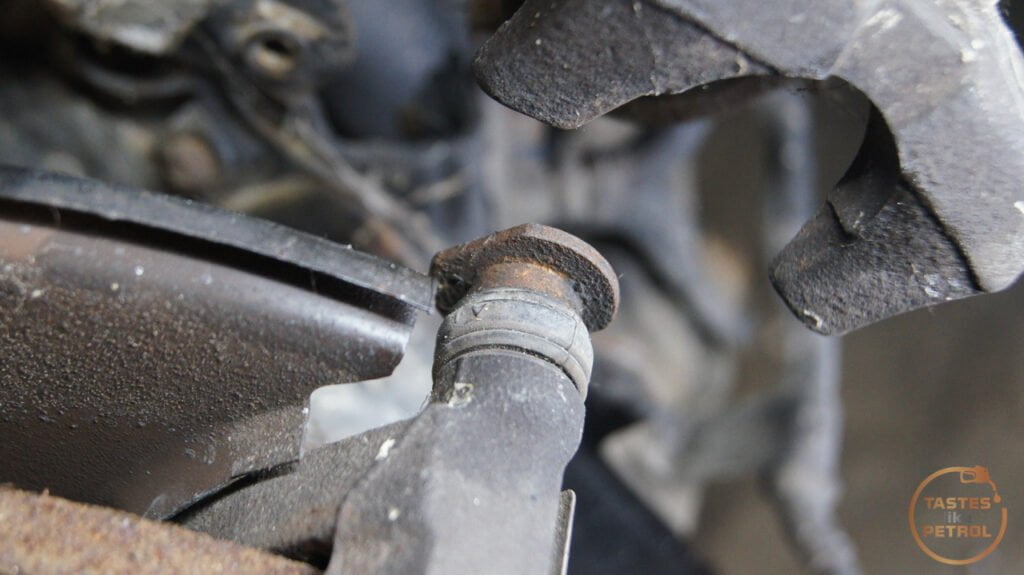 The boot should go right to the head of the pin  Everything was cleaned and greased, and the piston in the caliper freed up and wound back in.  The rear rotors aren't looking good. They have no lip but seem to be quite pitted. I might revisit these and if a few good hard stops don't clear them up, replace them.  The handbrake mech on each caliper moves freely, so they should be working OK. I gave them a good coating on WD40 to help them move nicely.  I bled the brakes next. I flushed the system, but I don't think I needed to. The fluid was quite clear and looked like it had been done somewhat recently (despite one of the bleed nipples being blocked and needing removal to clear it, and the two rear ones being rusty and taking a bit of force to shift). Bit of a mystery that.  The bleed sequence with the Bosch ABS unit is LH FR, RH FR, LH RR, RH RR. The pedal still has a bit of travel but does feel firmer now. I still can't drive the car because the brake light switch is faulty but once I can I will do the bed-in procedure. I tried to adjust the hand brake after pumping the brakes 20 odd times as recommended, and the adjuster had been wound all the way out. I got it from bout 10 clicks down to 5-6 but I'm still not sure if it's working evenly. I really need to bed the brakes in first, and then adjust it again and see what happens. One other thing I noticed was that the rear muffler was hanging on by one hanger. 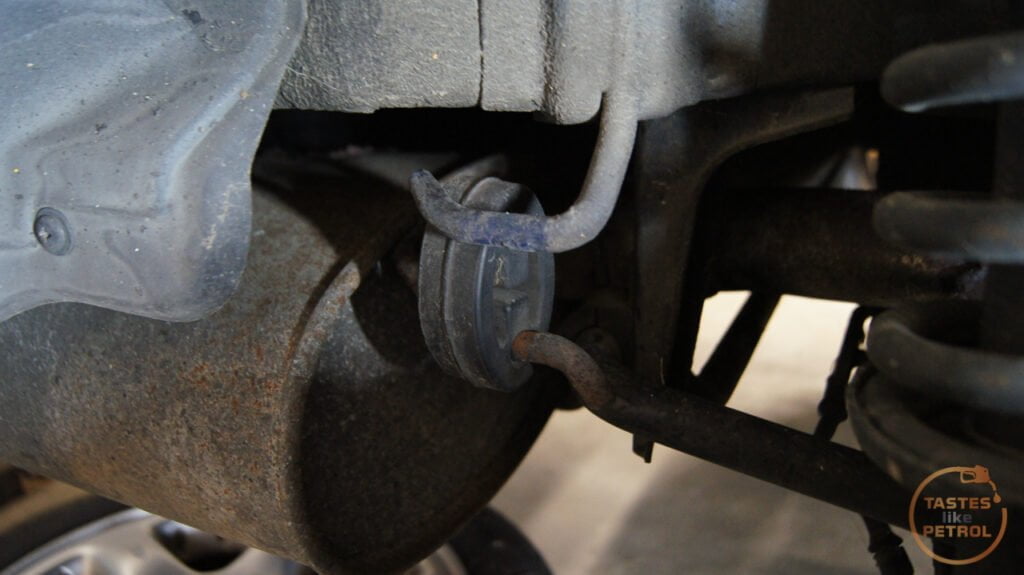 Some WD40 and a bit of wiggling and I had it back in place. Hopefully this helps the placement of the muffler as it's a bit on the curse word and doesn't match the cutout in the rear splitter.  The whole exhaust is a bit woeful. I might need to take it in somewhere and have it fixed properly. It's been "modified" and has no mufflers except the back box. Since the car has all the wheels off anyway, now is a good time to replace the tyres. I find tyres can tell a lot about a previous owner. A high powered sports car like this, running on ditch finders on the front and mismatched old and cracking tyres on the rear.... the previous owner was an idiot.  Yes, that is date coded 2008. All the tyres are the wrong size, being 185/55R15, not the turbo size of 195/55R15. I got the new rubber the other day, and I just need to book it in and have it fitted. Yokohama AD08R. 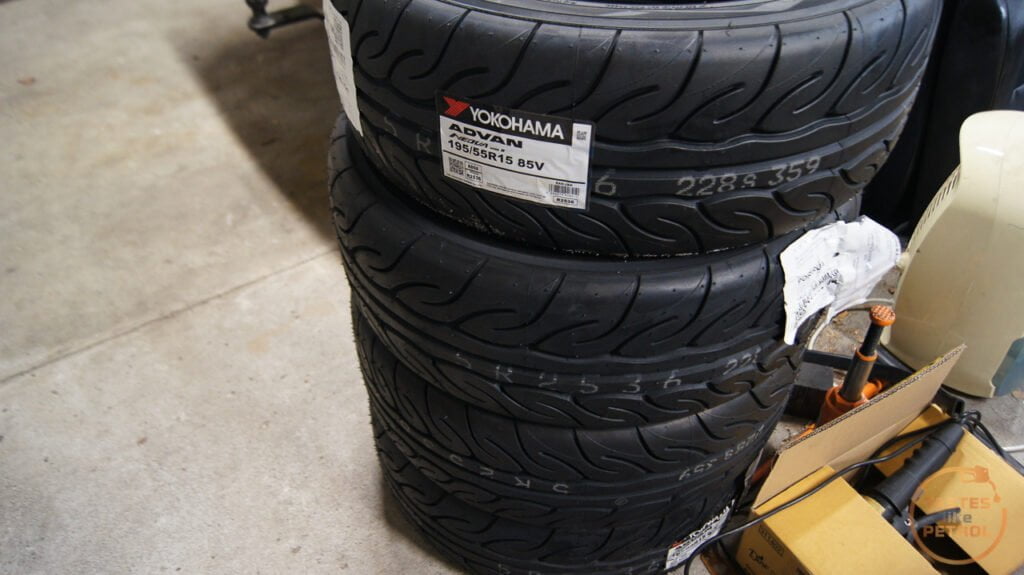 Pretty serious street rubber. I'm hoping they are as good as the Hankook I had on the Corolla (which aren't available in this size). I'm looking forward to putting them through their paces. I will hopefully have the brake light switch this week, and tyres fitted next weekend. I might even try for a WOF when I get the tyres done and see what happens. |
| |
|
|
|
|
|
Sept 18, 2021 18:15:36 GMT
|
This is how I wish all forums were. Well written and lots of good pictures. I felt almost like I was watching a TV show! Great job and please go save the rest of the internet the way you're saving this car!  |
| |
|
|
thomfr
Part of things
  Trying to assemble the Duett again..
Posts: 694
|
|
Sept 18, 2021 21:14:37 GMT
|
|
Very nice!
If you ever want to clean the coolant bottle try to use a cleaner tab for false teeth 😂. Worked very well at my cars.
Thom
|
| |
73' Alfa Giulia Super
64' Volvo Duett
65' Volvo Duett
67' Volvo Amazon 123GT
09' Ford Focus 1.8
20' VW ID4
71' Benelli Motorella
65' Cyrus Speciaal
The difference between men and boys is the price of their toys
|
|
squonk
Part of things
 
Posts: 864
|
|
Sept 18, 2021 23:16:47 GMT
|
|
Great cars, one of my wrecks is a 620Ti. It has the later distributorless engine. Head gaskets on these should be regarded as consumables. Mines been off the road for a number of years due to yet another failure - 4th in about four years of driving it.
Whilst sorting things out if I were you I'd remove the charge cooler and clean it out. A surprising amount of oil can collect inside it!!!
|
| |
2004 Chevrolet Avalanche Z71
2005 Mercedes CLK320 Cabriolet
1996 Mercedes C180 Elegance Auto Saloon
1996 Rover 620Ti (Dead fuel pump)
1992 Toyota HiLux Surf
1987 Range Rover Vogue (Rusty)
1992 Range Rover Vogue SE (More Rusty)
2006 Chrysler Grand Voyager
2008 Corsa 1.4 Design
|
|
|
|
|
Sept 19, 2021 9:16:20 GMT
|
|
I've heard and read a lot of comments about the head gaskets on 620 Turbos',
I can only say mine never let me down in about 3 years of driving it,
(Lasted really well until Son decided to "borrow" it while we were on holiday in Florida and put a rod through the block !!)
Nigel
|
| |
BMW E39 525i Sport
BMW E46 320d Sport Touring (now sold on.)
BMW E30 325 Touring (now sold on.)
BMW E30 320 Cabriolet (Project car - currently for sale.)
|
|
|
|
|
Sept 19, 2021 10:32:57 GMT
|
I've heard and read a lot of comments about the head gaskets on 620 Turbos', I can only say mine never let me down in about 3 years of driving it, (Lasted really well until Son decided to "borrow" it while we were on holiday in Florida and put a rod through the block !!) Nigel They werent as bad as K series engines were, but do have a design flaw of leaking oil down the front of the block. Mine was apparently replaced by the previous muppet/owner, but I see lots of black spooge everywhere (instead of the proper sealant) and its still leaking down the front of the block (and everywhere else that the seals/gaskets werent replaced at the time) so its on the list of things that need to be done in the distant future. |
| |
|
|
|
|
|
Sept 25, 2021 8:39:07 GMT
|
Well, it all ground to a halt today. Was out bedding in the new brakes, car running and driving the best it has. Took off from a stop with a little vigor, comes on boost and pop, suddenly it feels like its come out of gear and free revs. I try selecting a gear again, so change. Turns out I've lost all gears, including reverse. I have also lost all the fresh new gearbox oil all over the flat bed tow trucks deck. The car can be pushed forward when in reverse and backwards when in a forward gear, so the wheels feel detached from the gearbox. No grinding, no rattling, nothing. Just no gears. At least it looked really good sitting waiting for the tow  I'll need to jack the car up tomorrow and see what's given way. No result is good, as it all basically comes down to gearbox out and a rebuild. Maybe its time to get a Type B or Quaife, if that's whats gone. |
| |
|
|
|
|
|
Sept 25, 2021 9:12:53 GMT
|
Well, it all ground to a halt today. Was out bedding in the new brakes, car running and driving the best it has. Took off from a stop with a little vigor, comes on boost and pop, suddenly it feels like its come out of gear and free revs. I try selecting a gear again, so change. Turns out I've lost all gears, including reverse. I have also lost all the fresh new gearbox oil all over the flat bed tow trucks deck. The car can be pushed forward when in reverse and backwards when in a forward gear, so the wheels feel detached from the gearbox. No grinding, no rattling, nothing. Just no gears. At least it looked really good sitting waiting for the tow  I'll need to jack the car up tomorrow and see what's given way. No result is good, as it all basically comes down to gearbox out and a rebuild. Maybe its time to get a Type B or Quaife, if that's whats gone. this post triggered that "sick in the bottom of my stomach" feeling I get when one of my own breaks down! I'm sure you'll get it driving again though, always a pain having a big job thrust on you like that! |
| |
|
|
|
|
|
Sept 25, 2021 13:38:22 GMT
|
|
What a bummer! Loving the thread so far though. My brother has the engine from one of these in his lightweight Landrover, and that is scarily fast!
Good luck with the gearbox
|
| |
|
|
|
|
|
Sept 26, 2021 9:02:49 GMT
|
Well, that didn't take long. I knew I was on borrowed time with the gearbox but didn't expect it would come around this quickly. So, I had the new tyres fitted yesterday (Yoko AD08r in the correct Turbo size), fiddled with the old brake light switch (since the replacement is AWOL) to stop the brake lights from being on all the time, and then went out to bed the new brakes in. The car was running great, it ran smoothly and was responsive. The brakes have good feel, with no shudder and the gearbox was shifting great. A few hard stops and a KM or two later I pulled over to check the wheel nut torque (not going to take the risk of not checking them after a brake job again, after the wheels nearly coming off on the Corolla). Of course, the wheels were fine, so I pull back onto the road, gave it a bit of throttle, the turbo spins up, boost comes in and then suddenly 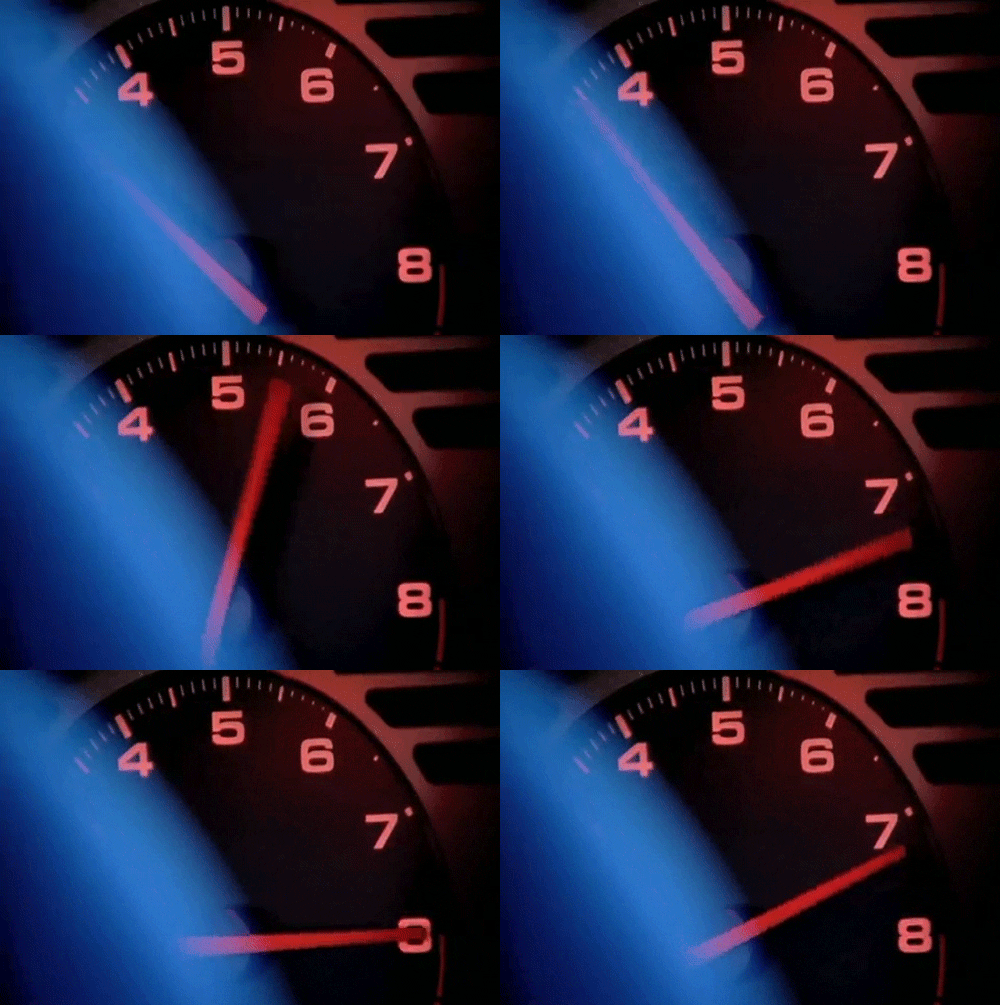 It just free revs. It felt like it popped out of gear, so I clutch in, into neutral, into second, let the clutch out, and nothing, just revs. Oh no. I roll to a stop at the side of the road and try a few more gears, nothing, I can let the clutch out with it in gear and nothing happens, doesn't even stall. I can push the car forward when it's in reverse, which is not good. I fire off a quick text to let my Wife know I might be a while and call AA to arrange a tow. "Yes, I am about 1.6KM away from home" I confirm with the rep on the phone... At least it looks good, sitting there, waiting.  Whilst I waited I took a quick walk back to where I stopped to check the wheel torque   A quick sniff test confirmed that was a nice trail of my fresh, rather expensive, Honda MTF gear oil. There was also a small amount under the car where it sat. After a fairly short wait, a friendly chap with a truck arrived winched the old girl aboard and dropped me home again. The Tomcat repaid his help by leaving a large amount of gear oil on the truck bed, and on the road where the car was loaded and unloaded.  So what went wrong then? I jacked the front of the car up, confirmed it had no drive to the wheels and slid under to find out why.  That'll do it. The shiny bit the arrow is pointing to should be inside the gearbox and shouldn't be visible. It also explains why the gearbox weed everywhere as the seal was wide open without the shaft to seal it. I did some careful levering with a prybar and popped it back into place.  I'd be very surprised if this is a new issue... I suspect I'm not the first one to lever that back into the gearbox. Whilst under there I had a good look around. Noticed a couple of minor coolant leaks I will need to attend to, but also noticed this rear engine mount completely missing its nut.  I found a new pre-loved nyloc nut that fit, and wound that on nice and tight. Who knows, maybe that will fix some of the movement in the engine. The driveshaft has quite a lot of radial (up and down) play when inserted back into the gearbox, which confirms my suspicions, both about the condition of the box, and why it popped out; the gearbox bearings are stuffed. These gearboxes do not tolerate being neglected, and being over a litre of oil down when I got it, I suspect it's not had a good time. When Rover had these boxes built, they chose to use hi-tech ball bearings with plastic to retain the balls. This probably seemed like a good idea at the time, and they worked well for years, as long as the plastic didn't get old and the gear oil could keep them cool  Above is an example of the bearings used in the PG1 gearbox; uprated steel cage bearing on the left and stock plastic cage on the top right. Unfortunately, the bearings Rover used seem to wear badly no matter what (they tend to get pitting in the races and go a bit grindy), but when coupled with low oil and high temps, the plastic can fail, causing the bearings to no longer be sufficiently retained, as per this extreme example where the plastic has broken and the balls have all converged on the lowest point. This sort of damage is what can also break the flange off the diff center.  So I suspect mine has either started to break down the plastic, or the races have worn to the point there is excessive play. The popping out drive shaft is the usual giveaway of bearing failure. With the driveshaft back in place, I have drive to the wheels again, so once I refill the gearbox with the cheapest oil I can get, the car will be mobile enough to get out of the garage and into the drive, where it will sit in shame waiting for me to rebuild the gearbox. I will be stripping the gearbox, replacing all the bearings, and oil seals. Uprated metal caged bearings will be used everywhere they are available. Whilst I'm there I will also be doing the clutch. I'm hoping to keep the Type A torsen diff, but I will need to check it's in good condition once the gearbox is split; if not, I will need to increase the budget and add a Quaife to the list. After that, the gearbox should be damn near bulletproof. I was really hoping to get more than a couple of KM (literally, I've done sub-10KM since I got it) out of the car before it seriously broke, but that's the British car game I play. Every day is a gamble. |
| |
|
|
|
|


